[Cas]
Finding my way-
Posts
24 -
Joined
-
Last visited
Profile Information
-
Location
Scotland
Car Info
-
Model
Fabia Mk1 VRS
Recent Profile Visitors
The recent visitors block is disabled and is not being shown to other users.
[Cas]'s Achievements
-
If you can open the door using a handle then it's definitely not deadlocked shut. It sounds like you have a different issue that may/may not require taking the door cards off, perhaps search topics or create a new one.
-
How to: Fit Heated Seats in Standard Fabia
[Cas] replied to hutchysrs50's topic in Skoda Fabia Mk I (1999-2007)
The issue is that the image URLs should be postimg.cc. I wrote a quick script to scrape from correct URL and attach them. @Xenicus hopes it helps you out. -
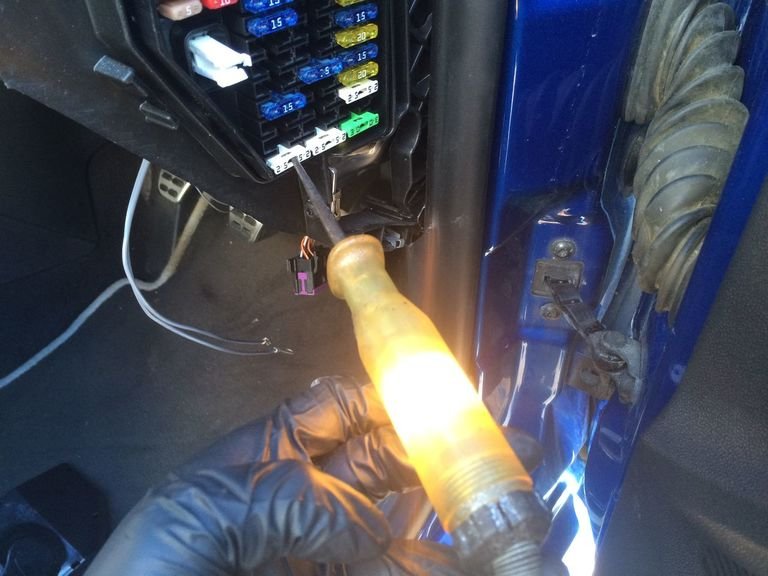
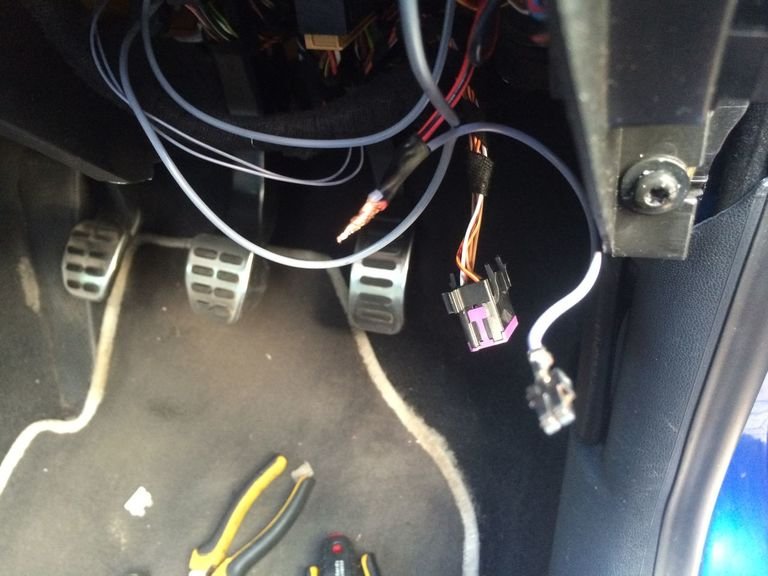
I wanted to show my appreciation for the contributions of Thisday and Wino to this thread as I am facing the exact same issue of PAS dead with simultaneous MAF fault. The details here have helped tremedously in tracking down the problem. I may write up a guide but for now I shall just post the results of my fault finding. I followed most of the steps for tracing the fault, fuses were fine but no 12 volts on MAF pin 2 with ignition on. I removed the scuttle panel and wiper motor to expose parition connectors. Note both plugs can be disconnected by undoing the T35 screw so easier to test between interior fuses and the black/yellow PAS wire (i'll check the pin number tomorrow). After finding no issues with the loom from the interior and along the scuttle panel, the only place left was between the loom dropping into the engine bay and the MAF and PAS connectors. I found that the MAF and PAS wires are joined with the black/yellow wire from the fuse box and an engine wire in a flexible conduit located just behind the battery so this is another place to check and use at a reference point (I'll add a photo). All this sleuthing led me to investigate the exposed loom behind the ABS pump where I finally found the problem! The above photos show that the exposed loom wires have been rubbing on the corner of the ABS pump and with water seeping down this section of loom making things worse. In the center of the last photo is the black/yellow PAS wire that has broken along with 4 or 5 more others. Splicing in new wires is going to be annoying but I am so glad I have found the issue and it is fixable. I hope this helps anyone else with weird electrical issues as this seems to be a very fragile section of the loom.
-
The front door is a harder problem however the cost/time of replacing the door vs replacing a damaged door card/carrier means it is worth persevering with. You should be able to forcibly remove the inner door trim as you can access all the screws for the inner trim even with the door closed. Pulling this trim off however might require removing the passenger seat and snapping some of the trim's plastic clips. If you do get the inner trim off I think you may also encounter issues with access to the carrier and window bolts as the dashboard might obscure some of them.
-
The issue with the PAS light remaining on, which actually resulted in dangerously intermittent power steering, plagued me for a while and I thought I would post on here that in my case it seems to all be related to the battery. I'll summarise it rather than rambling: The battery had been replaced with a slightly lower rating one (found this out too late), a Bosch 72Ah 680A CCA, after previous one died. I was leaving my Fabia VRS for long periods of up to 2 weeks without using it. The PAS light would only come on when starting from cold so was fine after driving around but I would notice it happening again if left to sit for days. Also if I restarted the car immediately after seeing the light come on it would normally go off and everything was fine. A year ago now the battery ran completely flat a few times so I put in on an overnight battery charger (6Ah) and since then, although I use the car a little bit more, I have only seen the PAS light issue once. To me this suggests if the battery is old or does not have high enough CCA then the PAS does not get the ampage required on startup to verify its all ok. I did not read this whole thread so apologies if this has been covered but I did notice some handy hints to verify the alternator that I will carry out if the problem re-occurs.
-
Have you disconnected the window glass from the window regulator/mechanism? The door carrier comes out with the window regulator/mechanism still attached. I will summarise the steps below but see this post, which has images and link to pdf manuals. These instructions are for the rear door only: Remove large rubber grommet on door carrier. Lower window until plastic retaining pin is visible. Screw an M5 screw (approximately 70 mm long) into the plastic retaining pin and remove from straddling dowel. Now screw an M8 screw (approximately 80 mm long) into the straddling dowel. Withdraw the straddling dowel from the window lifter guide and hence from the door window pane. Push the door window up and secure with adhesive tape (duck tape works well). I also have some updates to make to this post as I recently fixed the front door lock motor too, so took a few more pictures and measured the area that would need to be cut.
-
I thought I would share my experience of removing and repairing the locking mechanism of the rear driver-side door on my 2003 Fabia VRS. I hope that it might be helpful for anyone else stuck with this tricky problem. I spent many hours investigating possible solutions to access the door lock mechanism and open the door while saving the lock or more importantly the door itself from any irreparable damage. Summary The rear door was deadlocked was due to the motor no longer turning in response to the central locking circuit. There were warning signs that it would do this as it would occasionally fail to open but I ignored it, not realising the major headache it would later cause. Remove Door and secure Window The first stages involves removing the door card along with removing and securing the window glass using the linked guides or Haynes manual. I found removing all the rear seating made it easier and covered the nasty exposed seat hooks with a blanket. Separate Lock from Inner Panel and remove The locking mechanism is attached by a plastic arm to the inner panel by a cluster of three plastic rivets. This plastic arm is not too important and is simply to aid fitting/removal of the locking mechanism. In my case I found that previous garage work had already broken this plastic arm behind the panel so I am not sure the best way to deal with this. Cut Hole in Lock Casing Once the inner panel is removed you can finally get access the locking mechanism. I calculated that I could make a hole in the plastic casing and get access to the gears that the central locking uses. Once exposed I could manually turn the gear to disable the deadlocking and unlock the door. It sounded simple but its tricky to work in such a cramped space and I would be guestimating as to the actual location of the gears simply based on pictures of the lock internals on the internet. The area to be cut was masked with tape and using a Dremel with cutting wheel, the plastic housing was carefully ground away to expose the large white gear. As the area to be cut (green arrow in pic below) faces the door panel I stuck a small mirror onto the door to help. The pictures show I got close to the exact area needing to to be removed. It should be noted that the hole is very near to a circuit board on one side and the mechanical pivot on the other so care is needed when cutting not to hit these along with not cutting too deep and damaging the gears. I seem to have lost the measurements to determine the exact location and dimension needed to cut the hole. Unlock the Door! I cant remember the direction to turn the gear but using two small screwdrivers I ratcheted it around. It took a few attempts but persistence eventually won out and the door clicked open for the first time in months! In hindsight an alternative method would be to move the gear a bit, this rotating the motor, then try with the central locking again, because if the motor is still partially functional it may open. Once the door was open it was a simple case of removing the door bolts holding the locking mechanism and extract it. I originally thought of getting a spare locking mechanism from a car breaker but upon finding no suitable donor I ended up repairing the mechanism. Repair the Lock Motor I removed the plastic casing that houses the electronic parts of the lock from the metal mechanical part. Dismantled the casing and carefully separated the motor from the circuit board. Testing the motor with a 9v battery showed that it was simply not responding at certain point on the spindle. I surmised that simply cleaning the carbon brushes and commutator might bring it back to life. Getting into the motor is a bit fiddly but by grinding off the small crimped metal tags that grip the plastic portion and carefully pulling/prising. There might be minor points I am missing in the disassembly but I forgot to take pictures of this particular stage. I used IPA to clean the dirt from the brushes and commutator then put it back together and tested once again with the battery. The motor seems quite generic so should be relatively simple to source a replacement if needed. The hole in the casing was repaired with piece of scrap plastic and epoxy. The final step was to assemble the lock and test it with the central locking circuit in the car before fixing it to the door again. I did this last summer and the door has been working flawlessly since.
-
well i took my car to dealership and had them replace heater motor and door seals and gave them details about the skoda warranty, a week before i took the car in, so all the work could be carried out without issue. i turn up to collect keys and drive off but im told although all the work has been carried out, skoda warranty will not pay for the door seals job! they expected me to fork out £200, including a discount no less, for the work already carried out. after the initial shock, i calmly explained that at no point was i told it would not be covered and that i certainly would not have authorised the work had i known it would cost me £200. in the end they decided that they would not charge me and they would take it up with the warranty people themselves. i think they had just assumed it would be covered until they phoned to get final confirmation and complete the job sheet. morale of the story is to check very carefully with your dealership with these pesky door seals oh and the icing on the cake of this escapade was finding one of my tires completely flat as im about to get in the car :eek: turns out there's a hole in the tyres inner sidewall that, according to them, must of occurred somewhere between leaving mechanics and being valeted. they were quite apologetic and sorted getting a new tyre fitted at their cost.
-
real quality photos, 4th one esp
-
i have been told by a skoda dealership that rear leaking doors is a known problem and should be fixed under warranty. my 53 plate vrs needs it done i just haven't been able to find the time to get the car in to be fixed. i found on my old fabia the "water leaking into heating system and draining into passenger footwell" problem due to leaves clogging the drains below the windscreen. this was also a known problem by the dealership however they said it wasnt covered by the warranty and only cleaned the drains once as a good-will gesture.
-
Low Temperatures=funny bleep
[Cas] replied to TFFabClass14MPI's topic in Skoda Fabia Mk I (1999-2007)
glad im not the only one who jumps on the low fuel bleep. plus i always get strange looks from passengers unused to it -
Flashing Glow Plug light after start-up
[Cas] replied to des_pd_ tdi's topic in Skoda Fabia Mk I (1999-2007)
personally the first thing i would do is to go to the garage and get a vagcom check as this will show the faults instantly. -
ive got a Planex X Armadillo, i like my hardtails, and this is one tough cookie, but spec'd for light, fast XC riding :P
-
Flashing Glow Plug light after start-up
[Cas] replied to des_pd_ tdi's topic in Skoda Fabia Mk I (1999-2007)
-
Flashing Glow Plug light after start-up
[Cas] replied to des_pd_ tdi's topic in Skoda Fabia Mk I (1999-2007)
just had this fixed last month by the dealers: they changed the brake light switch and everything is fine now, iirc they quoted ~£30 for the part however my car is under warranty and this is covered.


