OCTAVIA_4X4_ABT
-
Posts
59 -
Joined
-
Last visited
OCTAVIA_4X4_ABT's Achievements
")


-
I am just trying to emphasize that many problems are caused by the wires and not the parts themselves. I was facing problems with low charging voltage, melting fuse boxes, flashing dash lights, dim lights etc. For more details on the fixes see the link in my signature.
-
I agree, personally speaking, a 100% of my electrical problems were due to wires and connections, not parts. Ever since I replaced the alternator-to-battery wire, added some extra grounding wires and rebuilt the fuse box, all problems have gone.
-
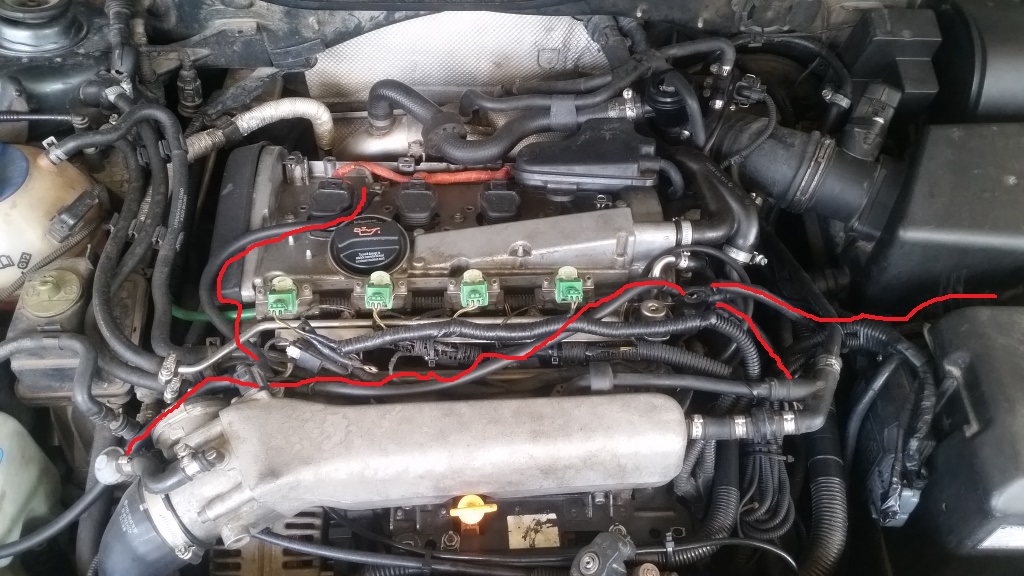
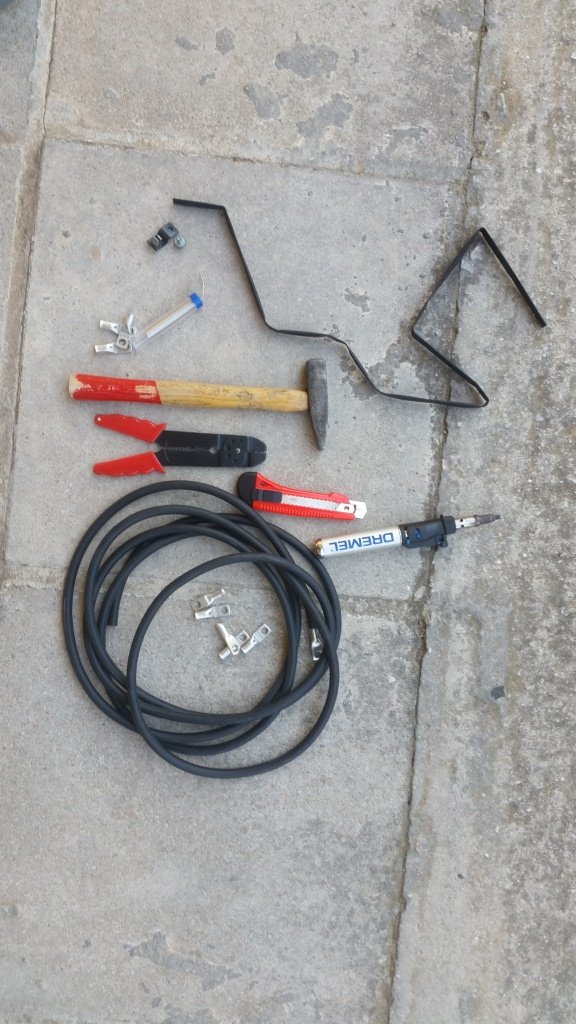
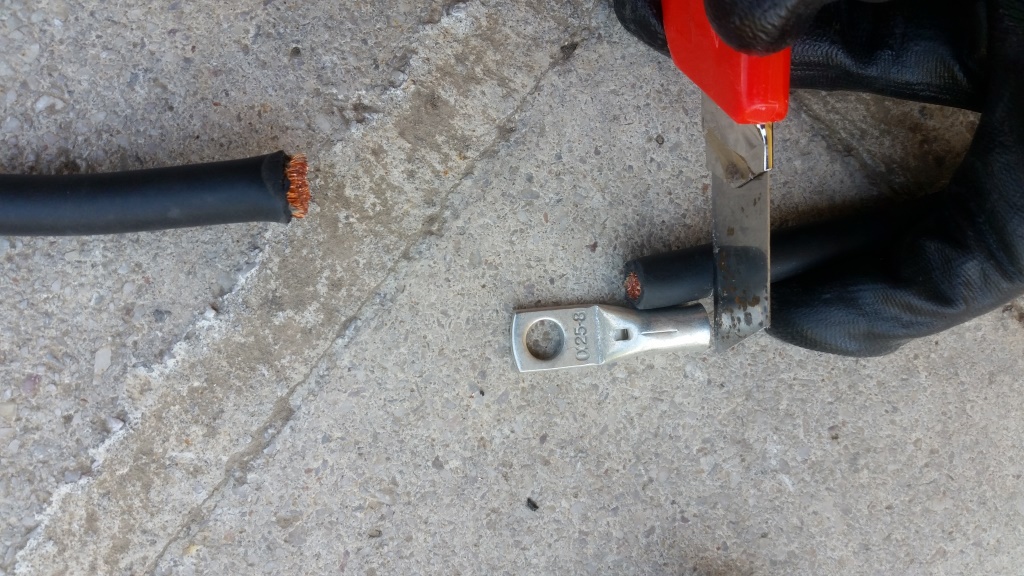
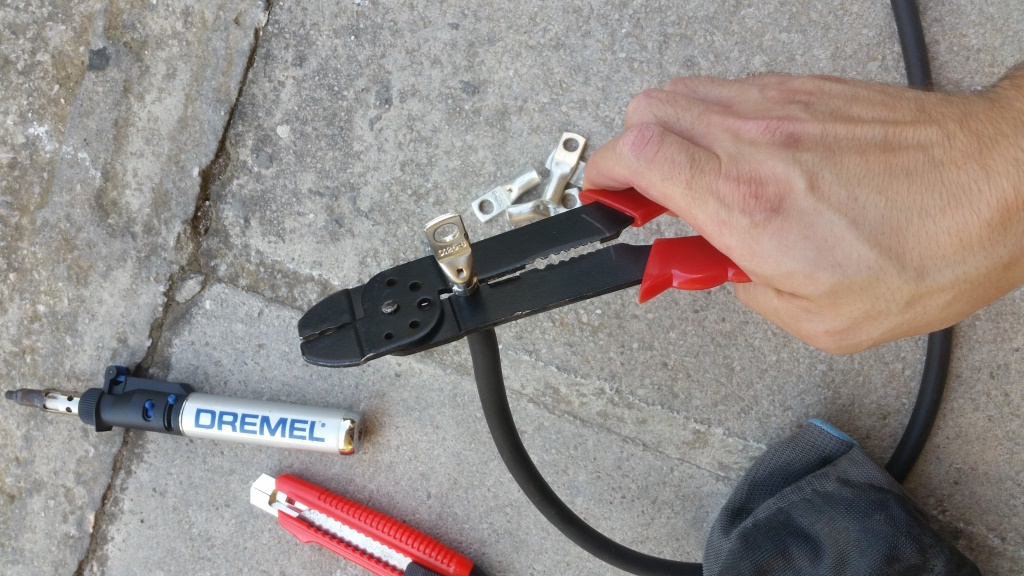
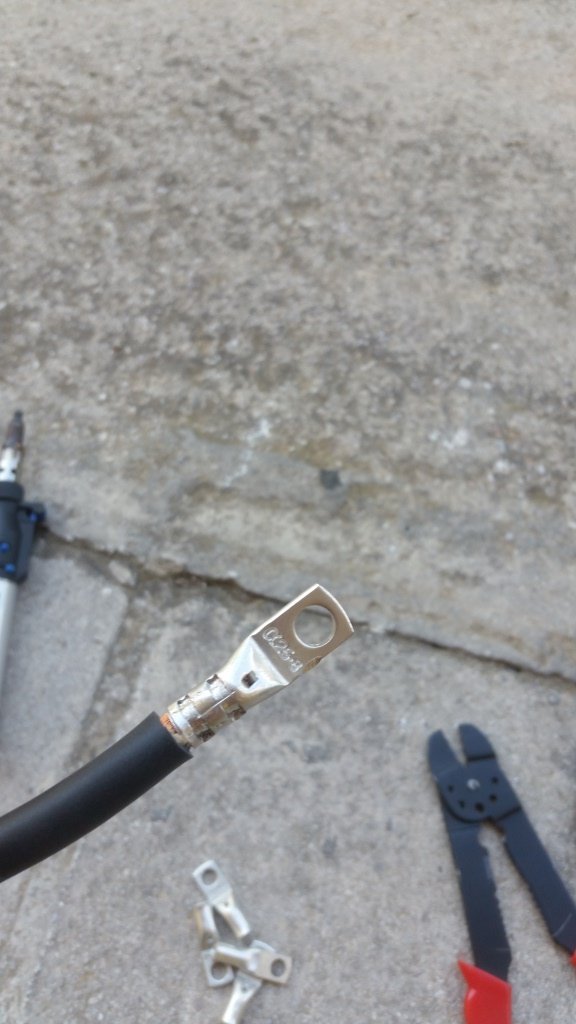
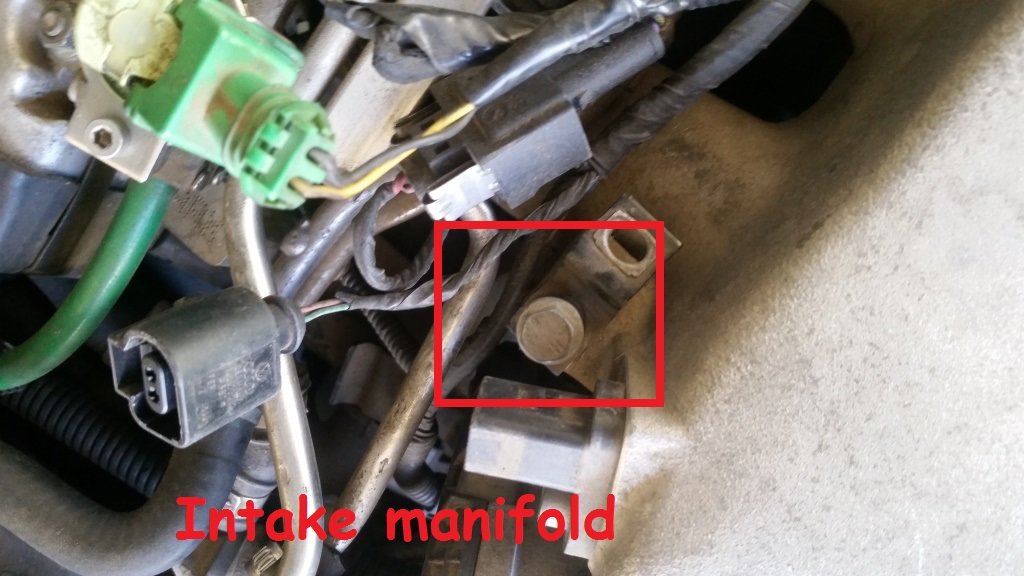
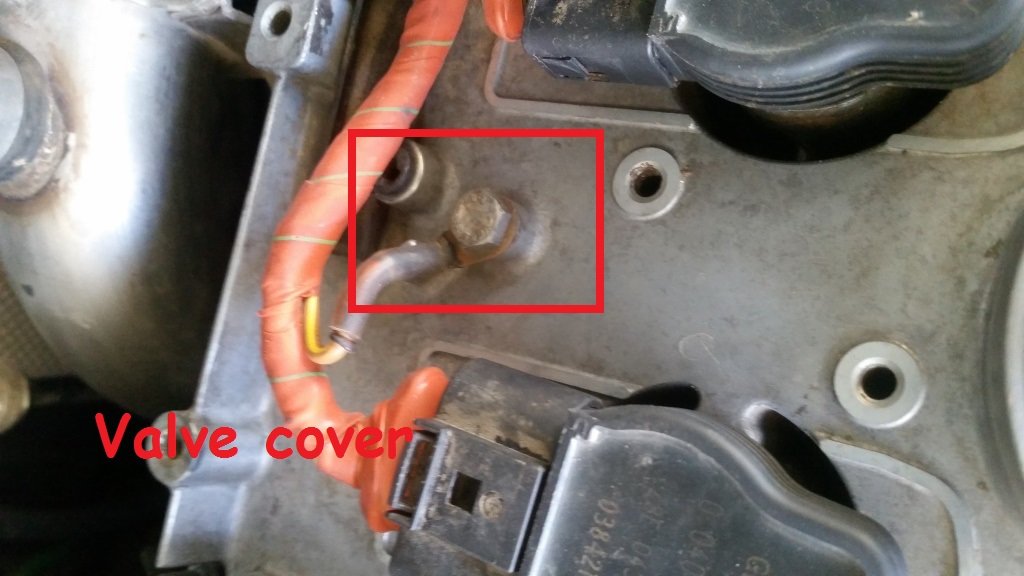
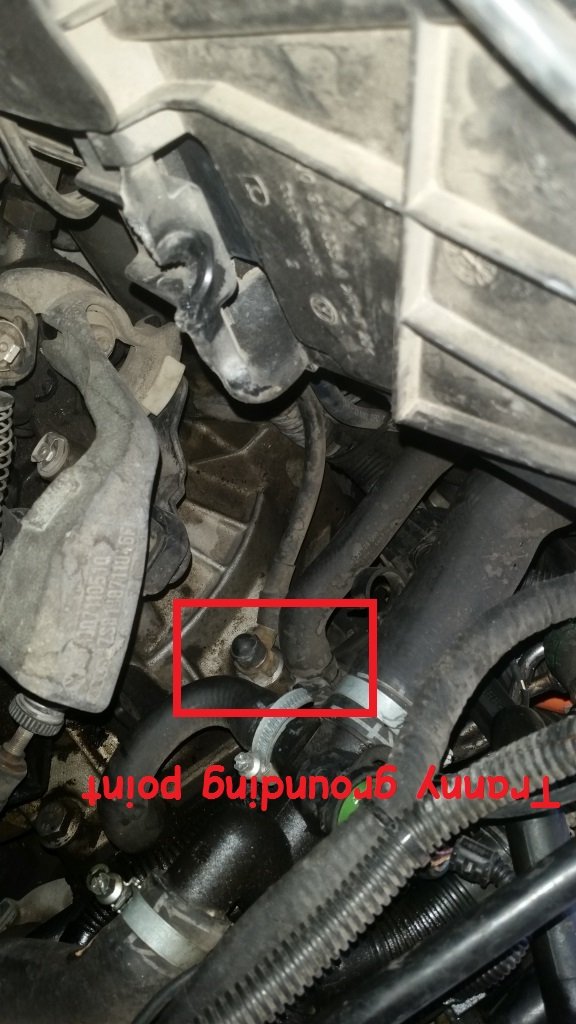
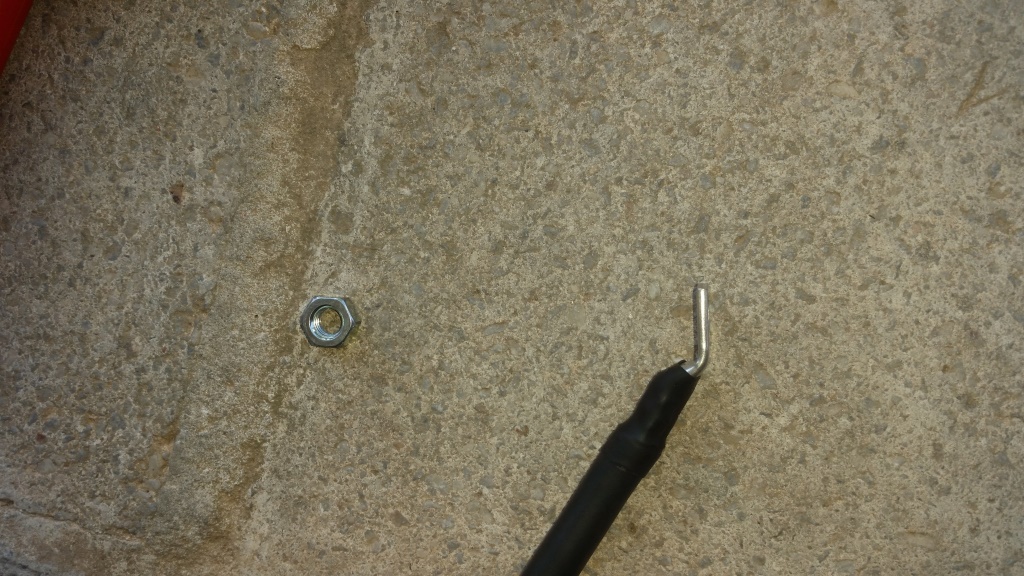
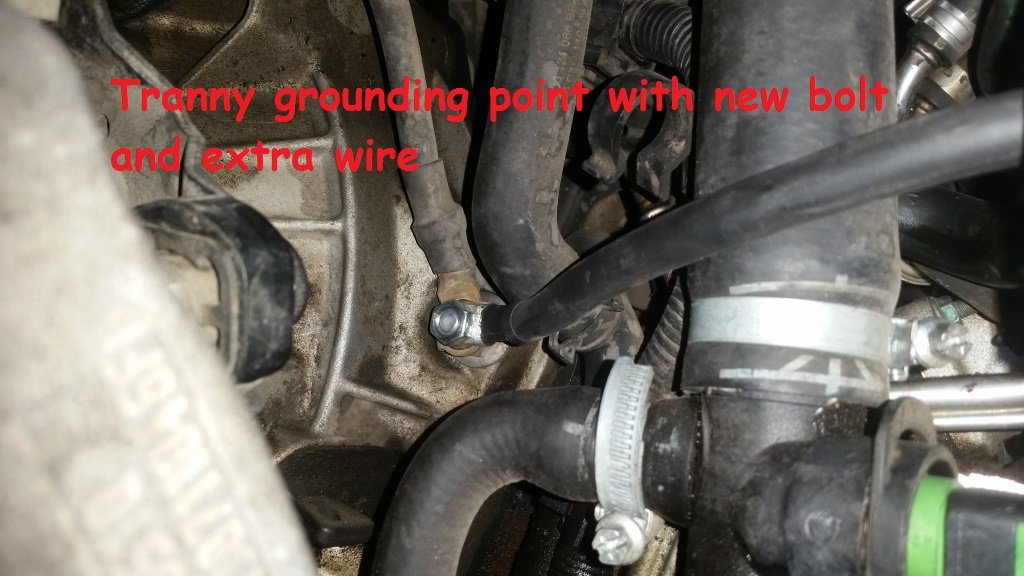
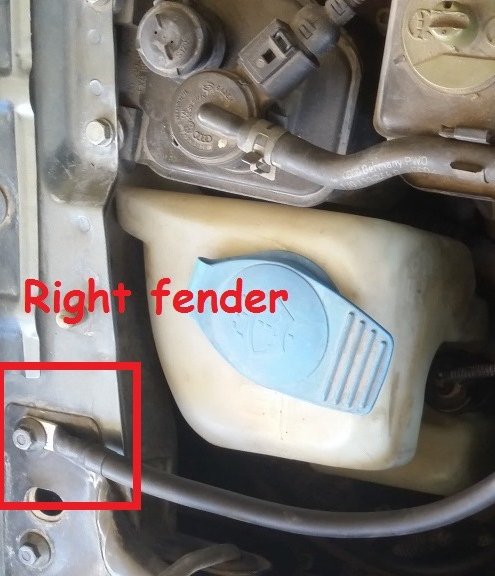
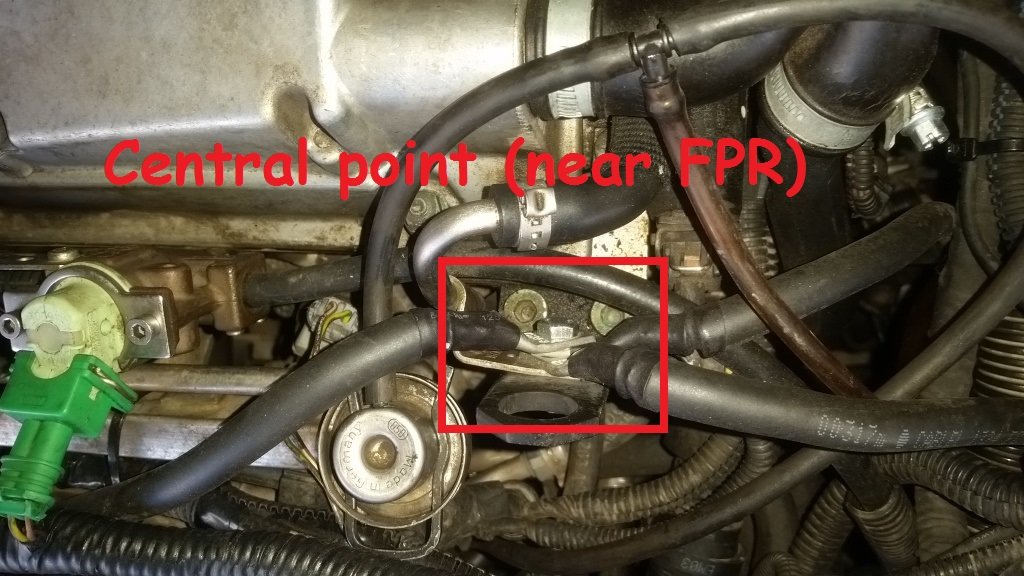
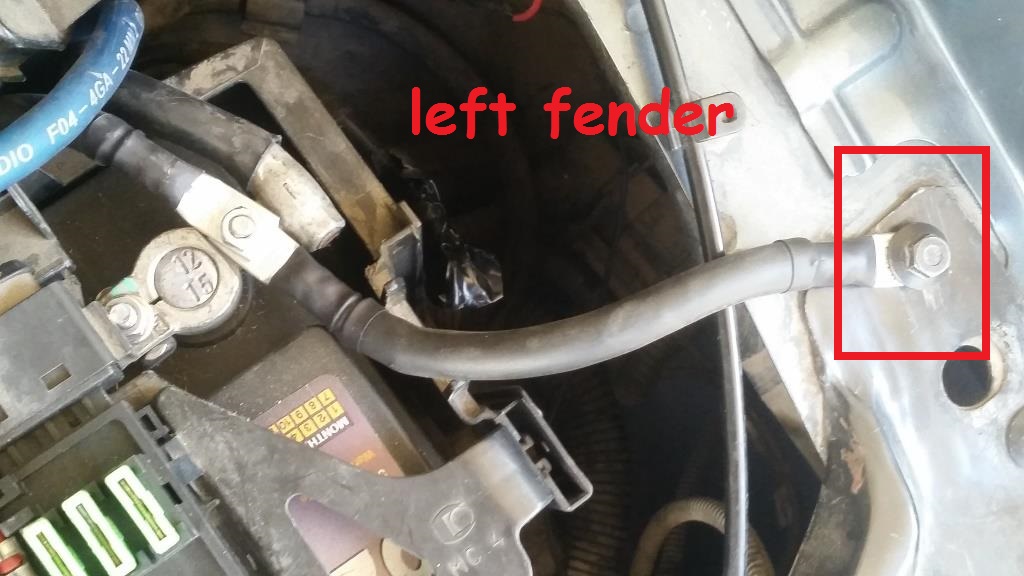
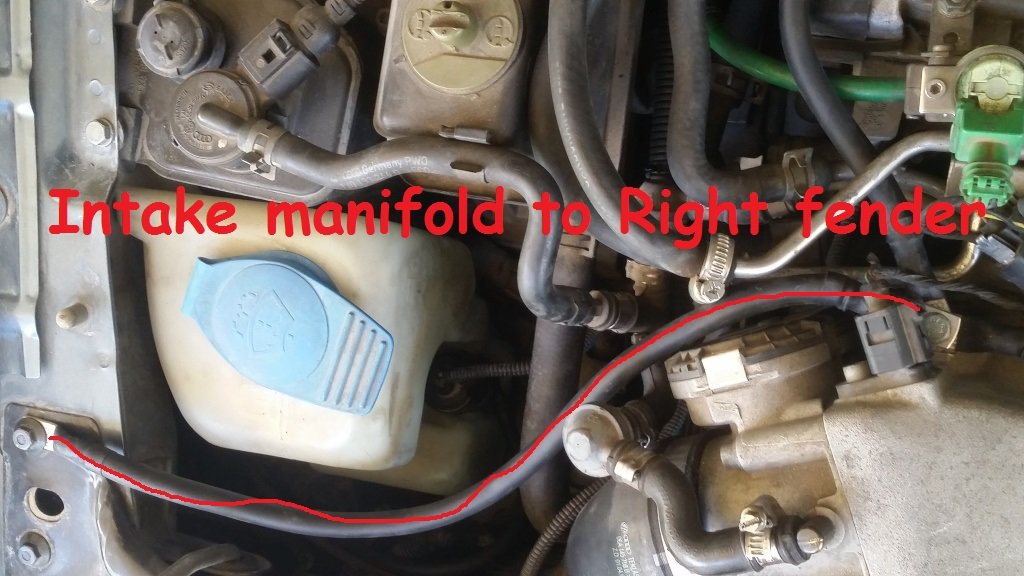
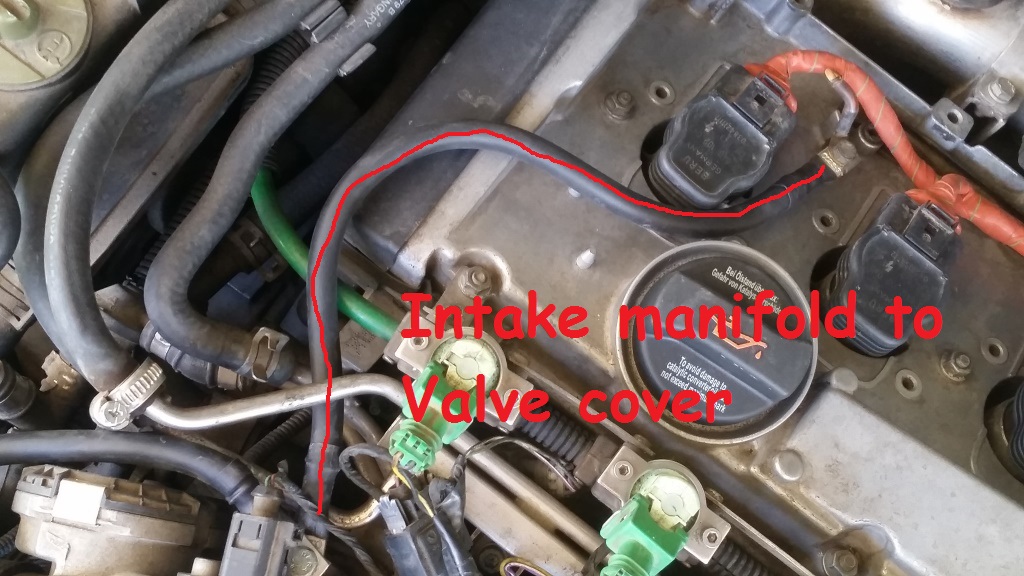
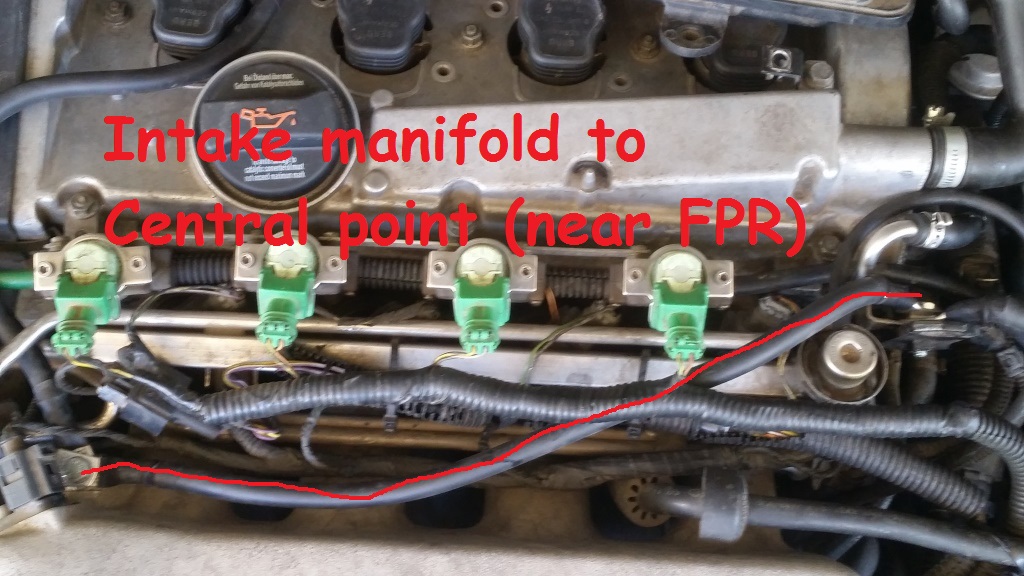
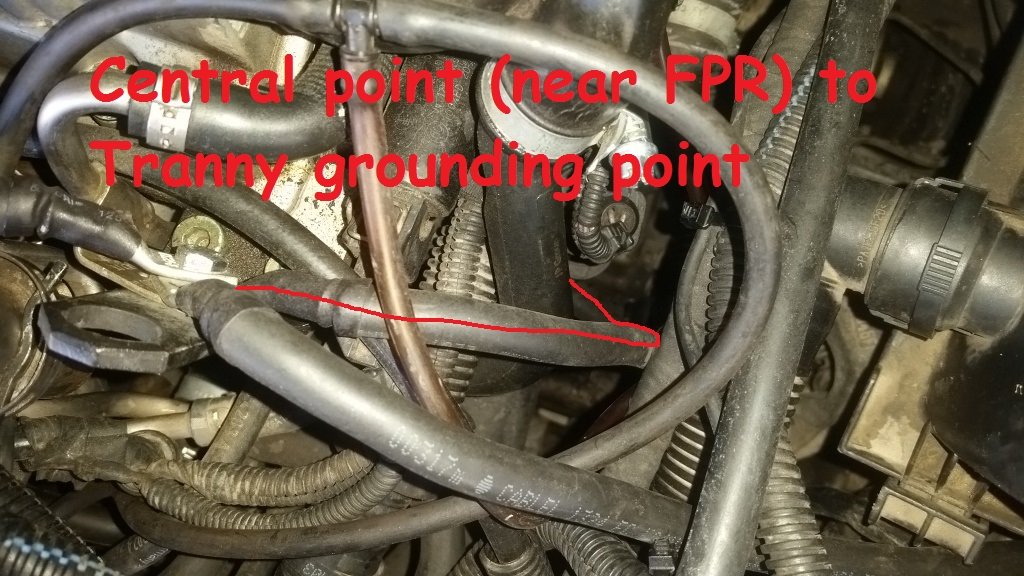
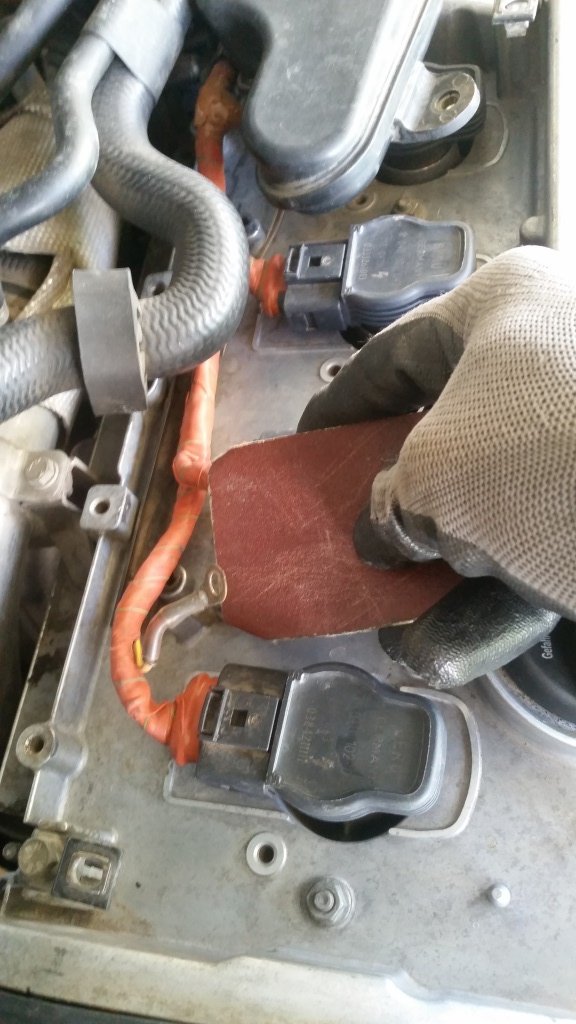
After experiencing some electrical issues, I decided to do the grounding mod-see the full DIY here: https://diy-vag-20vt.blogspot.gr/2017/10/ground-wiring.html I used about 2 meters of 4 gauge wire as in the following links (scroll down to find the tab ''ΣΥΝΟΔΕΥΤΙΚΑ ΑΡΧΕΙΑ''to see their specs): copper crimp connectors wire I built the following wires (length is not standard as there are different ways to do it): Intake manifold to Right fender Intake manifold to Valve cover Intake manifold to Central point (near FPR) Central point (near FPR) to Tranny grounding point Central point (near FPR) to Battery Negative Battery Negative to left fender After installing I noticed a slightly smoother operation of the engine (mostly on idle), slightly better radio reception and higher charging voltage (my Scangauge now saws 13.8-13.9 compared to 13.2-13.4 volts before). I have attached some pics.

-
http://diy-vag-20vt.blogspot.gr/2013/11/yellow-coloured-text-is-about-front.html?m=1 Scroll down a little bit until you see the driver's door photos.
-
odd glugging noise from fuel tank...
OCTAVIA_4X4_ABT replied to sharkrider's topic in Skoda Octavia Mk I (1996-2004)
After you fill it up, try not to tighten the fuel filler cap, just put it on. Maybe this will help the air expand. -
Starter Motor Slow to Dissengage
OCTAVIA_4X4_ABT replied to Normski55's topic in Skoda Octavia Mk I (1996-2004)
I agree that greasing will help a lot. Just dont use too much grease as it will spread everywhere. Here are my pics: http://diy-vag-20vt.blogspot.gr/2014/01/starter-maintenance-1-1-20-0-13-18-6-13.html -
Thanks, just found some photos here https://2urbietorbi.wordpress.com/tag/car/ from the inside and there is extra silicone insulation so there mustn't be a problem.
-
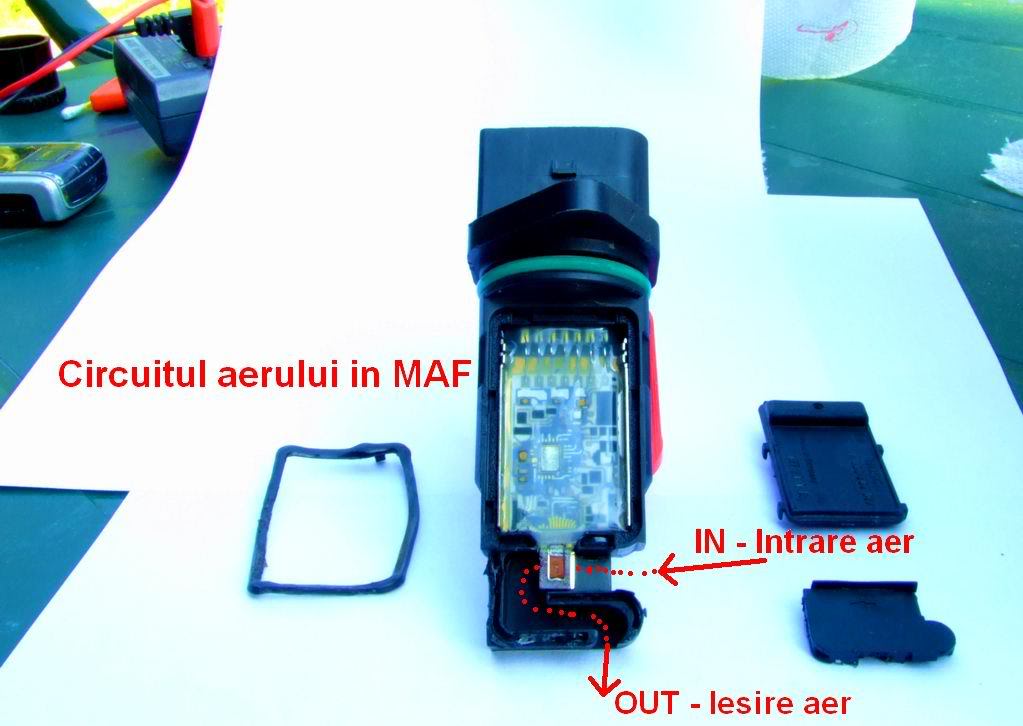
I am having the same code, P0172. Did you finally sort it out? I have already cleaned the TB and I removed the MAF today but I found a crack to what seems to be an insulating glue. Any ideas?
-
Drivers door window switch
OCTAVIA_4X4_ABT replied to mikec's topic in Skoda Octavia Mk I (1996-2004)
why don't you try cleaning it first? If none of the buttons is broken then it is likely to work like new. http://diy-vag-20vt.blogspot.gr/2013/11/here-is-diy-for-cleaning-electric.html -
Exactly these I would check too. Had similar issues, maf ok, coil packs are new, spark plugs are new. Also I temporarily exchanged injectors and temp sensor with another Octy. It proved to be bad fuel quality. I filled the tank with new petrol, it runs much much better now but I think I should use a cleaning product, sth like RedLine SL-1 or STP fuel Injector Cleaner. Buster5 have you tried anything similar? Suggestions anyone?
-
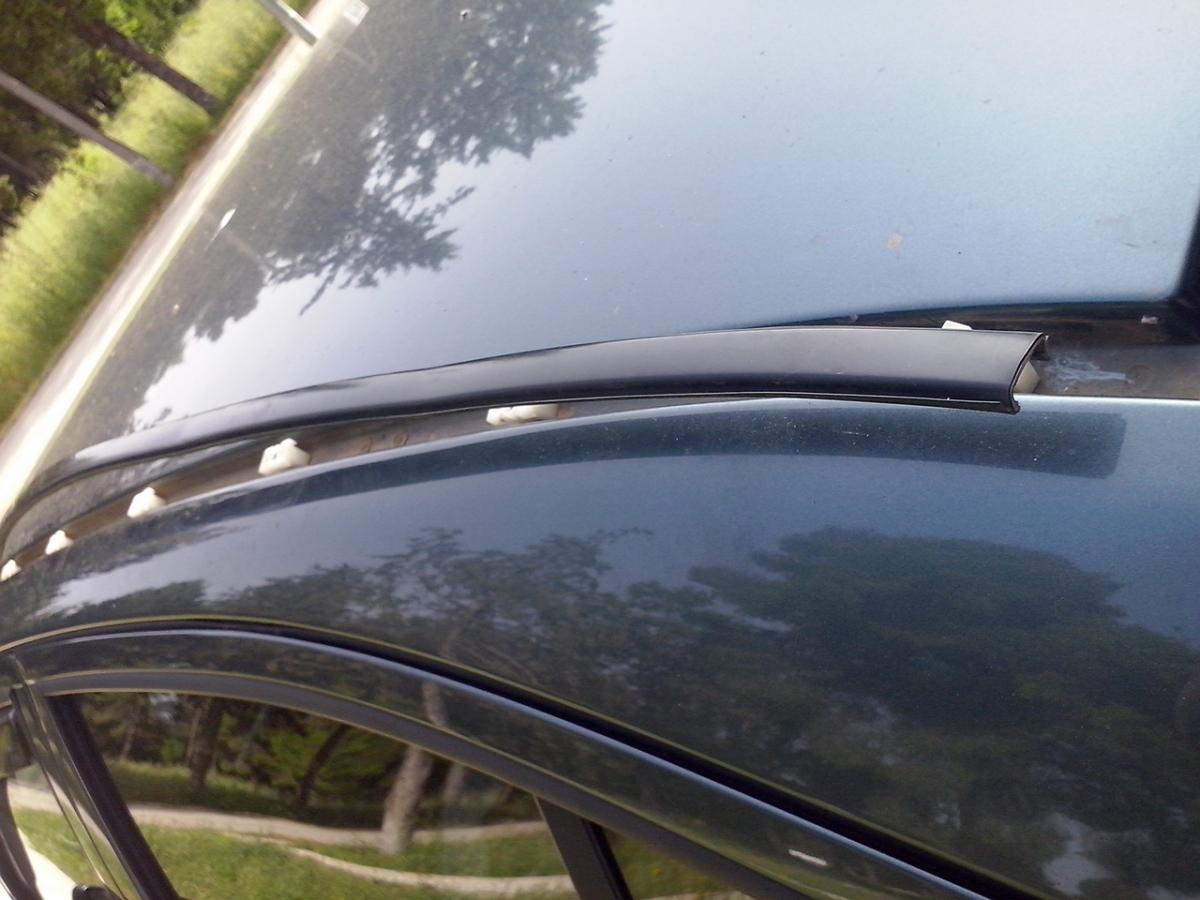
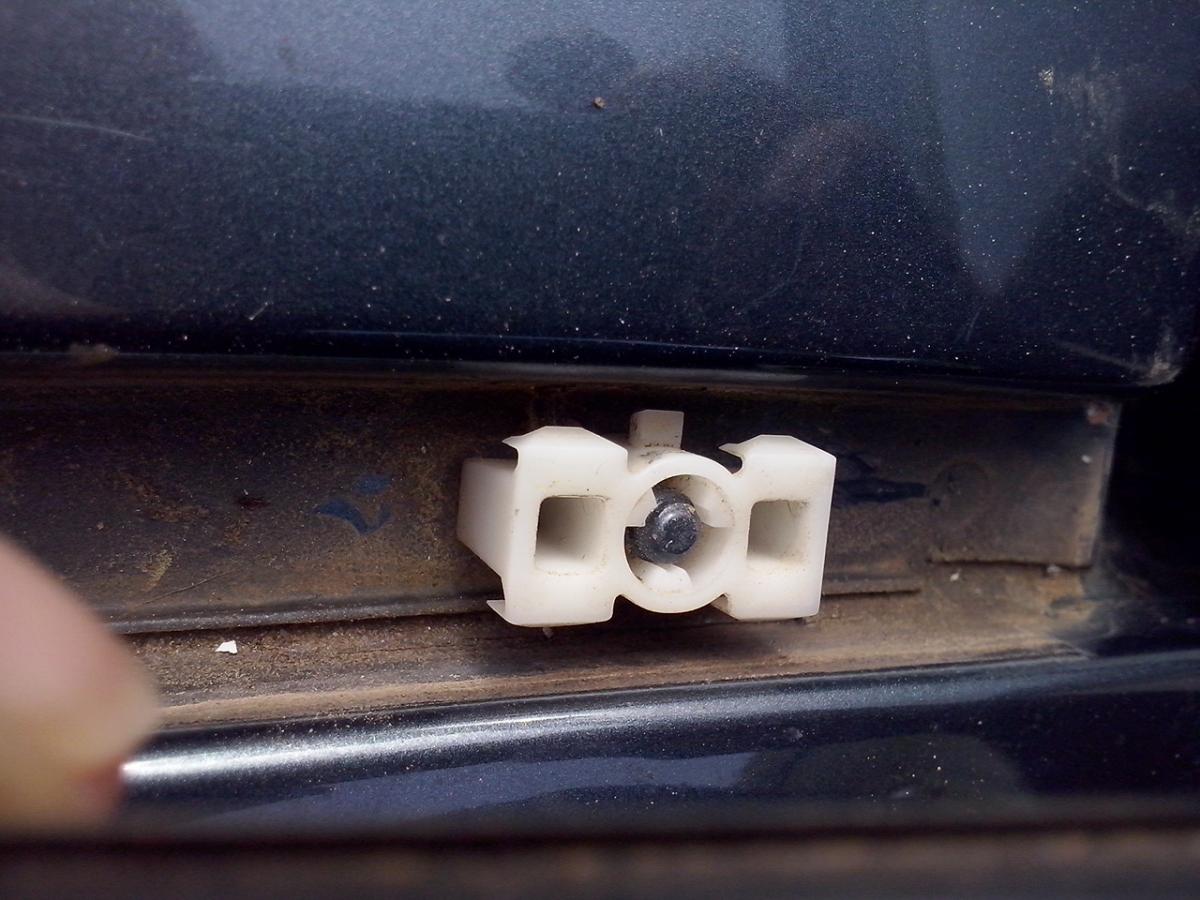
Today I removed the roof molding, its pretty easy, just lift with a screwdriver from the rear of the car. I found the holes covered by plastic caps. The total length is only 28 inches and I dont see how I will be able to install the rails from the wagon without drilling new holes. I imagine it will be much easier for the estates. Anyway, if the interior trim is removed I will be able to add the original 1u0860169 plates or retrofit some aftermarket rails. Any suggestions?
-
Yeah, the plates are item number 4 in the catalogue http://workshop-manuals.com/skoda/octavia-mk1/body/body_work/exterior_equipment/roof_rack/summary_of_components_of_roof_rack_(octavia_combi)/
-
Yeah I saw your post, better start looking then and waiting for a diy write up! Thanks Mike
-
Thanks for the info, I'll do some search. I actually have roof bars, the ones that grip the underside of the door openings. But as I install-uninstall them occasionally, I want to save some time and avoid damaging the car paint... That is why I want to install the fixpoint ones. Or if possible, install roof rails and then bars on the roof rails.
-
Which means that if I order strips with tabs and replace the non-tab strips, will I be able to use bars for fixpoint? My estate has no tabs either...