Leaderboard


Popular Content
Showing content with the highest reputation on 08/12/09 in all areas
-
I have produced this guide to show how I changed the headlight bulbs on my Octavia MkII Elegance (not Xenon). I am not sure whether it will also apply to other non-Xenon Octavia MkII models, or the Octavia MkII vRS. There is already a very useful guide to changing the lamps on an Octavia MkII with Xenons on VRStu's website at Octavia-vRS.com - Changing Front Lamps - Octavia II Tools Required: None You undertake this modification at your own risk. Neither I nor Briskoda can be held responsible for any loss, damage injury or malfunction arising from this modification howsoever caused. Note: The Skoda Owners Manual that came with my car states "Changing certain bulbs is not something which you can do yourself, but requires to be done by a specialist. Other parts of the vehicle must be removed in order to change the light bulbs. This applies, in particular, to bulbs which can only be reached from the engine compartment. Step 1 - Open the bonnet to give access to the rear of the headlamp unit Step 2 - Undo the white plastic retaining nut at the rear of the headlight unit Step 3 - Pull the hook horizontally towards the centre of the bumper. Mine required a reasonable amount of force to do this Step 4 - Slide / wiggle the lamp unit directly forward. Reach behind to give it a push if your hands are small enough. Step 5 - The electrical connector is at the bottom rear corner Step 6 - Once the headlamp unit is clear, turn it upside down to get best access to the connector (making sure not to damage the paint work). Step 7 - Pull the tab / spring clip on the connector to help it clear the mating connector. Step 8 - View showing connector almost off Step 9 - I used Halfords Super Brilliance +50% bulbs. Type H1 for main beam and H7 for dipped (low) beam. Step 10 - View of backside of headlamp unit once removed Step 11 - Twist and remove for indicator replacement (not done here) Step 12 - Slide off metal clips and then remove rectangular shaped black plastic cover for access to low beam bulb (H7). It looks like there may have been screws in the top left and bottom right hand corners of this cover at some point, although there were none in mine. Step 13 - Undo the metal spring clip to access the bulb. Note: A word of caution - You should never touch the glass part of the bulbs with your fingers - the chemicals in your skin may cause damage to them, or lead to premature failure. I think the bulb connection that can be seen in the top left of the compartment shown above is the sidelight, but I didn't attempt to change it on this occasion. Step 14 - Pull off the round black rubber cover to access the main beam bulb (H1). Again, the metal spring clips need to be removed to access the bulb, and care needs to be taken not to touch the glass of the bulb. Step 15 - Replacement of the headlamp units is simply a reversal of Steps 1 to 8 Edit: October 2009 - Its coming up to 3 years since I wrote this guide but I'm glad people are still finding it useful. I would also recommend having a read of FriendlyFire's Top Tips in http://briskoda.net/octavia-ii/few-tips-planting-bulbs-octavia-ii/158978/1 point
-
The next meet is to be sunday jan the 10th of january , running a week late due to the new year festivities. As usual its at the stretton fox , junction 10 m56. All welcome , will be a good evening as always . Pete/Tom O'connor1 point
-
Yes, the second run is richer but not particularly in the right places. The graphs track so similarly I suggest the fuelling is the same just perhaps with a higher rail pressure. I'll post an AFR plot up from mine tomorrow for you to compare against.1 point
-
if ben is online he'll prob be able to explain it. my before(bluefin stage 2+) and after(shark Stg 3) lamda logs for fueling. lambda before lambda after Cheers hedge mate. was searching the net for the conversion then. So it looks like the afr is about 11.2 on my after logs1 point
-
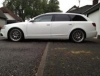
I'll have a look in the morning. I've got sports suspension & 17" Pallas alloys on mine.1 point
-
Pay your £12 for freedom status and advertise it on here without raising suspicions. SimonD - http://vauxhall.co.uk/vaux/pages/finance/valueYourCar/index.jsp1 point
-
Well lovely to see brisky back tonight. Hope it lasts! Thanks to those behind the scenes who must have been tearing their hair out. Your efforts are appreciated1 point
-
It might be shut off, after a couple of minutes. Just as your interior light is switched off after a while, exactly than if you need it most (when trying to find something or modifying something in the car when dark ) Just try to put a charger in the socket and close the car, than after about half an hour check if it is still on. (best is a charger with a led, so you dont have to open a door to check. Because this will activate it again.1 point
-
Road fund licence was its original name; during his time as Chancellor of the Exchequer Winston Churchill authorised the dipping-into of the road fund to top up general taxation. For some time now that expensive little disc stuck to the inside of your windscreen has had the snappy title of "Vehicle Excise Duty" disc. Arnie.1 point
-
You need to change all tensioners for both belts on this engine, you ll also struggle a bit without the correct locking tools as the cams will be on the rock at tdc, the water pump on this model however is not prone to failure and except for the very early ones has a metal impeller from the factory : )1 point
-
The 2.0 8v can develop a thirst for oil, but it's not a bad old lump, really.1 point
-
If memory serves correct autodata has it as a 2 1/2 - 3 hour job. I suspect garages bung a bit more on as 'insurance' against a bugled job, thus steepish prices. Not that I'm a cynic you understand.1 point
-
hows this then at Euro Carparts: http://www.eurocarparts.com/ecp/c/Skoda_Fabia_1.4_2001/p/Car-Parts/Engine-Parts/Belts-Chains-and-Tensioners/Timing-Belt-Kits/?348770685&1&8709584e22ee4b0fa39c0ee42bedef03877656ff&TBLK Assuming that the AUB engine is only internally different to the later BBZ lump then its exhaust cam driven by the inlet cam with a short belt with its own tensioner, conventional long belt to inlet, with an idler roller and tensioner, waterpump drive by timing belt. its good practice to change the pump with a new belt too ( impeller is plastic it can break up apparently) PS invest in ye olde fashioned 'aynes manual,. PPS everybody generally, how difficult is the accessory drive pulley to remove, 'aynes warns the nut is 'tight' :no: is the pulley on a taper with a keyway or what?. I'm planning to do mine in January after crimbo, do i need to invest in a puller?.1 point
-
1. Jonny5ive - fettled Fabia vRS 2. Hedge - Golf ED30 3. Makefish - Vauxhall Vectra ;-) 4.Chris ...Standard Octy...1 point
-
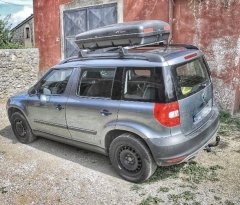
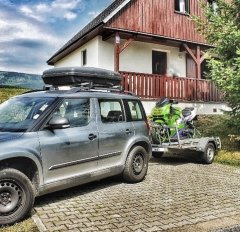
My detachable towbar was fitted by my dealer when I bought the car. It's very neat and fits in a socket behind the bumper. The electric socket is also in there. The cover comes with a frame that is bonded inside the bumper and the cover clips into that frame when it is scarcely noticeable. When not in use the towbar is stored in a recess under the spare wheel together with the jack and other tools. Our caravan has a 13 pin plug, but I also have an adaptor from a company called Towequipe so I can tow other trailers. One side plugs into the 13 pin socket while the 7 pin plugs into the other side and it works fine.1 point
-
No, it's telling you the outside temperature has dropped to 4 deg (or below) so there is a chance of black ice on the road.1 point
-
Nope They're good cars and those that think otherwise are retarded.1 point
-
12 months1 point
-
To quote Stu - 'Prise off the clear lens from the front leading edge, this will reveal two screws which you should remove.'1 point
-
Freedom discount will shortly be re-applied to these, which brings them down to £30ish IIRC. They are more expensive yes, but you'll spend £20ish on Bosch or flatblade replacements and these will easily outlast them. Plus you don't run the risk of having a slight bit of ice or frost on the screen now the cold mornings are back and ruining your rubber blades. The screen also gets coated with silicone as you use them, so gives glass protection, prevents the window icing up as much and also helps move water from the screen when at speed. For me it's a no-brainer but can appreciate that it's a costlier purchase than other offerings. Steve1 point
-
I've remembered the mats for you mudpuppy, in the back of the car1 point
-
Hello and Welcome to the Forum. I think it has to be a Skoda one. I had this problem this year with mine failing. The one I looked at was from a polo or Ibiza (can't remember which) and would not fit because the bolt holes were not the same. I ended up in getting it from a specialist Skoda Scrap yard, SkoSpares. It was £20 + VAT, which is much better than £85 odd from Skoda. Give them a try, www.SkoSpares.com1 point
-
Take off and nuke them from orbit, it's the only way to be sure1 point
-
Fairy is fine as many cars have been washed in it for many years without falling apart. The issue is that it is somewhat alkaline and contains salts. It's not that bad though, or think what it would do to your hands as a dilute solution. Never mind the hands, do you know how much washing up liquid the average UK person ingests because they don't rinse the plates after washing? How many people died from that? Cars deal with much worse than that in winter and in the general pollution in cities, so I think fairy is pretty low down on the risky list. The biggest issue of using fairy that comes from this is that it strips the wax from the car leaving no protection behind it. Oh and the Hazard Sheet for the pro version is here: http://www.pgprof.com/upload/documents/fairyliquidoriginalmsds.pdf1 point


Announcements
-
About BRISKODA
BRISKODA is for the sharing of information on ŠKODA. Founded for all motoring enthusiasts, it's free to join and use. We have members from all over the world.
- Our Guidelines.
- Search the Site.
- Explore the Forums.
- Gaze into the Gallery.
- Make a date, the Calendar.
- Classic, custom or modified car insurance!
- Please be respectful when posting.
-
Images