Leaderboard
.thumb.jpg.f67e31eea568c70a8aab8273b91b8344.jpg)


Popular Content
Showing content with the highest reputation since 20/09/16 in all areas
-
A warm welcome to BRISKODA. The community was formed by enthusiasts of the Škoda range. We still are a community who enjoy driving, maintaining, modifying and some even enjoy cleaning our cars. Above all else we enjoy a mature respect for each other's views and recognise this forum has members from almost every country. We're here for similar reasons, so lets enjoy it! Your account with us is what we describe as a new account. Some features are not yet enabled on this new account. Don't worry, you can post new or reply to threads in the majority of forums. You cannot use the personal messaging system yet. This will be automatically available to you after you've made a few posts to the community. A few other features are not available, but as per the private messaging, they will be activated once you start posting to the community. But lets not worry about that for now. First Step? The first place to post is our introductions forum, http://www.briskoda.net/forums/forum/20-introduce-yourself/ Let us know about you, your car, say hi, simple as that. Try not to post any technical questions there, better to use our owners zones, covered in the next step. Second Step You've said hello, hei, hi, and met some of our community, now you need to get some help or ask a question/answer a question, lets look at the owners zones. Each Skoda model has it's own owners zone within the forums, these can be found under the > Skoda Owners Forums < You may also be new to Skoda... we have a forum for you too > About To Buy a Skoda < Let other owners help you, no commission, targets, or order form pressure here! Škoda Citigo Škoda Enyaq IV Škoda Fabia Škoda Octavia Škoda Rapid Škoda Roomster Škoda Scala Škoda Superb Škoda Kamiq Škoda Karoq Škoda Kodiaq Škoda Yeti Škoda Classics For example you have an issue with your Skoda Fabia, I would suggest posting to the Fabia owners zone. The owners areas and all our other areas are visible from the main forums list page at http://www.briskoda.net/forums/ Next Steps You are now well on your way with the community here on BRISKODA. Your account will be very close if not already upgraded to a full member, enabling uploads, the private messaging system and more. Why not join one of our social pages? http://www.briskoda.net/forums/topic/281773-official-briskoda-social-media-linkspages/ Once again, I warmly welcome you to the site, please be considerate in your posting. We welcome debate, but reject cheap insults or keyboard warriors. If you have any questions, please feel free to get in touch, my email is colin [at] briskoda.net Cheers, Colin.81 points
-
Hi Newbies This part of the forum is basically just for saying hello... and you can let us a know a bit about yourself and your car if you so wish. If you have a specific query, we would be grateful if you could post it in the relevant section… For example, you need advice on a battery for your Octavia?... then post it in the Octavia mk1, mk2 or mk3 section…whichever model applies to yours. You want to know what polish is best for your car's colour?… then post in the Styling and Car Care section etc etc... I promise you will get more views/replies that way, and also save us Mods a job moving it for you One final tip… If you need to know the answer to a question, chances are its been asked before, so try the search bar in the top right of the screen (Sometimes best to use general terms rather than be too specific for better results) Thanks, and Welcome to Briskoda79 points
-
Some videos. From older to newer: 1/4 mile in 12.88 seconds "https://www.youtube.com/watch?v=j71bjibQ5XA" 1/4 mile vs Nissan Skyline GT-R R32 "https://www.youtube.com/watch?v=aA3iWbw3Otg" 1/4 mile vs Mercedes A45 AMG "https://www.youtube.com/watch?v=Jehosa8HwvE" 1/4 mile vs Saab Aero 2.8t "https://www.youtube.com/watch?v=7oO01TUCk8k" 1/4 mile vs Focus RS mk2 "https://www.youtube.com/watch?v=RFxs0VnaGkM" 1/4 mile in 12.02 seconds "https://www.youtube.com/watch?v=jot-bGeZJGQ" 1/4 mile in 11.46 seconds "https://www.youtube.com/watch?v=qhyc80pqBQY" 1/4 mile in 11.46 seconds Dashcam "https://www.youtube.com/watch?v=7pR3rJtw4A4" After using the car in standard form for a few months, I decided that I needed more power and better handling to go with the comfort, extras and space offered by this model. I have been modifying my cars for the last 20 years, having purchased a variety of British, German and Japanese vehicles including some JDM special editions. The modifications ranged from simple remaps to adding turbochargers or swapping engines from different models. The Superb is our family car and, thus, I was looking at modifications that would not affect the way the car behaved, so hard or overly low suspension, extreme visual changes, loud exhausts or anything that would seriously compromise reliability was not an option. The first modification was to be a tuning box from a company I used in the past. I will not mention the name as I did run into some problems with it and I do not wish this post to sound like a complain towards them as they did their best to rectify the issue, alas unsuccessfully. The tuning box did indeed increase power, as you will see below but it also introduced an uneven idle which was why I had to return it in the end for a refund. The tuning box and the Turbo technics large bore intake hose (http://www.vrsnorthampton.com/en/home/127-mqb-large-bore-intake-hose-and-bell-mouth.html) increased the power to 318.5 hp and 301.6 ft/lbs (323ps and 408nm). The mid-range felt quite a bit more torquey and the car was faster overall. NOTE: Through this process two different dynos have been used, I had the car tested, using the same configuration, on both dynos and the results were within 1% of each other so for the purpose of this thread we will assume the results of these dynos to be comparable, as comparable dynos results can be (this is a story for another thread!). Racelogic vbox was used for measuring the car’s performance as well as a few ¼ mile runs at the drag strip (both Shakespeare Raceway and Santa Pod). SUPERB (280ps) 0-60mph: 5.1s 0-62mph: 5.4s ¼ mile: ??? SUPERB (323ps) 0-60mph: 4.7s 0-62mph: 5.1s ¼ mile: 12.88s @ 106.43 mph The next step was to try an aftermarket intake. I chose to purchase and test the ARP carbon intake as I liked the way it looked and most reviews were positive. This increased power to 331ps which was a welcome increase but not especially good value for money compared to the tuning box and intake hose. After returning the first tuning box I decided to try a different one from a German company, the Racechip Ultimate. Unlike the first box this did not affect the idle negatively while also giving the user the ability to switch between different maps using either an Android phone or an iPhone. The maps are downloaded from the company’s server and, importantly, can be modified to increase or reduce power accordingly depending on each car’s characteristics. After a few tests and tweaks the best result I could get from the Racechip was 340ps. SUPERB (340ps) 0-60mph: 4.6s 0-62mph: 4.9s ¼ mile: ??? After testing both tuning boxes I was offered the opportunity to test another similar box, Burgertuning’s JB1, albeit one that could control, in addition to boost, the car’s fuel pressure. According to other users, this allowed the car to run even more safely and produce more power. In addition to the above, JB1 also allows the user much more control over the car’s boost giving the option to modify the additional boost in increments of 0.2psi based on the RPM range. This provides both a more smooth acceleration as well as more control for manual gearbox users that want to avoid clutch slip. Using MAP 1 at 5.2 (adding 5.2psi to factory boost) the Superb now produced 345ps and acceleration improved more than what the extra 5ps would suggest due to the better power delivery of the JB1 box. SUPERB (345ps) 0-60mph: 4.3s 0-62mph: 4.6s ¼ mile: ??? Having decided to move from Stage 1 to Stage 2 I ordered a Forge intercooler and a BCS/Powervalve downpipe with a sport catalyst. This would allow more power and faster turbo spool while retaining delivery smoothness and keep inlet and oil temperatures down despite the extra boost. The intercooler and downpipe allowed me to use +5.8 psi on the JB1 and also tweak MAP 6 (which allows the user to specify the additional boost for every 1,000RPM range). This increased power to 368ps and made the power delivery much more flexible. Acceleration improved accordingly. SUPERB (368ps) 0-60mph: 4.2s 0-62mph: 4.5s ¼ mile: 12.52s @ 111.05 mph I had decided to stick with stage 2+ until I was offered a hybrid turbo at a price I could not refuse. As I already had a lot of the bolt-ons needed to move to stage 3 I decided to take the plunge. I purchased the Turbo Engineers’ TTE525 turbo and started planning my next steps. VRS Performance installed the turbo and ancillaries. Still using the factory cat-back exhaust but changing the spark plugs to 1 step colder ones (NGK R7437-8 IRIDIUM), the ECU was mapped by MRC tuning, along with the DSG box, producing 453.8hp and 415.7 lb/s (460ps and 564nm). SUPERB (460ps) 0-60mph: 3.7s 0-62mph: 3.9s ¼ mile: 12.02s @ 114.68 mph Next step was a custom cat back exhaust. Not wanting the car to become very loud, being a family vehicle, I decided to choose a professional company that makes custom exhausts for Aston Martins, RS Fabrications. Their systems are of excellent quality while both retaining low noise levels and allowing maximum power with minimal restrictions. This new and improved exhaust in combination with a 5.5 inch catalyst (compared to the 4.5 inch one I had before) designed for the RS3 and TT-RS and tested to more than 600ps allowed the Superb to make a very impressive 519.7ps and 686nm for the drag strip! A more conservative 506ps (500bhp) map is used for everyday purposes to cater for fuel quality variations. An Autotech Uprated High Pressure fuel pump was installed for increased reliability. The ARP air intake was replaced with a VWR 600 intake. The NGK R7437-8 spark plugs were replaced with the NGK R7437-9s, which are a step colder. This allowed for a very impressive 11.46 ¼ mile, a time comparable to the time of a Lamborghini Huracan SUPERB (520ps) 0-60mph: 3.27s 0-62mph: 3.47s ¼ mile: 11.46s @ 120.28 mph FULL UPGRADE LIST Summer wheels Autec Wizard 8x18 ET45 5x112 70 Anthracite + Michelin Pilot Supersport 235/45R18 94 Y ZR Winter wheels Team Dynamic ProRace 1.2 17x7 + Goodyear Ultragrip Performance Gen-1 XL 215/55 R17 98 V MRC remap (DSG+ECU) NGK R7437-9 IRIDIUM Spark Plugs & 06J905110 (K-revision) Coils TTE525 turbo & LEYO Atmospheric Dump Valve (VRS Performance) Forge Intercooler Autotech Uprated fuel pump 034 Motorsport Billet Aluminium MQB Dogbone Mount Insert Paddle shift Extenders Racechip Throttle Response Box Eibach 30mm lowering springs (tracking done by STS tyres) Eibach anti-roll bars (front & rear) Ferodo DS2500 pads Racing Line brake lines BCS (Powervalve) Downpipe with 5.5 inches sports cat RS Fabrications Custom cat-back exhaust - resonated VWR 600 Air Intake Turbo technics large bore intake hose and bell mouth Front and Rear Black Badges48 points
-
I have compiled an up-to-date Speed Camera file (July 2018) for the Amundsen Sat Nav using the excellent POInspector software configured for a “Discover (Pro & Media) Navi” SD card. You can download the Camera POI file (attached). The password is my username in lower case with no space between the two words. It's working welll on my Octavia lll MY2018 and may well be OK for other vehicles. Unzip and copy the zip contents to an SD card (any card will do provided it has a capacity more than 2Gb) To activate, place the SD card into your Sat Nav unit then go to "Settings", "Manage my memory", "Update my POI's" which will upload the data to your unit. Next, ensure that in "Settings", "Map", "Show POI's" is enabled and also in "Select Categories" scroll down to the camera POI's (FIXED,AVERAGE,REDLIGHT,VARIABLE,SECTION END and MOBILE) and ticked each one. Also, in "Nav announcements" enable "Note my POI's". The unit will make an audible sound when you are near a camera and the display will show which type it is. The Amundsen system is not intelligent enough to know which direction you are travelling in though so you will get warnings for any cameras in your vicinity and that is the best it can do. That should be enough to avoid unexpected fines though! If you would like me to provide regular updates (if I can) then please like this post and reply accordingly. Enjoy Amundsen Cameras July 2018.zip31 points
-
After seeing so many people doing it the wrong way, I decided to make my own video30 points
-
As there seems to be a lot of people asking questions about this lately, I thought I'd put together a quick guide showing how I fitted my reverse camera to a facelift VRS hatchback. They way that i've fitted this will apply to most models, with the key differences being the size of handle (based upon car model year) and whether hatch or estate (but this is just inside trim differences), there may also be wiring loom differences for earlier cars or none VRS models. I've benefited from info from these forums so hopefully this will be useful to others. I am by no means an expert & I won't be able to answer all of your questions, hopefully others will chip in and can add other info as well. First of all, this is the camera that I ordered for my MY 2017 VRS (Camera A/Handle A): https://www.aliexpress.com/item/4000230897829.html?spm=a2g0s.9042311.0.0.40694c4dTEPT93 (link may no longer be valid when you read this so screenshot below) No programming is required for this camera and it supports dynamic reverse guidelines Tools: Trim removal tools would be useful, but otherwise plastic tool that won't mark your car, or screwdrivers or similar with masking tape over the end. A T20 torx head tool is required if you have a hatchback to remove the pulldown boot strap Cable rods are very useful, I couldn't have fitted through the roof lining without. Stereo removal tools unless they come with your camera kit Cable route - I went with an OEM route for my cabling, following existing cables through the roofliner and out to the back as show by the red line below. The camera: The first thing that I did was to check that the boot release switch was working on the new unit - there's no way you want to wire this in and find it is faulty. You'll need to start removing the boot trim to access it. Remove the plastic clips from the lower boot trim- this consists of a few plastic clips which easily pop out with trim remover/screwdriver. There are 8 of these on the hatchback. After that start removing the upper plastic trim, this simply requires forces to release the metal clips. You don't need to remove all of this for now, but it will all need to come off later Remove the lower upholstered trim covering the tailgate. More metal clips - work your way around. You'll also need to remove the pull down strap with the T20 torx head. When this is down you should be able to drop the boot liner which will give access to the boot release handle. This can be awkward to remove, but can be done by pushing in the clip on one on the ends whilst also pushing down on the handle from the inside (ignore the clips along its length) - it should then pop out. Repeat for the other side. Unplug the harness and plug the new handle in - check the release switch works. You can either now push the new handle in until it clips, or leave it out to test the video connection later before fitting. To wire it in Remove the glovebox (open, rock left to right whilst pulling up & you'll hear the bottom clips release. Raise the glovebox lid up and inside the housing and reach in and remove the dampening on the left hand side) Use the stereo release keys to release the multimedia unit. The kit used here comes with a replacement harness that sits between the original one and the media unit & includes the video feed cable. Some people have removed the upper glovebox section to provide more access, be careful not to unplug the airbag connector if you do this. This can be fiddly, but I found the best way was to lie on my back with my head in footwell looking up at the unit from underneath. With the media unit slid fowards this gives access to the harness. It's the large one at the bottom and there is a locking connecting that needs to be pushed backwards to release. Check how it works on your replacement harness. Unplug old harness and plug it in to one end of the new one, push the harness in to the void and plug the new connector block in to the media unit. This took me a while to get it all to fit in. When done you can now test the video feed to the rear camera before your start wiring it in permanently. I took the camera cable over the top of the fusebox cage & out through the side panel I then ran the cable up the A Pillar to the roof lining and all the way to the end. Cable rods were really useful at this point, especially to get around the B pillar , and to go from the end of the roof liner through the cable exit point behind the rubber trunking where the original boot cables are. You can also run the cable in the trim above the sill and work your way back up to the roof lining on the C pillar. When you get to the end of the roof lining you'll need to unclip the rubber gator at the top of the boot so you can get the cable out of the roof liner and in to the boot via this gator. If you install the same way as me you only need to peel the roof liner down a few cm, being careful not to deform or damage it and you'll see the OEM cables behind. Once you've got the cable this far it's a case of feeding it through the rubber gator, up the side of the boot and over to the handle; connect the video cable and tidying up any spare cable. Everything should now be up and running. Retrace your steps to refit your trim. You now have a fully working reverse camera, activated when reverse is selected and with dynamic guidelines. The parking sensor guide now shifts to the left of the screen the same as an OEM reverse camera. I will come back and re-edit this tomorrow and resize pics as it's getting late. I'll tidy up any errors as I see them so please don't jump on me straight away!
 28 points
 -
Due to high number of requests let me make some short summary of units that can be installed in Octavia III cars. I have focused only on MIB2 / MIB2.5 units, to indicate differences between them. 1. Amundsen MY16 unit 5Q0035864A (without DAB) or 5Q0035874A (with DAB) 2. Amundsen MY17 unit 5Q0035864B (without DAB) or 5Q0035874B (with DAB) 3. Amundsen MY18 unit 5Q0035864C (without DAB) or 5Q0035874C (with DAB) 4. Columbus MIB2 unit 3V0035020x (with DAB, with regular Bluetooth, without LTE Modem) 5. Columbus MIB2 unit 3V0035021x (with DAB, with premium Bluetooth, with LTE Modem) 6. Columbus MIB2 unit 3V0035043x (without DAB, with regular Bluetooth, without LTE Modem) 7. Columbus MIB2 unit 3V0035044x (without DAB, with premium Bluetooth, with LTE Modem) 8. Columbus MIB2.5 unit 565035020x (with DAB, with regular Bluetooth, without LTE Modem) 9. Columbus MIB2.5 unit 565035021x (with DAB, with premium Bluetooth, with LTE Modem) 10. Columbus MIB2.5 unit 565035043x (without DAB, with regular Bluetooth, without LTE Modem) 11. Columbus MIB2.5 unit 565035044x (without DAB, with premium Bluetooth, with LTE Modem) All MIB2 units (as well as Columbus MIB1 which is not listed here) work with 800x480 pixels screens, either 6.5 or 8 inch. Amundsen MY16 has old style (rotating, monochrome) menu, with only 1 skin having 5 memory buttons in radio and phone menu. They don't support for APP key in 8 inch FL screens. Amundsen MY17 has old style (rotating, monochrome) menu, with 2 skina having 5 or 6 memory buttons in radio and phone menu. It may also support Media Command (depneding on FEC.SWaP codes installed). Amundsen MY18 has both old style (rotating, monochrome) and new style (pictures, color) menu, with 2 skina having 5 or 6 memory buttons in radio and phone menu. It may also support Media Command (depneding on FEC.SWaP codes installed). Columbus units have built-in DVD drive and HDD for maps and audio / video files. Only Coilumbus units can play video files. Every MIB2 Columbus unit can be reworked into MIB2.5 unit if required. MIB2.5 Columbus requires new 9.2" screen 5E0919606D. Every Columbus unit can drive directly subwoofer and central speaker (although this setup is not officially supported by Skoda). "x" at the end of Columbus units model number is letter A/B/C/D. Can also be missing. It makes no difference, just indicates original SW release family. Every of listed above units can be reworked into Plug&Play version (no need to visit SKODA dealer).27 points
-
Some of you may already know and hopefully most people wont, this project was purchased by Darkside From Clive ( missingmyvrs - Briskoda Forum) the week before Christmas 2017. He purchased the car from Richard (BossFox - Briskoda Forum), here is the previous thread - https://www.briskoda.net/forums/topic/243854-citigo-go-a-citigo-with-more-go/. We were alerted to the availability of the car by a random Facebook message and within a couple of days the trip ‘darn sarth’ was scheduled, the next few months would not be easy... After a good chinwag with Clive (more like an interrogation regarding the proposed spec, which remained secret until the car was presented in person!) The car was loaded onto our trusty T5 Transporter ready for the 220 mile journey back to HQ in Barnsley, South Yorkshire. If you are inpatient and can't wait to see how the car looks now, here is the full spec list - https://www.darksidedevelopments.co.uk/citigo-4-motion-2-0-tdi-16v-common-rail/ So the first job when getting back to Darkside HQ was to unload, have a good look around, get a plan together for the full build and make a list of parts that need to be ordered. Lots of little parts were missing that you would hope were there (bonnet pull, boot locks, wiper mountings cut etc), and a good chunk of the fabrication and machining that was already done needed to be rectified or adjusted, Engine Mounts, Wishbones, Pedal box, brakes, the list goes on! The engine choice was already made the day we set eyes on the car. Basically an engine specification similar to the Arosa, mated to an AWD 02M Gearbox with Ibiza Cupra TDI Ratios, linked to the haldex setup at the back, then finished off with Limited Slip Quaife ATB Differentials Front and Rear. By the end of January we had the fully built engine installed and running. Mid February the car was fully MOT ready and passed with flying colours. We still had a lot of finishing touches and lots of specification changes (sounds easy typing that now…) to get to where we are now. Tuning was always going to be a big job, and finding the time between a jam packed diary has been quite difficult, and there is much more to come. We only have a GTB2260vk on there running moderate boost and 280hp until we have proven the chassis. The engine should be able to kick out a reliable 360bhp that will take punishment for 100’s of miles a day on track with the GTD2872vr turbo we plan to run. We didn’t have time to install the WON REVO Nitrous system either but that will come later! When news got out that we had a new project, we were approached by a few Magazines and asked if we would keep the project under wraps until after the first photoshoot that was planned to happen on the 28th of March. It was a difficult decision, as we would have to limit what we could post on social media and who we could involve in the project. I’m sure we had a mole somewhere, as quite a few people did know what was going on but thankfully the nice guys kept their mouth shut We had to hold off transferring the TD1 1 AWD number plate onto the car for obvious reasons. Tuesday 27th mid afternoon the Citigo and our trusty Ibiza track car were loaded onto the truck and trailer ready to head to Snetterton Circuit for the cars first shakedown. We had very few road miles on the car due to the last minute issues we faced so we had to cross our fingers (sorry Paul!) and hope everything was alright. Also, this was my first ever drive since passing my trailer test so the pressure was never off, haha. We arrived at Snetterton just before 9pm to unload and hide the car away in our Garage ready for the day ahead... Wednesday Morning bright and early Adam Walker ( https://www.facebook.com/AJWIMAGES/) was on hand at to shoot the car for the upcoming VWG Magazine feature, be sure to keep your eyes out for that in the next few months! This would be the first time Clive saw the car, we didn't release any information during the build so he was shocked when he saw how far the car had come since last time he saw it back in December, a passenger ride was scheduled for after lunch. Luckily we fitted a larger passenger seat especially for this day, Sorry Clive! The car was amazing on track, we expected the soft springs and no front ARB to upset the handling slightly but we had a good time and impressed a few people. We had a lot of people saying the short wheel base and narrow track would cause issues but looks can be deceptive. Our Citigo has a 2.45m Wheel Base and 1.65m track width compared to a standard Fabia’s 2.46 & 1.64m, its still short for a car with plenty of shove from the rear end but not as bad as you might first think. With ‘only’ 280bhp and weighing in at 1160kg without the 2 fat people on board it was never going to be the fastest car on track. The rain helped show the benefit of the the Quattro Haldex system compared to our FWD Ibiza and was the main reason this project was interesting to us in the first place. A Front Wheel Drive version of this would have been immensely cheaper and much easier to build, and on a dry track likely faster but where is the fun in that... Maybe in the future we will look to build the car into a replica of the WRC car Skoda, No reply from Skoda Motorsport regarding the panels so if anyone can help us with that, please get in touch! I’ll be making further posts about the car build showing some of the major hurdles we faced along the way, some expected and most of them certainly unexpected! Any questions please ask! Ryan Oh and here's a photo we took while servicing a stock Citigo a few weeks ago27 points
-
Step 1. Install the free VW Pre Compiled Database located on the download section of this site to your PC: https://free-speed-cam-updates.web2diz.net/ Step 2. Unzip/extract the files on your PC and copy the contents of the resulting folder onto a SD card. ( Important points to note: Only copy the contents of the main folder i.e. Do not copy the resulting extracted folder named Volkswagen PersonalPOI - just copy the contents that are displayed inside that folder which is a folder named PersonalPOI and a metainfo2.txt file. Delete the readme.txt file as well as that is unnecessary. Also further note that despite trying to use 2 different usb sticks unsuccessfully only an sd card would work for me. I used the sd card which contains my music files but remember to delete the copied files off afterwards as sometimes they may prevent your music from playing and they are no longer required as they have been copied to the internal memory of the Amundsen ). Step 3. Using the "manage memory option" of the nav settings upgrade the software. Step 4. In the "map" settings chose poi categories, scroll to the bottom and the newly added items should be displayed there. Tick these to activate them. Step 5. In the "nav announcement" settings of the nav settings make sure that there is a tick in the "My POI" item. This enables an audible speedcam alert. To sum up - it's pretty easy to do and it's free and there are monthly updates on the site. On the downside - I'm not sure how reliable and up to date the database is as I've already had to manually edit and remove an out of date camera from my location. IMO the audible alert is a bit feeble and can't be changed but it's better than nothing. I'm not too fussed on the camera icons either. I hope this post is of help to others and I would like to thank the contributors of the other threads regarding this topic on this forum from whom I have gained my insight. I have compiled my own version with my preferred choice of speedcam icons limited to UK fixed cameras and traffic light cameras using the VW database on the above site which I've attached below to share if anyone wants them. Remember to only copy the files as per the above instructions. My Uk Speedcams.zip26 points
-
All, TL;DR Black friday discounts code at bottom. A little over 18years ago an idea formed and so it began. Now 18years is quite a good run... For anyone in the dark, briskoda, turned 18years this year Over the years we seen thousands of members post, read, learn, share. Over all models in the range, united by a common theme, if not always in agreement. Each month now we see millions of visitors, reading the rich trove of knowledge we have here. The community has grown, shunk, grown, and will always eb and flow, much like a river as it finds it's way through the countryside. The rise of social media was, and remains a concern. Many of us believe the forum approach offers more than the immediate here today, gone tomorrow of social media. But we do need you're help to keep it thriving. Post, share, spread the word, every action helps. Talking of action, climate action. Earlier this year I set about covering our ongoing carbon impact. The internet is a huge contributor to the problem, more so than driving this year We've been cabron neutral/negative for the services we host upon and consume for a few months now. I wanted to do more, carbon negative overall? This milestone seemed like a good point to do it. Looking back, it's almost impossible to say how much we've used to provide the community; we don't have a totally accurate record of trips to data centre x or y, so it's the best of british fag packet maths... I've taken what we use today, <1/2 tonne per month, still quite a bit eh? Then multiplied it back over time, then added a bit on; quite a bit on, because all those odd days here there, older it equipment was more power hungry and so on adds up... In numbers we might comprehend, it's around 250'000 miles. To that end I've offset an addititional 180tonnes of CO2 to cover our earlier years, that's 10tonnes per year, and includes some slack for driving to x and y, my laptop being on doing updates to the site at 3 or 4am the odd night... Going forward we'll be covering our continued use, so continuing to be negative, along with the tree planting programme. You can find out more about all this here: I'd like to thank the current team of admins, mods for doing what they do. I'd liek to thank former members of the volunteer force over the last 18years for doing there bit to bring us to where we are today. Thank you to all t hose who through freedom part with your own hard earned cash to support what we do here. Of course all that we do, would be for nothing without you, the community member. I thank you too, for your time, the dedication by many to sharing info and the helping others. Thank you all for being a part of, and in making this community. It's yours, you made it, each post, thread added a leaf to briskoda's tree of life. To think we've seen marriages, babies, life altering advice and support, and so much more, all from connections, people, through these few pages. Quite humbling, thank you. So it's 18years, time for a party? Heck yes. One small pandemic problem in the way. I'm begining to come up with a few ideas for next year, shows, trackday etc where we can get together in one way or another. We've all got many bridges and challenges to cross before then, so stay safe and keep in touch. In lieu of a party, I decided to make some space in the storage. So a 50% off stickers voucher code, and other stuff to clear from the shop. I guess you could say it's a black friday event... https://www.briskoda.net/forums/store/category/3-merchandise/ Discount on stickers other merchandise of 50% - code: 18years Old models t-shirts discoverd in a box - £5 ea to clear. Freedom, great value as ever from £6 per year.26 points
-
Hi all thought I’d share a story with you all that’s relevant to some degree here and it certainly put a little smile on mine and the kids faces. Yesterday, I was out and about with the wife and our two young girls when my wife asked if I’d stop off at Tesco whilst she ran and and picked up a couple of things. Naturally I obliged and we stopped outside and I waited in the car with the girls whilst she went in. At at the same time another Skoda Superb, same year, spec and colour parked up in front of me and I smiled to myself thinking ‘nice car pal’, as you do. The same thing with this Skoda. The driver waited in his car and his front passenger got out and went into Tesco. I then said to my girls, ‘I bet mummy gets in the wrong car...’. The girls laughed and nodded. A couple of minutes later my wife appears. In her own world as usual and not even aware there’s now two almost identical cars in front of her. Guess what happened next? She approached the strangers car, opened the door, got in, sat down, closed the door and I could see her going for the seat belt. At this point I was in too much of a fit of laughter to go and intervene and knew any moment she’d appear. Next thing the door opened and a very red faced wife appeared repeatedly saying ‘I’m really sorry!’ My wife got in my car saying ‘oh my god’ and we all carried on laughing. Wondered whether the driver was on here. Apparently he was laughing too and said to my wife ‘oh hello’ as she got in Not often I see a car that looks identical to mine. But to see one then it stop next to mine and then my wife get in it just made me laugh. Cheers for listening folks.26 points
-
You may well of noticed a few topics have disappeared overnight. I hid them. For what feels like years now; because it is, we've been plagued by a growing divide. The uk, and many other countries, are facing similar divides. East meets west, left vs right. Pro vs Anti. The toxicity this brings, compounded by the mental pressures of lockdowns, stress, is poluting and damanging. Damaging to all, you personally... I hoped and indeed often shared my view that together we could accomodate and at least hear the other side of discussions. Alas it seems we cannot. So I took the choice to adjust the landscape, the canvas that this community provides. I no longer wish to see, or hear tit for tat style posting. It is no single persons fault, not the lefties, the righties, the remainers, the exiters, it' all of us and I include myself in that. I, we can't solve humanities desire to go at it. I was a fool for thinking we could as a community live in a idilc bubble... dammit, it was my dream, let me hold on to it. Thank you to all those who do post good, interesting stuff, even if it's non skoda related Sadly till we realise we all live on a sphere, that does not have sides, and thus collaboration is the way to achieve things, this sort of fight will continue. So why have I done this? The short version is despite repeated warnings, the recent antics, akin to the teacher saying ok everyone stop talking, some carry on wispering, because it's not talking miss... The barrage of pasted screengrabs or just copying text ( with source ) as a post... thats not conversation or debtate that's just a proxy parrot. Are you really a parrot doing someones elses bidding? No. So a degree of attitude, ignorance towards the nudges the mod team left and indeed other community members. That deafness if you like to consideration, a desire to perpeptuate, not to consider, to game etc. I get it, your views are strong and firmly held. There is a time and a place, and it's not every other post. I get it, to get folk to collaborate, you must present arguments to change there perspective, to illustrate a collabroative approach will actually work. It's how thats been done, or not in many cases that's gotten me to this point. Is this the right move? I don't know, but its one I feel forced to make. What happens next? There will be no clousre of the rodside hotel subforum. It serves and has served a very useful and good purpose. A place to have, and to continue to have serious conversations without diversion. To that end, if you just drop a video, screenshot or twitter esq embedd with no comment, please don't be upset if you find it gone. This means no proxy posting, explain yourself, explain why with this clip, insert, you feel, or agree/disagree. Add some of your own words, in the spirit of this, to illustrate/explain your post. Poitical topics? Gone. Some may remain. Of those that do it's my judgement they serve a purpose. The general sentiment of not making them political stands or taking them onto your agenda remains. But isn't everything political? Crikey this sounds like a physicology discussion I had one semester. Yes. You have to exercise self moderation, in where you drag a topic. If it's taken off topic in the hotel, you will be cupble for the threads closure and likely given a warning. No one has been removed today for any of this. I reserve the right to do so in the future if such actions or behaviour deem it easier than hiding posts. What happens next? We're in polluted waters now. The pollution from all the recent brexit, gov't, etc topics will continue to pervade our community. I can't clear that up, I can't erase your memory. That has to be done by starting a fresh, leaving the past at this point in time. If it turns out you can't, you essentially continue to whisper, then I'm afraid we might not be the community for you anymore. See even this is starting to sound like a episode of the fisherman. We are a product of our input. So, as ever, this topic is open, feel free to feedback. Bearing in mind all the above and the general guidelines. I'll accept & work with constuctive feedback. If you want to tell me some people or groups, tell me the names, in confidence via email/pm. I can't work on "some people" "that person", I'm not in your head or your side of the fight... We live on a sphere, there are no sides. Finally.... We're not alone, we're not the only community or group experincing these problems. Leave, stay, join, everyone has there time. Help us, to help each other and if that's a reach, help each other first. It takes two to tango, remember that old chestnut? Maybe you missed it while you were wispering at the back of class. I know I did... :( Thank you for reading, Colin.25 points
-
After four years again on Škoda. It is good to be back25 points
-
Hi all, After much procrastinating I collected a Superb 280 Sportline Estate at the end of January. I was toying with getting a new Skoda Superb and found the posts on this forum really valuable. I've been on here quite regularly as a guest, reading your experiences, hints and tips and am very thankful for all the useful info. I've only just registered an account so by way of giving something back here are some details of a 2-channel dashcam I've just fitted to my Superb. Hope this helps anyone considering a similar install. I decided I wanted a good quality but discrete 2-channel dashcam system recording front and rear simultaneously and ideally one which would do a little stealth recording whilst parked and switched off. I wasn't worried about a built-in screen as I'd take videos off with a smartphone or simply pull the memory card out when necessary. I've tinkered with car audio in the past and am not afraid of a little wiring if required, but I wouldn't call myself an expert by any means. Enthusiastic amateur if you will... I first looked at the Nextbase Duo (https://www.nextbase.co.uk/dashcams/in-car-cam-duo/) which has a screen, but decided against it due to the fact the Superb estate is such a long beastie, I doubt it would see much out of the rear window. In addition the front and rear cameras do not pivot up and down so once you've set the front angle best to see the road ahead, some people had found the rear camera recording more of the headlining or interior. It was quite a sizable thing and the inclusion of screen made me think I'd feel nervous about leaving it in the car. I decided against. Blackvue models looked good, in particular the DR650S (http://blackvuehd.co.uk/product/blackvue-dr650gw-hd-2ch-2) however for "parking-mode" recording it needed an additional "Power magic" adaptor thing, or a very expensive battery pack which added additional cost and complexity. Definitely looked the best in terms of aftersales support though. After much research I settled on one from Lukas/Qvia. A relatively unknown company I found initally, with very few reviews on the web, but with most of these things being made in China, Taiwan, South Korea etc, being from the latter didn't particularly concern me if there was a knowledgeable UK distributor. TTW were the guys and I found the one I wanted here: https://lukashd.co.uk/product/qvia-ar790-wd-2ch-dash-camera/ I chose the snappily named Qvia AR790-WD. It looked very similar to the Blackvue above, being quite small and with no screen included. It came with a very small front and rear camera and the inclusion of a super-capacitor (rather than a battery) meant it would last better in hot sun / cold weather and because all the power "smarts" were built in, no additional battery packs or adaptors were required. Once fitted, the super-cap charges up and holds some current and the camera has a built-in fail-safe setting to shut down if it detects the car's battery voltage drops below a certain level. The cameras can then be set to record when motion is detected front or rear, or to continually record on a kind of timelapse mode. So far I've opted for the former and it's worked well. Fortunately the only thing it's picked up so far are cars coming and going and the odd late-night wheelie bin deployment by myself and the neighbours. Anyway, on to the install. You can see enough pics of the camera itself at the lukashd link above, so here's how it went for me: First of all, the installation instructions provided are not that great. Enough to give you an idea, but given the breadth of cars out there, clearly not enough for your average novice in a specific vehicle. Proceed with caution and if you're not comfortable pulling bits of trim off your shiny car, get a friend to help or professional to do it for you. The instructions said to mount the front camera first and run the wires behind the headlining. This dashcam has two wires - one to supply power and one to connect the rear dashcam. Both cables would be run across the headlining to the passenger side of the car. The power cable would run down the A-pillar to the fuse box behind the glove compartment and the rear-camera cable would stay at the headlining level, running to the rear of the car. Fortunately the front lip of the Superb's headlining had a nice recess into which cables can be easily tucked (it's like the expect them all to be used as taxis...) What you see behind the rear view mirror - i.e. not very much: (and the eagle-eyed of you will see I took this picture after I'd finished as you can see the rear camera in the mirror) Next task was the remove the front left A-pillar trim. Not complicated, I had some cheap trim removal tools but this one was easy enough to prise away with fingers. Pull outwards away from the pillar at the top edge and continue pulling away from the pillar down the windscreen side. Eventually you can pull upwards slightly away from the dash and it should come free. Behind you can see the airbag and some other wiring. I chose to run the power cable above all this keeping well away from the airbag: Power cable secured with some cable-ties: (I wanted to avoid anything rattling around after all the trim was back in place.) Cable tucked down through the same hole through the foam insulation. Next, open the passenger door and remove the side dashboard trim. No screws, just find a leading edge you can get a trim removal tool under and prise outwards. Note: the trailing cable is still laying ready to be tucked down through the foam insulation at this point (previous pic). Close up of the side panel removed. Get your hand in there and fish out that power cable poking through the foam insulation: Again, once fished through I decided to cable tie to something solid in order to prevent rattles: At this point I removed the glove box, which the manual explains fairly well and I see others have covered in other articles. What comes next depends upon your specific vehicle and the fuse you have. This dashcam requires a permanent 12v supply and a ignition or "accessory" fed supply, along with an earth connection. The dashcam came ready for hardwiring, but I understand a cigarette lighter kit was an option. I opted to use 19x19mm piggy back fuses: https://lukashd.co.uk/product/fuse-holder-adapter-ato-19-x19-mm/ but you might prefer using the mini 11x16mm fuses https://lukashd.co.uk/product/fuse-holder-adapter-mini-111-x16-mm/ The idea with these is that they're a simple way to extend an existing circuit. They come with two slots for fuses - one for the original circuit and one for your new added dashcam circuit. You remove an existing fuse, place the removed fuse into the unoccupied piggy-back holder fuse slot, ensure your 10A dashcam fuse is seated in the other slot and then press the adaptor into the position you removed your vehicle fuse from. I used a tester to find the 12v and accessory feeds, with a little trial and error turning the ignition on and off. Fuse 38 (Trailer electrical socket) was live with the ignition on and Fuse 48 (Blind Spot detection) was a permanent 12v. This is what I ended up with: (Fuse 38 is the top piggy back and Fuse 48 the bottom one) In my case both fuse positions were empty - no fuses present as I have neither of those options on my car. So I had to buy another couple of 10A fuses to complete the circuits. The ground wire was easy to attach, but I didn't take a picture of it. There's a convenient earth screw position just under the glove box to the left hand side. Easy to find. With wires in place it was on to running the cable to the rear camera; by far the most time consuming part of the job. I didn't bother taking pictures of tucking the cable into the headlining across the front left passenger door and rear left passenger door, as it was fairly trivial to feed the cable behind. Just remove a little of the headlining tuck the cable behind and replace. It's very tight around the b-pillar, but again with a bit of help from the trim removal tool, it wasn't too hard. Once you get the cable to the C-pillar that's where the fun starts. In a saloon I guess you have it easy and run straight across the rear headlining. However in the estate (and hatchbacks as well I guess) you get the quandary of how to get the cable through to the rear window properly. Ideally you don't want a loose cable spanning the gap between the headlining and the boot, especially when the hatch opens and closes. This is the cable tucked just into the headlining, optimistically thinking there'd be some easy way to go from here to the boot lid. Nope. The only way to go is through the c-pillar, out through the connecting boot grommets and up into the tailgate. So C-pillar trim needs to come off and cable threaded through into where that top grommet meets the left side of the car. Here's the C-pillar with the trim removed (comes off much like the A-pillar one). The cable needs to come down from the headlining into here: Enter stubby oaf-like finger to tell you where to run the cable. I chose the C-pillar to hold all the surplus cable. Don't do what I did and thread it all through to the tailgate, only to find you there's no room for all the surplus up there. Don't pull it all through to the tailgate like I did, only to have to pull most of it back through again... This was not fun. With one hand poking the cable up through the c-pillar, somehow you have to feed it to the hole where that rubber grommet was. I opted for cable ties and insulating tape. If you can get the cable ties through to your cable, tape the insulating tape to the cable (carefully protecting the metal plug on the end) and pull it carefully through the hole: Now we're on one side of the grommet ducting thing. The cable needs to go through that and there isn't much room in there. Enter the cable-ties again to pull the wire through: Note: those grey plastic bits hold the rubber grommet ends tight to the body panels. They are easy to get off and a right pain to get back on again - especially if you have chubby fingers like me. Deploy the missus or someone with small fingers to help. Now the cable's ready to be threaded into the boot lid. My worst fears - the whole boot interior trim has to come off. Lower section has to come off first, then the upper section around the glass. First of all, pop out the electric boot release button (if you have one) and the two interior lights. Remove the plugs from all three of them and poke the wiring back into the holes inside the boot lid. The lower interior trim section just pulls free now - again like before pop out one section (I started near the very bottom of the boot lid) and work your way carefully around, popping out the trim panel with a trim removal tool. The clips are much harder than the interior trim and I was quite worried about damaging the panels. Everything went OK for me, but go careful! Bottom panel removed: One the lower panel is removed, you can start on the upper panel around the glass. This time I started around the sides near the gas struts. Again, level and pop them out carefully working your way up each side first, then across the top. Once free the whole lot pulls downwards away from the raised boot lid. The upper panel removed and laying in the boot: (just so you can see all the clips) With both trim panels removed, the top edge of the boot lid looked like this: You can see the cable hanging out from the rubber grommet. Use the cable-ties again, threading one through from the left hole in the boot lid above to the grommet hole. Tape the camera cable to the cable tie again and pull through. This whole part took me a couple of hours to do tidily and safely but it was worth it. The camera can then be mounted where you choose on the rear window and the cables will be tucked safely out of harm's way. I wrapped the cable in a little extra insulating tape to protect it where it passes under the rear trim. Up to you. Test the camera, make sure everything works OK then refit all your trim panels. Here's the rear cam. There's a little raising of the interior boot lid panel, which I guess could be solved by cutting a small notch into it. However it doesn't bother me that much. The rear camera cable would've been better with a right-angle plug in my opinion, but again, not the end of the world. Hope this helps. Any questions, feel free! Roy.24 points
-
I have been requested to give some background which may or may not interest members of BRISKODA. I am probably one of the oldest on the Forum being a wartime child and started my motoring career in 1958. On bikes, I passed my test on a 49cc Berini moped which was built in Holland and marketed by Halfords. I graduated to an Ariel Arrow, 250cc 2 stroke twin following which, I rode an Ariel VB 600cc SV single with a chair on the side. Not much speed but great fun and very useful in the atrocious winter of 1962/63 when the roads in the west were snowbound. Next bike was a BSA A10 650cc Rocket Gold Star, now a collectors item. In between, I also rode a number of smaller BSAs, C15, Bantam, Triumph speed twin 500s, Royal Enfield Constellation 700cc and Royal Enfield Bullet. There was also a Velocette LE water cooled that I have mentioned in other posts. The last one I rode was a Norton Commander 650cc and since then have never ridden any Japanese or left hand change bikes. My own cars started with passing my test on a Ford Prefect and then owing prewar Austins - a 12 and a 20. Back to a Ford Prefect also driving Ford Zephyrs Mk2, various commercials and a Dellow. Also had a go on a friends BMW Isetta bubble car which had all the grip of a bar of soap in the bath but still quite fun. A period of driving Land Rovers followed, all belonging to the government of the day. I managed to get hold of a 3.4 Mk2 Jaguar, lovely car, bit iffy in the roadholding stakes but a great engine. Sadly the body rotted faster than compost so I sold it on. Then came my first brand new car, a German Mk1 Ford Capri 1700GT. I enjoyed this one immensely , good performance and road holding and better than the UK 1600 equivalent. A few friends had the 1600 and all agreed the 1700 was a better build. Travels in the job forced me to sell and I drove company cars but did own an Austin/Morris 1100 for a while, Moving on, I had a Peugeot 305SR which was followed by a Peugeot 205GRD my first experience of diesel. My wife, being a lover of the Mercedes marque persuaded me to get Mercedes 250D which, being in Germany was left hand drive same as the Capri. This was the W124 series and almost unbustable, requiring only one clutch overhaul, various bearings and a new cylinderhead over a life of 20 years and 300,000 miles. Still miss it. While there I drove a fun car, Reliant Kitten, the 4 wheel version of the Robin 3 wheeler. Moving on, I had a Toyota GT86 which was great fun and another one I miss. At the same time, I did a bit in the classic field having a Morris 10/4 from 1934 and a Morris Oxford from 1930. Great fun but needed keeping an eye on and not for the dirty weather. Coming up to date, it is my very reliable and comfortable 2017 Octavia 1.5 TSI which may not be as sparkling as the 86 but still a good drive and very practical. There is a shed load of stuff I have not mentioned, lorries and coaches which are a wee bit different. I did quite a lot of driving tests over the years, either for different countries while I worked around the world and included the IAM. I am now retired but still enjoy driving and having a go when the road is clear which is not often these days with stacks of traffic and poor road maintenance. I still visit the continent, France and Germany, their roads having been a bit ropey in the sixties are now marvellous and if you find a clear autobahn in Deutschland can press on a bit. Other hobbies, rifle and pistol shooting until they took my pistol away, private flying and gliding of which I do very little at present as I am carer for my wife. Also do a bit of church bell ringing and fiddle with railways mainly models in gauge 1. So there you have it, just an old geezer living quietly in rural Somerset. and although some of you may know me, I was Harry G on the GT86 forum, I was definitely not in the RAF but flew with them. If some of you think I don’t post enough, that is because I am not as good at dealing with the intricacies and faults on the modern cars. I grew up with carbs, coils and distributors which could be fixed without plugging in for a diagnosis. Any further questions I will be delighted to help. Huh - just got a letter saying we must start paying for the TV licence again - what a state and the price of fish24 points
-
So Guys I am here and yes I will keep up the update from now on in so since the car has come to me we are putting plans in place but lets say its a massive job and some fabrication work needed to correct a few bits etc we will be taking it back to a shell and starting again with all parts to ensure its correct. the car has been at the cage builders and I can say that the car now has a full msa\fia cage fitted and will be back at my workshop on Friday ready for strip down. this is a massive task and a lot bigger than first thought but we will have it finished and it will be a full on track car!!!24 points
-
Picked car up yesterday. I am sure colour will be Marmite, some will love some will hate. Personally I am over the moon and love it. So pleased I changed the wheels to also be black. Car is: SportLine 2.0 TSI 280 PS 4x4 DSG in Dragon Green Extras added: Rear side airbags (PE2) Temporary steel spare wheel (PJB) Virtual pedal (PK9) Heated windscreen (PKV) Smart light assist with Lane assist and Blind spot detection (PNG) Park assist (PPA) Wireless phone charging with Bluetooth+ and Wi-Fi (PT5) Canton sound system (RA3) Heated windscreen washer nozzles (9T1) Crew Protection Assistant (7W2) Sliding trunk cover (3U2) Boot nets (6M3) Rear-view parking camera (KA2) Special exterior paint (FB1) Heated front seats (4A3)24 points
-
Various manuals available to download here:23 points
-
A few people have asked for this thread, so here it is. I'm not a mechanic nor an engineer, but I do have a fair bit of experience in this area (on both ends of the spectrum) and am happy to share what I've learnt so far. More importantly, despite other threads existing on the topic it might be an opportune time for other TSI owners to chip in with their experiences. Please forgive my verbosity and any omissions. Overall, I would start backwards by prefacing thus: Despite fierce debate online, and many conflicting articles, I really don't think running in a modern engine is rocket science. In the good old days, the big old push rod engines were made by hand and would have a lot of 'hone marks' on the metal, including inside the cylinders. Bearing in mind there was only one kind of oil - mineral - and it didn't last very long, running in was quite a complex procedure. You needed to provide enough lubrication to stop the engine lunching itself, but not so much the new moving parts couldn't wear each other smooth in perfect mating unison. All that worn metal left thousands of tiny (and not so tiny!) fragments floating around in the oil, which would then call for a 'running in service' not long after you took delivery of the car. Being too gentle could result in glazed cylinders, badly seated piston rings and bore wash - all of which are bad and all of which would require a top end rebuild to correct. Conversely, being too hard on a new engine (or indeed any engine) will accelerate wear and can cause its own problems, including a life of drinking its own oil. These days engines are (mostly) made by robots, which have a massively more precise output and are also infinitely more conforming. Engine 1 will be pretty much identical to engine 2, etc. In fact with modern synthetic oils, even after 150,000 miles one can expect the original factory honing marks to still be present and undamaged. Everything is built to such fine tolerances that the engine is perfectly 'just so' right from the factory. Because of this, many marques these days don't have any special running in procedure. They just advise customers to drive like normal and forget about it, and that certainly doesn't seem to cause any real problems. VAG (including Škoda) do still include running-in advice, and as such it'd be prudent to follow it. Regardless of what the Internet says, the people who designed and built your engine are likely the ones who know how best to treat it. That said, nobody can pretend that Škoda manuals (especially) are very clear or detailed - especially when it comes to the topic of running-in. The guidelines are very general, open to interpretation, and - respectfully - often in some Czech version of 'Chinglish'. Generally speaking though, the manual's suggestion involves not exceeding 3/4 of the rev range for the first 600 miles, and then progressively increasing the revs (including, shortly, trips to the red line when warm). The manual also advises not using full throttle, not labouring the engine at too low revs (manual gearboxes only, DSG would not allow this even in manual mode) and also not staying at constant speeds and revs for too long at a time during the running-in period. This makes sense, as the end result is a drive that allows the new engine to warm up, and then uses most of its rev range to help 'stretch in' the new engine and its many components. You're not just bedding in one thing, but rather thousands of complex moving components, all mated together 'just so'. Luckily, due to the aforementioned excellent manufacturing processes you won't find lots of swarf in your oil any more, and a running in oil change is no longer mandated. Your engine, regardless of how well built, is still a new beast however - and still requires some TLC. Here are my own observations, and I invite your own! Make sure the oil is up to operating temperature (~80oC) before you start increasing the revs past around 2,500rpm. That said, once the car is warm don't be scared to use the engine. The worst thing you can do is 'baby' it and just drive it everywhere on the low end torque, never seeing over 2,000rpm. This will be almost guaranteed to cause you problems with seating the new piston rings and can cause issues with oil consumption in the future. As per the manual, vary the revs. Your new engine will still be 'tight', and that is something you will physically feel as you start to explore the rev range over the weeks and even months after acquiring your new car. For example, there will be a slight resistance/hesitancy/flat spot in the power when you reach (for example) 3,000 or 4,000rpm. This is the engine resisting itself (to put it colloquially), and a manifestation of the parts claiming their space and rubbing up against each other under high load for the first time(s). Gently push through it, but gradually. Once you get past about 600 miles you can consider the car mostly run-in according to the manual. At this stage, if you have managed to restrain yourself thus far (and I hadn't!) you can start to push further up the rev range. Perhaps 5,000rpm when accelerating, before dropping into a higher gear for cruising, then 5,500rpm or 6,000rpm the next time, and so on. There are a hundred ways to skin a cat, but they all have the same end result if you're careful. Drive away soon after starting the engine, never leave it idling, don't thrash it when it's cold, and don't cruise in the same gear and at the same revs for long periods of time. Ideally, on delivery day you would have a route planned from the dealership and back home via the scenic route. Moderate hills, twisty roads, varying speed limits all interspersed with nice straights are the order of the day. That way you get to warm up the engine, and then give it a lot of varying loads, speeds and revs (30 in 2nd, 50 in 6th, then 40 in 3rd and 60 in 4th and so on). Once your oil is warm don't be afraid to push the loud pedal, certainly you want to be hitting 4,500rpm at points throughout your drive, or at least as that's what the manual recommends. Repetition kills new engines (at least figuratively, if not literally - eventually). Even if you have to drive on a motorway during running-in (can't you hit 'avoid motorways' on the sat nav for the ride home?), at least vary your speed and revs. Provided the engine is warm, give it some beans in a low gear up the slip road, then drop into 6th for a short while as you get your bearings on the new road. Then drop it to 5th or 4th (still at 70), and after ten minutes drop back to 60 in 4th, or 3rd, and keep changing gear up to 5th/6th and back down again. You are aiming to keep the engine 'guessing', and to not let it sit too still for too long. One important tip which all camps seem to agree on, no matter how they word it, is using the throttle to slow down as well as speed up, as much as you can. I don't mean full bore accelerations (though some do advocate this), but rather refraining from using the brakes as much as you can. This isn't actually anything to do with the brake system, nor the 'new' pads and disks. Rather if you're regularly cycling your speed between 30/40/50/60/70 (or more) and back again, doing it using 'acceleration sense' (i.e. by adding and removing throttle, without using the brakes) puts a lot of varying loads on the new piston rings, which in turn helps them 'seat' better against the cylinder walls. In the long run that will aid low oil consumption and prevent glazing. Belting down the slip road as you speed up to 70mph in 3rd, then taking off the throttle completely to allow the car to slow itself to 60 while you merge onto the motorway behind a HGV in lane 1 is one example. Sitting in lane one or two (as circumstances dictate) at 70/whatever in a particular gear, drop a few cogs and give it some beans into the next lane over, and then ease off the gas so that the car naturally slows itself back down, re-adding the power as you get towards 50mph so that you bring yourself back up to 70... all the while varying the gears and revs you're sitting in. That kind of thing. Those of you lucky enough to have advanced driver training (IAM, RoSPA, emergency services) will already be ideally placed. Just take it for a brisk run out across your favourite routes, taking in plenty of B roads, some fast A roads and a lot of changes in pace and gradient. Firm, brisk, and smooth - but definitely progressive - are the order of the day. Every drive - certainly after the first couple of hundred miles - can be a chance to push the engine, and its rev counter, that little bit more. You will literally feel it loosening up over the days and weeks after delivery, just enjoy it. Soon (especially after the magic 2,500 miles) you'll have a nice smooth, relaxed and revvy motor. You do have to bear in mind that not only is your metal new, but so is your rubber (tyres) and so are your brakes. That said, you can almost fully run-in a new modern car just on the way home, provided you have a decent and long enough route. It's always one of my great pleasures, and generally in our case involves a day out in Wales (well away from certain well patrolled main roads). Your tyres won't be providing optimum grip for the first few hundred miles, and your brakes will take time to wear in properly. A few firm stops can aid this, but don't plan them for when you are approaching that stationary HGV or a brick wall! In summary (again), just drive the thing. Let it get warm, don't purposefully abuse it or bounce off the rev limiter in 2nd all day, but at the same time don't be too gentle. In the past I collected a new (diesel) car and - being young and naive - didn't quite get the gist of the whole 'drive it like you stole it / give it death' ethos. Having read online how white vans and hire cars are generally the fastest and loosest things on God's green earth, I literally ragged the poor bugger from cold, right to the red line over and over, and thought I was doing tremendously well. Until, that is, I realised even a year down the line it was slow and wheezy off the line compared to my brother's (identical, collected the same day) car and that I always got about 5mpg less than he on the same drives. I'd knackered the poor thing. Don't mistake progressive and hard driving with a lack of mechanical sympathy. Provided you get it warmed up, keep an eye on the fluids, and don't treat it like it's made of glass, you'll no doubt end up with a fine specimen which rewards you with years (and many tens of thousands of miles) of trouble free service. Just don't be too scared of that gas pedal... or a loud, high revving trip or three. Remember, OEMs take new engines off the line and subject them to 'torture tests'. The poor things are strapped to a dyno - or into a sample car - and revved through the red line, and kept at full speed and load (V-Max) for many days and even weeks on end without ever letting off the gas. They must get through some fuel!! However, they test them this way to ensure that the engines are capable of taking sustained high speed, high load service for customers, without coming to any harm. So, compared to that, you can't really do much damage... again, provided you warm it up first! Here's a nice example from a Ford test to give you an eye opener to finish: Click me (YouTube link). Sorry this is so long, but I hope it helps give those who asked some food for thought. Feel free to add your own experiences, which - in these modern times - may well mostly echo the 'I just followed the manual and it's been fine' ethos.23 points
-
23 points
-
I have Now completed the first (40,000 mile) oil change on my 6 speed dsg box I will attach some pictures and information that may help others tempted to do the same though I have seen a recent post that stated they have been quoted £175 at a garage to do it so at that price it may not be worthwhile. For me there was little choice as Blade group will never get their hands on a vehicle of mine ever again. I purchased a " Sealey VS70095 Transmission Oil Filling System 3ltr instead of the vag6262 tool. " (use text between quotes to search) which cost me £69.49 (can be done cheaper without a pump but its slower) I purchased " 1 x Genuine VW DSG Gearbox Oil And Filter Kit (G052182A2, 02E305051C, N910845) from "Lancaster volkswagon" at a cost of £111.92 I already own Vcds (£270) So without going any further - if you can get it done for £175 then do it as even now I have the required equipment It will still cost £112 and a couple of hours of my precious snoozing time in another 40,000 miles time. Still interested...here we go then. I couldn't find an online video of a skoda superb dsg oil change but I did find a very good video of a vw model from a site covering their turbo diesel ( or was it "myturbodiesel" wink wink) search for this "How to change and drain the DSG transmission fluid in your VW w/ VAG6262" and select videos. The car needs to be level but there seems no where to measure the levelness of the superb so I measured the drive level and made blocks of wood to sit under three of the wheels. The oil would drain easier if warm but unless its the depths of winter I wouldn't worry about this too much, the oil is not very viscous. Step 1. jack one side of the car up slightly so that you can reach the furthest and middle of three TX45 screw that holds the engine drip tray up, remove those three tx45's and 8 TX20 (torx size 20) around the edge. (put the 11 screws in the tray and put it somewhere where you can trip over it and send the screws flying) Step 2 Identify the DSG box oil drain plug and slightly loosen it. do not remove it yet You need a size 14mm hex drive and a long ratchet or torque driver I have rung it here in green for you. (viewed from car front) Step 3. Lower the car, lift the bonnet and disconnect the battery . 2 @10mm Pull the battery fleece off (if fitted) Undo the battery retaining clamp. 1@13mm and remove the battery ( the battery tray has lips at the nearside edge so if leaning over the wing, lift and push away from you to disengage. Step 4 Remove the electrical connector from the air cleaner pipe and the smaller rubber pipe. The connector has a small grey peg at the side of it, pull this peg up slightly and then hold it against the connector as you pull it up. Step 5 remove the air inlet pipe from the air cleaner assembly Remove the top of the air filter box and take out the air filter. You now need to remove the lower part of the air filter housing, it is held down by two rubber push on nipples ( highlighted yellow on the 2nd picture below) and one TX30 screw (coloured green 1st pic below) and the air pipes. There is also a ribbed drain tube that goes down through the engine bay to the void in front of the wheel. it is connected to nothing so just pull it up and free. It will make sense when you do it yourself but it requires a yank upwards to lift the filter housing off the nipples and then twisting with the right hand side up in the air so that you can release the left hand U shaped tube. Step 6 Remove the battery tray, it has two 10mm bolts situated under where the battery would be (green and labelled here) and a 13mm bolt above the right hand rubber nipple for the air filter assy. In the picture above you can see the rust marks where this bolt was (just below the red wires) You can now see and easily get to the Dsg filter...It has a 24mm nut shape in the top of it and it is a one piece dome of plastic that is torqued up to 23NM. (My torque wrench starts at 48NM) As its unlikely you will have a torque wrench capable of measuring such a low value it would be wise to mark the top at say 6 o'clock and count the revolutions as you undo it. It is sealed with an O'ring so does not want to be overtightened. Clean around the filter case and then unscrew the cap, very little oil will spill if any at all. You will now see the filter which can be removed by pulling up, have a suitable container nearby to put it in as it is full of old oil. Put the new O'ring on to the cover, smear some oil around it and on the rubber gasket of the new filter and re fit both. Step 7 Re fit all the parts you have just removed apart from the engine tray and sump plug. Spend a moment looking down at the dsg filter cover and come to the conclusion that it should be possible (next time) to replace the filter without removing all this stuff, depends how strong your grip is but I will try that next time. Step 8 Drain and Fill By now the car has resettled after having been jacked up and as it is now back down you have limited room to work underneath, this is why you loosened the drain plug as it is too difficult to do later. Get a suitable container to drain the old oil into, I used an old 15kg tile adhesive bucket with an internal diameter of 280mm cut down to 130mm (the old oil filled to a height of 100mm) Put the container under the drain plug and ....blah blah blah Some oil will come out but not that much, not until you get your 8mm hex drive and undo the snorkel....let it drain.. then replace the snorkel. The VAG kit and the sealey have the correct size adapter to screw into the Dsg box and the sealey has a quick fit push connector and isolating valve so you waste less oil when passing the filling tube down through the engine. The sealey says it holds 3 litres, it either doesn't or my new bottles of oil were overfilled, not that important so just fill it up and pump it in. you need to keep adding oil until it spills back out through the snorkel ( you did re fit the snorkel didn't you?!) check for overspill at approx. 4.5 litres pumped in. Once it starts trickling back out you can connect the Vcds and start the car, as the video shows -pass through each selector position pausing for a few seconds and then back to park. as the oil warms it will expand and you will see more draining out , on Vcds select control modules, dsg automatic transmission and then measuring blocks and click the top left up arrow to get to block 19 , here you will see the dsg oil temp and when that reaches 35c you can turn off the engine andput the sump plug back in, torque up to 45nm Re fit engine tray and rejoice (hide those three extra bolts leftover...bound to be ok without them huh?)
22 points
-
Collection day has finally come around and I’m super stoked to be a Superb owner at last! I only grabbed a couple of pics as I was hoping it would be light and dry when I got home to take more but it was neither. Here it is on the forecourt It’s a MY2020 Facelift Superb SportLine Plus 2.0 TDI 190 DSG with the following options Exclusive Dragon Green paint Supernova wheels Virtual Pedal Reverse cam with washer Spare wheel Virtual Cockpit All of which put the list price at pennies under £40,000 which is nuts considering what I paid and the paltry 6560 miles it had when I collected it this morning. The 260 mile trip home was fabulous and I look forward to a much quieter build thread compared to my Octy as it has so much spec there is little to do, but I’ll be sorting a few things for sure! Badges are a start and some cool lighting mods too. More soon
22 points
-
Hopefully this will be fitting and a mark of the high esteem in which he was regarded by everyone who had dealings with him.
22 points
-
I have starting this LOCKED thread to include the tried and tested VCDS adaptations for the Superb MKIII. If you discover anything and have tested it, please either start a NEW thread in the Superb III section or add them to the VCDS options on Superb III thread, please include a full description and VCDS screenshots (as per the below), and if possible a photo or two of the results. Drop me a PM and I will then include on here and link back to your post and give you the credit. Any discussions around the mod can then take place in the original thread, and this thread becomes a 'bible' of mods that have been tried and tested. I will unlock this thread from time to time to update it, any posts in this thread whilst it is unlocked will be hidden to keep it tidy. Any comments, additions, errors etc. please notify me by PM. Please remember to give a 'Like this' as thanks to these posts if you find them useful, and also to the original thread author. Thought I had better add a disclaimer - you perform any of these changes at your own risk. Briskoda does not accept any responsibility for your actions, and neither do I! If you aren't sure, don't do it! Please always use the latest VCDS software. Software versions older than 15.7.3 do not provide full support for the MQB platform. 15.7.3 onwards also provides support for 5F MIB2 units in the Superb MKIII Most of these screenshots were taken with earlier versions of VCDS, so the Adaptation channel numbers may have changed slightly as more gets documented and different revisions of controllers have different features. On Adaptation channels it is the description that is important, not the number in brackets. Use the search function in the adaptation dialogue to narrow down the choices, especially on the BCM (Controller 09). Please note that any changes to lights configuration may not be legal in your region, it is up to you to check and ensure that any changes you make do not breach any regulations. These posts are only an indication of what is possible, not advice on the legality of the change. Any changes you make to 5F are entirely at your own risk anything older than 15.7.3 does not fully support MIB2, especially with HEX+CAN USB leads. Some of these adaptations are courtesy of andyvee - as they are the same on the Octavia MKIII For those users that want to help make VCDS even better then please feel free to e-mail Ross-Tech a copy of your Auto-Scan If there are no descriptions in the ‘Coding’ long code then Admaps would also be useful... Ross-Tech can then include further information in new software releases. Many of the newer (2015 onwards) cars are now using controllers that the HEX+CAN etc interfaces cannot fully read, if you come across this then you are going to need the one of the newer HEX-V2 or HEX-NET interface.22 points
-
Seeing as the threads on the Octavia III section are getting clogged up with comments, requests etc, I am starting a LOCKED thread here with tried and tested VCDS adaptations. If you discover anything and have tested it, please start a NEW thread in the O3 section and include a full description and VCDS screenshots (as per the below), and if possible a photo or two of the results. Drop me a PM and I will then include on here and link back to your post and give you the credit. Any discussions around the mod can then take place in the original thread, and this thread becomes a 'bible' of mods that have been tried and tested. I will have to unlock this thread from time to time to update, please don't post if the thread is unlocked so I can keep it tidy. Any comments, additions, errors etc. please notify me by PM. Please remember to give a 'Like this' as thanks to these posts if you find them useful, and also to the original thread author. Thought I had better add a disclaimer - you perform any of these changes at your own risk. Briskoda does not accept any responsibility for your actions, and neither do I! If you aren't sure, don't do it! EDIT: Some features appear not to work on 2015MY cars. Rain closing definitely doesn't as a new RLHS sensor has been introduced. A new RLFS has been introduced as of MY16.5 and this does seem to support rain closing. Please use the latest VCDS version, which at 27/02/16 is 15.7.4 Earlier versions do not provide full support for the MQB platform, especially for MY15.5 and MY16 vehicles. 15.7.3 onwards provides support for 5F MIB2 units in MY16 onwards cars Most of these screenshots were taken with earlier versions of VCDS, so the Adaptation channel numbers may have changed slightly as more gets documented and different revisions of controllers have different features. On Adaptation channels it is the description that is important, not the number in brackets. Use the search function in the adaptation dialogue to narrow down the choices, especially on the BCM (Controller 09). Please note that any changes to lights configuration may not be legal in your region, it is up to you to check and ensure that any changes you make do not breach any regulations. These posts are only an indication of what is possible, not advice on the legality of the change. For MY16 cars with MIB2 Infotainment units you must use 15.7.4 with HEX+CAN USB leads. For those users that want to help make VCDS even better then please feel free to e-mail Ross-Tech a copy of your Auto-Scan If there are no descriptions in the ‘Coding’ long code then Admaps would also be useful... Ross-Tech can then include further information in new software releases. Index How to capture an adaptation channel map Enable cornering fogs (inc. vRS) Enabling both rear fog lights Enabling boot closing from the interior button and keyfob on Combi models with powered tailgate Enabling rear teardrop wipe Enable rain closing (MY13 and MY14 only) Enable refuel quantity in Maxidot Enable laptimer in Maxidot Enable needle staging (sweep) on Maxidot Enable traffic sign recognition Enable passenger mirror dip on selecting reverse Enable rear lights with DRLs Enabling DRLs only on AUTO Change the number of flashes for the comfort (lane change) indicator Change the upper speed threshold for cornering fogs Foglights as CH/LH Foglights as DRLs Enabling speed limit signs from map data on Columbus Enabling fan speed display in AUTO mode Heated seat level memory MIB Columbus VIM Permanently disable Start/Stop Various xpower lighting tweaks – LED number plate, DRL LED dimming on indicate, DRL dim on low beam but not sidelight LED Fog Light coding DRLs flash out of phase with indicators DRLs flash in phase with indicators Various hravec adaptations – sensitivity of humidity sensor, deactivate AM band, comfort entry for electric seats Enabling high beam assist to stay enabled permanently Number plate LED coding Retro fit footwell lights Enabling high beam assist Disable DRLs on Halogen headlights Towbar electrics coding Enable automatic daylight saving time on Columbus & Amundsen Enable direct CD ripping to Columbus jukebox Retro fit OEM LED rear lights Enable trunk lid lock delay LED sidelight bulb coding for Xenons Front Teardrop Wipe Front wiper park after ignition off22 points
-
A neighbour a few doors up from me has a BMW M5 which he constantly informs me is so good, so fast as he looks down at my humble Superb, that I want to chuck. Well last night returning home to a couple of inches of snow found him at the bottom of the hill to our road wheels spinning and going nowhere. He got out, slid down the road to me and informed me "you won't get up there tonight". Now I know it was my winter tyres and not the car but I couldn't resist saying to him "or course I will, it's a Skoda you know". Well I pulled out drove safely up the hill and pulled onto my drive. So smug.22 points
-
Just had to pull over for these shots22 points
-
This article describes locating and rectifying a catastrophic water leak into the nearside passenger compartment of a six year old Škoda Yeti, which had a standard-fit panoramic sunroof. The leak was traced to the NSF corner of the sunroof by removing the top of the NSF door seal and the NSF screen pillar trim. Subsequent removal of the headlining and testing of the sunroof showed the cause to be failure of the seal between the aluminium channel forming the nearside of the sunroof frame, and the plastic channel forming the front of the sunroof frame. The sunroof was removed from the car in order to run a penetrating sealer vertically down into the defective join, using a syringe and needle. Upon re-fitting the sunroof, the remediation was found to be successful, however the corresponding join on the offside front had been compromised, presumably because of the mechanical trauma inflicted on the structure during re-fitting. The offside join was subsequently sealed successfully with the sunroof in-situ, using the same method. Experience showed that (once correctly identified) a repair could have been effected without any dismantling, although the seats, carpet and underlay were subsequently removed in order to dry them properly. The full story, together with annotated images is in the attached pdf document. If you're suffering with the same problem, I hope you'll find it of help. Please post any comments or questions. Yeti Panoramic Roof Leak.pdf21 points
-
I've spent a bit of time collating some of the available information about the Octavia Mk2 with regards to which oil to use, timing belt intervals, DPFs, service schedules, brake disc sizes, etc. I've tried my best to ensure there aren't any errors, but if you spot any let me know and I'll edit the info. Important - You make use of this information at your own risk! In the following documents and information distances are primarily given in kilometres along with the equivalent mileage value. This is because the distance guidance provided by Skoda / Volkswagen Audi Group is generally specified in kilometres, not miles. Engines, Cambelt Intervals, DPFs, Oil Capacities and Required Oil according to Servicing Regime The following two PDFs contain the general info I have collated with regards the engines that have been fitted to the Octavia Mk2 and also the VW approved oil lists. Octavia Mk2 Engine Info: Octavia Mk2 Engine Info.pdf VAG Approved Oils Lists (Split by standard / viscosity spec): Approved Oils.pdf Oil Standards: VW 502.00 – Fixed servicing on petrol engines VW 504.00 – Variable / long life servicing on most petrol engines (all 5W30) VW 505.01 – Fixed servicing on PD diesels (don't use 505.00 as 505.01 has additional anti-wear requirements to protect cams / lifters) VW 507.00 – Variable / long life servicing on any diesel and fixed servicing on any diesel fitted with a DPF (all 5W30) Servicing Intervals Engine Oil Change: Petrol Long Life / Variable - Up to every 30,000 Km (18,641 Miles) or 2 years maximum Time & Distance - Every 15,000 Km (9,320 Miles) or 1 year Diesel Long Life / Variable - Up to every 50,000 Km (31,068 Miles) or 2 years maximum Time & Distance - Every 15,000 Km (9,320 Miles) or 1 year Air Filter: Replace every 90,000 Km / 55,923 Miles or 6 years Cabin / Pollen Filter: Replace every 60,000 Km / 37,282 Miles or 2 years Brake fluid change intervals: Up to MY2010 - Every 2 years From MY2011 - Initial change at 3 years, then every 2 years Fuel Filter: Diesel - Replace every 90,000 Km / 55,923 Miles Petrol - Skoda state no interval / Lifetime fit, however would advise changing every 4 years (the fuel filter isn't expensive) Spark Plugs: 1.8TSI and 2.0 TSI/TFSI (BZB, CDAA,BWA,CCZA) - Replace every 90,000 Km / 55,923 Miles or 6 years All other Petrol Engines - Replace every 60,000 Km / 37,282 Miles or 4 years Haldex 4x4 Oil Change intervals: Up to MY2009 - Every 60,000 Km / 37,282 Miles From MY2010 - Every 3 years DSG (6 Speed) Oil Change interval: Replace every 60,000 Km / 37,282 Miles Alarm Sounder: Replace every 6 years - mine didn't last that long, but in real life I think most people only replace this when it breaks (the internal battery in the siren tends to leak) Battery: Replacement recommended when the battery is 5 years old. Brakes: The following PDF contains tables that are based on what was originally factory fitted, subsequent owners may have upgraded the disc sizes (e.g. 288 to 312mm front discs) so it is always worth measuring them to double check before ordering. Brake info removed whilst I amend the rear brake details for the VRS which are missing from the table. Hopefully the above info is useful and will help with some of the frequently asked questions in this forum. 0wl.20 points
-
So the time has come to move my beloved Octy on and I’m super pumped to say that I’ve paid my deposit on this lovely lean green machine 💚 It’s a 2019 Superb SportLine Plus 2.0 TDI 150 DSG with the following options Variable Boot Floor Folding tow bar Exclusive Dragon Green paint That’s all it has for now but there’s a laundry list of retrofits to get through on it in time. It’s having a service and DSG oil change currently along with a full prep this week for collection in early March. I legit can’t wait to finally be a Superb owner!!!!20 points
-
Brands Hatch a few weeks ago. Pictures like this make me happy, despite all the work it shows just how "normal" the Yeti still looks.
20 points
-
So, here I am. Yesterday it the old girl ran on the RR at Surrey Rolling Road and it managed 723bhp. Which is impressive, but there is more to it than that... I'll explain. I have low and high boost in road fuel and race fuel. 723bhp is race fuel, it makes around 680 on road fuel. BUT... it's not reached it's full potential. At the top end it's running 1.7bar of boost, but it's capable of 2.0bar. But to get the benefit of the extra boost it needs a few more tweaks and possible water/meth injection. For now we are going to use it as it is, they told me it's "silly fast" so we'll use it at 723bhp at 1.7bar and see how it is. If needed we can do a bit of winter tweaking. Currently I'm not sure if I will, as my desire was for 700+bhp, and we are there now. So let's see how it copes with the power and how the gearbox does first. I am so happy we have got this far. To me, it now really is a Brisk Skoda. Can't wait to try it out on track. 723bhp. 1300kg. 556bhp per tonne.20 points
-
My new vRS TSI giving it the full Bradley Wiggins!
20 points
-
20 points
-
Some more pictures of my Dragon Green Superb Estate. Taken by KDS after detailing.20 points
-
Latest Updated Speedcams - December, 2022. It's been a long while but at last here's the latest update of my customised version of EUR Speedcams ( December, 2022). They consist of the full EUROPE speed cameras which I've split up into four consolidated poi categories i.e. Fixed Speedcams, Average Speedcams, Variable Speedcams and Redlight Speedcams. They come supplied with my own preferred personal choice of icons, shown below, to match each of the speedcam categories. Remember to Install them as I explained in the first post in this thread i.e. after extracting the zip file remember to open the newly extracted folder and place only the PersonalPOI folder and metainfo2.txt file onto your sd card ( Please Note: a usb stick will not work! ). Also, please remember to select/tick the relevant newly added poi categories and the poi audible warning alert in your infotainment map menu settings after performing the update or they will not display on your map or audibly alert you. Hope you all enjoy them! EUR Speedcams December, 2022.zip *** A brief update*** For all those who have asked - I am still continuing to update these files but since the Covid situation I have found it difficult to get hold of a good FREE reliable updated database. I continually regularly check the forums and when I come across a suitable database I use some software to check the cameras in my area before I decide whether to convert and compile them as it does take a bit of time and effort to accomplish this. For instance, some average speedcams were installed about 3 years ago in my area but no database has yet reflected this change. It's therefore been pointless doing any updates. Thankfully, this new updated database has finally recognised them so perhaps things are starting to get back to normal. Rest assured though these files will be updated as and when I come across any further suitable databases.
19 points
-
I’ve been driving for 53 years and have never felt the need to have a drink while at the wheel so don’t really get this obsession with cup holders. Neither do I understand why so many people seem to be surgically attached to coffee cups as they go about their daily business. My kids think it is because I’m a cantankerous old sod - they’re probably right.19 points
-
Several months ago my 2014 Yeti went into the main dealer in order to replace the outboard rear seat belts, as they'd frayed. This was completed under warranty and was the second time I experienced this failure - my 2012 Urban suffered similarly after ~2 years. The outermost rear seats are in regular use and the spring intended to keep the receiving part flat tends to push it's way through the webbing, causing it to fray. When I dropped the car off the EA189 Emmisions Update was mentioned and I was initially cautious, given the negative feedback I'd read on HonestJohn's webpage (involving similalrly engined Tiguan's: link). I was assured my local main dealer had seen no such issues (following the update) and I elected to have it applied. On collecting the car it initially seemed unchanged. Over the next few days however I noted a changed in engine note when accelerating, which in a petrol engined car I would have described as "pinking". Outright performance appeared relatively unchanged, although there appeared to be a very slight fluttering / misfire, more noticeable on a light throttle. I re-fuelled the car and became aware the fuel economy was noticeably less. I was also increasingly aware the engine appeared to begin developing power / torque approximately 300-500 RPM further up the rev range. This lead to me often driving in a lower gear, than before the update. Fuel economy is admittedly an obsession of mine and my Fuelly account now covers in excess of 100K miles, covered in 3 Yeti's (x1 1.2 TSi, x1 110 BHP 2.0 TDi 2WD and my current 140 BHP 140 BHP 4x4). I went back over the preceding years economy and found what appeared to be a fall in fuel economy, following the EA189 emissions update. I matched the fuel economy over the preceding months (Dec, Jan, Feb and March) with those from 2015, 2016 and 2017. I also became aware the car was actively regenerating the DPF on a much more regular basis. I downloaded the full version of the VAG DPF app (link) and it became apparent the DPF was becoming 100% full after around 80-90 miles. It was regenerating as normal and the resultant ash load was still low. I'd previously only been aware of occasional active regenerations, but following the update, these were occuring every few days. I cover ~20K miles yearly and tend to favour "branded" fuels (Esso / Shell), with the occasional tank of V-Power Nitro+, in an attempt to keep everything clean / ticking over. I'd assumed the worsening fuel economy was a direct consequence of the increased fuel injected to facilitate frequent active regeneration? As the car is approaching the end of the manunfacturers warranty I was pondering options - keep the car long-term, sell it (it was advertised on here for several months, with no interest, despite being the cheapest 140 TDi 4x4 currently onsale) or possibly part-ex. I test drove several alternatives - Yeti (150 BHP TDi and 1.2 TSi), Octavia (150 BHP TDi and 1.4 TSi) and Superb (190 BHP TDi and 1.4 TSi), but to my surprise found I actually prefered my existing Yeti! The newer 150 BHP diesel was a little dissapointing. I'd expected it to be a significant improvement on my 140 BHP TDi, but it seemed no quieter and certainly not noticeably quicker. I was also concered the Ad-blue dosing system in the Yeti was very much an after thought, which may prove problematic in the long-term. The Superb is a nice car, but somewhat too large and the Octavia was simply boring. I didn't get the opportunity to try the 1.4 TSi in a Yeti (L&K), but had effectively ruled this out given the awful colour of the interior and costs associated with the top of the range vehicle. I decided to seek advice outside the VAG dealer network and visited my local mapping specialist. I'd used them previously and found them to be knowledgeable and helpful. They told me they could offer 2 options - roll back the map to a state before the EA189 emissions update, or a stage 1 perfomance map, again based on the pre-emissions update map. Following due consideration (invalidating the remaining few months warranty, increased insurance costs, probable lack of goodwill contribution from Skoda, in the event of a failure) I decided to opt for the stage 1 option. Following the remap the car is absolutely transformed. There is considerably more power / torque throughout the rev range and it's especially noticeable it begins pulling from lower revs and continues pulling (virtually) all the way to the red-line. I've owned several mapped cars (Revo'd Roomster 1.9 TDi and Mark I Octavia vRS - these were mapped by my local Skoda main dealer, Mark I Octavia 1.8 T 4x4 Combi - mapped by Jabbasport when new) and have found this map to be more subtle than the Revo / Jabbasport maps, but nontheless has made the car a much more enjoyable drive. I've only re-fuelled a single tank since the remap, but early indications are the fuel economy has at least recovered to pre-update levels. The active regenerations are also now much less frequent. I now plan to keep this car long-term and hope I don't fall foul of some future change in the law regarding this emissions update. I'm hopefull the Yeti continues to prove reliable in the long-term, but am somewhat reassured as the re-mapped 4x4 Octavia is still within my immediate family and has proved astonishingly reliable, despite running considerably more (+38%) power than it left the factory with (for the last 15 years). I'll update this thread with my on-going fuel economy and will feedback any issues, as they arise.19 points
-
New toy.... So after 20 years in business (and 9 years tuning R35 GT-Rs) Litchfield Motors decided to celebrate with 20 new modified cars with a factory equaling 3 year warranty. This encouraged me to come back to R35 ownership after 3 years in an MY10, MY11 and MY14 then a 3 year break. The idea was the right blend of usability and performance, not silly power. I chose build slot 17. LM20 no17. Seemed apt as it's a 17 reg car on the new shape MY17 GT-R platform. Here she is: The LM20s delivered so far (there are 4 slots left) have all been based on the normal GT-R. But wanting something a bit edgier I asked for the Track Edition, with an amount of work by Nismo under the skin including the hand welded Nissan bonded chassis for better handling. As Nissan UK has not sold many Track Editions (currently 3) they keep no stock, hence a three month wait... but it arrived two weeks ago at the UK port. Nissan collected it and send it straight to Litchfield Motors for the LM20 treatment. Track Edition has the following extras over the stock Nissan GT-R. Nismo welded/bonded chassis. Nismo front hubs. Wider front wings. Optional Nismo carbon boot lid. Carbon rear spoiler. Red stitched interior. Track Edition plaque. Litchfield then add the following as part of their limited run of 20 new LM20 GT-Rs. ENGINE Litchfield 102 mm exhaust system with Sports Cats Cast turbo downpipes Larger fuel injectors High flow fuel pumps Litchfield air intake kit Litchfield boost hoses Litchfield intercooler Litchfield Version 6 custom ECU calibration 4 switchable maps for fuel octane Adjustable boost levels iPhone/iPad connectivity Upgraded gearbox software SUSPENSION Litchfield/Bilstein Damptronic Custom Eibach springs and anti-roll bar BRAKES 400 mm Alcon front rotors with lightweight bells 380 mm Alcon rear rotors Upgraded brake pads front and rear Goodridge braided brake lines Litchfield silver brake calipers WHEELS Lightweight RAYS Volk Racing TE37 TYRES Michelin Pilot Sport 4 EXTERIOR Litchfield carbon front lip spoiler Litchfield carbon front grille blade Litchfield carbon rear spoiler extension Litchfield carbon rear bumper vents INTERIOR Alcantara steering wheel with red band Unique badging with internal build number plaque This leaves you with a very impressive and special car. I then added one extra thing that wasn't on the list... A full Carbon Ceramic brake kit from Alcon including new (lighter/better) calipers, which seemed fitting for the only LM20 to date to be built on the Track Edition base car. The car is amazing. Quoted performance is: POWER: 675 PS (666 bhp) TORQUE: 833 nm @ 2,100 rpm (615 lb-ft), 813 nm @ 2,500-5,100 rpm (600 lb-ft) ACCELERATION: 2.5 secs 0-60 mph, 5.7 secs 0-100 mph TOP SPEED: 203 mph Needless to say it's very, very fast. And stops amazingly quickly. But with the LM changes it also handles really well and you have more feel than in a normal R35. I am so glad I went for the Track Edition, as the base car for the LM20. It's a beast. Love the engraved wheels too. It's not a silly big power GT-R, but it's a great car and can get all the power down nearly anywhere. Exactly the point of the LM20 and why I personally would leave it as standard LM20 as possible. Blisteringly fast point to point car. And I still have my 3 year new car warranty.19 points
-
If you are reading this post do not despair! The horrible burning smell coming from your new diesel car is OK. When you stop and turn the engine off and the fan stays on and the engine seems to be super hot, the car is OK. The above are clear signs of an active DPF regeneration and is normal for your new diesel Skoda car. To comply with the latest emission levels diesels have to capture the large soot particles and burn them up into smaller particles which are kept in the DPF, this process is called regeneration. A lot of regenerations take place during normal driving where the exhaust is hot enough to burn the soot in the DPF and are unnoticed and are known as passive regeneration. When the temperature in the DPF is not hot enough for an passive regeneration, the ECU injects diesel into the DPF which burns up the soot and is known as an active regeneration. When you stop the car part way through an active regeneration, often the car smells like it's burning and the engine fan will stay on to cool the car. Mods could you please edit this thread (if needed) and make it a sticky or just delete, thanks18 points
-
Mine. I have it 5 months now, the first 3 we were in lockdown and it didn't move much!
18 points
-
Dealer wants £30 , I said ok and I donated an extra £20 to a charity of their choice. I think lesson learned and all done and dusted.18 points
-
Actually yes it is at least for me.. Went on holiday for a few days to Oslo. Got engaged18 points
-
First shakedown day at Snetterton on the Brisky track day. Since the car was last out three years ago it's had the following changed. Forged engine with cams allowing it to rev to 8,200. Dual mass flywheel to stop the synchros failing. Bigger Turbo Twin injector manifold Syvecs ECU to run everything. Carbon ceramic brake upgrade. Carbon bonnet, tailgate and four door. Additional roll cage bars do to carbon door for safety. End result, we have gone from 510bhp to 723bhp. And lost almost spot on 100kg. But what I found interesting was the additional revs means it now has a wider powerband despite the extra 210bhp. It comes in quite well around 3,000-3,500 and then absolutely flies with no let off to 8,000. So it has over 4,000rpm of solid thrust. The day went well. A few mapping issues were sorted early on, then we found right at the top end at the end of the long back straight it was dropping fuel pressure a little. To protect it the Syecs ECU was then putting it into limp mode. JDR brought a new fuel pump just in case and this was soon fitted. As the track dried out the extra grip caused a fuel smell that was soon traced to a seal on top of the tank, which was temporarily fixed to get us through the day until a new one could be fitted. Then we had another limp mode creep in as the car got down to a third of a tank of fuel. This was quite simply the standard tank and pick up struggling under the force of the acceleration and filling the car solved it. Overall it was a great day. Not only because after so much work and time the Yeti performed all day. It was also a really good track day with lots of great people that made it a fun day and drove well with minimal issues and stoppages. Plan is now to fit a new tank or modify the existing one with a different pick up system and swirl pot. And a little bracing for the polycarb screen as it deformed slightly as we hit 152mph at the end of the straight. It really hit me driving home Monday what a project this turned into. It's such an amazing car to drive, still fun with plenty of driver fell and interaction. But the way it piles on speed from 4000rpm means you just launch past people that a second before you were following at the same speed. And on top of all that we have pretty much managed to keep that Yeti look. Right, that's enough waffle. I'll put a few videos up later.
18 points
-
2 weeks into ownership very pleased, 220 DSG Petrol
18 points
-
I love my banana!
18 points
-
The attached 'Maintenance' workshop manual may help - had to split into 2 to upload. Maintenance1_Part1.pdf Maintenance1_Part2.pdf18 points
-
Decided to fit the OE mudflaps today, pretty simple job and didn't take longer than 30-40 mins. Heres the lowdown. If you follow this guide you do so at your own risk Car is a Superb Estate Sportline 4x4, photos are from front passenger side and drivers rear. Part numbers Front - 3VO 075 111 Back - 3VO 075 101 Tools needed Torx 25 bit and ratchet Pliers Electric drill (right angle if you have one) 7mm drill bit The mudflaps come with all fittings required. Front Mudflap fitting I managed to fit them with the wheels still attached, a right angle drill would make it much easier. 1. Put wheels on full lock 2. Remove 2 x torx screws attaching wheel arch liner/wheel arch 3. Remove plastic plug (little plug in the middle of the photo) holding undertray to wheel arch liner (I used pliers for this) 4. Separate undertray from wheel arch liner and fit captive nut (from the fitting kit) where the plastic plug was. 5. Offer up mudflap and mark location of hole 6. Drill hole with 7mm drill bit 7. Offer up mudflap and hope the hole you drilled is in the right place. 8. Fit 3 x torx screws 2 (original) fit into the wheel arch/wheel arch liner and 1 (new from fitting kit) fits underneath into the new captive nut. 9. Fit plastic plug (from fitting kit) into your correctly located freshly drilled hole. 10. Job done now do the same again for the other side of the car. Rear Mudflap fitting The two sides are slightly different. I'll add comments where it differs. 1. Remove 2 x torx screws from wheel arch liner/wheel arch 2. Remove 2 x trox screws from sill and underneath the car (not required on passenger side) 3. Passenger side only, fit 2 x captive nuts (from the fitting kit) to sill and undertray 4. Offer up Mudflap, ensure that the hook at the top hooks inside the wheel arch 5. Insert 4 x tork screws, 2 original into wheel arch liner/wheel arch, 2 new (from fitting kit) into sill and underneath car arch liner. 6. Job done, now do the same again for the other side of the car. Quite please with how they look, looking at the car normally you can hardly even notice them.
17 points
-
I initially presumed this was misspelt but judging by the number of times @Lady Elanore has previously used it, there must either be some reason for her doing so (which I'm unaware of) or they have a slightly different sort of butter where she lives? 🧈 Unfortunately though, a Lurpack (or Lurpak) award wasn't in my thoughts. @MikeTheThinker hit the nail on the head with his earlier post but I ideally needed to be at home to get it sorted:- the awarding of Honorary status to our dear departed friend. Andy has been an active member on Briskoda for over 17 years and as far as I'm aware, Honorary status has only previously been given to ex Staff members. Even though he's no longer with us, his persona and legacy continues to set new boundaries and we are proud and privileged to be able to bestow this award posthumously as a mark of our gratitude for all his contributions and for just being himself. RIP Old Friend. 🌹
17 points
-
Nice cold eavening on the west coast of Norway. 300 miles straight ahead, you can almost see Aberdeen
17 points


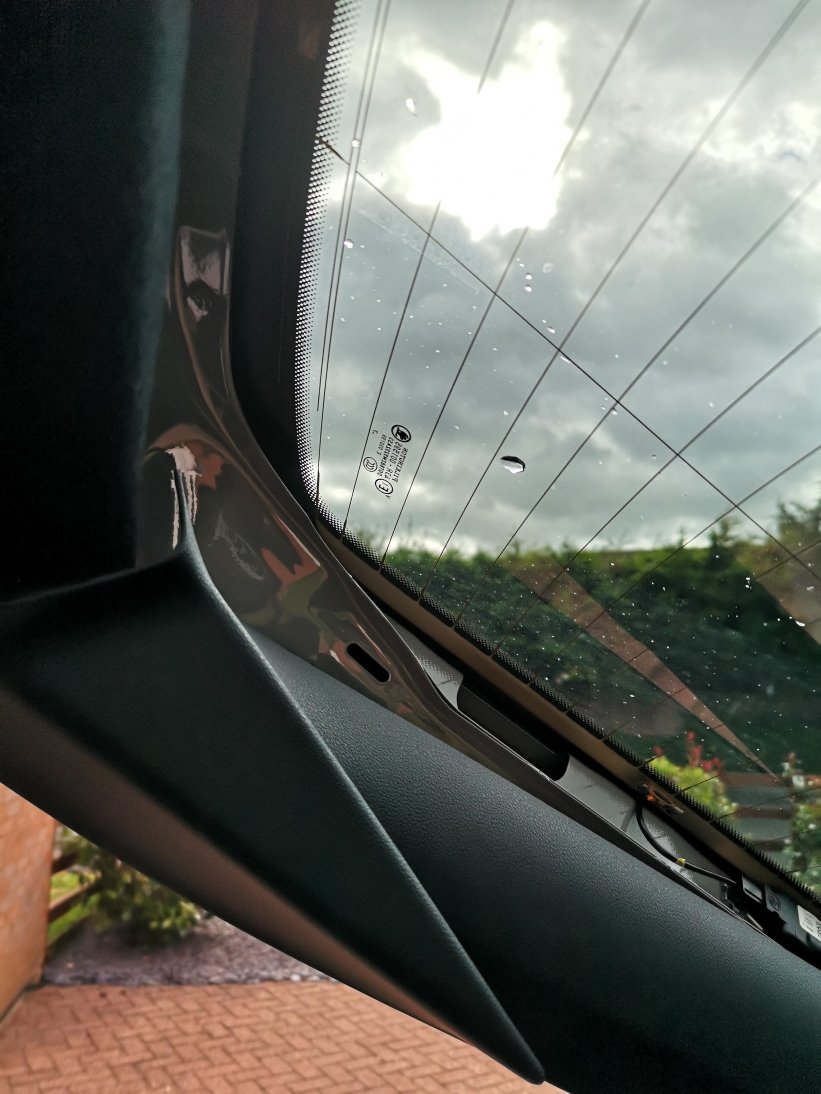
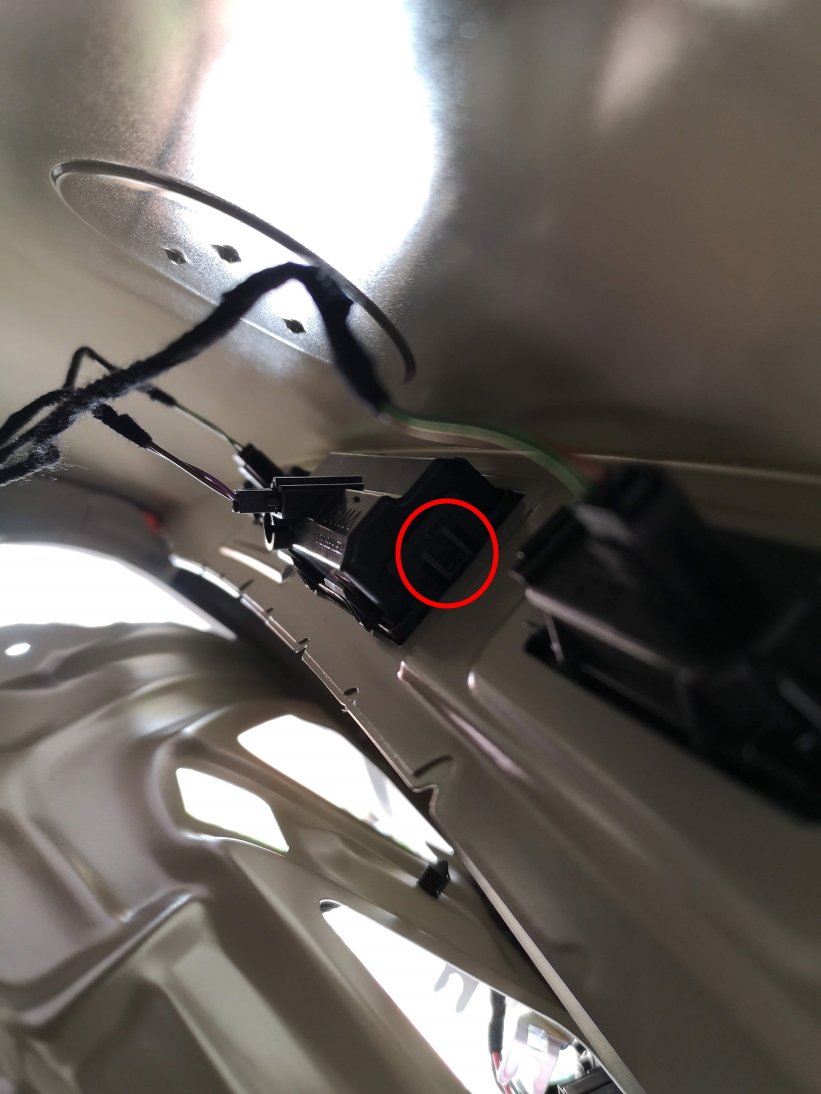
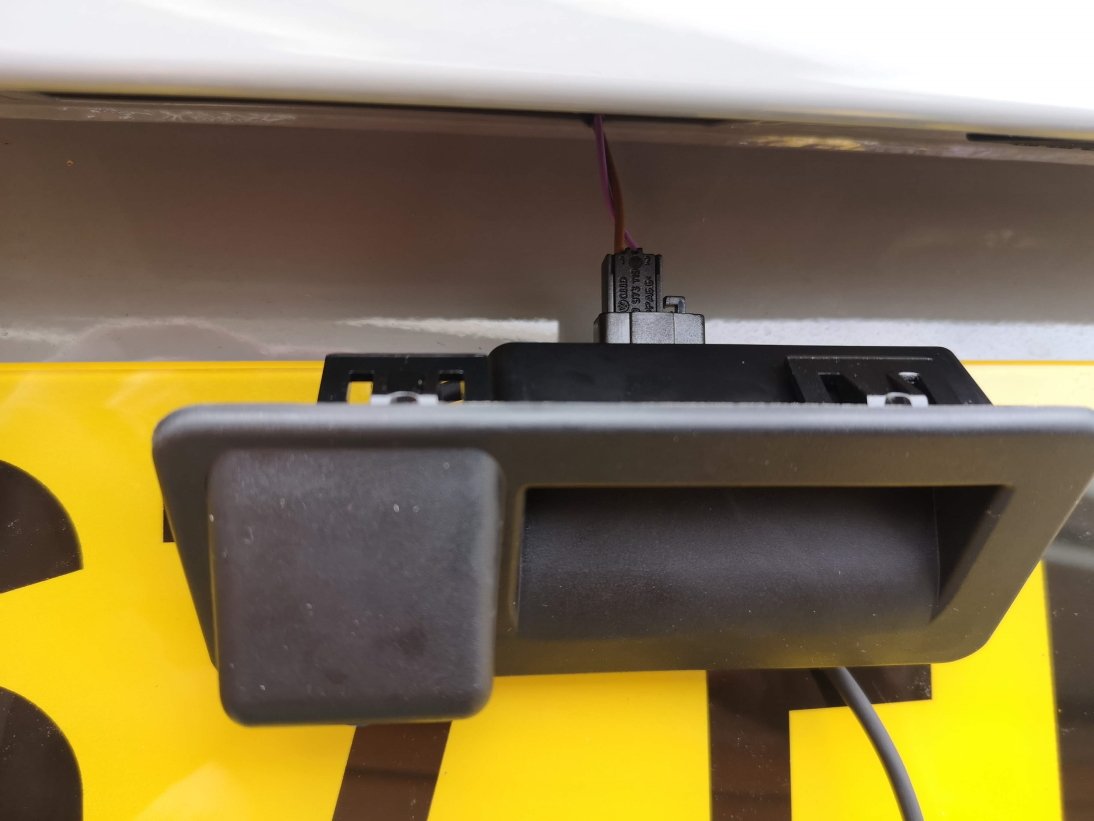
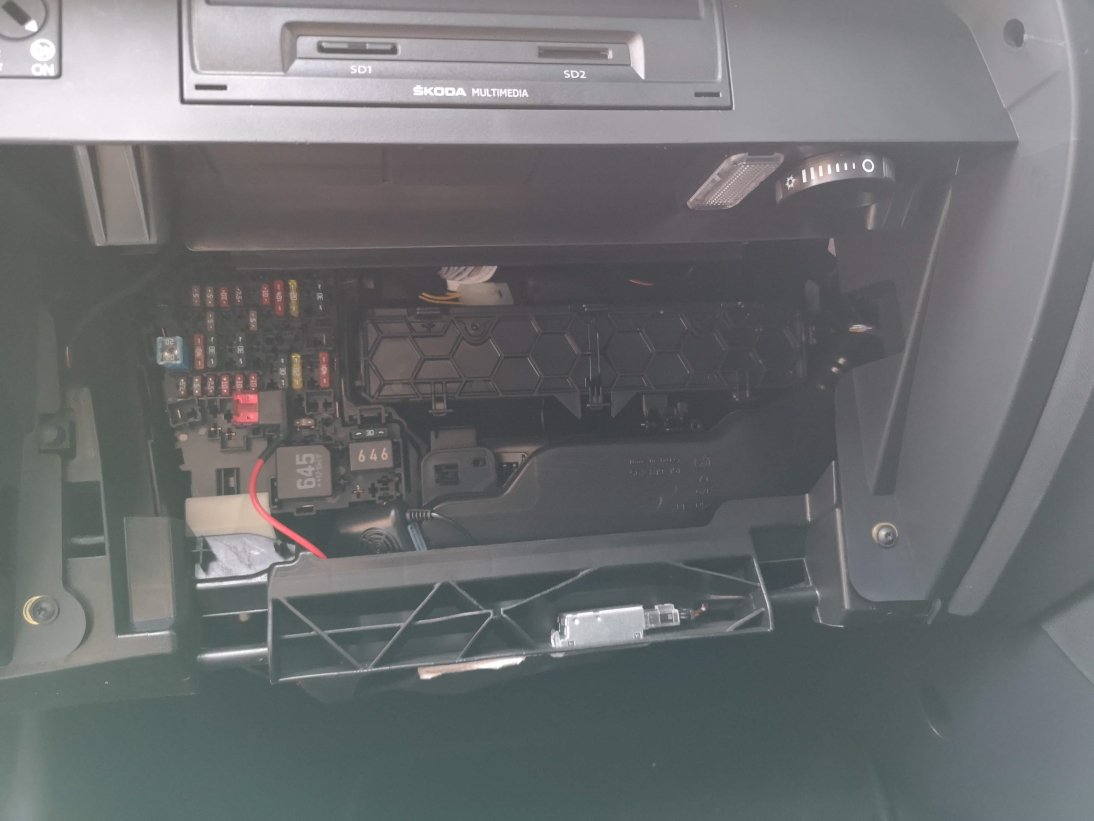
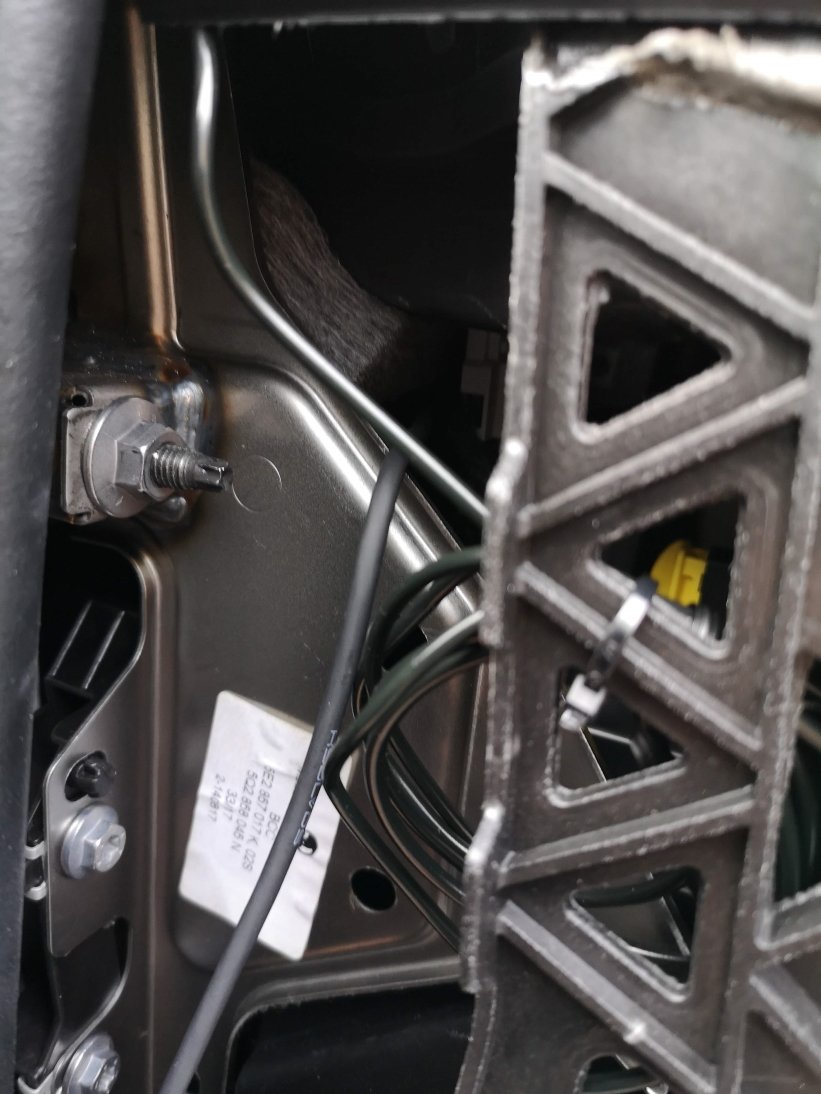
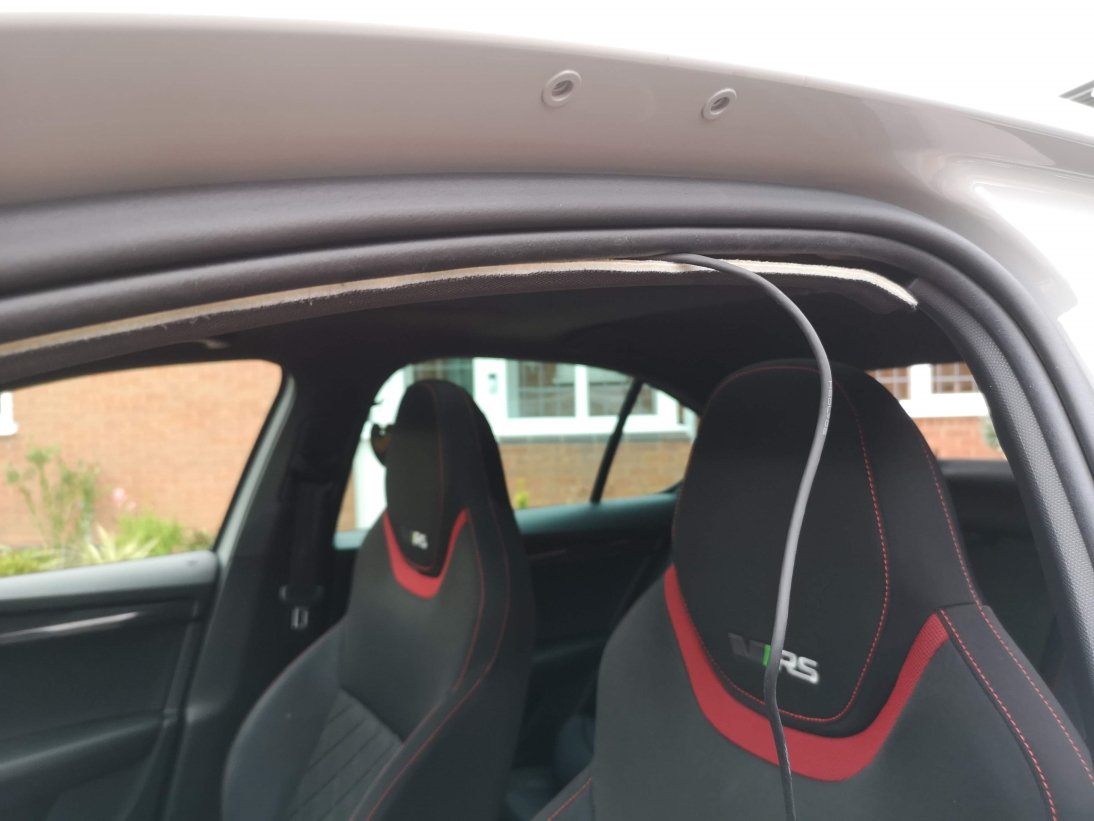
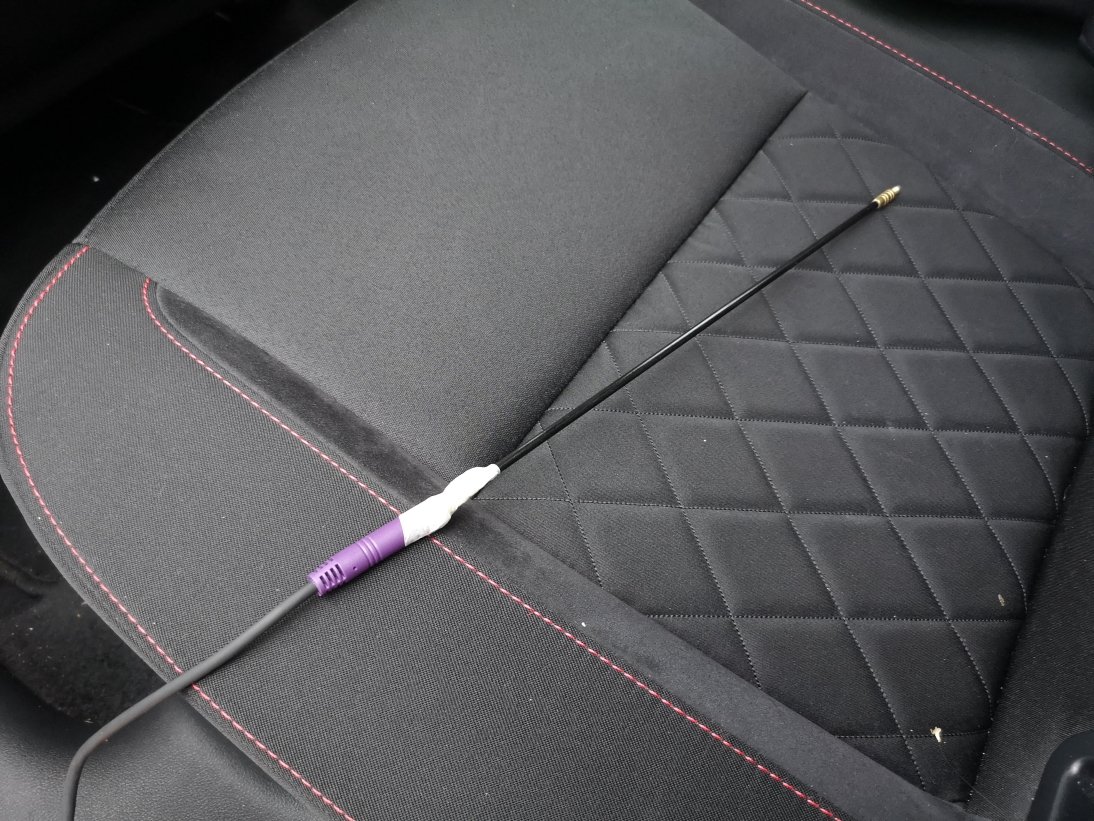
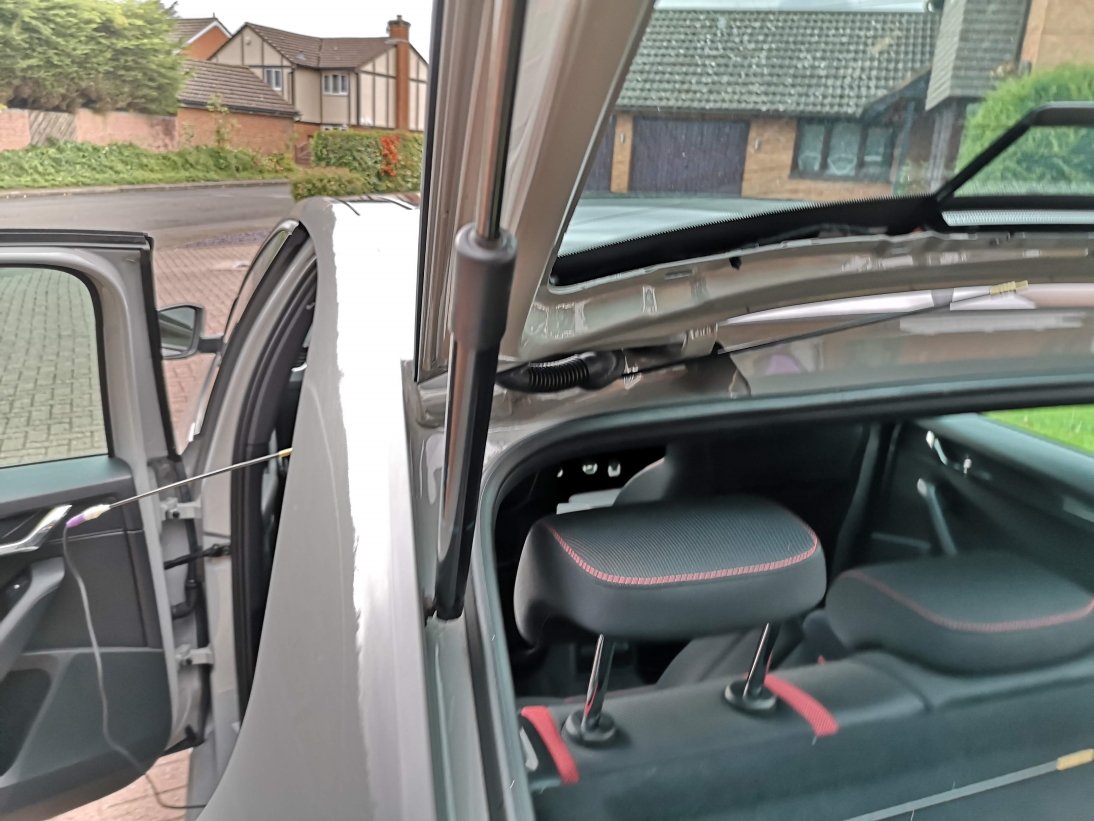
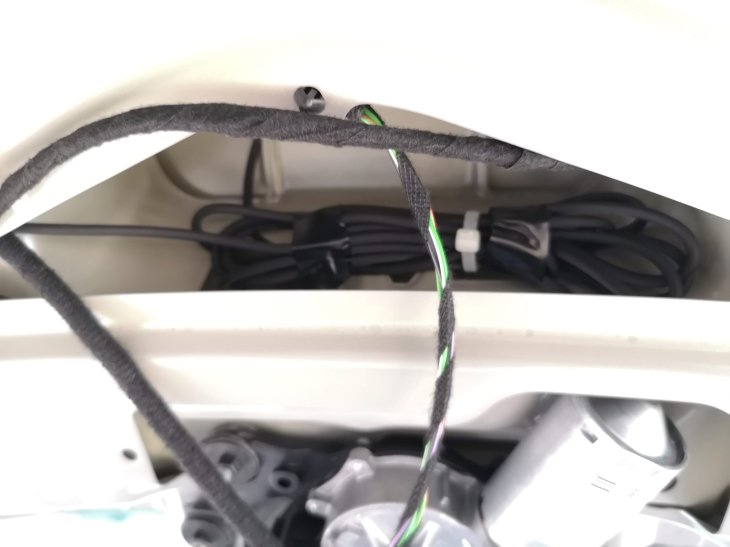
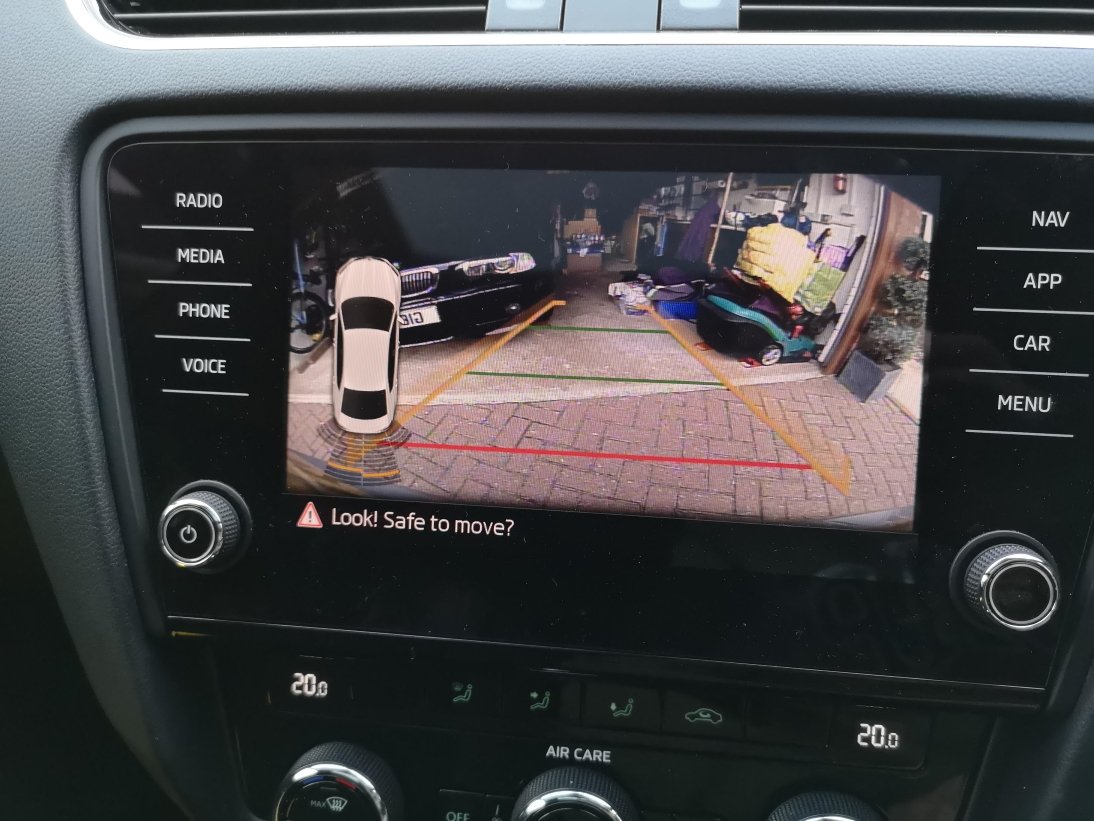


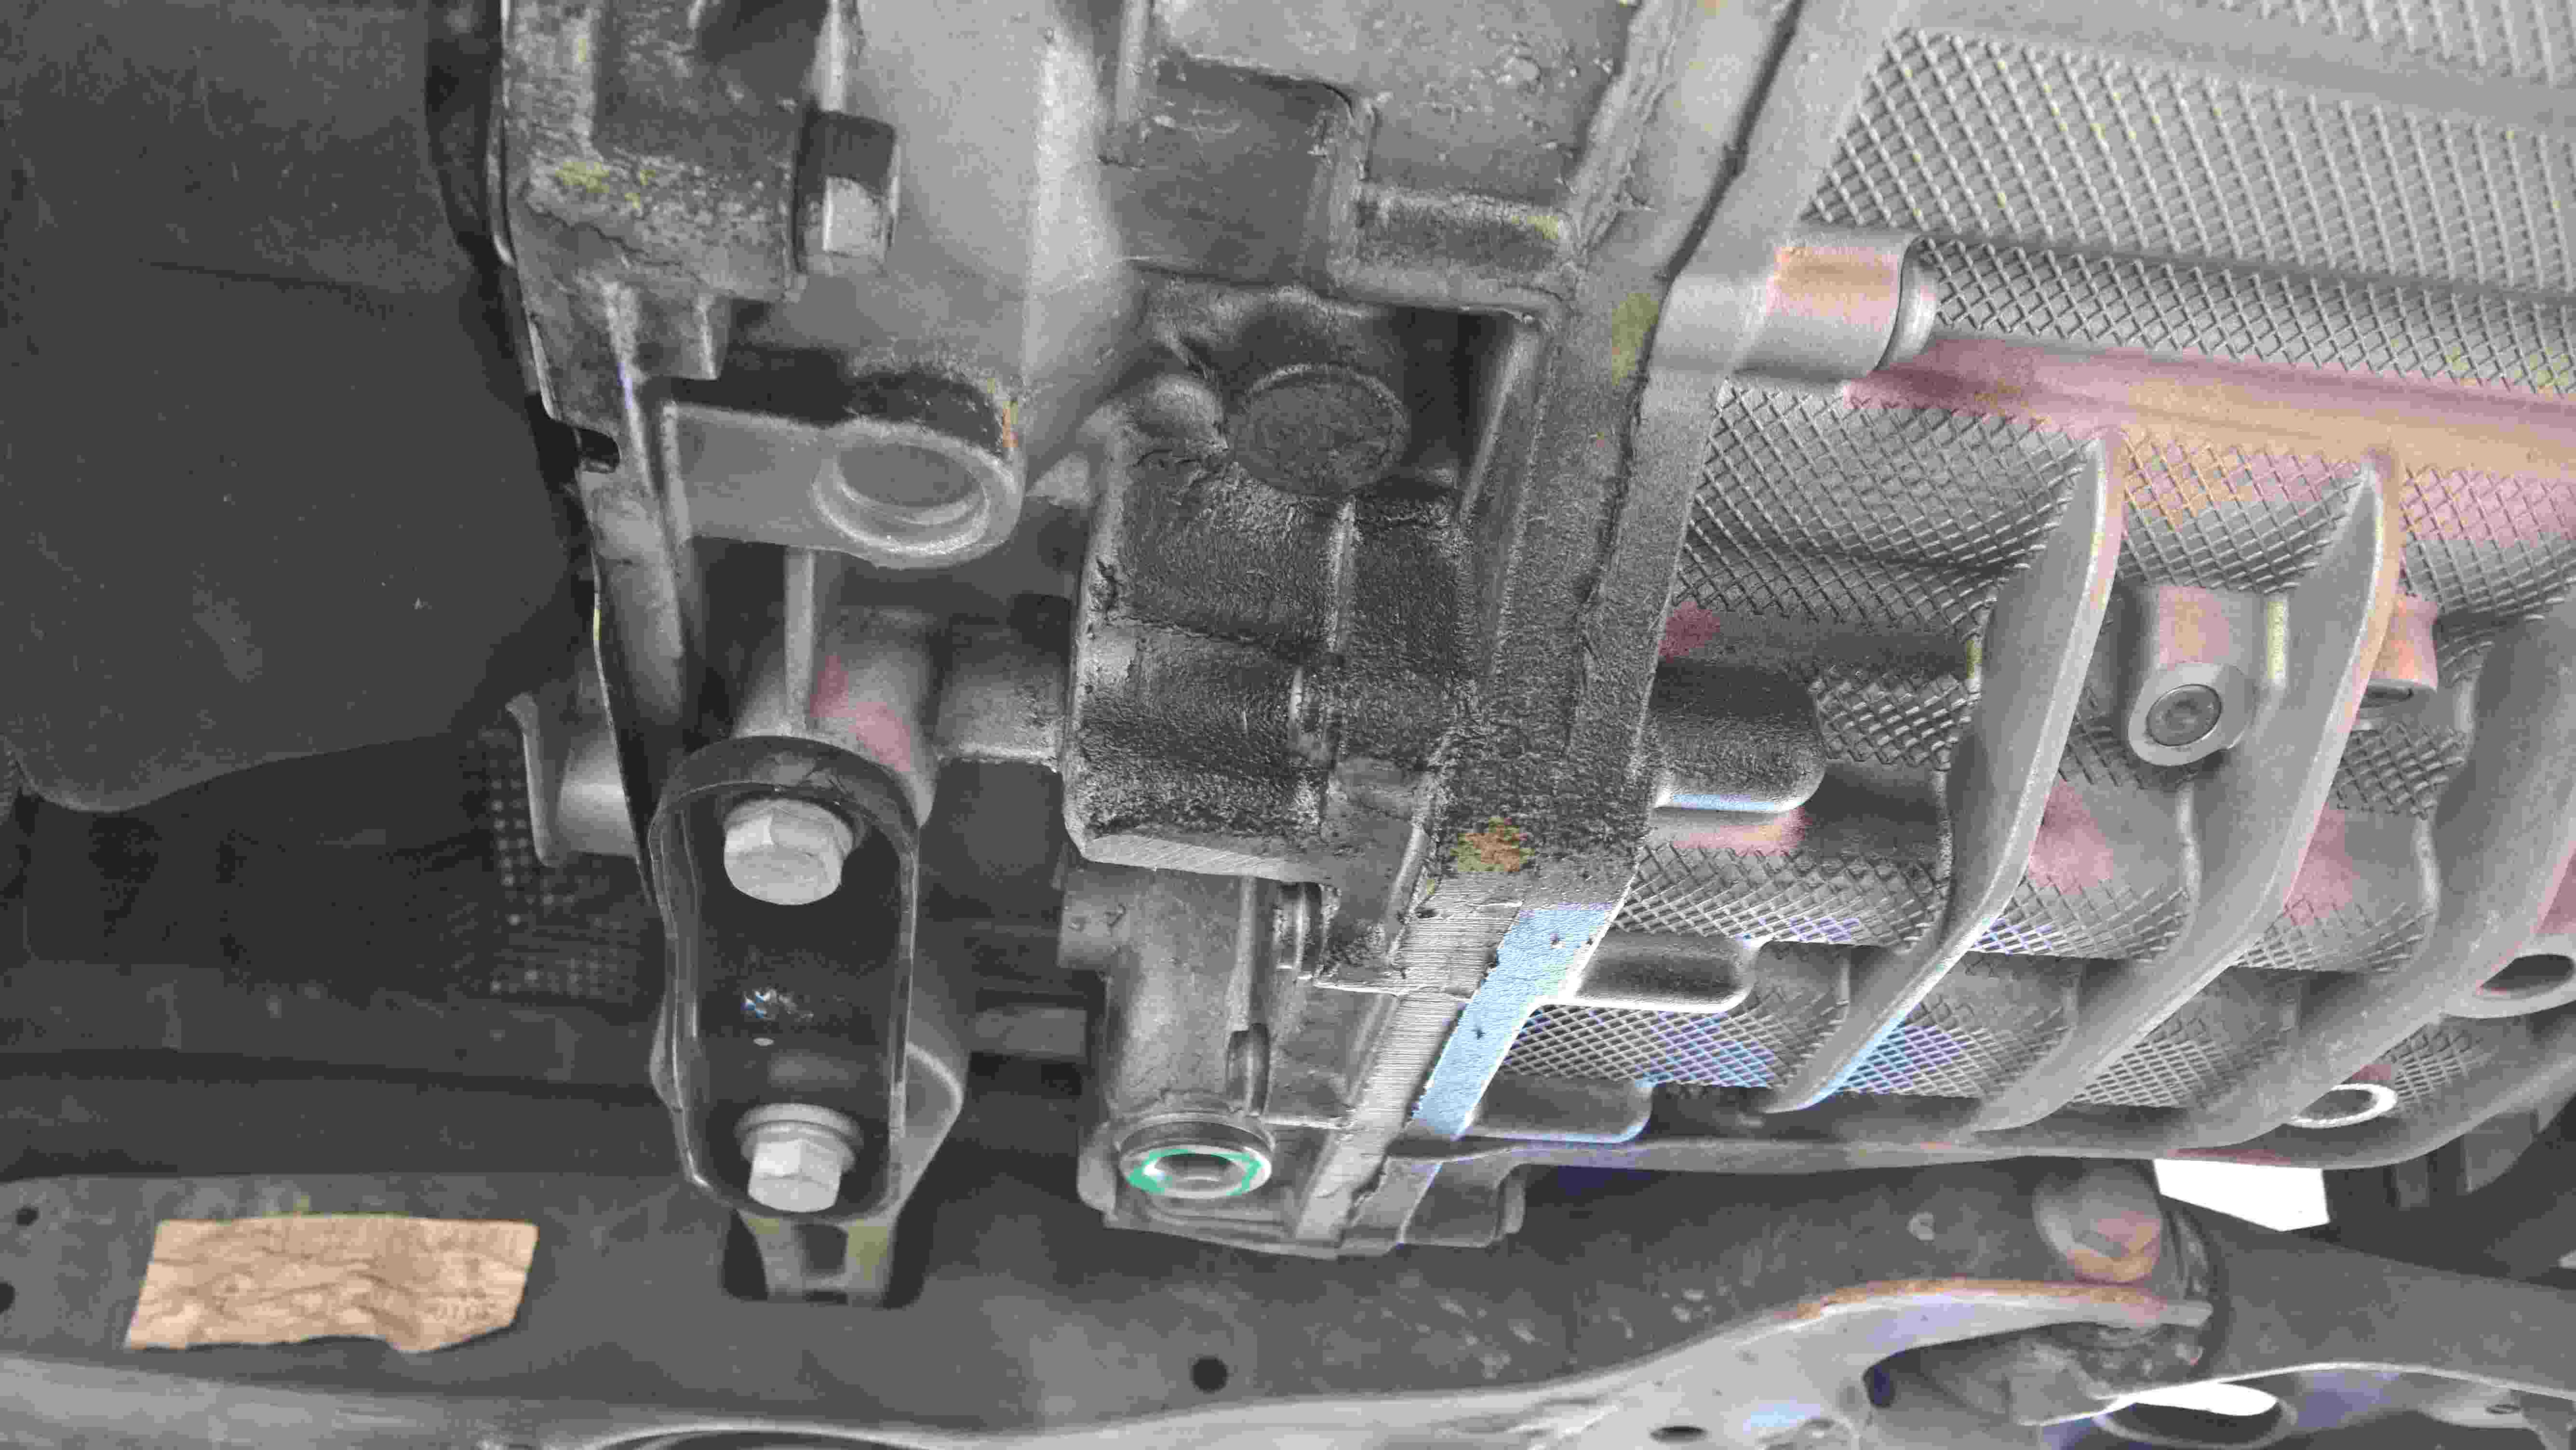
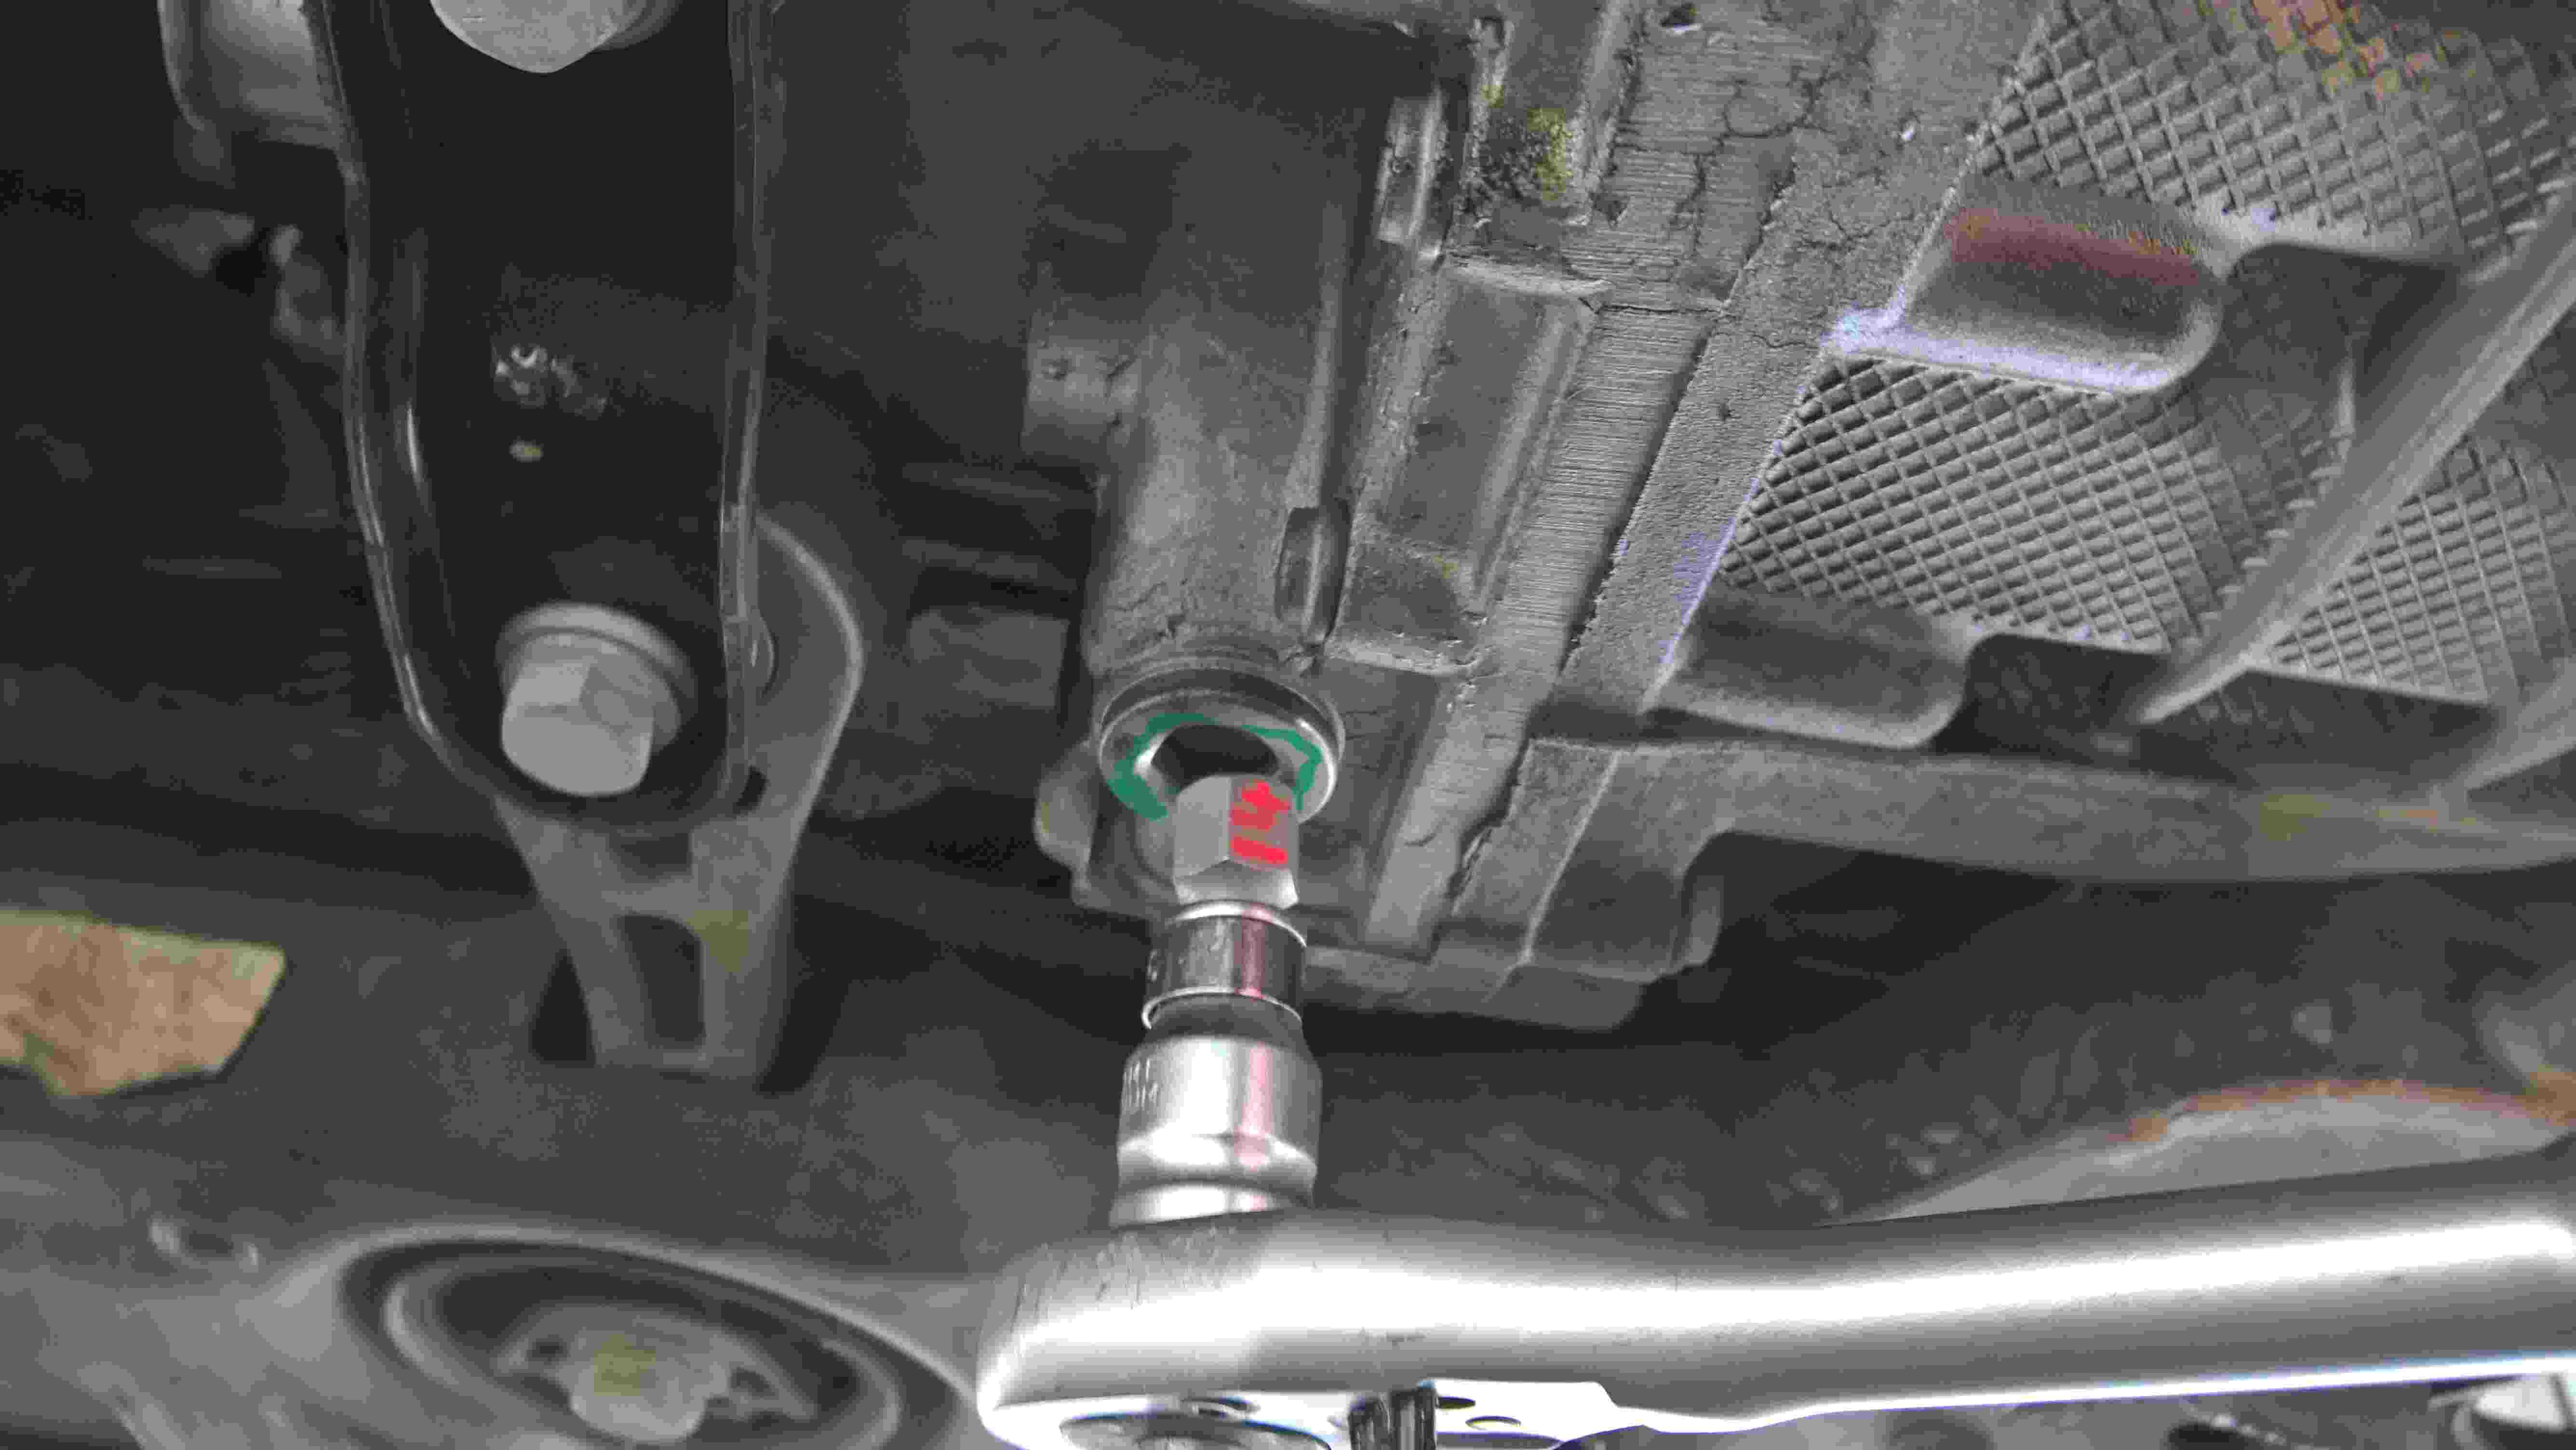

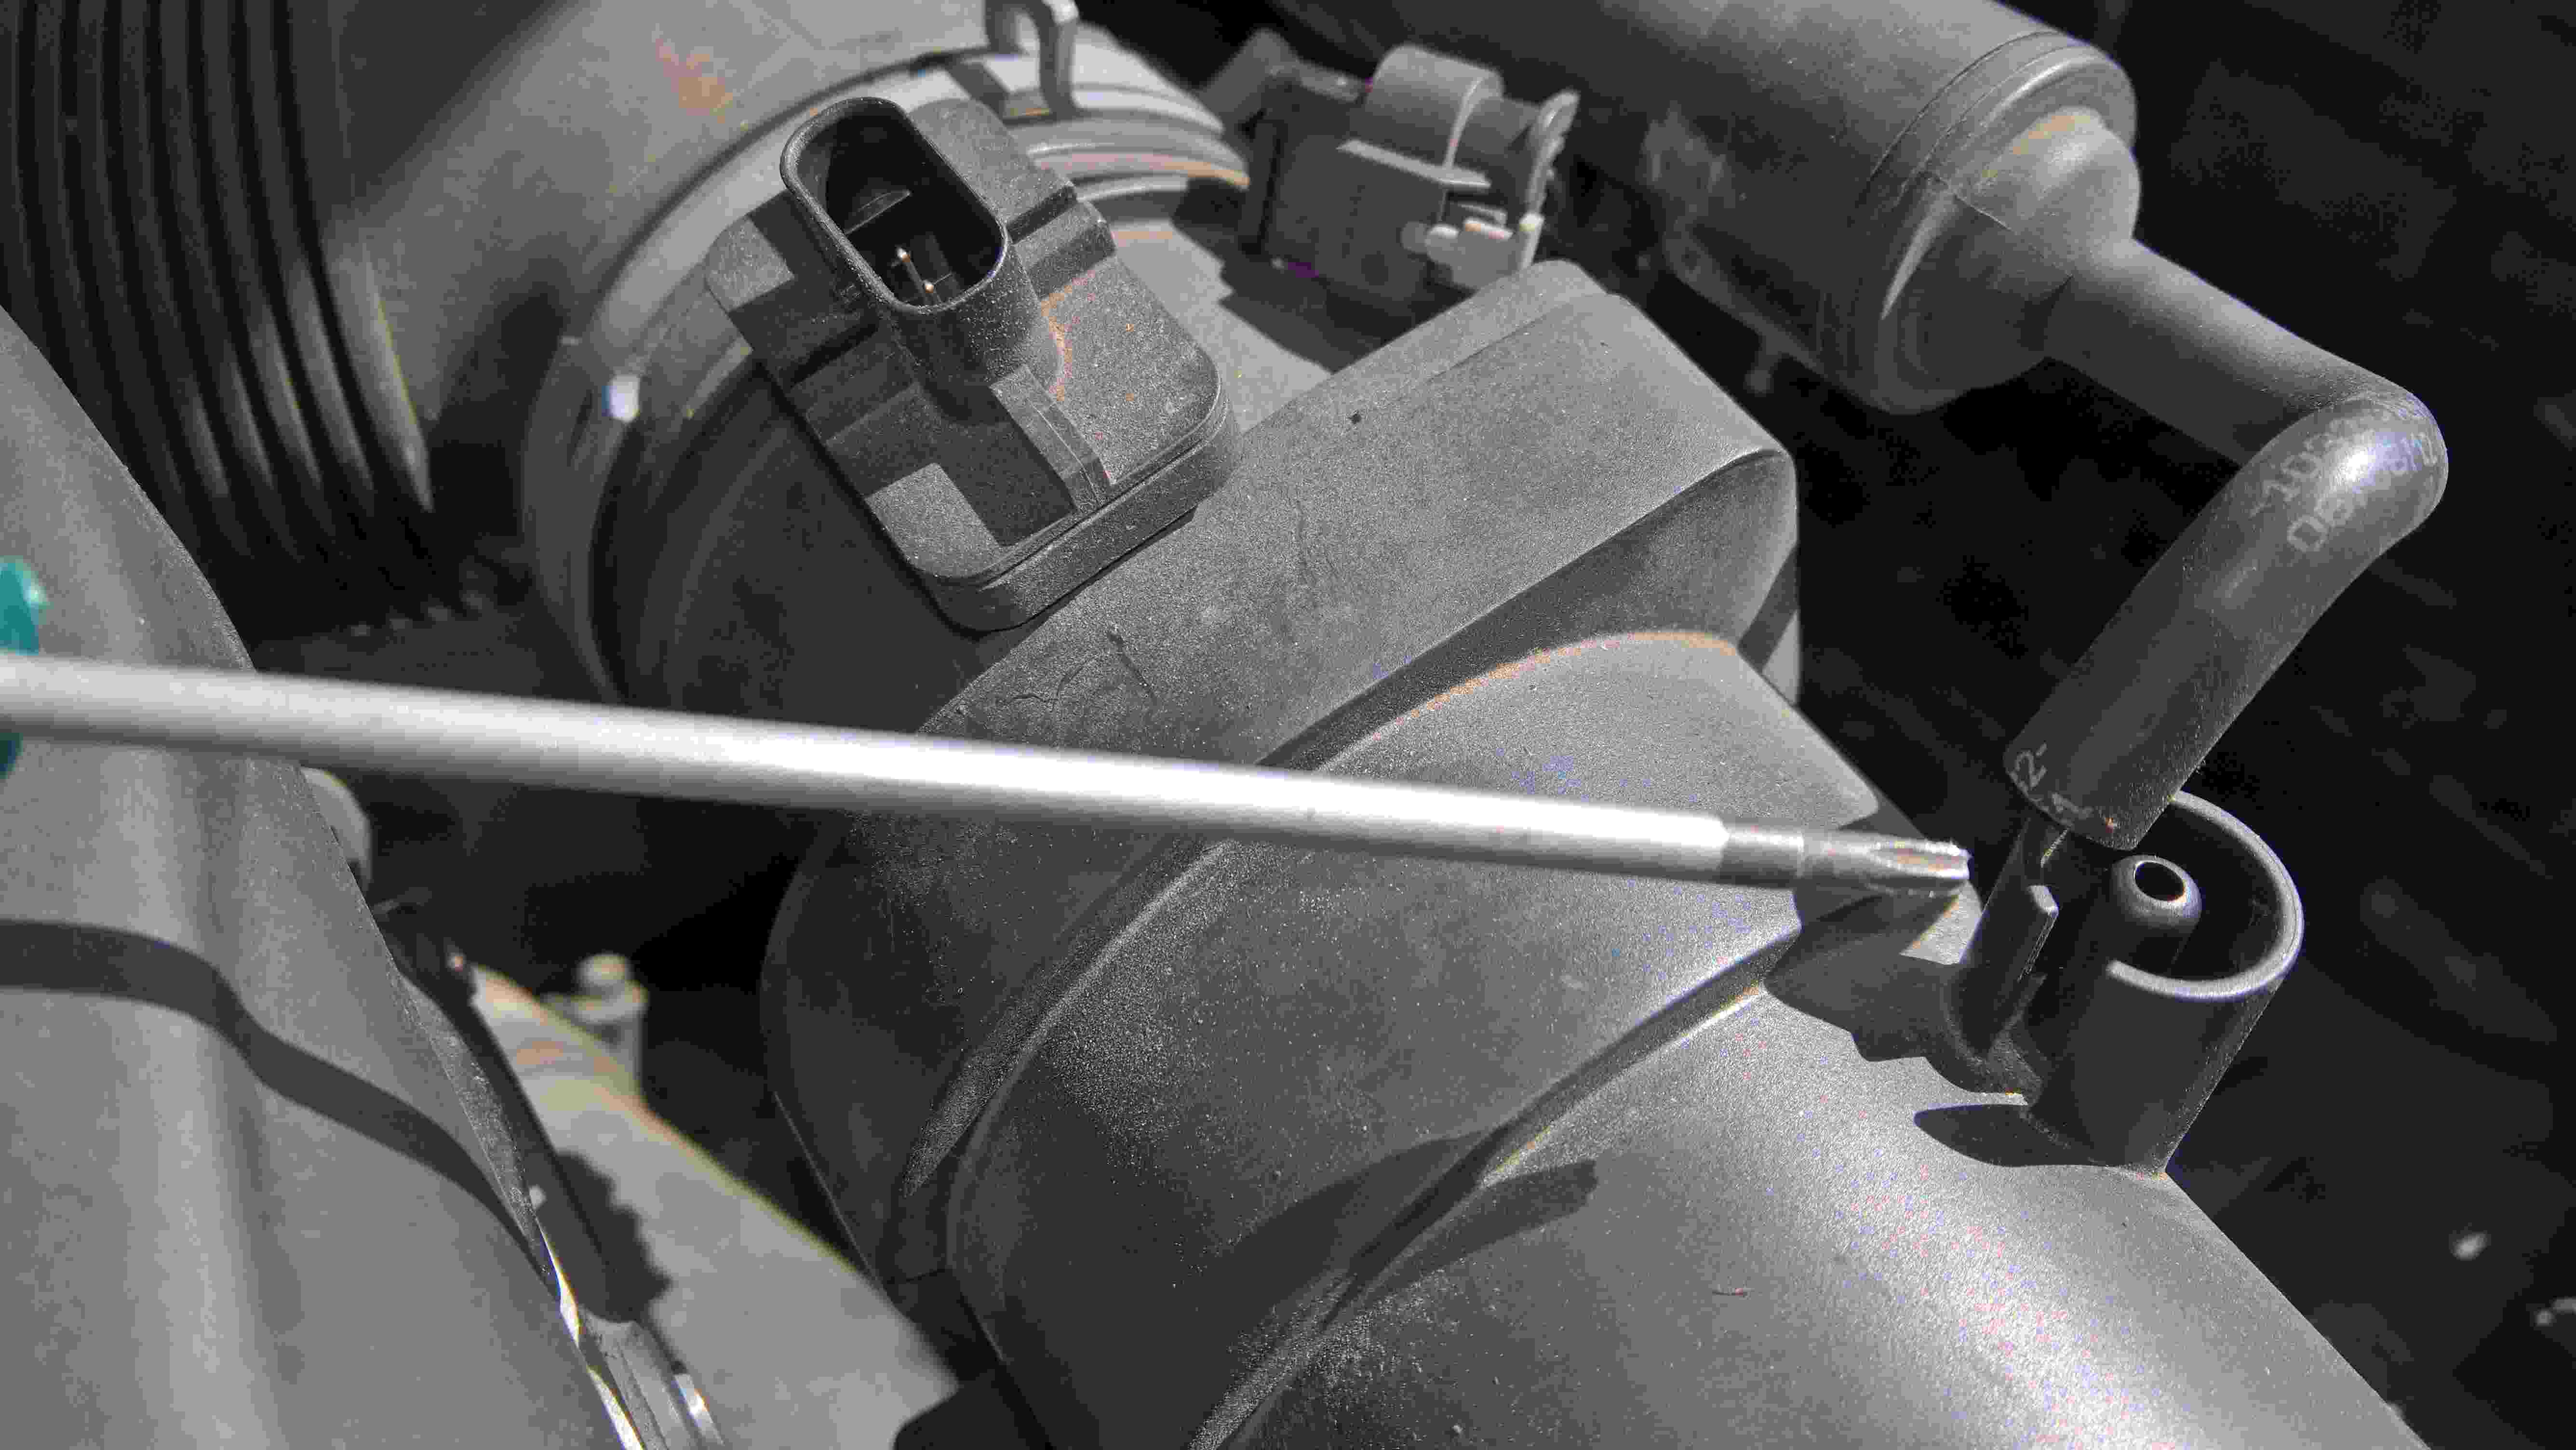
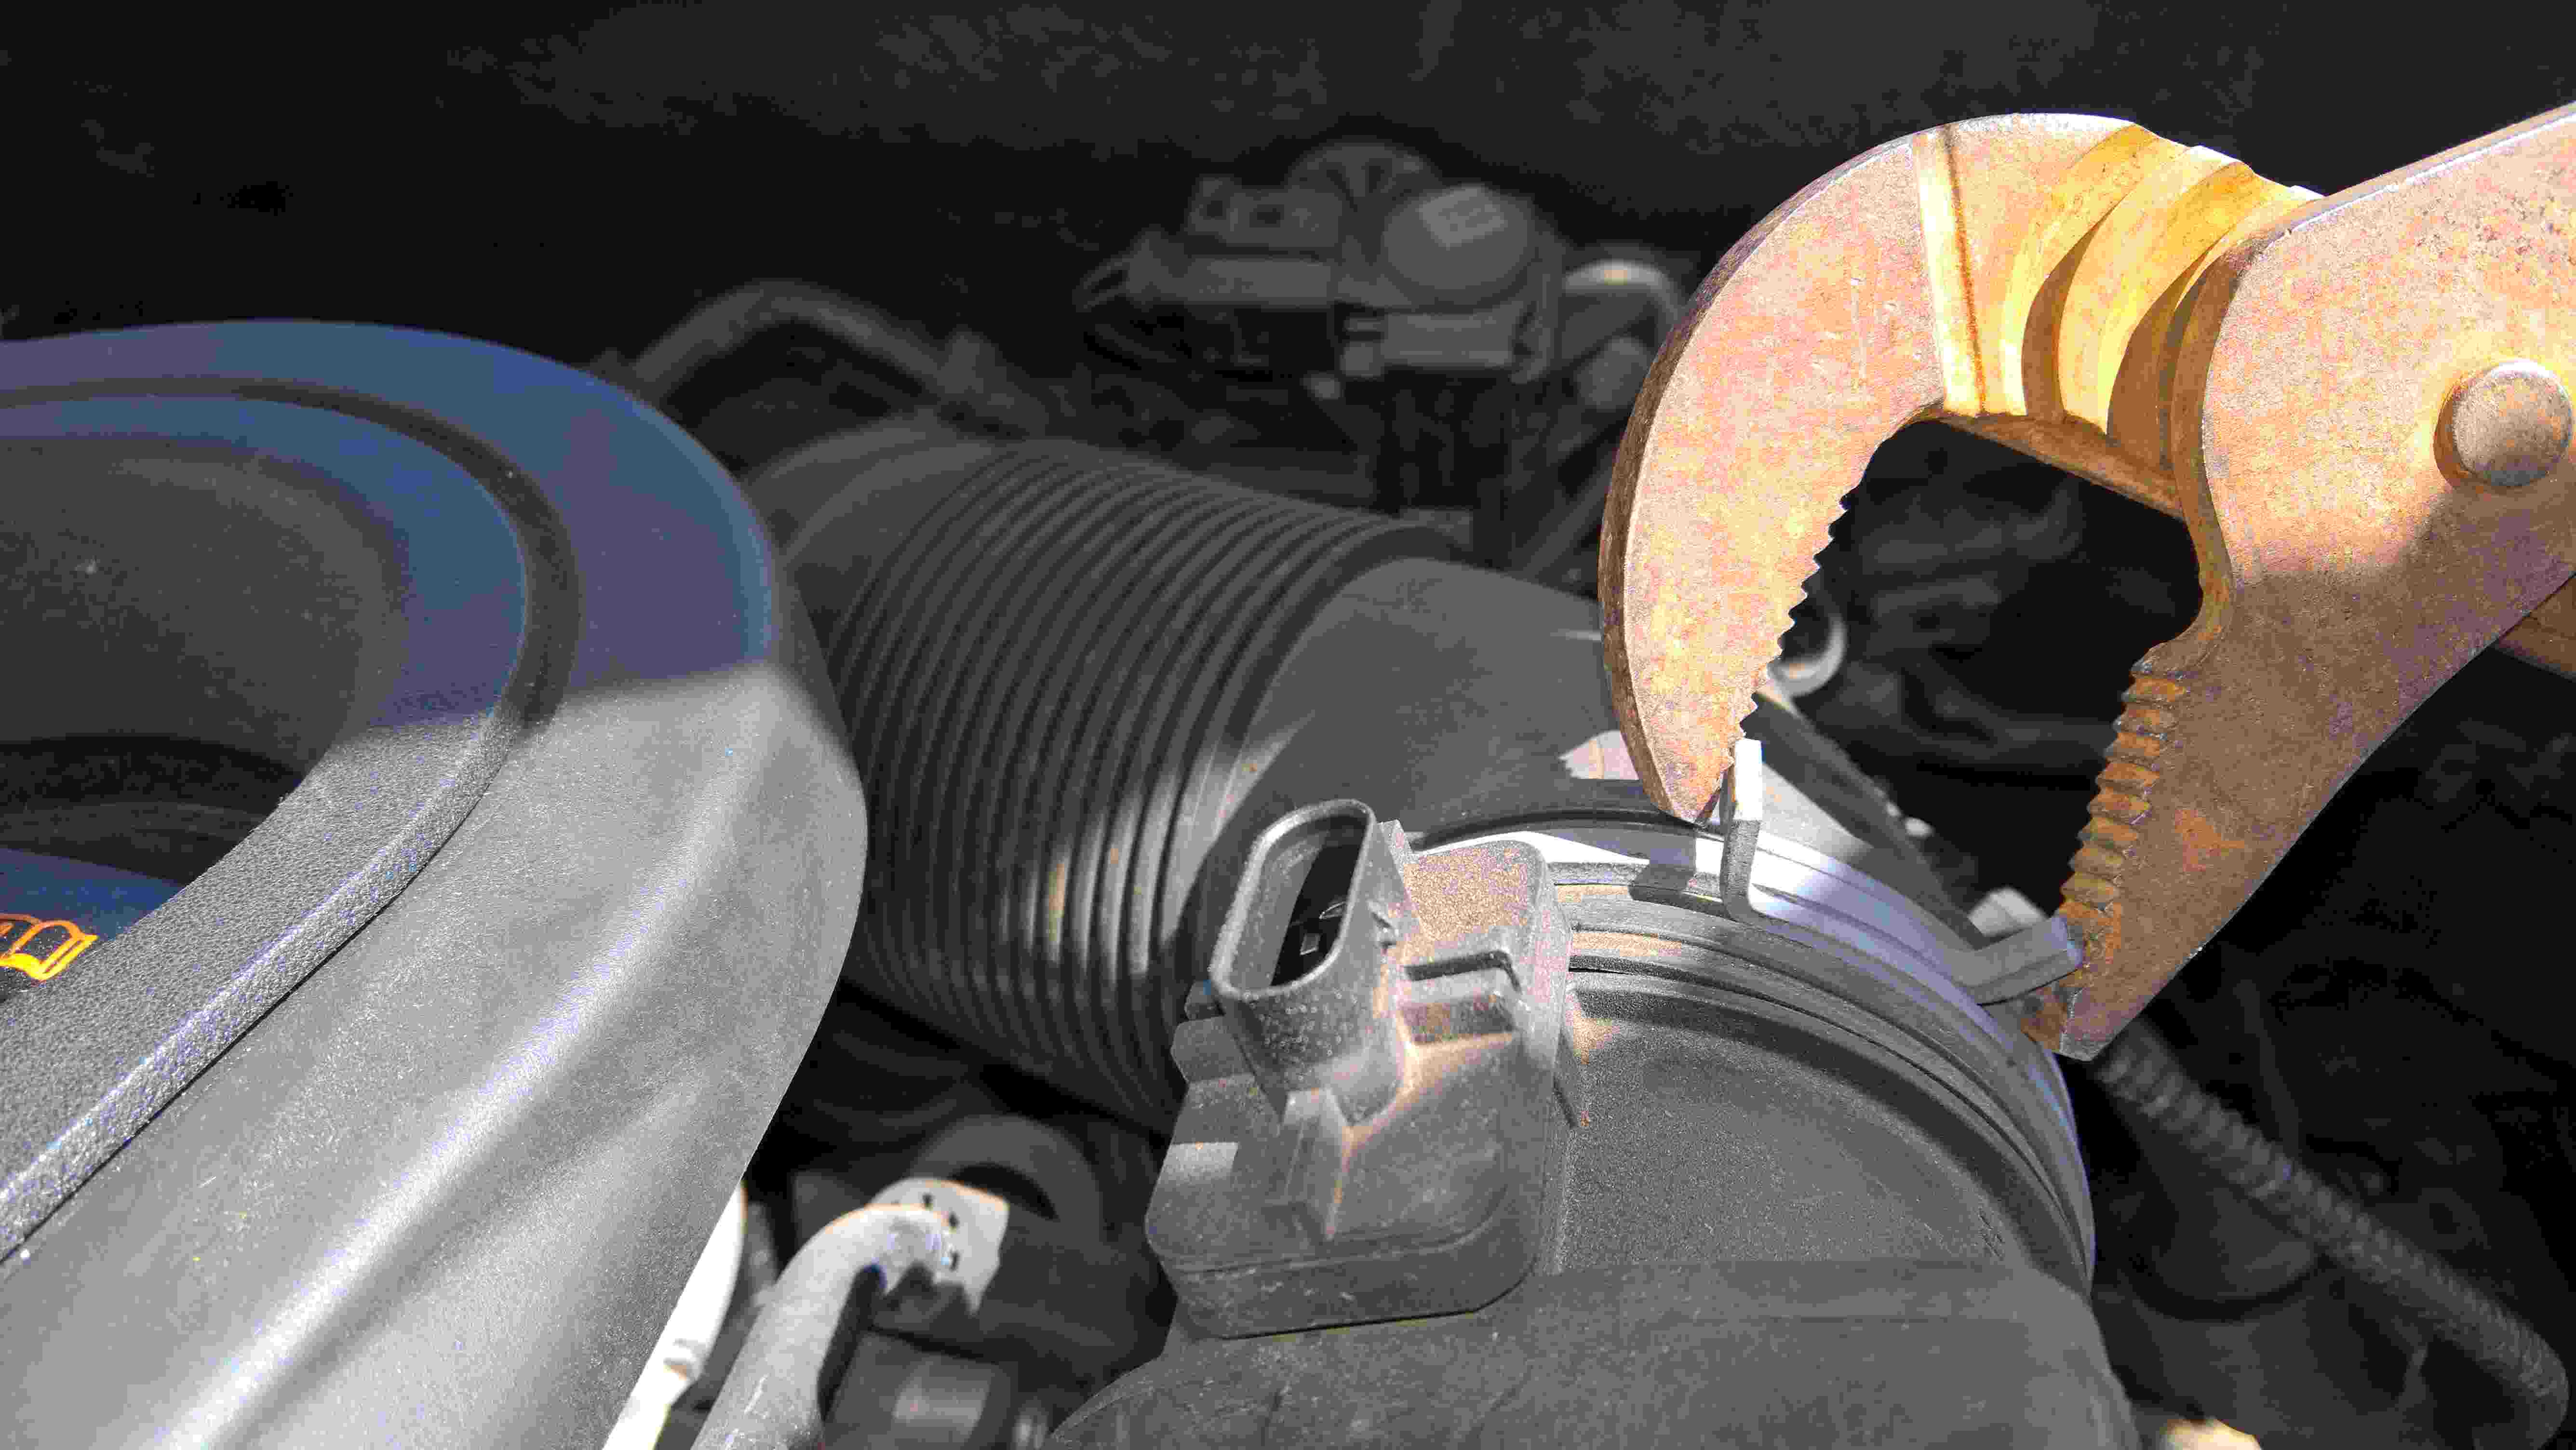

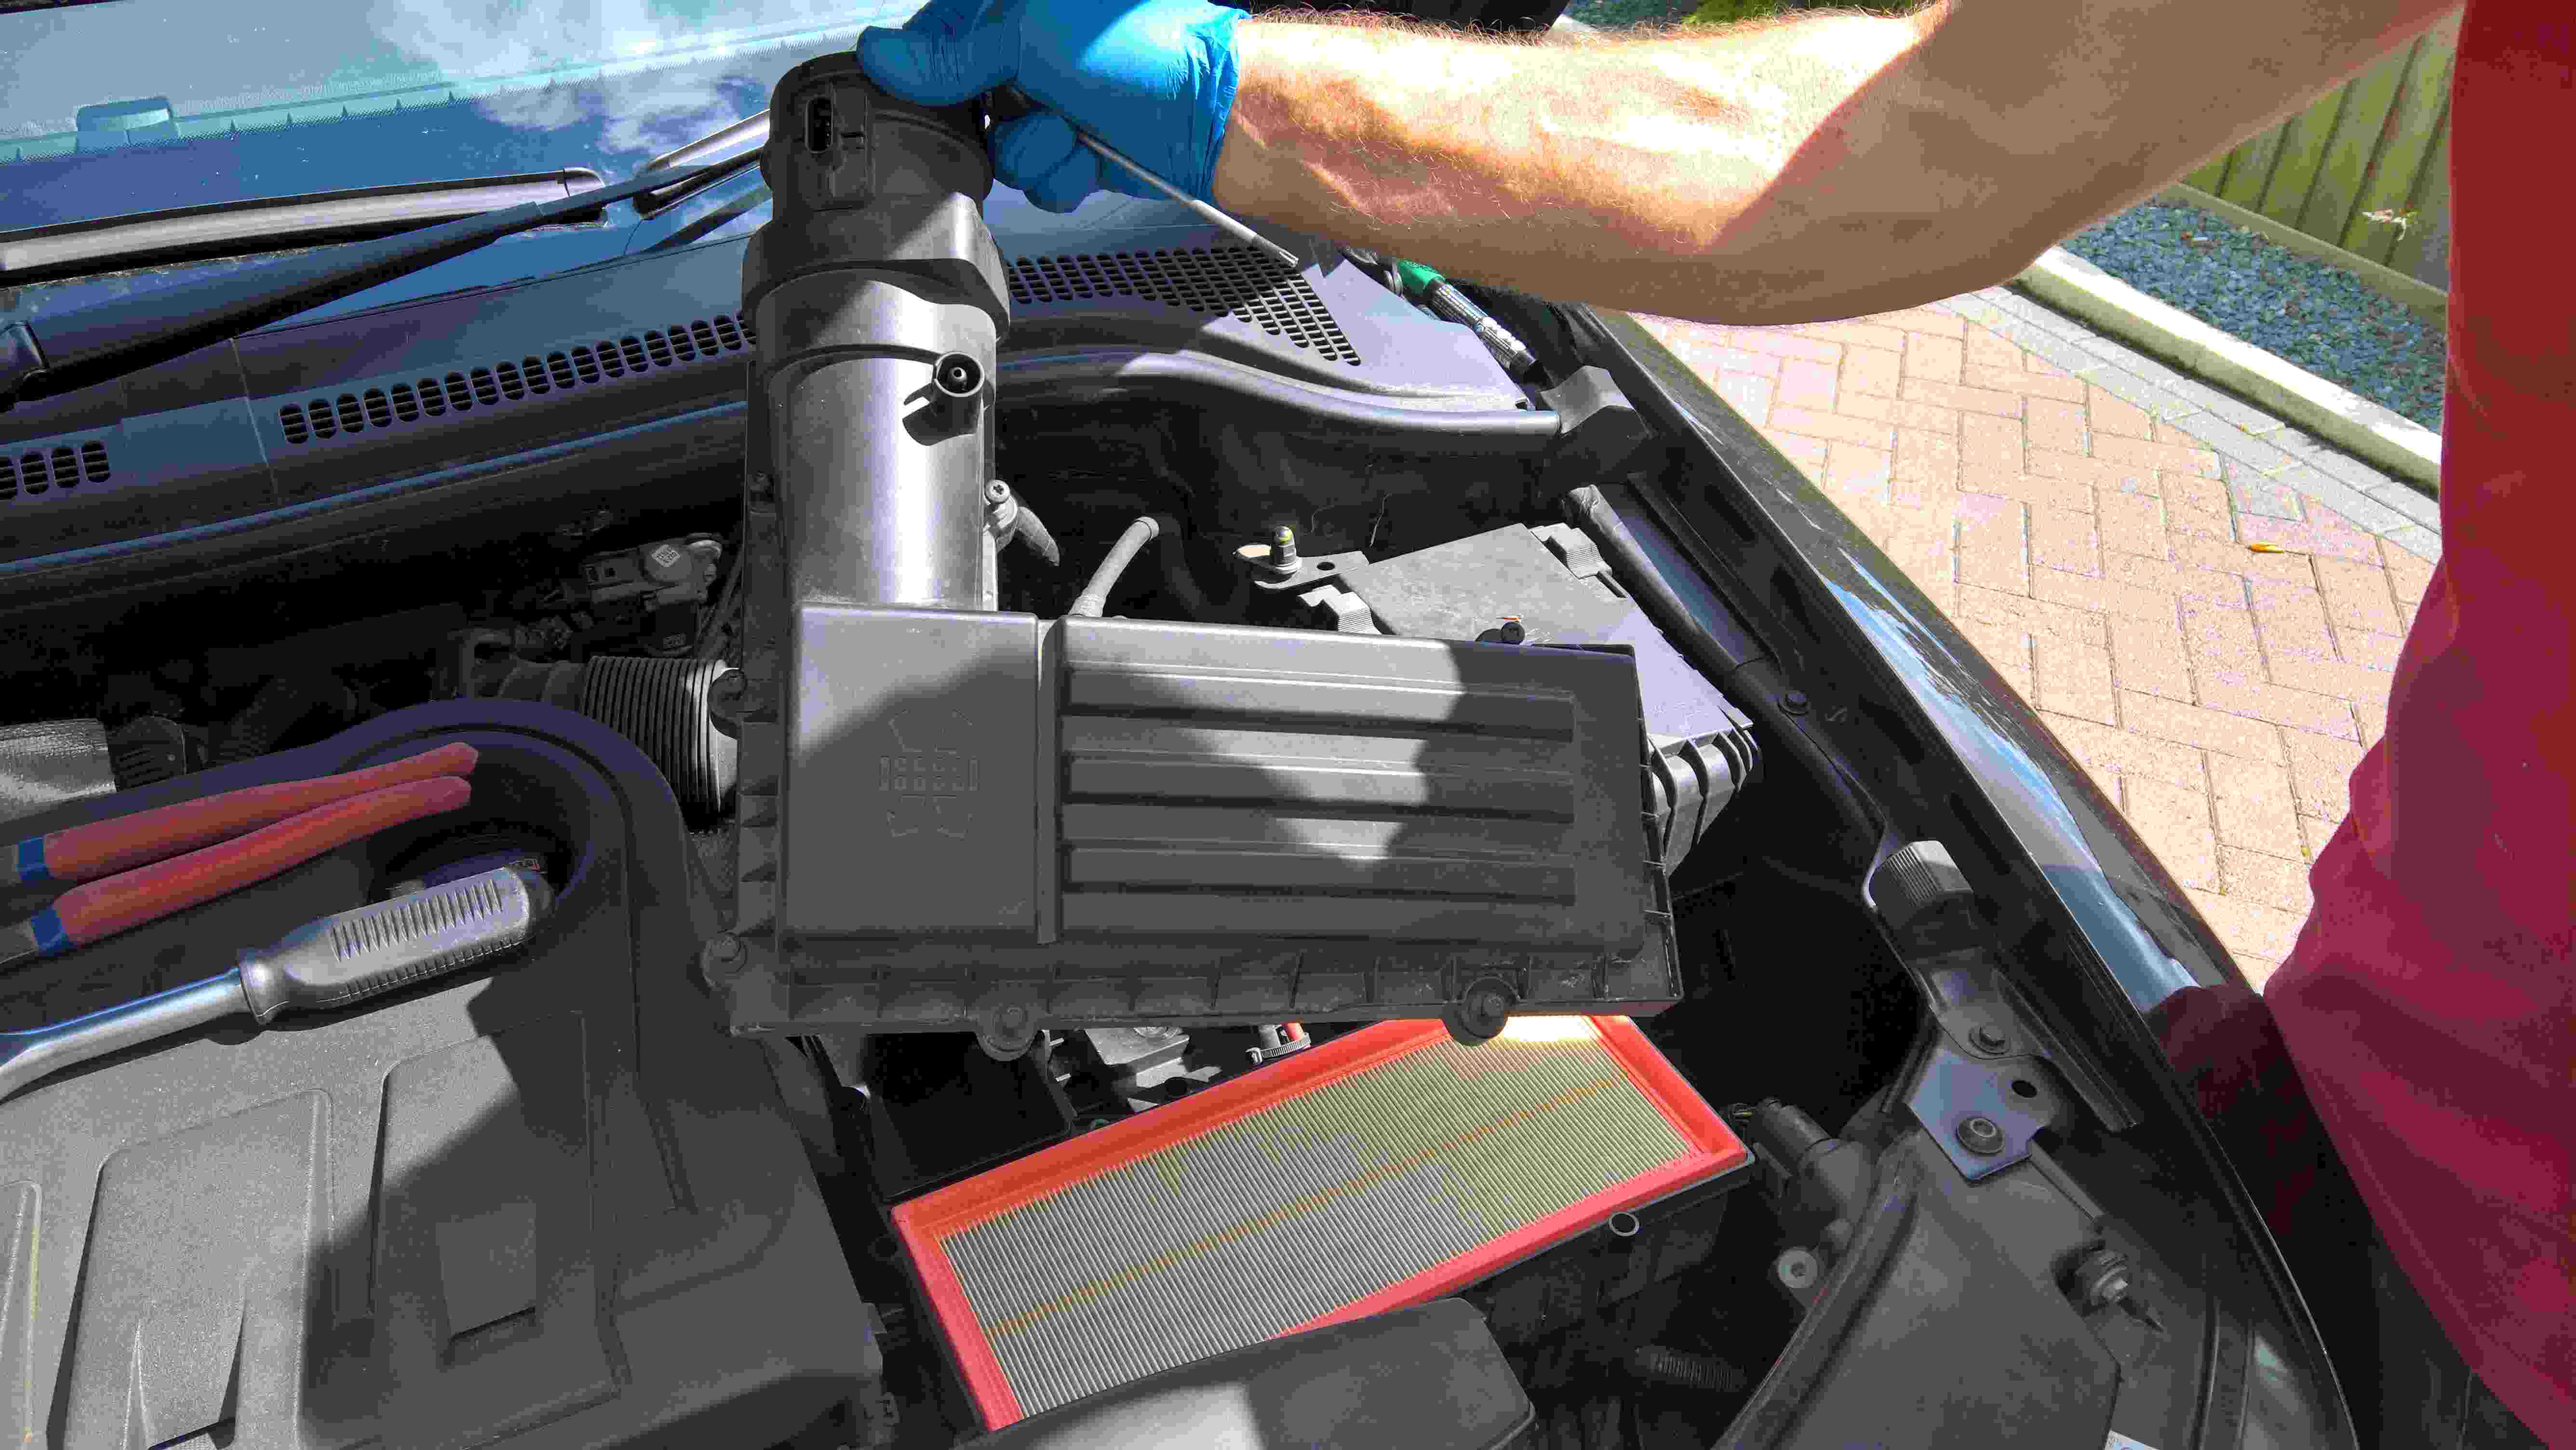
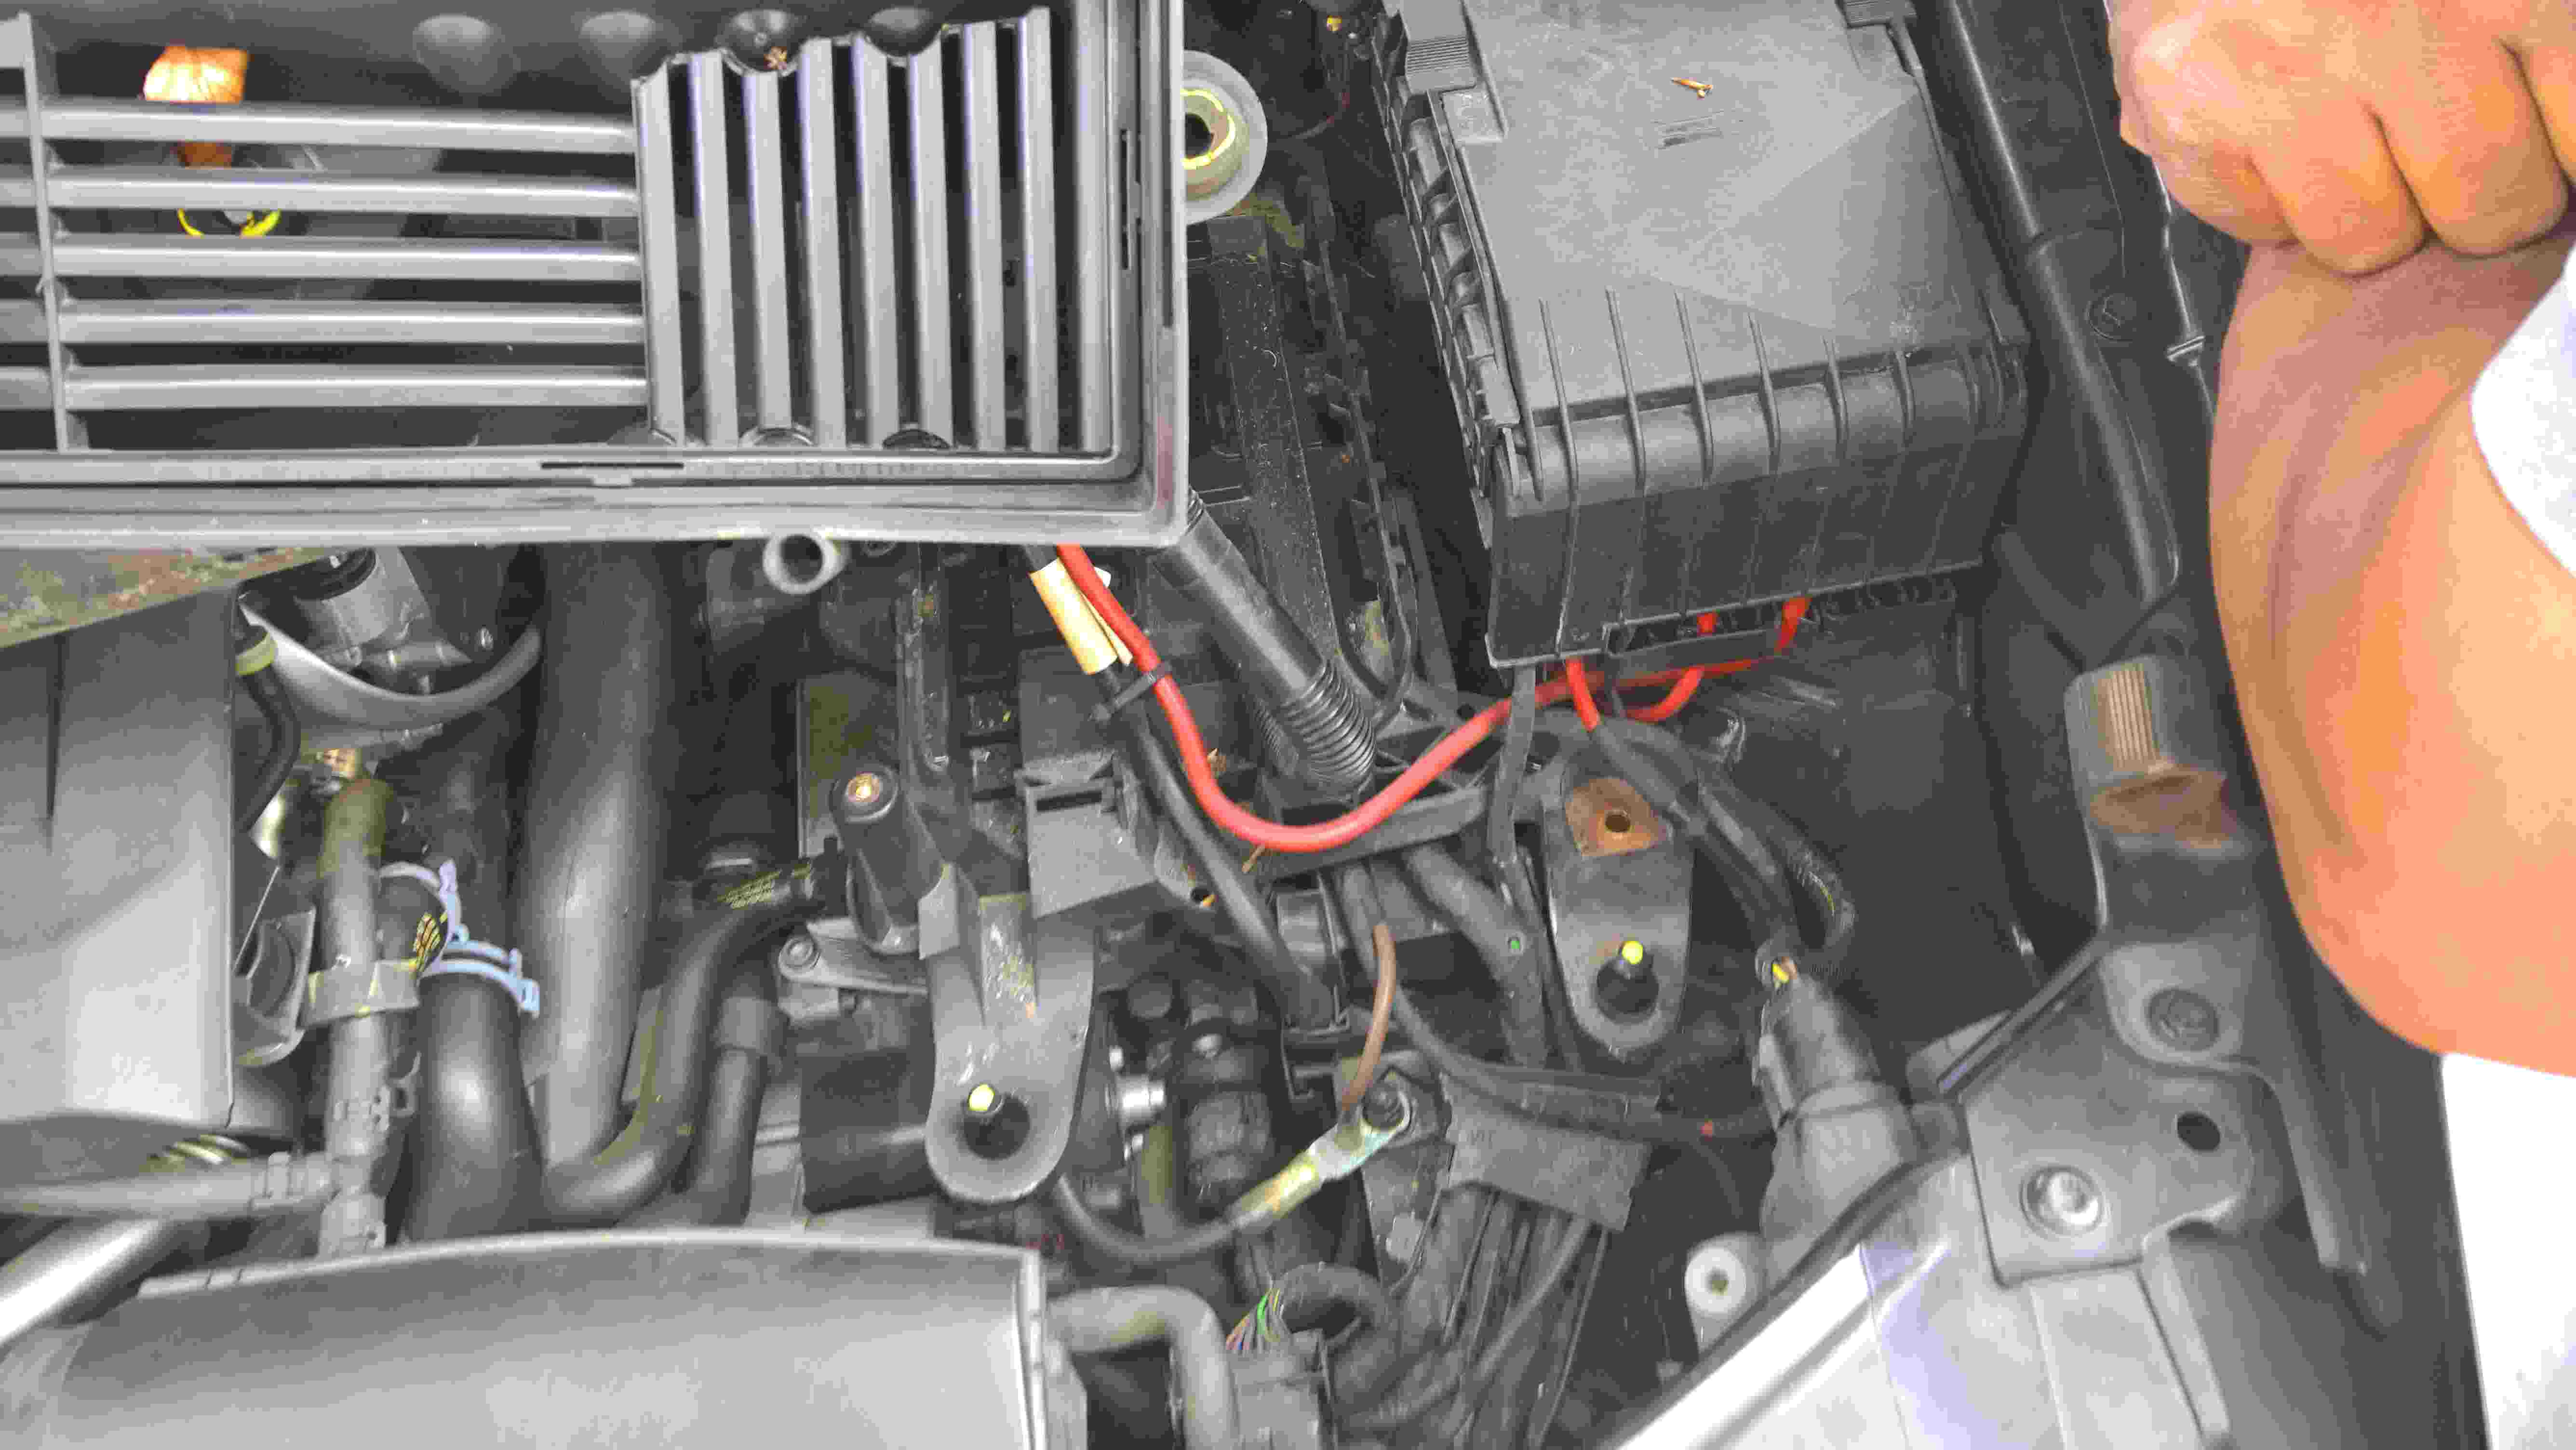
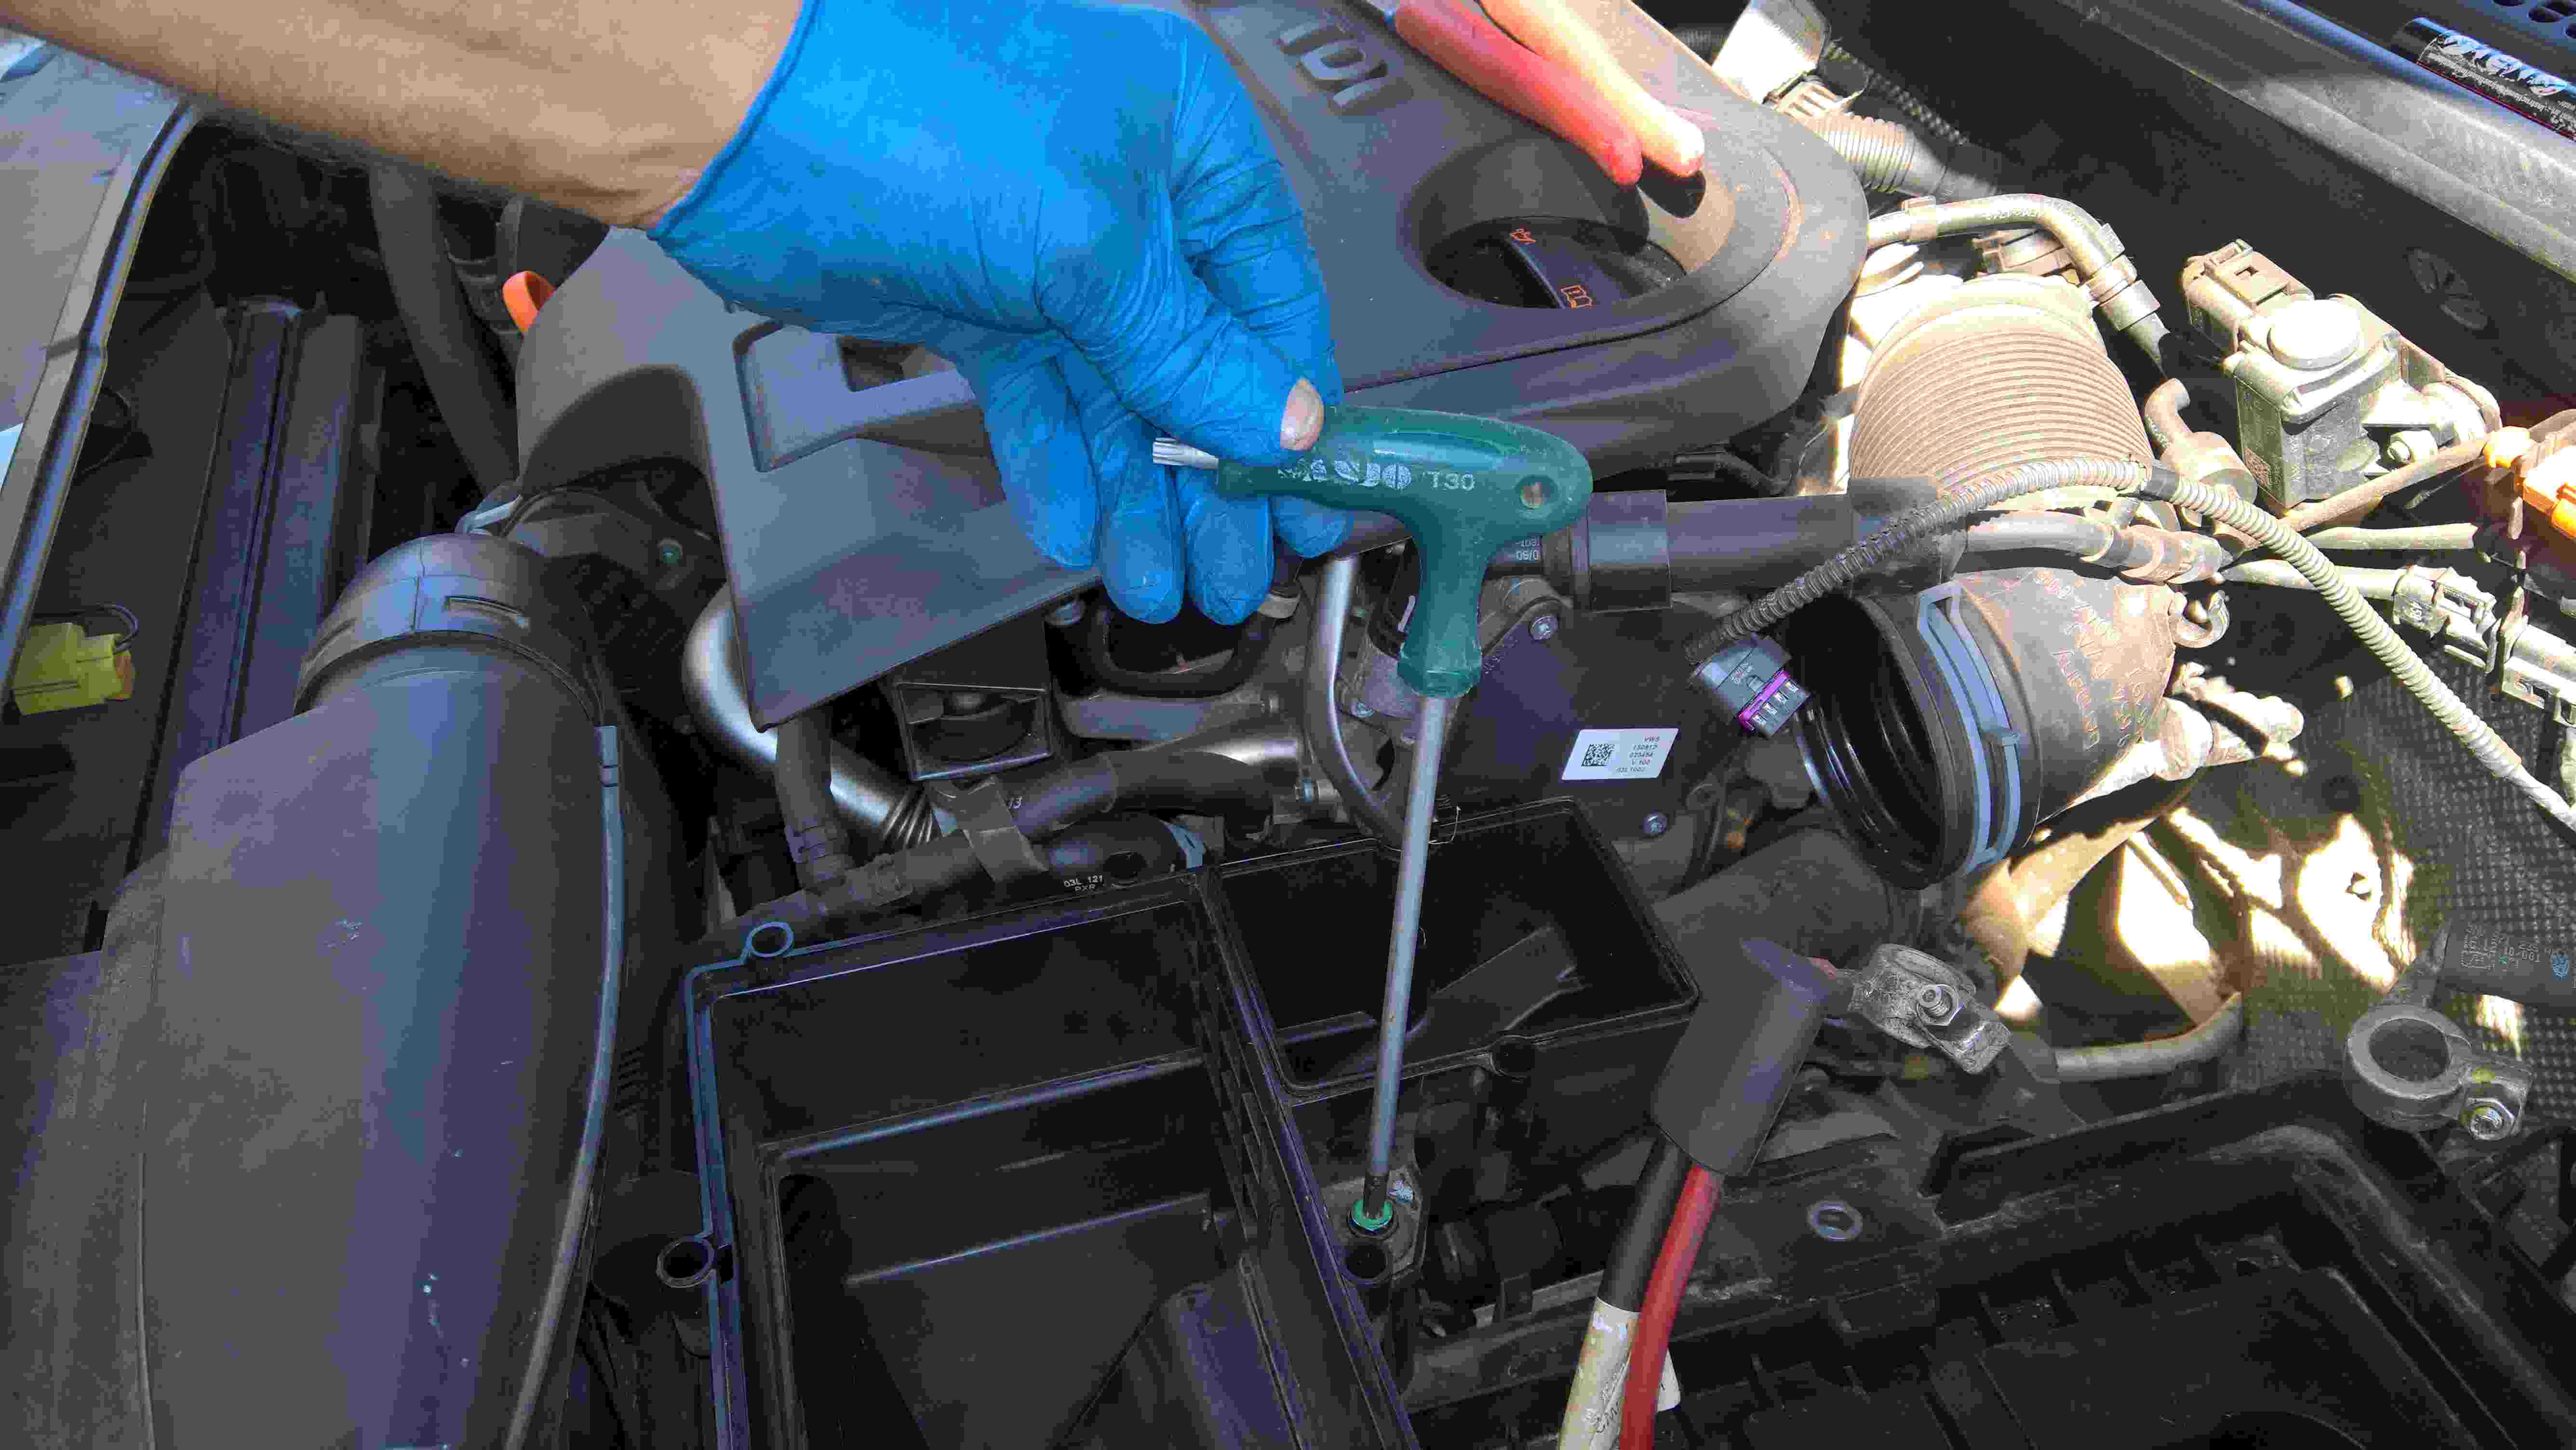
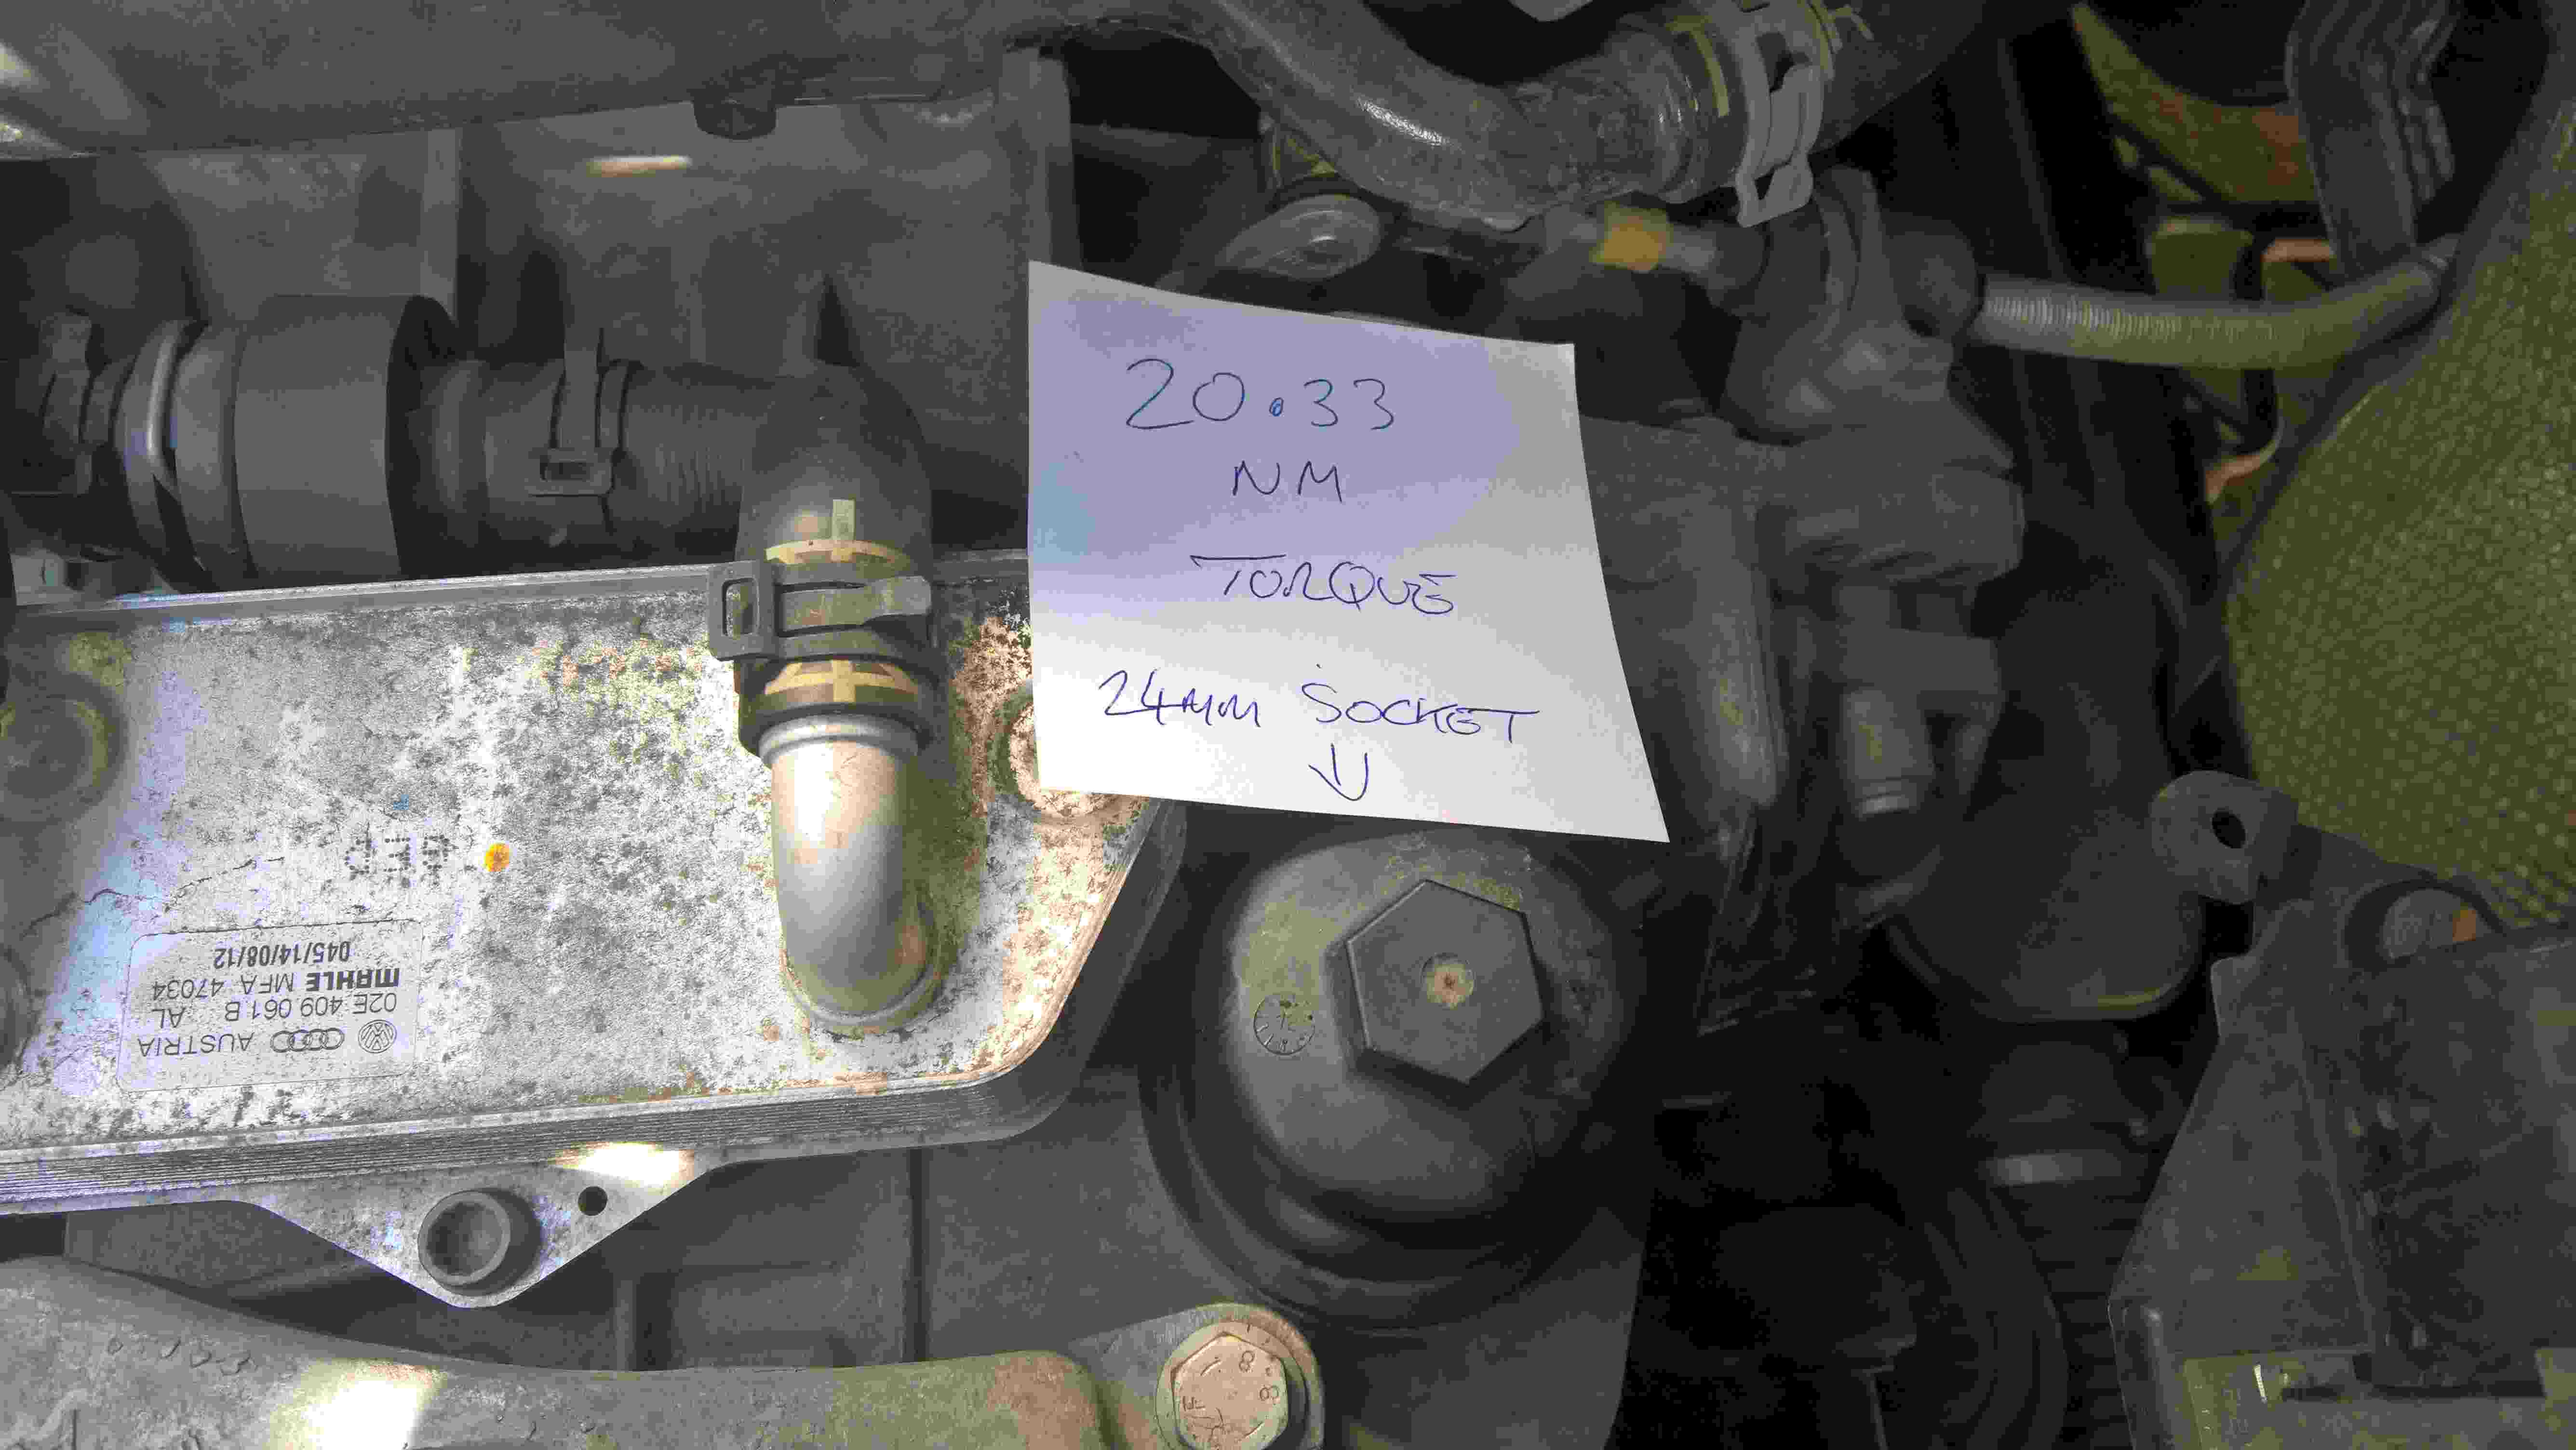
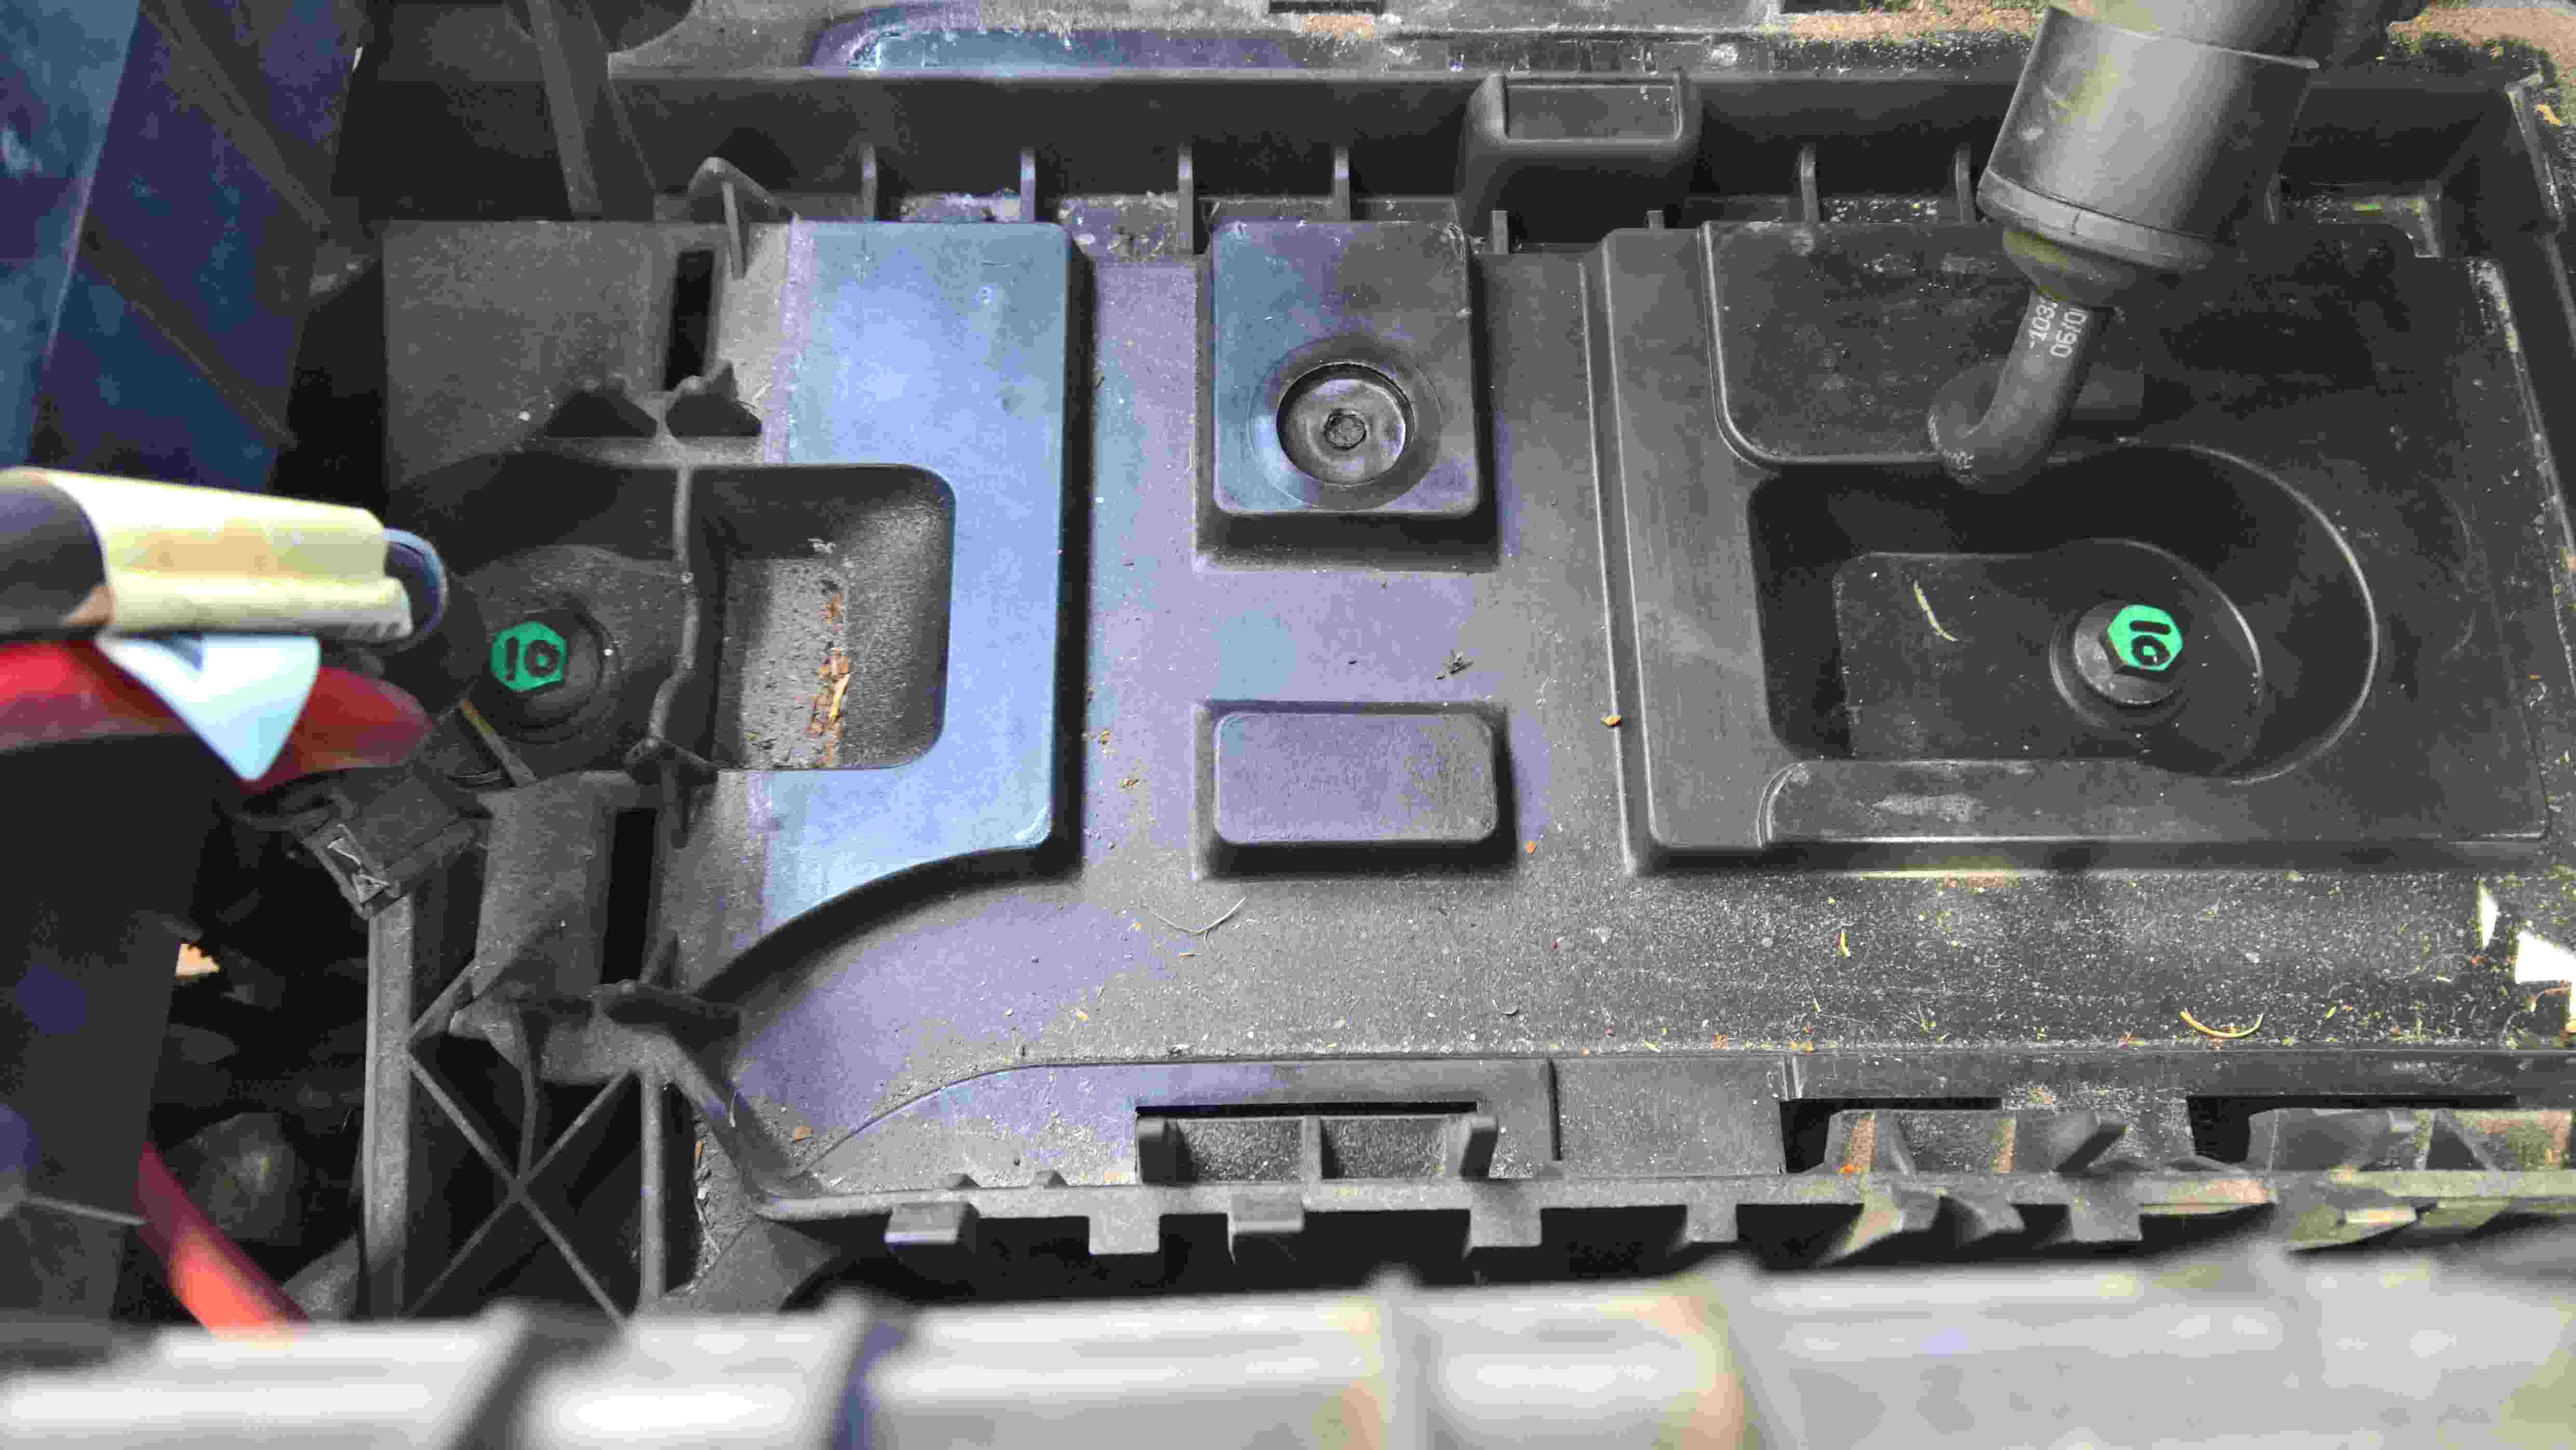

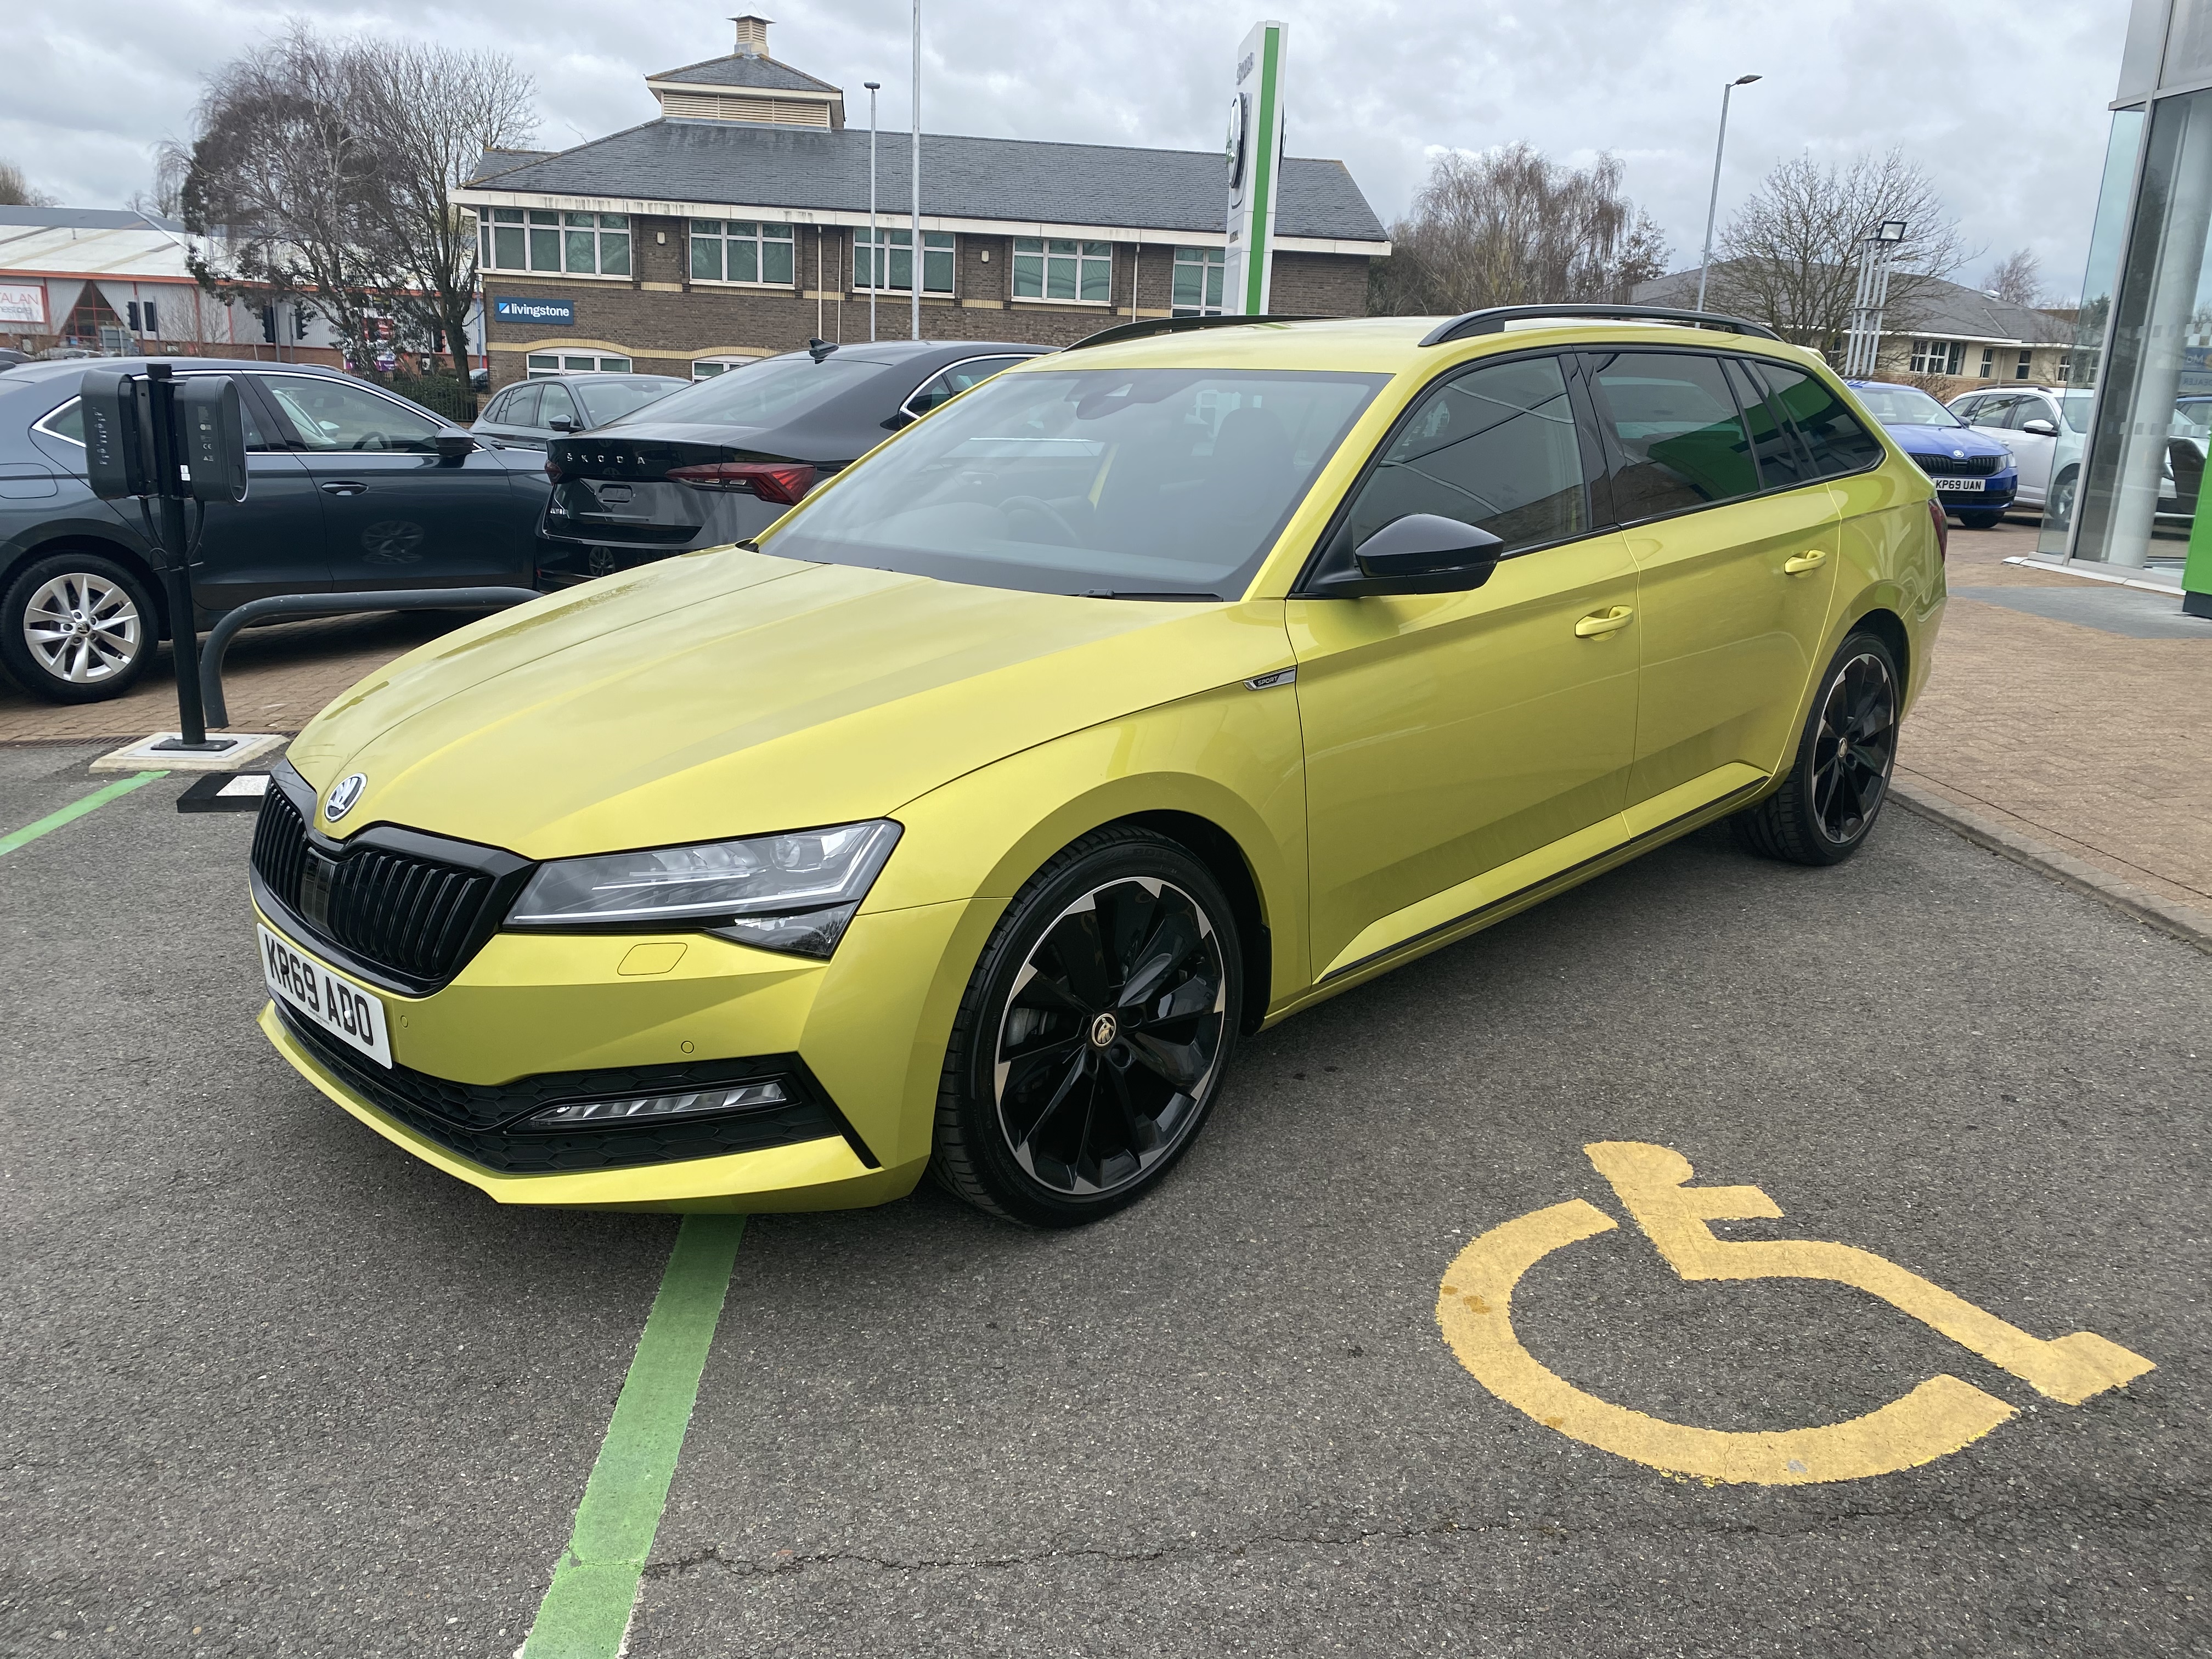
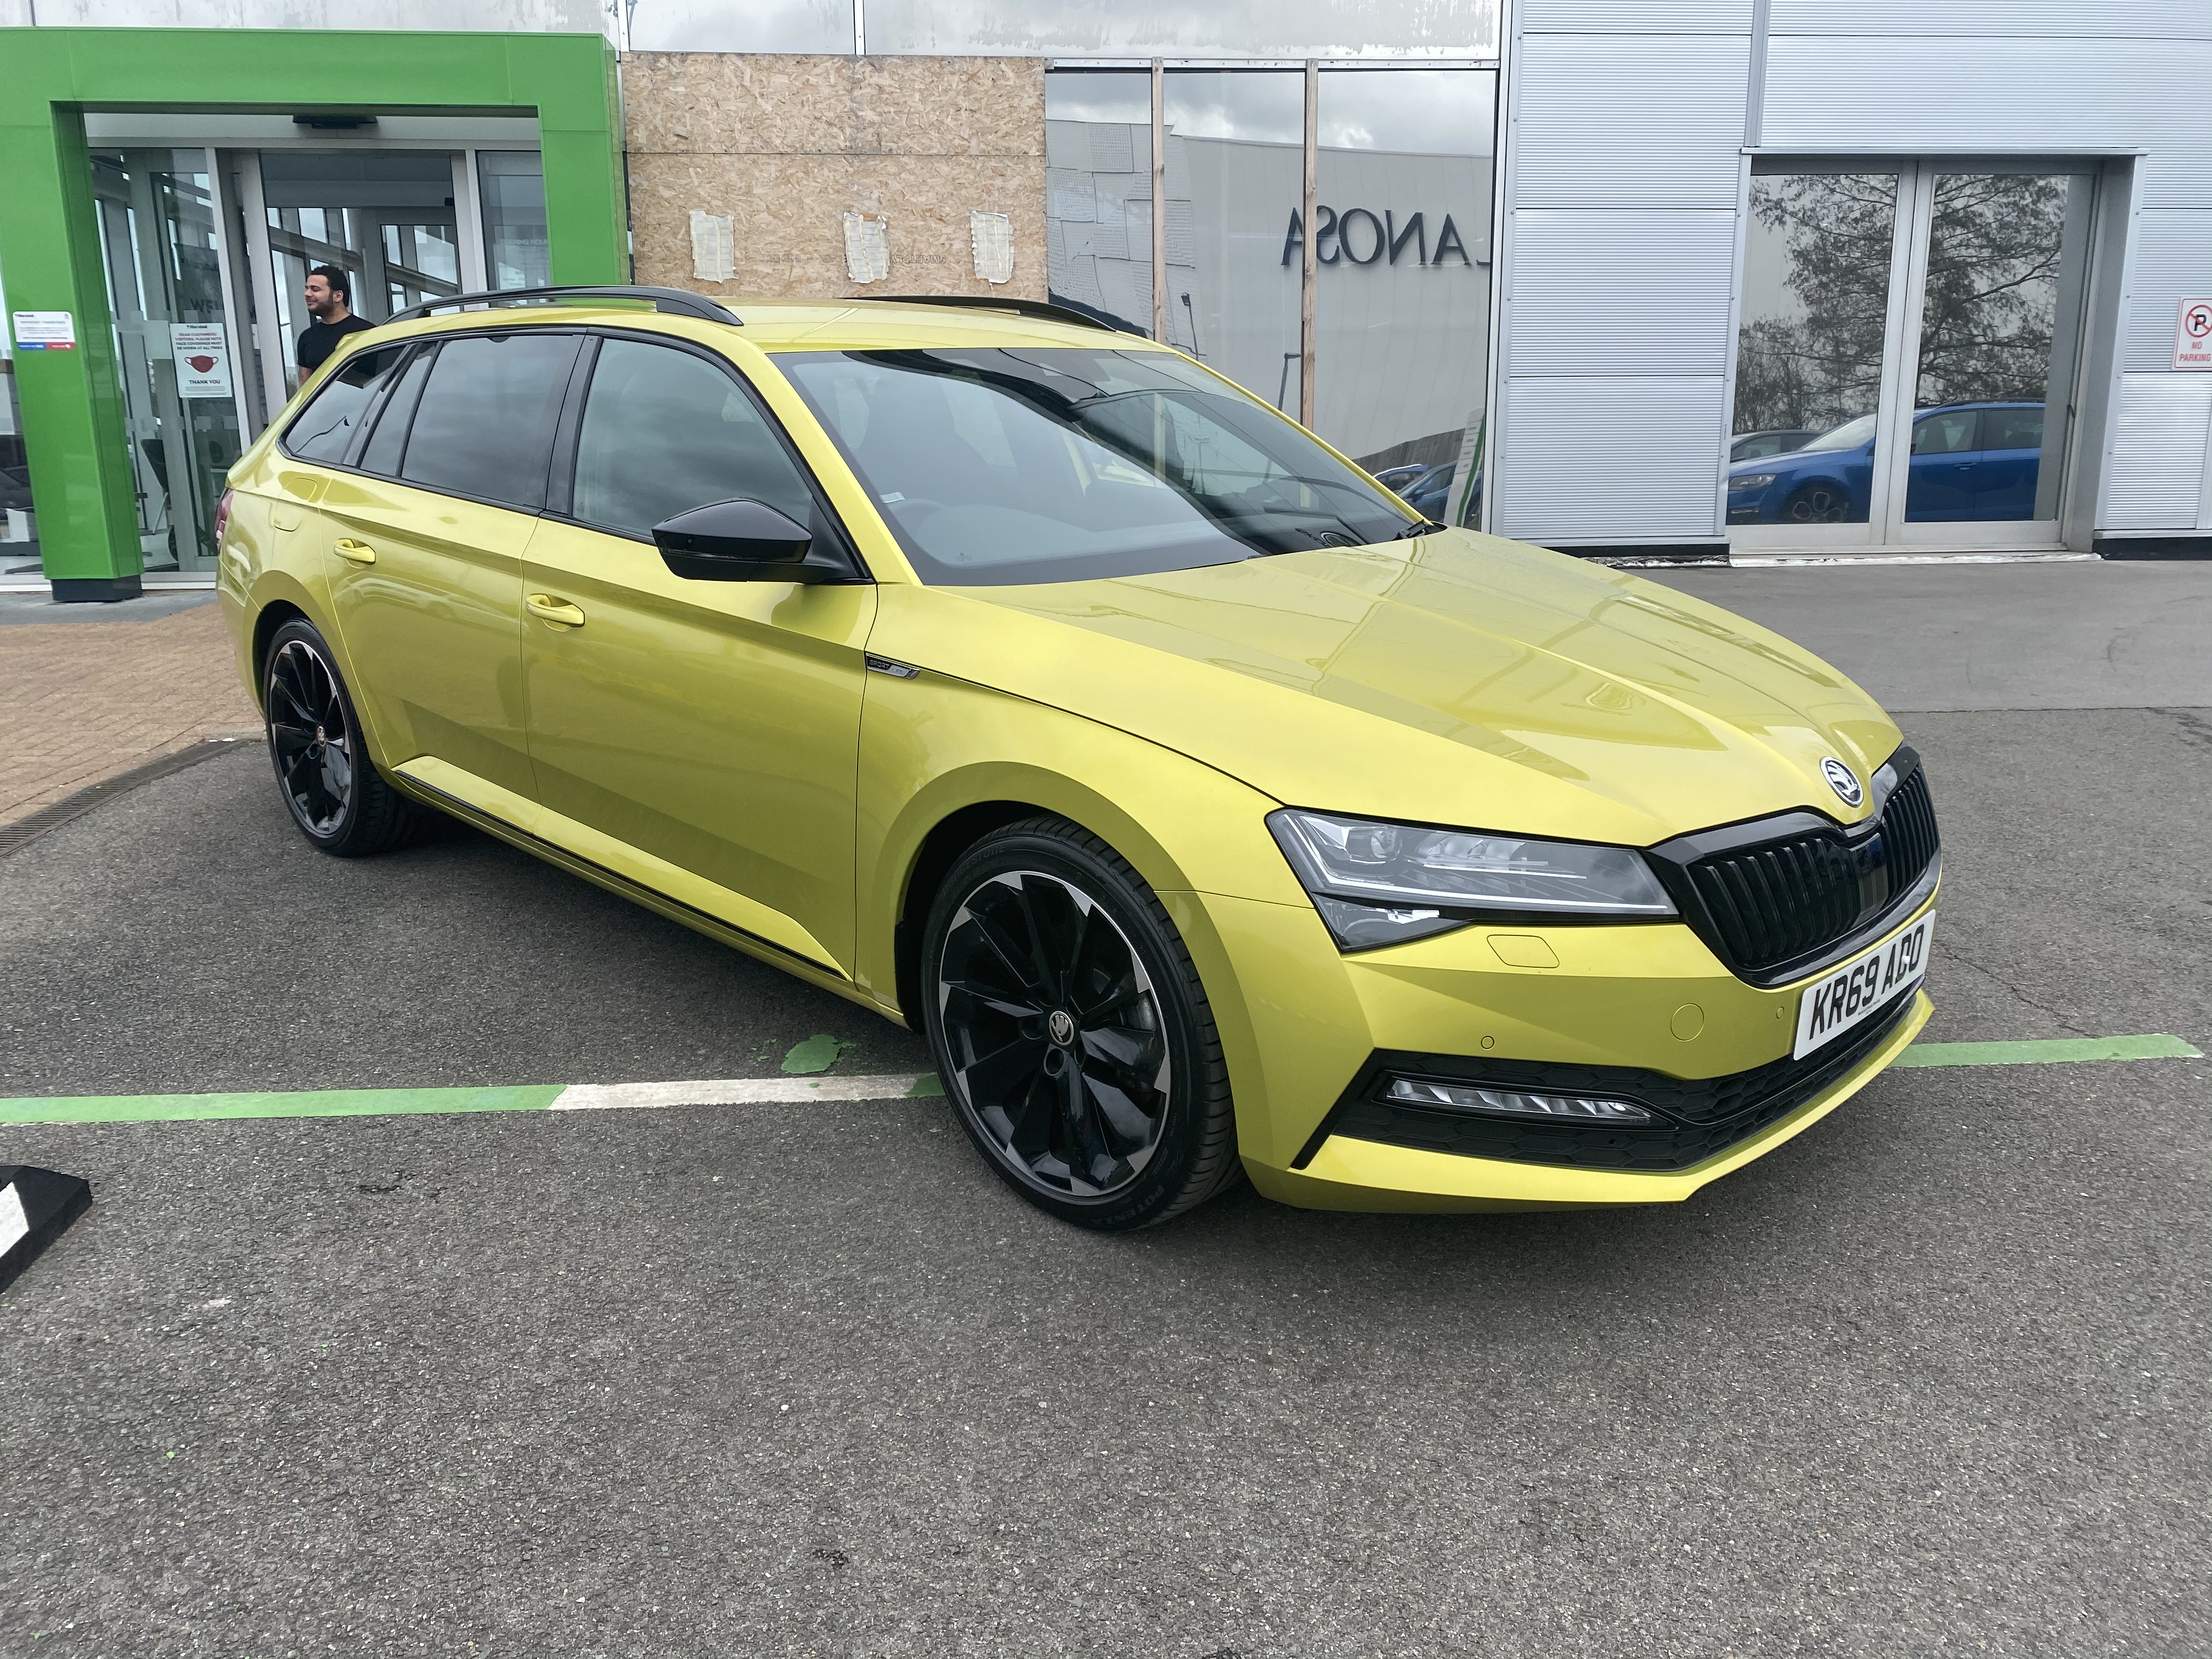


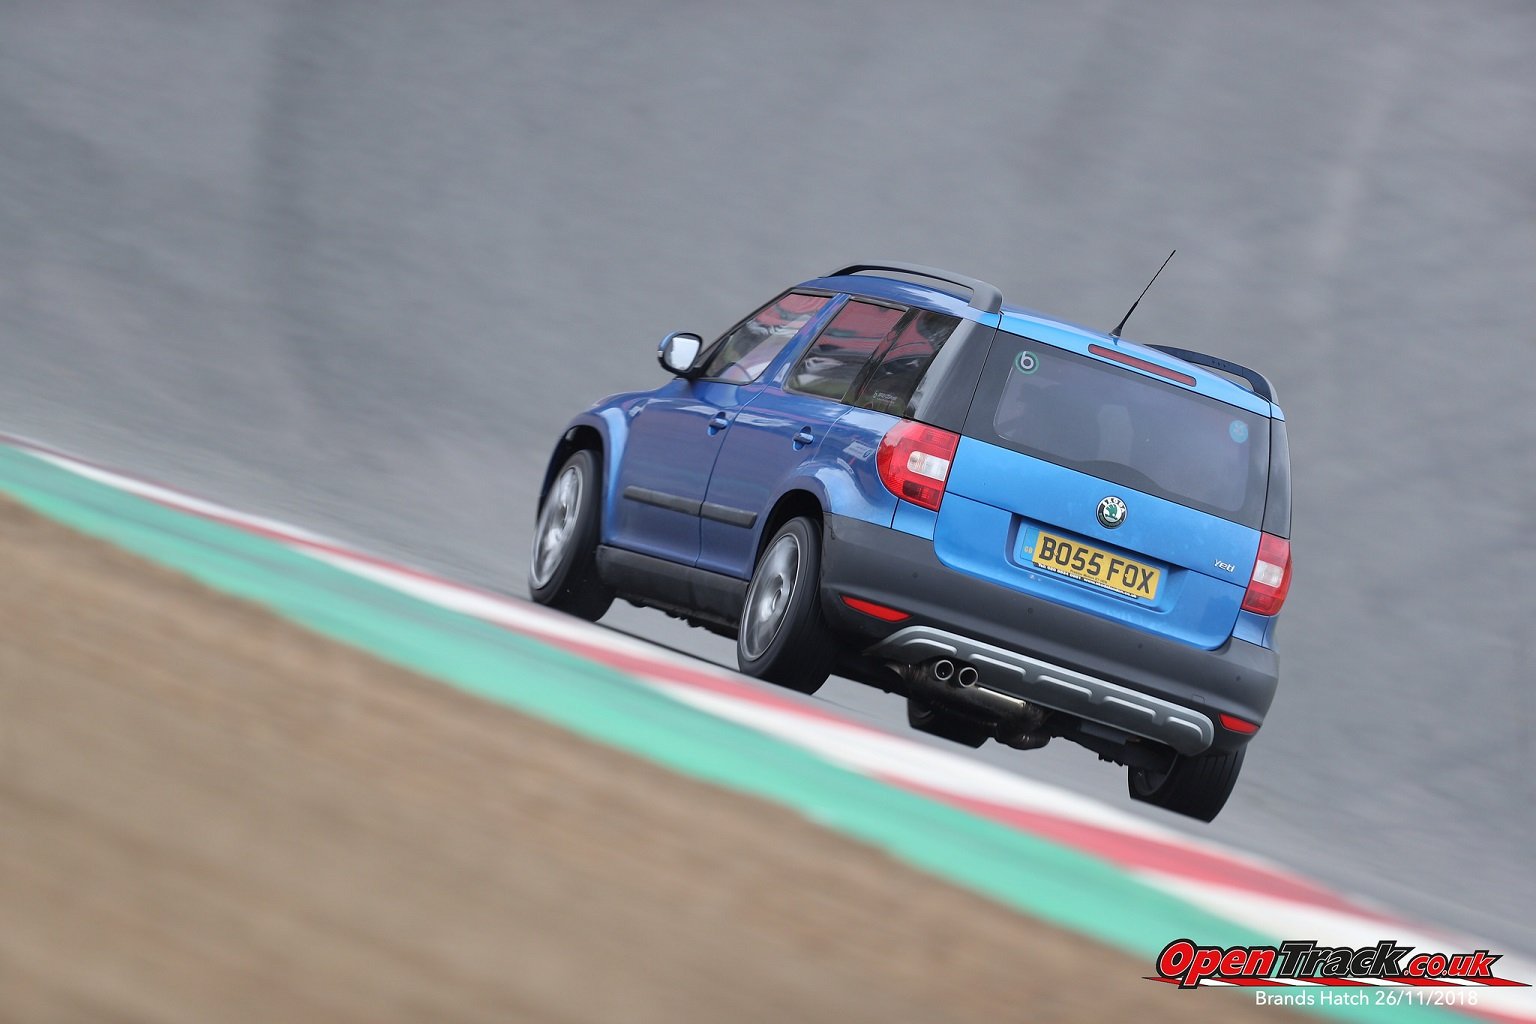

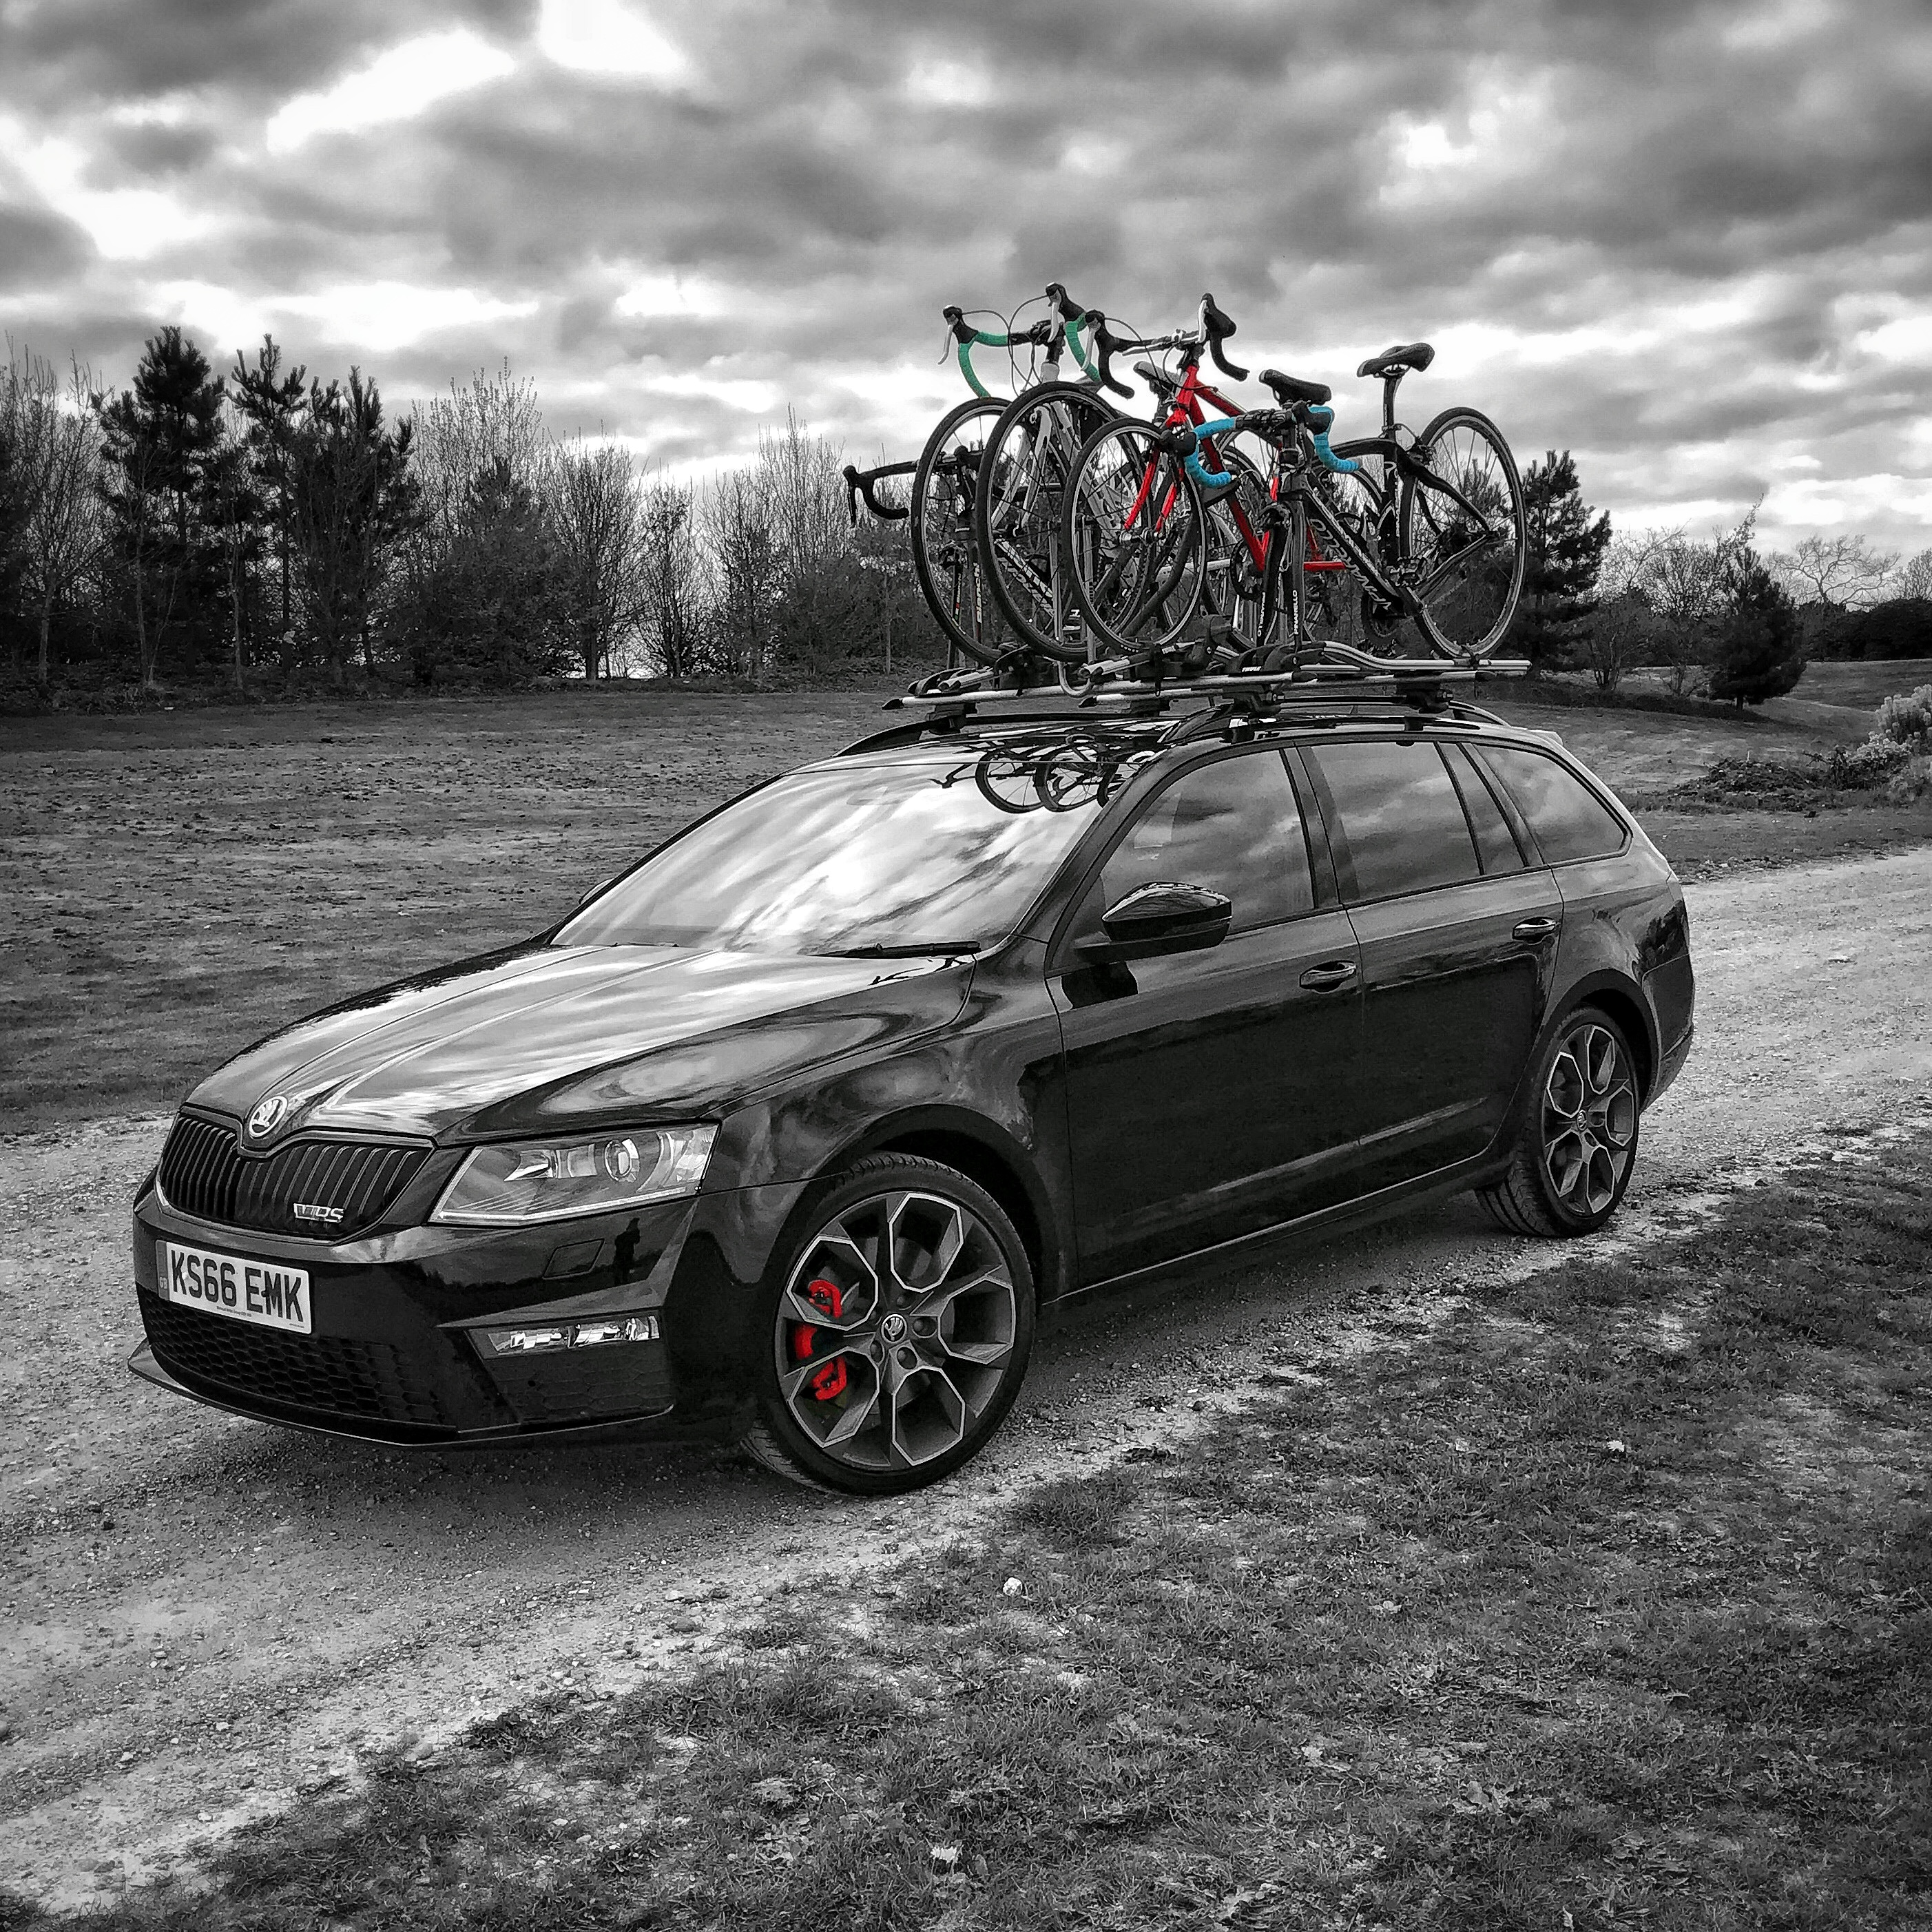


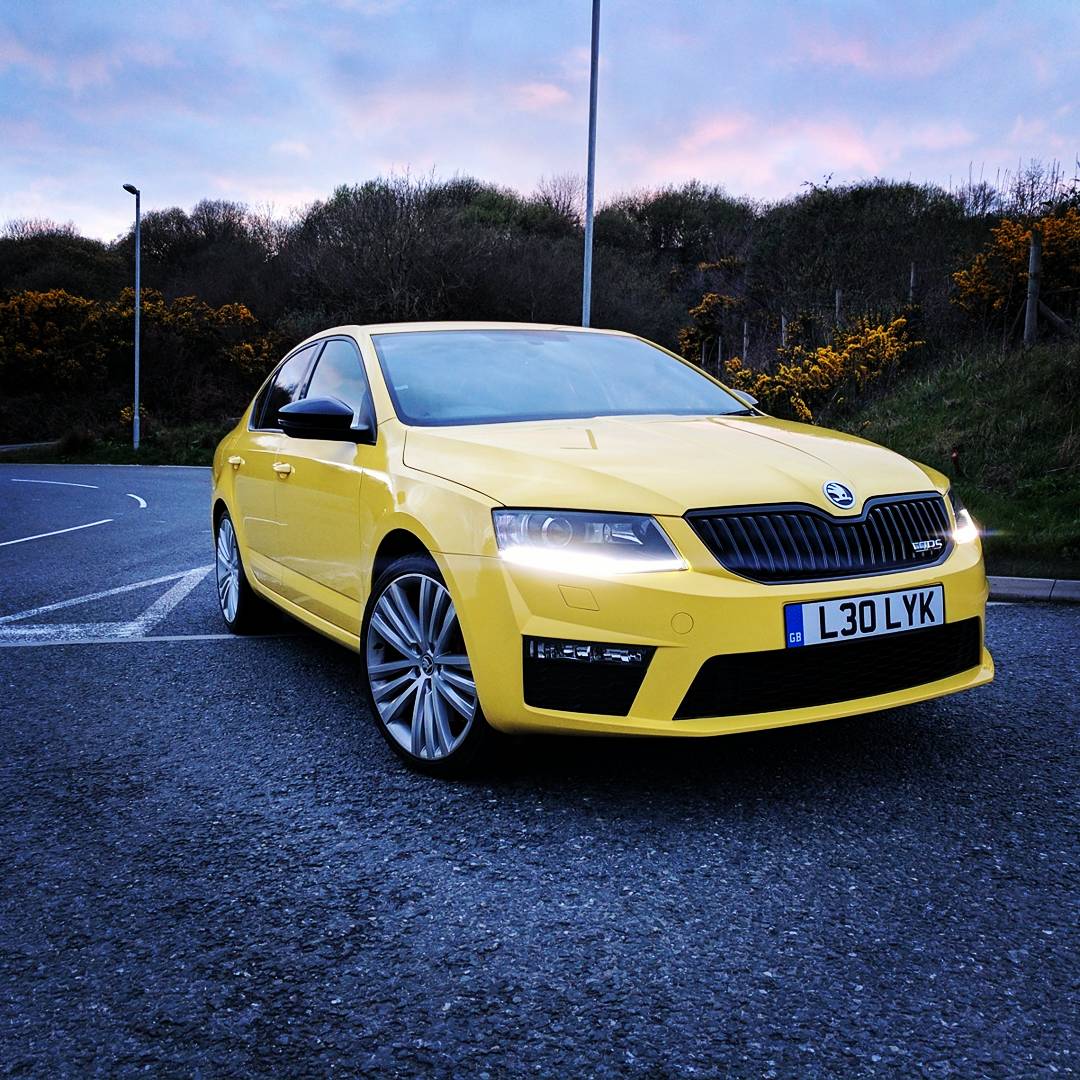
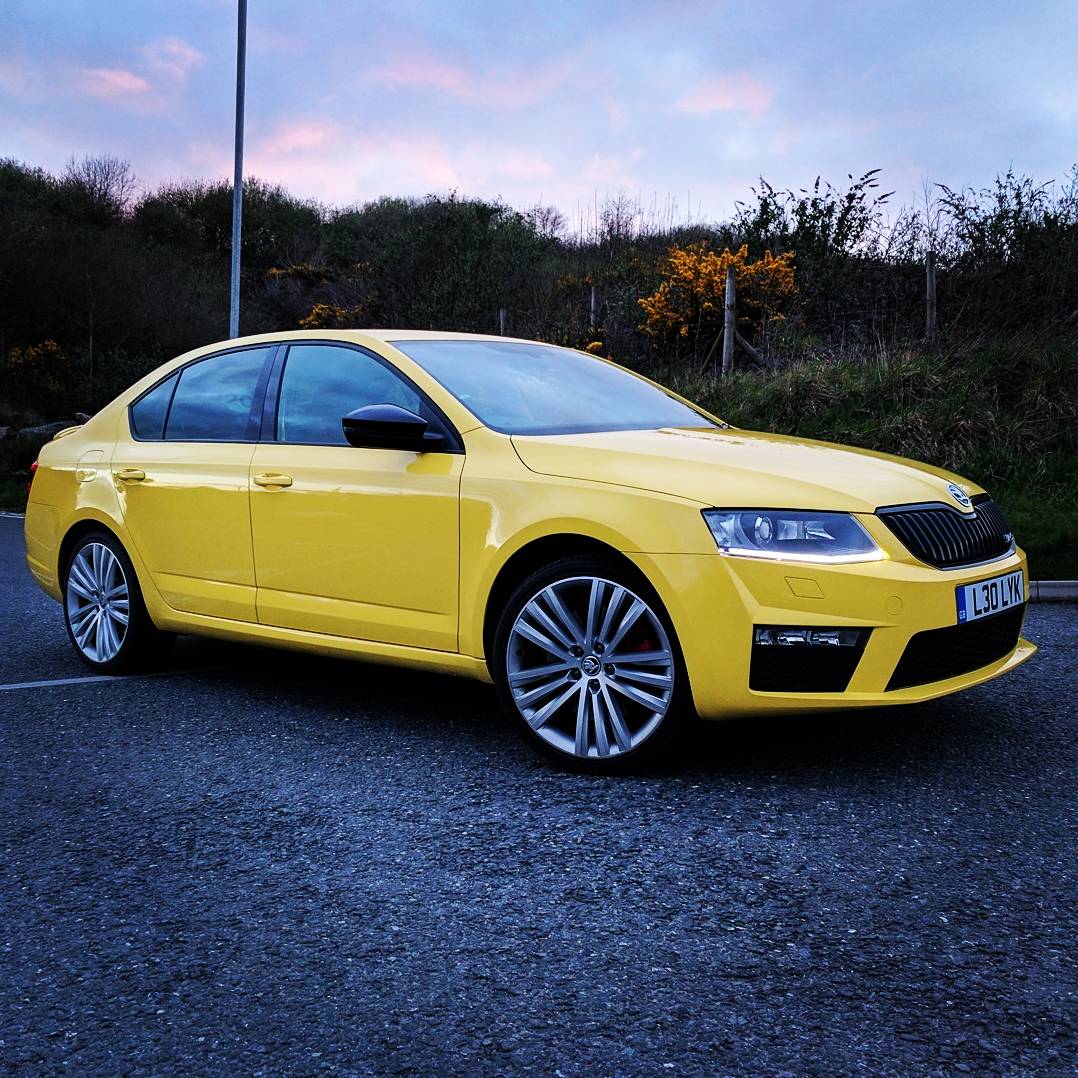


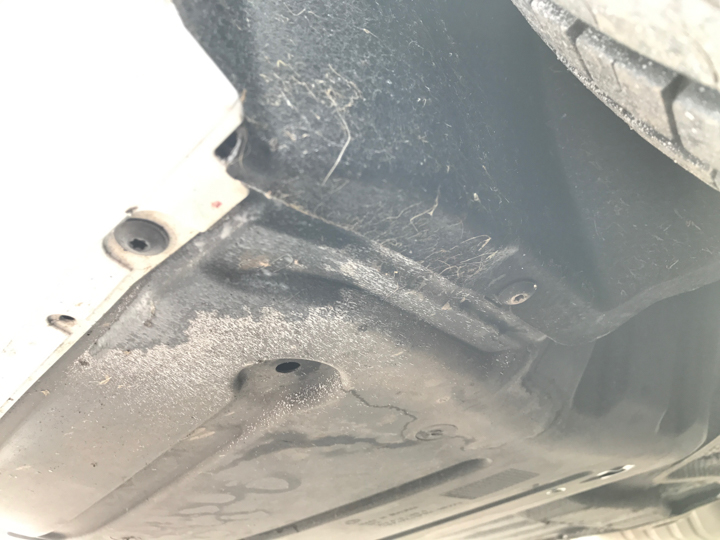
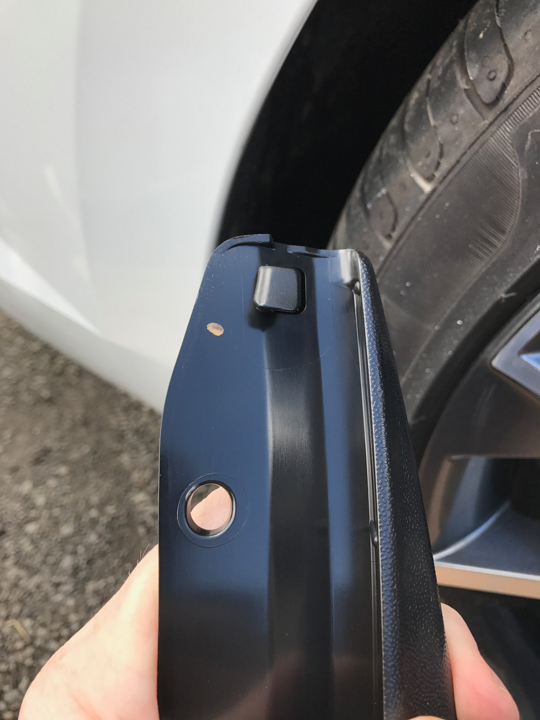
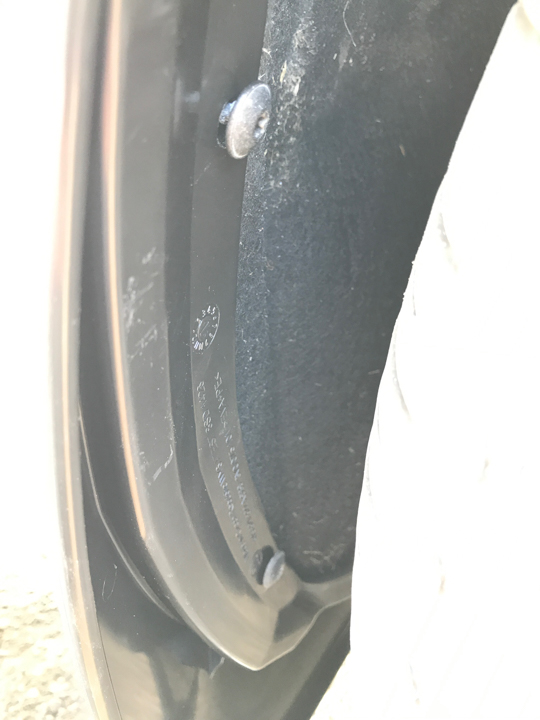
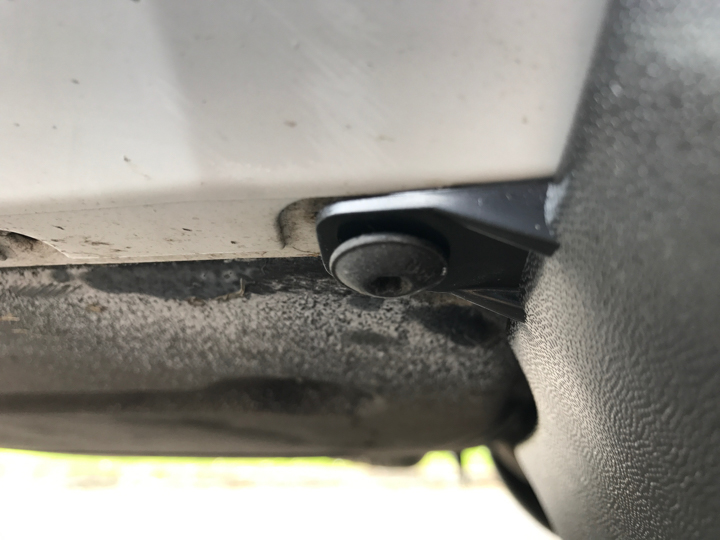
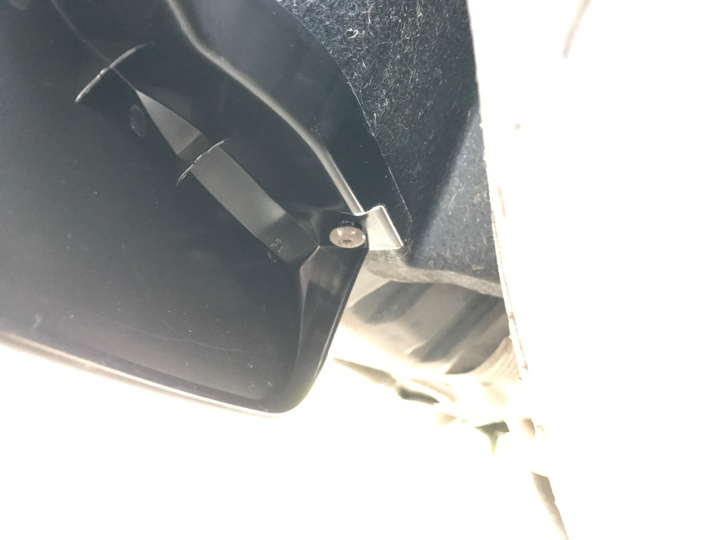
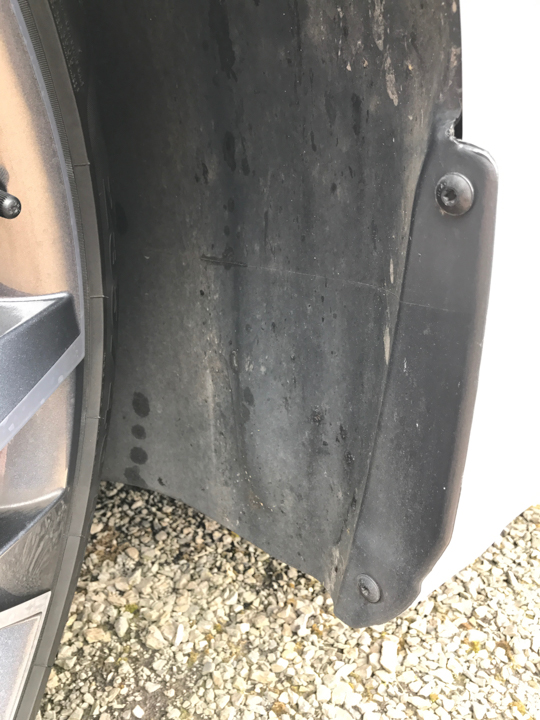
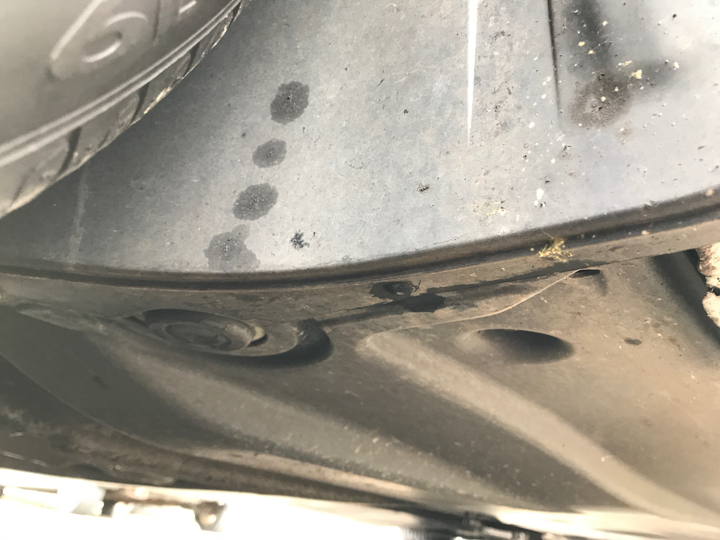
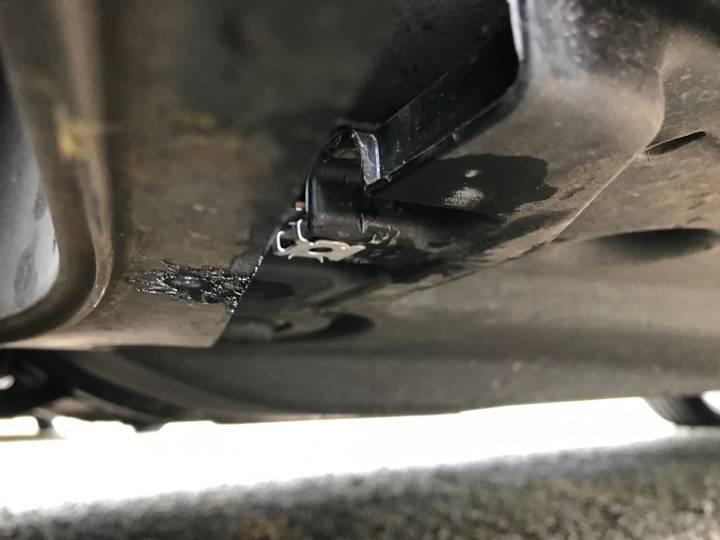
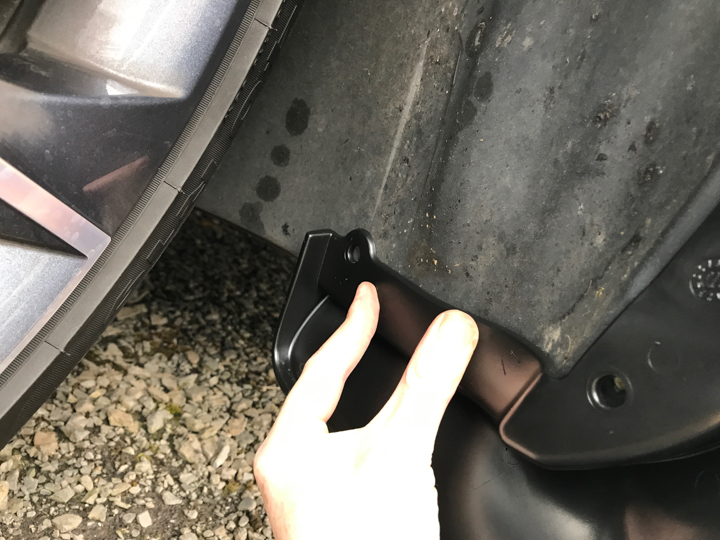
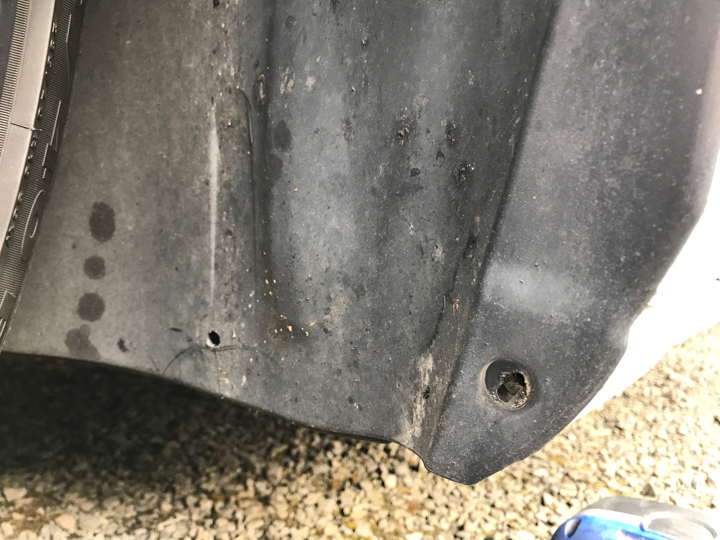
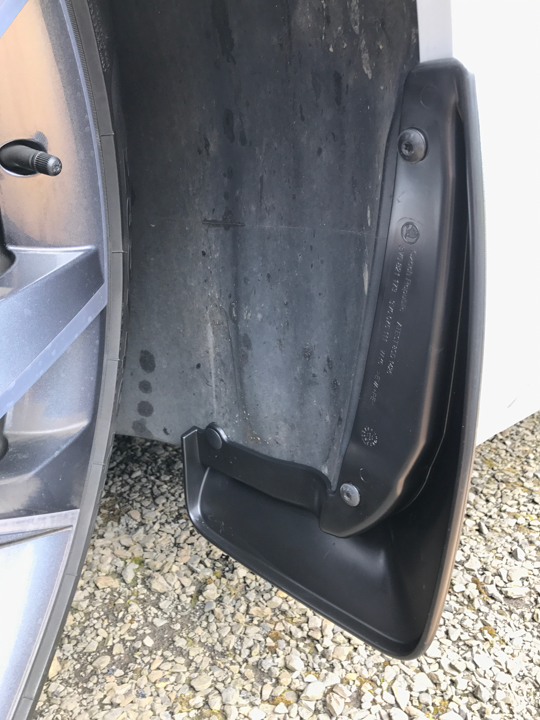
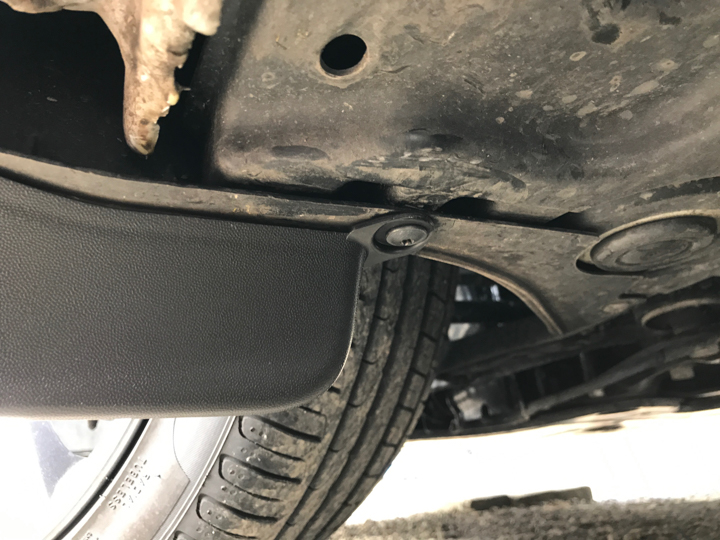
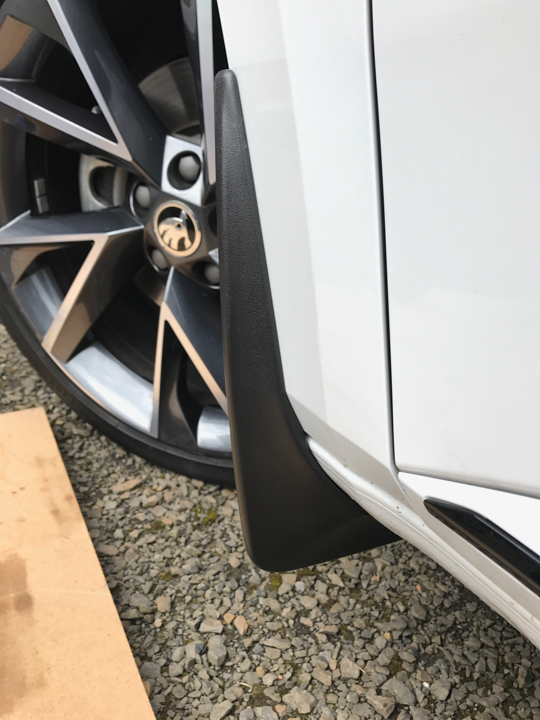
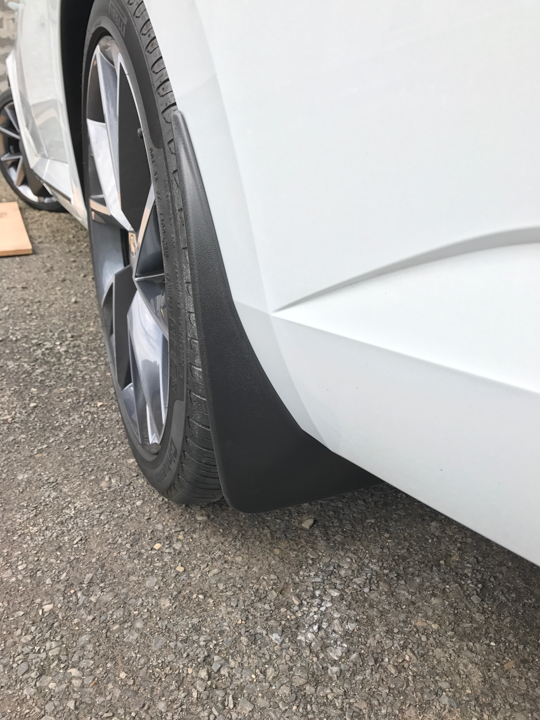
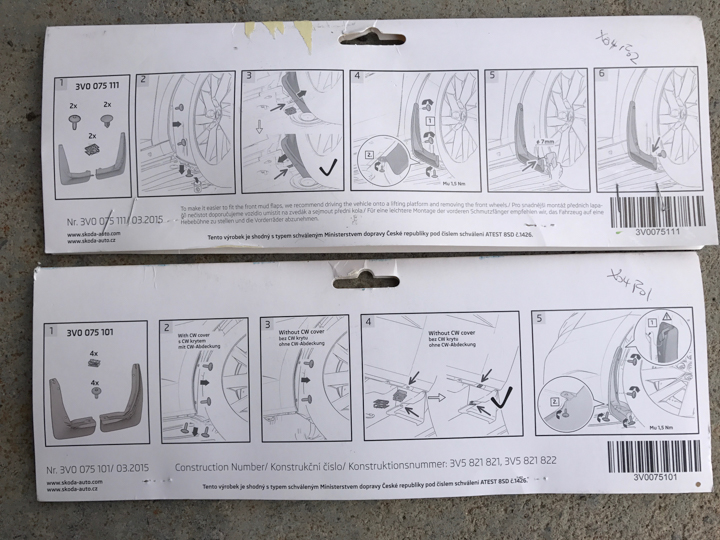
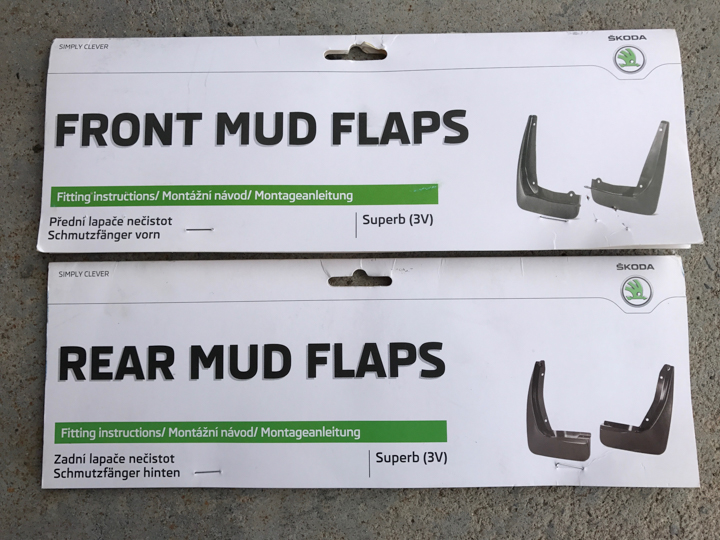


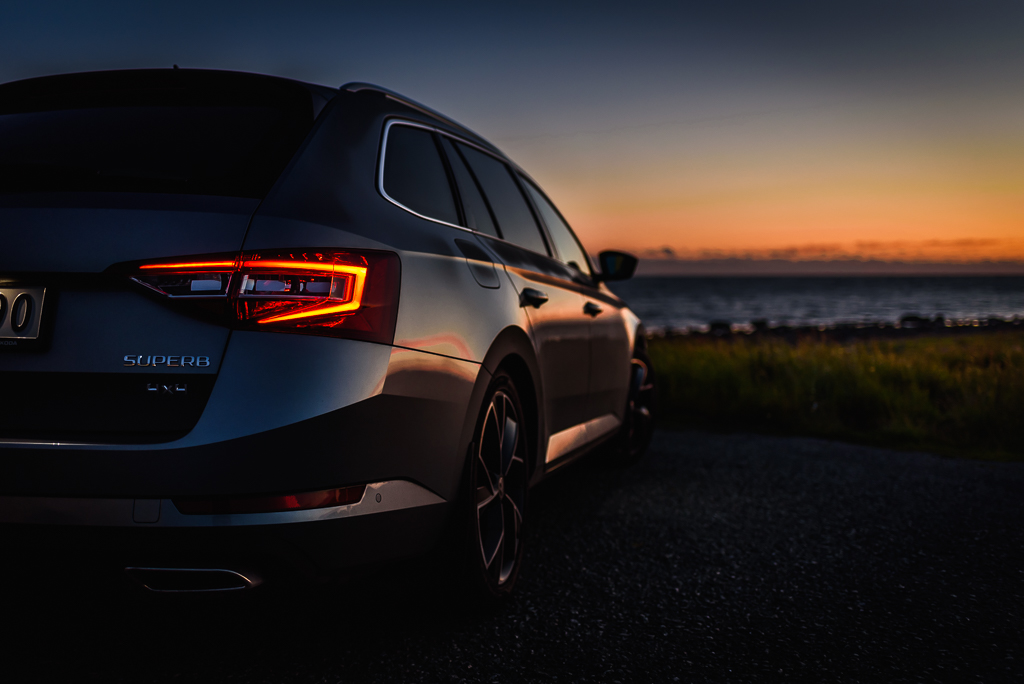
Announcements
-
About BRISKODA
BRISKODA is for the sharing of information on ŠKODA. Founded for all motoring enthusiasts, it's free to join and use. We have members from all over the world.
- Our Guidelines.
- Search the Site.
- Explore the Forums.
- Gaze into the Gallery.
- Make a date, the Calendar.
- Classic, custom or modified car insurance!
- Please be respectful when posting.
-
Images