1loud1
Finding my way
-
Joined
-
Last visited
Everything posted by 1loud1
-
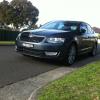
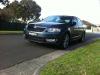
Hi all, First of all sorry for the lack of photos and light and clarity in them. It has been well documented about the Canton subwoofer upgrade and the disappointment it has had on most Octavia owners, as I’m no different I decided to do something about mine. As I have been an audio installer for over a decade I thought I’d share some information about my install and the Canton audio system on our Skoda's About the Canton System: The canton system is a 10 speaker stereo system powered by an 11 channel 570W amplifier (the subwoofer uses 2 channels), the factory subwoofer claims to be 200w with a frequency response of 50HZ to 120 HZ (that’s approximate and purely from listening, don’t quote me on that) it’s also a 6” woofer so my doubt is it can’t get close to 50HZ. The factory amp is located under the left seat (I’m Australian so it’s my passengers side) under the plastic cover When the factory audio system reaches ¾ volume it attenuates the bass to avoid overdriving the subwoofer causing damage. (Skoda don’t want to be replacing subwoofers under warranty), I believe on the later ones this has been removed as I have driven the newer Octavia’s and at low mileage the subwoofers all sounded blown (I believe this is because clients have turned the subwoofer level and the bass level to +9, and turned the Canton EQ to Rock, this leads to overdriving the subwoofer causing it to prematurely fail, (I’m not sure if this is covered under warranty). Remember it’s like any stereo system it needs a good 100 hours of wear in time. What did I want out of this? Like most Skoda owners I wanted more bass, it has also been well documented that “cabin Boom” is common in the Octavias too, at the same time I also wanted to reduce cabin road noise and make it quieter like its more expensive brother the Audi A4. Australian roads are not as good as the Europeans (this is why I went through a pair of continental tyres in less than 10,000 kms) and at $300 a tyre I decided to go for something harder wearing which of course has made the road noise so much worse due to the harder rubber. I also wanted to keep the car as factory as possible I didn’t spend a stack of cash on a car to then plonk a subwoofer next to a factory subwoofer, I also wanted a subwoofer upgrade that didn’t take up any boot space (I know we have the biggest boot in our class of car but I use almost every inch of it) What Equipment did I use? Skoda Octavia 3 Custom Subwoofer box (surprisingly these can be purchased off the shelf from www.basser.pl) http://sklep.basser.pl/en/fit-box-enclosure/501-skoda-octavia-3-fit-box-subwoofer-enclosure.html it cost me just under 600 Zlotty delivered to Australia (approx. $200.00 AUD) it took 5 days to get here too!. JL Audio A2150 2 Channel amplifier (150W RMS bridged), I know what you are thinking its 50W less than the original, I kept in mind that I have no intention to change the speakers and tweeters, I like the sound the speakers output and I love the soundstage the system provides, I didn’t want to come out of this having a subwoofer that was drowning out the mids and highs, it’s not what I’m about, I just wanted depth to the bass that the original woofer can’t provide. JL Audio 10 “ Subwoofer 10w0v3-4, perfectly matched to the amp as it wants 150W RMS and only requires 18 litres of space to work (the box is 15 litres but I used Dacron to give the subwoofer the illusion it is in a bigger box) JL audio Matching subwoofer grill Stinger Australia 8-gauge amp wiring kit Stinger Australia “Roadkill” Sound deadener (36 Square Feet) 0.5 Watt Resistors (you will need them see below) Close braided wrap (to make exposed cable look original) Audio control LC2i Line out converter, I used this one as I find it the best for high end audio upgrades it also accepts up to 400W RMS and has Accubass (this stops the bass rolling off at high volumes, which is why I’m doing the upgrade to begin with) it outputs 8 Volts through its pre-outs, signal sensing turn on (so you can still use the subwoofer with the car off and has a remote output (for the amp) (Amp and LC2i not pictured they were still on their way) Where to start: Skoda uses Torx Screws (my advice is investing in a set of small to large Torx bits), they will come in handy when working on the car I started with the sound deadening, this involved stripping out pretty much everything from the rear seats back, stripping out the car isn’t as difficult as some think (remember I’ve done this for a long time so I know what I’m doing), my advice is to be careful when pulling things apart things will only come off one way, also take note as to what order things come apart so you know what order they will go back on, check the back of each panel removed to ensure that clips aren’t broken or damaged making it harder to put back on later. To sound deaden the rear end properly I removed the whole back seat, the bottom is fairly easy as it unclips and with a bit of jiggling it comes out, the top looks harder than it is. Between the 40/60 split is a plastic trim cover, this unclips and under it is a Torx screw which holds a metal clasp on, removing this will allow easy removal if the back seats, to totally remove the 60 split you will need to unbolt the centre belt from the floor pan. (re-fitment is done in reverse, that plastic cover is a pain to get back on) Removing the back seat gives easy access to being able to remove the boot lining for sound deadening, you will also need to remove the cream c pillar covers and the suspension tower covers (that hold the parcel tray in) there’s a clip that is extremely stiff a lot force was needed to get it off (there is also a Torx screw in there too), once the left side liner is off you will find the 2 bolts holding the factory canton subwoofer enclosure in, unplug the speaker terminals from the subwoofer. The boot lights and power socket will need to be unplugged as well, they are fairly straight forward. I used pretty much all 9 sheets of sound deadening for the boot, I didn’t go overboard with it as I don’t think it’s needed, I also didn’t want to kill my cars fuel economy. I also did the boot lid. I put my amplifier under the right side of the front seat (Drivers side), I chose my amp because the dimensions fitted the space underneath the seat. Wiring in the Amplifier, I Started by disconnecting the battery (I usually don’t however the grommet through the firewall is behind the battery next to the ABS module), its easily accessible when the battery is removed. Under the main loom is a blank grommet I put my power cable through, it could easily take a 4 gauge however my amp only needed 8 gauge. I covered my power cable in the closed braided wrap so it looked factory. I Fitted my amp fuse in the factory engine bay fuse box, this added to the factory finish, it was a little bit of a faff but it looks better then it bolted to the outside Wiring the LC2i: I Put my LC2i in the left rear quarter panel (above the suspension tower), this makes perfect sense as here I can utilize the original subwoofer leads, and the LC2i needs constant power which I got from the power socket wiring. ( I didn’t refit the light or the power socket as I don’t have a need for them, the shopping hook also got culled too) From the Canton subwoofer you will have 4 wires White/ Red + White/Brown - Grey/Red + Grey/Brown - From experience and working on German cars Brown is usually ground. NOTE: over each speaker – and + you will need to put a 0.5W resistor the reason is, when the canton subwoofer is plugged in the amplifier sees a load, when the subwoofer is unplugged the amp doesn’t see any load and shuts down the subwoofer channel putting the resistors on the leads creates a dummy load so the subwoofer channels are still active (and you can use the subwoofer level control in the head unit. From here All I then need to do I run my remote cable, RCA’s and subwoofer wire to the amp. Fitting the subwoofer: This doesn’t take a degree to do but a little common sense, Once the boot lining was in I offered up the subwoofer box and screwed it in to the floor (be careful as the muffler mount is under there and I missed mine by a bee’s ****), after that’s bolted in the subwoofer can be fitted to the box, again be careful as the last thing you want to do is put a hole in the cone) Connecting the Amplifier: Connecting the amplifier is as normal, I Close braided all of my wiring to complete my factory look, To mount my amp and run my cable to under the seat, I unbolted my driver’s seat, be careful of the original wiring (as airbag wiring is in there), removing the kick trims isn’t rocket science however I managed to tuck the wiring in without lifting them (I have it down to a science), I screwed my amp into the carpet but not through the steel floor (I didn’t want to hit something under the chassis and cause damage like brake lines) The Home stretch: Once everything is connected its time to turn on and test There are specific videos on You Tube showing you how to tune the LC2i (including the Accubass feature) From my experience I found it best to Lower the bass to -3 Turn the subwoofer level to +5 ( I don’t go any higher myself) (both of these settings are in the head unit) Keep the gain on the LC2i high and lower the gain on the amp I don’t use any bass boost settings on the amp as it only ever boosts 1 frequency I have my crossover level at 100HZ (but each to their own. Use good judgement, with your own equipment. And what sounds good to you. Re-fit your interior and enjoy the better bass. Any questions im happy to answer.