Jump to content

John_S

Finding my way
  • Posts

    8
  • Joined

  • Last visited

Profile Information

  • Location
    Liverpool

Car Info

  • Model
    Karoq 1.5 SE Technology

Recent Profile Visitors

The recent visitors block is disabled and is not being shown to other users.

John_S's Achievements

Rookie

Rookie (2/17)

  • First Post
  • Conversation Starter
  • Week One Done
  • One Month Later
  • One Year In

Recent Badges

16

Reputation

  1. Hi, The bottom pivot of the arm is set in a "snowman" shaped hole if that makes sense. It normally sits in the smaller "head of the snowman" but to remove the arm you need to move it into the "body of the snowman" hole by pressing the lower pivot point forwards. Hope this makes sense! John
  2. Ideally you want to insert the piggyback adaptor with the +12v to the connector as shown.
  3. Yes. You cannot "bypass" any fuses with the piggy back fuse adaptors. See the attached photo for the circuit, apologies I scribbled it on my phone. Hopefully should make sense. EDIT: I see what you might mean, when I said the fuses the wrong way around I meant having the original fuse swapped with the piggy back fuse. So in my case I would have replaced the rear wiper fuse 15 amp with my dash cam fuse 1 amp. On the photo the original fuse would go in the lower slot and the dash cam fuse in the upper slot.
  4. Personally I would want to know how the piggyback fuse works so belled it out, is pretty simple but came with no instructions. It's not possible to have it so your dash cam isn't fused. You could however have the 2 fuses the wrong way round (not a good idea), Or have the piggy back tapped on the fused side of the original fuse (just means if the original fuse blows then there'd be no power to the dash cam).
  5. Cheers, pretty sure the fuse I used was a standard sized fuse, the blue 15AMP one in the photo of the fusebox.
  6. Thanks, that's an excellent point. I've just been out and tweaked the wire routing. The A pillar trim comes away at the top easily enough, without complete removal, to have the power cable sit forward of the airbag, now being closer to the windscreen and no longer in the path of the airbag if it were deployed. Cheers
  7. Ours is PCH also so in the same boat. Don't want to damage anything and needs to be easy to remove when the car goes back. The cabling I just run along the door seal rubber, across the join at the top of the A pillar cover and then along the headlining at the top of the windscreen. No trim removal required. There's a little bit of cabling on show as it exits the fuse box but I'm not too bothered about it, see photo. In this car I've installed a Mini0801, it's probably 3+ years old and still works, don't think they make them anymore! Just sticks to the windscreen with a sticky pad. See photos, if you can afford a bit more time than I had you can probably install it a lot neater. As installed i doubt it would rattle or vibrate. Included some more photos of the bits required for the installation.
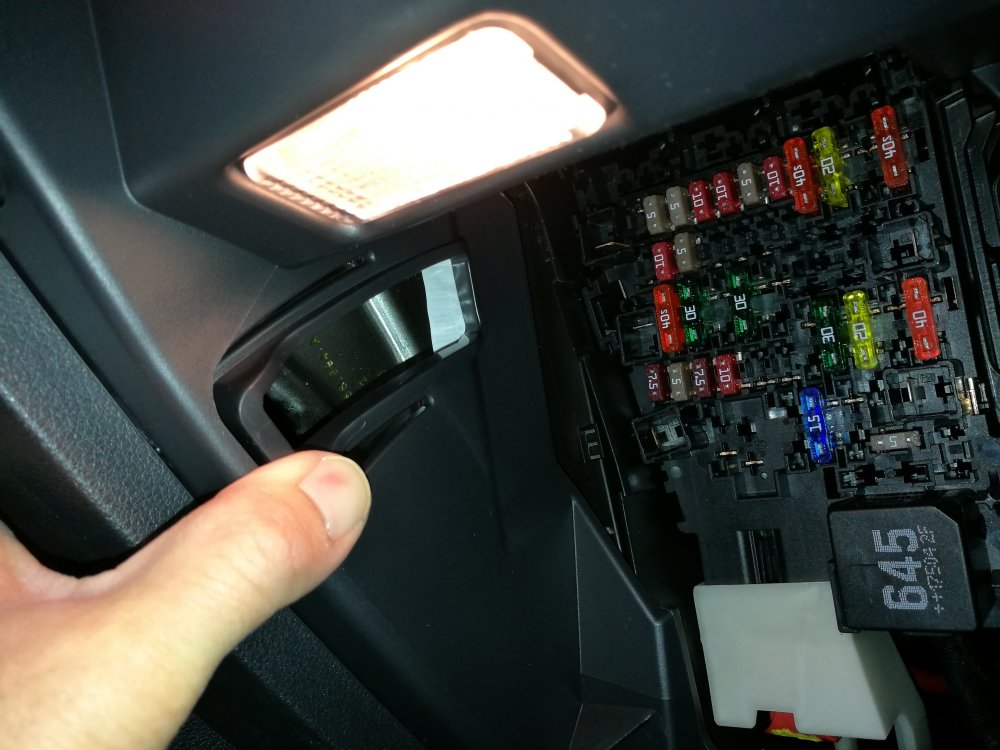
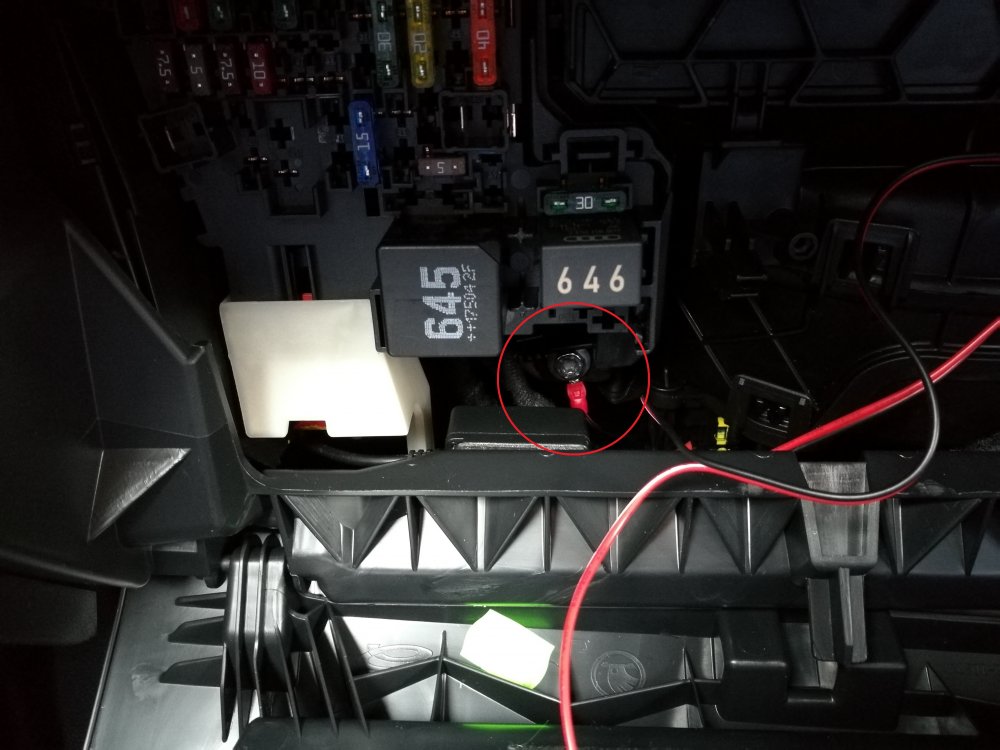
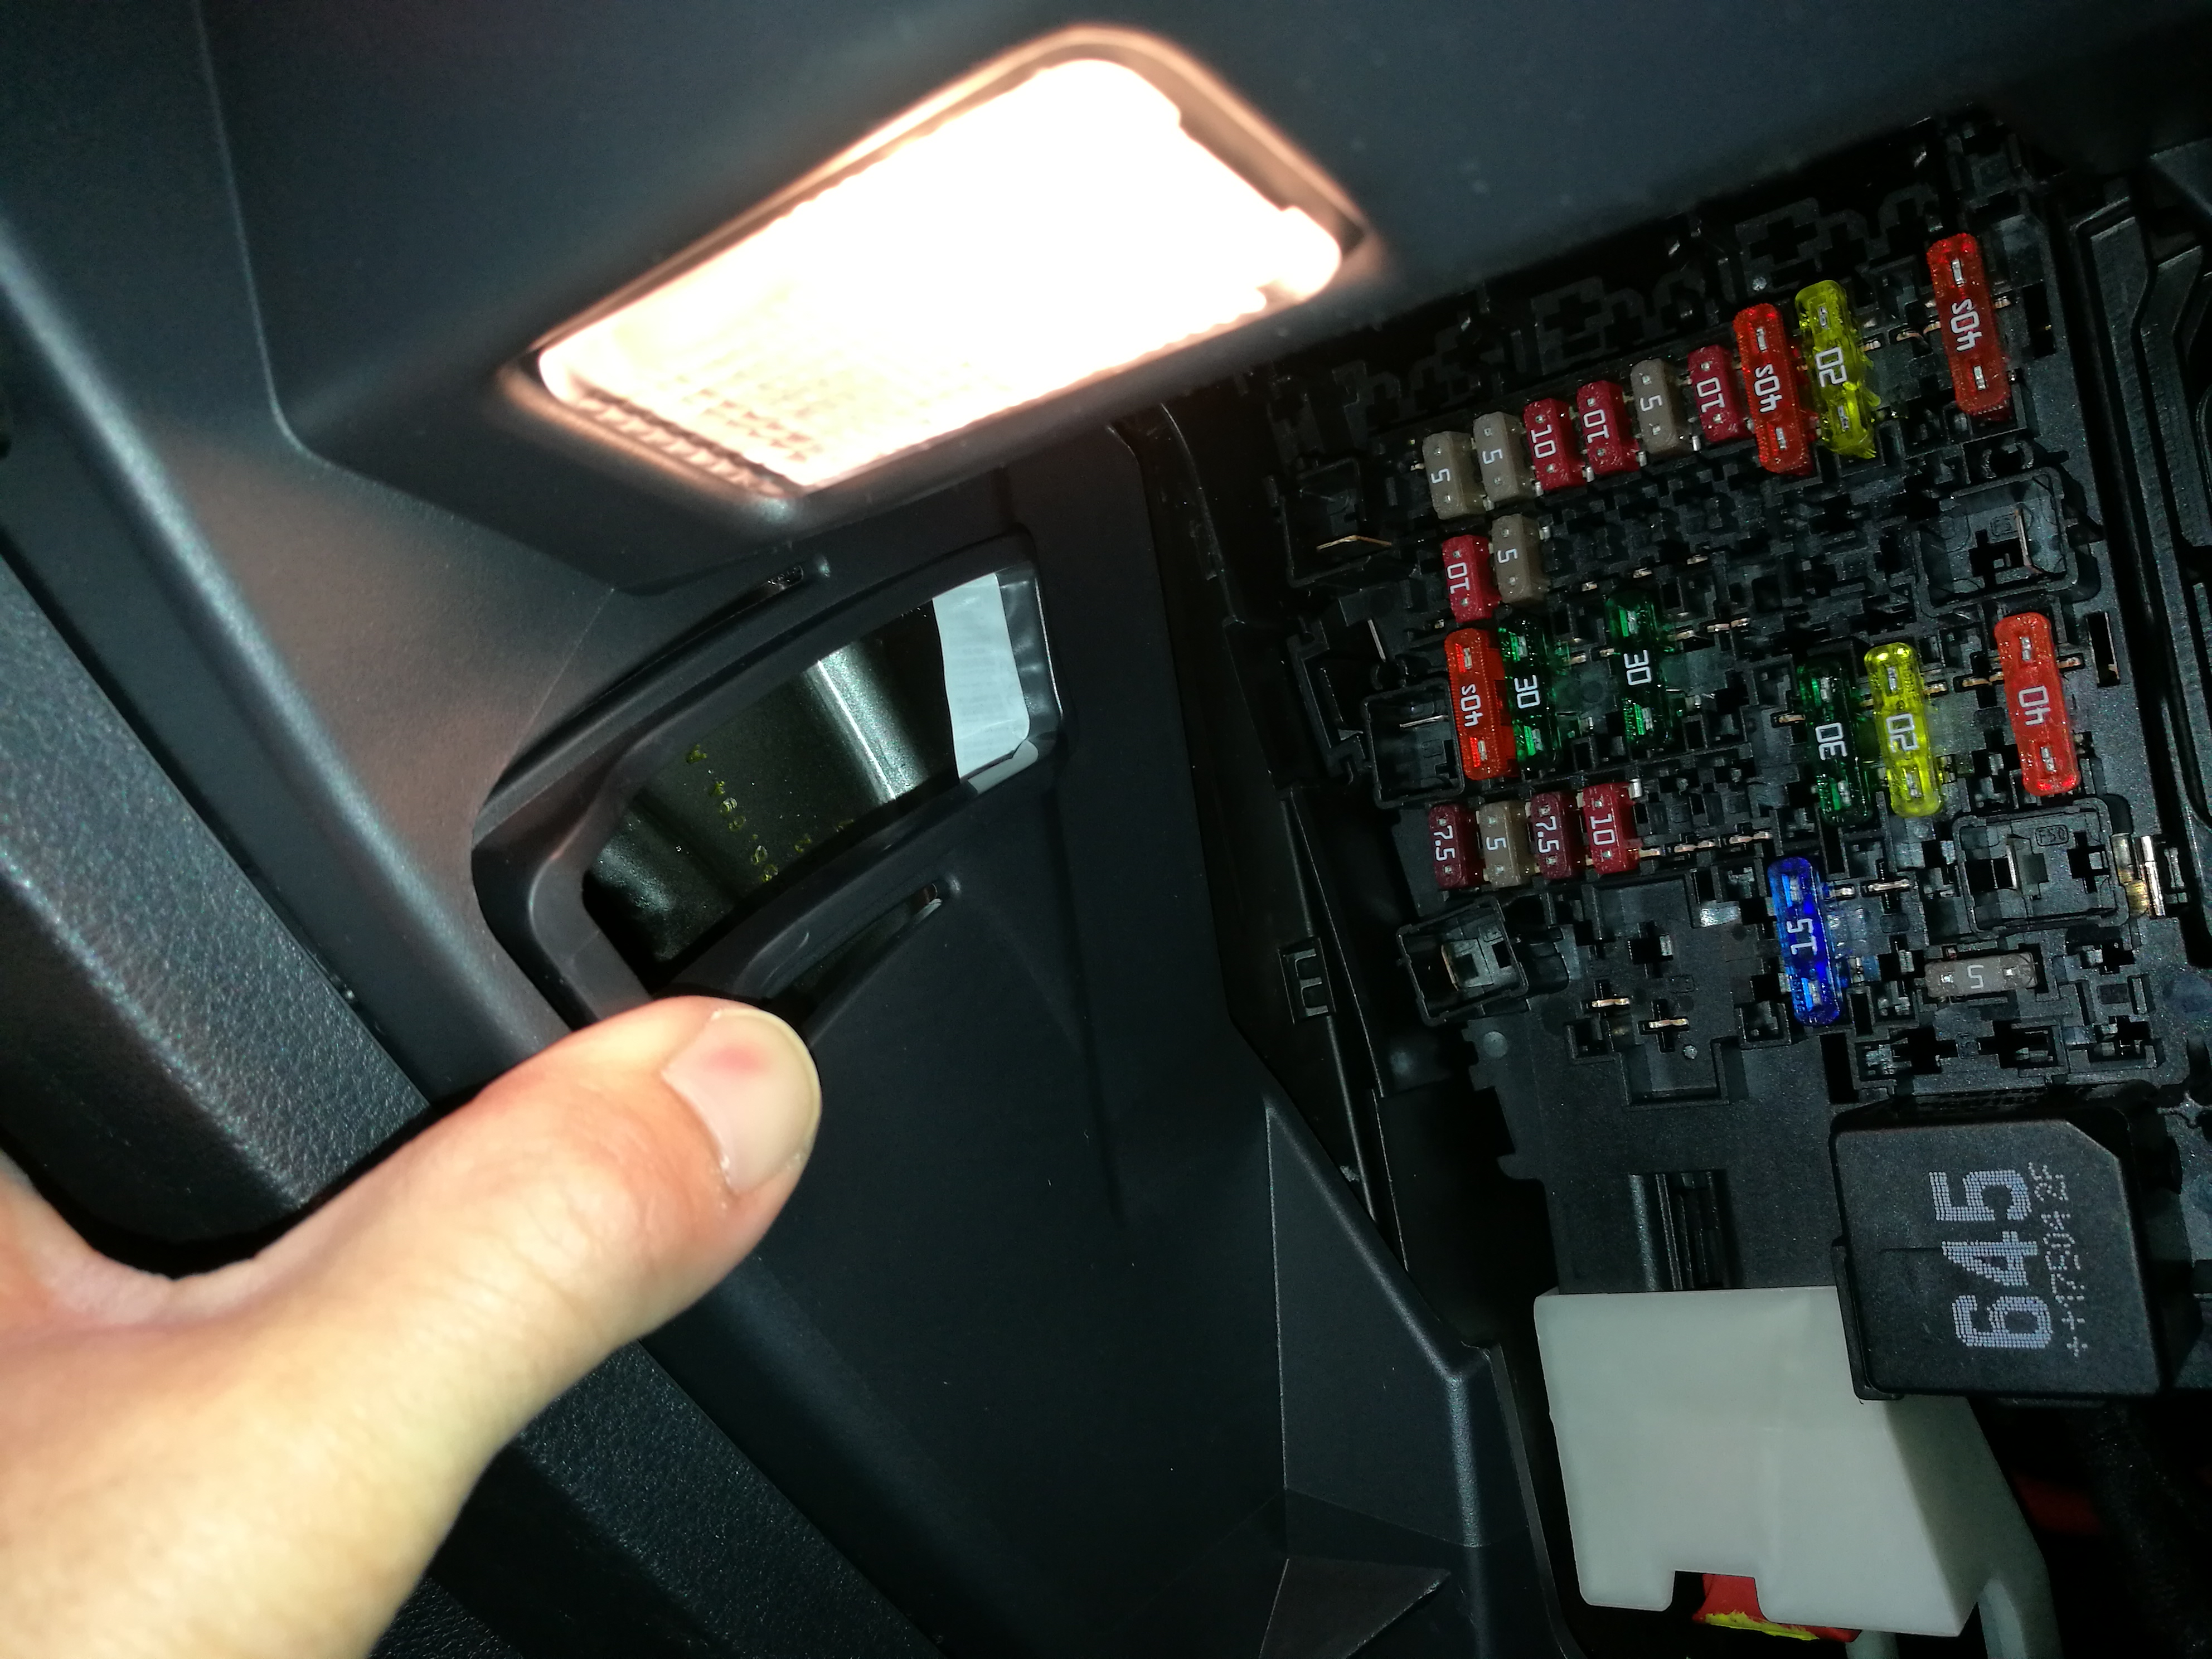
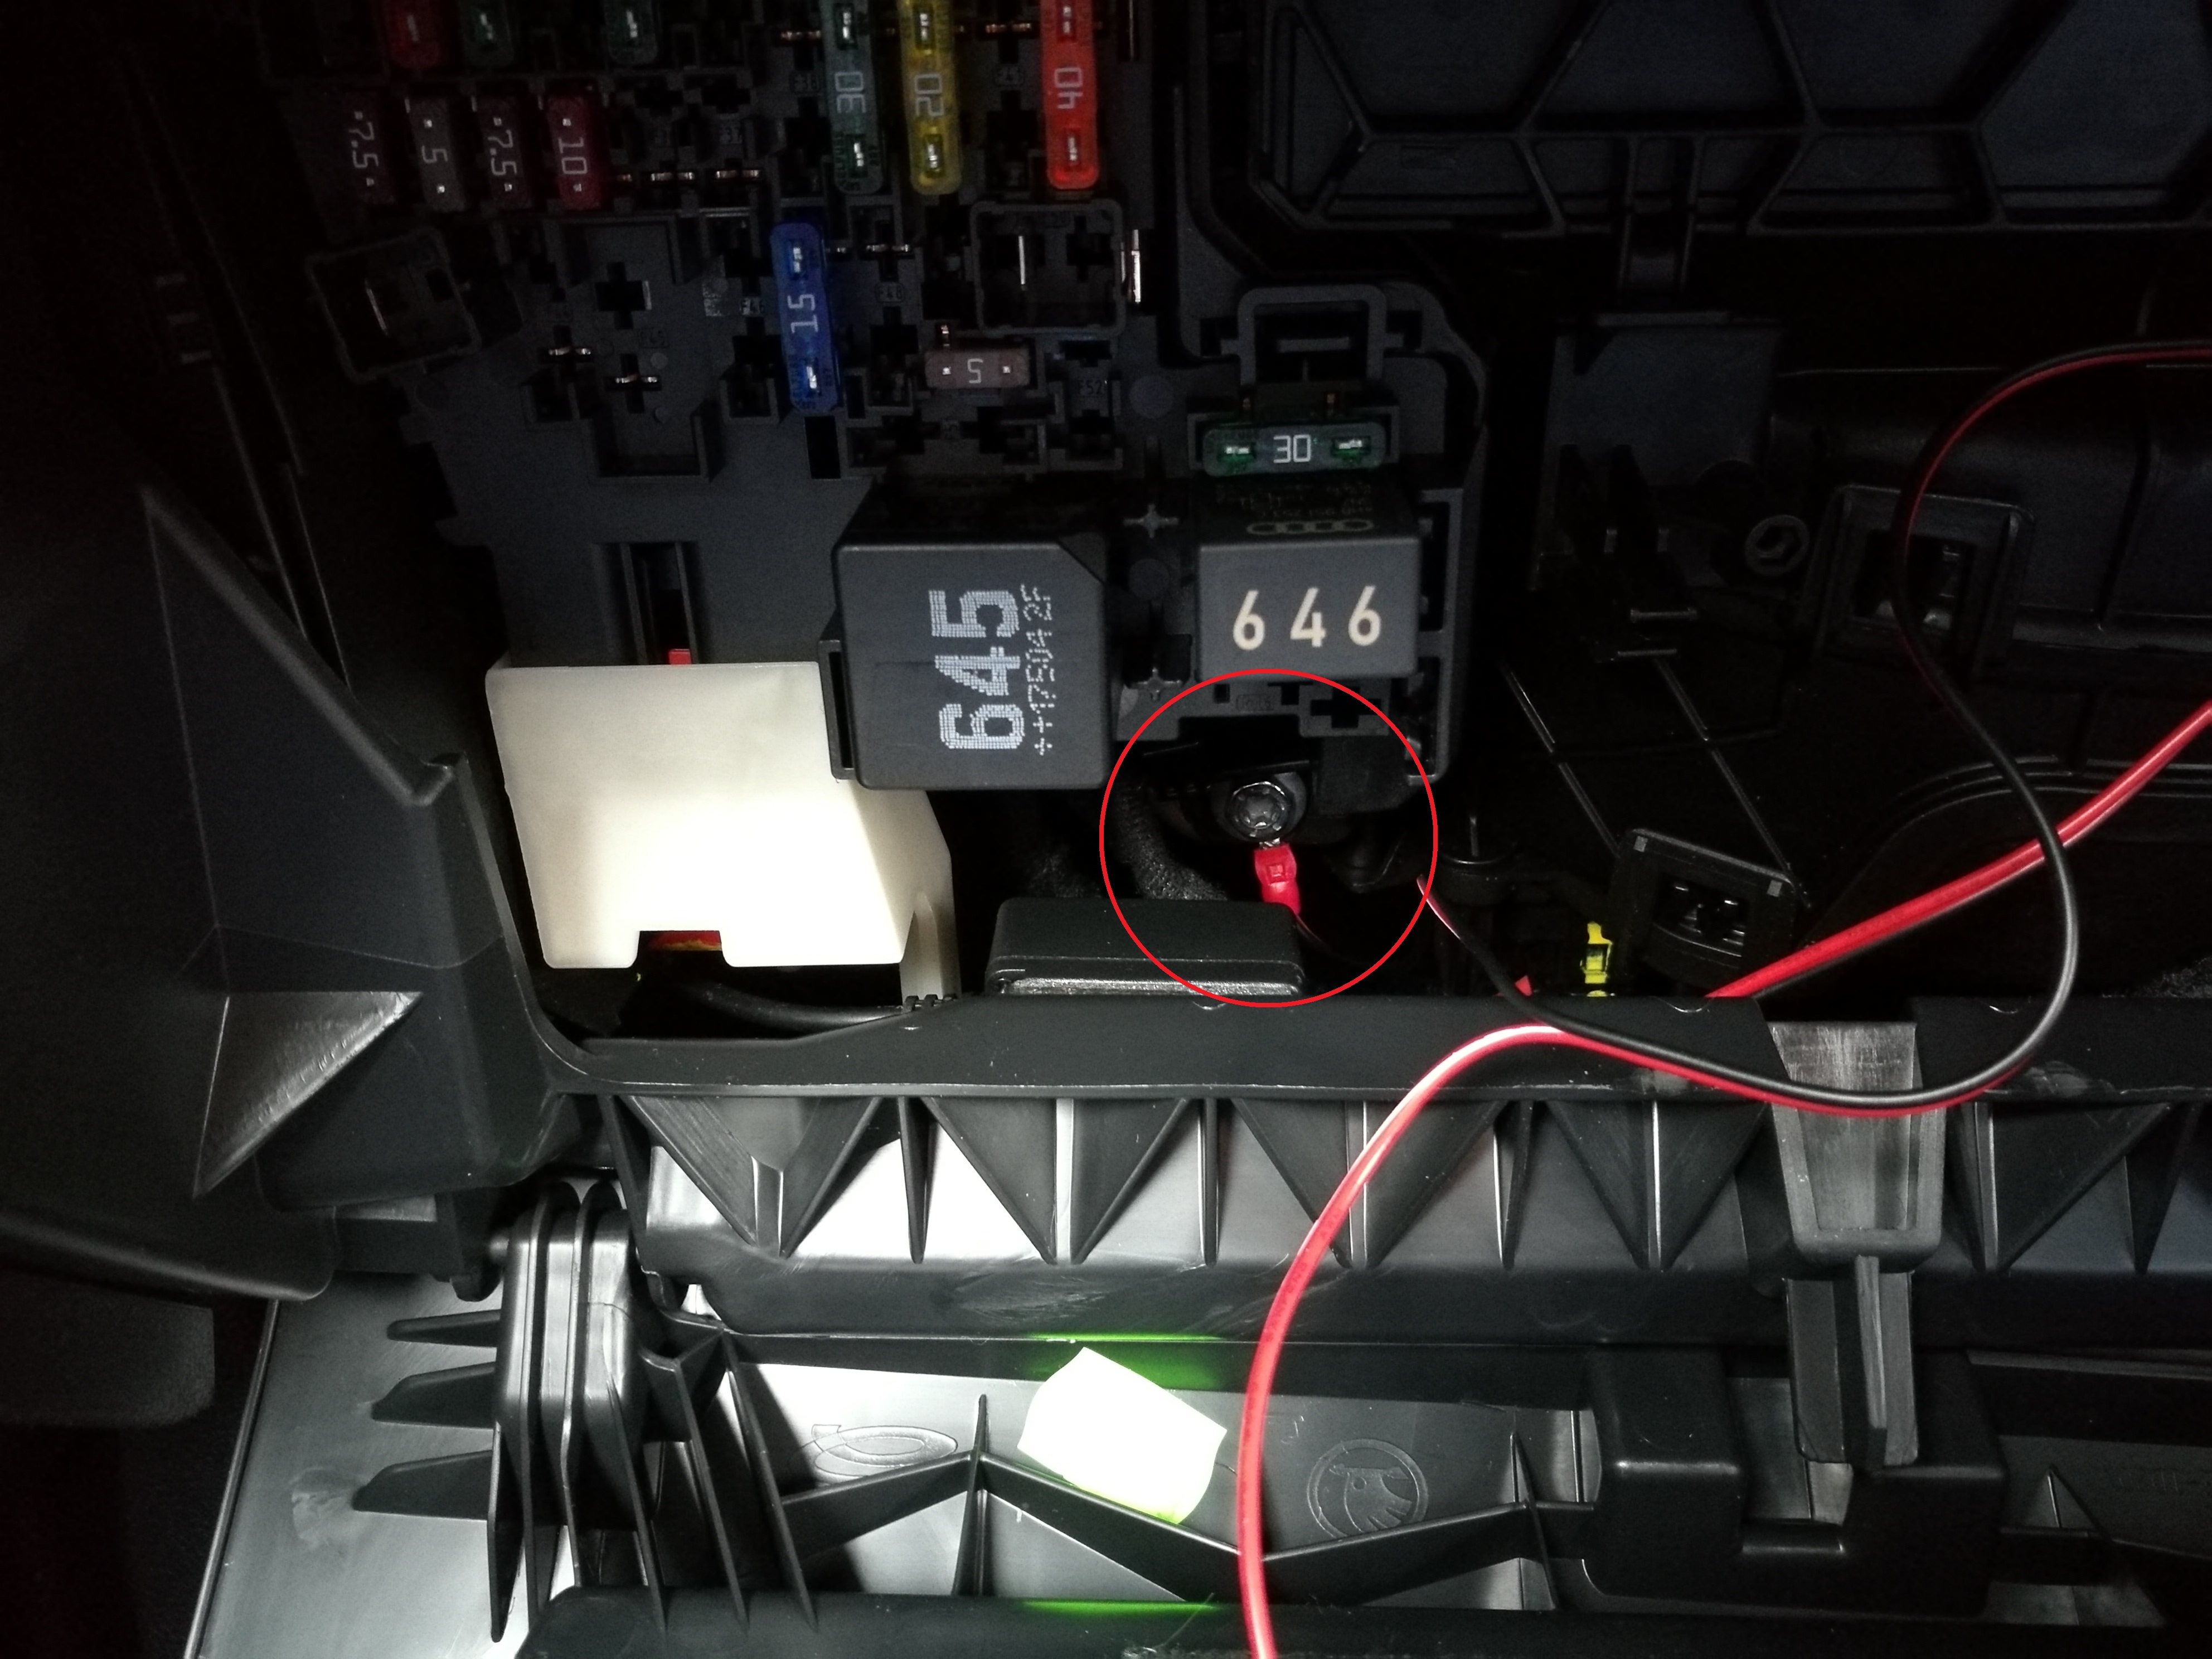
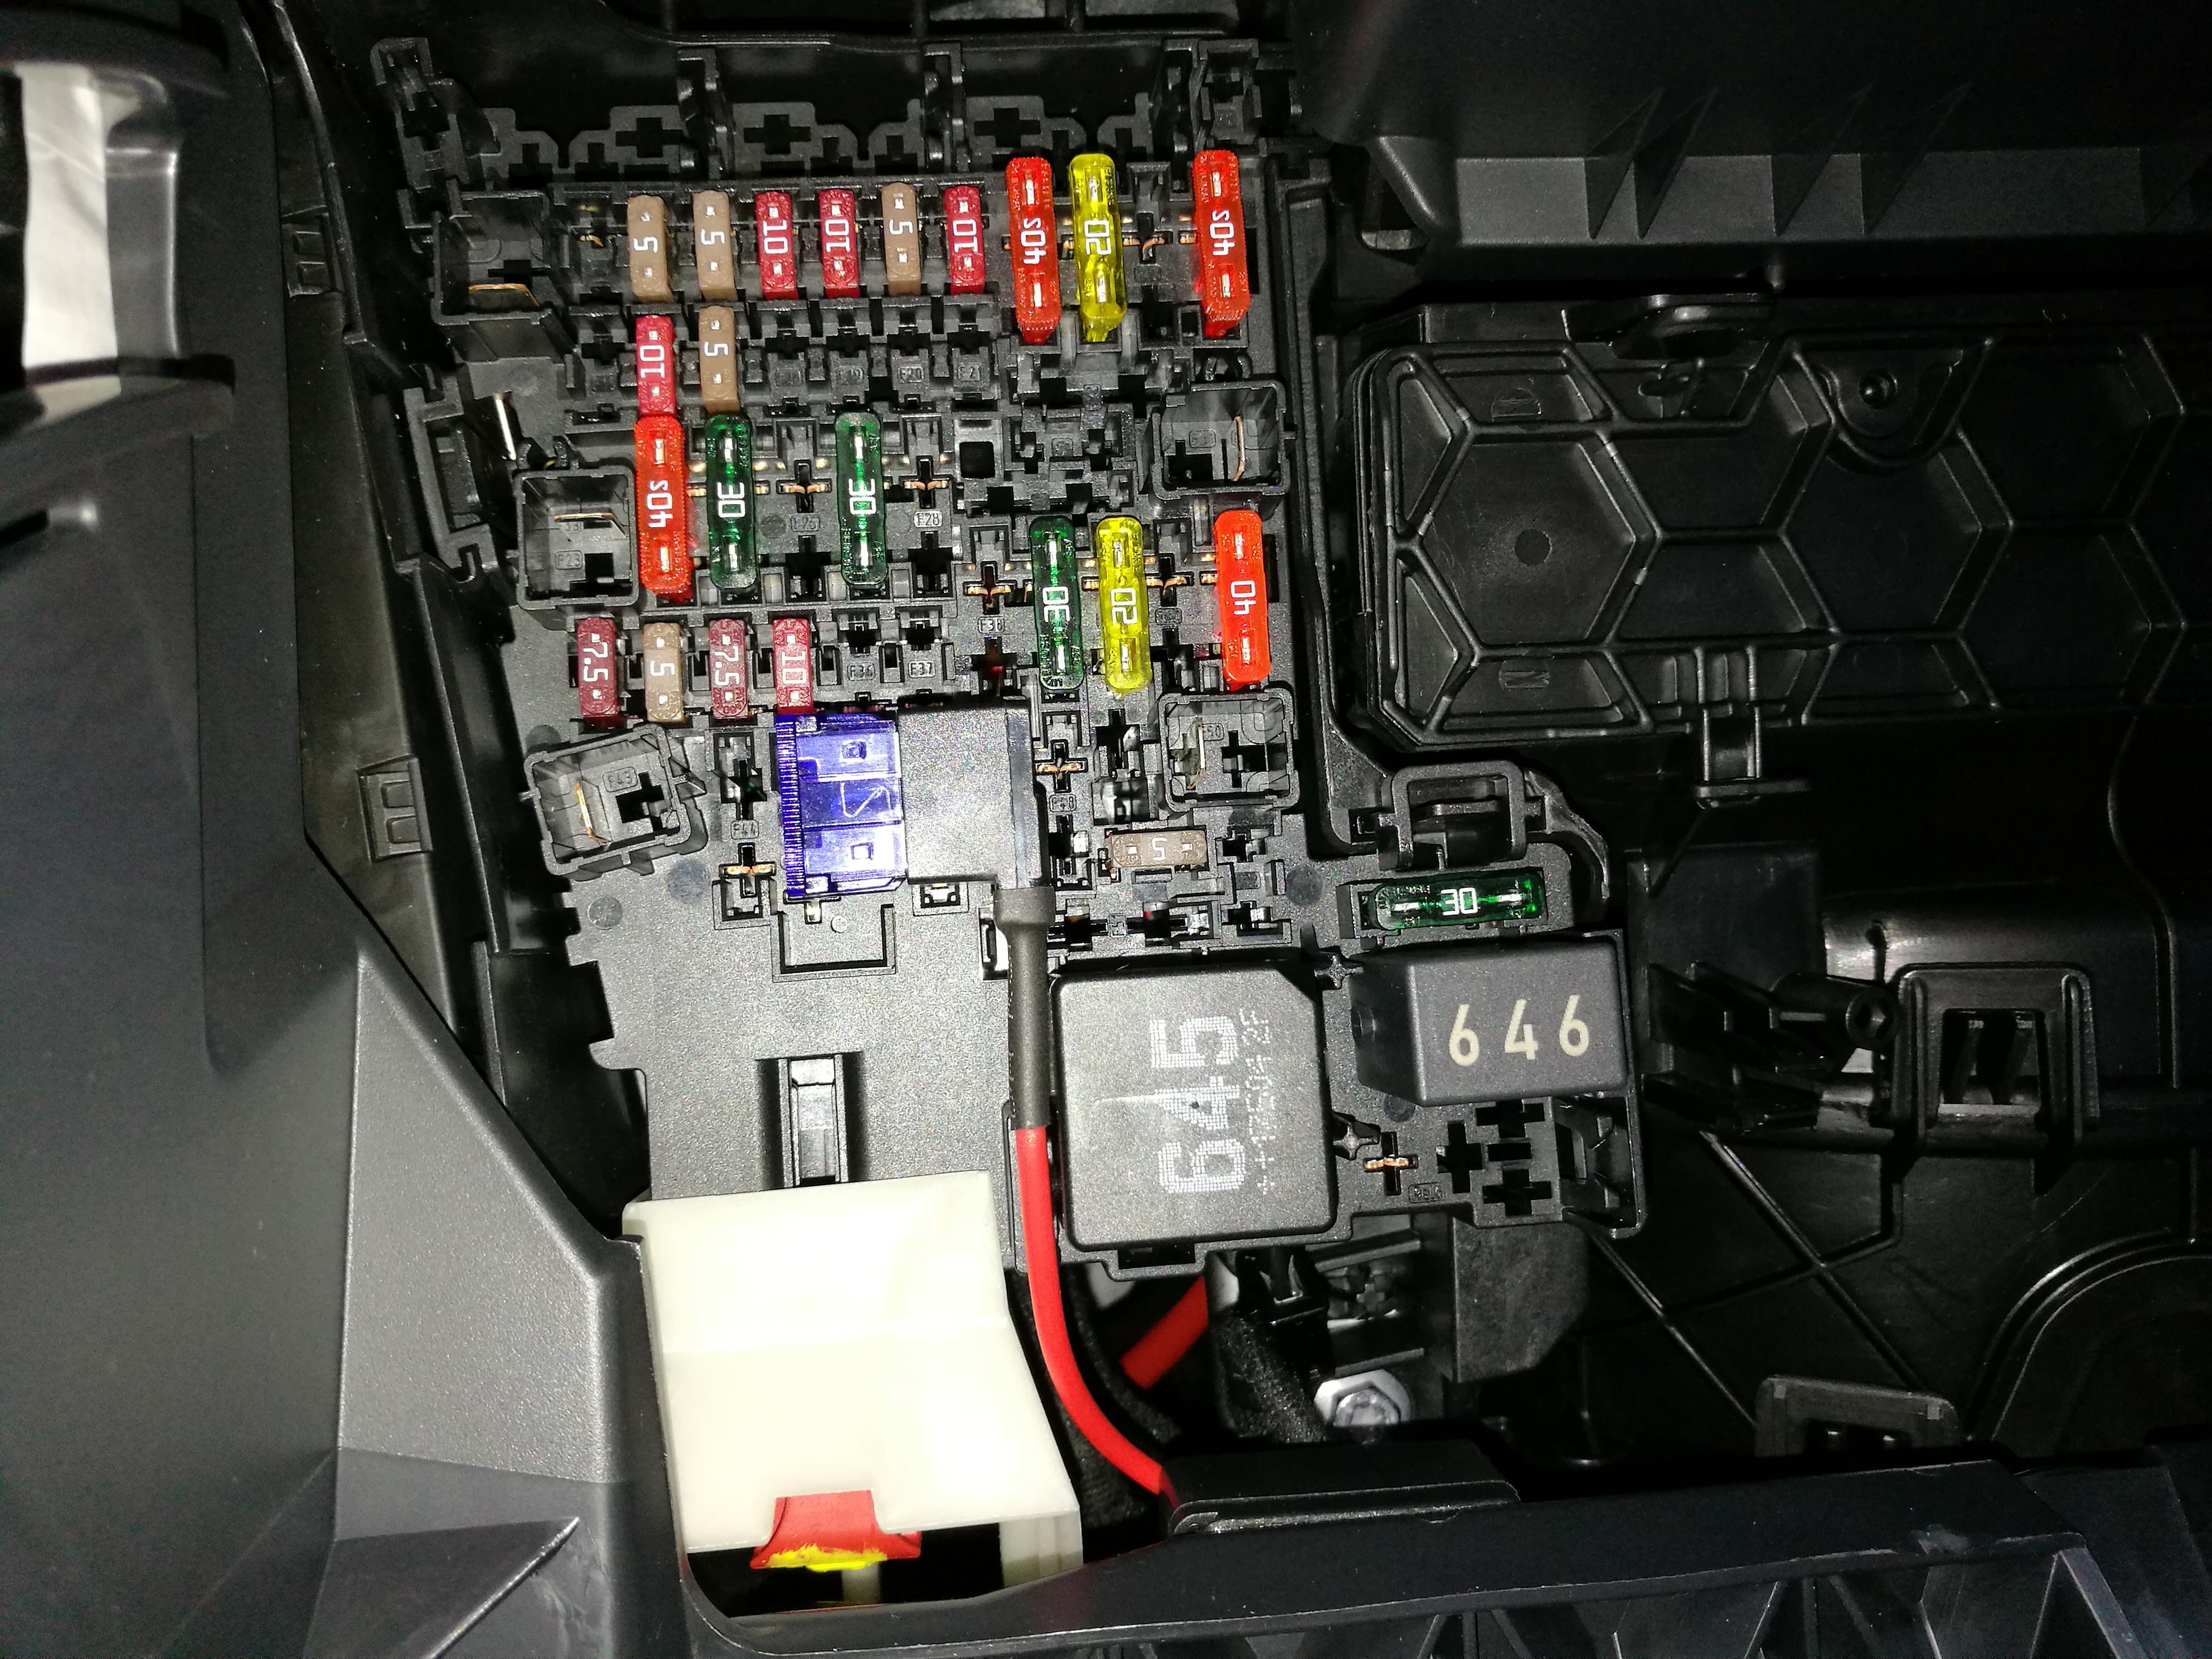
  8. Recently got ourselves a Karoq, first Skoda for us and we really like it. Replaces a Tiguan for the family moving duties. Anyway for whatever reason the lighter socket on the Karoq is always live which isn't very useful for powering a dashcam. Had a look for a how-to for tapping a switched feed from the fusebox but only found little bits of info here and there so here is my quick guide to how I've done it. Convieniently there is a fuse box right behind the glove box (UK RHD car). Getting to the fuse box was in my opinion the most difficult task! The instruction manual does describe the process but it still took some figuring out. The glovebox is hinged at the bottom, has 2 bump stops (one either side) and a damping arm. The damping arm is removed by first pressing the lowest pivot point of the arm towards the engine, this should free the bottom pivot point and allow the arm to be detatched from the glove box. The 2 bump stops are freed by pressing them away from the glove box, see photo. From there it's pretty straigh foward. I used piggy-back/add a fuse to take a switched feed from fuse 47. For a return I used a ring tag on the T27 torx bolt that holds the fusebox in place, it's not ideal as the fuse box is plastic but I couldn't find anything easier or better that didn't probably involve taking more things apart. Routing the cable to the dashcam was simple, drops easily out the back of the glove/fuse box, behind the rubber seal up the door frame/A pillar and along the top of the headlining/windscreen. Hope this helps others with installing a dashcam. Cheers John
×
×
  • Create New...

Important Information

Welcome to BRISKODA. Please note the following important links Terms of Use. We have a comprehensive Privacy Policy. We have placed cookies on your device to help make this website better. You can adjust your cookie settings, otherwise we'll assume you're okay to continue.