Skip to content

Cubbington

FREEDOM
  • Joined

  • Last visited

Everything posted by Cubbington

  1. Hi All, About to hit the button on getting a Google Nest thermostat installed after doing some research between Nest & Hive. I was initially drawn to Hive as the controller drops into where the original thermostat is fitted (hall), and they also do smart TRVs for the radiators, whilst Nest doesn’t. I prefer the look of the Nest controller, but will need a bit of tidying the wall to mount it cleanly in place of the original thermostat as I like the clean look of it without the surround, or as the Google manual suggests put it in a regularly used room...ironically have just decorated the hall! We’ve also got Philips Hue lighting throughout, and Nest integrates with Hue, whilst Hive has it’s own lighting and smart home integration. I really like the idea of the Smart TRVs as we’ve never been able to get an even temperature throughout the house, but it’s not a deal-breaker, and there seems to be a lot of bad feedback regarding the Hive TRVs on their own forum... Honeywell do a system called Evohome which is supposed to be excellent, but is way out of our budget and has an awful looking controller! Initial outlay for both Nest & Hive is pretty similar. So throwing out there to anyone who has either system, and read your thoughts & experiences. Thanks, Nick
  2. How hard was sound deadening the front wheel arches? Having the space and axle stands, the rears were we’re pretty easy. Definitely do the boot and doors. The boot isn’t obvious until you lift the carpet and wooden base; start at the back, removing the plastic trim lip between the boot floor and bumper and you’ll find more plastic trim clips. Remove the plastic trims at the rear of the car to expose a hex screw, and remove the trims the behind the seats (as you say), the shopping bag hangers need to be removed, and the little plastic hooks on the side panel trims. You should then be able to wiggle the trim panels from the metal hooks on the boot floor at the back to swing them into the car without having to remove the rear seats. If you’re going to this level, do the doors too. Removal of the door cards is easy if you’re careful, apart from popping the light switches, which are a real PITA, and you’ll no doubt break a couple of the little clips...I need to order a new passenger side switch as I completely trashed the clips after removing it about 10 times 🤦‍♂️ It is well worth enabling high power mode, but not before doing the other work, and they do suggest you upgrade the speakers before doing it to. On that note, the plastic rivets are easy to remove as you just pop the centre through with a small screwdriver and fish it out of the door...maybe buy a few spare rivets, or be careful not to lose them - they tend to hide in the waxy gloop in the doors, so you’ll need a torch to find them!). You don’t want to leave them in the doors to rattle around, and I found them all every time I popped them out. And of course, if you’re going to the level, then it’d be foolish not to sound deadening the doors 😊 With regards to the imbalance you’re experiencing, have you set the amplifier to accept a 2 channel input and routed the front inputs to rear outputs as per my earlier post? I’ve enabled my rear speakers again, but after watching the video I set them to ‘Rear Fill’, which seems to be a mono-matrix, and now I’ve discovered the gain setting on the IO page, I set them to 5db lower than the fronts, so I’m not aware of the tweeters so much, and it’s helped integrate the sub even more. Still yet to calibrate it with the mic though 😉 Hope that helps! Nick
  3. Couple more updates to this thread, as more progress has been made. @rossinio, you may be interested in the following video I found on YouTube, posted by an Audiotec installation company: They explain the software much better than Fischer's own guides, and it's enabled me to adjust the gain setting on the IO page I hadn't even been aware of so I can now crank the volume up without overloading the inputs! I've also set the crossover point at 120hz between the doors and sub, and am currently tweaking the sub's phase and level to blend it in properly. It's starting to sounds even better! I've also got a pack of 4mm SilentCoat to line the outer front wheel arches when I get the chance, so hopefully that'll make the front end a bit quieter now the rear's so quiet. Cheers, Nick
  4. Ouch, that sounds more expensive than the amplifier ☹️ Interested to know the outcome. Cheers, Nick
  5. Have you tried downloading the setup software and connect to the amp via PC?
  6. Plus 1 for this comment. Had Cross Climate + fitted at the beginning of December last year and they’ve been fantastic in all conditions so far...would happily fit them again. Car came fitted with Bridgestone Potenza S001 which were noisy and uncomfortable...replaced with Bridgestone A005 All Weather, which were much better, and great until worn...so far the Michelin CrossClimate + have been the pick of the bunch.
  7. Nice one buddy, glad you made a positive move forward, and I wasn’t imagining that the rears sound so different - have you set the car’s fader control all the way to the front so it’s only having to drive the front outputs? Who cares what the EQ curve looks like if it sounds good to your ears 😊 The boot and doors will make a massive difference, and tyres are a big contributor to noise - looking forward to reading your progress. Interestingly, I played about a bit the other day muting front and rear channels independently, and it’s amazing the difference between them, which I can only put down to the volume (as in volumetric size) of the doors - think of a speaker cabinet; generally the larger they are, the greater bass depth, and the front doors are somewhat larger than the rears...the fronts have more depth, whilst the rears seem to have a higher mid-bass hump, which to my ears just sounds wrong...I’ve muted the rear speakers again and prefer fronts + sub. Whilst you were tinkering with amp settings, I stuck a piece of soft foam to the top of the sunglasses holder in the roof lining; hopefully no more sunnies annoyingly rattling around 😁 Cheers, Nick
  8. OK, try the new version of the software; this isn't relevant to you yet, but I found that even though it was showing as being set to high power mode on version 4.52, it had somewhere gone back to low power mode - it was showing as disabled in 4.65...This was good as it confirmed how much better it sounds running high power mode once I enabled it again! The other thing I can confirm is that on my car at least, the rear channel outputs from the standard headunit sound awful. In one of my previous posts I said that I've disabled the rears as I just couldn't get them to sound right; they sound out of phase whichever way phase is selected in the M5's settings. I did the following which improved things (although I'm still not sure about running the rears due to the rear door tweeter being closer to my head than the front tweeter!): DCM Page > Plug & Play Features > Routing Mode: 2 Channel Input - Front/Rear This mixes the front only inputs from the car's headunit to the M5's front and rear channels, and on the IO page you should see the following configuration: I then set the car headunit's balance all the way to the front, muting the rears, so in theory lowering the distortion level as the power supply is only having to drive the amplifier's front channels. When I tried a different configuration of mixing all four of the car's headunit outputs in the IO page to the front channels, they suddenly sounded a lot worse. I think (but am happy to be proven wrong) that there's a little bit of time delay and phase processing built into the standard headunit to integrate them with the front speakers. With regards to your comments about Placebo & NIN sounding flat in comparison to Anunjadeep, I think it's just now that your car system is able to resolve the sheer dynamic range in the electronic/dance that just isn't there with those other rock/metal recordings. The door panels come off really easily, and as long as you take your time and put everything back in place you shouldn't get any rattles; I bought a pack of ten trim clips before I took the door cards apart and glad I did as a couple inevitably broke, but I had the spares to replace straight away. The only reason I've found rattles is because the new setup goes a lot deeper and louder than the standard!!! I did a simple check on how loud the system goes without distorting now - I spoke at normal volume and asked myself if the system was loud enough, and couldn't hear my voice 🤣 The other interesting thing about this is that I also stood outside the car with the system playing loudly to see how much of a yob I was looking like, and with the amount of sound deadening I've put in, it's actually quite quiet; you wouldn't even be aware that there was a sub in the car...open the boot and it's certainly pounding away! The other thing I also discovered when looking at the original speakers the other is that they all have cracks in the baskets; normally speaker baskets are pressed or cast metal but the standard speaker baskets are plastic! I'm not surprised they've cracked considering the environment they're in... Needless to say, they're not for sale any longer and have gone into the electronic recycling - I couldn't sell them with a clear conscience! Cheers, Nick
  9. Thanks Buddy! Once it was looked at with a bit of space and time, removing the side panels wasn't that difficult; I didn't remove the rear seats at all, as it was easy to push the side panels out and into the middle of the car due to them just being attached with carpet. Deadening the doors, and the OCD detail tidying the looms & hot glueing/anti rattle-taping the connectors has made a hell of a difference. I wouldn't necessarily recommend doing the hot glue on the electrical connectors unless you're really sure, but just applying sound deadening and anti-rattle tape is so worthwhile. To give you an idea, we nipped out early yesterday morning and the roads still had some surface water in places; at around 40-50mph you're really aware of the spray from the tyres hitting the underneath of the car, but in the dry, it's oddly quiet - you can now hear the diesel clatter if you listen for it, the majority of other noises are really muted. I've still not spent the time tuning it as I want to get some real time on the speakers before doing so, and need to get a passenger (not my wife!) to sit with the laptop and analyse the road noise with the microphone whilst at motorway speed, so the DSP can be configured to allow for the road noise. I also think the the M5DSP is extremely revealing so if you feed it bad source material, it's going to show it up - I've got a mix on the phone ranging from Nick Cave & the Bad Seeds to Excision, but it is all stored in either uncompressed CD or High Res format using the Qobuz streaming system. For example Lana Del Rey's "Norman F*cking Rockwell" sounds really good, but The Smashing Pumpkins' "Siamese Dream" sounds a bit rough... I would recommend downloading the "Sound Tuning Magazines" from AudioTec-Fischer's website to help with the setup: https://www.audiotec-fischer.de/en/dsp-pc-tool/sound-tuning-magazine/ I think they've named them incorrectly, as they are the setup guides, and it's worth reading all three as they cover different aspects of the setup; remember you can run a demo mode disconnected from the amp so you don't mess any settings up(!), and it really helped me to understand what changes I was making. I'm using version DSP Version 4.52a, but have literally just looked at the website to see that the beta version 0f 4.65a (which was a Beta version until last week) is now an official release, with 4.70 now being the Beta...I'm not interested in being a Beta tester, so will update to 4.65a today as there are quite a lot of updates to the interface which look good 😊 Maybe we can hook up sometime once lockdown eases and do a little tweaking on the systems. Cheers, Nick
  10. Right, I think I'm finally there with pulling the car apart for a while 😁 There was still a nasty buzz coming from the passenger door, and I really thought I may have blown the speaker, so had the door card off again (and unfortunately for neighbours!), gave the system a blast. Thankfully it wasn't the speaker, it was the electrical connectors on the black electronic box, which are really loose, so I put a little bit of anti-rattle tape around them: That didn't make much difference and I realised it was also the cable pins rattling - the four big cables nearest in focus were the worst culprits, so out came the hot glue again: This did the trick, so I continued and did the same with all the connectors, as they are all both loose when seated and have loose pins. I did the same to the driver's door (including the work to the door card in my previous post), took it for a drive, and my word what a difference that made; with no music, the doors are now silent, where there wasn't really annoying noise I was aware before, and with music on it sounds significantly tighter and more controlled...no vibration and distortion from all those loose connectors! Considering the sheer amount of time it's been in pieces, I'm just going to tune it with the amp's software and enjoy it for a while before taking it apart again to run cables to the front doors and go active on the front speakers 😊 Cheers, Nick
  11. Thanks buddy, much appreciated! Of course if there's some way of hooking up sometime then would be great to do a comparison. Good to hear you're pleased with both the performance of your sub, and the long-term quality of the enclosure. With regards to padding the arches, it's cheap as chips to do; the 200g bags of soft toy filling were on special offer (2 for £6.00) and I bought 14 bags...8 were returned for a refund! More progress last night getting rid of the rattles in the passenger door. I replaced the broken lock cable, which was a doddle, and hot glued the gaps where the very top section of the door card is fixed, along with the connector blocks on the LED light strip, as they are really loose and rattly - I made sure I got the hot glue to run down the gaps in between the two sections. The card can still flex as hot glue dries with some flexibility. The pics were taking during the job, and I trimmed the leather slightly (you can see in the bottom left of the pic) before adding more hot glue as that small section is responsible for an awful lot of the creaking noise! Door was held up vertically to allow the glue to run down in between gap before adding a bit more to bring it right up past the join. Connection for LED lightstrip glued, with all the sections where blue and black mounting points also done, as that the mounting plate for the door handle...which also creaked a little. I checked where the wiring loom was loose on the door, and ran sections of the speaker gasket foam in line with them on the door skin, along with wrapping small sections around the loom in the clips where it fits loosely. Tight but still flexible. Also stuffed a little more of the foam filling into the tweeter housing where the cable was loose. Took the car for a spin afterwards and it was worth doing as there are no more creaks and rattles from that door now! I'll do the other doors over the next few evenings, as it's now starting to feel a bit luxurious in there with the reduction in noise, squeaks and rattles so far 🤣🤣🤣 Thanks for reading, Nick
  12. Hi All, Big update! Slight change of plans with regards to the sub, and I decided I didn't want to lose the boot space, so cancelled the order for the Match sub and went for a custom-fit enclosure & Focal RSB-250 sub. Focal don't make a grille so the bars were just a cheap job from Amazon. Didn't get any pics of the enclosure, but the quality is amazing, and it arrived within a few days from Poland for a sniff over £90.00...don't know how they do it, but here's the link for anybody interested: https://www.ebay.co.uk/i/173036155328?chn=ps&norover=1&mkevt=1&mkrid=710-134428-41853-0&mkcid=2&itemid=173036155328&targetid=908661247816&device=c&mktype=pla&googleloc=1006636&poi=&campaignid=10199631325&mkgroupid=103626356284&rlsatarget=pla-908661247816&abcId=1145987&merchantid=101742229&gclid=CjwKCAjw57b3BRBlEiwA1Imyts1hpIWvKJCveT81B7VLG6OKFD4-50S3p1VHdB9Q1K4WEHNoE5HvPRoCCQQQAvD_BwE Dual voicecoil wiring to bring the impedance down to 2 ohms: Some Dynamat on the rear panel - a bit of wadding also went in as the driver's meant for a 20 litre enclosure, but the enclosure's on 15 litre. You can also see where I removed the terminal panel and used some silicone sealant to completely seal it; the front panel is made from two sheets of MDF, so also needed a tiny bead of sealant along the edges, and speaker gasket foam tape around the lip: Driver in, and grille on, and the job's done: I was lucky to get the use of a friend's carport over the last week, which was great as it meant I could work on it in the rain, and not have to worry about rushing to put it back together in a hurry, so now was the time to work on sound-deadening the rear quarter panels and wheel arches. Pay attention to the two pieces of grey foam behind and next to the seat belt reel, as these are obviously there to block noise from the void entering the cabin. Neither of these were seated correctly on either side so weren't really doing anything; I wonder if this could be the problem for those suffering with a boomy boot? There's also another piece inside the area of the wheel arch and outer panel quarter skin, again these weren't seated correctly. I'll add this info to the thread on the main Octavia 3 section. Getting there: And the final touch; Hobbycraft's finest "soft toy filling" to fill the voids: I didn't get any pictures, but also put Dynamat on the inside front of the wheel arches, and filled the space with soft toy filling; this is the area covered by the big plastic trim in between the doors and the rear seat backs. Also thanks to @JohnnyType2 for the great idea of running the sub cable down the centre console and cutting a hole in the carpet to run it down the transmission tunnel and pop out under the rear seat bench - very easy, and much nicer than trying to remove all the trim around the bottom of the doors I'm sure. Not content with just doing the inside, my buddy had a few sheets of Silent Coat left over from another project, and as there was the space and a set of axle stands kicking about, the rear wheels and arch liners came off, and the outer arches also got some treatment: The difference this has made is crazy...there's virtual silence from the rear of the car at 30-40mph, and sooooo much quieter and serene at motorway speeds. The only problem is that it now sounds like the engine & road noise from the from the front has increased 🤣 Considering how easy it was to deaden the rear arches, I'll do the front sometime soon. And all back together; my buddy had some sorbothane (isolating material) washers, which work by being under compression, so there are two of these at the bottom of the sub between it and the mounting points, and then at the top of the sub where it clips into the car trim - we cut the washers into section, straightened them and pushed them into the space - the sub is extremely rigid in there, but also decoupled so doesn't rattle at all! The pic isn't very forgiving with the difference between the original carpet and that on the sub, but it doesn't look that different in the flesh...and it's in the boot, so I don't care as I'm not going to be looking at it 😉 The only thing I have to do now is sort a couple of rattles in the front doors; both doors are doing it in the same place at the top, near the back where the door card is split and stuck together where the LED lights trip is. I think some hot glue and foam padding should cure that, as when I push that area with my hand the rattles stop. Having the sub in has allowed me to roll the low frequencies off form the front speakers, which has opened them up considerably. I've currently got the crossover point set at 100hz, after playing about with it at 80 & 120hz. I've also experimented with muting the rear speakers and just going with the fronts + sub, which sounds so much better. I think due to the position of the rear speakers (the tweeter's much closer to your head than the front speakers and points backwards), then it smears the image and sounds all phasey - I've checked and double-checked the wiring, and flipped phase live in the amp's software and it just doesn't sound anywhere near as good with the rear speakers enabled. This isn't a problem, as I hardly ever have rear passengers, and it also gives me the ability to remove the passive crossovers from the front speakers, and configure the amp to run them actively with all four channels. I'm probably going to remove the rear speakers, pop the originals back in just to fill the holes, then I have a spare set of Focals just in case...this system goes loud now 😈 I think in the short term, I'll do some measurements with the mic and real time analyser and tweak the amp's EQ settings and see how it goes from there! If you've made it this far, then thanks for reading! Nick
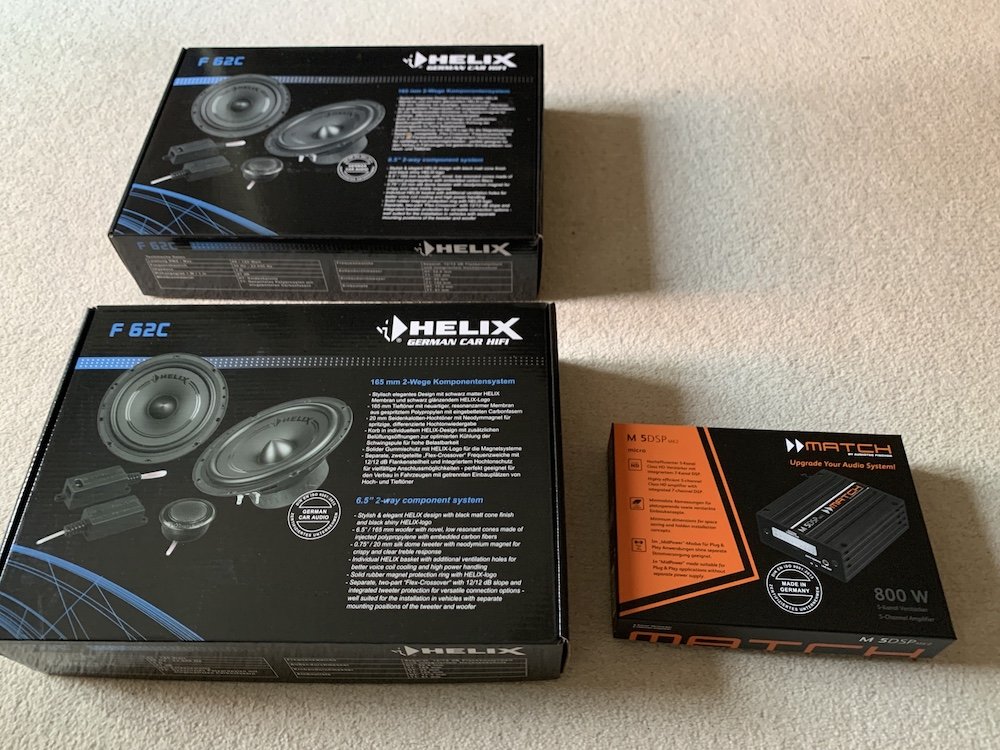
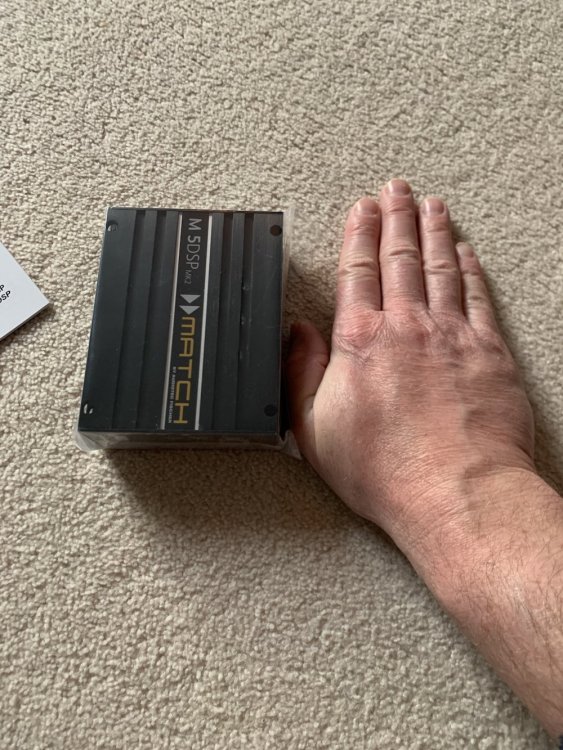
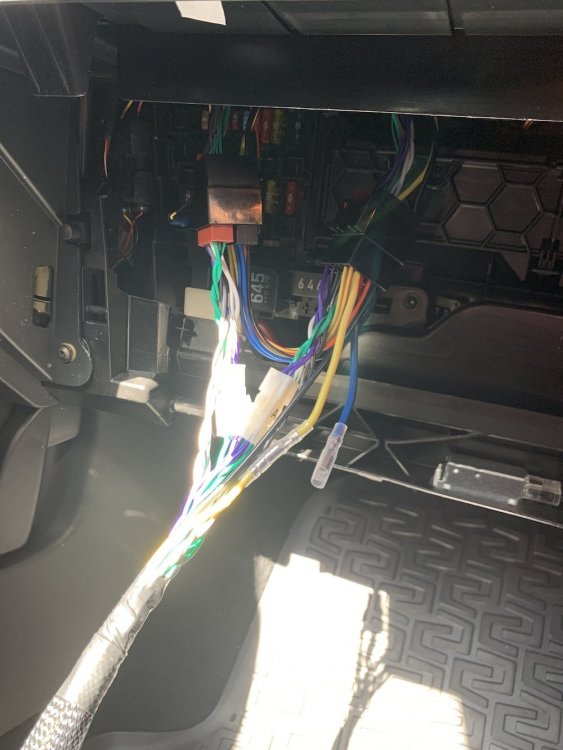
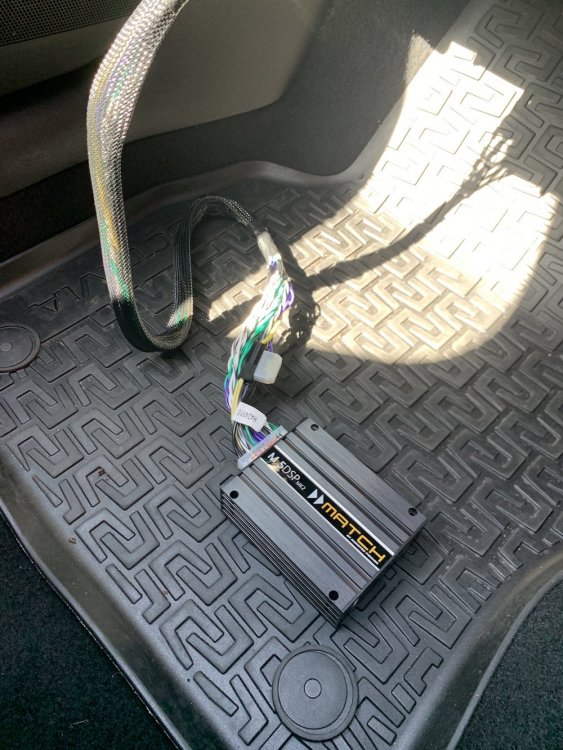
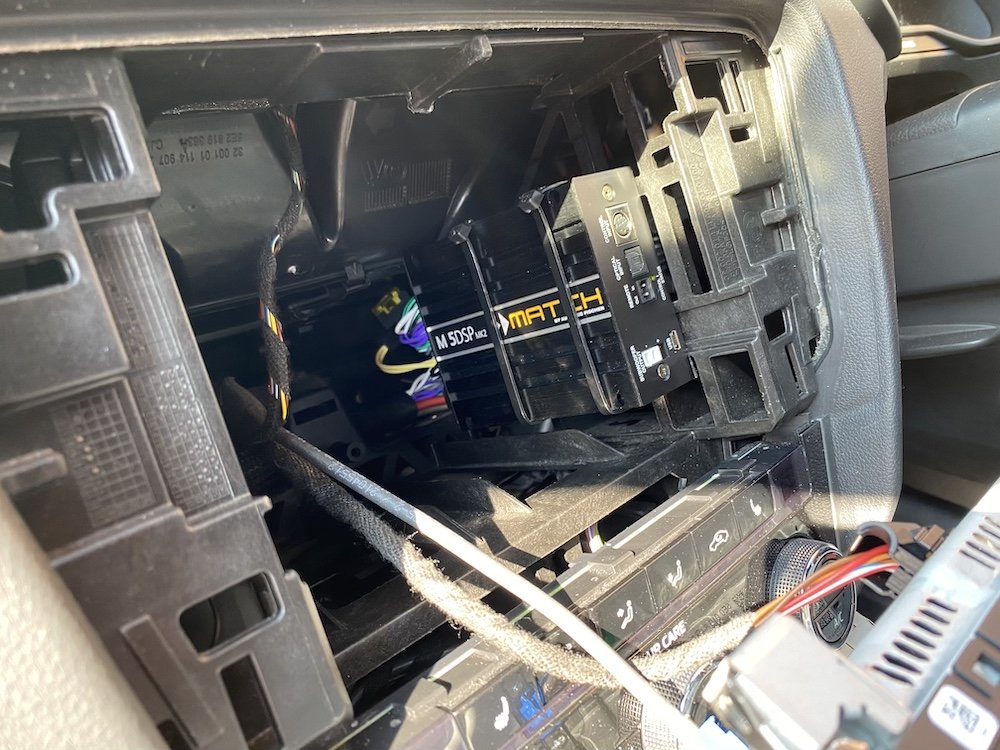
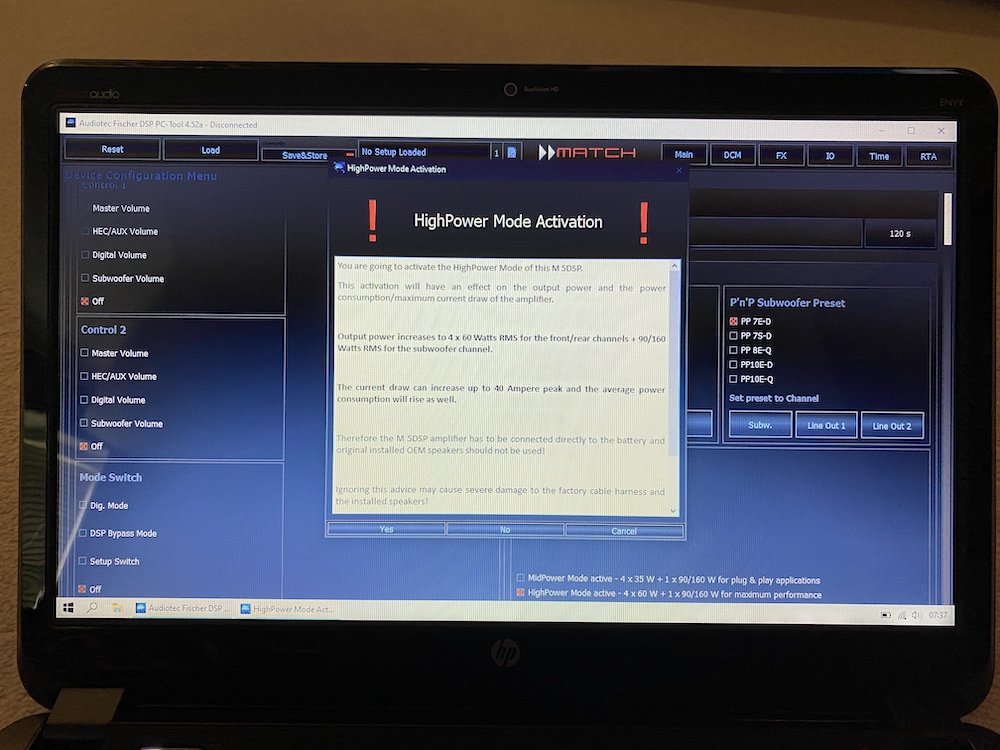
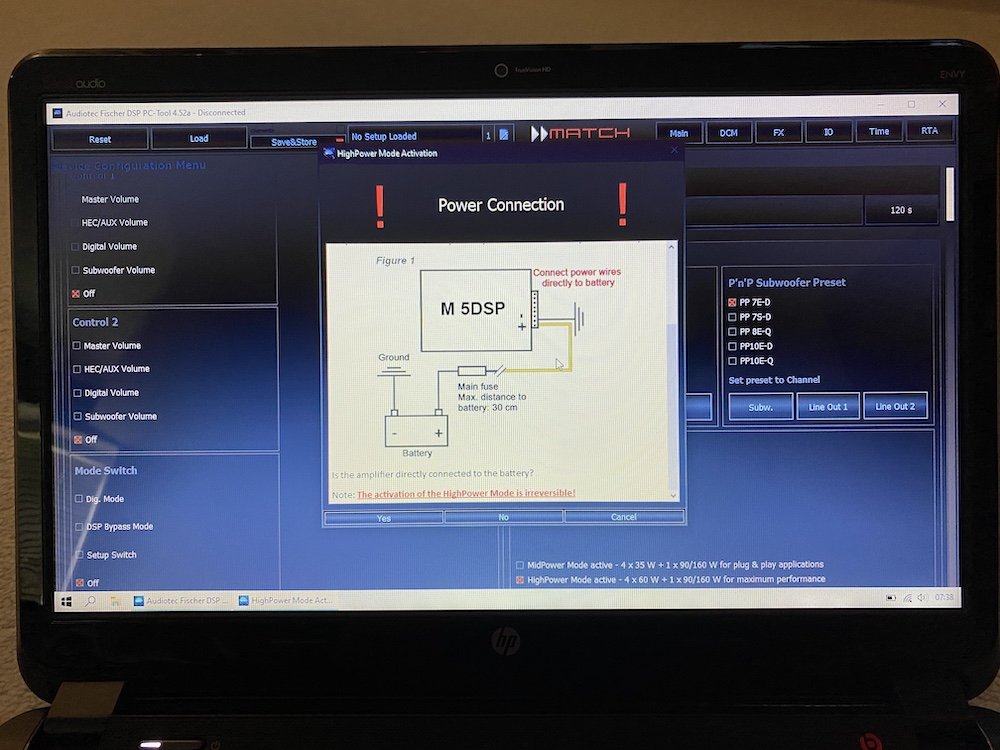
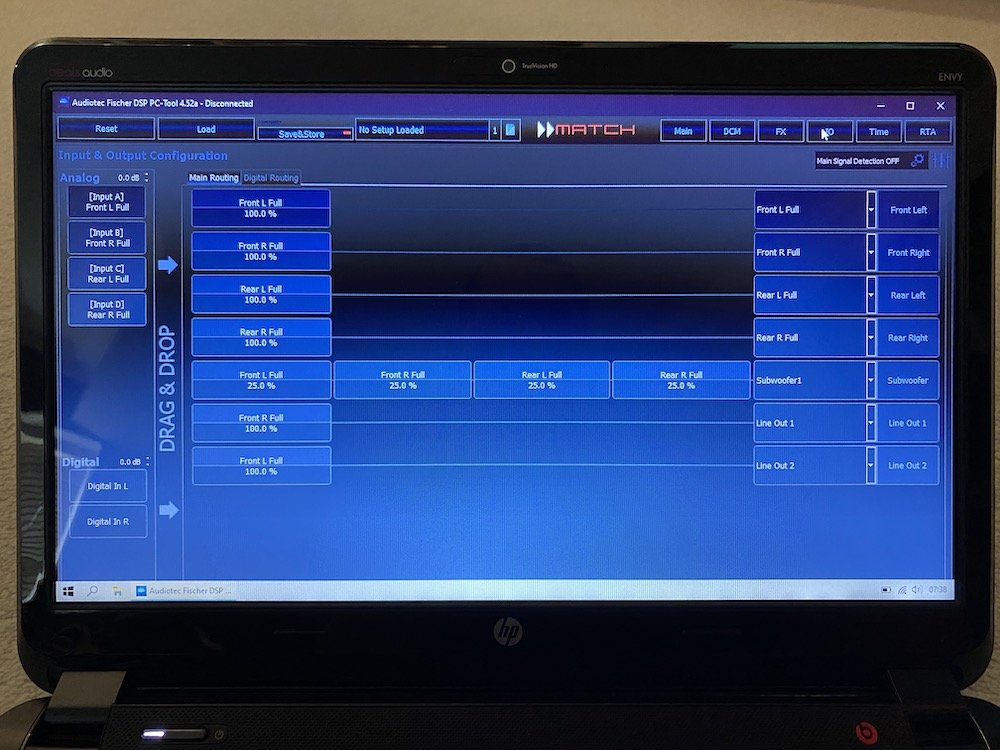
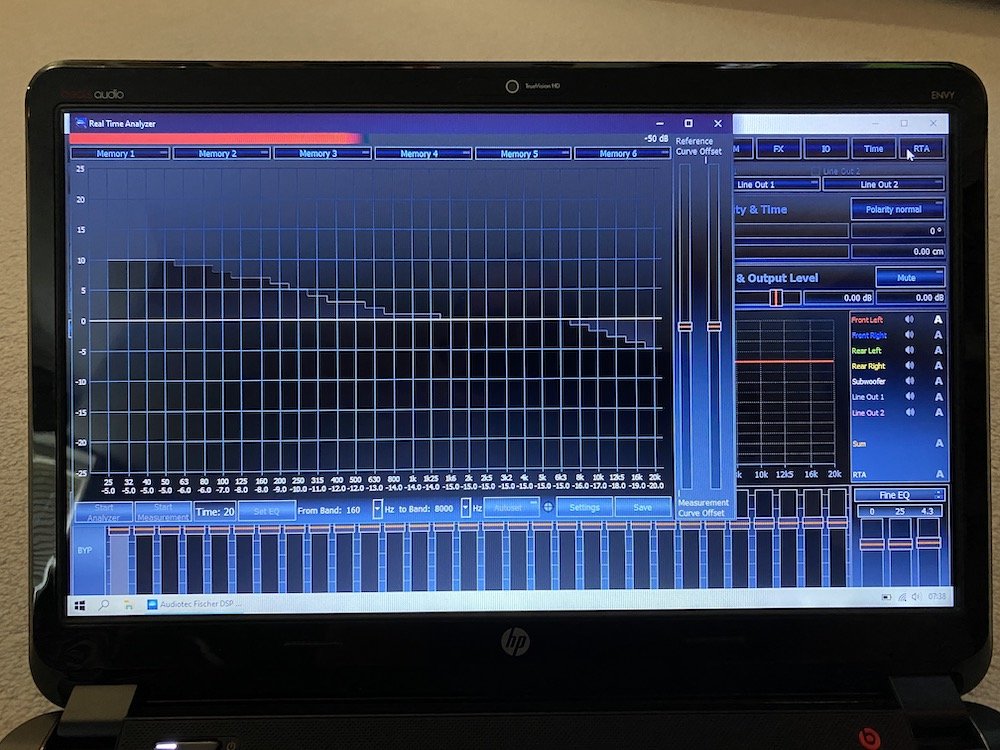
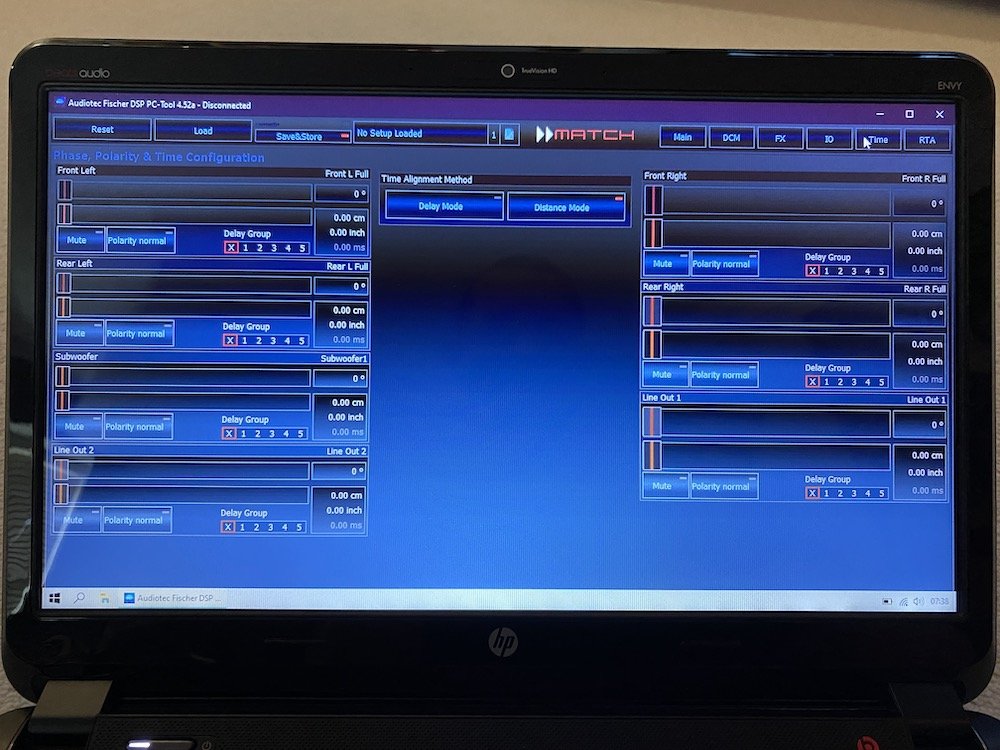
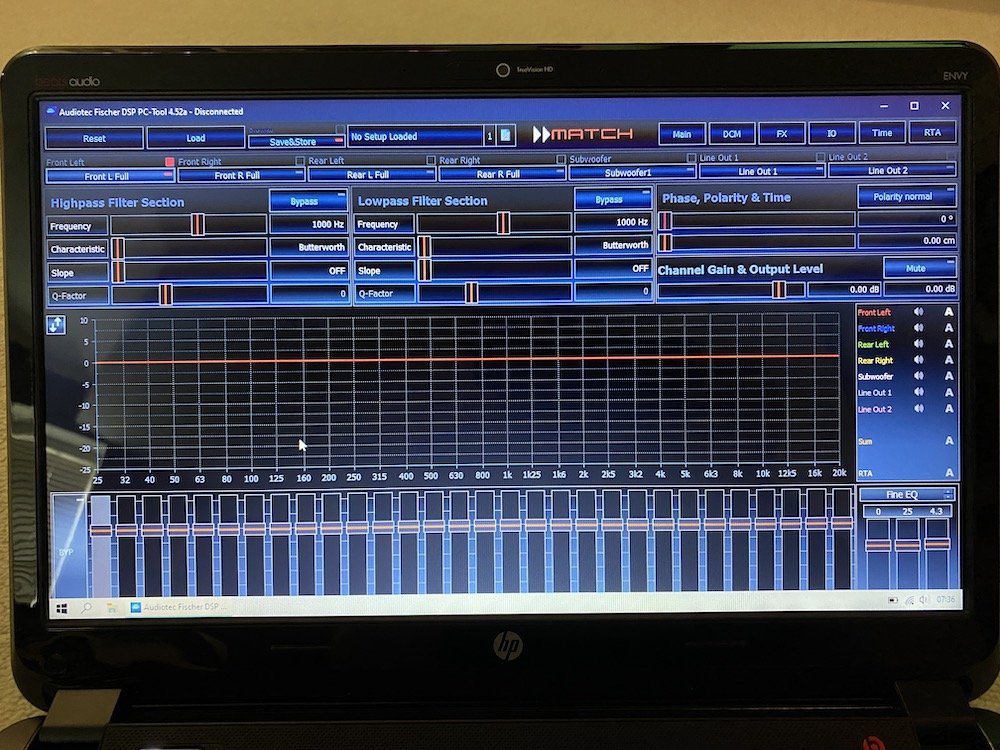
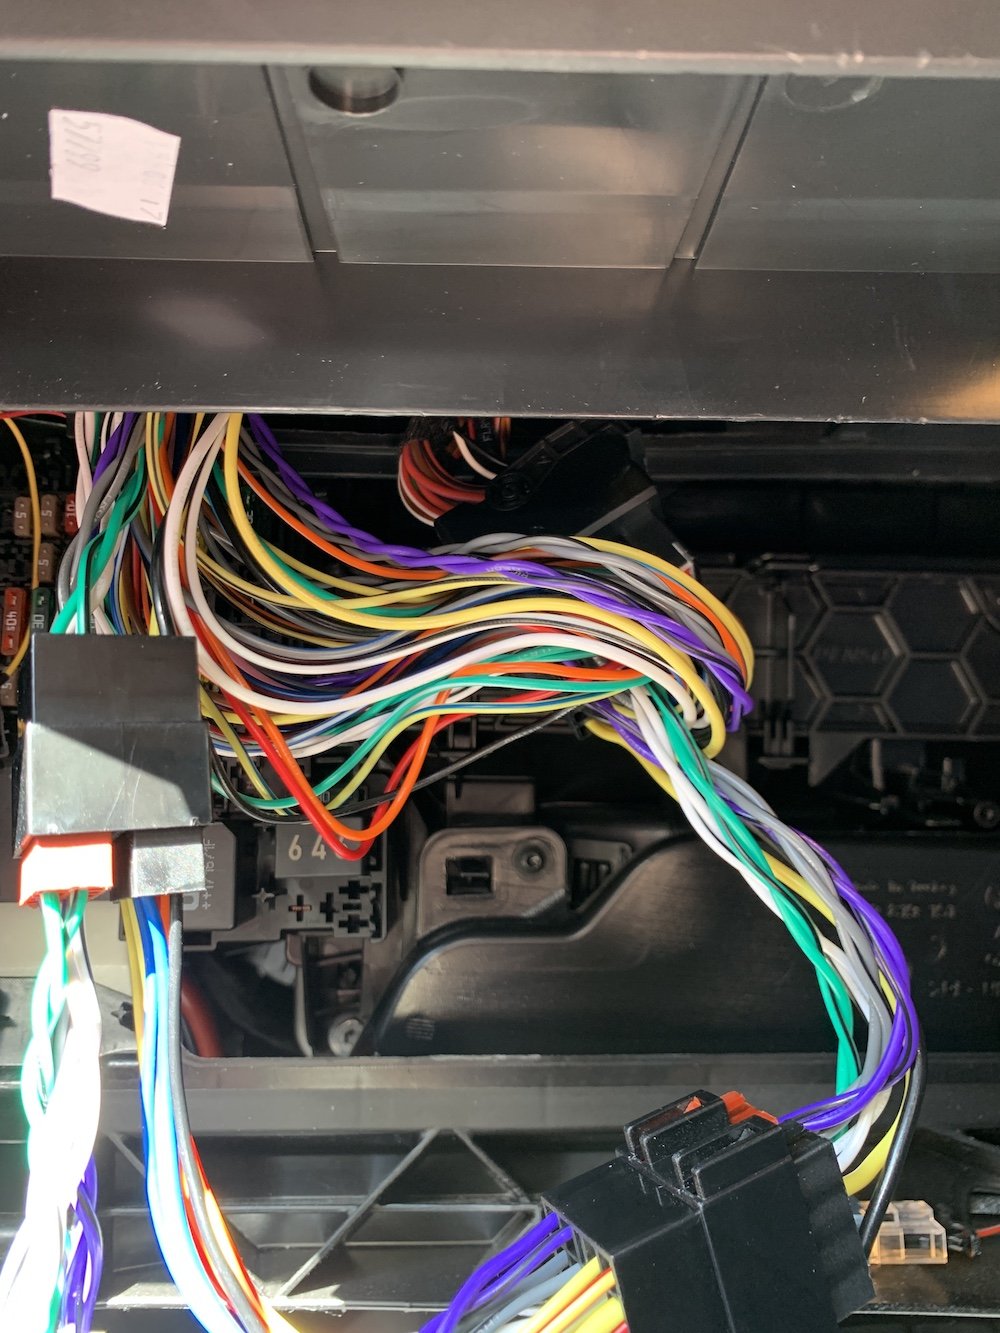
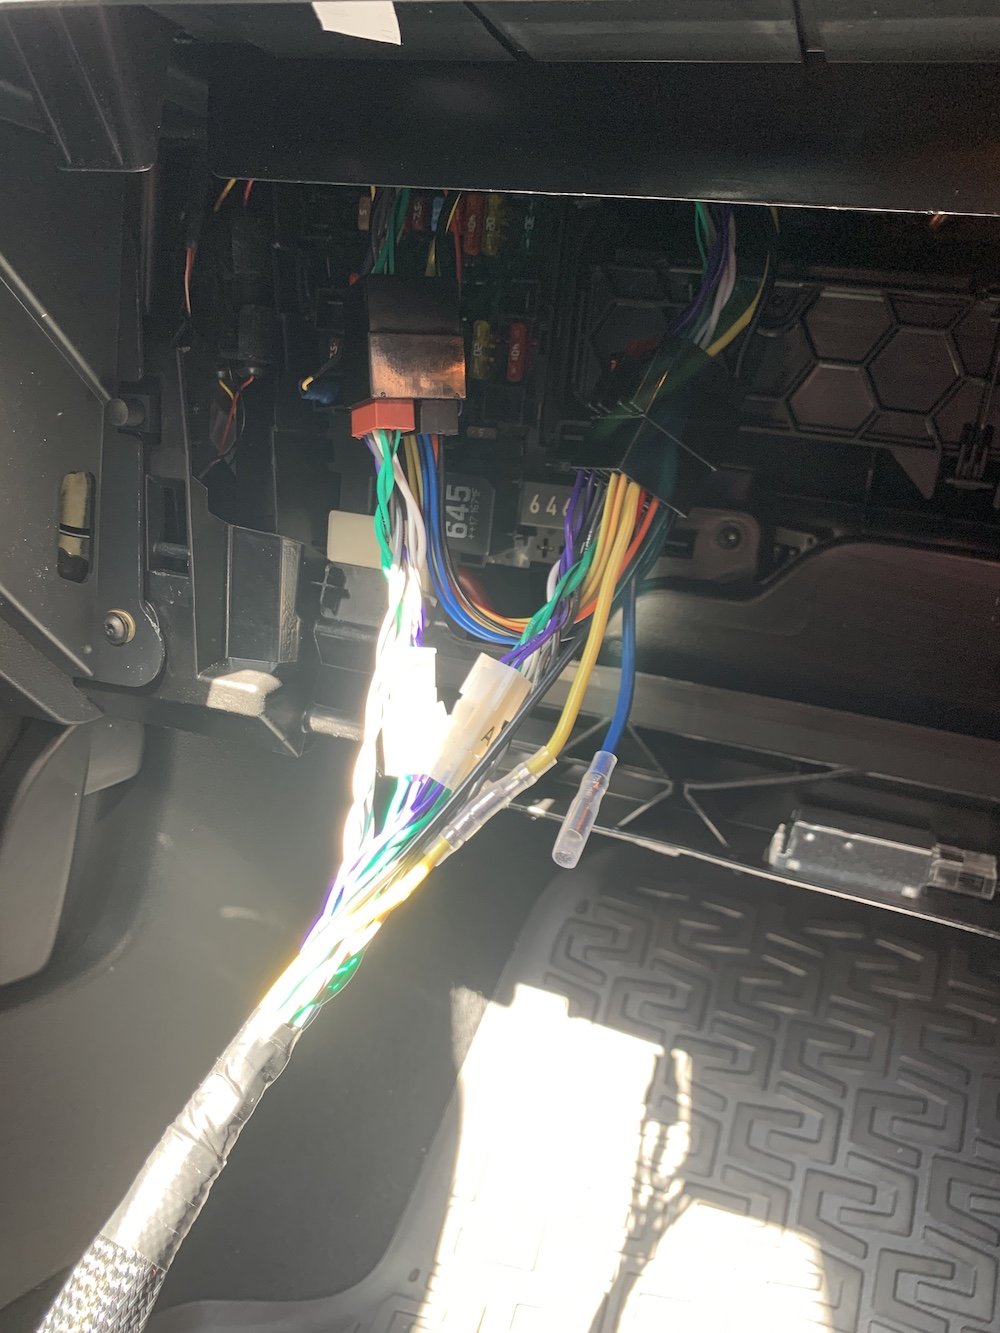
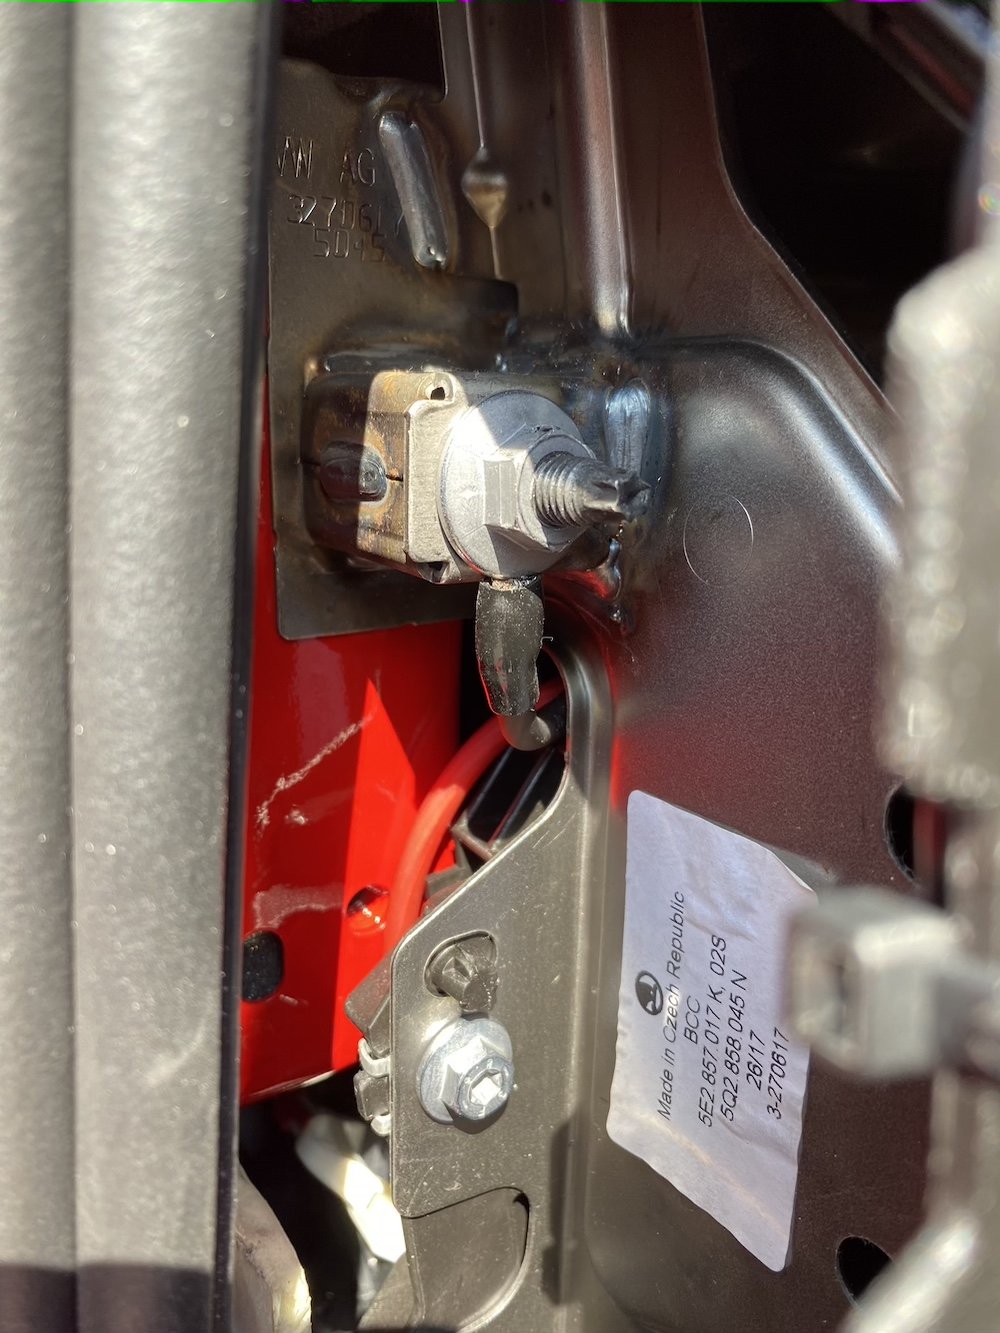
  13. Hi All, Hope you're all staying safe and healthy. This is taking some time, and I still have the speakers to do, but just wanted to post some pics and info on the system upgrade I'm currently working on. The standard system isn't too bad, but I wanted to improve things without changing the original display, nor have visual evidence of different speakers. I've already spent some time Dynamatting the boot floor, spare wheel well, tailgate, under rear seat bench, bonnet and front doors, and just have the rear doors and rear quarter panels to do. As such, my research lead me to a German brand, Audiotec-Fischer; they do plug and play systems for the main German car brands, and their Match range has various amplifiers, speakers, subs, wiring harnesses & looms designed to just drop in - the main systems are for BMW. Unfortunately, they've discontinued the VW specific 6.5" component speakers, which have the exact same mounting for the tweeter in the front doors, so I went for their Helix F 62C 6.5" components. I also had a look at Focal, as they make a specific VW component set, but the connectors/wiring in VW is different to Skoda, so they aren't plug and play for us either. I really liked the look of these, as the tweeter fittings are the same, and the speakers include the deep baskets for the mid-bass drivers. I went for the M5 DSK Mk2 amp, which can be mounted virtually anywhere, as it runs cool and has a tiny footprint. It's also configurable via a laptop to enable so many settings it's a bit mind-boggling! The amp install's been pretty straightforward with the harness and loom in place; I plugged it all, switched the headunit on...and it worked! I was able to remove 28 wires from the plug and play harness, as it's a generic VAG compatible unit, so everything's wired - by my reckoning, it was about 8.5m of little wires acting as aerials I got rid of! The increase in performance was really good; a lot more grip, control, detail, and obviously louder at the same volume level. Not satisfied with that, I bought a Rockford Fosgate amp wiring kit, and ran a direct power feed from the battery to enable 'high output' mode. This is one of the programmable settings, and there's a warning in the manual not tenable it with the standard loom, as the current draw can peak at 40 amps and damage the existing wiring loom! Thanks to @JohnnyType2's excellent write up on his install, I was able to find the loom through the bulkhead, and whilst I'd planned to use that, directly below I discovered another part of the rubber grommet directly below protruding for a wiring loom that my car doesn't have! I made a tiny hole, fed a draw wire (a straightened coat hanger!) through from inside the car, taped the cable to it, and pulled it back through into the car. Oddly, the negative cable was only 18" long, so whilst I couldn't get this onto the battery, I put it onto the mounting point for the dashboard. With loom fitted, and amp connected, I switched the system on...and nothing! Total schoolboy error, I'd connected positive & negative around incorrectly (too much time out in the heat I think), once connected correctly, I tried again and nothing. Thankfully, it was just the fuse in the amp's wiring harness that got taken out, and not the amp... Fuse replaced, all was working as it should, phew! Next was to connect the laptop, and enable the high output mode. It was very easy to do, and nice that you get warnings before enabling the high output mode. All settings changes are live, so you can hear what you're doing - I thought I was saving the file name with the date, pressed '2' and that disabled output channel '2'/front right, pressing 2 again enabled it! The difference between the two output modes was night and day, significantly better than plug and play/low output mode. There's even more control and detail - hard to believe I'm still running the standard speakers actually! I just took the photos below, with the software in demo mode - it was too bright yesterday to take any pics of the screen. The images below are of all the other setup pages; crossover and equaliser, input/output configuration, time alignment & real time audio analyser - I think you plug a microphone into the computer and it'll do 'room' correction as you find in home cinema and some high end audio amplifiers! The amp is five channel, and has a separate sub output, this can also be configured for a centre channel if you don't have a sub...as our cars have the centre speaker mount for the Canton system, I might just buy a cheap speaker to try this out; the bass response with just the standard speakers is fine for me, but it's good to have options. Configured for now, I put some anti rattle tape and velcro strips on the amp, stuck it in place behind the screen (it's a 30 second job to pop the screen out if I want to make changes to the amp settings), and then cable-tied it to keep it in tight: Thanks for reading this, and I'll update when I get the speakers in! Cheers, Nick

Important Information

Welcome to BRISKODA. Please note the following important links Terms of Use. We have a comprehensive Privacy Policy. We have placed cookies on your device to help make this website better. You can adjust your cookie settings, otherwise we'll assume you're okay to continue.

Account

Navigation

Configure browser push notifications

Chrome (Android)
  1. Tap the lock icon next to the address bar.
  2. Tap Permissions → Notifications.
  3. Adjust your preference.
Chrome (Desktop)
  1. Click the padlock icon in the address bar.
  2. Select Site settings.
  3. Find Notifications and adjust your preference.