Sprinkles
New here
-
Joined
-
Last visited
Everything posted by Sprinkles
-
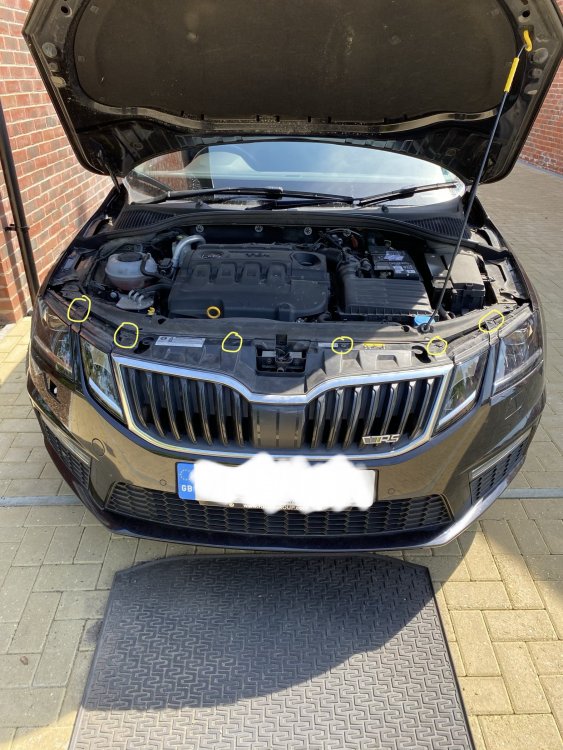
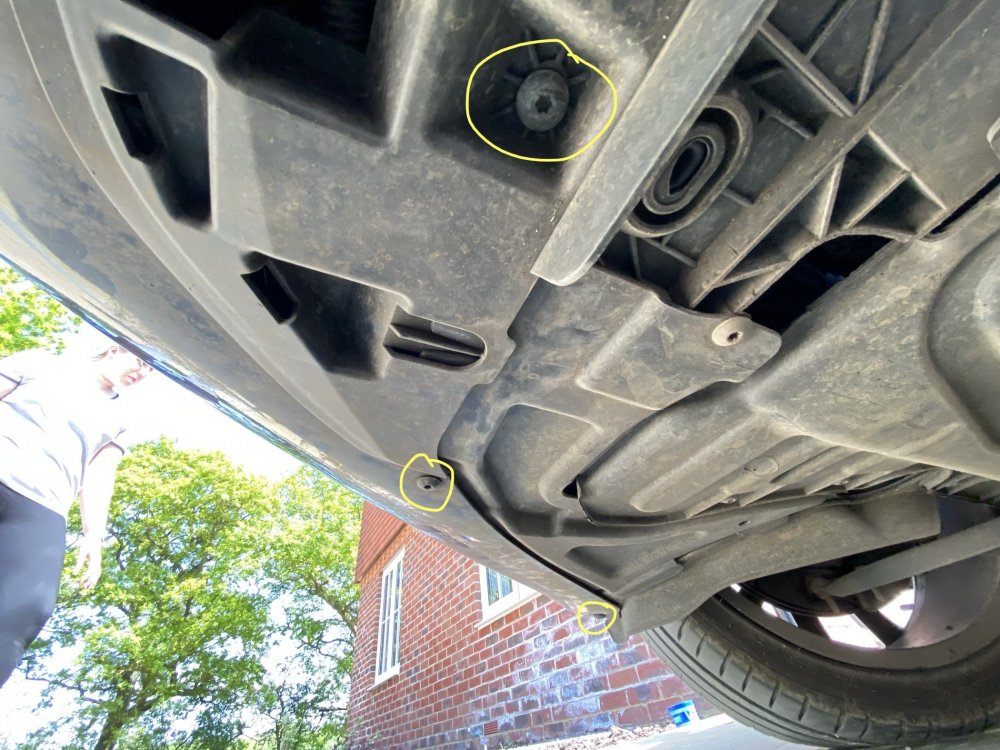
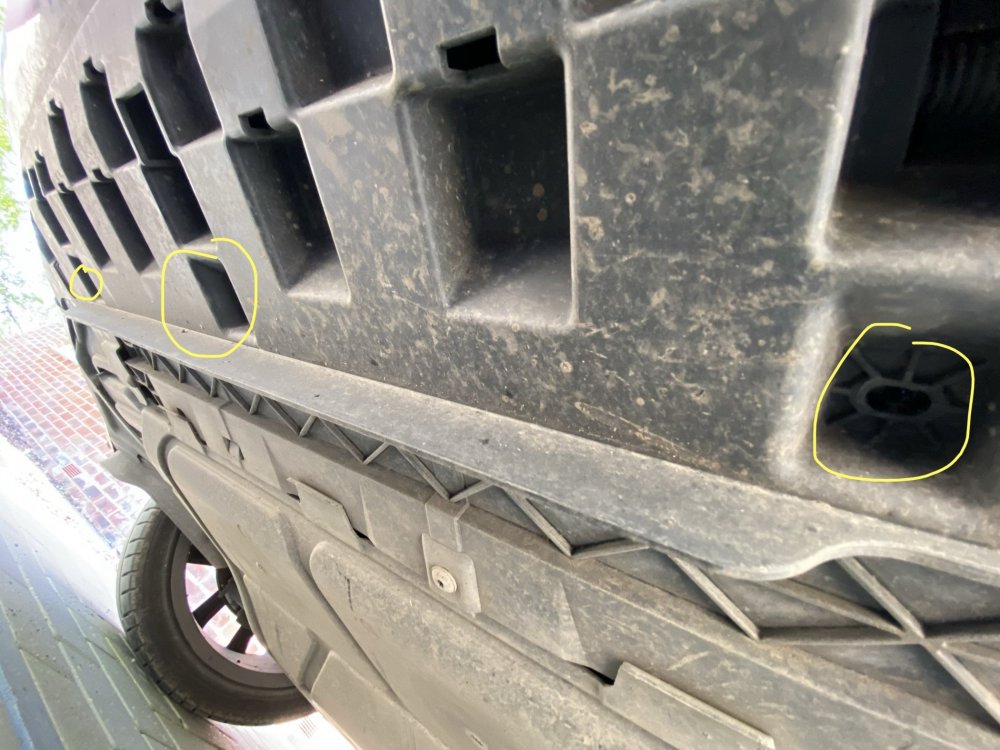
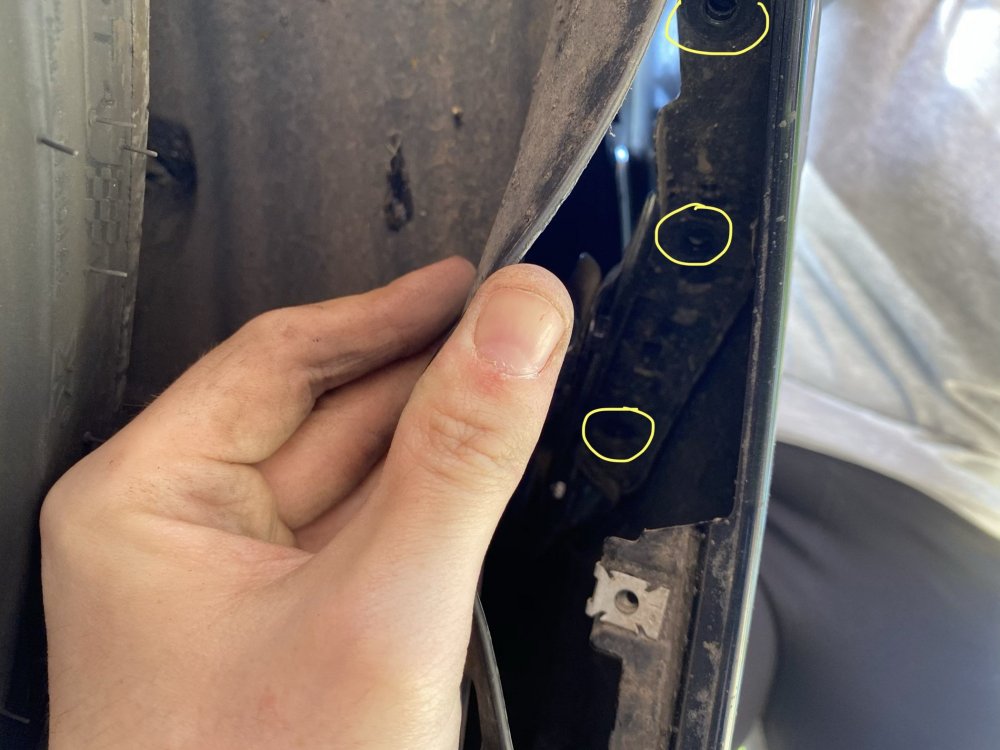
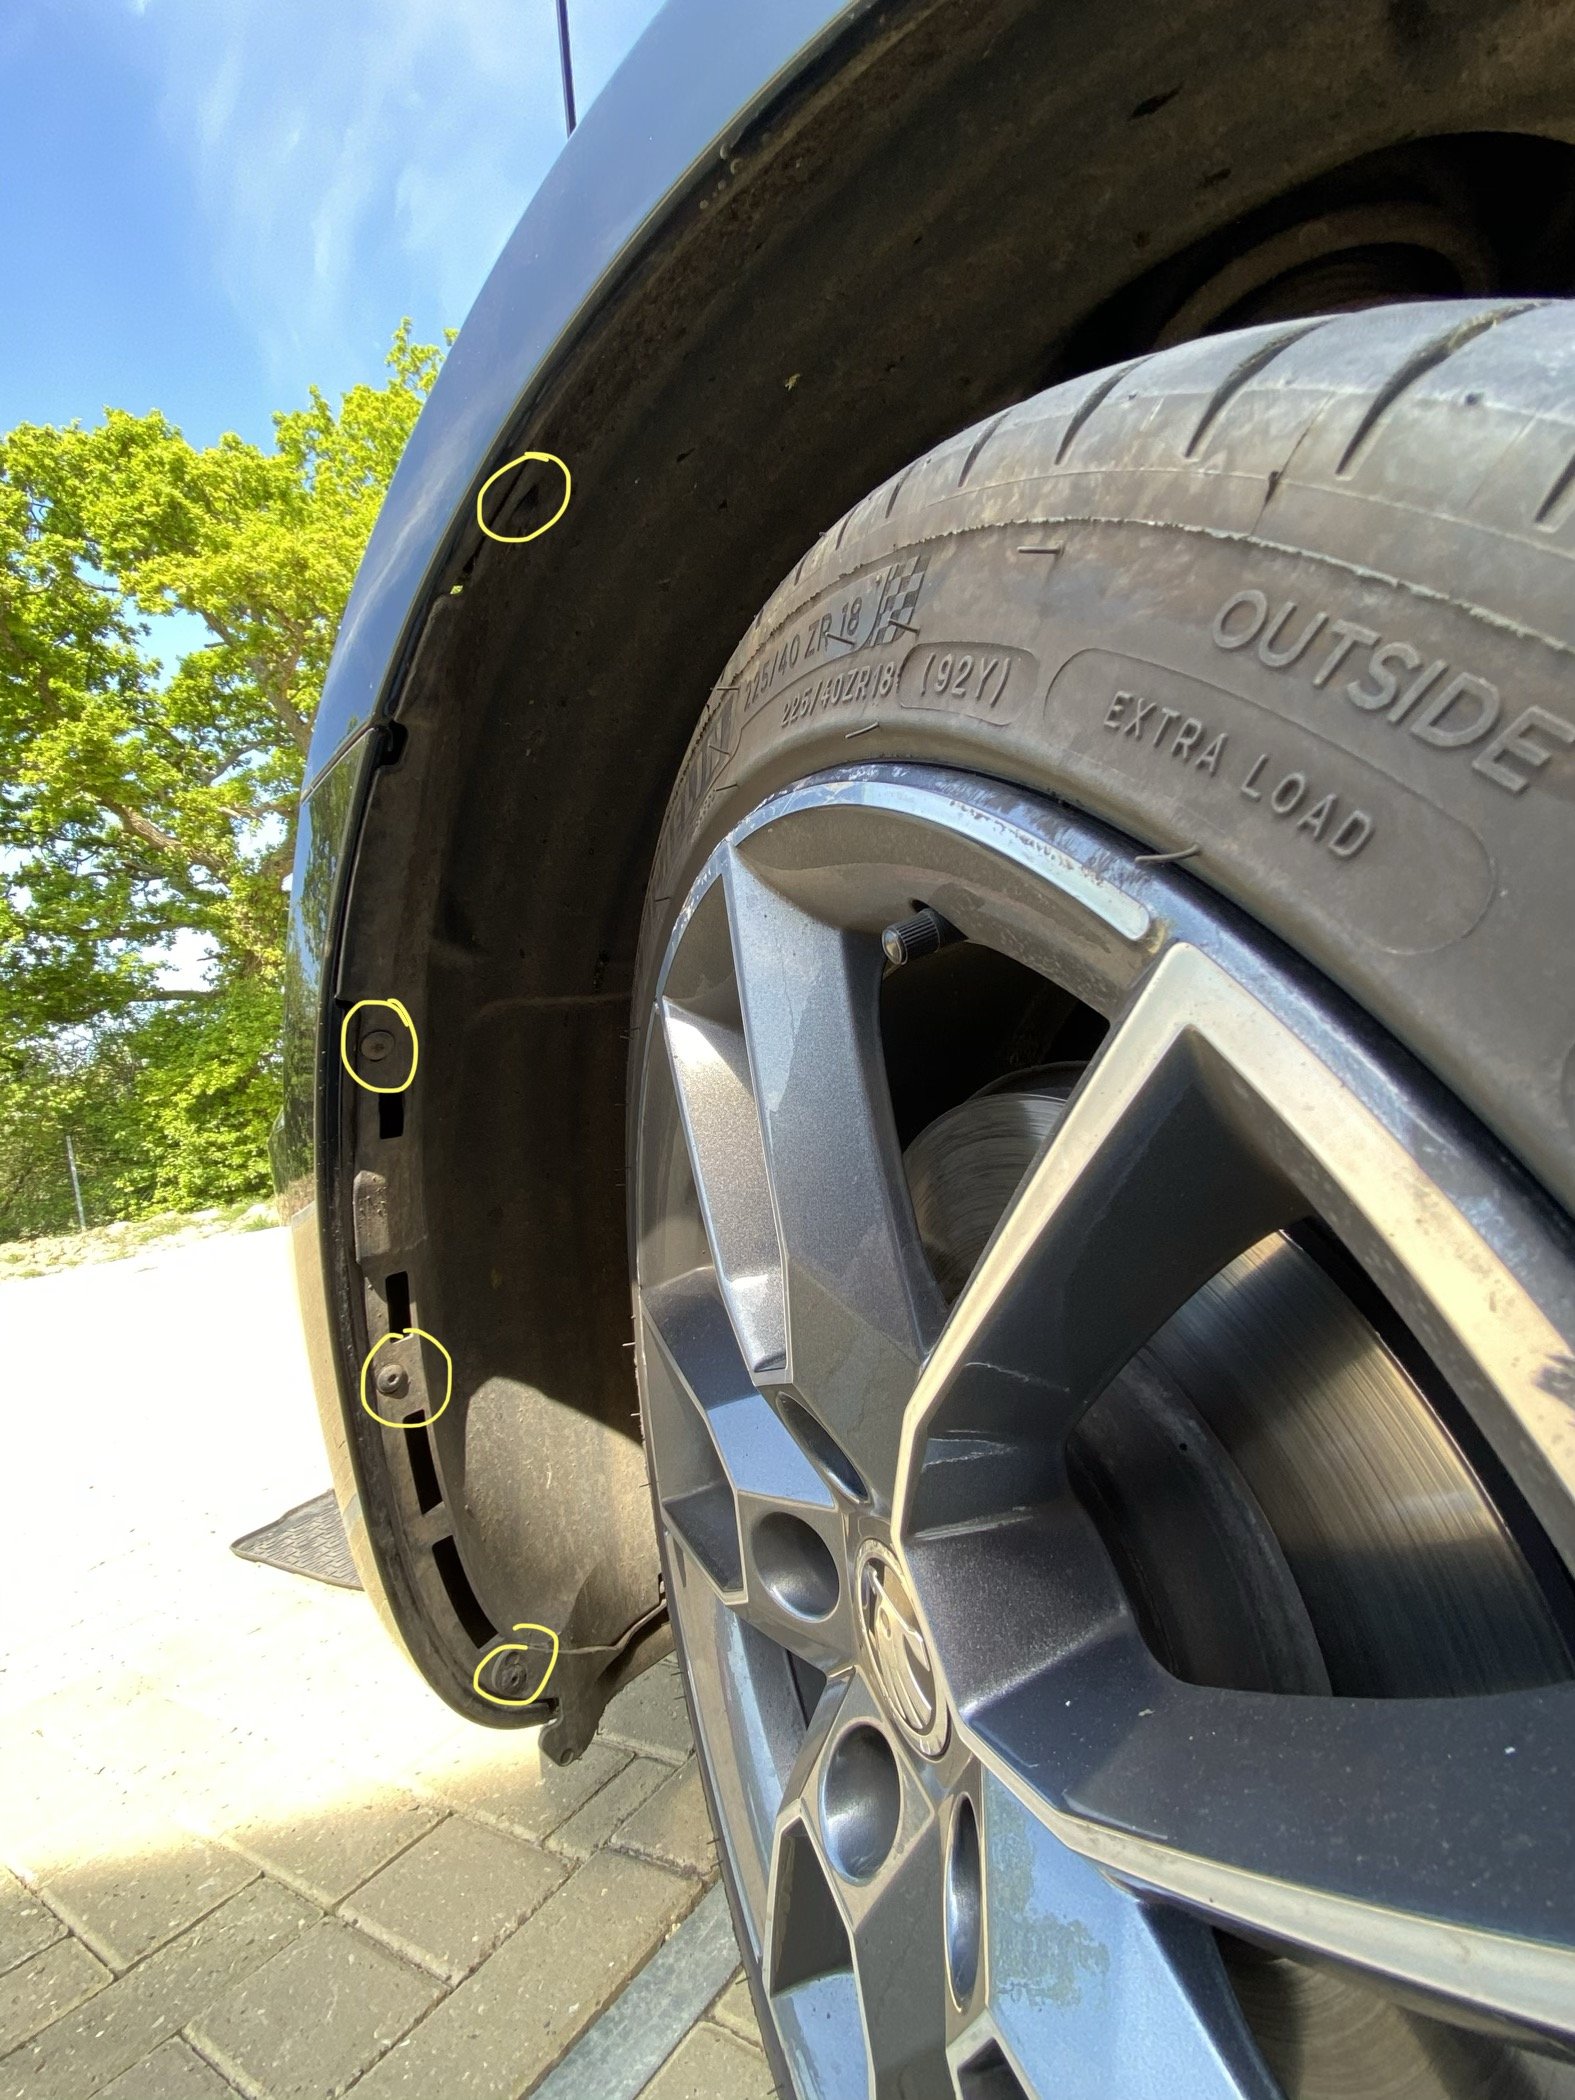
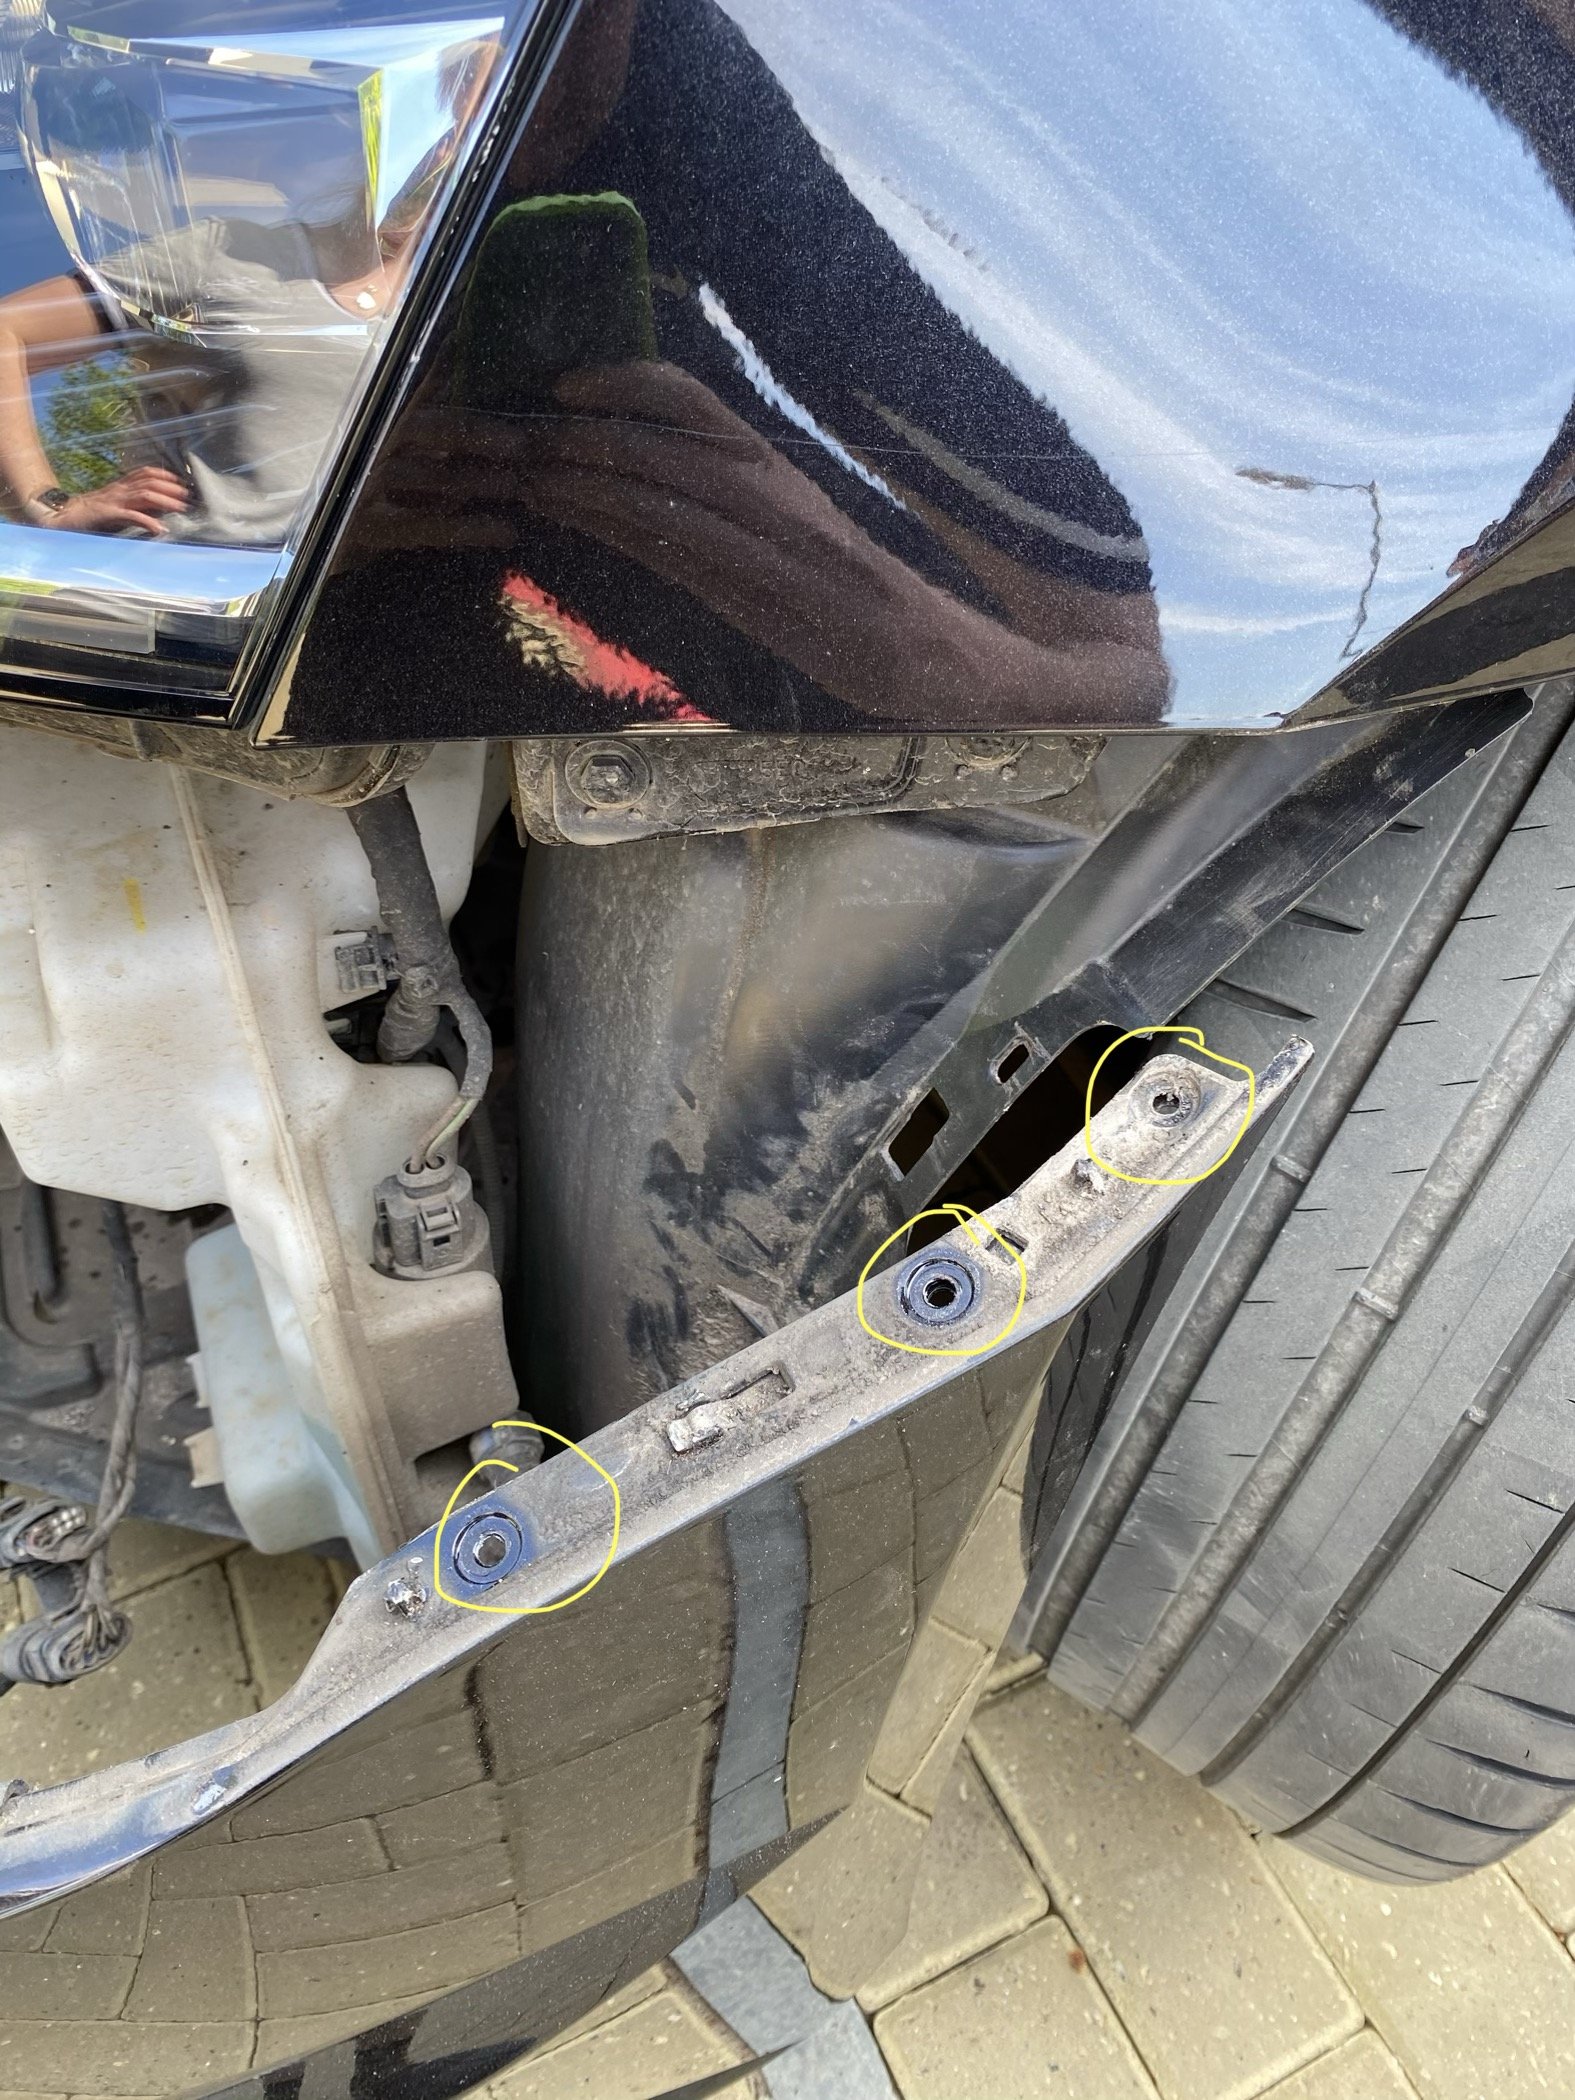
Hi guys, I wanted to put a new thread down for the front bumper removal for the Mk3 Octavia. I read Maxpowers excellent guide which helped a lot but there were a couple of additional things I wanted to add as the Mk3 has one or two more screws in places. Thus I wanted to show how I did it to help others if they needed help too. I had had to replace my right headlight washer jet after kissing a deer. The washer fluid was leaking and I had to top it off a lot more regularly. An annual service reported the washer jet was snapped and I also had to replace the headlight washer jet cover. Which went walk about after the deer incident. Skoda quoted me around £300 to repair this and not wanting to pay that much, I bought the parts in an attempt to do it myself. The parts cost approx £50 if I recall for the new washer jet and cover. Plus some spray on Black magic paint and lacquer from Halfords. This is is what I did. 1. Took off the eight screws attaching the bumper and grill at the top. 2. Took off the eight screws underneath the bumper. 3. Took off off the four screws in the wheel wells. The very top screw isn’t necessary to remove the bumper but removing it makes it a lot easier to man handle the wheel well arch out of the way. The wheel well arch is pretty pliable plastic but you need a bit of brute force to get it out of the way for the next part. Like Max says turning the wheels over gives you more access. 4. This bit, like Maxpower said it’s the awkward bit. There’s now three screws you need to remove. They attach the top corner part of the bumper to the chassis, just in front of the wheel well and they’re screwed in from underneath in an upwards direction. The screw closest to the front of the bumper is the hardest to get to and requires a bit of persistence. Having a longer torx bit and a spare pair of hands certainly helps. And removing the screws are a lot easier than putting them back. Once all of the screws are off, you should be able to jimmy the bumper off. Thats it! Upper should be off! 5. Removing the washer jet is really easy. The washer jets are attached to the bumper so you don't need to remove the covers before you remove the bumper. There’s also a bit of slack with the wires so I didn’t need to disconnect anything. The jet is connected to the plumbing and all you do is press two blue buttons to remove the jet. The jet is attached to the bumper with two shoulder clips. Just jimmy them up to unclip it. Thats it. Putting it back together is actually more of a pain than taking it off. There’s four prongs on the back of the bumper which fit into four separate holes on the front of the car. They’re a bit of an pain to get aligned and I actually snapped one off in the process. I wasn’t too bothered considering as the entire bumper is held on by 28 screws (not including the two at the top of the wheel well) in total! But getting the bumper back in the correct place to seat correctly is quite hard work. Parts need to align properly and some parts of the bumper need to slide into various channels at the top and underneath. Once the bumper was clipped back onto the chassis and back in the right place, we put the three awkward screws in first. These are the three that screw upwards into the chassis just in front of the wheel well. You’ll want a spare pair of hands and a suitably long torx bit to get these screws back in. I got my missus to use all of her weight to keep the pliable wheel well far enough away from the bumper so I could get some tools in to screw them back in. Again it was a pain and persistence is the key. Don’t be surprised if you drop the screw back into the bumper. If you’re lucky, you should be able to retrieve them without having to take the. Upper back off. After doing this twice we came up with ingenious solution of using masking tape and taping the screw onto the bit. Once the awkward ward screws are in you can then replace the others. We did the wheel well screws next, then the eight on the top of the bumper and finished with the eight underneath. It it took about 90 minutes in total which I don’t think is too bad considering neither of us are mechanics. A bit of swearing, a few nicks on the hands but we managed to get it done. I have tested the washer jets for the headlights and they still don’t work! But I believe they don’t go off every time you spray the washer fluid. They certainly don’t leak anymore! I’ll try and attach some photos that might help including all of the tools I used. I also used four ramekins to put the respective screws in so they didn’t get lost and I knew where the were from.