MariusMo
Finding my way
-
Joined
-
Last visited
-
I was short on time, so I did this: Universal Fits for Skoda Octavia Airbag Bridging/Resistor+Advice | eBay It worked. But admittedly I still don't have a functional side airbag. I was told that an alternative approach would be buying an entire seat from a scrapped car. Something I might do when the weather gets warmer. I see they sell at aroun 100 GBP.
-
Yes, that is what I thought too. But user @tdiestate says about the fault code that "it usually just moans about the igniter (can't remember exact words)". And the he solved it by fixing wiring to the door.
-
Interesting that this was solved by fixing broken cables to the door. My understanding was that cables to the door do not lead to the side airbag itself -which is in the seat-, and therefore I assumed that a fault code pinpointing the igniter would also indicate a fault in the seat (or between the seat and the controller, e.g. that infamous yellow plug/connector). Does anyone know if the igniter is actually in the door?
-
I'll consider your advice. As for the airbag I assume it hasn't been working ever since that warning light first lit up a few months ago. Turning off the warning light will not make the vehicle less safe.
-
Back again After replacing the yellow connector with a more permanent (though not soldering) version, I still did not get rid of the warning light. Yesterday I had the car at a mechanic for the biannual ("MoT"?) technical control, and they think there must be an actual airbag fault. I.e. I would have to change the airbag. So, I am starting to consider the "resistor fix" that was the start of the present topic/thread. My plan is now: I disconnect the battery, and then disconnect the yellow connector (or rather, my replacement for it) and isolate the the two wires between the yellow connector and the side airbag. Then I fit a 2,2 ohm resistor between the two wires leading from the yellow connector to the control unit. I may not be succesful, but I can't see any major hickup I could do either. Am I missing something?
-
I am starting to suspect that this might be the real thing. I.e. the igniter is in fact dead, and has to be changed. I measured the electrical resistance on the yellow plug (that I cut off): Not broken.
-
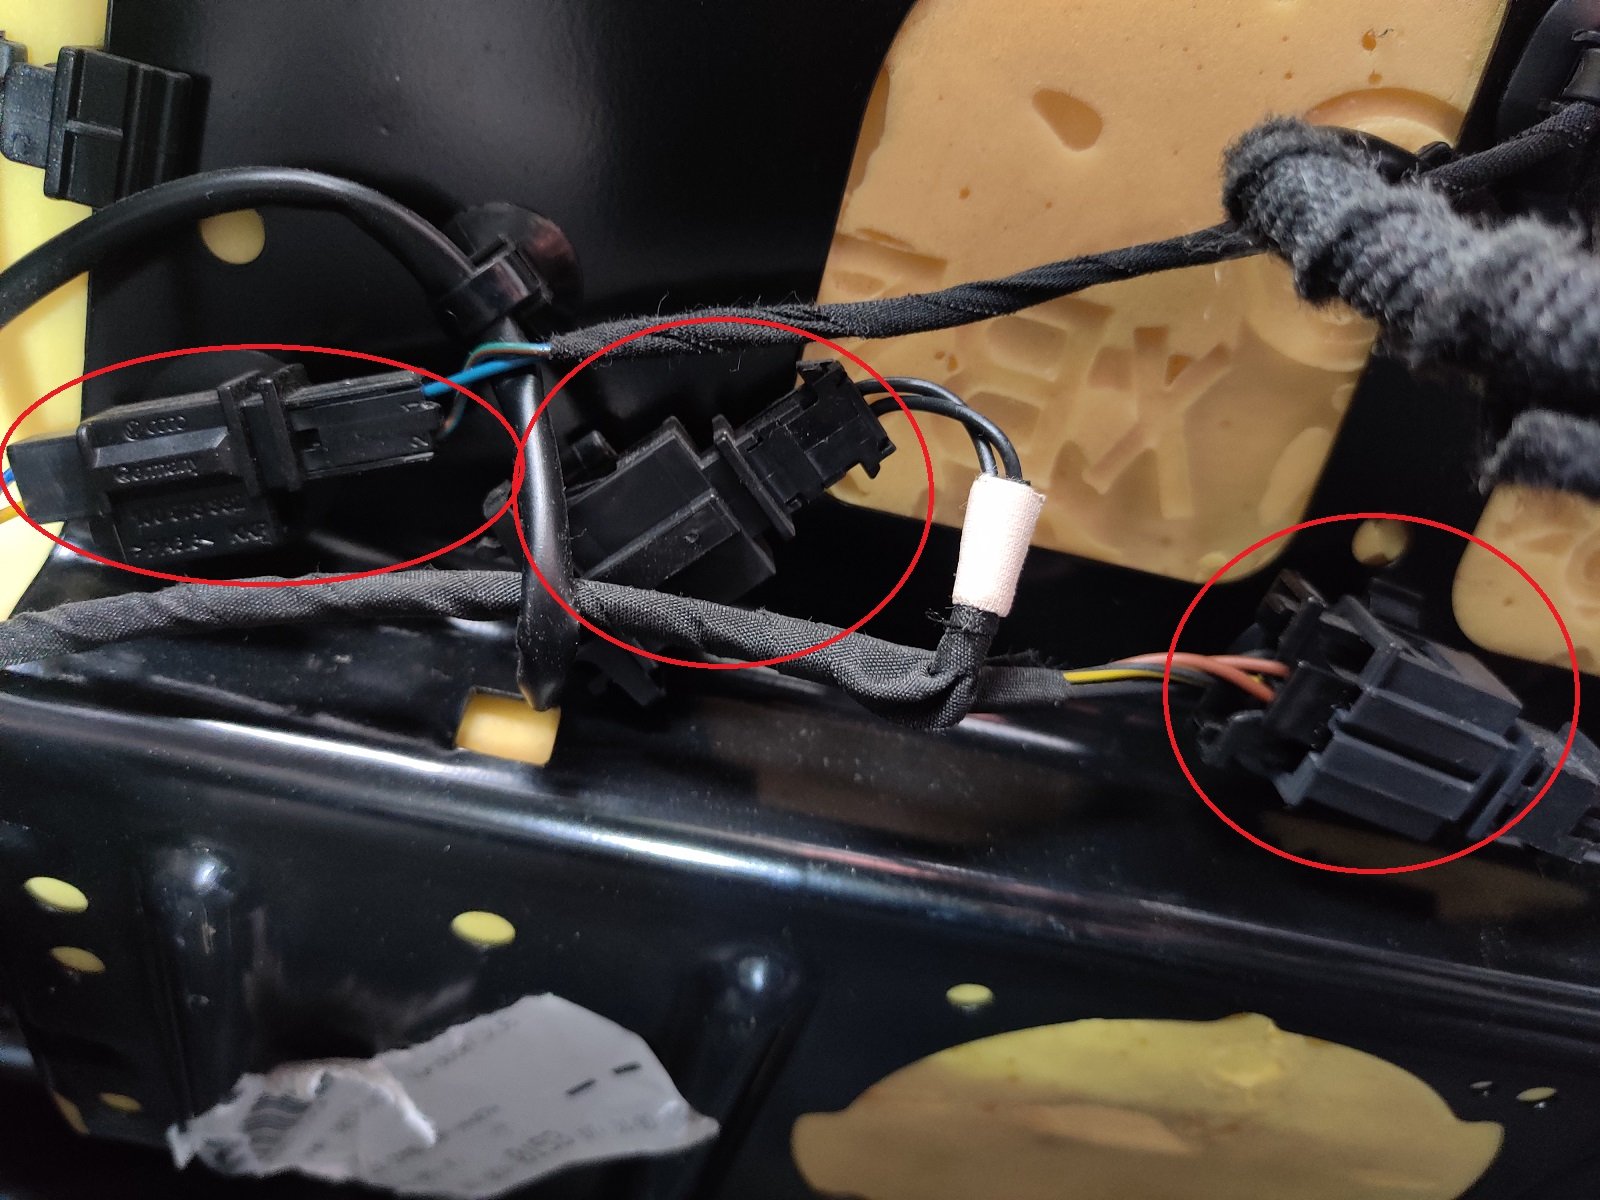
There is only one cable bundle going to that part of the seat which is actually labelled "air bag" (facing the car's side/door). This cable comes from that yellow connector in front of the seat (the one I cut off and wago'ed), with no additional connector under the seat. The cable bundles from the three connectors found under the seat (see photo above) are all going to the opposite side of the seat (towards the car's center). I plugged out and back in again all connectors I could find (2 in front of the seat, 3 under the seat). The problem stays the same. Snowing in Kirkenes right now, by the way. Hope for better working conditions tomorrow
-
Seat tilted now, and I found no less than 3 connectors Off to see if I can find a wiring diagram. The fault code specifically says "igniter". Perhaps one of the cable bundles is for that exact purpose.

-
Mine was identical to the one in this video, and I found it in the same spot, i.e. not strictly necessary to tilt the seat. This seems to be the one that the forum member "J.R." refers to as "the connector at the front of the seat rail". Now, the same J.R. also mentions "a second connector tucked up under the seat squab". And it is this second connector I am looking for now.
-
Having the same problem. Today I cut the yellow connector forward of the driver's seat and joined the 3 cables with wagos. The problem persists: A few seconds after resetting the fault code, it comes back. So, I would like to look for this second connector. Where exactly is it? And does it have a distinct colour? Would I be able to see it without removing/lifting/tilting the seat?
-
Is there a fairly easy way to check if the problem is actually that yellow connector, or is the easiest approach to just go ahead and cut-and-solder?
-
I had the same problem just now. Turned out the plastic "soldering" of the light had cracked open and a fair amount of water was inside. I replaced it with a clone that cost me about 40 pounds. A fairly easy job, except from refitting the interior trim. Patience needed to guide all the clips into their respective holes. I found this video helpful: Just for the fun of it I dried the old LED element and tested it: Still works fine.