Jump to content

Mart Vrs

Members
  • Posts

    29
  • Joined

  • Last visited

Profile Information

  • Gender
    Male
  • Location
    Derby

Car Info

  • Model
    2009 Superb 140tdi SE

Recent Profile Visitors

The recent visitors block is disabled and is not being shown to other users.

Mart Vrs's Achievements

Explorer

Explorer (4/17)

  • First Post
  • Collaborator
  • Conversation Starter
  • Week One Done
  • One Month Later

Recent Badges

15

Reputation

  1. Hi d_aero, sorry I'm not sure where the join is in the body and if there is it would probably mean dropping the headlining for access, the revering lights are connected via the plugs in the tailgate, as pictured. I would imagine there is a dedicated point for connecting towbar wiring somewhere behing the luggage compartment trim panels, someone else may know better. Good luck.
  2. Thanks for posting this warning, my 2009 140tdi hatch started to rattle like this on the way to work last night, I couldn't see anything obvious in the dark, I'll make the rear brakes my 1st check.
  3. I looked at FL in local dealers, In addition to changing the parts mentioned the tops of the rear wings each side of the bootlid look to have a slightly sharper crease in them. I like the LED clusters in the pictured 'old' shape, would i have a problem fitting them to my '09 SE?
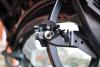
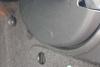
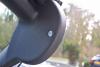
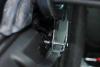
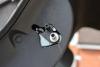
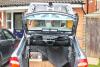
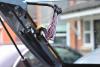
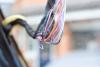
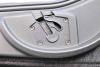
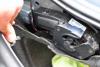
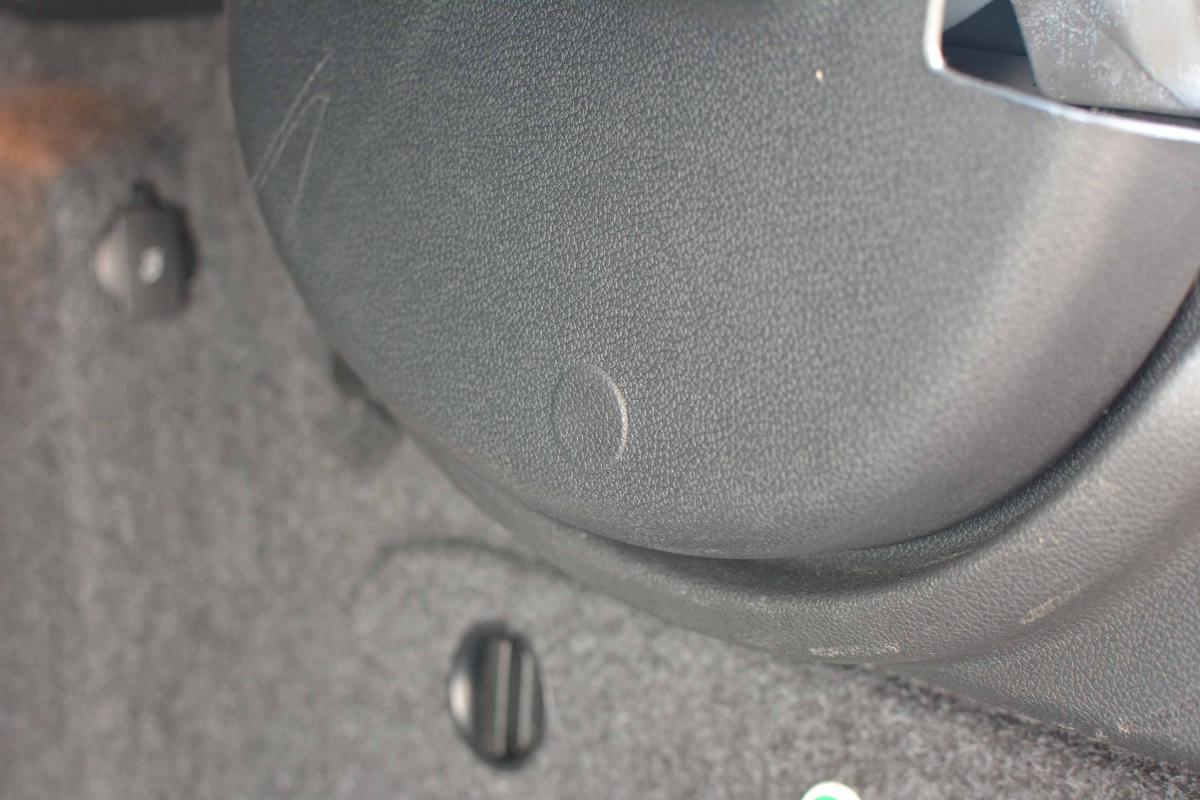
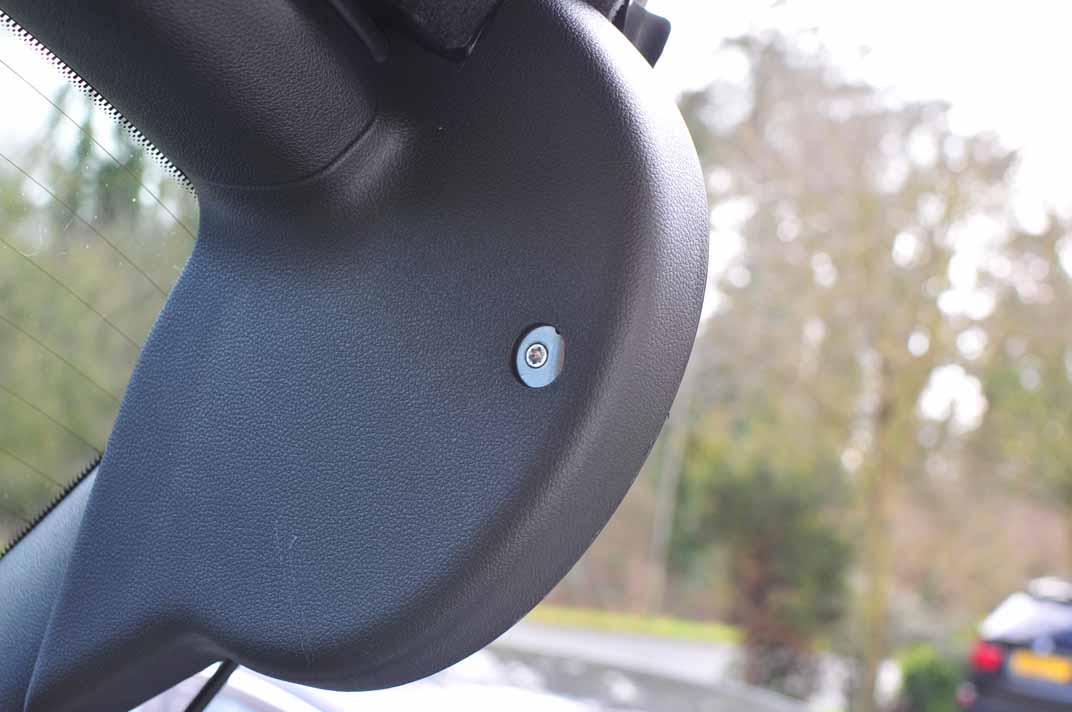
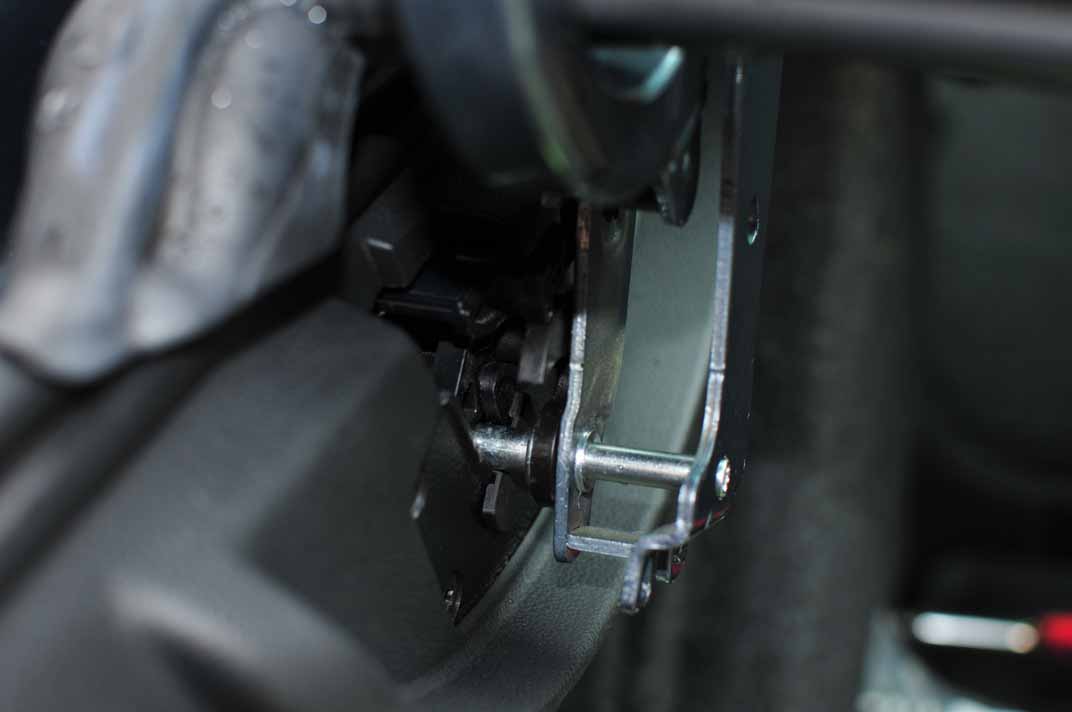
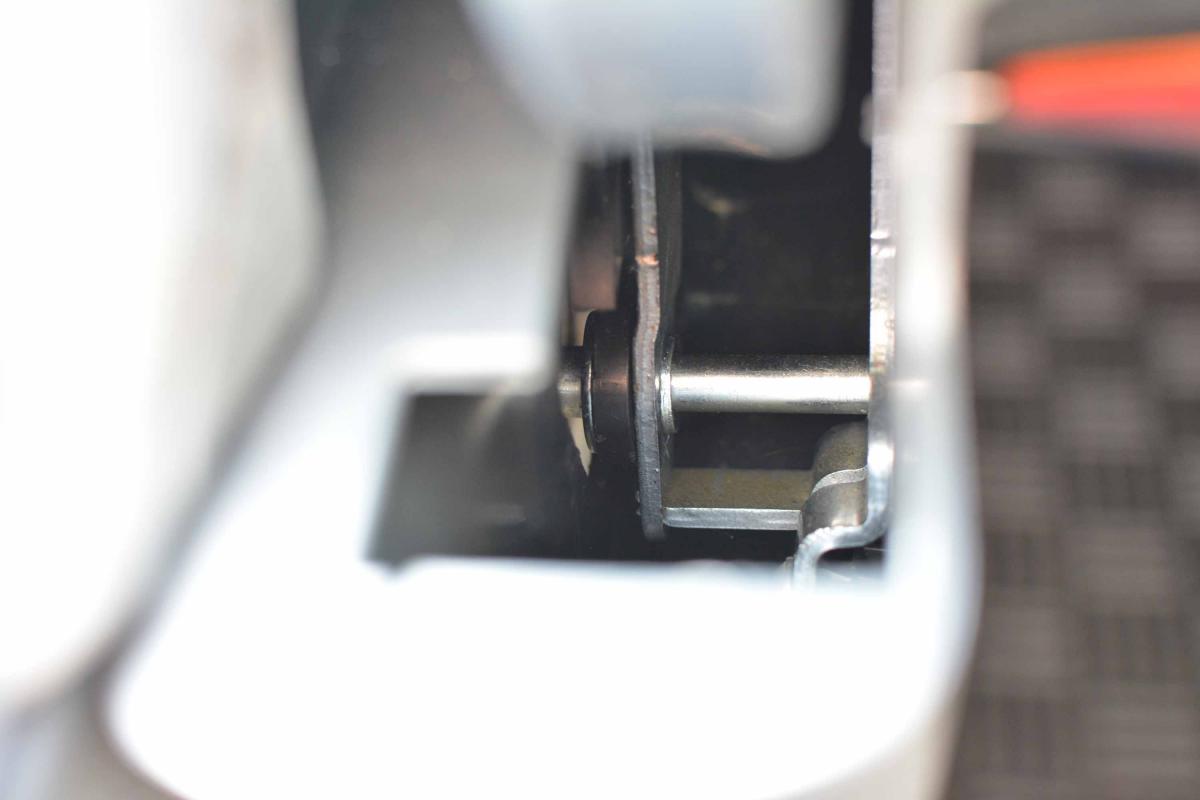
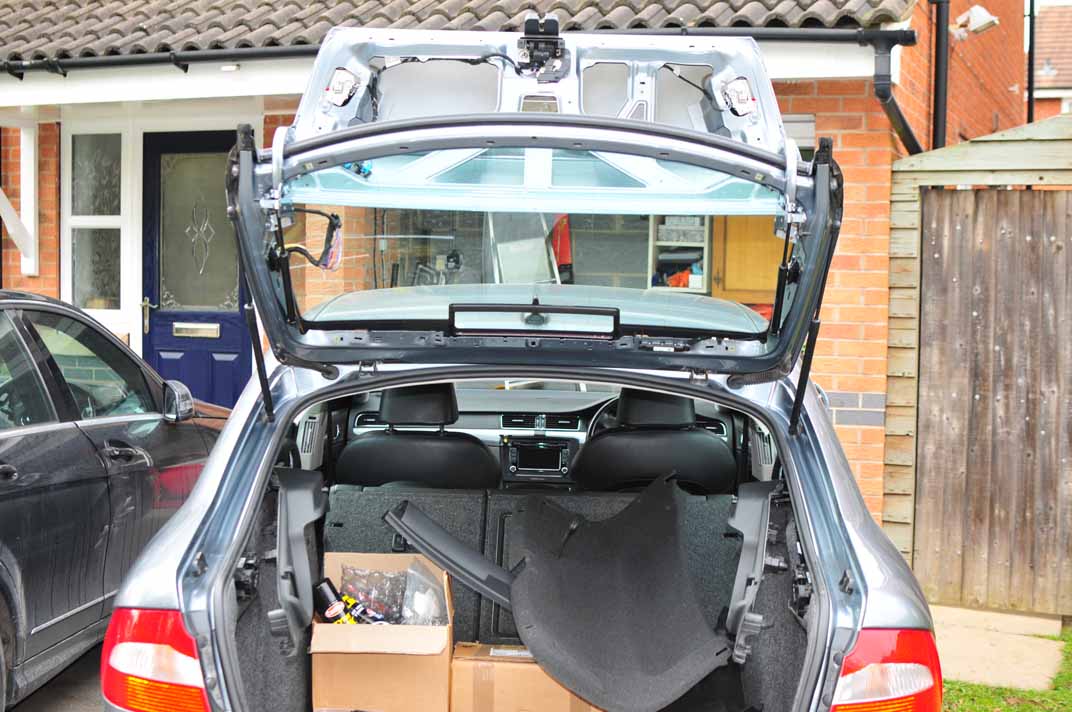
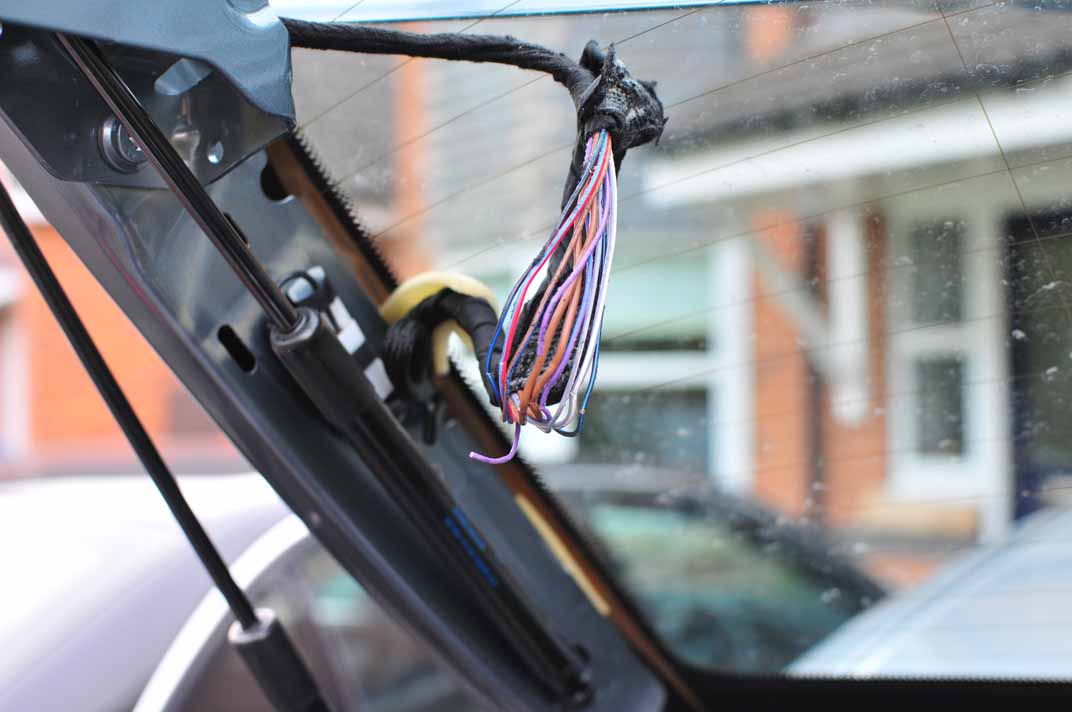
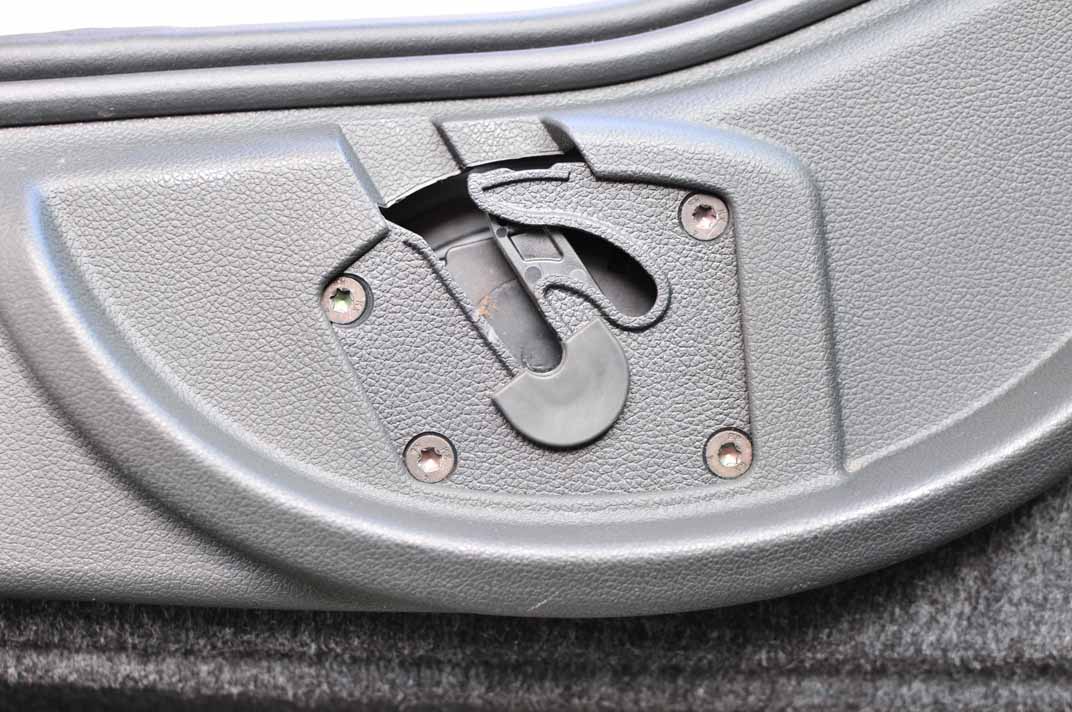
  4. The fault I had with my twindoor was that neither of the boot lid buttons would work and the only access I had was boot not hatch and only via the remote, after much fumbling and stripping down I discovered that the fault was broken wiring which runs through the left-hand side of the boot/hatch via the hinge to the roof of the car, there were no fault codes showing on VCDS. Once you understand it the twindoor system is not complicated, the main components are the usual centre mounted centrally locking boot lock, two electrically operated latches, one mounted each side of the luggage compartment, a bolt and hook assembly each side of the tailgate and the two boot lid switches. Boot or Hatch mode is determined by the position that the side latches push the tailgate mounted bolt/hook assembly into, activated by pressing the relevant button(s) on the boot lid. Pic below shows bolt/hook assembly exposed in hatch mode. The following is a rough guide with some pictures to assist anyone attempting this repair, I’m not an expert and someone with more knowledge may have hints on refining this guide. As only the boot lid will open the 1st task is to release the top glass part of the hatch from the car, this is done by removing the long torx headed pin from the side bolts on each side of the car, looking into the plastic covered hinge casing this is the bright metal pin pictured below. To do this 1, Remove the plastic trim button on each hinge cover (pic below) 2, unscrew and remove the side bolt retaining screw (pics show exposed head (tailgate open in this shot) and in situ (hatch closed) but without covers for clarity) Now using a large flat bladed screwdriver or trim removal tool lever the side bolt/hook away from the upper tailgate mounted bracket, this is fiddly and required some jiggling from side to side however once free on both sides the upper tailgate can be raised, the amount of clearance required is only a little more than the thickness of the body coloured tailgate bracket. Now recover the side bolt/hook components from wherever they may have fallen at each side of the car. NOTE MY PIC SHOWS THE PIN YOU HAVE JUST REMOVED STILL IN PLACE. Next remove the inner trim from the boot lid and the plastic covers from the upper part of the tailgate, on the upper part start with the horizontal trims then the side trims 1st removing the outer hinge covers (pic below), these panels just pull away from the tailgate except for a small screw on each inner hinge cover Working inside the boot lid release the wiring from its plugs, note the route and feed the wiring loom out of the lid through the hinge and free of the car to just past the damaged area, below are 2 pics of the wiring condition that greeted me! Plus stripped tailgate open. I repaired my loom but believe that a repair section is available from Skoda, the repair can just about be made without shortening the loom so much that it is strained at the boot lid connectors, when repairing the loom mark the wires carefully as some are the same colour! Refit and connect the wiring. Next you will need to close and lock the tailgate without refitting the side bolt/hook parts, this should lock the boot lid normally, now if all is well you should be able to unlock the boot IN HATCH MODE and the high level brake light will give its confirmation flash, this will position the side latches to accept the hatchback in its complete state when you have finished. See below 1, latch in boot lid mode, you won’t be able to close the complete tailgate in this position! 2, latch in Hatch mode Working with the hatch open refit the earlier removed screws and assemble the bolt/hook parts as shown below, note how the hook locks around the body coloured pin on the hinge, this locks the boot lid and upper glass into the complete hatchback. Now open and close via the boot lid buttons to confirm that all is working correctly, if it is the upper brakelight will give its confirmation flash and when closing the hatch you will hear its usual extra clunk as it is locked down by the side latches. Reassemble any removed trim, job done! Good Luck.
  5. Hi, sorry I didn't get around to posting pics of my experience fixing this fault, I will do it in the next couple of days. As for the wrong light messages the plugs do only fit one way but I assumed I had incorrectly joined the two brown earth wires also my wiring fix is only temporary and I'll buy the loom repair section next time there's a fault.
  6. I've had this once with the reversing lights after repairing the broken wiring loom in my twin door, I put it down to my incompetence joining two wires incorrectly, but perhaps not...
  7. I love the whole package (09 plate, 2.0tdi se) had to drive my wife's 09 Merc c class diesel a few days ago, it's very uncomfortable, Superb soon put the smile back on my face.
  8. I popped into Derby showroom today buying parts, when I asked about FL Superb they said it was out in June, they didn't have details on any revised engine lineup though.
  9. I will put a guide together with pics ASAP, yes the elaswin was useful if less than crystal clear in places.
  10. Finally got around to fixing this, problem was as above. The wires from the bootlid switches run through the left hand bootlid hinge and up the left side of the window, if you open and close a lot in boot mode rather than full hatch the wiring gets open and closed around the hinge eventually breaking. Took me about 5 hours to fix, I've got pics if anyone's interested.
  11. +1 Especially for family summer run to Spain.
  12. I've been on Erwin and printed all the relevant material from the workshop manual but haven't had time to work on it yet, I'll report progress as and when I get around to it for anyone else's benefit.
  13. Thanks Stuart, I had seen this earlier and I'm going to try it tomorrow although the fauld code points in another direction, I think?
  14. Hi folks, I decided to vacuum the Superb out this afternoon and found that the twindoor will open in bootlid mode only with only the remote key, no boot or hatch mode from the car as both of the buttons on the twin door have stopped working. 1st I checked the fuse (ok) then plugged in VCDS and got the following fault log; 03396 - Supply voltage terminal 30 for central locking 011 - Open Circuit - Intermittent Freeze Frame: Fault Status: 00101011 Fault Priority: 1 Fault Frequency: 1 Reset counter: 147 Mileage: 167209 km Time Indication: 0 Freeze Frame: Term 15 Off Voltage: 12.25 V OFF ON Term 50 Off OFF OFF Before I go scouring the online manual for help can anyone give me any guidance? Many thanks Mart
  15. It looks like that to me also the number plate looks to be in a temporary place on the bumper. I just bought an 09 superb and will change it in approx 3 years possibly for a 2+ year old FL model.
×
×
  • Create New...

Important Information

Welcome to BRISKODA. Please note the following important links Terms of Use. We have a comprehensive Privacy Policy. We have placed cookies on your device to help make this website better. You can adjust your cookie settings, otherwise we'll assume you're okay to continue.