hobbie2k
Members
-
Joined
-
Last visited
Everything posted by hobbie2k
-
No need to apologise for stating the obvious. Sometimes I realise the answer I needed was obvious. I have tried opening and closing the vent with the knurled roller switch. It doesn't seem to make a difference to air flow. It is possible that the switch has become disconnected from the vent door and left it closed, but i think I can still feel the door moving. Maybe if it is just the centre console I'll try taking it apart one day.
-
May have to take it to a VW specialist shop, then. Don't know anyone in Adelaide with VCDS. The only google results I get are for climate control models. Or I may just live with it, as we're planning on replacing it with an Enyaq as soon as the car is available in Aus. Thanks
-
It does have the rear upper vents (the ones in the centre console/armrest), and they are the ones that are not working. They definitely used to work, and we haven't changed the way we use the hvac. I have tried max fan at various settings to see if there is any flow. I think I can feel a trickle, though it can be tough to be sure. Temps are getting above 40 and the kids have commented that it gets warm in the back.
-
So, it's a 2015 Octavia Wagon without climate control (just standard old-fashioned hvac control). I'm not getting any air from the rear seat air vents. The front vents all work fine. Settings don't seem to have any affect. I've seen there is a way to reset the climate control models, is there a way to reset the standard system? Any other ideas short of tearing the dash apart?
-
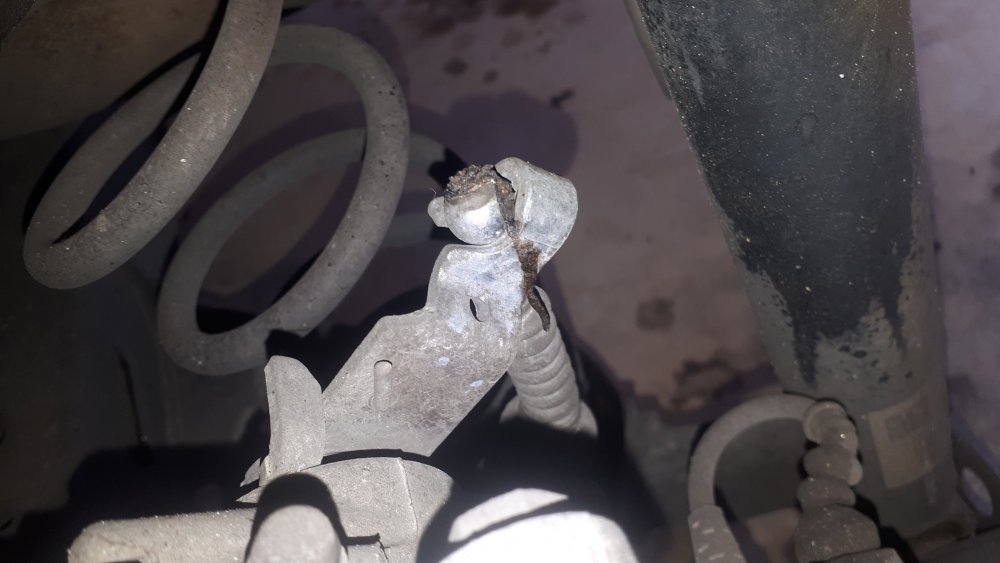
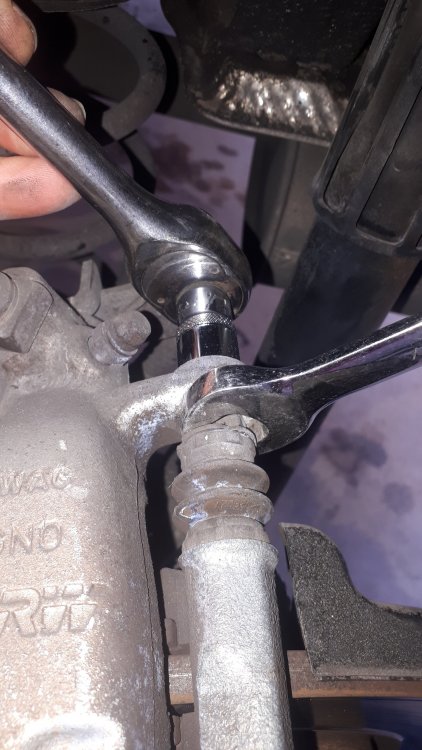
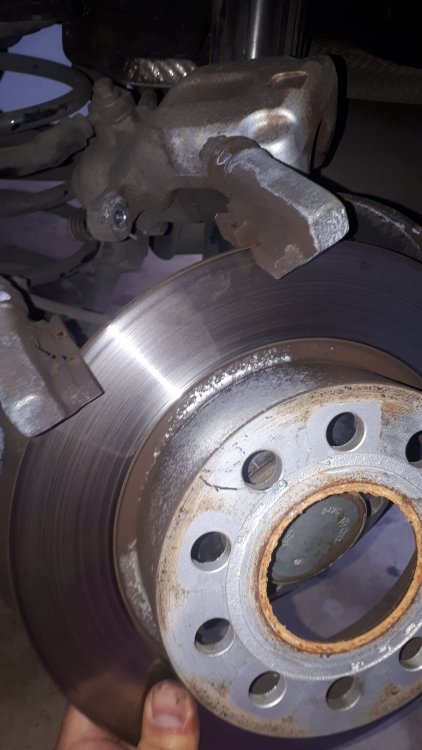
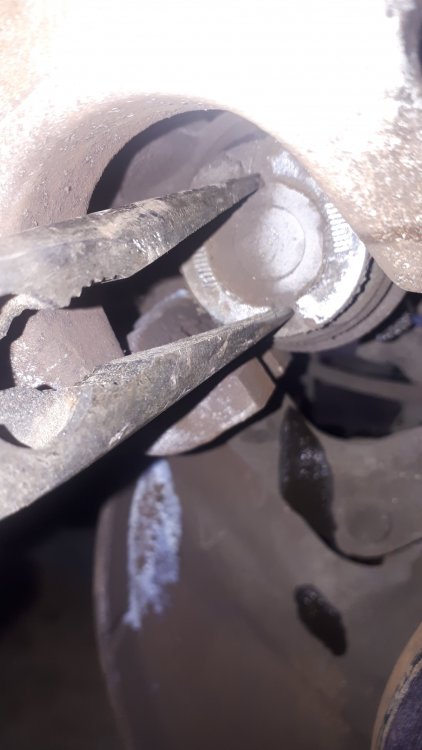
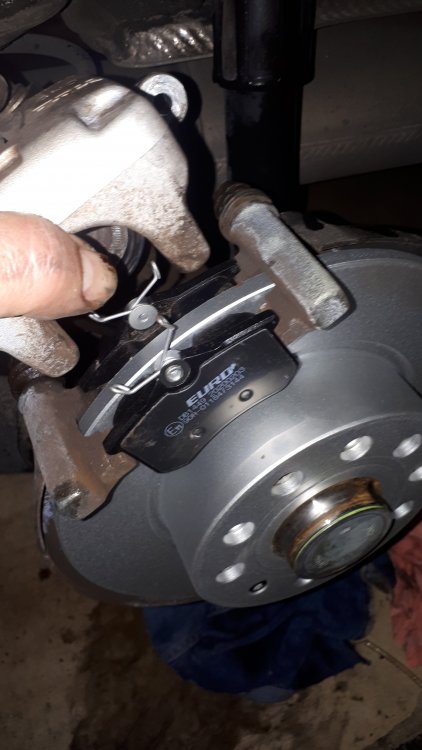
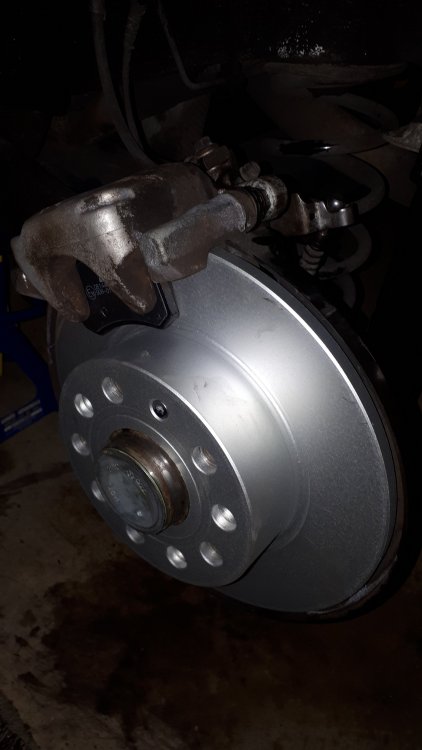
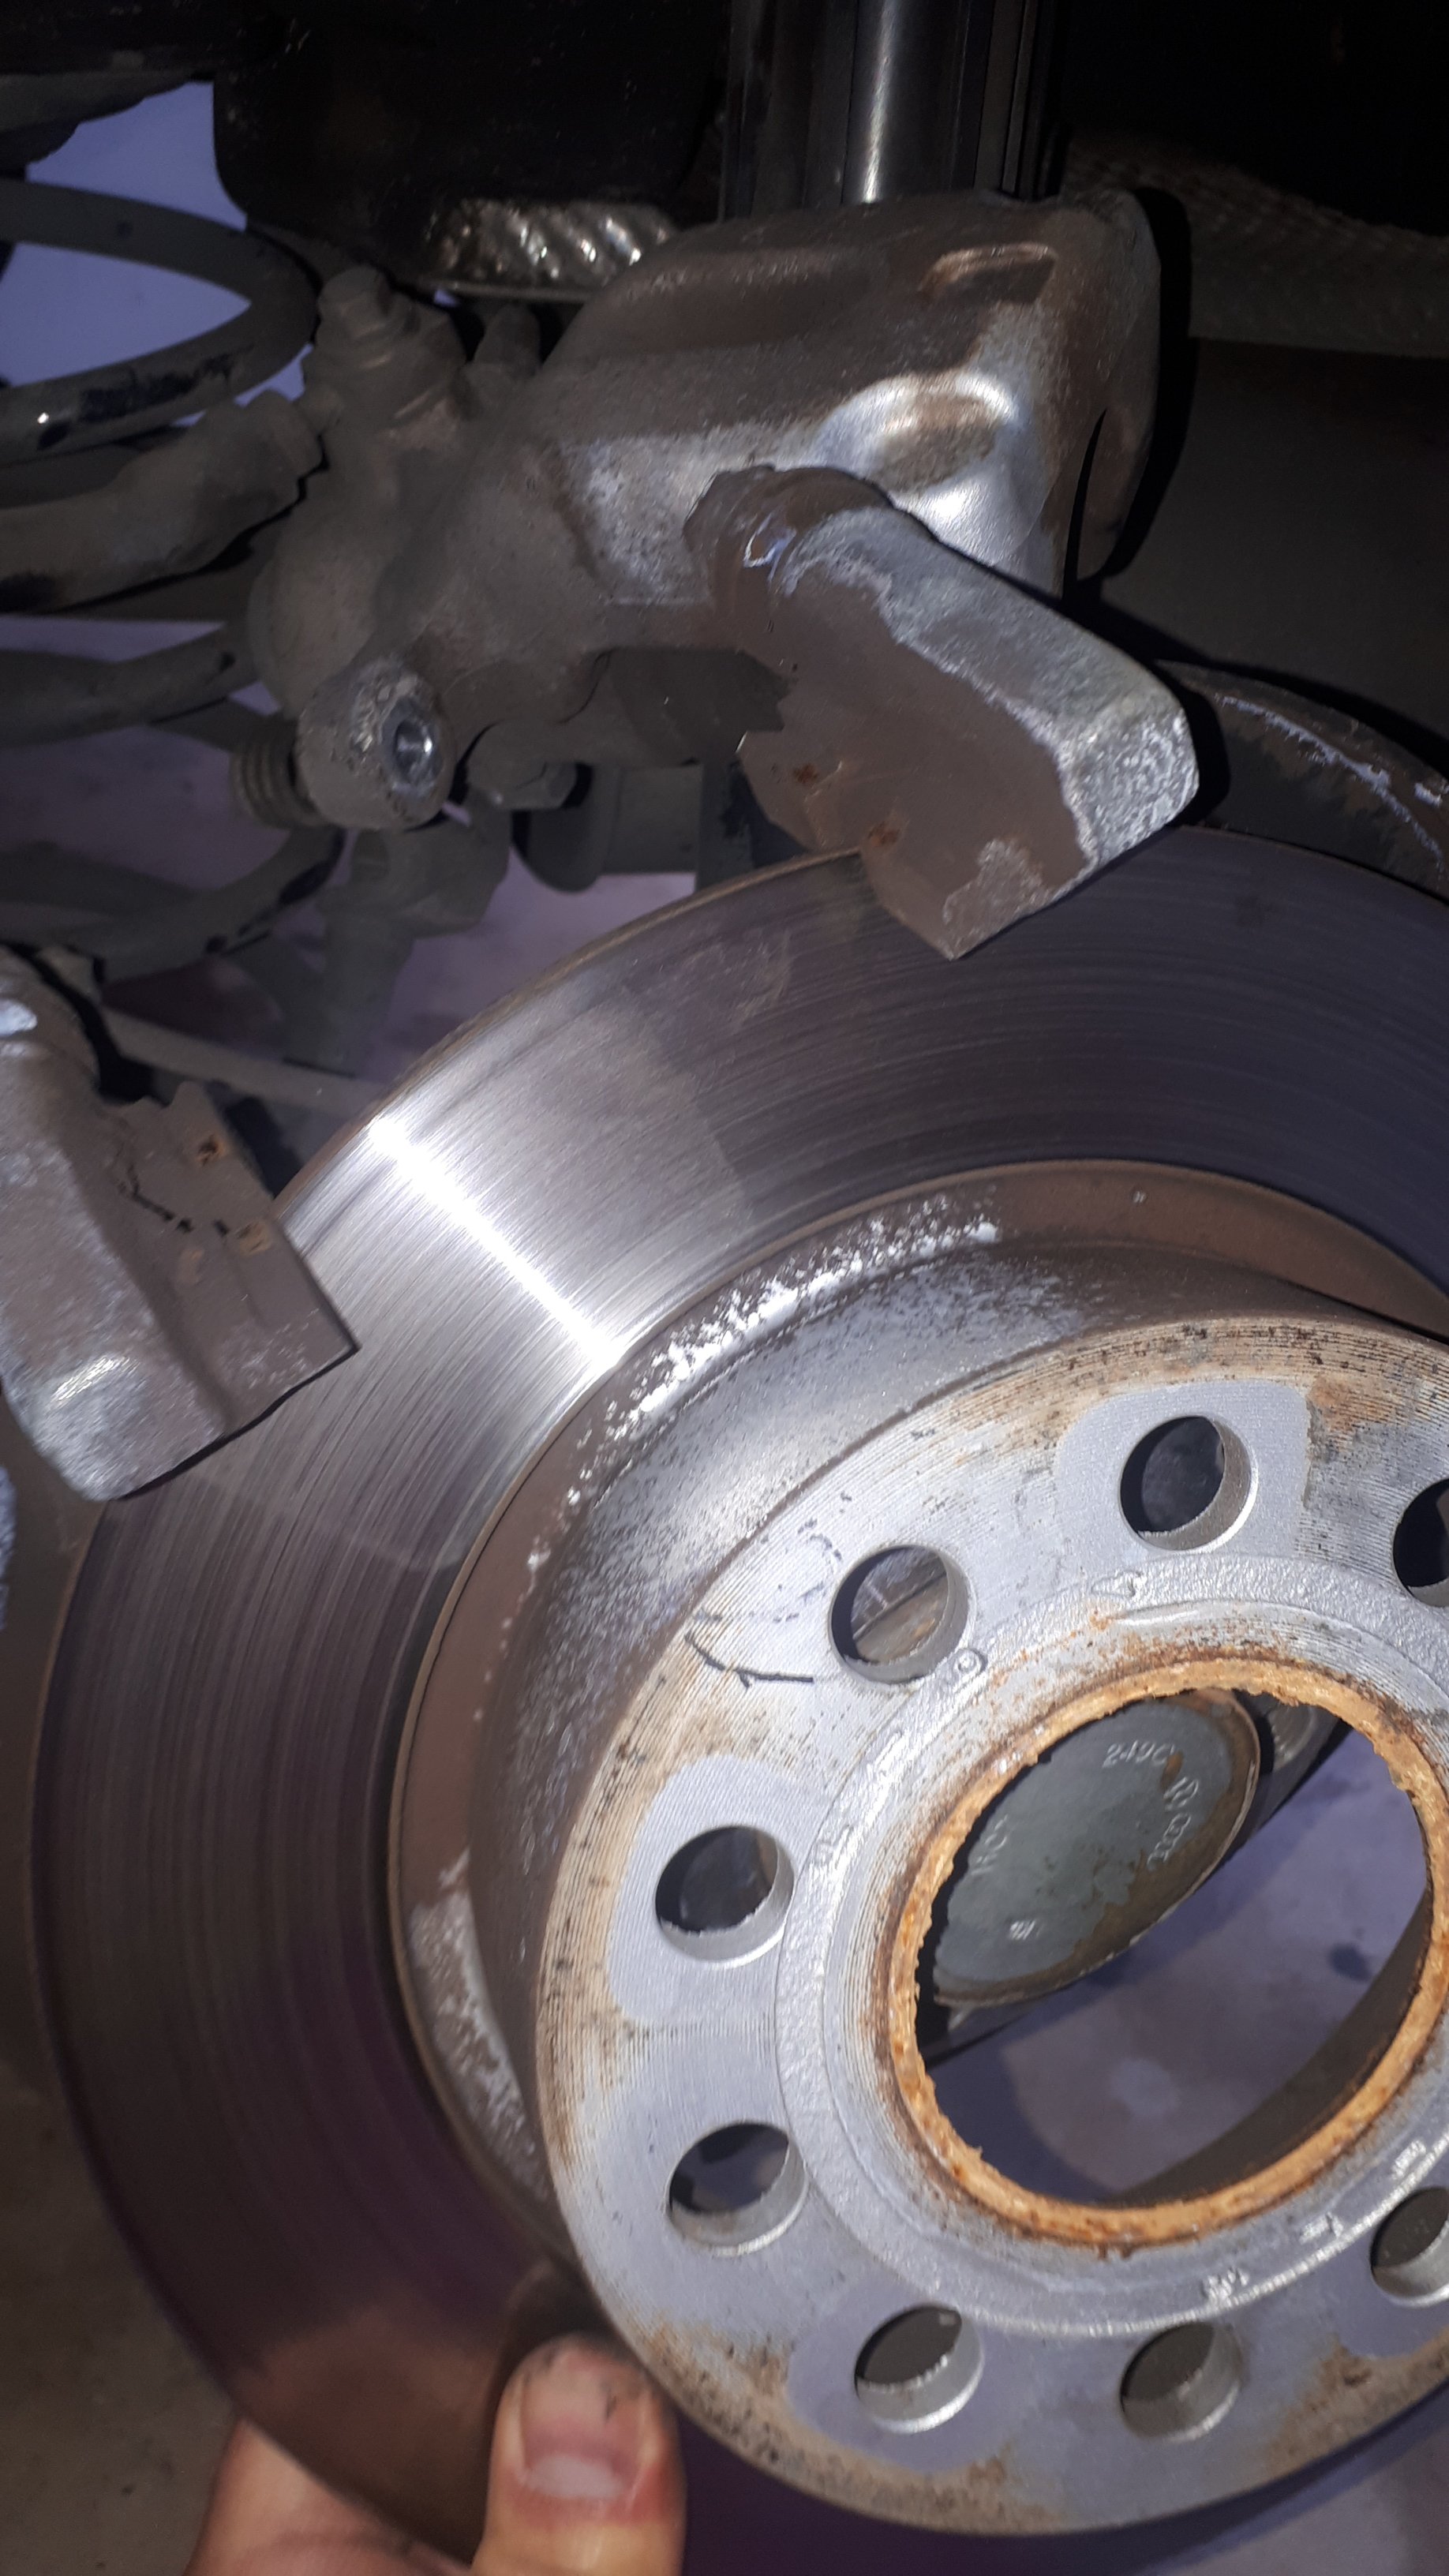
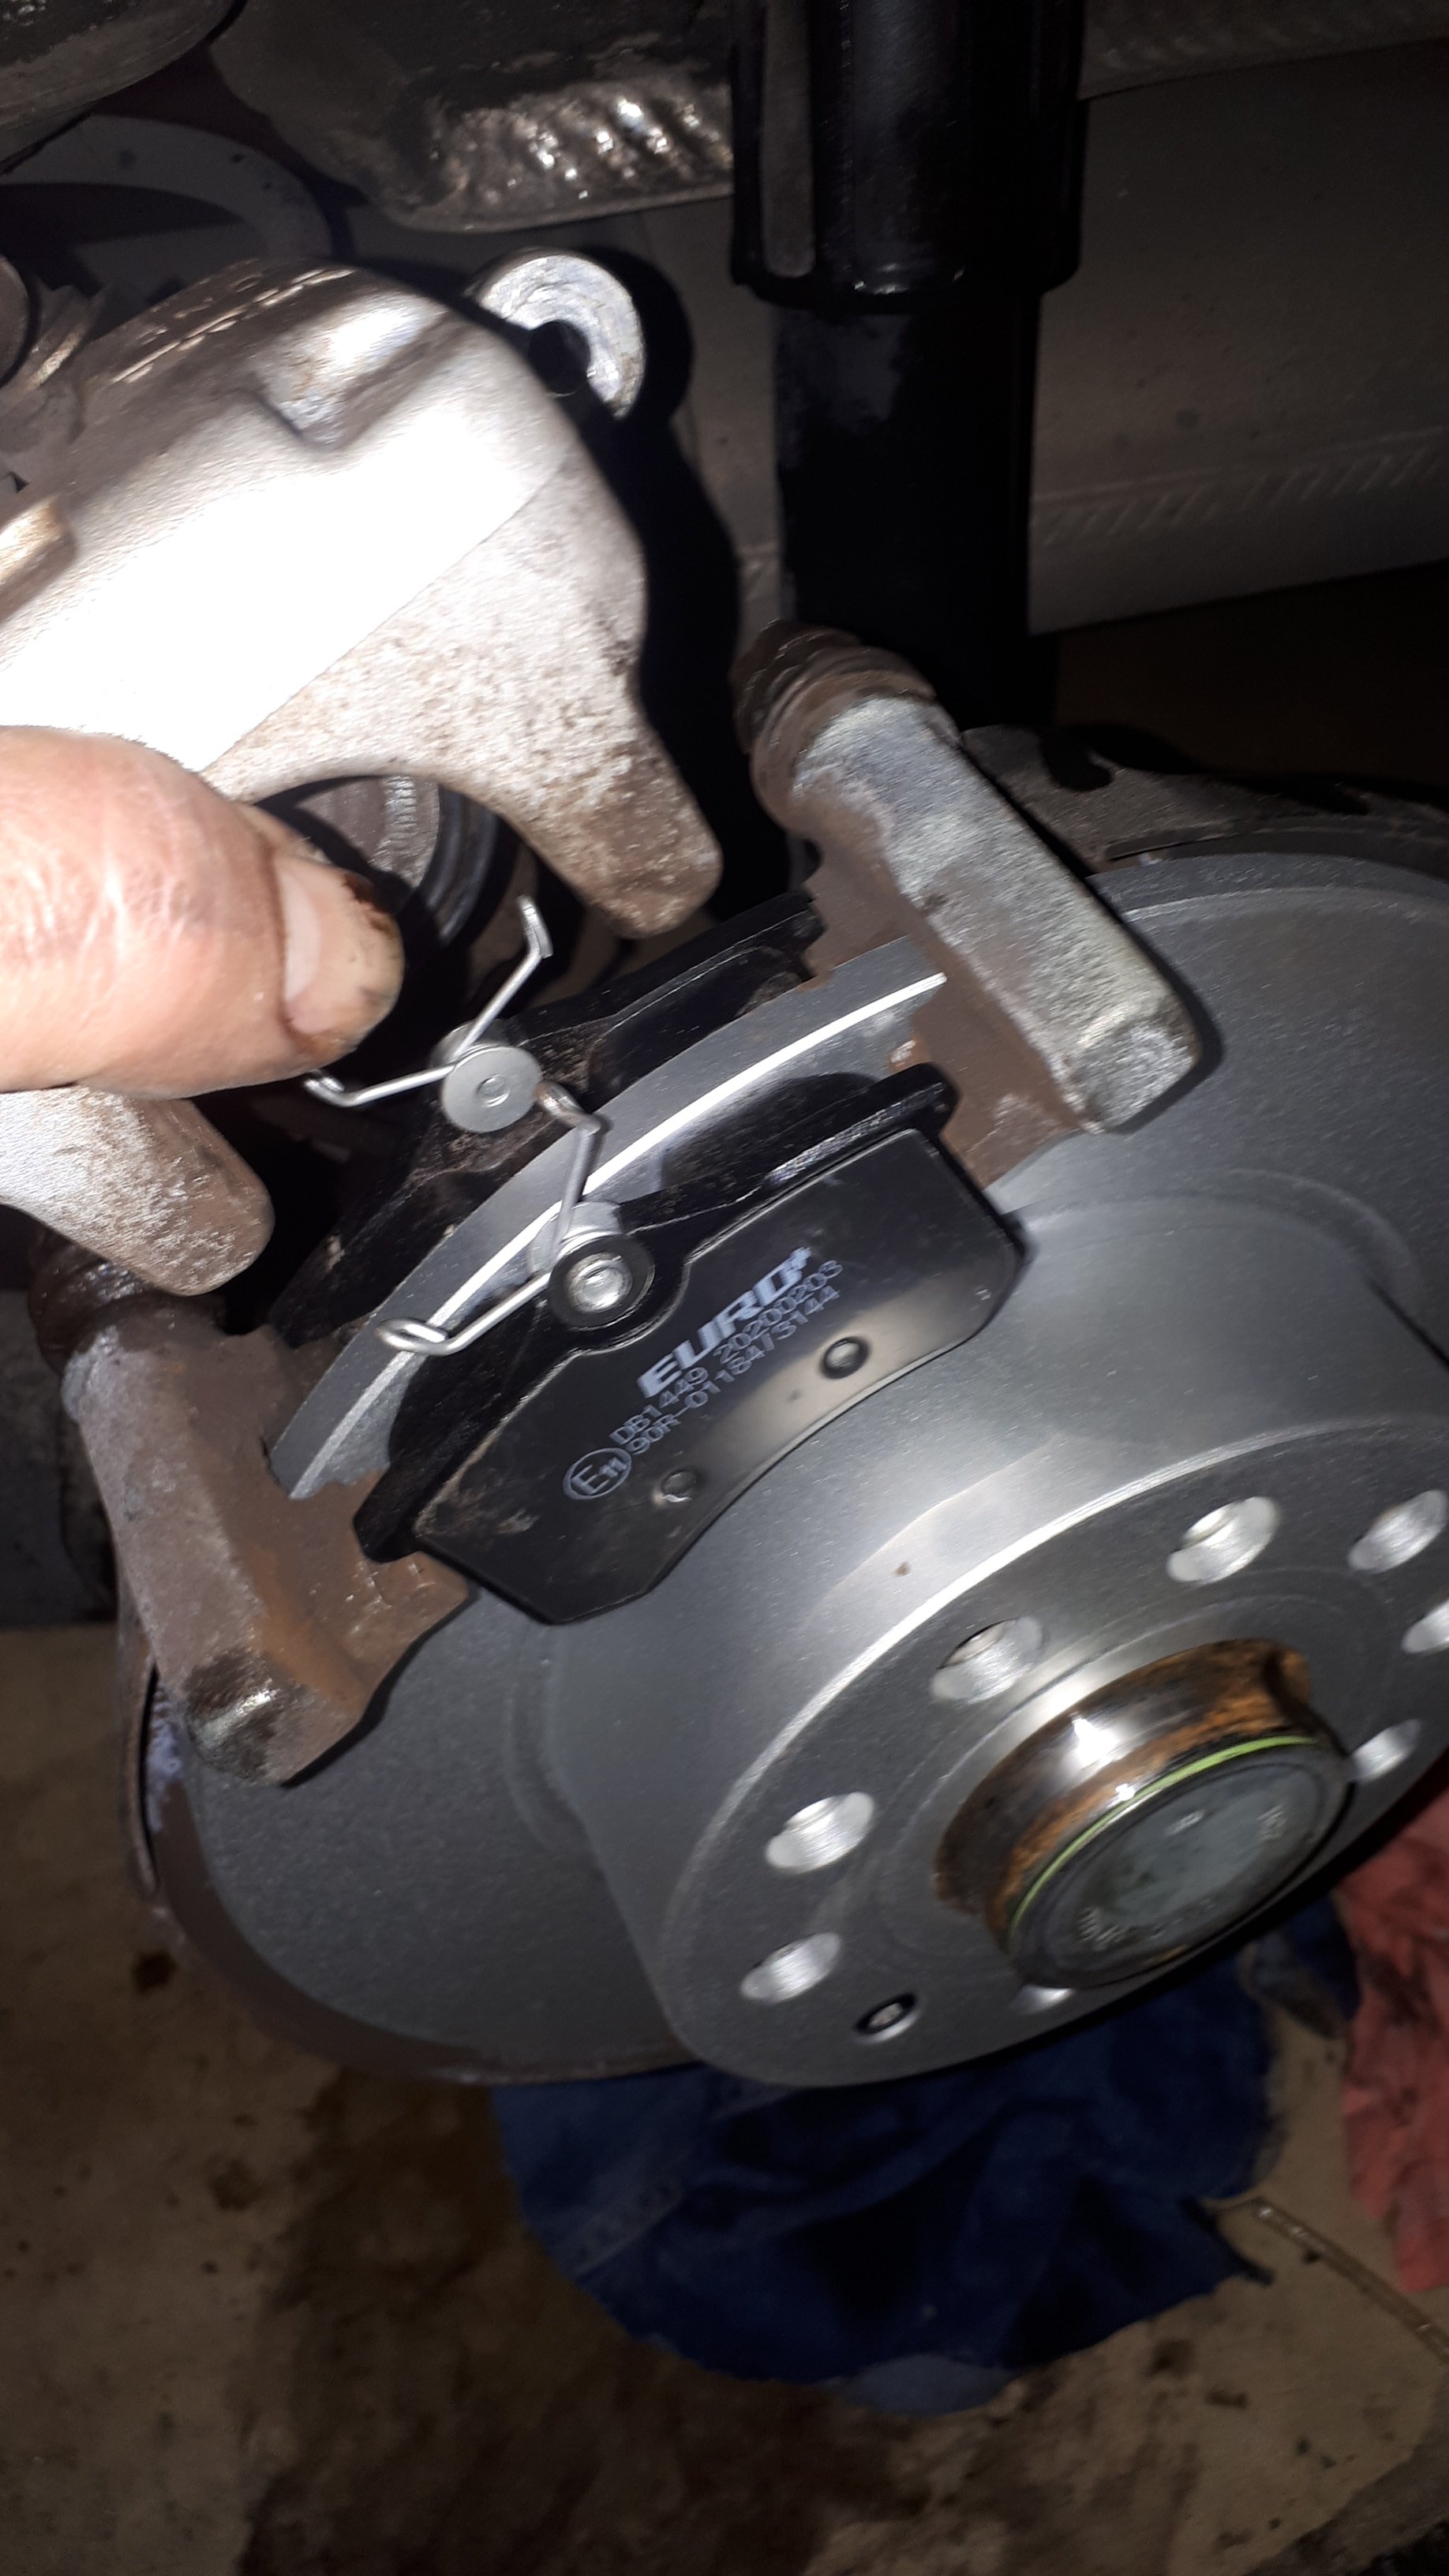
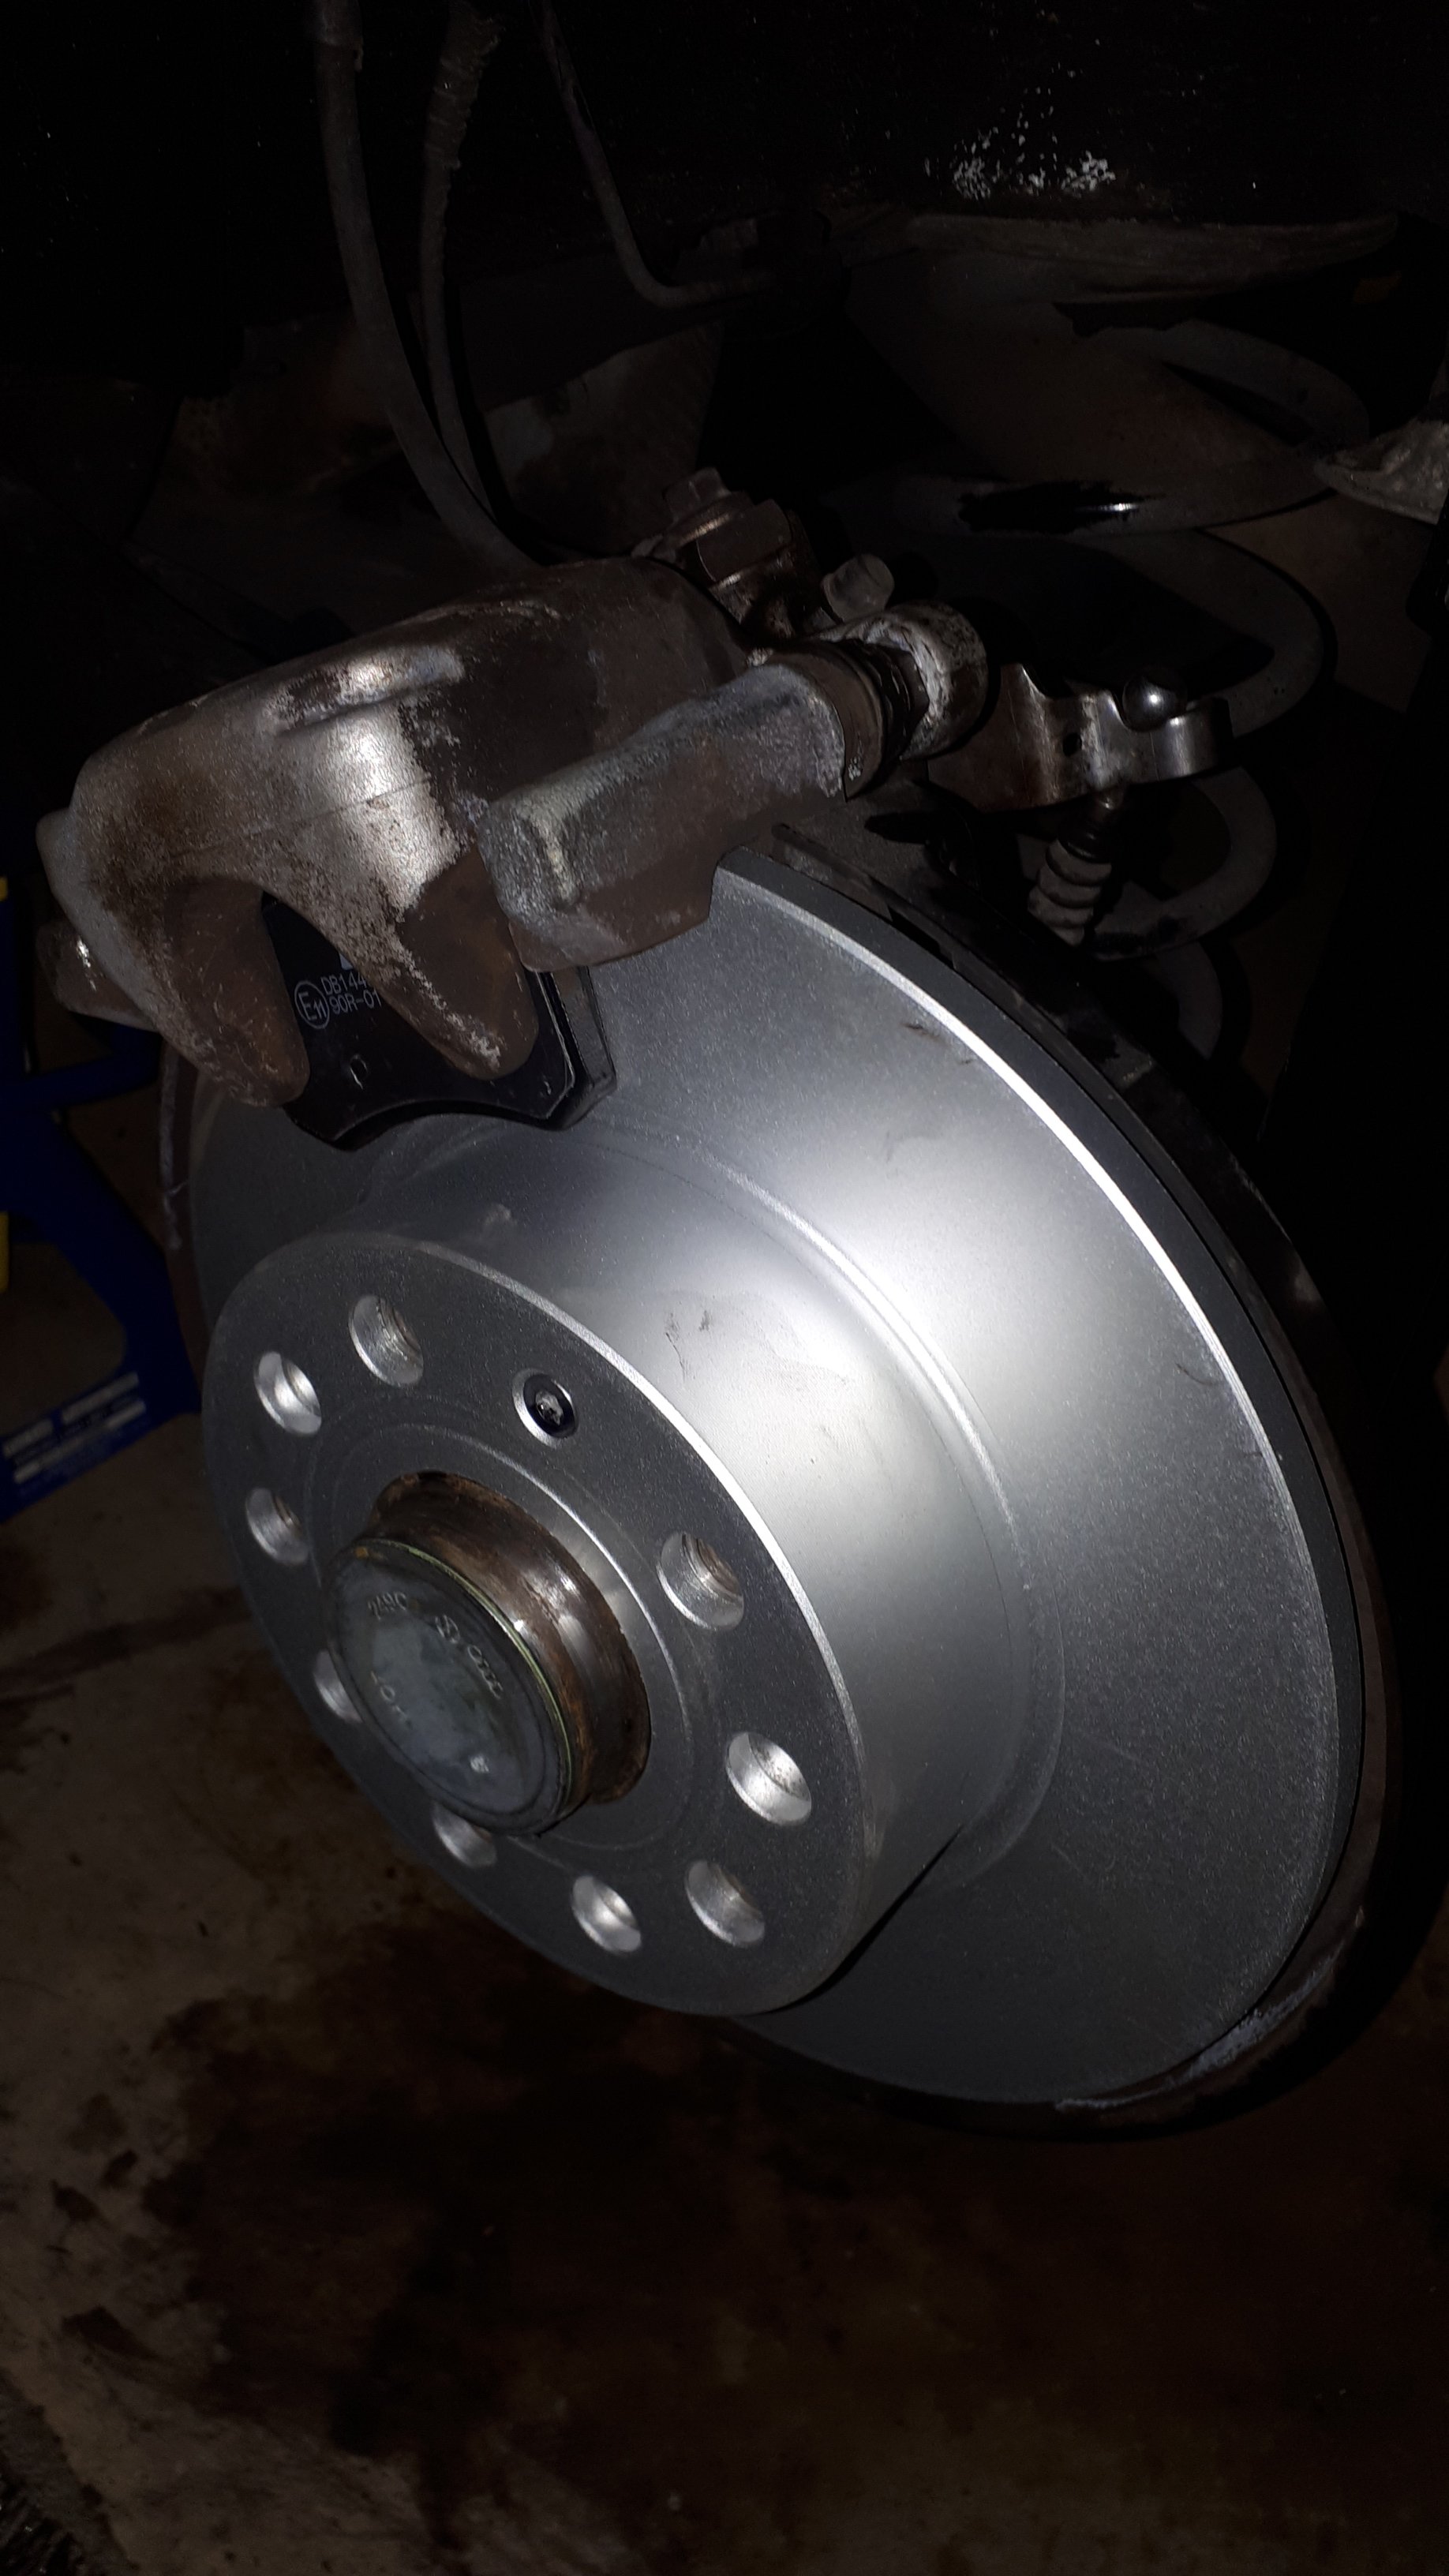
I spent the day swapping the rear pads and rotors on my 2015 1.4TSI Estate and thought I would put a little write up on here. 1KD Rear Brakes Rear Rotor DBA2811 253mm Rear Pads DB1449 Tools: Wheel Chocks (block of wood or brick) Jack 2x Jack Stands Lug cap removal tool Tire Iron Brake Cleaner 11mm (optional), 13mm, 15mm Wrench T30 Torx Key Rubber Mallet or block of wood and small hammer Wire Brush Needle-Nose Pliers or socket adapter or piston pressing tool Brake Bleeder hose and tray (optional) 1. Park car on a firm, level surface. 2. Chock the front wheels. Put an auto transmission in "Park", leave a manual in gear. Release the park brake. 3. Jack up rear of car slightly to take weight off rear wheel. 4. Remove lug caps (if present), then loosen the lugs. 5. Raise rear wheel completely off the ground, place jack stand under a strong, stable point, and lower car onto the stand. Ensure the car is stable. 6. Remove the lugs and the rear wheel. 7. Repeat steps 3-6 on the other side. Work on one side at a time. That way if you have any questions you can reference the other side. 8. Open the hood and loosen (but don't remove) the brake fluid reservoir cap. You want to leave the cap on top to prevent any debris or water from falling into the reservoir. 9. Check the fluid level. It should be about halfway between Min & Max. The level will rise as you install the new pads and you do not want it to overflow. If it is near Max, you may have to remove some with a clean, dry syringe or medicine dropper, or pump a small amount out of a bleed screw. 10. Spray the brake caliper down with brake cleaner to settle any dust. Do not use air. You don't want to risk breathing the dust. 11. Disconnect the park brake cable from the rear of the caliper by pressing the lever down and pulling the cable ball out of its cradle. 12. Use a 13mm wrench or socket, and a 15mm wrench to remove the bolt at the back of the two caliper sliders. The 15mm nut is quite narrow so it may be difficult to get the wrench fully on it, but as it loosens there will be more room. 13. Once the slider bolts have been removed you should be able to pull the caliper up (may have to wiggle it a little). Do not let the caliper fall or stress the rubber brake line. It could easily damage the line resulting in potential failure. 14. You can now remove the old brake pads. If you plan to reuse the old rotor, skip ahead to step 19. 15. To remove the rotor, use a T30 torx wrench to remove the small retainer screw. It should come loose easily. 16. Use a rubber mallet and/or block of wood and small hammer to gently tap the rotor off the hub. Using a hammer directly on the rotor could cause cracks resulting in failure if you plan to reuse to old rotors. 17. Once the rotor is loose, you should be able to pull it off without removing the caliper carrier. 18. Use brake cleaner and a wire brush to clean and smooth the hub face. A dirty face can result in a misaligned rotor resulting in warping, pulsing, and poor performance. 19. Now you need to retract the caliper piston back into the caliper to create enough clearance for the new, thicker pads. On front calipers you can usually just use a clamp to press it in, but on rear calipers you need to twist the piston clockwise while pressing it in. There are tools you can buy to make this faster and easier (a ratchet adaptor, or a special tool just for twisting and pressing rear pistons), but I just used a set of needle-nose pliers inserted into the two recesses of the caliper piston. It may take a while before the piston retracts (I have spent more than an hour on one piston). If it doesn't seem to be retracting, opening the bleed screw with an 11mm wrench can help relieve pressure (attach a length of hose draining into a pan to avoid a mess). I have also found that turning the piston counter-clockwise for half to a full turn can help free it up. 20. Now that the piston is retracted, you can install the new rotor and secure it with the T30 set screw. 21. Install the new pads into the caliper carrier firm against the rotor. 22. Slide the caliper over the pads (you may have to wiggle it a little or give it a thump). Line up the caliper and reinsert the caliper slide bolts. Tighten them firmly with the 13mm and 15mm wrench. 23. Reattach the hand brake cable. 24. Inspect your work against the other side to ensure everything is back in the right place. Spin the rotor to be sure it moves freely (light rubbing from the pads is fine). 25. If everything looks good, repeat steps 10-24 on the other side. 26. Now that you have new pads and rotors installed, apply the hand brake, mount the wheel back on the hub and tighten the lugs in a starfish pattern. Double check to be sure all the lugs are evenly tightened. 27. Jack the car up and remove the jack stands. 28. Take the car for a spin around the block. Accelerate to a moderate speed, check that traffic is clear, and brake firmly to a stop (not a panic stop, but firm). Do this a few times forward and a few times in reverse to bed the brakes while listening for grinding or squealing, and feeling for pulsation, shaking, or pulling. 29. Visually inspect the brakes to be sure everything is still in place and there are no signs of uneven braking. 30. Get yourself a beer or vice of your choice and bask in the glow of a job well done.