cw246
Finding my way
-
Joined
-
Last visited
Everything posted by cw246
-
-
Thanks for that, I've sourced a whole display model off of ebay which came off of the same model & looks the same in photos. Once I've got all the parts I'll go for take II of trying to remove the panel and have a look as to what is holding it on & will post photos of what I find should someone make the same mistake as I did in the future!
-
-
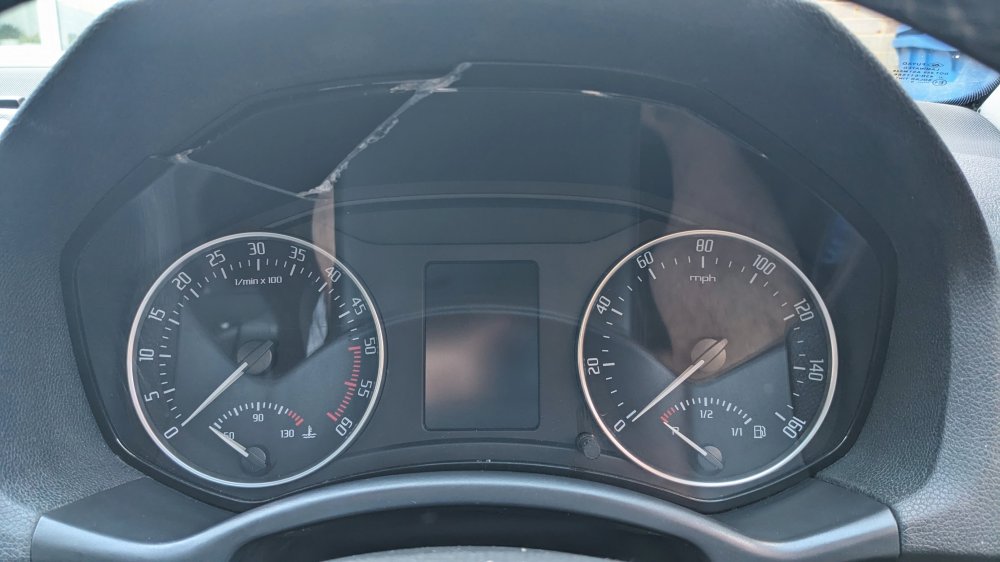
Hi All My speedo has an issue where the LED's flicker so was attempting to remove the cluster. when at the stage of inserting the trim removal clip(s) at the top upon levering the perspex shattered per attached image & I now have a nice missing triangle. I fear the years have not been kind to it. Hopefully more of an annoyance than an MOT failure & the dials are still functional! Car in question is a UK 2011 1.6tdi Octavia estate (elegance) In the question of "how much is this learning experience going to cost me" can the perspex be bought separately & if so where from/is there a part number or do i have to replace the whole cluster and do I need to get the ECU recoded if I do? (I can see on ebay they go for ~£50 odd so not outrageously expensive) Thanks in advance