Mintyfresh
Members
-
Joined
-
Last visited
Everything posted by Mintyfresh
-
You are correct Lukas, it's a ongoing battle! I dare say - like any job - once you have done it once, it'll be much easier the next time. Thanks again. Just to add, that I had taken one photo during the disassembly that could help others, that I have now attached. It helps to show the removal of the microphone plug. Insert a small pointy object - like a paperclip end or similar - into where no 1 is arrowed and pull out towards no 2. Do not just pull the wires, you'll most certainly break them in the plug, which would be a world of annoyance! The wire junction box itself can be unclipped fairly easily to allow removal of the sunglasses holder.

-
@Lukas_2611 and @Giannis20 , thanks you for posting your input into this issue with the creaking roof console. I unfortunately have the same issue which was happening from pretty much new on a 2025 Octavia. It got to the point where I was holding, prodding or thumping the console on every journey due to the creaking and rattling from it. It's a very frustrating and intrusive noise which can't be tuned out by turning up the radio! I removed it from the roof today - where your photos came in very handy Lucas - to try and rectify the issue. I started by spraying silicone spray on the plastic edges where the body clips to the trim but unfortunately got a bit too liberal and some worked it's way into the reading light lens where it's could be seen through the lens. This meant I had to do a full disassembly to clean it up - where your photos came in very handy Giannis. I put a light coating of silicone grease on all plastic joints and clips and reassembled with some felt tape on other plastic to plastic contact points, very much like Lukas did. It still creaks but is better than before. For anyone else going in to do this, worthy of addition is that there is a microphone control box attached to the top of the sunglasses holder now, which as an extra wire running to it. It's for microphones for the phone integration I believe. To remove the male plug you have to poke the metal lock tab through the top of the female connector and slide out to remove (I wish I had taken photos, but you'd know what I mean if you see it). Also, when removing the circuit board (if you're going that far) the ribbon cables remove by flipping up the black locking tab as opposed to sliding it back, before removing the ribbon cable. They're very small so be delicate with tweezers preferably. The other white plug connecting the main circuit board to the smaller one is removed by pulling it upwards with a pair of needle nosed pliers - wiggle it from side to side as you remove as its a tight fit. As I say, I wish I had taken photos now to better explain but if/when anyone sees this, they'll know what I mean. It's seems the cheap, thin plastic Škoda use these days is the culprit in this creaking/rattling. My previous Octavias and Superbs didn't seem to have as much of this cheap plastic around the cabin and didn't have anywhere near as many rattles and noises and this new car does. It's a shame as it spoils the enjoyment of the car. I don't trust the dealers near me to go to the effort of taking everything apart to try and sort this issue out, like what's detailed here. It was about 3 hours I spent messing around with it today. I'd be surprised if they even bothered to investigate it as opposed to calling it a 'characteristic' or some nonsense! If you have the same issue and are wanting to attempting a fix, all the info in this subject thread is enough to get you through. Just take it easy and don't force anything - it's cheap hard plastic which cracks and breaks if forced too much. Wither it will sort the issue... that's another thing altogether.
-
We've had this problem intermittently with our 2014 Rapid Spaceback. It appears to be an issue whereby the fuel flap actuator/release motor mechanism sticks and doesn't release the flap when you push it in. In our case, a quick smack of the flap with the side of the hand, followed by locking and unlocking the car doors 3-4 times (either by the central locking button in the car or the key fob) pings it open as normal. This 'solution' was found out of frustration 😅 An IPA clean followed by a small spray of Silicone spray may help it. Alternatively, a new mechanism is around £20.00 from eBay - its the same part as a VW Golf mk7, if that assists you in finding it. Good luck on your next refueling trip (hopefully the fuel prices will have come down somewhat!).
-
MickA is correct; its the same as the Toledo, in that if you turn and look down to your right while sitting in the drivers seat, you'll see a button with a car symbol and 'OFF' to the right of the door on the plastic trim. Once your engine is off, hit that button (it'll light up amber), jump out and lock car. Interior sensors have been deactivated.
-
Further to the above; here is a link to the workshop manual for removal of the pressure pipe, for anyone wishing a 'proper' holding hand for safe removal. https://workshop-manuals.com/skoda/fabia-mk2/power_unit/12/63;_77_kw_tsi_engine/mixture_preparation_system_electronic_inj.gas/intake_manifold_and_fuel_distributor/removing_and_installing_the_throttle_valve_control_unitj338/
-
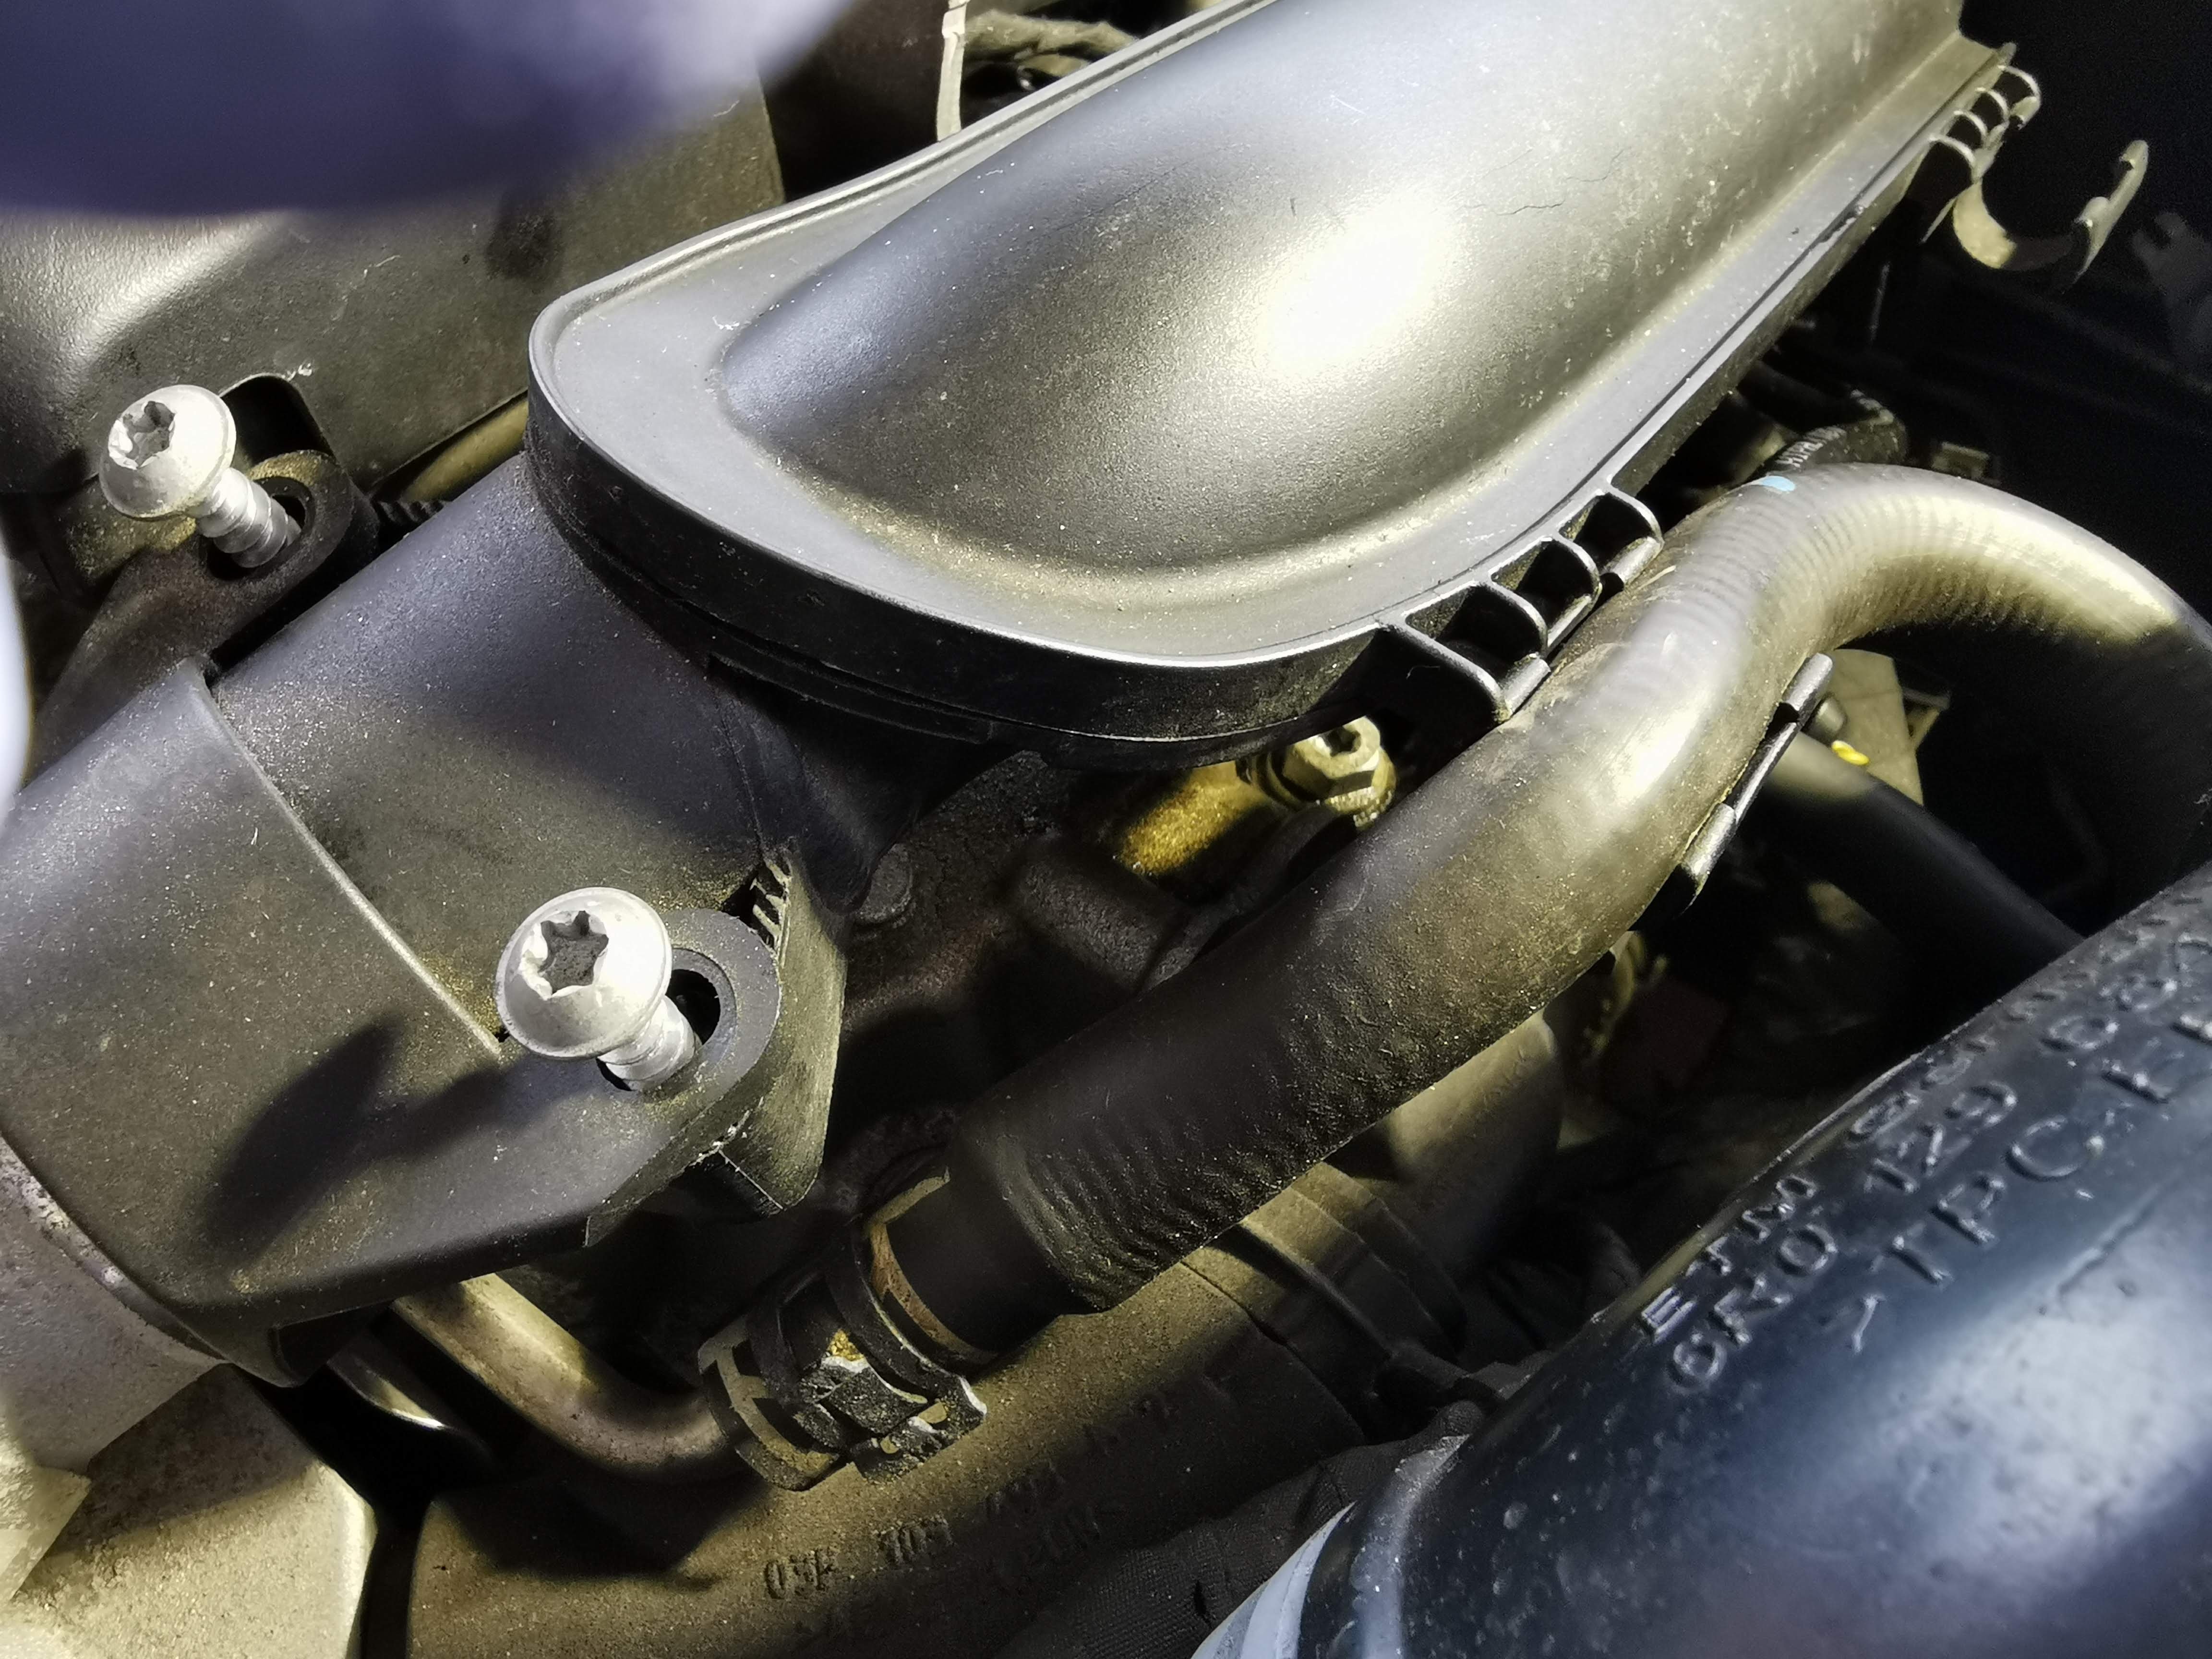
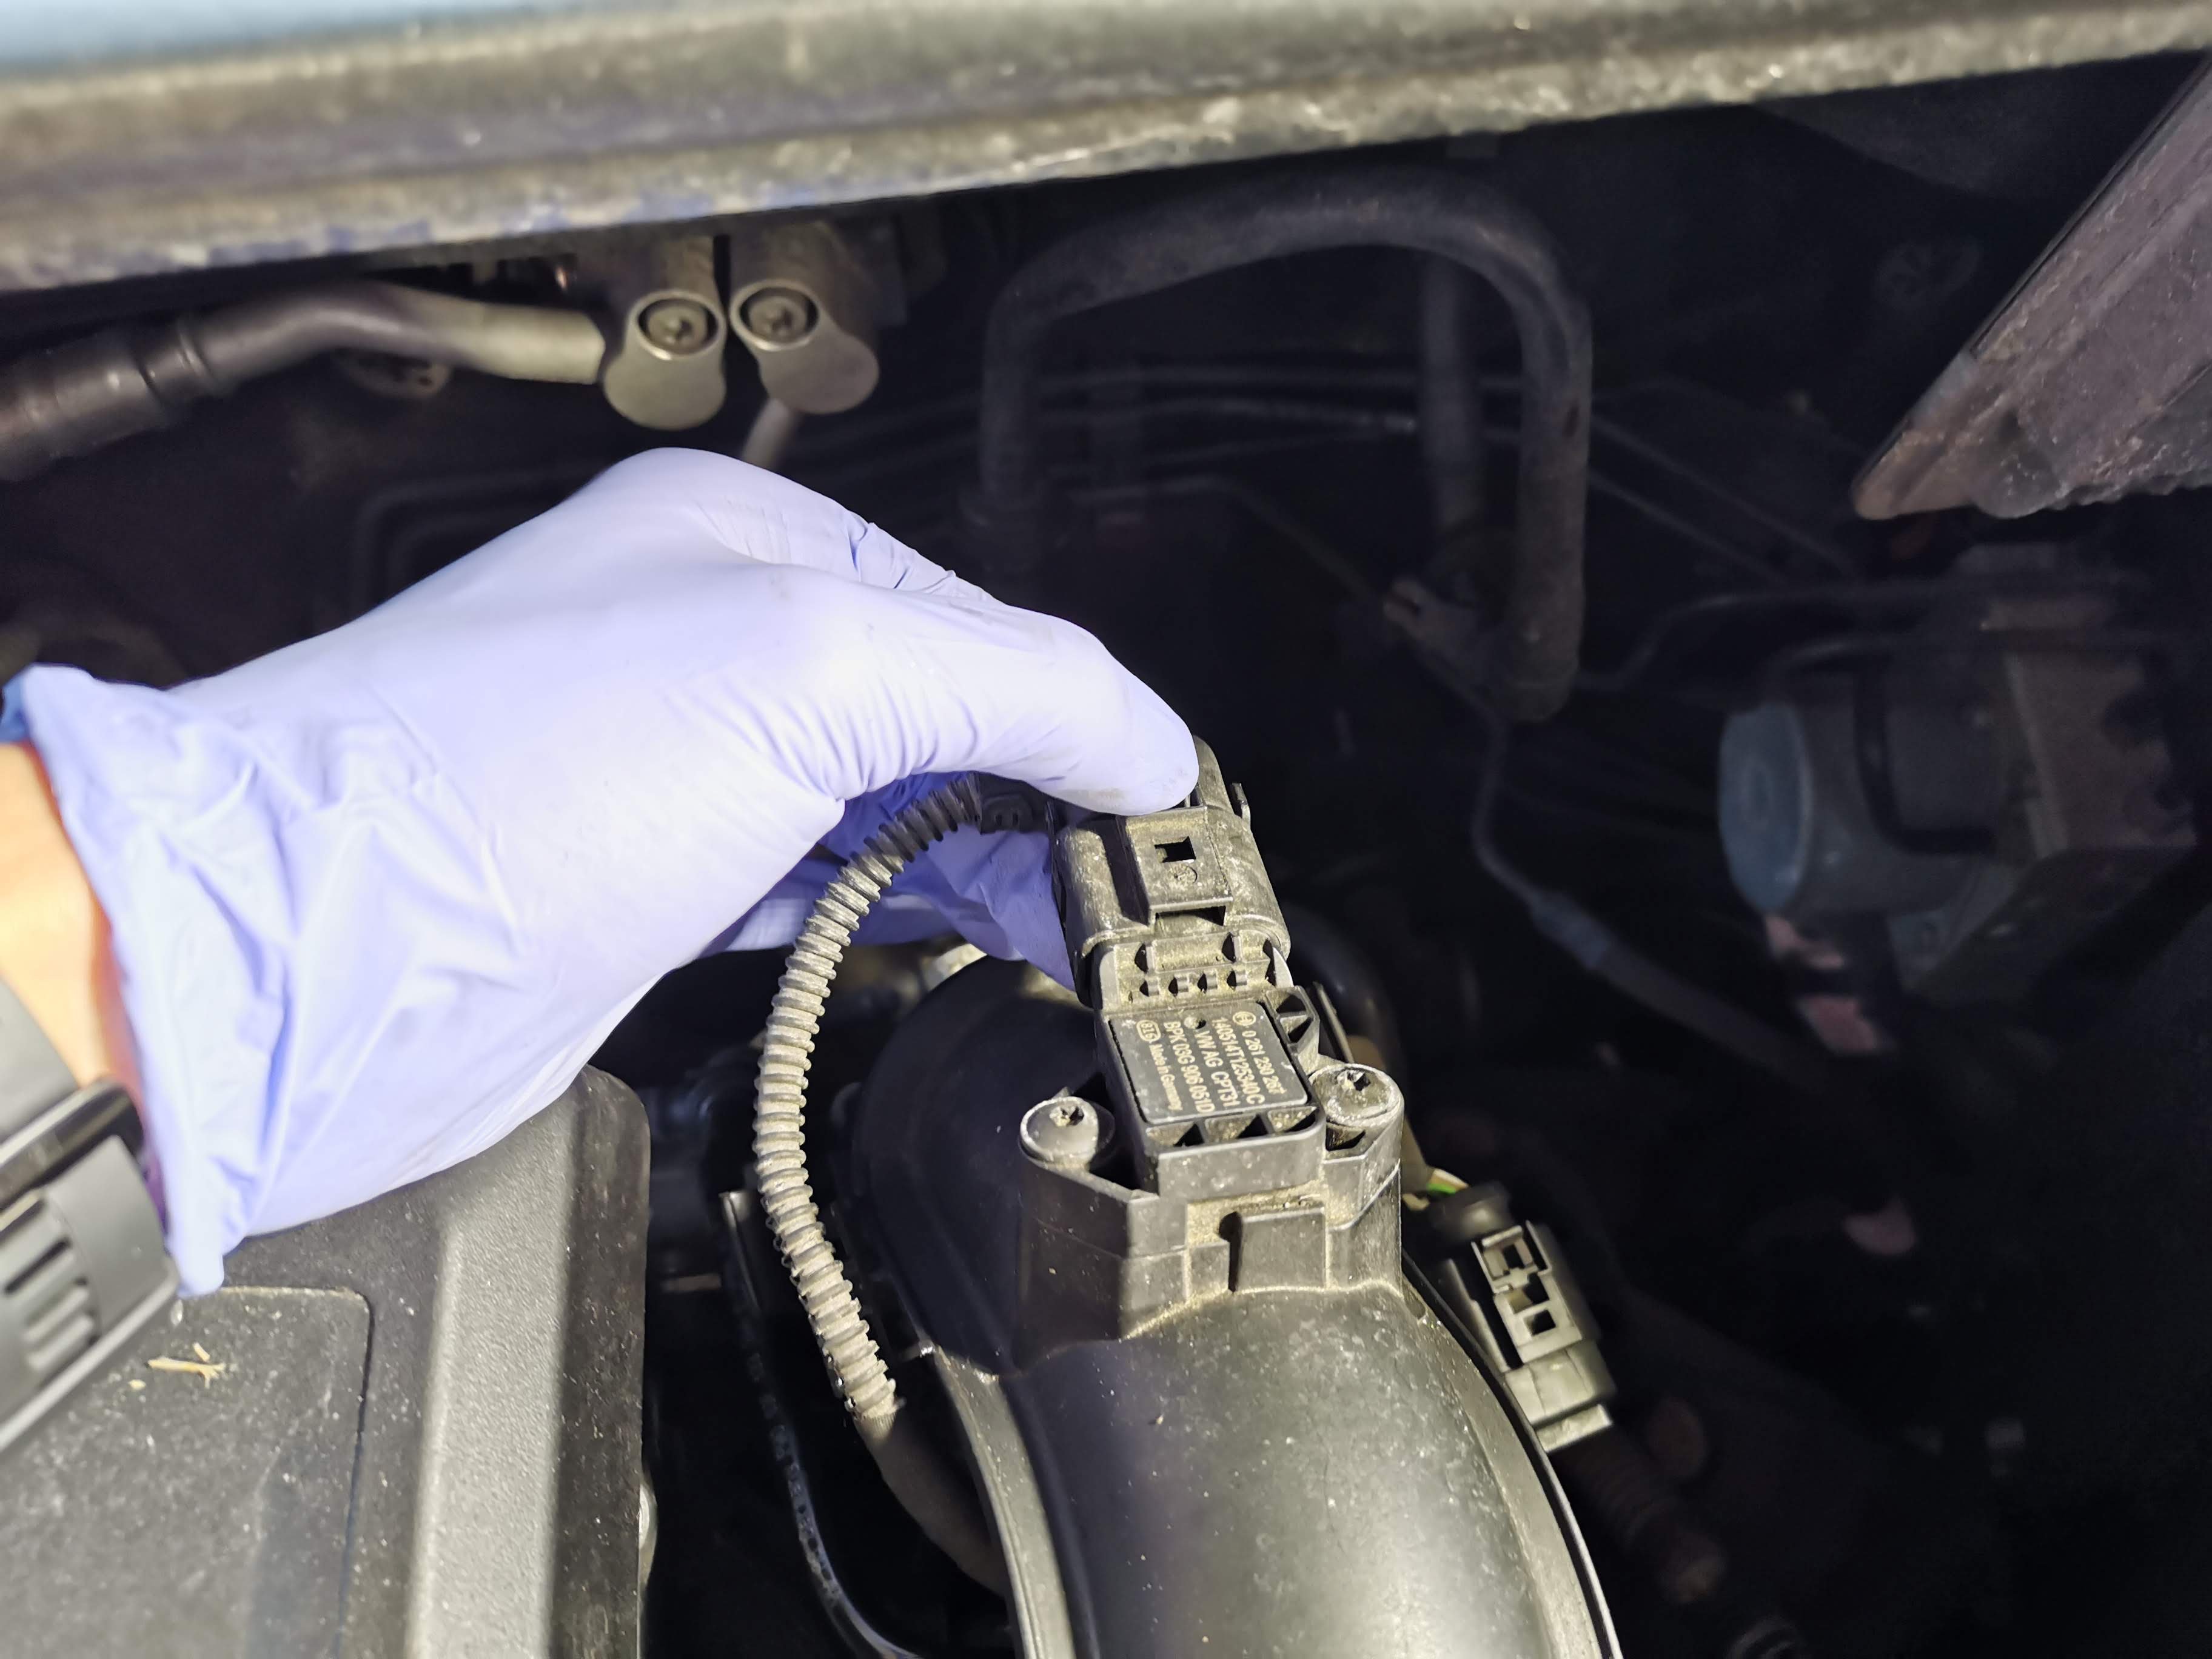
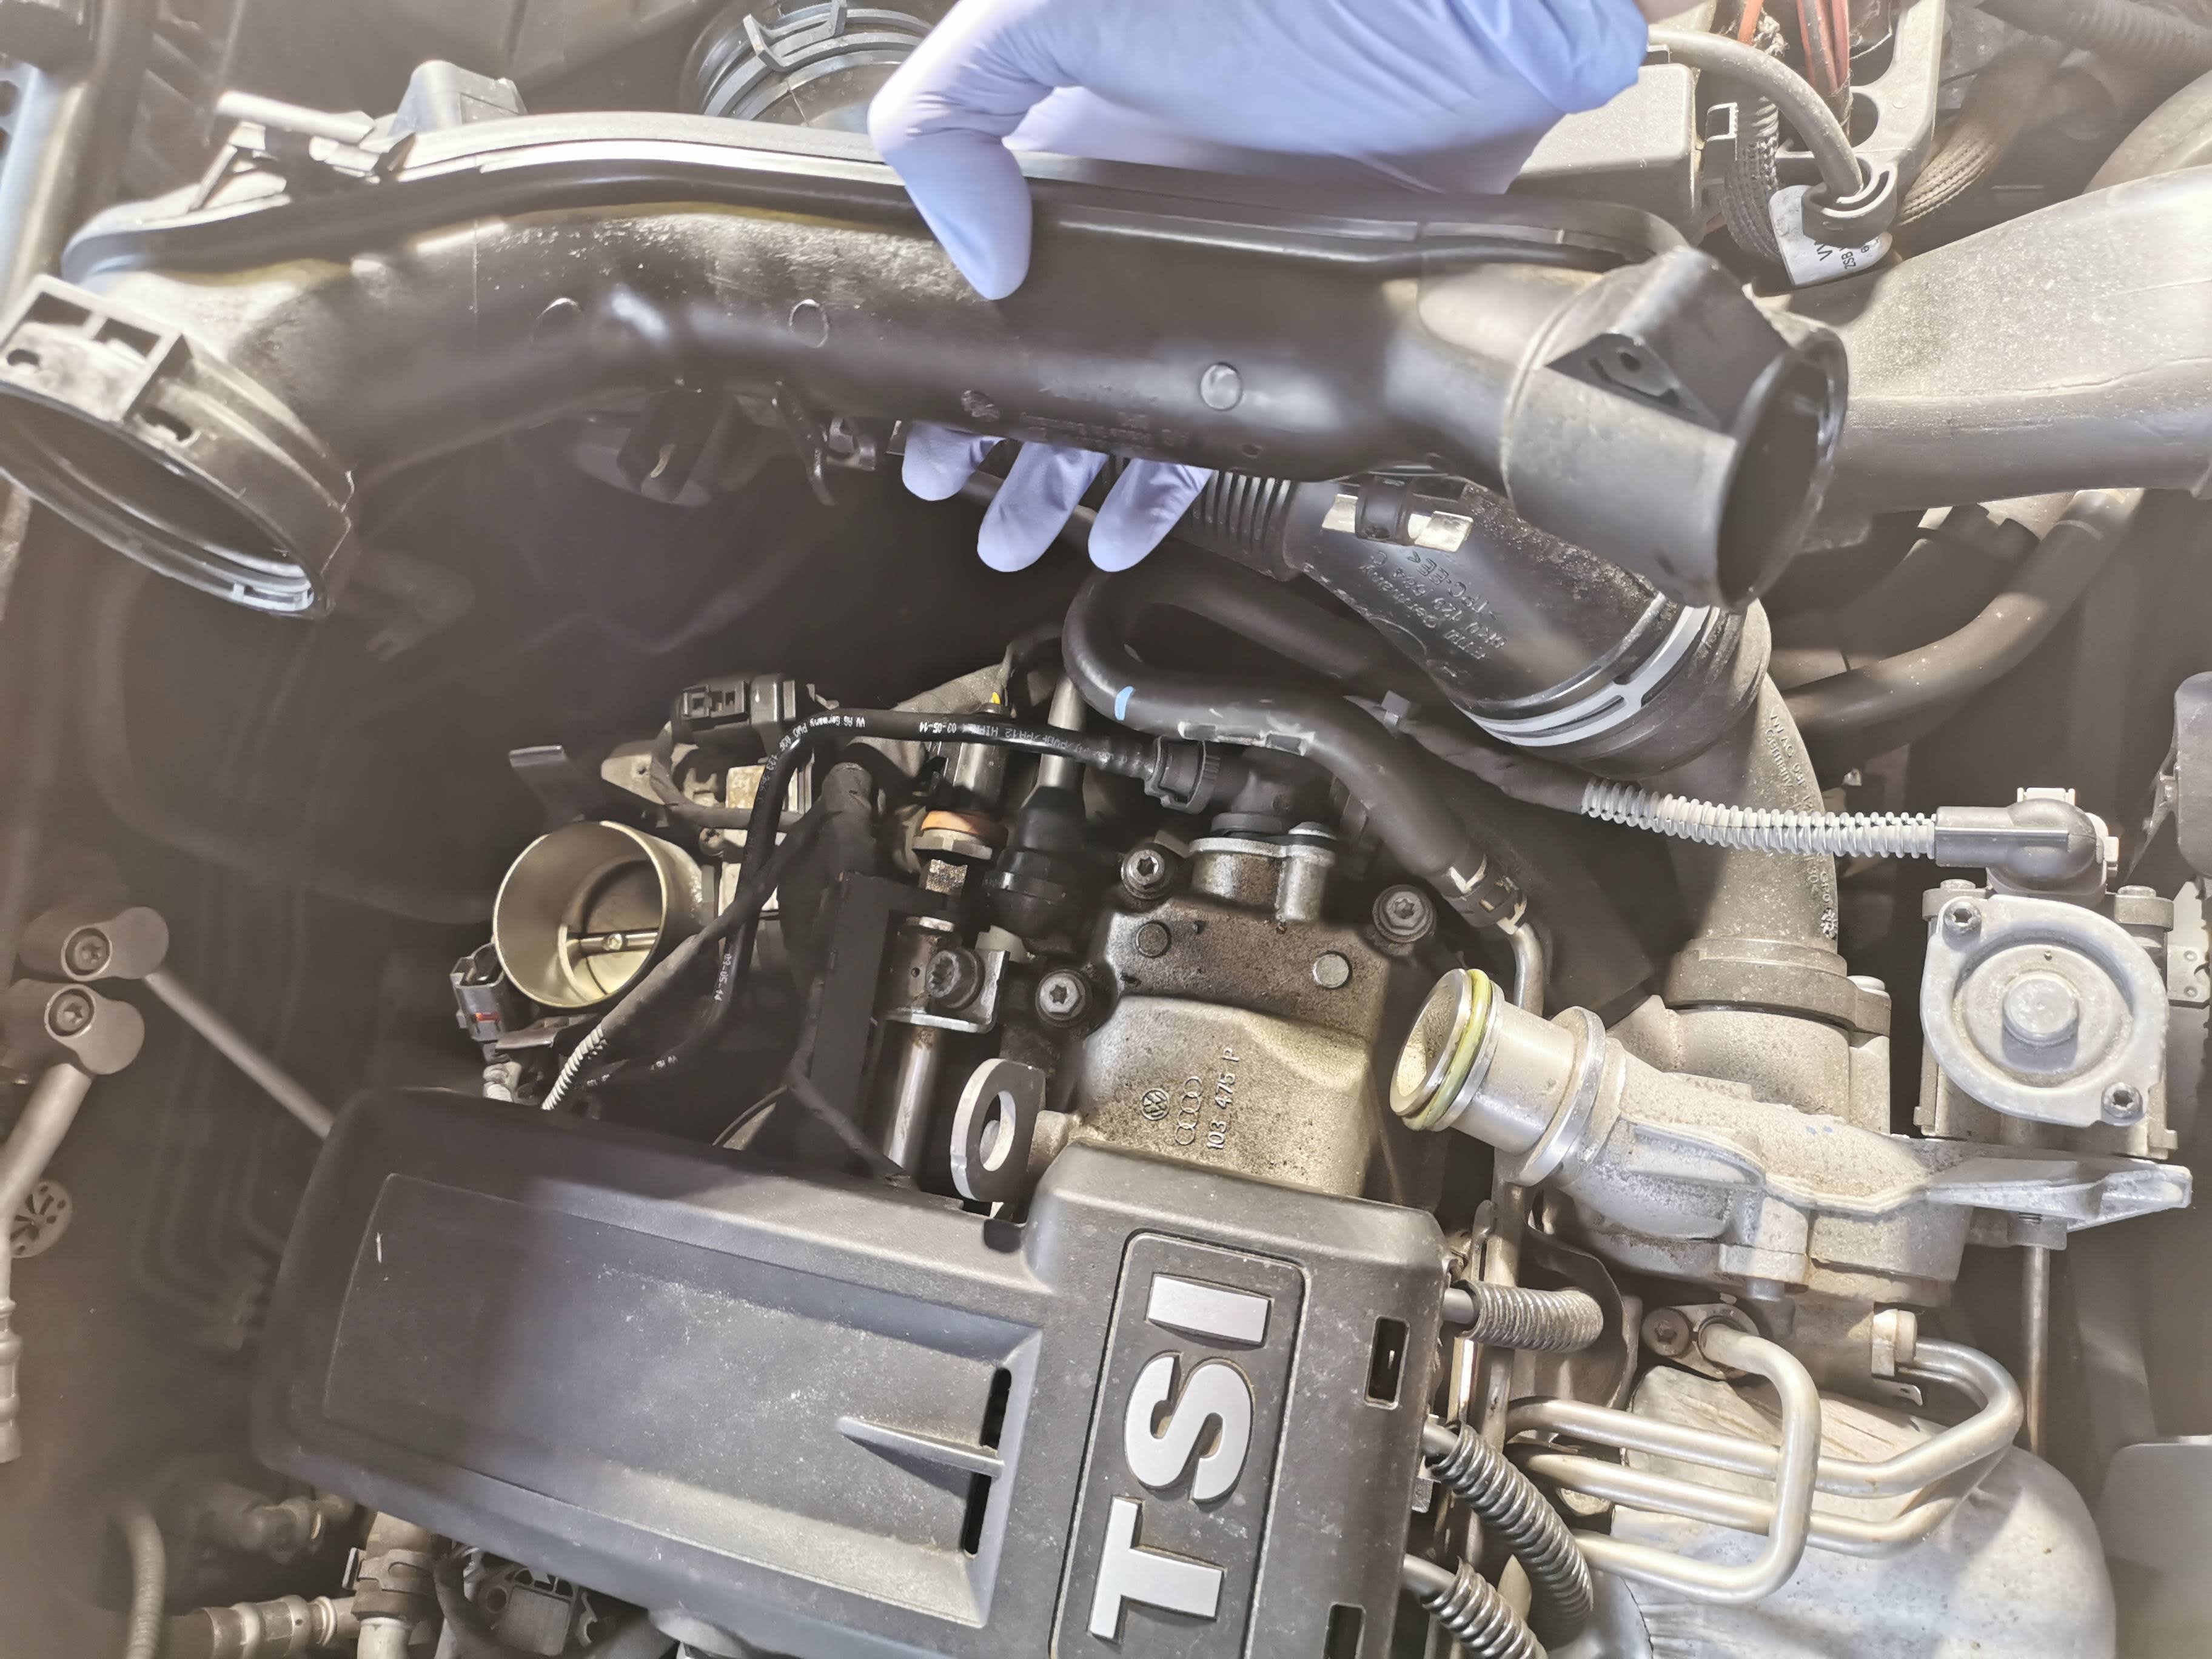
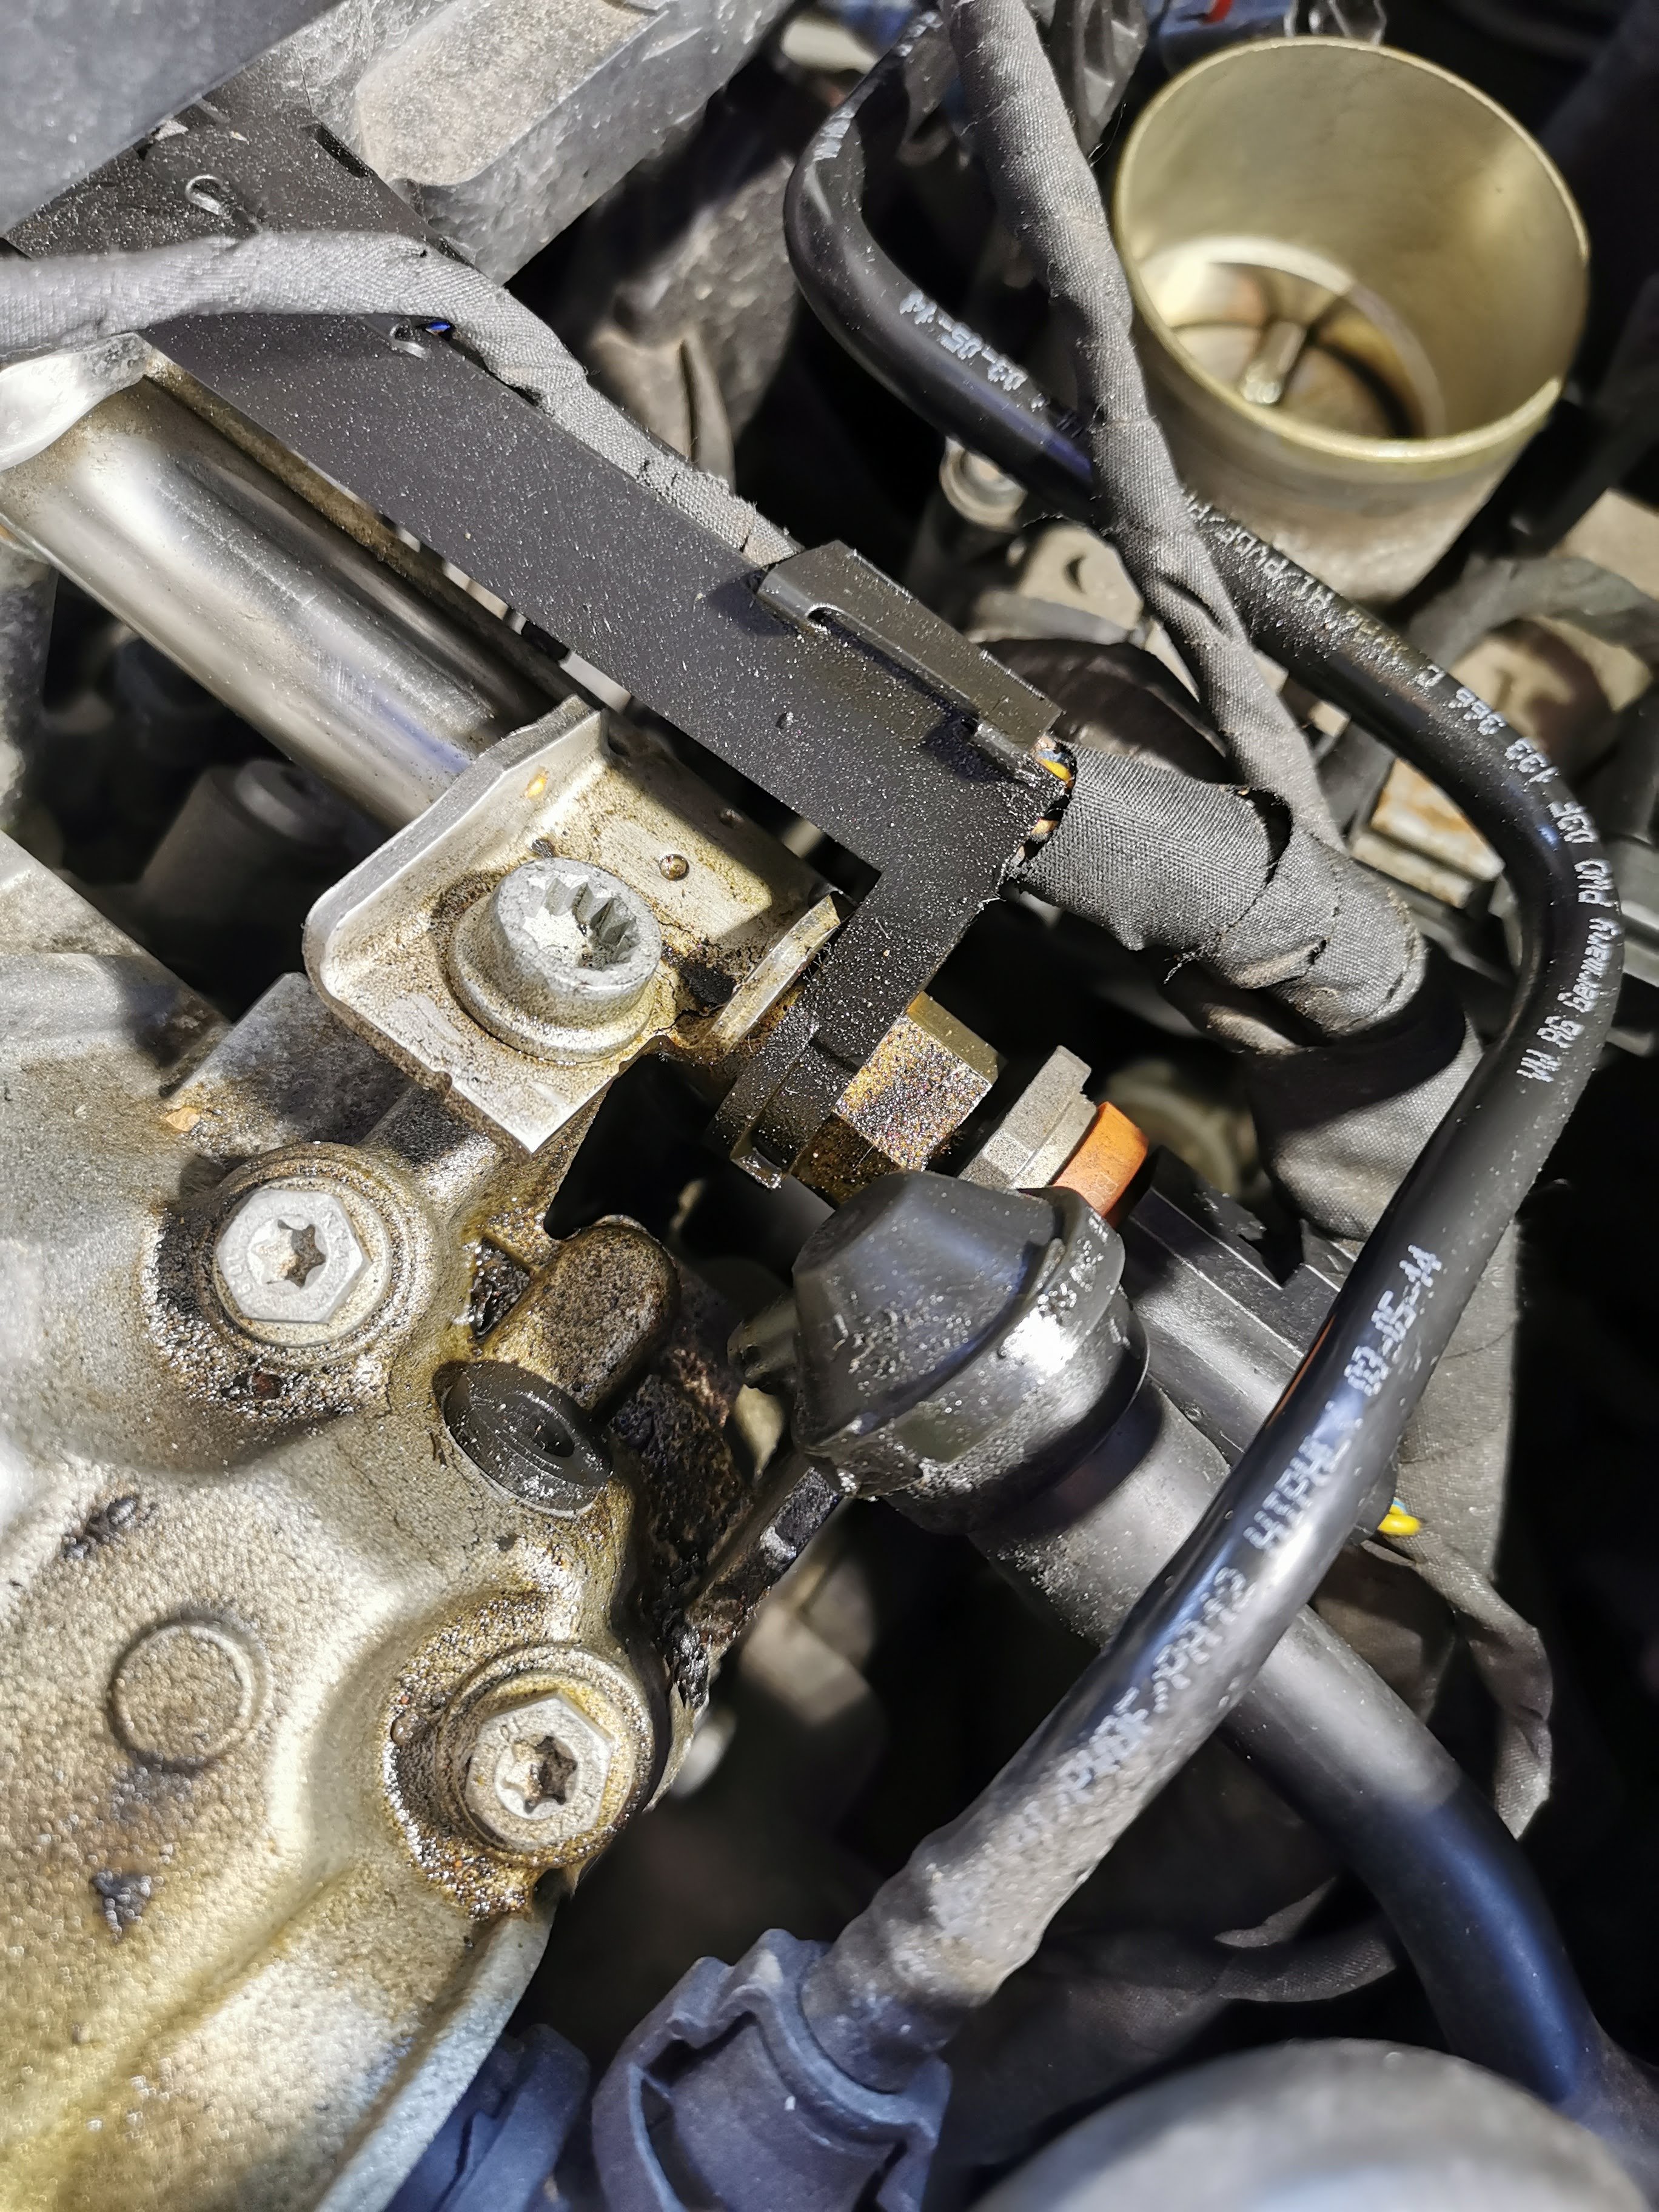
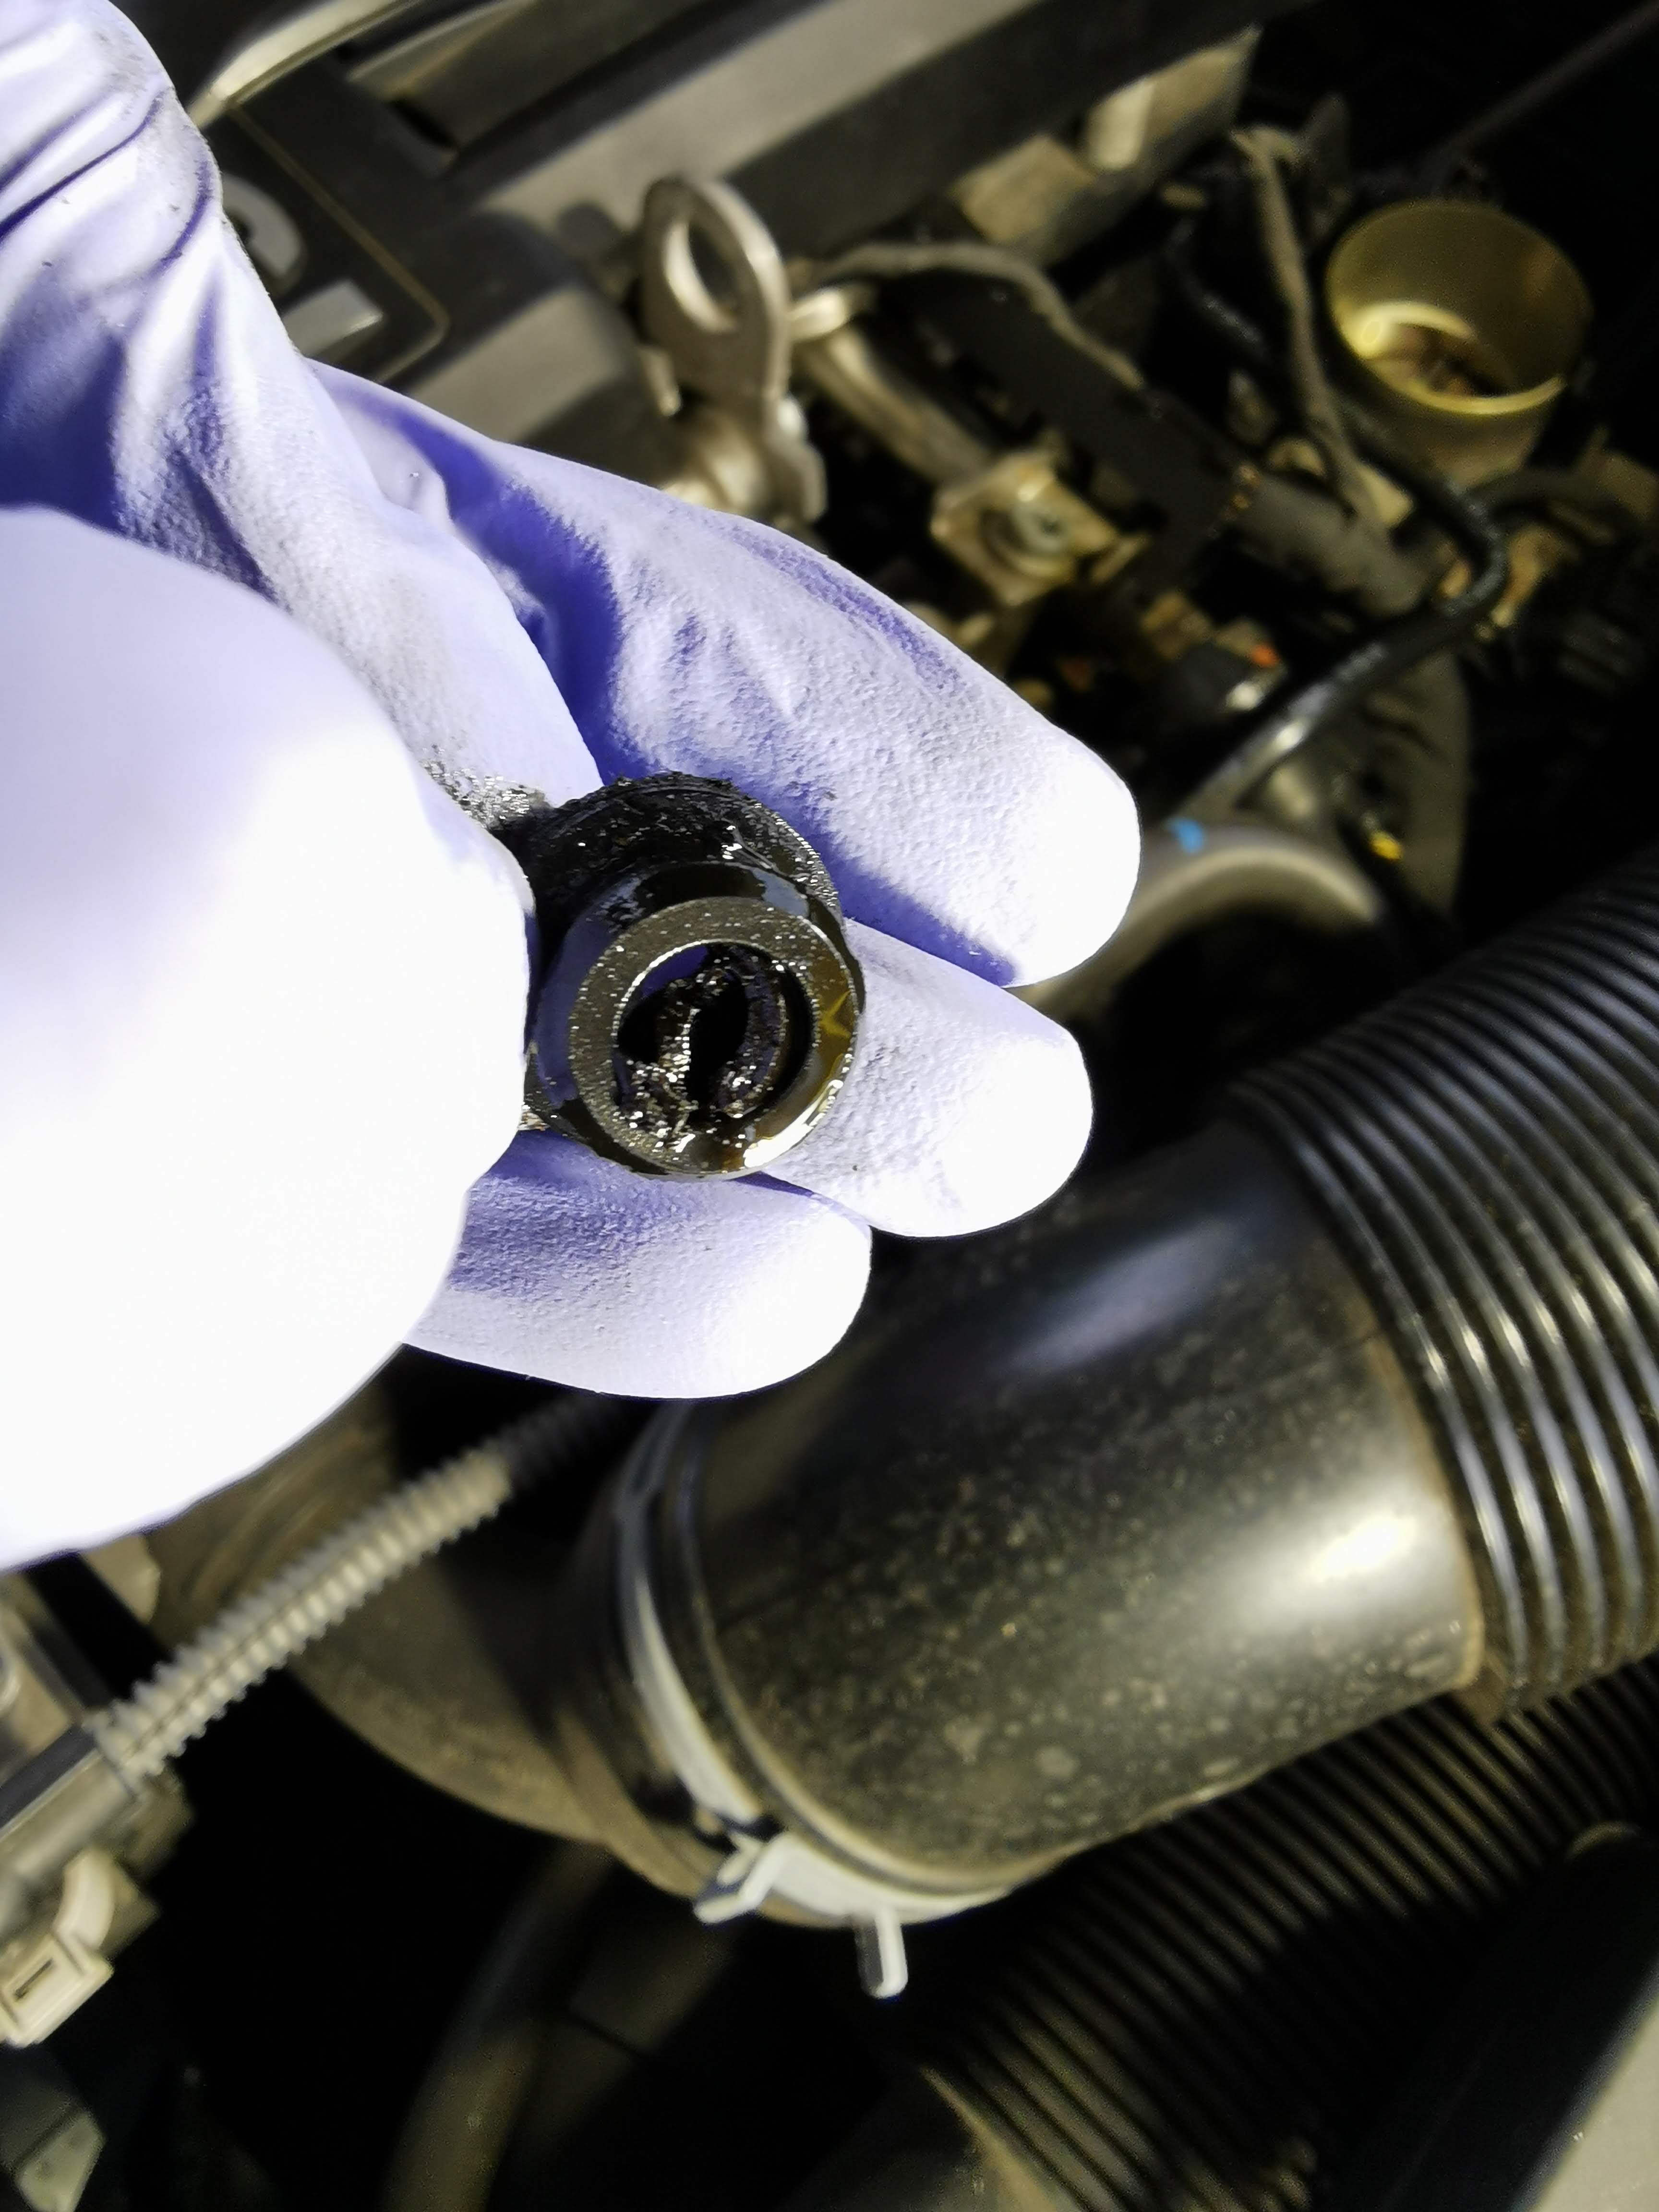
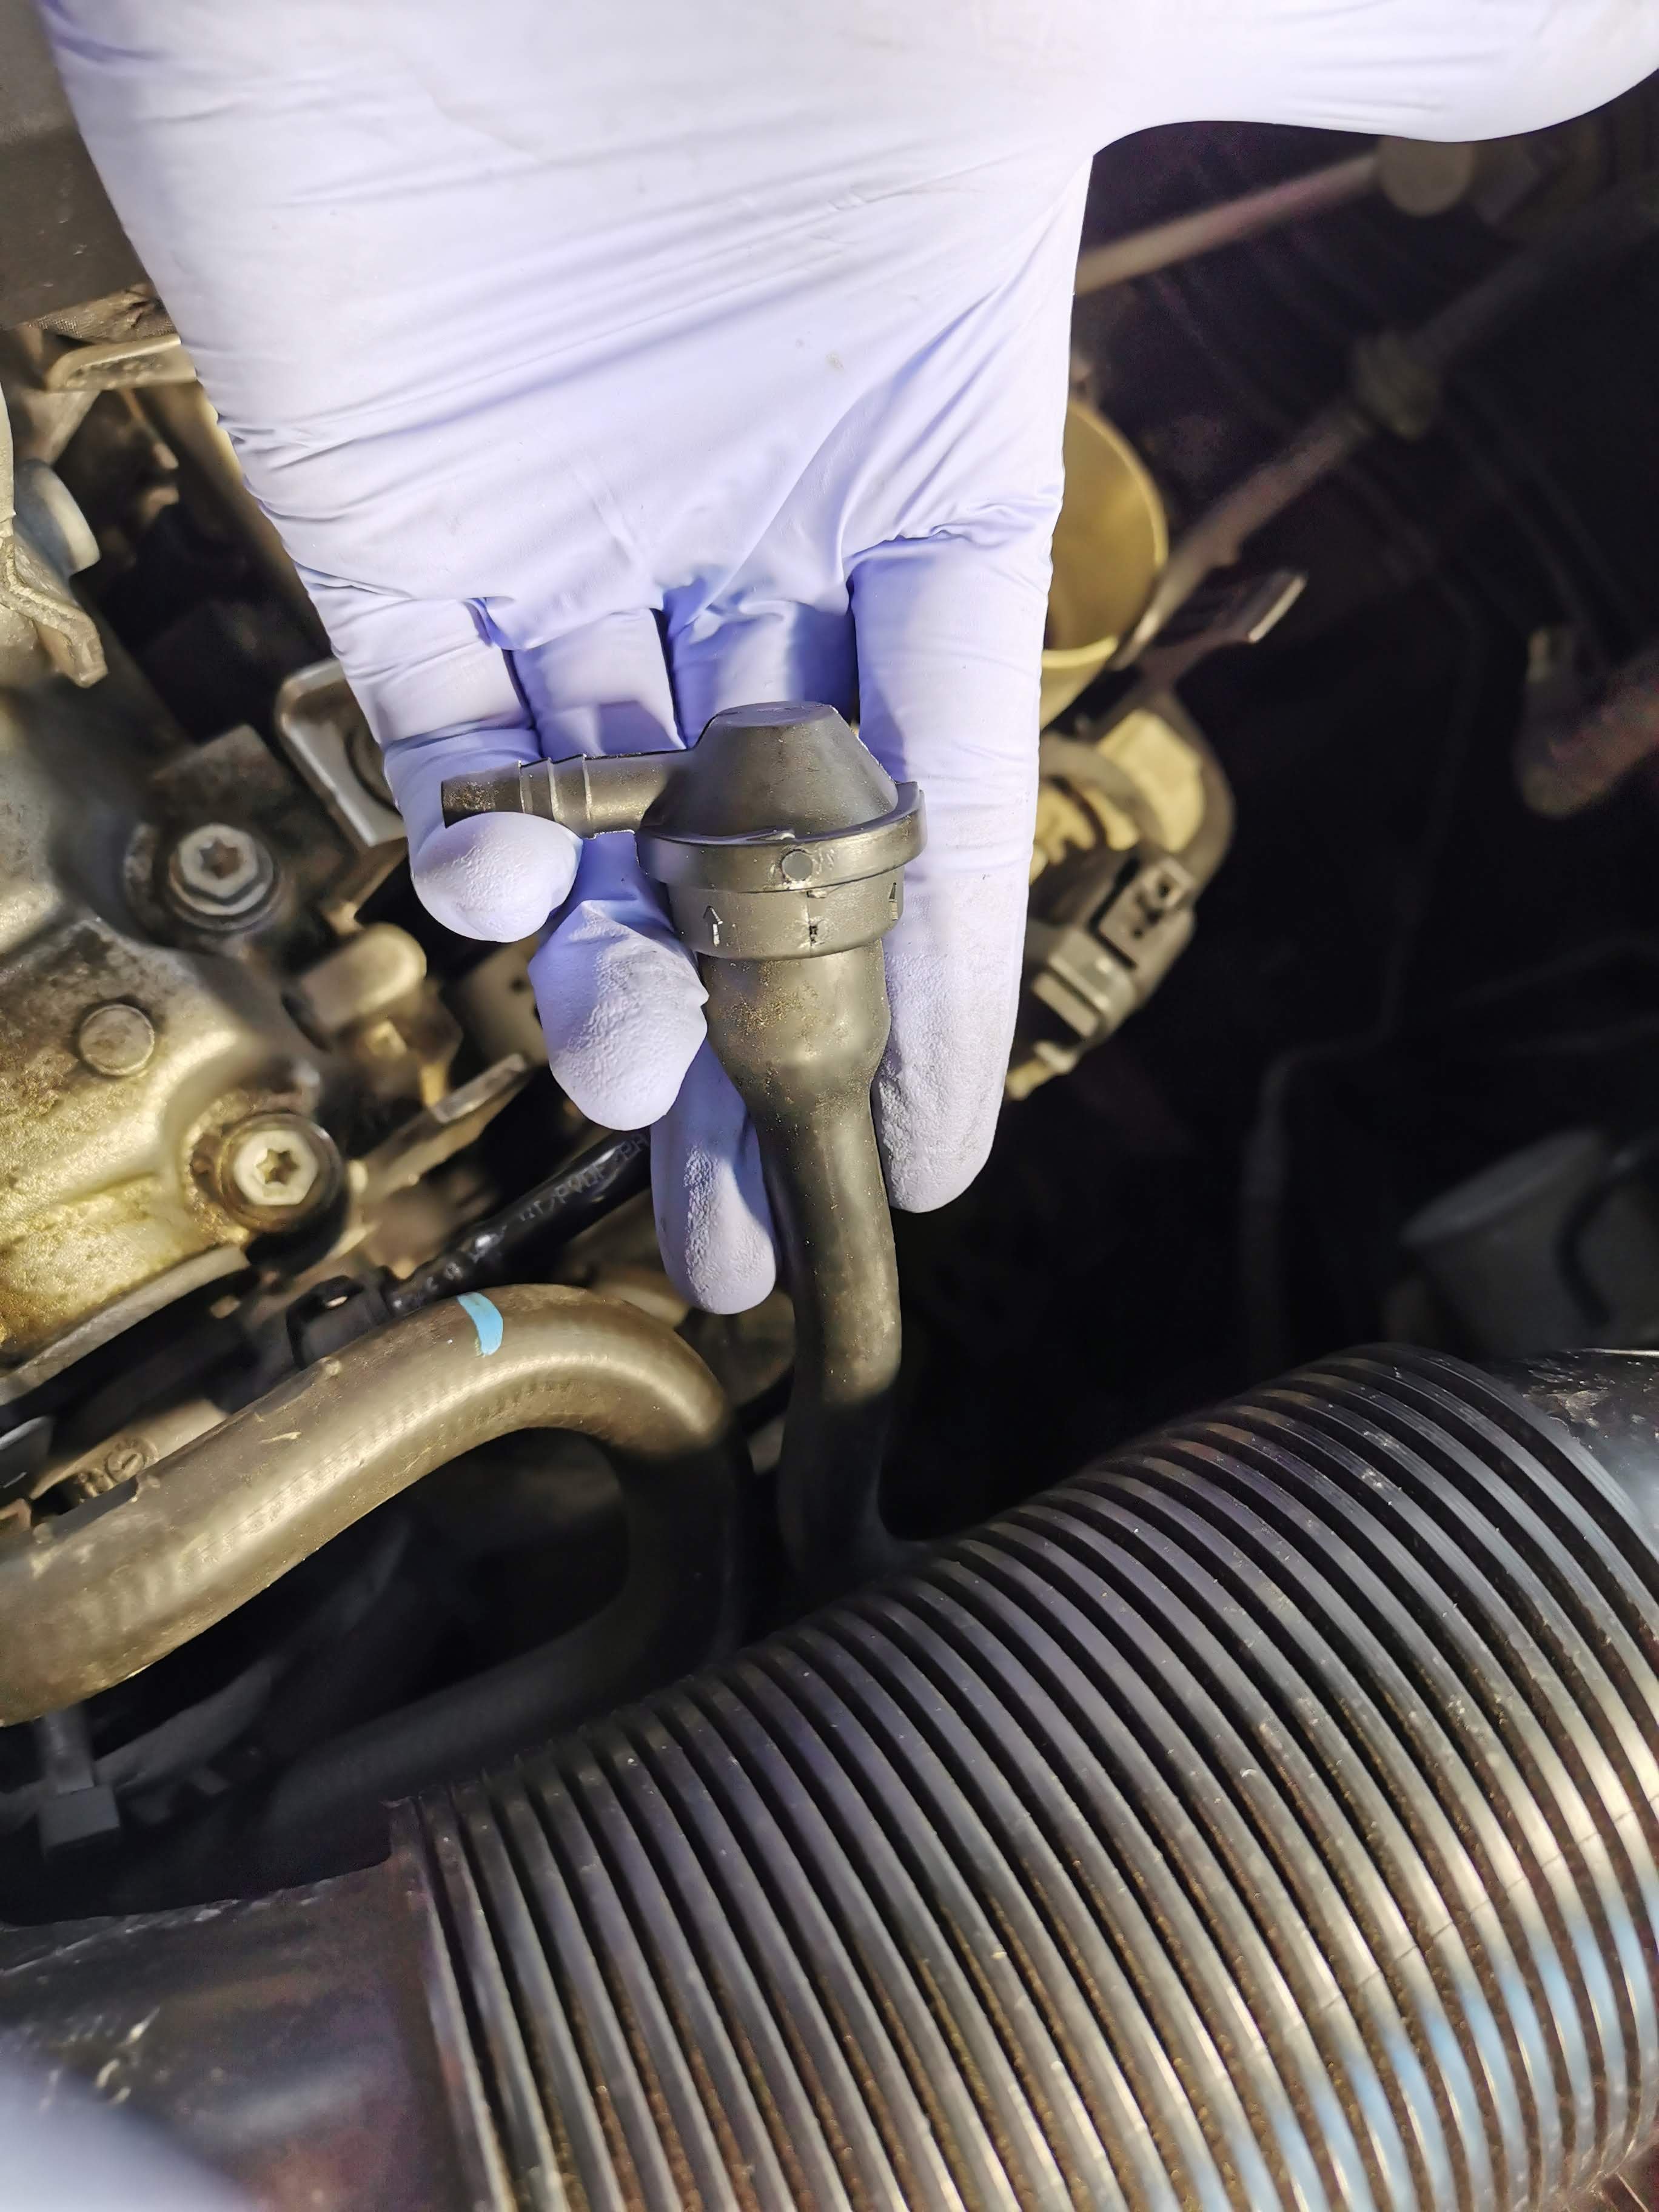
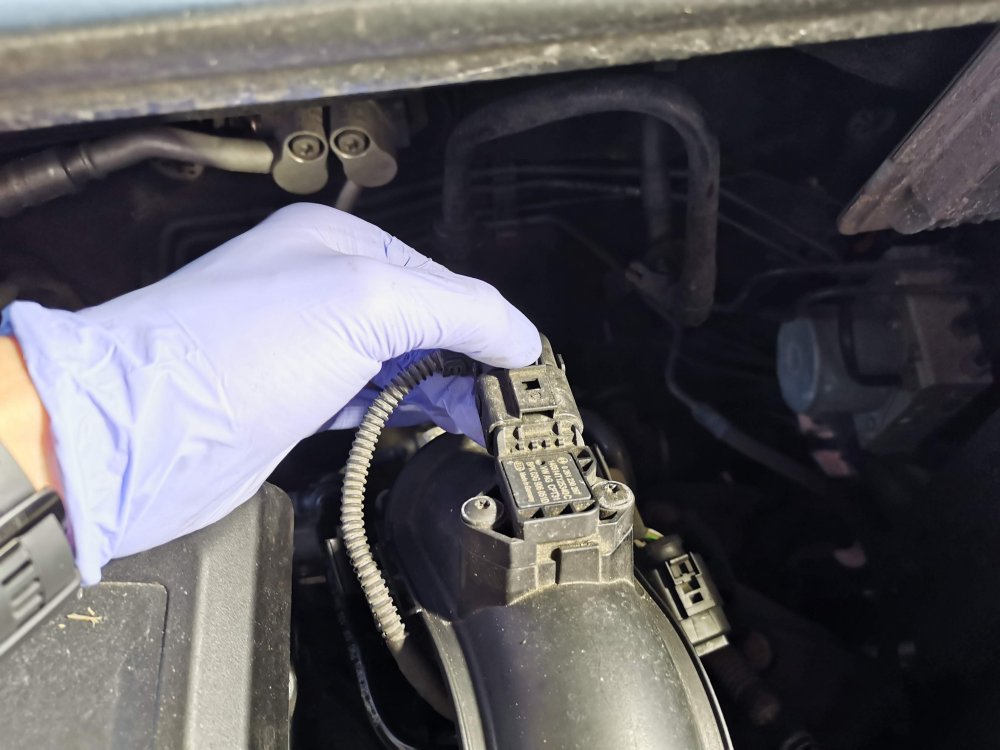
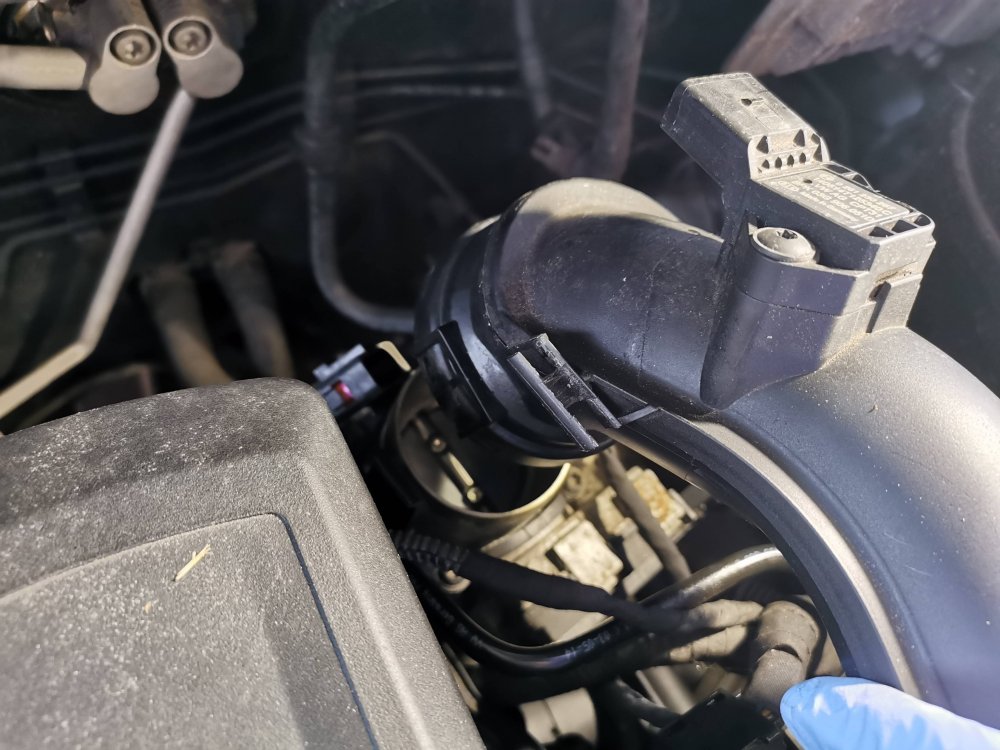
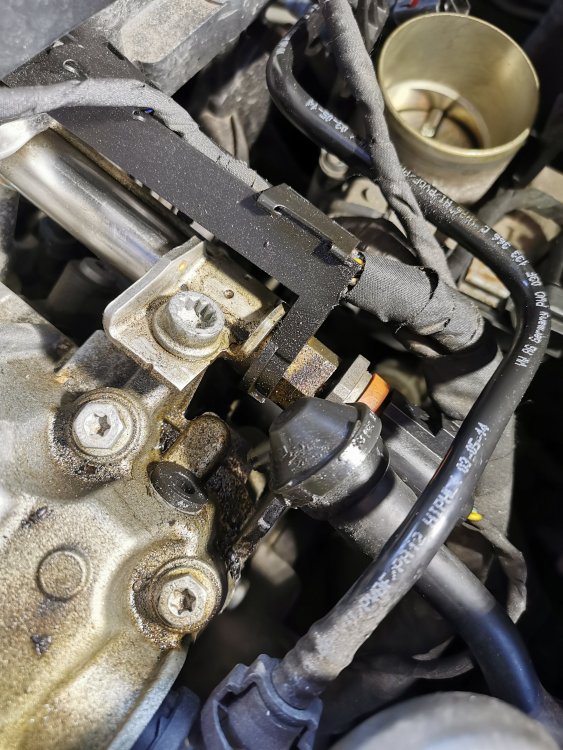
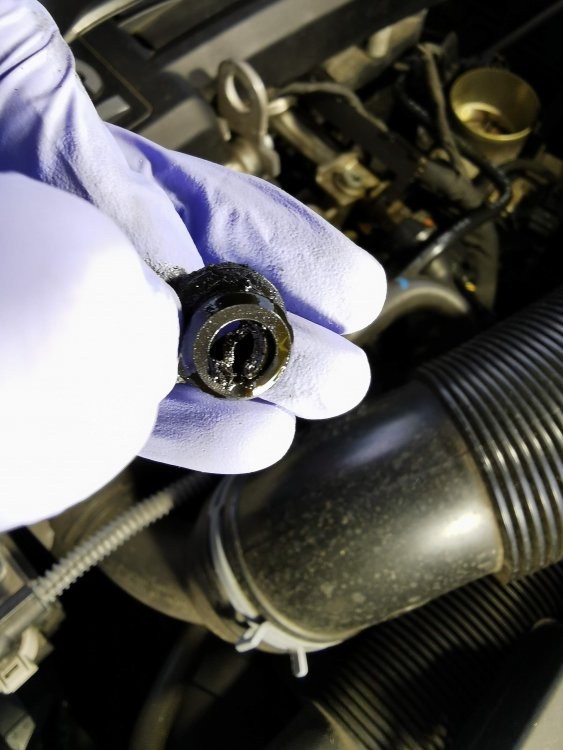
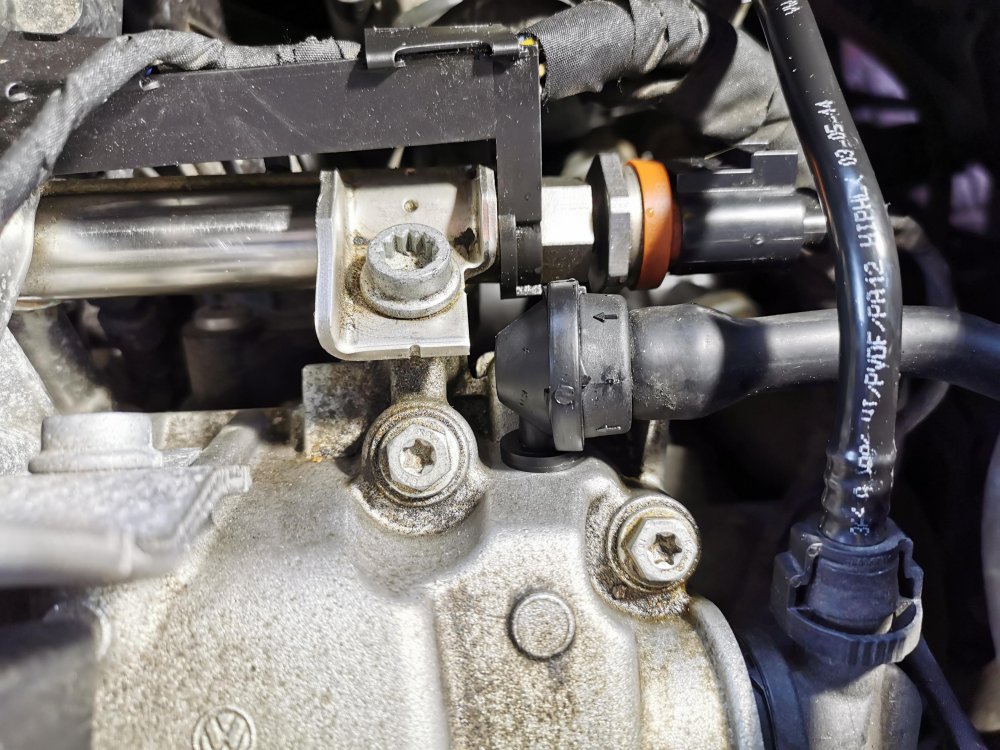
OK folks, my first time doing a guide. The Briskoda community has provided me a load of help over the years, so I thought I'd give something back. The crank case one way breather valve attaches to the crank case at the upper right hand side of the engine. It connects to a rubber pipe which runs to the underside of, and connects to the air intake hose. From what I understand, its purpose is to provide ventilation to the crank case to remove unwanted gasses which can build up. The valve is one way to stop air returning up the air intake and possibly into the cabin via the engine bay. The tell tale for failure seems to be an oily smell working its way into the cabin (due to the one way valve not being one way any more), or oily fumes from the car while running. Checking the engine bay, you're looking to inspect below the throttle valve cover pressure pipe (the black pipe to the right of the plastic 'TSI' engine cover), near the front. You'll know if its gone as the valev will be broken and there will be a misting of engine oil surrounding the area. The new valve can be ordered from Skoda direct or via Ebay - search for 'Skoda 1.2 TSI breather valve' and plenty of listings will appear. To fit: you'll need a Torx T30 bit, flat head screwdriver, a jug for some boiling water and some rags to tidy up mess. Start by using your T30 bit to remove the two screws at the bottom of the black pressure pipe. The black cover, which the torx screws hold down, lifts off once the screws are removed. Keep the screws safe. Remove the electric plug at the rear of the pressure pipe, along with the wire to the left of it which should be clipped onto the pressure pipe. The rubber breather hose at the front right of the pipe should also be removed. There is a sneaky wee plastic black pipe on the underside of the pressure pipe as well, this should slide out downwards. Once those parts are all removed from the pressure pipe, you are looking for two clips at either side of the pipe, at the very top, below where you removed the plug. Move them both out to the side, away from the pipe and pull the pressure pipe upwards - it takes a bit of force. Once it comes off, pull the pipe out from the other end (at the turbo). You can see where the oil has sprayed out from the crank case and onto the underside of the pressure pipe, as well as around the top of the engine. This is how the oily smell emanates from the engine bay as earlier described. Use your rags/cloths to clean it up. Now you can get a closer look at the offending breather valve - or whats left of it. The rubber grommet that the valve fits into (or did, before it broke) is needing removed. Use your flat head screwdriver, or other blunt, pointy object, to remove the grommet. The reason for removal of the grommet is to (hopefully) remove the remnants of the old valve. I don't suggest just pushing the new valve into the grommet without removing the old bits. If there are bits left in it, it is best to not push it into the engine where they are not meant to be. Check inside the crank case hole to see if any bit linger which can be fished out. As you can see, some gibblets of the old one remained in my grommet, the rest must have been swallowed up by the engine- ho hum! Clean out the grommet as best as you can with rags and then dump into your jug/cup of boiling or very hot water - it helps soften it up for putting back in place later. The valve itself is a straight pull off of the rubber connecting pipe - just a friction fit. So pull it out of the pipe and discard. Push fit the new valve onto the rubber hose you just disconnected the old one from. Fish out your rubber grommet from the hot water and push back into its hole on the crank case cover, being careful not to split or push in too far. If the grommet is knackered, new ones can be ordered from Skoda or Ebay. Once the grommet is back in its place, push the new valve into it. I used some of the water as a lubricant to ease it in. Then, just make sure the valve and grommet are snug and it is a case of putting everything back together. Re-attach the pressure pipe by putting the bottom part in first, then pushing the top part back down, making sure both clips fully engage (click). Connect the plug at the top of the pressure pipe back onto the pressure pipe. Place the black plate back to its original position and tighten the torx screws up (7nm tightness). Finally; clip the rubber pipe to the lower right side and the wire for the plug to the top left . Remember the sneaky wee plastic pipe under the pressure pipe at the top - clip that back in too to avoid any chaffing. That's the job done. Don't fret too much if the remnants of the old valve are not in the grommet. Chances are they fell inside the case and were chewed up long ago, hopefully not damaging anything. From what I gather the crank case air intake valve breaking is a common fault, so I hope the guide assists someone.


-
Just to chime in with this and add my experience; squeaking coming from front nearside and offside, especially over speed bumps. I traced the noise to the Anti Roll Bar bushes. Sprayed some lubricant over them and the noise was gone - that has been well over a year ago now and it hasn't returned. If the bushes were worn, I would have replaced them, though they were fine and the above solved the issue. Hope it helps.
-
I'm assuming you got this sorted by now, though I just thought I'd share my way of 'encouraging' the flap to open; At filling station, get out, lock doors, a couple of knocks on the filler flap with hand, then cycle the lock/unlock a couple of times and it always pops open. I really should just get it fixed - from what I read on the linked thread it appears to be a new solenoid required - but the above works every time, so it's treated as more of a quirk of the car now! Oh, and the above was found out due to frustration one day - brute force and hitting stuff sometimes proves useful. In any case, I hope this helps someone.