


Zgarbiony
-
Posts
4 -
Joined
-
Last visited
Content Type
Profiles
Forums
Gallery
Shop
Events
Downloads
Posts posted by Zgarbiony
-
-
11 hours ago, humsk said:
Yes, I'm still around but don't get much chance to read and post these days. Please fire away with your questions ......
11 hours ago, humsk said:Yes, I'm still around but don't get much chance to read and post these days. Please fire away with your questions ......
Hey,
Thanks to the fact that I found information provided by you about the way of changing the starter graphic, I managed to change the picture in my Kenwood to the one I wanted to have for a long time. Unfortunately, something went wrong. I do not blame your advice absolutely :-). I had to do something wrong accidentally. Everything works, but the unit does not remember basic settings such as changing the language e.t.c. No radio stations. Each time during start up, I have to set everything again. The really strange thing is that the unit seems to have set itself in a demo version. When I try to eject a disc from the drive, a message appears on the display informing that I can not remove the disc because it works as the demo version. Maybe this is the main reason of this mess... I even tried to disconnect the power for a few minutes, without any result. Any idea what I could have done wrong or accidentally changed?
-
On 30.05.2015 at 16:42, Jelibeli said:
Hi. Thanks for that. Just one correction: the image has to be on a microSD card, not on the USB. Just finished fitting mine & this was really useful.
I did this from USB.
-
On 16.02.2015 at 17:36, humsk said:
Hi folks,
After replacing the standard Bolero head unit with a Kenwood DNX525DAB unit, I've updated the start up screen with something more suitable for my Yeti.
There are a number of videos online demonstrating how to do it for other Kenwood models but nothing for the DNX525 so here goes:
1 – before you start, you’ll need your new image scaled to 800 x 480 pixels and saved in the 16 bit r5g6b5 .bmp format on a USB memory stick.
2 – turn the unit on as normal then whilst holding down both the MENU and TEL buttons, momentarily press the RESET button (just below the AUDIO button) with the point of a biro or pencil. You have to do this fairly quickly otherwise the unit turns off as the MENU button also sets it in standby.
3 – the unit will power off but still hold down the MENU and TEL buttons and wait until it turns back on (the normal Kenwood start up screen will be displayed). You can now release the MENU and TEL buttons.
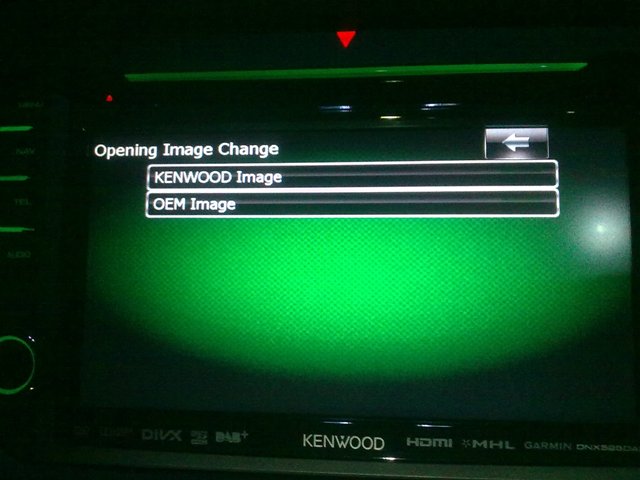
4 – after powering up, the “Opening Image Change” screen is displayed.
5 – Plug in your USB memory stick containing the required bitmap image and select ‘OEM Image’.

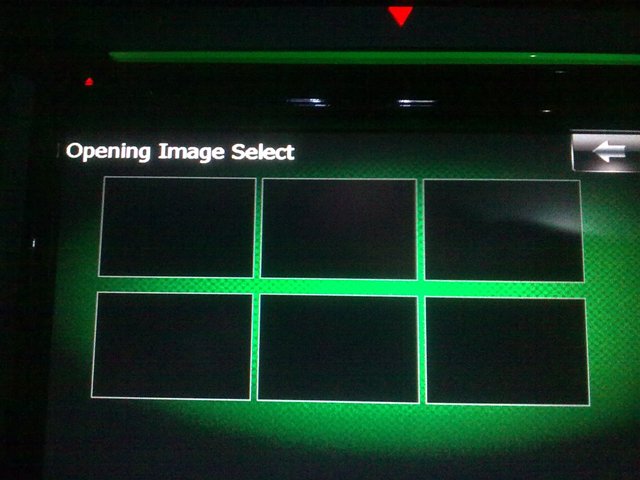
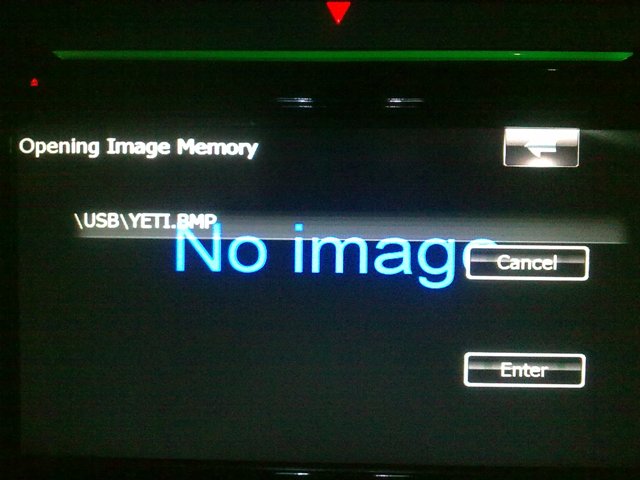
6 – as the unit can't display bitmaps in this format, the images you can select from are shown as blank boxes – select one and its file name will be displayed (“yeti.bmp” in my case). If it’s the wrong one, assuming there are more than one on the memory stick, press ‘Cancel’ and pick another. Don’t worry that “No Image” is displayed.
7 – once you’ve select the required image, press ‘Enter’ and wait until it finishes writing the image.
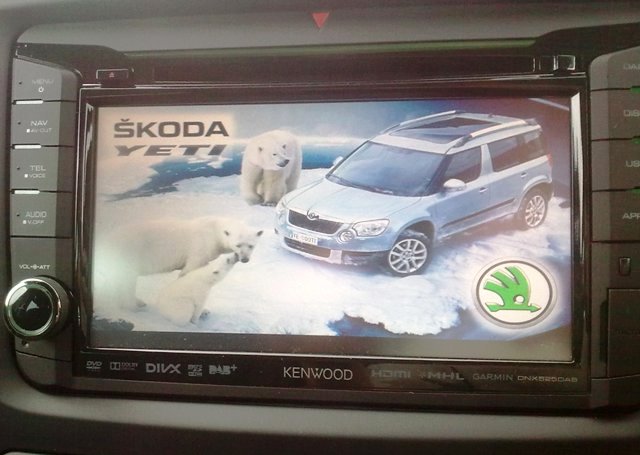
8 – press the MENU button until the unit powers off, wait a few seconds and press MENU again to turn it back on. Your new image should now be displayed instead of the original Kenwood one. This is my image - something a little different to the standard Skoda "Welcome aboard" one.
I'm assuming the same method would apply for updating the DNX521 head unit.
Cheers,
Andrew
Hi. Are you still on this forum? If yes, I would like ask you for few things about kenwood DNX.
How to update the Kenwood DNX525 start-up screen
in Audio, Electronics and Security
Posted
Hi. Thanks for the answer. I did it according to your advice and it did not work. But it's my fault because I did it twice. Probably of and on again . And it was still the same problem. I just did it once. "Menu" button together with "Reset". And everything works. Thanks again. Especially for instructions on changing the start logo. Regards.