Snapperseb
Finding my way
-
Joined
-
Last visited
Everything posted by Snapperseb
-
Having done a bit more reading, I'm beginning to think it's more likely to be a door control module issue, since it's only the mirror indicator that's affected on that side. I've sometimes had issues with door control modules on previous cars... usually water ingress of some kind. Can anyone confirm that the signal for the mirror indicator comes via the door control module?
-
Hello all, While signalling left the other day my Octavia 3 beeped at me and flashed up a warning to check the left turn indicator signal. Sure enough, the left door mirror repeater had stopped working. I partly dismantled the mirror to get at the wiring, thinking it might be a bad connection or a broken wire. TLDR: it's working again, for now. BUT here's the thing: I found no bad connection, no broken wire (lots of wiggling to test), and nothing I did got the repeater working again. It just began working of its own accord. On further testing, and through further random cycles of working / not working, the voltage to the repeater was cycling 12v/0v as expected when it was working, and was showing either a constant 0v or a constant 8v when it wasn't. I did switch to the Superskoda dynamic indicators a week or so ago, but they worked fine on installation and I've had no problems with the originals. I tried plugging an original indicator in during one of the repeater's not-working phases, and that didn't work either. So it doesn't appear to be the indicator unit, or the connector, or the wiring in the mirror housing. Am I looking at a potential BCM fault? It's the intermittent nature and the apparent randomness that's stumping me... Thanks in advance!
-
Yikes. Nope, I'll hang onto mine thanks
-
I didn't know that. Makes me even more glad that I bought mine when I did
-
Right back atcha 👋🏻
-
I've spent a fair few hours over the past few years going past Coventry
-
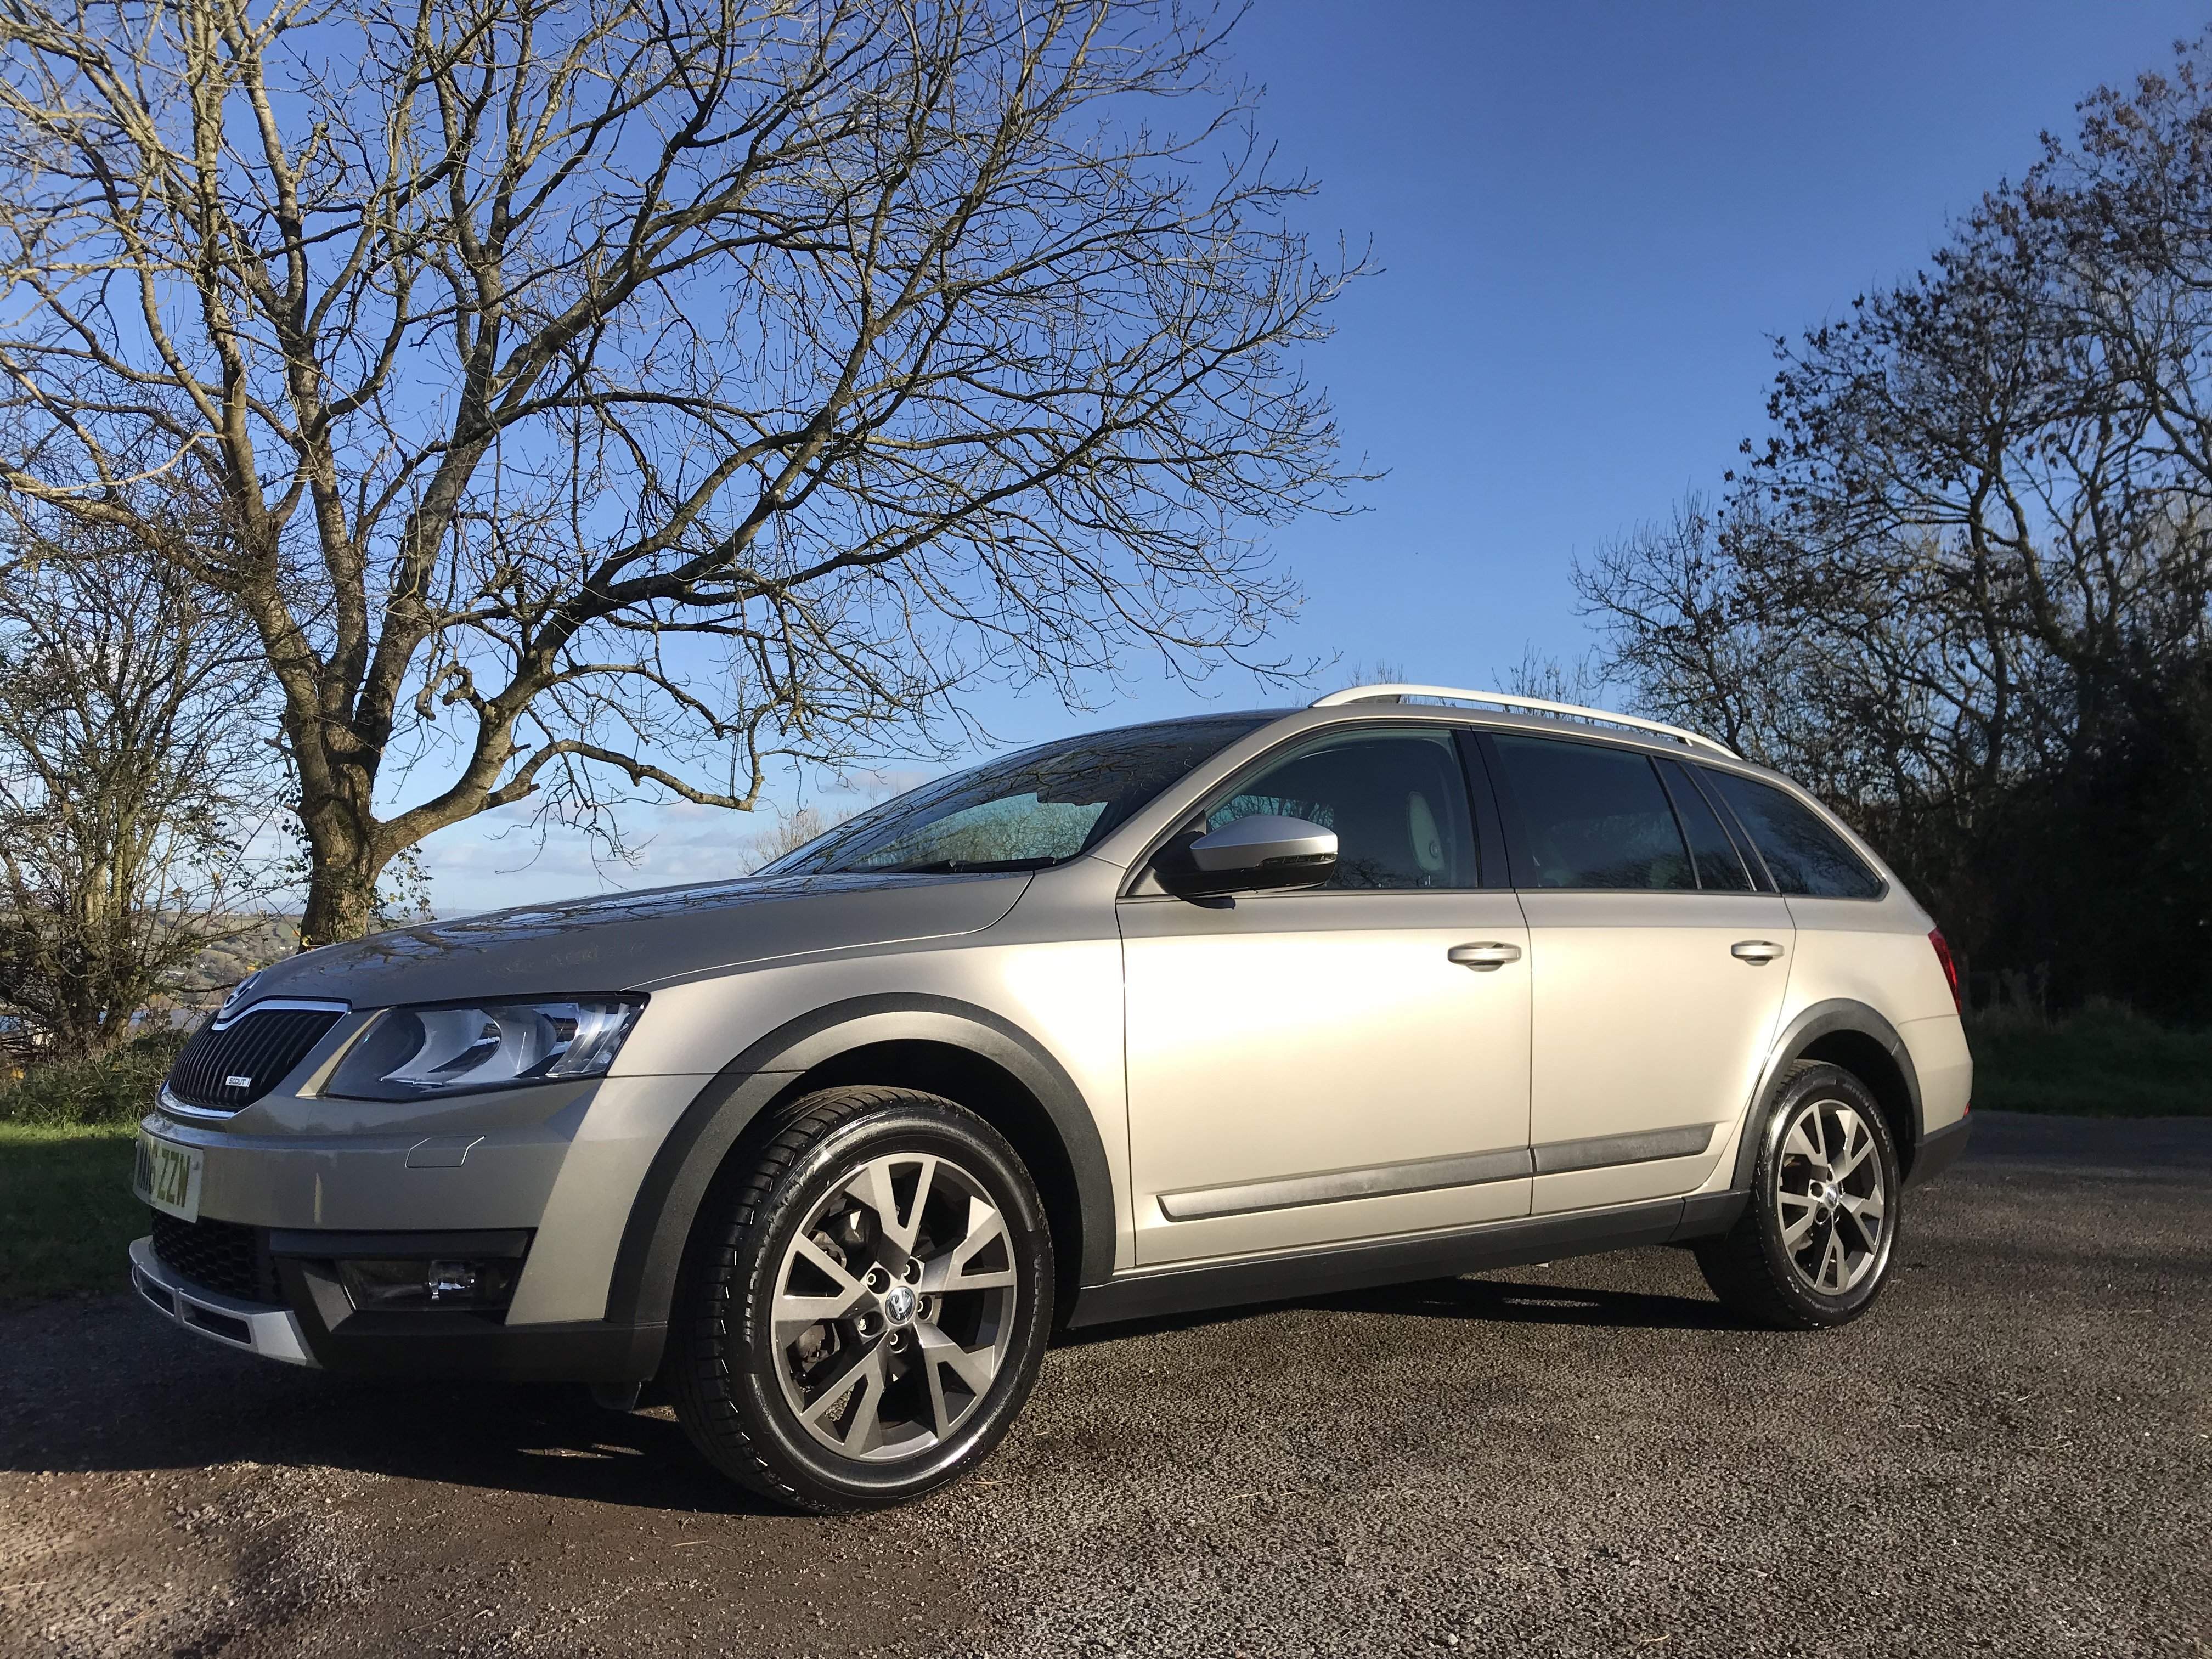
I bought my Scout a few months back but never really got round to saying hi. So, er, hi 👋🏻 Had an Octavia mk 1 from 1999 to 2008, so it’s nice to be back in the fold. Fair to say the mk 3 has improved in a few areas 😎

-
Installation is the reverse of removal, obviously. But first, I wanted to de-creak the cluster surround. I released it by carefully undoing the clips holding it in place (most of them, at least - there were two I couldn't figure out, so I left them and settled for being able to pull the surround mostly free of the cluster, rather than all the way). To start with I tried putting tape on the surround where I thought it was meeting the cluster (example shown in orange). But that didn't seem to do anything, so I had a closer look and realised that most of the creaking was at the locating lugs near the clips. So I released it all again, and wrapped tape around the part of the cluster where the lugs meet it. It creates a snug fit and all but eliminates creaking between the two surfaces. The result appears to be a noticeable quieter dashboard
-
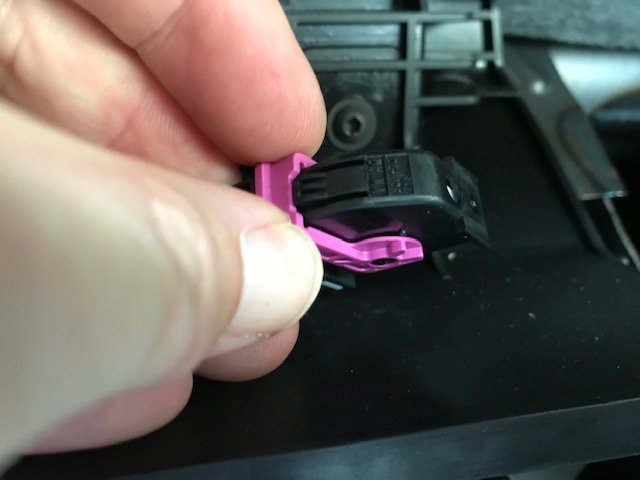
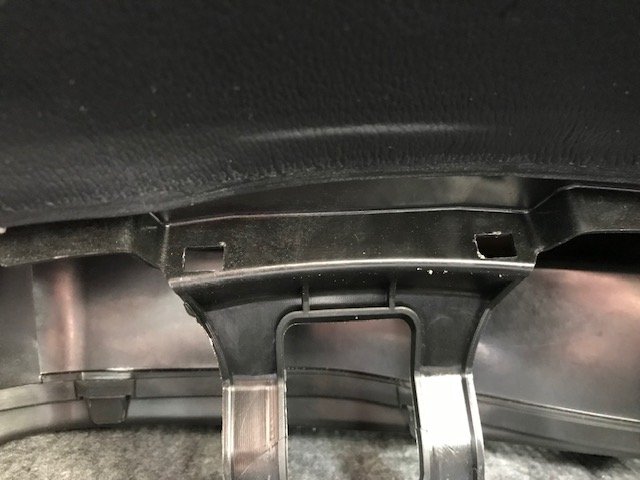
7. Finally, remove the wiring harness. The biggest problem I had with this is the access is poor, because there's very little slack in the harness and, even with small hands, you need to do everything by feel. Looking at the cluster from the front it's at the lower left rear. Just to the right of the pink clip in the picture you can see a small black nubbin - you need to press this and then rotate the clip to the right (as shown in the picture) to release the harness. It's easier than it sounds... the hardest bit is not being able to see any of it.
-
And here's the two clips at the top of the cluster. They literally just sit in those holes - nothing more complicated than that.
-
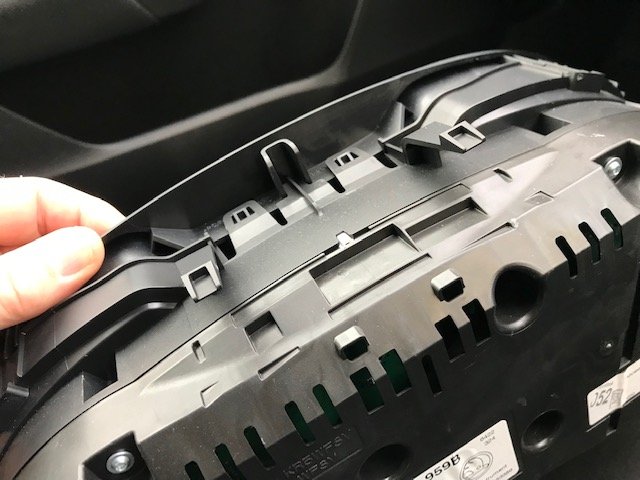
4. The two bolts recessed at the bottom of the cluster need to be removed. They're T20 and they were tighter than I expected. I also found the recess made access a little tricky, and I had to have a rummage to find a tool that'd fit - my go-to ratchet set was too bulky to get in there. 5. Drop at least one of the bolts in the footwell and swear while you try to find it... 6. Just me? Oh. In that case, pivot the bottom of the cluster towards you and, with a bit of fiddling around, the two clips that hold it in place at the top should come free. An old credit card or similar might help if you get stuck - I used a narrow trim removal tool. The picture shows where those two top clips locate, right at the back of the instrument cluster recess.
-
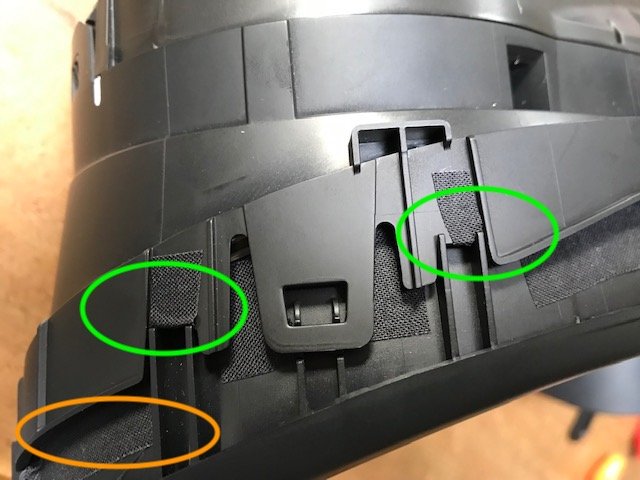
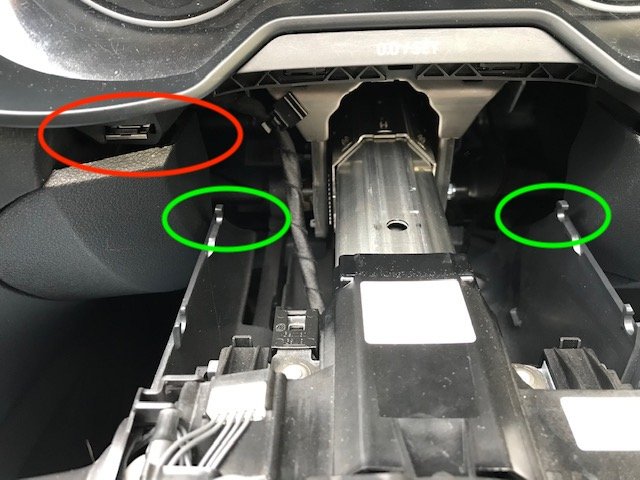
Right then. Here's how to remove your instrument cluster (at your own risk - I'm not an expert and pretty much just figured things out as I went along). 1. Ignition off 2. Pull out and lower steering wheel as far as it'll go 3. It's at this point that you need to remove the trim at the top of the steering column, and at the base of the cluster They're attached with a piece of flexible fabric which allows the steering wheel to be adjusted. Start by lifting the trim at both sides just behind the steering wheel. It should pop free, and then it will pivot upwards from the locators marked in green in the picture. Give it a gentle pull towards you and it'll be free. The smaller trim piece below the cluster is attached at the point marked in red (one on each side). It pulls straight back towards you. I found I needed a trim removal tool to do this part, but if you're confident enough you can probably just use your fingers.
-
Right, it's back in. No apparent ABS issues (haven't done a scan yet, though I've been for a test drive and all seems well). Just as important, creaks and rattles appear to have gone I'm going to put up a few pics and notes shortly, in case anyone else wants / needs to remove their cluster.
-
Ah, bugger. Too late 🤦🏻♂️ I'll have to come back to that.
-
Hi all, Apologies if this has been covered... I did try a search and came up blank. I'd like to remove the instrument cluster in my Scout to try and quieten the creaks and rattles coming from that area. As I understand it, this is what I need to do: 1. Ignition off 2. Pull out and lower steering wheel as far as it'll go 3. Remove the trim from above the steering wheel / just below the instrument cluster (instructions say, rather unhelpfully, 'take hold' of it and 'unclip it from the catches', without saying how or what direction to pull in) 4. Remove the two torx screws at the bottom of the cluster 5. Unclip at the top (again, how?) and remove. Harness will also need unclipping. As with all things trim-related, I'm just looking for a bit of guidance on where clips are, what direction to pull / push in and so on. Anyone who's actually tackled this before, if you have any handy hints I'm all ears! Oh, and I'll be doing the centre dash speaker grill next. Same deal, really. I know it's clipped, just looking for insight from anyone who's been there and done that successfully. Thanks in advance.
-
Yes, I'd be doing that anyway every 4 years with a belt and pump change anyway Very much not a fan of 'for life' fluid fills. They never are, and they always cause some kind of problem down the line...
-
Thanks, I saw that thread. I'm not sure it's particularly reassuring! I think I agree with you on non-OEM. My other vehicle is a heavily modified VW T3 pickup running a Subaru engine, so I'm used to mixing and matching components. But on a modern car I'm much less keen.
-
Thanks for the reply! Yes, I get that. I don't understand what's caused the contamination. I've read a lot about the silicate additive (which my car has), but Skoda don't seem to reference this in their TPI. Can't see why it would have overheated (or why so many people, with different engines on different VAG cars using the MQB platform, have had the same problems). Maybe they're acknowledging that a lot of cars had casting residue in the system? I fully intend to make sure the whole system is properly clean anyway, before doing anything else. Having done a little more research online, I'm fairly sure that adding brass / copper / solder into the coolant circuit is likely to be a bad idea in the long run, so I'm more likely to stick with a like-for-like replacement. The car has a goodwill warranty from the (independent) dealer I bought it from, and he's been very helpful and responsive so far and indicated that he'll sort it, one way or the other. It's booked in at the local Skoda dealer for them to have a look, so I'll wait to see what they say.
-
Hi all, I've just bought a new-to-me 16 plate Scout (manual box). I'm not new to Skoda, though - I bought a brand new mk 1 Ovtavia SLX tdi estate in 1999 and kept it until 2008. It remains one of the most reliable cars I've ever owned. Everything I've owned since then has been from the VAG family, but I'm enjoying being back in the Skoda fold
-
Hi, I'm new here, having recently bought a new-to-me 16 plate Scout. I'm not new to Skoda, though - I had a mk 1 Octavia SLX tdi estate from 1999 to 2008, and it remains one of the most reliable cars I ever owned... I'm sorting through a few issues on the car and discovered that I have the dreaded sludgy coolant / blocked heater matrix issue. Currently weighing up options. I found this alternative heater matrix: http://www.motoradsonline.co.uk/products/Skoda-Octavia-Heater-matrix-2013-onwards.html . Has anyone had any luck using one? On the face of it, the larger coolant passages sound like a good idea. My main concern is whether adding a brass / copper component into the cooling system is going to mess with the coolant chemistry. Does anyone have any insight into this? Thanks!