bigwhale42
New here
-
Joined
-
Last visited
-
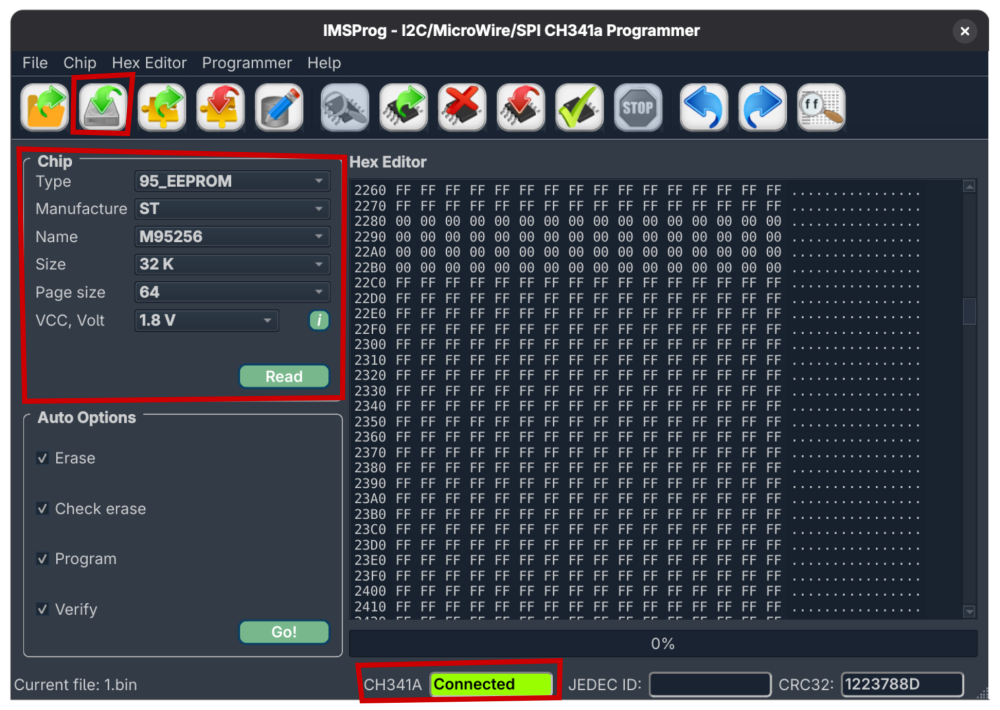
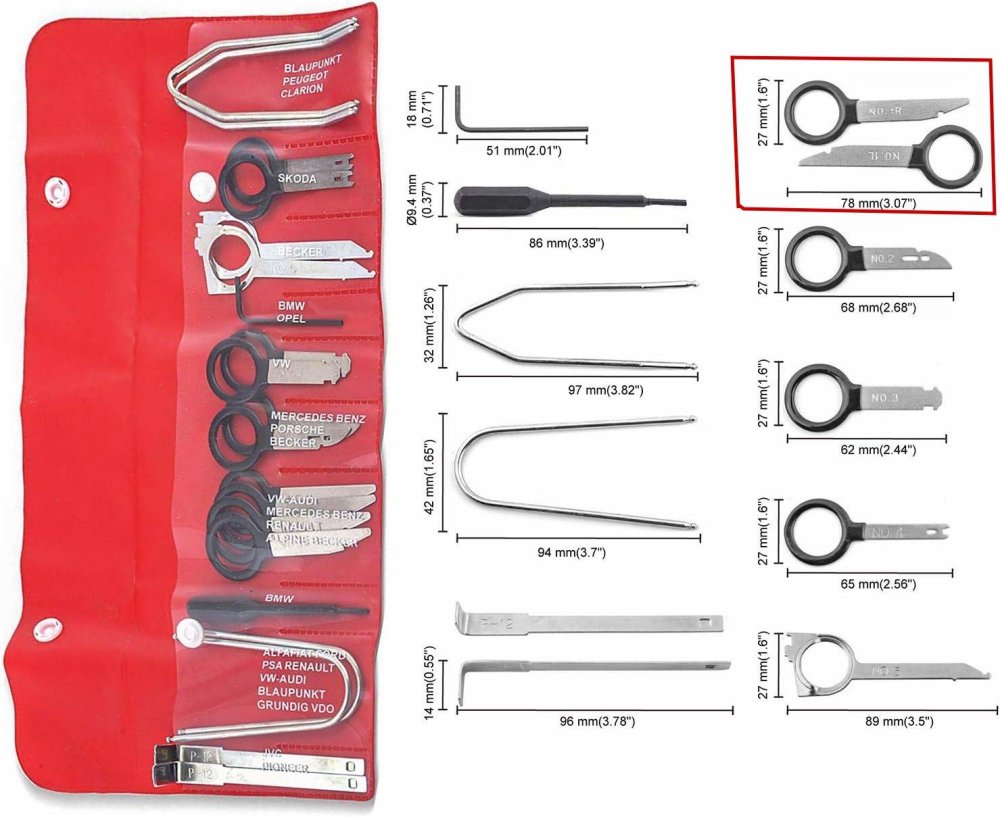
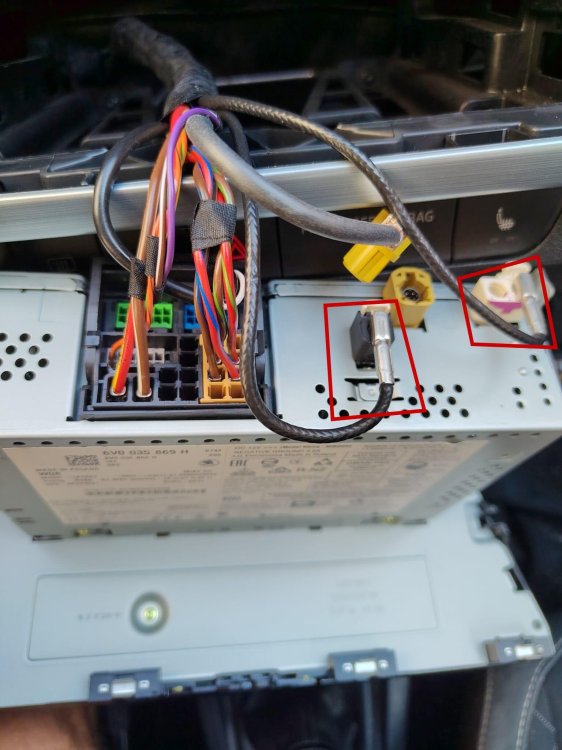
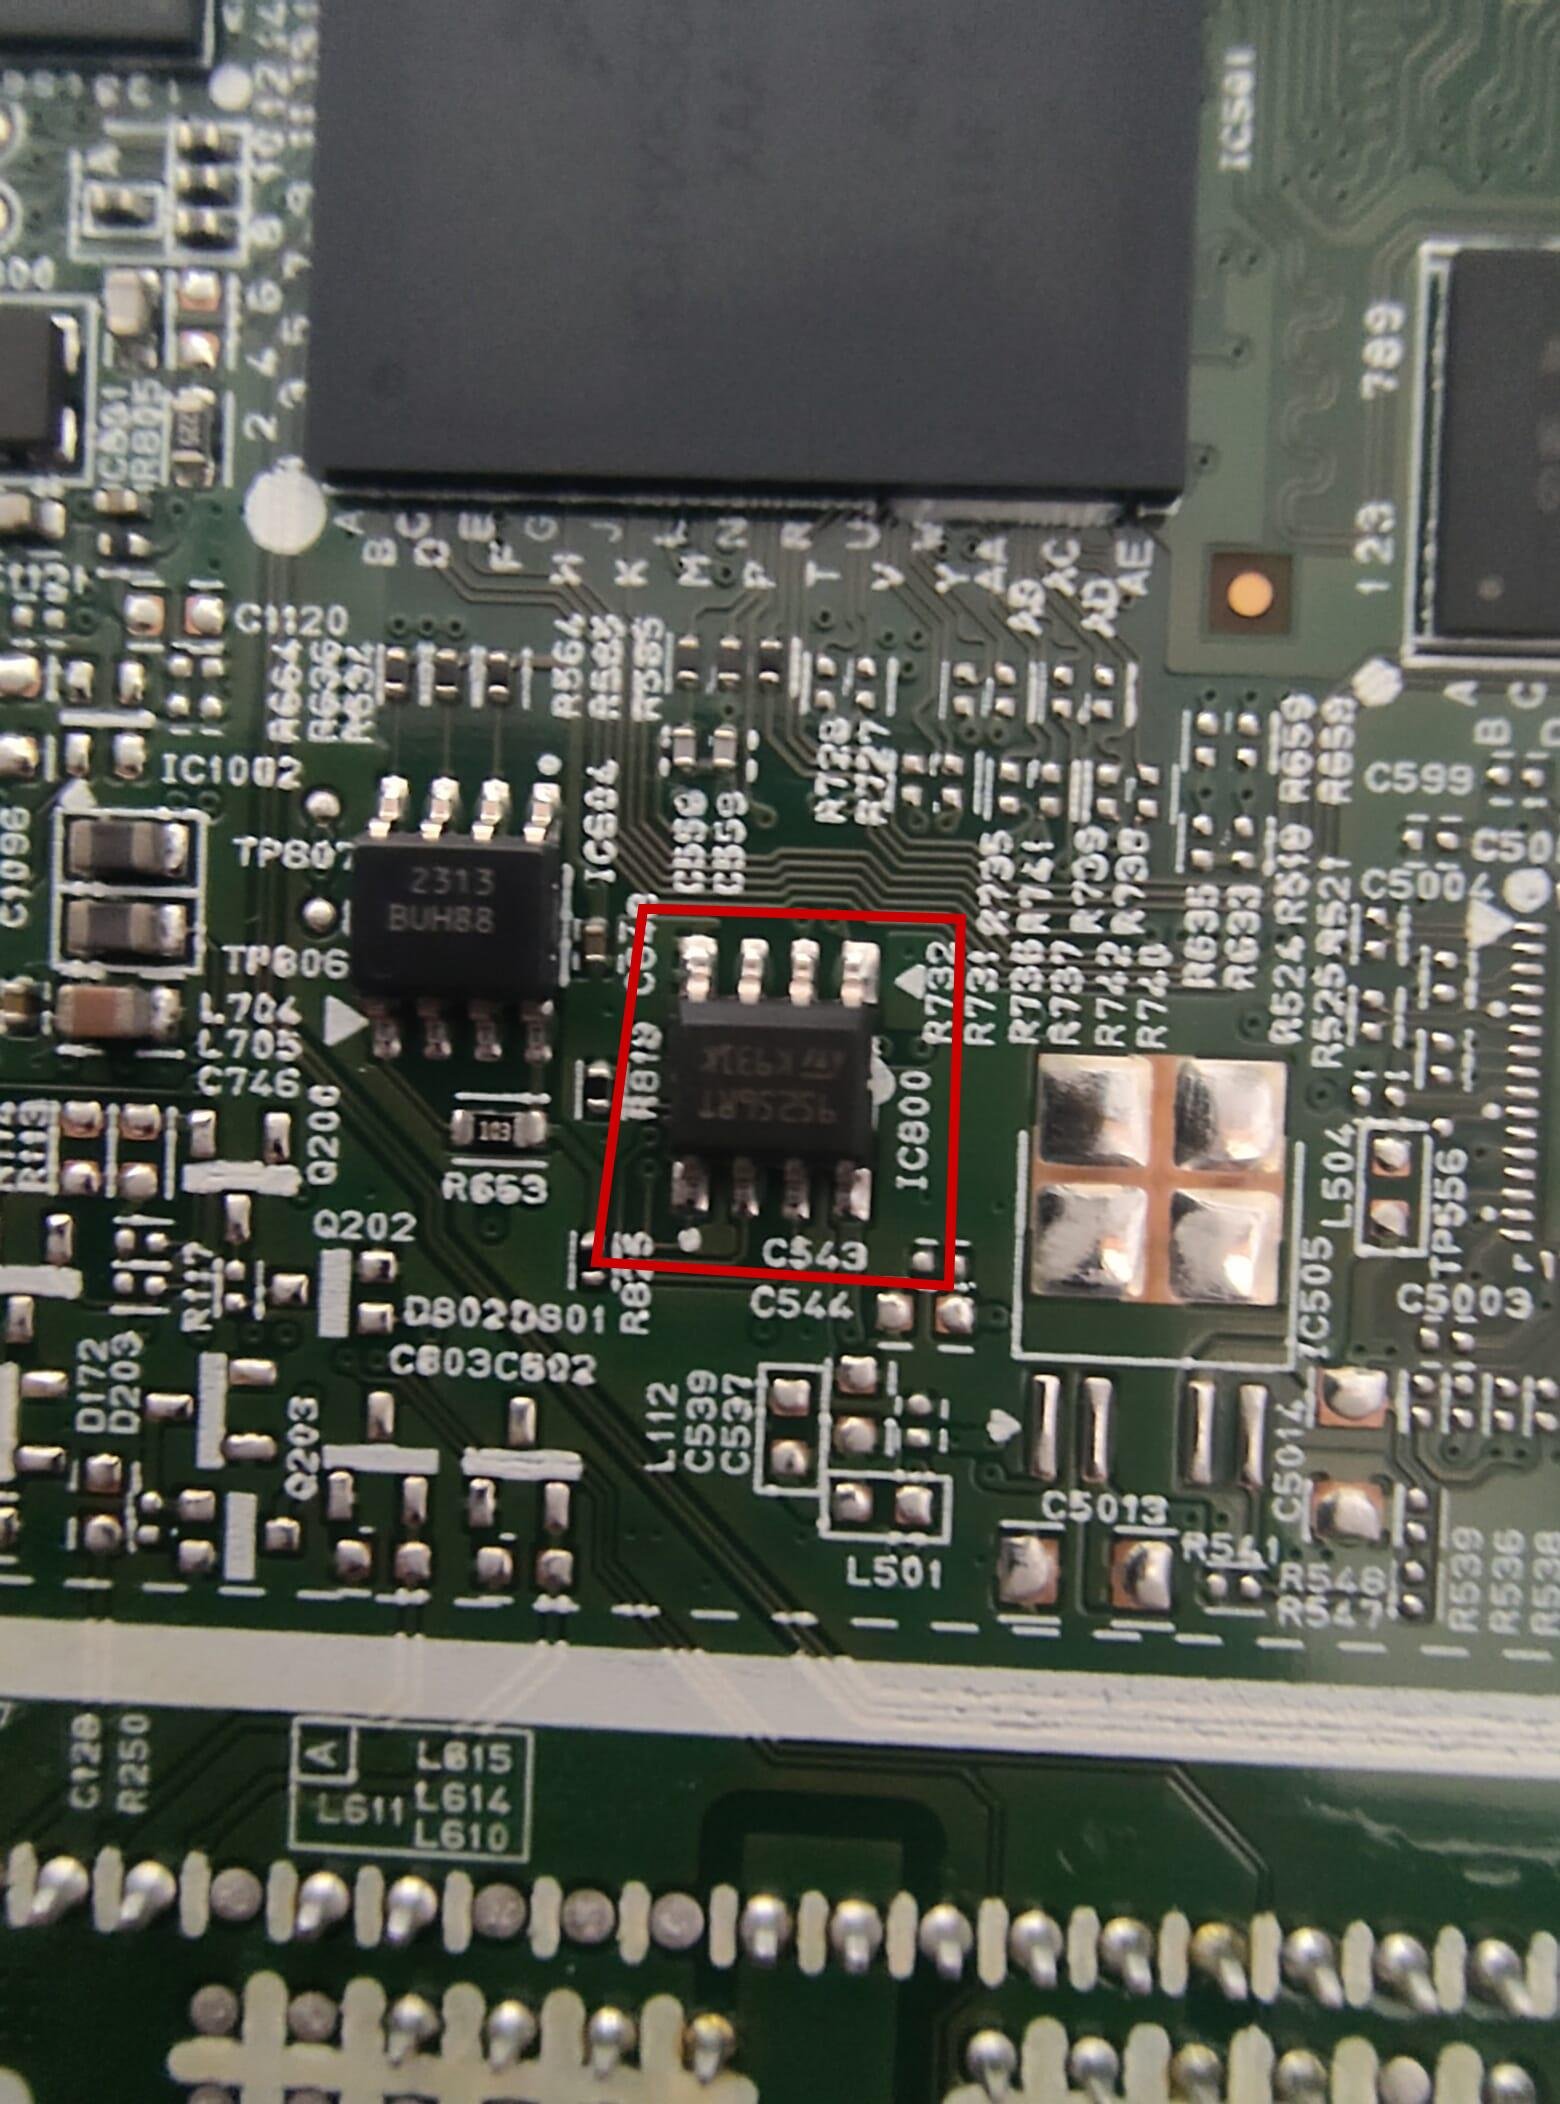
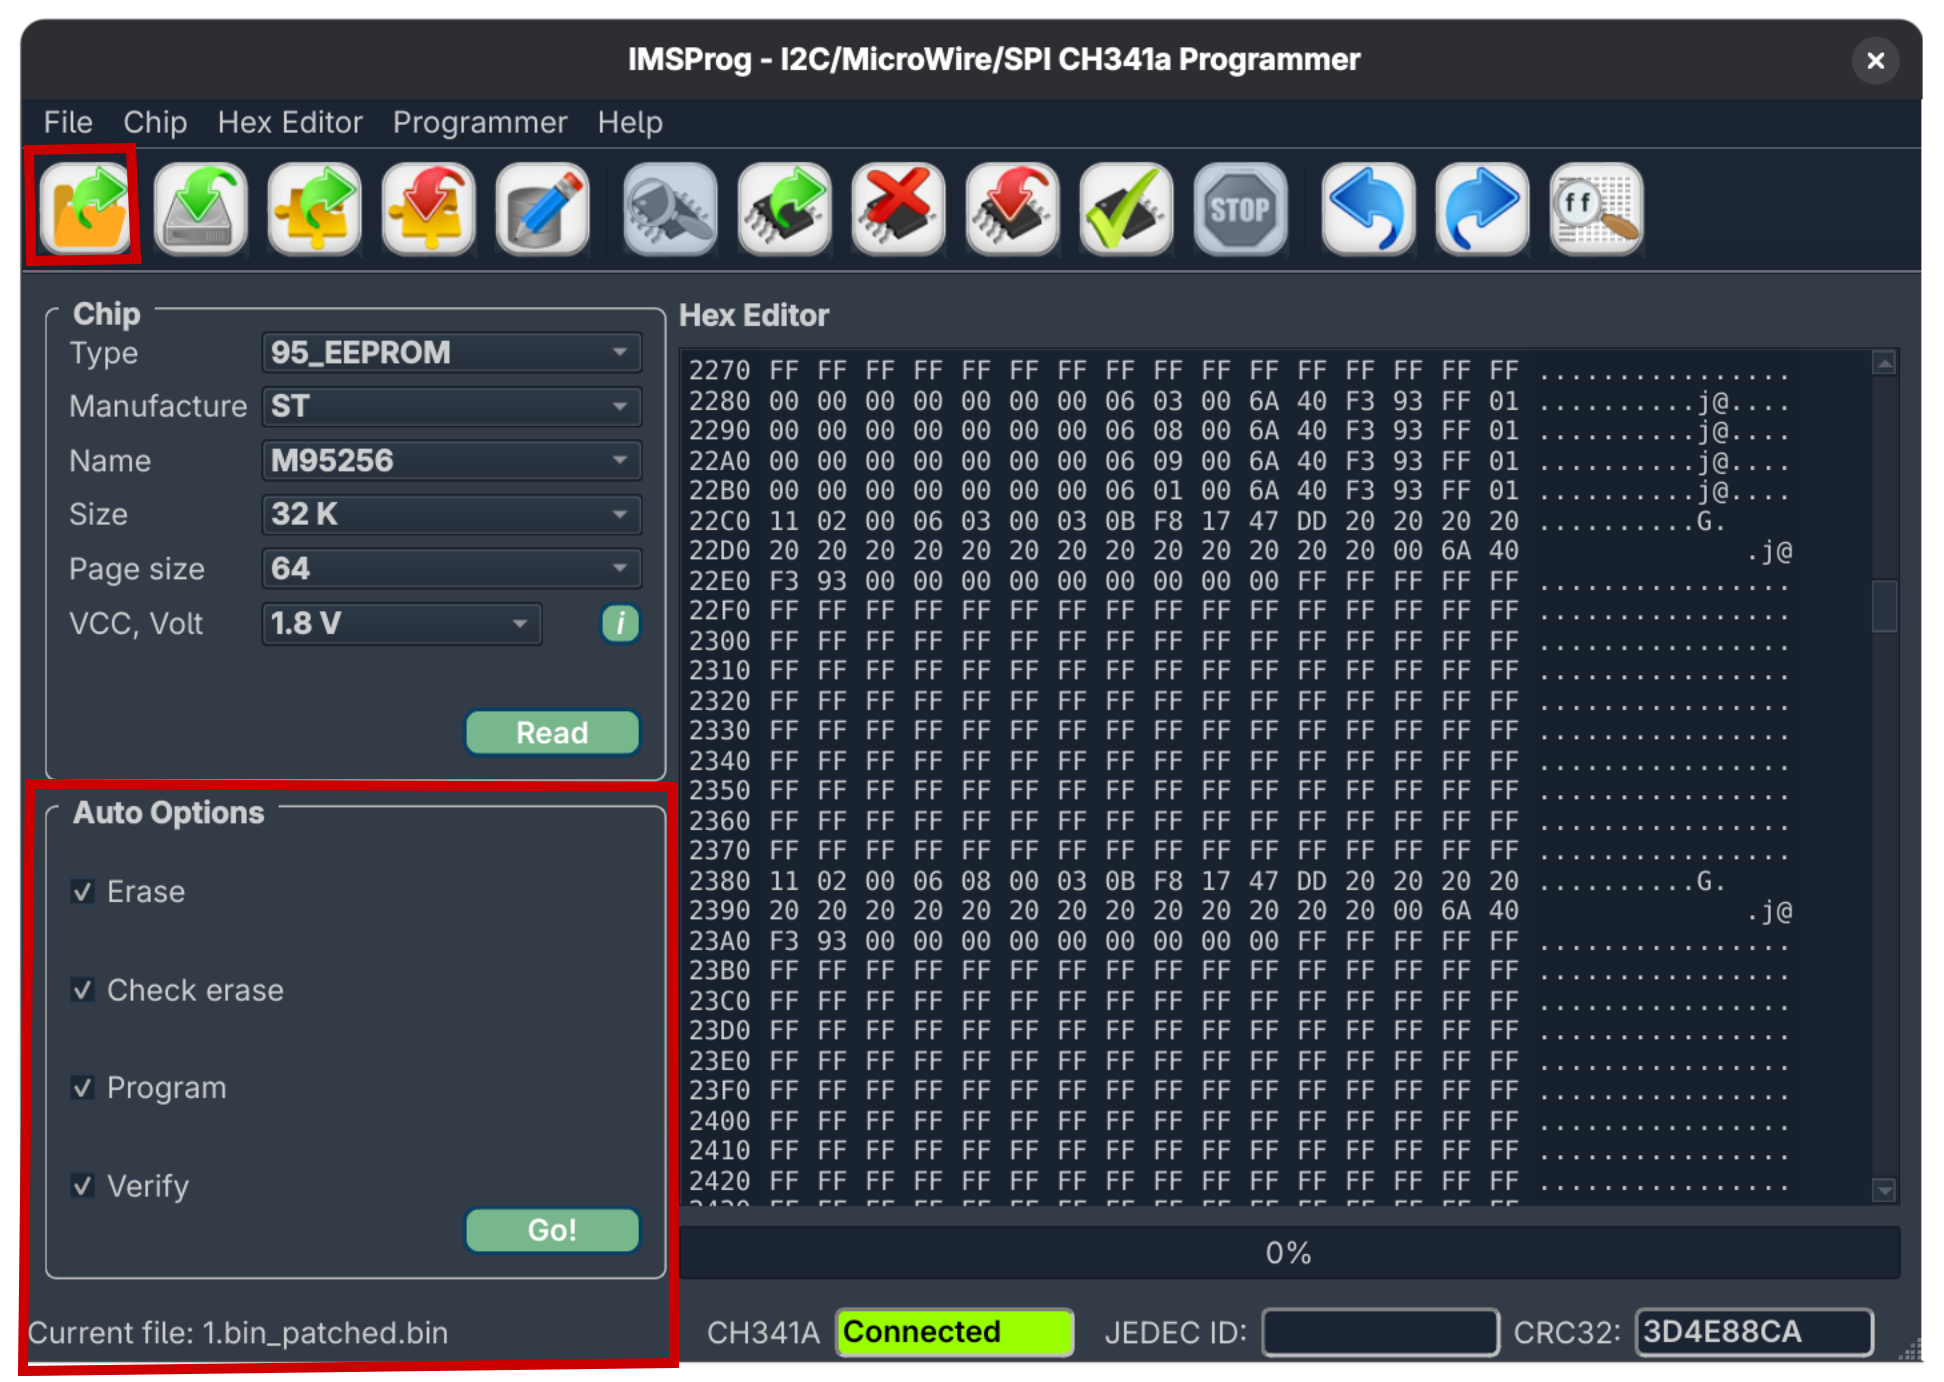
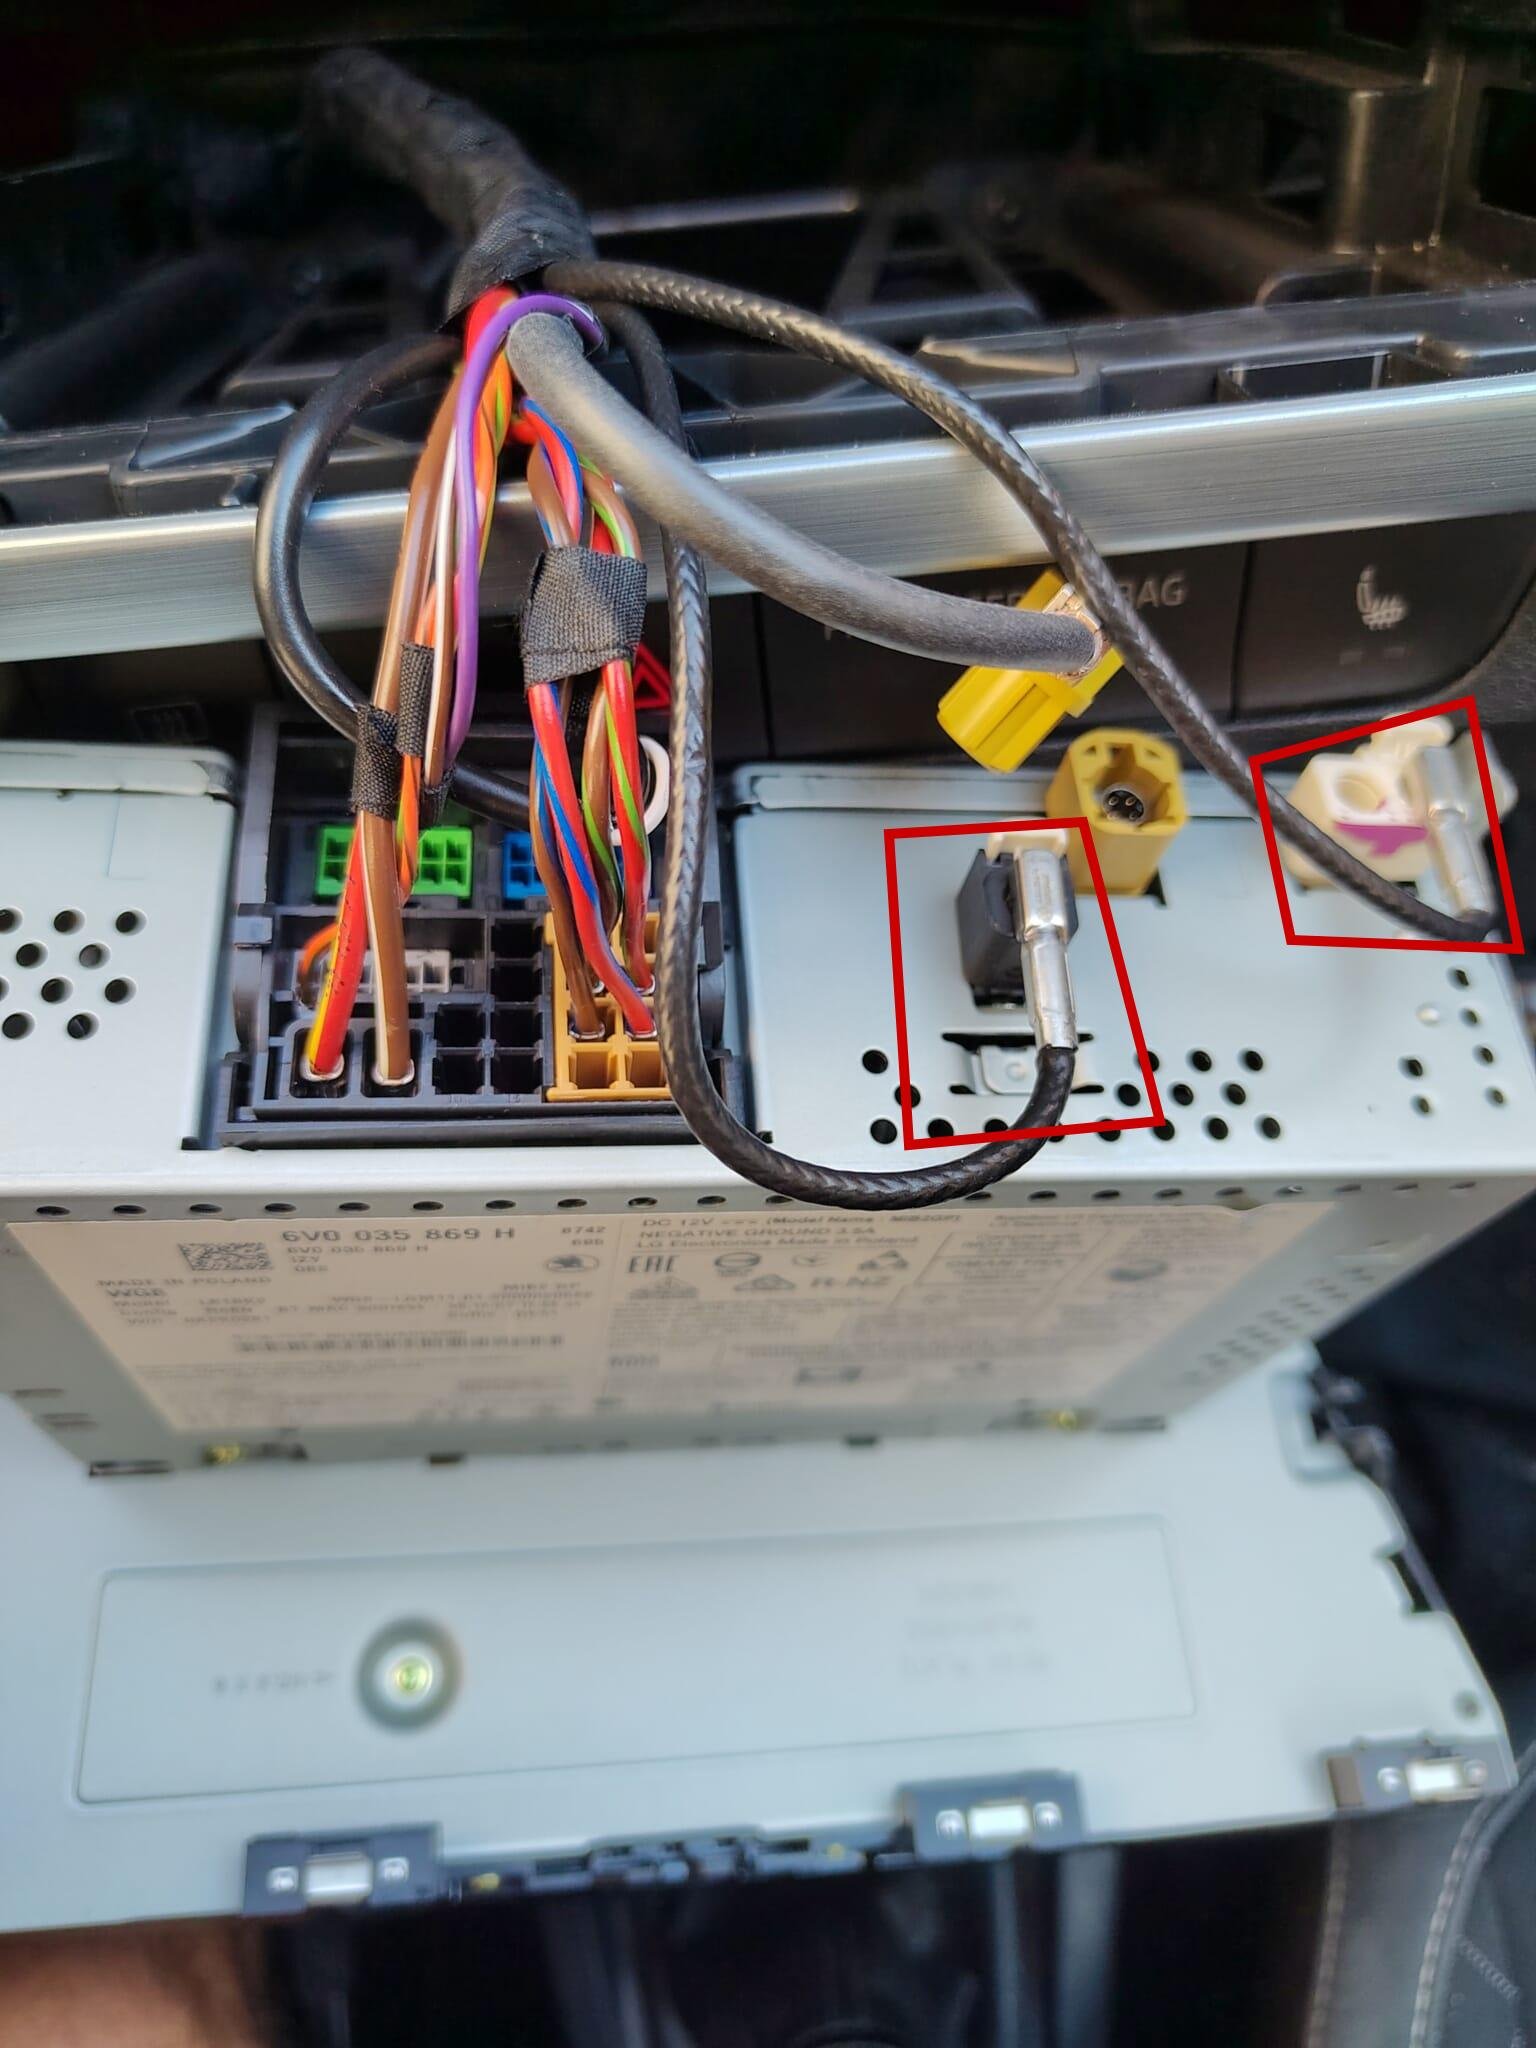
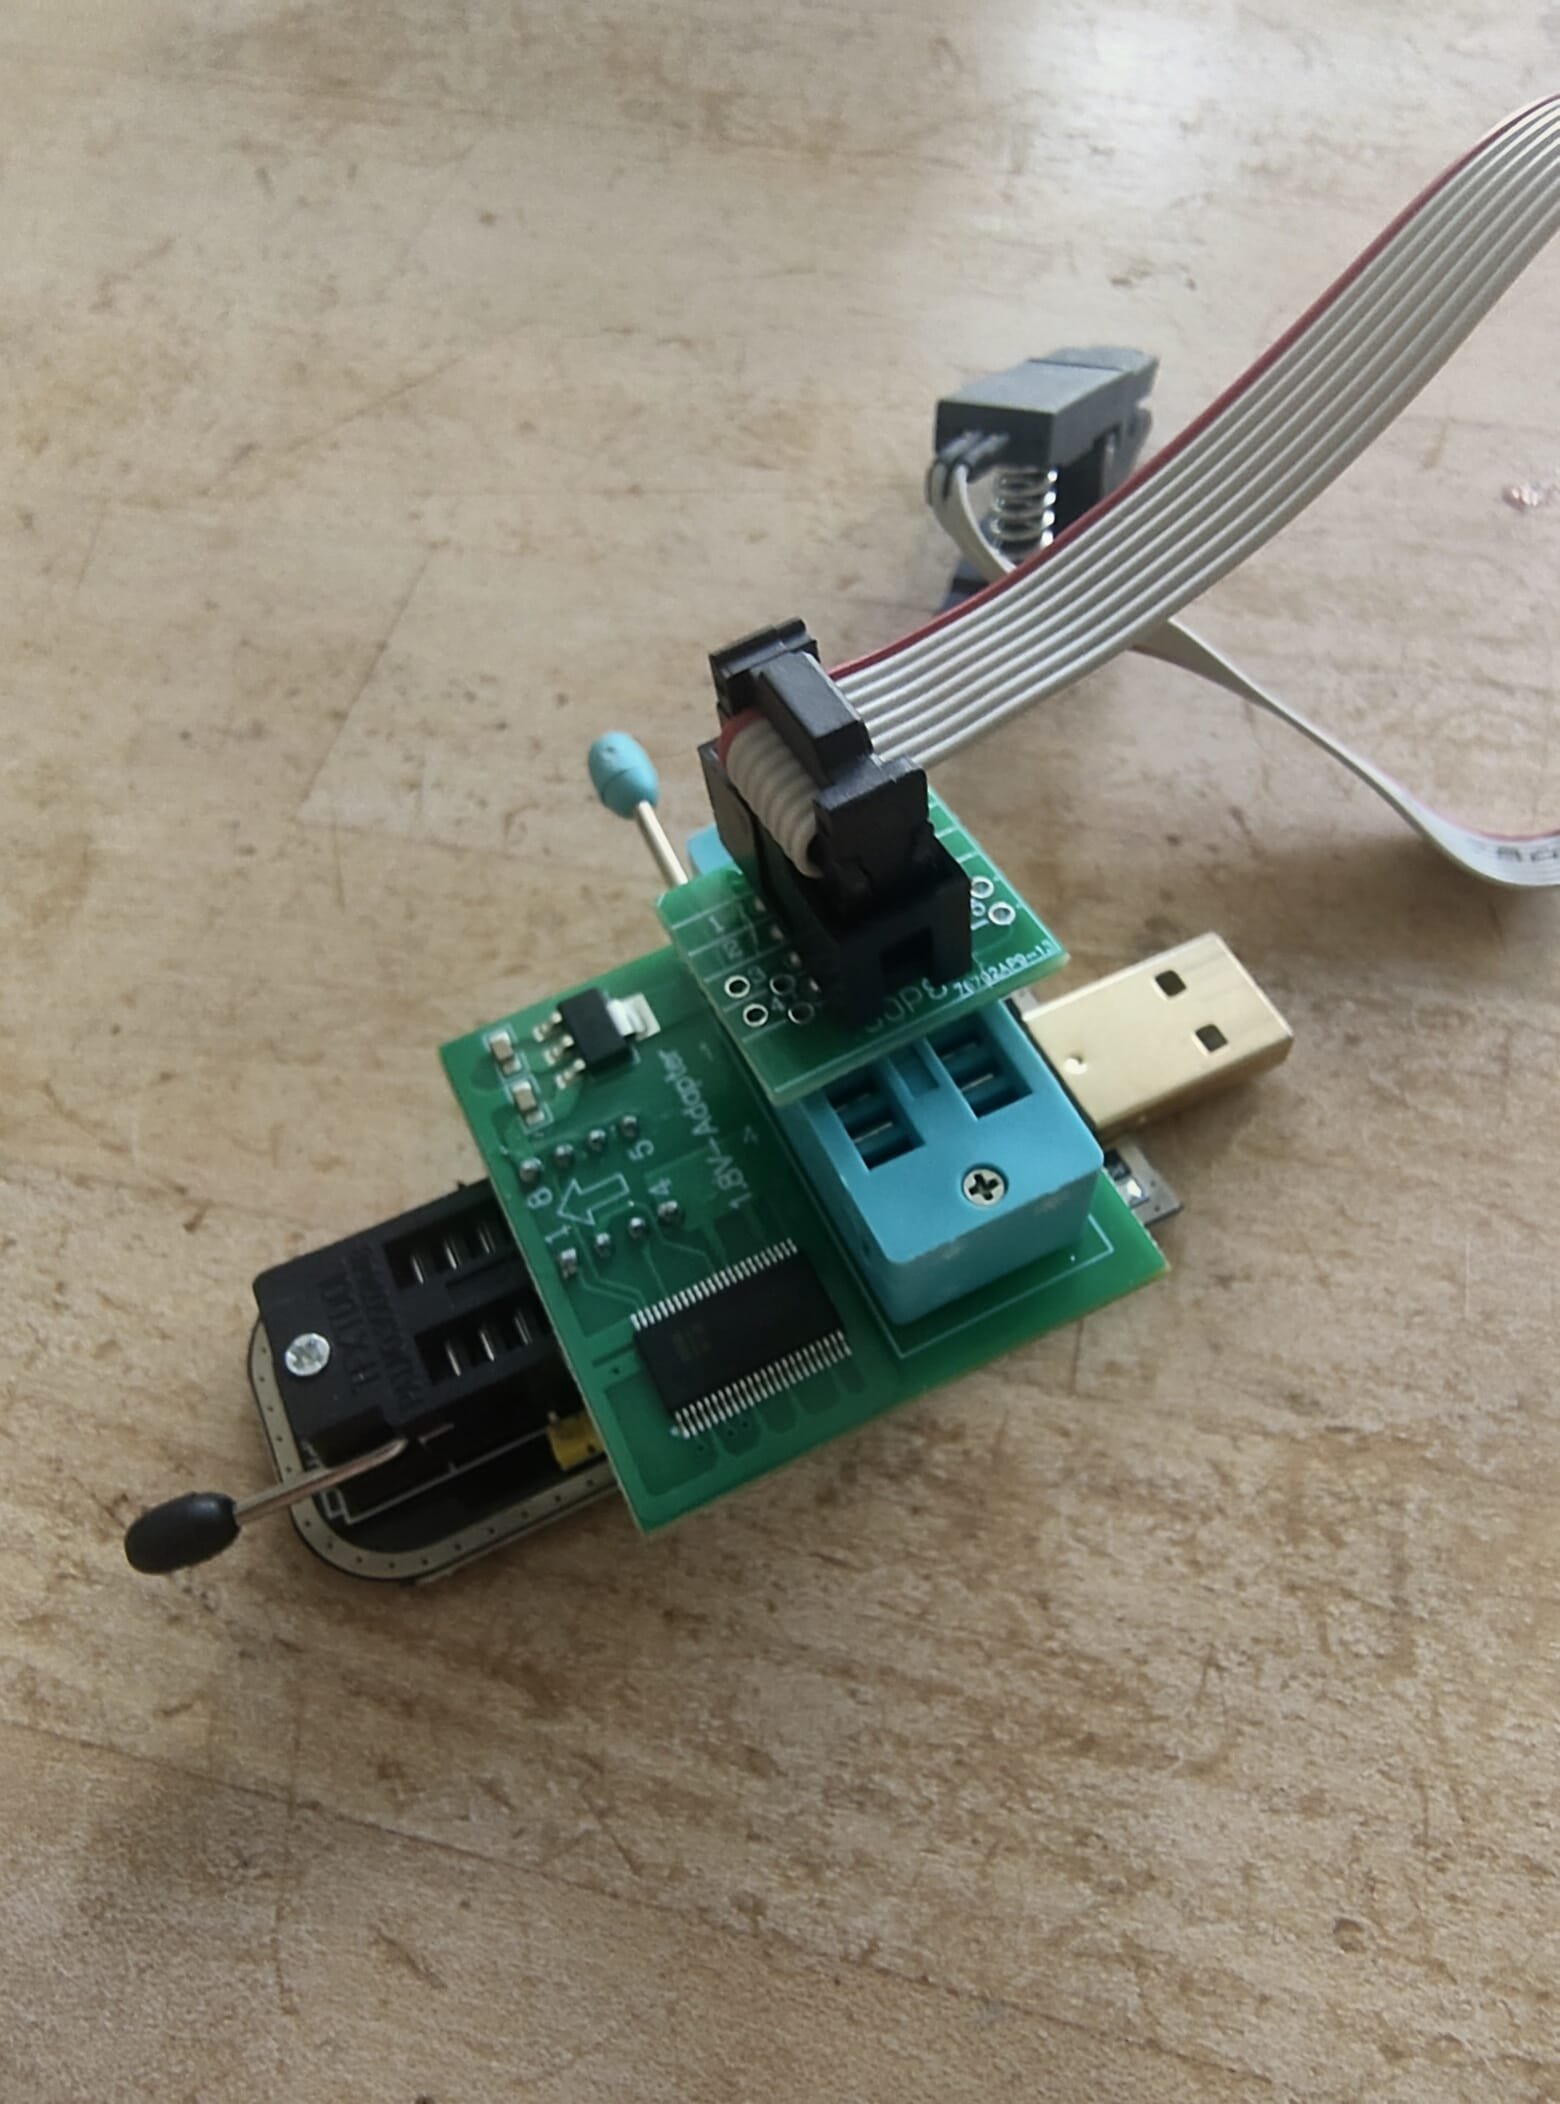
First of all: thank you for the brilliant hack - it really works and will save your summer road trip! This is exactly the kind of weekend project that hits my sweet spot—part grease monkey, part code monkey. Unlocking Smartlink (Apple CarPlay/Android Auto) on the Skoda Fabia III (Swing 3, MEN2) by directly flashing the M95256 EEPROM is a brilliant hack, but as noted in many of the comments, the original guide can be a bit of a maze. If you've got a Fabia III and want to tackle this without bricking your head unit or losing your mind, here is the streamlined, battle-tested notes based on real-world trial and error. Read this as supplement to the original guide. Hardware & Teardown NotesGetting the head unit out and prepped is half the battle. Don't force things, but be prepared for a little stubbornness from the VAG-group hardware. The Right Removal Tool: The "VAG Radio removal tool" isn't universal. While the original guide might point you to different keys, for the Skoda Fabia III, you strictly need the No. 1 removal tool. Don't bother with the No. 2 keys; they won't seat properly in the Swing 3 chassis. I suggest getting a kit – better quality and you will not cut your fingers on cheap e-bay tools. Wrestling the Connections: Once the unit is loose, detaching the back wiring can be a pain. The yellow connector comes off easily, but watch out for the white dual-Fakra antenna plugs. They are notoriously sticky. I actually broke the plastic housing on mine trying to get it off. Pro tip: Even if the plastic clip snaps, they are single plugs underneath and will still attach securely when you reassemble, so don't panic if it cracks. The EEPROM Programmer Setup (CH341A)We are targeting the 95256RT EEPROM chip on the board. You need a CH341A USB programmer, a 1.8V adapter, and an SOIC8 test clip. Assembly: Assemble the stack exactly as shown in the setup: Programmer base -> 1.8V Adapter -> SOIC8 Clip. Make sure to align pin 1. The 1.8V adapter is non-negotiable for this chip; The ”Red Light” power issue (see below) happens when supplying 3.3V or 5V or not enough power. The "Red Light" Power Issue: When you attach the clamp to the chip on the PCB, keep an eye on the programmer's red power LED. If it immediately goes out or dims drastically, you have a power delivery issue, not a dead chip. USB 3.0 is Your Friend: To fix the power drop, plug the programmer directly into a high-powered USB 3.0 port on your motherboard, not a cheap hub. Patience with the Clamp: The SOIC8 clip is finicky. It took me about 10 tries of gently seating, unseating, and wiggling the clamp before the pins made solid contact and the software recognized the chip. Keep at it. What does success look like? Data in the Hex editor window and not zero 00 everywhere! Software, Flashing, & Security (The Linux Way)All due respect to the original poster, but as a rule of thumb: never download and run random executables from forum users. You don't need their .exe files. You only need the raw Python script (MEN2SwingPatch.py). Because of this, Linux is by far the superior environment for this hack. If you're on Windows, just install WSL (Windows Subsystem for Linux)—there are plenty of simple guides out there—and do it safely. Here is the Debian/Ubuntu Linux workflow using IMSProg: 1. Install the Flashing Tool: Forget hunting for sketchy Windows drivers. Just open your terminal and run: sudo apt update sudo apt install imsprog 2. The Read & Patch Workflow: Open IMSProg. Make sure it says Connected (green box at the bottom) and set the Chip Type to 95_EEPROM, Manufacture to ST, and Name to M95256 (32K size, 1.8V). Hit Read. This pulls the original firmware off your radio. Save this file as 1.bin. (Keep a backup of this safe somewhere!) Open your terminal in the directory where you saved it and run the patcher script: python3 MEN2SwingPatch.py 1.bin This will generate a new file named 1.bin_patched.bin. 3. Flashing the Patched File: Go back to IMSProg. Under Auto Options, make sure the following are checked: Erase, Check erase, Program, and Verify. Load your newly created 1.bin_patched.bin into the hex editor. Hit Go! The software will wipe the chip, verify it's blank, write the patched Smartlink-enabled hex data, and do a final checksum verification. Once that passes, unclamp the chip, reinstall the head unit in your Fabia, and enjoy your unlocked Smartlink!