Sympol
Members
-
Joined
-
Last visited
Everything posted by Sympol
-
Thanks - I saw an arrow on the top of the pump assembly and a corresponding arrow on the tank, which I've aligned. With the tank out of the car I managed to get the top screwed on. After a lot of struggling I got the tank back in place, but the top of the pump assembly seems uncomfortably close to the floor of the car - not sure if the top is crewed down cpmpletely now 😞 There is a seal where the pump assembly sits in the tank, but I believe I got that situated right. I'll have another look shortly - still got the exhaust to refit.......
-
Thanks for the replies - I eventually figured out that it was a cross braking system so as advised I connected the pipes so that the right front/left rear work together etc. Hardest part was threading the new pipes from the master cylinder to under the car. And taking out the fuel tank to get to the cross body pipe, which was well corroded. Also fixed a vouple of corroded fuel lines while I was at it. Next problem is getting the fuel tank back in place - having problems getting the fuel pump large 'jam jar' type screw retainer to connect properly - it keeps popping up when I think I've got it screwed on properly......
-
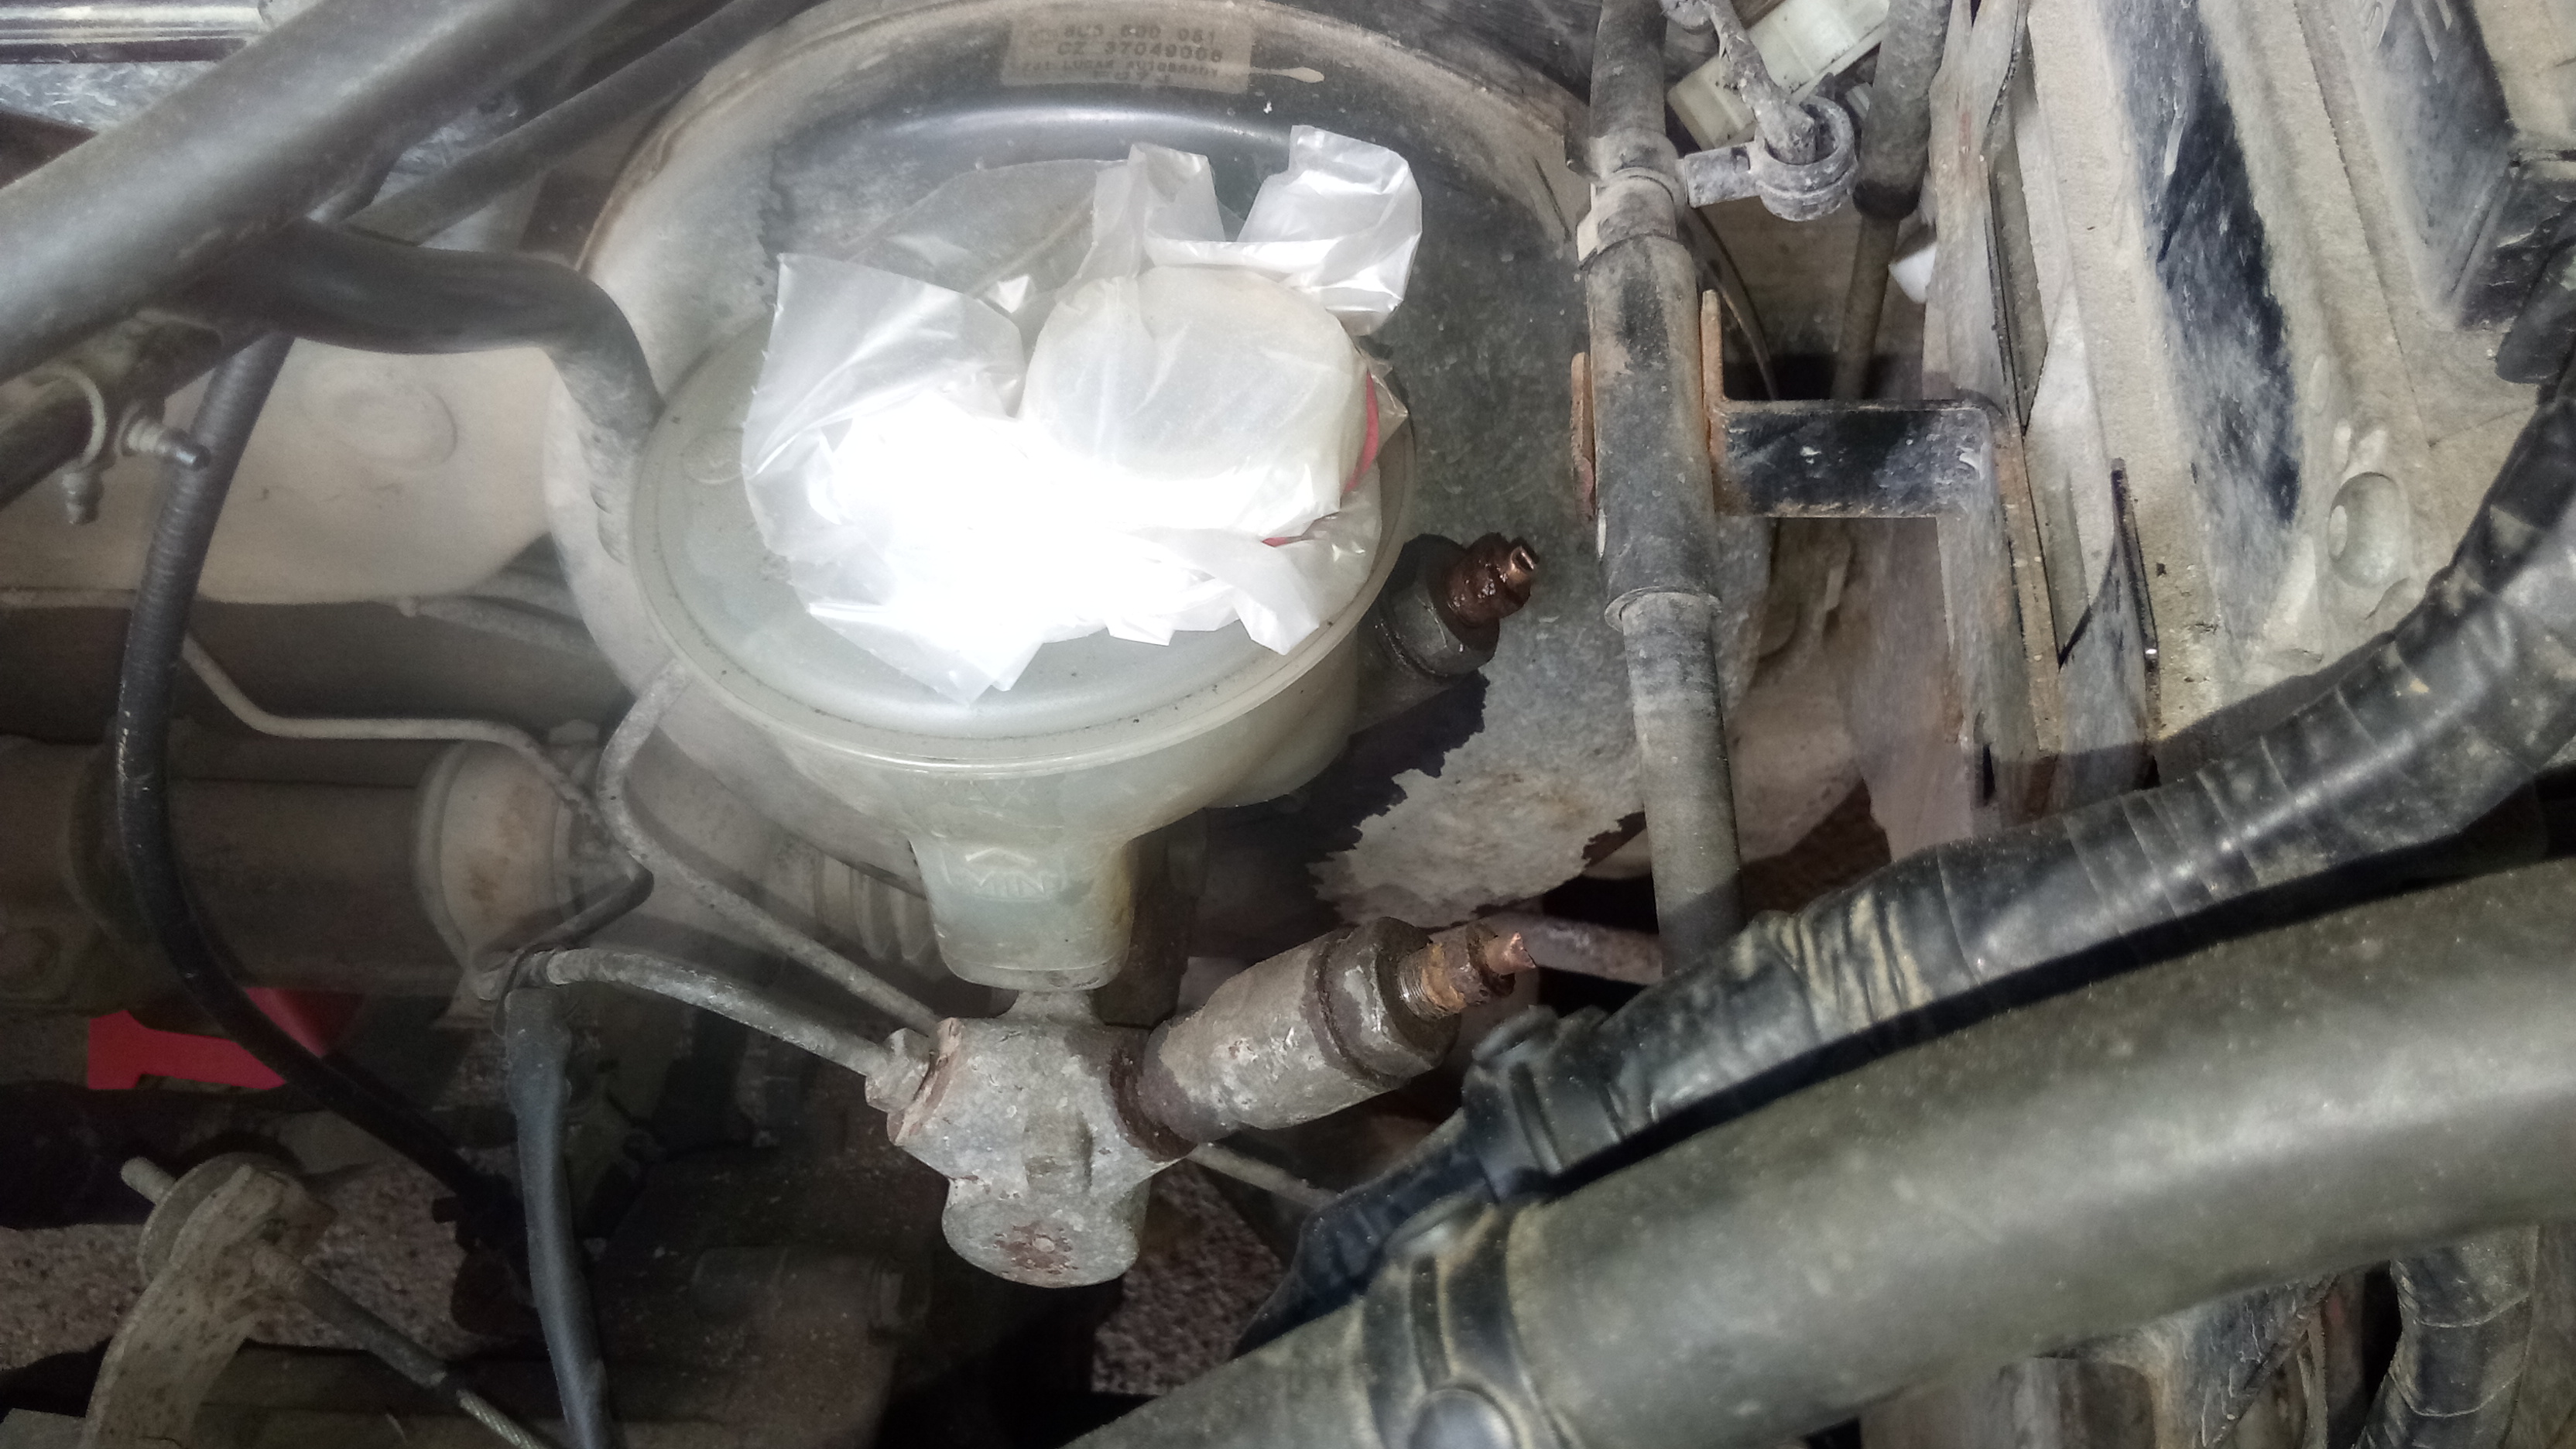
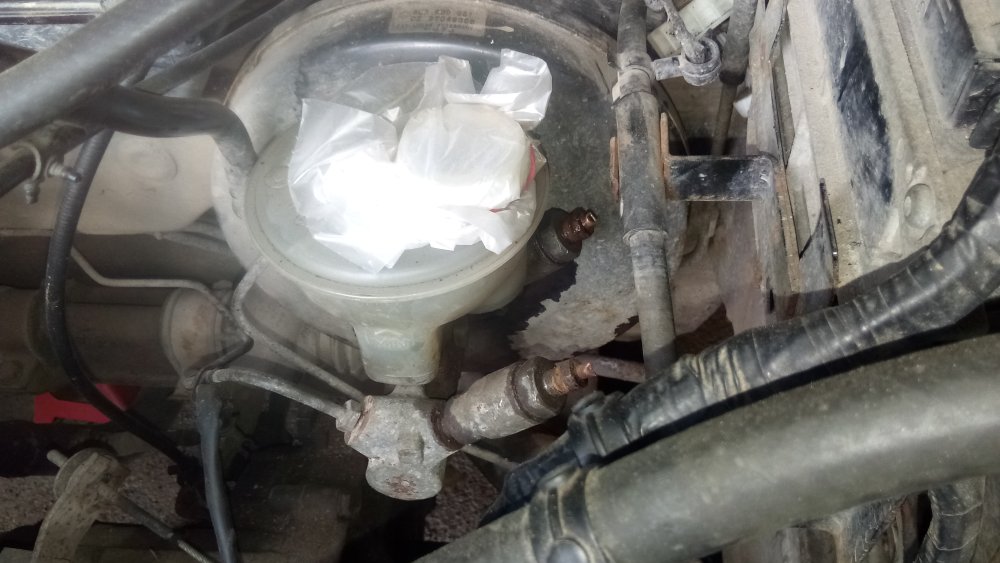
This may be a silly question. I'm renewing the brake pipes to the rear brakes on my 1999 Felicia 1.3 non ABS and I foolishly forgot to note which pipe from the master cylinder goes to which rear wheel.... Is it critical and if so, which connection goes to which rear wheel? It looks like one side of the master cyclinder goes to the front calipers and the two outlets on the other side (on the right in the attached photo) go to the rear cylinders... I'm expecting to have some problems feeding the new brake lines down from the master cylinder to under the car, does anyone have any hints on whether it's better to start feeding the new pipes down from the engine compartment, or is it better to work from under the car and feed up the shorter amount to the engine compartment? Any and all advice/hints/tips more than welcome... (I've already rebuilt the rear brakes with new shoes, cyclinders, springs etc. together with new pipes and hoses and removed the fuel tank and exhaust system to make it easier to get the long brake pipes installed) Thankyou....
-
Thanks for those images - will certainly help when it's time to put it all back together. Taking a break now for today, carry on tomorrow.....
-
Well, that was fun! Just a quick update to remind myself never to rely on the Haynes manual. So many hoses and connections not even mentioned in the section of fuel tank removal..... In the end I managed to get off the filler hose at the tank and as the tank was less than half full I managed to syphon out around 10 liters of fuel through that opening before removing the rest of the hoses attached to the top of the tank and not visible/mentioned in the Haynes manual and lowering the tank with the use of a trolley jack. Still have a couple of nuts holding the heat shield in place (which I would have liked to have removed before the tank) but I should now be able to attack them better now the tank is out of the way. Looks like I might have to replace a section of the fuel line as well as the brakes, as that is corroded in places ......
-
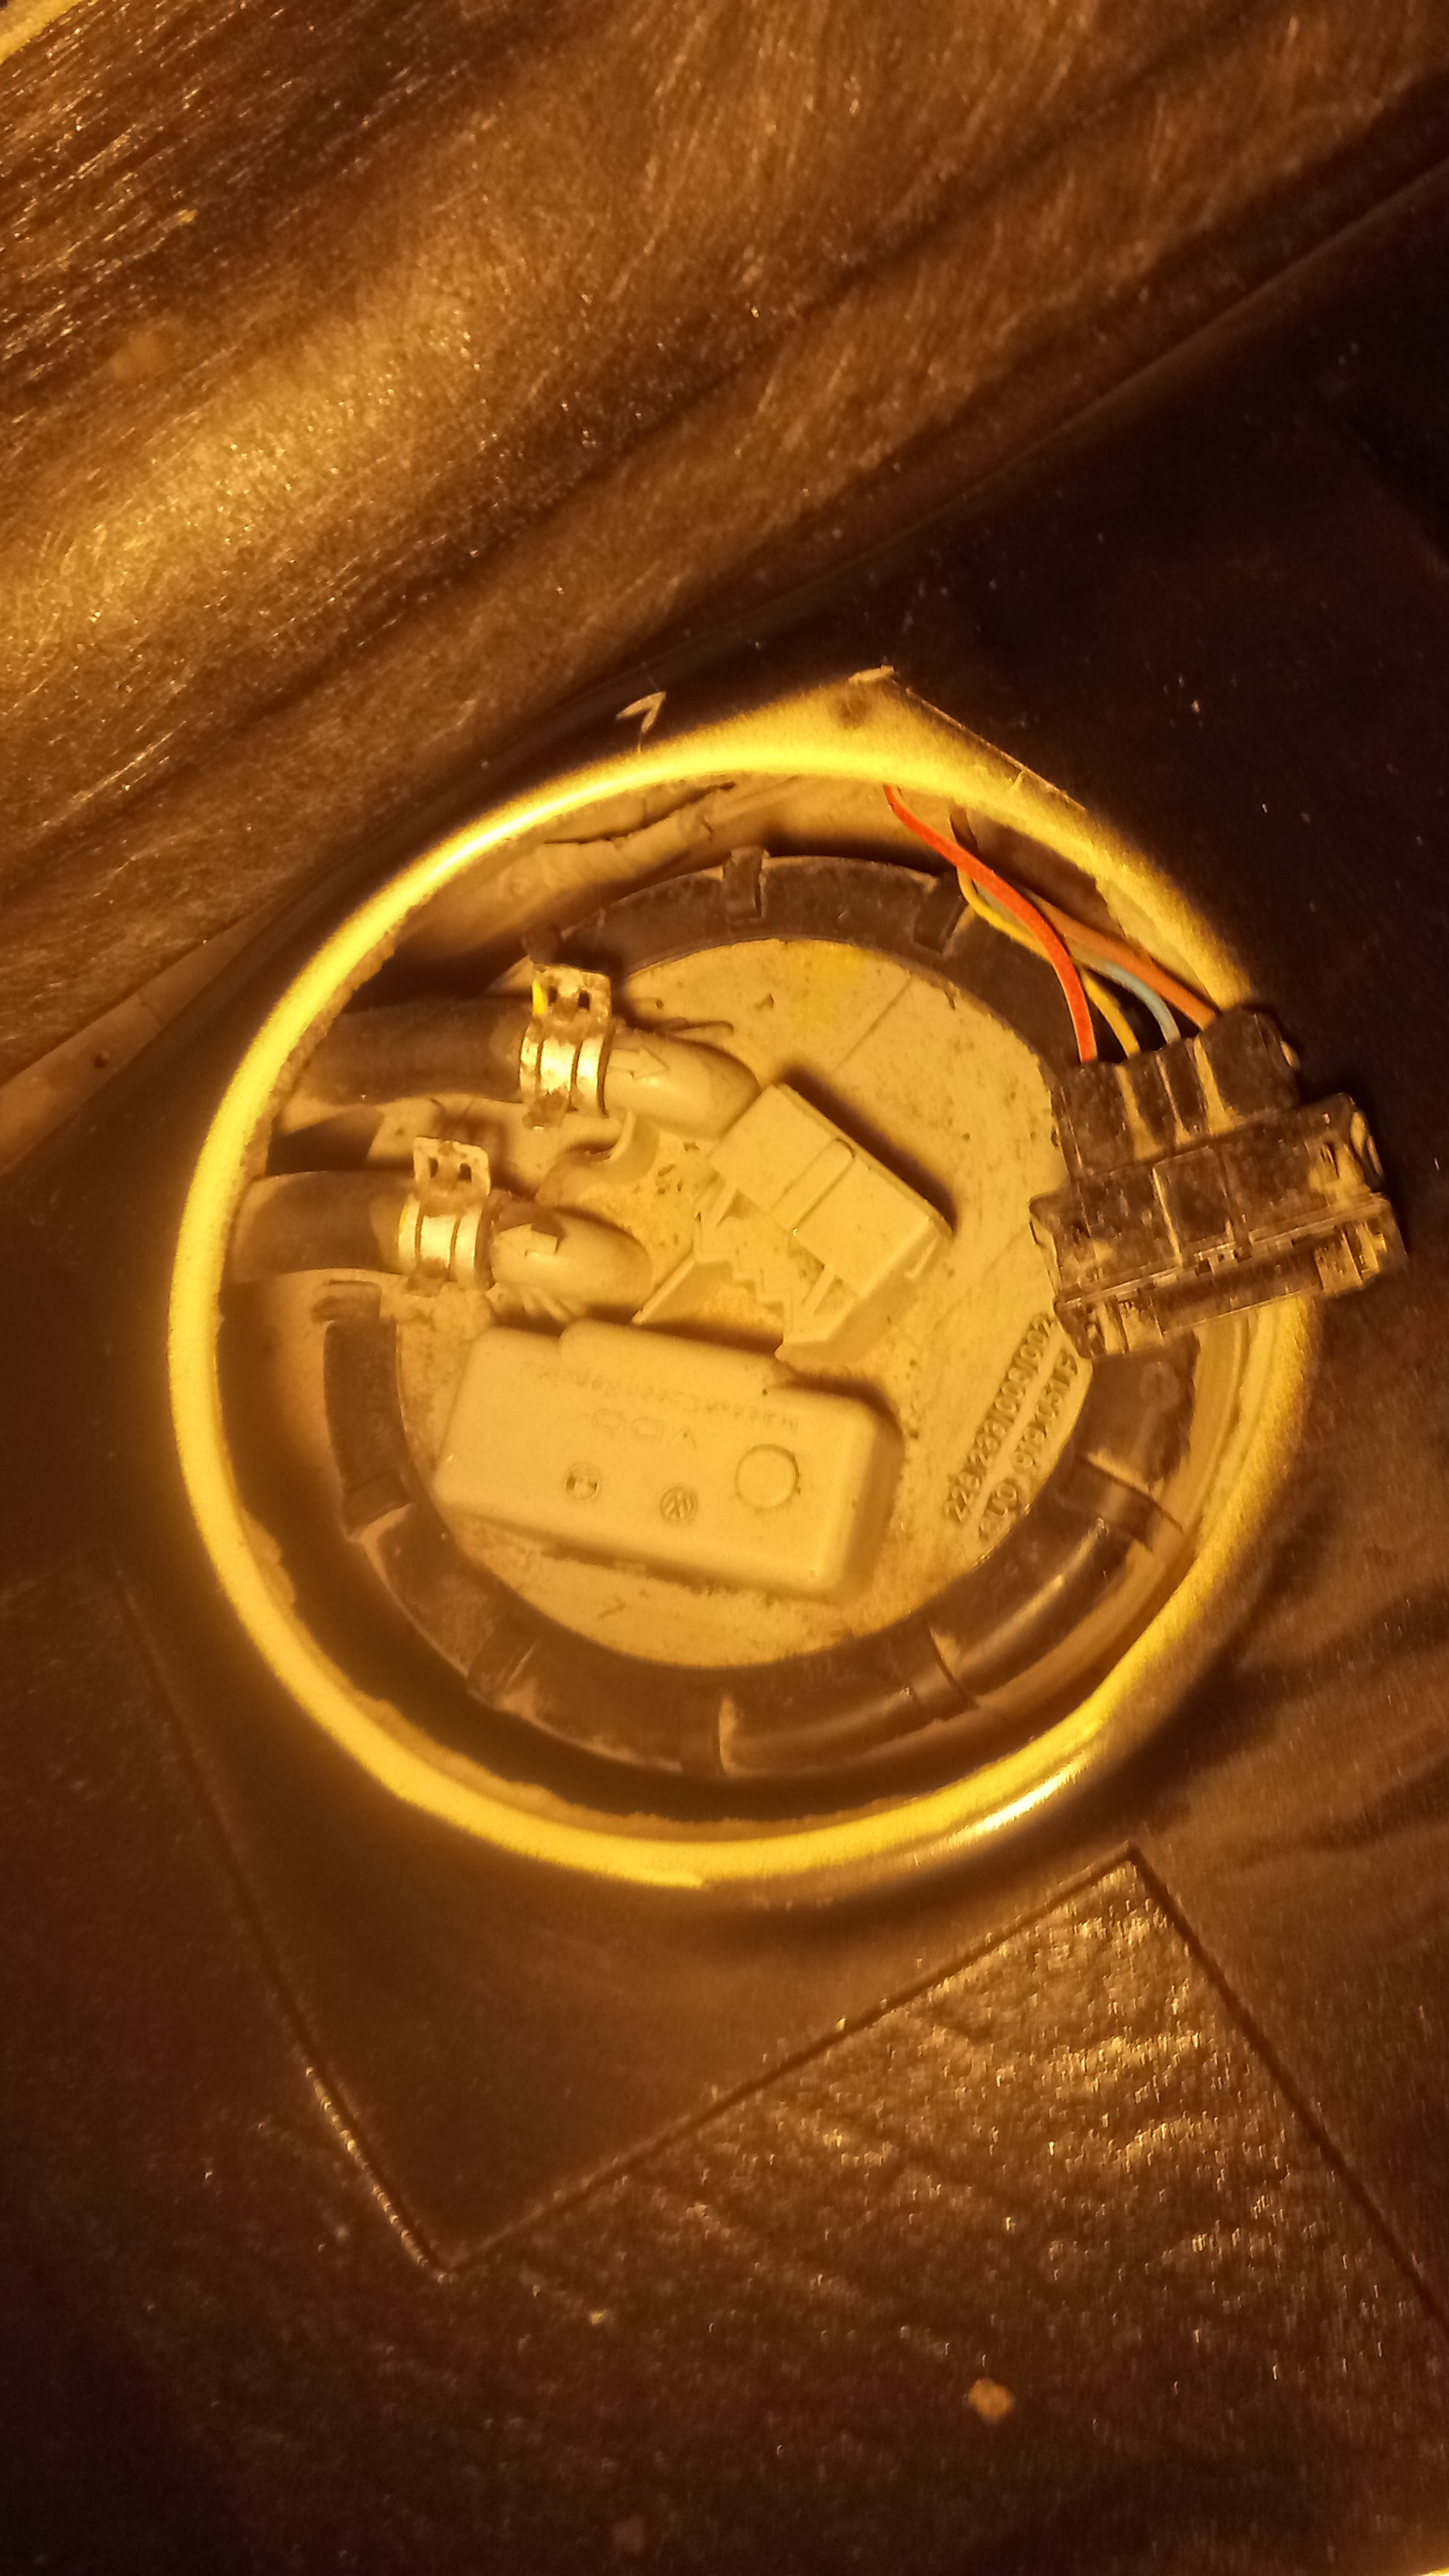
Good evening all. The saga of my Felicia continues! I've managed to successfully fix the front end - new shocks, disk rotors, lower control arms - now it's time for the back end which failed the annual inspection through uneven rear braking and rusted long brake lines. I've rebuilt the rear brakes both sides with new wheel cyliders, shoes, springs etc..... I've bought a set of replacement rear brake lines and hoses, including the long lines from the master cylinder. It appears that I need to drop the fuel tank to be able to get to the brake line that runs across the top of the fuel tank. I've been able to gain access to the top of the tank by removing the rear seat and cover plate (I've depressurised the fuel system first) but now I need to drain the tank, which is almost half full and would appreciate some advice on the best way. I've tried a flexible pipe down the fuel filler, but can't seem to get it into the actual fuel level to syphon it out, despite the pipe going down a long way. One alternative is to pull out the fuel pump from the top of the tank and syphon from there, but there is very little room to get the supply and return pipes off to unscrew the 'jam jar' lid as per the attached photo. But if that's the only way...... The other problem is that it also seems necessary to remove the exhaust pipe from the cat converter backwards (which I've already done) to be able to drop the tank and also to improve the access to those long brake pipes. The connections around the rear brake pipes/hoses are badly rusted so I'm doubtful I'll be able to unscrew those, but as I have replacements I'm not unduly worried there, but of course all the bolts holding the handbrake cables & fuel tank straps are also corroded and will probably be b......s to loosen. Does anyone have any experience of doing this job on their Felicia and can offer advice? I'm running against a time restriction, as the car is due for a re-check at the Swedish MOT equivalent before the end of next week. At least I'm a pensioner and have all week free to do the work..... Any and all suggestions/hints/tips very welcome

-
I managed to press the control arm further onto the bush and with a bit of wiggling managed to get it into p+lace. Thanks for the suggestion......
-
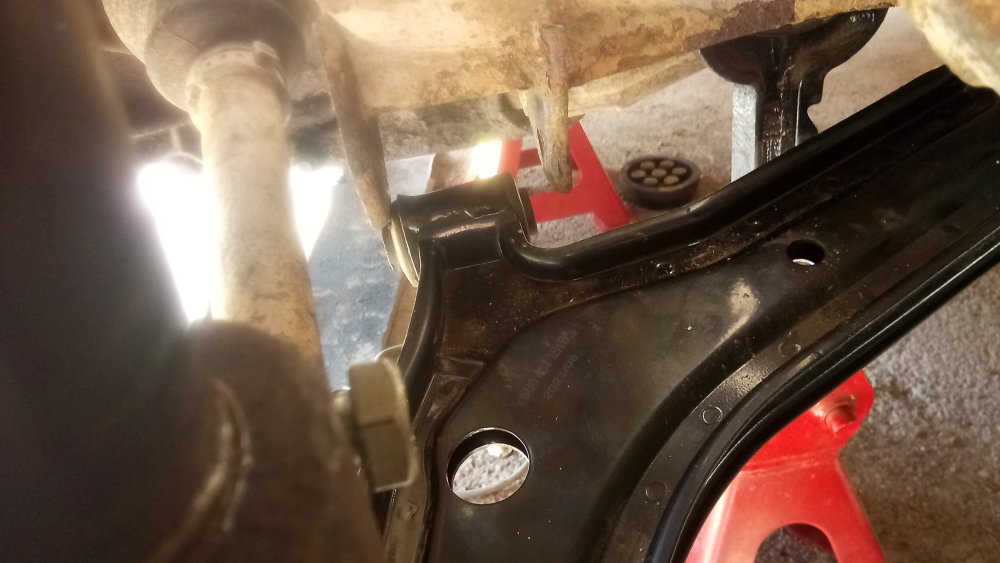
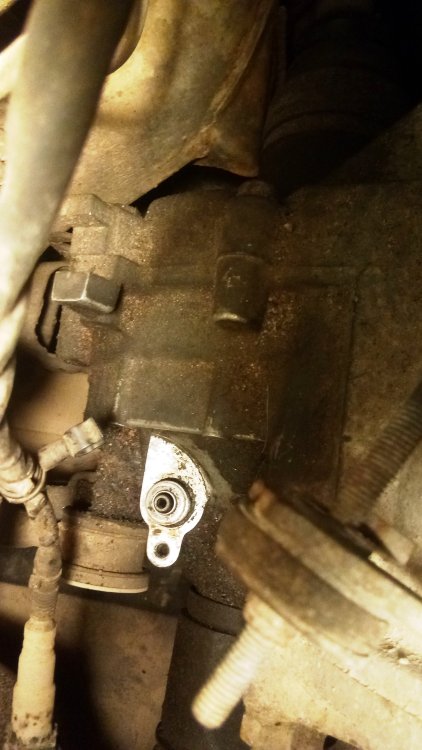
A couple of photos - the rear bolts loosely in place and the ball joint. As you see, the front bush doesn't line up with the chassis......
-
Thanks - it's a 1999 model. I'll try to take some photos tomorrow - it's been pouring with rain all day, so I'm trying to dry out just now,,,,,
-
I've put copper grease on when reassembling thanks
-
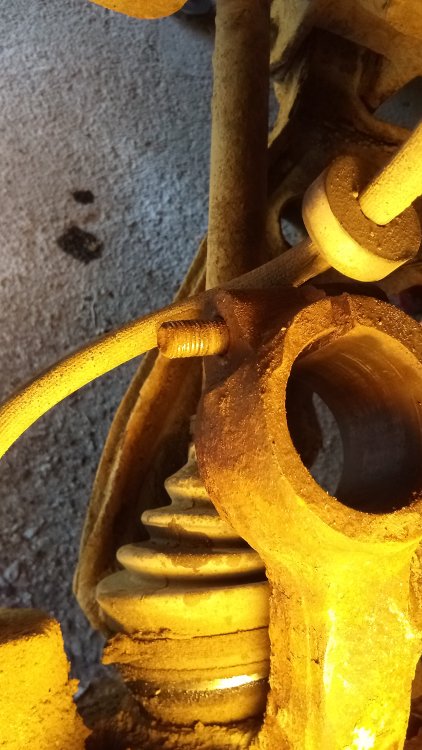
Hello everyone.... I'm busy doing work on the front end of my Felicia following the registration check - which advised replacing the lower control arms. I've removed the old ones and am halfway through installing the new ones but wonder if there is a recommended method.... My Haynes manual tells me to first fit the ball joint, then the front pivot bolt (loosely) and finally the retaining bolts for the rear pivot bush. My problem is that when I come to the rear bolts, they are around 1/8" from lining up with the holes and I can't get them in position. I then tried fitting these bolts first (loosely) but then I find that the front pivot bush won't line up with the chassis enough to install the front pivot bolt. It's as if the distance between the front bush and the rear bush is slightly too great. Do I just have to use more strength to try to pry the arm into position or is there a simpler way? Any suggestions very welcome, thanks.....
-
Thanks for the replies. I managed to get both bolts out by removing the complete hub assembly from both sides - lower ball joint, axle nut and steering linkage - then for the complete bolt I used my extra large hammer, and together with a slight backwards/forwards motion and an extension handle on the head of the bolt managed to work it loose. The bolt with the head sheared off I did as suggested and but off the bits of the bolt visible outside (and in the gap) of the hub, then used a drift and the extra large sledge hammer and eventually got both halves of the bolt to drive out. What a pain! Currently replacing the link arms on both sides - that's another pig of a job!
-
Thanks for the confirmation about the threads on the bolt. I was able to remove the nuts from both the bolts, which presumably released the clamp enough to be able to pull out the strut - that was the easy part! - but the bolts themselves just won't budge at all despite the heating up, hitting with my biggest sledge hammer (although movement is restricted under the wing). I'm more inclined now to remove the complete assembly and work on the bolt removal on the workbench. As I mentioned earlier I intend replacing both link arms (suggested at the MOT inspection) and working on the front brakes (new discs) so it basically has to all come apart anyway apart from the steering ball joint.... Thanks for the clarification on the threads on the bolt and the tips. I'll report success or failure later.....
-
Thanks for the replies. I've tried the blowtorch for around 10 minutes after removing the brake caliper etc and hanging that out of the way. Despite whacking the bolt with my biggest hammer, there's not a sign of movement. I'm wondering now whether to remove the complete hub assembly (I have to replace the link arms anyway) so I can work on the bolt removal on the workbench. A lot more work I realise with the lower ball joint, the drive shaft nut and the steering linkage, but I'm not going anywhere unless I can get those bolts out. Frustrating as the suspension struts have been refurbished and are ready to go back...... Can someone please confirm if the bolt is threaded into the clamp or should it just drive out backwards?
-
Hi, just a quick question. Replacing the shocks on my 1999 Felicia 1.3 and although I have removed and replaced/renovated all parts for the shock assembly, on both sides the pinch bolt holding the shock absorber has seized up completely. I've managed to remove the nuts on both sides but the head of one of the bolts has sheared off completely and the other is well rounded..... First question - is the bolt supposed to be a sliding fit, or is it threaded part way into the clamp? I've tried soaking in WD40 for a couple of days, using a drift to try to drive the bolt out (in both directions in the case of the side without a head) and also heating with a blow torch but nothing seems to shift either of them.... Before I resort to attempting to drill out the bolts and replace with new ones, does anyone have any clever ideas on how to remove these bolts? It won't be easy drilling the length of the bolts and I'm tempted to use an angle grinder to cut off the protruding bits (including those visible in the split in the clamp..... Any suggestions will be very welcome as I'm on a deadline to get the new shocks fitted before a reinspection for the Swedish MOT..... Many thanks....

-
Thanks for the replies. The fuel level was quite low (less than a quarter of a tank) so it could have been condensation in the fuel tank, possibly. Not had any problems since that one occurence - the car starts pretty well first time every time. I'll investigate the crank sensor as soon as I can.....
-
Hi, My 1999 1.3 manual Felicia sometimes stalls after around 1-2 km and is then very hard to start (often a couple of minutes or more before I can get it going agqain). Otherwise it runs normally with no problems. This happened yesterday as I was moving through an intersection and could have been dangerous with more traffic around. As it was I was able to coast to the side of the road for a restart. The engine spun normally on the starter, so no problem with the battery. Eventually the motor started - sounded like it was firing on only one or max. two cylinders at first, but then suddenly came good and has been fine since then on a 60km round trip. Wondering if it could be fuel or electrical? No misfire before stalling, just a sudden engine cut out. A bit wary now, in case it happens again (yesterday was the second time in a couple of months)..... Any comments/advice much appreciated, thanks
-
OK, trial and error worked it out! The locking nut is on a bolt that needs to be removed from underneath the car with a ½ extension bar for the socket. The other bolt comes out from the top. Managed to lower the engine/transmission enough on the jack to gain access to the 8 bolts holding on the end cover. Getting cold and dark now so that's for tomorrow......
-
I have the same 5th gear noise problem on my Felicia. I've obtained the 2 nuts mentioned and am about to tackle the job, but I'm uncertain about the transmission support removal. When I look in the engine bay I see one nut and one bolt which appear to hold a rectangular plate over the transmission support. Is it as simple as removing these 2 and the plate (supporting under with a jack of course)? Or is there more to it. My Haynes manual is not too helpful - it says 'remove the self locking nut and the 2 bolts and take off the mounting plate from the top of the mounting' but no mention of any further bolts etc..... Any advice very welcome, thanks.....
-
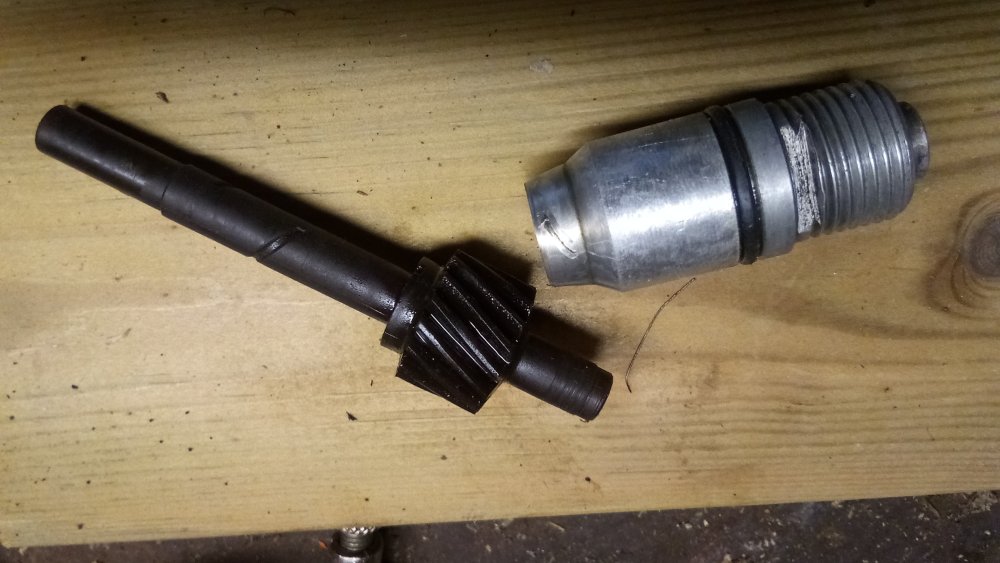
Thanks again. Managed to spray cleaner around the assembly, then gripped the knurled nut carefully with vice grips and rocked it gently while pulling upwards and the assembly popped out. The shaft and gear remained as it is a loose fit in the body, but I was able to remove it easily. Next step is to make up a proper locking plate, drain the old fluid, refill to correct level and replace the gear assembly and speedo cable and lock it in place. Thanks for your help and advice - now I know how it goes together (and comes apart) for the next time....
-
Just cleaned everything up, screwed the speedo cable back in place (but not the large washer/retaining bolt) but cannot budge the gear out of the transmission case. Reluctant to pull too hard on the cable, perhaps I can try levering it out with a screwdriver? I'll leave it for tomorrow....
-
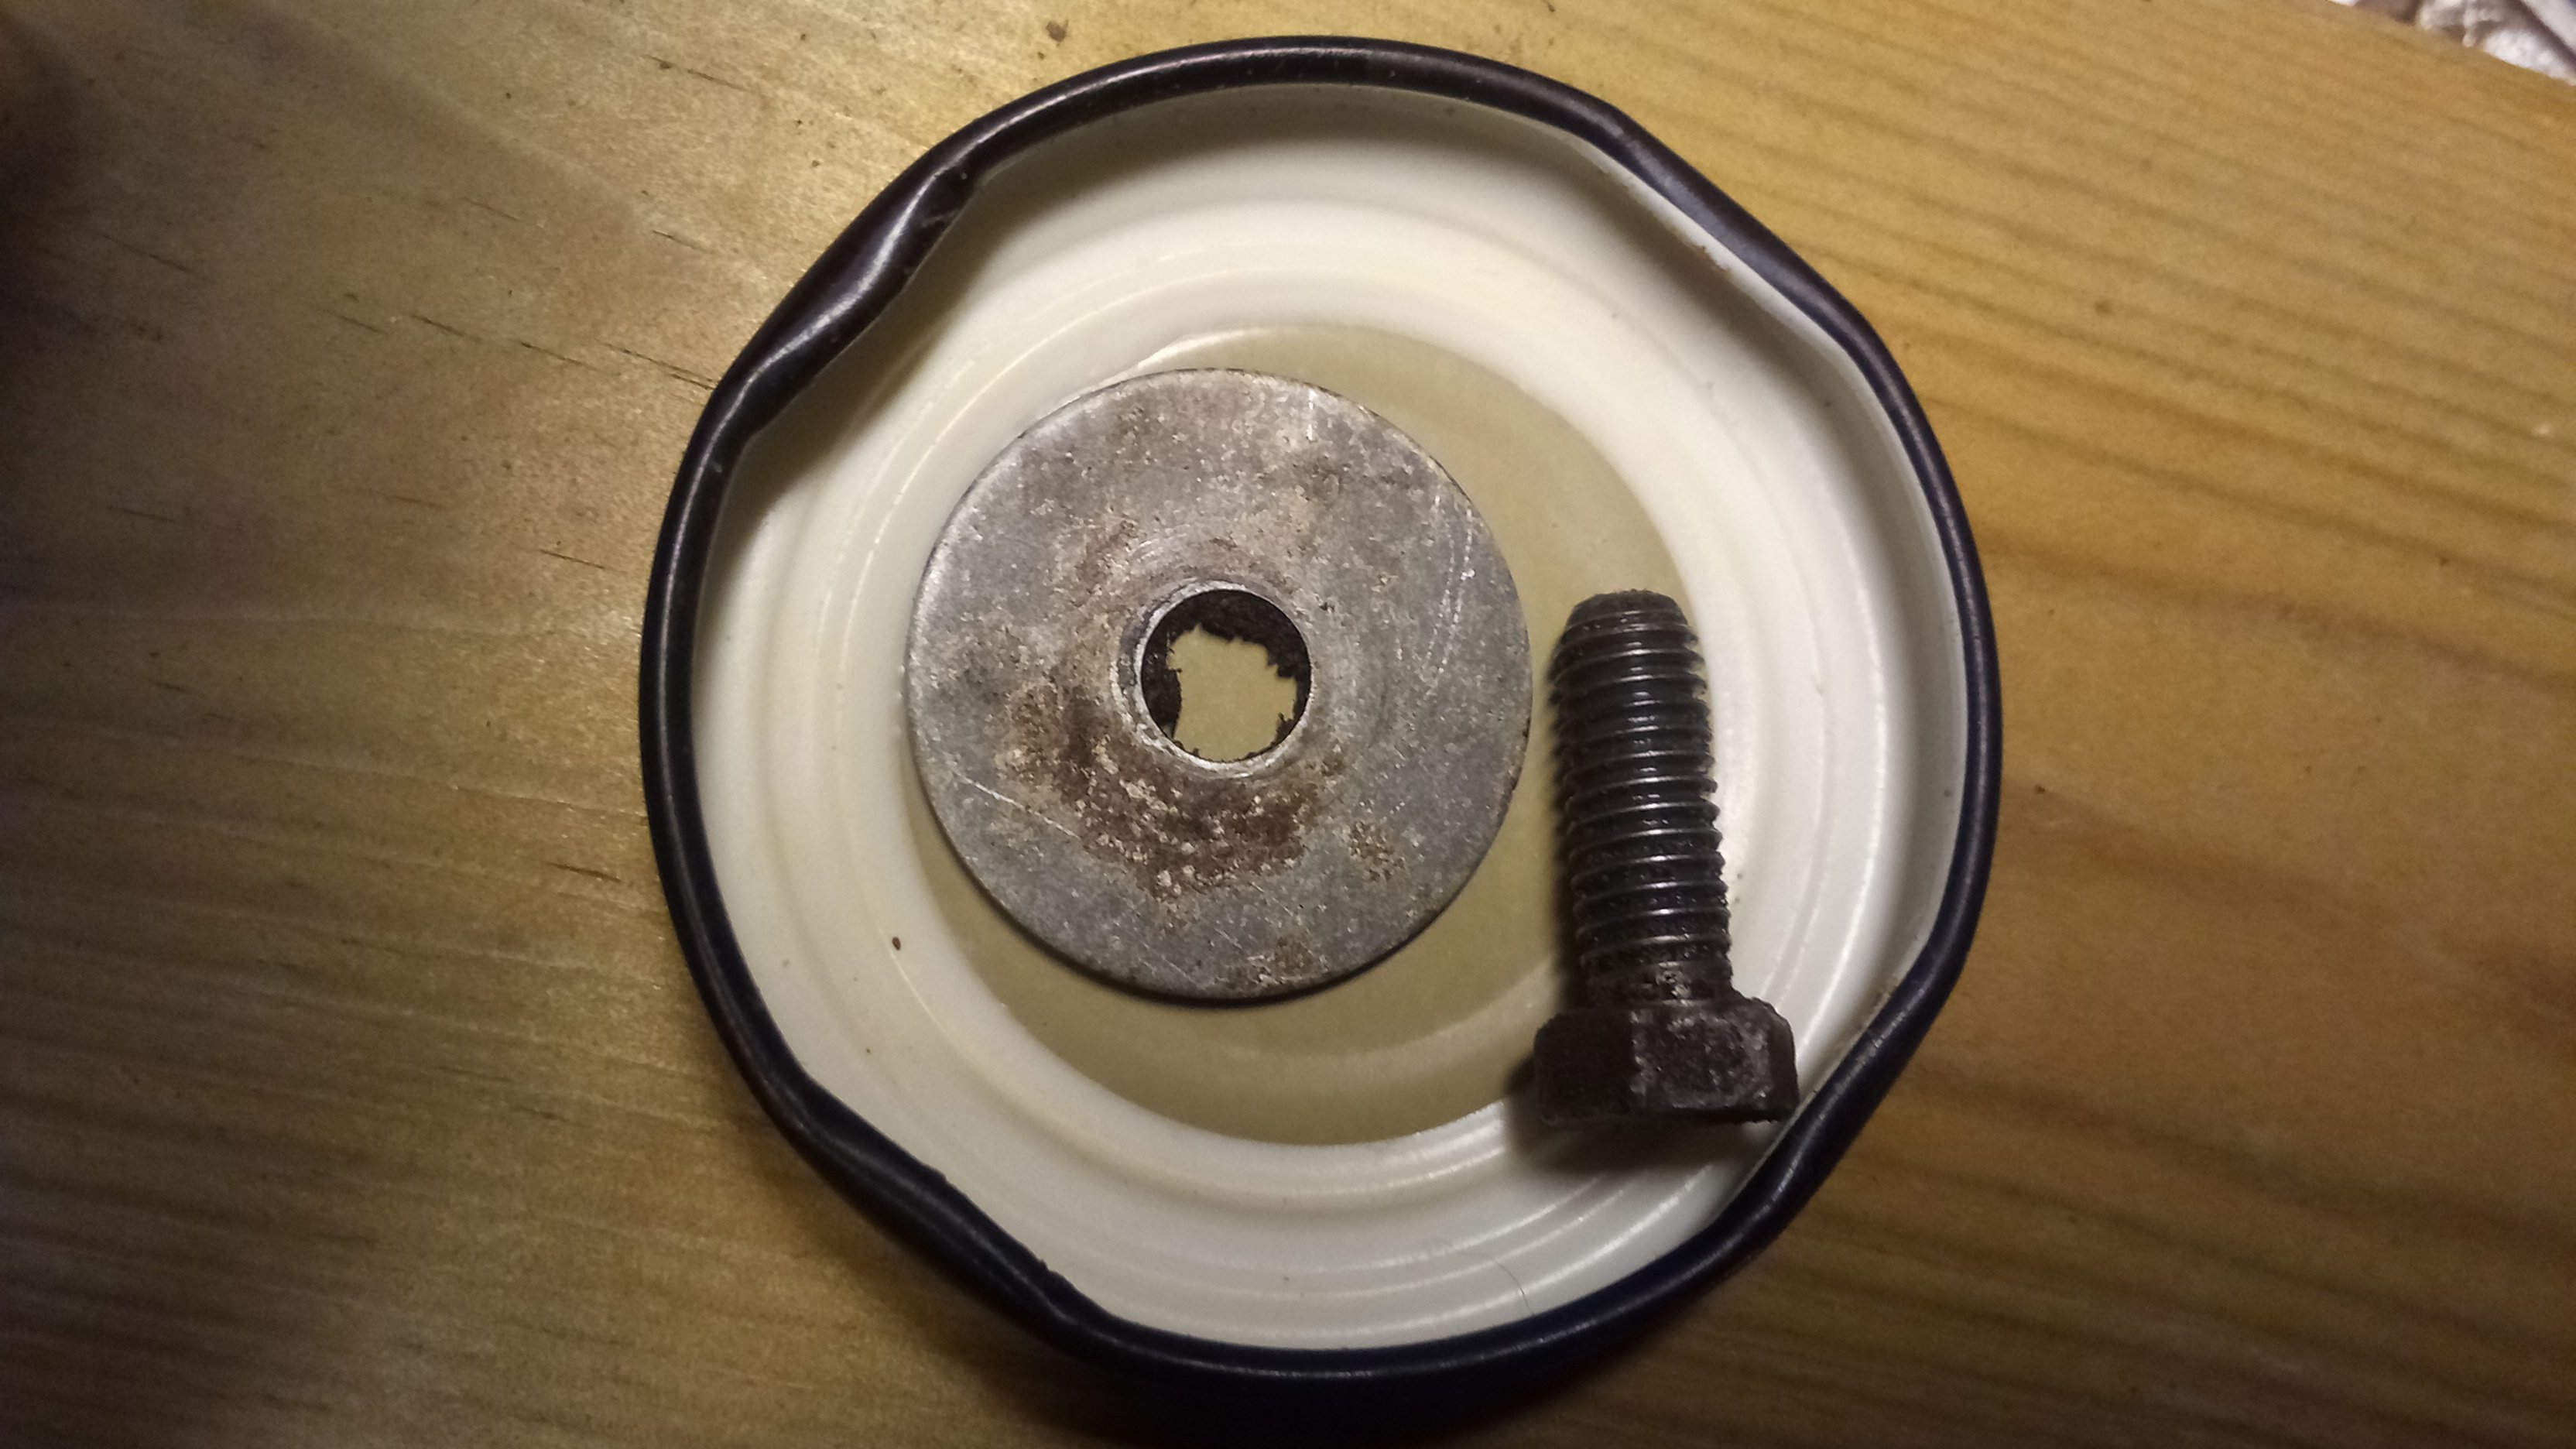
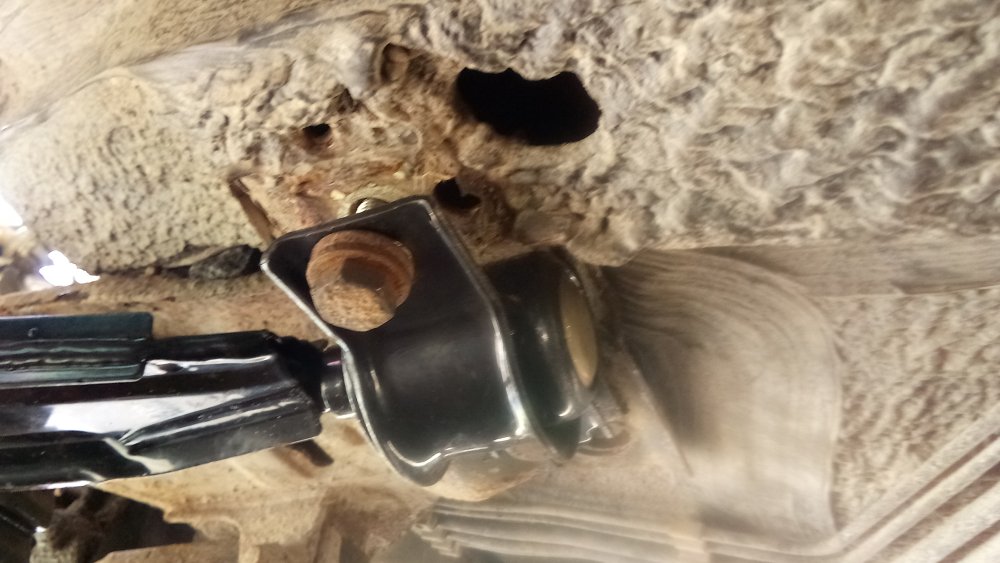
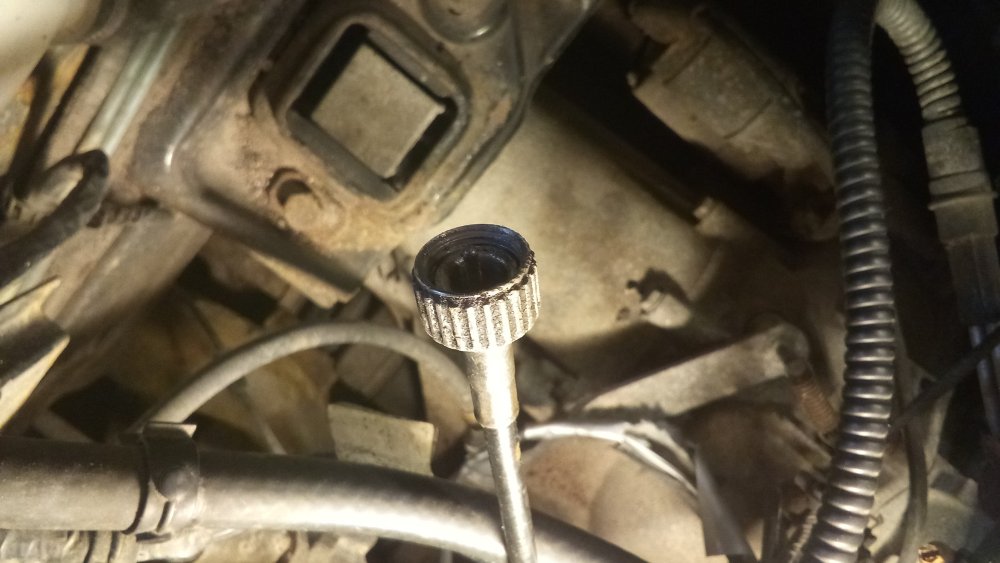
Thanks for the replies. I've taken a couple of photos. When I removed the retaining bolt, there was no locking plate, just a circular washer (see photo 3). The speedo cable didn't seem to want to pull out, so I thought I had to unscrew the knurled end of the cable. But when I did this, the cable came free but left the drive gear assembly sitting in the transmission housing (photo 1). I'm assuming from the comments and info already given (thanks all) that the speedo cable should just pull out from the transmission without having to unscrew the knurled end, and that I just didn't pull hard enough (for fear of breaking something. What's happened to the locking plate I've no idea - I can only assume that perhaps a previous owner lost the original and replaced it with the large cirular washer. My next step - unless someone has a better idea - is to reattach the speedo cable to the gear assembly and try to pull the whole thing out and hope it's just a bit stuck! And that nothing falls off the end into the gearbox. Any more thoughts very welcome...

-
Thanks, I'll try to add some photos tomorrow. The problem is not so much how to drain and change the fluid - I'm aware that new fluid is added through the speedo cable drive aperture, but unfortunately when I unscrewed the speedo cable, the gear assembly remained in the transmission case, flush with the casing, making it hard to grip. I'm not sure if the gear should just pull out or if it needs to be twisted and pulled and I don't want to drop anything in to the gearbox.... Thanks for the replies so far....
-
Well, this is embarassing. Changed engine oil, filter and spark plugs on my Felicia yesterday and thought the next logical step is to check the transmission fluid level. According to the Haynes manual, I need to remove the speedo cable retaining bolt, then slide out the retaining plate and withdraw the speedometer drive assembly from the transmission. Apart from the awkward position and difficulty in reaching the required bolt, plate etc. it sounds simple..... After removing the retaining bolt, there was no retaining plate to slide out, just a large circular washer, which I assume is what is meant. There is a knurled end to the speedo cable holding it to the transmission case. After much cursing and difficulty I managed to get a pair of long nose pliers on this and eventually unscrew it and remove the cable. Now it appears that the drive assembly remains in the transmission case, as I have just the square end on the speedo cable and a corresponding square hole in the gear assembly still in the transmission. I thought perhaps this would lift out so I could check the fluid level, but I cannot lift it - not using grips of pliers etc. for fear of damaging it. My question is - is there something else I'm missing holding the drive in the transmission that I've failed to slacken, remove etc. Does the transmission need to be in neutral (currently in second gear)? Any hints or tips much appreciated - I don't want to give up and just reassemble everything after so much struggling..... Many thanks... Robin
-
Yes, it's from the same supplier, so a direct replacement, thanks. Installed the new alternator this morning and everything back to normal. Thanks all for comments/suggestions