WelshSkoda93
Members
-
Joined
-
Last visited
Everything posted by WelshSkoda93
-
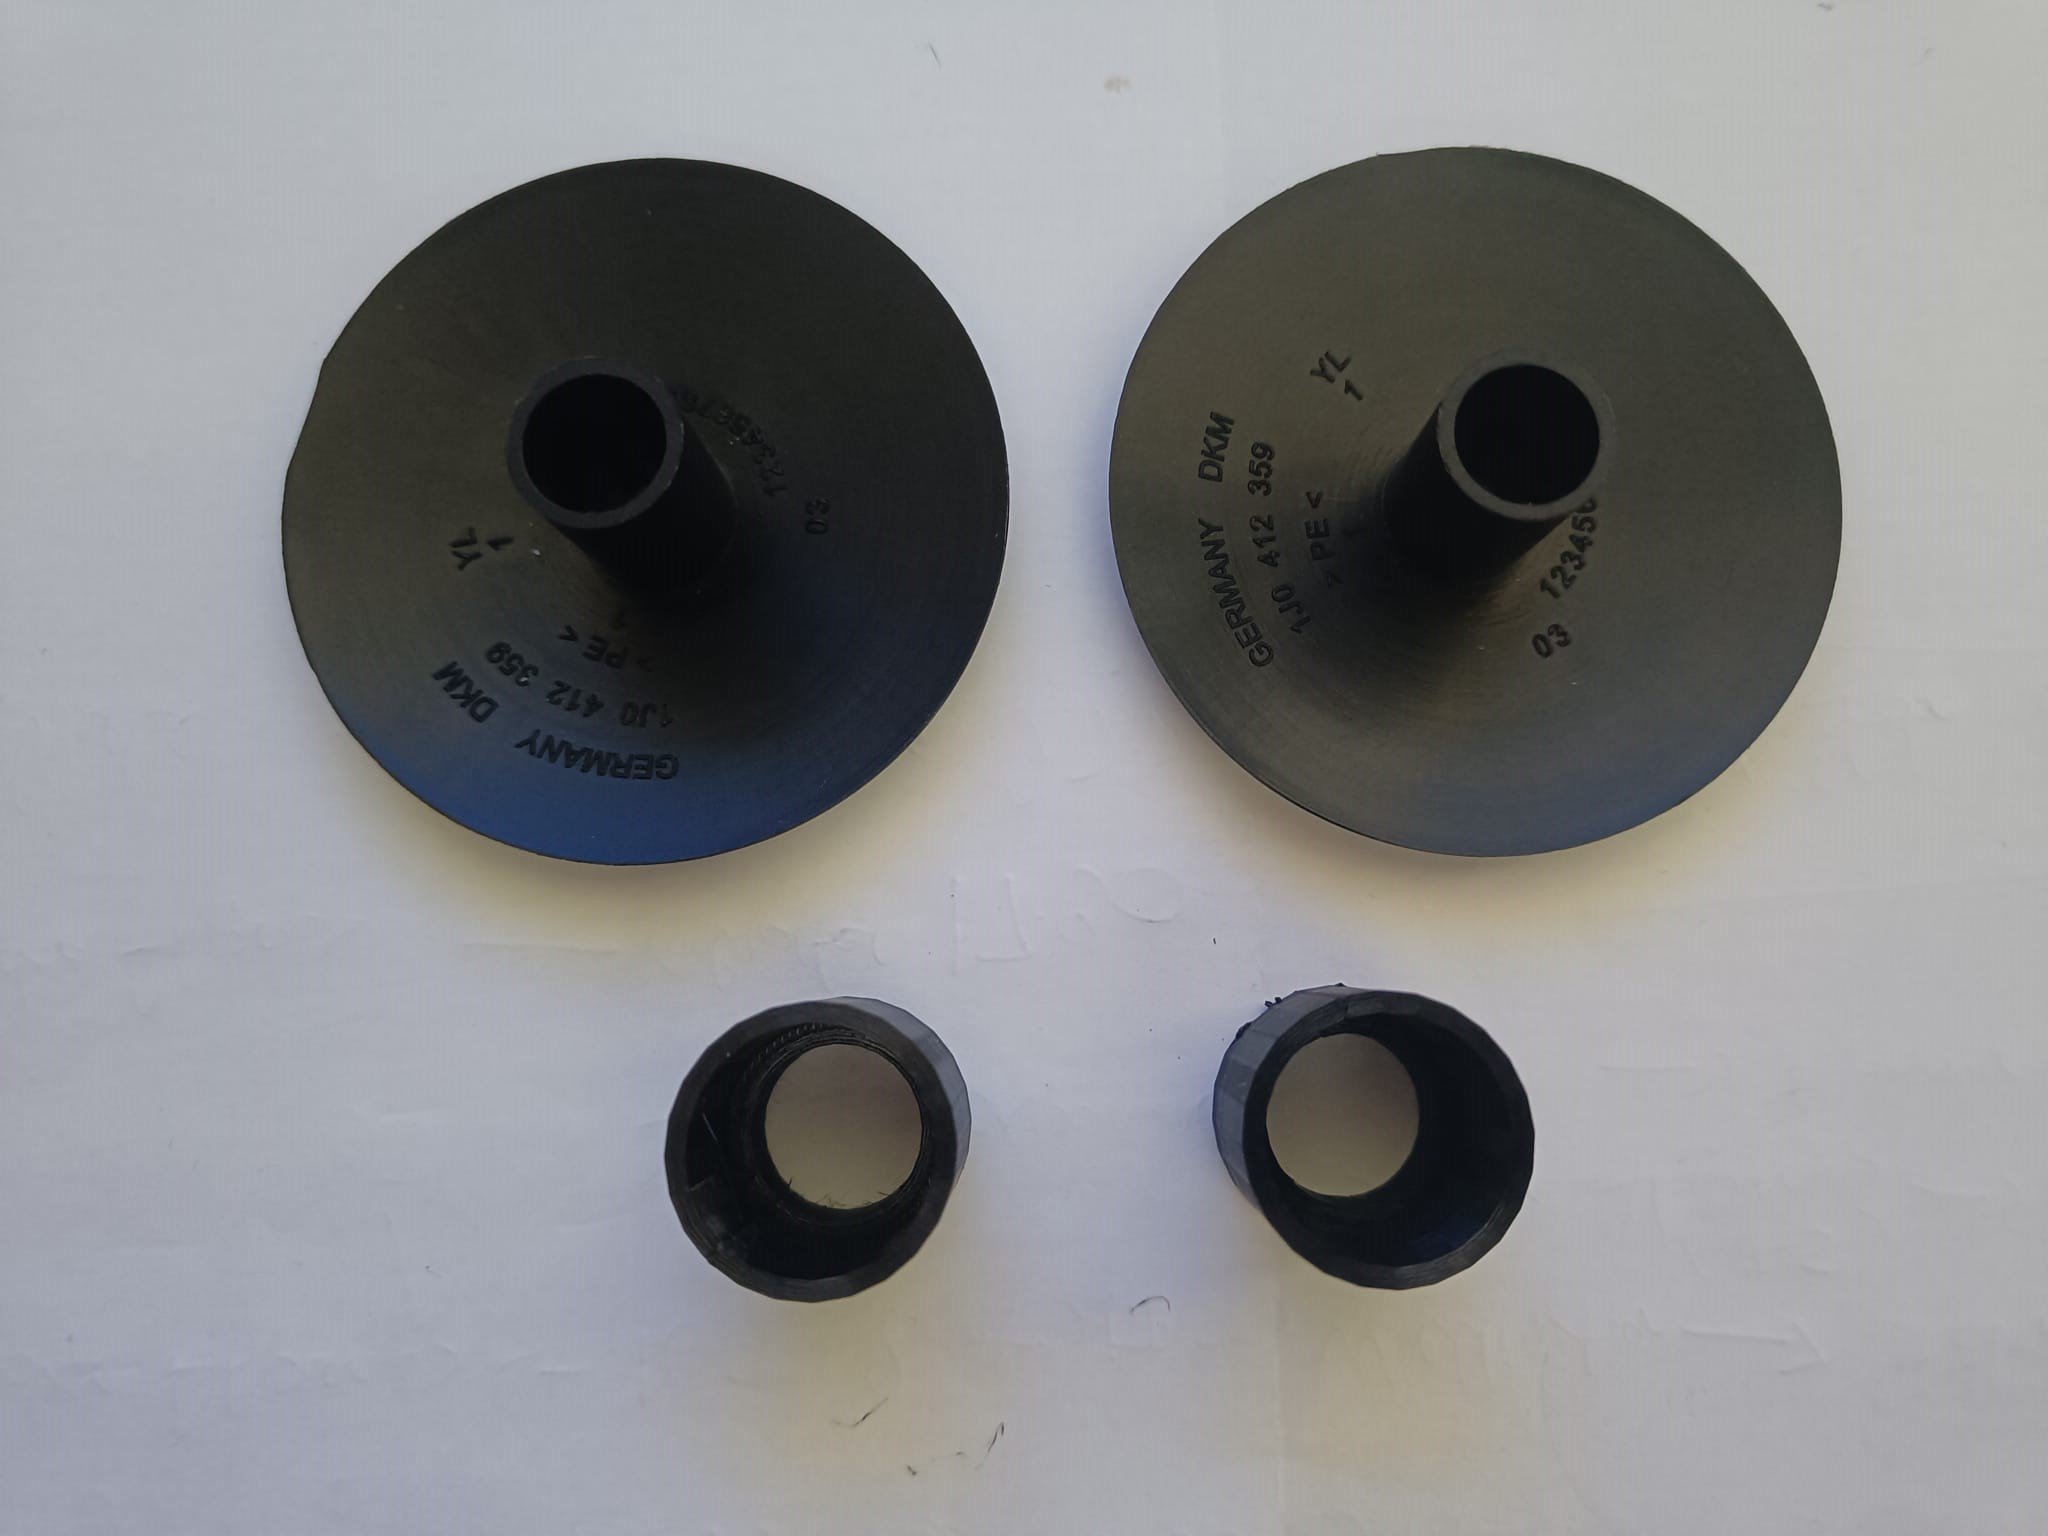
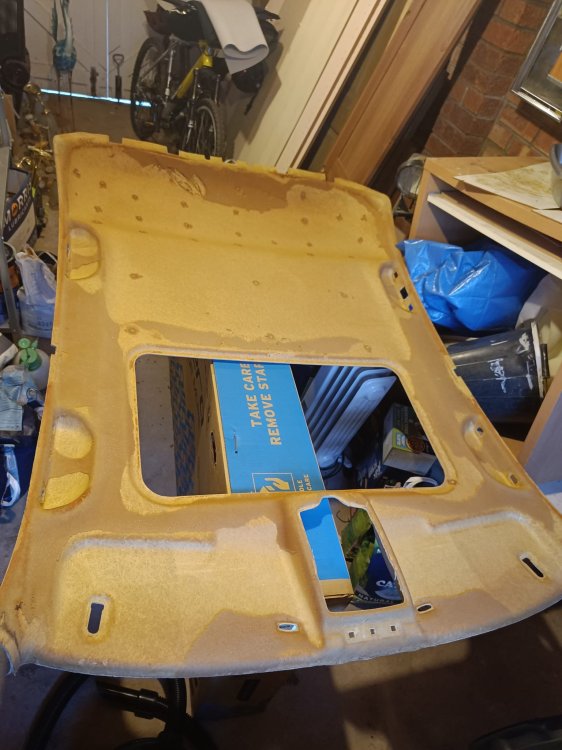
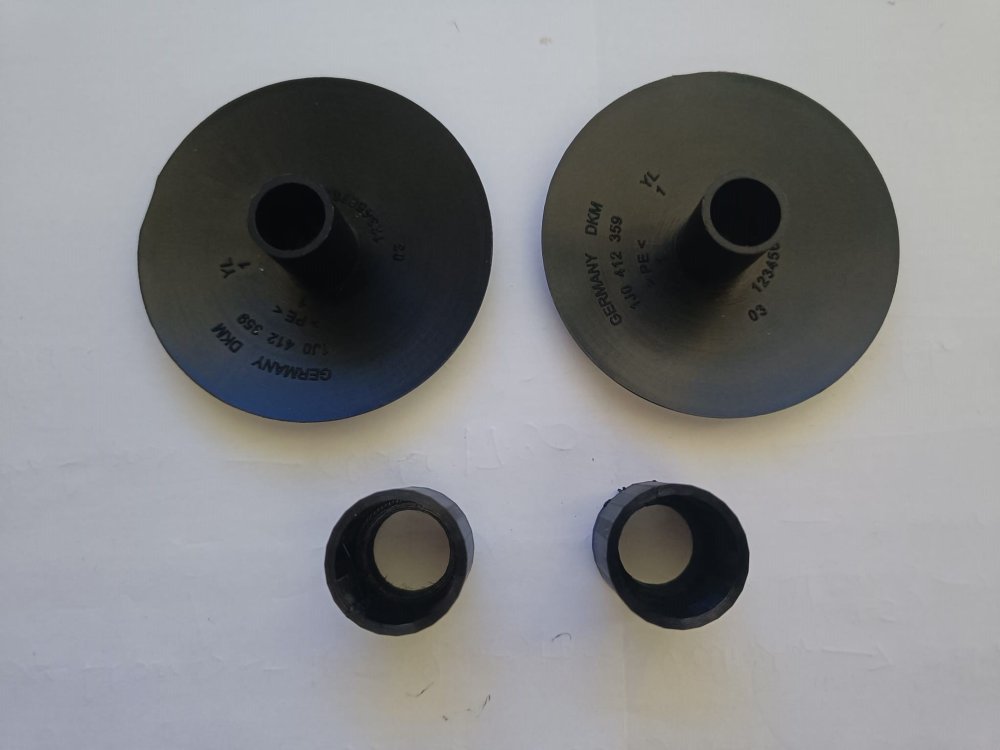
So, the headliner job turned out to be absolute nightmare, i totally messed it up and binned the lot... If any of you want to DIY it, i advise you pay someone the 200-300 quid for retrim and fitting its an absolute PITA of a job.. Here's the pic of the headliner after tearing the old fabric off. After that it took an hour to clean up the old foam and apply contact adhesive before I tried to put the fabric down and work it along all the shapes and curves. I had my brother to help but we failed miserably. I found someone selling an incomplete black headliner set in Birmingham for £80.. didn't even argue about the price and wasted no time getting and fitting it. colour combo is not too bad: My new struts came with brand new 22mm nuts instead of 20mm ones so i 3d printed adapters for the original covers: Finished product:

-
wrong forum section
-
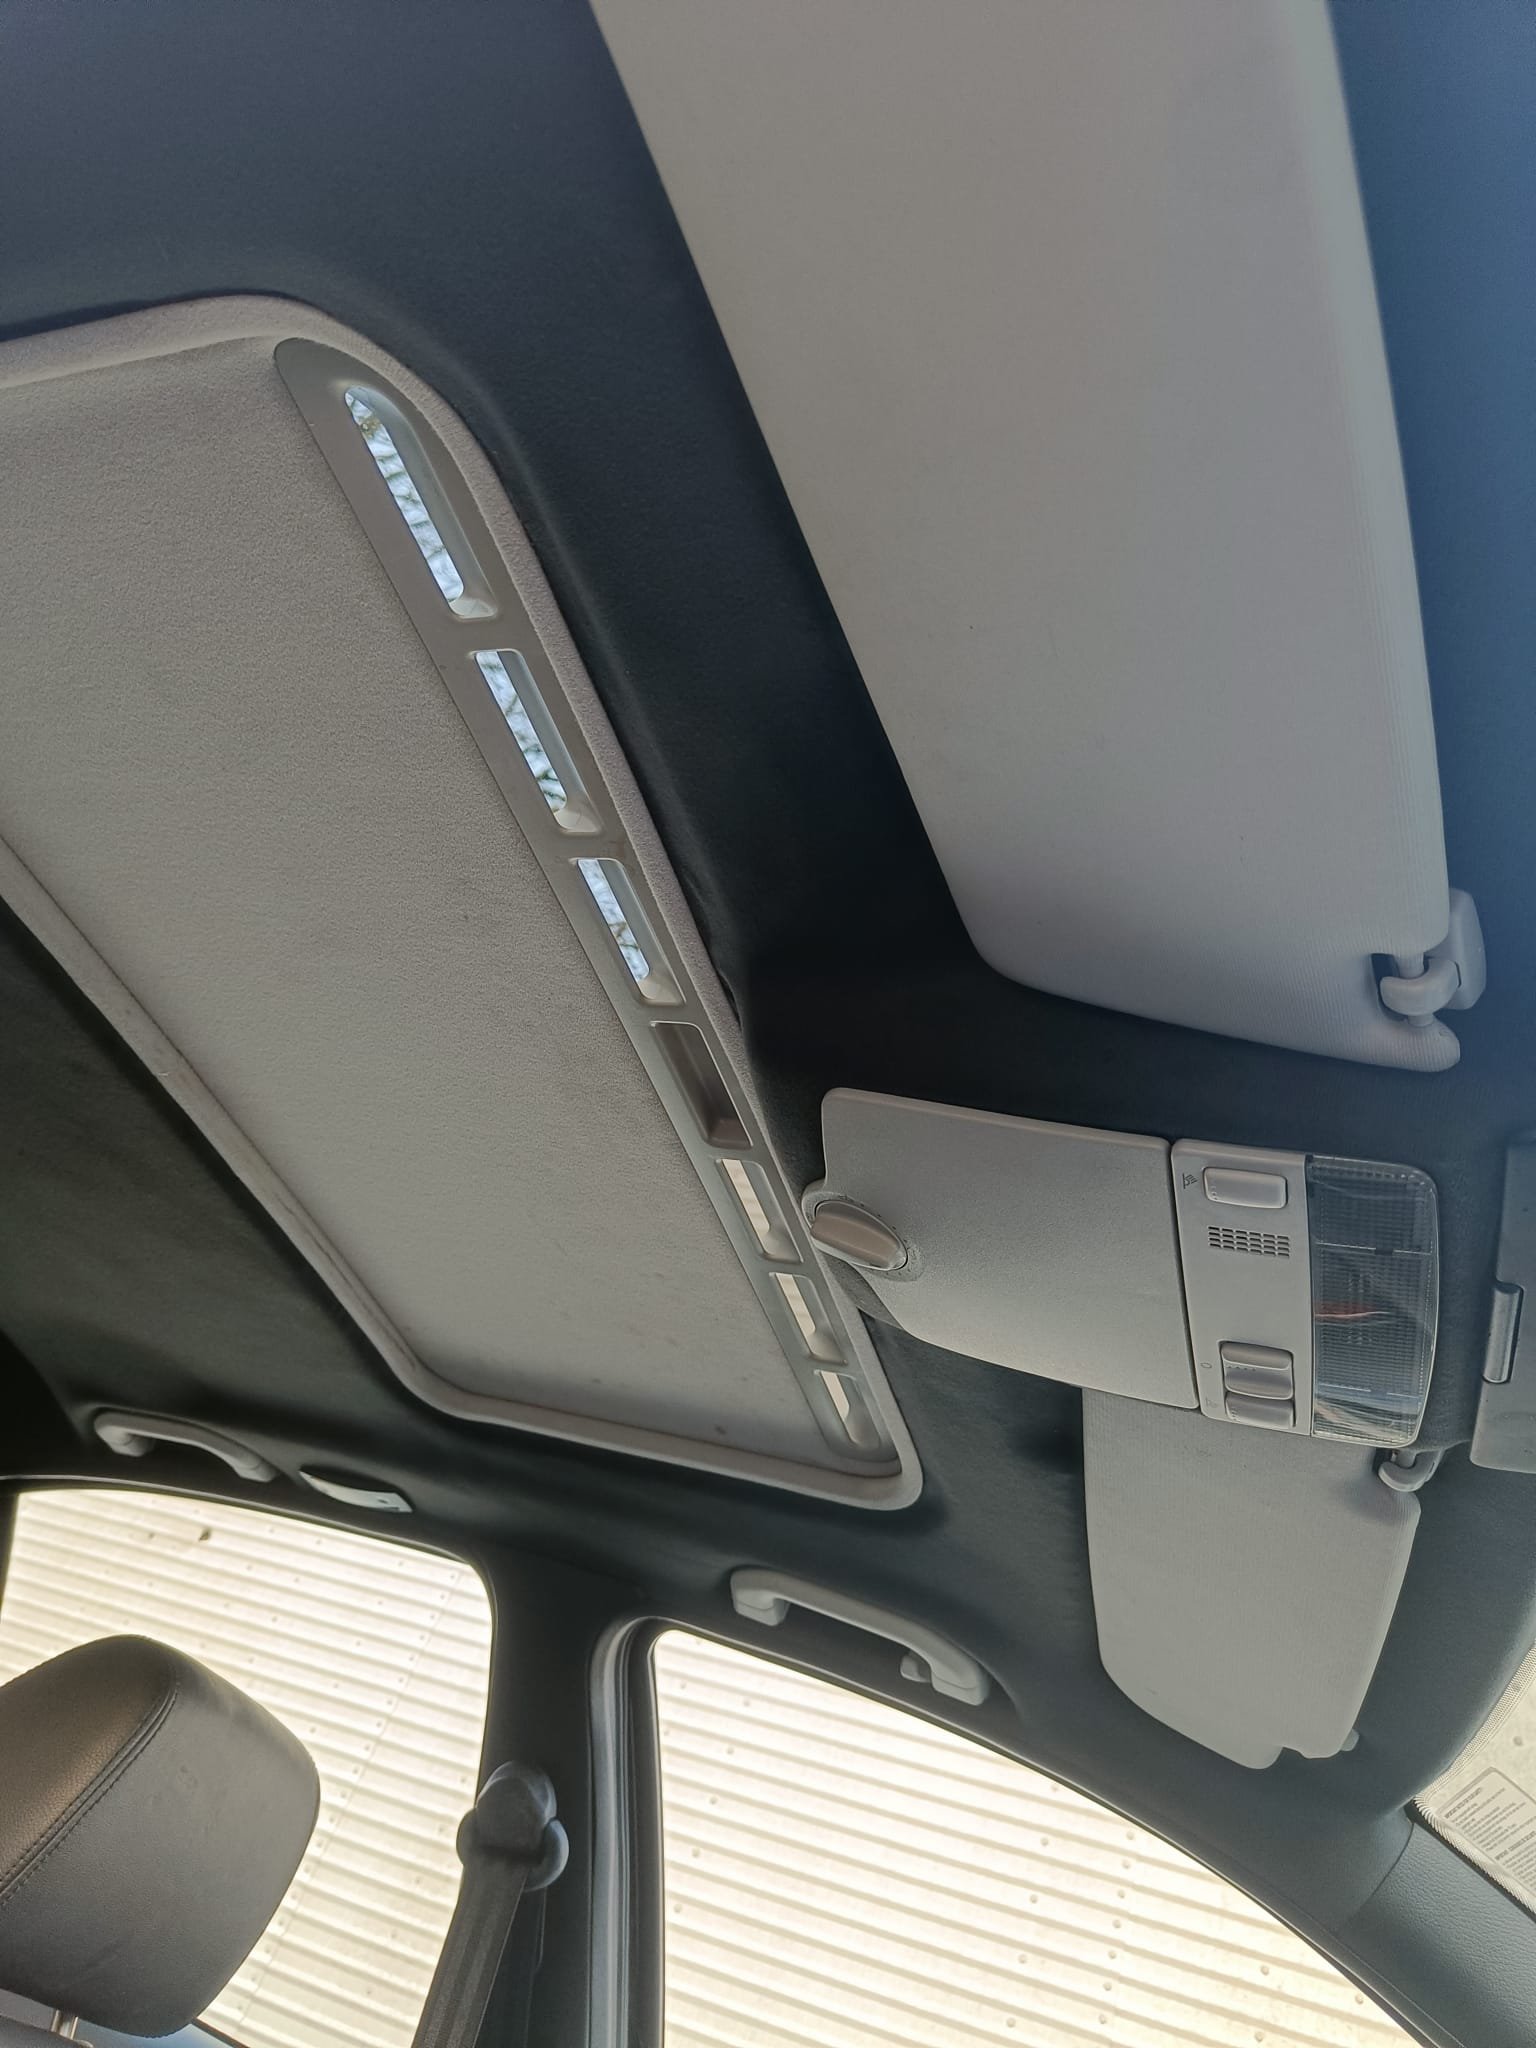
Next up is the headlining.. I will try to DIY this over the coming weekends: I'm really not looking forward to this, but im not paying someone 250 to do it for me:
-
More work done: New subframe: New control arms and New inner tie rods and track rod ends: New anti roll bar bushes and brackets, old ones were shagged: New top mounts VS old top mounts: New shock absorbers: I have no idea how the shock pinch bolts came out, but they did...: Final result:
-
Back to work, lots of stuff to fit: Titanic-level rust exhaust clamp replaced: New springs, oem sachs shock absorbers and bolts: Also replaced the bottom washer, only one of them was fitted, i replaced 2: New top mounts and rubber bumps: I also applied bilt hamber wax to the rear beam, springs and wheel arches.
-
Late xmas presents: Instant gratification:
-
I've done it 3 times successfully. Remove all the trims and bolts you can, lower the window (if you can) which will allow you to pry off the top of the door card will allow you to drill the lock motor releasing the deadlock or like in my case it will allow you to totally remove the door card and then drill it. Then its a case of fitting a new ebay lock but removing the deadlock mech so it will never happen or cause issues again.
-
I've been keeping santa busy as well: I'm not looking forward to painting these...
-
Water has been leaking though the boot lid bump stops straight onto my tools... i used my trusty sikaflex 221 to seal them up: This isn't pretty, but works and keeps the boot dry: Domed nuts and sealant on the other side as well:
-
Progress has been tough... The brand new front driver side lock has failed, it was the stupid deadlock mech again... I bought another new £25 lock and took it apart, and removed the deadlock from it. Now it just works and is not going to break ever again. I will probably take apart all the doors again and remove the deadlocks from the rest of the door. Door lock taken apart, arrow points to the deadlock. Deadlock removed. It's an extremely poorly designed part, it fails on OEM locks and cheap £25 ebay ones: Deadlockless lock:
-
manually send 12v to compressor clutch? maybe wire it through a relay to rear demister.
-
Crimp cut off and wire exposed: Copper cleaned up with vinegar and salt solution: Connector crimped on: Fuse block re-assembled: Total cost of repair, excluding knowledge and tools was around £3.
-
I got myself a transporter wiper arm and golf mk4 wiper motor. Motor fits fine, but the arm requires some adjustment: I sanded down probably ~1cm from the bottom of the arm: And now it fits: A job for tomorrow will be this, a very common fault. I'll probably go over to screwfix and get some tube crimps:
-
This is how i waterproofed all of my doors. 1.First of all all the original foil removed, glue residue removed with label remover. 2. First layer of foil applied with the bottom part put inside the door, so that any rain water flows into the door and out through the holes as it should: 3. I then applied a second layer of foil just like the original stuff, using butyl tape to seal it. Notice how i used a single piece of it and routed it above the threaded door card clips: 4. For the front doors I also replaced the standard plastic threaded inserts for speakers with rivnuts, clamping the foil with them as well so it all became very water tight. With the above approach I've been able to permanently stop water getting onto the sills and leaking inside.
-
Last but not least... working reverse camera with automatic switching to rear view: ASR and Windscreen buttons will be corrected.
-
Finally had some time to spend on the car: Replaced driver side undertray cover and installed diesel automatic undertray. These were brand new pattern parts and if i was to do this again I would buy good second had parts. Fitment was 'challenging' to say the least: Also replaced these L brackets which hold up the front of the bumper, I've seen these broken on almost every single octavia ever:
-
Have any of you jumped into the rabbit hole of connecting a reverse camera to a DX unit or an MFD-1? I know that there is a 'video on' pin (7) at the round DIN connector, and depending on which head unit you have and its firmware, if 12v is applied to it, the screen will switch to the aux video input, giving you a fully functional reverse camera. I have gone this route, and bought this quite pricey adapter: https://www.carfeature.de/en/hifi-navigation/cameras/...alle-kameras/21323/caraudio-systems-rl-mfd1-rgb-converter-fuer-rueckfahrkamera-mfd1/navi to convert a modern video signal from a reverse camera, to whatever the MFD1/DX uses. I plugged in and it works but only if i manually switch to the aux video in input. I have tried feeding the head unit 12v to pin 7 and it doesn't automatically switch. I contacted manufacturers tech support, and they said that this pin is activated only in some versions of the firmware, and the firmware is of course different across the Skoda, Vw, Audi, Seat and Ford variants of the head unit. Has anyone come across this before and has any extra info? I have managed to find youtube videos of people getting this to work and switch automatically when the car is put in reverse but only on the VW units...
-
I found the HVAC ducting split: So i fixed it up with some rivets and my favorite windscreen adhesive: I really didn't like how it all went it, there was no satisfying click sound, so I've put in a spreader river for good measure: I've re-assembled the cut up pieces of original sound proofing and replaced the 'missing' bits with 2 layers of 12mm carpet underlay. Having to leaks in the car and no wet sound proofing has completely transformer the way the car smells and i feel much better being in it...
-
You need to locate the fan switch, i gave you an example of where it was on my 1.8t. It will look very similar to what i posted earlier. What you have there is a temperature sensor.
-
#11 is the fan switch. if you tested both fans with 12v battery you probably removed the plug for this thermal switch. it makes the circuit when coolant reaches certain temperature.
-
If it spins with more resistance but still spins, the fan is on its way out so it does need replacing at some point, but it should still start. There is a 3 pin fan switch screwed into the radiator in roughly the bottom corner near the fan controller, they also like to fail. You can short out the terminals in the 3 pin plug to see if the fan comes to life, this should give you a definitive answer. If the engine reaches 90c but you're getting no warm air through hvac, I would check out temp sensor readings in VCDS and also check when the water pump has been replaced last, that's the only thing which circulates coolant around heater cores and the engine..
-
the car is supposed to lock itself after x time unless you have they key in ignition.
-
check if fan spins freely by hand if it doesn't you need a new fan, if it does you need a new fan controller located under the battery tray.
-
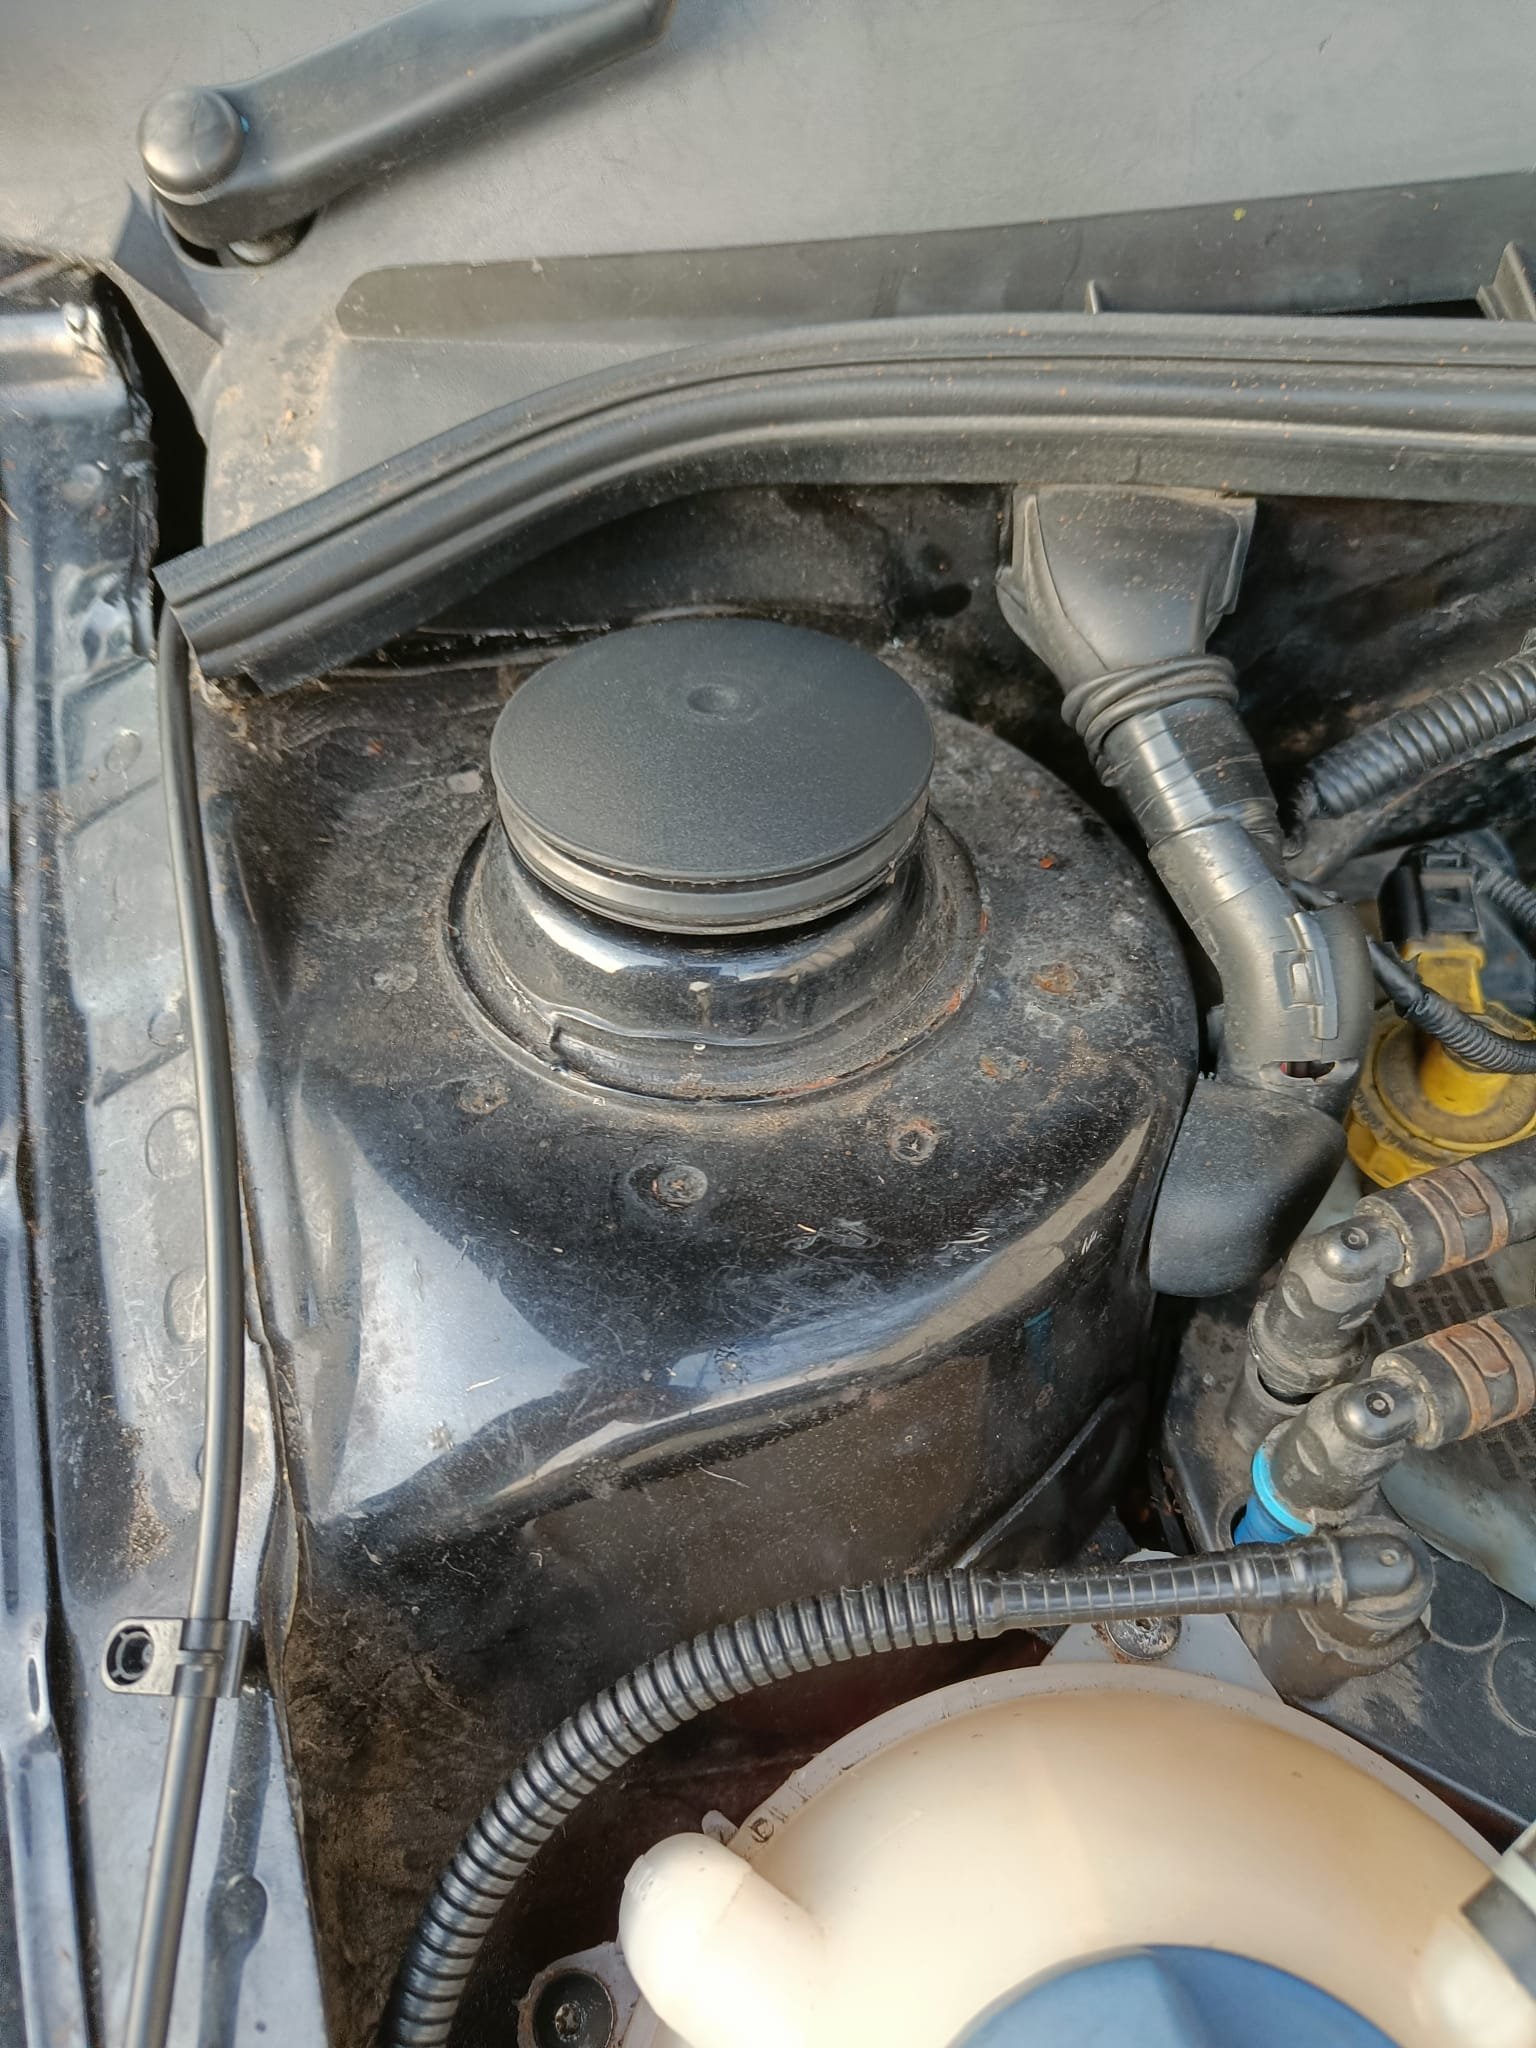
Progress has been slow, i fixed all the door leaks + the lhd bonnet release grommet as in previous post but carpet was still moist, i ripped the whole interior out to see where it was coming from and it turned out to be the rhd bonnet release grommet and the electrical box cover... I cleaned the scuttle panel area up, cleaned both the electrical box and cable grommet and reinstalled both using windscreen adhesive. If they both leak again, ill buy a new lid and replace the cable grommet with a cable gland... I also realised that you can have a leak at the rear footwell even though the actual the leak is coming from the front because of the way the floor pan is built, it just allows water to travel all the way to the back. I created little 'dams' with windscreen adhesive to stop the leak spreading if it ever happens again: Finally, i threw all of the factory sound proofing and carpets away. I left the car for a few days in Welsh rain and wind and came back, it was all dry. I proceeded with installing 30 2.3mm thick bitumen mats on the floor pan: I will then use carpet underlay and layer as much of it as i can before fitting the main carpet. The eagle eyed of you will spot i also removed my android head unit and installed an MFD1... more on that later.
-
I got them separately. Gasket: 06A103609C Sump: 038103603M