.jpg.0cc4d3e30505640265a3a2514d7261e3.jpg)

Scott_4x4
Members
-
Joined
-
Last visited
Everything posted by Scott_4x4
-
An alternative way to "turn off" the Haldex is to look in the manual for a fuse labeled "all wheel drive" and remove it 😃. For whatever it's worth, never run with different sized tyres on any of the corners of a 4x4 car that uses a Haldex. There are slight tolerances that the Haldex will ignore such as differences in tyre wear, but beyond that it'll stay permanently stay engaged because it thinks it's detecting wheel slip due to the rotational differences. This will then cause it to be engaged at higher speeds for extended periods of time which will do it no favours at all. 😃 My suggestion to anyone having to run a different size of tyre for whatever reason is to remove the Haldex fuse while doing so. The car will run in front wheel drive and probably flash all sorts of warnings at you due to alot of safety systems that use the Haldex. Just make sure to drive extra careful as not only will you not have various safety systems, but in an event of a loss of control accident, I'm not sure what an insurers point of view would be if they saw the Haldex fuse in the cup holder 😂.
-
2 things we haven't done while owning a 4x4. 1, been green laning in the Cotswolds and 2, been on a guided green laning trip. It this video Alana and I tick both of those things off the list by doing one of Green Laning Lennie's half a day Cotswold trips 😁. We have met Josh (aka Green Laning Lennie) 2 or 3 times at different shows and he has always said that we should do one of his tours one day. We thought we'd dip our toe in at the shallow end as to say and booked onto one of his half a day trips to get the feel. Even though some of his trips can be hard going, he also does some lighter ones for anyone with cars that don't have low range, diff locks and high lifts on them 😁. Seeing as we had a lot of fun on the Wales trip in the Yeti, we opted to take it to this Cotswolds trip and it was really at home with the terrain! 😃 The scenery on offer was pretty incredible too! We try and mix up the videos that we put out, so this one is mostly set to music and I've tried to add a bit of pace to the overall video. Hopefully all being well, there should be a more raw edit of our trip being released this coming Friday if I get my bum into gear 😂. If anyone else has a Skoda that they use offroad or just a second vehicle that they use off-road and want to do a similar trip or something a bit more aggressive, head over to Green Laning Lennie's shop to see what he has on offer. If we had an overland equipped vehicle, we would be sorely tempted by his morocco trip! 🤩 https://www.greenlaningtours.com/
-
Until someone more knowledgeable comes along, here's my 2 pence 😄. I wouldn't of thought it would be the Haldex at fault as it has 0 effect over what happens at the front end of the car. If anything goes wrong with the Haldex, you'll probably have 2 outcomes. 1, you'll have 0 power to the rear wheels because the pump has died or clutch plates are worn out. 2, you'll have 50% of the drive to the rear wheels all the time as you've experienced with the rear end skipping because the Haldex cannot disengage itself. I'd probably point my attention to the Angle drive possibly which is bolted onto the gearbox and turns the drive 90 degrees to send the drive to the rear wheels. Maybe something funky has gone on inside which stops the front wheels getting drive but is still sending power to the back. Or like you say, maybe something within the gearbox. Neither of my suggestions make 100% of sense as I would've thought if something broke with the gearbox or angle drive, you'd get zero drive rather than rear drive only. Hopefully someone with more knowledge will be along shortly to give you a much better answer 😁.
-
For those of you that just want to see a Yeti driving on a greenlane without the quick cuts and music, then this video might be for you 😀. There might be some of you that might not know too much about green laning. The Golf Links trail near to Rhayader offers some truly spectacular views across the Welsh hills and makes for a great drive. Even more so when the sun is shining! ☀😁 I've plucked this lane out from our recent trip to Wales so you can ride onboard with us and get a tiny idea of some of the views and also the terrain that the Yeti can handle 😀. Hopefully you enjoy this one 😁.
-
Hi EPW 👋 and welcome to the forum from a fellow Skoda owner in a similar area. 👍
.thumb.jpg.a4cfba0a44ff1af2db3a1f4bd0675481.jpg)
-
If you ever plan to go green laning with a group of people, we personally think it's almost essential to have a CB in your car. If for nothing other than for the leader of the group to communicate to the rear person if a gate needs to be closed after the group has gone through. Also, if you've seen our Wales off-roading video, you'll have an idea about the great sense of humour that people have 😄. CB's are also a fantastic bit of kit to have because they generally will keep working where mobile phones do not due to a lack of signal. As with all of our other videos, they are mier guides and not how-to videos because there is a multitude of different ways this could've been done with different CB's and different antenna mounts. It's there to give people an idea on how to have a working CB in their own car if they so wish 😀. Oh, and yes, we are well aware that the drip loop isn't in the most perfect of places in the video 😁. We opted for a non-permanent install, just like what we have done with our Freelander 2. That means no screw holes and you don't have to tap into any of the electronics to power it. We have routed the antenna wire through the existing hole behind the rear light, through the car and into the back of the CB. The antenna is mounted onto the roof by using a mag-mount base. The CB radio mount base is stuck into the car using some 3M velcro tape. Tha CB radio is then powered from the 12v power socket from within the car. Lastly, the external speaker is just put into the cubby in-between the driver and passenger seat. 😀 The only thing I'd suggest is if you do follow this video and you want to mag-mount it similar to ours, go for a bigger 6 or 7 inch mag-mount base as the small one seen in this video did fine on the road, not so fine off-road 😂. A link to Thunderpoles website: https://www.thunderpole.co.uk/
-
It's another new week and we have a new addition in our Skoda Yeti. This time in the form of a CB Radio 😀. If you ever plan to go green laning with a group of people, we personally think it's almost essential to have a CB in your car. If for nothing other than for the leader of the group to communicate to the rear person if a gate needs to be closed after the group has gone through. Also, if you've seen our Wales off-roading video, you'll have an idea about the great sense of humour that people have 😄. As with all of our other videos, they are mier guides and not how-to videos because there is a multitude of different ways this could've been done with different CB's and different antenna mounts. It's there to give people an idea on how to have a working CB in their own car if they so wish 😀. Oh, and yes, we are well aware that the drip loop isn't in the most perfect of places in the video 😁. We opted for a non-permanent install, just like what we have done with our Freelander 2. That means no screw holes and you don't have to tap into any of the electronics to power it. We have routed the antenna wire through the existing hole behind the rear light, through the car and into the back of the CB. The antenna is mounted onto the roof by using a mag-mount base. The CB radio mount base is stuck into the car using some 3M velcro tape. Tha CB radio is then powered from the 12v power socket from within the car. Lastly, the external speaker is just put into the cubby in-between the driver and passenger seat. 😀 The only thing I'd suggest is if you do follow this video and you want to mag-mount it similar to ours, go for a bigger 6 or 7 inch mag-mount base as the small one seen in this video did fine on the road, not so fine off-road 😂. A link to Thunderpoles website: https://www.thunderpole.co.uk/
-
Welcome to the forum @simmybear 👋. I shall keep my eyes peeled looking for a smart Superb Estate in the local area 👀👌😁.
-
Congrats on your purchase @Vfr400boy 👌😀.
-
I'd also throw the Thatcham branch of what was A-Plan that is how Howden insurance if anyone is looking for modified 4x4 insurance. 😀 That's who Alana is using with out Yeti and who I'm also using for our modified Freelander 2. I recently renewed the Freelander 2's insurance and gave Adrian Flux a call first to see if they could beat the renewal price I had but they couldn't come close unfortunately. 😀
-
A few other things when I asked what to look for... "If a pre facelift make sure it has not had the "fix" put the vin into the link below, if it says the fix is available it is safe, if it says the fix is not required walk away: https://skoda-recallactions.skoda-auto.com/210/en-GB " "Unless you want a water feature avoid the sunroof models" "Check the touch screen is functioning properly, the original basic Bolero so far seems unaffected but there is a growing failure rate amongst the later infotainment models fitted." Some other things that have just come to my mind. Something that isn't spoken about but does need to be kept logged in your mind if you're going for a 4x4 Yeti. The Angle Drive box which rotates the drive 90 degrees from the front wheels so it can head to the Haldex and Rear Diff. This has its own oil to which Skoda claim "filled for life". When manufactures use the term "filled for life", they normally mean until the warranty is up or about 10 years. That needs changing roughly every 40 to 50 thousand miles. The same goes for the rear diff oil, another "sealed for life" item I believe but needs doing at the same sort of frequency 😀. There is also a great post here for you to have a read of for other things to look for: https://www.yetiownersclub.co.uk/threads/older-yetis-with-higher-mileage-things-to-expect.5008/?post_id=55914&nested_view=1&sortby=oldest#post-55914
-
It'll be interesting what other people's opinions are, but I think sometimes you can think far too much about buying a car and end up putting far too much pressure on your own shoulders. Alana and I was in the same position as you @Vfr400boy in that we were looking for a Yeti and we too had never spent so much money on a car before. The reality is, providing it's got a good MOT history, comes back clean on a online checking site and the Yeti ticks the boxes that you have set, you've completed all you can do from the comfort of your home. Once you get to looking at the car, unless you want to roll around on your back under the car, you're somewhat limited as to what you can check. What you can check are... Car sales place... Do your background on the company. Do they have a new name every year? Have they been trading long? Is it 2 signs on a portacabin and 1 computer in an office that could disappear in an hour if they wanted to be? From looking at their stock you should get a rough idea if they buy blindly from an auction and don't have a clue what they actually own. Or if they somewhat hand pick their cars. Walkaround of the car... Are the tyres in good shape with reasonable tread? What make of tyres does it have on? A good brand probably shows the previous owner probably had a bit of care and money for the car than someone that sticks the cheapest brand of tyre on which could mean it's only had work done on it when it's had to have had rather than on a routinely basis. Does the suspension look to be in good condition with no leaks on the legs? If you stash some tissue you in your pocket, give the oil a quick dip to check the level and to make sure it doesn't come out white and creamy. Is the coolant a nice pink colour and hasn't been mixed? Stick your head under the front of the car and check for any leaks. Be careful of stoney surfaces that cars can be sold on as this can hide the signs of leaks. Have a really close look at all the panels and bumpers, do they look straight and do the bumpers line up. Or has it had a dink in its life that's been patched over? Check the cills of the car to make sure they haven't had a cill to high kerb interface. Check that the number plates front and back have the same maker on the bottom of them. If one has a different name at the bottom compared to the other, question in your mind, why would only 1 be replaced? Give a good check all over for any rust patches that might need work doing. Look for condensation in any of the lights which could indicate a duff seal or maybe that they have had a minor bump and they have a little crack somewhere. If you buy a cheap OBD2 bluetooth dongle, plug it into the OBD2 port of the car, download an app light Torque Lite and do a scan of the ECU to see if there are any codes on the ECU which could indicate trouble. Have a little check for the exhaust condition and security. That's a walkaround of the car done, onto the mechanicals... Does it start up prompt or is it a bit slow and lazy which could indicate and new battery or starter motor might be needed. Make sure the bonnet is raised before starting it so you can listen for any strange noises or rattles when it's started from cold. If the engine is close to or at running temperature when you get to it, wonder why they have chosen to show you the car warm/hot. Turn the steering from lock-to-lock, any strange sounds and does it turn nicely? Check for smoke out the exhaust. Anything other than condensation, walk away. Give it a rev to check it revs nicely and isn't stuttery or has a misfire. Check the controls in the car all work as they should. Turn on the air con to make sure it works and hasn't got pump issues. Press on the brake, does it go firm and hold its firmness or does the pedal slowly head to the floor? Put it in gear with the handbrake on and slowly lift the clutch. Is the handbrake in good condition and holds the car? Also, does the car pull and revs die? Or do the revs start to die and then start to recover which could indicate clutch slip? Take it for a drive... Does the car pick up well when you give it maximum throttle? Listen for any rumbles, knock's, whines or just anything out of the ordinary. Do the brakes bring the car to a prompt stop? Is there any pulsing felt under the brake pedal? This could be a sign of a warped disc. If you can find a bit of road, try and brake hard and sharp enough to activate the ABS. With ABS pumps not often being used on cars, you'll be surprised how often this can flag a warning when used because something has gone dicky in the ABS system. Try and give the car a little zig-zag to move the weight of the car from side-to-side to make sure there are no suspension or wheel bearing issues. Try and get a feel for the gearbox to make sure it slots into each gear nicely. Put the heating on, does it warm up nice and quickly and get to a good temperature? Paperwork... Does it come with any or did the 3rd owners dog eat it all? If it does come with paperwork, have a good flick through to make sure what's in it tally's up with what's been advertised. Is the paperwork in date order or is it all over the place? This gives a good indication as to what type of person owned it previously. Does it come with a single key or 2? Go with a list on your phone of jobs that have meant to be done and maybe note how often so you can see what you have or haven't got to play catch-up with on the maintenance. Coolant changes, did it have a water pump when done? Timing belt. Oil and filters changed. Brake fluid. The biggest winner for Alana and I was the next 2 following items... Does the sales person leave you to look at the car or do they hover over you like a bad smell? Do they trust you enough to take it for a drive on your own with a set of plates on the car? I have gone into far more detail than even I expected to with this post. Even though it looks like a wall of text, it's not actually that much when you're looking at a car and most of it I'm sure you're already well aware of. 😁
-
As @Prezafab said, you're looking at around £200. I think Darkside Developments charge a little less than £200. I never really know where the line of trust should be drawn with garages as both Alana and I have had some quite bad experiences in the past when having work carried out which has led us to having major trust issues as you may tell 😄. A Haldex service on its own on a Skoda should be a pretty straightforward while-you-wait job. If it's a decent garage I would've thought you could ask to see how good or bad condition the filter was (if it's a Gen 4 Haldex) and the mesh screen in front of the pump is if their policy allows, or have someone take a few pictures on a phone and show you😀.
-
I really appreciate you adding that to this thread @Carlston 👌. A couple of things I'd highlight and no doubt this boils down to personal choice, but anything bigger than a 205 tyre on a 6J rim probably isn't ideal. I'd would personally say that you want to look towards the 6.5J rims which would be good or 7J rims would be perfect 😀. Once you factor in a good quality all-terrain tyre, you're somewhat limited to 215/65/16 or 235/60/16 tyre. The Geolander G015's are an alright tyre but I think they are trailing behind and most people would pick a Toyo Open Country, Falken Wildpeak, General Grabber or a BF Goodrich if budget allowed. Maybe even throw the Comforser CF1000 into the pot as well 😀. Alana and I mulled over between going for a 215/65 and a 235/60 for a good while before we settled for the 215/65. In our heads, the 215/65's have the bigger sidewall which would soak up more of the bumps both on and off-road. Having the narrower 215 profile over the 235 could also be marginally useful when it comes to any snow or mud that we encounter. In the real world it probably doesn't actually make that much difference so I guess it's horses for courses 😁. To wrap it up in a nutshell and obviously my advice really counts for nothing 😂, but I'd say to anyone, the best pick is to go for either a 215/65/16 or 235/60/16 tyre and stick that on a 6.5J or 7J rim. 😀
-
Just a quick one regarding the Haldex service, I really wouldn't focus too much whether it has or hasn't had a Haldex service. Obviously if it's never had a Haldex service in its life and it's done 100,000 miles, maybe factor in a new Haldex or at least a new pump after you buy it 😄. I would factor either doing a Haldex service yourself or book the car into somewhere that actually knows about Haldex'es which isn't as common as you'd think. I am generalising here, but a lot of places (even Skoda dealerships themselves) will class a service as draining out the oil and topping it back up with fresh stuff. While in-part they are 60% of the way to servicing the Haldex, they miss out on the crucial 40% of the job. On the pre-facelift Yeti's it will most likely have a Gen 4 Haldex I believe fitted to it. This will have a filter that needs changing and a mesh screen in front of the pump that needs cleaning. On the post-facelift Yeti's it'll have a Gen 5 Haldex which just has a mesh screen in front of the pump. If you're lucky, some places will drop the oil and fit and new filter in the Gen 4 Haldex. Very few places will know about the mesh screen in front of the pump or go to the small effort of removing the pump. There-for, junk will build up in front of the pump which leads to the pump working harder and harder until it eventually burns out. There is also a procedure that is meant to also be followed after the Haldex has been serviced which VCDS (or similar) is needed to complete the service 😀. Here's a video where I briefly talk about the Haldex and how important it is to get service at the right place 😀. Oh and yes, our 4x4 Yeti was meant to have had a Haldex service and just look at the state of the pump! 🙈 After Alana and I bought our Yeti, within 2 or so months of ownership, we drove it just over 2 hours and 110 miles North to Darkside Developments in Barnsley to make sure our Haldex service was done properly 😁. Not that my advice is worth any more than the next persons, but I'd factor in a Haldex service into your buying costs 😀
-
@Servicepoint3 and to anyone else interested in going down the same/similar route to us, I've just posted a write-up over in the Yeti guides section so that you can see our wheels and tyres and the pro's and con's in more detail 😀. https://www.briskoda.net/forums/topic/530972-fitting-all-terrain-tyres-to-a-skoda-yeti/
-
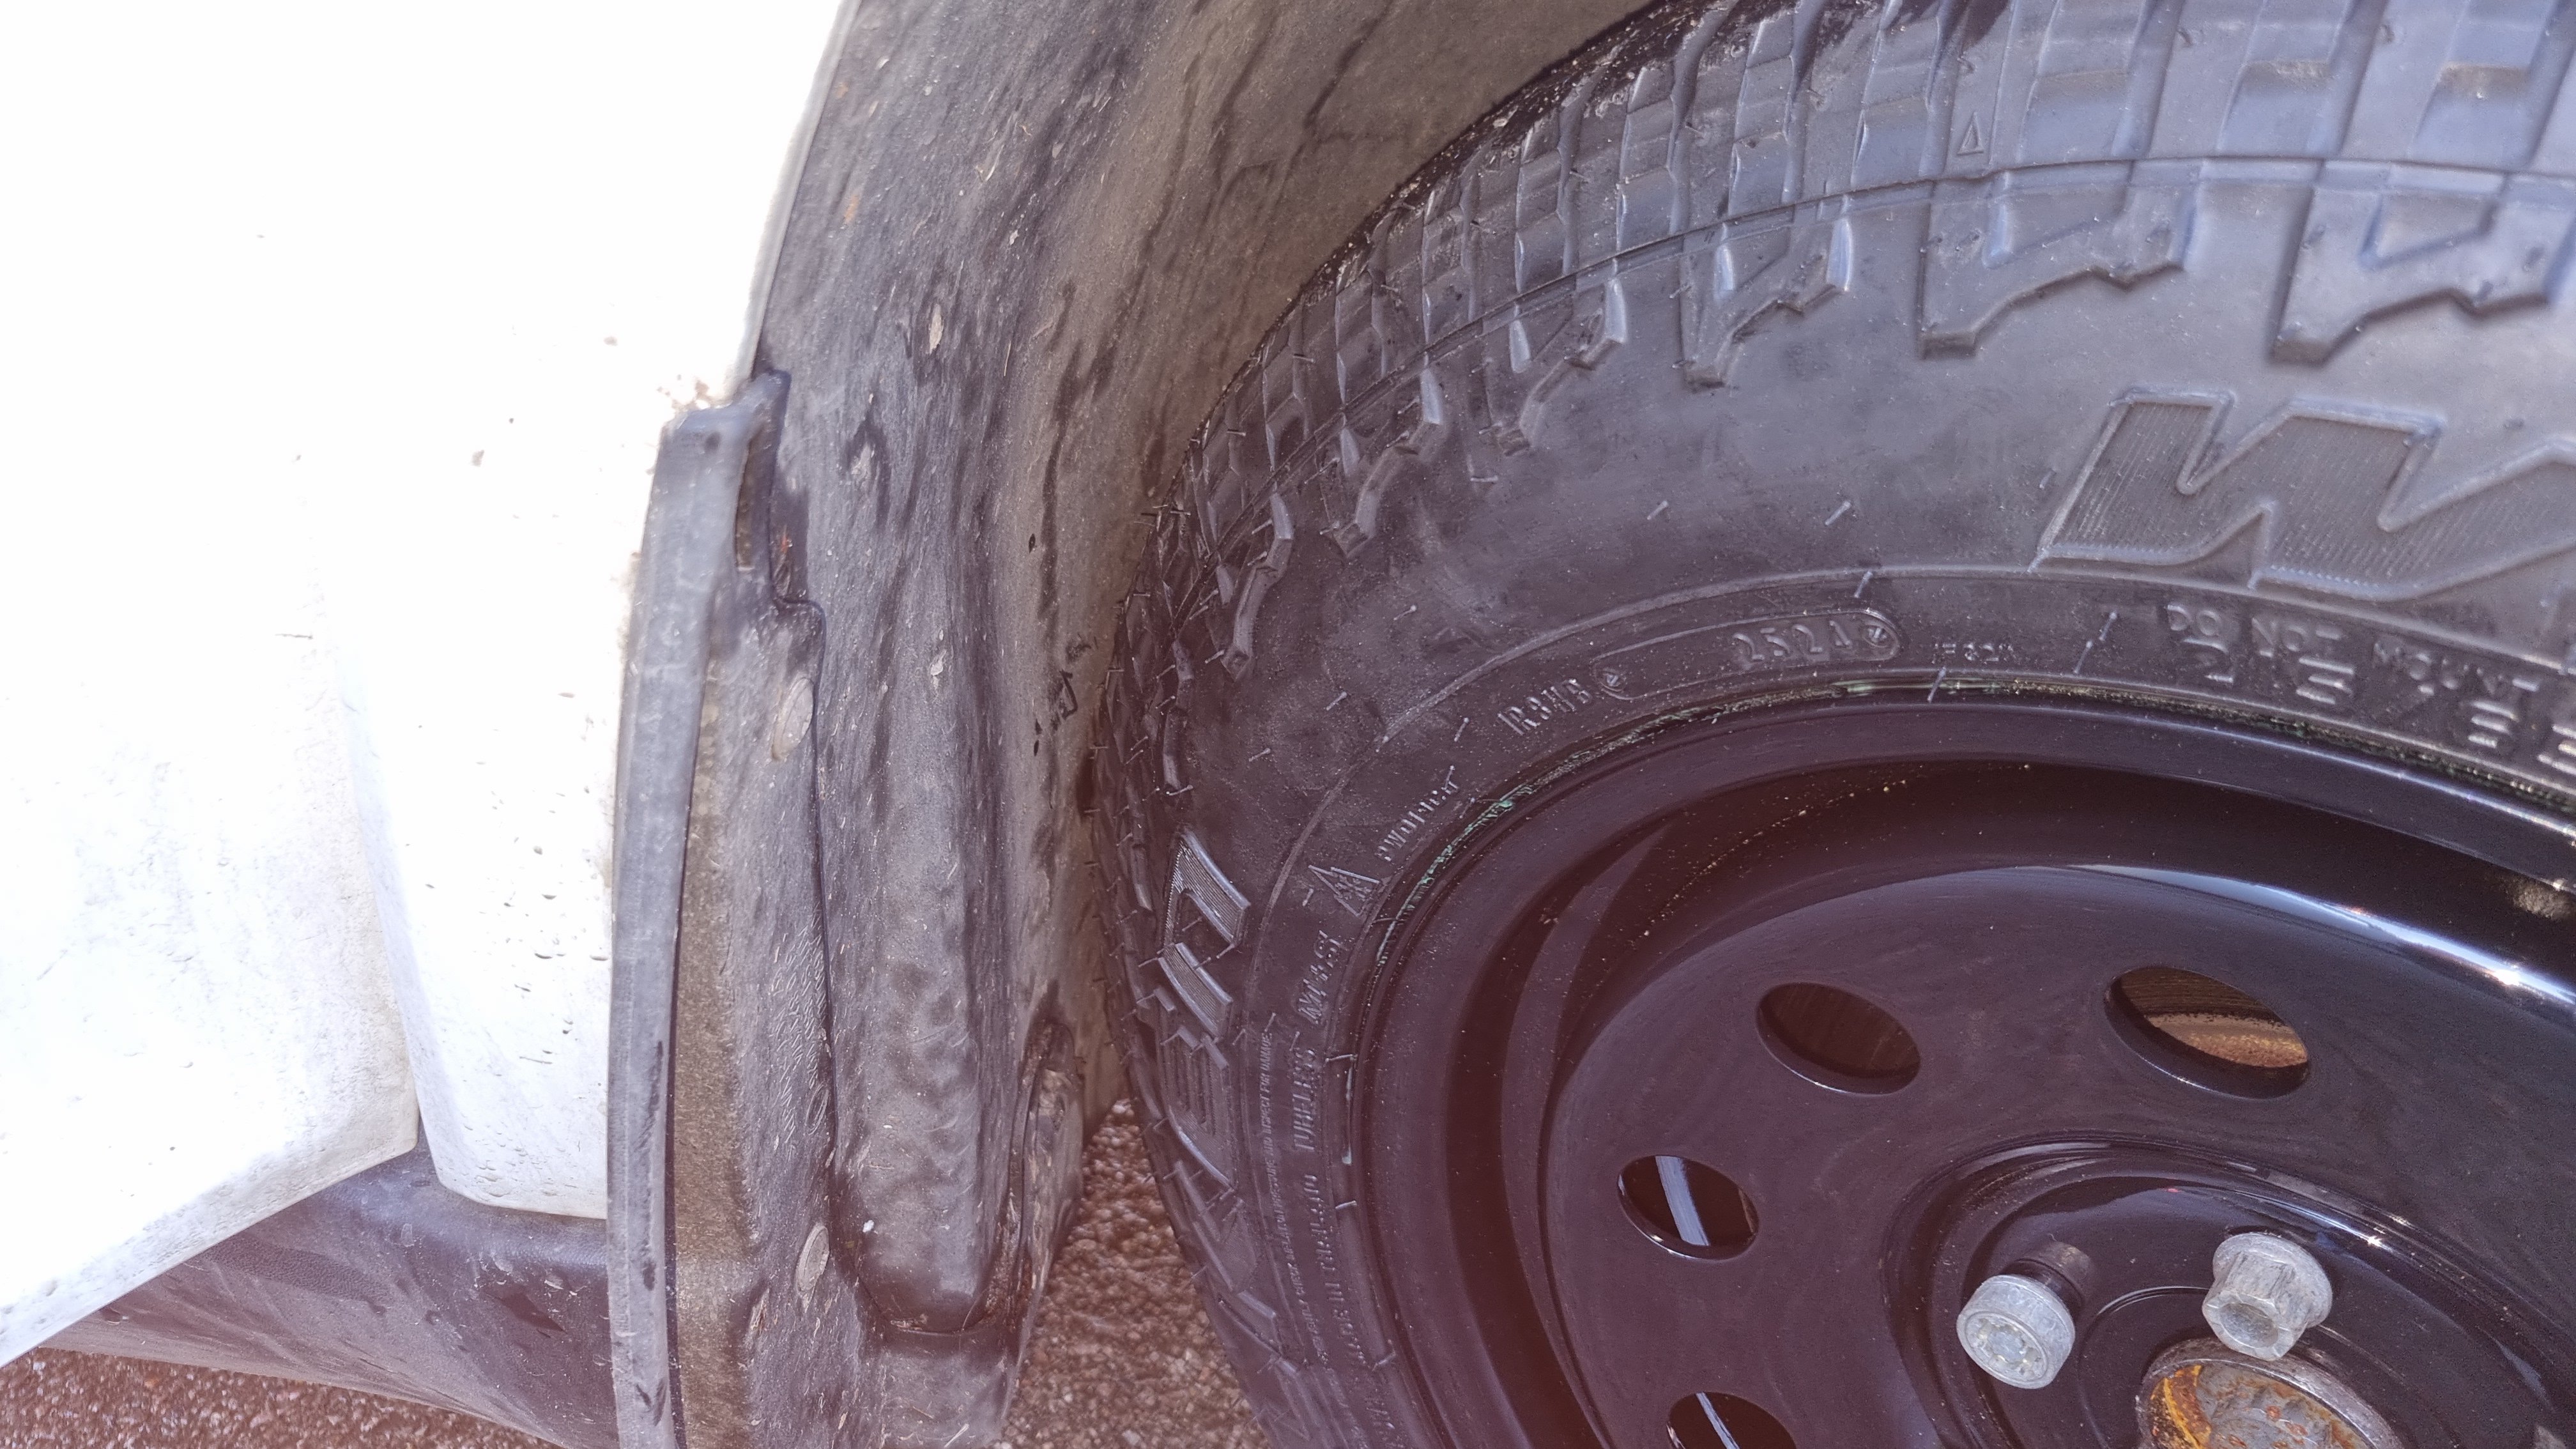
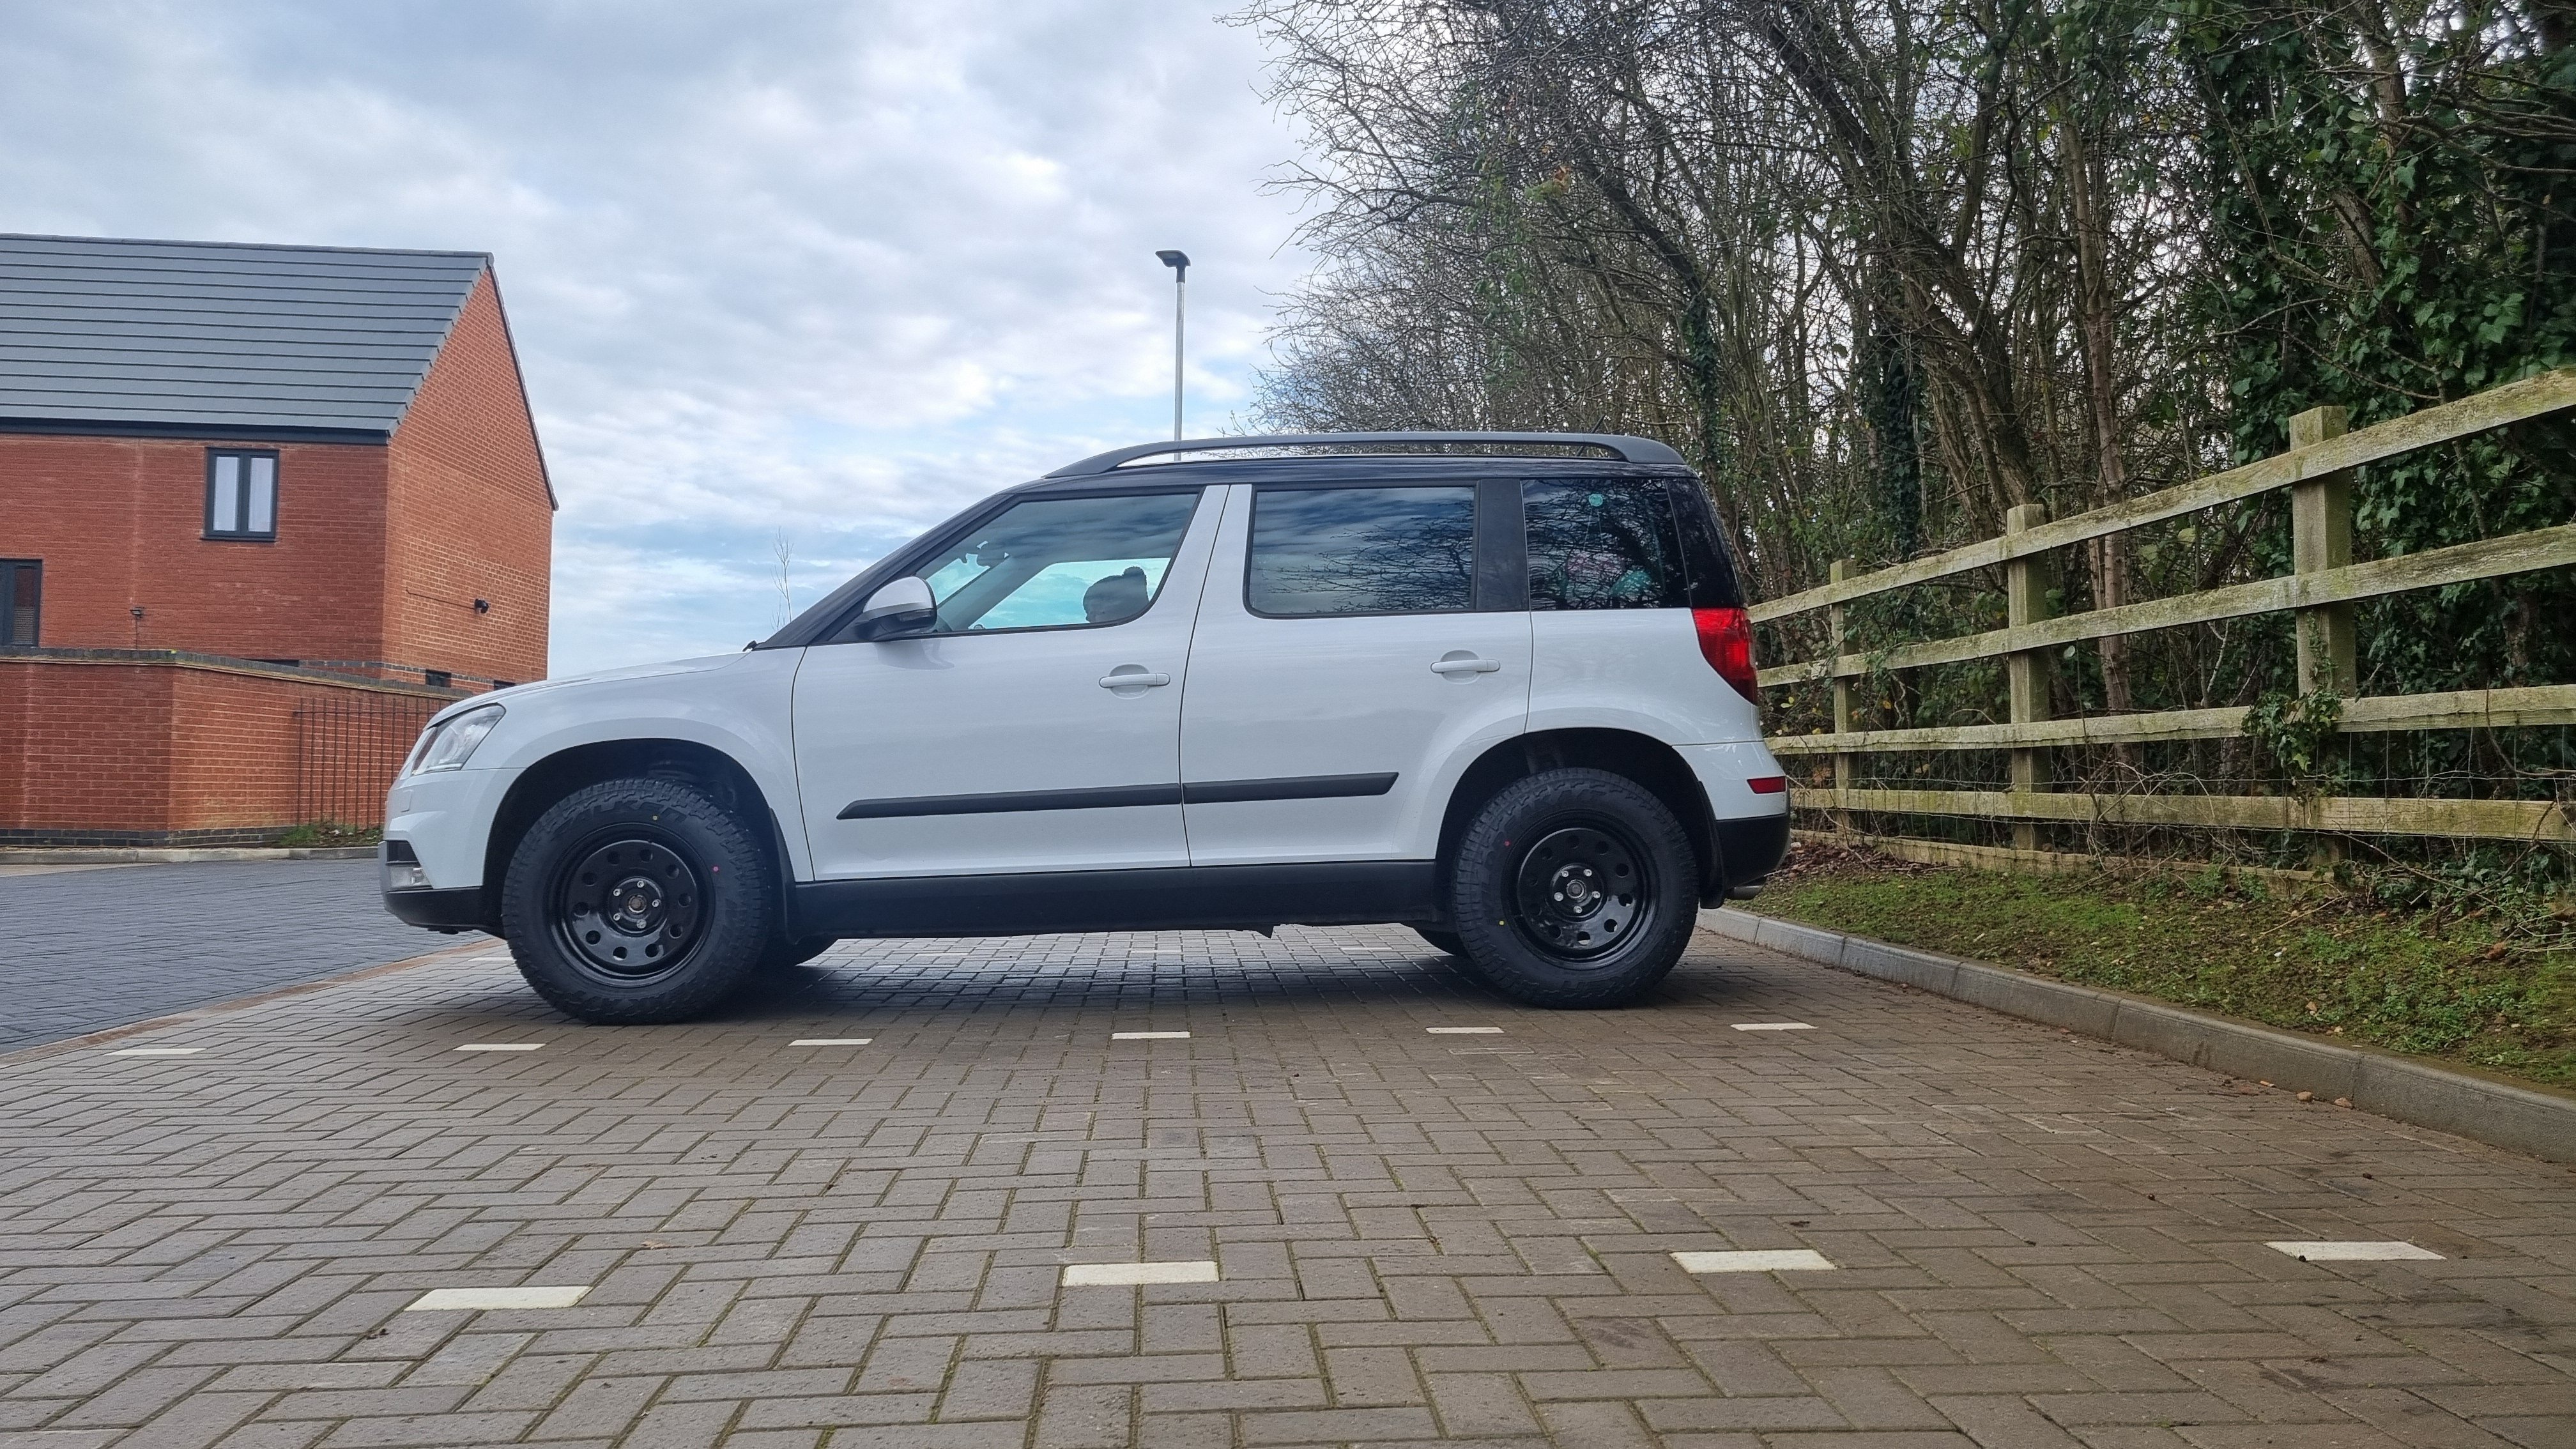
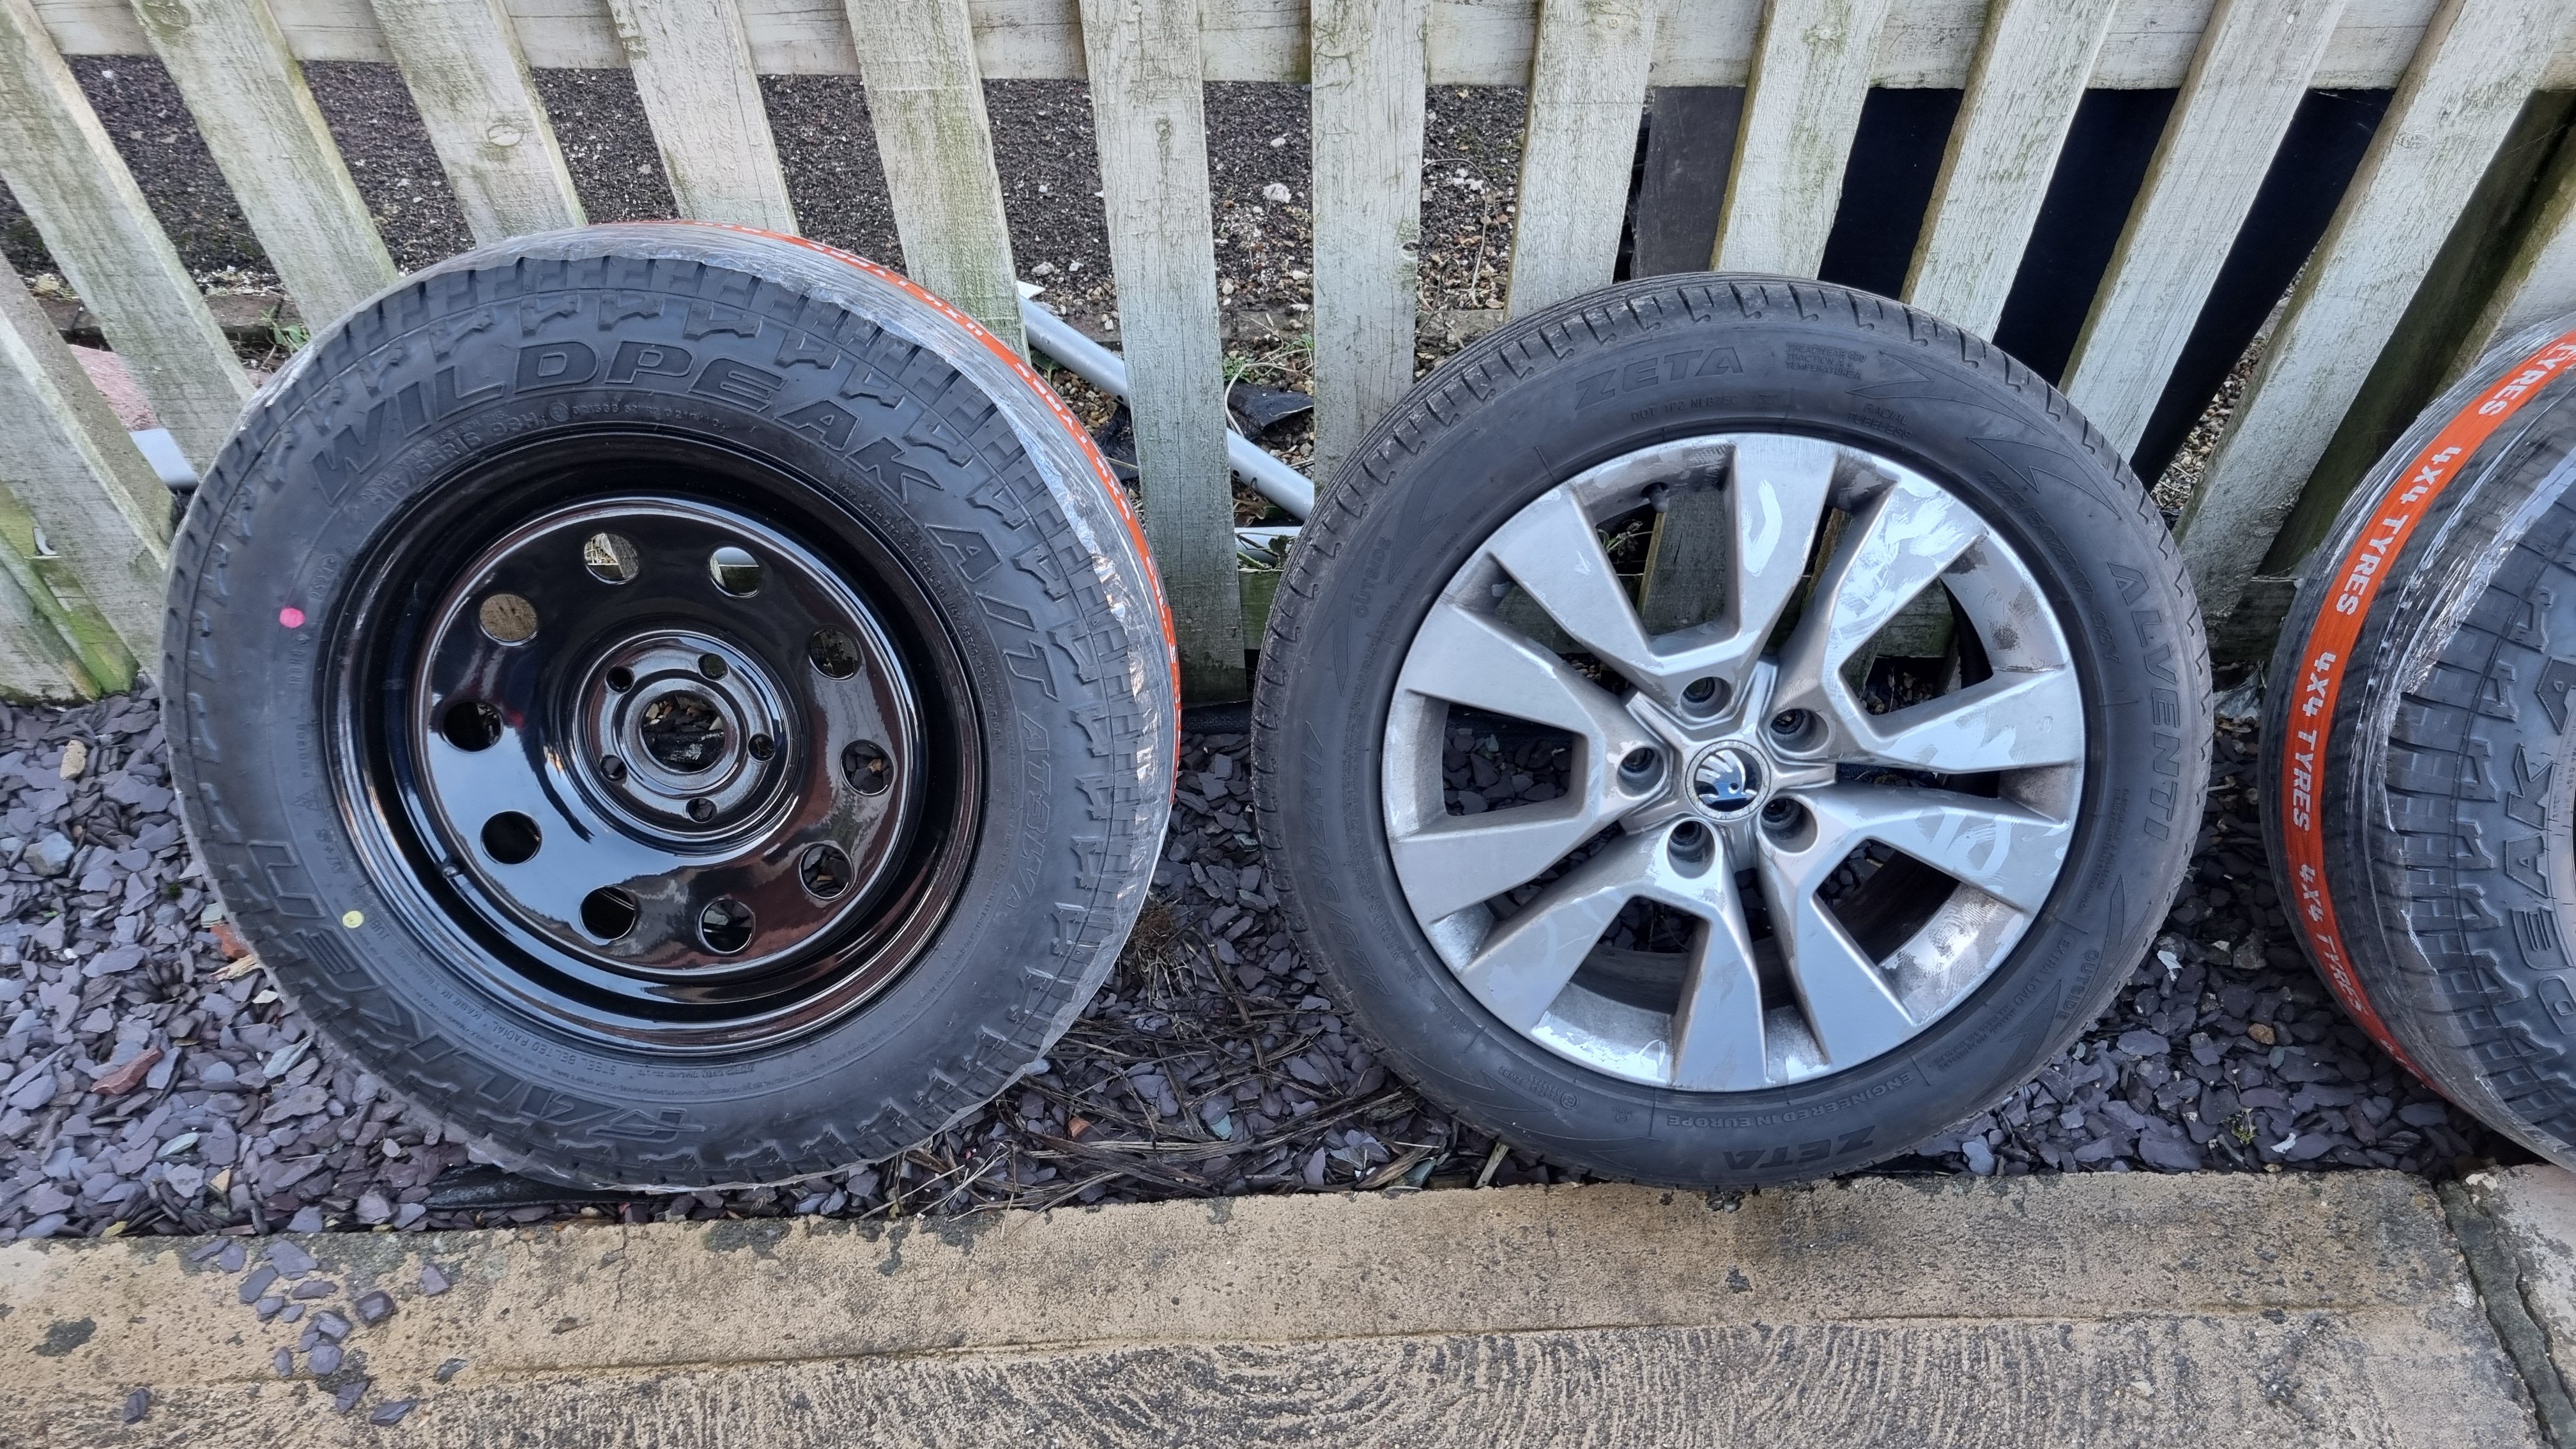
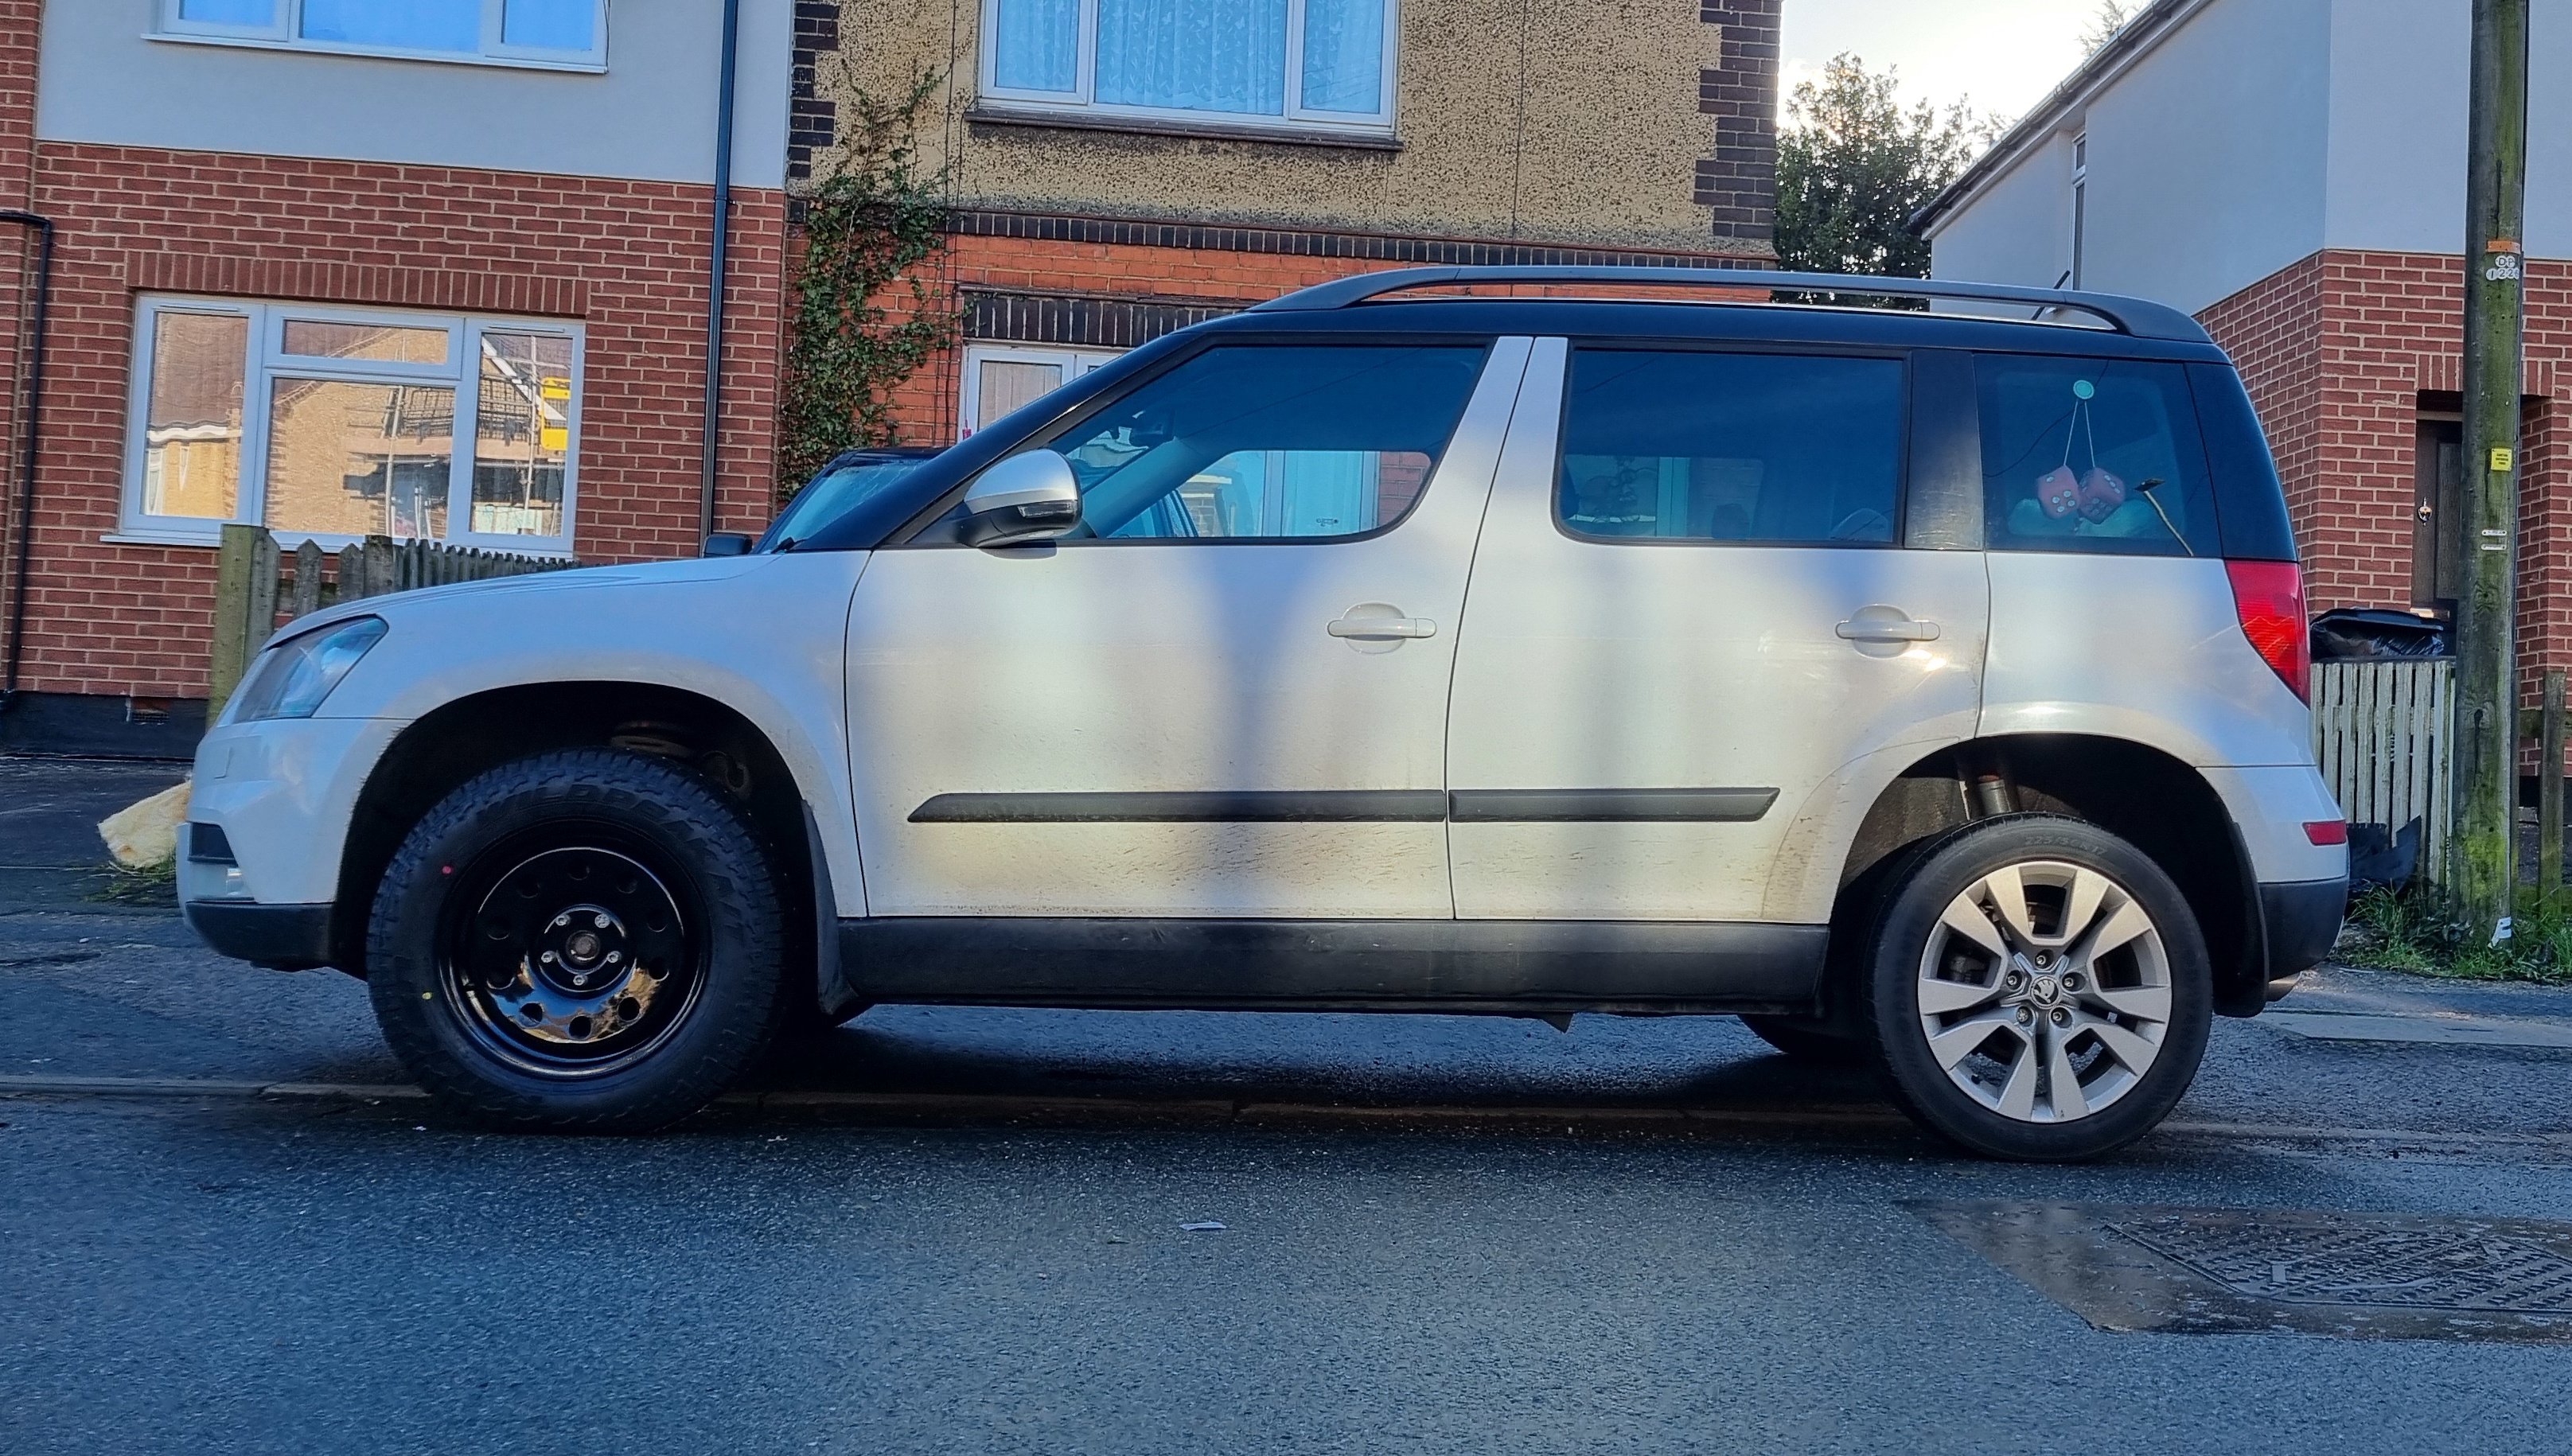
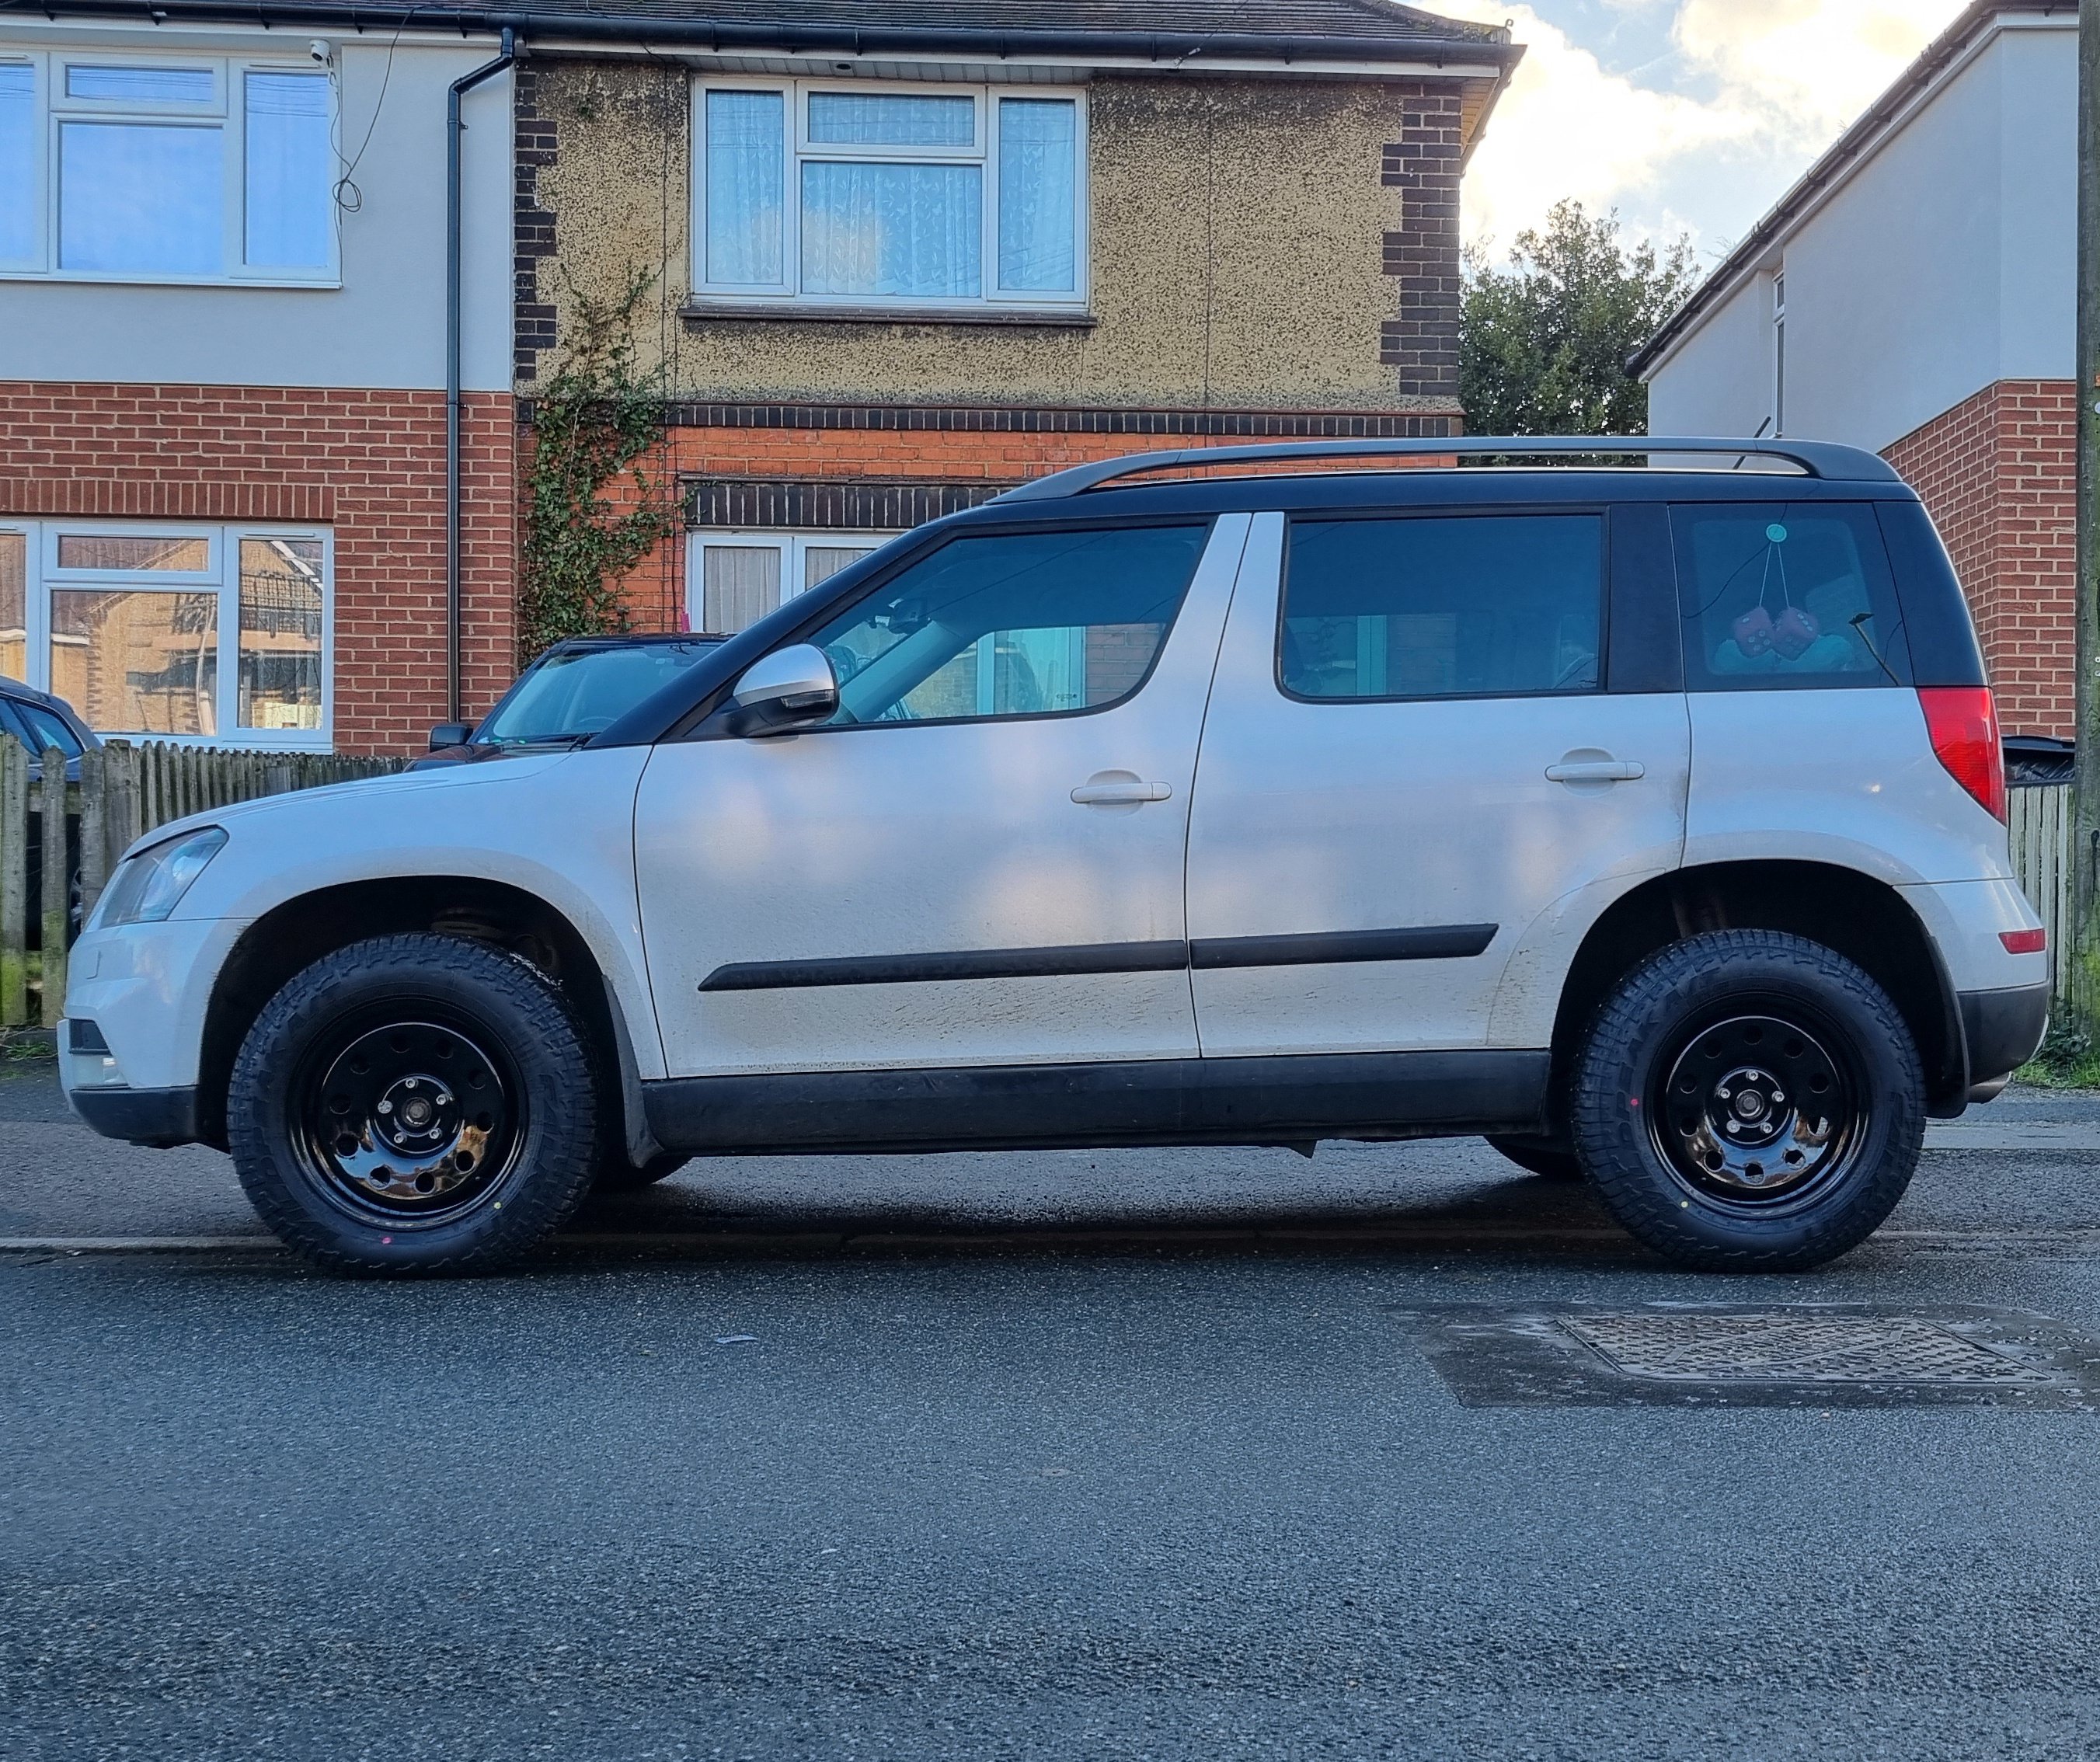
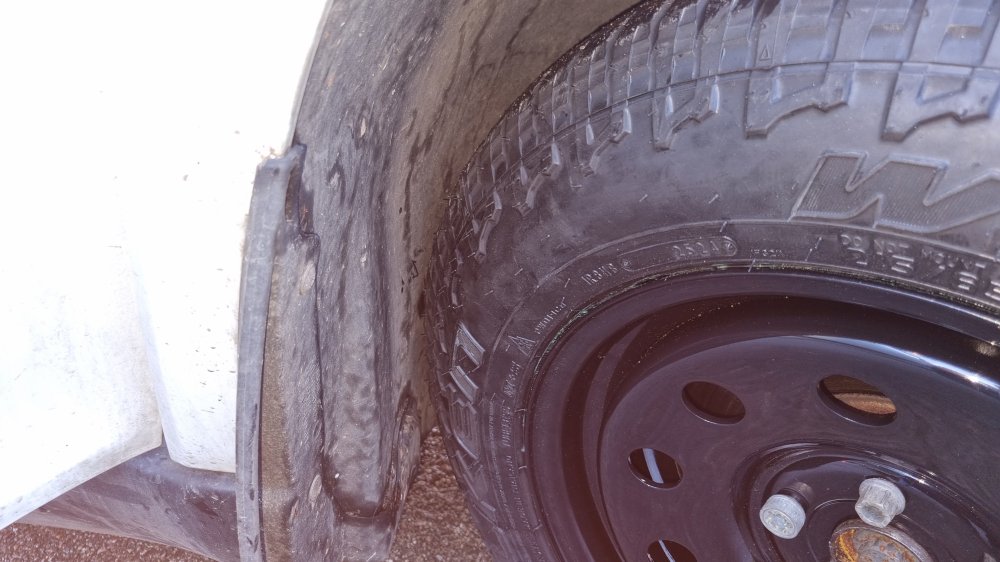
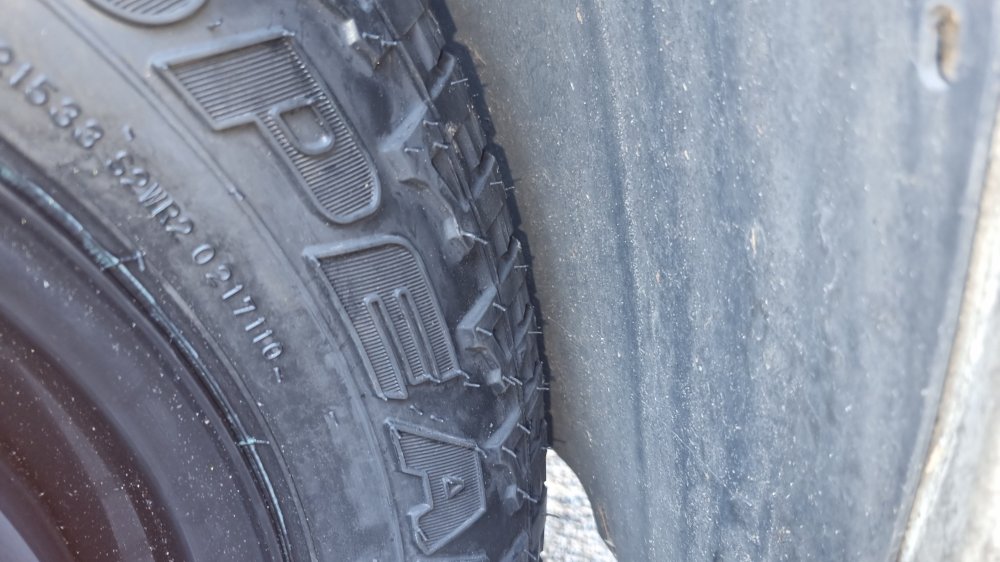
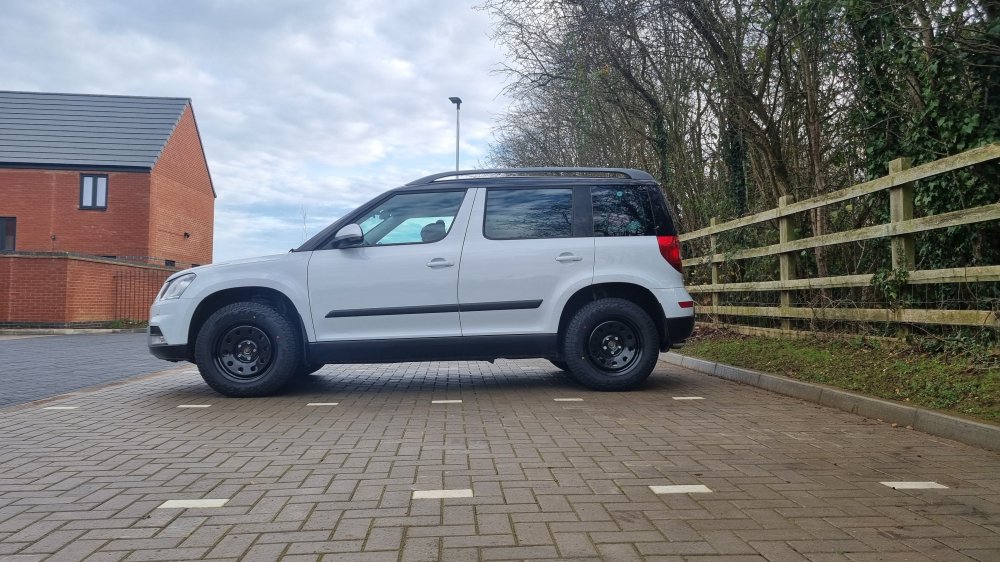
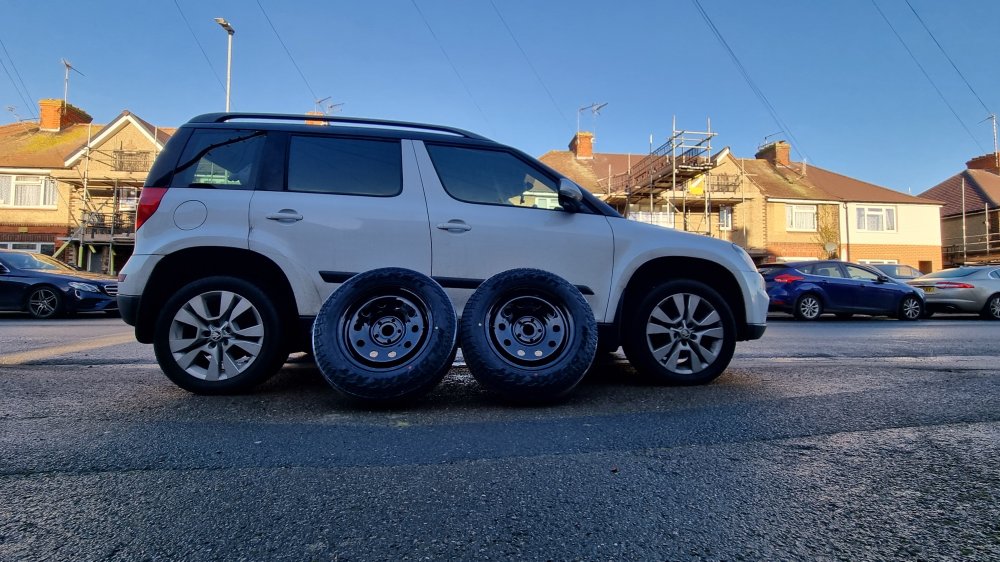
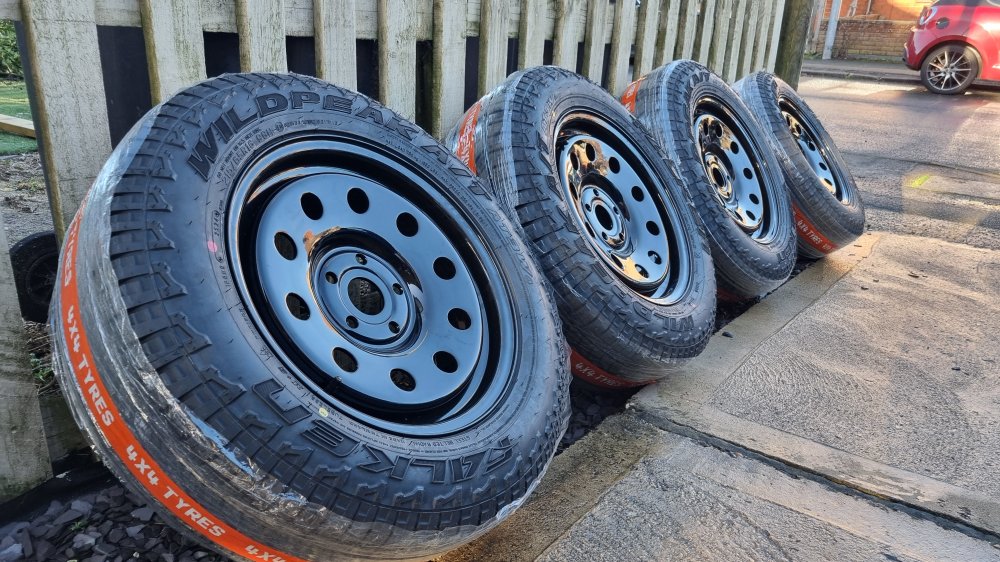
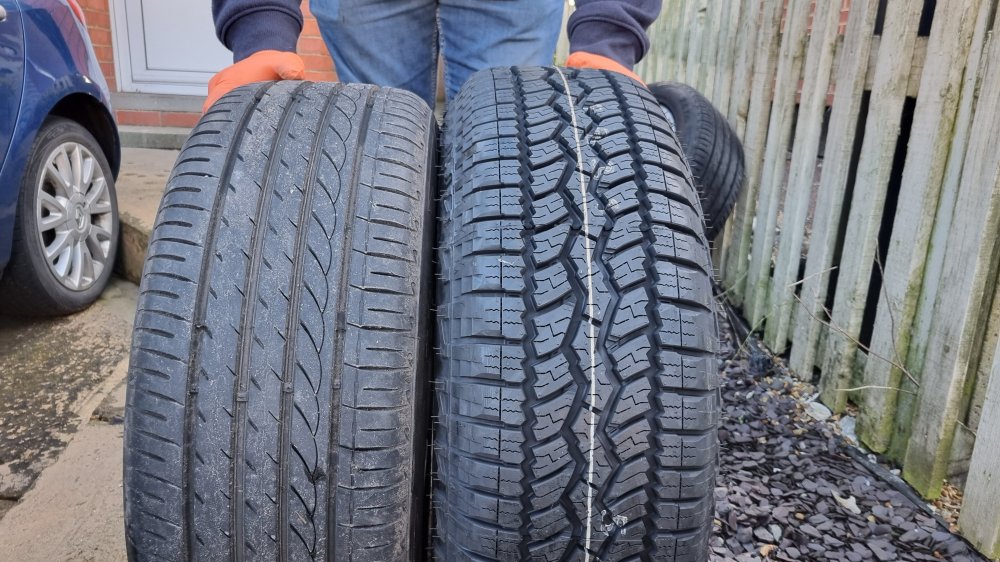
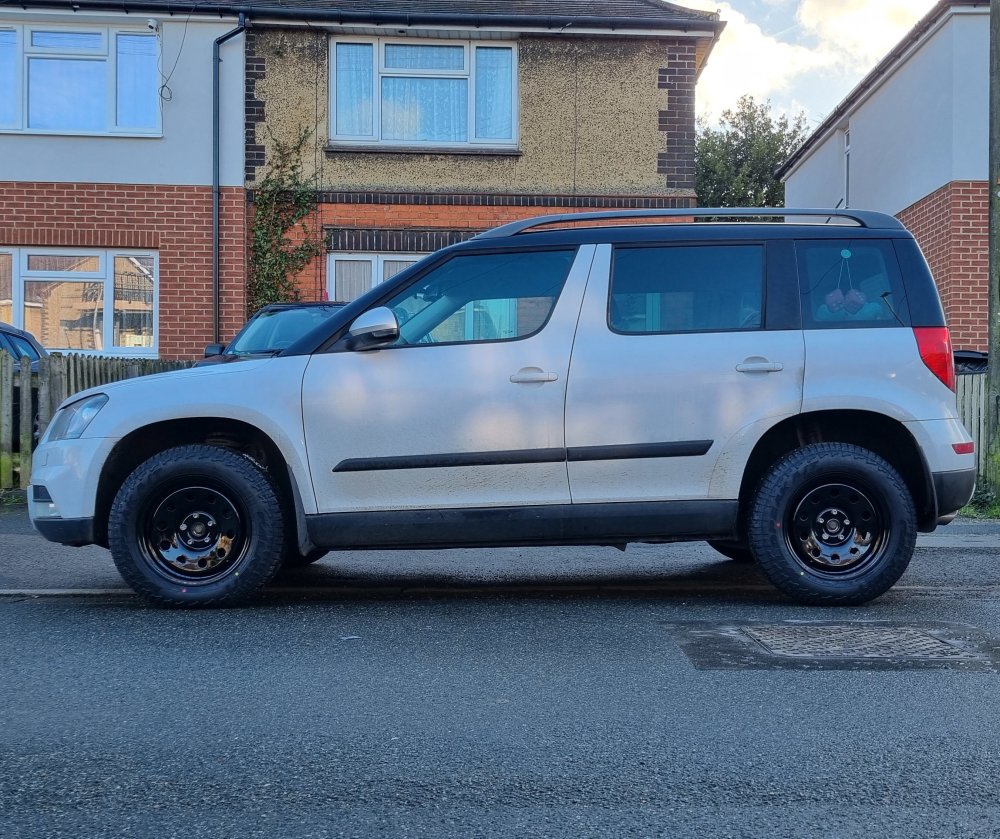
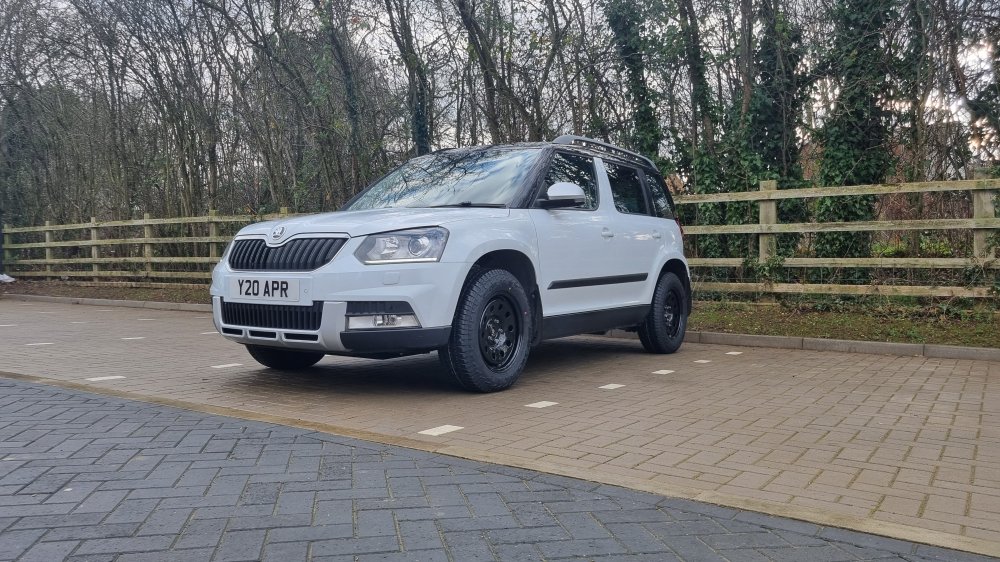
Hi everyone 👋. I kind of posted about this is the thread I've got going in the galley section located here: https://www.briskoda.net/forums/topic/530881-scott-and-alanas-yeti-4x4-modifications-and-adventures/ I didn't really go into detail in the post about how we come to end up with the wheels and tyres that we did and I know it pops up every so often so I thought I'd put a small write up together for anyone else that might be looking to go down a smiliar route. Our first port of call was to look to see what all terrain tyres was out there for the Yeti's standard tyre size which was 225/50/17. We were greeted with nothing which halted us in our tracks! I asked on the Yeti Owners Forum and my partner, Alana, asked on a Facebook group and between us we received a wealth of information to digest. The general consensus was, if you want a choice of all terrain tyres, you going to have to go down to a 16" wheel. The cheap route and someone will have to fill in the blanks with this part as we never looked a huge amount down this route. I believe you can get 16" rims from a VW Caddy? van which has the same bolt pattern as the Yeti. The downside to this route is it's very rare to see just 4 (or even 5 if you want a spare) steel wheels popup without any tyres on. So not only have you got to buy the wheels, but you then have to pay to get rid of the tyres. You're also not going to know what sort of life they have had and how round they still are. No one needs oval wheels in their life 😁. Although it cost us a bit more,we used a site called 4x4 Tyres (https://4x4tyres.co.uk/) to create a wheel and tyre package and get them delivered to our door. At least that way they are ready to be thrown straight onto the Yeti 😀. Choosing what wheel to first go for was easy for us as Alana has always had a bit of a weak spot for a 4x4 on steel wheels. We had toyed with the idea of doing it with our Freelander 2 but we never did. We ended up going for 16" Tuff Torque Modular steel wheels which were the same width as the Yeti's alloys at 7" wide. Next up is tyre choice. When we asked Rob at Darkside Developments what they used on their Yeti he said the following... "We ran a 215/65/16, I would consider slightly smaller if you want to avoid scrubbing. 225/60/16 or 215/60/16 depending what's available in those sizes" We first looked at the safer options to what was on offer. In 225/60/16 there wasn't anything great coming up. In 215/60/16 there was a couple of choices. 1 of those choices being a Yokohama Geolander G015 which we ruled out quite quickly as we had run those on the Freelander 2 and personally didn't think much to them. One of the things we took into account was that I'm pretty sure when Darkside put tyres on their car, they were quite aggressive mud terrain tyres. We took the gamble and looked down the 215/65/16 all terrain (not mud terrain) tyre route to see what was out there. To our surprise, we had quite a wide choice. After umm'ing and arrr'ing for a bit, we finally settled on Falken Wildpeak AT3Wa all terrain tyres. The main reason being is that we have them on our Freelander 2 and love them. It seemed silly to us to go with something different over something we know. It then come to fitment day and it was met with a bit of trepidation with both how they would fit and also how they would look on the car. We started with the fronts because we thought that surely if the fronts fitted, the backs would be fine, right... After getting both fronts fitted, we dropped it off the jack and Alana jumped into the car. She moved it forwards, backwards and lock-to-lock to check for any rubbing because we did think that we'd have to live with farting sounds as the tyre's rubbed until 1mm had come off of them or need to do some form of wheel arch lining modifications... This is the clearance on full lock right: (Click to expand) Full lock left: (Click to expand) As you can see, there is the tiniest of rub patches when turning right and the tyre is brand new. Other than that, I'd consider it perfect fitment. 😀 We then got the rear tyres on and our thought process was correct as they fitted just fine. Some of the other questions I had that I wouldn't find out until we had them fitted was, are they any louder and how do they affect the speedo? The answer to the loudness is that I didn't notice any sound increase and Alana said maybe fractionally. It wasn't until we used a free sound app and compared it against the road tyres at the same speed along the same section of road did we notice that there is a mear 2 Db increase inside the car. As to how do they affect the speedo? I forgot to note it down, but with the original wheels and tyres with the speed held at 70 mph, GPS was about 65 or 66 mph. With the smaller wheel but bigger tyre resulting in an overall diameter increase, the speedo at 70 mph is now 69 mph GPS speed. For some of you, this may be seen in a negative light as you may like having that bit of buffer. That way if you slightly stray over, you should still be fine. For Alana and I, we enjoy having a speedo that's very close to the speed that we want to do. On our 2 and a half hour trip up to Darkside, it was really nice to be going with the traffic at 70 mph rather than being the cork in the bottle. If you want to see this write up in video form, check out the following video that we made: If you want to see the review that I did of the Falken Wildpeak tyres, check out this video (this was recorded before we purchased the Yeti, hence the tyres being on our Freelander 2 😁) Lastly, a few random bits that didn't fit into the write up above. The standard wheels and tyres that were on our Yeti: Origami Wheels 7Jx17" ET45 PCD 5/112mm Centre Bore: 57.10mm Tyre size: 225/50/17 Davanti DX640 New wheels and tyres: Tuff Torque Modular Steel Wheels 7Jx16" ET35 PCD 5/112mm Centre Bore: 57.10mm Tyre size: 215/65/16 Falken Wildpeak AT3Wa All Terrain The wheels and tyres now stick 10mm further out. Have given us 14.55mm of extra ride height. We have gone from a 113mm tall sidewall to a 140mm tall sidewall, perfect for all those pothole roads out there 😁. The width of the tyre has gone from 225mm to 215mm which is about -4%. The overall diameter has gone from 657mm to 686mm which is about +4%. An assortment of images... Standard wheels and tyres to steel wheels and all terrains: (Click to expand) Wheel and tyre size difference: (Click to expamd) Fresh wheels and tyres ready to go: (Click to expand) End result: (Click to expand) Just to finish off this post, do you need to go to this effort before you go offroading? Nope, certainly not. With our Freelander 2, we started off on the standard road going tyres that it had on and it coped just fine and has been demonstrated on this forum in the past, the Yeti is more than capable of going off road in its standard form. It's similar to that of, do you need snow rated tyres to drive in the snow and the answer would be the same, no. Summer tyres will still get you going and eventually stop you 😁. Why bother then? Well you wouldn't drive to a snowy climate with summer only tyres would you? You'd go and fit some snow rated tyres. By the same token, if you're heading off road, fit some tyres that are suited to the terrain you'll be on. It's surprising the difference between the makeup of a road focused tyre Vs and all terrain. The biggest one being their sidewalls. If you push your thumb into a road tyres sidewall it'll be quite stiff and barely move. Do the same again on an all terrain and you'll be surprised how much the sidewall deflects. This softness in an all terrain really helps the tyre mould itself to its environment for grip and avoids punctures. Also the side grips on the sidewall of an all terrain really do help fend off sharp rocks from tearing a hole in the sidewall. The tread pattern of an all terrain also aids the tyre in throwing out any loose mud, snow or any other material from the tyre and really helps it bite into any firm material it can find. Lastly and most importantly and sorry if I'm telling you something you already know but it's best to be safe than sorry... Just remember that this is an outright modification. So if you do look to do this, or something similar to this, make sure to contact your insurance company and declare it. Comparison website insurers can be massively variable as to how bothered they are about this sort of thing because generally it's not their cup of tea. But companies like Adrian Flux, A-Plan/Howdens and the likes that do 4x4/modified car insurance policies, generally aren't all that fussed 😀. Just to add the almost final piece of the jigsaw. We took the Yeti green laning along with a few of our friends. In a whole days green laning, the tyres only rubbed in the arches 2 or 3 times. When I say rubbed, I mean gentle kisses, but enough to hear a little fart noise each time from inside the car which may, or may not of made us chuckle a small amount 😄. So the big question of do the tyres rub. My answer would be, only when the suspension is seriously compressed. Even in the following image there was 0 tyre rub. Can I just ask, if this post has been of any use to you and you're part of this forum for you to put a like on it 👍. Any questions, feel free to ask and if I cannot answer it, I'm sure 1 of the many knowledgeable folk on here will be able to. 😀


-
You could get a similar look to ours but cheaper. I believe one of the small VW vans have 16" steel wheels that have a slightly different ET that I believe will still fit onto the Yeti that you could possibly buy from eBay or the likes. We very briefly looked down this route (hence why I'm not 100% sure on the exact details). The only reason why we didn't go down this route is trying to find 4 steel wheels that were the right size was actually harder than what you'd think. We personally didn't think there was much saving to be had if we sent them off to be painted so that they looked reasonable. Lastly, you never know what life they have had and how round they actually will be 😄. The last thing we wanted was for there to be annoying wobbles or vibrations for when we did long trips 😁. But I will put the idea out there for you and anyone else that reads this thread because it's still a perfectly feasible route to go down to achieve the same outcome but with maybe less cost overall 😀.
-
We have had these same tyres (slightly bigger in size) on our Freelander 2 for a year or 2 and we love them on both the Freelander 2 and the Yeti! 😀 We do have a road set of wheels and tyres for both cars in case we do any serious miles on just the road but we have never fitted them to date 😄. Not that the Yeti is at all crashy over the bumps, but the bigger tyres have made it less-crashy than what it was if you get what I mean 😁. The edge protectors on the all terrains will help a small amount when it comes to fending off those sharp edged pot holes. In the dry they grip perfectly fine unless you're driving like you're on a track day and you'll start noticing the limits 😁. In the wet they also grip really well but a decent road going tyre will always grip better. We haven't noticed an alarming wear rate on the set we have on the Freelander. They will wear quicker than a road going tyre as they are a softer compound and the tyre is more flexible overall due to their off-roading characteristics. You do compromise on them not lasting so long, being a couple of Db louder and not being quite as grippy on-road. But the upside is they work really well off-road which is obviously where they are going to shine compared to an all season road tyre 😁. If you want a tyre for road use that might put up with a few miles of light green laining, get a good quality all season tyre. If like us, you plan to do a good few trips off-road, get a set of Falken Wildpeaks, Toyo Open County, General Grabbers or BF Goodrich if you can afford them 😁. Here's a video of what we put the Wildpeaks through with our Freelander 2. Obviously they won't he stressed quite that much on the Yeti 😄. I've also done a tyre review before we bought the Yeti 😀.
-
Some of you will know that I currently have a thread running over here detailing all the modifications and adventures Alana and I are having with our Skoda Yeti. https://www.briskoda.net/forums/topic/530881-scott-and-alanas-yeti-4x4-modifications-and-adventures/ A few weekends ago, we set out to service our Diesel Skoda Yeti 2.0L CR170 and took out the camera to show how we went about doing it 😀. I've split the main video (which you can find in the thread above) in smaller videos for each of the serviceable items which might be handy for you if you fancy servicing your own Yeti 😀. Changing The Air Filter: Changing The Cabin Filter: Changing The Diesel Filter: Changing The Oil And Oil Filter: Resetting The Service And Inspection Interval:
-
-
-
Thanks @Servicepoint3 👍. One thing to bear in mind and this is only because I like to be 100% transparent and highlight the pro's and con's so everyone can make their own fair choice. All season tyres on standard rims = not a modification so your insurance doesn't need to know or care (I believe). What we have done = a modification and a insurance company will need to know and will care 😄. Apologise in advance if I'm telling you to suck eggs as I know to some that it's obvious 😁. As for the size of tyre affecting the speedo reading, if you flick through to the back half of the wheels and tyres video, you can see that we did a before and after 😀. The short of the long is that is gets rid of most of the speedo error that Skoda has built into the car. With the wheels and tyres we have on, 70mph on the dash is about 69mph actual speed. For some having a accurate speedo might be a negative as if you sneeze, fart or burp at the wrong point, you could easily find yourself the wrong side of a speed limit 😄. We love an accurate speedo though as it's nice to know that you're actually doing 30 in a 30 and not 26 in a 30. The same way is if you're on a long trip on a 70mph piece of road. It's nice to be going with the flow of traffic and not tripping over it because even though you're doing 70, your actually doing 65 or so 😀. Lastly, having a more accurate speedo brings the car's speed in line with HGV's. So if you spend any amount of time in average roadworks, they won't be tailgating you because you'll actually being doing 39 in a 40 or 49 in a 50 😁. Any more questions, feel free to ask and if I cannot answer them in writing, I'll add in to my video ideas pile 😁.
-
As much as you jest Colin, that is actually part of the reason that we have put the bigger tyres on 😂. The Mini Cooper S R53 that Alana used to own was an absolute blast to drive with it's supercharged petrol engine. But that soon was ruined when you were looking no more than 5 feet in front of the bonnet looking for the next pothole that would swallow up its super low profile tyres 😄. With the Yeti, we only now have to worry about 10% of the potholes and not 100% 😁. I will await you to sweep me and my thread off of our feets when the computer finally says yes 😄.
-
For anyone that wants to follow mine and Alana's journey with our Skoda Yeti, I've posted a thread over in the Yeti section which you can find here: https://www.briskoda.net/forums/topic/530881-scott-and-alanas-yeti-4x4-modifications-and-adventures/ I was looking for a more general section to post the thread in as it might (or might not be 😁) of interest to others out there that are not Yeti owners. But I didn't want to get told off on my first day here so played it safe 😄. If a moderator or admin knows of a better place that the thread could reside, feel free to move it 👍.


.jpg.76388295fe7d32a11bc02eb29b3c2f31.jpg)