simion_levi
FREEDOM
-
Joined
-
Last visited
Everything posted by simion_levi
-
I used the Kufatec loom to fit USB hub 5Q0 035 726 L, with two cables - connecting to the fusebox and the earth point in passenger footwell https://www.kufatec.com/en/infotainment-multimedia/entertainment-accessories/cable-set-usb-hub-for-vw-audi-seat-skoda-43184 I've not seen your cable before. It looks like it is meant to piggyback on another connection to share power/earth. Not sure if that is going to be the front USB port or one of the buttons in the centre console? The loom doesn't look long enough to reach radio/fusebox or elsewhere in the dashboard. Might not be applicable for the Octavia, of course.
-
I will say that the larger JT terminals still seem to fit and latch in the standard size fuse positions.
-
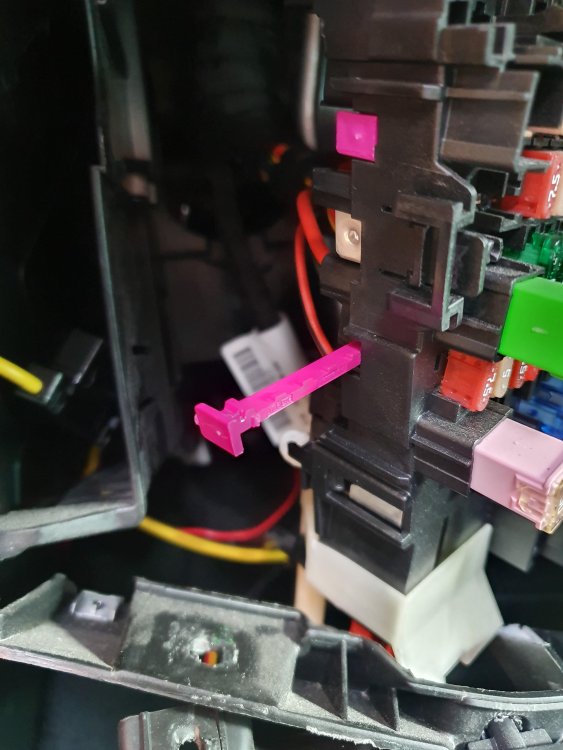
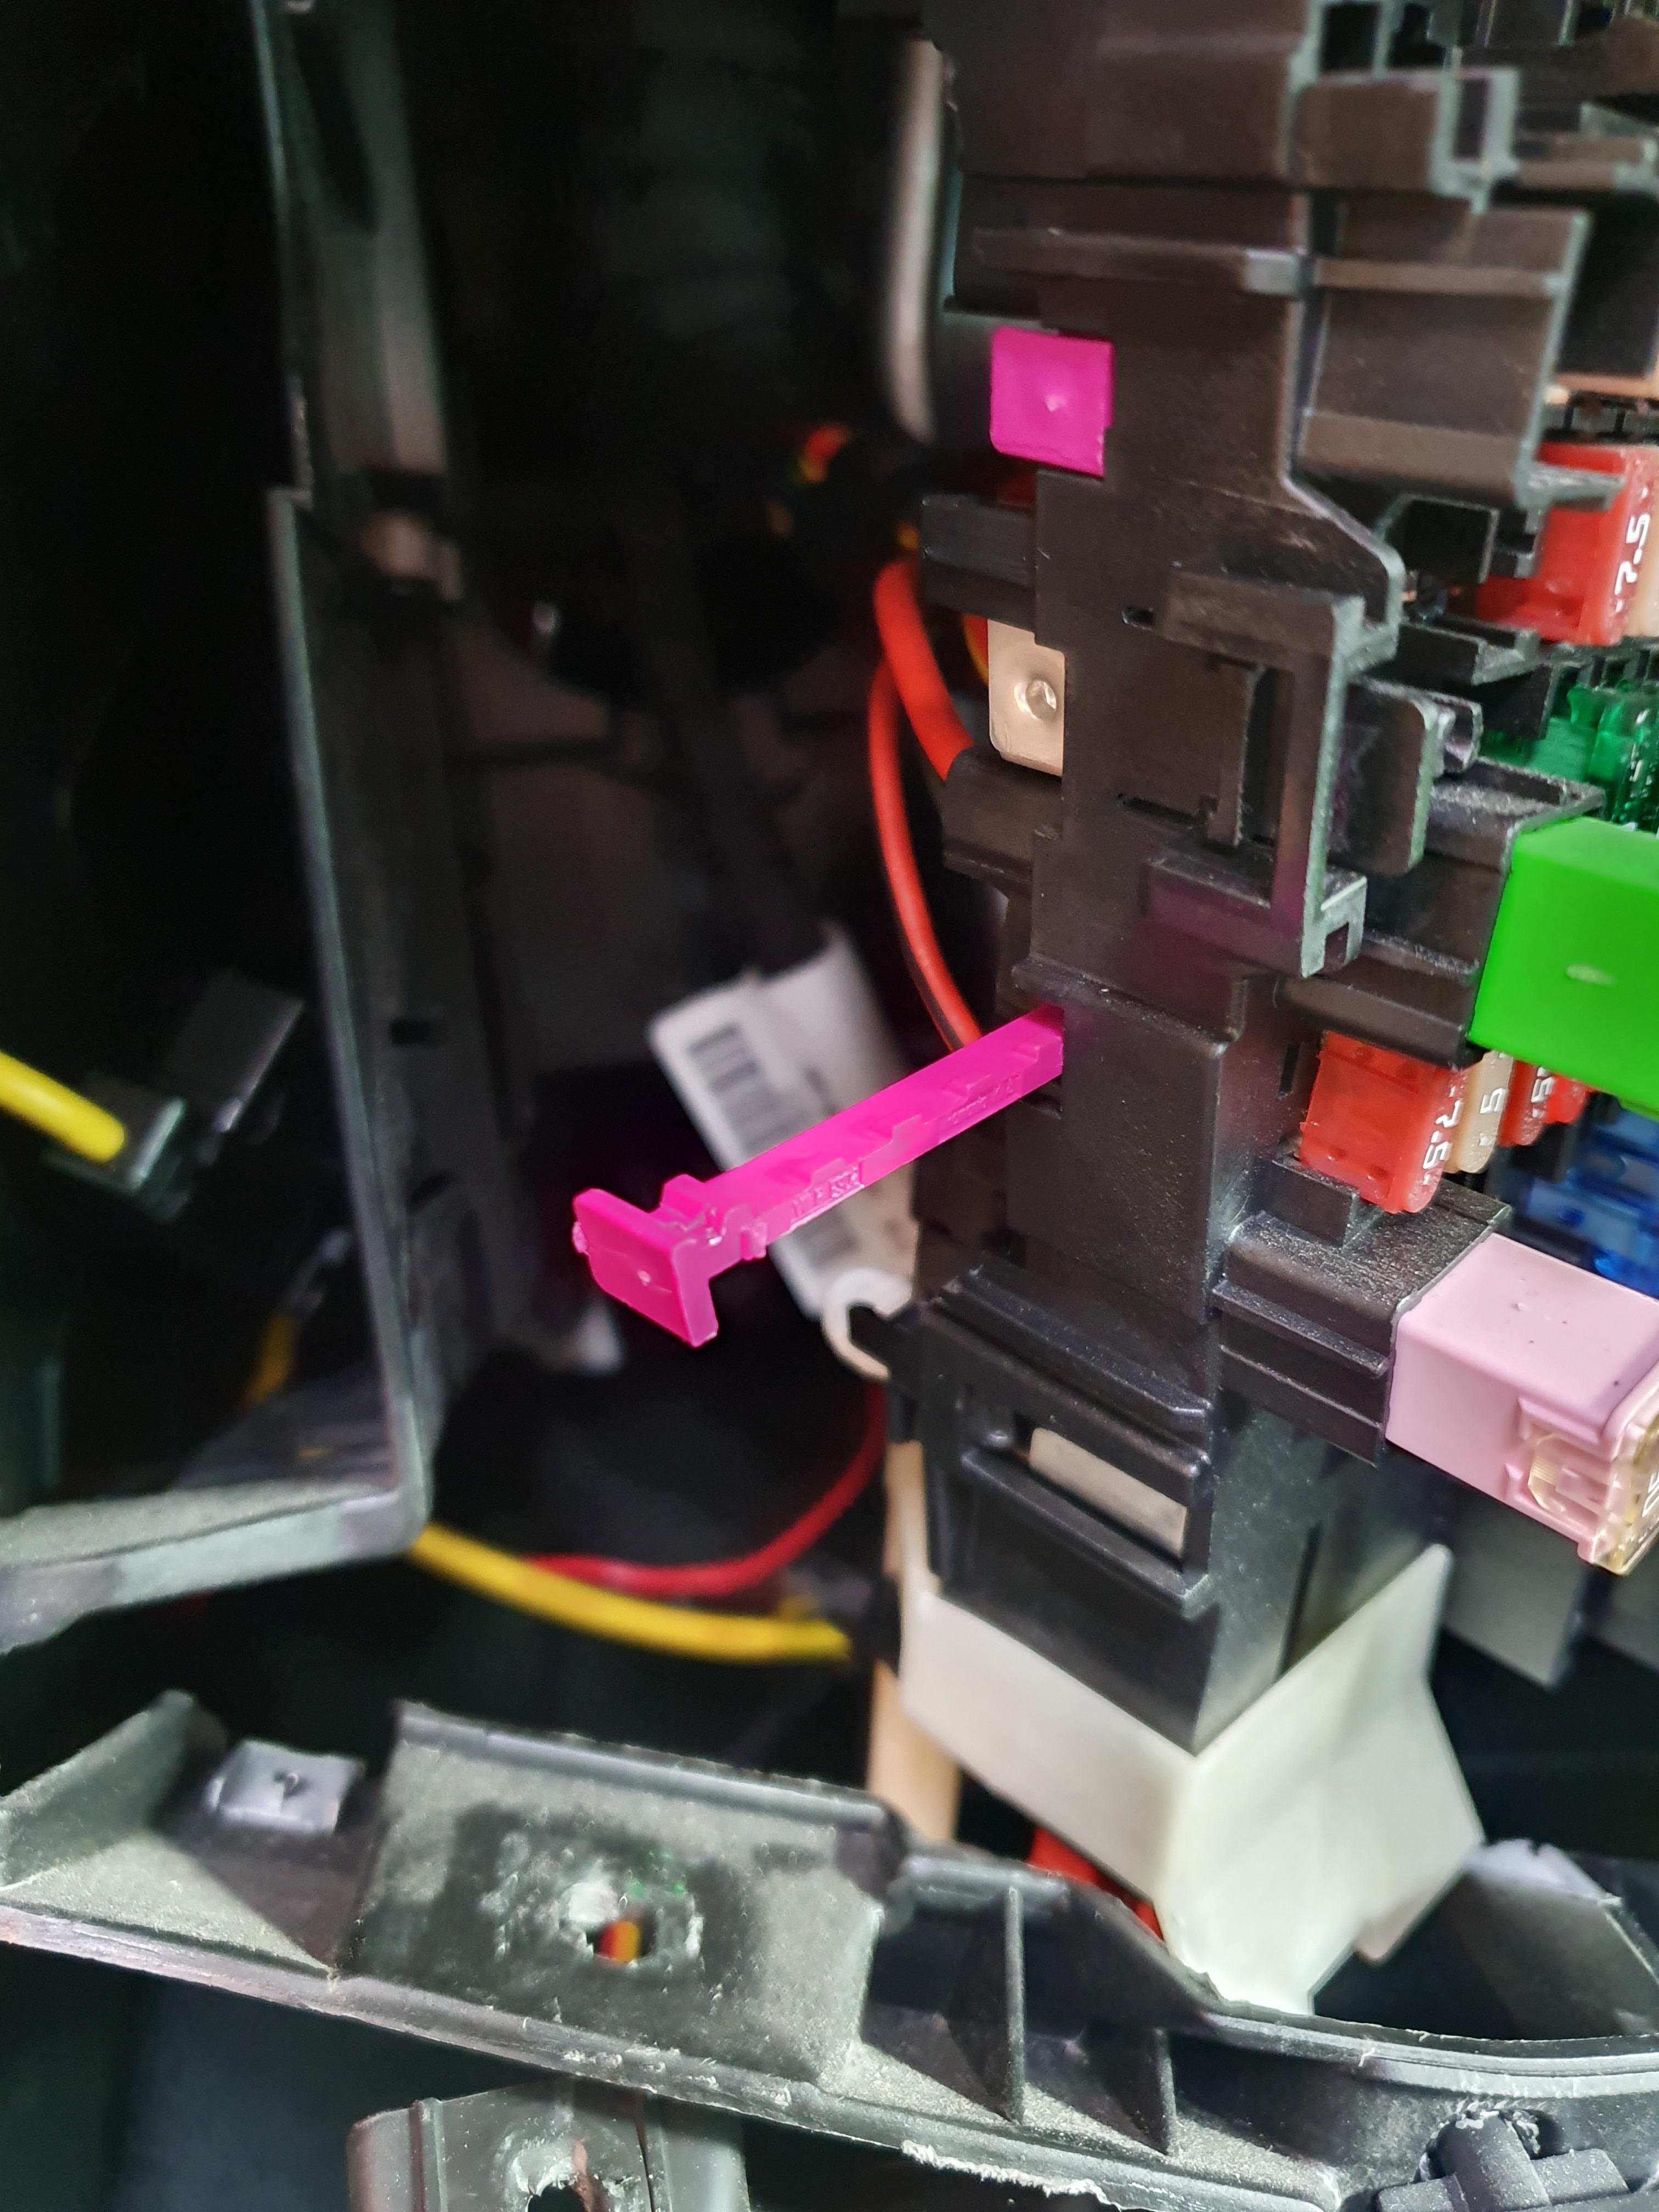
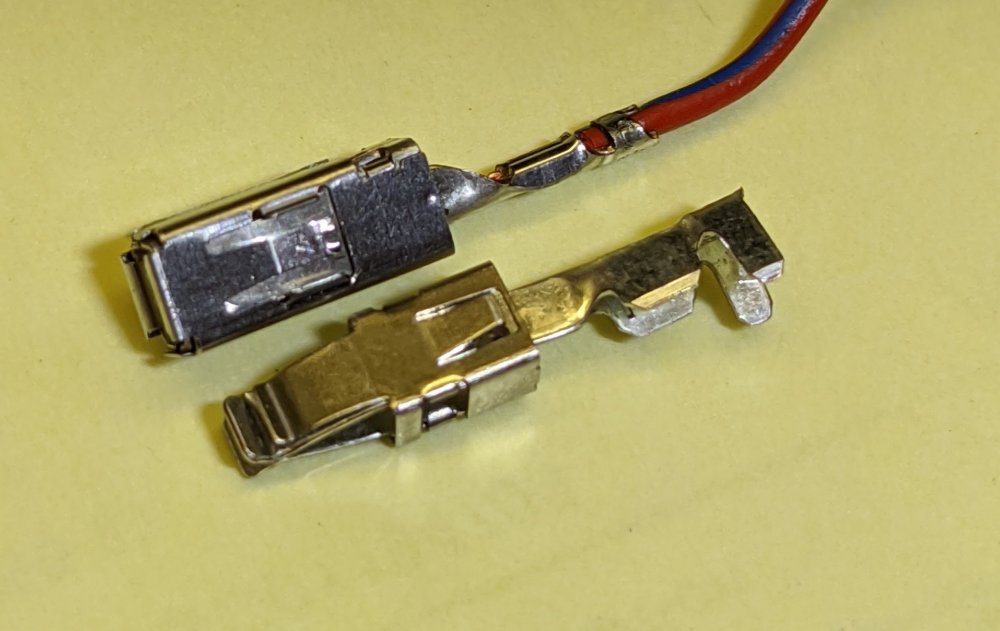
In case this helps anyone else: I did this a few weeks back and spent ages buggering around trying to get the JPT fitted connectors on a couple of looms I was adding to latch into the fusebox. In the end I had to give up and rely on the secondary lock (the purple strip) to hold them in place. It'll be absolutely fine, but frustrating and a job not done 'properly'. Well today I got hold of a similar fusebox from a scrapped car and very quickly realised that JPT will never latch. MCP 2.8 connectors are needed instead! Photo attached - JPT (TE Connectivity AMP Junior Power Timer) crimp terminal at the bottom - I've used these in previous generation fuseboxes (Octavia MK2 etc) and received several ready made looms for current MQB models, to fit to my Octavia MK3, with them attached - so naturally thought they should fit! Whereas top connector, crimped to a cable, is the MCP 2.8 (TE Connectivity AMP Multiple Contact Point) connector that is actually required in fusebox Octavia 3 and other MQB models for minifuse connection. Note different latch position.
-
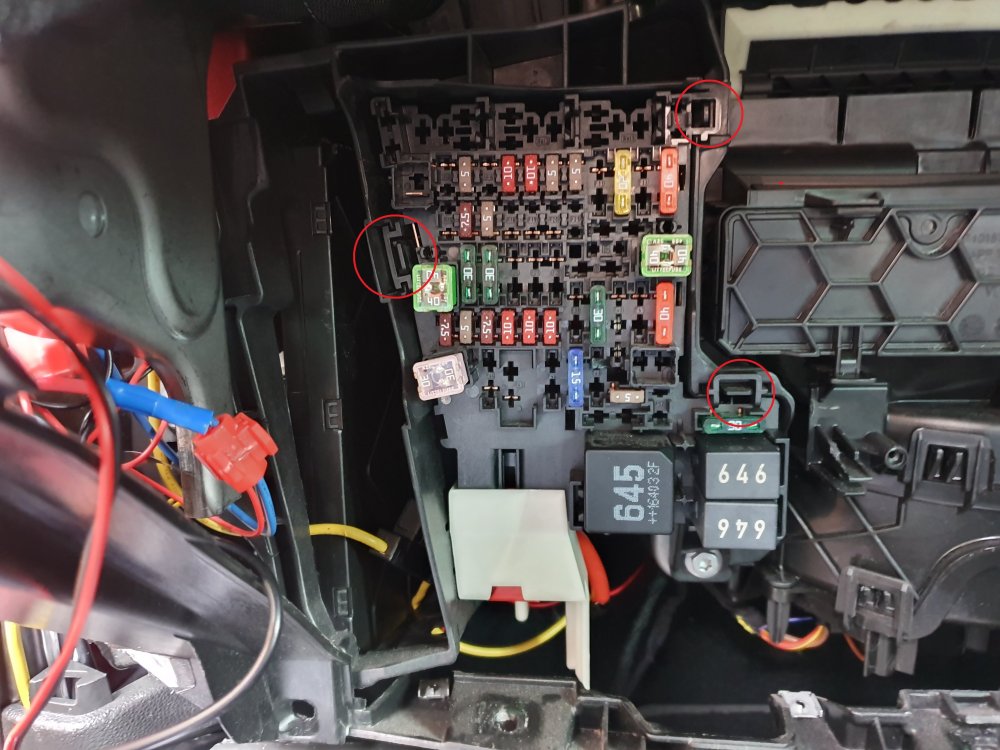
Has anyone successfully added a circuit to the Octavia 3 fusebox without disassembling the whole dashboard? That is to say, pushing cables with JT/JPT connectors in to the back of the fusebox, not using the add-a-circuit fuse taps. I've wired in my OEM reverse camera recently, it's the correct loom with a JPT connector for 12V so I'd like to connect up to fuse position #18, as it should. I've had a bit of a poke around, but I couldn't see a way to get the fusebox forward enough to release the purple locking strip, Some success stories would help give me motivation to return to it another day, rather than leaving a temporary bodge in place! I've shamelessly borrowed a couple of photos to demonstrate from our Cupra friends at: https://www.seatcupra.net/forums/threads/retrofit-heated-seats-a-complete-how-to.457156/ The Octavia has a crossmember passing straight over the large white shield/connector near the bottom of the box, but this looked to be integral to large parts of the dash.