


Othen
Members
-
Joined
-
Last visited
Everything posted by Othen
-
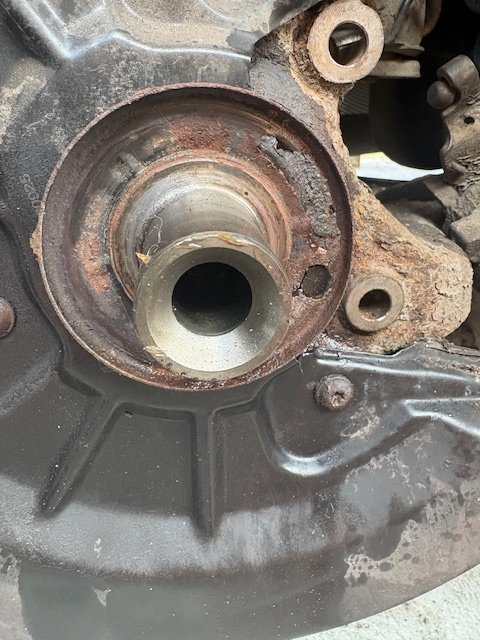
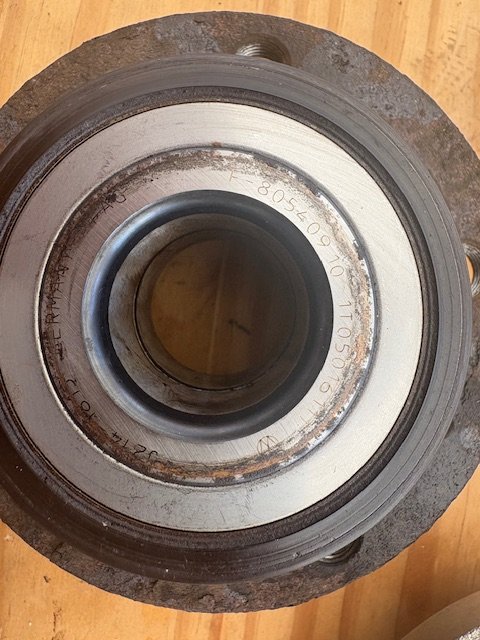
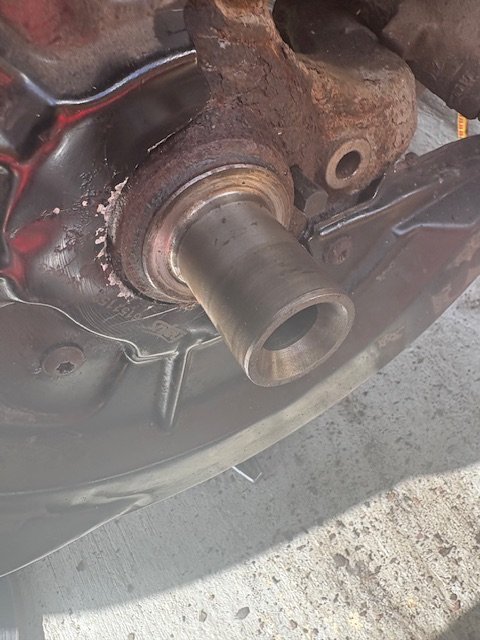
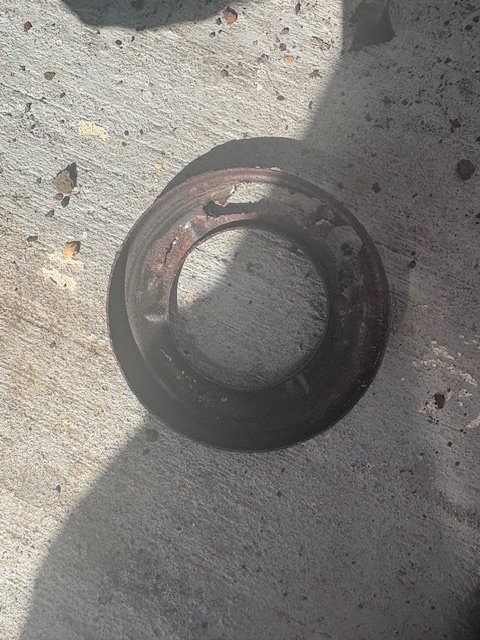
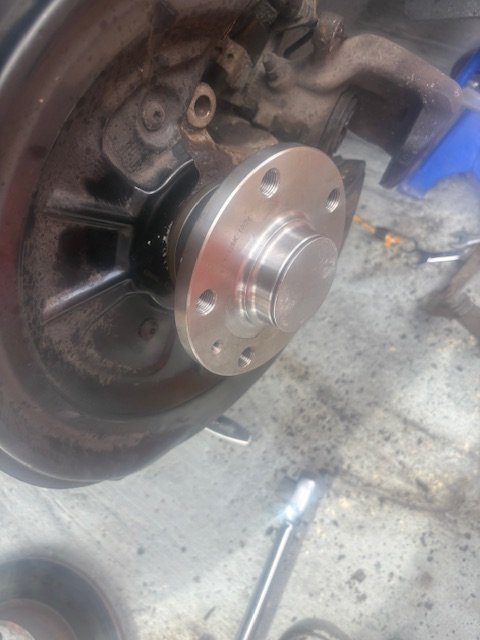
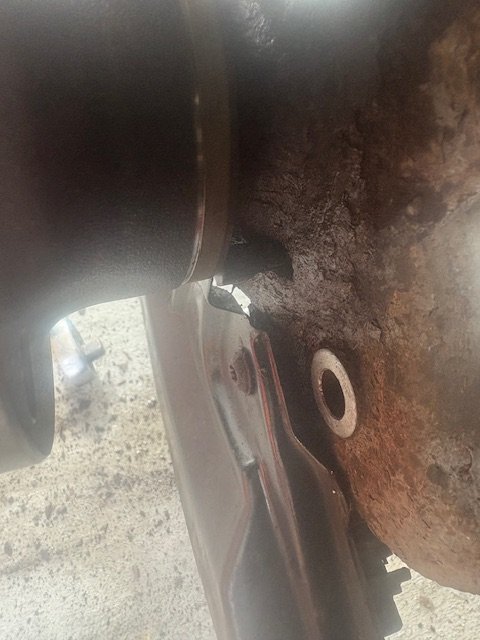
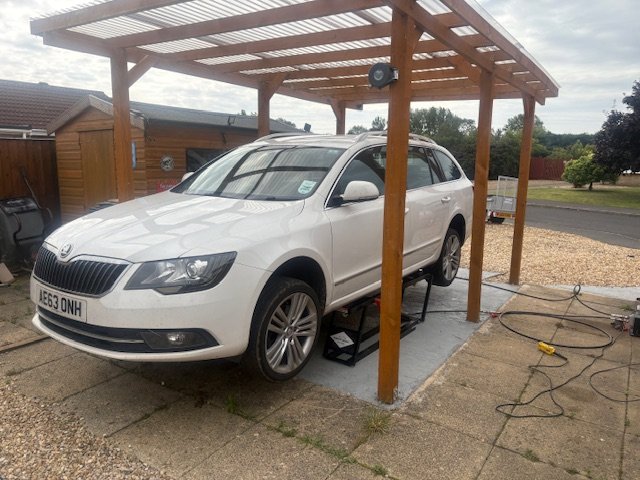
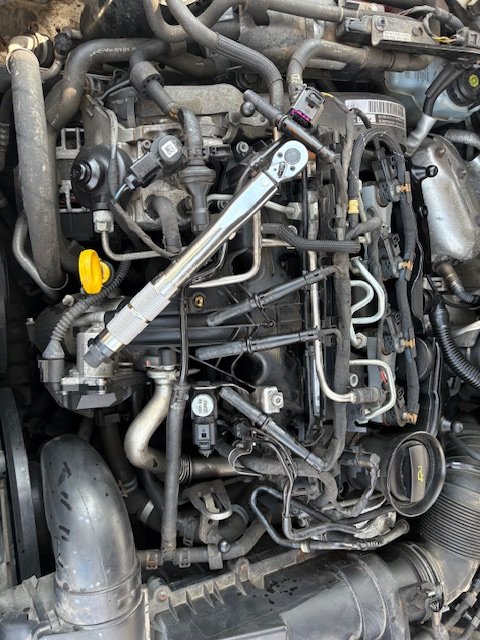
Following on from my last. There was one reoccurrence of the ABS and other warning lights coming on - as I was turning onto the M8 on my way home from Paisley. The lights cleared themselves after about a mile and I made it home (330 miles) with no further problem. I thought the issue must be with the OSR ABS ring, so this morning I got round to swapping the hub with the ring attached. I suppose it took me about an hour to get to this stage: … once the car was jacked and the wheel off there were only 6 bolts to undo - but some of them were a bit hard to access. First the calliper (13mm and 15mm open end spanners, then tied out of the way with a bungee). Then there was the calliper bracket - two #14 XZN bolts hidden away behind the inside of the brake and fiendishly hard to get at - also done up very tightly, after that remove the disc (a little Torx screw) and remove the cap to reveal the hub bolt. I thought it prudent to apply a bit of heat: 2 minutes from the electric heat gun, then the bolt came off easily enough with a #18 XZN bit and a big breaker bar. The hub then just dropped off to reveal the above. The magnetic ring didn’t look too bad: … so I suspected the issue may well have been that steel dust cover that was rotten to the core behind the ring. It had perforated in several places and rust was falling off in lumps - perhaps bits of rust were interfering with the magnets and causing the intermittent fault? I’d already bought a replacement hub, so I thought I might as well fit it rather than just clean up the dust cover. I noticed that the ABS ring stood about a millimetre more proud than the old one, so it wouldn’t fit with the rusty dust cover in place anyway - hence I knocked it off: …and everything fitted. I don’t think that dust cover was any great loss: I still rather suspect it was the culprit. The new hub slid straight on: The hub nut has to be done up mighty tight (180Mm plus 180 degrees - eeeek!). Clearance to the sensor seems just right: I suppose it took about another an hour to get everything buttoned up, so this wasn’t too hard a job. Hopefully that will be the intermittent problem sorted out. Alan
-
Now I know about it, I’ll give the two sensors a good spray with some WD40 once or twice per year. 😎
-
I used Carista to code the battery, it worked fine (that was the reason I bought it, but it has been useful for other things). The Autophix scanner that David6253 recommended above also claims to be capable of re-coding the battery, and he tells us that works. That is exactly the point of my question though: how good a scanner do I need? Having checked my Carista contract, I find that I have until January to decide what to do. Many thanks, Alan Addendum: I can see the Autophix 7610 is available on eBay for £57, which would be less than the renewal price for the Carista licence, with no annual recurring fee - so at first sight I’d probably go for that when the time comes.
-
My modern motorcar is a 2013 Superb diesel estate, Elegance model. I have lots of other cars and motorcycles, but they are all too old to need an OBD scanner. Nearly a year ago I purchased a Carista dongle with a fairly cheap first year subscription (I think it was £30 for both). It seems to work fine and I have used it to help maintain my Skoda to good effect, but the first year’s cheap subscription is nearly up (October I think) and the renewal would be £60. Whilst this is probably a reasonable price, I’d prefer to buy a scanner without an annual fee; also I feel Carista is rather more capable than I need to maintain one motorcar. I know very little about OBD scanners. I’ve spent an hour or so this morning reading reviews and comments, including in the BRISKODA forum; now I’m more confused than when I started. I’m guessing VCDS is VAG’s own software, and as such will be much more competent and expensive than I need. At the other end of the spectrum eBay and Amazon are full of hand held, plug-in scanners for a tenner or so. I’m guessing that something between is what I need - but I have no idea what that might be, so my question is: can someone point me in the right direction regarding OBD scanners? As I said in the above, I only need a scanner for my 2013 Skoda as my two ancient Volvos and 5 motorcycles are all too old to need a scanner. I don’t particularly need Bluetooth connectivity (although it has been quite useful with Carista) - a wired scanner would be perfectly fine. It might be useful to be able to update the scanner online - I’ve noticed some manufacturers offer this - and often free. It may well be that the answer is to stay with Carista and pay the yearly subscription fee, but if there was something similar I could buy for say £100 that didn’t need a subscription and might last some years I’d prefer that. Is anyone able to help with some advice? Alan
-
I had driven my Superb for a month and probably 1500 miles (a return trip to Paisley and two to Gatwick from Skegness) with no problems whatsoever, when whilst driving around a local car park the same set of warning lights returned a few days ago. The lights all cleared themselves by the time I got home (about a mile) and the fault could not be traced with Carista. My first thoughts were a poor connection at the only joint in the wire, the one close to the wheel sensor. I pulled that apart and gave it a spray with contact cleaner, and the outside of the joint with WD40. The warnings have not returned and again I cannot trace anything with Carista. Maybe that did it? I suppose this could just be a computer on a day with a ‘y’ in it - just a spurious fault that will never return? Otherwise the new sensor I fitted could be faulty, but that seems unlikely? Thirdly perhaps there might have been some dirt or debris around the sensor when I fitted it (it was a very tight fit), or finally it could be the ABS ring on the back of the hub starting to fail? I will have another long trip to take my son back to university in Glasgow this week, which will be a good test. I’m wondering whether I ought to have a new hub (or a pair, they aren’t expensive) ready to fit just in case the issue returns? Changing the hub looks easy enough - a few of those XZN fasteners that VAG likes, a bit of heat and some brute force. Alan
-
I can’t particularly help with the issues, but it might be worth starting a new thread with a catchy title - this thread probably won’t attract much interest now the issue is fixed. Alan
-
The good news is: I’ve waited for dusk and taken the Skoda for a spin; what a difference! Everything is back to the way Mr Skoda intended for less than £20. 😎
-
It is fixed!
-
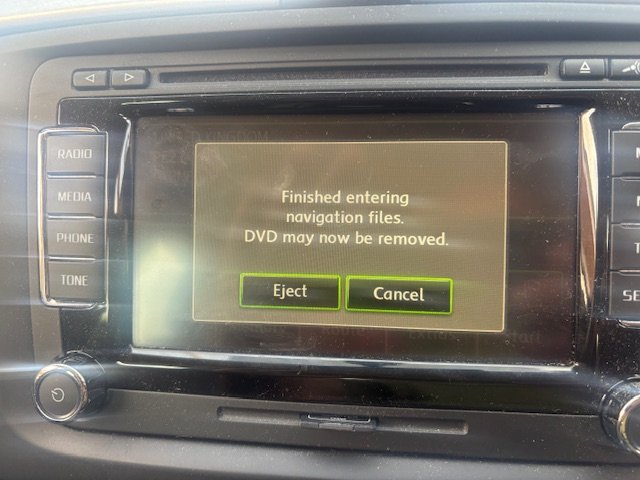
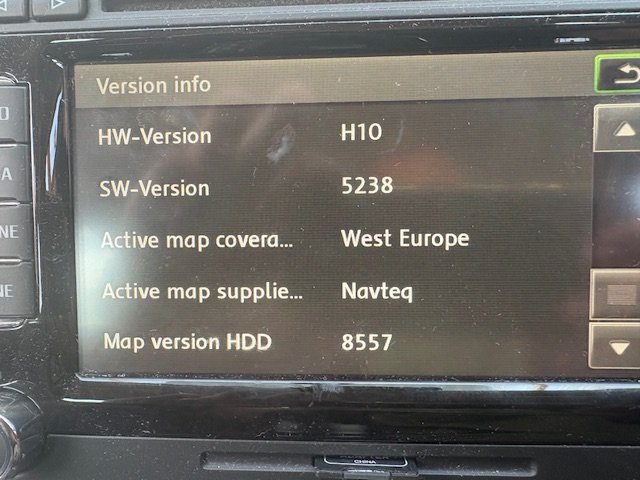
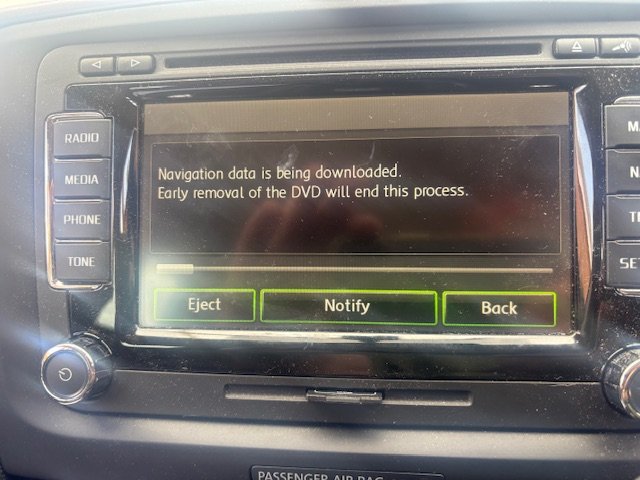
This will probably be the final post in this thread. After 55 minutes this message appeared telling me the process was done: Everything seems to have worked fine, the map version has changed from 8536 to 8557. I don’t know how much of an improvement in detail that will give me. This has been a good few days work on the Skoda, I’ve changed the glow plugs, found and (I hope) fixed an issue with the headlamp aim and changed the rear brake pads. That should be all that is required for a while. I really like my Superb diesel estate, it is such a practical motorcar, and so much less maintenance than my two old Volvos. 😎 Addendum: I have also received the Skoda’s road tax reminder in the mail this morning- just £35 for the year. It is (almost) a pleasure to pay it.
-
The postie delivered the v.17 map CD this morning. I understand this dates from 2021 and is the last update available for my Columbus unit. There aren’t any instructions with the CD, but it is pretty obvious. Turn on the car (no need to start the motor), insert the CD, press ‘continue’ a couple of times and eventually get to a screen asking whether the maps on the HD should be replaced, or run from the inserted CD. I chose to replace the maps… then wait an hour or so (which is what I’m doing this whilst typing this, and listening to Smooth Radio). There is a comfort screen, activated by touching the ‘eject’ button (this was about 5 minutes into the update): I’ll let you all know whether the process worked in about another 30 minutes. 😎
-
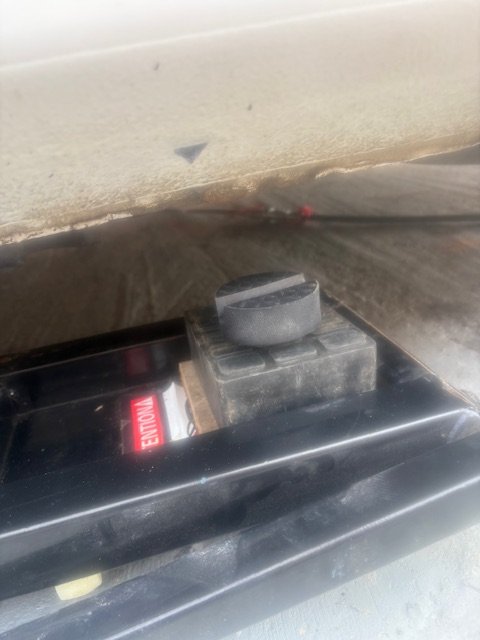
I’m pleased to report that the replacement headlamp level sensor and the map update CD both arrived with the postie this morning. I’d left the Skoda up on the ramps, so fitting the replacement sensor took just a few minutes. It is helpful to have a ratcheting ring spanner to do up the 10mm bolt at the top because there really isn’t much room. The 10mm nut at the bottom is much easier to access. So, wheel back on and the motorcar jacked down. These are the rubber pucks I mentioned the other day. They fit the ridges underneath the Skoda’s sills perfectly and ensure there is enough clearance so the Kwiklift doesn’t damage anything under the car. Everything looks okay. I’ve returned the headlamp adjusters to their original positions (I’d marked them with a white paint pen), but I’ll have to wait until it gets a bit dark this evening to see if the aim is right. Now on to the map update. 😎
-
I would tend to do the cheap and easy things first - so the ABS sensors are only a tenner each and are easy to fit. That probably won’t stop a scraping noise though, that still sounds like a brake pad or disc. These are free to diagnose and cheap to replace. Wheel bearings are easy enough to check yourself - so that would be a really good place to start.
-
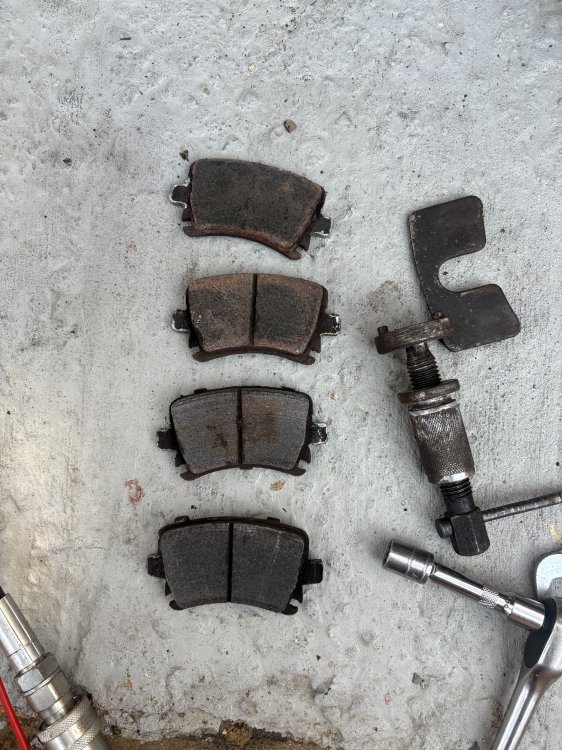
I did change the rear brake pads this afternoon- an easy job with the motorcar already up on the ramps. The old pads didn’t look too bad for 45,000 miles worth of wear: This was the third set of pads, so they are lasting pretty consistently (97,000 miles total for the first 2 sets). I might as well leave the motorcar up on the ramps until the headlamp level sensor arrives. 😎
-
This should only be a 10 minute job to fit, so I should have my bi-xenon headlamps working as Mr Skoda intended on Saturday. I’d adjusted both headlamps up ‘a little bit’ to compensate before I knew about that sensor - fortunately I’d marked the start point a white paint pen, so I can put them back to their original positions. It is nice to solve a problem (fingers crossed). 😎
-
Thank you. I had no idea those sensors existed until I saw a similar thread yesterday - this forum is such a useful resource, I might have gone round in circles looking for faults if I hadn’t been pointed in the right direction regarding the sensors. Alan
-
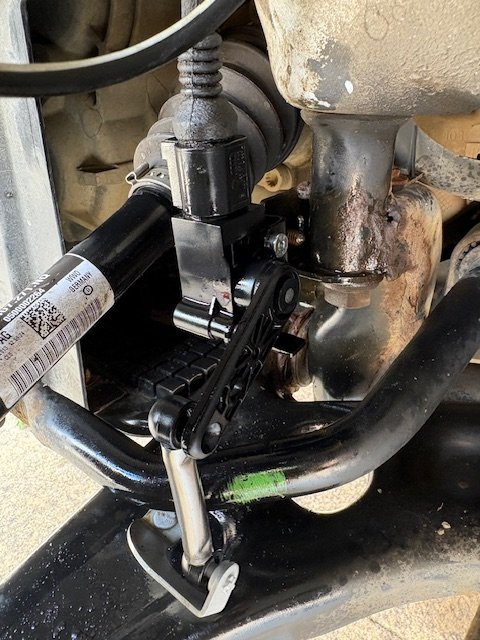
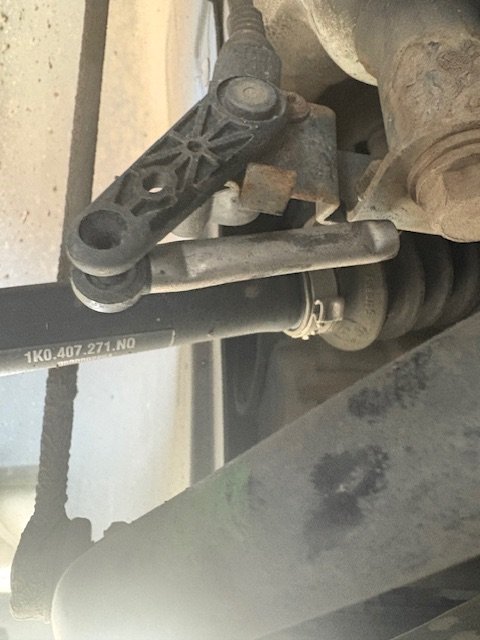
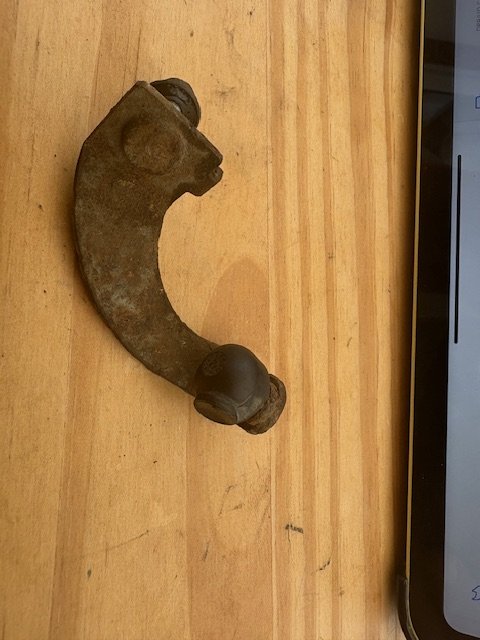
Having been put on the right path by Jimbo’s thread, I investigated the sensors. The Skoda was on the Kwiklift ramps anyway to change the rear brake pads (the Kwiklift just about fits - with some assistance from some rubber pucks I found on Amazon - I’ll post a photo once the motorcar is jacked down): The rear sensor looks fine, but as you may see from this photo, the shaft that attaches the front one has sheared through and through: I’ve removed the bottom bit from the motorcar as it it’s not doing anything, it looks like the ball joint seized leading to the shaft breaking. It looks to me like that probably happened quite a while ago. This looks like the right part, and only cost £20: Headlamp sensor Alan
-
Many thanks - you put me on the right path. I’ve just located the problem:

-
This is interesting. I wonder whether this is making my dipped beam lights point a bit lower than I remember previously? I’ll be putting the motorcar up on the Kwiklift tomorrow to change the rear brake pads so I’ll have a look. My motorcar is the Elegance model with bi-xenon lights. Alan
-
In view of the above, I’ve ordered a copy of the v.13 disk from a different company on the internet called latestsatnav.co.uk - it was a few pounds cheaper (£25) and the company did respond to an email I sent asking whether it was right for my motorcar. Indeed they asked me to send a photo of my unit displaying the software and map edition screen (as well as telling me how to activate that screen - press the SETUP button for more than 3 seconds). In the light of that I have somewhat more confidence that it isn’t a scam. The disk should be here in a couple of days (by RM first class) so I’ll report on whether it works when it arrives. Alan
-
Thank you for that. I did check with Carista this morning (I had to re-set a code after changing the glow plugs anyway), but it didn’t report any faults. I can’t see anything wrong, but what I have done is adjust both headlamps up ‘a little bit’ - I don’t have access to beam setter so I’ve just wound each of the adjusters up half a turn. I’ll see if that solves the issue the next opportunity I have to drive in the dark. If that doesn’t solve the problem I’ll start doing some reading on the internet, as you suggest. Many thanks. AO.
-
So this company is a scam? It is just as well I asked the question!
-
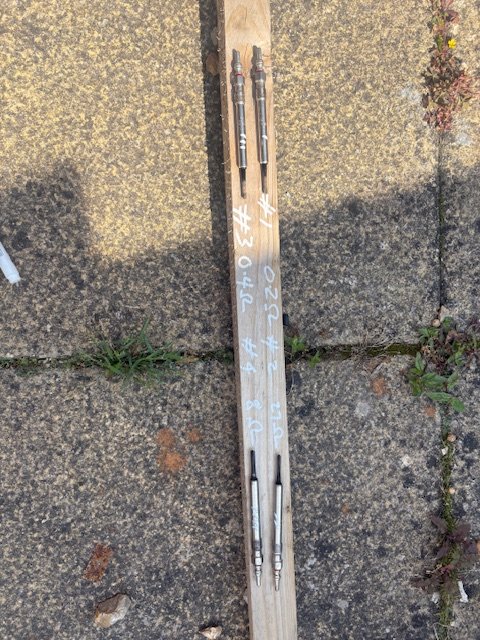
Whilst fixing an ABS wheel speed sensor a week or so ago, I noticed that Carista reported an issue with the glow plugs on cylinders #2 and #4. I hadn’t had any problems with starting, but then it is summer and I’d fitted a new battery last year, but I decided that for the small cost (£37.70 delivered) I’d fit new glow plugs. This was a fiddly rather than difficult job. First one needs to remove four T30 screws that hold down the fuel pipes that run over the glow plug wiring, then open the plastic conduit that carries that wiring with a flat blade screwdriver to get sufficient play in order to pull up the plug caps. I used a pair of long nosed pliers to gently pull up the plug caps as the wires look quite delicate. With the wiring lifted up there is just enough room to remove the plug caps - #4 is particularly fiddly. I vacuumed the cavities before undoing the glow plugs, then used a long 10mm socket to remove each in turn. Some of the threads were a bit squeaky, but a bit of WD40 spray helped. The new plugs were easy enough to re-fit and torque up to 18 Nm. Of the old glow plugs, the impedances of #2 and #4 were clearly out of tolerance; #1 and #3 were fine, but I changed them anyway. Carista reset the fault and everything is fine. Hopefully I won’t have to do that job again for another 95,000 miles.
-
I’ve had my 2013 Elegance diesel estate from new and it has been very good indeed, in particular I like the £35/year tax, over 50 MPG and excellent reliability. I’d recommend the diesel model from my experience. Alan
-
My apologies for yet another numpty question about my 2013 Elegance diesel estate - this is a bit of a modern motorcar for me (my others are 1963 and 1972 Volvos, which are much less sophisticated - I’m much better with 60s/70s vehicles). My Skoda has a ‘Navigation System Columbus’ which works perfectly, but the maps are a bit out of date. I have a vague recollection of it having version 16 installed some years ago. I’d like to update the maps as much as I can, but it would appear that this isn’t something still supported by Skoda. I’ve found this advertisement online that would seem to be right for my car: SatNaviShopSkoda Sat Nav Update Discs | Sat Nav DVD 2025SKODA Sat Nav Map Update Discs V17 for All SKODA RNS510/810 Navigation's. Get the latest 2024-2025 sat nav Disc for your SKODA Skoda Roomster, Octavia, Yeti, Superb from satnavishopThe unit looks just like the one in this picture, but before I order it I have a few questions: A. Does anyone have any experience of SatNaviShop - is it a reputable supplier? B. How do I know whether my unit is a RNS? The manual just says Columbus and doesn’t specify RNS? C. Is this a sensible thing to do? Alan
-
Thank you. I have Carista and the corresponding dongle - is that something that would be able to identify an issue? I’m not sure there is a fault as such - perhaps the headlamps just need adjusting, but I don’t know anything about bi-xenon lamps. Alan


