Jump to content

apmaman

Members
  • Posts

    1,223
  • Joined

  • Last visited

Profile Information

  • Gender
    Not Telling
  • Location
    Dundee Scotland

Car Info

  • Model
    Ford Mondeo tdci VW BEACH BUGGY!!! WOOO!

Recent Profile Visitors

3,195 profile views

apmaman's Achievements

Proficient

Proficient (10/17)

  • First Post
  • Collaborator
  • Posting Machine Rare
  • Week One Done
  • One Month Later

Recent Badges

149

Reputation

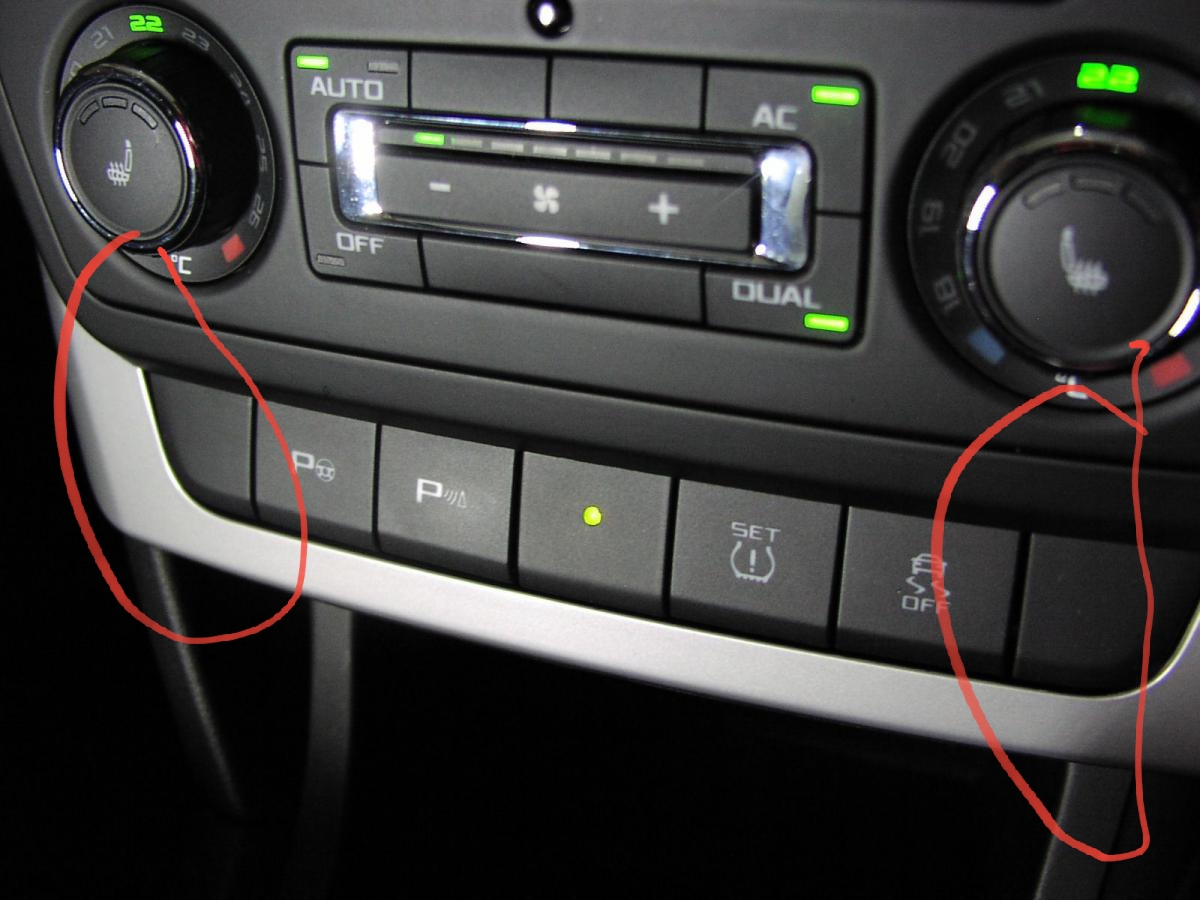
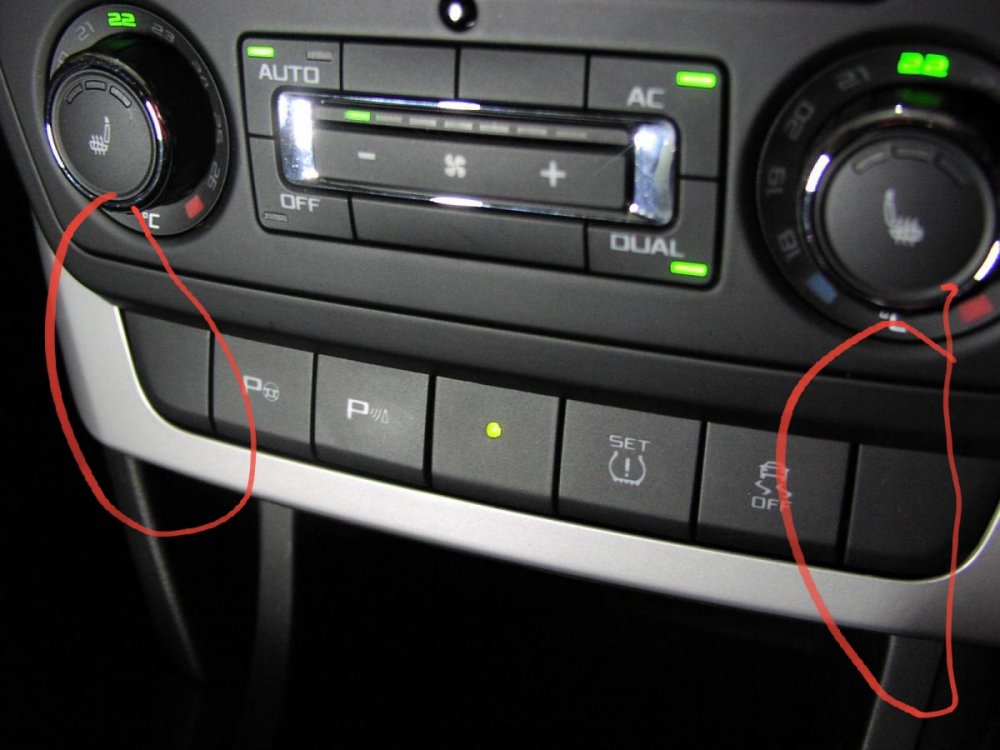
  1. Can the outer two buttons be removed? I want to wire a 3 position switch next to my other ones. As I have all the oem switches in place it looks like a great place to add another.
  2. Does anyone know the bolt size thread and length of the red circled hole? Dropped it and cant find it for the life of me.
  3. Hi. Looking to replace the rear reverse, indicator fogs for LED replacements. Either phillips or osram. Does the 2016 yeti throw up canbus light outs when using LEDs? Does anyone have a repuitable supplier of led bulbs? Autobeam have been great as well as powerbulbs but i have not used powerbulbs m series leds before....
  4. Well, its been a while! As of the last post it did get an MOT in Feburary, clean with no advisories! Huzza! I've been using it as much as I can in the good weather. Clocking up around 600 miles so far which is pretty awesome. Now, some things have gone wrong in that time which have been addressed as they've cropped up. Things like tracking was a nightmare because of bent rods and incorrect rod ends being used. The spot lamps have stopped working on the bumper, and little things like the lack of carpet is starting to annoy me slightly. Anywhooooo! It's been to a couple of shows; here's some pics! Cause thats what we all love. Pretty loud, straight pipe 90mm exits
  5. So, bit of an update. Well. Going from the disc brake conversion.... On the rear end the EMPI kit had a tiny little ickly flexy pipe which I wasn't a fan of at all. As pictured above, so I decided to replace the copper cable from the rear brake union split with some SS yellow coated flexy jobs on both sides. They look much better, and a lot more professional as well. The calipers got a lick of paint to Lumonious yellow/green and all went well. Installing them gave me a lot of brake pedal travel as the pressure and foot effort have changed now the drum brakes have all gone. I installed some Residual pressure valves (2psi) on the single rear outlet and two front outlets at the brake cylinder. This should allow the callipers to remain full of fluid and just at the point where they want to press on the pads. The pedal travel has reduced and is very firm. Its slightly firmer than before, but I see that as a good thing to be honest. They feel very progressive and will lock if slammed on, but if your firm and smooth they wont. Which for 60 year old technology and no abs I guess is alright. from then on I had some massive issues with the steering wheel float. To cut a very long swear filled story short I had excessive float on the steering wheel. It turns out the new steering wheel bearing inner part are either manufactured a ball hair out or my steering column is a ball hair thin.... either way the bearing wouldn't seat properly and allowed movement on the actual steering shaft. Bit of a head scratcher that one but got there in the end. No end float at all and I decided to replace the old mountney wheel with a new shinie one. Bling! With all the hassle to get the steering correct the indicator stalk looked a bit worse for wear. These are notoriously impossible to repair as one of the cables had came loose in mines. I decided not to bother trying to fix it and just replaced the unit with a new but high quality repro part. This gave me another problem. The repro indicator arm has a much more acute angle than the original did, so the stalk arm would interfere with your hands at the 10 & 2 positions, so off to get a 20mm spacer made to get the wheel slightly closer to the driver. Not bad as theres good room now, even with thick gloves theres about 5mm of space. Other things I've done is add more of the tinware that was missing from the engine to make it look a bit smarter. Two lower cylinder tins were missing as well as the fan shroud, which I have modified to have a black grill on. As the fan sucks air inwards I had fears that leaves or small stones kicked up may be sucked into the fan. As the fan is made from magnesium I didn't want it getting damaged. Good times! With that the car should be MOT ready now, I believe it should pass as these issues were the reasons for the fail last year. With it being my honours year at Uni this took a big back seat, but now ive graduated and the job hunt is underway I have some spare time to get it all sorted. Stuff left to do is purely cosmetic, like put in a carpet, a centre console for an arm rest, some new seats, repaint the wheels at some stage and I want to replace the exhaust with the Varex remote adjustable unit that I had on my mk2 fabia. It's been sitting under a table in the garage unloved, and I think it would be a unique addition to the car....
  6. Well I got some free time today to work on the rear brakes. By spare time, I mean not doing my uni work Made a deal with myself to do one side at a time, once a week. As not to distract me completely and to stop me from getting annoyed I wasn't making progress. Not much in the ways of progression pics, but I have a before and after! I noticed that my rear brakes were absolutely drowned in oil. The shoes were soaked in the stuff, so I guess I have an bearing seal leak. As the beetle uses the gearbox oil to lube the rear bearings its a common problem for them to leak from here. Anyway after lots of too'ing and fro'ing I got the discs and calipers mounted up. Replaced the paper gaskets on the seal. Will check in the morning to see if any oil has appeared but im hopeful it wont... gotta say the castle nuts were on super tight. My 1000w clark impact gun of death struggled to get it off. Needed a good 5 second trigger hold to get the nut loose. Usually the gun just looks at bolts and they come out. You can see on the pic of the caliper that they gave me a tiny little flexy brake pipe to fit onto the hard line. I'm not keen on this at all, so I have ordered a long flexy line to replace the hard line and this little piece of poop. The hard line is connected to a bulkhead joint, so it wont be too long but will look alot more professional. I just have to put the handbrake cables in (and shorten them a touch) and this side is done! Old drum set up New caliper, oohhhahhh
  7. Eeeek! Rear discs :D Anyone want to stick these on my buggy?
  8. Meh thought so too but whats done is done. Still waiting for the rear disc brake it, been told it can be up to 3 weeks wait. Not to bad for something thats listed as in stock...... Got my money back and I'll just wait it out and see what deals come up. Better me having my money than some company!
  9. Little bit of an update... Ok, took the buggy in for an MOT and it failed on poor rear brakes, loose wheel bearing and steering wheel play. I will start with the steering wheel play.. the play in the wheel was only a small amount, maybe 2mm but I decided to swap out the bearing after recommendations here. (Thanks guys) With the steering wheel and indicator switch off I was left with only the bearing, and a rather messy steering column shaft. Looks like whoever put the bearing in hated the car as much as I do right now Anyway lots of swearing later it was out and replaced. this time with the spring, locating washer and C-clip. A few more swear words and hammer love it was in and all sorted. However... The old bearing had a hole in the outer race where my indicator stalk would be secured to with the little hole for the bolt/screw. I shall have to find another way of securing the indicator stalk to the steering column... Yay....but there's no more movement or play in the wheel so I cant complain too much (but I will anyway, im scottish) Now.. The brakes! For a while I have been umming and awwing at getting a full conversion to discs. Not just to look cool but because drums are a pain with the constant adjustment. Well, it was to look cool mostly but hey ho! I ordered an EMPI kit from coolair and it arrived all nice an secure. The delivery boy wasn't impressed with how much the kit weights! Jeezo! hefty big of kit but comes with everything you need for an installation including bearings and new flexy lines. Installation was alright. I'm no pro mechanic but the instructions are good. A few things got me confused about removing spacers which weren't there. Perhaps the kit gets updated every so often and the instructions dont.... Anyway all good. My only problem was the rear of the discs werent machined deep enough and would just catch on the lower (I think king pin) housing. I'm sure if I let it they would have worn a groove out but the noise was horrible. So a few seconds with a dremel on the lower part of the pic and it was fine. Just 2 seconds was enough! Re-painted the part and installed the disc on. The rest went on great with no problems and the wheels are back on... The rear disc kit i ordered from a supplier who shall remain nameless now, but have a good reputation, have let me down big time. The kit was advertised in stock and money taken... A week went past and no news about delivery so a phone call later and my items, which are still listed as in stock now, were "missed" from an order from the states to come in. So I will have to wait for the next order to come in. Very disappointed and annoyed but the kit is a higher quality than the empi so I hope its worth the wait..... Also a big word of advice when it comes to residual pressure valves... Standard beetle threads on the brake pipes are m10x1 which might be of help. The EMPI kit pressure valves are not threaded to this, they are some weird and wonderful thread... I would avoid these and get other ones which are threaded for m10x1. ebay has a few of them but email just to be sure! Wish I did that before hand but oh well! Little bit of grinding was done under here.... I like the silver black silver look ;-)up
  10. Looking at them fitted they look a bit wee, should of probably went for 255 60 as they'd be a bit meater but oh well! I know how much space i have to play with now. MOT at the weekend hopefully.
  11. Size comparison of old and new. If anyone knows someone with a big 4x4... got a pair going :P :P :P Essentially 255/75/15 to 235/60/15.
  12. The coils are off. when they came out the bushings disintegrated so probably not re-usable. the boge replacement ones dont have any springs in them, just a standard oil filled shock absorber. It seems that I can tape some wooden blocks onto the bump stops at the rear, pushing the shocks up slightly to extend them until I either re-do the splines (which I didnt want to do but looks like I will have to) or get smaller tyres. wont have much in the way of rear suspension apart from the big tyres taking the load. Lowering the tyre pressure slightly can help. the wooden block method can let me get about, especially if I can find someone who can do the adjustment for me. A lot easier to get there under its own steam. Even to a tyre fitter to check out new tyre sizes to prevent scrubbage. I had looked into a body lift kit, but the roll bar would cause a lot of headache as lifting the body would rise the roll bar and one of its securing points is through the floor, so thats out as well. 10mm gap with no weight in the car... You can see the lip I was thinking about cutting but im against it. Add in a full tank of fuel (45kg) me (80kg) and another passanger (80kg) then its easy to see its not gonna be fun! The stance now is perfect compared to before.
  13. I think I have a water float as well.... Do you need cpr doll? So, turns out the suspension has worked a treat, cambers all fine and normal. Just a shame that its so soft now that the big 31x10.50' BFG tyres are now scraping the sides of the fibreglass body! WHEN WILL IT END! I guess thats why it had the coil overs on in the first place. They were so stiff the car weight couldnt compress them, and give lots of room for the tyres clearance. Just effected the camber, and made the handeling terrible. So, now that its on standard beetle shocks which are much softer the ride height as lowered just enough to allow the buggy to roll around all fine and well, but soon as I get in and drive about... SCRAPPPEEEEEE As its been in my garage with no MOT I've not been able to drive it to find out until I went for a little spin in the morning before going to the MOT station... Guh..... Might be able to get away with going from 31x10.50R15 down to 30x9.50R15. This will make the tyres a inch thinner and a diameter of an inch less as well. Slight increase in acceleration but decrease in top speed.... Not that I would be overly worried about that. Can't slip my fingers through the gap.
  14. and they said buying this thing was a bad idea, Who's laughing now!! Muahaha! Beach themed party this weekend
×
×
  • Create New...

Important Information

Welcome to BRISKODA. Please note the following important links Terms of Use. We have a comprehensive Privacy Policy. We have placed cookies on your device to help make this website better. You can adjust your cookie settings, otherwise we'll assume you're okay to continue.