


DrPinball
-
Posts
65 -
Joined
-
Last visited
Content Type
Profiles
Forums
Gallery
Shop
Events
Downloads
Posts posted by DrPinball
-
-
Worse, American - Apples inability still not be able to cut and paste correctly.
-
This may help:-
http://www.oemretrofits.co.uk/manuals/RNS310-RNS315-Manual.pdf
Reverting to factory settings
Resetting to the original conditions deletes all pre- vious inputs, destinations and settings.
• IntheSystemsetupmenu,pressthe Factorysettings functionbutton.
• In the following confirmation prompt, press Yes inordertoresetthedevicetoitsoriginalcon-
dition.
-
- Popular Post
- Popular Post
Love Hettie, two and a half years in she's still hands down the happiest drive I've owned. I used to do upwards of 50,000 miles a year and I had a new car every 18 months on the company. Vauxhalls, Fords, an Audi, a Mazda (excellent), a Mitsubushi (also great), a VW, a Seat and some Citroens so like many here I think I've had enough experience of various cars to make a decent judgement. Where we are it can be easy driving or plain muddy, last Christmas after a Carol service at a local stately home Hettie ( with ESP etc off) toddled out of a field full of stuck cars. Then we threw a rope to them and helped tow them out, I went home feeling stupidly happy with the thanks of a load of folk ringing in my ears. The other week I picked up a pinball table for repair, 1900mm long in parts the owner snorted and said "you'll never get that in there". As I drove away with the lid shut having spent ten minutes answering his Yeti questions I was wearing 'The Yeti Smile' again.........best car I've owned.
-
 5
5
-
Had the same issue with Hetties pedal, silicon did not really work so I fixed it permanently by slipping a small piece of packing (in this case a window space wedge) under the pedals base plate. Yes I know that it's a bodge but it's been a fix for over a year now and it's simple, more importantly with a trim its also invisible too.
-
Hetti was born in June 2013, she's a 1.4 TSI, other than some idiot backing into the rear door she's been a cracking car to date.
Happy to hear that it worked for you DrPinball. What model year is your Yeti?
I
-
Just want to say many thanks for this one folks. I fed my 1.4 TSI VCDS output into the generator mentioned above: http://carsareweapons.com/golfR.html and it was immediately accepted and works like a charm.
Chatting to a friend who is a VAG mechanic he pointed out that on the other VAG cars which come with this feature enabled even when the ESP is put into the 'off' state it is not truly disabled rather it just makes the stability system far less sensitive.....although I probably won't test this myself it may be good for others to know :-)
-
1
-
-
Ironic after all our chat it appears that I've bought it from you after my original camera was smashed in tesco's car park - thanks for the quick despatch it only took 5 minutes to pop out the boot release and swap the camera over ;-)
-
The most important thing is the Amundsen+ needs an RGB Low line (fixed graphic lines) camera, Check the size by measuring your boot lamp fittings holes, it's easy to lever out the lamps with a simple screwdriver protected by some felt (or the paint gets scratched). I went with the kit as I struggled to find details Ion the connection - until *after* I had it fitted here they are - good luck finding the plug too :-)

This article is great: http://www.sciroccocentral.co.uk/roccopedia/index.php?title=How_To_Retro_Fit_The_Reversing_Camera download the pdf at the end, although its in German it's very helpful.
-
Just reviving this thread...
I notice that a reversing camera built into the Yeti boot catch is now an option. Does anyone know if the latch cut-out is the same size on the FL, and if the FL Yeti boot camera is likely to fit?
I'm asking now as I'm considering retrofitting the OEM DAB roof aerial, and if I'm going to drop the roof lining to run cables I'd rather only do it once
Pretty sure they are different - I looked for ever to try and find one that would fit Hetty, if you search eBay there are several adverts that lay out the full dimensions of the latches - I spent an evening with the measurements of mine and had no luck so fixed it as shown above - good luck running through the head lining, I took the sill cover route and followed the loom.
By the way it the one mod I'm glad I did, it makes reversing an absolute doddle. The one thing I wish that I had not bought was the park assist - Wifezilla has never managed to do anything but loose her rag with it, still I suppose in that way it has my back :-)
-
Hi All, as promised a quick update. It really is a case of 'so far so good' with a couple of caveats, late last year I left Hetty in the less than capable hands of Purple Parking at Heathrow while I worked abroad off a few days. On my return the rear passenger door was stoved in, a massive shallow dent about .75m square, effectively from the window to the trim. I will not bore you with their explanation but they eventually coughed up for a new door. Well here's the odd bit I asked my local body shop if I could rip the trim from the old door, I wanted to see how well it was attached (at least the thump had not dislodged it). I tore it off with a bit of heaving and there is no doubt that once started it could be peeled. Fascinated by my idiot effort the lads in the body shop wanted to chat about the removal and we ended up using the old door as a test piece.
The result was that polyolefin primer is definitely the way to go, although Tiger Seal forms a good bond on plastic, if you prep the job with polyolefin as a primer (rough plastic with emery, spray on, leave for 20 minutes) and then Use Tiger Seal it forms a ridiculously strong bond. There is no doubt now in my mind that this is the way to go for anyone considering doing this retro fit and there is an old dented door covered in odd bits of plastic to prove it too.
One final point, as we had a door with a perfect trim shaped lump of glue stuck on it from where the trim had been fixed and the piece of trim in question we did one more experiment to see if it was possible yo reattach trim without cleaning off the old glue, this may save anyone who has trim coming off a lot of cleaning up. We treated the trim with polyolefin primer, let it dry and then liberally brushed the old glue on the door with Locktite 406 superglue and stuck it back on, it's not cheap but by heck does it make for a simple job. As we had the door lying on the floor it made the job easier as all we did was spread the very thin and runny 406 over the existing glue and offer the trim up to the job. Even though the trim was bent by our earlier clumsy removal two of us easily held it on and happily slid it into place, thirty seconds later it was going nowhere. In fact after a day it was impossible to pull off, so if you do have trims and lose one it's an easy fix to remember, especially as the trim pieces are available to order separately.
Happily the rest of the trims are stubbornly still in place despite the wet weather and 10k of driving around Norfolk :-)
-
2
-
-
I connected the blue wire to the rear left reversing light cluster an easy job once you manage yo get the lights out. The red wire goes to the fuse box to a switched ignition fuse on the fused side, again very easy with a quick crimp connector once the box is taken out. There are two earth points under the carpet on the will by the accelerator, both have other things connected to them and the good news is they are held on a thread from the chassis by a nut. All you need to do is crimp a loop connector to the black and pop it under the nut and tighten.
The good news is you need to take most of the panels off to run the video wire to the head so this becomes all very simple then, the hard parts of the jobs are teasing off all the panels I took a lot of pictures so I remembered the order and fit. Running the wire into the boot on the Yeti this is a pain and needs a flexible pull wire and patience. Cloth taping everything to stop rattles and of course making sure you can reprogram the head and everything works before you put the panels back.
My advice is to check it all works in your car by popping the camera wire into the head and then running a temporary live and neutral yo the harness connections to make sure its all good before you start.
Good luck!
-
Any pics of all the mods?
What would you like to see? Let me know and I'll snap it
-
Have followed this thread with a lot of interest, it is a very very good thread.All your VCDS work done on Heti must have your head "buzzin", well done. I have taken taken a lot of interest in your interpretation on how to fit the Wheel-arch covers. What seems to be a fairly simple job on paper seems to be a nightmare for a lot of Yeti owners, as previous threads on the forum seem to justify.You have certainly researched the procedure of how to do it properly.
I must say that I agree with Jeep as to the type of product to use to glue the plastic parts to the bodywork, I do think your use of clamps and clips is a very good idea and had crossed my mind to use the same.Please post on how they stand up to rigors of everyday use and the immenent Winter weather. I will attempt to do this project next year when the weather gets a little bit warmer and dryer as like you point out this is so important to helping adhesion. keep up the good work!!!!
Tony
Will do Tony!
-
Thanks Ibwill keep a carefully eye on them, as I said above I did do one wing all on its own well in advance of the others. I guess the real test is time and temperature variation, the twin enemy of even good bonds. For good or bad I'll keep updating so folk can learn from our experiences.
The first time round I used the expensive Henkel Elch Pro adhesive that Skoda recommend, this is also polyurethane adhesive and little bottle of polyolefin primer is part of the kit. I have to except that my failure with it was not using the primer properly or generously enough. I thought I had done a good job until ten days after fixing it and the car went in for service and was put through the dealers carwash. When I got it back I could see a slight gap on a couple of pieces of trim, and found that they were all really easy to 'peel off' leaving a perfect impression of the trim marking behind.
The adhesive took many hours to remove from the car. I had carefully degreased trims and car also rubbing inside of trim with coarse emery cloth. There are many varieties of plastic, but it would seem that polypropylene is one you need to take extra care with being a fairly 'soft' plastic. The Czech Skoda site states that the trims are made of polypropylene.
-
Interesting, I take it your first adhesion failed? If so what adhesive did you use then and did you scarify the trims first? So far despite the recent heat and several car washes mine seem fine but I did decrease both the car and trims pretty thoroughly.
I did a test on the second time round of fixing my trims. Using one of the trims I stuck 4 x clean and degreased 2p pieces to the inside of trims. One with Tiger Seal and no polyolefin primer on the polypropylene trim. One with Tiger Seal and primer. One with Speedbond and no primer. One with Speedbond and primer. All except the Tiger Seal without primer had bonded well after being left for three days. Tiger Seal is a polyurethane adhesive. Masterseal Speedbond is a MS polymer adhesive and does not need a primer. So beware it's a hell of a job to do twice. I should add that in the end I used Masterseal Speedbond along with the Masterseal polyolefin clear primer, belt and braces the second time round.
-
She looks very smart! I hope you find that all the worries about bonding prove to be unfounded
I did try to source recommended glue but at £55 for three tubes and the bonding agent I thought the cost rather prohibitive. I have used Tiger Seal to bond the boot protector and the kick plates and they are both rock solid. However to be sure I called Upol who make it and had a chat with them and they assured me that Tiger Seal was designed for not only sealing but also panel and trim bonding in automotive uses.
So, fingers crossed!
-
Hi, I though that I would post my experience of fitting the arch extensions to my Yeti here in case it proves a help to anyone, it's part of Hetty's project journal that can be found here: http://www.briskoda.net/forums/topic/279490-happy-hetty-the-fen-yeti/
Happy to help anyone else thinking of attacking their SM with glue and a mad gleam in their eye....
-
....and here she is in all her glory
-
Oh well after picking up a couple of wing dents thanks to the local car park I decided to fit the wheel arch set.
I sourced a genuine set for £75 off of eBay - rather a bargain given the usual cost is more than £200 plus glue and fitting. Speaking of glue I was horrified to find our that the recommended glue was over £10, so I used the ever trusty Tiger Seal (£7) which is designed to remain permanently flexible when dry and is used for mounting body panels and sealing joints.
Just to complicate the issue as Hetty has parking assist I had to drill out holes in the front trims after several experiments to make sure the sensors would still do their job. I settles on 23mm hole saw cuts with a slope made of Tiger Seal between the edge of the arch and the sensor. After I had dome I had intended to paint the sensors black but the family have decided that leaving them silver is the way to go. Time will tell if I agree.....
If you are thinking of going down this route then I offer the following observations (which I wish I had had when I started:-
- It's not that hard a job, but it does need preparation, get all the materials including a good degreaser (I used a can of IPA)
- Don't rush, the glue I used dries slowly so I actually did a wing a night, had the neibours in stitches but that's the price you pay for living in East Anglia
- If you have no garage to work in wait for a good spell of warm dry weather, yo uwant things to stay between 15-30C really
- Wash the arches thoroughly inside and out
- Rough up the inside of the trim 15mm around the edges with coarse sandpaper
- Start at the back, the pieces are smaller, easier to fit and simple to clamp
- Speaking of clamps you only get 4 bulldog clips with the arches - I used 16 'borrowed' from work and some of those larger spring clamps you can pick up from the pound shop.
- Get some strong double sided tape, make a pad by folding it four times and put three to seven pieces in the middle of each tirm depending on their size - this make fitting the front so much easier.
- Clean the area where the tirm is to go with degreaser
- Add a 5mm bead of tiger seal around the edge about 7.5mm in.
- Fit in place, every piece has a lip of some sort that makes lining up quite easy, take your time and push down until the double sided tape grips.
- For the back two piece you can use clamps at the bottom and I used gaffer tape at the top, at the front you cannot use the clips so run the tape from the inside of the arch (that's why you cleaned it) over the trim and onto the wing)
- Clean up any glue around the edges as you apply the tape, the IPA worked a treat with Tiger Seal for this.
- Leave the car overnight, for as long as you can prior to CAREFULLY removing the tape, there's no point rushing this part and tearing off the trims or the rear wheel arch stone chip films (yes you glue over these)
- Don't go over 60 for 24 hours and no car washes for at least 2/3 days
That's it - good luck an dI hope this is a help.
-
I compared dimensions and they were very similar, but unfortunately only outside dimensions. Light from Golf is bigger and I had to cut out plastic a little bit. I will also need to use silicon as seal around light.
That's not too bad, better to trim the light than the car :-)
-
What about such set?:
In my Fabia I have license plate lamp without screws. If size is the same as in Golf VI then it would look much better than camera mounted somewhere by screws...
My previous post highlighted by 007lookalike covers this - the product you linked has dimensions that you can compare to your own car, you can remove the newer Yeti number plate lights by simply springing them off with a trim tool or screwdriver blade protected by felt. Unfortunately I think you will find that the item does not fit, additionally it's fixings are different and would need a creative solution. Finally there is no need to drill any holes in the boot, the image posted above shows my mounting has no holes at all, I shaved the back of the bracket by 3mm put a little soft tape around the edges and simply trapped it under the flange of the rear handle at the back as shown in the image above - I cut a notch cut in the boot handle plastic for the camera cable but not the rubber cover which simply stretches over the small indentation the wire made. The whole assembly could be removed in under 5mins with access to the boot if it ever needs replacing.
-
Hi, I looked at the camera you've shown when I was planning my RVC fit (http://www.briskoda.net/forums/topic/279218-reversing-camera-on-amundsen-plus/) it will not fit the yeti without cutting a larger hole than the existing boot release. The fitting I used will also work with a Columbus so I hope the way I ended up fitting a camera (after writing to all those selling different fittings boot release and number plate mount and finding that none would fit correctly).
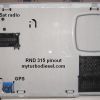
One other point that may help, the graphics shown on the screen are generated in the RGB camera, not in the head unit, in the case of my camera you can choose to have the lines on and off. I believe that these are known as 'low line' fittings, the graphics do not move. The one shown above is a 'high line' fitting where the graphics are generated in the head unit and are tied into the steering so the lines curve as you turn the steering. The Amundsen+ (RNS 315) definitely does not support this not sure about the Columbus (RNS 510) but it will definitely work in low line.
Mark
-
Added the missing fuse chart to the internal fuse door and modified Great Yeti's Fuse/Bulbs/Tyre infor sheet - see here
-
Thanks Tony, now modified for the 1.4TSI manual in elegance spec:-


Park Assist or Rear Camera
in Skoda Yeti
Posted · Edited by DrPinball
I never use the park assist on Hetty, by the time it's engaged I have already parked using the Parking sensors and the rear view camera I fitted. The PA was bought for She Who Must Be Obeyed, who has never used it despite insisting on the option (reason: too fiddly) I have used the PA when the space is really tight and there is is time to crawl along with it engaged. All in all for our next Yeti we are going to just go with the parking sensors and rear view camera.