



MrRedSquirrel
Finding my way
-
Joined
-
Last visited
-
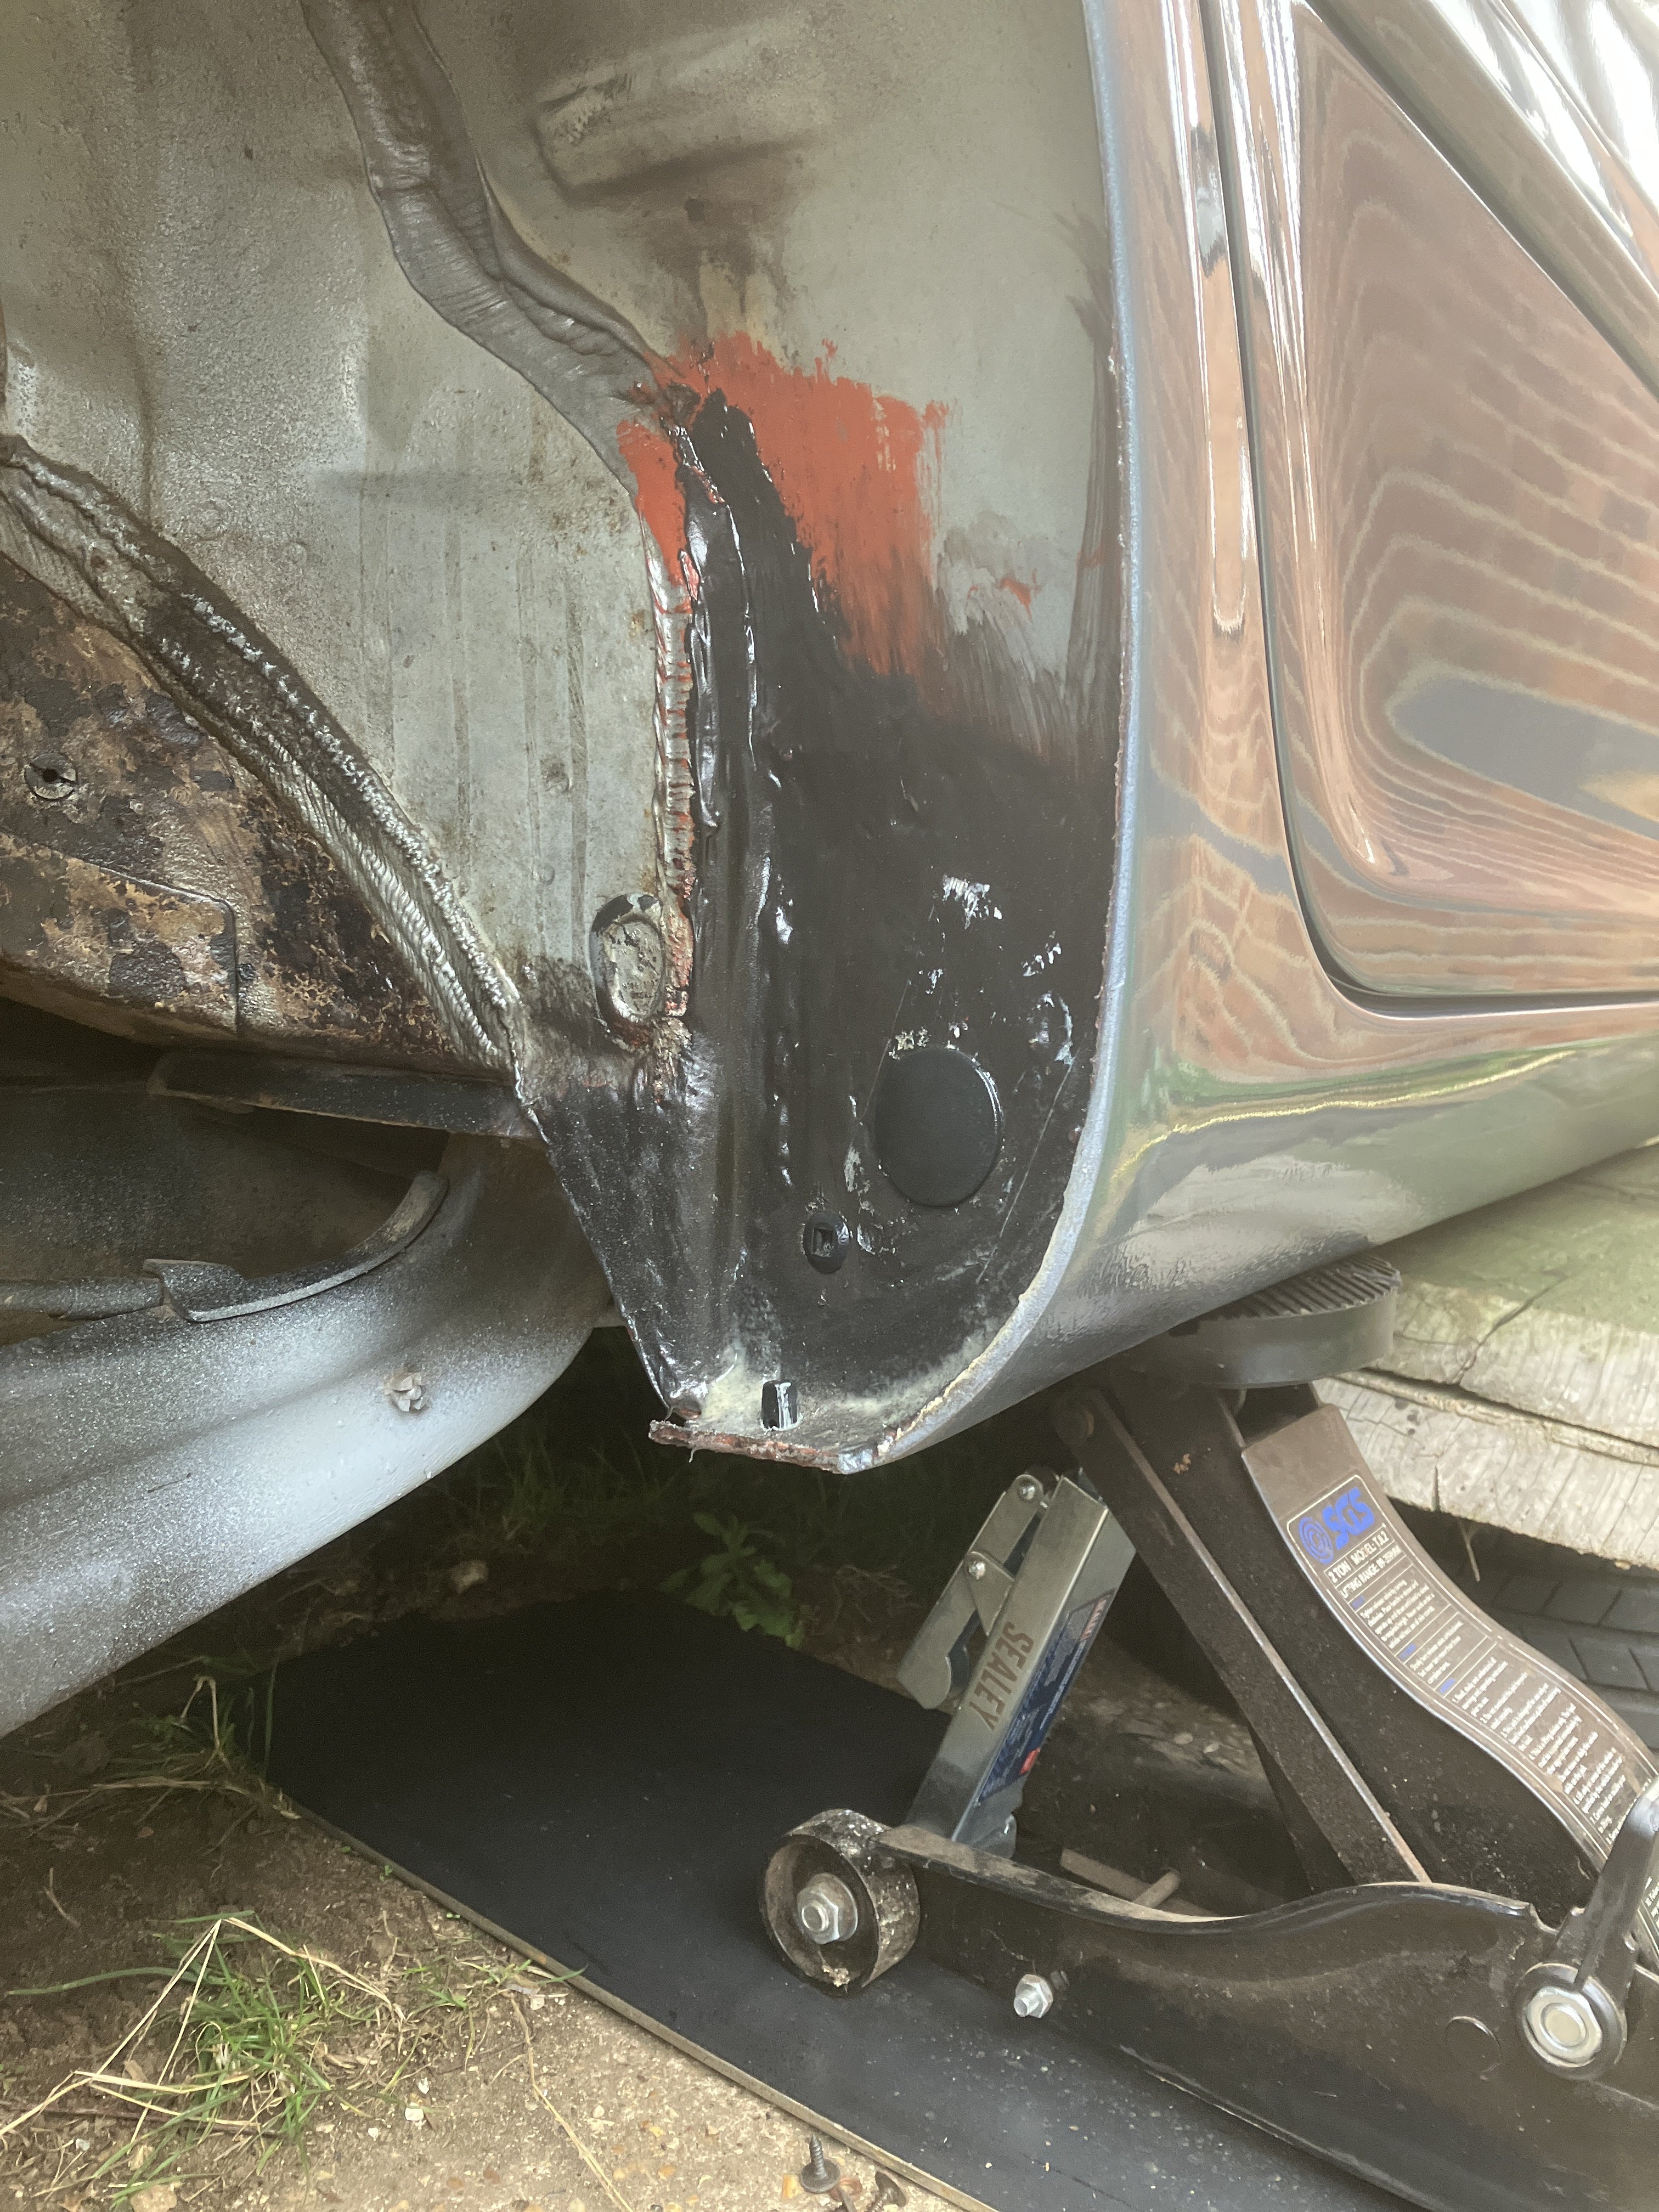
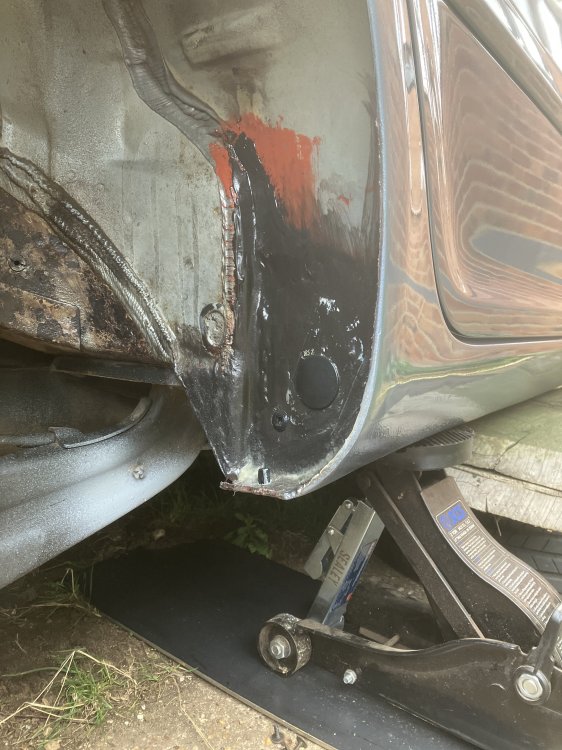
Note also the support for the trolley jack arm. It means you don't need a jack stand as well.
-
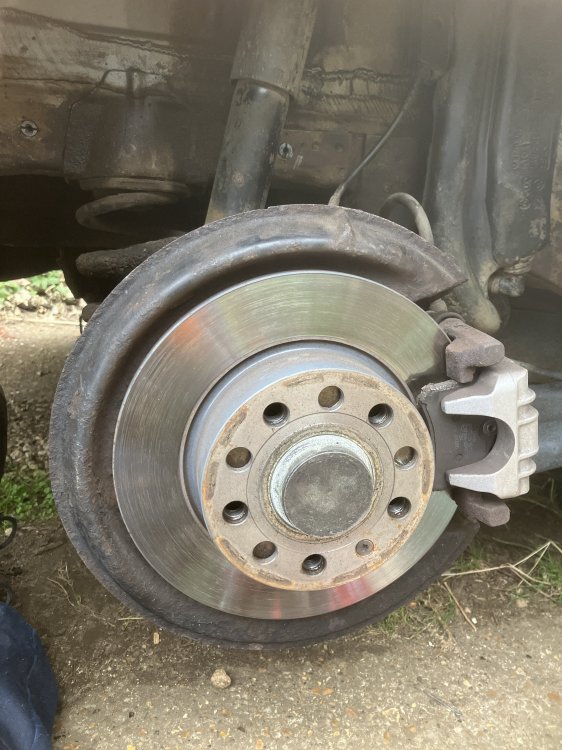
At last, got it back from the welding and paintwork. I've looked at the offside so far,brake backing plate with Fertan, and plate welded in for the holes.
-
S50 is for inside cills and all the box sections. HAve a look at the Bilt Hamber site for details. There is a fair bit to read.
-
You could choose hydrate 80 or jenolite. Jenolite is good, so you might want to save your money, and save even more by going to Dynax for the underbods, and S50 for cavities. Dynax and S50 are available 750ml spray cans, so it's easy as lanoguard to apply, and if yu were using one of those hand sprayers, it doesn't dribble over your hands so much. 3 cans of jenolite should go a long way. Some people won't put any coating over it, and just retreat the necessary bits each year. I think you might need to rinse with alkali solution to neutralise the acid, but a chemist could give better advice. Do you use a trolley jack for lifting?
-
Many years ago I had a rusty drain shovel/spade that I coated the handle with Hydrate 80. Amazing transformation, it was smooth like paint once cured, and it's been like it ever since, and it has lived outside in the weather, still no sign of rust. Having said that, I use fertan for vehicles as it can get into places more easily than Hydrate 80. I haven't tried the spray gun yet for Dynax, but I've bought a LVLP gun ready. I bought a kit of various nozzles from Amazon for the spray cans, so I coud get a fan nozzle. IMO it's much more use than the round one supplied. The nozzles are handy as they will fit male as well as female cans, just by swapping the inserts over. For the S50 cavity lances, you need to dunk the ends in white spirit immediately. after using to make sure they don't get gunged up. and let a few drops run down the pipe.
-
Thanks, that's what I've always reasoned in the past to get rid of the beep-beep horns. Even mains plug fuses won't blow at their rated current unless they get it for about 30mins.
-
Many thanks, that makes more sense. So since Skoda just parallel the horns the AI suggestions of using 2.5mm ² is not fact based. PS how do you get the correctly formatted superscripts for wire sizes?
-
Well, it looks like they just added a second horn in parallel if you have posher trim. Not sure about the wiring thickness, as the main wire from the supply control unit appears to be 0.5, though it's a bit blurry when I zoom in. Strange diagram for the relay as it's control wire might be to pin 11, and so a ground operated line, but if the diagram is correct , that would ground the horn as well.
-
Another thought, if your black plastic trims, perhaps the wing mirrors too, unless they're painted, are now grey, wash them off, wipe over with alcohol, allow to dry and coat with a very thin film of baby oil. Cheap as chips (actually much cheaper nowadays) and works. It may need a re coat every few months, but it's so cheap it's worth it. I posted the wrong link above a better one is https://youtu.be/kVYPYF_n_Ms
-
Jenolite is good, I think it has both tannic and phosphoric acid in. I used to use Lanoguard, and before that I've used the Bilt Hamber stuff. Have a look at mobile rust doctor on youtube. He recommends the BH stuff, and interestingly suggests NOT power washing, but just dry brushing and treating. He says why on the vids. Yours are ok from what I see in the pictures, definitely worth doing. The suspension bits should be reasonably ok, otherwise it would have been flagged at the last MOT. With the chassis don't be afraid to really mechanically attack the rust. If it's gone through, welding repair is a must. The car is generally worth saving, as they were build better than the modern Stellantis style offerings. I was lucky as I bought mine about 8 years ago and did everything I could see, so the suspension got coated then, with Lano, but every year it needed doing again in places. With BH it gives a dryer coat that is more robust, and is overall cheaper. They also have a tech department which has proved useful when I had my usual picky questions, though their website info is very comprehensive. One thing that is useful is a compressor so you can blow all the dust away before coating, then because everything is dry, the jenolite can creep into everything. I was surprised also how much loose paint flakes got lifted and removed by the air. Another thing is having a large 2 deep plant watering tray to put on the ground to catch the crud, then it's just lift it and tip it. If you use an electric wire brush anywhere, avoid the angle grinder ones. They are dangerous, and burnish the rust instead of just removing it. It looks good, but the surface then stops the Jenolite getting down to the metal. The BH stuff also has rust inhibitors in, so any bits you can't get with Jenolite will be caught by BH, which will also go over grease at a push, so no need to worry about degreasing. My budget for anti corrosion and other MOT related fixes is £2000 a year. Sounds a lot, but it's £40 a week, and where can you get a car for that? If it passes the MOT it's a useful piece of kit, if it fails it's useless, and worth very little. Here's a rustdoctor link, https://youtu.be/1RAw9UqUZXM (and there's more) his vids are good, whereas some, well................I have better ways to waste time. Would be good to see how you get on. Mine will be welded in just over a week, so I'll post the finished results. I will take the liners off again next year, if I had done that 8 years ago I wouldn't have welding to do now. Every day's a school day.
-
I 've fitted twin horns on other cars in the past by just removing the single and connecting the new hi-lo pair to the original wire. I was young then. Now I'm more cautious, whats the practical thoughts on doing this on an Octavia Mk2? If I use 2.5mm2 wire I don't envisage a problem, but if I ask questions the recommendation is to fit another relay and add a fused power wire from the battery. That makes it a tedious job. Does any of the Mk2s have twin horns, and what size wire was used?
-
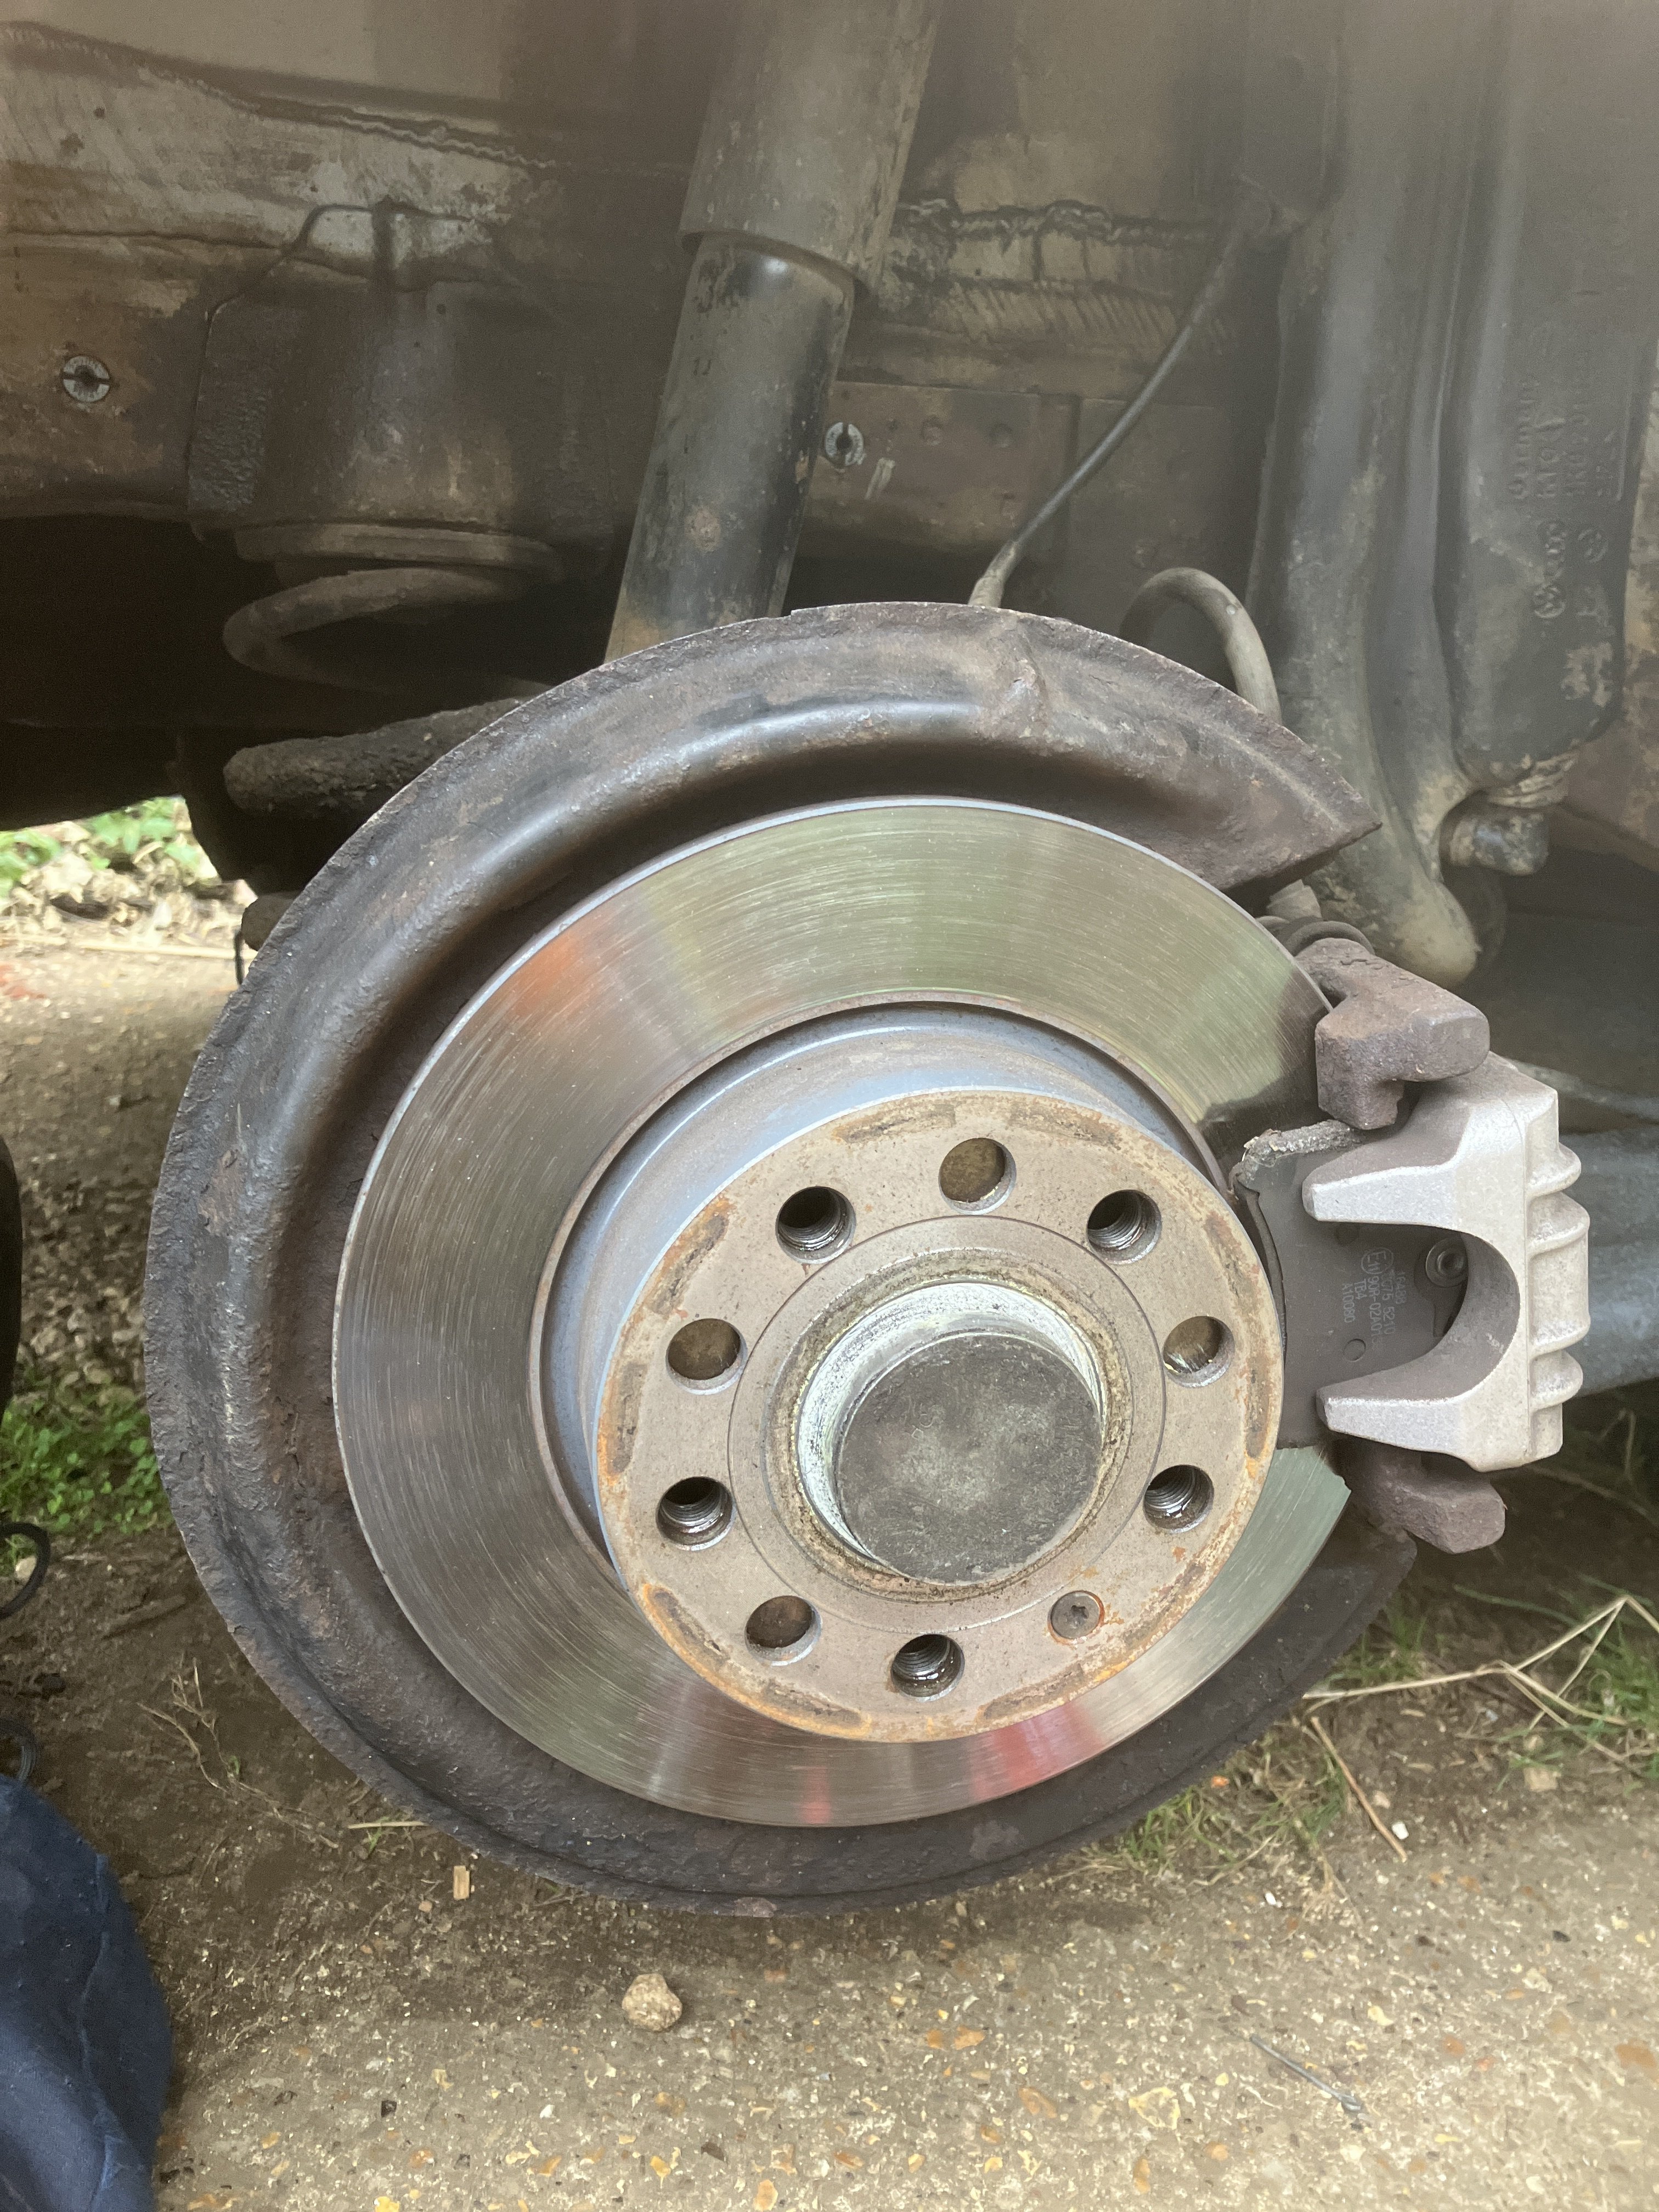
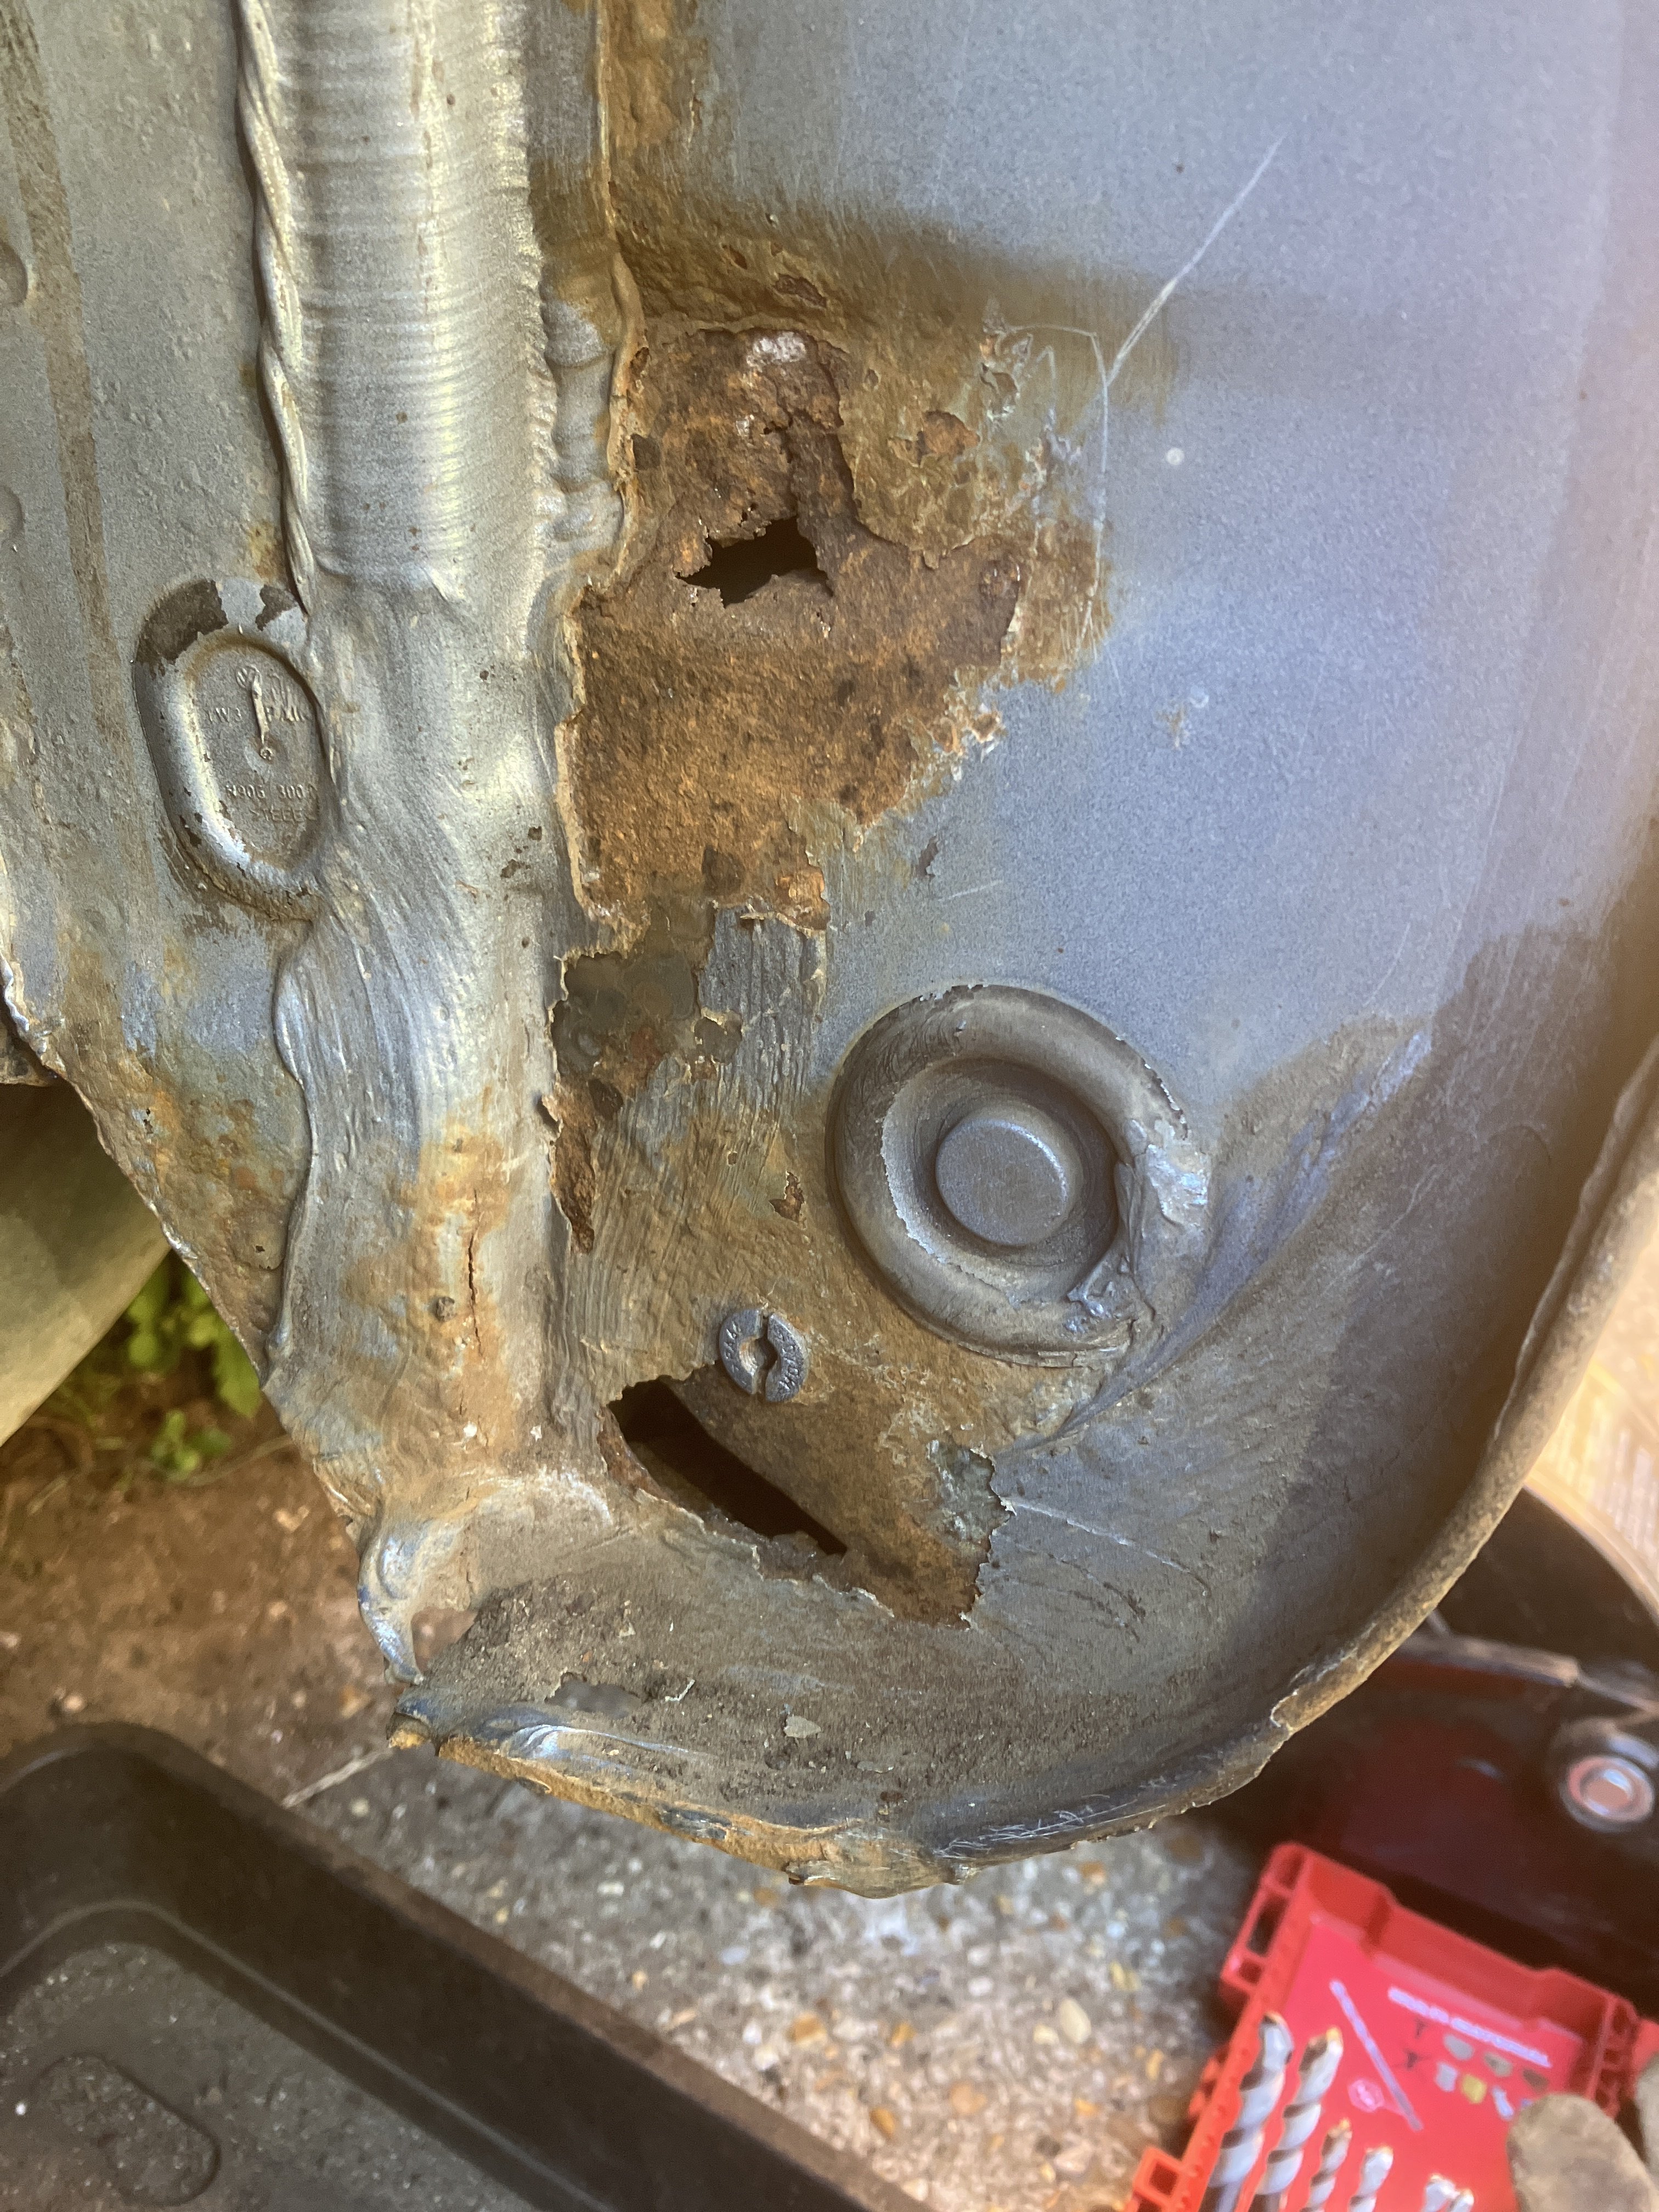
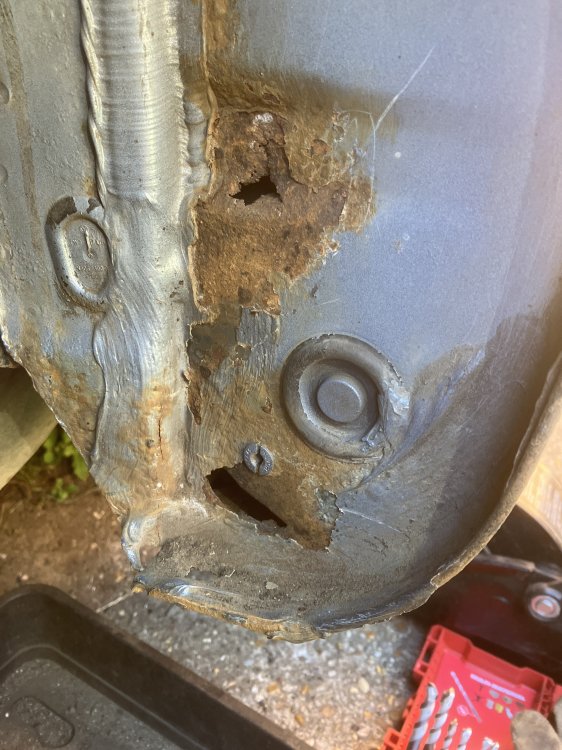
As has been suggested, take the arch liners off. Though the fronts will have some crud behind, these are not normally as bad as the rears. The offside being worse than nearside. So start with the rear offside. The wheel has to come off of course, then find all the screws They will be Torx 25. A 2mm or 2.5mm drill bit is useful to clear the muck out of the heads, then the bit doesn't slip. You may have to brush away mud from the liner to find all of the screws. Once they're off, the most likely rust spot is at the sill. A hand wire brush and a screwdriver will find the loose bits, but carry on tapping if it looks soft, and you may make holes. There is no magic fix, it has to be welded, no amount of zinc will fix it. If it's ok, I use Fertan or any other rust converter will do. Though Fertan will creep and convert surface rust if you cover it with plastic film for 24 hours. This stabilises the rust, then I use Bilt Hamber Dynax underspray. It is less marketed than other more well known brands, and recommended by restorers. There are youtube videos, lookup "mobilerustdoctor". I've just done all mine, found some holes which are getting fixed next week, and to do it throughly took 1/2 day each for the rears. See pic of offside.
-
Does anyone know where I can get a proper rubber driver side (RHD) floor mat? It needs to be proper rubber that doesn't stink, and with a rubber edge to contain spills. Not one of the cheapy "tailored" offerings.
-
Yes, they don’t last long. mine was only 15 years old. Can’t get the quality nowadays. I noticed the end of the wiper was gradually moving off the bottom of the screen, so I kept nudging it up. I decided I should look at it properly and found the plastic moulding had separated from the splined connector. I pulled the wiper arm away, and that left me with the nut and splined bit on the shaft. Needless to say the nut was rusted to the shaft, and a lot of torque didn’t shift it. I used a die grinder with a cut off wheel, a Dremel like tool will do, to slit down both sides of the nut. I slotted a bit of card to slip behind the nut to protect the glass and sealing bush from sparks. Overkill probably, but a new rear screen is EXPENSIVE!!!, and the card was incredibly cheap. With the nut cut nearly through, I played about with it, trying to finish the splits with a screw driver blade. Eventually a spanner helped dislodge it, and I could remove the two halves. Put a M8 nut on the shaft, run it down, then back it off a turn. This is to protect the thread, and to locate the puller spindle. Next get my small bearing puller under the splined bit, and tighten it up, CLICK! and the spline separated. Tighten the nut down, and wait for the new wiper arm to arrive. The nut was a flanged type, but looked to have a smooth plastic washer embedded in the underside. Has anyone seen such a thing? Is there a reason for not using a normal flanged nut with the serrations on? I can think the sealing against water might not be as good I intend to use some Lanoguard grease for assembly, then it wont corrode again. If you do this, use a heat gun to warm up the grease to make it flow into all the cavities. Anti sieze compounds could be used instead, but they won’t coat over the nut and protect it. I’ve written this lengthy tome, as something as simple as replacing a part, when the bits are corroded, can cause plenty of grief, and if you get too heavy handed the job can escalate to catastrophic.The next thing to do is to look at the front wipers, and remove and refix them, then if anything fails the fixing will be trivial. Any car you have now is worth looking after, as the government is making life more difficult, and much more expensive.
-
Well, 10 years late, but I bought a 2009 Octavia, 89,000 miles, and it had a chuffing sound like you describe, but it would be doing it in a straight line as well. The brakes were worn, so it was new pads and brakes all round. That did not get rid of the noise. It was worse when going round a curve. I bought a kit of sensors to clip to the suspension on each corner to try and work out which wheel was the problem. Eventually guessed it might be the offside front bearing. Got that changed and it was ok for about 30,000 miles. Now the noise is coming back slowly. Most noticable at around 40 to 50 mph. So will have to work out where it’s coming from. The CV boots are old, but if it is CV boots, why doesn’t every VAG car do it? They all use CV boots. As for spraying the boots, there’s no problem doing that, a rubber or silicone lubricant wouldn’t damage them. I spray everything underneath with Lanoguard. If you haven’t come across it look up lanoguard.co.uk, it will save a lot of grief later if you keep cars for years.