SpaceWalrus
Members
-
Joined
-
Last visited
-
These don't match the button blanks in front of the gearstick The actual USB element would work fine, as all it needs is 12v from somewhere suitable, but if aesthetics are your main goal, nothing seems to exist for Mk3 Octy
-
While physically possible, it will likely require cutting or drilling, as I can't find any button fascias on aliexpress or similar with a USB port for an Octavia 3 It's not helped by the fact that the fascia is one part rather than seperate removable blanks
-
"Next week" he says... Sorry for the delay - I don't have a garage, so I was waiting for the rain to stop. Anyhow - here's the video: Remove Boot/Luggage Compartment Trim Skoda Octavia Mk3 Estate I doubt I'll win a BAFTA, but I've done my best with an old iPhone and a GoPro. Any questions, put them in this thread or in the video comments, and I'll answer them in due course.
-
-
Have you tried putting your VIN into Skoda-parts.com ? I've found their catalogue to be pretty accurate
-
-
I have the 2016 with a variable boot floor, so there might be a few differences if you don't have this - I imagine there will be fewer things to remove. There are a variety of bolts and screws, so I hope you have a comprehensive toolkit! Start by putting the back seats down and clearing the boot of anything, including under the variable floor if you have it. The spare wheel well is fine, if you have extra stuff in there it may need to be pushed to the side for one of the future steps - but you don't need to remove the spare wheel. The plastic trim on the D pillar needs to be removed - just grip the top where it meets the roof lining and pull towards the back seats, it should come away without too many issues - mind you don't break the plastic clips at the bottom of it. This exposes a T25 screw near the rearmost corner of the boot side glass The two black plastic netting hooks (the bulbous double-ended ones) need to be removed; these use a T20. There's another T20 screw in the hole where the parcel shelf sits Pull down the bag hooks, and there's a T30 bolt behind each of them The fold-down metal loop nearer the back seats can be removed. This has a little plastic cover which you can flip down when the loop is down, and this exposes an M8 spline bolt. If you don't have a bit for this, you can probably get away with leaving it if you're just replacing the strap. If you've got a variable boot floor, you can remove the plastic siding it sits on, and you'll need to remove the cubby holder for the roof bars. You'll need a T45 for the big plastic nuts - be gentle! You'll also need to remove the trim that runs along the middle of the back inside of the boot - this shrouds the boot latch for the boot lid to lock to. This has two T45 plastic nuts down low in the spare wheel well, and two plastic trim clips at each end, which require the top part to be lifted to unlock them so they can be removed. A knife or a flathead screwdriver will work, but a trim removal tool with two prongs is best. Then there are four metal clips along the topside of this trim piece - these should unclip just by pulling it up. I find it easiest to start on the left or right and pull it upwards, making sure the bottom clears from the two fixed threads in the wheel well that you removed the plastic nuts from earlier. There might be a plastic trim clip holding the boot side trim in place that was concealed by the middle trim piece you just removed; this needs removing same as the other two earlier. Remove the boot light - the bottom should pull out and you can just unplug the black connector. There may be different things you can see on yours. If it looks like it's holding that trim piece in, it probably is, so remove it. There are two plastic bits on the end of the plastic side trim that runs around the boot opening, these jut into the metal frame, so require some gentle prying upwards, such that the trim can be pulled away from the frame. Then it's just a case of pulling gently and unhooking the carpet and plastic trim from some fixed attachment points. If you pull the trim far enough, it can disconnect it's little plastic clips from the C pillar trim, and may also unclip the trim that runs alongside the backs of the rear passenger seats. This can all be popped back in afterwards. Once you've pulled the trim piece out, just do what you need to do, and then put it all back in reverse order. I'll be doing the same operation to my boot to replace part of the variable floor in a few days, so I can make a video on it if need be - just let me know.
-
If it's just in one specific location, sounds like there's some particular geometry of the signs on that bridge that causes the car to think the windscreen is dirty. It might be worth taking the camera off and cleaning the inside of the windscreen of any streaks or grime that might not be visible from the outside.
-
Found it! Took some time to fully remove and partially disassemble the variable floor today, and after having a good look at it - it's the plastic part of the brace, 5E9 861 527 A, (A for left side, B for right). Have now ordered from skoda-parts so my floor should no longer sag disconcertingly in that corner.

-
-
-
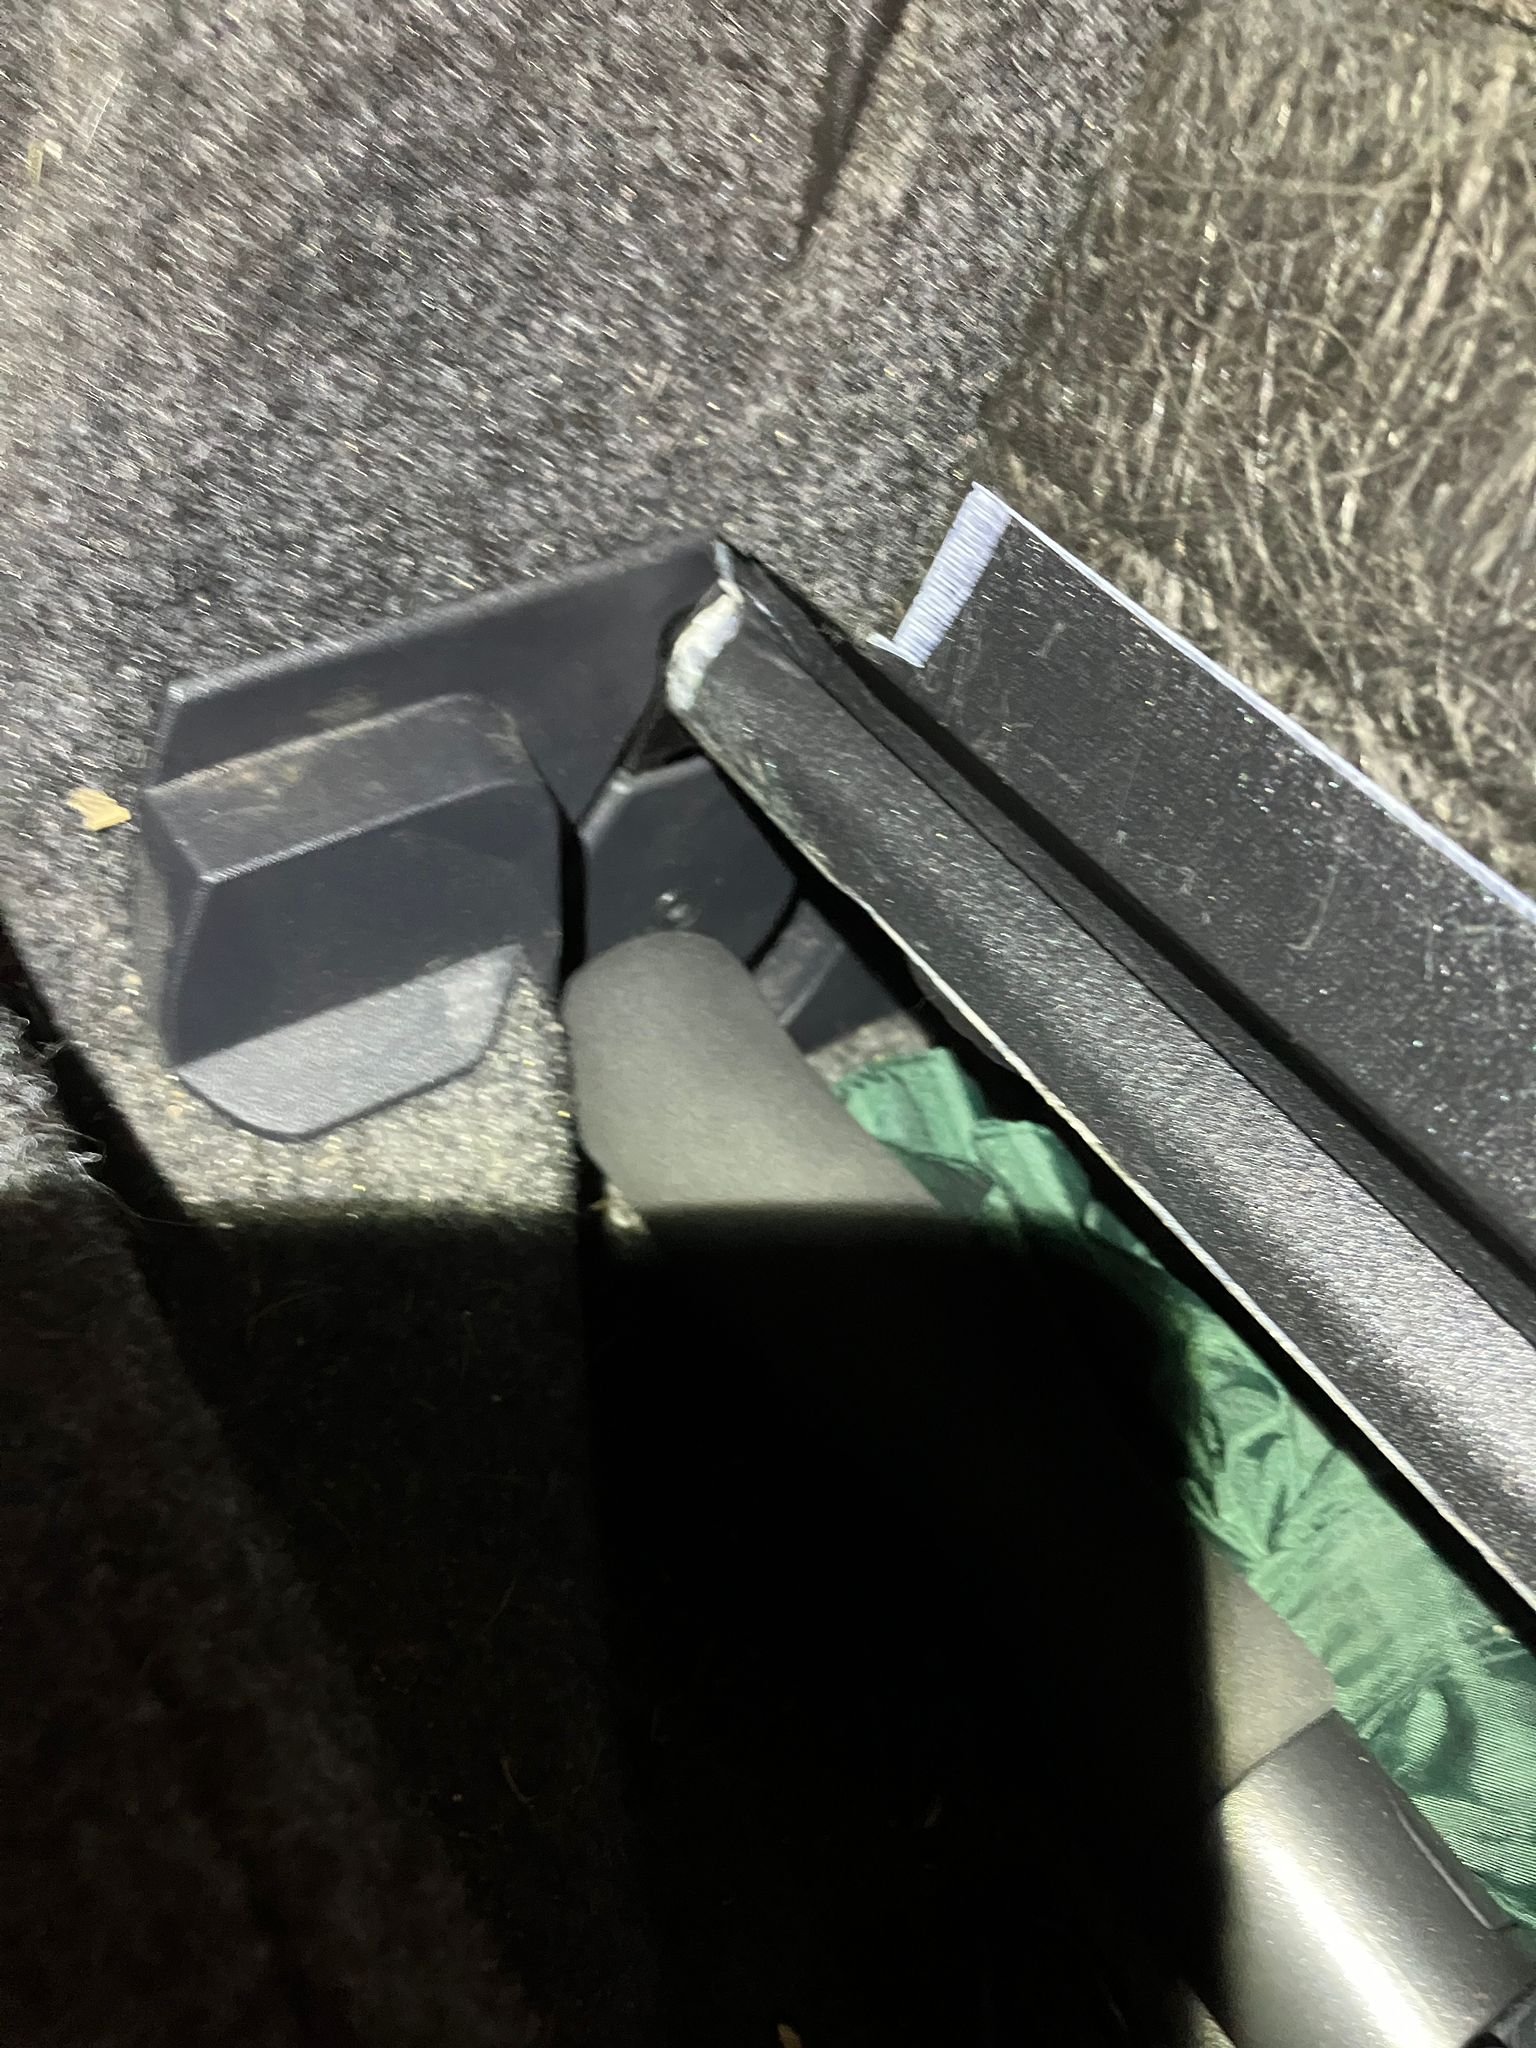
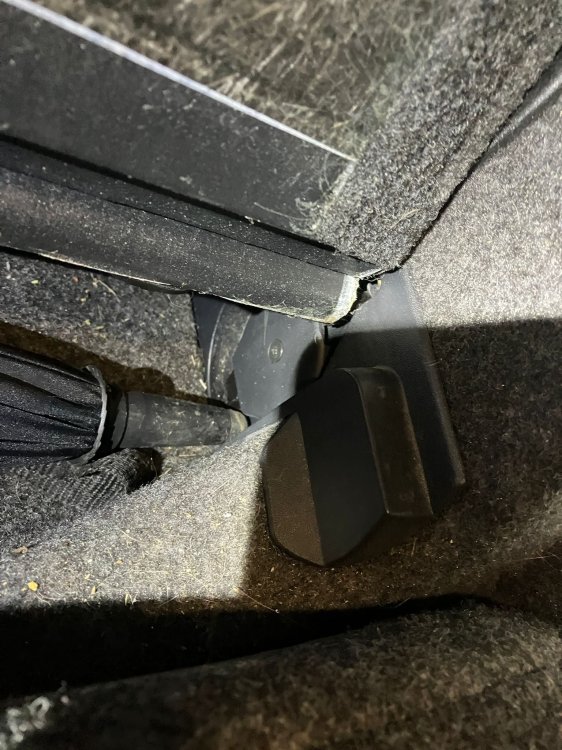
Hi all, One of the rotating bits on my variable boot floor has broken, but I can't seem to find the correct search term to find a new one to buy - does anyone have the part number or name for it? I attached some pictures of both the broken and unbroken sides. Broken swivel part - you can see the darker black plastic hanging at the bottom where it should be attached at the top. Unbroken swivel, note the darker black plastic is at the top, and the bar of the variable boot floor is right at the top of the plastic bracket.

-
Hello all, I have a 2016 Scout 2.0TDI 150ps It has the OEM removable towbar, which I normally keep detached for a bit of extra space at the back for parking, and to stop me smacking my shins into it. As the towbar is stored in the foam insert that sits in the spare wheel, it’s a pain to get out, as I have the false floor, with roof bars, tools and equipment under the floor, and all my work equipment on top. This means it’s quite the operation to access the spare wheel well. Annoyingly, having the OEM removable towbar means the crash bar at the rear does not have the screw in point for the towing eye. I’d like to keep the towing eye accessible, as it’s smaller and not covered in grease, so if I need to pull a vehicle quickly I don’t need to unpack the whole boot. Does anyone know if it would be possible to retrofit the towing eye screw point, or failing that, if there’s a insert for the OEM towbar hole that would provide the socket for a square tow hitch under the car?
-
As above, it's either the flap motor has failed or the gears have become misaligned, this can be checked by changing the temperature on the climate control while looking at the motor and it's movement. This is best done with an endoscope, but can be done by removing glovebox (if RHD) or looking up through pedals, but it's quite an awkward position. Both heater core pipes being hot does not necessarily mean there isn't a blockage, as this was the same on my car, and my matrix was blocked. I have instructions on how to replace heater matrix, coolant tank and flush coolant on this post
-