Dr_Mike_Oxgreen
Members
-
Joined
-
Last visited
Everything posted by Dr_Mike_Oxgreen
-
There is also a thermostat for the DSG (hence my question!) which can fail. If that fails open, coolant will be circulating through the DSG cooler all the time, and this will cause your coolant temperature to remain lower than it should to a certain extent. I believe it’s a reasonably straightforward DIY job with plenty of YouTube videos out there. A genuine one is around £40-50, but it looks like you can buy third-party parts for considerably less. Could still be the main ‘stat, and I’m not sure how you distinguish between DSG ‘stat failure versus main ‘stat failure.
-
Need more info on your car. Engine? DSG?
-
With apologies for spamming this thread again, but here’s another update from me. Hopefully this may be useful to people searching for this kind of info in the future. So I was unsuccessful with the PH24WY front indicator LEDs from CarModShop, because the pins didn’t correctly engage with the holes in the connector. However, I have tried a different pair: https://www.ebay.co.uk/itm/274963723745?var=575243879512 I have just fitted them, and they appear to work without bulb faults, for the time being at least. They’re quite nice and bright, too. And of course they have a nice crisp on-and-off. Removal and refitting is a right pain. In hindsight it would probably be easier to jack each corner up, remove the wheel and the arch liner - and then I think you’d have access to the indicator fitting from behind. But I did it the hard way, working from above. As you can see from the picture I’ll put at the end of this post, there’s a single torx T20 screw holding the plastic collar of the bulb. Someone on another thread has said that you only need to loosen this; I was sceptical but he was right. Slacken it about 4 or 5 millimetres (careful not to lose the screw altogether!), turn the bulb anticlockwise to release it from its bayonet-like fitting, and you have just enough wiggle room to persuade the plastic collar to go past the screw head. Refitting is “the reverse of removal”, but it was quite hard to turn the bulb to re-engage it. I don’t think I managed to turn it more than a few degrees, but at least the screw should hold it. Note that one of the plastic lugs on the bulb is different from the other three - the different one needs to align to the right (as viewed from the driver’s seat), then you try and turn it clockwise. Here’s that picture of the back of the PH24WY fitting. The screw “inboard” on the left-hand side and not too difficult, but on the right-hand side it’s between the light fitting and the inner wing and is hard to access. Probably less so with the wheel arch liner off…

-
That eliminates the possibility of a DSG fault causing jerkiness that might feel like an engine hesitation. I take your point about not employing the parts cannon, but I think I would be throwing a bottle of complete fuel system treatment in and going for a long drive. For a tenner I think it would be worth a punt.
-
Manual or DSG?
-
Just an update on my attempt to replace the front indicators with the following LEDs: PH24WY: https://www.ebay.co.uk/itm/304561517995 Available slightly cheaper direct from CarModShop’s own web site: https://carmodshop.co.uk/product/pair-ph24wy-canbus-led-turn-signal-indicator-bulbs-amber-orange-yellow/ However, these were not successful. The bulb didn’t really seem to fit properly into the connector, and didn’t light up. I suspect the pins in the bulb were slightly misaligned, and didn’t engage with the holes in the connector. With some extra force it did eventually slide in further, but one of the bulb’s pins had retreated up into the body of the bulb instead of going into the connector and it still didn’t light up. I didn’t actually get to the point of fitting the bulb into the light fitting. CarModShop were excellent at accepting the return and refunded me very quickly. Here’s another PH24WY candidate, which I might try in due course: https://www.ebay.co.uk/itm/274963723745 I’m still not 100% sure about the Katur H3 bulbs for halogen full-beam (on car with bi-xenons), but it’s looking more hopeful: https://www.amazon.co.uk/dp/B0CB5YK3MW?ref=ppx_yo2ov_dt_b_fed_asin_title&th=1 One of these was giving intermittent bulb warnings, so I took it out and cleaned both the bulb and the light fitting using electrical contact cleaner on a cotton bud. H3 bulbs earth themselves through the body of the bulb where it touches the light fitting, so a dirty connection may have been the issue. Since doing this I haven’t had a repeat of the warning, so fingers crossed. Note: It’s worth repeating that LED retrofit headlights or full-beams in fittings not designed for them will be an MOT failure if the tester can see what you’ve done without removing covers.
-
-
I went out and had a play with mine to see if I could reproduce the issue. At first I wondered whether it was simply the rear window lock button on the driver’s arm rest, but that doesn’t lock out the rear seat heating. It also illuminates with an unmissable yellow light. On mine, pressing the rear seat heating buttons cycles the three green lights next to each button, but nothing comes up on the RNS510 screen - unlike the front seat heating buttons which do show on the screen. When I first got my car, the rear seat heater buttons were not working (though I don’t remember if there was any kind of padlock icon like you’re seeing). In my case it was a fuse, but not one of the two full-size fuses for the front and back seat heating (37 & 38). There is an additional fuse that’s physically smaller - I think it was number 46 labelled “switch for seat heating”. This one had blown; replacing it brought my rear seat heating back to life. I’ll try to locate that fuse and pull it out to see if I get the same symptoms as you’ve got.
-
Can you explain in more detail what is happening? My 2012 Elegance is non-L&K, but it has rear heated seats as an option. And as far as I know the only way of operating them is via the buttons on the rear centre console - they can’t be operated from the front, and they’re not operated by touch-screen. So are you getting a padlock symbol on the screen when someone presses one of the buttons in the back? Are you able to read fault codes? If I remember correctly there are three fuses related to heated seats: one for the front, one for the back, and another for the “switch” (which is a 7.5A micro fuse, IIRC). Worth checking all of them.
-
It wouldn’t take a huge effort to cover the whole front face of both front seats, which would eliminate any colour mismatch. I think the next bottle size up is 250ml, which might be more cost-effective and would probably allow you to do the back seats as well. It’s not a quick job, but it’s fairly straightforward. Best of luck, and I’ll be interested to hear how you get on!
-
Interesting idea. Worth a go!
-
I don’t know if it’ll help, but according to the sales brochure for 2012 the correct name is “Onyx” for the very dark charcoal/black leather. I dare say that’s a standard VAG colour, so Furniture Clinic might be able to match it.
-
On one of the pictures you can see how grubby my seat belts are. I’ve tried various things but it’s pretty stubborn. Any ideas to clean those up?
-
I also did the arm rest, and a little dabbing on the passenger seat bolsters. I’ve probably got at least 2/3 or 3/4 of the 50ml bottle left. £16.99 well spent.
-
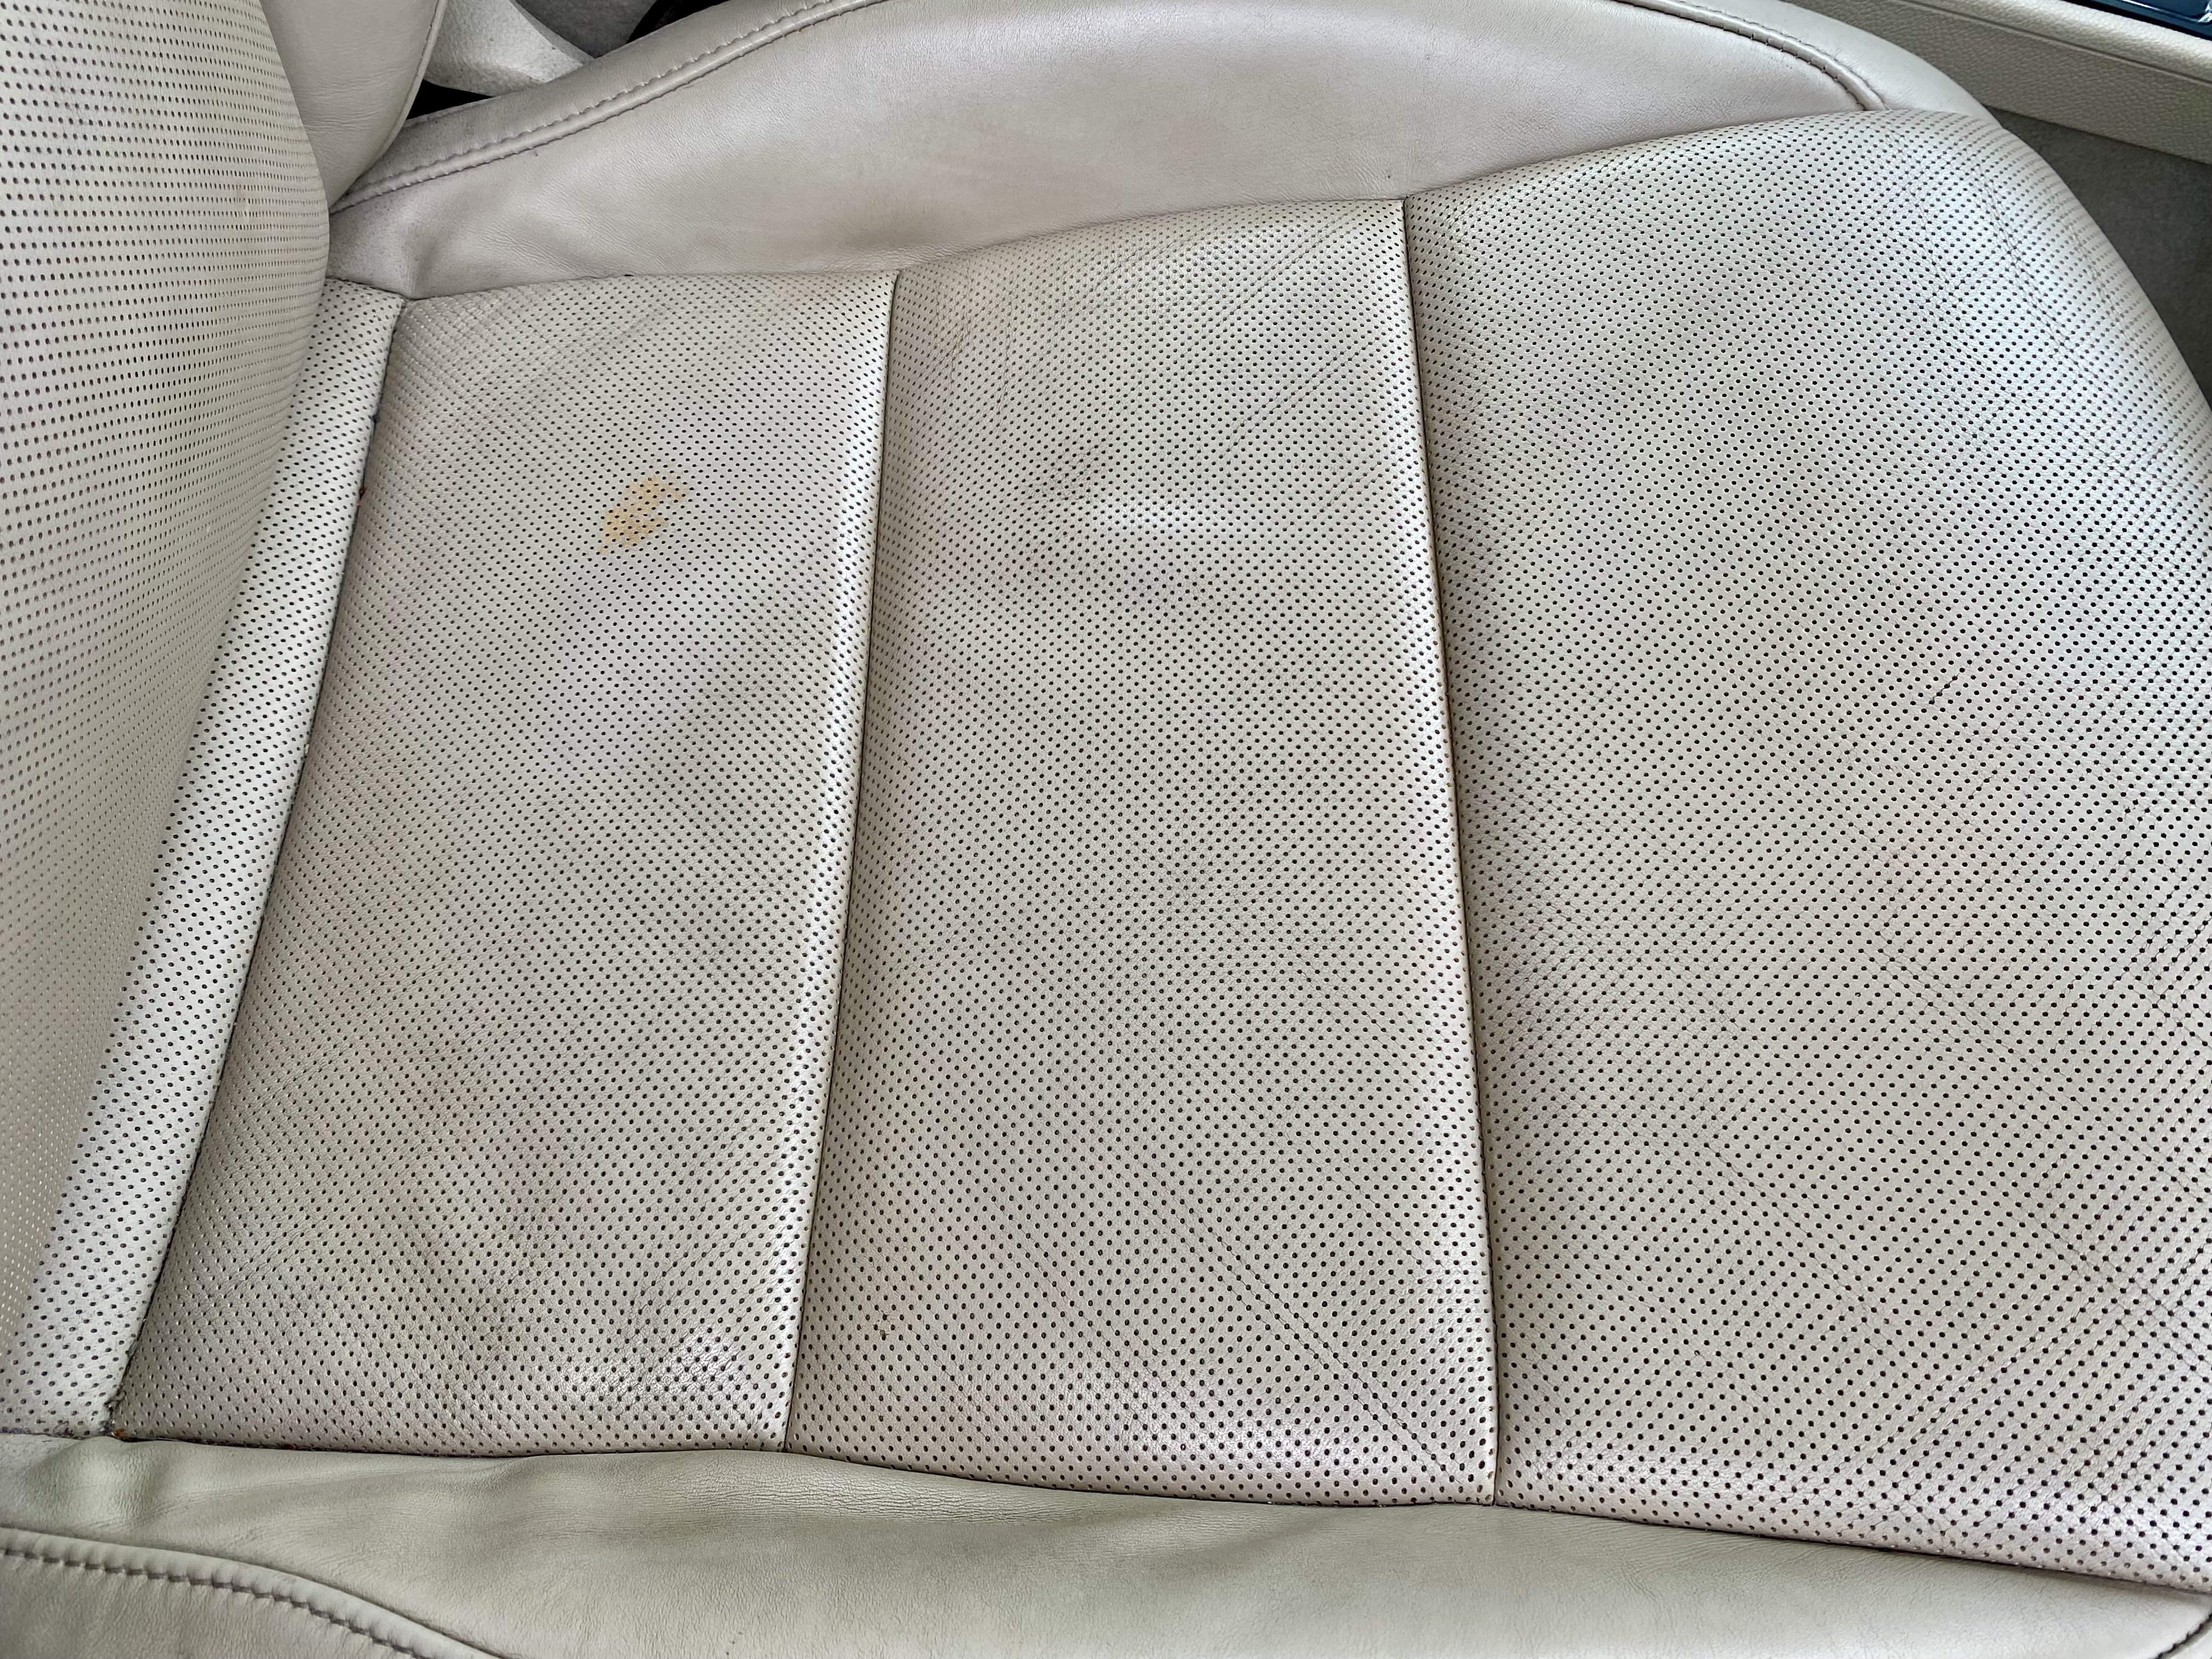
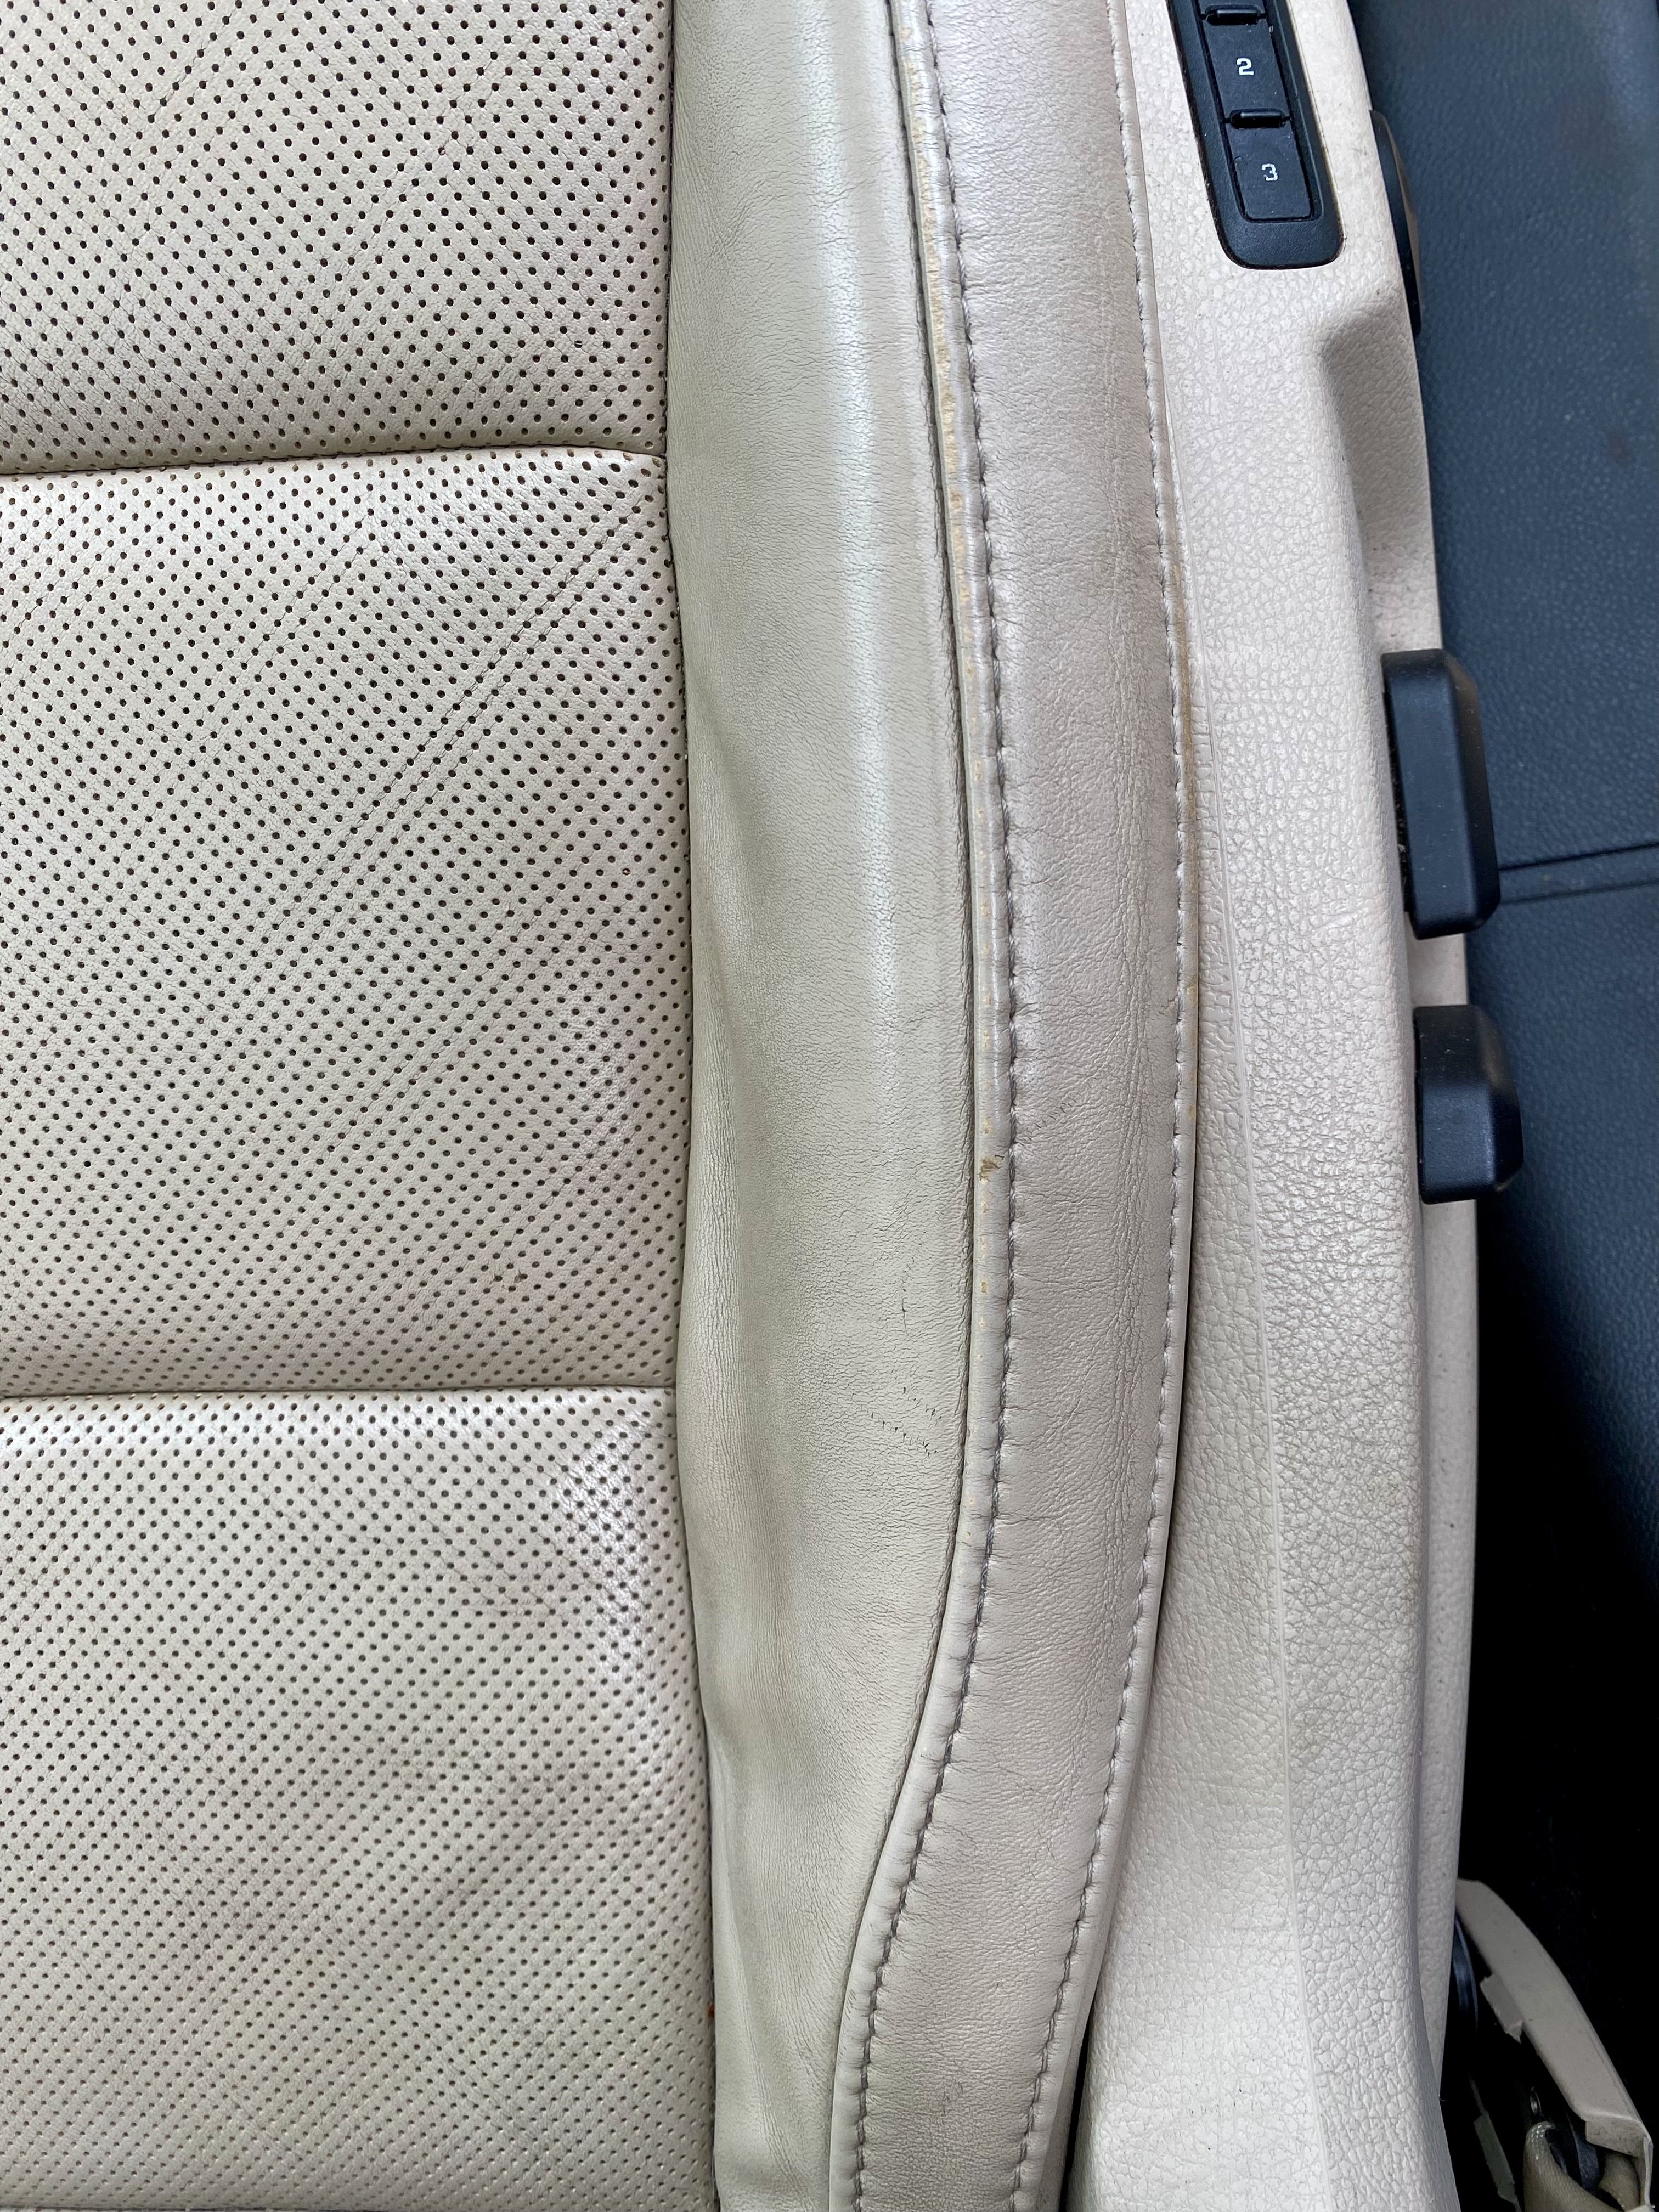
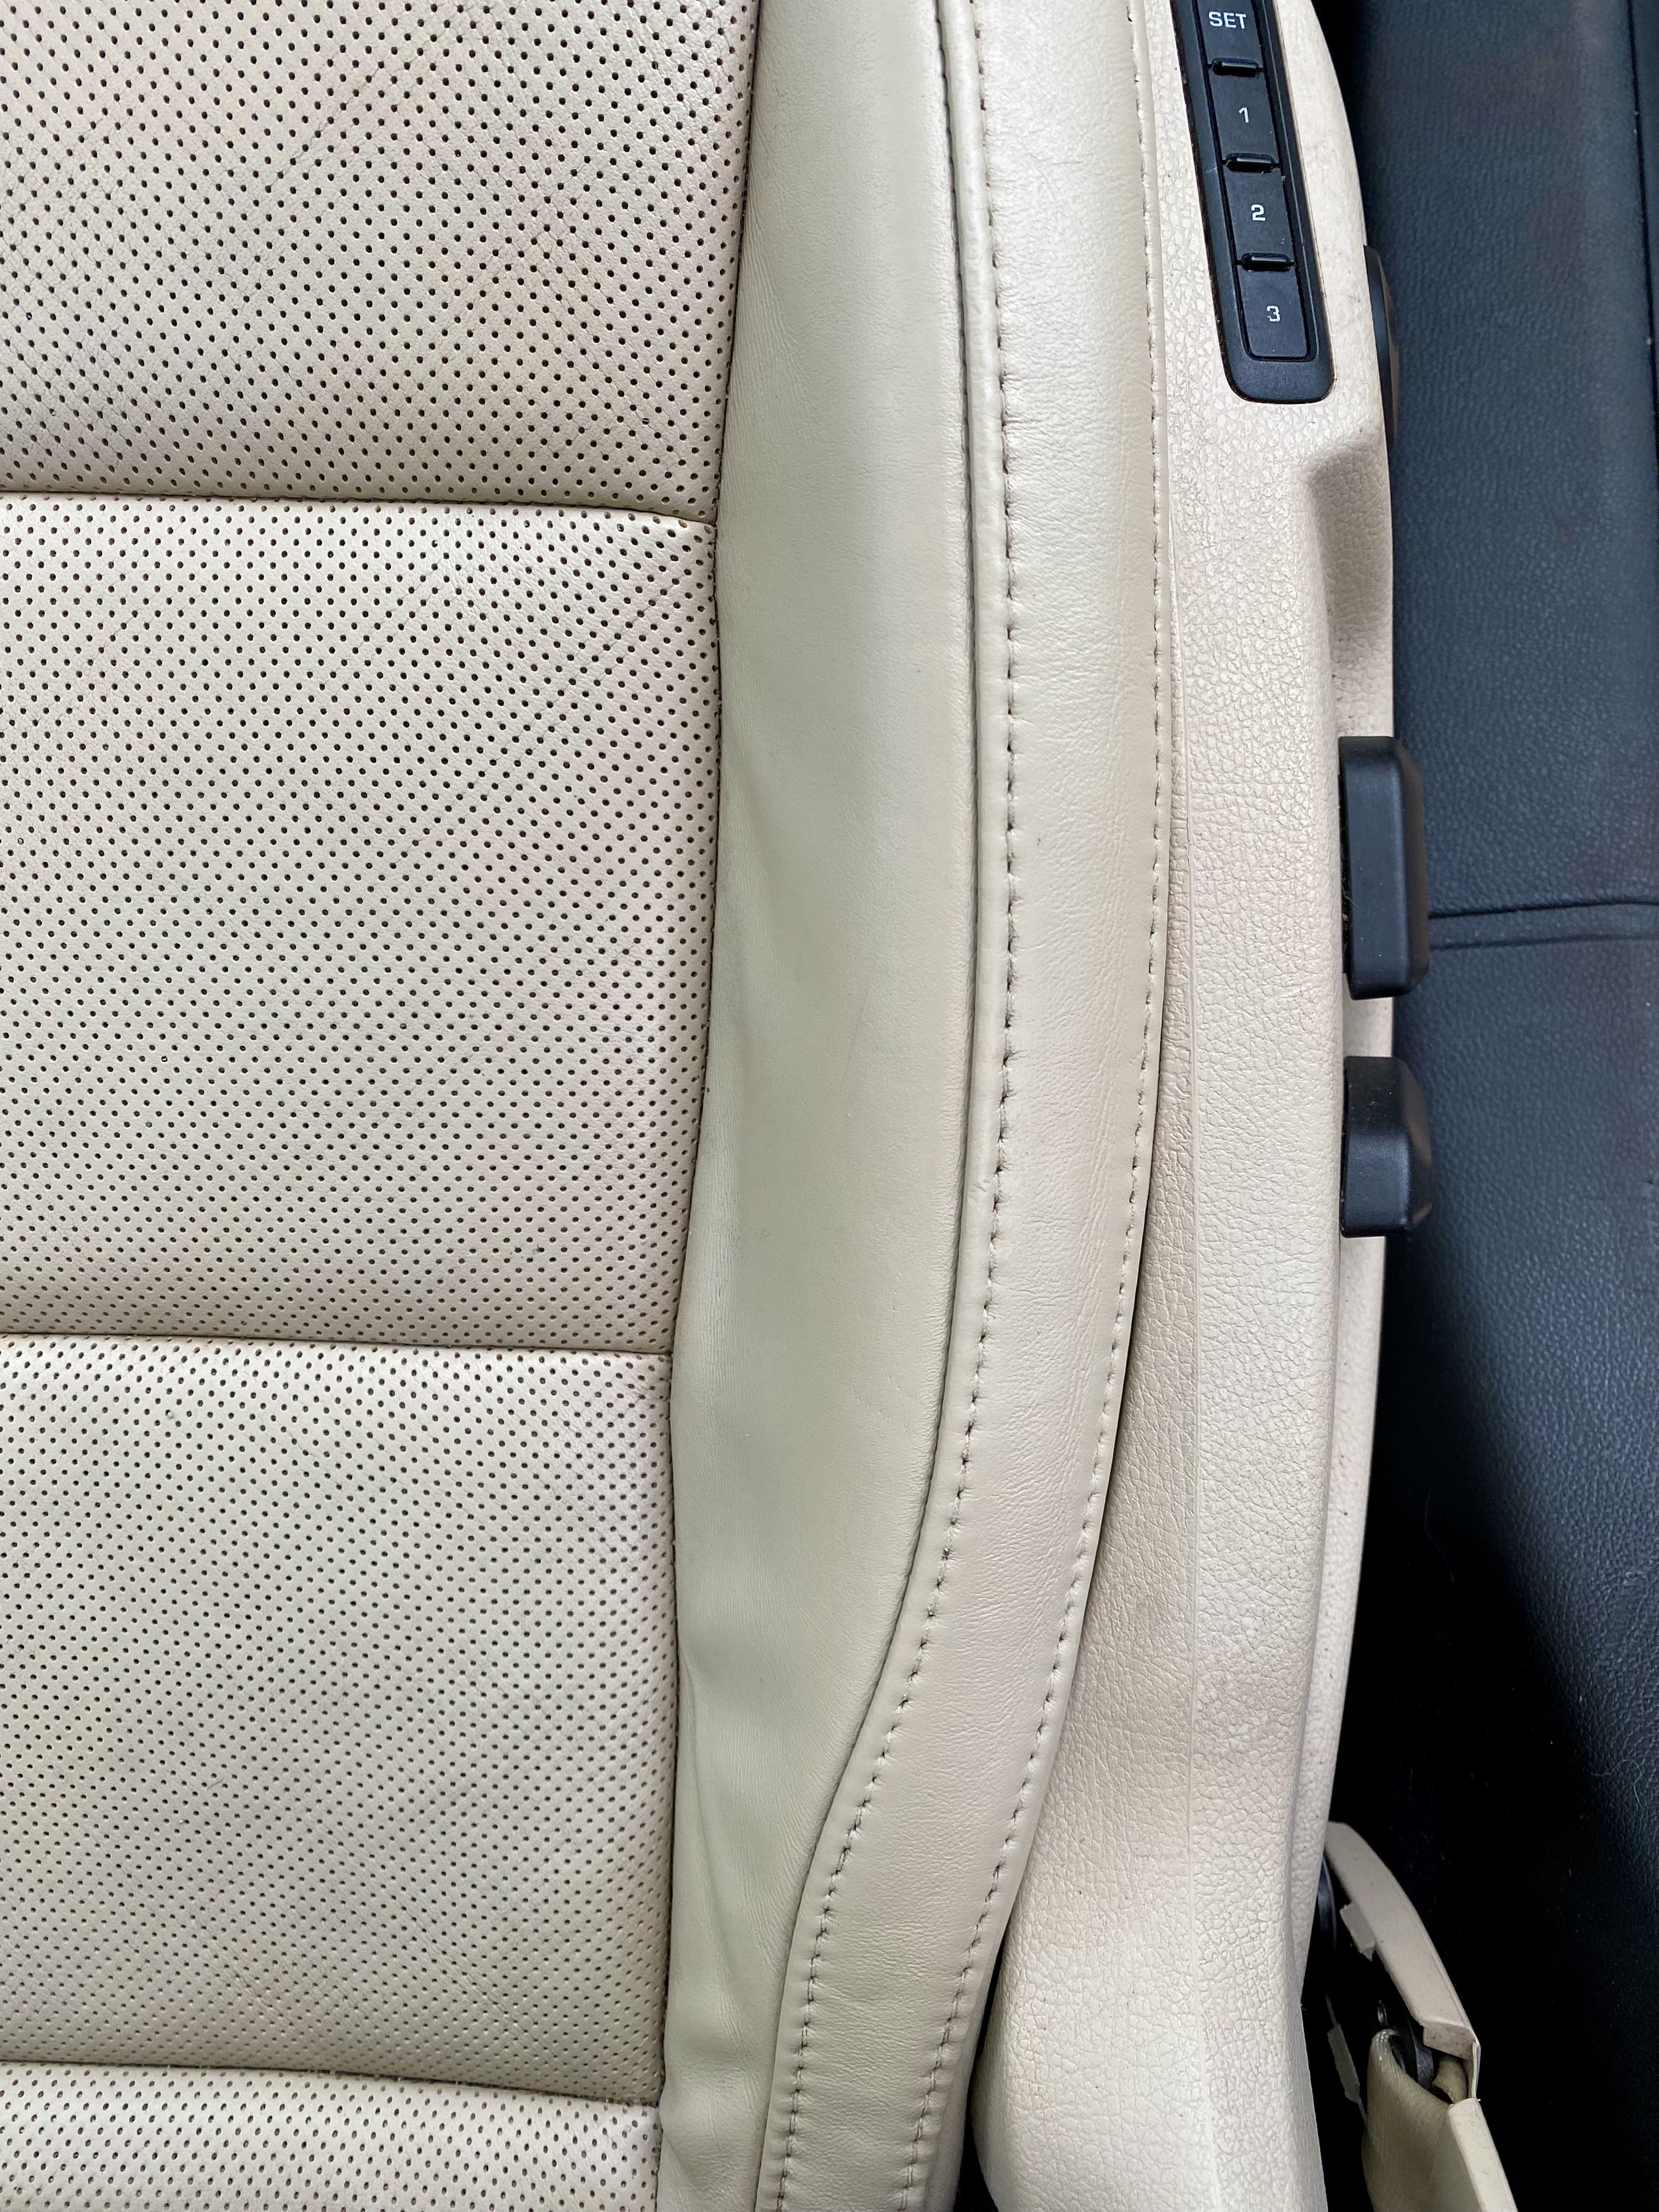
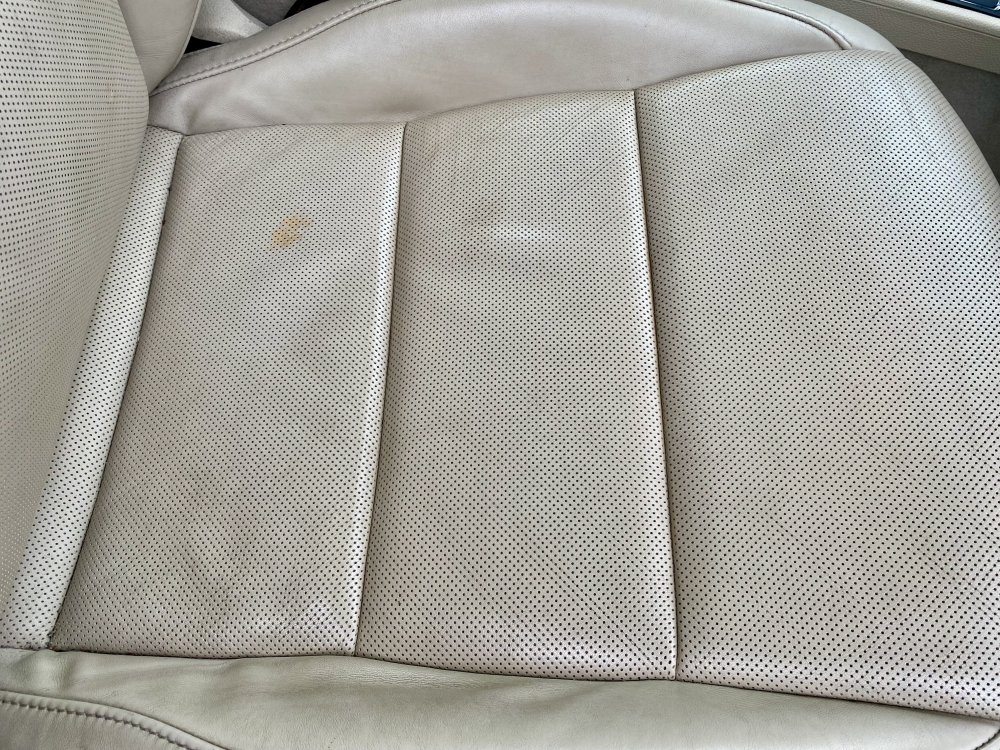
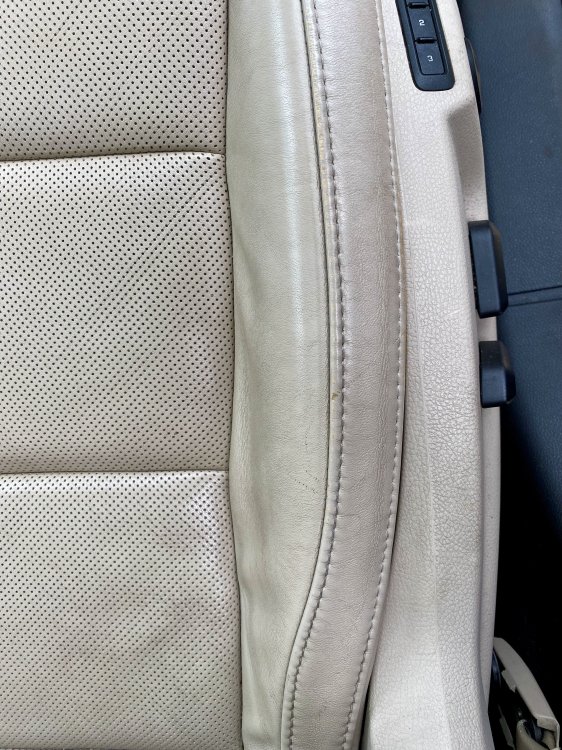
The annoying orange mark…

-
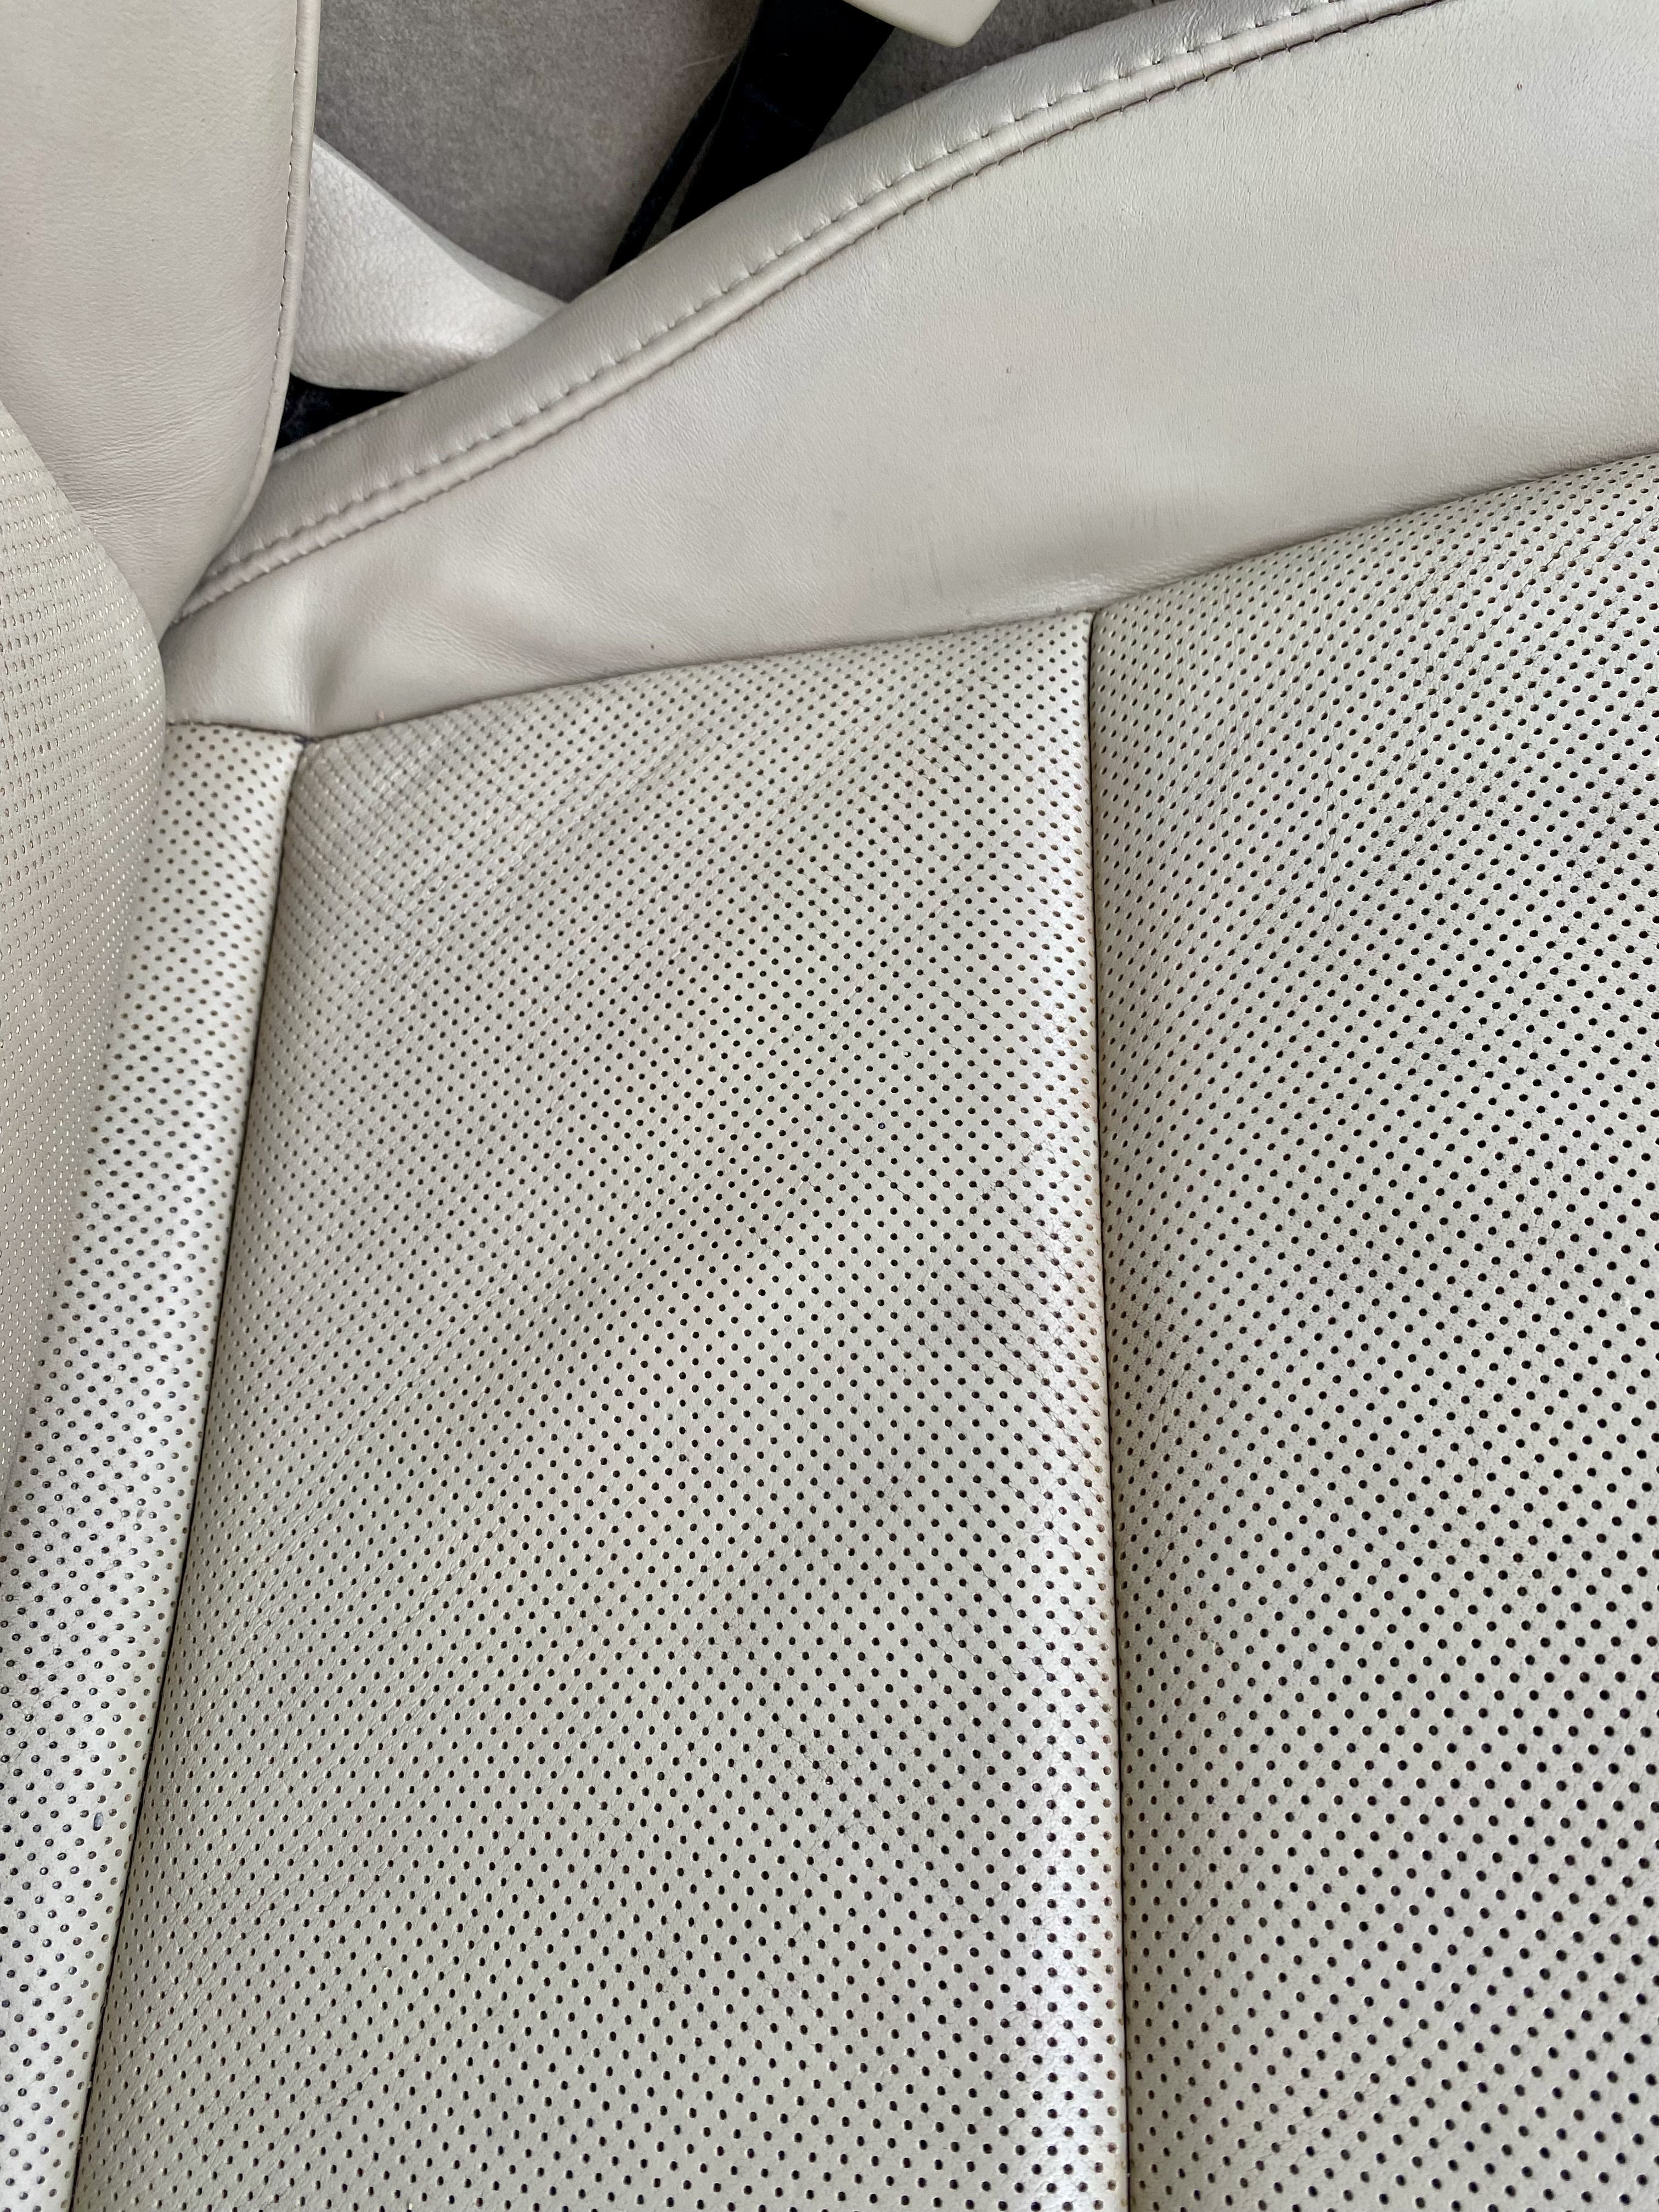
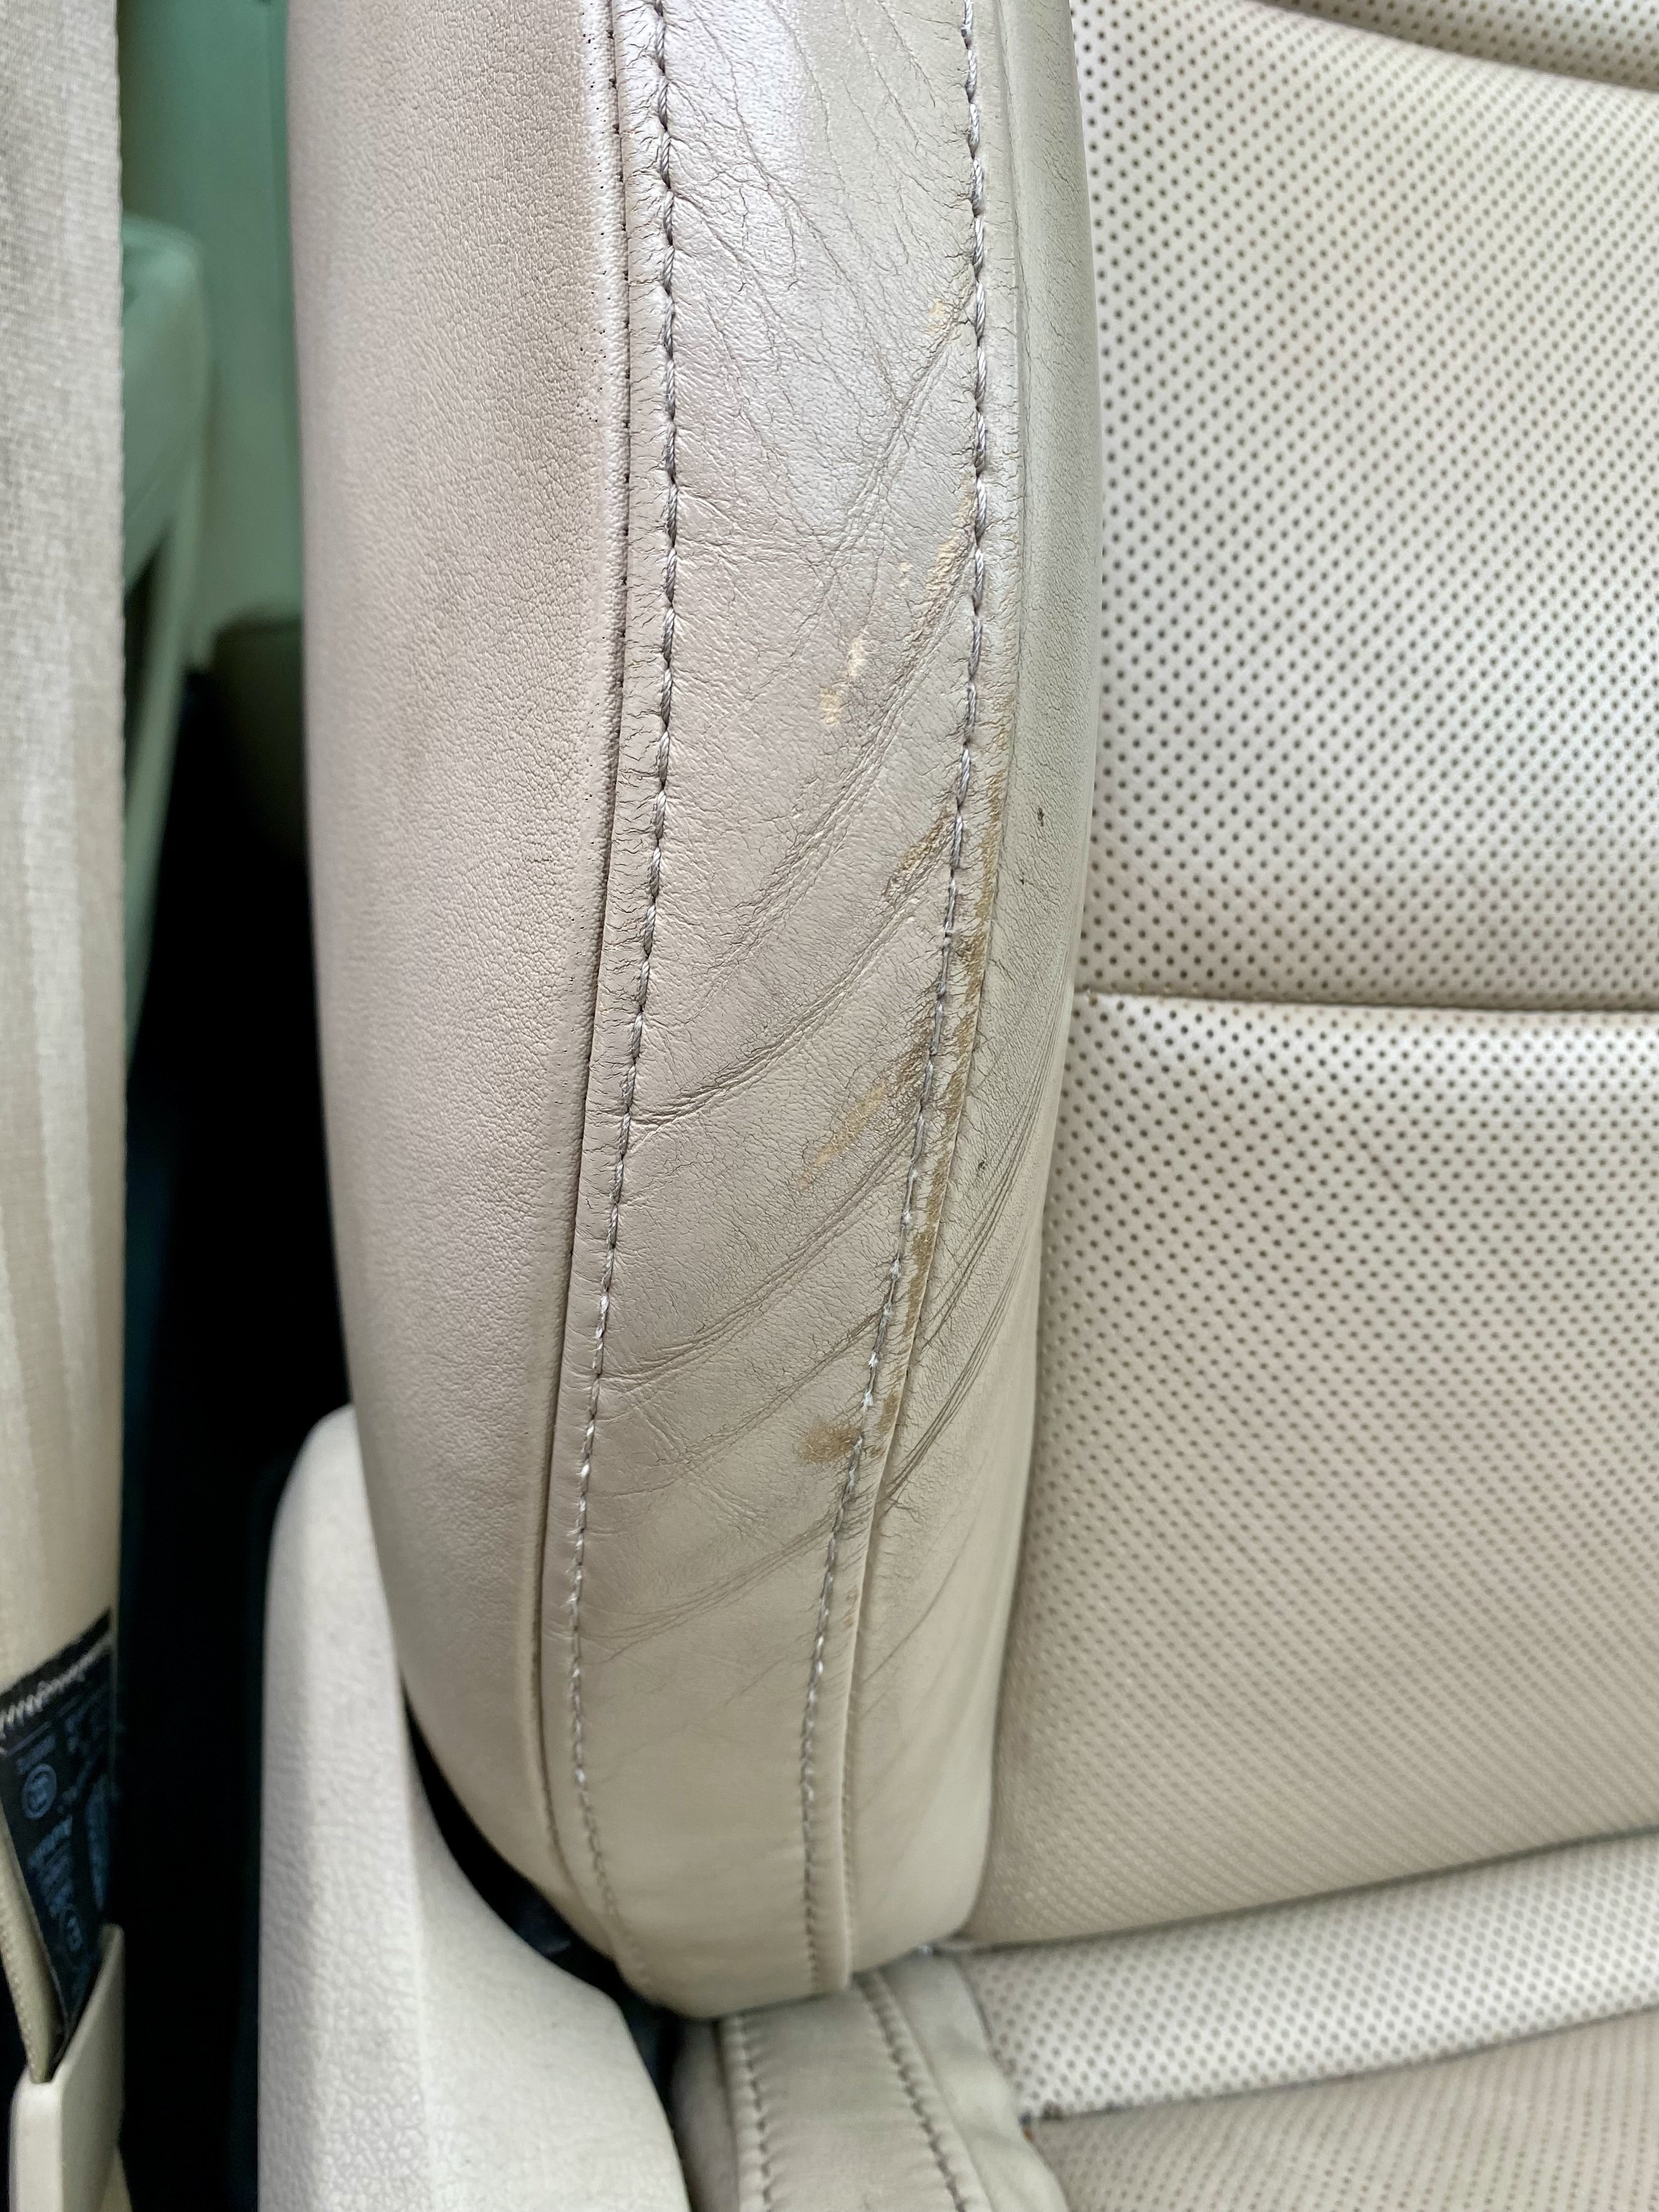
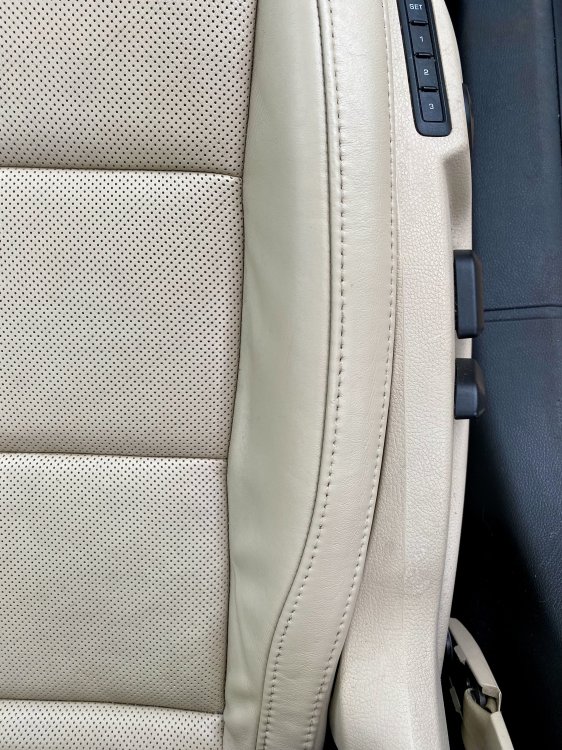
After 13 years and 85,000 miles, the driver’s seat on my 2012 Superb was looking slightly tired, with minor wear and some colour loss, especially on the bolsters. I also had an annoying little patch on the seat base where the colour had worn through to a yellowy-orange layer. A couple of weeks ago someone posted that they’d used Furniture Clinic leather repair paint with good success, and included a colour code for their 2012 Superb with ivory leather, same as mine. If you’re reading this, thanks! I contacted Furniture Clinic to confirm the code, and their response was understandably cagey - they cautioned that the match might not be perfect on my car due to differing wear use and sun exposure, but I took the gamble and ordered 50ml quoting the colour code KM8127. I also gave a description “2012 Skoda Superb ivory”. I figured that if I took a sample from an inconspicuous area, or even if I sent them a headrest, the wear and exposure would be different from the seat base anyway. When I received it I was a bit sceptical. The paint looked too “biscuity” in the bottle. But I tried it on an inconspicuous area and the match was as near perfect as you could hope for. It went on the correct colour, and was virtually indistinguishable once dry. So yesterday I spent the afternoon working on the seat. First, I cleaned the whole area (not just the bits that obviously needed attention). I didn’t buy the special cleaning product; I used dilute Fairy liquid on a cloth and dried it with kitchen paper. Then I degreased - instead of using their alcohol cleaner I used electrical contact cleaner on a clean cloth, and immediately wiped over with kitchen paper to mop up any greasy residue. I also considered using spectacle lens wipes - I reckon that would have worked as well. Then I shook the paint vigorously and started applying thin coats onto the areas that needed repair using an artist’s paintbrush, which allowed me to gently work it into the cracks. I allowed about 30-40 minutes for each coat to dry naturally, and did 3 coats using the brush. I was a bit more generous on the edge piping. In places, particularly on the bolsters, the leather had darkened with age and the colour match wasn’t perfect. But I had used only minute quantities of paint so I could afford to cover the wider areas. I did this by cutting a 1 inch square from the corner of a washing-up sponge (fresh out of the packet, obviously!). Using a small piece allowed me to saturate the sponge without using huge amounts of paint. I dabbed this over the wider areas, doing a second coat where necessary. On the perforated leather I kept a cocktail stick handy so I could unblock the holes if needed. I also found it seemed to work well on the plastic base, around the seat position buttons. And I’m delighted with the results! It was slow work, but quite satisfying. Time will tell how well it lasts; I suspect the prep is the key, so I hope my improvised degreaser did the job. More pictures…


-
When I got the white W16W bulbs for the reversing lights I did try plugging one of them into a brake light to see what would happen. When I switched the side lights on, the bulb lit up at full brightness (hence it looked like the brake light was lit on that side) and gave an instant bulb fault. So it looks like some of these LEDs will produce their full brightness at a wide range of voltages - some even say they work between 8V to 24V. I’m therefore sceptical whether it’s possible to retrofit the brakes and rear fogs. I’d love to know how these work - maybe there’s a resistor in each of these circuits to lower the voltage and current when just the tail lights are on, and perhaps the brake pedal switch and the fog light switch short their respective resistors to bring the voltage up to 12V. It is possible to code-out the bulb checking for each lighting circuit by changing some bits in the hex coding for the electrics module. VCDS makes it easy by decoding it for you and I think it presents a list of nice friendly tick boxes to enable/disable the checking for each, but my tool just gives you a big long string of hex digits and I wasn’t sure which byte I needed to fiddle with (or what would stop working if I got it wrong). Anyway, I’ll update this thread with any more info on my dodgy H3 bulb that throws a very occasional warning. If/when it happens again I plan to remove it and give it a clean up with contact cleaner, and also the mating surfaces that it sits against. H3 bulbs earth themselves through their body and the body of the light fitting, so if there’s some dirt reducing the current that could be the issue.
-
Mine is a 2012 pre-facelift estate (“combi”). Everything in this post is applicable to a 2008-13 pre-facelift car, and I’m not sure about differences with hatchbacks. When replacing with retrofit LEDs, even ones that claim to be “canbus compatible”, some bulbs work and others don’t. It’s trial and error to find ones that work. The DRLs definitely do generate bulb failure warnings with some LEDs, but not with others. Likewise with rear indicators and reversing lights. I have fitted “Antemoon” LEDs (link below) for DRLs and they work fine with no bulb faults. The only peculiarity is that they flash three times, left then right, when you turn the ignition on. I suspect this is simply the test pulses that the car sends to see if the bulbs are working, and the pulses are normally too short for a halogen bulb to actually light up, but LEDs do because their response time is quicker. Antemoon P21W for DRLs: https://www.amazon.co.uk/dp/B0DP4PYW2K?ref_=ppx_hzsearch_conn_dt_b_fed_asin_title_5&th=1 I have tried replacing the front fogs (H8 if I remember correctly), but they don’t work because when turning left or right the car ramps the brightness up and down, and the LEDs aren’t dimmable so don’t respond properly. I’ve also replaced rear indicators. This took a bit of trial and error because some caused a bulb fault, and others were simply too bright and would dazzle following drivers at night. I settled on the following, which work and are a sensible brightness: Argo PY21W for rear indicators: https://www.ebay.co.uk/itm/374844629873?var=643919891661 Note that PY21W filament bulbs do not fit for the rear indicators because the bulb glass physically won’t go through the hole in the light fitting. For conventional bulbs on a pre-facelift you need RY10W, but PY21W LEDs generally do fit. And I’ve done the reversing lights. These are now very white and fairly bright (but not enough to blind anybody). No faults with these particular bulbs. Antemoon W16W for reverse lights: https://www.amazon.co.uk/dp/B0F5B4LK16?ref=ppx_yo2ov_dt_b_fed_asin_title I’m not bothering to try the brake lights or the rear fogs, because the Superb mk2 is very unusual in using single-filament bulbs for both of these and they both do double-duty as tail lights as well. Most cars I’ve owned use dual-filament bulbs for this purpose, but the Superb must be switching the voltage to drive the bulbs at different brightness - which doesn’t generally work with LEDs. Also, matching the brightness with the single tail-lights bulbs will be difficult without it looking like your brake lights are permanently on. I am currently testing a pair of H3 which my car uses as the auxiliary full-beam halogen lights (in addition to the bi-xenons). This pair were the only ones I could find that didn’t have a ridiculously big base, which I suspect wouldn’t fit in the housing. HOWEVER, I have had intermittent bulb faults from one of the bulbs, so I can’t be sure about them yet. Further testing required. Katur H3 bulbs for halogen full-beam (on car with bi-xenons). Note I’m not 100% sure about these: https://www.amazon.co.uk/dp/B0CB5YK3MW?ref=ppx_yo2ov_dt_b_fed_asin_title&th=1 It’s worth bearing in mind that LED retrofit headlights and full-beams are an MOT failure if the tester can see that you’ve fitted an LED into a reflector lens, so if I do keep these I’ll have to swap them back for the test. The last thing on my list are the front indicators. On my pre-facelift these are a very unusual bulb - PH24WY, and they look a bit of a pig to get access to. I’ve only found one LED retrofit bulb, and haven’t tried it yet. But these do specifically mention 2008-13 pre-facelift Superb, so I’m hopeful. PH24WY for front indicators (not yet tried): https://www.ebay.co.uk/itm/304561517995 And the above are slightly cheaper direct from the Car Mod Shop web site.
-
I’ve always assumed that the heated mirrors are thermostatic, rather than on constantly. Either that, or the power is low enough that they reach a sensible equilibrium. I find it’s quite useful to be able to switch them on independently and have the mirrors kept warm, because otherwise they can mist up again after being cleared initially on really cold and/or humid days or when you go through a foggy area. This is much less likely to happen with either the front or rear screen, because they’re kept warm by the heat of the cabin.
-
Pah! That’s nothing! If I’m really careful I can get 28 mpg. Sometimes 29 if it’s mostly downhill. Occasionally I can go 300 miles on a single tank. The numbers are a bit different with the VR6! 🤪
-
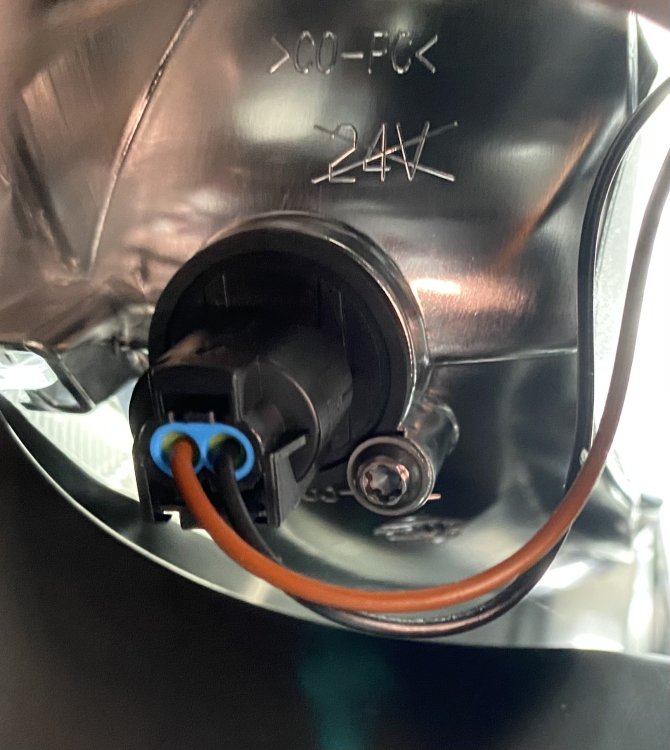
What is this thing? Where do the two ends attach? Does it have an official “name” that would be searchable on eBay or on parts web sites?
-
Ideally not traditional WD40. It will work in the short term, but tends to attract dirt and will gum up in the longer term. It’s not really intended as a lubricant. I prefer using silicone spray (available under the WD40 brand). It is intended as a lubricant, and can be used on plastics and rubbers where you shouldn’t use traditional WD40.
-
Nope, looking at the photos above, it’s clear that the cigarette socket(s) are fed from a 25A fuse in slot 24. There’s also a separate circuit in slot 26 labelled “12V”, and I’m betting that’s the one for the boot socket, same as my Superb. I didn’t suggest piggybacking an existing fuse. I suggested putting a fuse tap into an unused slot and putting the cigarette lighters’ fuse into the upper slot of the fuse tap, leaving the lower slot of the tap empty. Thus the “new” cigarette lighter circuit will have exactly the same fuse capacity as the existing circuit, and there will still be no fuse connecting the contacts of the previously unused slot. But in fact you can piggyback an existing fuse if you want. Just put the existing fuse into the lower slot of the fuse tap, and put the cigarette lighter fuse into the upper slot of the fuse tap. Then feed the fuse tap output into the bottom contact of the cigarette lighter slot using a spade. The cigarette sockets will still have the correct fuse capacity. I’ve done this on my Superb, which also has a 25A fuse feeding the two cigarette sockets in the cabin (front and back). These I have made ignition-switched, but I have left the socket in the boot (which is on a separate circuit) unchanged so it is still permanent 12V. Looking at the fuse diagram in the photo above, it looks like the Octavia also has a separate circuit for the boot socket - the labels of fuses 24 & 26 are the same as my Superb. If I’m right, fuse 24 is the one the OP wants to change for the cabin socket(s), but I’d suggest leaving fuse 26 alone for the boot.
-
Do you have a multimeter, a pair of wire cutters, wire strippers and a crimp tool? If so, this is an easy mod… Use your multimeter to find an unused slot in your fuse board that is ignition-switched. Put your meter into DC voltage mode, put the black probe against a metal part and put the red probe into the top half of each fuse slot. Turn the ignition on and off, and keep looking until you find one that only gives you 12V with the ignition on. Plug a fuse tap into that unused slot. These are available from Halfords. Remove the fuse from the cigarette lighter circuit, and insert the fuse into the “upper” slot in the fuse tap. The output wire from the fuse tap should now be an ignition-switched +12V. Test this with your multimeter. Get a spade connector (also available from Halfords) and crimp one onto the end of the fuse tap’s output wire. Insert the spade into the lower part of the cigarette socket fuse slot. Your cigarette sockets are now receiving power from the ignition-switched circuit instead of the permanently powered circuit.
-
Okay, I went and had a look at the front indicators. You pull off the circular rubber cover, and underneath this is what you (can’t) see… The picture is of the left side, and the Torx screw is on the inboard side so reasonably easy to access by feel. Unfortunately the other side is not a mirror image, so the screw is between the bulb fitting and the inner wing on the right hand side. I managed to get a T20 bit to engage with the screw, so I think that’s the correct size. As I mentioned, the other thread implied that you only have to loosen the screw, not remove it. But since the black plastic bit is part of the bulb, I can’t immediately imagine how you can remove the bulb without removing the screw entirely - and I imagine it’d be a nightmare to get back in. When I’m feeling braver I might try and remove it!