KevinSt
-
Posts
62 -
Joined
-
Last visited
Content Type
Profiles
Forums
Gallery
Shop
Events
Downloads
Everything posted by KevinSt
-
estate boot will not close!
KevinSt replied to Fake elvis's topic in Skoda Octavia Mk II (2004 - 2013)
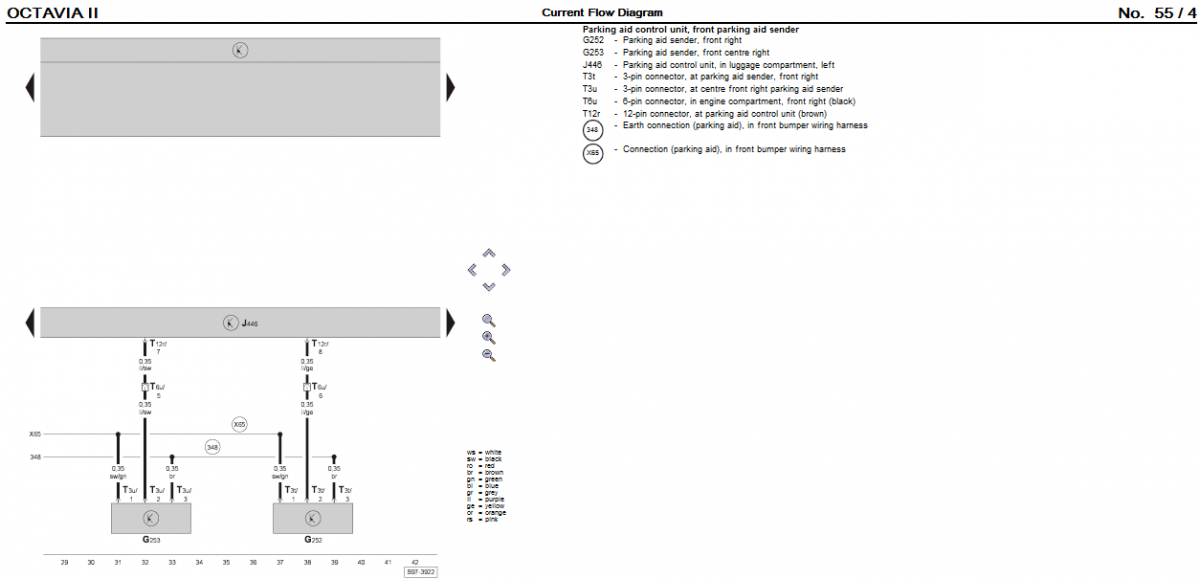
Looking at the current flow diagram in the manual the central locking motor is driven directly from the control unit behind the dash. There is a local ground point in the loom. You can test the earth and the supply with a meter. I have uploaded the wiring diagrams here: https://drive.google.com/folderview?id=0B6ytVYfsfAiNUWs3RWhRUjYwd0k&usp=sharing If the wiring checks out then it may be the motor. -
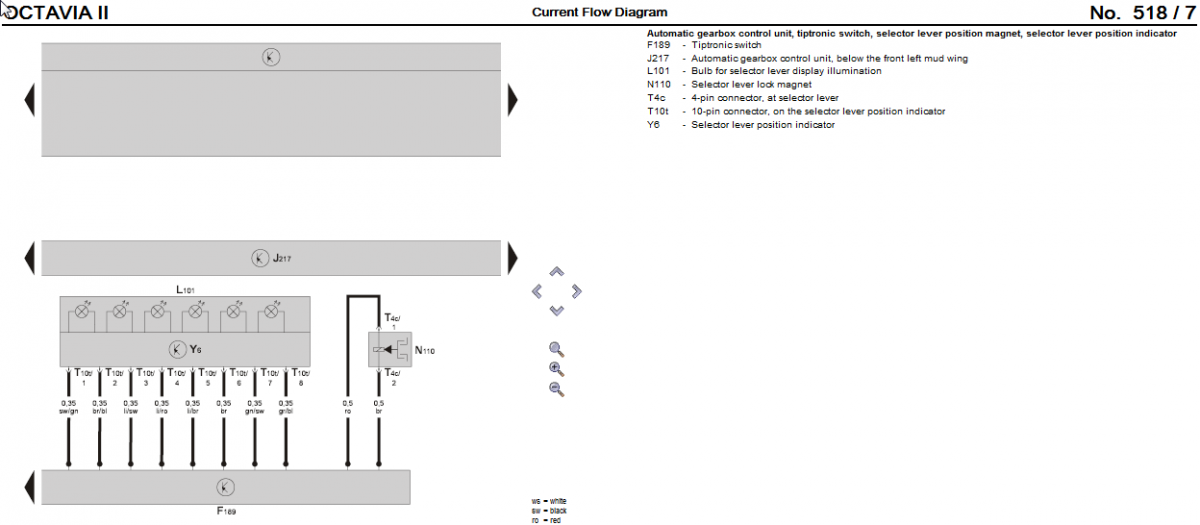
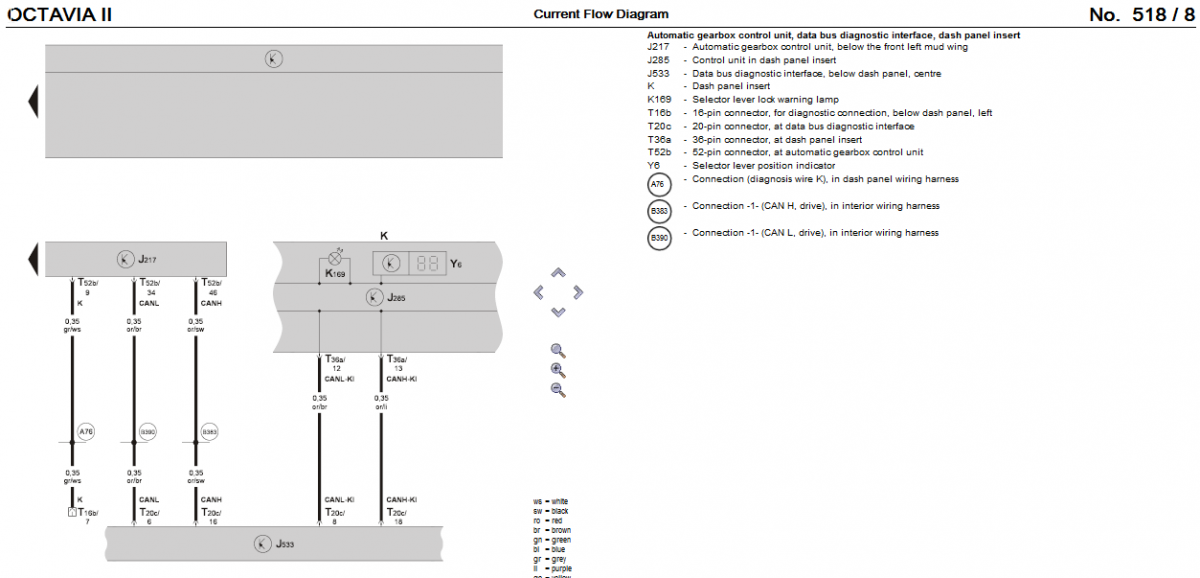
The DSG selector is connected to a control unit on the CAN bus. See the diagrams below:

-
Rear brake disc shield replacement
KevinSt replied to KevinSt's topic in Skoda Octavia Mk II (2004 - 2013)
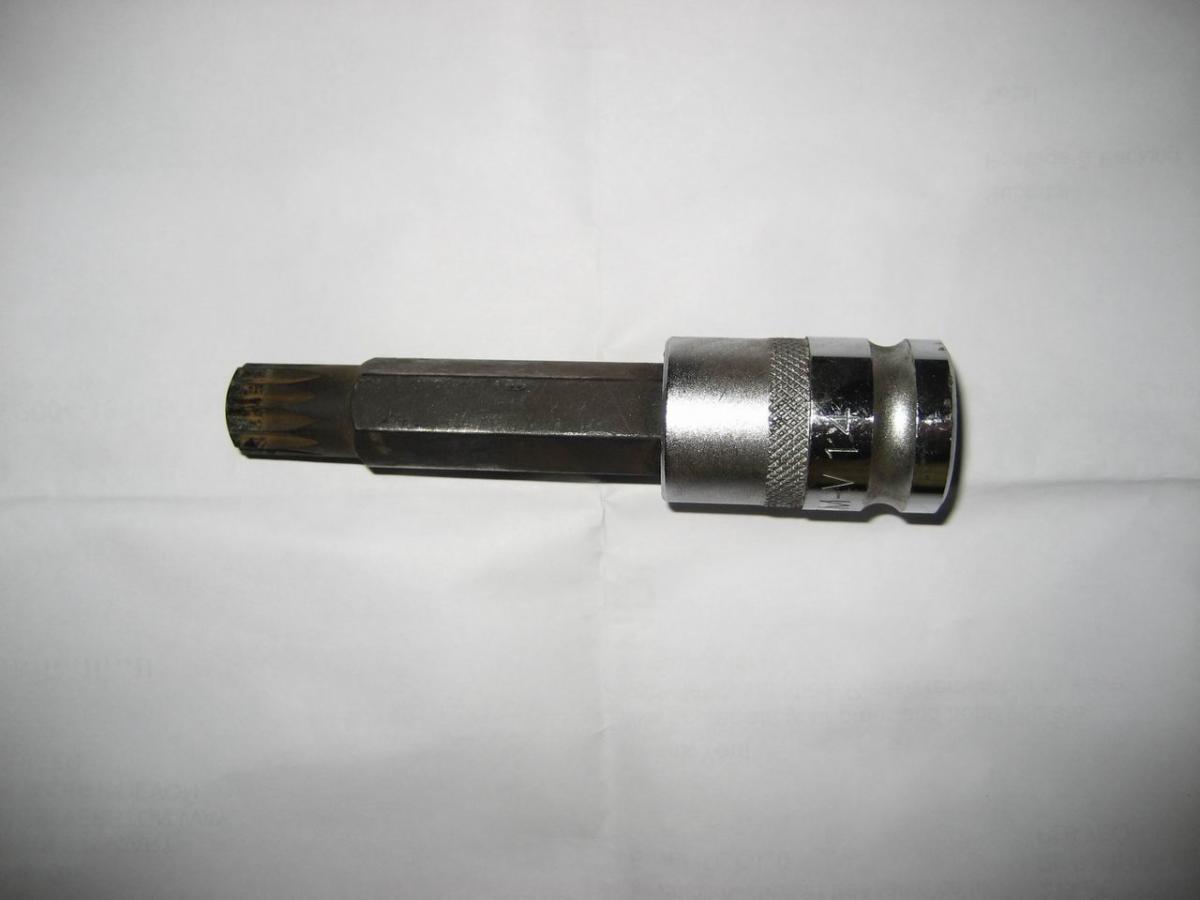
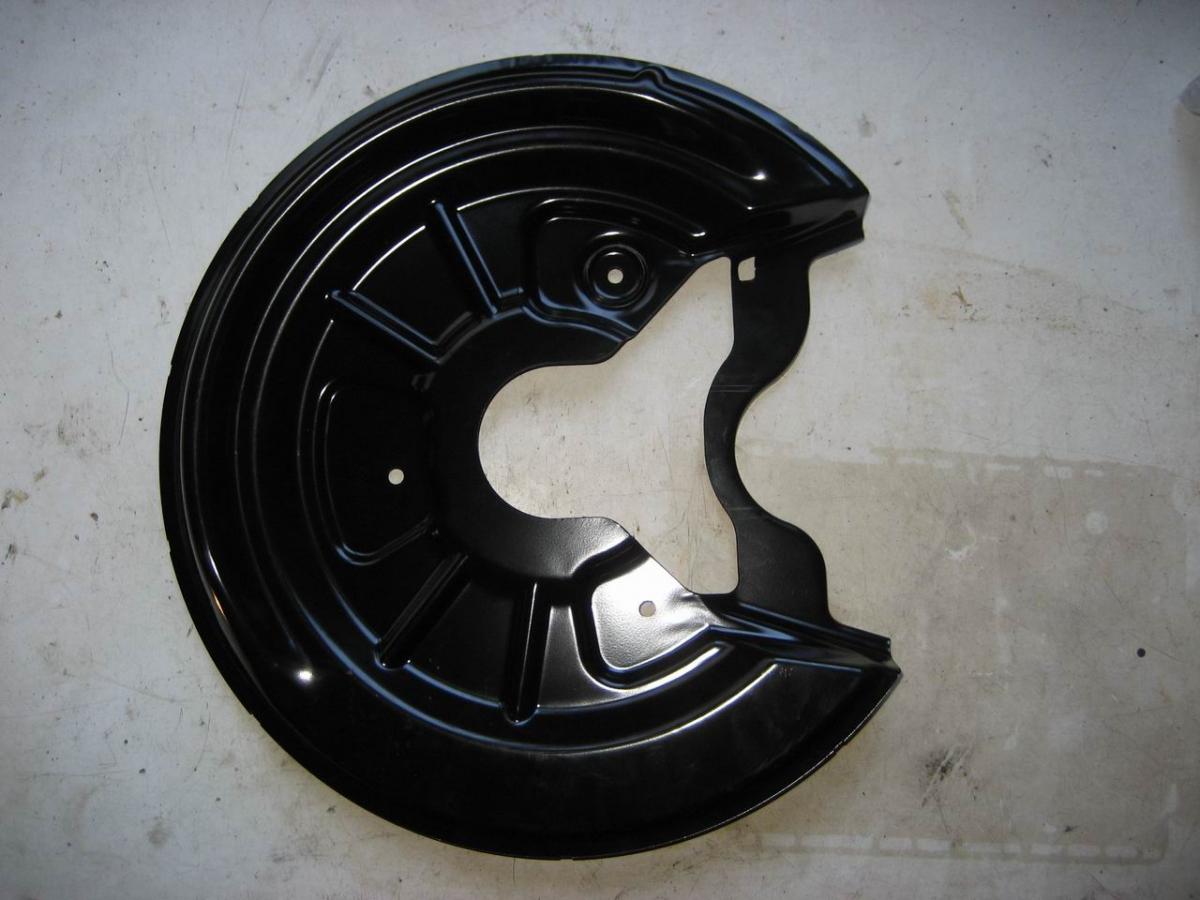
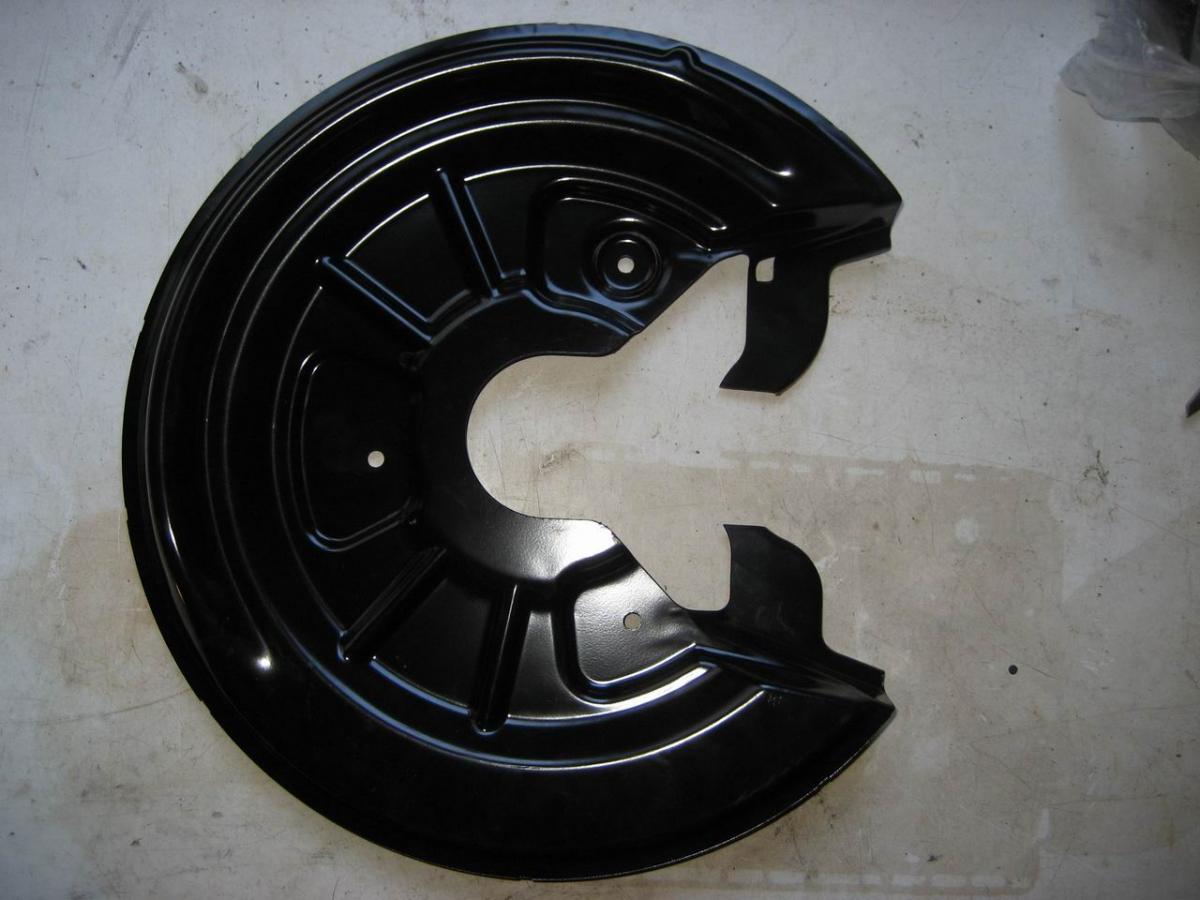
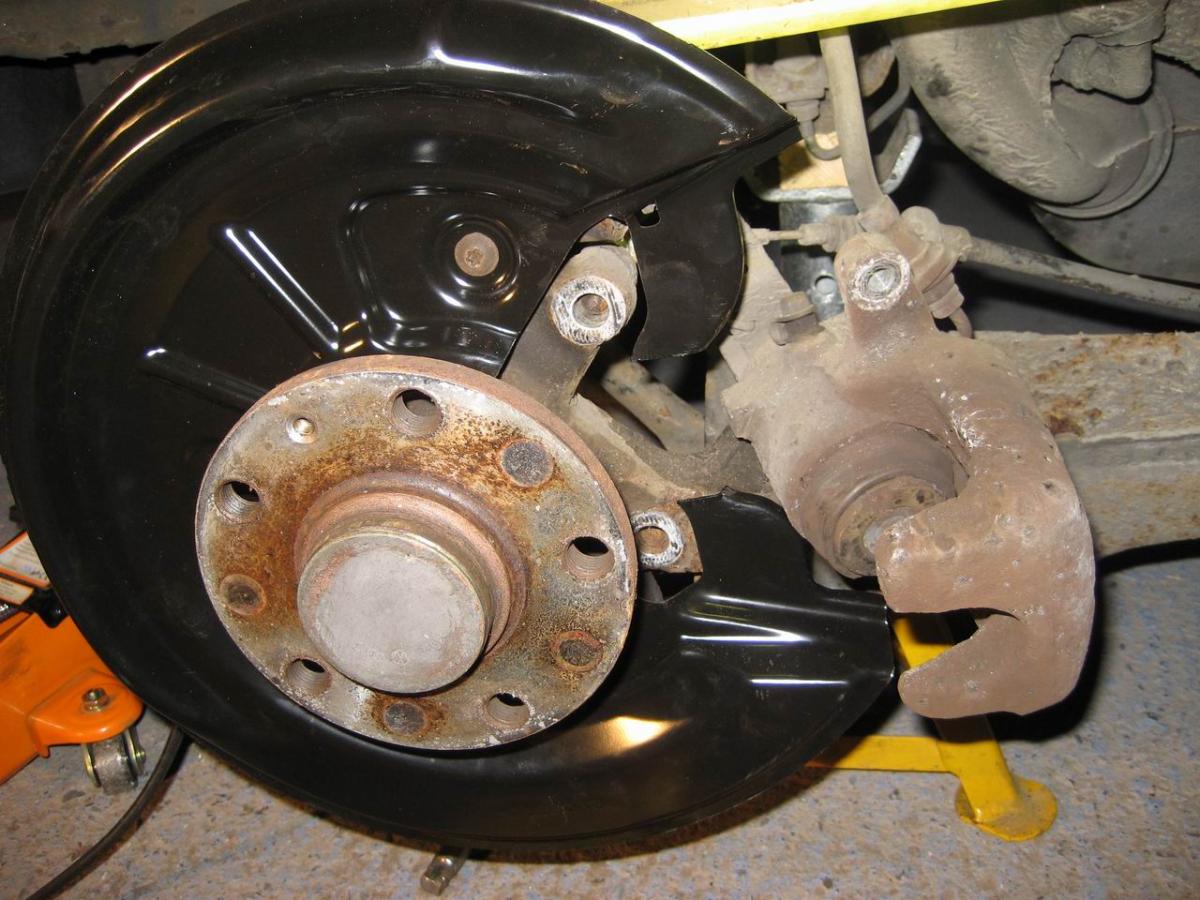
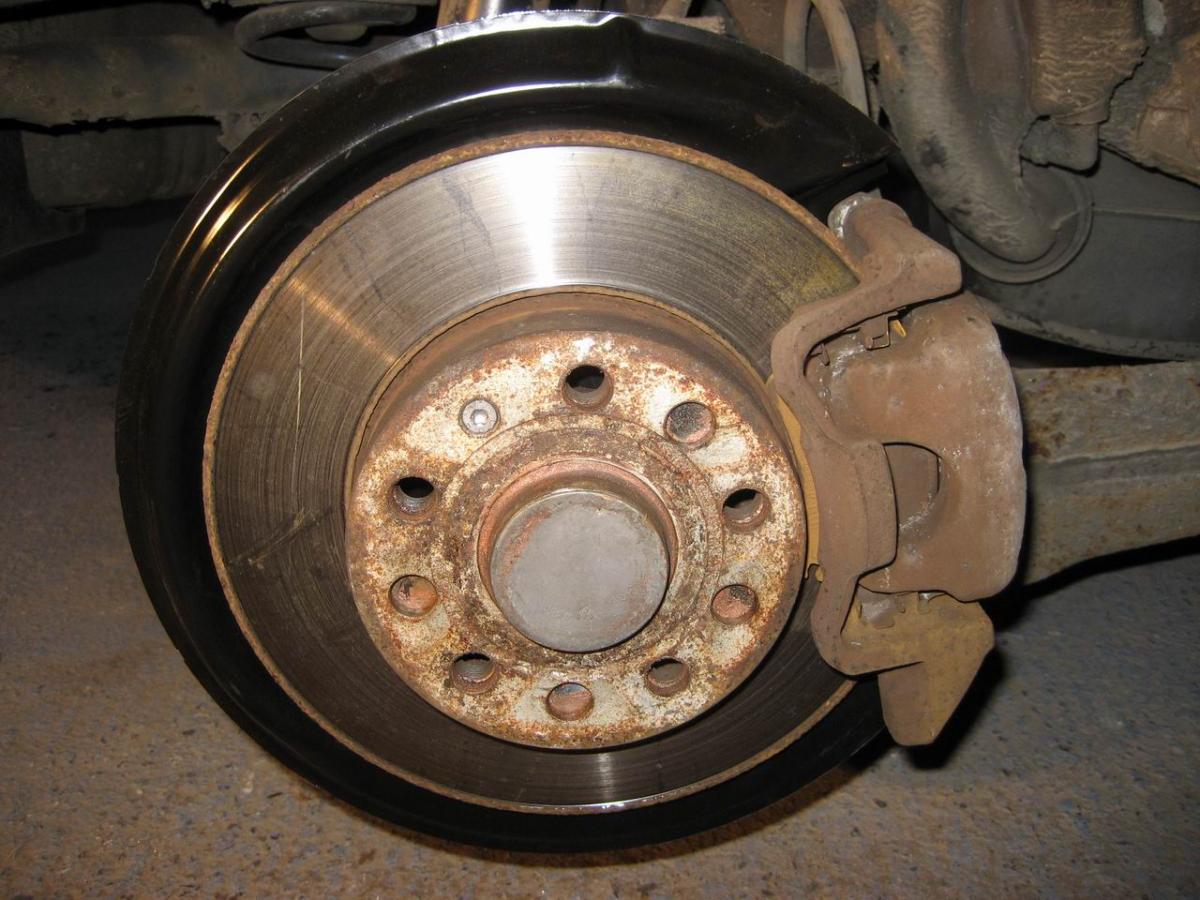
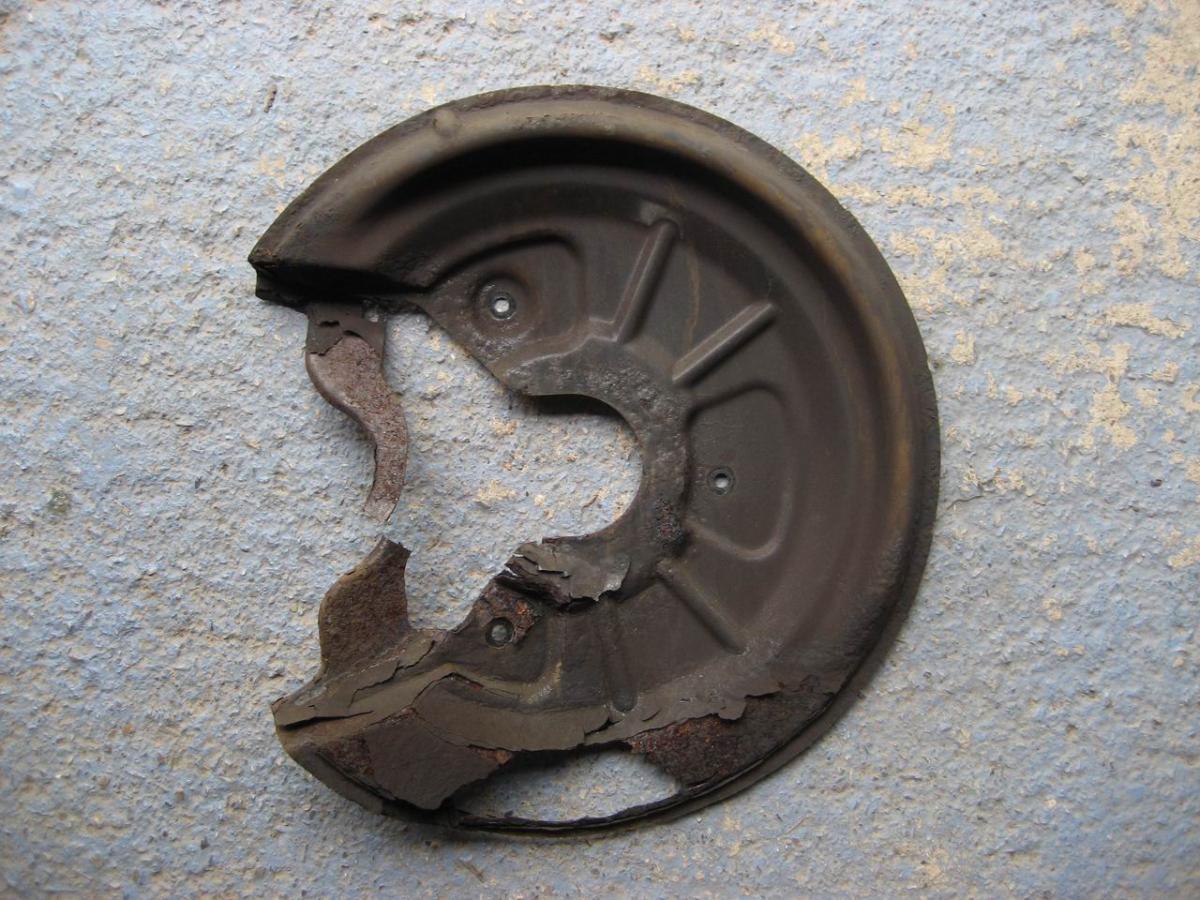
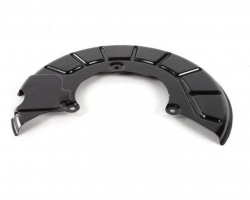
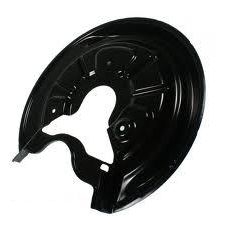
I did the job today; it probably took me about 1 hour per side. Here is the procedure on a 2005 Octavia 2.0 TDi. Remove the road wheel. Remove the brake calliper (15mm & 13mm spanners). Disconnect the ABS sensor connector and loom. You need to be careful not to snap-off the release clip. Sometimes pushing the connector on more can help when trying to lift the clip. If you are not familiar with the plugs then look online for a guide otherwise there is a high probability that you will break it! Remove the brake calliper carrier mounting bolts (M14 splined tool). These bolts are very tight so make sure that the tool is FULLY inserted before applying any force. If you are doing the job on axle stands then you will need to be cunning with how you loosen them. I had a long M14 spline bit (see photo) which allowed me to attach a ratchet at one end on a long extension and fit a large adjustable spanner across the flats of the bit. I pre-load the ratchet using a trolley jack under the handle to apply the force. I then used a small lump hammer to hit the handle of the adjustable until the bolt finally 'gave'. The carrier and pads can be left on the disc. Unscrew the T30 disc retaining bolt. Remove the disc from the hub. If the disc is seized to the hub then heat the disc in the area of the road wheel bolt holes using a blow torch. A tap with a lump hammer behind the disc should then release it. If necessary hacksaw through the old disc shield at one end of its narrowest section and bend the narrow section out of the way. Remove the corroded disc shield using a T30 bit. Make sure that they are fully inserted before applying any force. Cut a 55mm section out of the new shield (see photo), de-burr and paint the cut edges. Slide the new shield in place and reassemble. This procedure avoids having to undo the hub bolt which requires an M18 splined bit which needs to be replaced when refitting. I am unsure as to the purpose of the disc shields but the manufacturer would not have bothered to add weight and cost to the car had their engineers not believed there was good reason.
-
Rear brake disc shield replacement
KevinSt replied to KevinSt's topic in Skoda Octavia Mk II (2004 - 2013)
Thanks for the info guys. I'm going to cut the new shields and avoid interfering with the hub. I'll try to take some pictures and post them after I've done the job. -
Reading the manual, the procedure for accessing and changing the selector lever PCB is horrendous, it involves removing the exhaust and undoing things from underneath. I would say that if your reversing light and dash are working reliably then I don't understand how the selector switch module and wiring can be at fault. Unfortunately I don't have access to any CAN bus diagnostic tools. Let me know if you get any further forward. Kevin
-
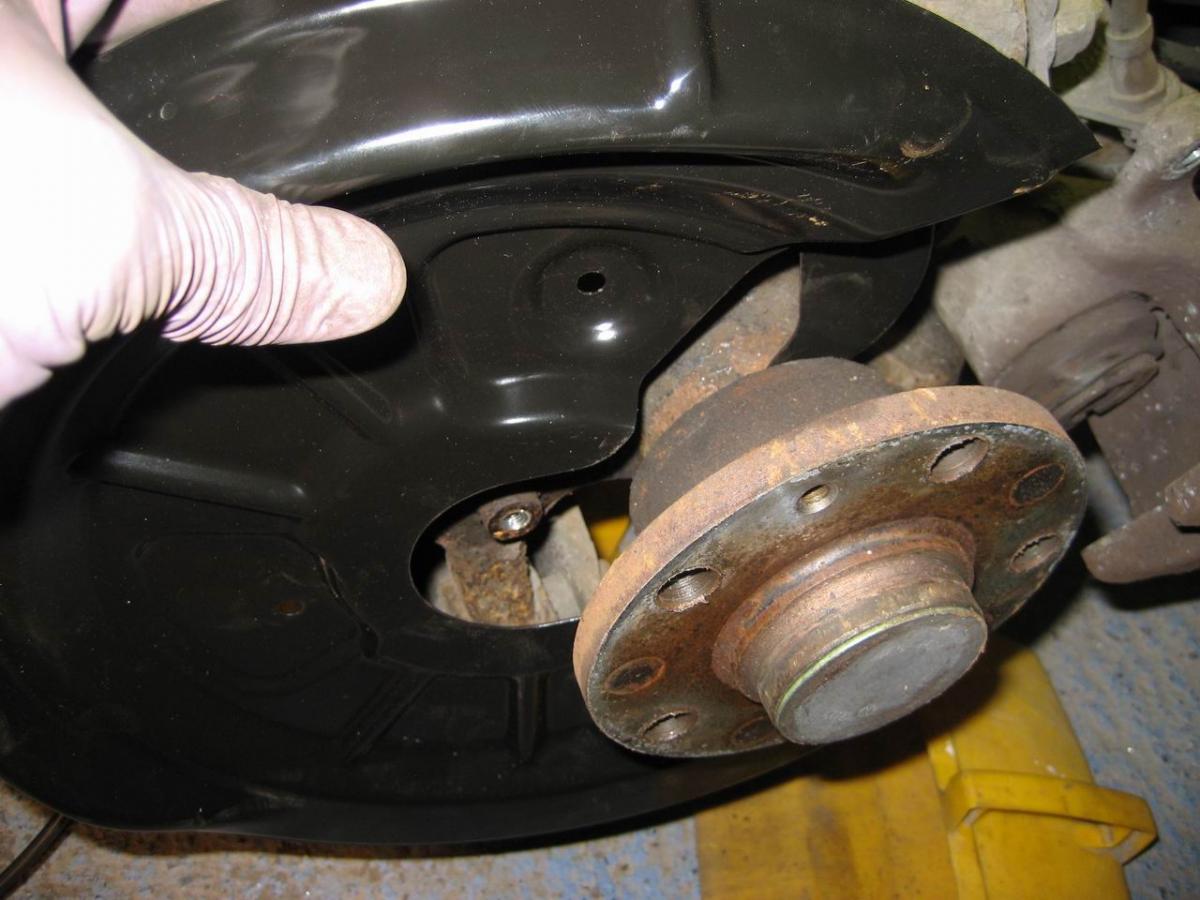
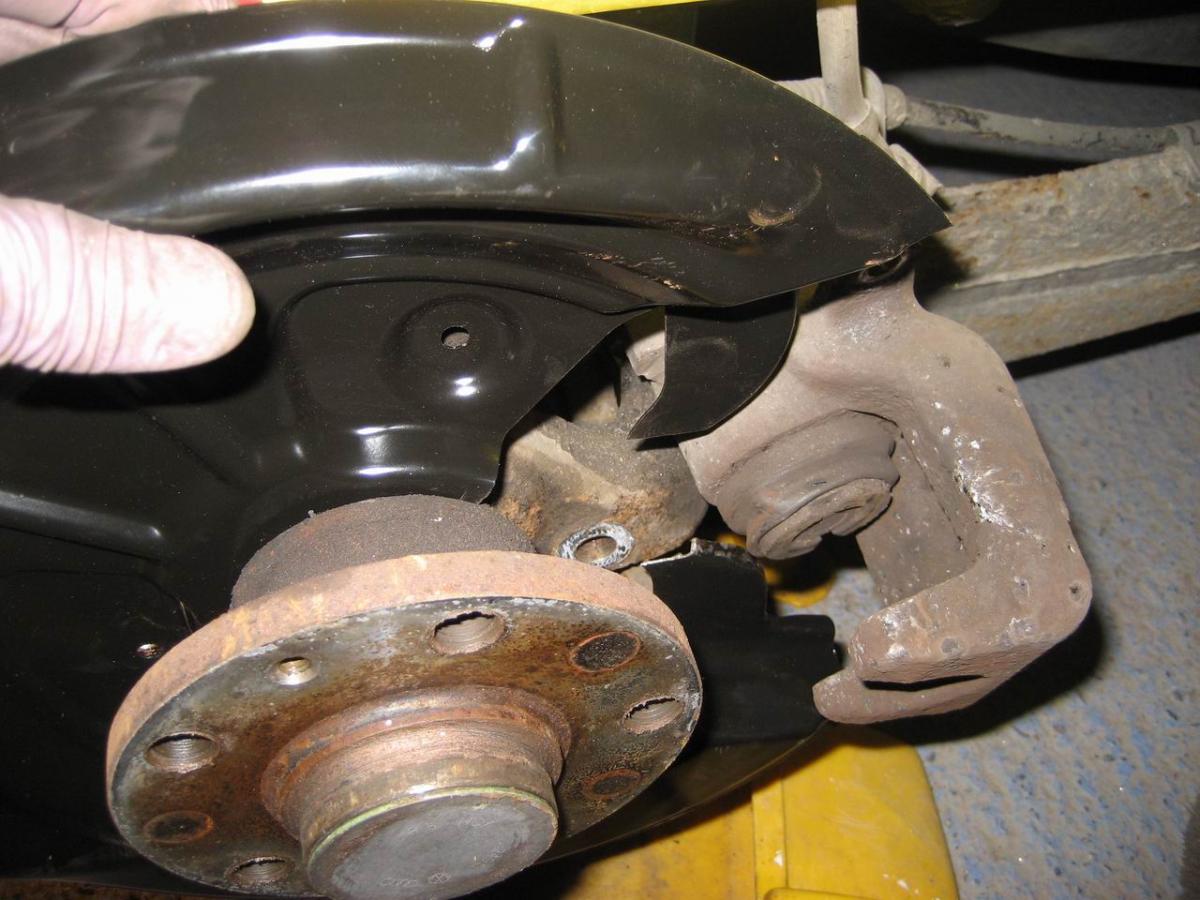
All 4 of my brake disc shields have badly corroded. I have replaced the front ones which was quite straightforward. I have now started on the rears but discovered that to do them properly you have to remove the hub. The front shields are shaped like the letter 'C' and can be slid behind the hub without removing it. The rear shields have a large hole in the middle rather than being 'C' shaped but the hole is not large enough to fit over the hub. See the attached pictures. My question is: I don't really want to remove the hub so is there any good reason why I shouldn't cut the shields so that they are more like the front ones and then I can just slide them behind the hub? The position where I would cut it only has a very thin strip of metal so it would not compromise the strength greatly and I would paint the cut ends. Thanks, Kevin
-
Hi John, I still have not fixed the fault. I am thinking that the gear selector lever probably does work correctly because it interfaces directly onto the CAN bus and if that wasn't working then the reversing light would not work and the gear selection indicator on the dash would not work, both of which do. I have now obtained the circuit diagram for the gear selector and it just shows a single electronic module that connects to the CAN bus. I did wonder whether there was a problem with the radio. I thought that it might be interesting to disconnect the radio and then try the reverse alarm again. Kevin
-
I've used the guide on the forum here: http://www.briskoda.net/forums/topic/258617-identify-and-change-a-faulty-rear-parking-sensor-mk2-octavia-updated/ to identify which sensors had failed. It was the outer two. I bought two new, pre-painted sensors from eBay (goodparts32) for about £16 each. I have replaced them and I get the clicking sound from them but the radio graphic is still intermittent and there is no beeping. Do I need to clear any stored error codes before it will work correctly?
-
Unfortunately the sensors (if they are OEM) are not just ultrasonic transceivers. The sensor module contains some electronics that pre-processes the signal before sending digital data back to the control unit in the boot. I guess that this explains why they are so expensive. The circuit is sealed in potting compound so I fear that they are not that easy to repair. I just bought some pre-painted ones from this seller: http://www.ebay.co.uk/itm/PDC-REVERSING-PARKING-SENSOR-AUDI-VW-SKODA-7H0919275C-NEW-ORGINAL-/321253117100?pt=UK_CarsParts_Vehicles_CarParts_SM&hash=item4acc2d8cac
-
When I replaced one of mine I found it easier to remove the electrical connection first whilst the sensor was still held securely. I found a seller on eBay in Poland that sold pre-painted sensors making the job easier still. The price was about the same as from UK sellers. http://www.ebay.co.uk/itm/PDC-REVERSING-PARKING-SENSOR-AUDI-VW-SKODA-7H0919275C-NEW-ORGINAL-/321253117100?pt=UK_CarsParts_Vehicles_CarParts_SM&hash=item4acc2d8cac I plugged the electrical connector back in after the sensor had been reinserted into the bracket, simplz. I have a couple of front ones to do next, they too look tricky to reach :(
-
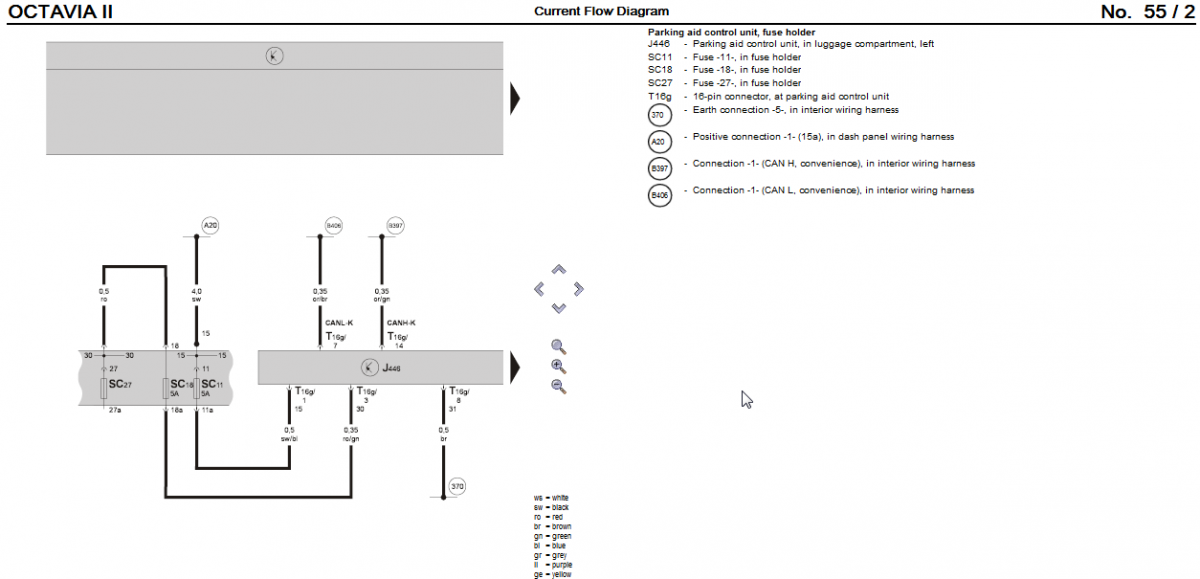
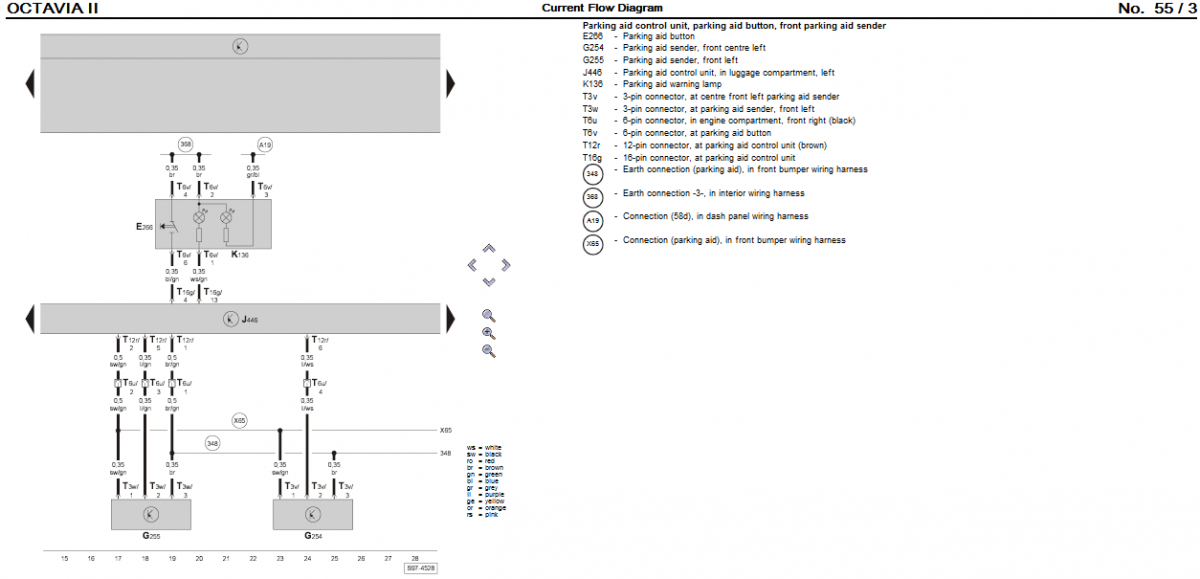
Hi, I am in need of some assistance. My father and I both own a 2005 2.0TDI Octavia Elegance. His is a DSG and mine a manual. Just recently his rear parking sensors have stopped working completely. No graphic on the radio and no beeping. However the reversing lights work correctly and the LCD in the dash correctly indicates 'R'. I have removed his parking sensor controller from the boot and tested it in mine and it works fine. If I lift the trim around his DSG gear lever and gently pull on the wires from the circuit board along side the lever sometimes the graphic appears on the radio when reverse is engaged. My questions are: Has anyone else had this fault? What is involved in removing the gear lever and accessing the circuit board? How does the system work, does it communicate with the parking controller over the CAN bus? Does anyone have a circuit diagram that may help to guide me? Why doesn't the parking system work if the reversing lights and the dash LCD are working correctly? Thanks for any assistance. Kevin
-
£100 for fitting seems a little steep but is probably correct by the time you factor in the fiddle factor of getting the trim off & on and replacing the clips that break and then add the VAT. When I replaced my motor it was corroded internally and seized solid. Removing the wiper arm can also been problematic. I used a puller and had to put considerable force on it to remove it. I would never have been successful without the tool. Refitting the plastic trim at the end of the job is very fiddly. Unless the new motors have been redesigned then the job will need to be repeated in a few years time :(