Silver Bullet
FREEDOM
-
Joined
-
Last visited
Everything posted by Silver Bullet
-
Brilliant job👍, Glad I was able to help, I did replace the arb bushes a few years ago, and can still remember how tight the space you had to work in was. I wasnt sure if you could use a r/angled attachment in the space available, what you did though was really the best approach, ie drilling it out.
-
Ouch!!. All I can suggest is, for a couple of days fill that bolt recess up with Plus - Gas. its one of the best penetrating fluids around. People make the mistake of using WD40 this only a lubricating fluid and rust preventer. Then, gettiing hold of a right angled attachment for your drill, drill most of the centre out. Using a extractor tap try to unscrew it, if it doesnt budge try a bit of local heat, after cleaning off the Plus -Gas (its very inflammable). If that isnt possible can you drill from underneath into the bolt?. If you cant get the remaining bit of bolt out, then drill it out until you remove most of it, re-tap hole to M10 The hole in the clamp is 10mm, then just use a M10 bolt x 18 long. The existing part numbers are:- M8 x 18 hex' bolt N - 101 - 016 - 03 (2 off) Clamp ...................1J0 - 411 - 336D (2 off) NB: Put a bit of copper grease on the bolt thread this will avoid it happening again. Good Luck
-
👍
-
Yes you are corrrect, This has been done in past years by other vrs owners. There is a lot of good stuff on here for mods, you just have to dig deep to find it. If your going to improve handling / performance / quality, there are a number of Audi TT parts that can be added :- Heat shield cover ( clips together over coil pack harness and prevents coil pack wiring insulation from breaking down from top end engine heat). TT drivers side inner plastic wheel arch (get hold of one and cut out the slotted panel carefully leaving a 1 inch border around it) Cut out a rectangular hole behind inner wheel arch inline with existing intercooler carefully so that slotted panel sits over the aperture and glue vent panel in place using Tiger Seal, leave overnight to set. I braced mine using bits of wood wedged against the tyre. This will improve air circulating through the intercooler, or you can fit a front cooler of course , a lot more expensive and more work with piping etc. TT front upper / lower strut bracing bars. The top one needs holes drilling in the top mount metal work (If you treat hole edges with anti rust and paint before fitting no problem) . The lower one uses existing holes in front sub frame, you just have to buy the " TT riv nuts", they expand and hold themselves in place in the holes. Finally Anti roll bars If your using a Std suspension set up then a Whiteline 21mm rear one will give instant improvement and reduce body roll . The Ulitmate set up :- Front......Golf R32 23mm dia / Rear...... Neuspeed 28mm Look for posts by Bowders1 and Steevie Wonder, they have done loads more and are the leaders in mods.
-
I bought 2 new arms (std pressed steel ones) cut out the existing rubber bushes and replaced them with super-pro ones https://www.superproeurope.com/products.cfm?vehicleid=7720 Part numbers are :- SPF 1915K Front control arm SPF 2082K Control arm rear. This is the one you intend to replace, also always buy new Skoda nuts and bolts when doing this work. I did use Powerflex when replacing the dog bone bushing (to stop front wheel skip), but went over to Super Pro ones as the Powerflex ones transmitted to much engine vibration into the cabin (sort of a low droning). The Super-Pro ones have a slightly lower Shore A Hardness but are still harder than std. This worked for me but its really up to the individual as to what you are trying to achieve, ive heard of competition bushes being fitted but the made the Vrs undrivable. Good Luck
-
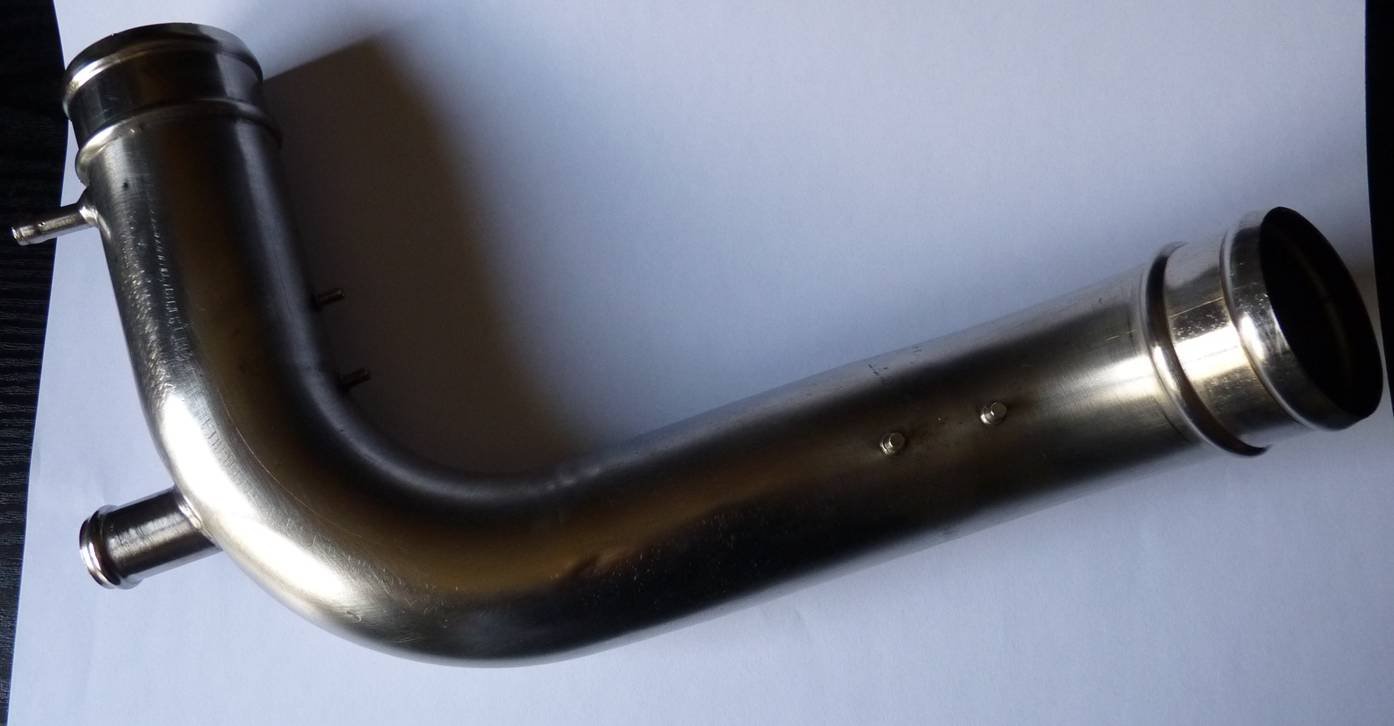
Cheers, in the time i've owned the car, to be fair the pipe only came off once. I had pulled out to overtake a bus on a dual carriageway, was alongside, heard a loud "pop" all power went, it started misfiring and the dash lit up like Christmas Eve. Struggled back to the house, cleared the faults with vagcom and filed a recess on both hose location ears and refitted it. 06A 145 731D hose connection is so much more secure and positive plus better air flow at the connection
-
I managed to find a charge pipe :- 06A 145 731D. The blue silicone hose came today. Just need to get 2 stainless hose clamps, swap everything over, job done 👍

-
Thanks for that
-
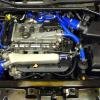
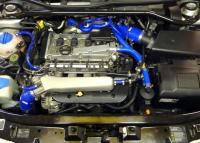
Nice mod Scott, A few years ago I fitted the Forge silicone charge pipe kit + one of their TIP's. One thing I didnt do however was change the crap connection you mention, what you have done looks a good fix. Do you have part numbers for the AGU boost pipe and the CM silicone boost pipe. Thanks