Ooopnorth
Members
-
Joined
-
Last visited
Everything posted by Ooopnorth
-
After much deliberation we've gone for Pirelli Cinturato All Season SF3 on the original alloys. So it'll be even more diligent washing off of salt than usual! Cost £744 fully fitted. It looks like we're due for a dusting of snow next week and the temperature is already below 7 degrees average daytime ambient, so right for use of winter rubber compounds. If the winter turns out to be really nasty, we can always rely on the Subaru shod with Michelin Pilot Alpin 5 SUV - excellent over the last two winters. Now we have to decide what to do with the nearly brand new Goodyear Eagle F1s that came with the car and have less than 700 miles or so on them.
-
Yes, that circular ring and hook sounds like the bumper cap removers. The towing eye is an important component and is usually standard equipment for most vehicles of all makes. You can't mistake it, as it's heavy duty, and the sort of metal chunk you'd want to secure somewhere in the boot, but readily accessible, just in case. Thanks for the advice regarding the wheel alignment pins - I ordered x2 last week (great minds...) - one for the boot and the other for the garage
-
My partner, who is the owner of our Karoq, has found the DAB reception for her favourite station - Smooth - anything but smooth in comparison to the DAB reception of her 2016 Fabia that we just traded in for the Karoq. I noticed that the old Fabia had DAB and FM separate selection touch screen buttons, but in the Karoq you can have either FM or DAB/FM selected. The car is supposed to have Amundsen Plus - whatever that is. Is the problem with the reception that's it's some sort of hybrid DAB (if that's a thing!)?
-
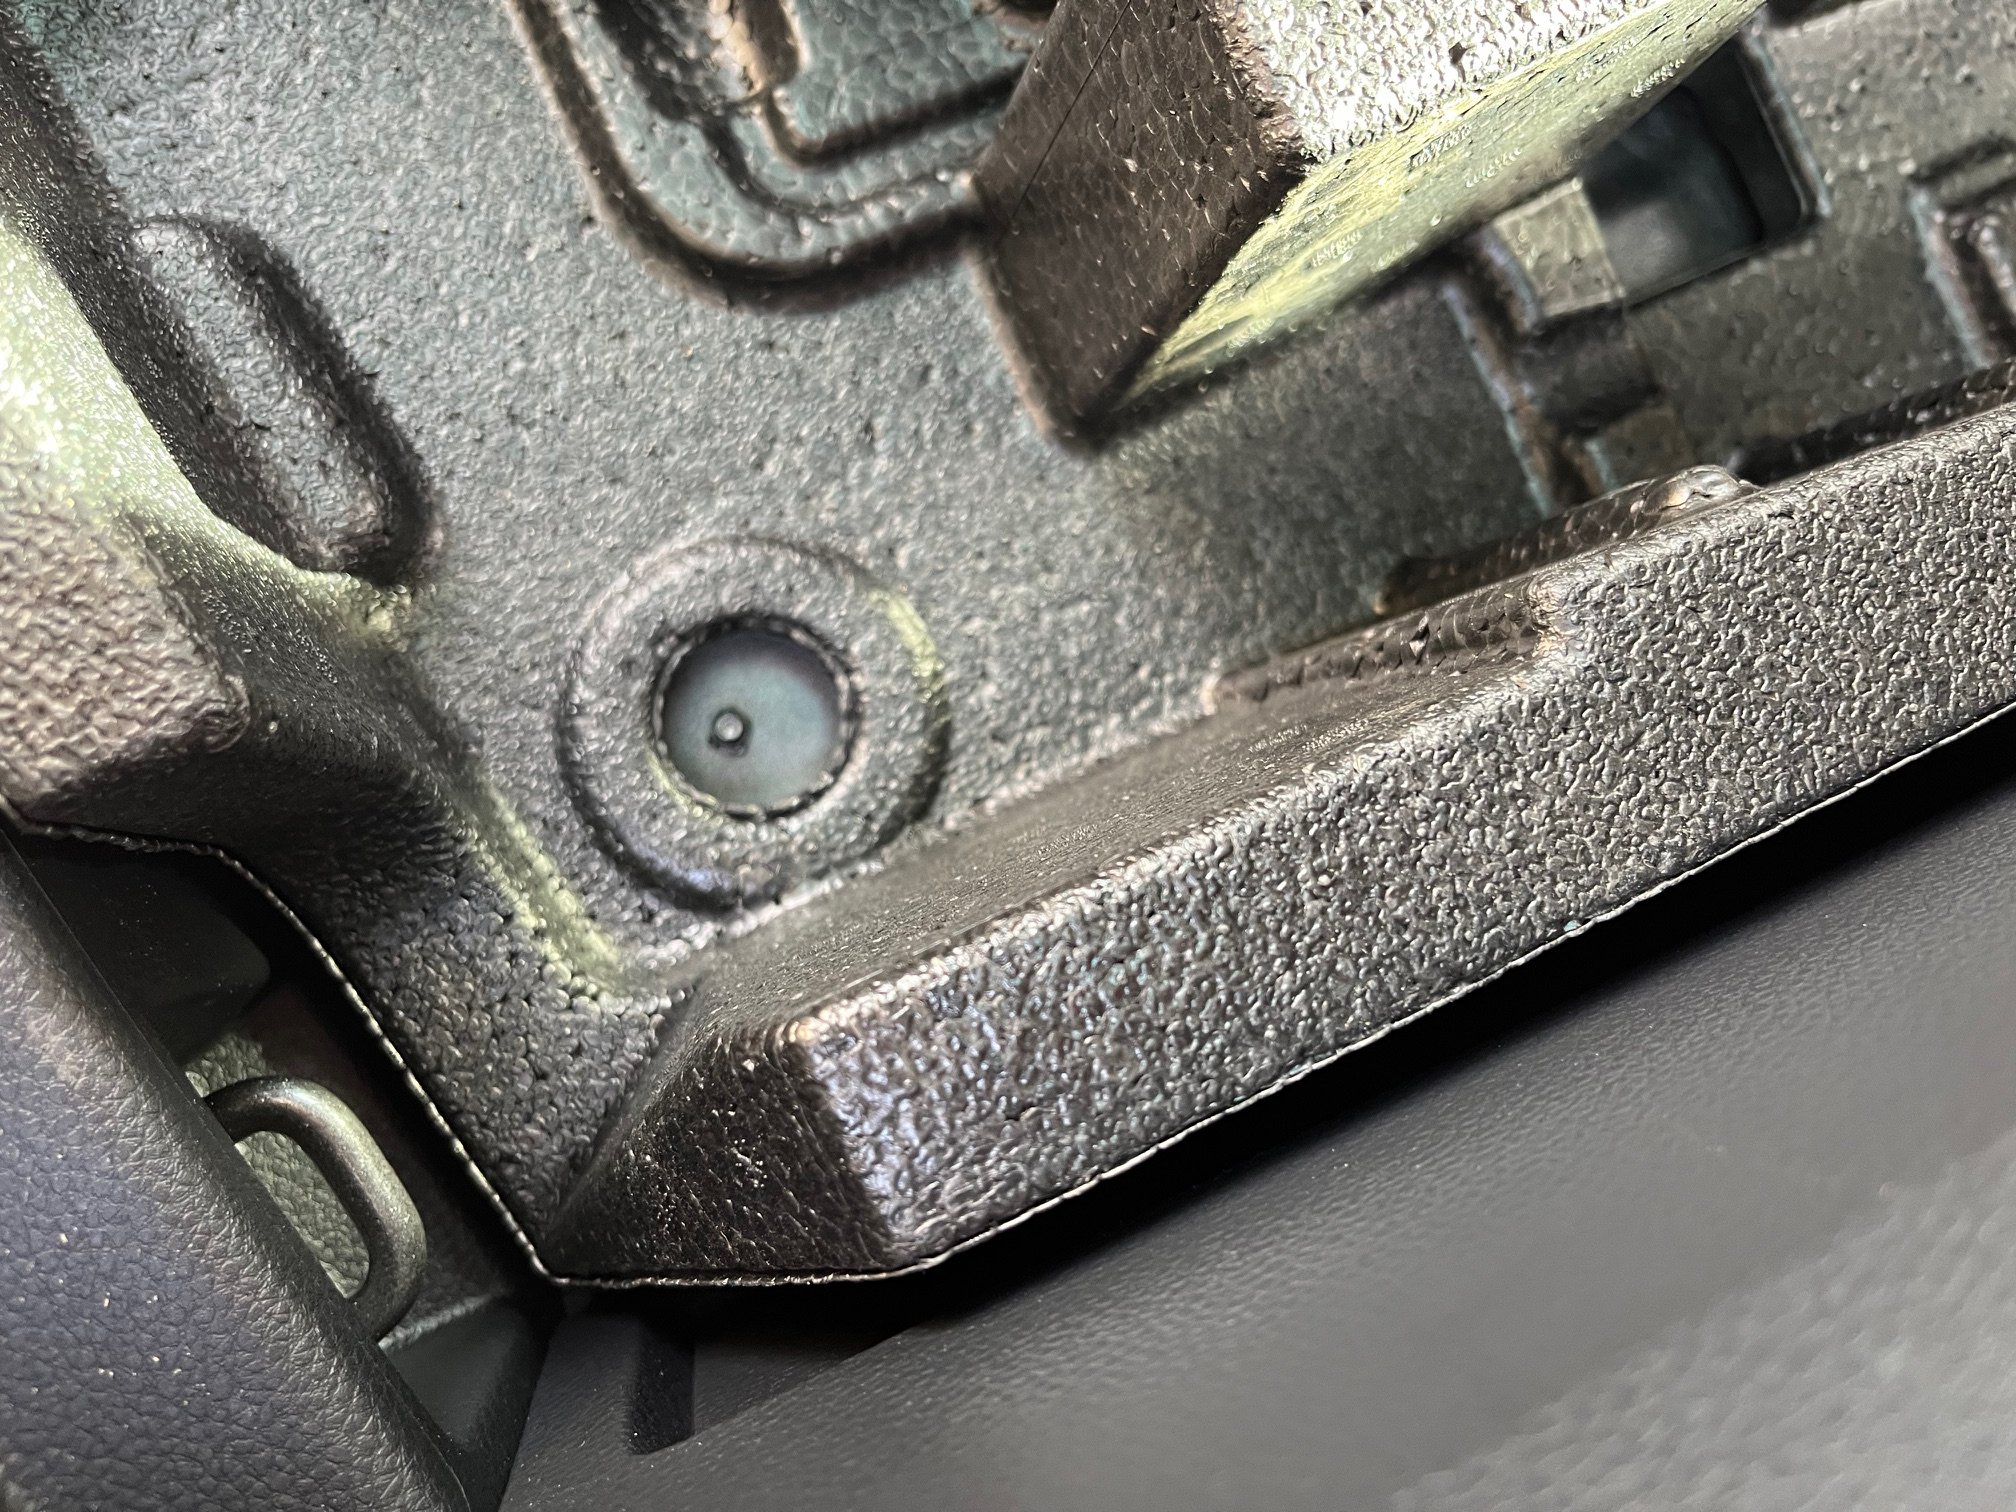
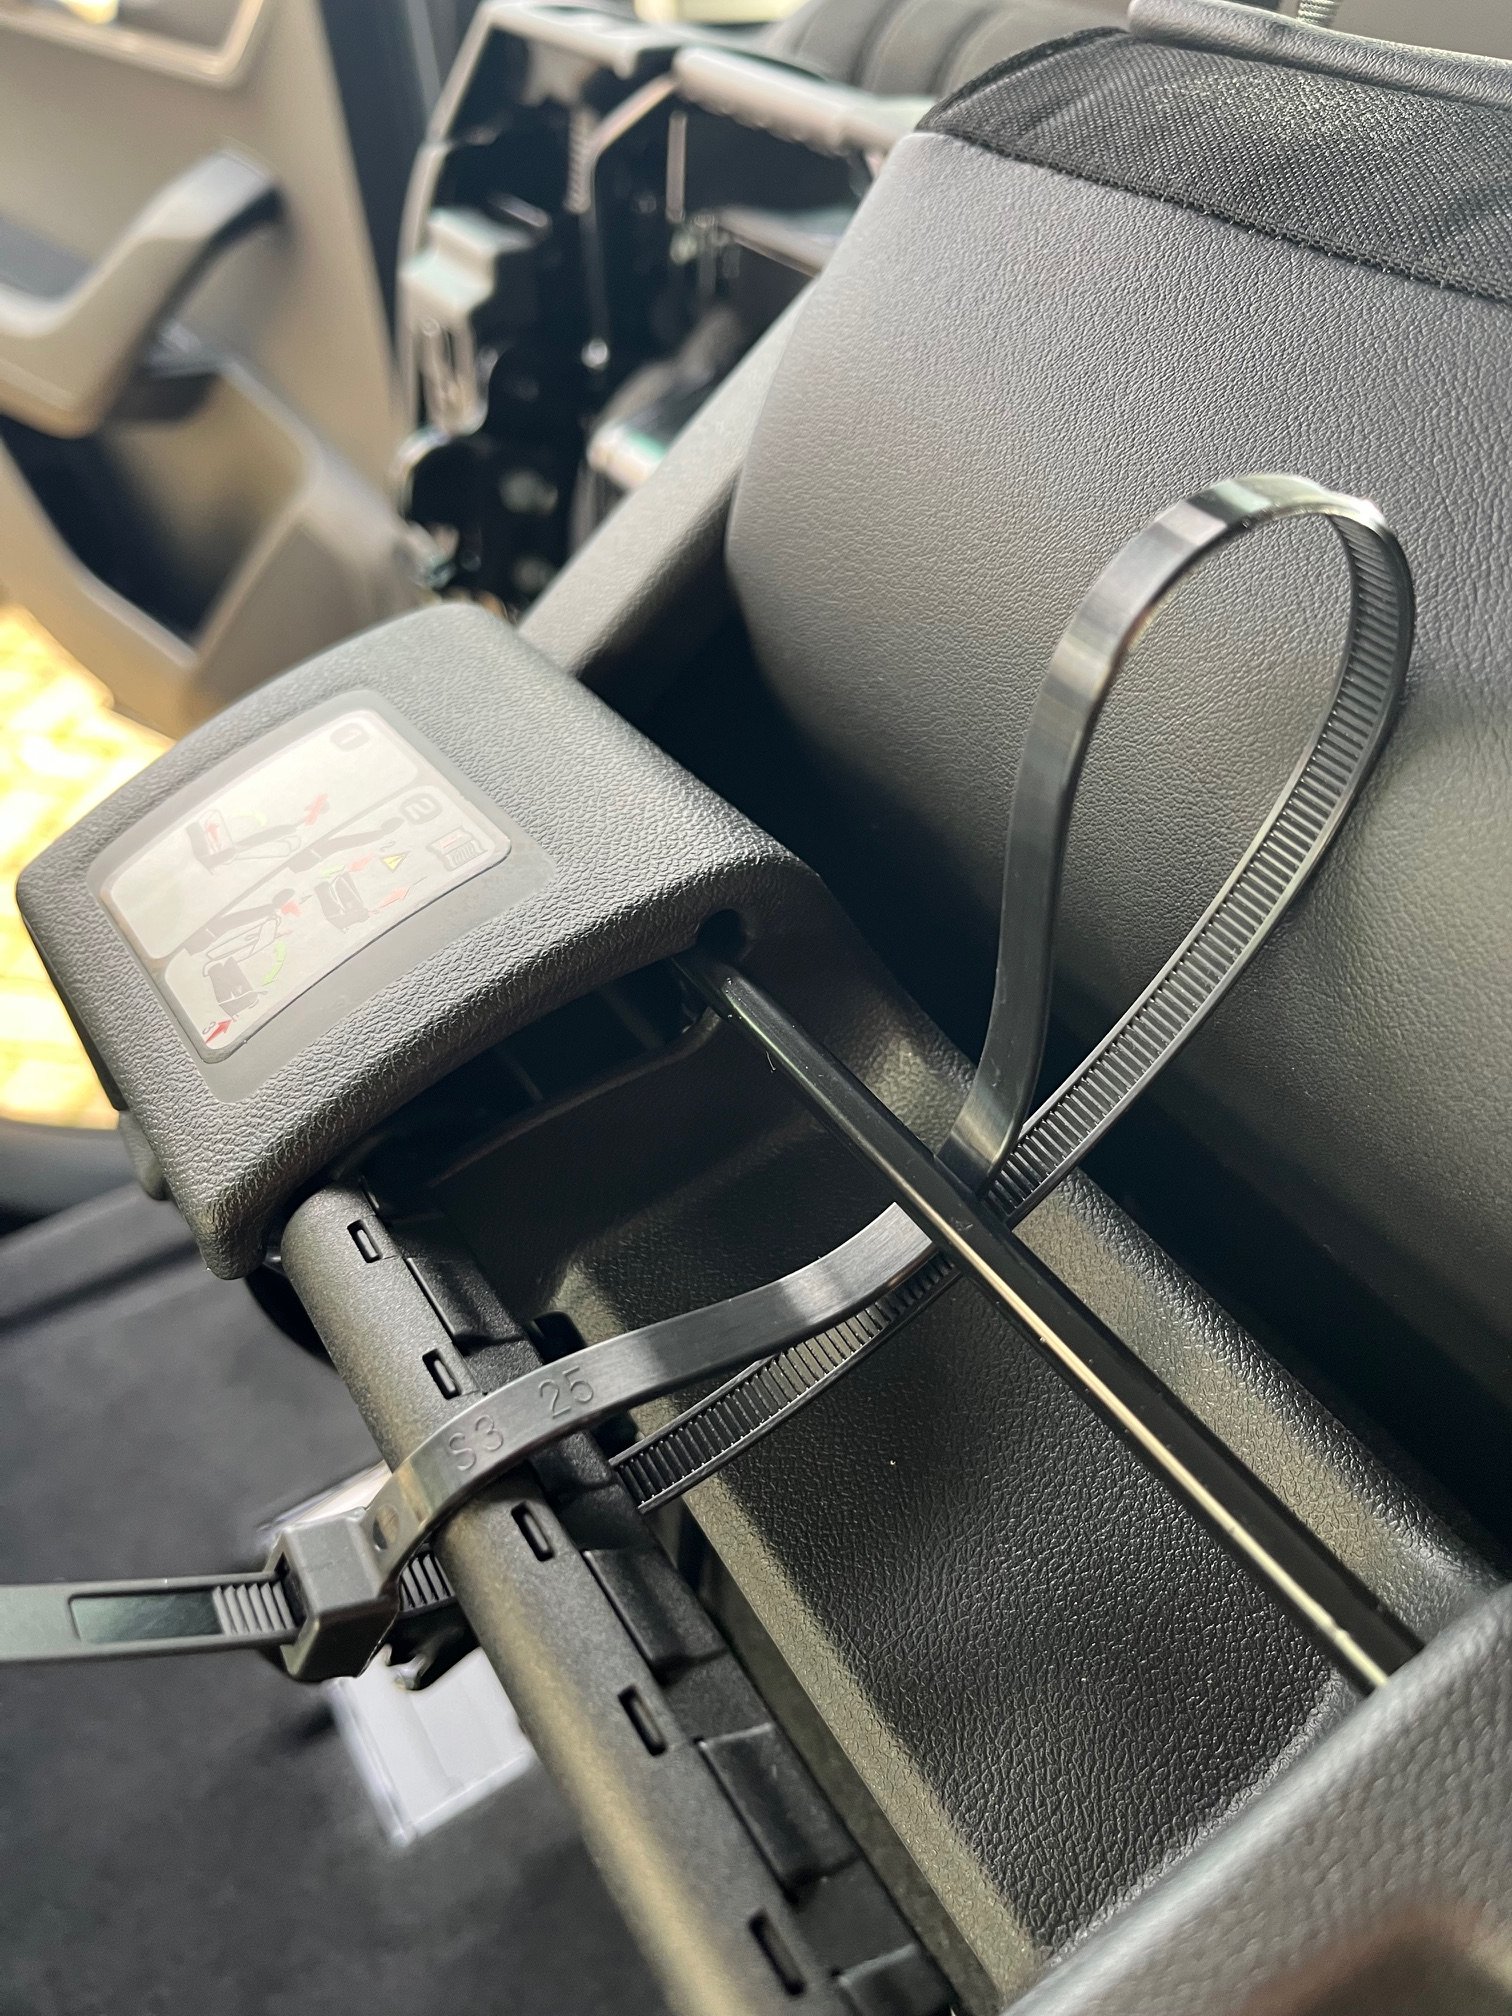
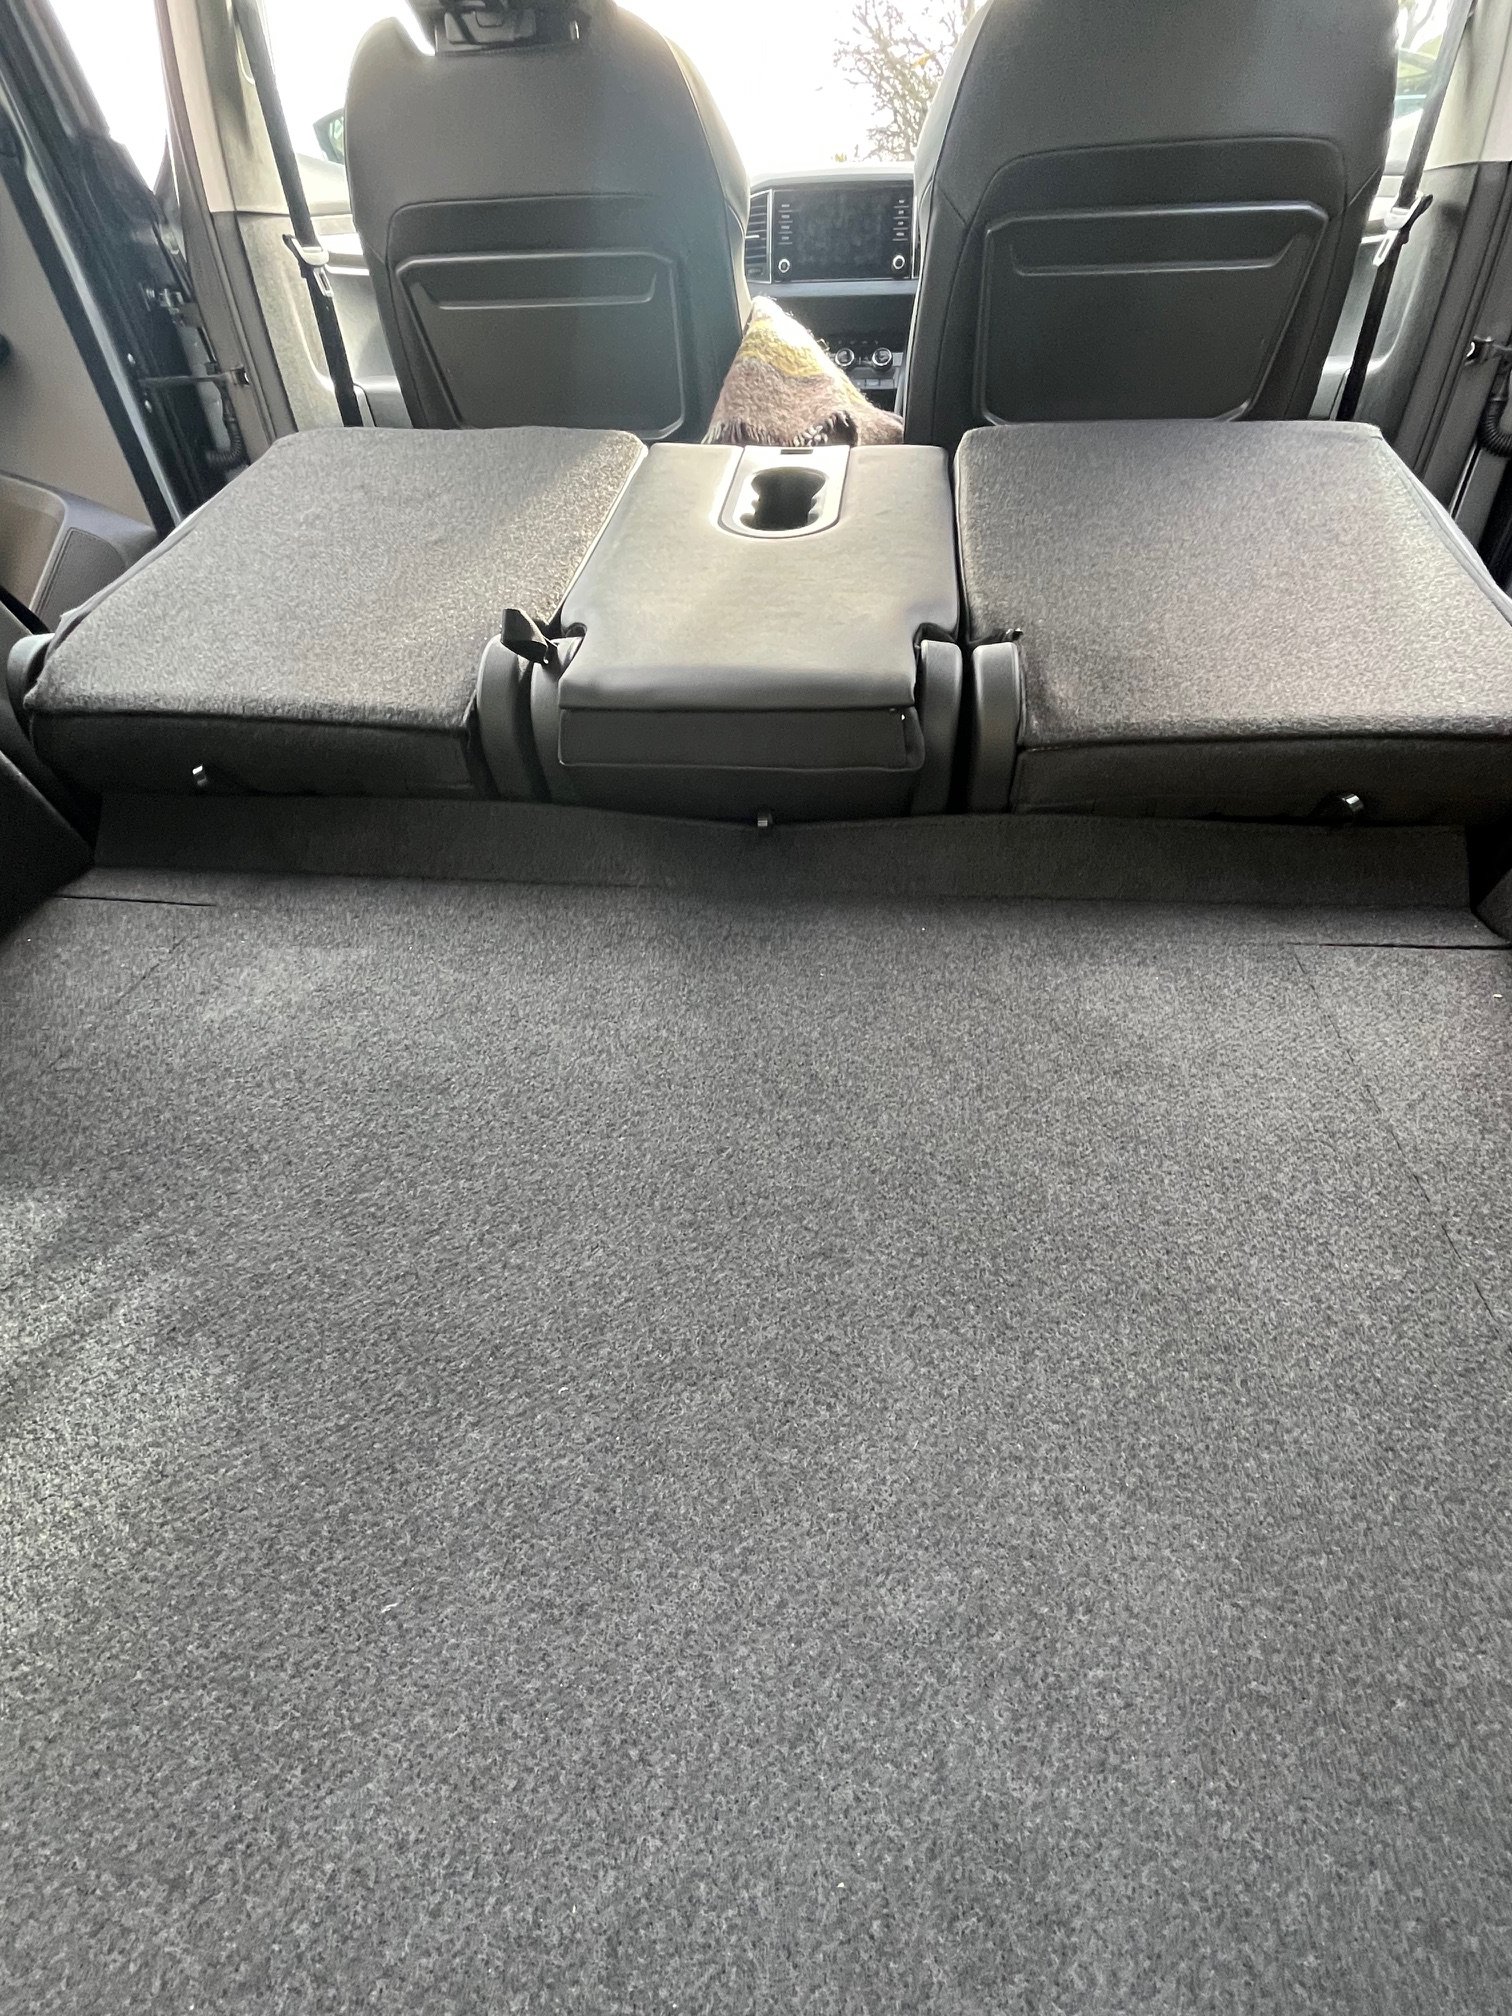
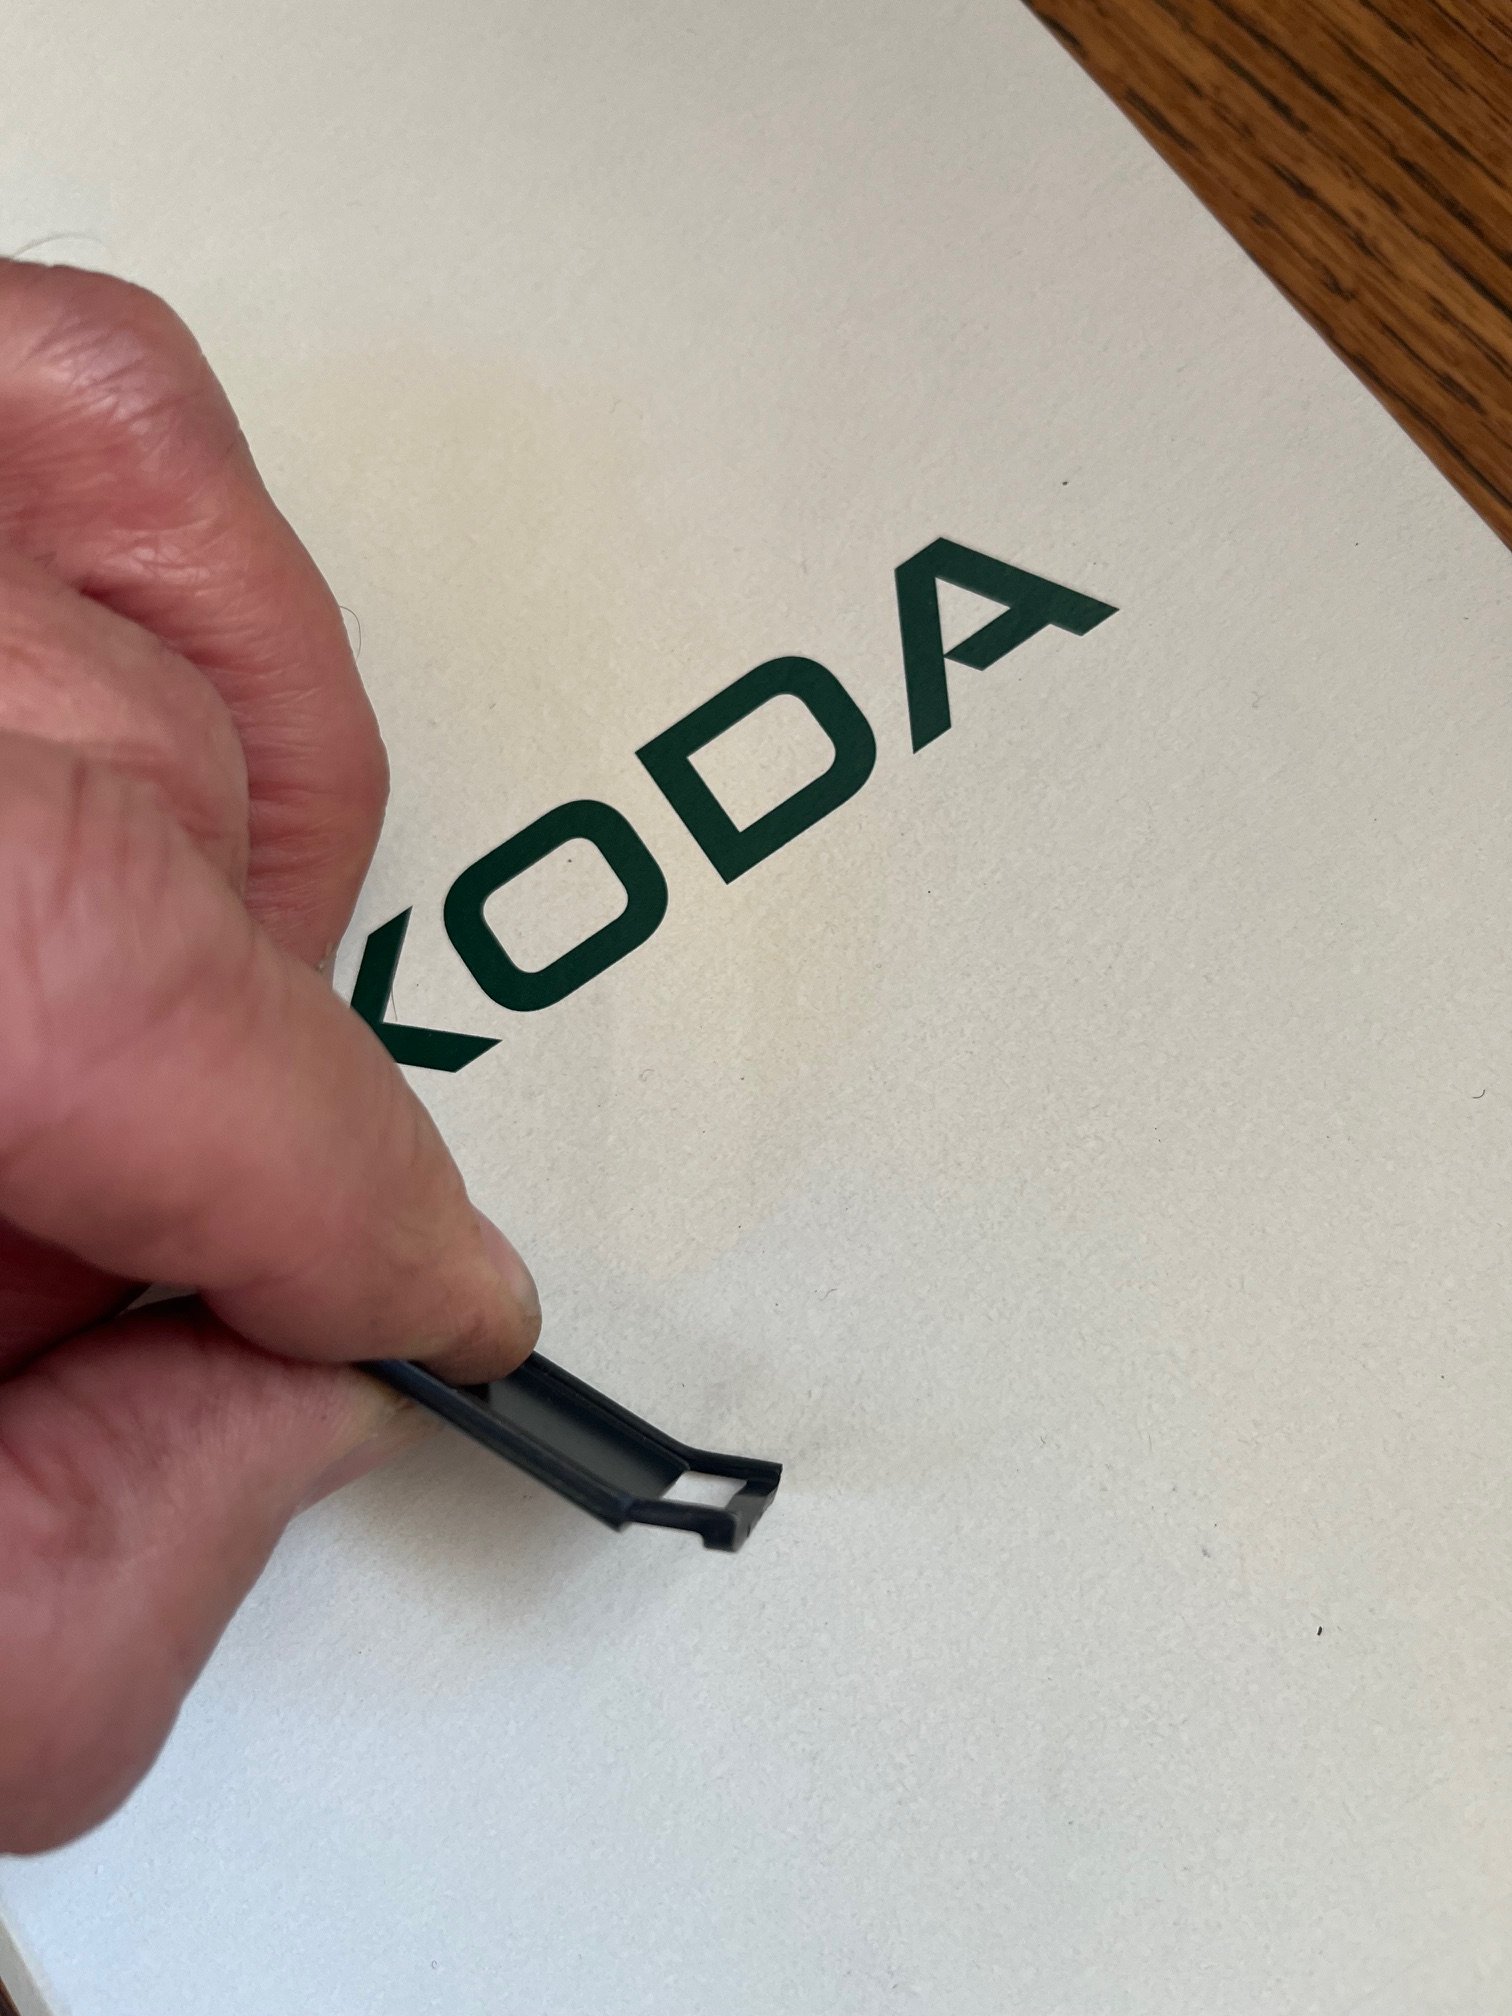
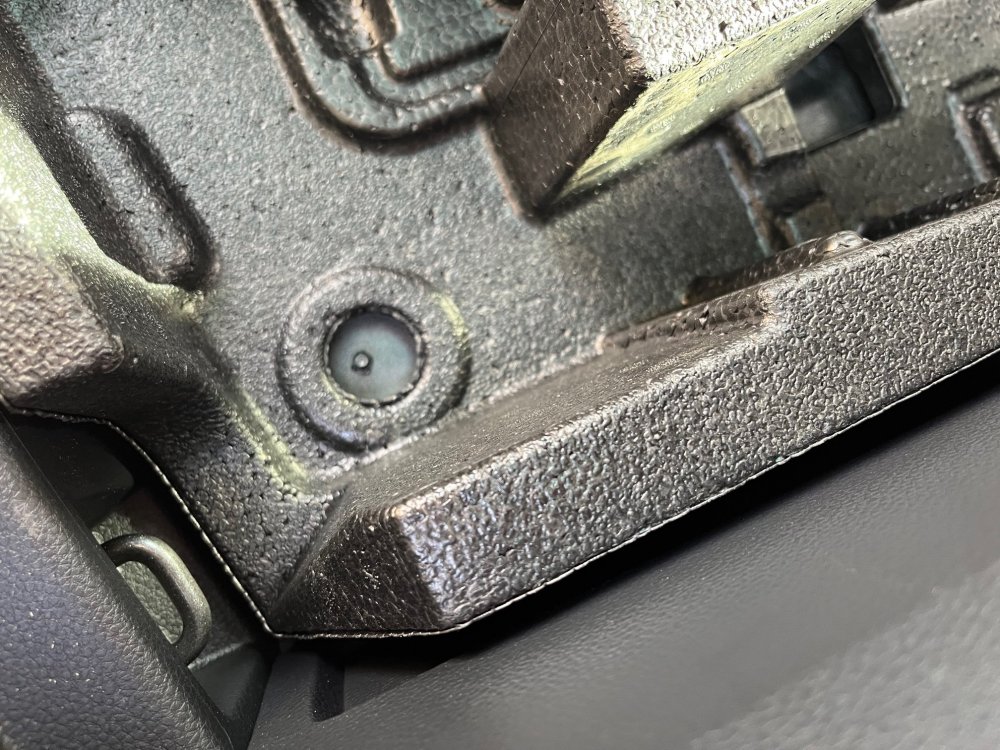
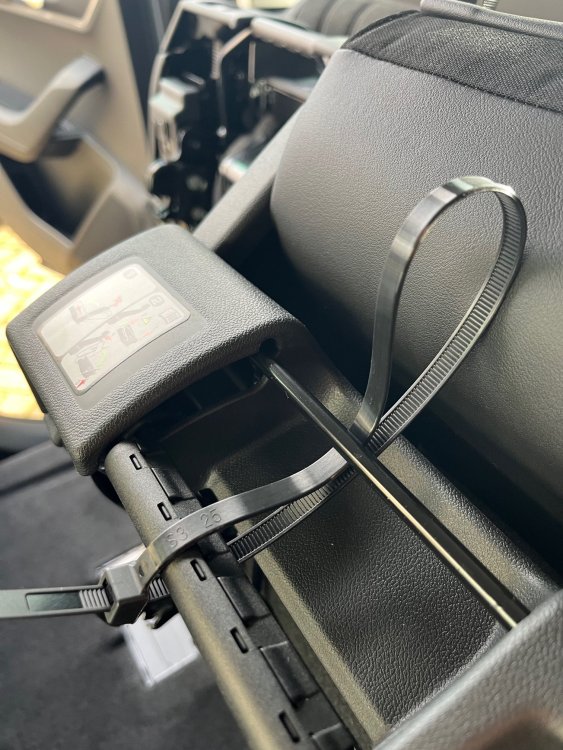
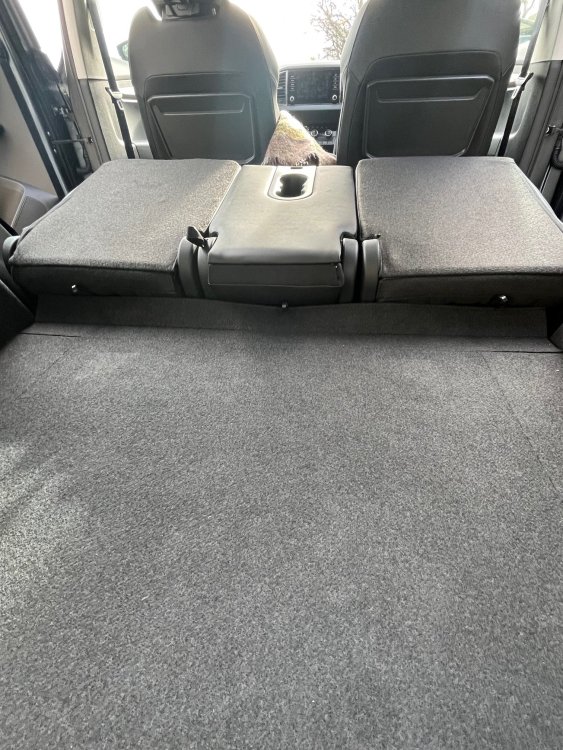
An update and a few questions and a few observations regarding the space-saver wheel and fitting kit (4x4). 1. The space saver wheel. The tyre rim notes that the tyre should be inflated to 490 kpa. Mine arrived with 360 kpa of inflation and so needed to be further pumped up. Learning point: do this first, rather than mount the wheel in place, put in the new boot floor and load the car's boot with item, like, erm...I did having only realised afterwards I really ought to check the pressure ...doh! Still with the spare, I see it can only be mounted with the label side down, as the securing stem and large plastic screw won't screw in place. While I understand how having the spare this way up provides some extra storage space, and arguably protects the vulnerable valve stem, it does however mean that if you want to regularly check the pressure of the spare, you have to remove the whole wheel in order to get to the valve (see above point!). 2. Polystyrene boxes to support the spare wheel installation. Firstly, can anyone enlighten me on how these are supposed to be secured other than by the weight of the boot floor? I see there are possible securing points but nothing to screw into these. See photo: Varioflex seats. Elsewhere on this site there was some really helpful advice about the polystyrene tool box and modifying it by cutting sections away to enable access to the rear levers on the seats. As it happened, I didn't need to cut into the boxes and a decent work around is to attach robust cable tie loops to the levers and to tug on these instead. Works a treat. When in situ you can either leave the top of the ties proud or tuck them in to be more discrete, or even use something bright and obvious for easy location, such as braided coloured rope. I don't know if Skoda have modified this polystyrene box, but it doesn't snag the rear of my seats, although without the cable ties it is fiddly and tight to reach for the seat releasing / tipping levers. See photos: A few other questions and points. I seem to recall that the tool kit that came with the Fabia we part exchanged and with my two previous Yetis, had a small wire-like tool for pulling out the towing eye covers on the bumpers. Nothing like that here. Am I missing some items or aren't these supplied anymore? We also had a Skoda screw driver in the last spare wheel kit. Unfortunately, we left this with the Fabia as we were driving over 300 miles to collect the Karoq and had we left the spare at home, well, I know the Gods of Fate like a laugh sometimes! The towing eye: Skoda and VAG enthusiasts will already know this, but I didn't. Last year while marshalling at an equestrian event, I had the dubious honour of hitching up over 14 vehicles to a tractor and towing them off a muddy field. One learns quickly the following: VAG towing eyes have a left hand thread (ie. turn anti-clockwise to tighten - so forget the saying 'righty tighty, lefty loosey ). Most folks on the day didn't know what a towing eye was (I'm making no comment about their gender least I appear on a watch-list), or indeed if they had one in their vehicle or where it was, and those that did found it deeply buried and had to scrabble under heavy loads of equine tack, water containers, and sundry kit, while waiting in queue to be towed. Other makes of vehicle had a standard thread. Further point: you often need a short bar, such as a heavy duty screwdriver stem to put through the eye-let of the towing eye in order to help tighten it, making sure it goes all the way home least something very unfortunate happens when the chain from the tractor is attached. Maybe that's why Skoda supplied a screw driver in their tool kits? Simply Clever. Here's something that I'm guessing might cause some contention. Positioning the space saver spare on the car. There is nothing in the Skoda owner's manual about this, so it might just be my imagination that I've read this somewhere, but it makes sense to me albeit extra effort at a time of, usually, high stress. Here goes! I've been told that the space saver spare wheel should ideally be placed only on the rear axle. So, if you have a puncture on the front set of wheels, you should first use the space saver on the rear and to remove the replaced, intact rear wheel, and move that full size intact wheel to replace the punctured tyre on the front. However, I can imagine that on a dark, busy roadside somewhere, and when you need to get out of there to somewhere safer in a hurry, you might just swop the front over with the space saver to get yourself moving. The Jack. For several years now I've been carrying a couple of plastic scaffold pole base plates to place under the jack after having to change wheels in country spots such as verges or in soft grounded pull-ins and lay-by https://www.amazon.co.uk/Scaffold-Foot-Plate-Scaffolding-Footplate/dp/B09JZMGMW6/ref=sr_1_1?crid=QEIM4GPFGUPQ&dib=eyJ2IjoiMSJ9.hqOvx87vui7l6jXDfHQ_ND6ly2ZxbsO37ZCir4uquK5fBqann62ulT33nZJUGFMdiB5JJxH30HDyZ2W0dPe6h7xC5HJ8OqGRxLi7C38FkbjrNkcxmib4E84Kyi6SQ95JPxv2FXFYB9XlygJ6IZ5iE4JNImEM58qpjzSy08JCJFBfqmOQtIt4eAye1DRBcIcFrfnr9APNI8zMgsRgyJrcZT0iPSzyTuxWekF00HCI8plQw6YRC3pVoCzgF5w9t-5fDplzP1Looh2PPSW2KL8CorpzBFUgxLdgw7kN4FbubIY.rlxVNgiN1OyhGrZuvIfzJTqBBn5YFV96hYJCr8sEZbA&dib_tag=se&keywords=scaffold%2Bpole%2Bplates%2Bbase&nsdOptOutParam=true&qid=1731684471&sprefix=scaffold%2Bpole%2Bplates%2Bba%2Caps%2C526&sr=8-1&th=1 and a folding plastic wheel choke saves you also from needing to hunt around for a rock or similar to lodge under the diagonally opposite wheel to the one being lifted. https://www.amazon.co.uk/Leisurewize-Foldable-Chocks-Caravan-Stoppers/dp/B07BRRYR64/ref=sr_1_6?crid=2KQUGKPXAJ1AI&dib=eyJ2IjoiMSJ9.1XQRyYT69OQwc1PFrUD31_NE2nf3VDdrLY_9soGuT706yidF-m2N8L3X3Jf-A8utDcPIrWEzRONCBriTZUgWIoCyqGCCw31c-anvChYLzii53VBXy4bJTvPhx0m7RpPhlWbjn98g0xqhmJW9Yn9kKTSaIzBjkOa4TVcls6geXhsrFDPwoq9hs9BzCOVSviq8WizjxLH5hBCmA1C1wqwiQh5R_Hw6MROtB7xVdgfAkJi0z_i9ak1iaSIzb-UiqdJEhONCoJ0joCtHoFLOXFFaXeLcOaNArzoRsWLTqwPGFZQ.UC9u0ttyTVC_E2d8MHPqSYA6lmqgi0jJQIXYYvP78Eo&dib_tag=se&keywords=wheel+chocks+folding&nsdOptOutParam=true&qid=1731684597&sprefix=wheel+chocks+floding%2Caps%2C154&sr=8-6 Really pleased with the Karoq so far - its steering is so much lighter than the Outback, and it's a pleasure to drive with the diesel engine.
-
Phew...sorted. You're right. Those expanding rivets on the front mudflaps are annoying. They readily went through the plastic of the mudflaps and seemed to go into the drilled hole on the plastic lining, behind, but then completely refused to 'spread' and so languidly fell out with the merest movement of the mudflap. As you say, the flaps looked quite soldly in place without them, but I hate to be defeated so persisted (sort of!) With much effort, and patience, I managed to get the driver's side rivet to remain in place (for now as I'm not confident!). However, on the nearside I resorted to using an old Subaru spreading-rivet left over from when I put mudflaps on that. These are much more user friendly. They're the same size as the Skoda rivets (depth and diameter) but come in two parts, with a central pin, which you push down into the main body of the rivet, once it is in place, and the pin causes the rivet to splay and remain in place. They're useful because by removing the pin you can retrieve the rivet out again if necessary. The rear flaps were a doddle once I saw Mumpsim's helpful diagrams. Next it's the spare wheel kit and space saver wheel fitting. Again, no instructions and Skodapartsonline informed me that they're aren't any, and didn't point to where I might find one! Thank goodness for Briskoda!
-
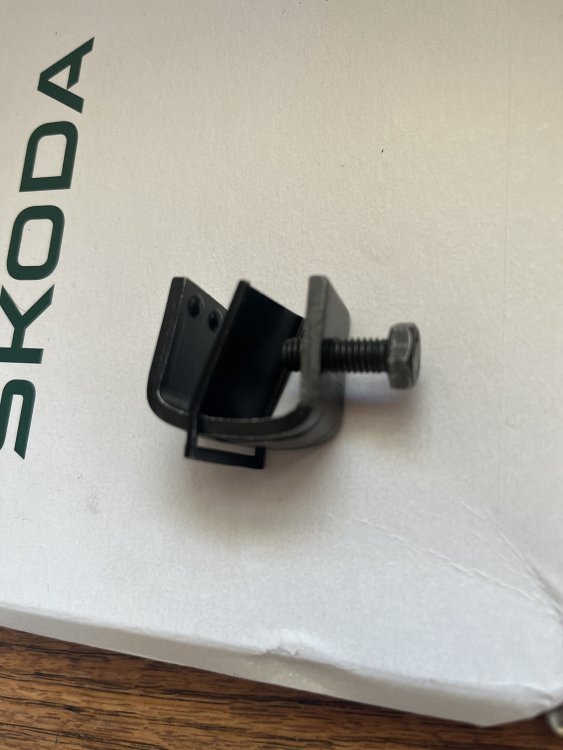
Got it! (I think). It must fit like this....with the plastic jaws (see metal pen !) clamped as such. The 'little grey matter' isn't so sharp today!
-
Right, I'm thinking it goes like this: But which side of the plastic mudflap jaws?
-
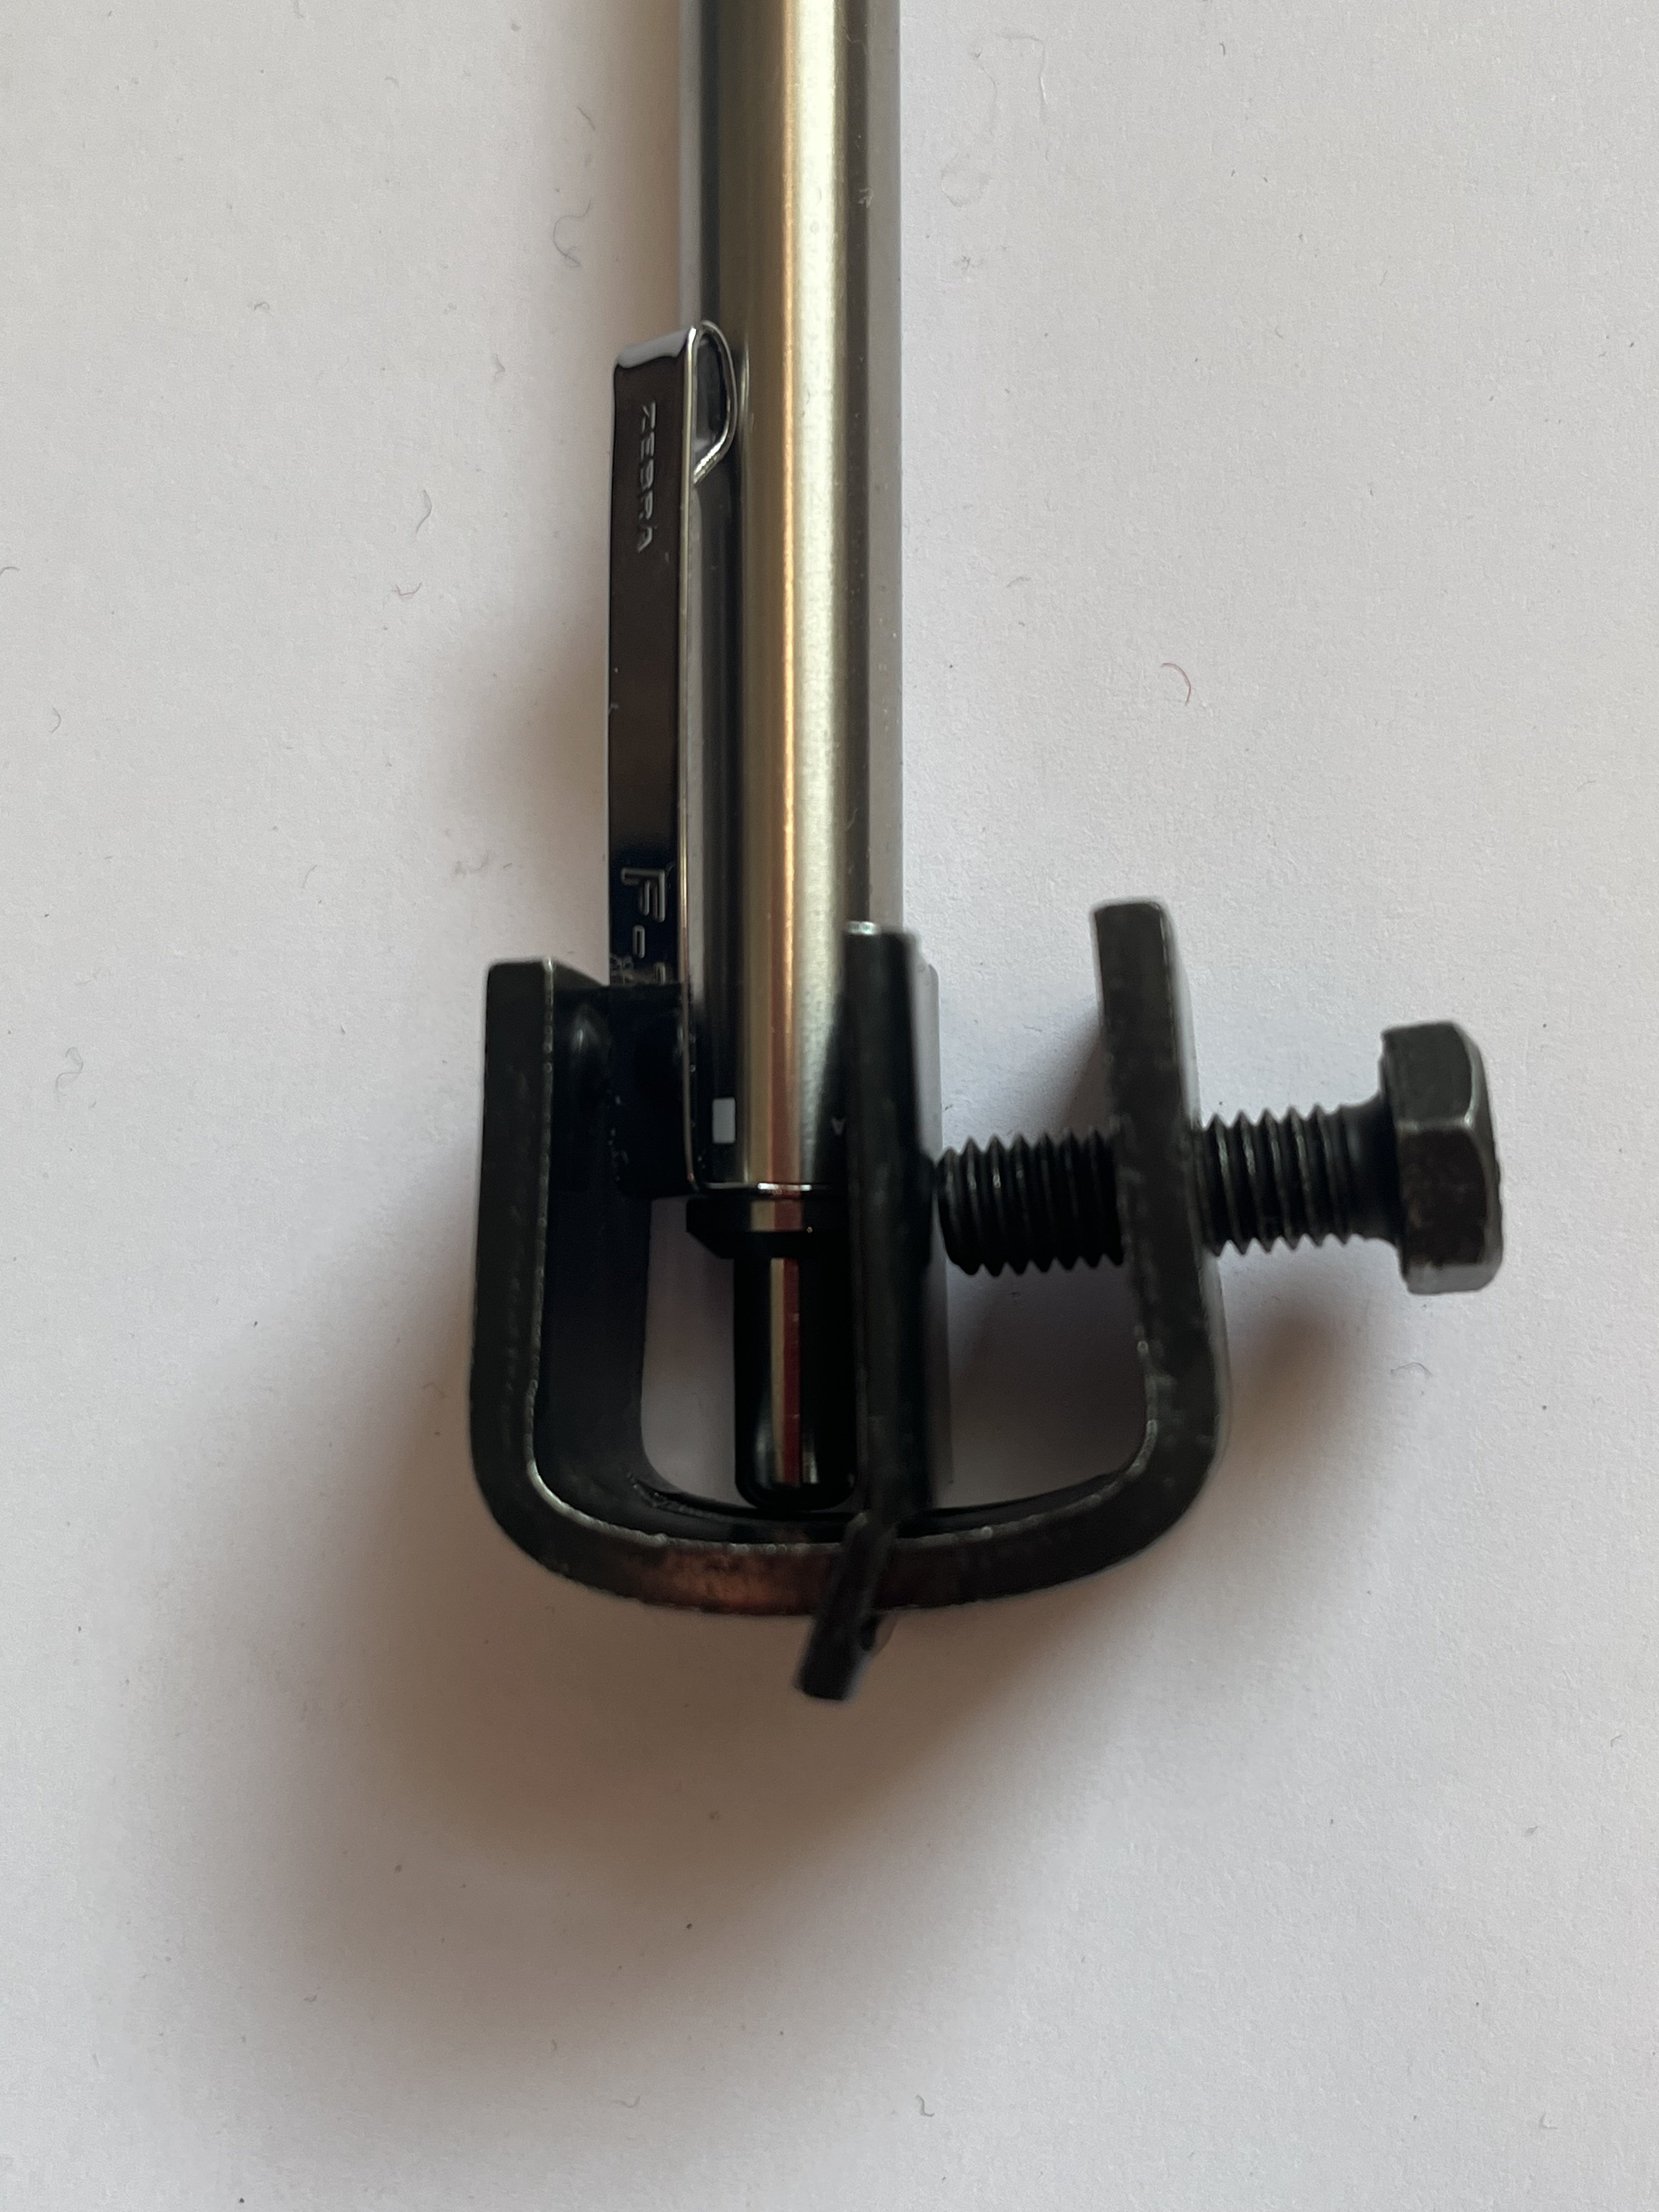
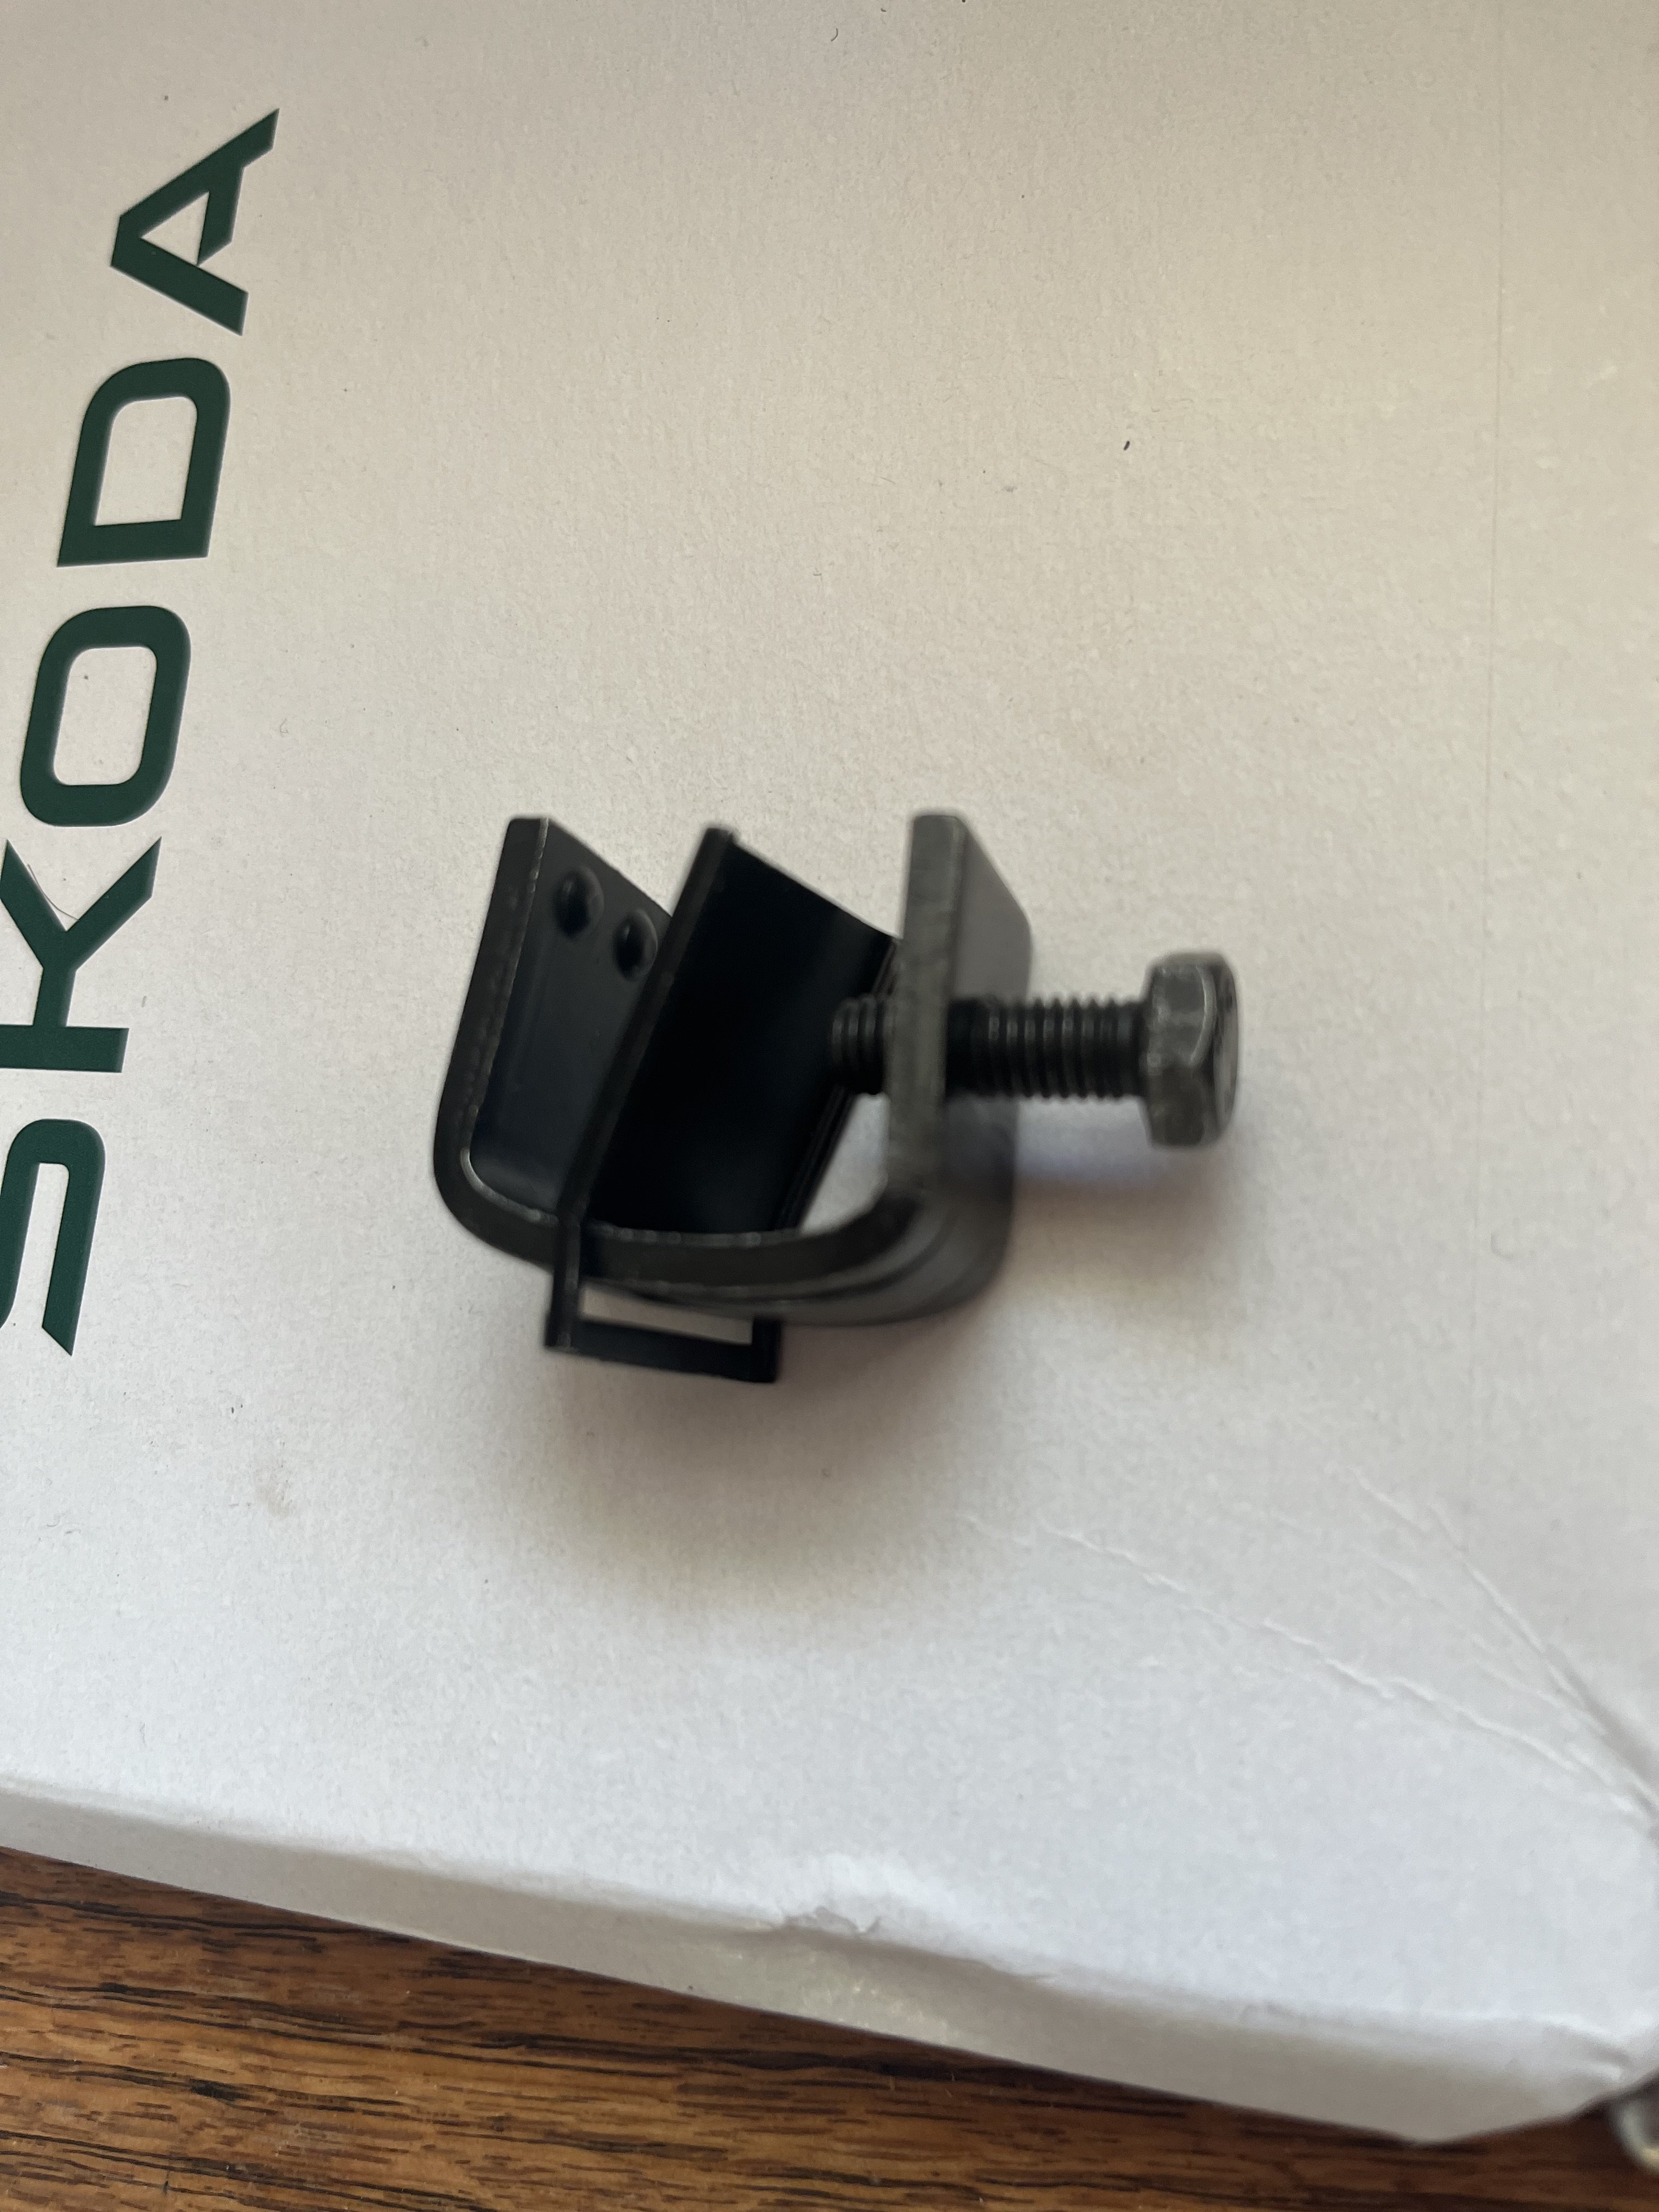
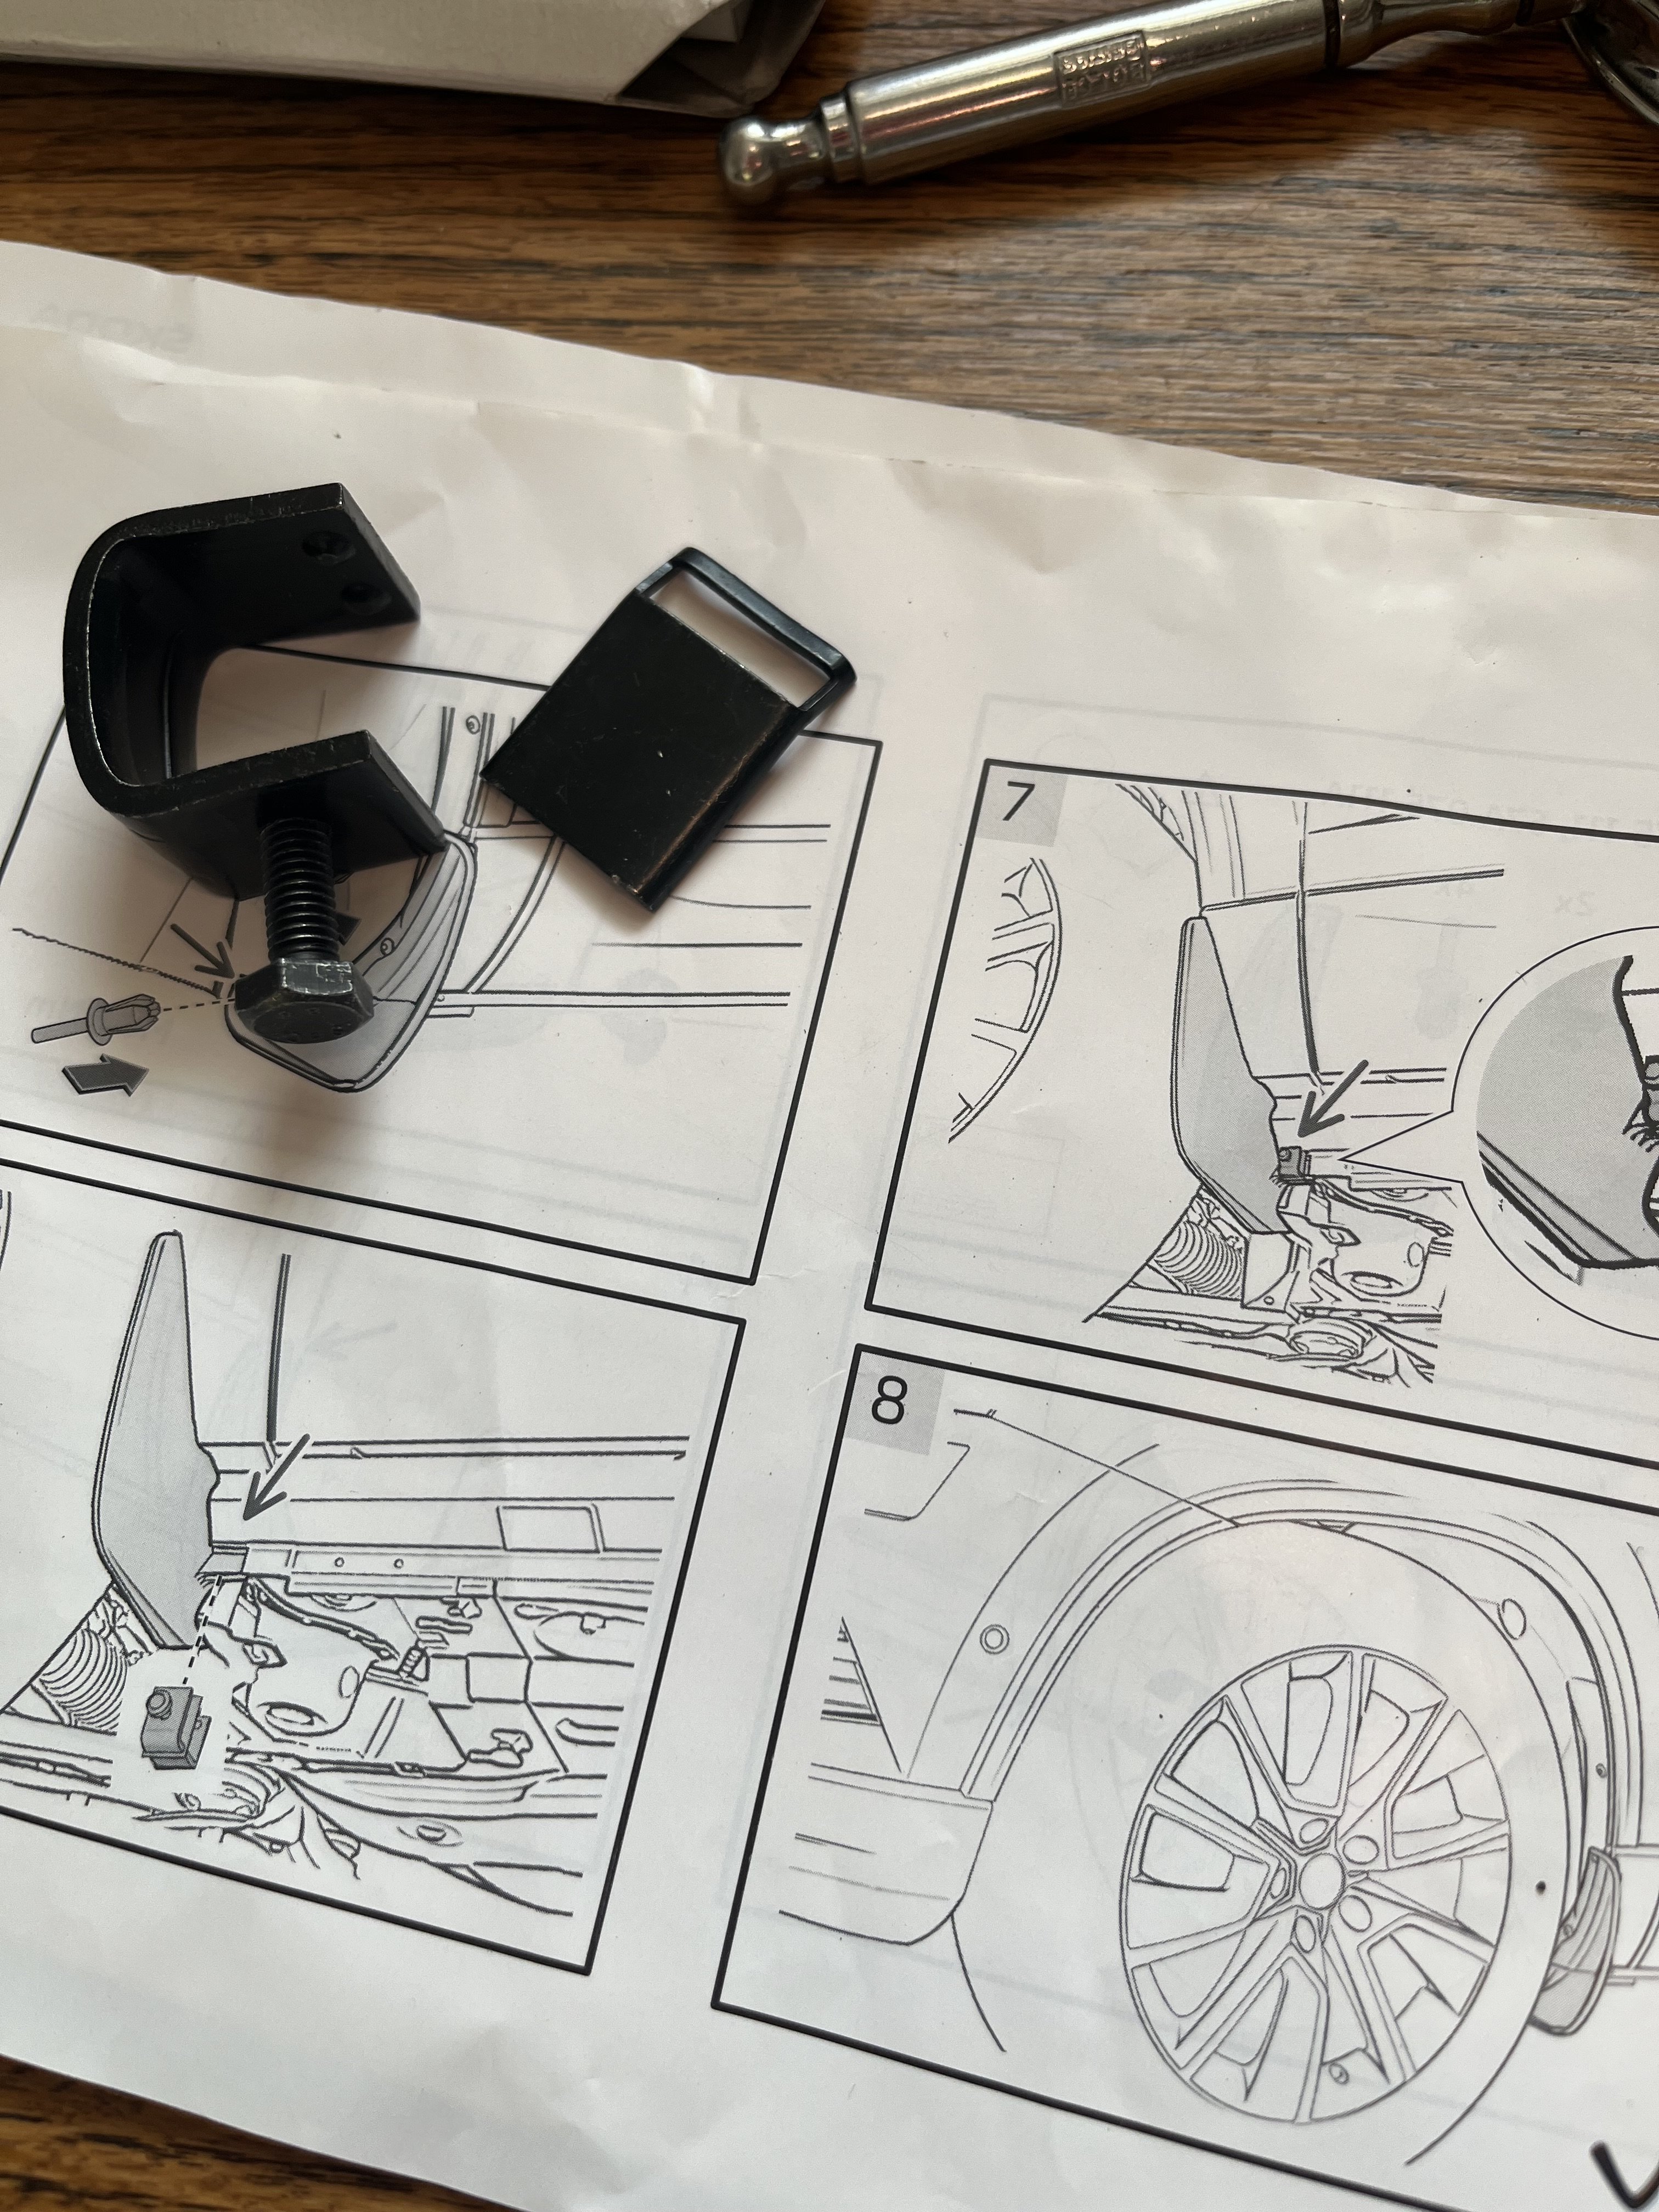
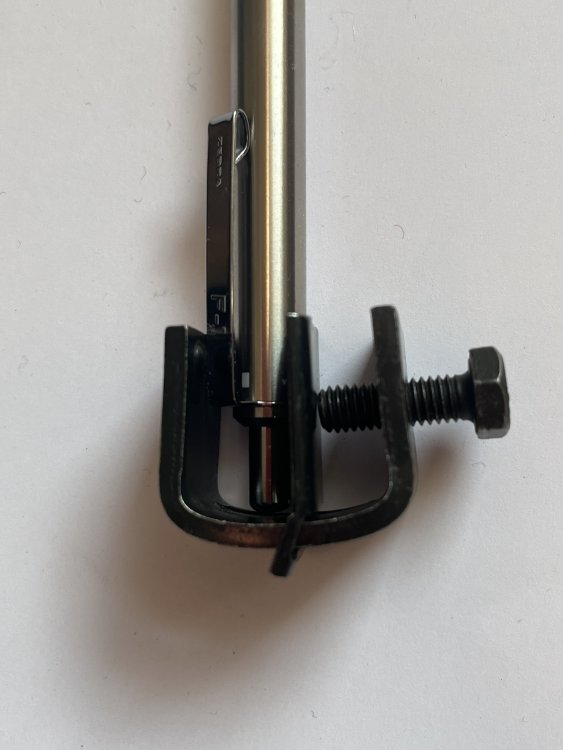
It does!! Huge thanks. I can see in diagram 3 that the 'mushroom' fixture does into the vertical hole. Great stuff. But! Having started on the fronts, and readily got to the place where I need to tighten the clamps onto what Skoda call 'the beam' , the clamp assembly isn't clear from the diagram. It states "...in the lower section of the front mudflap, fit a retaining clamp (see arrow) in the correct position such that, when the screw is tightened , the clamp cannot slip outside the tabs on the mudflap (see detail). Fully tighten...) Unfortunately, to my perhaps needing-spec-savers-eyes, the 'correct position isn't clear at all. Below is a photo of one of the clamps, the screw and a 'plate', the latter of which I'm guessing fits somewhere between one side of the metal U-shaped clamp, and the plastic 'jaws' of the mudflap which surround the 'beam', although which way up isn't clear. It has a slot in the top section, which is slightly angled away from the rest of the item. I imagine this piece of metal works a bit like a spacer, but does it fit with the 'gap' upwards or down, with the angled section towards or away from the bolt passing through the u-shaped metal? Thanks for your patience!
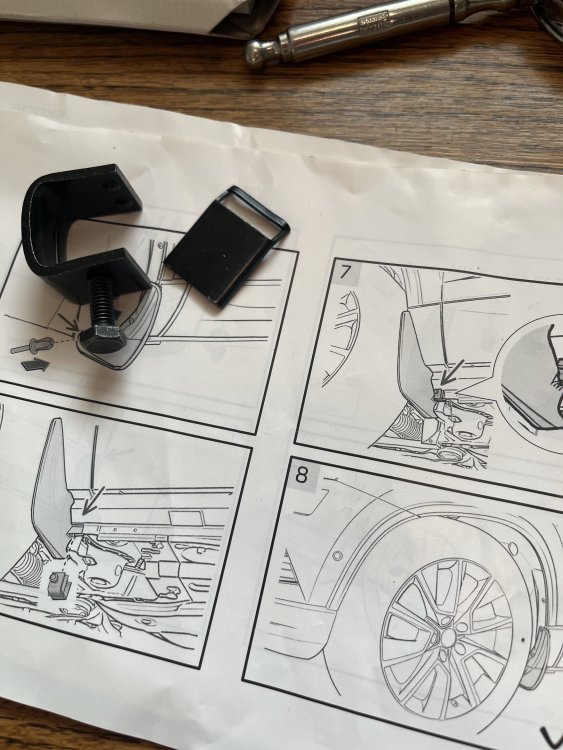
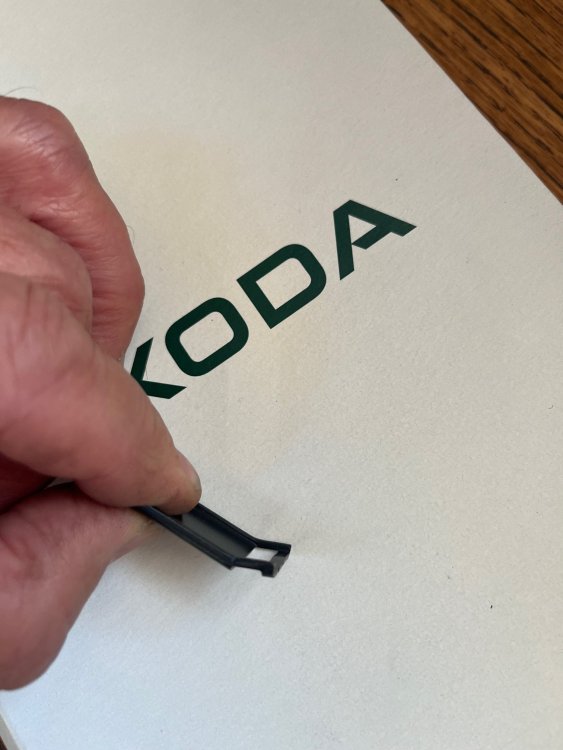
-
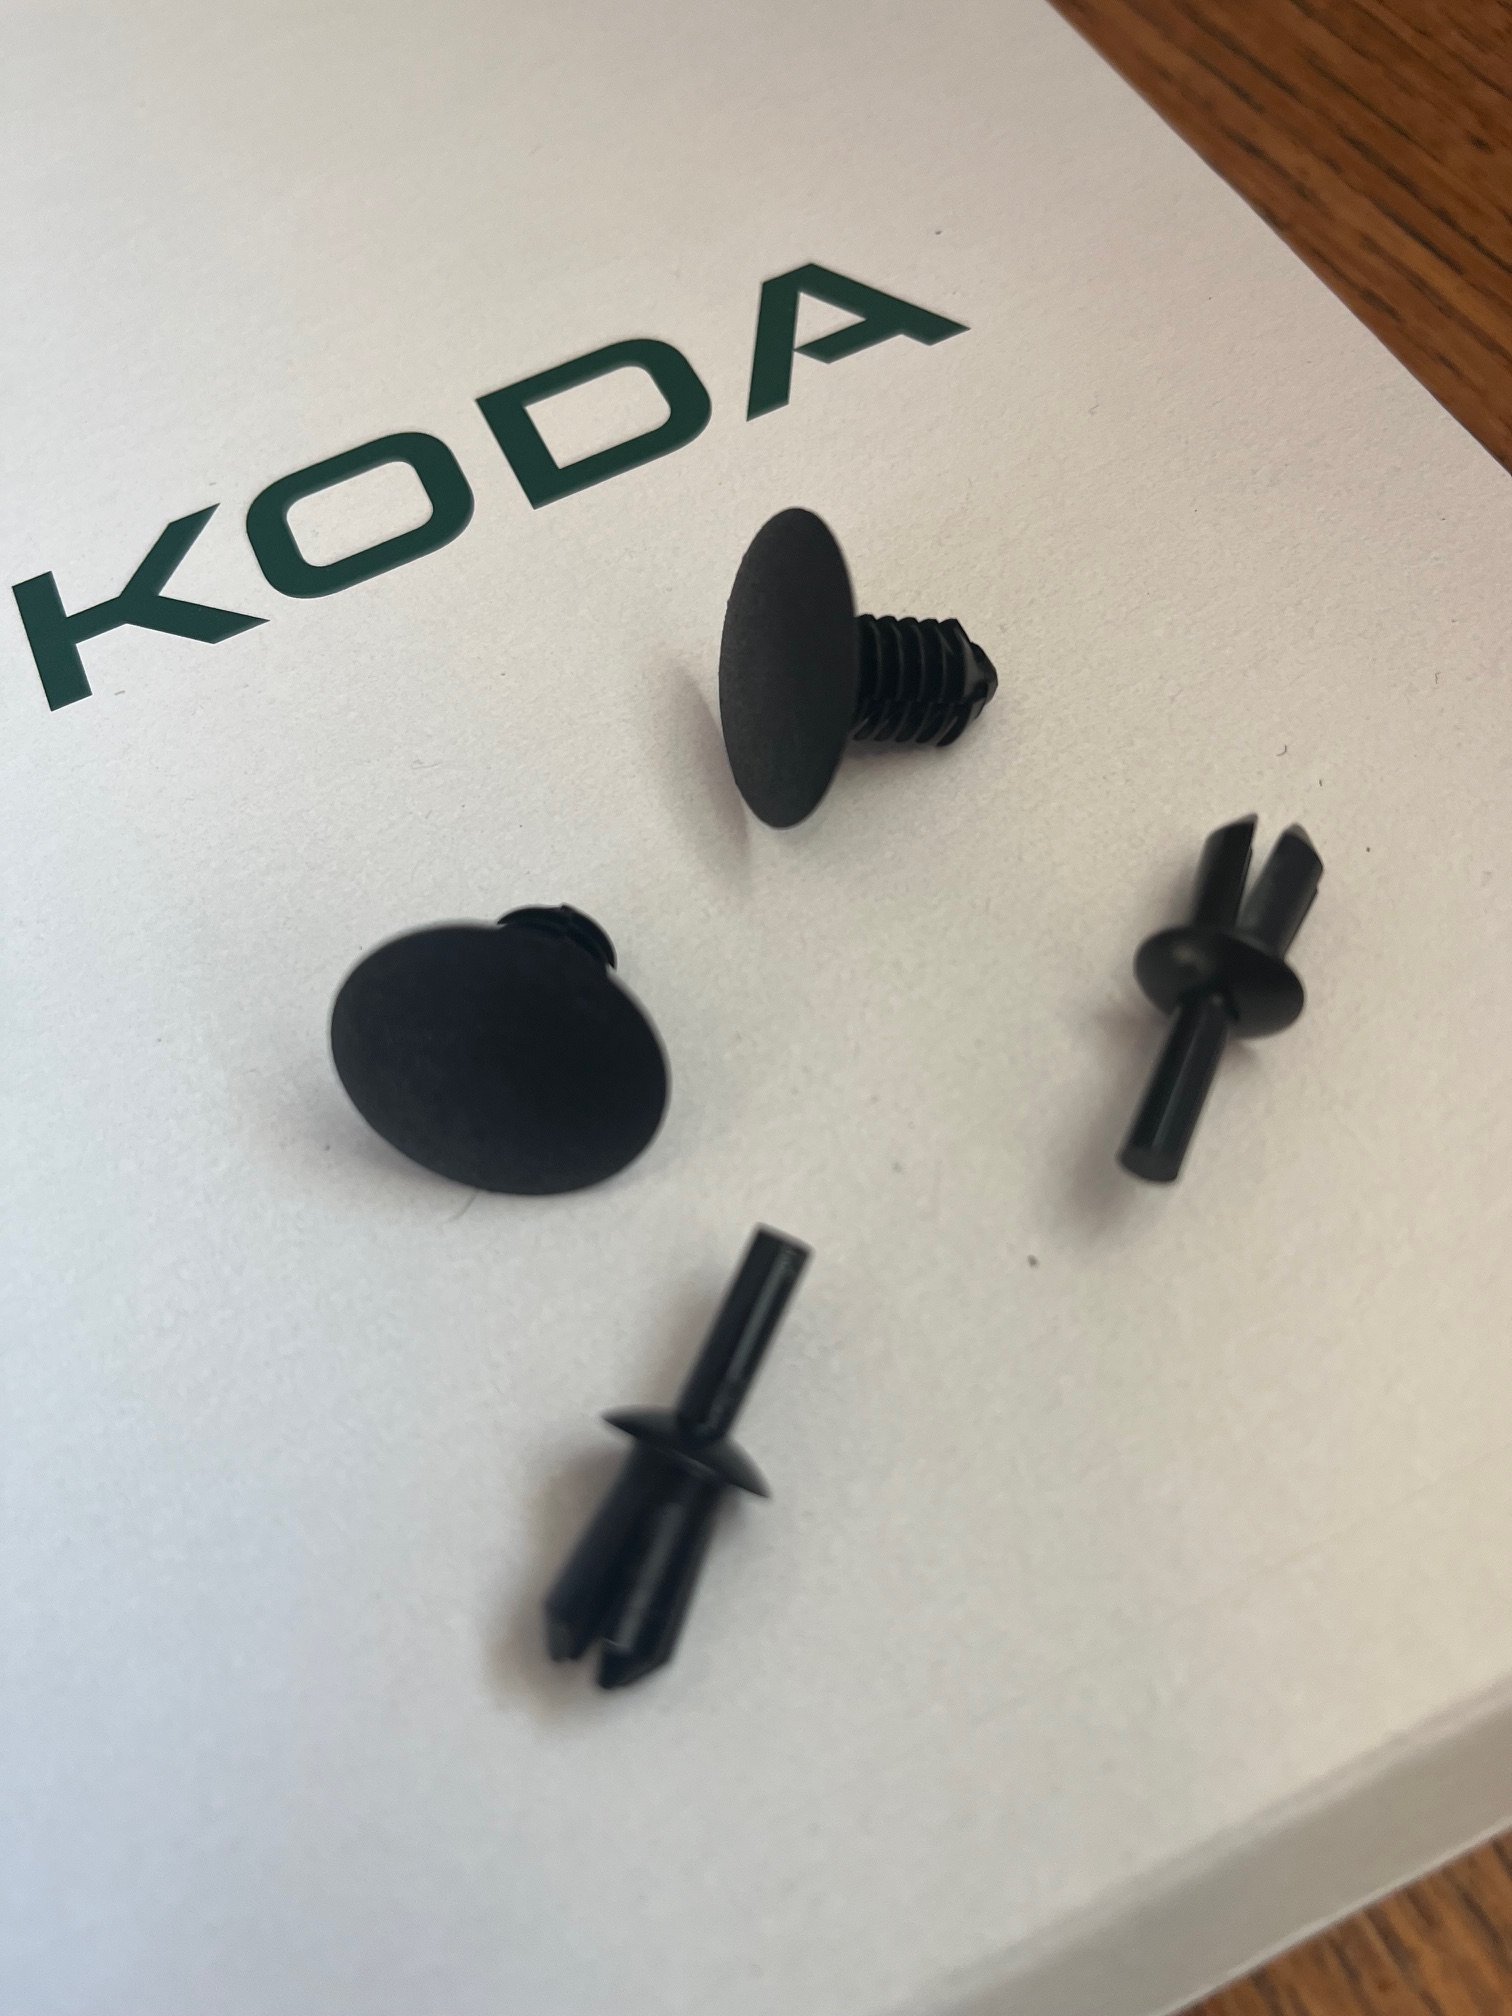
So, it's a nice dry sunny morning here up north and the two sets of new mudflaps packages are staring at me from the kitchen table demanding to be fitted! I've just unpacked the sets and noted that unlike the front, there are no instructions for the rear set. No worries, I've fitted many sets before, so how hard can it be! First up, I married up the new rear flaps to their positions to see what's what. There are 2 torx screws already in the wheel arch lining which match nicely the two outer most holes on the mudflaps. So far so good. Checking where the lower two holes in the new mudflaps line up with (one a horizontal hole) and the other (the most inner hole which will have a vertical fitting, from the bottom upwards), both have two empty holes already positioned in the wheel arch lining also in the the correct place, so again, that's nice. But (there's always a 'but' isn't there?) of the six fixture items (2 torx, two 'mushroom-like' screws and two 'spikey' thingies) that come with the pack, the question is which of the latter goes where? See photo of the fixtures in question. I'm hesitant just to push them in and see, as experience has warned me that once in these things can be a devil to get out again. The front set of flaps come with instructions, so they look reasonably straightforward (huh!) to fit, albeit I'll need to drill two holes in the wheel arch lining to accommodate the, this time, two spikey, expanding things/fixtures (no mushroom shaped fixture this time!). Also, is it best to use the torx already in place on the vehicle's wheel arch linings, or to use the new ones supplied in the packages? All constructive advice gratefully received.
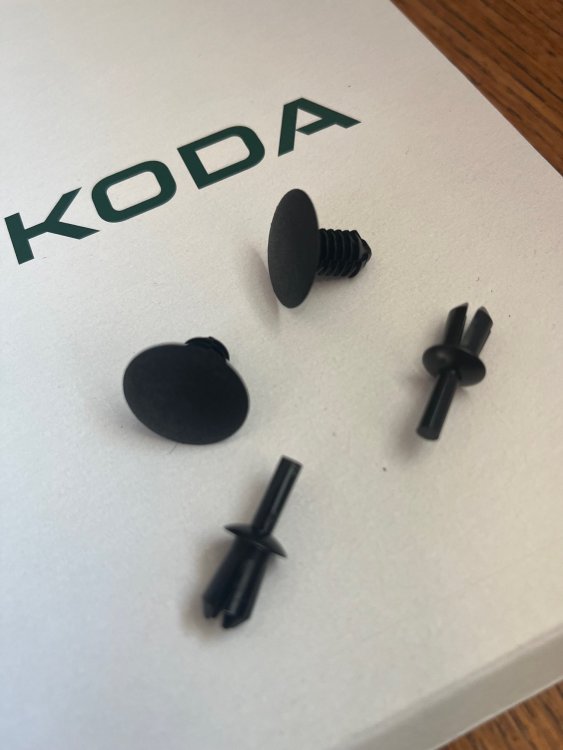
-
Went for these eventually: RIDEX 2070W0005 Wheel BoltBall seat A/G, 27 mm, silver, SW17, Steel, Male Hex Article number: 2070W0005EAN: 4059191605279 https://www.autodoc.co.uk/ridex/13547056
-
Thanks for your thoughts on the price. I agree. I've had a look at a few Skoda UK parts websites but they're not listing basic bolts. I could give them a ring of course. No, I'm actually replacing all the security bolts with standard bolts. We've done this on all of our cars over the years after encountering some very annoying issues, such as changing the spare on a dark, cold winter road side and finding the anti-thief socket/bolt isn't playing fair. A few winters ago, on a cold evening outside the drive, I also managed to switch most of my summer alloys over to the winter wheels and tyres, but found that the security bolts on the last wheel just wouldn't budge. So, all in reverse and the summers back on again - urgh. Rush drive down to the nearest local garage for assistance, and they couldn't shift it either. Eventually. a few days later the local Skoda dealership drilled out the last intransigent security wheel nut and I had to buy a whole new set of security bolts (to pass on when I eventually sold the car). Alloys tend to not be stolen so much these days (am I tempting fate!), so they're more trouble than they are worth, just in my opinion of course.
-
Looking to replace the locking wheel bolts on the Karoq and wondered if either these: RYBO Alloy Wheel Bolts - M14 x 1.5, 27mm Thread, 17mm Hex | Replacement Bolt Kit for Audi & Volkswagen Car Models | Car Accessories (Silver, Set of 4) https://www.amazon.co.uk/RYBO-Alloy-Wheel-Bolts-Replacement/dp/B0DJR3CS9Z/ref=pd_ci_mcx_mh_mcx_views_0_image?pd_rd_w=c9YH9&content-id=amzn1.sym.d63274d0-bf52-45e7-ae69-2bcf85c5865c%3Aamzn1.symc.ca948091-a64d-450e-86d7-c161ca33337b&pf_rd_p=d63274d0-bf52-45e7-ae69-2bcf85c5865c&pf_rd_r=QW9BXSM2AT7XD6007SY3&pd_rd_wg=JnySx&pd_rd_r=13f6ff3f-7df4-4957-83c8-65ddd805afbb&pd_rd_i=B0DJR3CS9Z&th=1 or these: VAICO V10-3211 Wheel Bolt Length: 48mm, M 14 x 1,5 mm, M14x1,5mm, Spanner Size: 17, Ball seat A/G, Original VAICO Quality https://www.autopartspro.co.uk/skoda-carparts/karoq-nu7/128289/10313/wheel-bolt-and-wheel-nuts? would be equally suitable for a Karoq 2.0 Tdi 4x4 (2024) ?
-
I wonder if any other formites have any issues, such as rusting, with the towball once (as recommended) the powder coating is removed before using it for towing. Also, is the housing that the retractable towball is positioned in, when not in use, a source of problems, such as rust or build up of dirt?
-
The space saver wheel and fitting kit arrived yesterday and I'm planning on putting it all in the boot soon. I've had a quick glance and it all looks fairly straightforward, but wondered if there is any advice to save time or angst from other formites who have already completed the process. I've noticed already that apart from removing the reversible boot liner, that the carpet liner below that seems to need detaching from under the varioflex seats. There's are plastic torx type fixtures holding it in place under the seats. There aren't any instructions with the kit but the three pieces of foam (two half-circle shaped to surround the wheel and a straight piece for behind the seats?) obviously slot into the boot space. I seem to recall that when I fitted the kit in my last Yeti, that there were plastic screws that fixed the polystyrene 'boxes' to the carpet lining below the rear seats and fixtures to secure the boxes together. This kit looks different, and there are 'prongs' on the bed that I imagine hold the foam pieces in place. It looks like the raised boot floor will mean the tie-down points will be too submerged to have easy access to. I recall that last time I attached braided loops to these to provide some form of attachment for loads.
-
Do you know, after posting the above message I did wonder that myself too. I think you're right, that it may have been possible that she was so distracted by the newness of the procedure for her (DSG, electronic parking brakes, etc.) that she didn't have sufficient pressure on it. Thanks.
-
So we've had the Karoq for about a week now and my partner is getting used to driving the DSG auto after trading in her manual Fabia. Today, we drove for about 30 mins and then parked up. My partner stayed in the car, with the engine running (the weather was cold), parking brake on, while I called into a shop, before returning some 10 mins later. She then tried to shift from P to R, but she couldn't move the shifter. At first we thought this was down to her rheumatoid arthritis affecting her grip we thought this might be affecting her ability to press in the shifter button. But then I tried and the shifter wouldn't move for me either. So, as one tends to do in tech problems, we switched it (the engine) off and then turned it on again. All sorted, following the restart. But I'm concerned that I don't know why this happened and I'm not sure if it's a fault with the DSG or something we did or didn't do correctly. I've been driving a Subaru auto with CVT for 3 years now and have never had a similar issue, but I'm aware from the Subie manual that there is a possibility as the owner's handbook explains the process for freeing the stuck shifter. I've scanned the Karoq manual and noticed a similar set of advice there too. The car has clocked up 700 miles from new. It was in Eco mode (not sure that's relevant). Any thoughts?
-
Ah, that could be it. This 4x4 car comes with the Performance Pack.
-
Over the past few weeks I've spent an unhealthy number of hours closely scrutinising autotrader and other sources for the details, stats, photos, etc. of far too many Karoqs, and especially those with 4x4, prior to purchase. It's just out of my idle curiosity, but does anyone know why for some vehicles with 4x4, the offroad button (i.e. top-left of the 5 buttons circling the lower half of the gear shifter cluster) is there, marked 'offroad' in place, while in others it's blank? It doesn't seem to matter whether the vehicle is older or brand new, Sportline or SE L. I haven't checked whether diesel or petrol is a factor. Is this just a random thing, depending on whoever was on the production shift that week in the factory, or does it have some deeper meaning ?
-
-
Yes, that's where I thought it would be having watched a short vid. above. But the MySkoda app, in the inspect menu only has 'Driving Data' (distance; travelling time; speed; fuel consumption), "Vehicle Health Report' (last update" We have not found a defect') and "Service Partner (leads to a map of local dealerships). In the other sections the Home lists 'does and lights' or Vehicle Status (range). The 'More Tab' looked more promising and lists 8 categories, but searching each revealed no Digital Certificate. I wonder if the change to MySkoda from 'Skoda Connect' has removed this option to generate a Digital Certificate. I've also looked at the Skoda Connect - Lite app in the Apple Store - no joy there either. Hey ho...
-
-
This is all very helpful - thank you. As one of my favourite economists/philosophers says: “There are no solutions. There are only trade-offs.” ― Thomas Sowell
-
I've noticed that some of the genuine Skoda winter wheel/tyre combos come in 215 width, and I wonder if that is to do with: 1. Belief that narrower tyres are better in snow, although this suggests not (https://www.youtube.com/watch?v=wf_mIlU82Ac 2. Snow chains fit more readily on a narrower tyre? Our Karoq came with 225s, hence that sizing for a straight swap- summers to all-season.
-
Decisions! Decisions! Still can't decide whether to buy a set of winter rims for the Karoq or to just go for all-seasons and be done with it. Swap off the current Goodyear Eagle F1 tyres that came with the car and store them incase we need a new set (following a major unrepairable tyre damage event) of tyres. I appreciate the alloys will have to brave the worst of the winter salt, but we could always buy new alloys many years down the line (we tend to keep our cars for 8yrs plus on average) if needed. Thoughts on the CC2 (I know they get good online reviews, but...)?
-
Thanks. Yes, it has the performance package. I'll check that out.