Jxx
-
Posts
25 -
Joined
-
Last visited


Jxx's Achievements
")


-
Favorit Water Pump Replacement
Jxx replied to Jxx's topic in Skoda Favorit, Skoda Felicia, Skoda Fun and Skoda Forman
Hi, Ricardo. "I don't know how did you come to this conclusion. It is not doable. The engine gets lowered. " The link you posted. The gentleman from Jordan claims to have done it from above, by raising the engine. Now I've never seen under the lid of a Felicia, but I've always assumed that the major difference in structure was that someone was paid good money to take a large file to the edges on the original Italian body design to give it a more "modern" half sucked sweet look. I guessed that the fundamental body structure was similar. There's my expert ignorance speaking. Now it appears that there's a difference in engine mounts - I have only 2 engine mounts and a stabiliser bar on the bottom left of the engine (right hand side of the car) as confirmed by Papez, although it's a steady bar rather that a loadbearing mount. No idea if all Favorits are like this - mine's 1991. Secondly, although the Haynes BOL talks about dropping the engine, It gives a nice piccy at the top of the page clearly showing the engine raised with the pump removed. So I thought I'd give it a go that way. Sticking the brute up on ramps to have a look underneath and remove the side cover for access revealed a split ns CV joint boot, so I thought that was the first emergency. (Car was still usable with the coolant filler cap loose to prevent pressurisation.) Filthy job with CV grease, changed both boots on the shaft at the same time. I think the inner one was original. Back to the plot. Yesterday. In order if anyone's interested: 1. Put the brute back on ramps, have a good look around for obvious gotchas. Decide to try from above. 2. Remove gearbox steady bar mount. This did not in fact need to be done. There was plenty of room. 3. Remove the bolt through the centre of the steady bar doughnut. 4. Remove the air cleaner assembly for easier access. Release the alternator fixing and remove the fanbelt. 5. Drain the coolant via the drain bolt and save for reuse. (Mine's only about a month old.) 5. Loosen the pump fixing nuts and remove the nuts and washers. Remove the nut and washer from the mounting through bolt. Tap out the plug in the wing. 6. Fit a support bar between the wing gutters and connect the lifting chains to the front engine lifting eye. 7. Undo the jubilee clips securing both ends of the short hose connecting to the pump. Note the location and orientation for replacement. (A 1/4 inch ratchet and small sockets are almost mandatory here, especially for re tightening.) The hose was original and I decided to replace it. 8. Remove the bolt securing the steel pipe connecting the bottom hose and pull down, removing the short coupling hose from the pump. 9. Wind up the chain to take the weight of the engine. Push out the mounting fixing bolt. It came out easily, but the mount had collapsed and the bolt was not correctly lined up with the hole in the wing. It was necessary to push the bolt back into the remains of the mounting, release the load on the lifting support and move the support a couple of inches or so towards the front of the car. Now when I raised the engine it was possible to line up with the hole in the wing and remove the bolt. 10. It was clear that the water pump could not be removed with the fixing bracket in place. 11. Safety. Needing to get back under the car, in case the lifting chain failed, I put a jack and block of wood under the clutch housing. 12. Using a long socket extender, loosen the 3 bracket fixing bolts. This allows the brackets to move about freely. The fixing holes allow for considerable adjustment. I did not remove the bracket, but had to crawl under a second time to loosen it some more. 13. Lift up the engine until the pump can be removed. It took quite a bit of tapping back and forth on the engine mount to free it from the glued on gasket and studs. Yes it can JUST be done, with the mounting bracket still attached to the car. 14. Carefully clean off, as far as possible, all the old gasket, especially round the studs and below them. WARNING. It looked as if the old one was asbestos. This was the worst bit of the job, leaning over the raised wing with a sharp wood chisel and single sided razor blade. I'd hate to have had to do it from below. 15. A smear of LSX (plumber's silicone, designed for leak sealing joints on heating systems) on both sides of the gasket, fit gasket to the studs, a smear of anti seize grease on the studs and wiggle everything so that the pump goes back on the studs. I put the new hoselet and new jubilee clip on the pump before I fitted it. 16. Replace the washers and nuts and tighten. The bottom nut and washer is a bit of a brute, best done from below. 17. Lower the engine carefully (remove the wood and jack first!) so that the mount fits into the bracket, fit the large bolt (smear of anti seize compound) through the wing and fit nut and washer and retighten. 18. Get back under and tighten the 3 mounting bracket screws from below. In my case refit the unnecessarily removed gear change steady rod. Refit the Engine steady bar bolt TIGHT. (I lost mine a few months ago. The engine rock was interesting. 19. Clean up the end of the steel water pipe and fit it together with a new jubilee clip. Line up both clips and tighten securely. It's easy working from underneath to get the clips a little skew wiff. I did and had leaks. Replace the pipe fixing bolts. 20. Remove the support bar and chains. Refit the air cleaner and pipes. 21. Refit the fanbelt and adjust the alternator. Check all electrics are secure. 22. Refill with your favourite beverage, start and test for leaks. Top up as required. 23. Refit the bottom side panel. Replace the wing plug. So, it is possible to do the job from above, I've got the dirt under my fingernails to prove it. I took a few photos if anyone's interested. Interestingly, the engine's been making a horrible rattling noise for a few years now, which I presumed was timing chain. When the leak from the pump started it started to quieten down. I presume the bearing was finally getting some "lubrication". Funnily enough the old pump seems free and no sign of significant play. Nice and quiet now. Thanks, everyone for your input. -
Favorit Water Pump Replacement
Jxx replied to Jxx's topic in Skoda Favorit, Skoda Felicia, Skoda Fun and Skoda Forman
Ah, just taken a closer look at the gearbox mounting. I don't follow this: "10.Also i recommend you undo the lower engine mount; the one that holds the gearbox and differential to the car underbody near the gear lever linkages. Undo the front bolt not the rear bolt. This will ease lifting the engine upwards." On my favorit the mounting has one bolt at the top through to the sideframe and another north south as it were through the rubber mounting, The bracket fixed to the body appears to be slotted to allow for adjustment. I suspect that post refers to a Felicia in reply to the original post. Trying to get at it from the top seems worth a try, though. -
Favorit Water Pump Replacement
Jxx replied to Jxx's topic in Skoda Favorit, Skoda Felicia, Skoda Fun and Skoda Forman
Thanks for that link, Ricardo. Very Interesting. So it seems to be possible to raise the engine enough to get the brute out from above. That might mean that I don't have to remove the engine mounting first? I don't think I'll have to remove the alternator - just slack off the belt tension enough to remove the belt. I'll have to work underneath to get at the hoses - so I'll need to have the car up on axle stands - I suspect that may mean that I'll have to jack up the RH front suspension arm to allow the engine to be raised to clear the mount and give clearance for the pulley?? Not really happy releasing the mount at the end of the gearbox as well - anyone know if the job's possible without doing this? I'll have a scout around underneath to check clearances - exhaust, gearchange etc first. BTW, thanks for all the advice you gave with the head gasket problem I had a while ago. That seems to be running fine, I've posted a very belated update to that post. -
Skoda Favorit 1.3 1991 Been loosing coolant , strangely somewhat intermittent in magnitude. Got worse lately, initially no idea where from. Felt around under water pump, wetness. Mirror and torch showed some leakage from the vent under the pump. Ah, found guilty party. Part obsolete from Skoda, so sourced a Quinten Hazell off fleabay. Hopefully NOS before the Clarius takeover. (I gather that following Clarius going Phatang the QR brand is now owned by Tetrosyl - Bluecol, Carplan, Carlube etc). After a run yesterday, came back after a few hours to find a trail of fluid coming out from underneath beginning under the pump. Of course all appeared dry around the pump. Topped up and drove home. Popped lid and trickle of fluid coming from the pump. Guilty as charged m'lud. Right now all the relevant bolts / nuts are soaking in Laco penetrating fluid. Tomorrow, weather permitting I'll give 'em another soak, get the ol' pig up on ramps, fire her up and see if I can confirm exactly where the leak's coming from. I've got a support bar that sits in the wing gutters with a couple of lifting chains which I bought a few years ago to do the clutch, but I suspect that I'll have to put her on axle stands as well to access the underneath to do the job. In which case I'll chock the underneath as well just in case. The Haynes BOL talks about removing the engine mount and dropping the power unit to enable the pump pulley to clear the bodywork. It doesn't appear possible to raise the engine to gain clearance from what I can see. What I'm asking is for any tips on changing the brute from anyone who has done the job. I'd appreciate any advice and gotchas before I start what looks like quite an awkward job.
-
Favorit - Removing cylinder head bolts
Jxx replied to Jxx's topic in Skoda Favorit, Skoda Felicia, Skoda Fun and Skoda Forman
Very belated update. Sorry, things have been manic here, personal reasons. Head gasket job seems ok. I tried flushing out the heater matrix out with a modified garden sprayer that i have modified to top up pressurised central heating systems with corrosion inhibitor. Several goes flow and backflow. An incredible amount of muck came out. Got me from cool to warm for the winter. I need to get the brute out and backflush it properly and clean out the matrix air side as recardo suggested. Ricardo - you were right - there is a hot air control flap - as well as the water valve assembly. I'll have to check that out as well. It's just the pain of removing the wiper motor assy as well to get ot out. (Time and all that). In the end I didn't change the valve seals - the cowboys sent me the wrong seals - in an open packet - and I had to get the head back on. The time they took to send me the right ones proved I made the right decision. Got away with it. Oil consumption zilch, no smoke. Skimming the gasket seems to have upset the mixture settings a bit. Tends to jerk ocasionally at low revs under load, and the co figure was silly low at MOT last year. (that's if his equipment was ok.) I'll have to give it a bit of a tweak sometime. Had to change the rad. There was a small weep at the tophose connection which suddenly turned to a plastic rad inlet pipe fracture, fortunately very near home, so nothing boiled. The fan stat was weeping a bit at the aluminium sealing washer, so changed that for an o ring. Been loosing some water, seemd a bit intermittant, so worried about the new gasket. No mayo in the oil filler cap, oil ok, plugs looked ok, running fine. A little damp from the water pump vent hole, wet behind the pully. Aha. Water loss getting worse. Took it for a 10 mile or so run yesterday, came back a few hours later to find a streak of aqueous fluid coming from under the car, somewhere below the pump. All now dry inside. No sign where it had come from. Topped up and drove home. Popped the lid, and behold a nice trickle from around the pump. So hopefully head gasket innocent. Will start a new thread re changing the pump. Many thanks to all especially Ricardo for all your advice here. -
Favorit - Removing cylinder head bolts
Jxx replied to Jxx's topic in Skoda Favorit, Skoda Felicia, Skoda Fun and Skoda Forman
Hi Ricardo - The problem, as you said, is that the Favorit you know may not be the version here in the uk. Which, I get the impression from a Cz guy living with my neighbour, is not exactly what they had back home. I remember you said that the Felicia imported to the Dominican Republic had a carburettor. Favorits only had a carb here until (according to vagcat - and that might not necessarily be UK) dec 1992, then some Bosch injection thingy, and at some stage a catalyst. I've not checked (don't have one) but I've always assumed Felicias here were all injection / catalyst. Would have to go online to find a partslist to check. Last time I looked 7zap was still alive. Problem is that most of the online sites now don't cover these older vehicles. Main dealer still has the details of the Favorit on his ETKA, but many / most parts are "no longer available". For me the biggest problem with a control valve on the water supply to the heater is that the control is somewhat slow to respond, meaning that it needs some experience of the car and a little anticipation to get it to work smoothly. At least with the Favorit the valve is isolated from the engine. On the early A series Austin engines things developed historically. 1950s Morris Minor - Water take off from the cylinder head via a manually operated tap. If you were cold you popped the bonnet (hood) and opened the tap to let water through the heater. With the Austin 1100 Luxury! The tap was replaced by a cable operated valve. On the head. Generally quite reliable (OEM ones anyway). Aftermarket parts sometimes worked in reverse, ie hot was cold. Problem was that with the control at its furtherest extent and the control wire taught a lot of tappet noise could be introduced into the cabin. Stuffing the valve inline in a heater hose solved that one on the Austin Maxi. The Metro went for the continuously fed heater and air flaps. But I suspect that after 30 years the foam seals on the flaps have all but disintegrated, bypassing the heater somewhat ... KISS. When the Moggie Minor came out in the late 1940s it had no heater. That was a later addition. Export only at first. Go figure. Prewar Sidevalve engine capable of over 40 MPG. Never had the privilege of owning one (want want want) so no personal experience. Too young to appreciate Dad's. Moggie got the Austin A series when Morris merged (was taken over by) Austin. I'm getting to sound obsessive. But there is such a rich vein of pioneering motoring history here in the uk which is in danger of being completely lost. I'm particularly interested in the "export" variations and local tweaks and redesigns done by overseas subsidiaries and manufacturing plants / companies. Anyways, where you live I would have thought that a heater was an unnecessary luxury! [Jealous - desperately looking forward to summer.] -
Favorit - Removing cylinder head bolts
Jxx replied to Jxx's topic in Skoda Favorit, Skoda Felicia, Skoda Fun and Skoda Forman
Hi Ricardo. That's a new one on me. I don't doubt that there's a lot of dust on the outside of the matrix. Most oven cleaners are strongly caustic. What's the matrix made of? will they damage it? Anyway, on my Favorit, the cable from the top (temperature) slider in the car goes to a lever under a black plastic box connected internally to something my parts list refers to as a regulating valve. 2 plastic pipes out of that valve cover connect to the heater flow and return hoses. Do they do it differently where you are? At least the heater matrix is easy to get at. In my metro it's built in under the dash. A day's work to get it out. That has air flaps. At least you get instant warmth when you operate the slider. Warmth, not heat. Metro heaters are weak. The Favorit used to be toasty. -
Favorit - Removing cylinder head bolts
Jxx replied to Jxx's topic in Skoda Favorit, Skoda Felicia, Skoda Fun and Skoda Forman
Sorry I've not reported back sooner. Life has been horrendous here recently - I've barely had time to breathe. Also I've been working locally recently (2 miles or so each way town driving most of the time) and not had the opportunity to give the car a decent trip. (Apart for the weekly trips to see my wife, who's staying looking after her 96 year old dad at the moment. That's a 120 mile round trip, but I wanted some confidence in the car before I went so far from home.) I've had a couple of longer work trips, and had it up to 50 / 60 mph, so this sunday I bit the bullet and took it up to see father-in law. Mixed country road motoring with some decent fast stretches. Coolant level seems constant, holds reservoir pressure after 15 mins or so, so I don't think coolant is going anywhere. There was a very tiny amount of mayo in the oil filler cap after the short runs, now all gone after the longer trips. Lovely day on saturday, so I had the plugs out after I got back from work. All looked ok, but gave 'em a clean before I put 'em back. All went well, so I think we can mark this one as "solved". Many thanks to everyone for your input. What would I have done differently? 1. I would have oiled the bolts rather than using the grease supplied. I think it would have been easier. 2. I changed the first hose down from the radiator because I had had a slight weep from the connection to the rad. I would have liked to change the other 2 underneath, but access is not easy. In ideal conditions (summer) I'd have refilled with plain water, and got the car onto ramps for access. I've had the hoses for a while, but never had time to do the change. (initially when I finished replacing the head I had a very small leak from the bottom of the radiator by the outlet pipe first evidenced by a tell tail trail of water vapour from the area. I let the radiator get nice and hot with the filler cap removed to prevent the system pressurising and sprayed the area with fresh water to clean it as far as I could. When it was dry I pressed in some Fernox LSX, a plumber's silicone sealant specifically designed as a jointing compound and leak sealer. The small weep seemed to be from one of the bottom cores of the rad, right in the corner by the outlet. I gave this several hours to cure, tightened down the filler cap and it seems to have cured the problem. I'll have to keep a close watch on this area. I then noticed a small weep from the outlet hose / radiator joint itself. Easily cured by nipping up the jubilee clip. Truly, Murphy is a sadist.) I'll leave the other hoses till the spring. 3. The heater matrix is quite blocked up, heater is very poor. Had been like this for a while. THAT IN ITSELF SHOULD HAVE RUNG ALARM BELLS. I would have liked to backflush it properly, clean out the control valve etc, but the weather and time made me decide to leave it all to the spring. I'll change the antifreeze again then. 4. With hindsight, now knowing the cause of the rotten gasket and head, changed the antifreeze every 2 years! 5. I think undoing and pulling back the manifolds first and removing the head without them was a good idea, even if getting the nuts back on the studs was a bit of a pain. It avoided a lot of messing about with the carb, and I've never tried disconnecting the exhaust from the manifold from above. (Always done it from below with the car on ramps - easy that way.) UNRELATED INFO. The front downpipe (My car is without catalyst) always seems to rust out at the weld with the flange which joins with the mid section. Aluminium paint rather than aluminising. The last unit I got off Skoda was wrapped in plastic bags and selotape. There was some selotape still stuck to the pipe when I fitted it. This has burnt off and taken the aluminising with it, leaving a rusty patch. Something else to look at in the spring. Worth checking that a new section is clean before fitting. -
Favorit - Removing cylinder head bolts
Jxx replied to Jxx's topic in Skoda Favorit, Skoda Felicia, Skoda Fun and Skoda Forman
Good idea, Ricardo. Finally got the head back on on wednesday. Weather's been absolutely foul here, and trying to fit this in urgently when I can with other work. I actually very carefully laid the head directly on top of the block, inserted the bolts and checked that way. I carefully took a mm or so off the ends of a couple of the new bolts, and marked them with a felt tip pen. As I said, the new bolts were supplied with a sachet of "special grease" I decided to use this. I was a little bit worried that it seemed to contain a very small amount of copper powder, A flame test confirmed copper ... oh, well, I hope they know what they are doing. Only a very slight amount - the grease was almost transparent. I'll try to post a photo of the greased bolts later. (Not loaded with the stuff like copper ease.) I carefully removed the head and ran a bolt down each hole a couple of times to make sure the grease got to the bottom of the threads in the block, removed the bolt, cleaned and re greased it each time. Not over happy with the feel of the bolt as it went in the first time - the next time I do this (hopefully never again on this car) I think I'll stick with oil. Then cleaned the block again with with white spirit followed by acetone, cleaned the head again with acetone, fitted an new manifold gasket the (right way round - it's symmetrical), spread copperease on the manifold studs, fitted the head gasket to the block (checking it's the right way up) and laid the head on the gasket. Dropped in the push rods in the original order, fitted the rocker arm assembly with the tappet adjusters unscrewed and made sure that the ball on the adjusters was correctly in the top of the pushrods. Fitted the new bolts into the appropriate holes and did them up finger tight. Then tried to fit the rocker shaft bolts through into the head. ERROR. I should have fitted the small bolts first. There is a cut out in the rocker shaft to take these bolts, to locate the shaft. I had to undo the 2 long head bolts a few turns to enable me to turn the rocker shaft to get the small bolts through. Then torqued up the head bolts as per spec. Then fitted the alternator mount and torqued the the head nuts. HINDSIGHT - It would have been good to make a copy of the tightening sequence diagram and ticked off each bolt 3 times for each sequence - prevents errors if you get distracted during the process. That was it for wednesday - dusk. Thursday was mildish but damp. I removed the drain plug from the sump, a little more oil came out as expected. A bit of paper towel into the sump did not detect any coolant in the bottom of the sump. Replaced the plug and changed the oil filter. Adjusted the rocker clearances, replaced the rocker cover, refilled with cheap oil. Cleaned off corrosion from the alloy pipes on the inlet manifold, stat housing etc, checked and refitted the hoses. Filled with 33 % blue antifreeze. Replaced thermistor cable, spark plugs plugs and leads. Started to drizzle slightly. Decided to try to get the manifolds back. Carefully knocked out the little wooden block I had inserted to keep the exhaust pipe and manifold back - (it's possible to push the manifold back enough to remove the head without disconnecting from the exhaust), and fitted the washers and nuts. Next, the inlet manifold and carburettor. Problem - the bottom inlet manifold nuts are almost unreachable with the exhaust manifold in place. It's worse the other way round. In the end I fitted the top washers and nuts very loosely, got the washers on the studs with a pair of long nosed pliers, adjusted the heatshield slightly with a drift and hammer, lifted up the inlet manifold on the top studs and managed to get the nuts on and tightened with a slim 1/4 in drive socket and extension. The state of the heatshield and fixings meant removing it for easier assess was not a sensible option. Attempted to start the beast. By now it had been drizzling steadily, and despite some wd40, no go. Decided to go in and dry up / warm up, and leave it for the day. Had to go out a bit later, returned after dark. Noticed that I had left an interior light on - I've got a pair of 20 W halogen spots in the roof - so I thought I'd give it another go if only to check if I needed to put the battery on charge. Much to my surprise it started immediately. Let it warm up, lots of water vapour out the exhaust, expected of a cold wet day. Let it warm up. No bubbling out of the coolant filler. Let some of the water vapour out of the back condense on my hands and licked carefully. Slightly sweet, nowhere like as bad as before. Probably residual in exhaust. Waited till the thermostat opened, no overheating. Coolant level had dropped from max to min. and seemed stable. Switched off. Oil level slightly lower - expected as the oil filter and galleries filled. Started it up again later and warmed it up again. Levels stable. No more discernible taste out of the back end. Hopeful. Fitted the air cleaner today Took it out on the road for a few miles locally. Seems to run ok apart from the tappets. Would expect that as the pushrods etc settle in. Will treat it carefully and use for local trips for a while to make sure. Thanks everyone for all your advice! WARNING. Antifreeze (and brake fluid) is toxic. Do not ingest. It can also pass through the skin into the bloodstream. Having said that, it is VERY sweet, and not so long ago cheap wine from a european country which shall be nameless was found to be sweetened with antifreeze. -
Favorit - Removing cylinder head bolts
Jxx replied to Jxx's topic in Skoda Favorit, Skoda Felicia, Skoda Fun and Skoda Forman
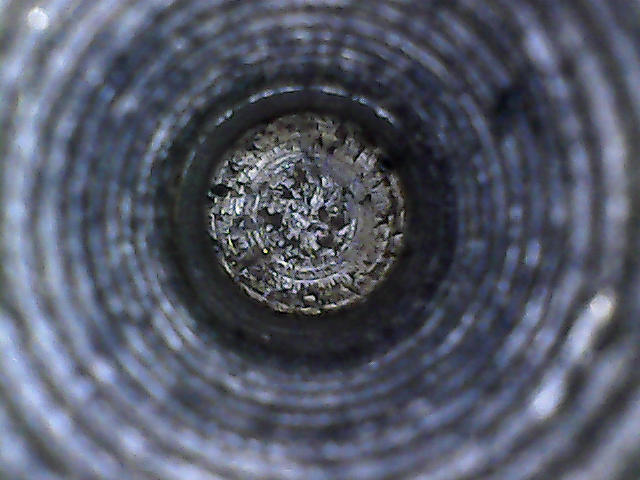
Hi Ricardo. From what I could see with a torch before, all the holes looked clean. This morning I stuck a camera down all the holes to try to get a better look. That was all I could do before the rain set in. Unfortunately, the kind of inspection camera I can afford that is thin enough to fit down a 11 mm hole is fixed focus and low resolution, but the image clearly shows that the thread does not go down to the bottom of the hole (none of them do) and that the hole is clear to the bottom. You can see where the end of my screwdriver scraped the bottom of the hole when I was using it with some industrial grade paper towel wrapped around it to clean out the wd40. It's also clear where the bolt has bottomed and polished the end if the thread as I ran it up and down with wd40 to clean the threads. I'm putting it down to manufacturing tolerances. I guess it was near the knuckle before I had the head skimmed. My memory of the machining limit was getting on for 2 mm before I took the head in - it's just about 1 mm now. Difficult to tell exactly because the notch is rough cast not machined. So maybe they took getting on for 1 mm off? I've decided to grind a mm off the end of the new bolt for that hole. Don't want to take much off because the thread in the block is not much more than 25 mm judging by the marks on the old bolts when they came out. I'm actually more concerned about the somewhat tatty threads I can see with the naked eye in nearly all the holes in the block, but there's nowt I can do about that. It's not nearly as bad as it seems in the photo - pixelation due to the appalling resolution - 640 x 480. The other thing I can do is **gently** lower the head onto the block without a gasket, fit the bolts finger tight and see if any actually bottom out then.
-
Favorit - Removing cylinder head bolts
Jxx replied to Jxx's topic in Skoda Favorit, Skoda Felicia, Skoda Fun and Skoda Forman
Thanks for that, Ricardo. Just seen your post. Nice to have my somewhat uneducated guesses confirmed. My main worry was no.2. I've checked my digital "vernier" against another one and a real mechanical one, and checked the bolt protrusion measurements. Coming up with the same figures. I've had a good look down the holes in the block. The holes go rather deeper than the threads. The threads in the holes are clean, but are a tad rough looking. I suspect they've seen better days. That was my guess yesterday, and trying to tighten down a bottomed bolt would be bad news. Problem is, I don't know how much the guy took off the head. At a guess no more than a mm - probably a bit less. There's still about 1 mm left on the maximum machining notch. I've got a nasty feeling the thing might have overheated in its early days and the head skimmed before. Someone's put an override switch on the radiator fan - I've certainly never had overheating problems, although it's possible the first owner was panicked by the temperature gauge rising very slightly before the fan kicks in. Have you any idea how deep that max machining notch would be on an original head? I had already decided to grind back the ends of the new bolts to the size of the Skoda part, and gently cone off the ends to match. I'm coming to the view that it would probably be safe / safer to take another mm off the bolt for no.2 to allow for the machining. Alternatively I could add an extra washer under the thick bolt washer. The only ones I have available are ordinary 1.2 X 10 mm x 25 mm penny washers - trivial to open them out to 11 mm. The original hardened washer would be up against the bolt head, and I presume the air cleaner bracket is nothing special. The other one I would need to check is the middle bolt on the other side - no.1 - the one recessed into the head under the rockers. The only way I could see of getting a better measurement for that row was to carefully put a bit of masking tape round the bottomed bolt in the head and measuring with callipers after I took the bolt out again. Got to be more accurate than trying to look at a ruler. Or engineer's callipers and measure them if I've got some suitable. Very many thanks for all your advice Good not to be doing all this on my own. Jxx -
Favorit - Removing cylinder head bolts
Jxx replied to Jxx's topic in Skoda Favorit, Skoda Felicia, Skoda Fun and Skoda Forman
Foul day here today in spite of what Mystic Met promised. Forecast changes with the hour. Mild but bouts of very fine west country type rain. However - I took one of the old bolts, cut a couple of slots in the thread with a hacksaw, brushed it out well to remove burs and had another at the threads in the block. Cleaned the wd40 out well with a bits of paper towel wrapped round a long thin screwdriver. (Compressor's a big heavy brute in the shed at the bottom of the garden, didn't want to lug it out if I could help it.) Very little further muck came out and I can see the bottoms of the holes are clean. Had a look at the new bolts, threads all good - no nasty damage. Gave them all a good clean with a stiff brass wire brush - the long and short ones had a bit of spotting corrosion and felt a bit rough. Decided to run them down dry into the threads finger tight to the bottom to make sure all ok. I ran a straight edge over the block. As far as I can tell it's true. The liners seem pretty well level with the block rather than protruding slightly, but there's nothing I can do about that. Measured the protruding lengths with the new bolts out of curiosity to see how much room there was. I used a digital vernier which I have always found very accurate and reliable up to now, but I've not used it needing high accuracy over an inch or so. I'll check it against a "real" vernier calliper I inherited from my father tomorrow. Measured the head - 97.6 mm after skimming. Allowing for 4 mm for the air cleaner bracket, 4.2 mm for the washers and 23.9 mm for the rocker shaft clamps and I did a few quick calculations. Head gasket is 1.5 mm new. No idea what it is compressed - 1 mm?? Had some difficulty getting in to measure the protrusion of bolt sticking out of the holes which take the bolts under the rocker shaft, I'll try again tomorrow using the depth gauge bit of the callipers. So far I've only got rough ruler measurements for them. This is what I get, with a finger tight untensioned bolt: Short bolt (no.10) (New bolt 0.5 mm longer than old Skoda bolt) Protrusion 100 mm. Head + washer + gasket @1 mm = 102.8 mm --- Gives 2.8 mm to torque down --- tight. Medium bolt. (new bolt 0.8 mm longer than new Skoda bolt) Manifold side: No.6 - Protrusion 104.5mm Head + air cleaner bracket + washer +gasket = 106.8 mm --- gives 2.3 mm to torque down --- tighter. No.2 - Protrusion 106 mm --- gives only 0.8 mm. No.3 - Protrusion 103 mm --- gives 3.8 mm. No.7 - Protrusion 100 mm --- Head + washer + gasket = 102.8mm --- gives 2.8 to torque down. For the medium bolts under the rocker shaft I only have a rough ruler measurement at the moment, but I suspect that the middle bolt, No.1, which for some reason is set about 4 mm down in the head will be tight. For the long bolts I get : No. 9 - 4.5 mm to torque down, No. 8 - 7.5 mm to torque down. Now, I will check this all again and check the accuracy of the callipers, but these figures don't look right. Or I've made some silly error somewhere. I've noticed with the medium bolts that not only are they 0.8 mm longer than the original, the threads are rolled all the way to the end of the bolt. The Skoda ones have the ends nicely rounded. I'd be very surprised if the tappings in the block have no run out. If - and it may be a big if - my measurements prove correct I'm tempted to grind the ends of the bolts down to at least OEM sizes, and round the ends of the medium bolts slightly. I'm pretty sure that the threads in the block are clean , but I'll check that as well. In the meantime I've got a few questions: 1. How much spare depth is considered normal / safe for the threads in the holes in the block? Obviously I need as much used thread as possible for strength. 2. How much should I expect the head gasket to compress when the head is torqued down? 3. How much do the bolts stretch under tension - after all they are effectively a mighty strong spring. 4. I've measured my head at 97.6 mm. Does anyone know the height of a stock Favorit head? The number 0881 is stamped on the head, top centre, manifold side. I don't think the machine shop took that much off, there's still some way to go to the marker notch - difficult to measure as it's rough cast, not machined. Thanks everyone for your patience - especially Ricardo. Jxx. -
Favorit - Removing cylinder head bolts
Jxx replied to Jxx's topic in Skoda Favorit, Skoda Felicia, Skoda Fun and Skoda Forman
The story so far: The BGA bolts arrived on wednesday. Correct ones this time. They all have the correct 10.9 marking, also 5 stars. Purely out of interest, does anyone know if that is another grading code or a manufacturer's code? The bolts look a lot nicer than the wrong Victor Reinz ones I was supplied earlier. Better packed and far fewer nicks in the threads, better than Skoda OEM for that. I'll give them a careful look over, carefully relieve any significant nicks and test fit them into all the holes first. some seem a mm or so longer than the originals - I'll screw them in by hand until they bottom out, measure protrusion from the block and double check things are ok especially as the head has been skimmed. BGA supplied a sachet of "Special grease for cylinder head bolts". I'm a little cagey about this. If I use it I presume it's essential to get it to the bottom of the threads, so a very light application with a toothbrush? Or possibly a thicker smear right down the threads but not all the way round the bolt? No instructions supplied. I'm inclined to ignore the grease and just lightly oil as normal. Bad news with the seals - Correct BGA part no bag supplied (another supplier), but had a very small seal sized tear in it Seals were smaller than 8 mm - loose to the shank of a 6 mm drill, just smaller than a 6.5 mm drill shank - so I guess for a 7 mm valve. Will have strong words with that ebay supplier shortly. I made Ricardo's valve spring tool and popped one of the exhaust valves. The old seal still seemed to have some tension on the valve left, and did not seem to be burnt at all. I've decided to leave well alone and risk it. I have to get this job finished. The weather here has been foul all this week but Mystic Met were forecasting mild and dryish over the weekend. Mind you, an hour is a long time in weather forecasting in the UK these days, and they're now suggesting rain on sunday. If it looks reasonable I'll have a bash. -
Favorit - Removing cylinder head bolts
Jxx replied to Jxx's topic in Skoda Favorit, Skoda Felicia, Skoda Fun and Skoda Forman
Dear Ricardo Very many thanks for that - looks far easier to handle than the "proper" tool. It's roughly what I remembered. I'm sure I can knock something like that up. I like the idea of the packing washers to keep the spring down. I was mulling over the idea of a second bolt and a small block to protect the top of the head, but simplicity is best! (There's another reason to pop the valves. I've noticed that there is a small wear ridge on the top of a few of them, which will make setting tappet gaps awkward. It'd be nice to hone them flat.) I guess from the stat housing that that is a Felicia. I noticed from the pictures of the nut and bolt locations you posted that the M8 nuts were stiffnuts. My favorit has flat washers, split shakeproof washers and ordinary nuts. I wonder why Skoda changed? Just checked the 2 Favorit partslists I've managed to grab off the net - plain nut 8.87 - 01.94, hex nut, self locking, N0111849 02-94 on. No mention of any split washers except on the bolt for the alternator bracket. I did notice when I removed them that they seemed quite easy to remove. The other thing I noticed on my head was that the central head bolt fixing hole inside the tappet cover area was lower than the others. I see your Felicia head is the same. ?? Just had an email from the bolt supplier. Dispatch confirmed for tomorrow. I had to get the seals from someone else, projected delivery 6 - 9 jan. I really DO NOT want to do that job later with the head on. I'll wait unless I have trouble with the Metro. (I do have to have a working car at the moment for work and with my wife up in Suffolk 60 miles away with her dad. Also, I'd like to get that head off the stool in the kitchen where it's living at the mo. Perhaps its a good job my wife's away at the moment .... Jxx Regarding draining the block ... the drain point in the block was really tight - I presumed it was seized in so quit while I was ahead and drained from the bottom hose. I had a small weep from there anyway, so I'll change the hose when I refill. I couldn't be bothered at the time to crawl under and remove the drain plug in the bottom pipe. Looking at your pics,the other thing I'll have to do sometime is replace the vapour lock device on the pierburg. The plastic is beginning to craze slightly. That's a leak I DON'T want to have. At the mo I haven't been able to source one anywhere - strange because I presume they were used on a lot of cars. I'll try again in the spring. If I get no luck I'll fabricate something out of copper pipe. Could be cheaper and quicker in the end. -
Favorit - Removing cylinder head bolts
Jxx replied to Jxx's topic in Skoda Favorit, Skoda Felicia, Skoda Fun and Skoda Forman
Ricardo Thanks for the info re BGA are ok. Have just ordered a set of bolts off a company on fleabay for £35. They've got a 100% rating, and wanted me to confirm reg no / engine no, so they seem to be quite professional. I gave the top of the block and liners another spray with WD40 yesterday. It's been cold and foggy here and everything's wet under the bonnet. I don't want any rust on the liners, especially the tops. I'll sort out degreasing when I fit the head. Also ordered a set of BGA seals from someone else. I'll fit them if they arrive in time. My spring compressor is too small for the favorit head so I'll either have to buy a bigger one of make up something like the "spanner" one you posted a picture of. I've had a search on the forum I can't easily find it again - got a link? General question - If this has to be done with the head in situ at any time the rockers will obviously have to come off, that means 2 head bolts out. I presume it is necessary to release all the others in sequence at the same time?