STU3Y
Members
-
Joined
-
Last visited
Everything posted by STU3Y
-
Have you seen this one https://www.cars-equipment.com/en/shop/radio-adapter-can-bus-decoder-22/canbus-adapter-reduction-for-steering-wheel-2/ This suggests that it solves the menu option and makes the heated steering wheel button work?
-
What did you do with the round wheel? Also do you have any links for the crimp connectors that you used on each end of the power and ground wires. If I do it I am not sure what fuse I would use, so trying to source some for the mini fuses and standard fuses I believe the mini ones are mcp2.8 terminals but not sure about the standard ones.
-
Sadly can't afford to spend that much just for a heated wheel, especially when it will still need the clock spring and loom on top.
-
Nice, thank you. Do any of the other buttons not work? I don't have ACC either. I am just trying to find the cheapest way to do it as its obviously an expensive mod. But I am torn, as I really want to retain the flat bottom and vrs style leather. But not sure what will bother me most, the round wheel but works perfectly or flat wheel but inoperative buttons 🤔
-
Can you provide a list of part numbers and links?
-
Part number for the golf is 5q1 953 539d. I assume the variation is just cos it's a Vw. Only asked about the splicing as part of the thread shows the kufatec loom needing splicing. I would love a Mk4 one as can get one for about 100 quid. Just don't know how or what else is required as the only thread I've seen is the Russian guy I have a manual vrs.
-
What exactly did you change?
-
Did you use the ali express clock ring in the end. If so do you have a link and is it still working?
-
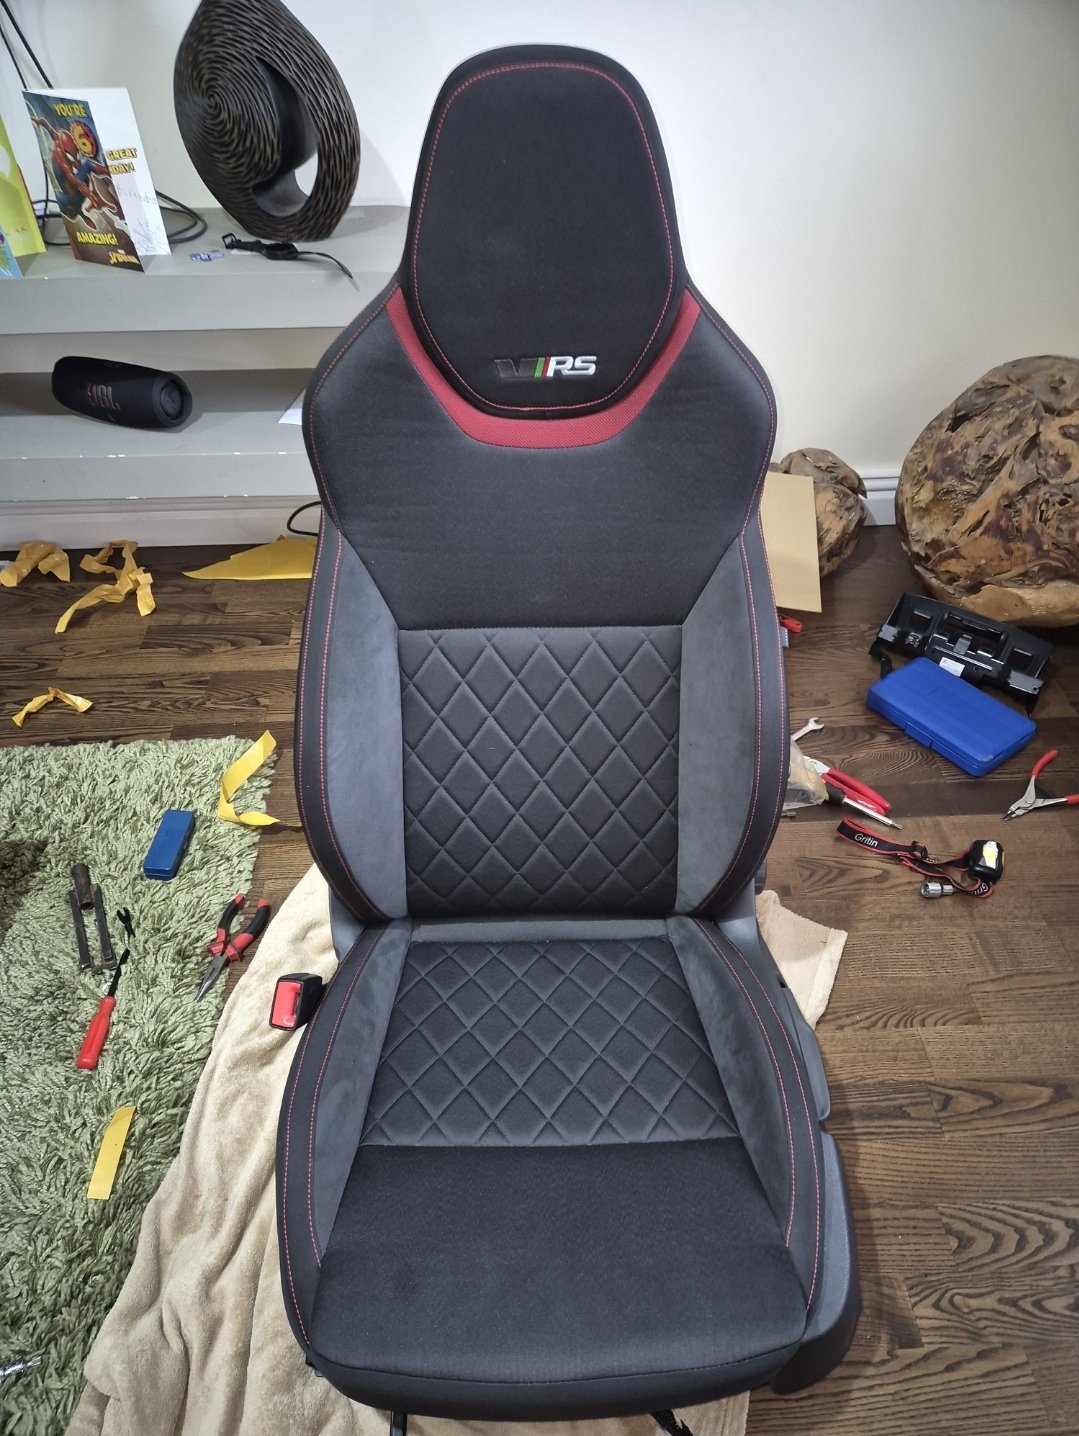
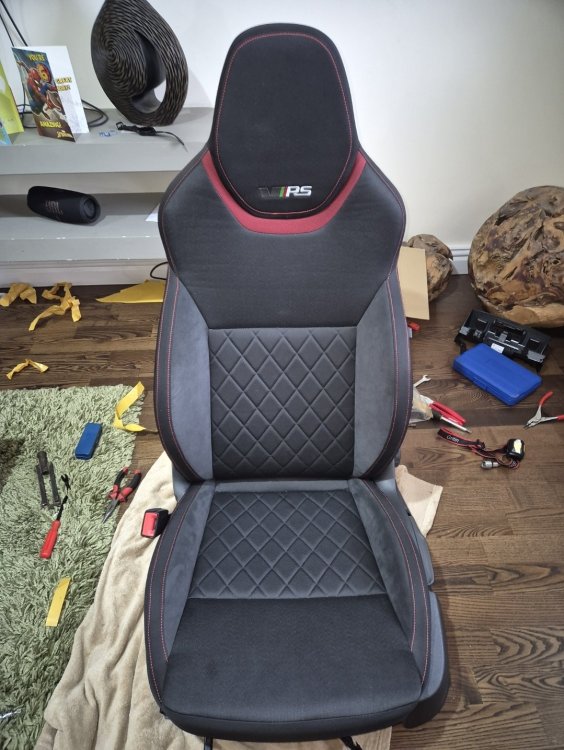
Hey guys. I have now fitted my heated seats and they are working great. Very hot. Now looking at this as my next upgrade. I am little confused as the original thread suggests using 5q0953549B or the new version ending in D. Then later in the thread people suggest C. I have all 2017 Vrs 230 Fl. So a few questions: 1. Which one is the one I need, as the prices do seem to vary. 2. Are they nterchangeable between brands. I.e skoda, vw etc. As there are a few available for golf's that are a lot cheaper. 3. Do you actually have to splice into any original looms? As I am not too keen on that 4. Anyone know of a flat bottom vrs heated wheel at a good price?
-
Been scanning the web for a heated wheel. They are so expensive, not many available and most asking 400-500 just for the wheel. Really annoying as the mk4 heated wheel chair be picked up for a little as 150 quid.
-
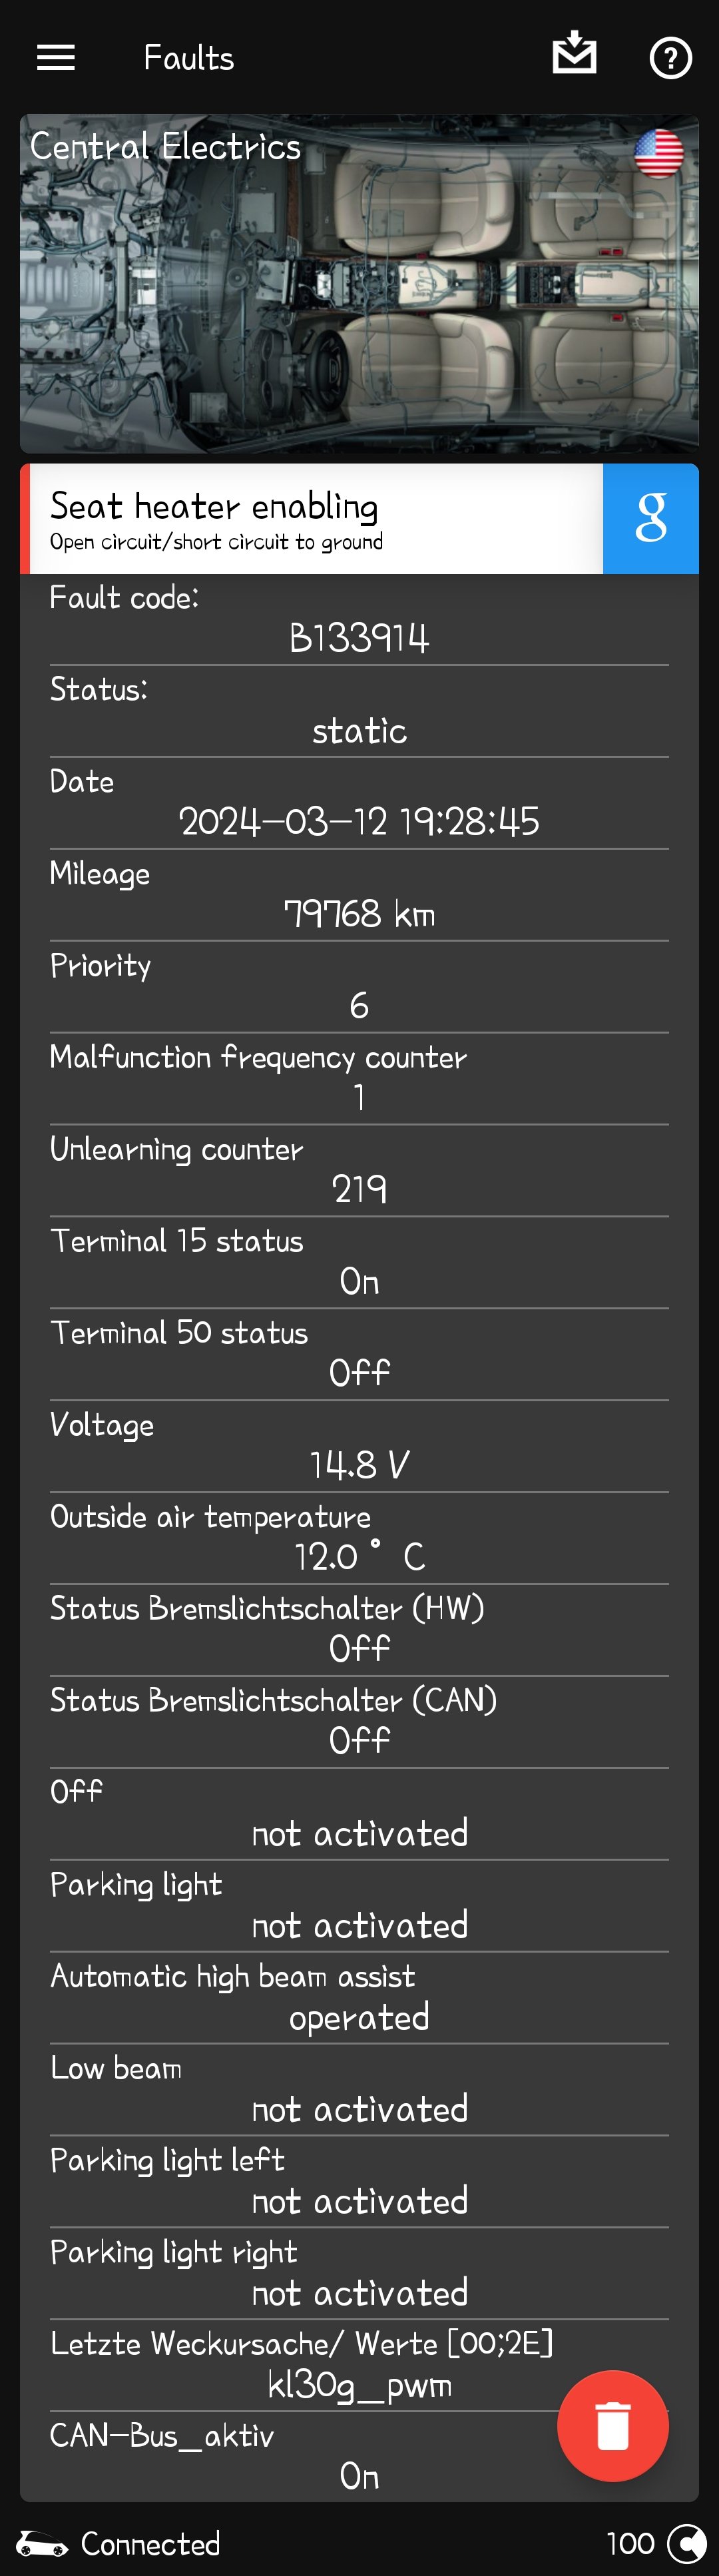
Anyone know the factory settings for heat levels?
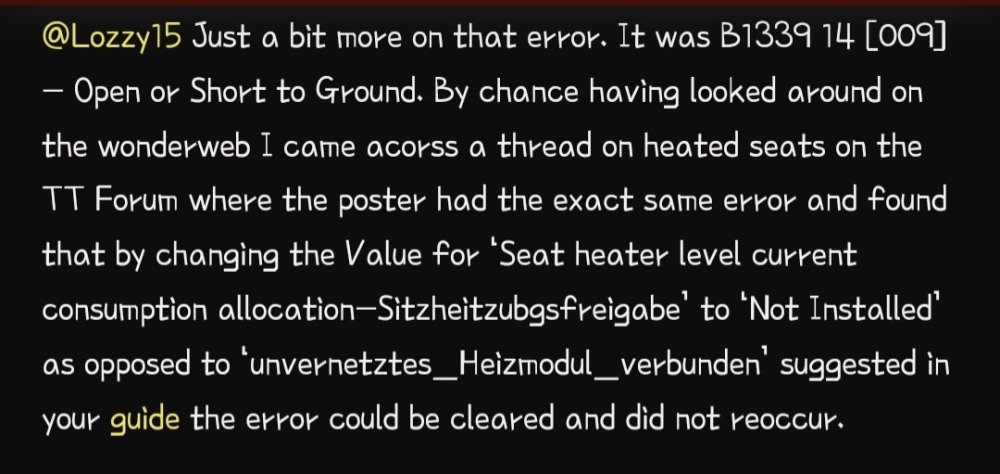
-
So changed the coding as above to not installed, and the fault code is now gone and isn't coming back. Not sure exactly what the setting is for, Google suggests it's an un networked heating module. Either way it has solved the problem. The heated seats are fantastic. If anything probably too hot on top setting. Can anyone that has them fitted as standard, put up the factory heat levels?

-
-
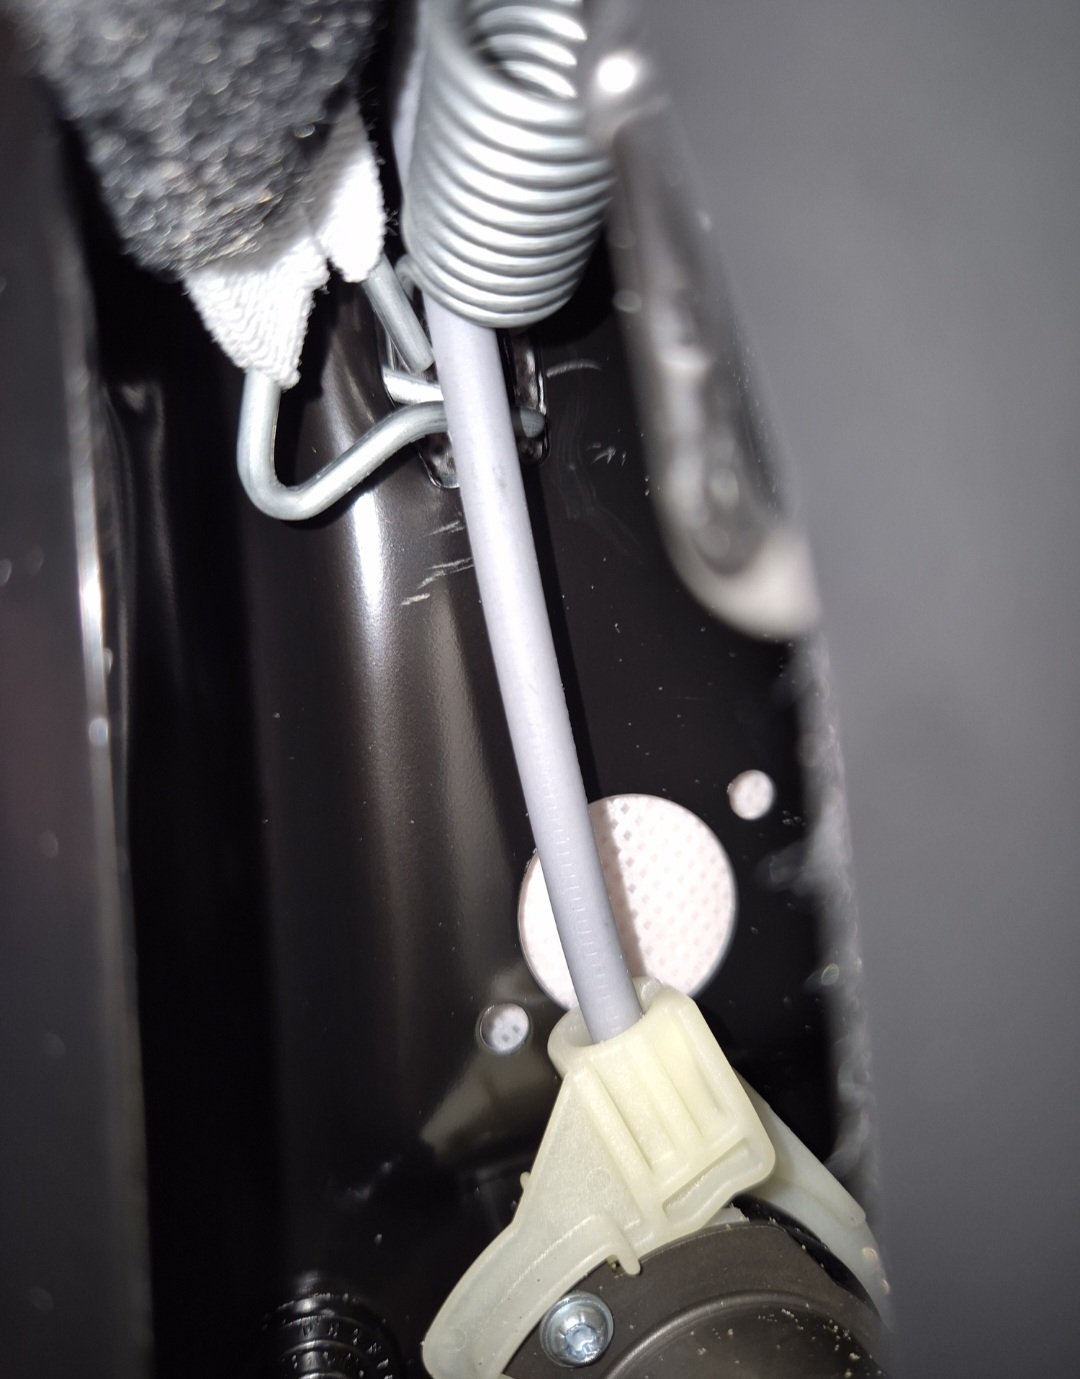
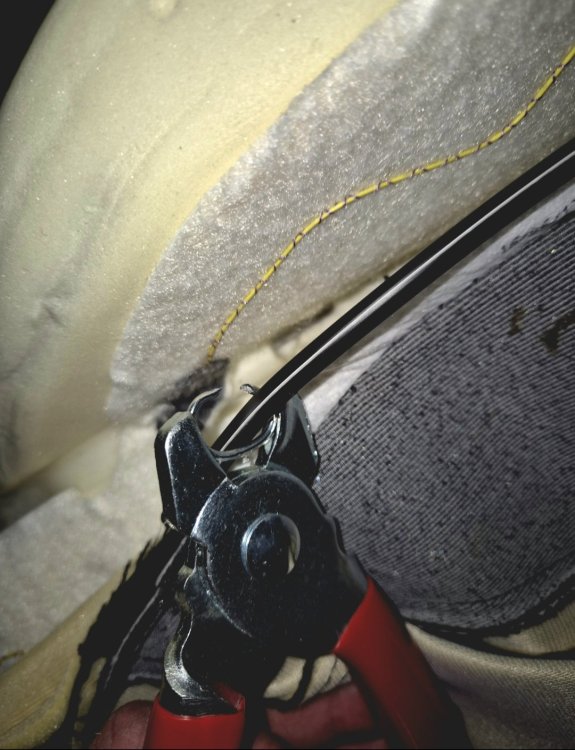
As it stands, all appears to be working fine, however I have one fault code. I am yet to investigate this i have read the following but not tried it yet Anyone got any ideas in this. As far as i know all wiring was fine and, the cables were connected to the factory earth points in the door trims.
-
-
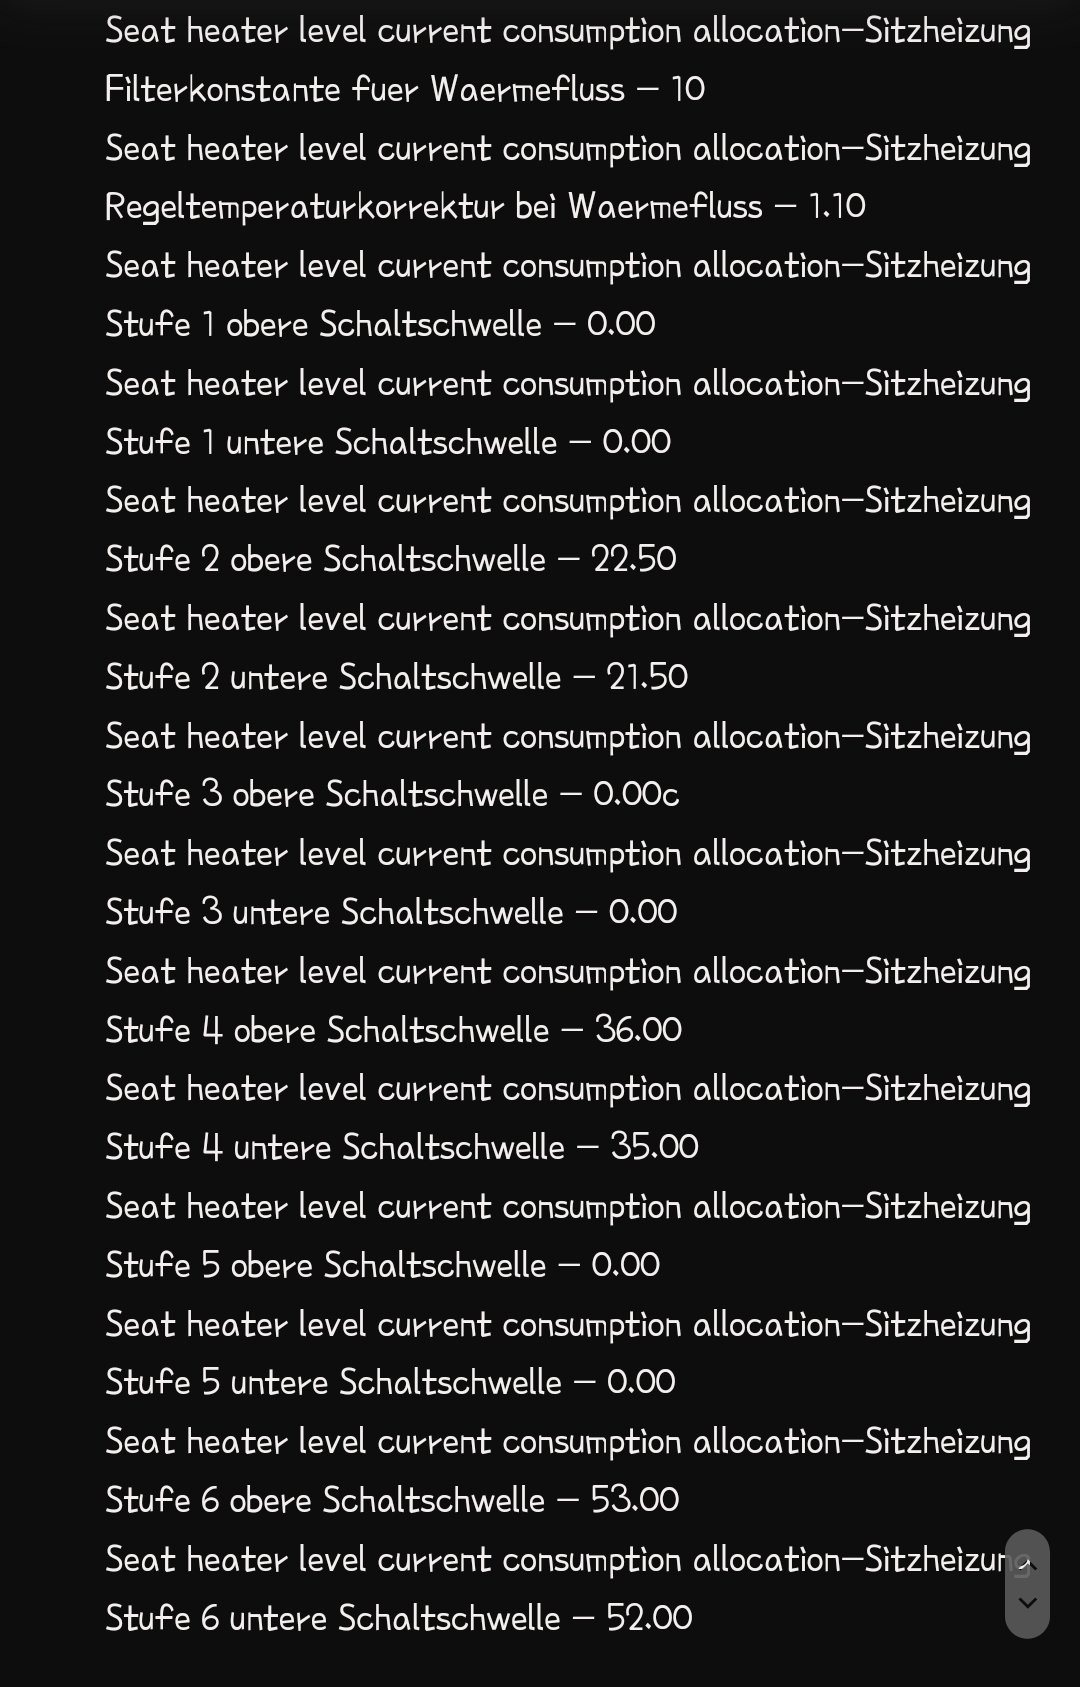
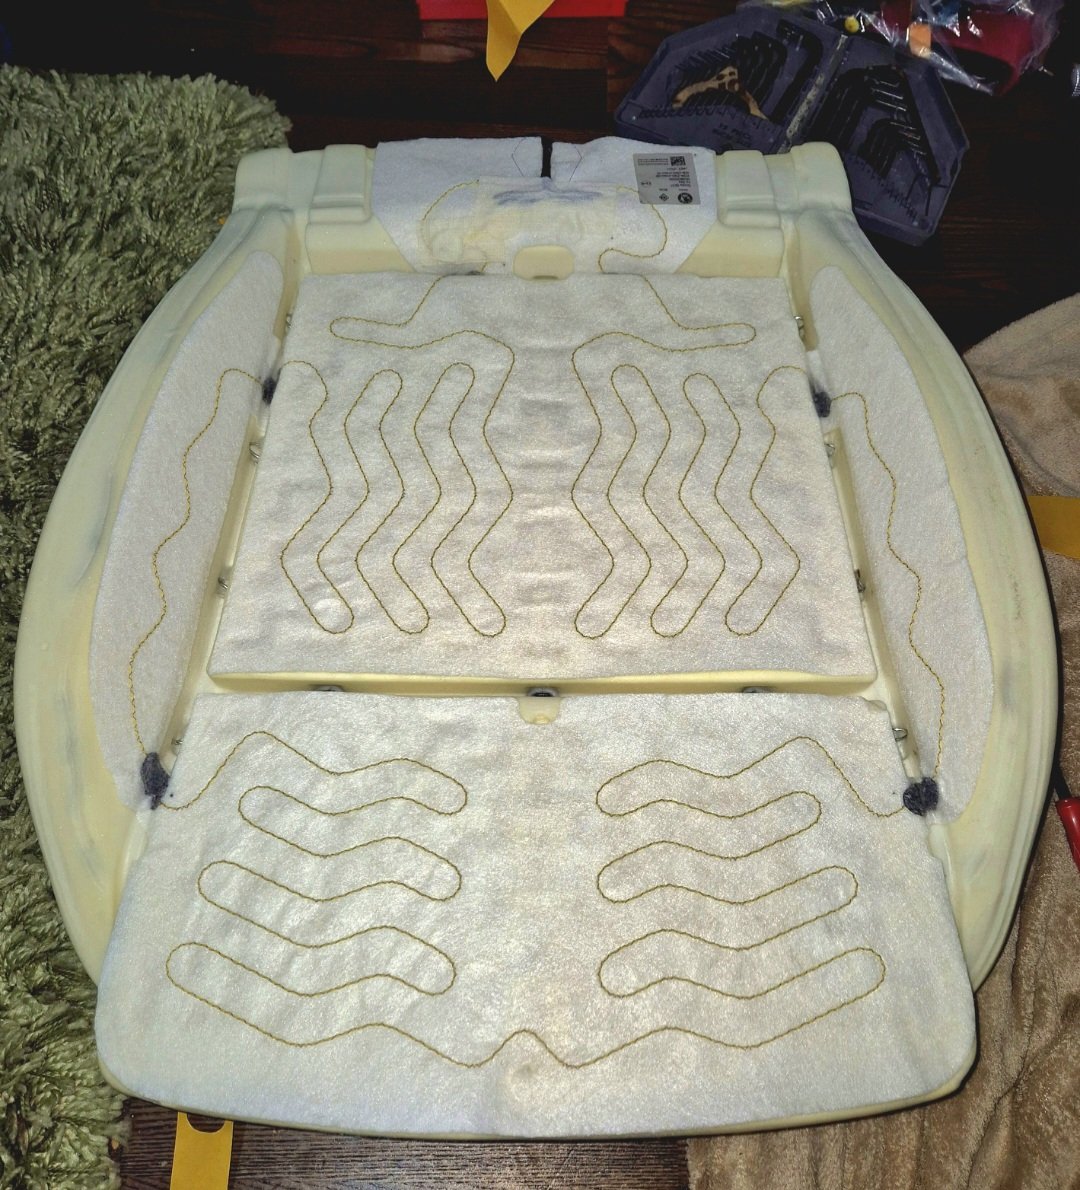
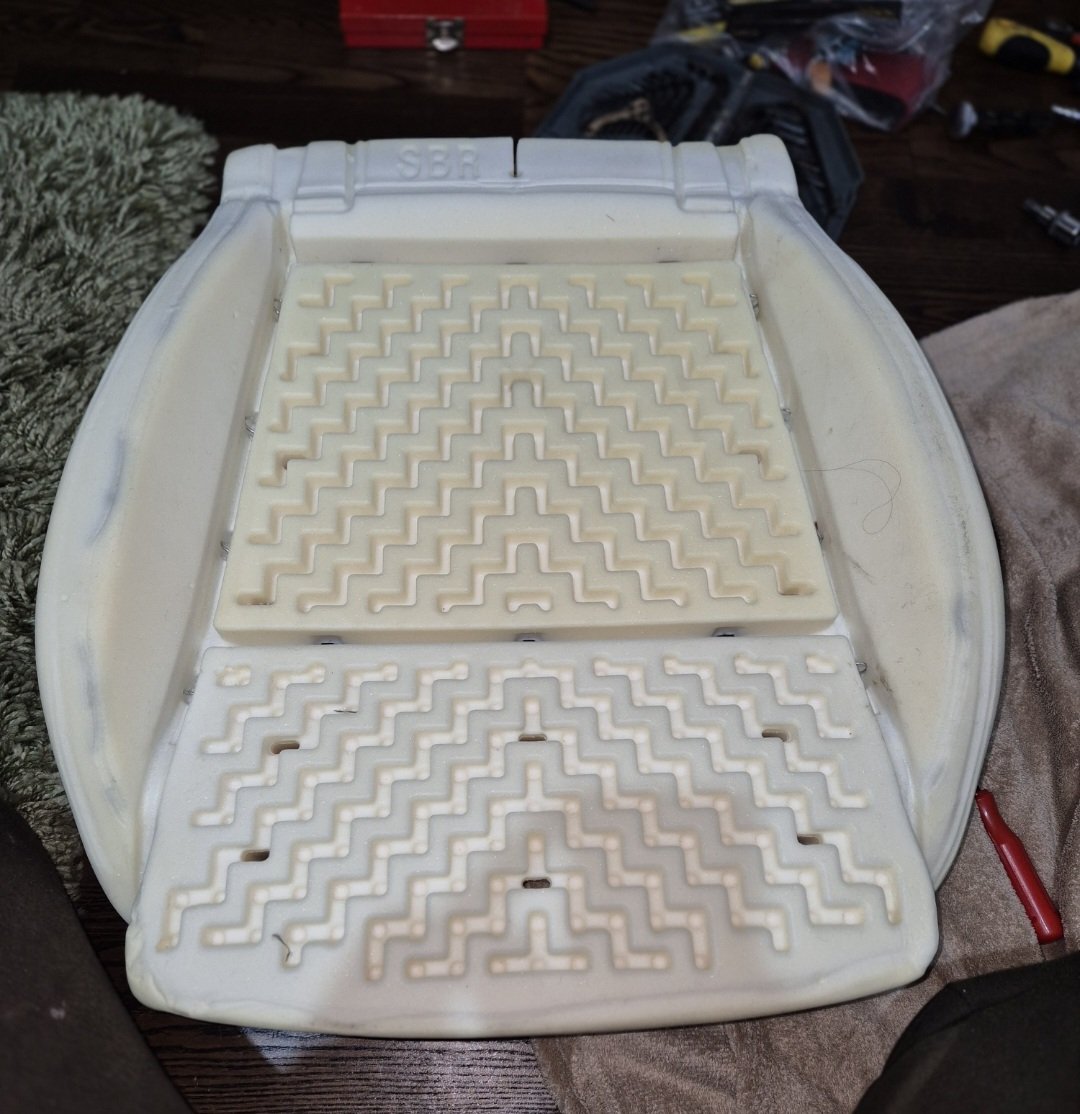
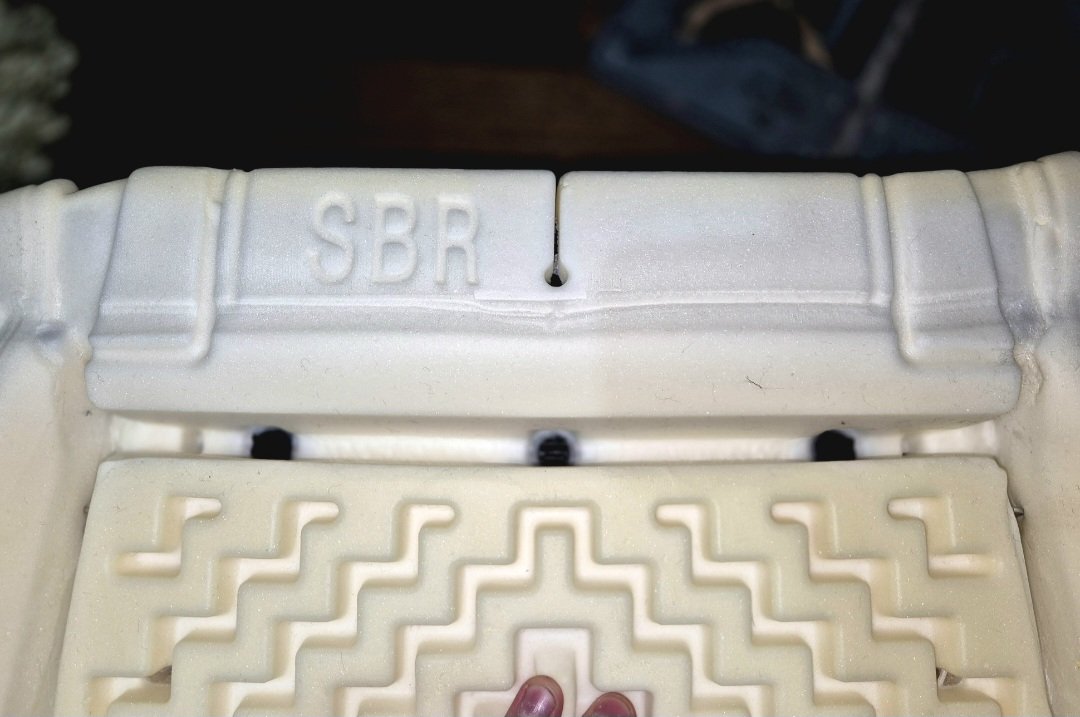
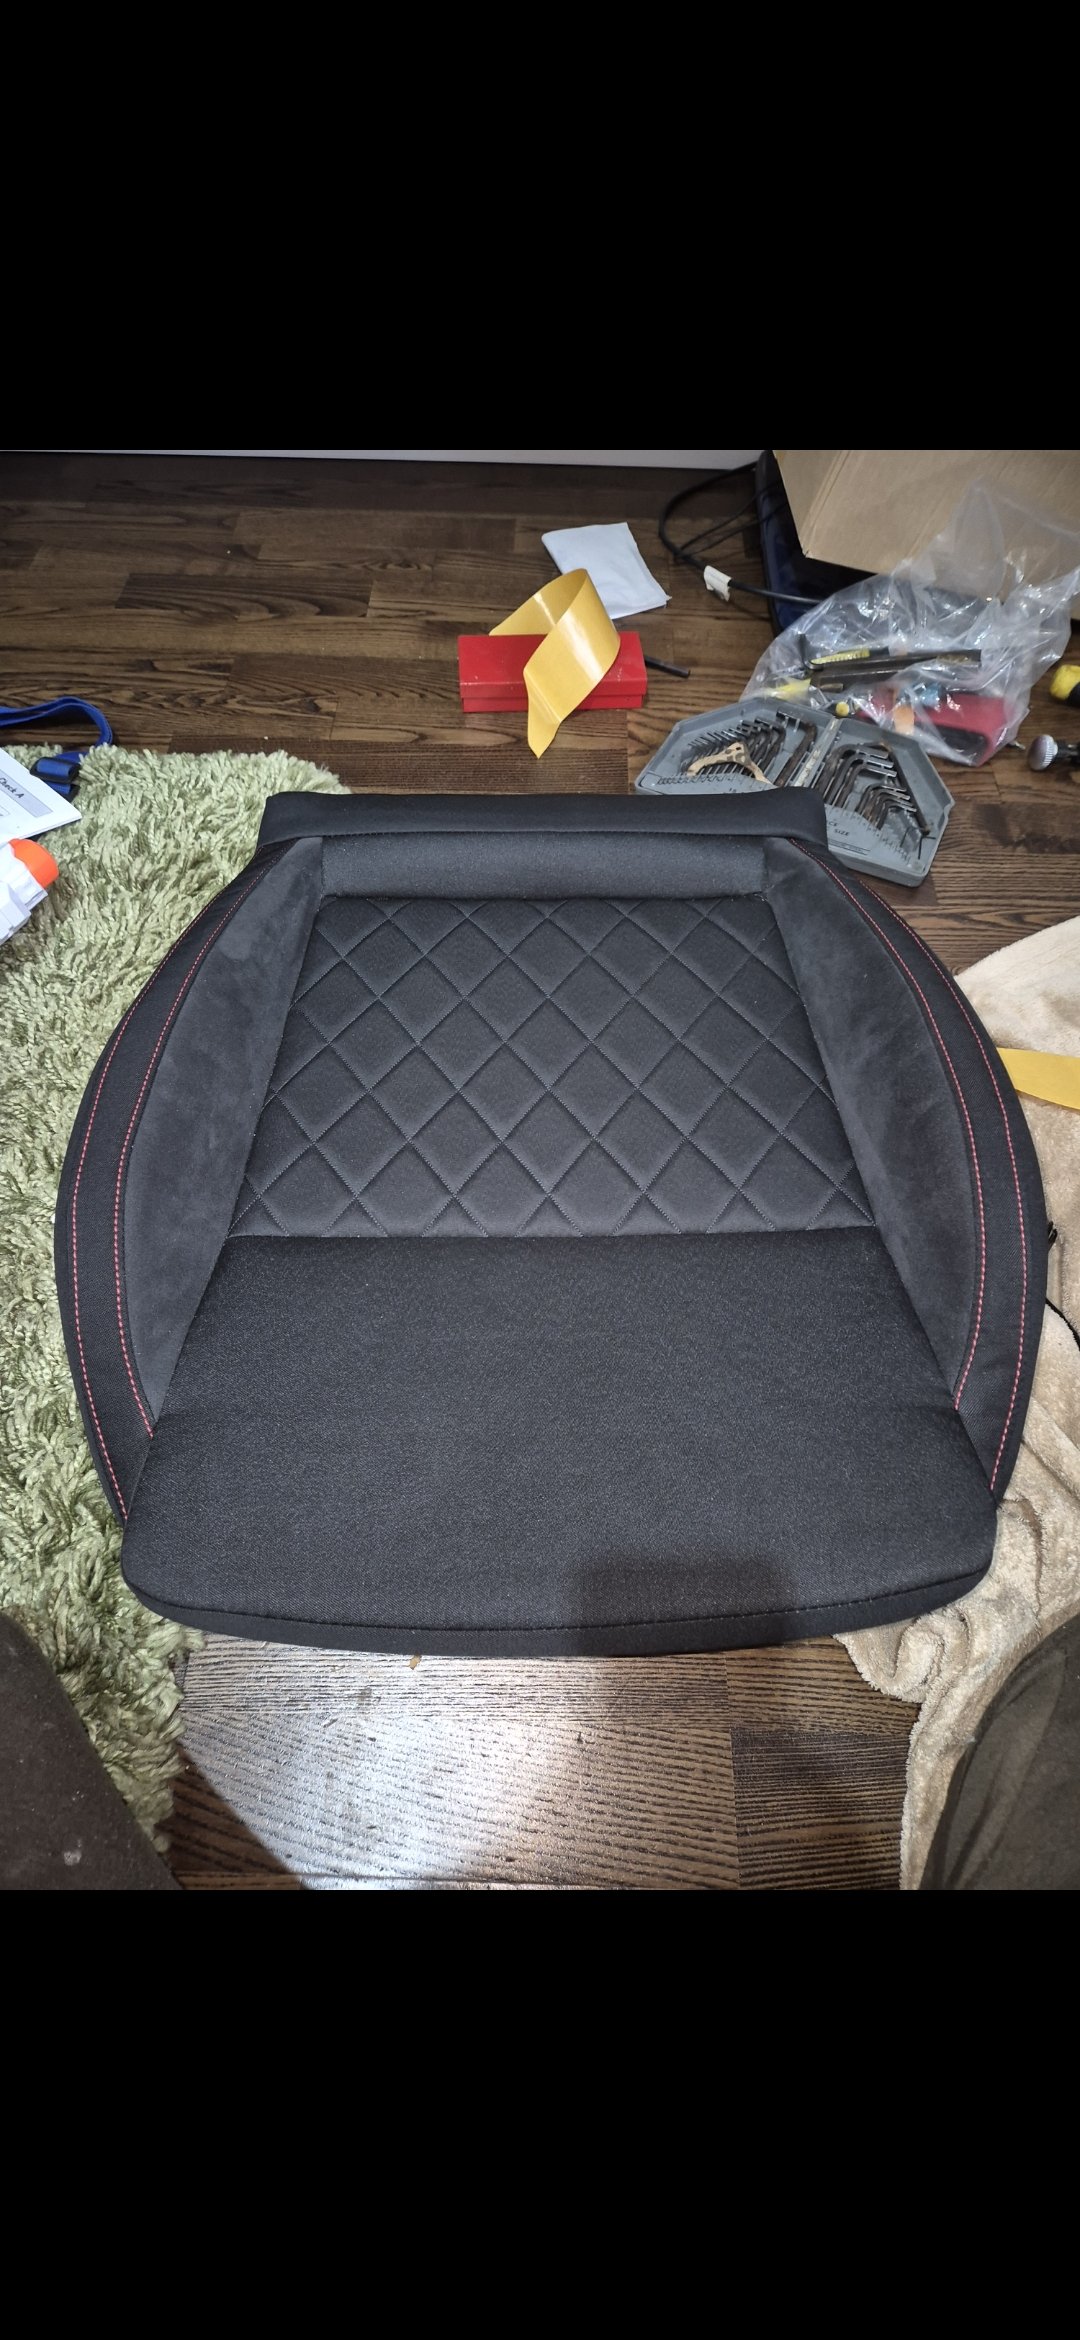
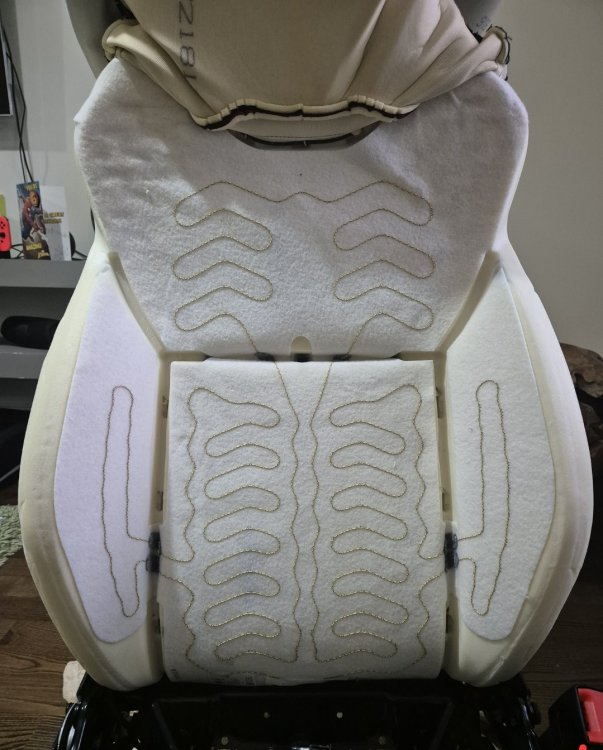
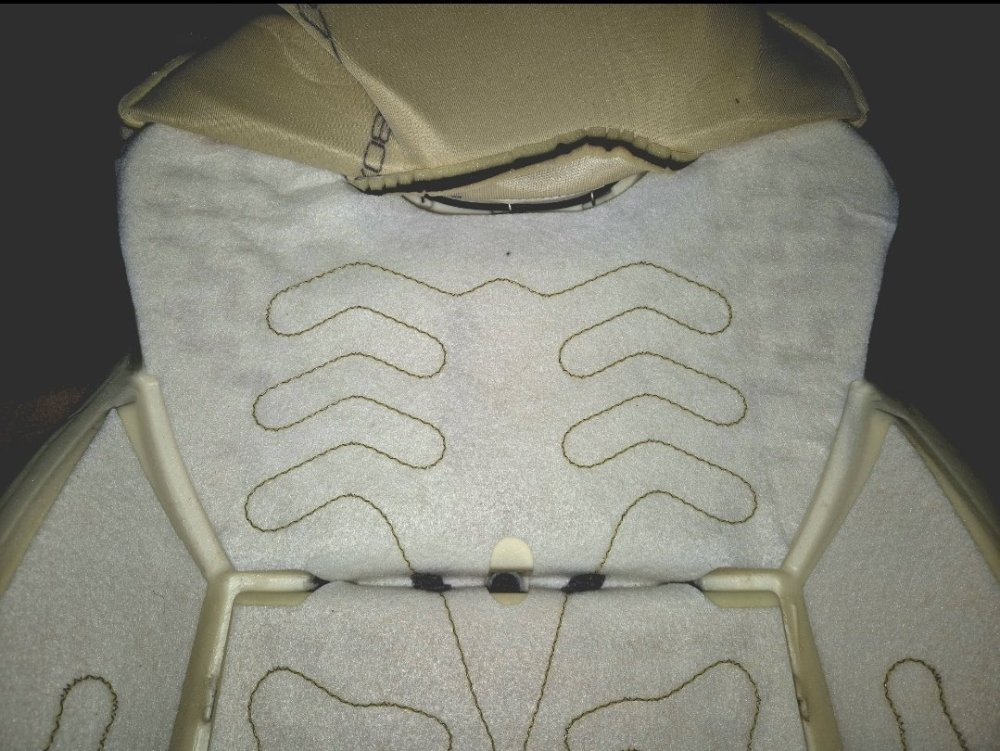
Now add the heat pads. Start at the top. You will have to hold the cover out of the way slightly but it's easy enough and will end up like this. Again make sure you push the joins into the grooves to prevent them breaking. Having done this, start sliding the cover back down again. Take your time and do a little bit each side to keep it level. Again push on the bolsters yo make this easier. I won't list the instructions as it is the reverse of removal. The wiring for this is pushed out at the base. You will see a loom already to one side. I just ran my beside this. Once both parts are now fitted with the covers, start by installing the base first. Get this in place and hook the covers together and over the frame. Run the new plug/loom throigh the hoke in the base that already had wires in it. Then cabke tie it to the rest of the seat loom. Reassemble the two parts of the frame and bolt them together. Plug the two looms together using the new kufatec seat harness, and then reinstall all plastics and handles and you are good to go. No one will even notice the cover was off Reinstall the seats in the car, carry out the coding and enjoy the warm bum! Hope this helps someone, and sorry for hijacking the thread, but thought it best to have all the info in one place. In total it cost me £378 I used the following: 1. Used climate control panel with heated seat buttons. (Ebay) - 5E0907044AQ 2. Kufatec car harness for heated seat item 43340 3. Kufatec heated seat looms, item 49047 4. Skoda heated back rest pads x 2 - 5E0963557S 5. Skoda heated cushion pads x 2- 5E0963555N 6. Obdeleven for coding


-
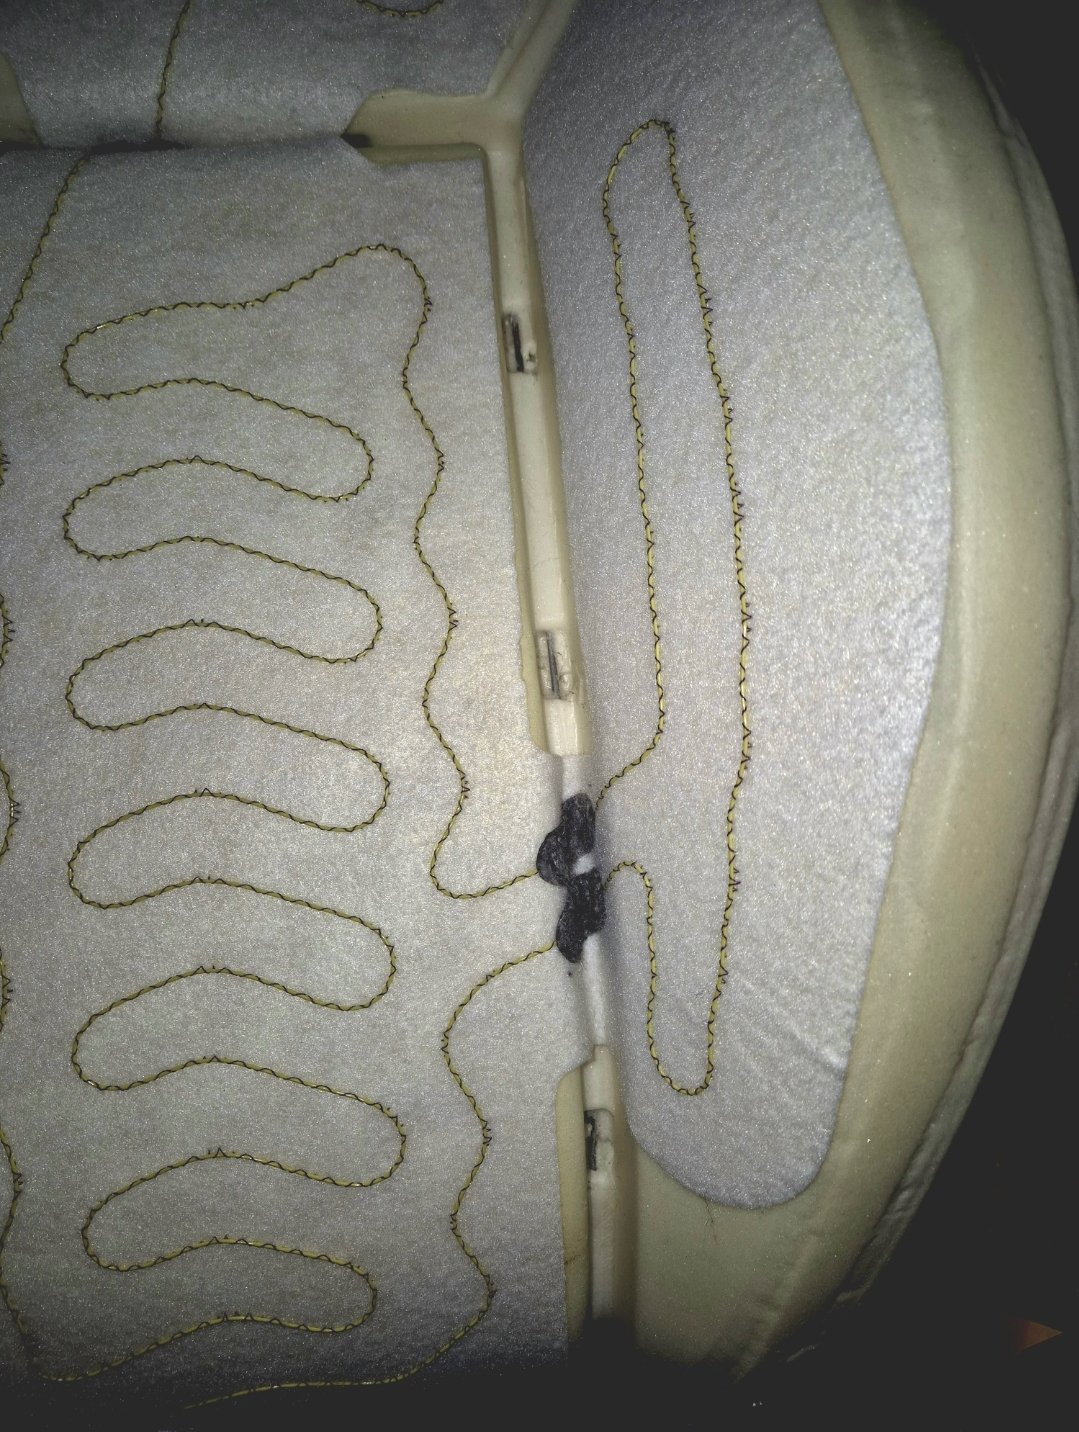
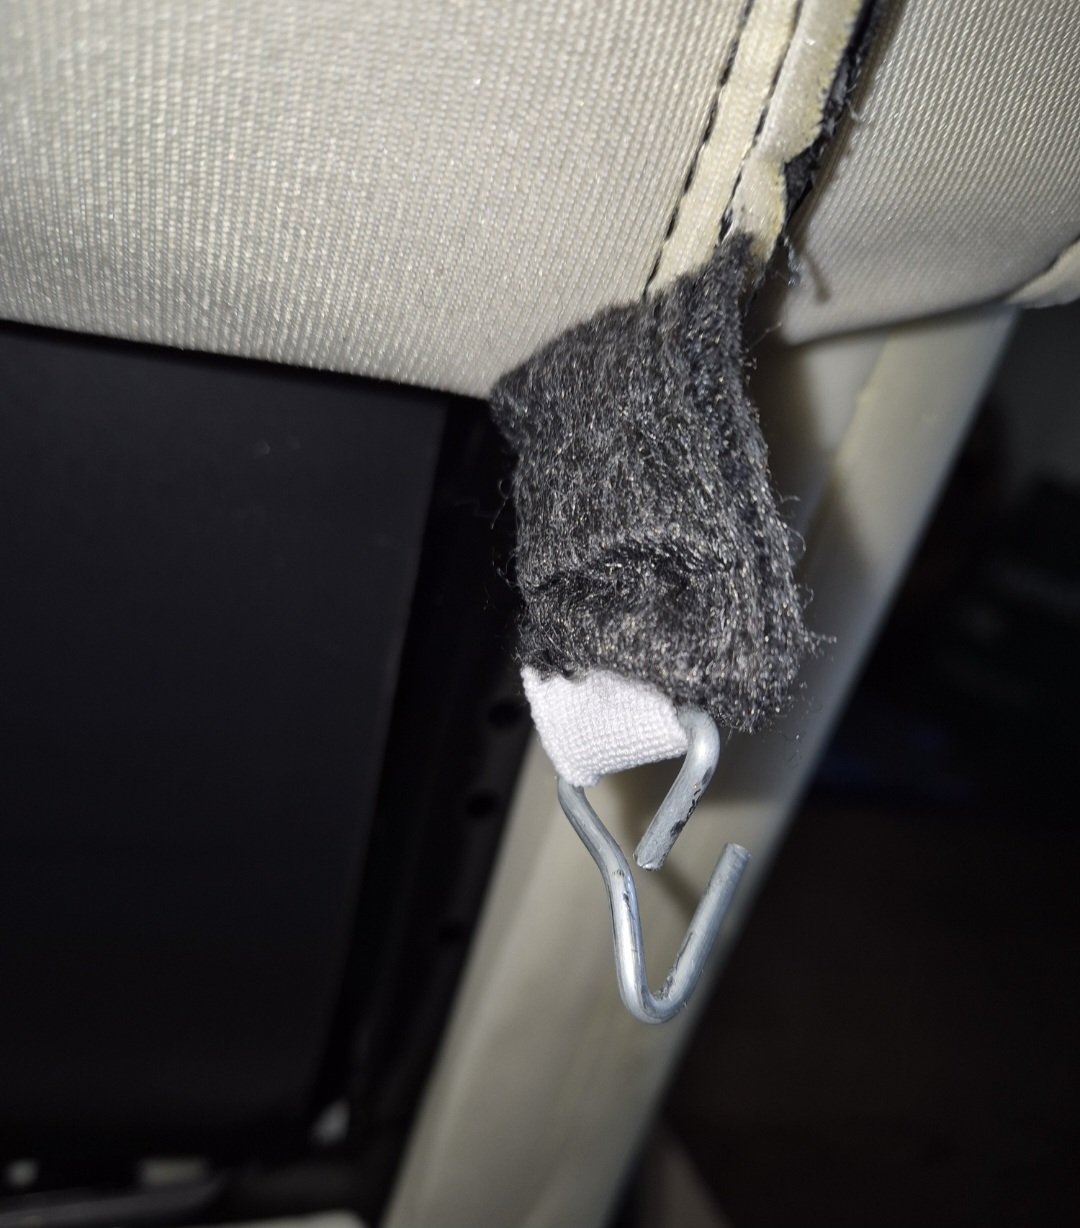
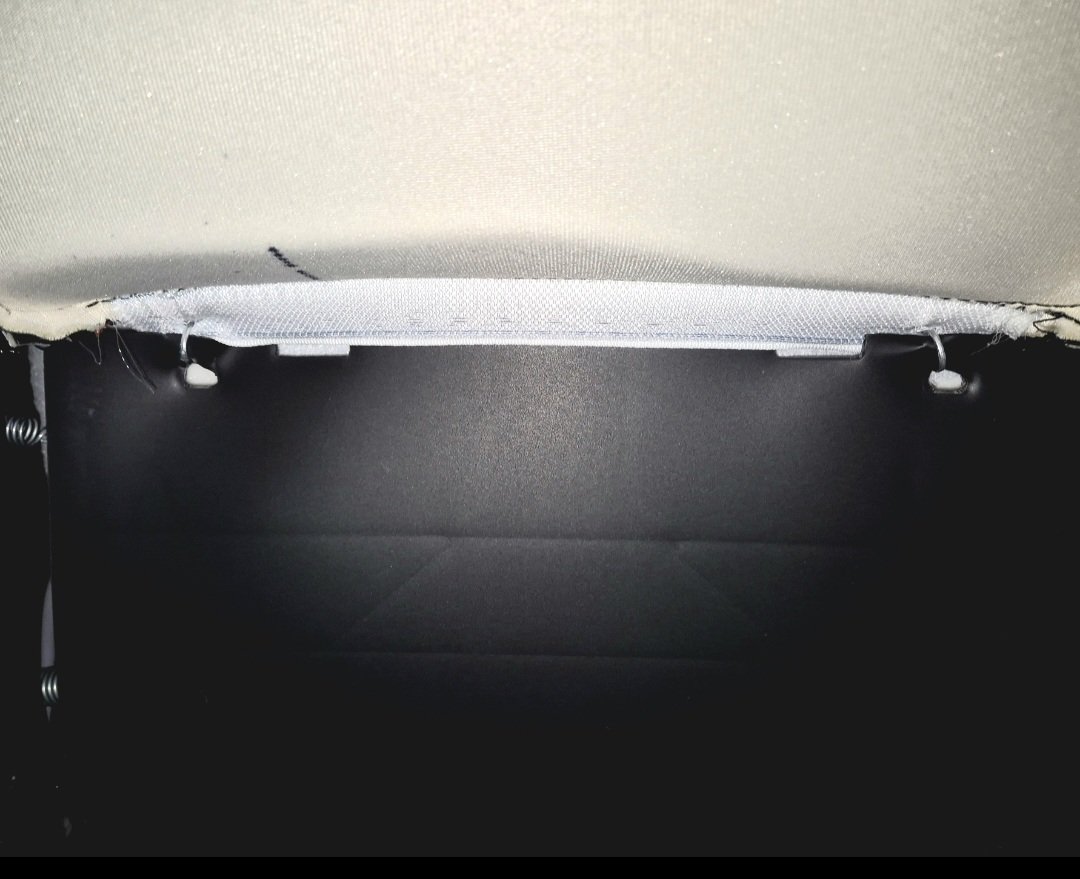
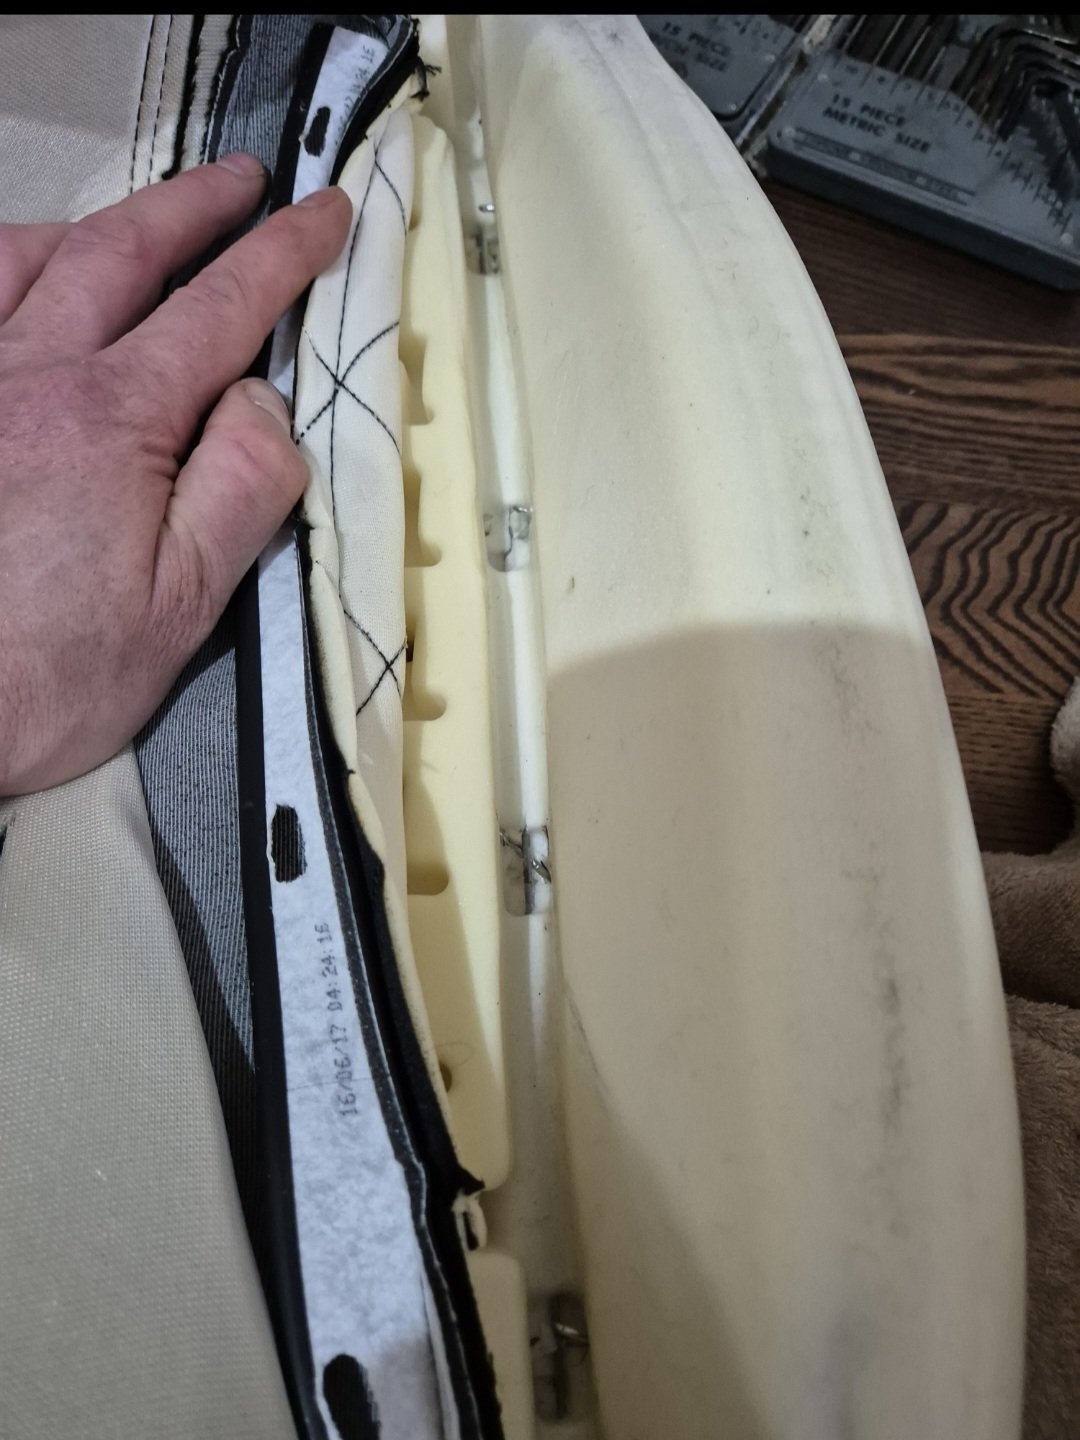
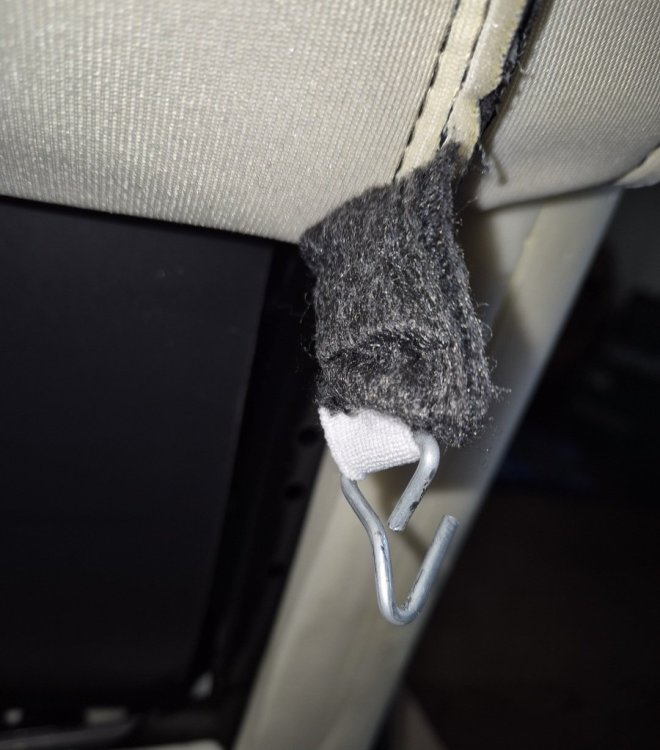
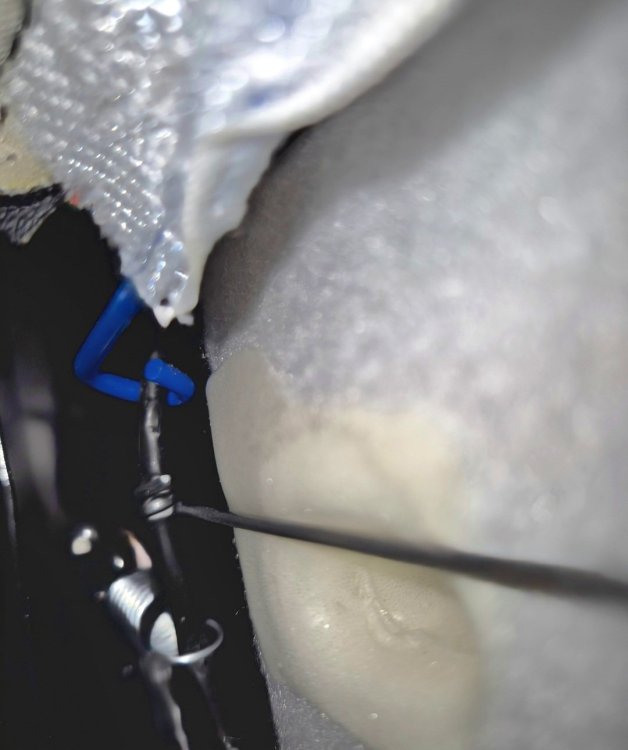
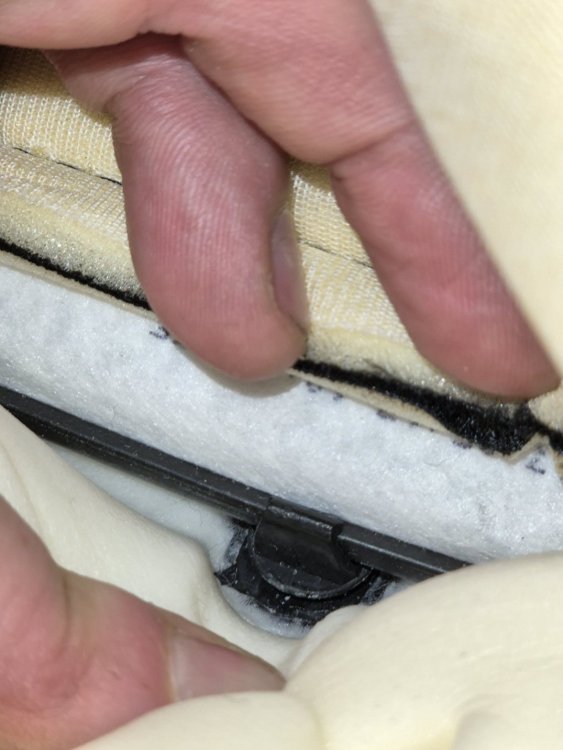
The back rest is a lot harder but still easy enough for a diy'er. You need to remive the lumbar handle and rotating handle. These just pull off, however the rotaing one has 4 retaining lugs. Once again i just used a trim tool to help unclip these and avoid damage. Once off remove the side plastics, held on with The little pin clips. Push pin in with small screwdriver or pliers then remove the clips. With regards to the cover, you have to start by unclipping the two sections of cover that join at the base. It is basically a big U grooved bit of plastic, with another folded bit of plastic inside it. Pry it apart at one end and start running a trim tool along it. It will pop open easy enough, but does need encouragement so don't be afraid to use a bit of force. Just make sure the tool you use doesn't pierce the cover above. Once it is apart you have ti very carefully start turning the cover inside out, it is tight, so i found it best to push on the side bolsters to provide a bit of play. Obviously you need to do a bit at a time on each side to keep it level and prevent the stitching getting damaged. There are 3 hog ties each side on the lower section of the back rest. They are tighter than the base ones so you have to be careful. Once the first one is undone on each side, you need to carefully roll the cover up and over the the lumbar handle. Then you can get to the next hog tie. Once all three are off it will look like this Now there is another rail with the v groove plastic clips. This one can't be slid out sideways, so you have to use a trim tool or a flat head screwdriver to gently pry the clip apart. Start on one side and then you can twist to cover rail and it will pop out of the clip. Now on the rear of the seat you will find that it is attached by two hook on elastic. They hook into a slot by the spring. If your hands are small enough you can just use your fingers to unhook them, if not you will need Long nsoe pliers. Now on the back is a little foam coverz this hides the lumbar adjustment etc. It is held on by two hog ties. I didn't take a picture zoomed put, but you get the idea. Once these are removed th cover will come away. You are then left with a blue bar that is slotted through the cover and hooks either side of the lumbar frame. You need to unhook this. It takes some doing, but I used pliers to flex the spring frame and then unhooked one side. The other is then easy. Once off you will be able to loft the rest of the cover up to the point of the head rest. This is as far as it needs to be removed for the heated pass to be added. However if you want to remove the resr it appears to be held on by another 3 hog ties.


-
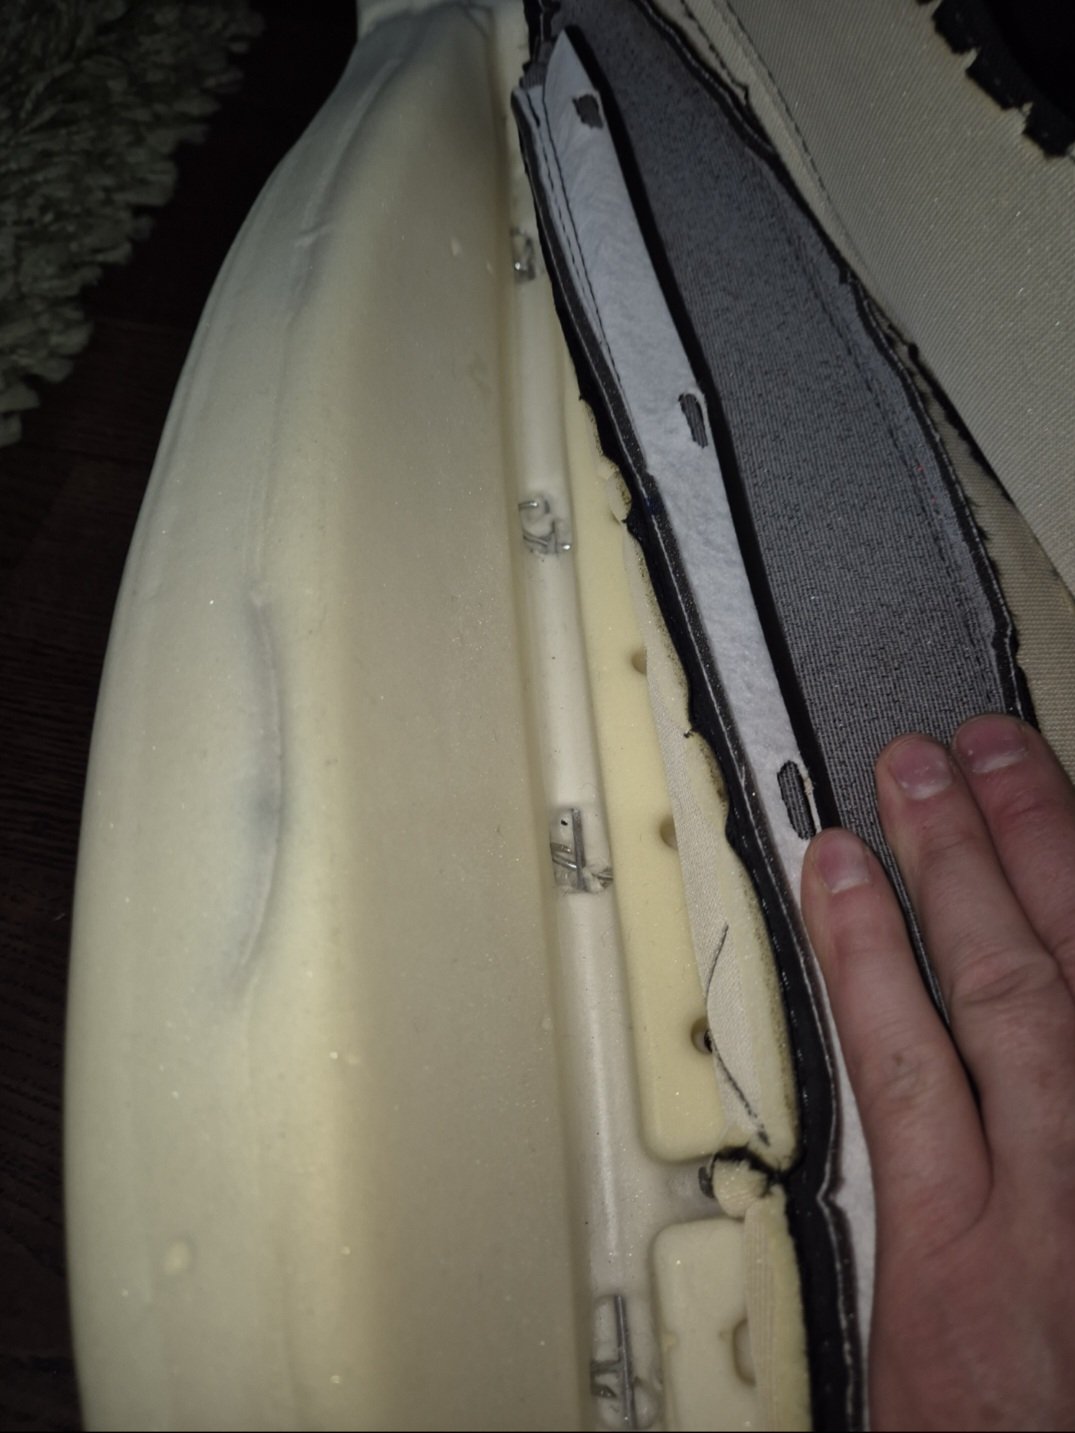
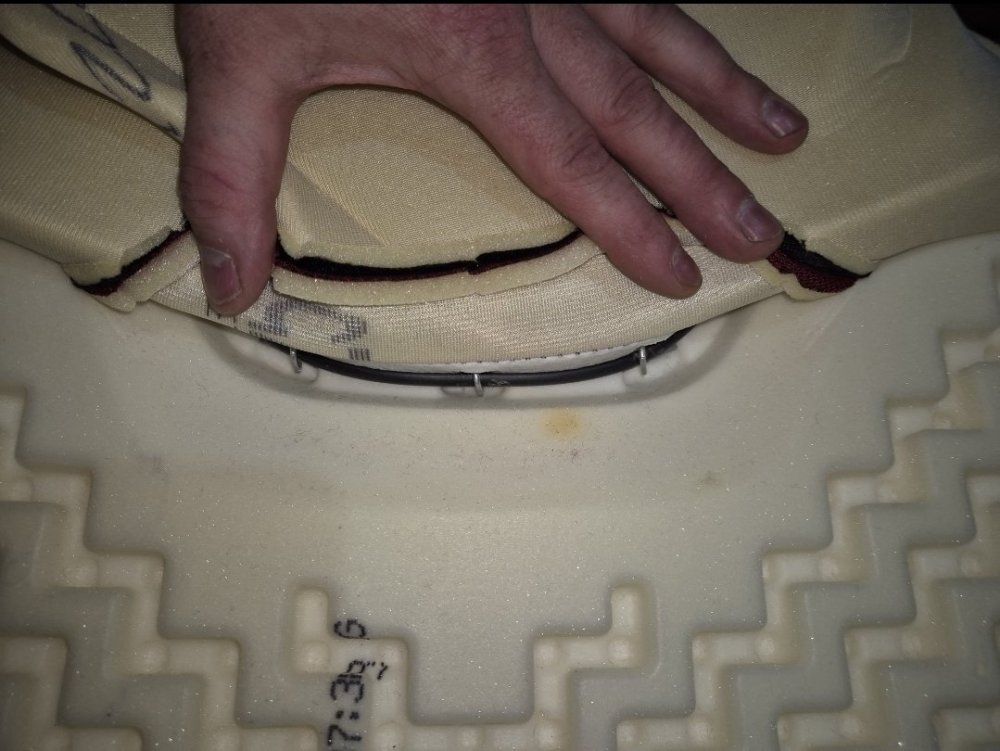
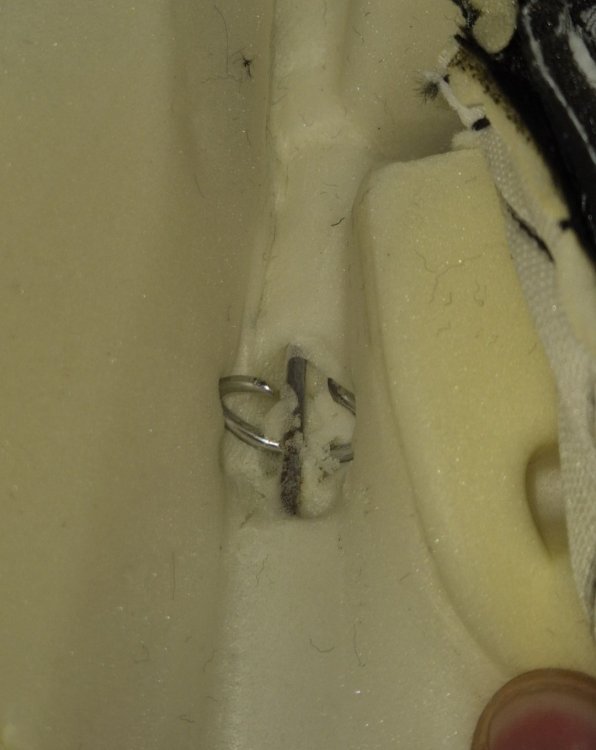
Now you can refit the cover. This is it, inside out after removal, you can see the holes where the hog ties go. I used the original hog ties and hog tie pliers I bought from Amazon Insert the hog tie, loop one emd through the gap in the seat cover, then push down into the channel gap on the Seat base. As soon as you see the hog tie go under the retaining rod, squeeze the pliers and job done!
-
-
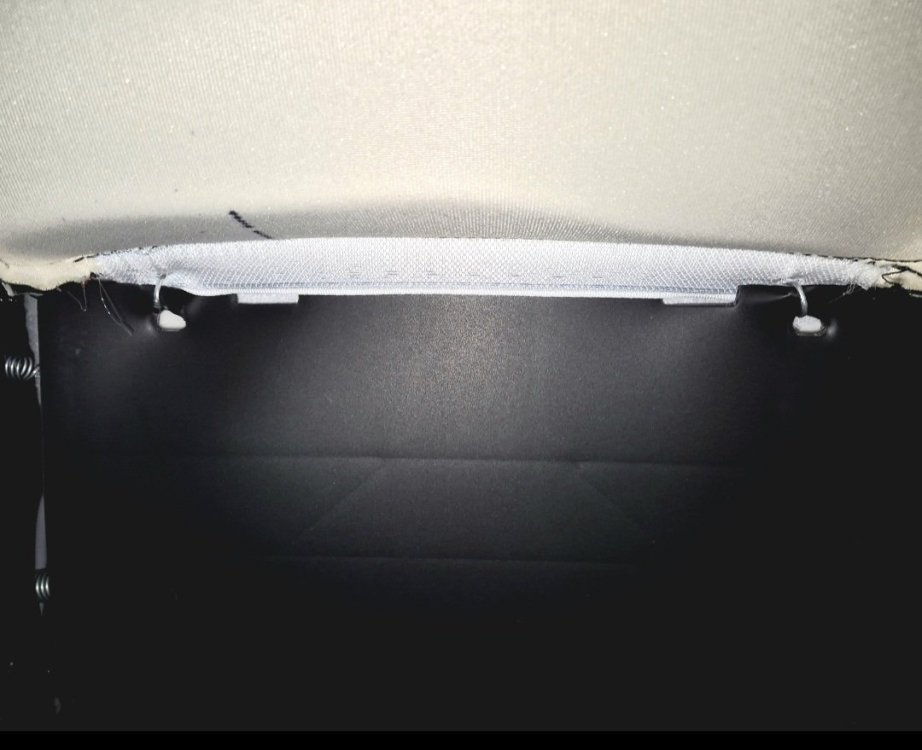
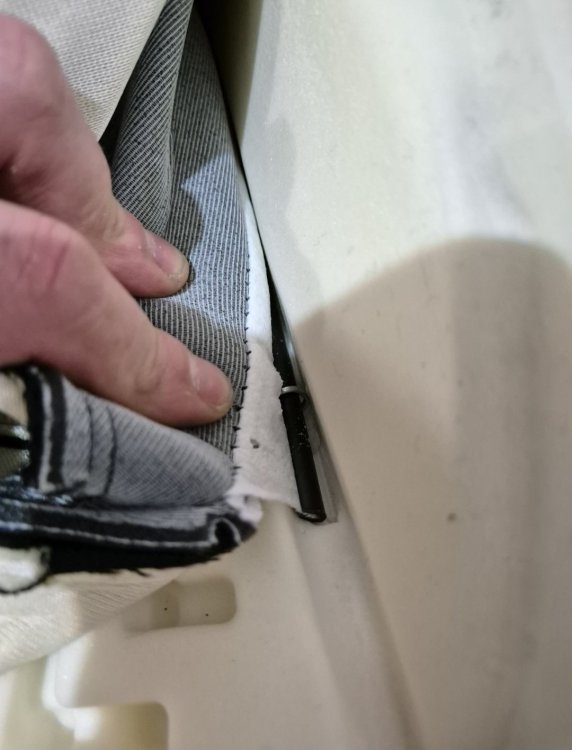
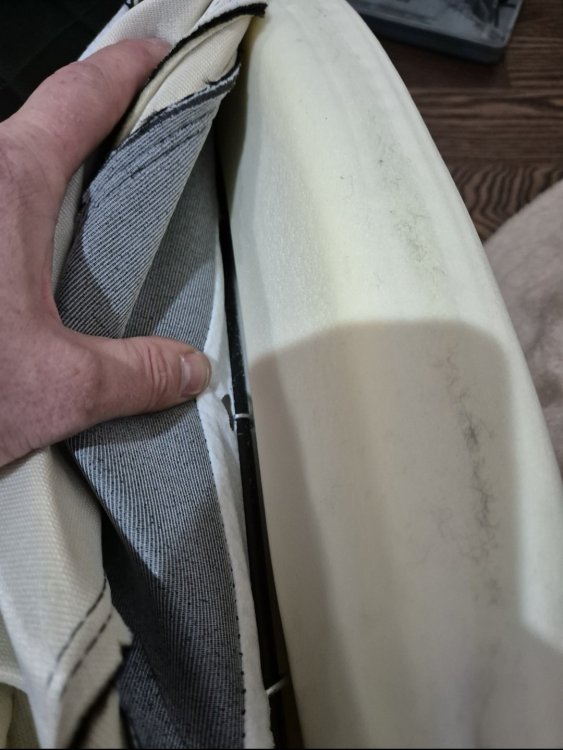
I used Long nose pliers to start opening the hog tie, and then one there was enough room I used Cir'clip pliers to open them fully. once the cover was away, i removed the hog tie and put it aside to be re used when putting things back together. Having removed all hog ties on both sides I was left with the v groove clips, one row at the front edge of the cross hatch stitching, and one at the back For ease and to prevent damage, i just slid the cover slowly out of one side. This stopped me having to lever theem open, which is needed on the back rest later. You are now left with this


-
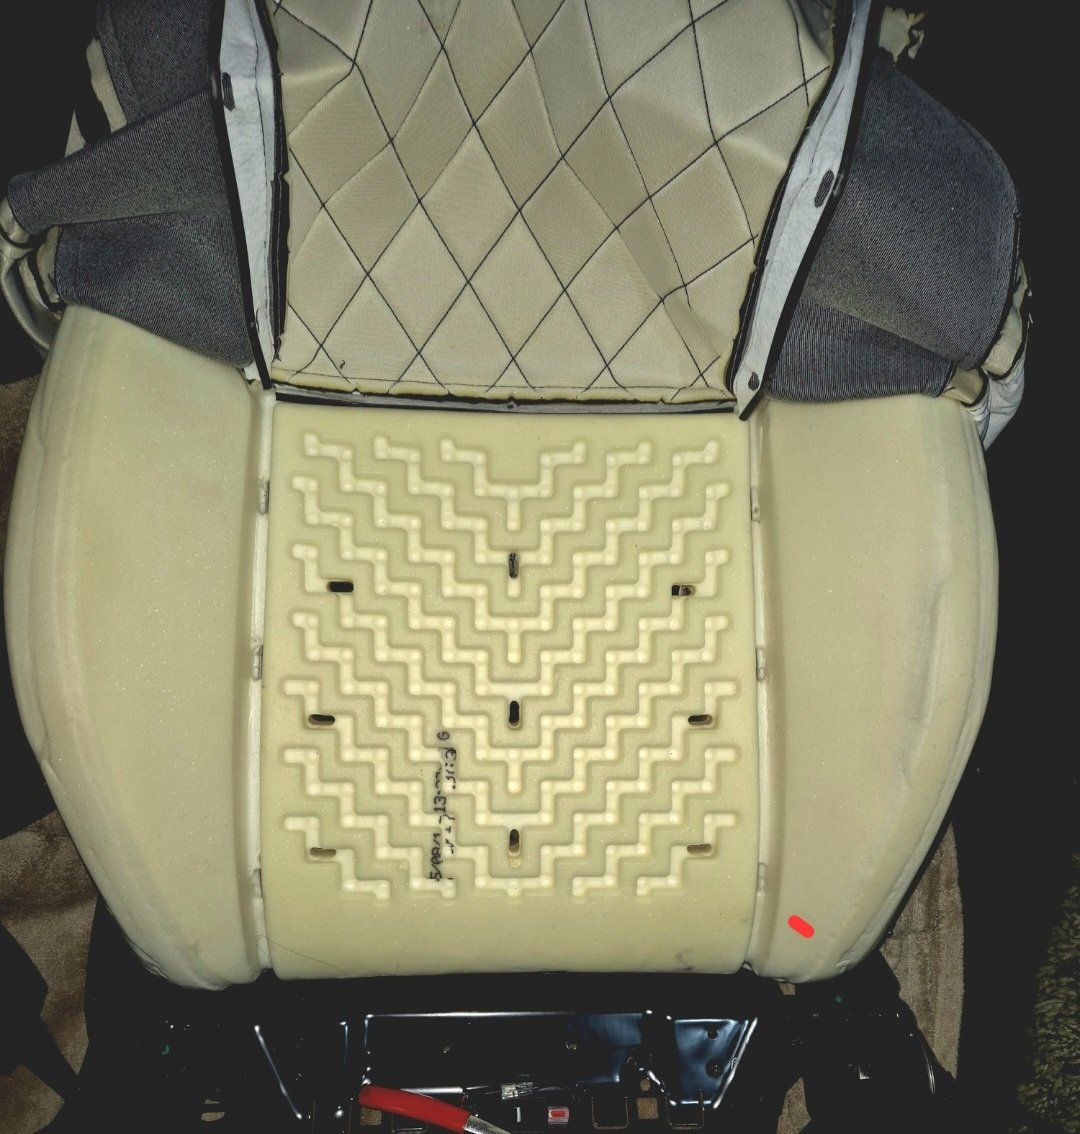
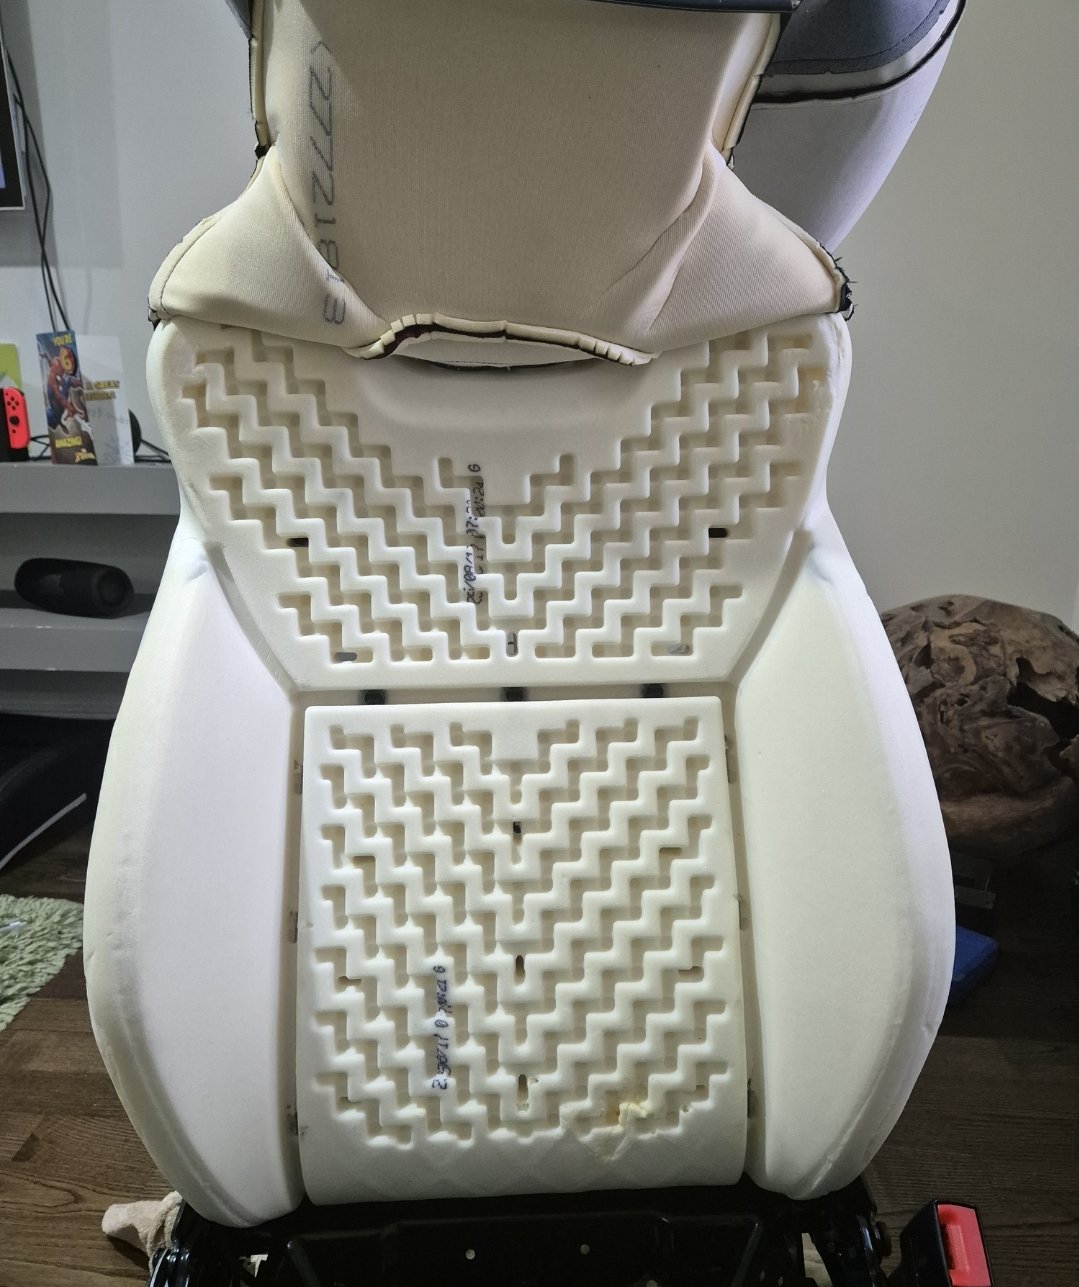
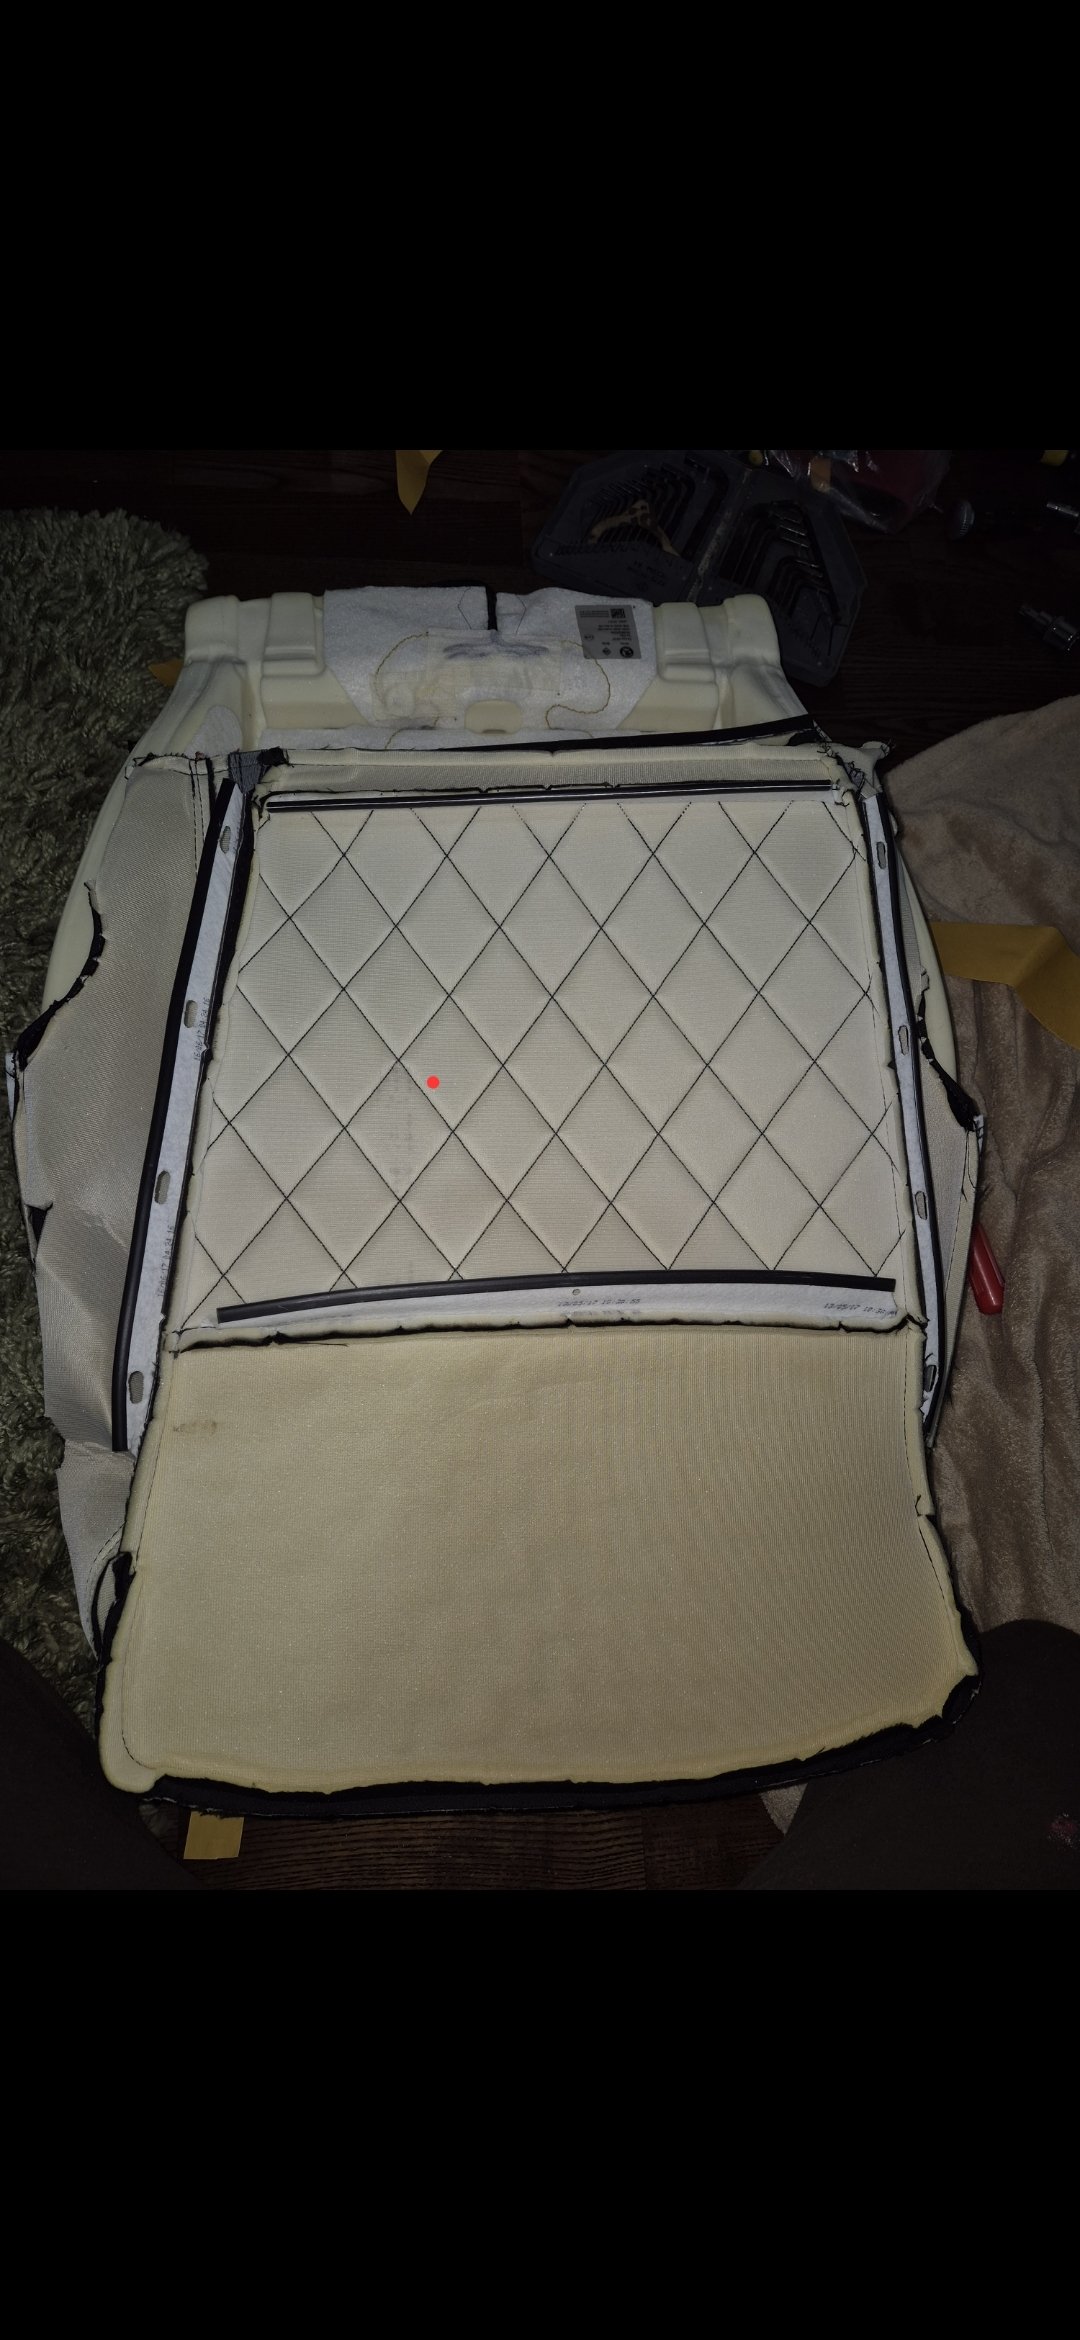
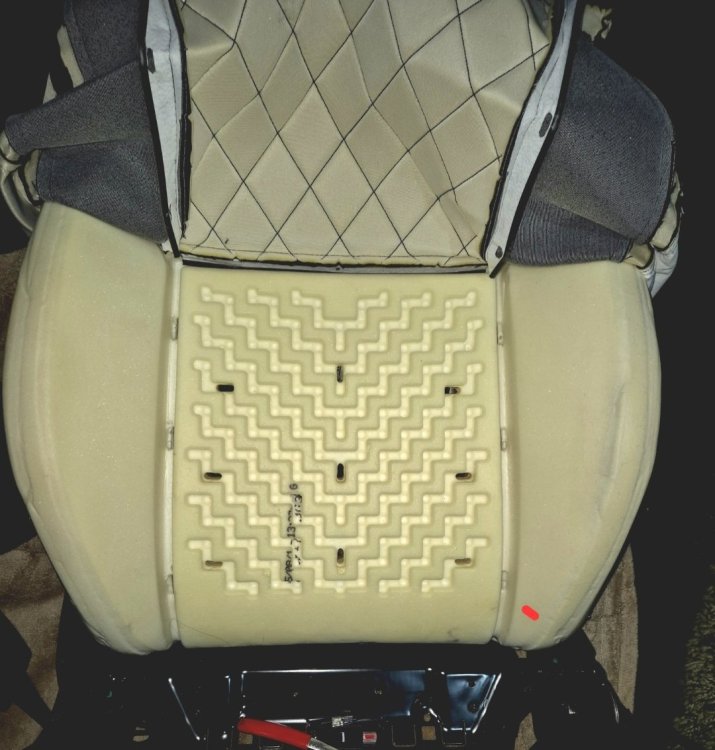
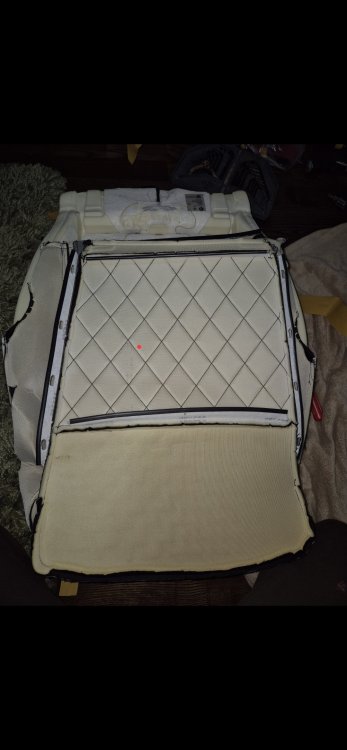
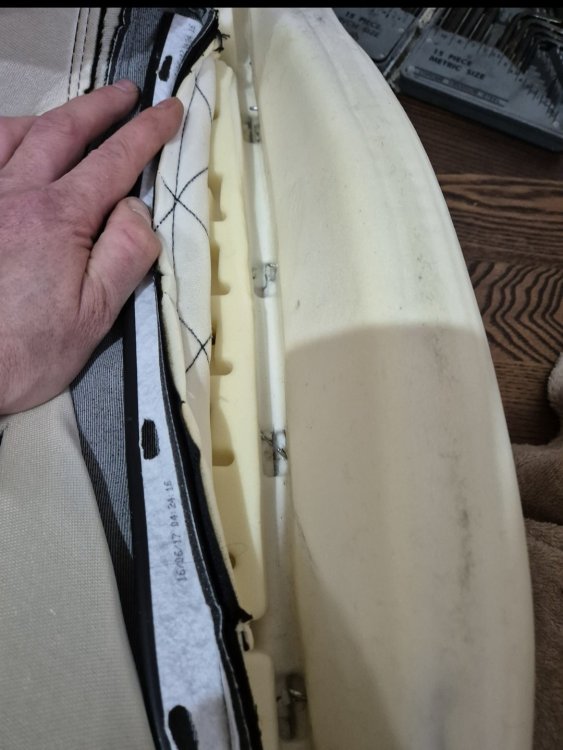
So just installed everything today. For anyone the is going to do thsi by inserting pads rather than buying the sears, here are a few pics of what to expect in a Mk3 Vrs fabric seat First I took the last seats out, undoing the 4 multi spline bolts. I found it easier to lay the seat flat and remove it via the back door as there is less chance of damaging the dash etc. Once out I removed the plastic compartment underneath, which was a few torx screws. I then removed the side plastics, these were held in by little plastic pin clips. You push the oin in the it allows the main body of the clip to be pulled out. There are a few clamps inside that just need prying open with a screw driver or trim tool. I then removed the metal rails that the plastic clips too. This is a few torx screws also. Having done that you get access to the covers. Start with the base cover. They take a bit of encouraging to get off, but you basically unclip the fabric from each side underneath. It is like a U shaped plastic that slots over the frame. Once you start taking it off the rest gets easier. After all the front and side are done, the foam will lift up freely. On these seats there are no wires connected to the foam base. They are only connected to the bakc rest. Now is the time to undo the 4 multi spline bolts that hold the backrest to the base frame. Once these undo, you can lift the backrest off. BE CAREFUL as there is not much free play in the cable that is still clipped the underside of the base frame. You can move it away enough to get to the back of the base. Again unlcip the cover from the back. This will then free up the entire base foam and cover. Now this is off you can start peeling the cover off. Both sides and front and back will lift off. However the cover is held with 4 hog ties each side of the seam. It also has plastic v groove clips along the back seam. The above pics are the sides


-
So i have sorted this. It was previously fitted to a LHD, so is now changed to right and syncing correctly. Turned out it just needed a couple of minutes with the ignition off for the coding to take. With regards to the heated seat levels showingon infotainment screen, i have discovered these only show when the heated wheel is coded and shown to multi stage, ao at least i know nothing is wrong.
-
Another random thing i noticed, the heated rear screen button only work with engine running. Is that normal?
-
So went out this morning and it was now coded again, and as you say it it showing in the diaplay when press heated seat. Coded it back out and on again. Turned out just needed a couple of minutes with ignition off before coding took place. But you were correct, only shows heated seat levels when steering wheel coded too. Thanks for the help. At least now I can accept that's just the way it is and there is nothing wrong.
-
Will post tomorrow as packed up for the night now.