digifish
Members
-
Joined
-
Last visited
Everything posted by digifish
-
I think the front would be more important FWIW.
-
OEM: 8J0512149 Rear Upper Spring https://www.ebay.com/itm/232691651138
-
In my experience. If you don't enter the car, and just open the boot, and leave it too long. It auto-closes after a while.
-
Yeah just saw this, indeed Torx. Most things are T25 and T30 on the Skoda.
-
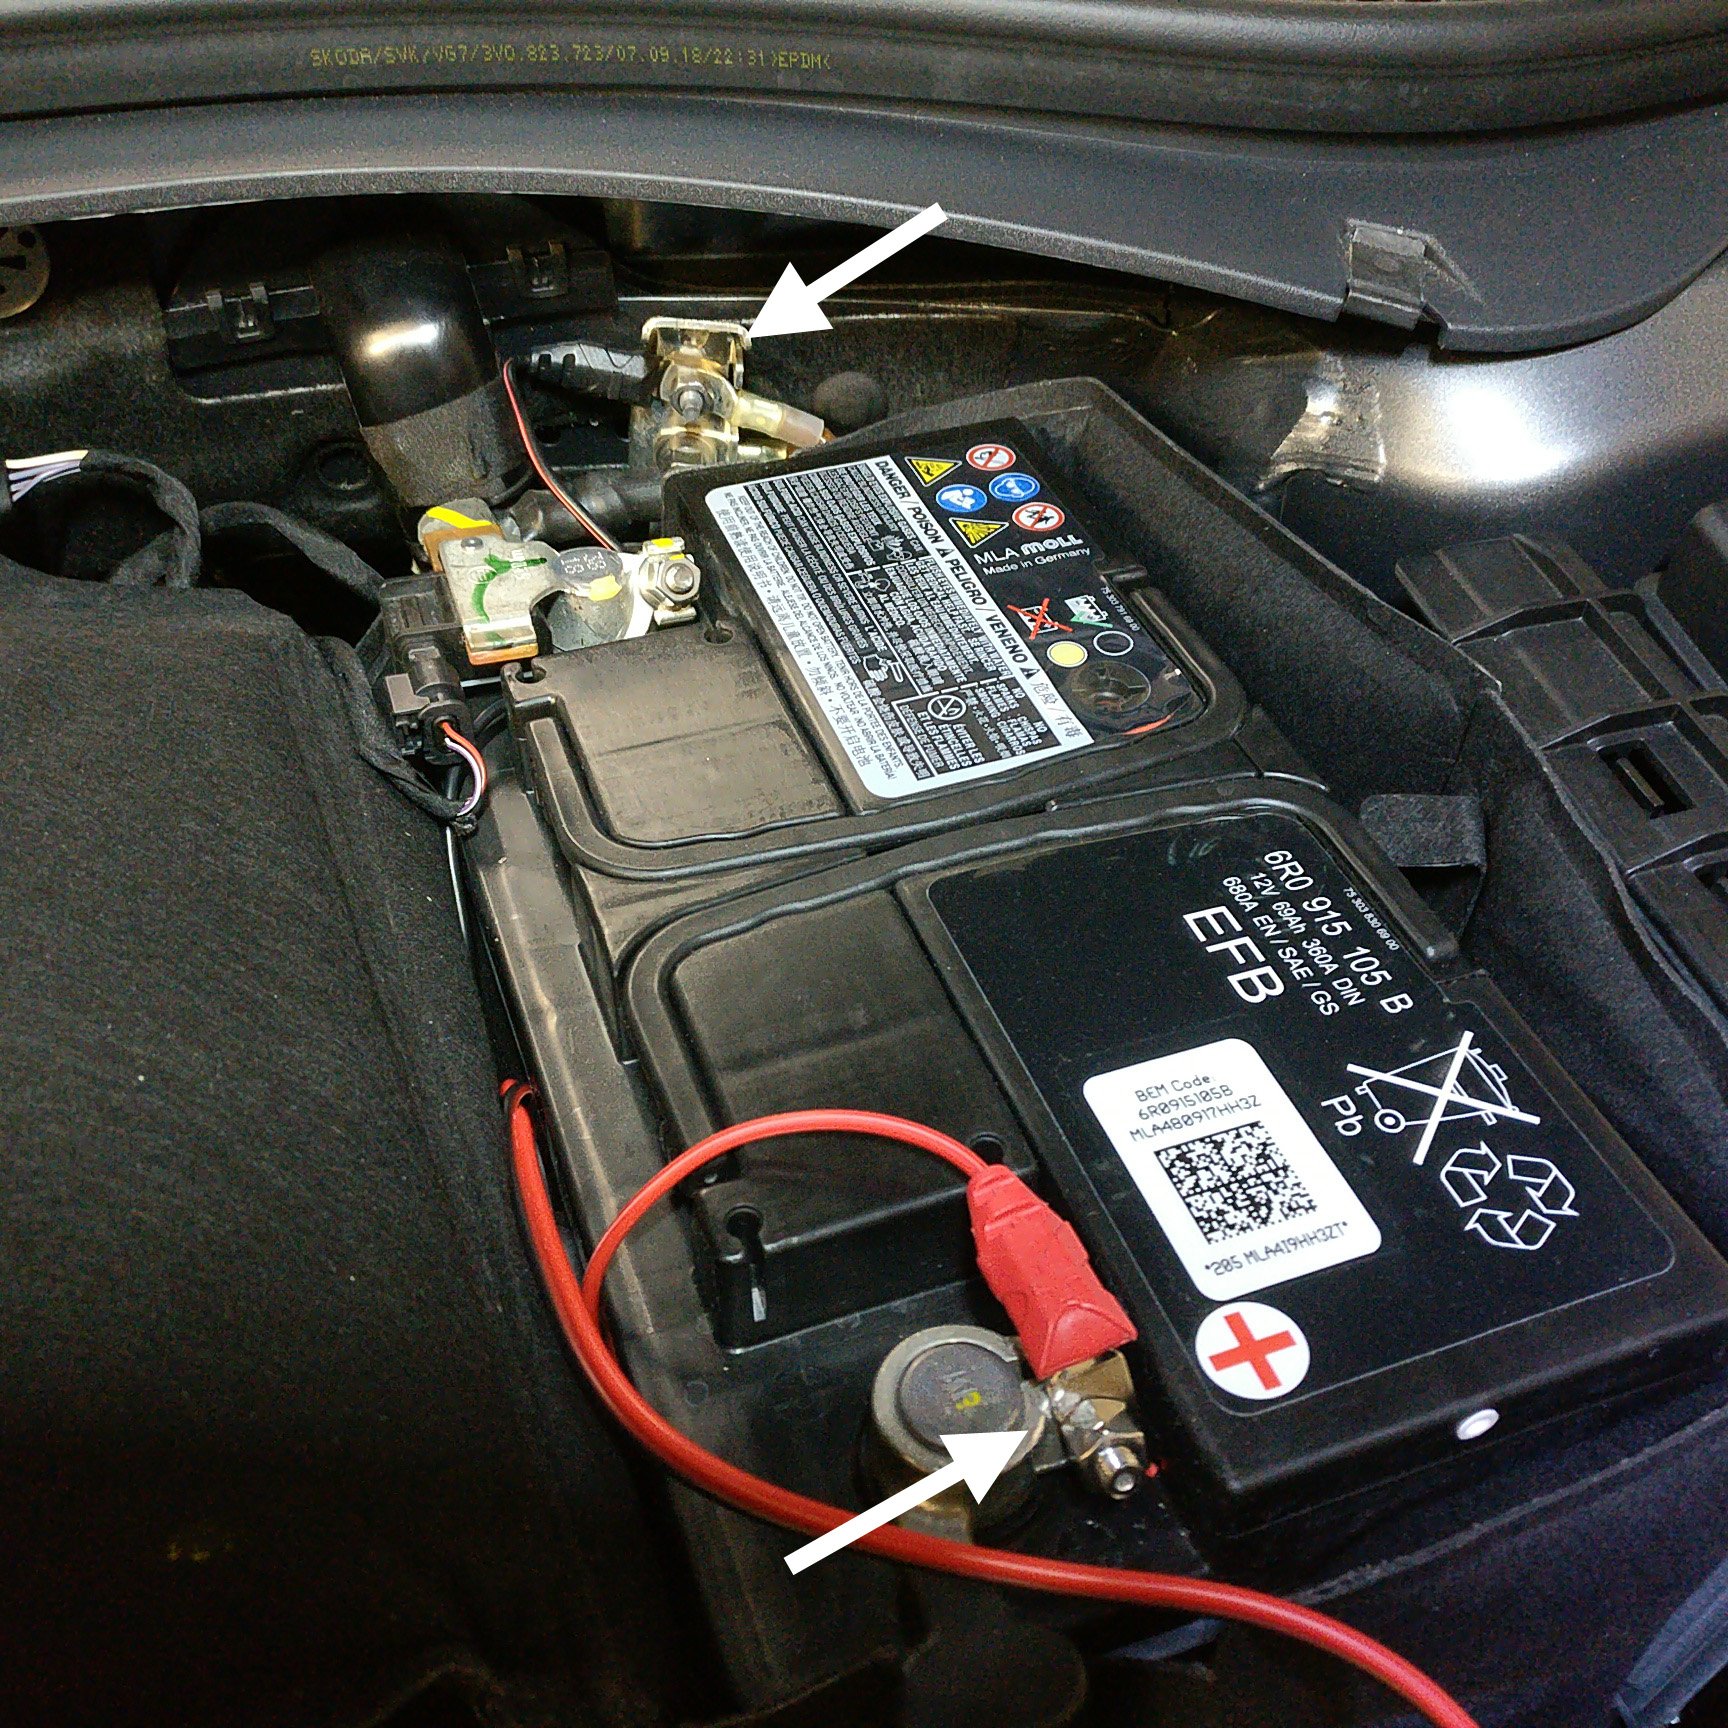
I point to the KESSY connector here ... it has Red and White cables. I know because when I was working on the Passenger side I forgot to connect that...and KESSY wouldn't work Sigh. Beck in again...
-
No This one is a great indication of the work required to dismantle the interior. Parts are 90% the same as the Superb
-
I can't remember. More was on the rear quarter panel.
-
Just saw this... an Octavia, but almost the same as a Superb.
-
I wouldn't call it excellent more of a warning about what you are getting yourself into I didn't show the technique of popping the door card clips or lifting the panel up/off after removing the bazillion connectors. For me the main key, it shows you where to start and what lies beneath
-
Only worth it if you want to see what's under the wheel arch liner The rear liner is a lot easier to remove than the front so its a good place to start on wheel wells. However, to do it properly you need to remove a lot of wax which is tedious. The liner is also felt so you can't really stick anything to that either. Coming at it from the inside of the vehicle would make more sense. but that involves dismantling the boot interior...also tedious. So I would skip it.
-
Mighty effort thanks for sharing. I have to get my car on a lift as I have wondered if applying butyl from the underside would be an option. Not sure what's under the plastic shielding. Would save a lot of work
-
Yeah but I am not sure if it matters that much as it is behind carpet. The same with under the rear seat squabs, its radiating up into 10-15 cm of high density foam. Yeah that was my experience too. Once you do the boot and B-pillar it really takes the noise (on coarse chip roads) down from headache inducing and annoying to noticable but reasonable. My main observation before I started was all the noise was behind my head. The B-pillar is a silly design...funneling sound from the sills right up to your head level.
-
With the amount of foam in there. No Wouldn't make any difference. I assume you ram-rodded sone down into the trumpets at the bottom of the pillar?
-
When I lifted my rear seat there was already some sort of cotton blanket. You can see it in this video @ 0:21
-
Given you would only need one slab sure. It looks to be even higher density full of glue and a mix of chopped up foams
-
It's a high frequency absorber. Would drop the noise levels a dB or so. The more layers you can add the better the result I suppose.
-
Just go to the local foam shop and buy a slab of high density closed cell foam - 5 cm x 50 cm x 50 cm would be more than enough. The stuff they would use for a seat on a bus. Most shops have lots of offcuts they will probably sell you by the bagful.
-
The function of the butyl mats is not to decouple. Its to damp, and so needs to be bonded to the metal surfaces. It's the same principle as putting your hand on a drum skin and hitting it vs hitting it with no hand. Thok vs Booooommmmmmmmmmmmmmmmmmmmmmmmmmmmm
-
It is tho. It requires no changes to geometry. What you are witnessing is probably a new compressor design / supplier being used. They may have also increased the size of the heat exchanger (front radiator) to extract more heat from the atmosphere. If they were only dumping hear before it probably required a smaller radiator.
-
On my 2019 MY I turn off the display when the car is running - hold the on/off button for a while....then it stays off with a clock showing between cycles.
-
Yeah. I needed brutal levels of force...hence snapping the two rearmost clips. But I was also working blind. Knowing where everything was I did the passenger side without incident. I think what snapped them was me sliding the pry tool in too deep and shearing them off
-
I wish I had put a video camera on a tripod and filmed the whole thing start to end. Its easy to get seasick watching that Its most useful to let you know what you are in for and not to be deterred. Glad you found it useful. The main problem for me at the start was how to get the window switches out.
-
I posted a similar pic elsewhere

-
East. There's a few aussies about here inc Gandalf
-
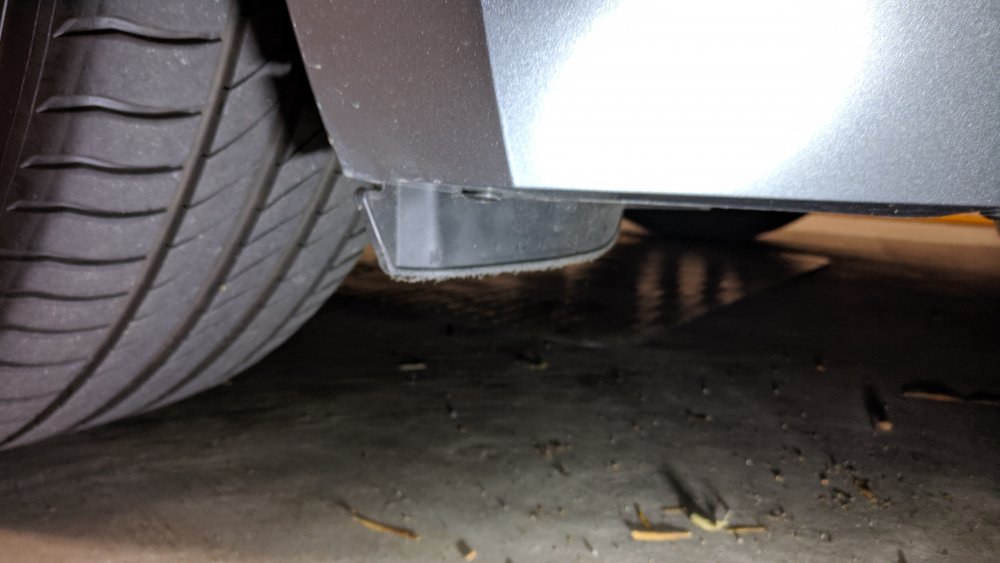
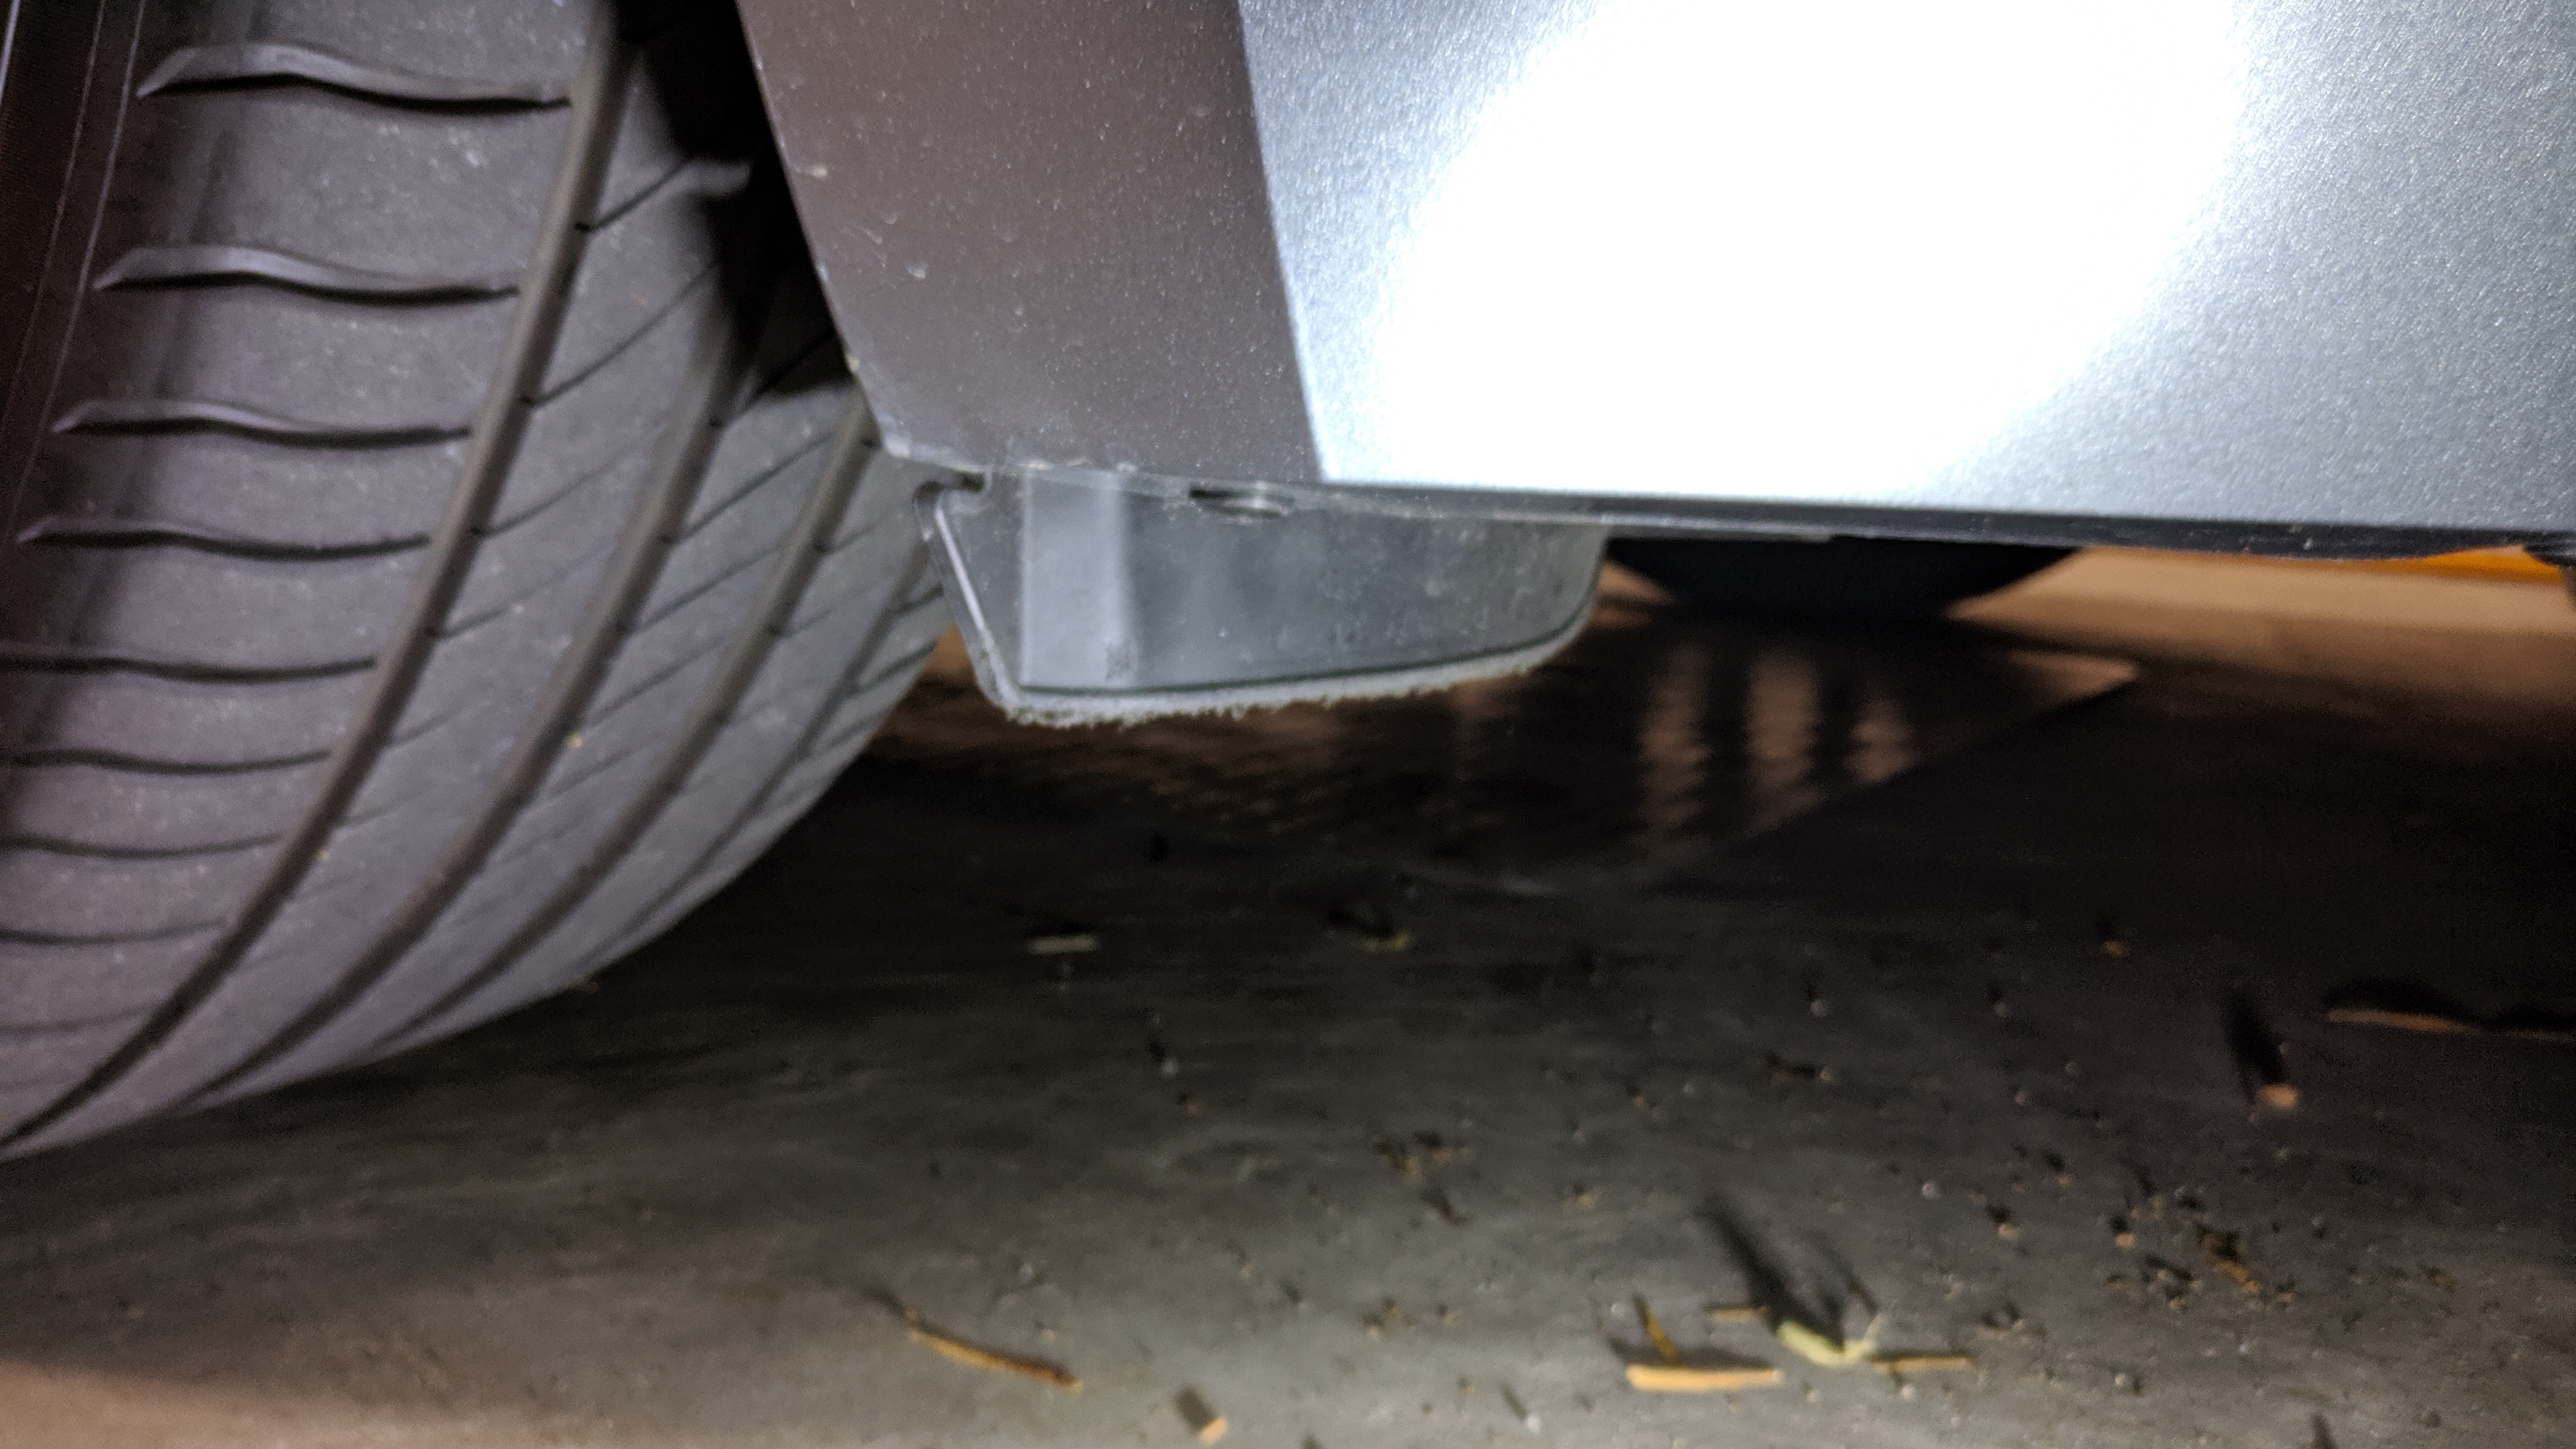
Good luck with that. I keep scraping my OEM bumper on those concrete sleepers they often put at the end of car parks EDIT ... I just went out to check, its actually the front lip of the wheel arches that hangs down in front of the wheels I keep scraping...so you may be OK