SpaceWalrus
Members
-
Joined
-
Last visited
Everything posted by SpaceWalrus
-
These don't match the button blanks in front of the gearstick The actual USB element would work fine, as all it needs is 12v from somewhere suitable, but if aesthetics are your main goal, nothing seems to exist for Mk3 Octy
-
While physically possible, it will likely require cutting or drilling, as I can't find any button fascias on aliexpress or similar with a USB port for an Octavia 3 It's not helped by the fact that the fascia is one part rather than seperate removable blanks
-
"Next week" he says... Sorry for the delay - I don't have a garage, so I was waiting for the rain to stop. Anyhow - here's the video: Remove Boot/Luggage Compartment Trim Skoda Octavia Mk3 Estate I doubt I'll win a BAFTA, but I've done my best with an old iPhone and a GoPro. Any questions, put them in this thread or in the video comments, and I'll answer them in due course.
-
-
Have you tried putting your VIN into Skoda-parts.com ? I've found their catalogue to be pretty accurate
-
-
I have the 2016 with a variable boot floor, so there might be a few differences if you don't have this - I imagine there will be fewer things to remove. There are a variety of bolts and screws, so I hope you have a comprehensive toolkit! Start by putting the back seats down and clearing the boot of anything, including under the variable floor if you have it. The spare wheel well is fine, if you have extra stuff in there it may need to be pushed to the side for one of the future steps - but you don't need to remove the spare wheel. The plastic trim on the D pillar needs to be removed - just grip the top where it meets the roof lining and pull towards the back seats, it should come away without too many issues - mind you don't break the plastic clips at the bottom of it. This exposes a T25 screw near the rearmost corner of the boot side glass The two black plastic netting hooks (the bulbous double-ended ones) need to be removed; these use a T20. There's another T20 screw in the hole where the parcel shelf sits Pull down the bag hooks, and there's a T30 bolt behind each of them The fold-down metal loop nearer the back seats can be removed. This has a little plastic cover which you can flip down when the loop is down, and this exposes an M8 spline bolt. If you don't have a bit for this, you can probably get away with leaving it if you're just replacing the strap. If you've got a variable boot floor, you can remove the plastic siding it sits on, and you'll need to remove the cubby holder for the roof bars. You'll need a T45 for the big plastic nuts - be gentle! You'll also need to remove the trim that runs along the middle of the back inside of the boot - this shrouds the boot latch for the boot lid to lock to. This has two T45 plastic nuts down low in the spare wheel well, and two plastic trim clips at each end, which require the top part to be lifted to unlock them so they can be removed. A knife or a flathead screwdriver will work, but a trim removal tool with two prongs is best. Then there are four metal clips along the topside of this trim piece - these should unclip just by pulling it up. I find it easiest to start on the left or right and pull it upwards, making sure the bottom clears from the two fixed threads in the wheel well that you removed the plastic nuts from earlier. There might be a plastic trim clip holding the boot side trim in place that was concealed by the middle trim piece you just removed; this needs removing same as the other two earlier. Remove the boot light - the bottom should pull out and you can just unplug the black connector. There may be different things you can see on yours. If it looks like it's holding that trim piece in, it probably is, so remove it. There are two plastic bits on the end of the plastic side trim that runs around the boot opening, these jut into the metal frame, so require some gentle prying upwards, such that the trim can be pulled away from the frame. Then it's just a case of pulling gently and unhooking the carpet and plastic trim from some fixed attachment points. If you pull the trim far enough, it can disconnect it's little plastic clips from the C pillar trim, and may also unclip the trim that runs alongside the backs of the rear passenger seats. This can all be popped back in afterwards. Once you've pulled the trim piece out, just do what you need to do, and then put it all back in reverse order. I'll be doing the same operation to my boot to replace part of the variable floor in a few days, so I can make a video on it if need be - just let me know.
-
If it's just in one specific location, sounds like there's some particular geometry of the signs on that bridge that causes the car to think the windscreen is dirty. It might be worth taking the camera off and cleaning the inside of the windscreen of any streaks or grime that might not be visible from the outside.
-
Found it! Took some time to fully remove and partially disassemble the variable floor today, and after having a good look at it - it's the plastic part of the brace, 5E9 861 527 A, (A for left side, B for right). Have now ordered from skoda-parts so my floor should no longer sag disconcertingly in that corner.

-
-
-
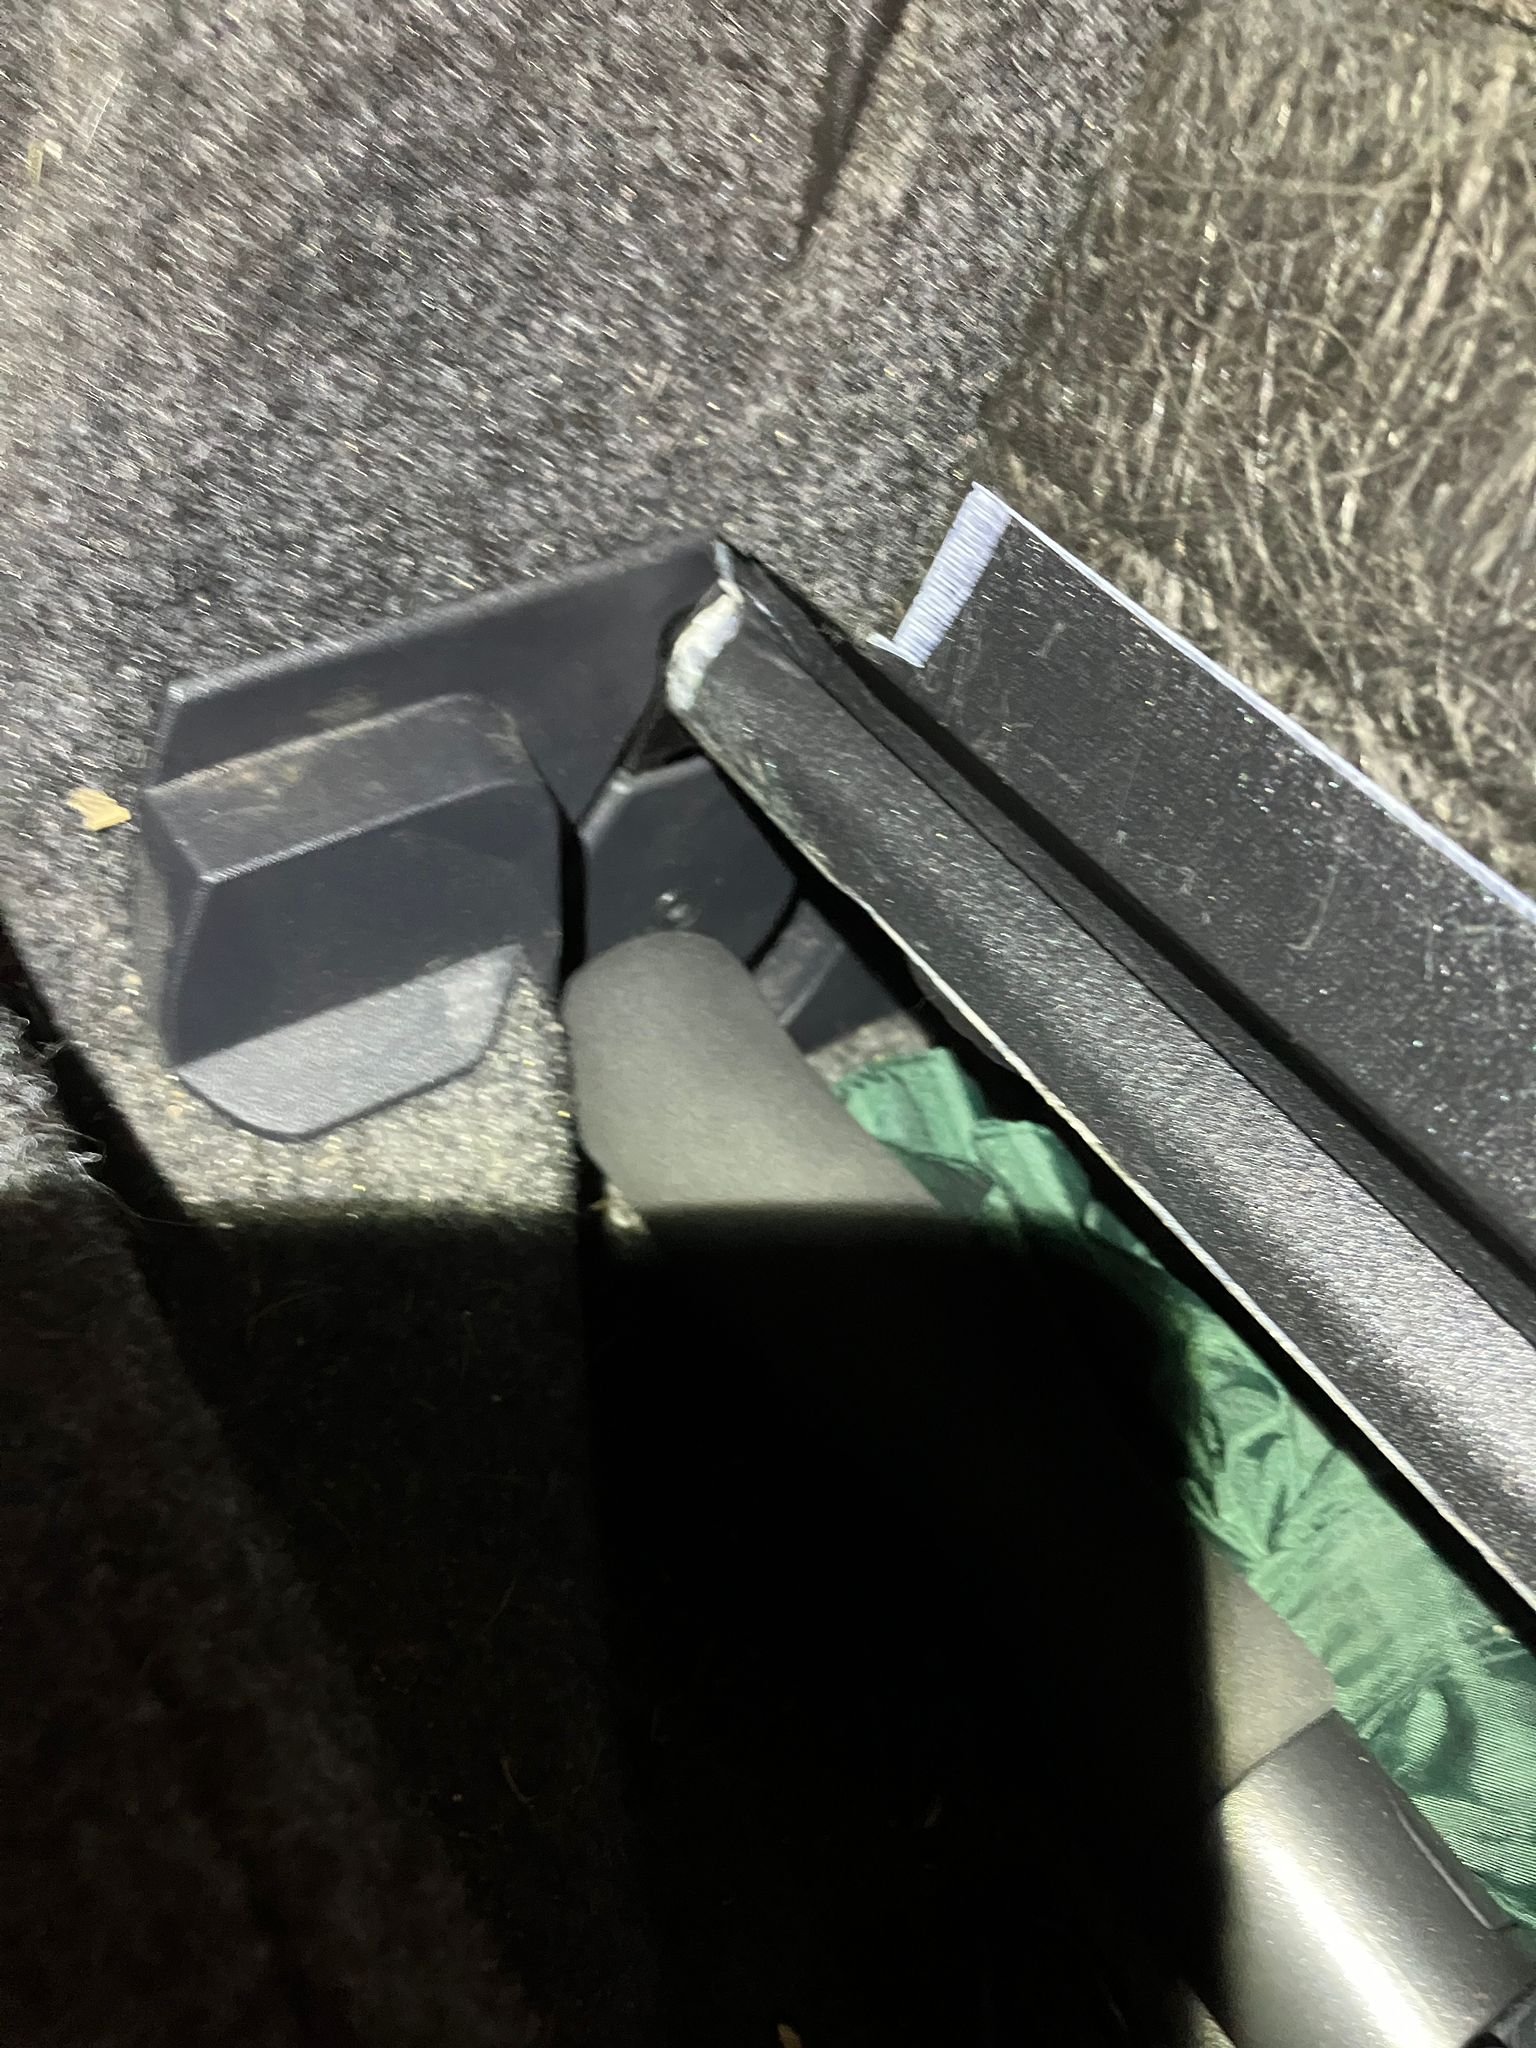
Hi all, One of the rotating bits on my variable boot floor has broken, but I can't seem to find the correct search term to find a new one to buy - does anyone have the part number or name for it? I attached some pictures of both the broken and unbroken sides. Broken swivel part - you can see the darker black plastic hanging at the bottom where it should be attached at the top. Unbroken swivel, note the darker black plastic is at the top, and the bar of the variable boot floor is right at the top of the plastic bracket.

-
Hello all, I have a 2016 Scout 2.0TDI 150ps It has the OEM removable towbar, which I normally keep detached for a bit of extra space at the back for parking, and to stop me smacking my shins into it. As the towbar is stored in the foam insert that sits in the spare wheel, it’s a pain to get out, as I have the false floor, with roof bars, tools and equipment under the floor, and all my work equipment on top. This means it’s quite the operation to access the spare wheel well. Annoyingly, having the OEM removable towbar means the crash bar at the rear does not have the screw in point for the towing eye. I’d like to keep the towing eye accessible, as it’s smaller and not covered in grease, so if I need to pull a vehicle quickly I don’t need to unpack the whole boot. Does anyone know if it would be possible to retrofit the towing eye screw point, or failing that, if there’s a insert for the OEM towbar hole that would provide the socket for a square tow hitch under the car?
-
As above, it's either the flap motor has failed or the gears have become misaligned, this can be checked by changing the temperature on the climate control while looking at the motor and it's movement. This is best done with an endoscope, but can be done by removing glovebox (if RHD) or looking up through pedals, but it's quite an awkward position. Both heater core pipes being hot does not necessarily mean there isn't a blockage, as this was the same on my car, and my matrix was blocked. I have instructions on how to replace heater matrix, coolant tank and flush coolant on this post
-
-
-
Did you capture an adaptation map before you made your modifications? It looks like you've read too far in the VCDS modifications doc; changing channels B8 and B9 are only for vRS models, so they should be left alone. Also, make sure you've set it as ABBIEGELICHT LINKS / RECHTS, no ABBLENDLICHT or similar. I did this by accident on the right side when I first set up cornering fogs.
-
Quite correct I have both, originally got the Ross-tech one, and then bought the knockoff on FB marketplace for £50, it turned out to be quite useful as my work got a fleet of Mk3 Octavias at an absolute base spec, and I only had the 3 vin ross-tech version That being said, I'd recommend the proper one - you will get proper updates to the software and firmware.
-
Always worth mentioning VCDS for things like this - it can scan and delete fault codes, read values, graph readings and change countless settings in the car - if you have a look on this forum you'll find all sorts of VCDS adaptations. The OEM cable is expensive, but it's a one time purchase and you can unlock all sorts of stuff. There are some shady options on facebook marketplace, ebay and the like for knock off versions of VCDS cables, and I do have one, it seems to work fine, but it does require disabling your antivirus when you want to use it 😬
-
Personally, I'd find the wire for the sidelight within the headlight unit and tap into that - seems like the easiest option. There's a few options for splicing a wire out to the side of an existing feed - I've done this on a few cars and then wrapped the splice in electrical tape or used marine heat shrink - it's not the best practice, but all the things I've done on my cars are years old and still going strong - you just have to make sure you secure the splice from swinging around with cable ties or similar. If you're dead set on separate switching, I have a few accessories powered from a basic latching push button, fitted into the steering column cover, just behind the ignition key barrel - these wires can run through the dash (dealers choice of where they go) and then through the cable grommet in the firewall between the cab and the engine bay - this is best accessed by removing the battery, and you can then see where all the wires go. Then it's just a case of feeding and securing the wires around the edge of the engine bay, till you reach the lights - I'd recommend feeding both headlights around the left side of the engine bay (battery and fusebox side) and feeding cable for the right headlight round the front of the engine bay, where it should be cooler. Then for power, you can either get 12v by splicing from an existing circuit, or I'd recommend getting a fuse tap from the fusebox behind the glovebox, feeding a 2-core wire to the switch (1 core for power there and 1 core for switched power back), and then you can feed a single core cable through to the lights (splice off the cable for the R headlight from behind the L headlight). For negative, just find a nearby chassis ground and put a cable with a crimped eye onto that - there's one directly behind the L headlight that is empty. Just make sure everything is rated for the amps you expect to draw, and that no cables are insecure or able to be damaged by heat. My go-to tools for vehicle wiring are as follows: 1x Box of various solder heat shrink connectors 1x Box of various crimp terminals 1x Stripper and crimper 1x Cable snips 1x Bag of smaller cable ties 1x Box of various sizes heat shrink 4:1 marine (those last 2 points are important) 1x heat gun 1x Box of various splices Usual tools such as screwdrivers/pliers/knife, etc Good luck and remember, any positive wire you're running should be fused.
-
Forgot to mention - the advantage of this is that you don't have to fully empty the system and pressure refill it - I haven't noticed any issues with coolant flow after doing this
-
I just fixed this issue on my Scout. I used an endoscope to look at the flap motors (you might be able to squeeze around the pedals to see it, but it's just easier to use the tool) - for me, there were no issues, and they were moving around fine. The coolant in my expansion tank was a brown, muddy/scummy colour - not the lovely pink it should be. I then purchased: 1x New coolant tank without the silica bag - metalcaucho 03344 from Autodoc - you can use the old tank's lid 1x New heater matrix (double check part numbers before you buy, as there are a few different fitments) 1x 5L concentrate of G12evo (successor to the rubbish G13 coolant) 1x set of hose clamps (amtech 3 piece set) 5x 5L Distilled water 1x Bottle of coolant flush chemical Tools I already had, which you may need to buy if you don't have: Spanners, sockets, screwdrivers, big set of pliers, tin snips, torx bits, a 1 meter rubber hose with an internal diameter matching the outer diameter of the coolant return hose that feeds into the top of the expansion tank, a small victoria clamp to fit around the aforementioned hose, the garden hose connected to the tap (ideally with an adjustable and lockable sprayer on the end), a rubbish towel I don't mind ruining, plastic sheeting to go under the towel, a few buckets, and a tupperware container the wife hopefully won't notice going missing. I started by warming the engine up to operating temp, you can do this by driving around or just idling. Once at temperature, I disconnected the coolant return hose, put it into the rubber hose and secured the victoria clamp to prevent it from leaking - I then ran the rubber hose into a buckets, and let the engine run. The old coolant ran into the bucket, and I topped up the expansion tank with the garden hose, occasionally changing which bucket the hose emptied into so I could monitor the colour of the water coming out of the car. Be aware that if the water level in the expansion tank falls below the sensor, the car will sound an error on the dashboard. You don't have to worry about this as long as there's always liquid above the feed hole at the bottom of the tank. Once the worst of the discoloured water had stopped draining, I then reconnected the return hose to the tank and added the coolant flush - I let this run through for 20-30 mins. Whilst the coolant flush is doing its thing, it's a good time to prepare the heater matrix for replacement by removing the glovebox, footwell vent, centre console side panels and heater matrix retaining clip. BodriG has a good video on this, along with the rest of the heater matrix replacement steps: https://youtu.be/oHfQ_27dDRM?si=Rnah_XBRDNAvrNV5 Once the coolant flush had done its thing, I reconnected the return hose to the rubber drain hose and continued draining the coolant into a bucket and topping up the coolant tank with tap water. After the coolant had started to run clear again, I turned off the car and installed the new coolant tank and heater matrix. Once I had replaced both items, I then continued the flushing process, except this time topping up the tank with distilled water. I kept 1 bottle of distilled water to the side for mixing with the coolant, and once I'd used up the fourth bottle of distilled water, I then used the coolant concentrate to top up the tank - using 4 litres from the 5 litre bottle. Once I'd put 4 litres of coolant into the car, I reconnected the return hose to the coolant tank, reattached all hose fixings, and all was done! I also poured the remaining distilled water into the remaining coolant concentrate, such that I now have a bottle of readymix coolant to top the car up if required (I used a bit of this readymix to top the tank up to its correct level after I reconnected the hoses) Cleaned up all the mess I had made, and now my car's heating is lovely and toasty warm on both sides. There are videos on YouTube which run through the processes as well.
-
Hi all, I'm looking to upgrade the brakes on my 2016 Octy Scout - my driving can be "spirited" at times, and sometimes I get home and notice that I would be able to cook my dinner on my brakes. My question is: Would I be better off changing the discs for some higher-end perforated ones; Or - is it possible to retrofit vRS calipers and discs with 17" wheels? (I don't want to go up to 18" or 19" wheels as I have several sets of 17" alloys and tyres) I look forward to your thoughts
-
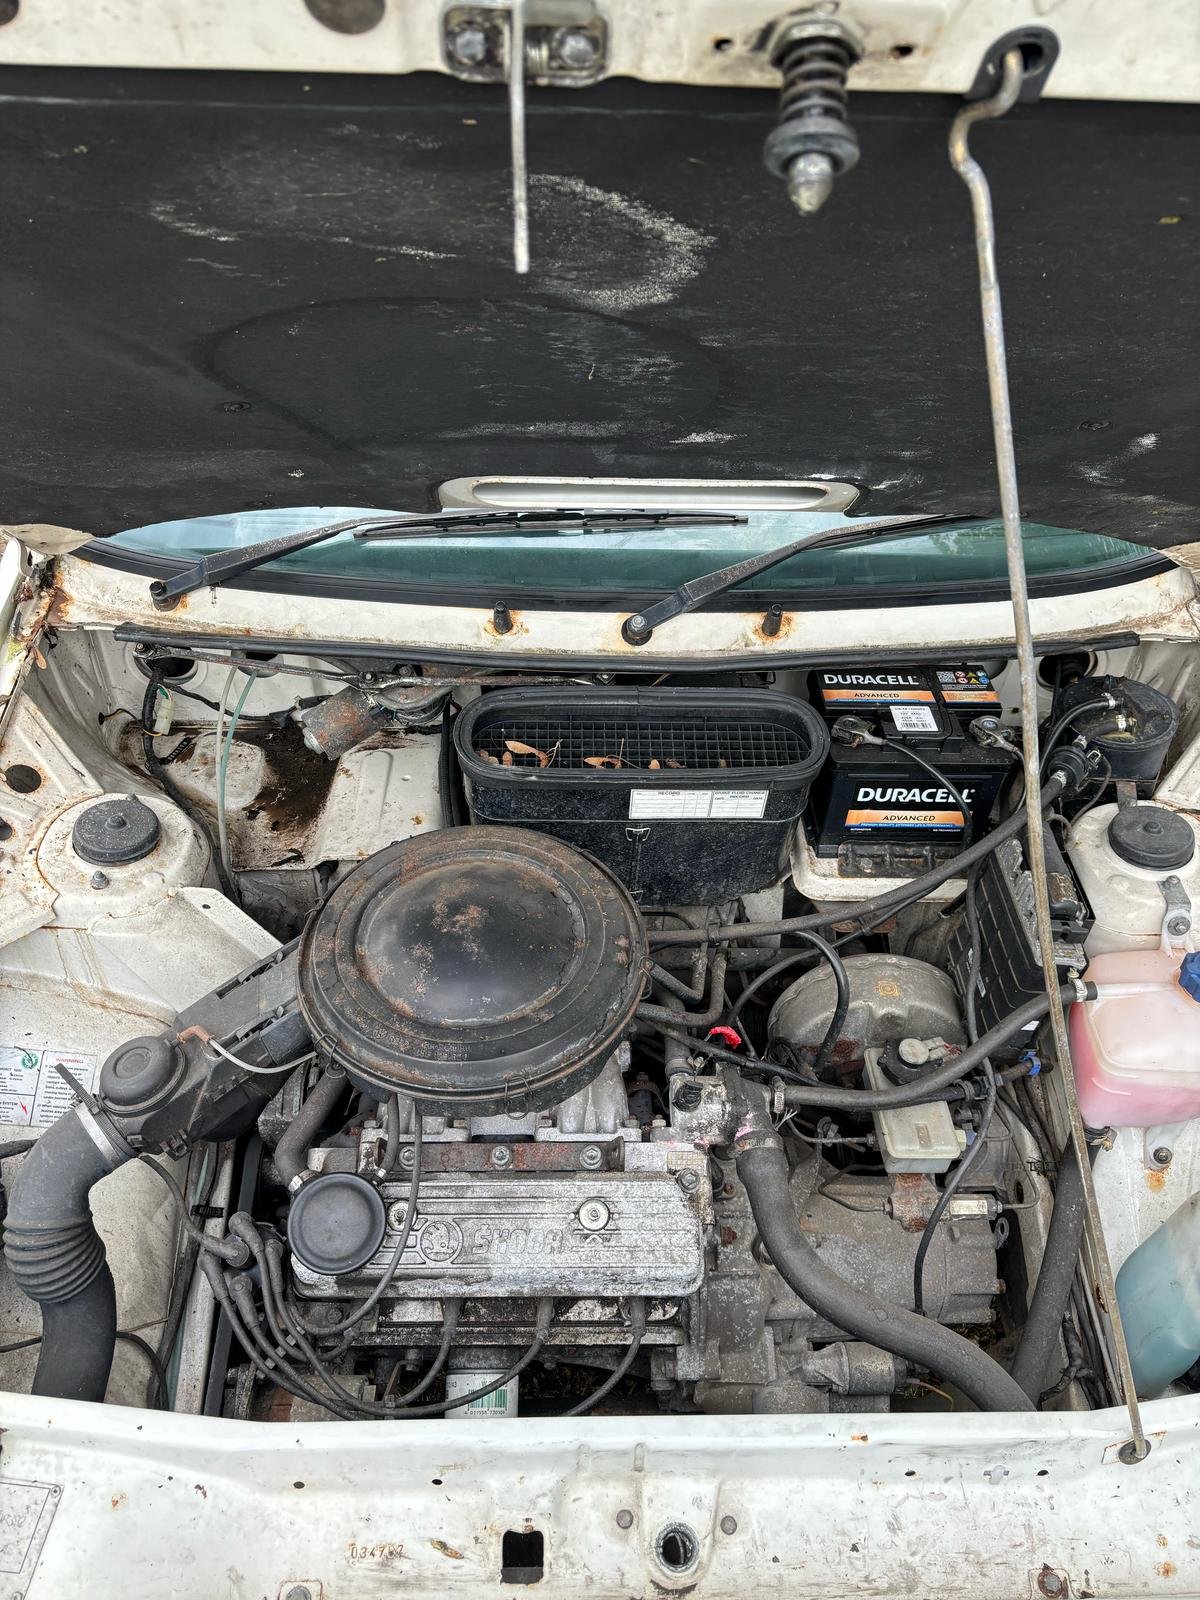
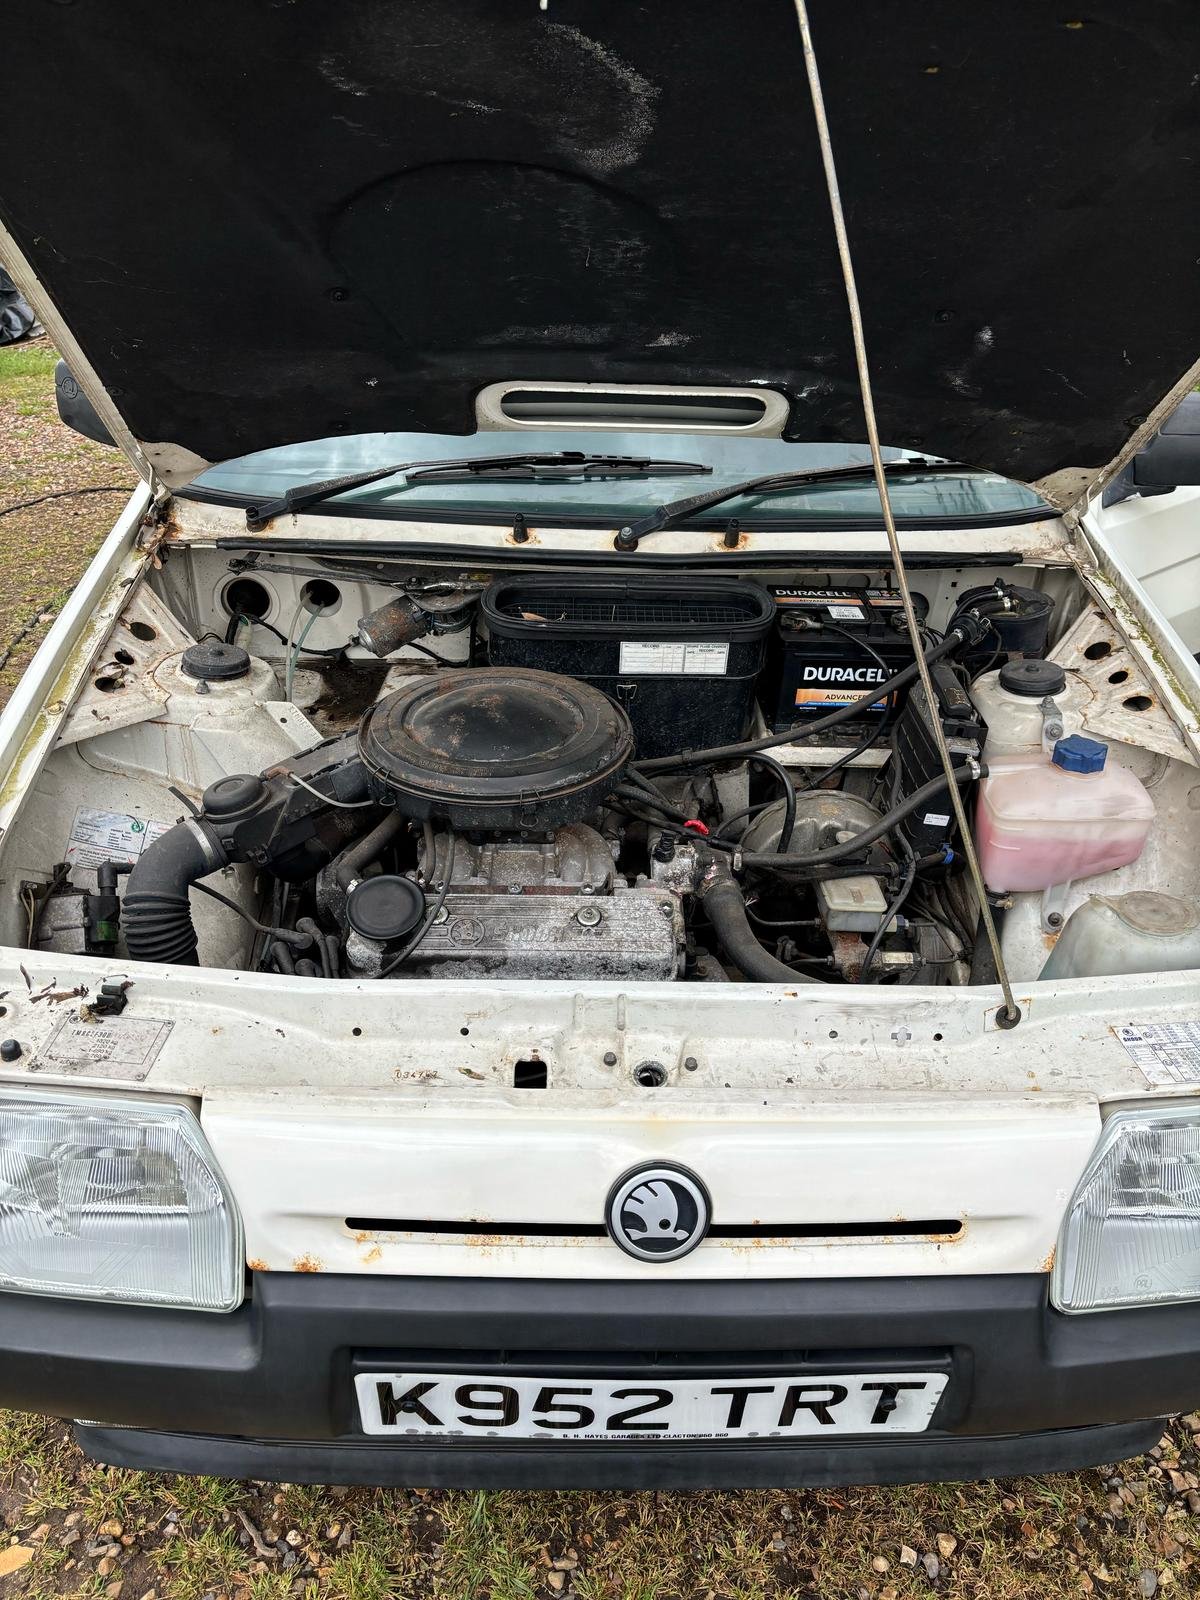
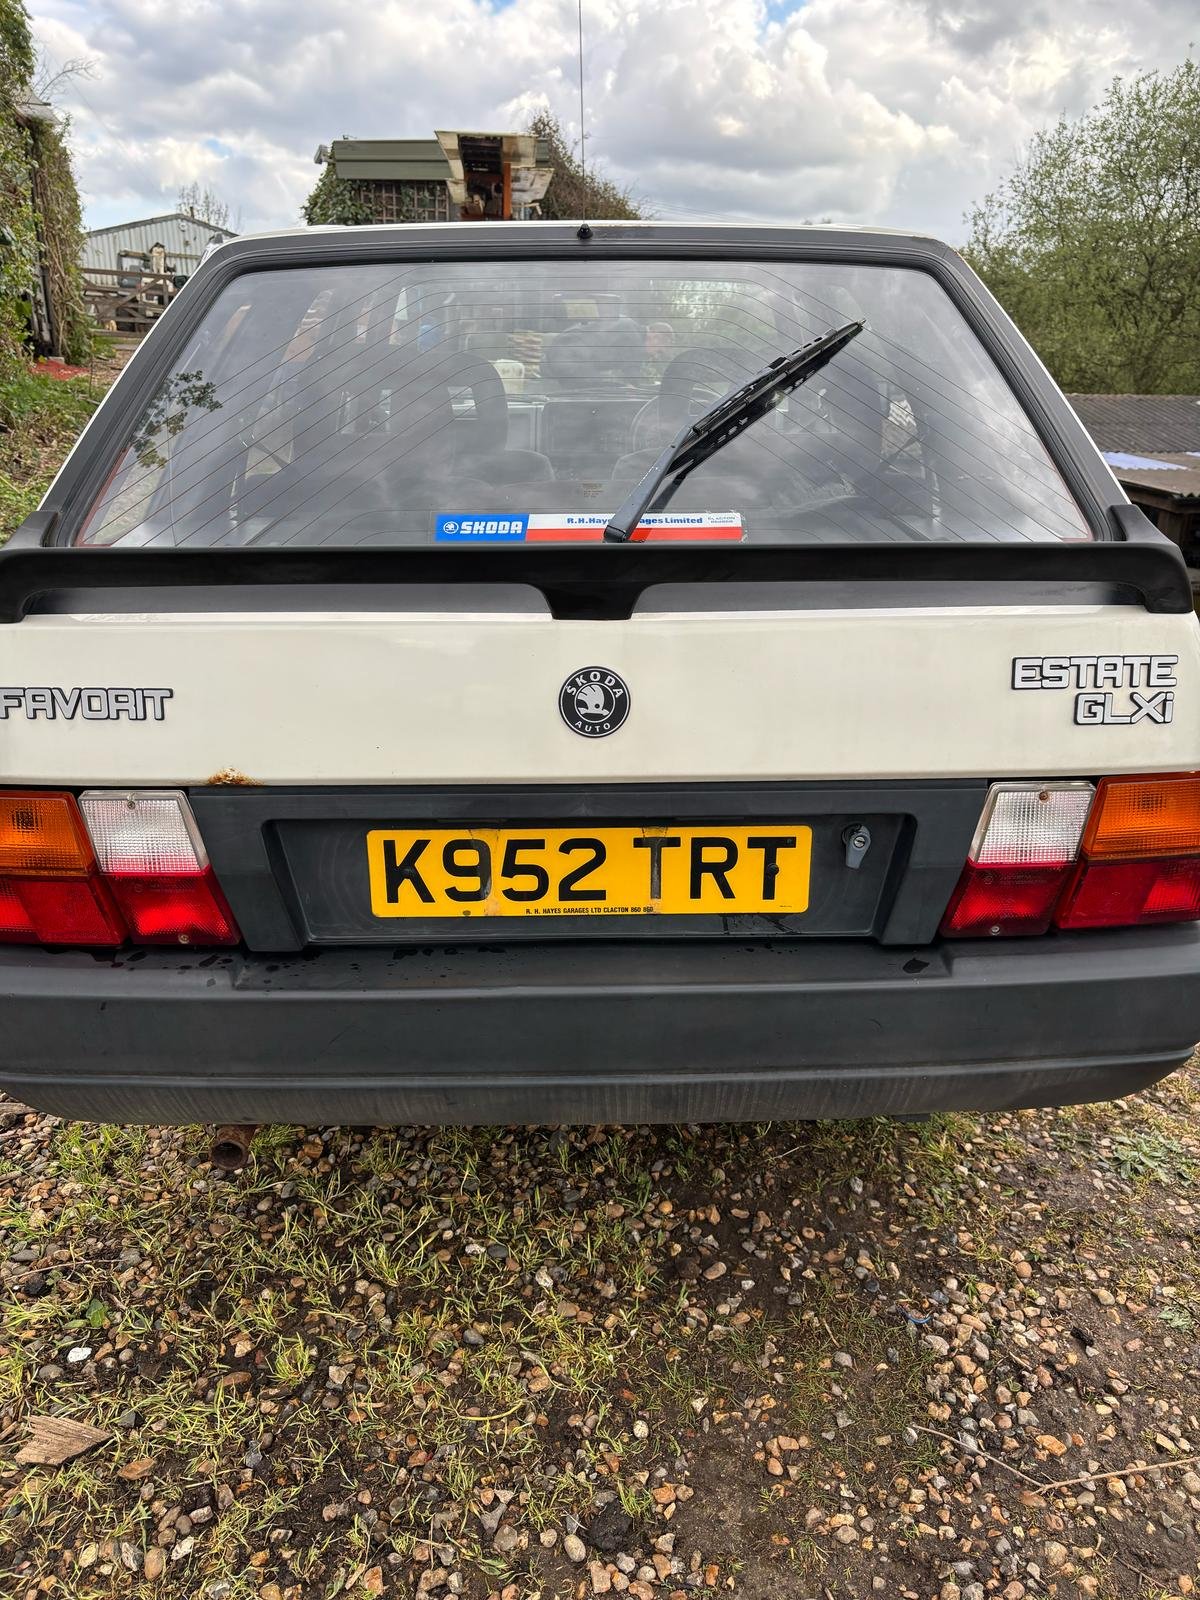
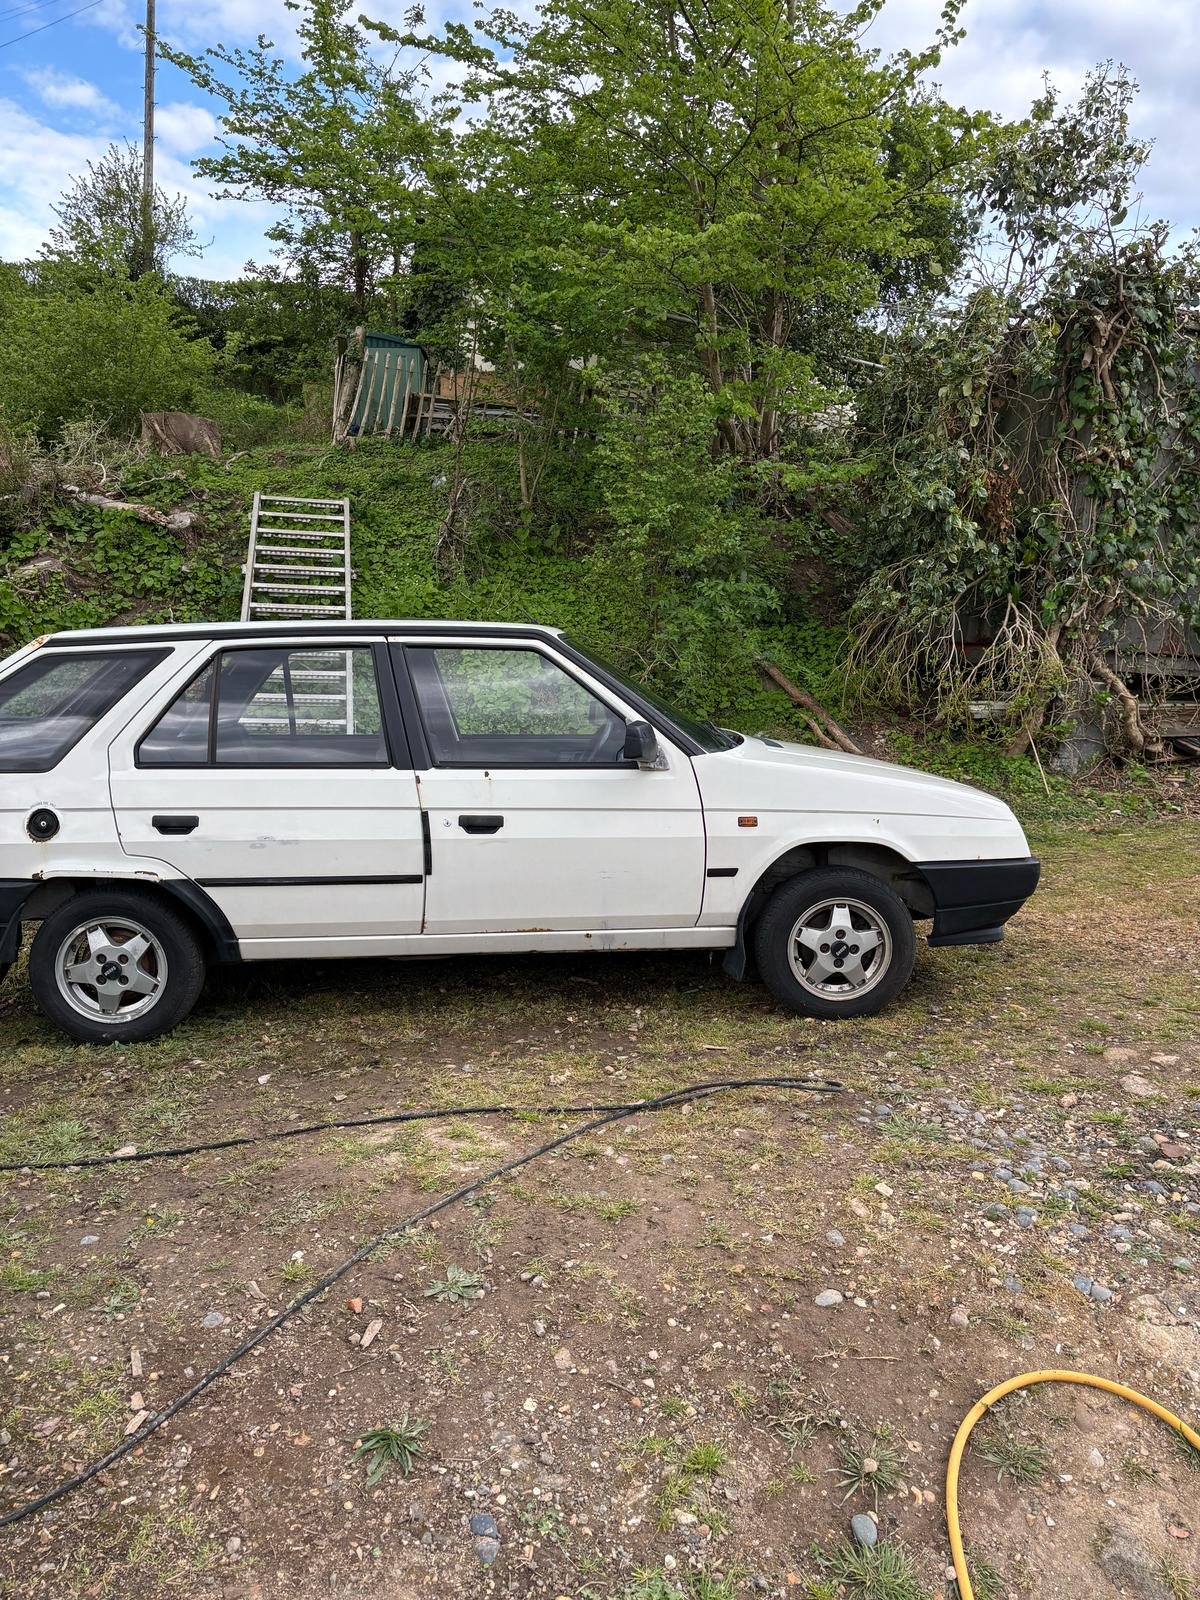
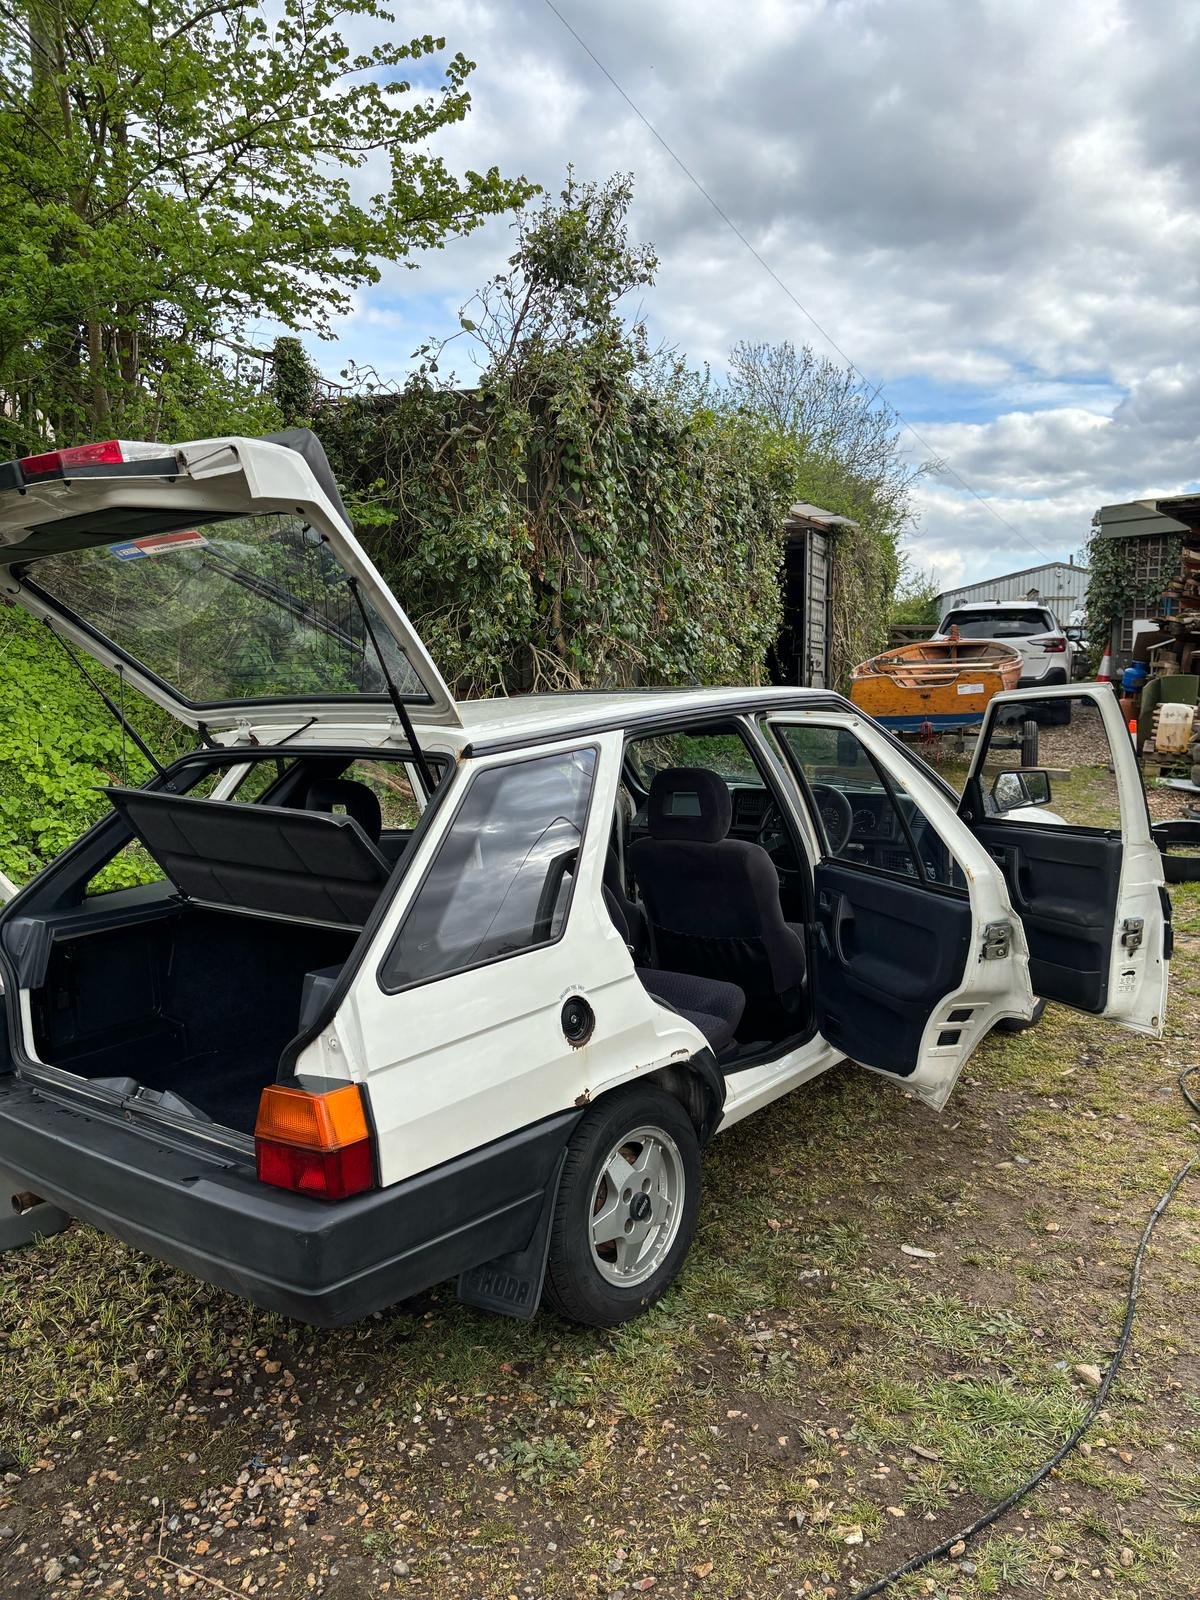
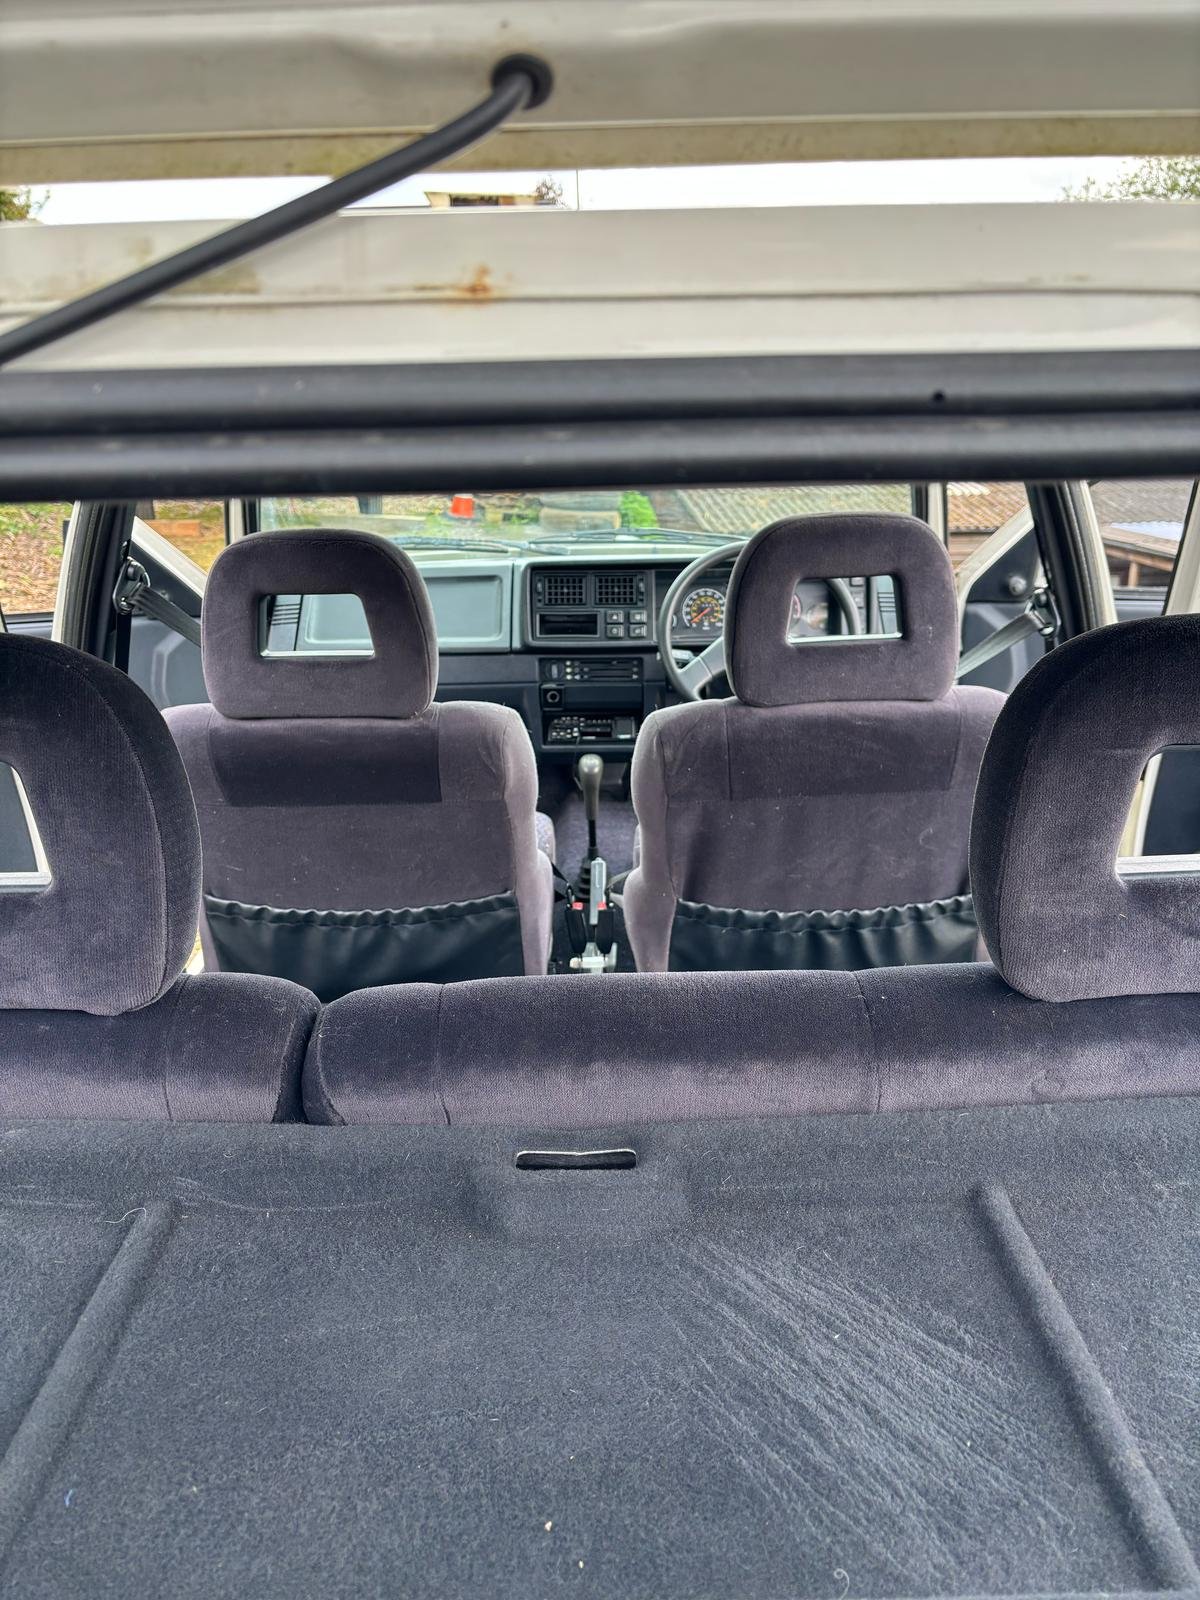
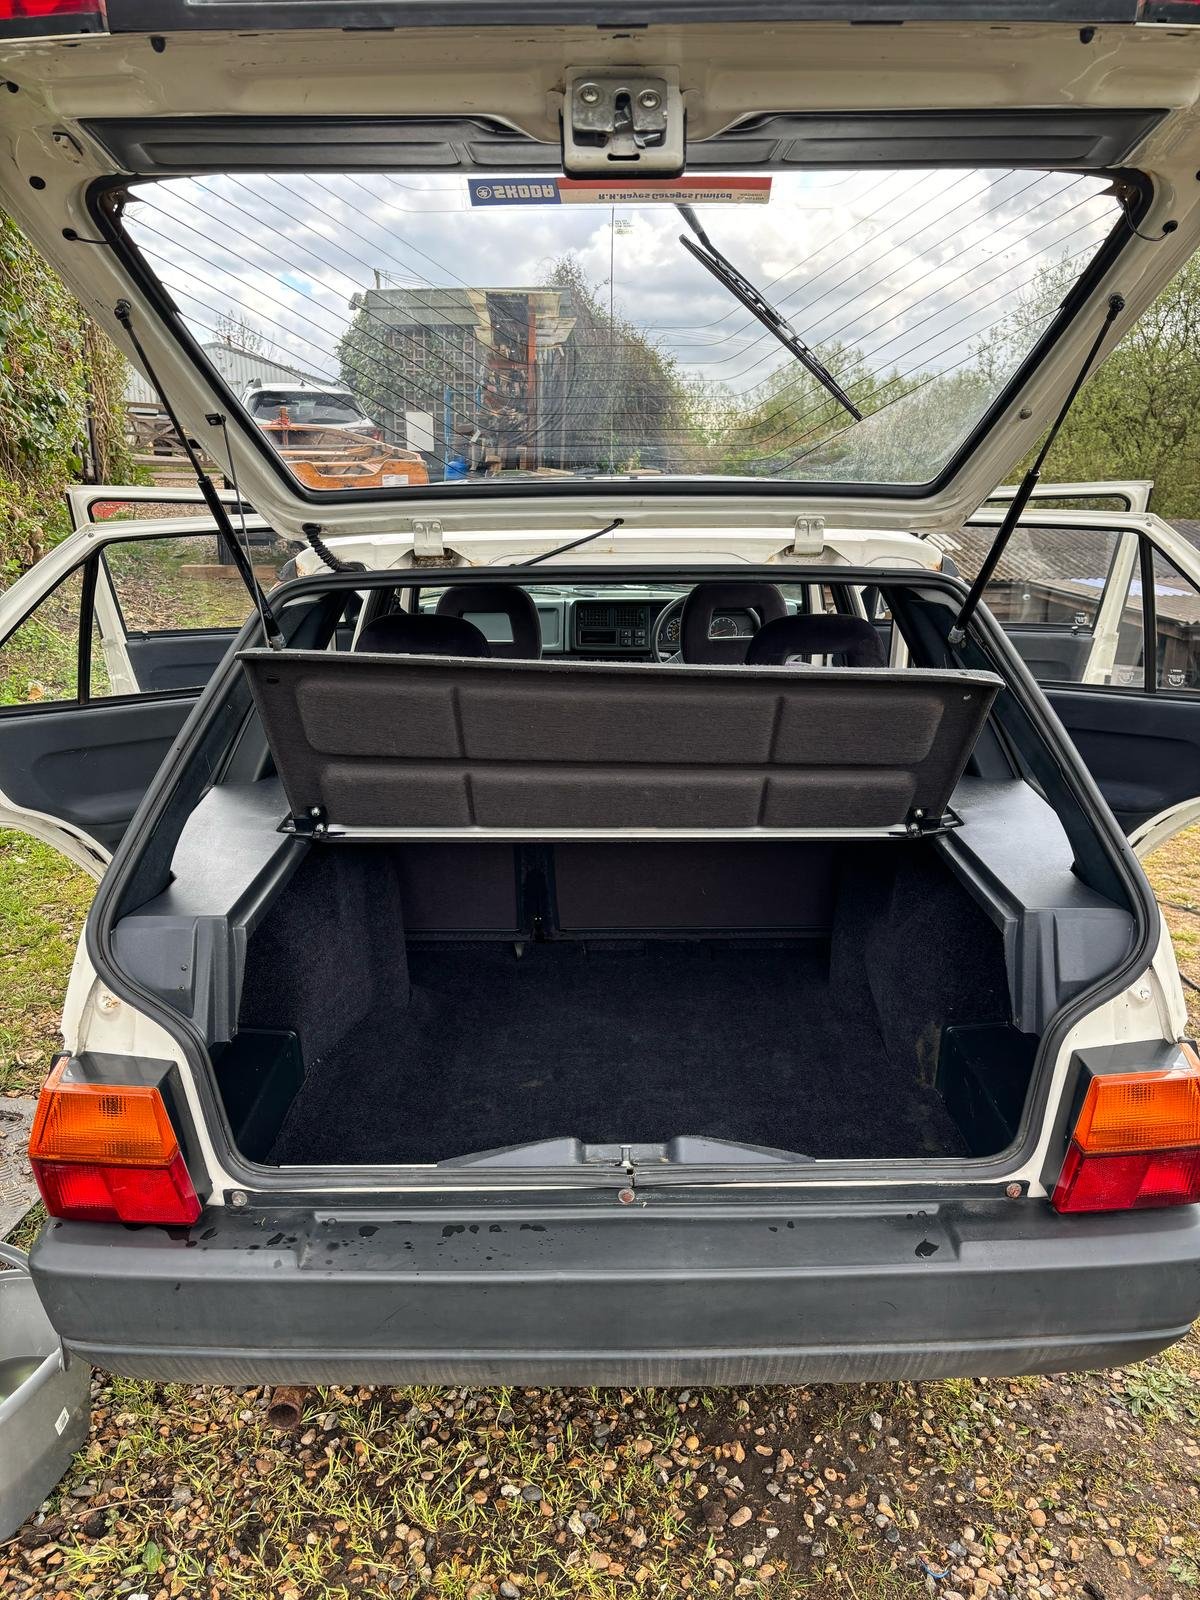
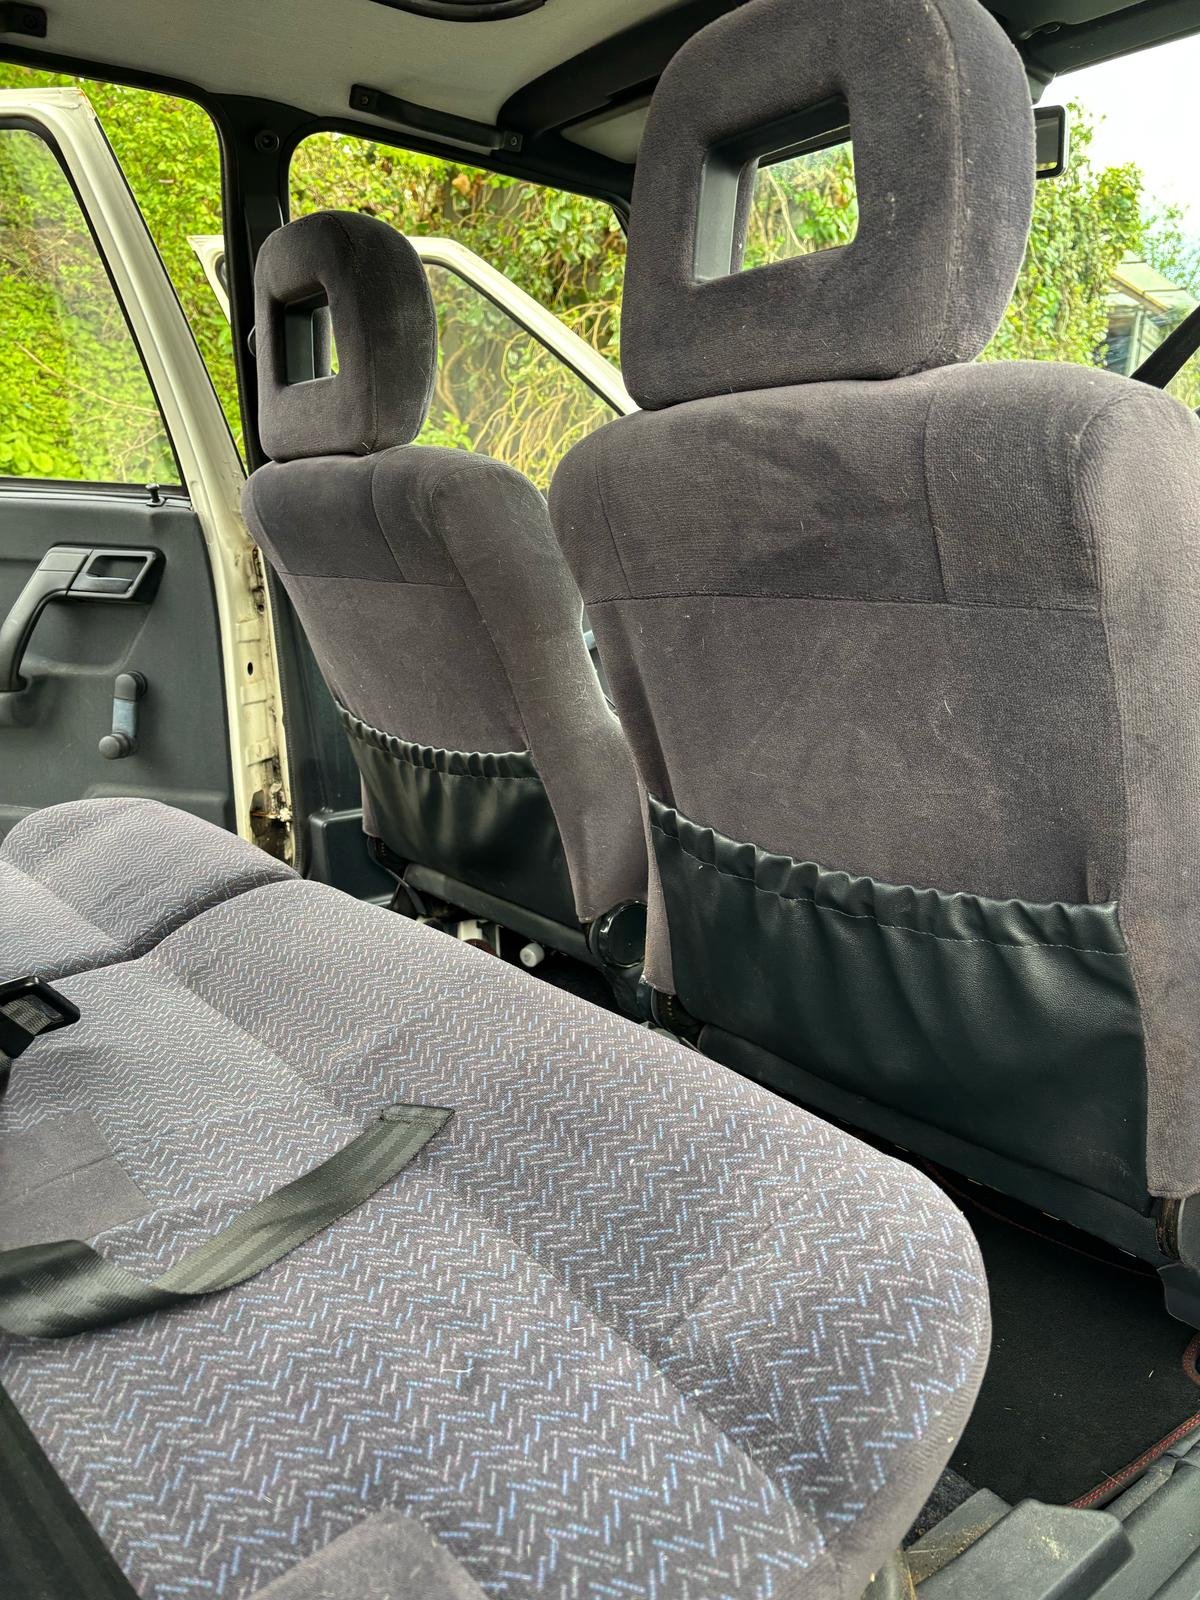
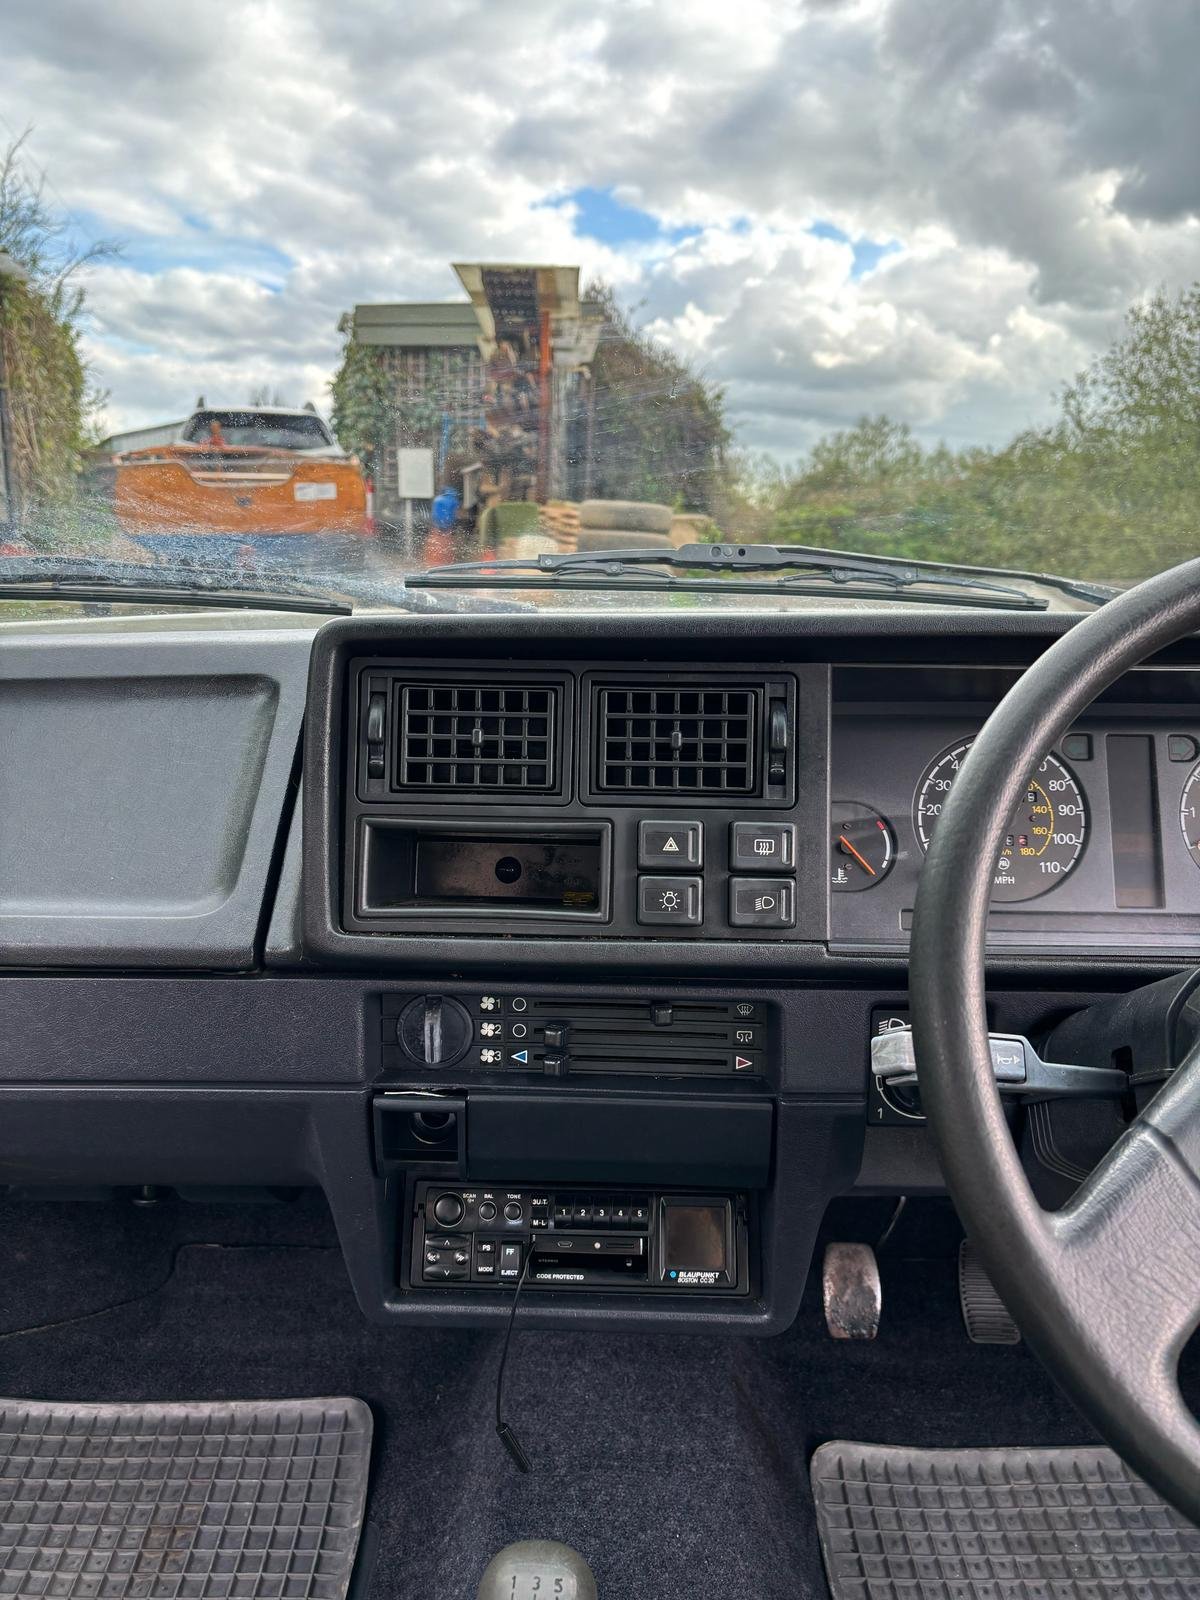
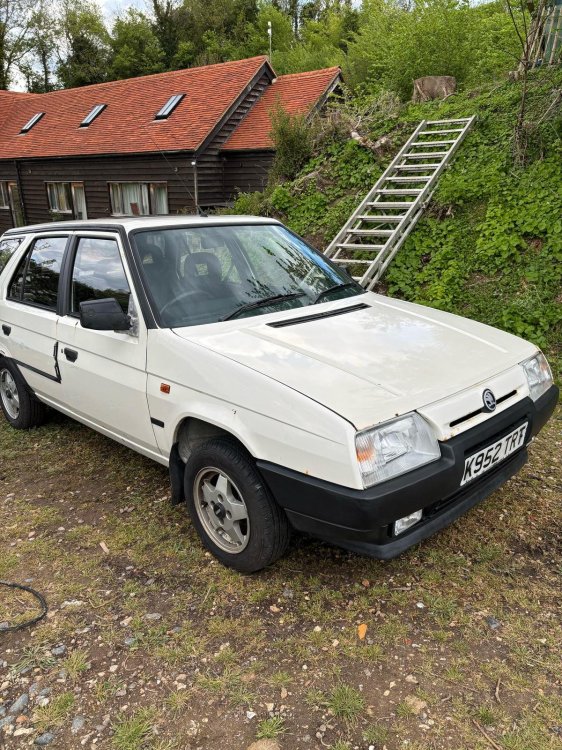
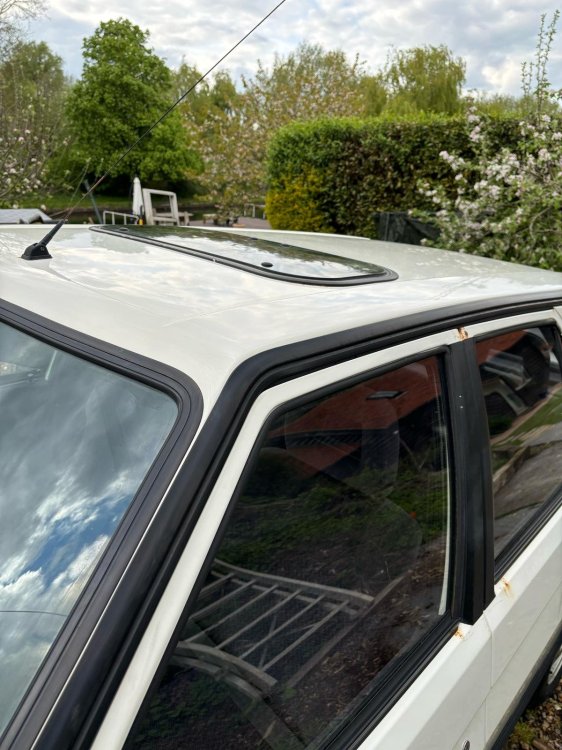
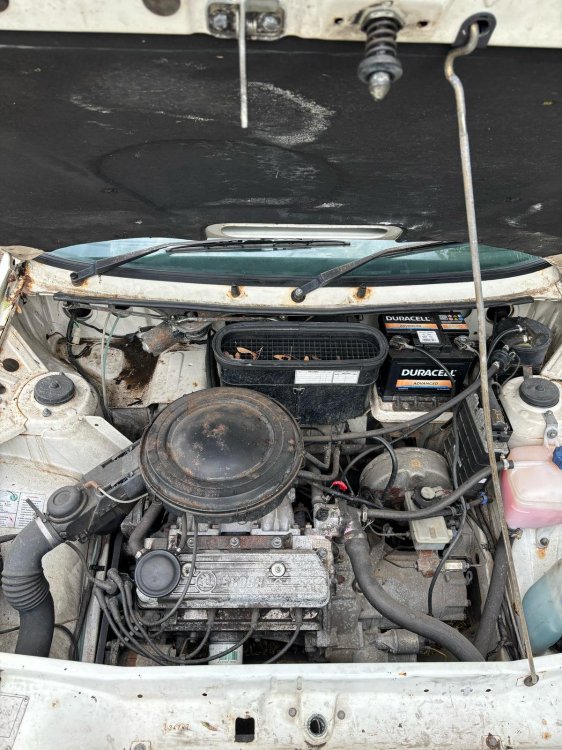
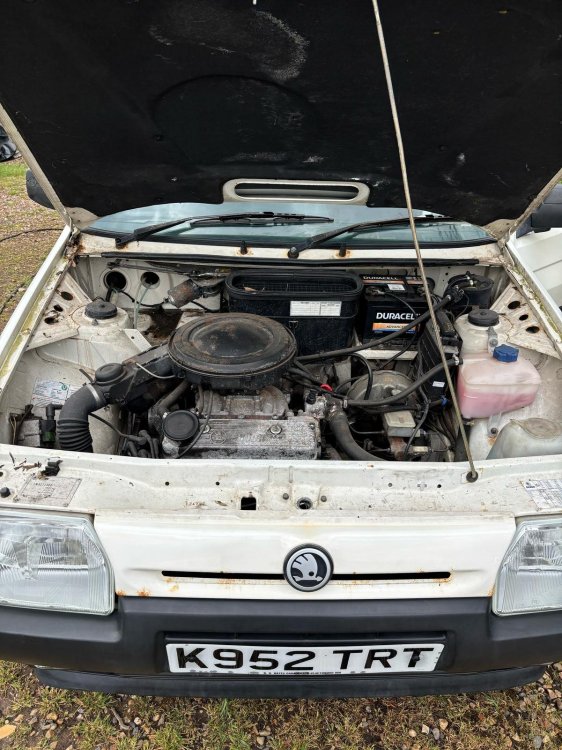
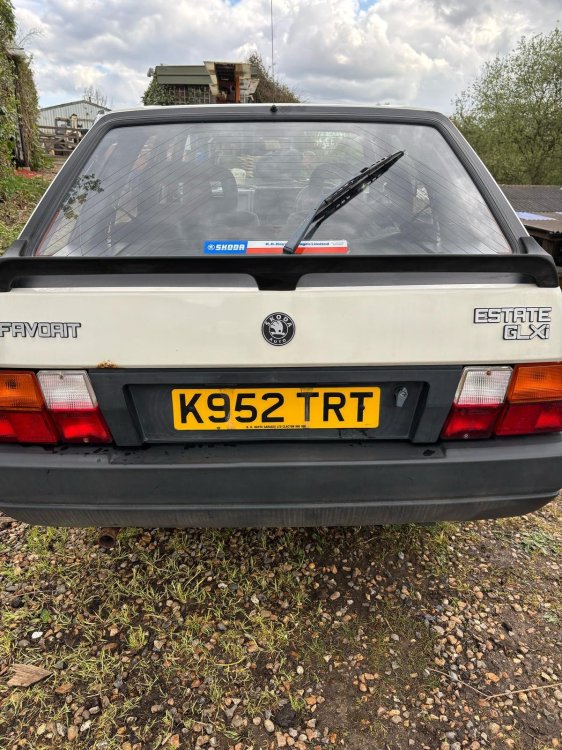
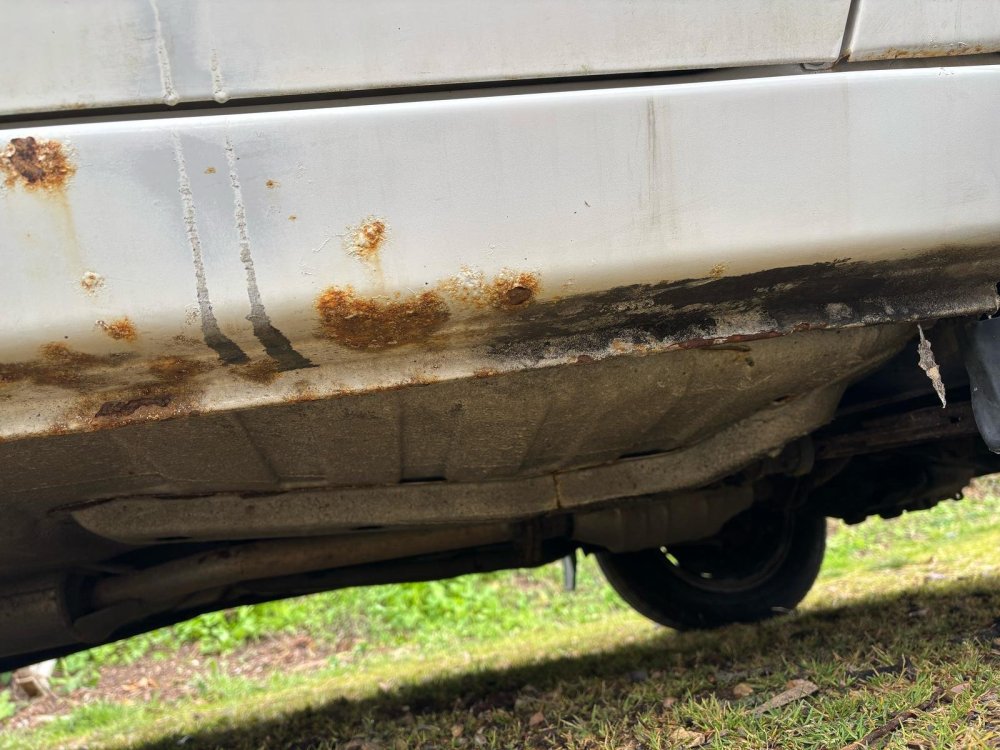
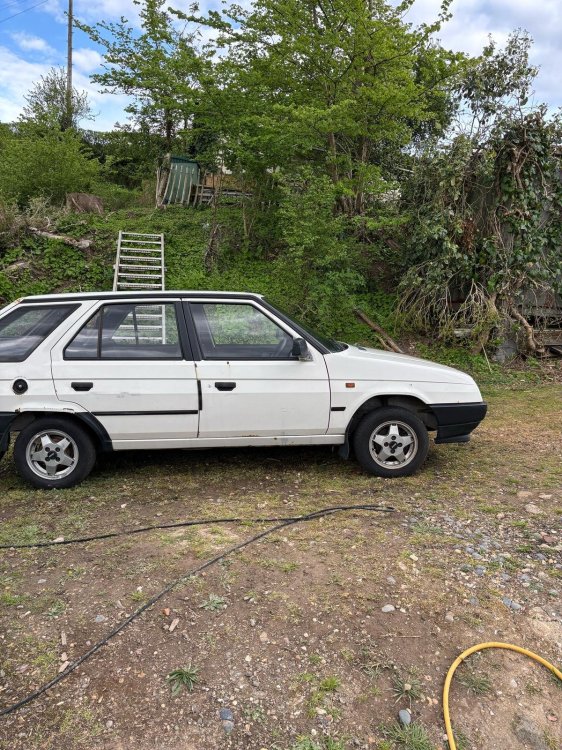
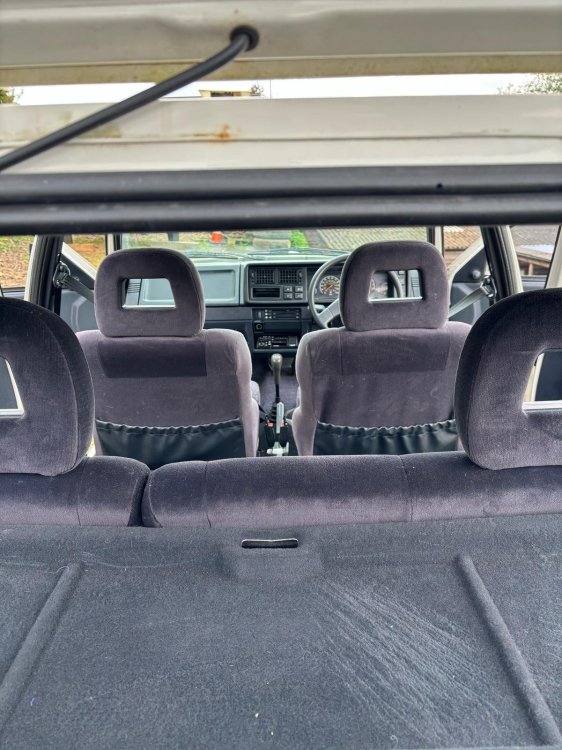
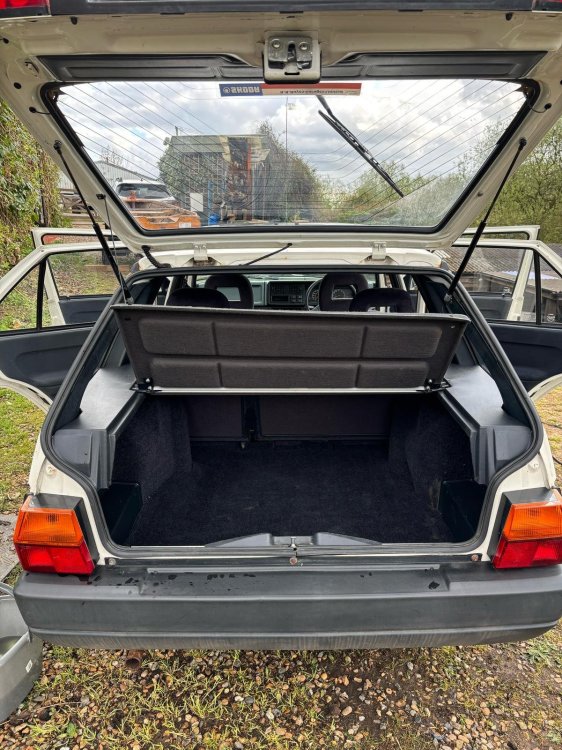
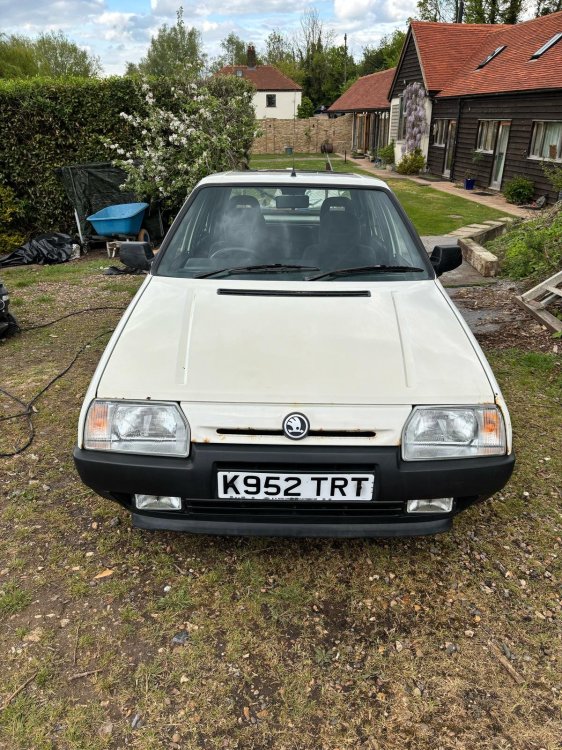
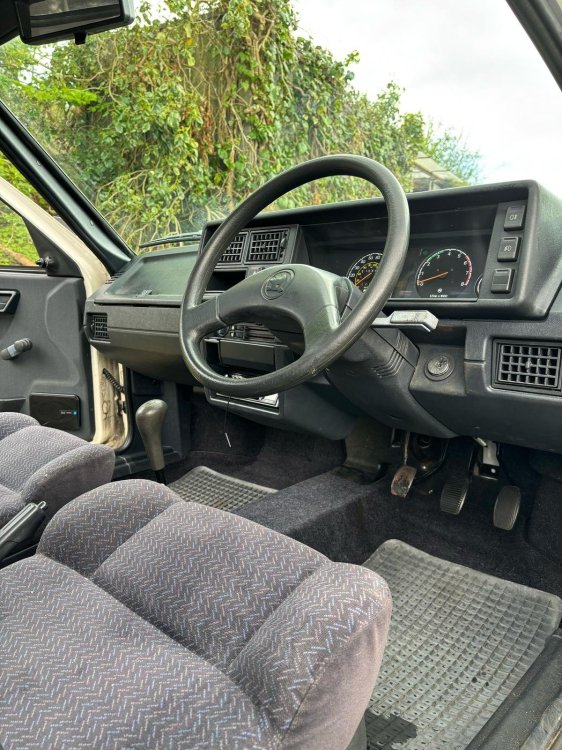
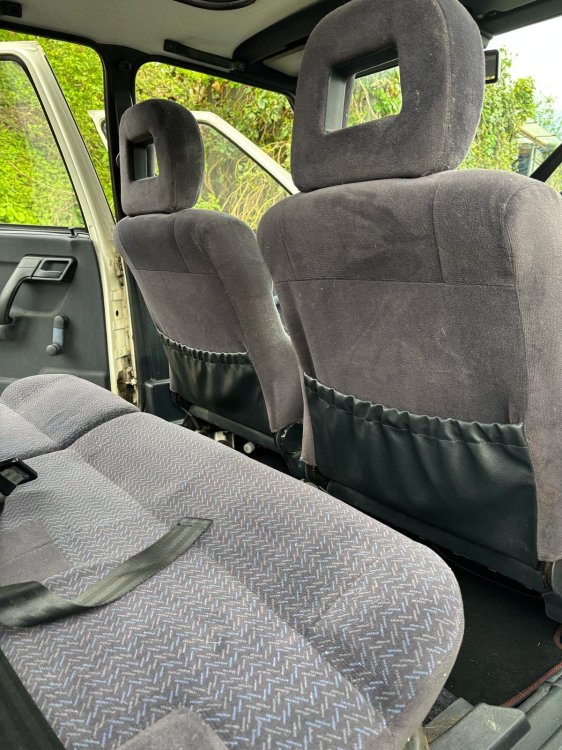
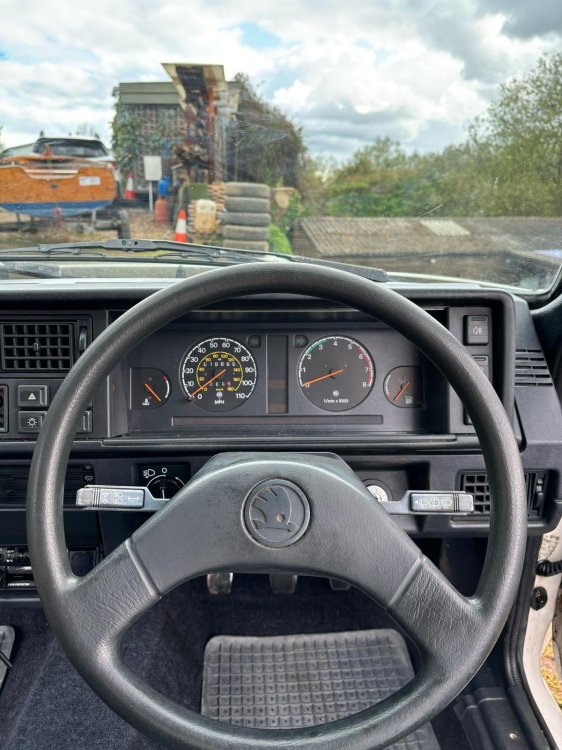
Make & Model: <1993 Skoda Favorit GLXi Estate> Colour: <White> Mileage: <19,900 mi> Price: <£1500 OBO> Description: <I love this little car - nonetheless, I need to sell as I'm moving house and haven't the space for it. It was originally bought a year or so ago as a project car with my mate, but we soon realised that there wasn't actually much to work on except the bodywork! It runs like a dream, and has only required a few fixes (as seen below). It's only done ~150mi since purchase, and has been kept under cover the rest of the time. Whilst it is currently SORN - does have a valid MOT till July. As can be seen, there are some minor rust patches in a few corners of the bodywork - however all structural areas are solid. Being the GLXi estate model, it's packed with extras. If you're looking for a project car that doesn't need major (and expensive) mechanical work, and only needs some touching up to look lovely - this is the car for you.> Condition: <Mechanically sound - minor bodywork issues> Service History/Receipts/Recent Service work: <Oil change <100mi ago, Repaired an exhaust leak and fitted a new exhaust support, Fixed a small leak in the sunroof, New wipers, New Battery, New rear wheel bearings> Extras: <GLXi Spec: Halogen front fog lamps, variable interval windscreen wipers, 5-spoke alloy wheels, bodyside mouldings, tilt sunroof, front mudflaps, stereo radio/cassette player, tachometer, interior boot light, contoured seats in polyester trim, knitted fabric interior door trim, cut pile velour carpet, rubber floor mats, bonnet sound proofing, document pockets, split folding rear seats> Mods: <None> Shipping: <Buyer to organise shipping or collection> Collection: <Collection available from Rickmansworth, WD3> Pictures: <See below - if you would like specific close ups I'm happy to help>


-
I have a MK3 Octy Scout with the OEM removable towbar. Does anyone know of any alternative style of towbar attachments that have the same removable attachment? Ideally one with a square or ball/pin coupling?