commievid
Members
-
Joined
-
Last visited
Everything posted by commievid
-
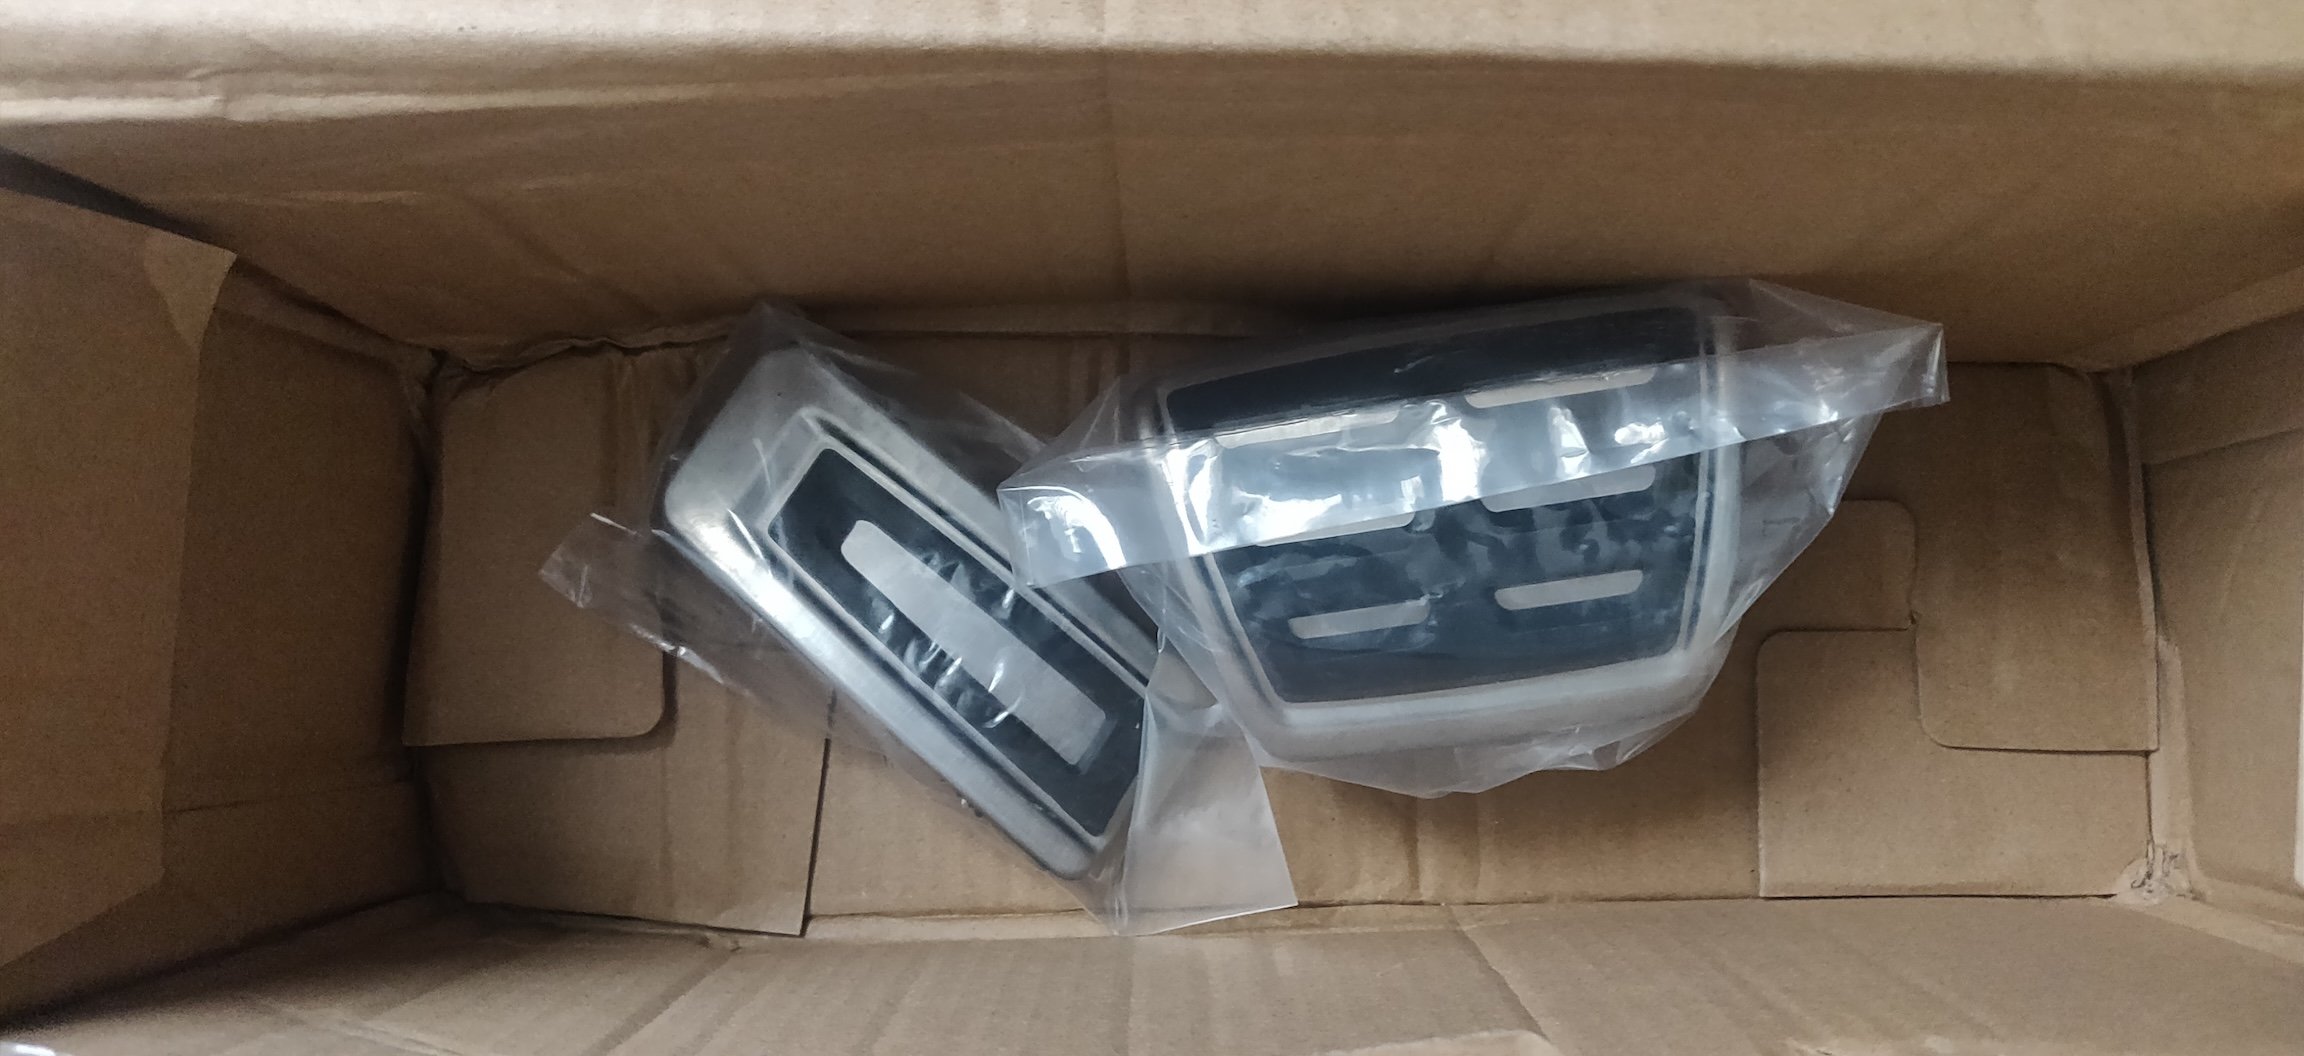
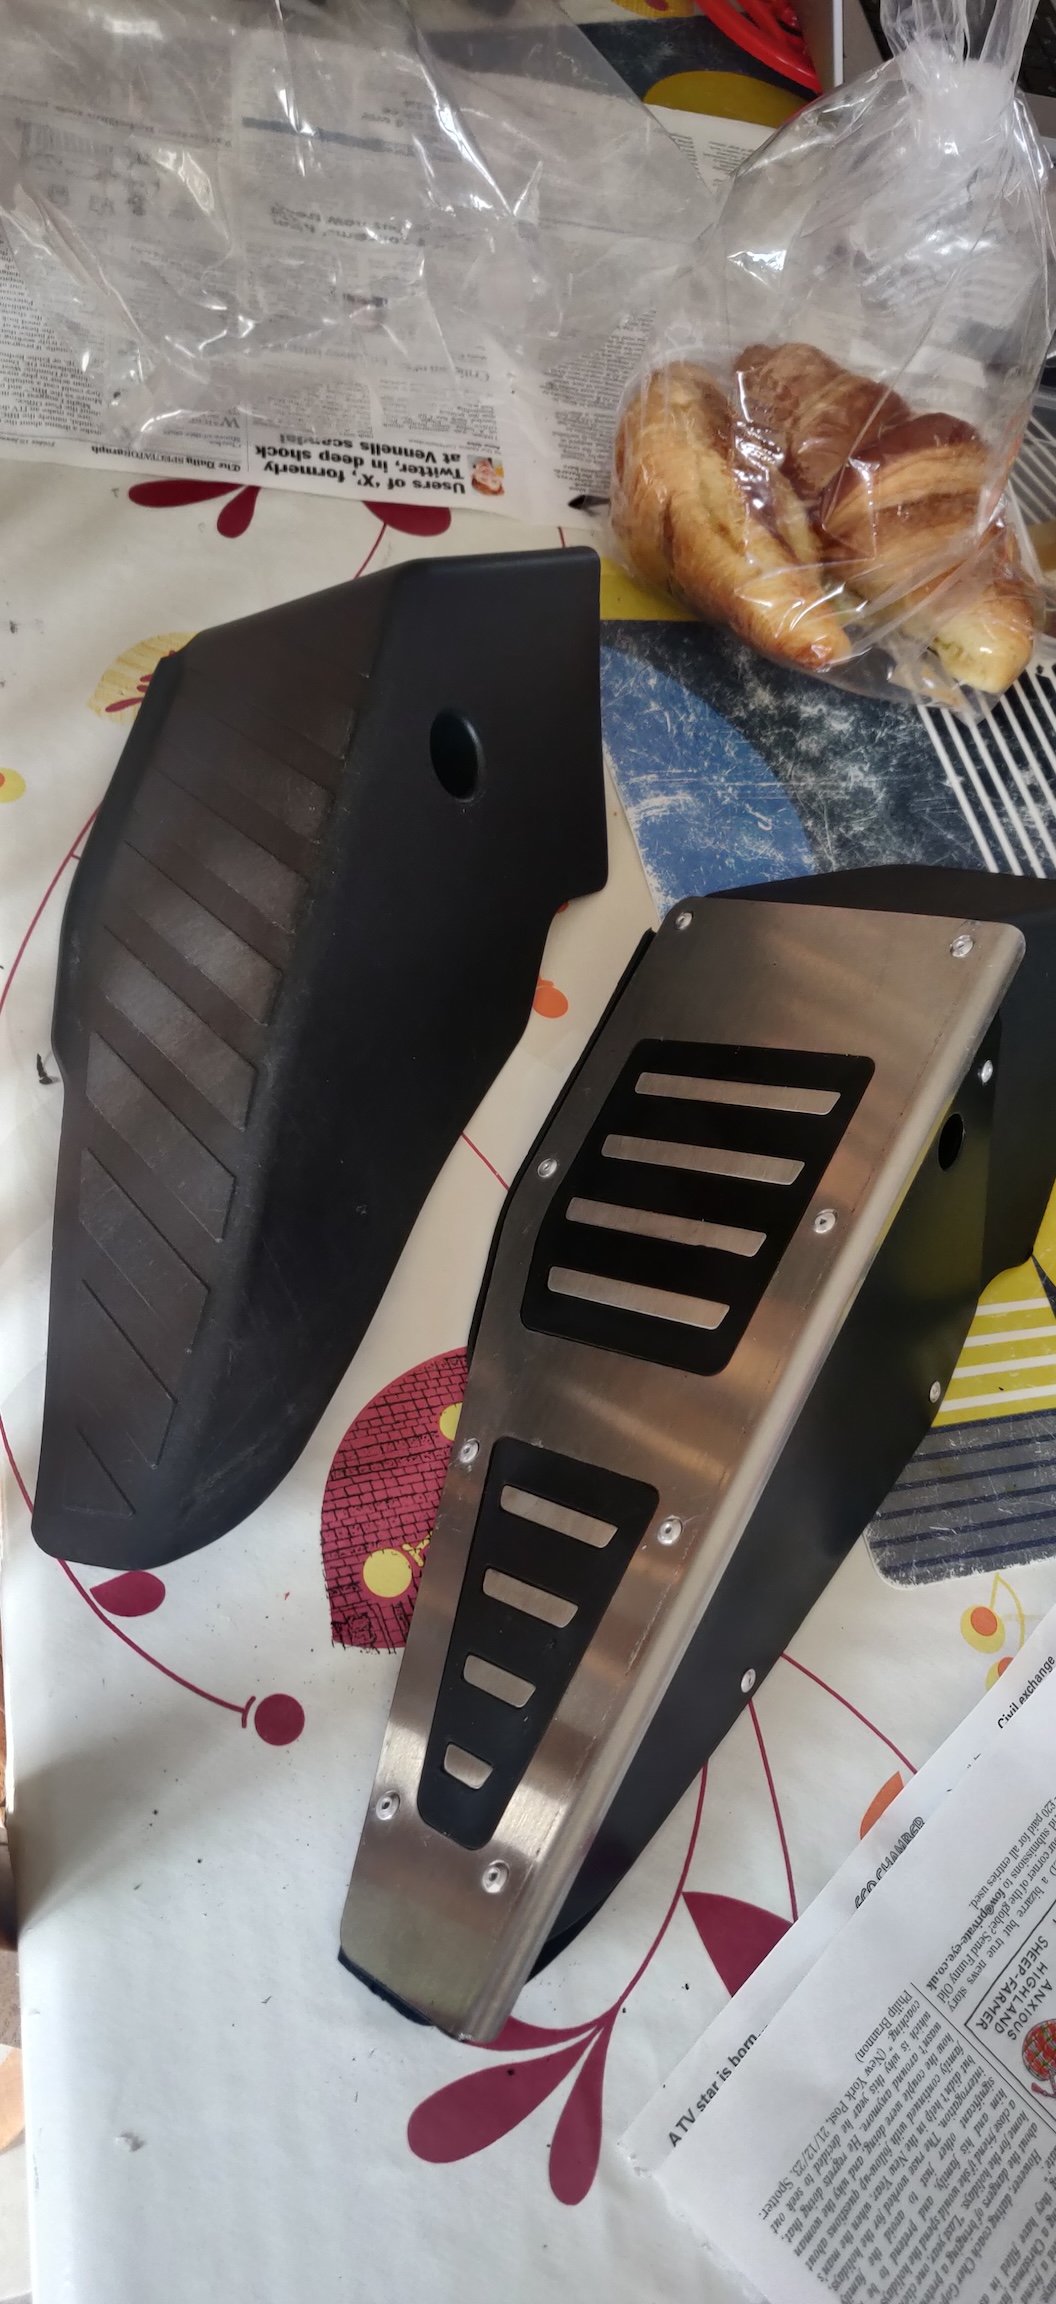
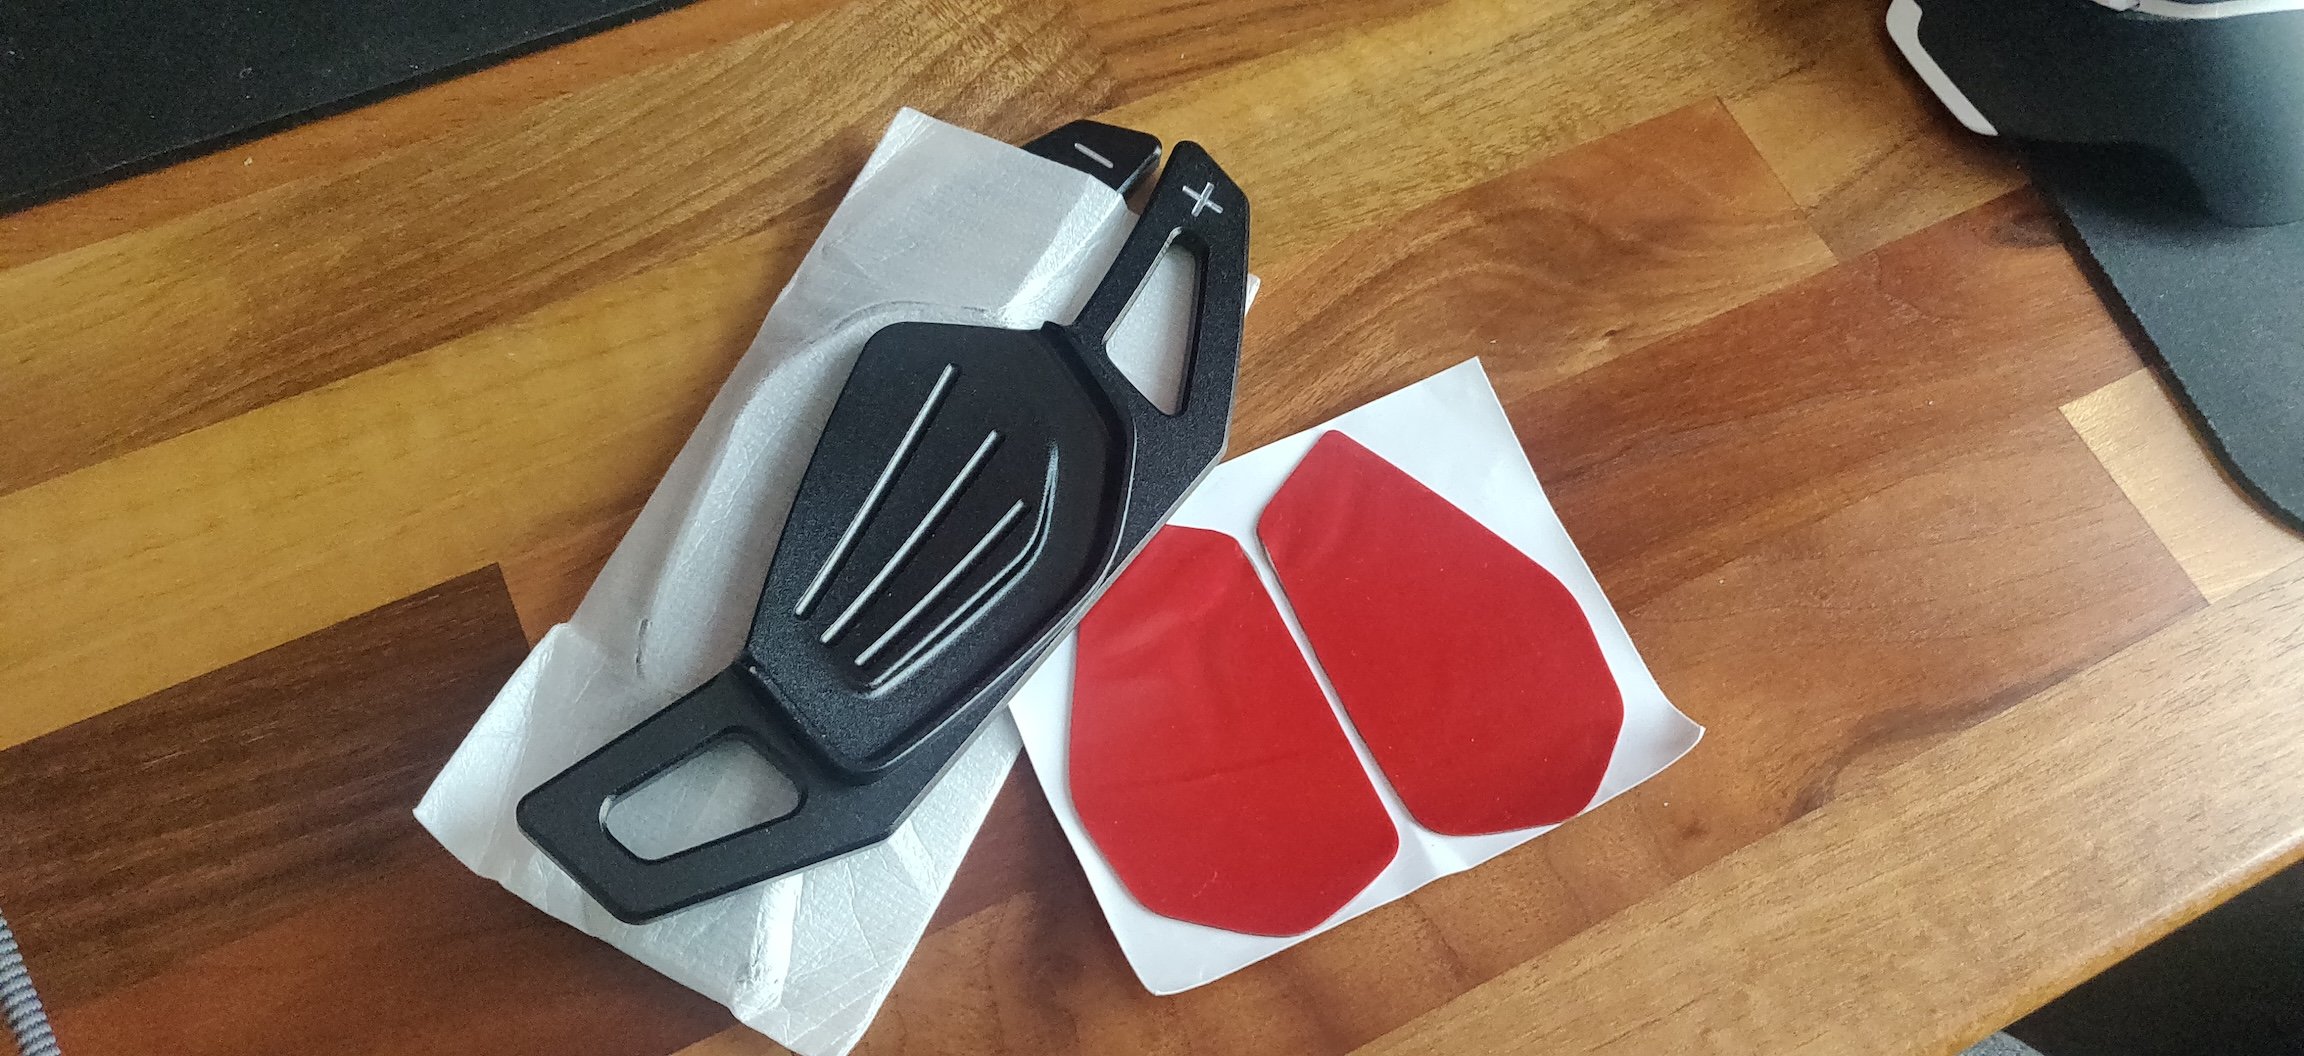
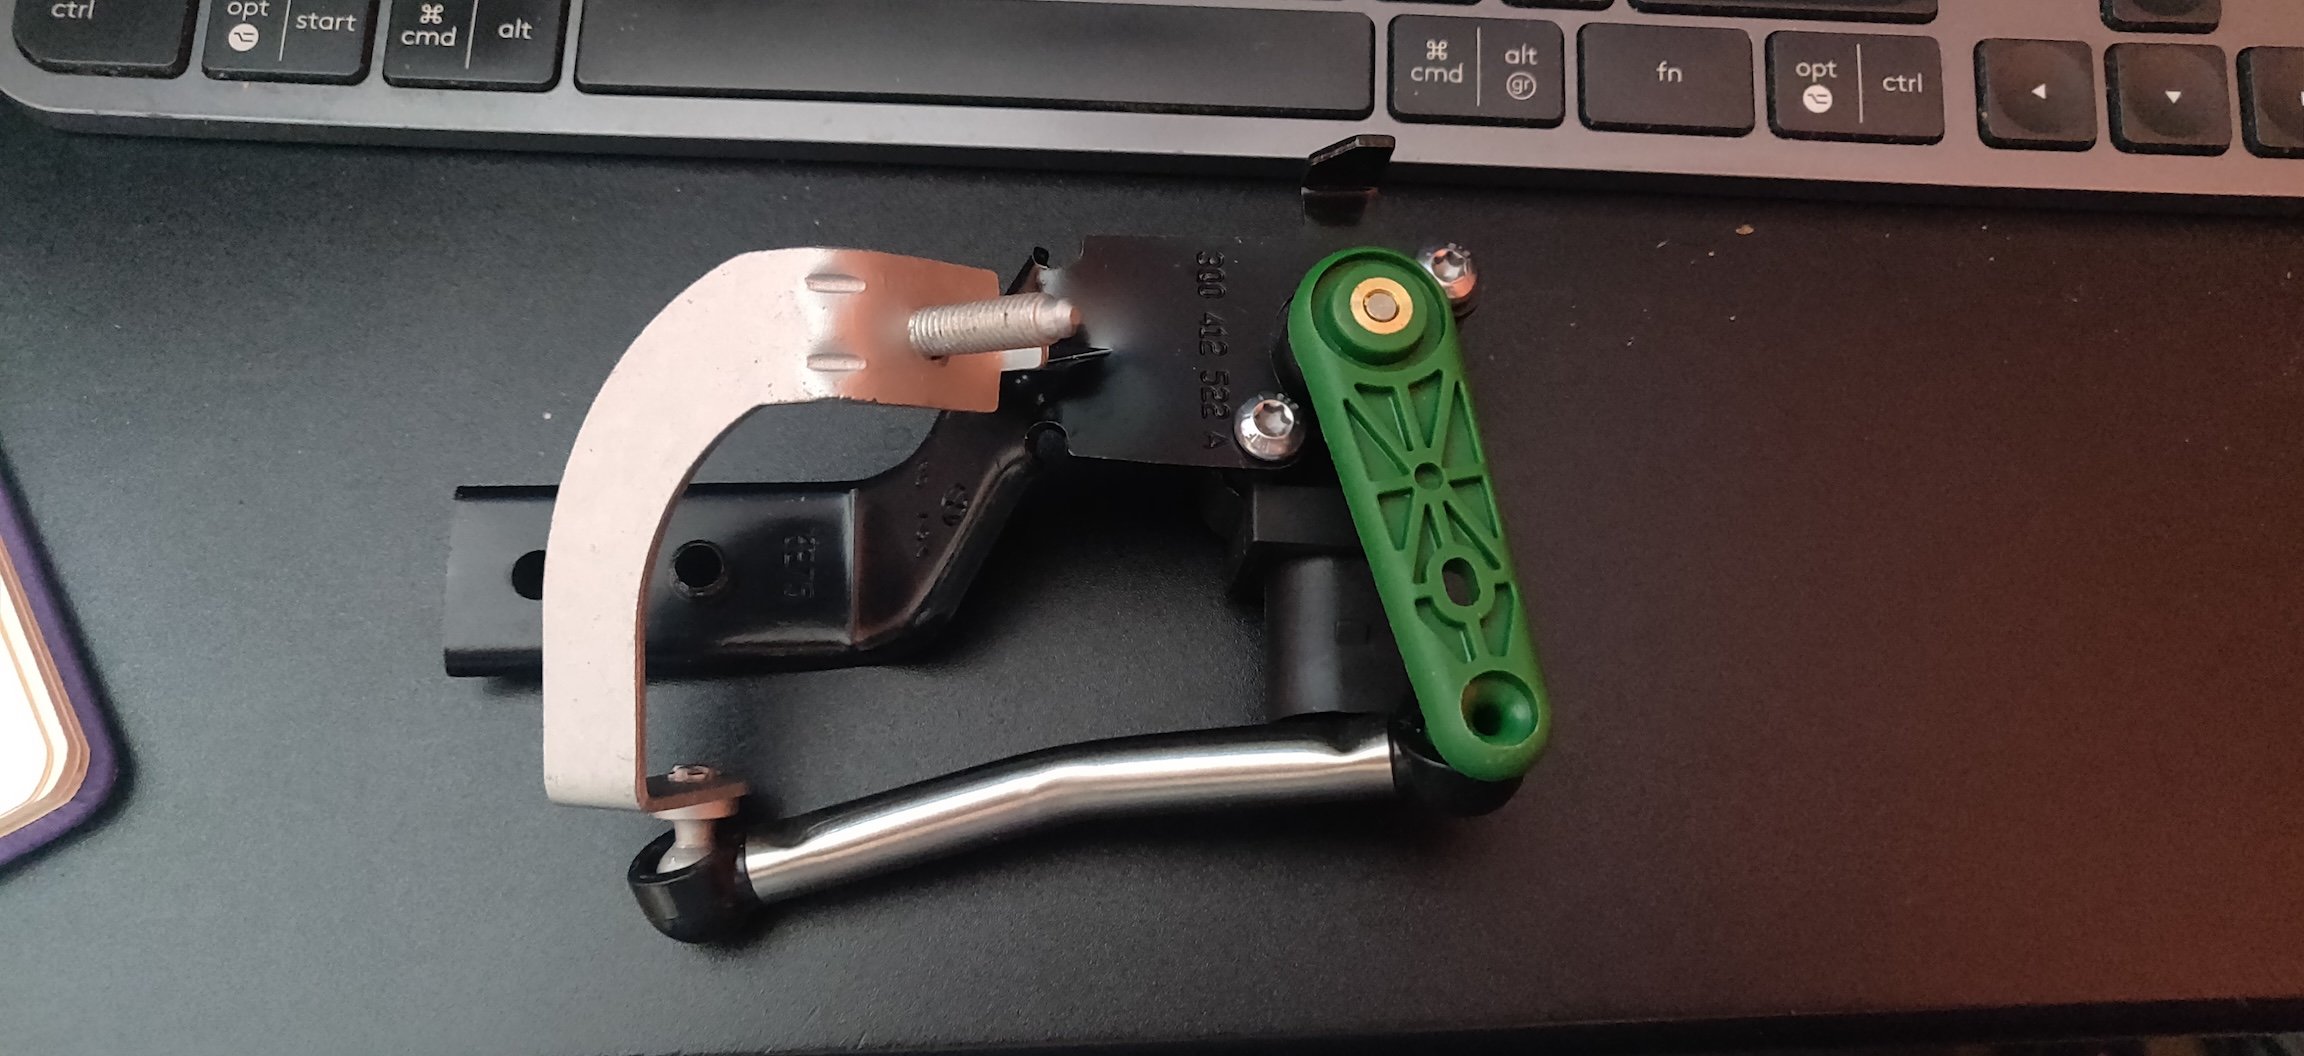
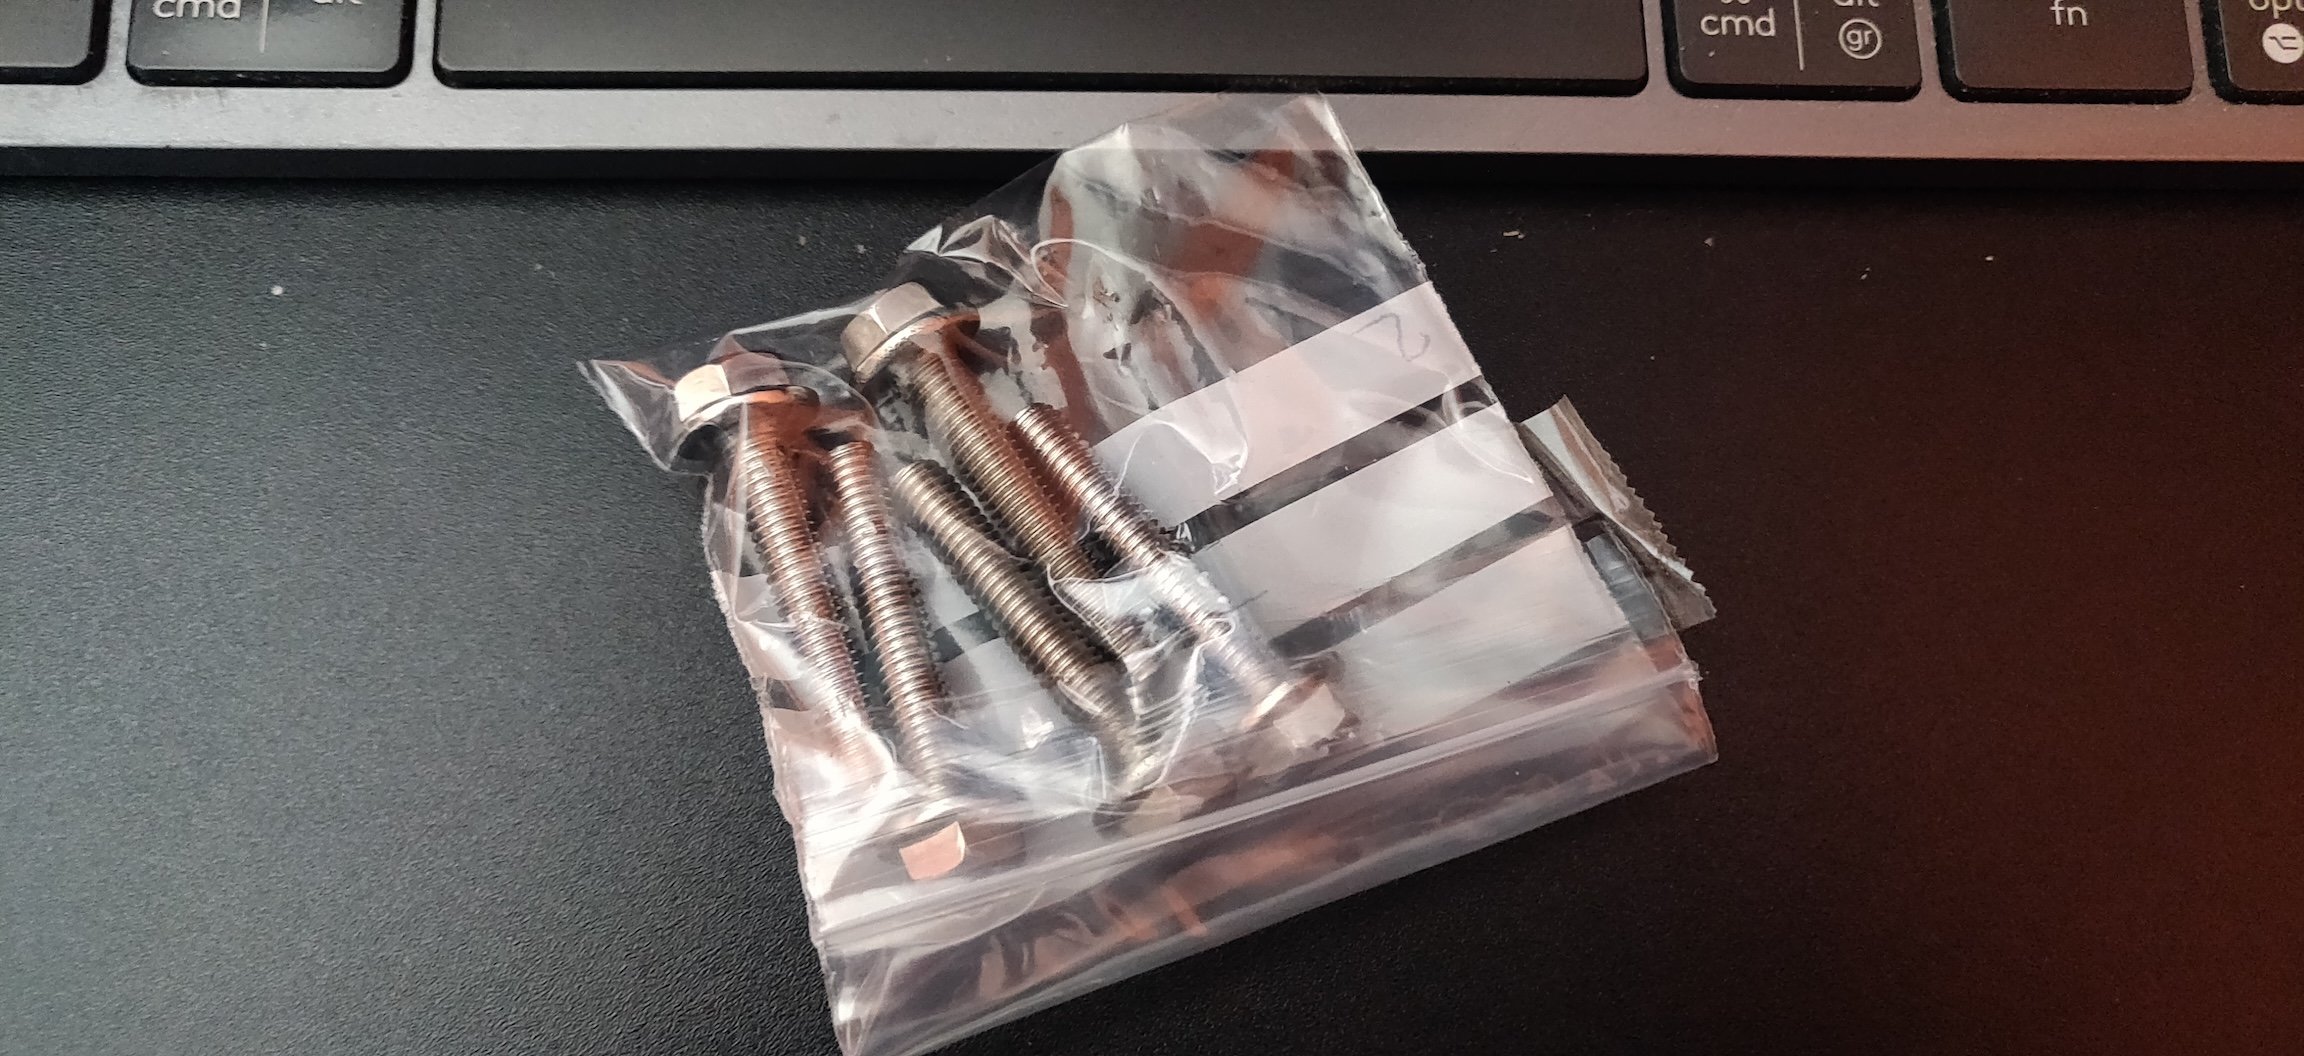
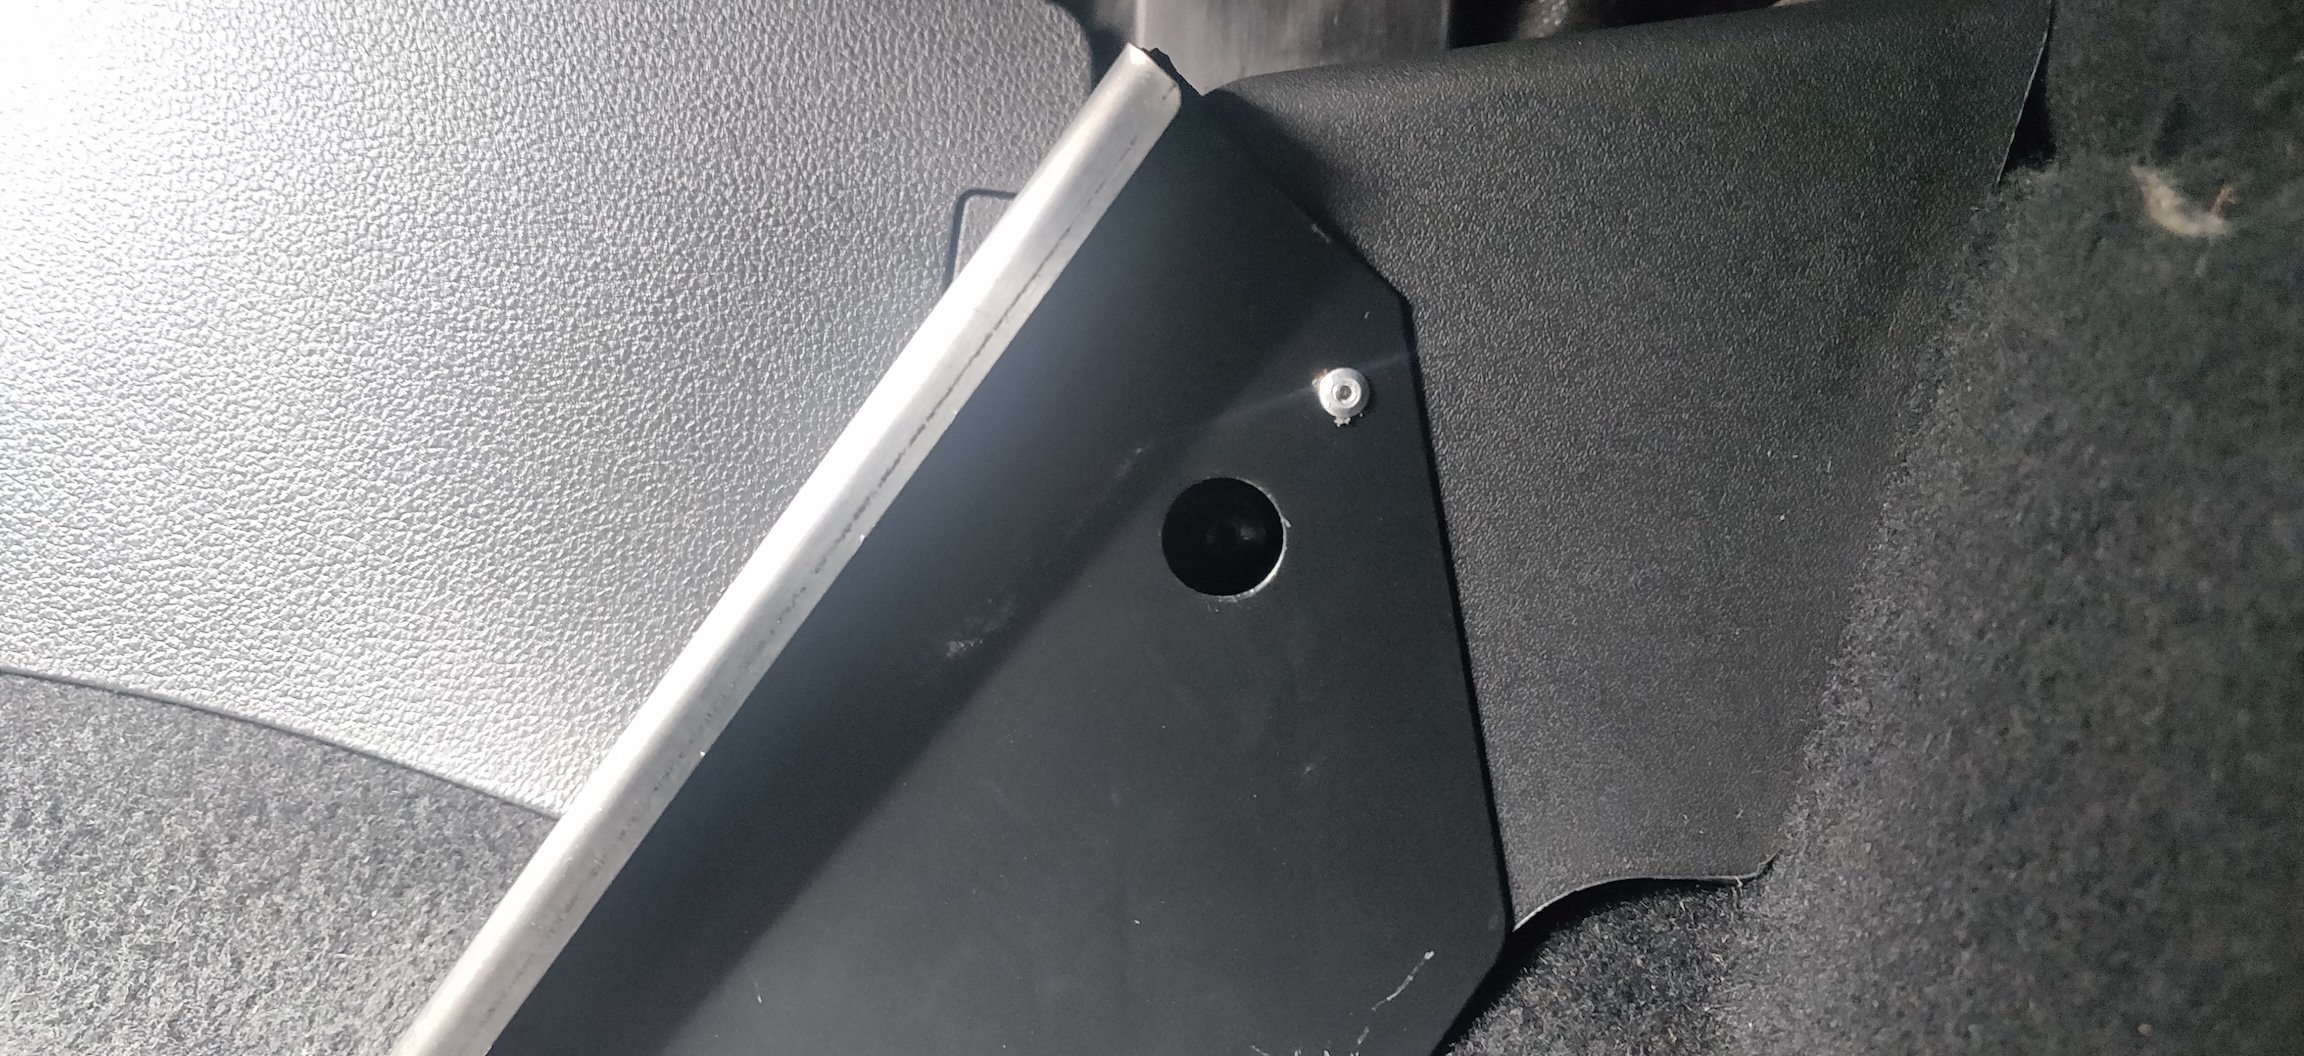
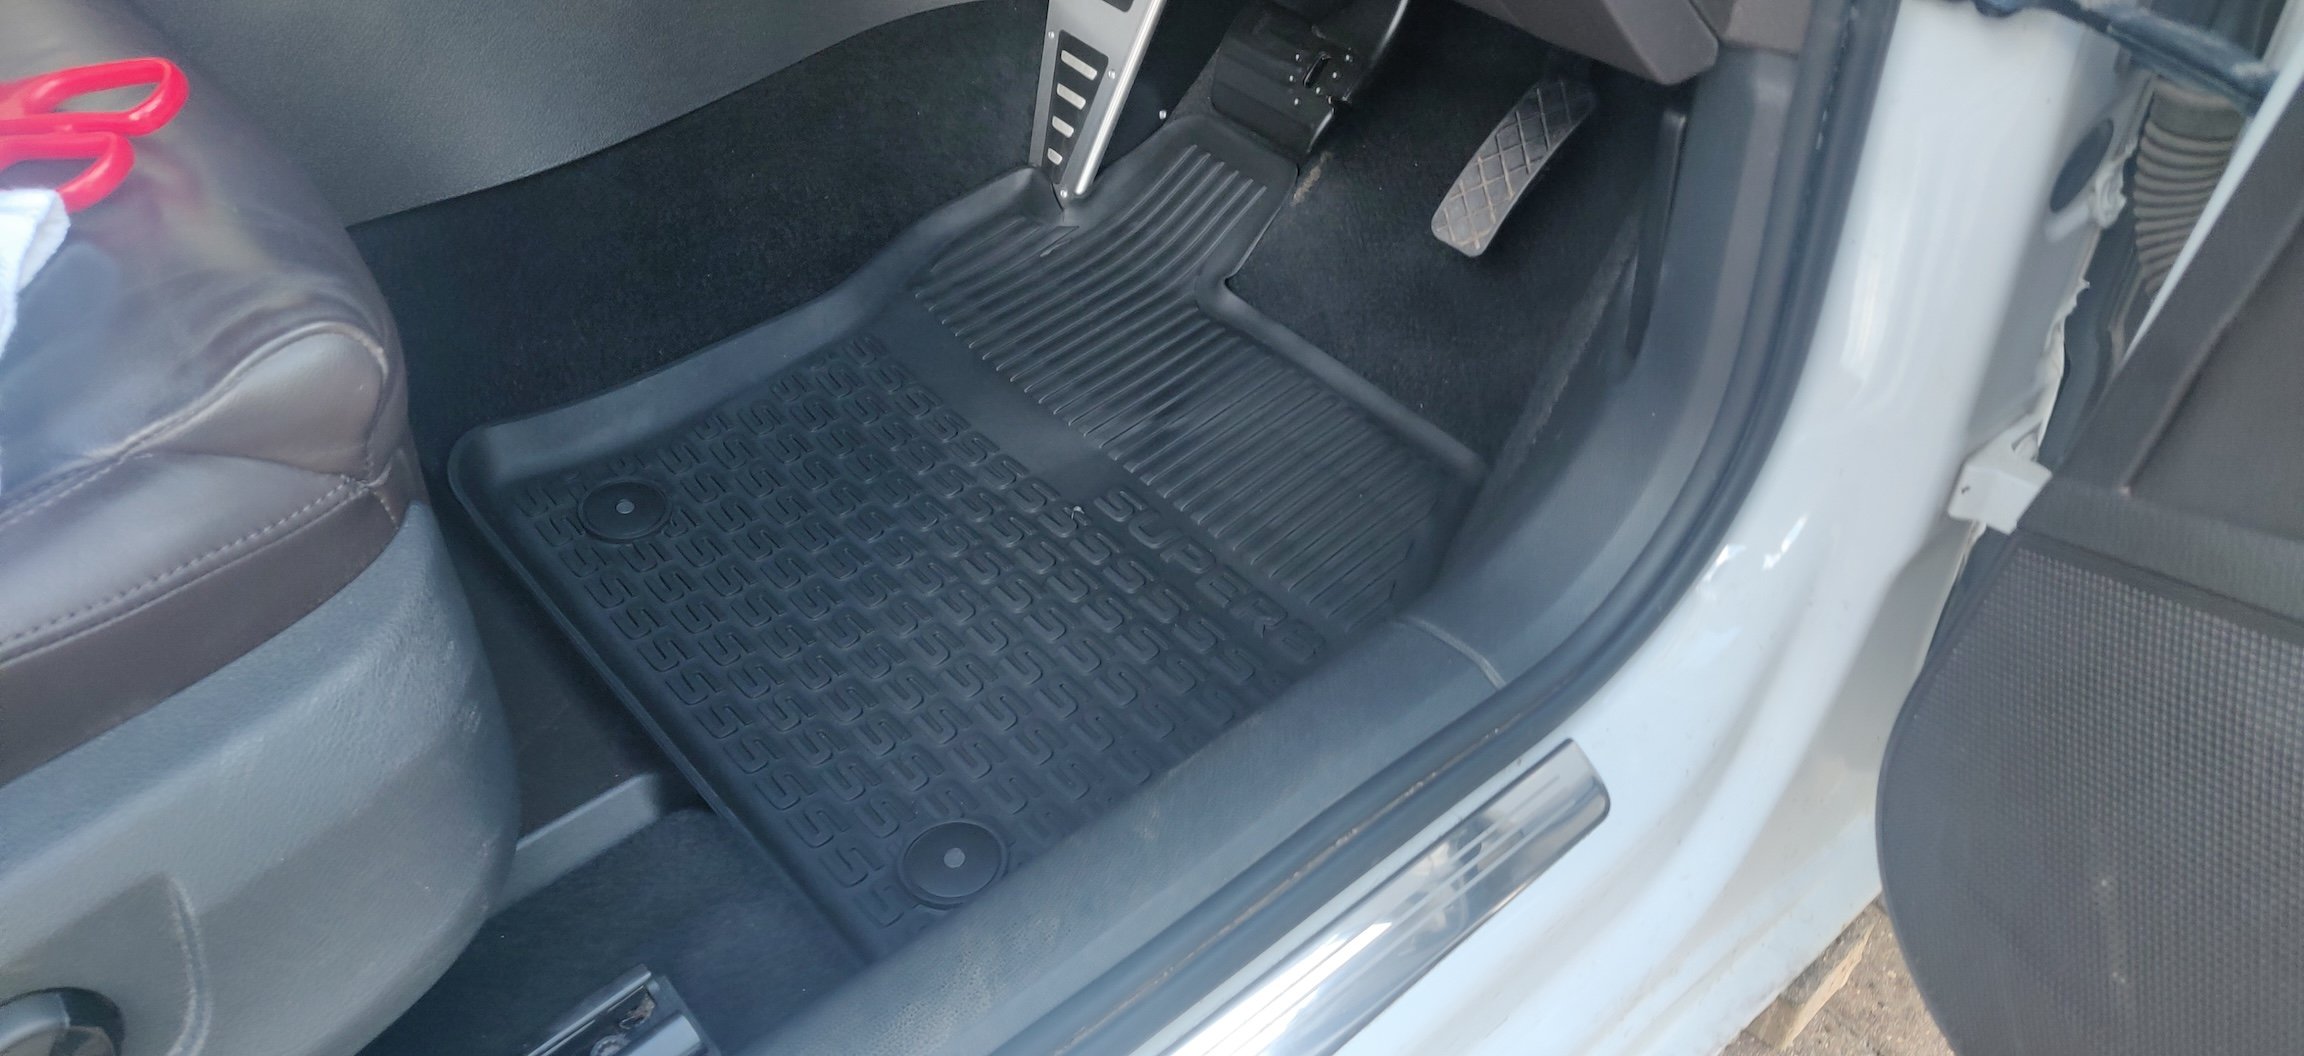
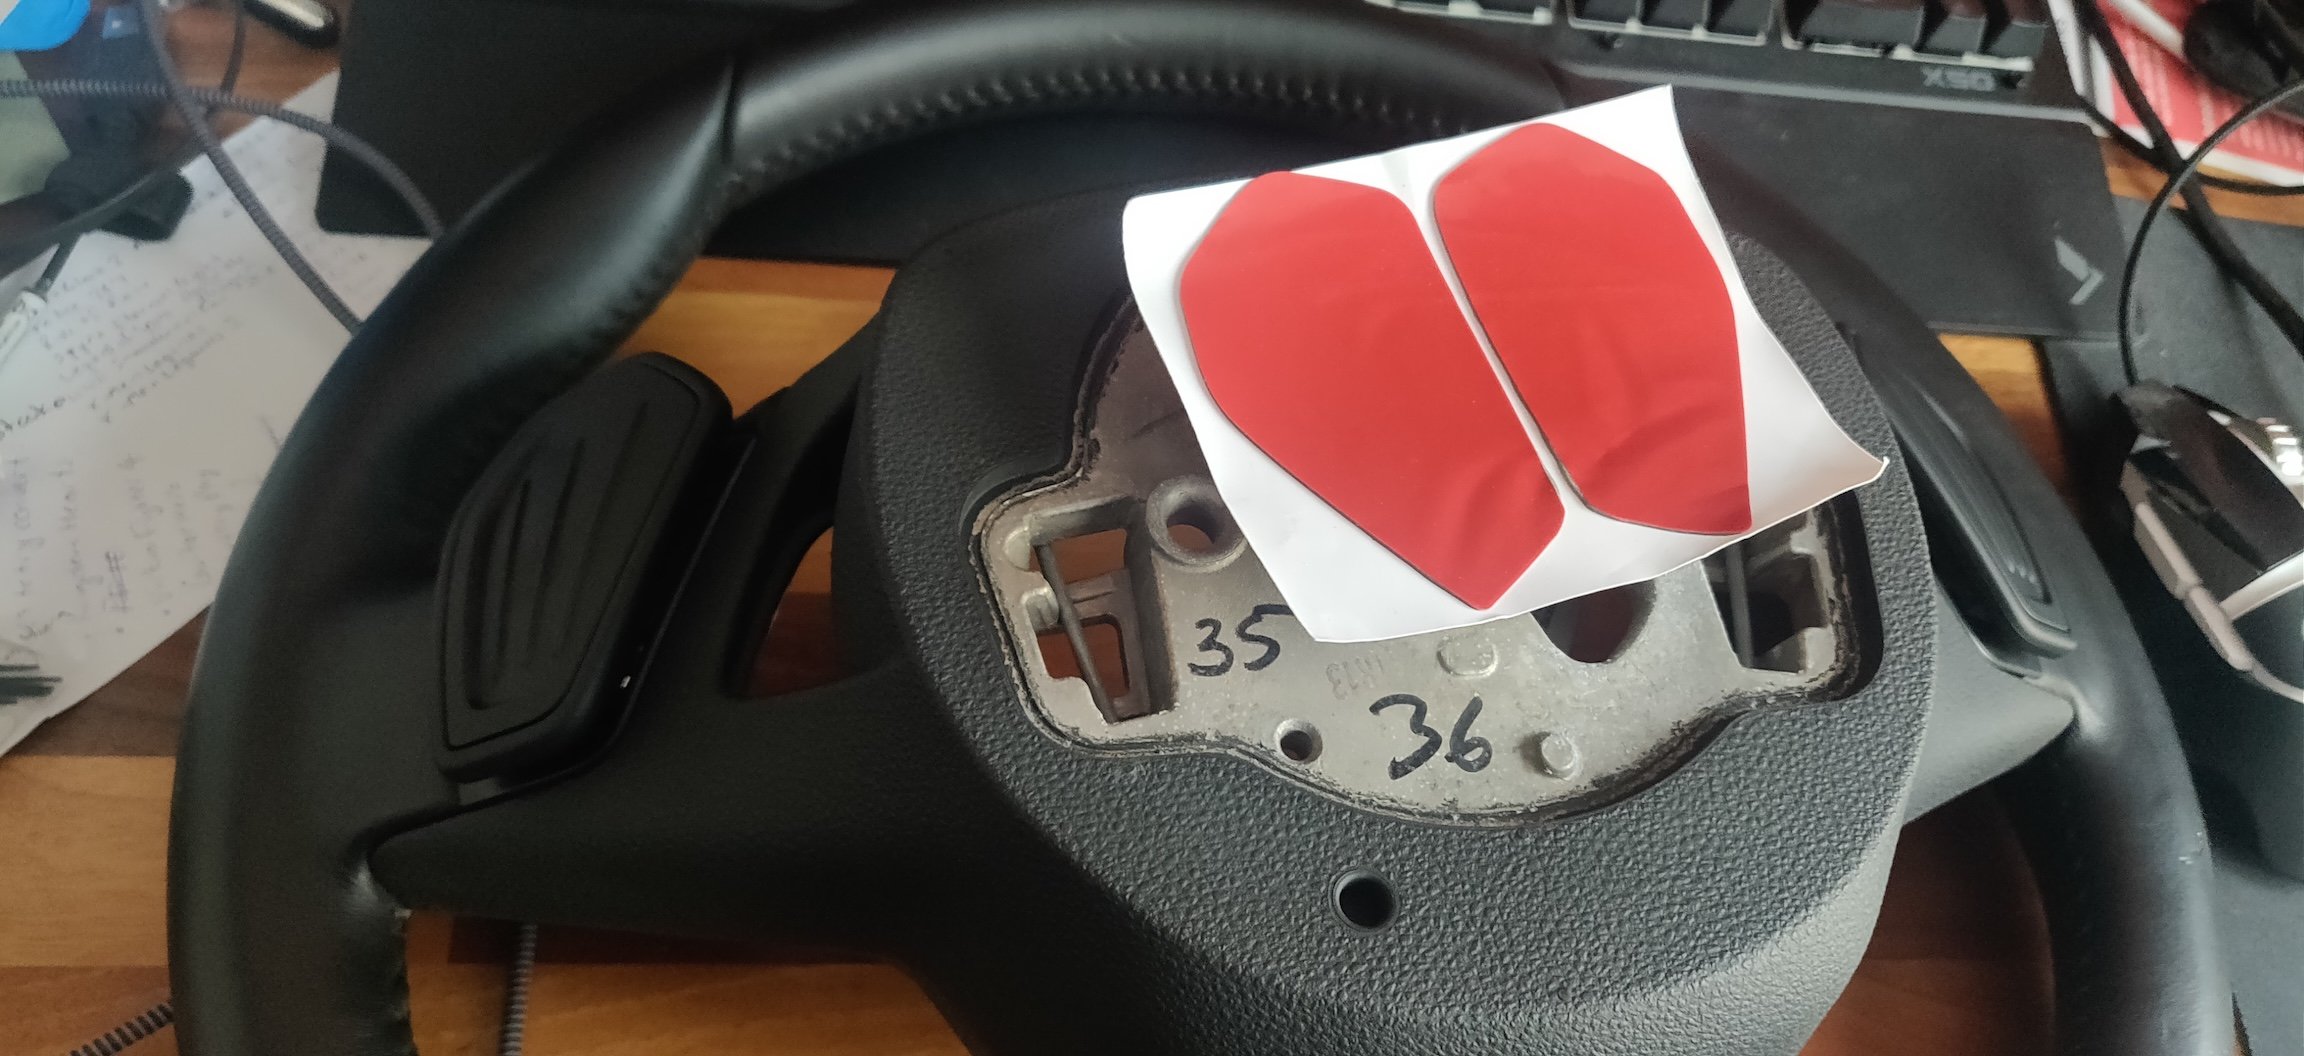
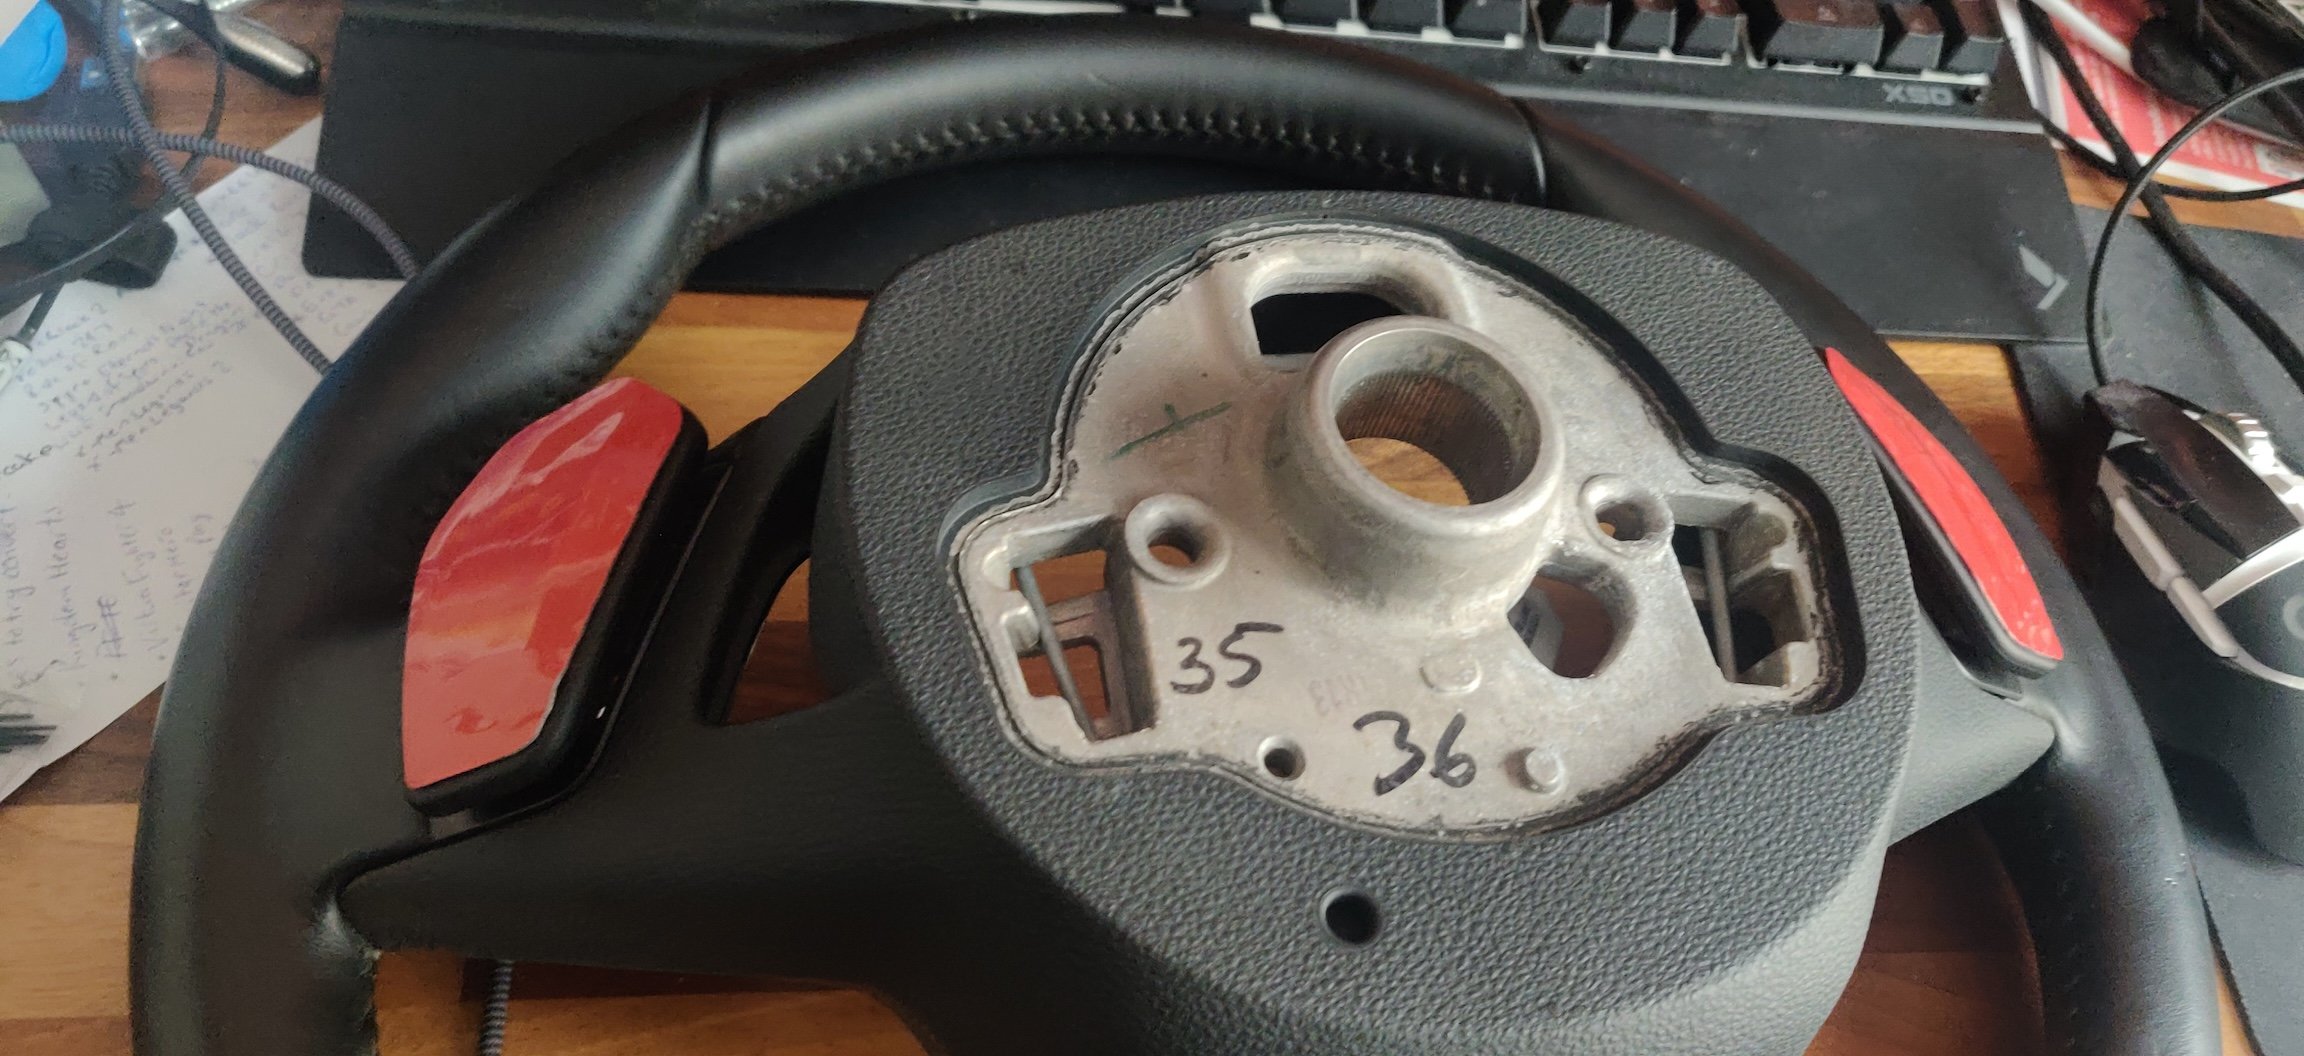
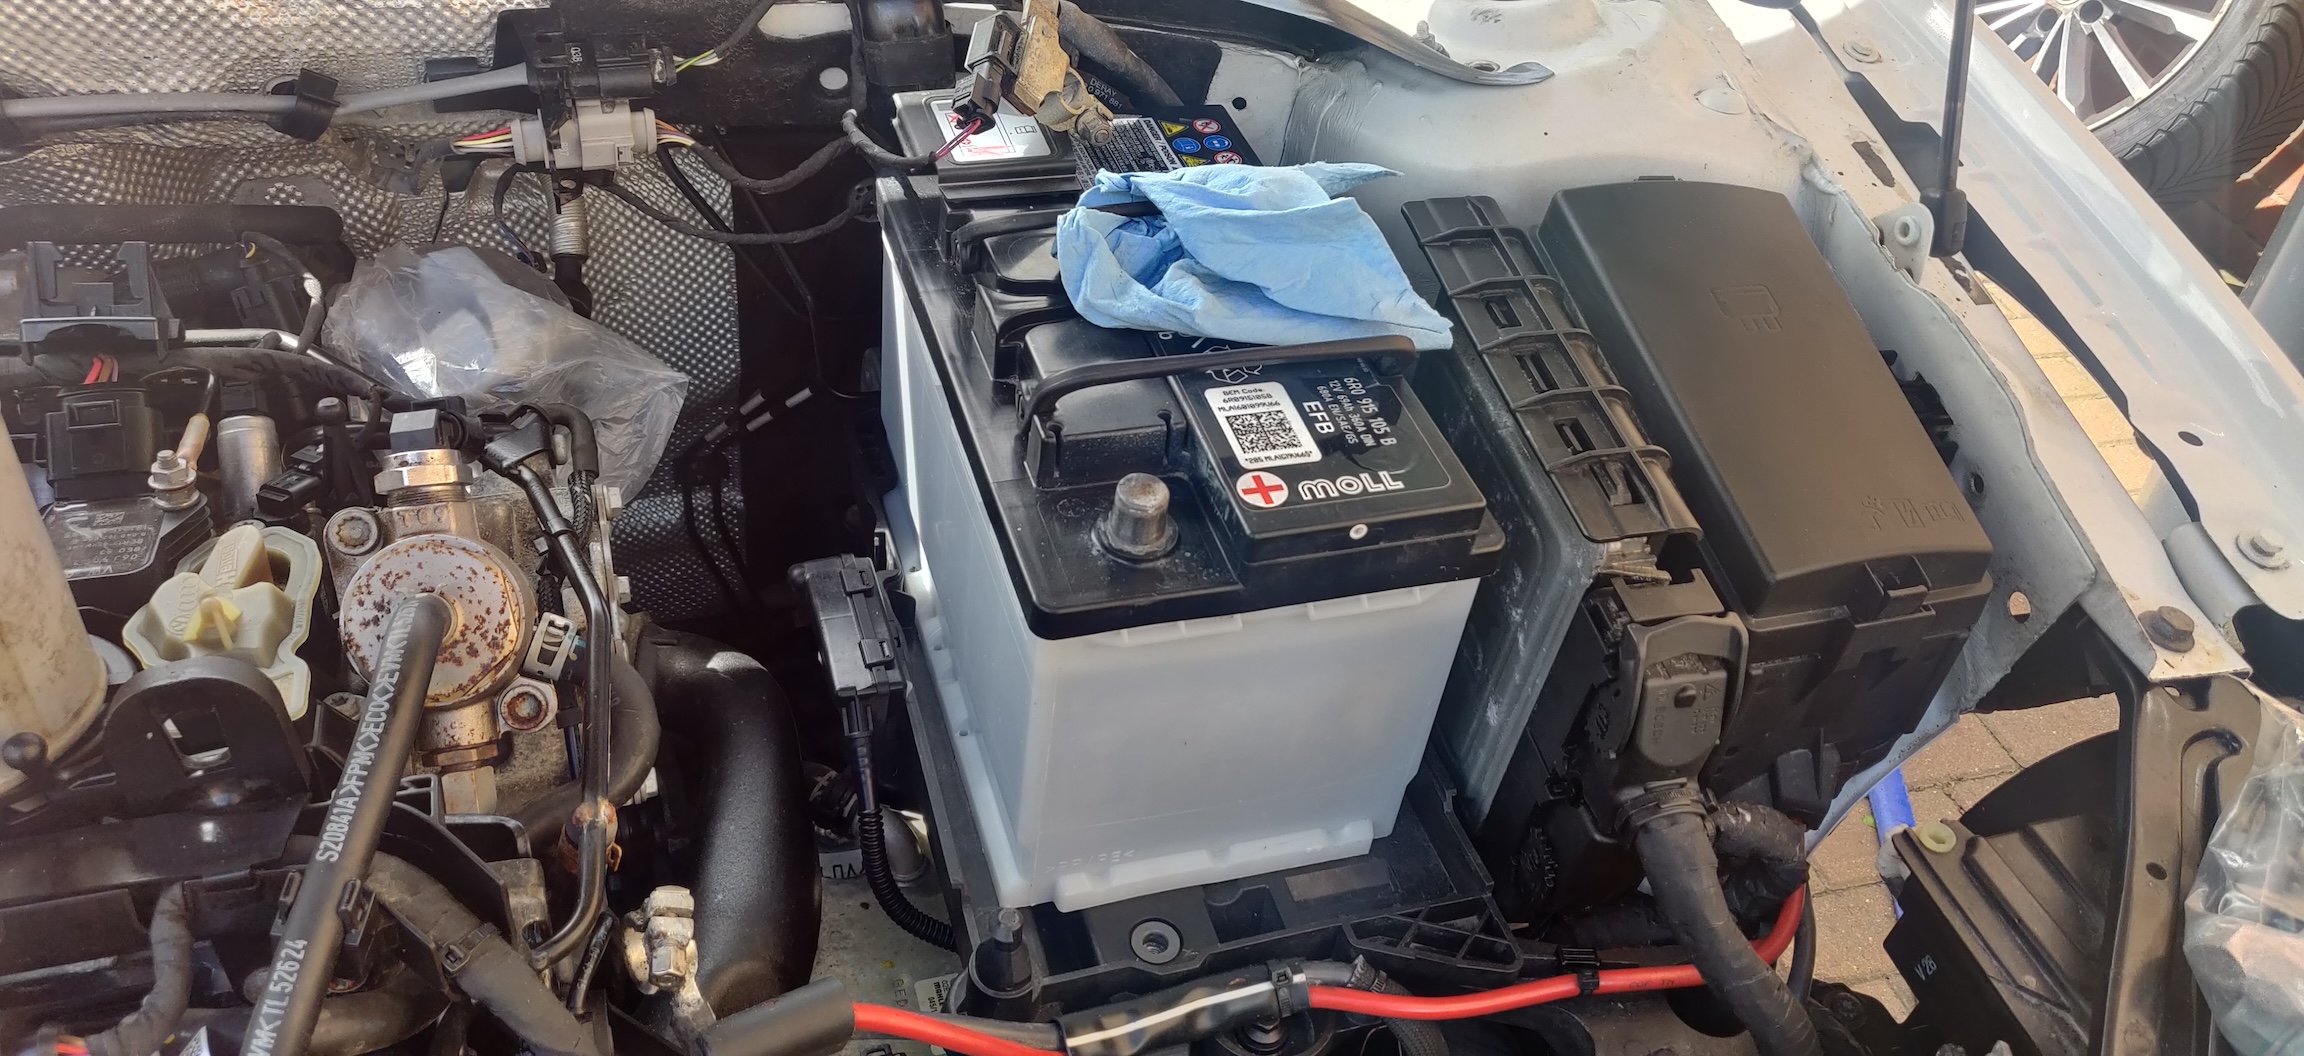
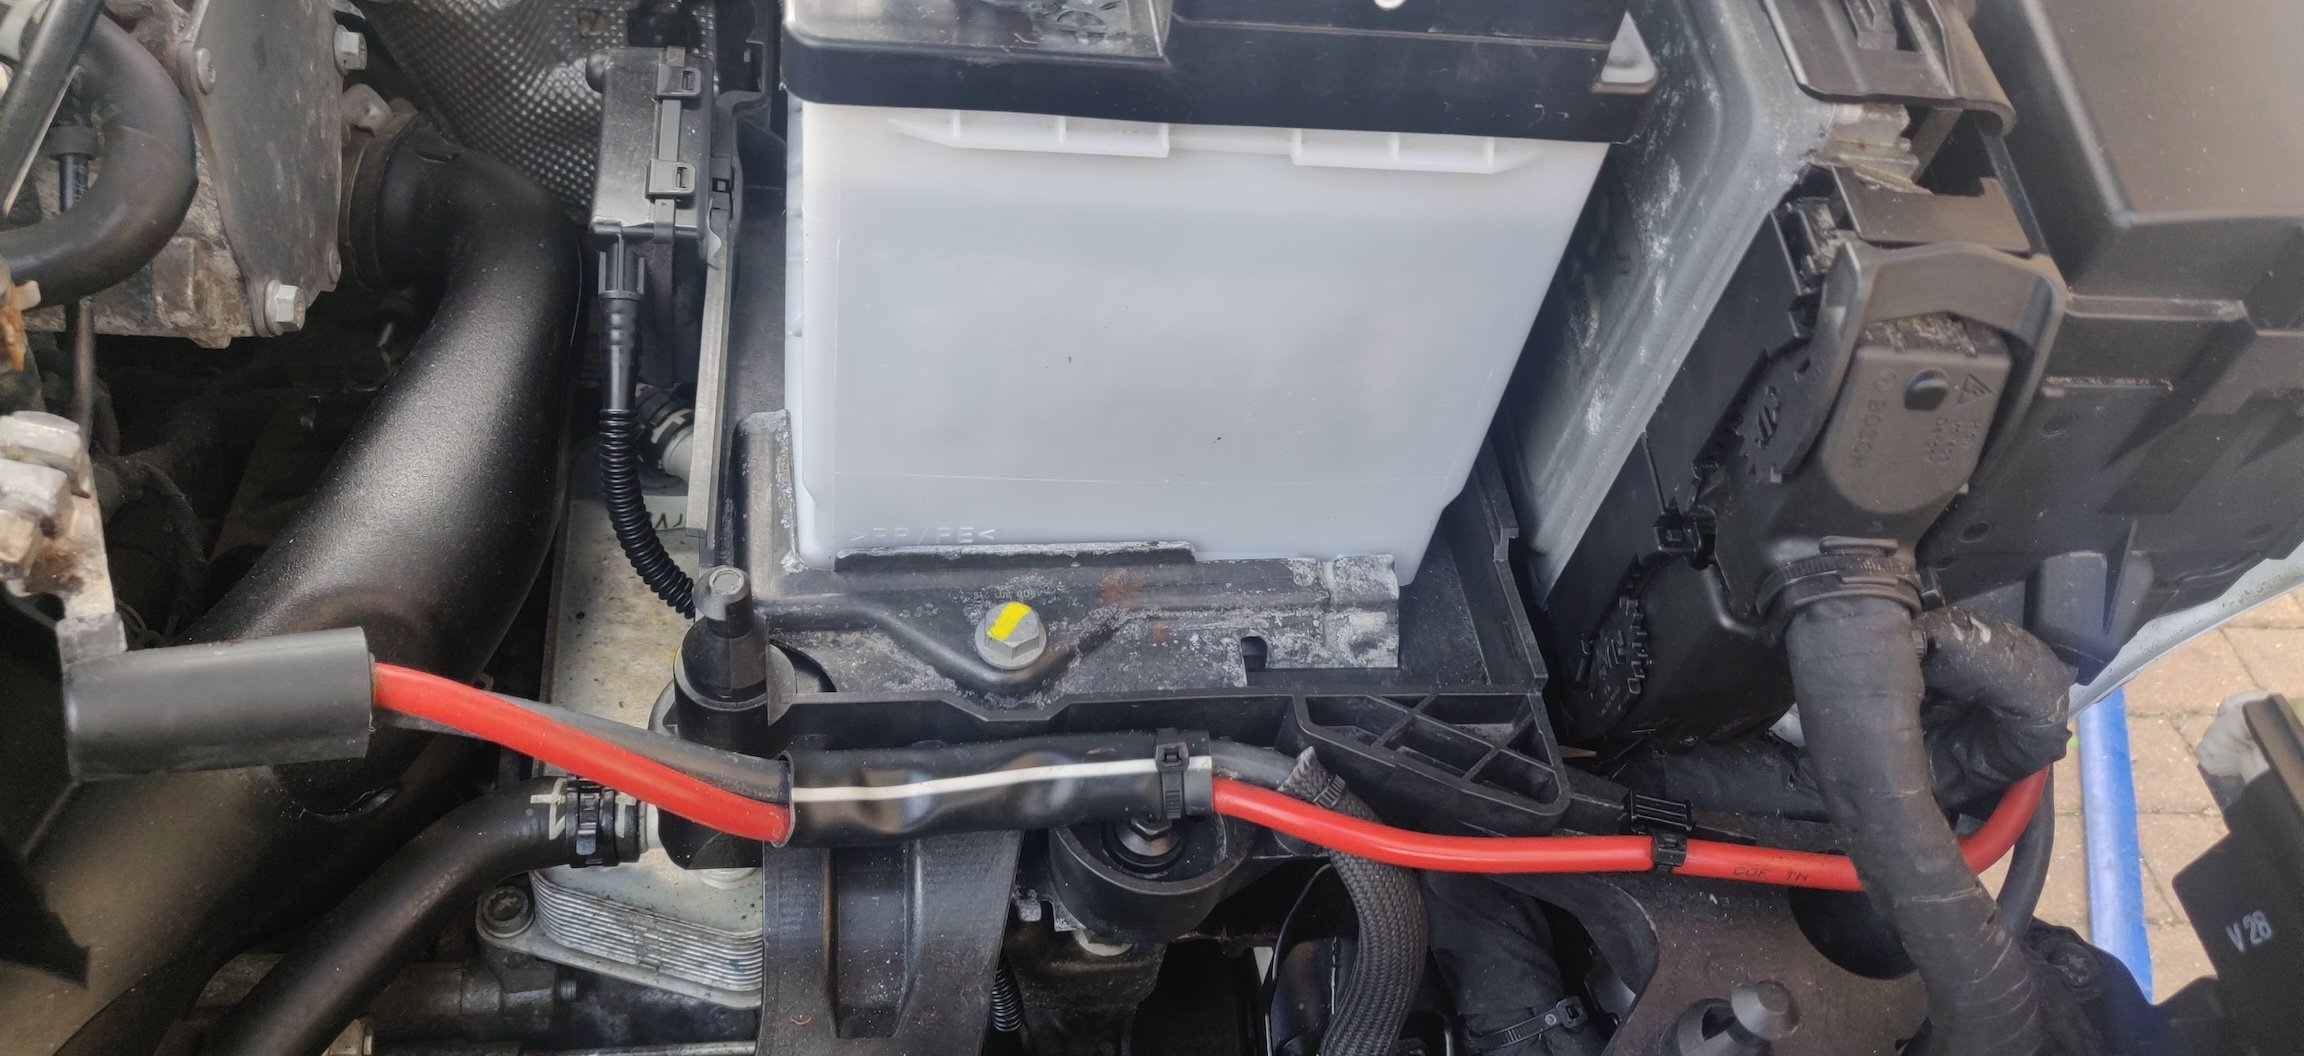
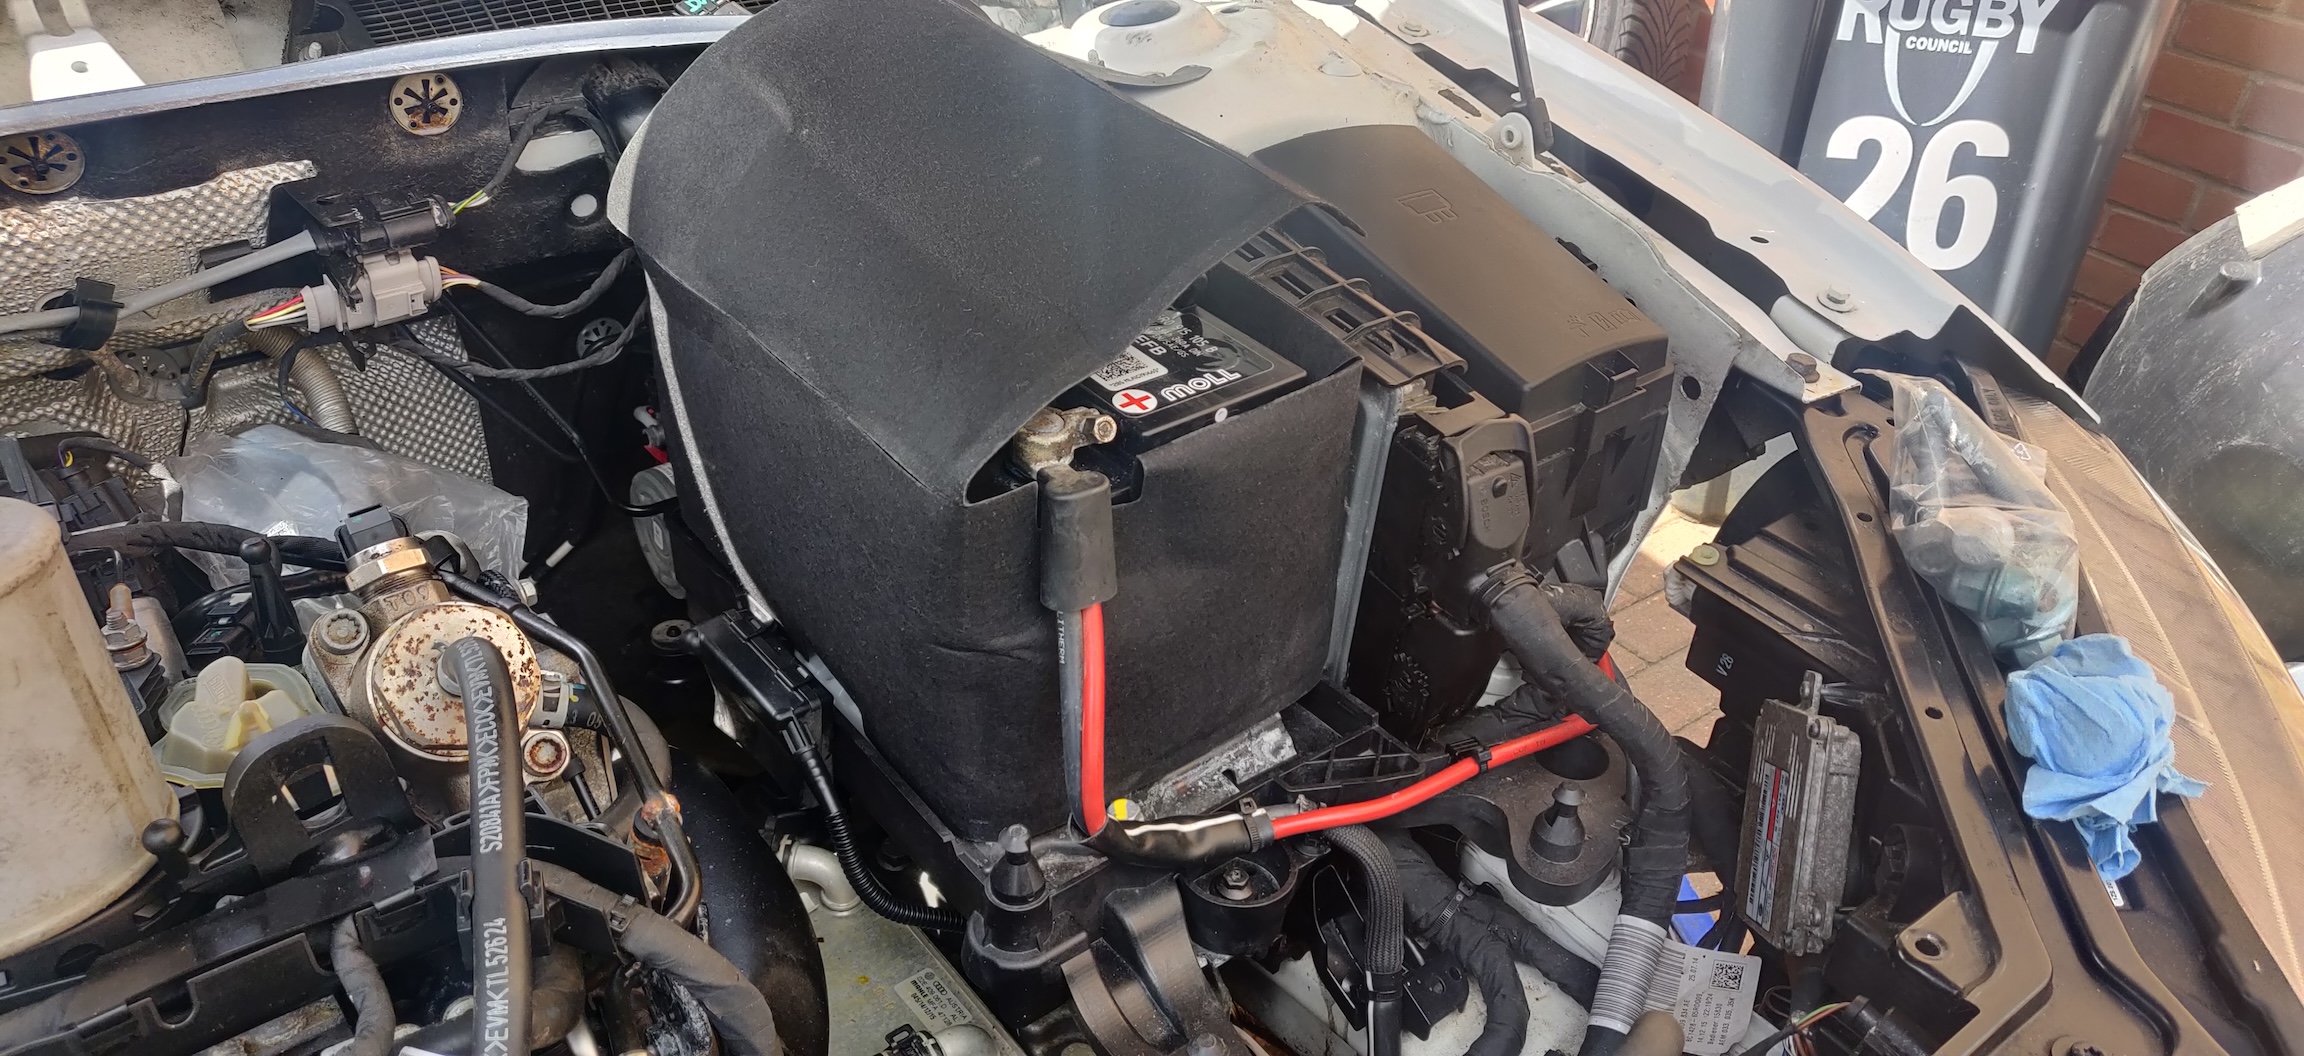
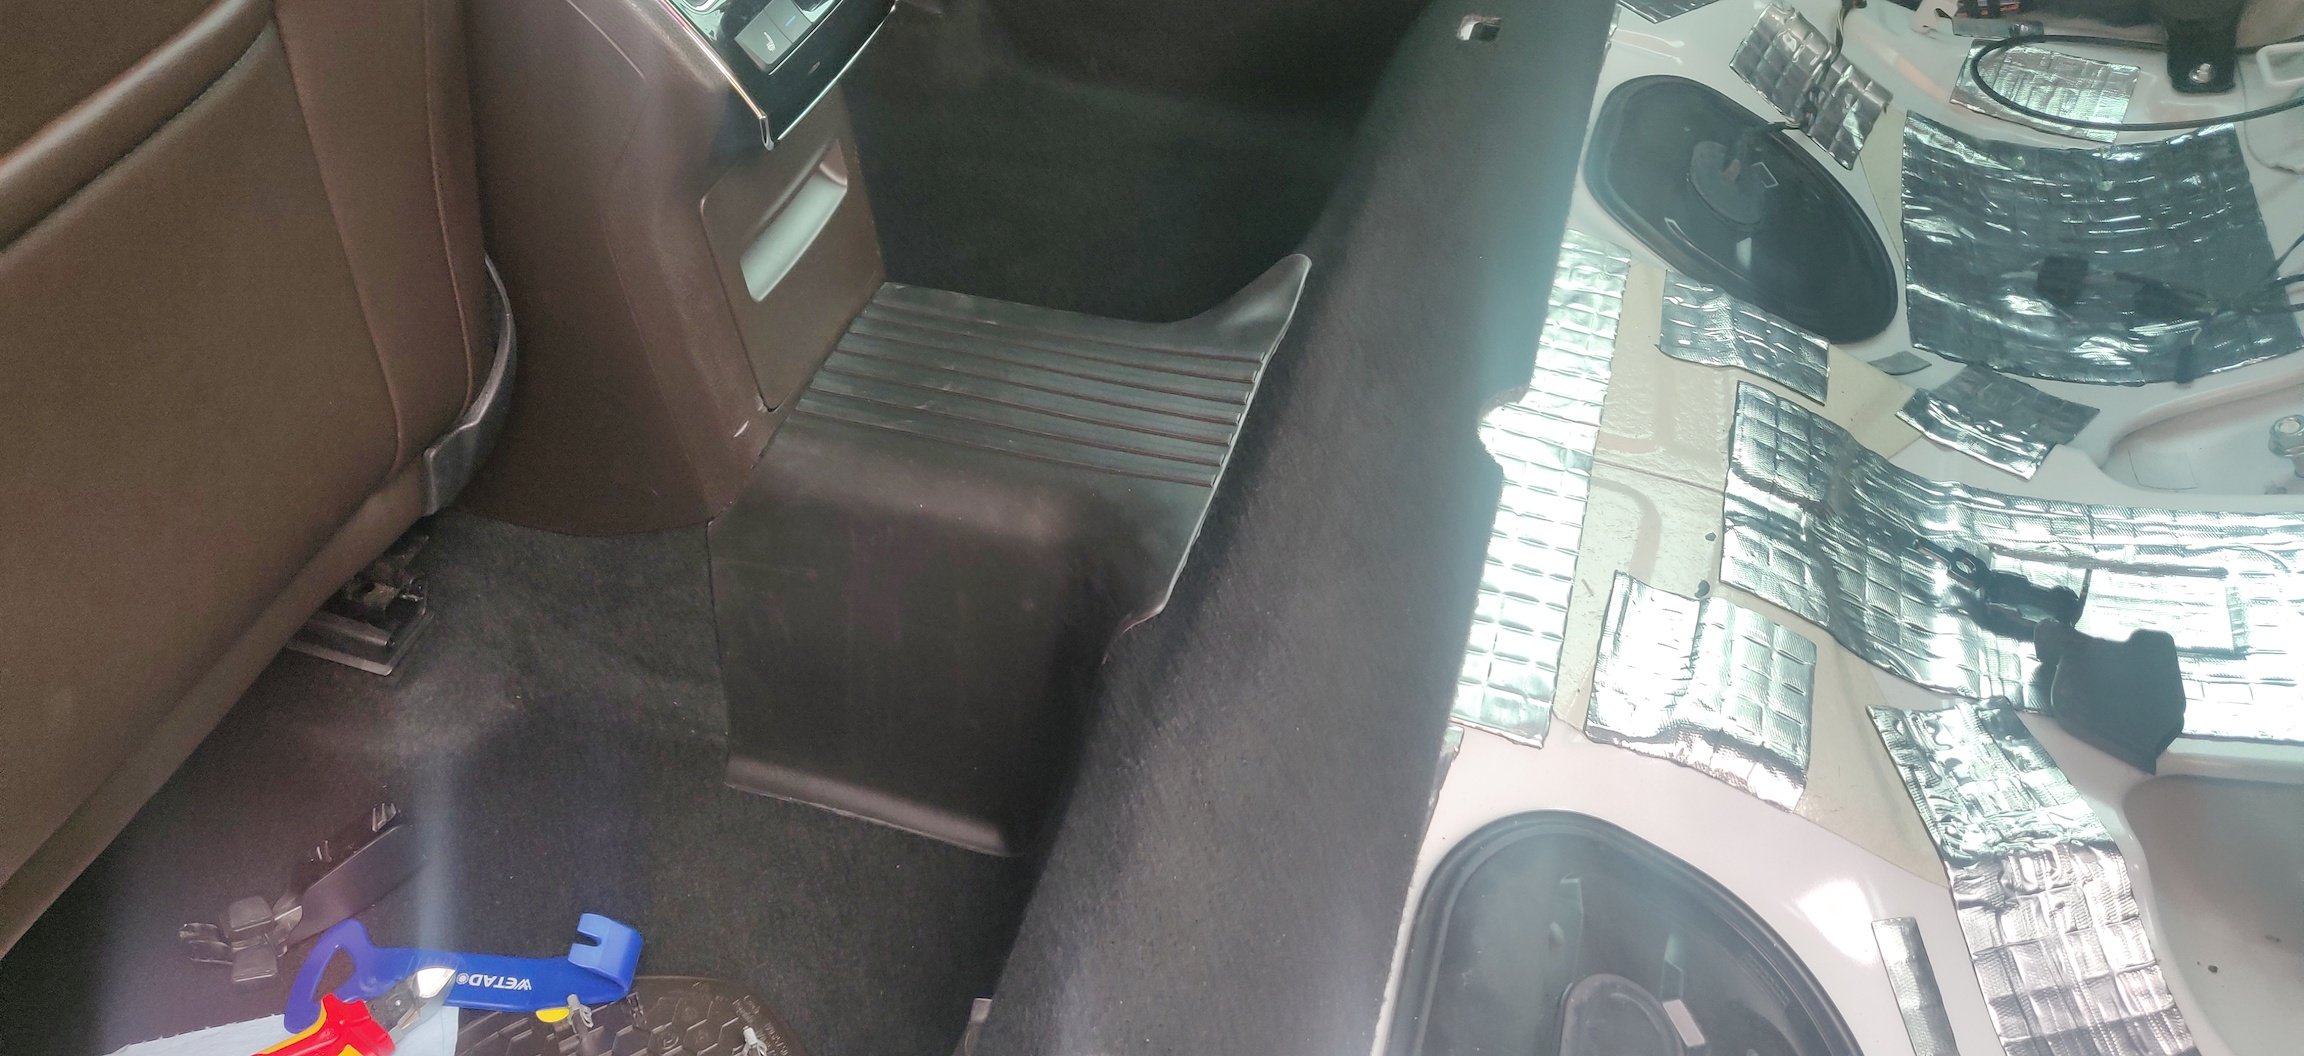
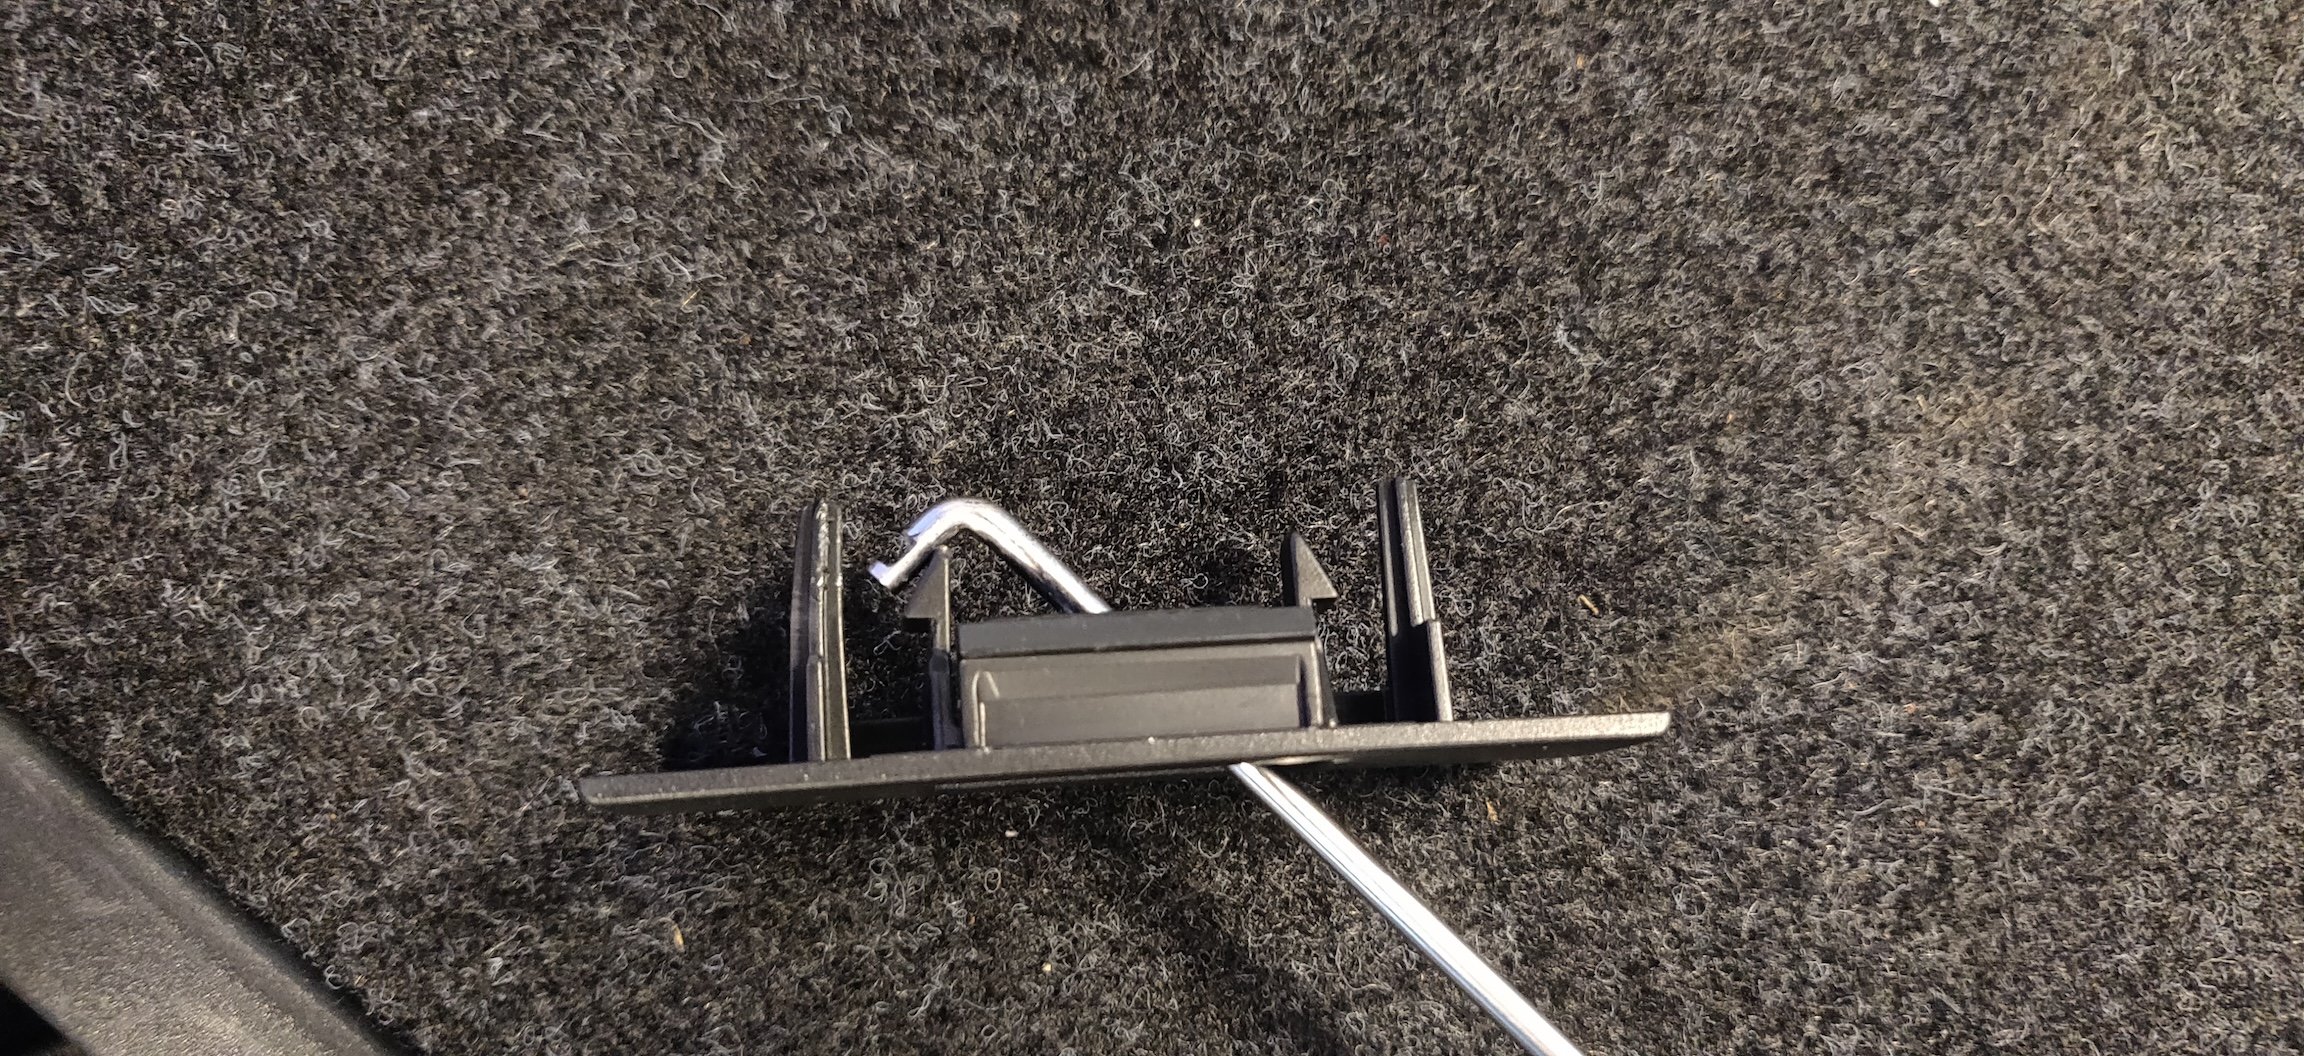
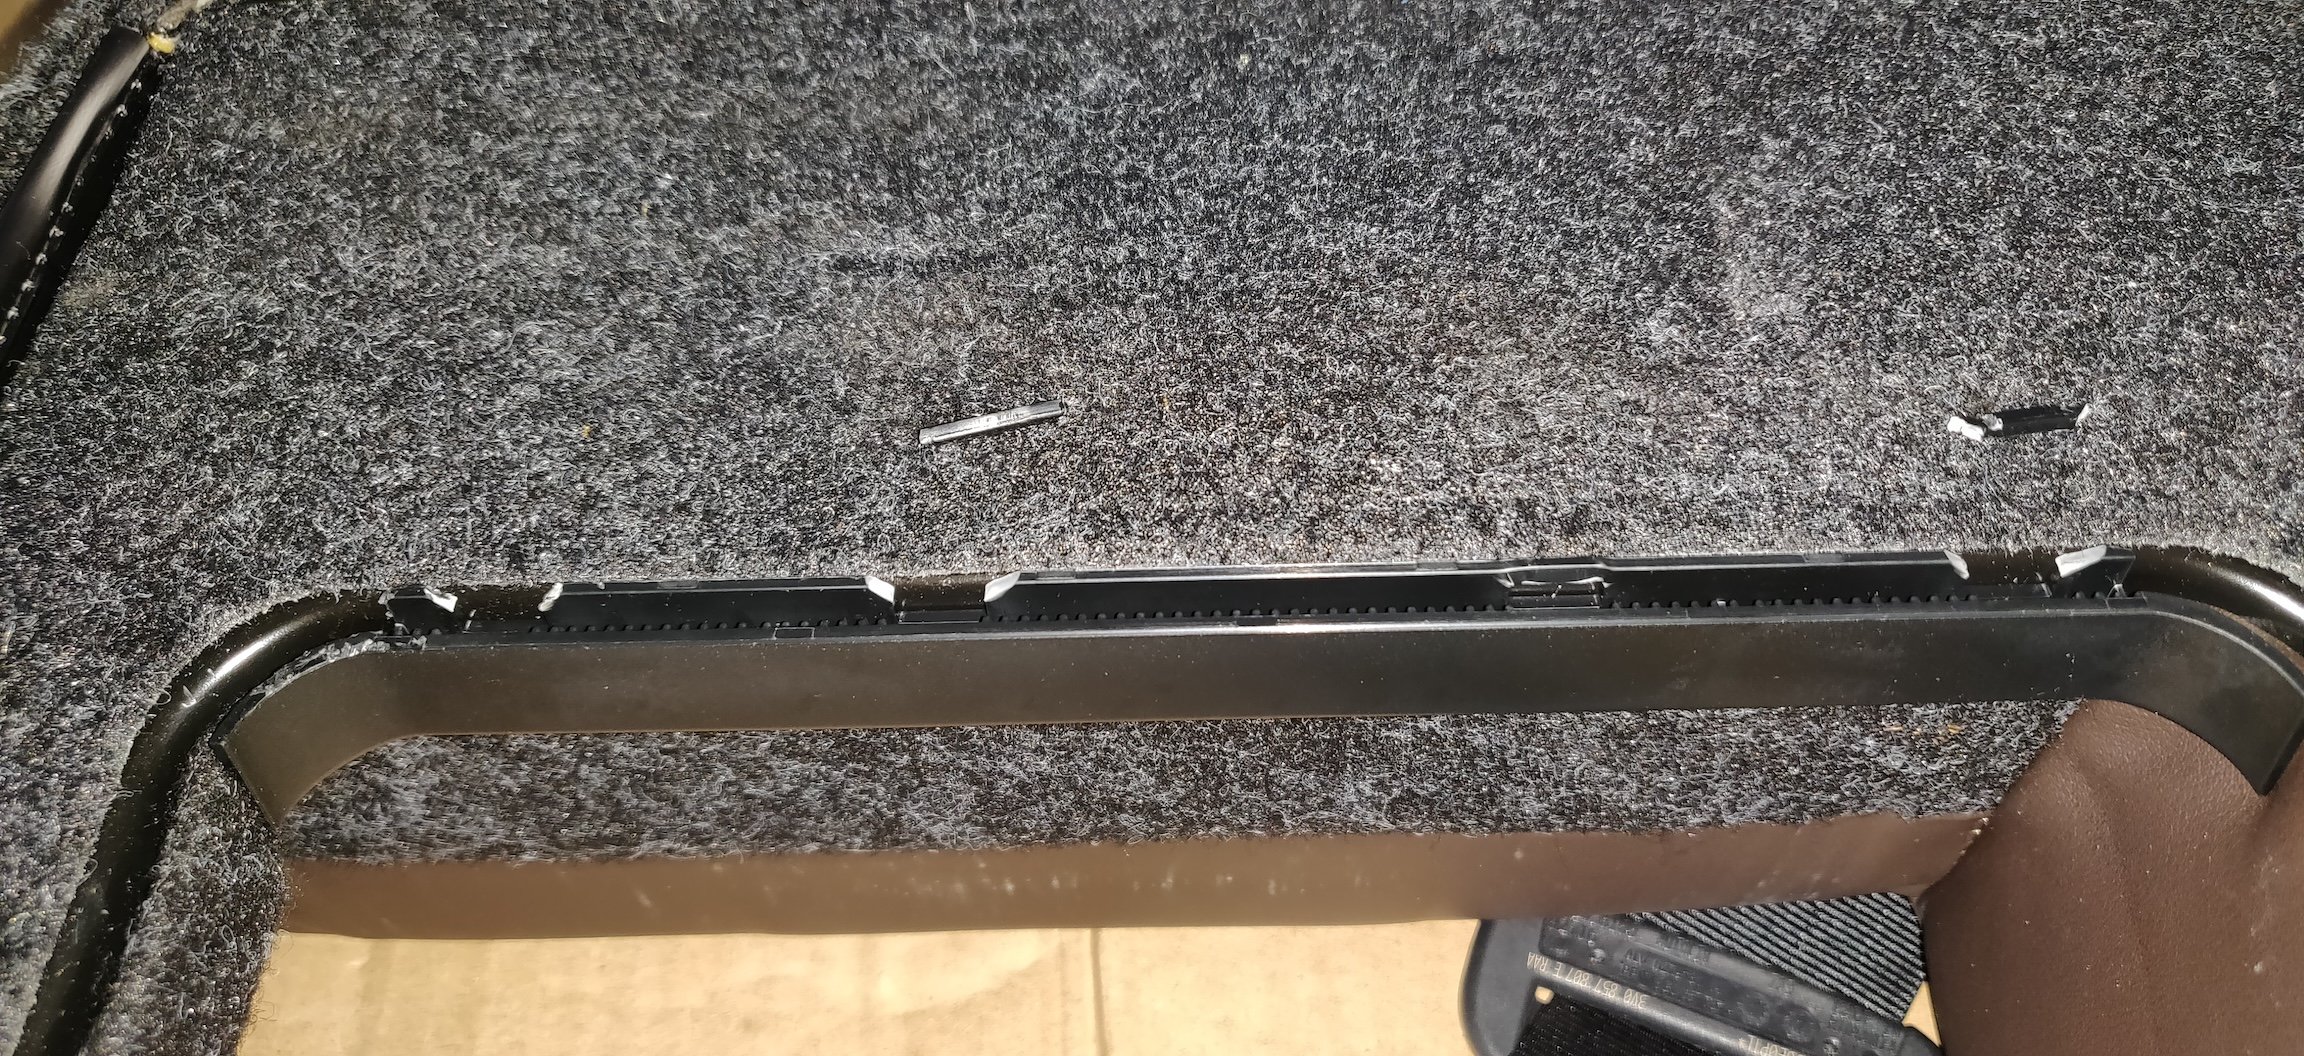
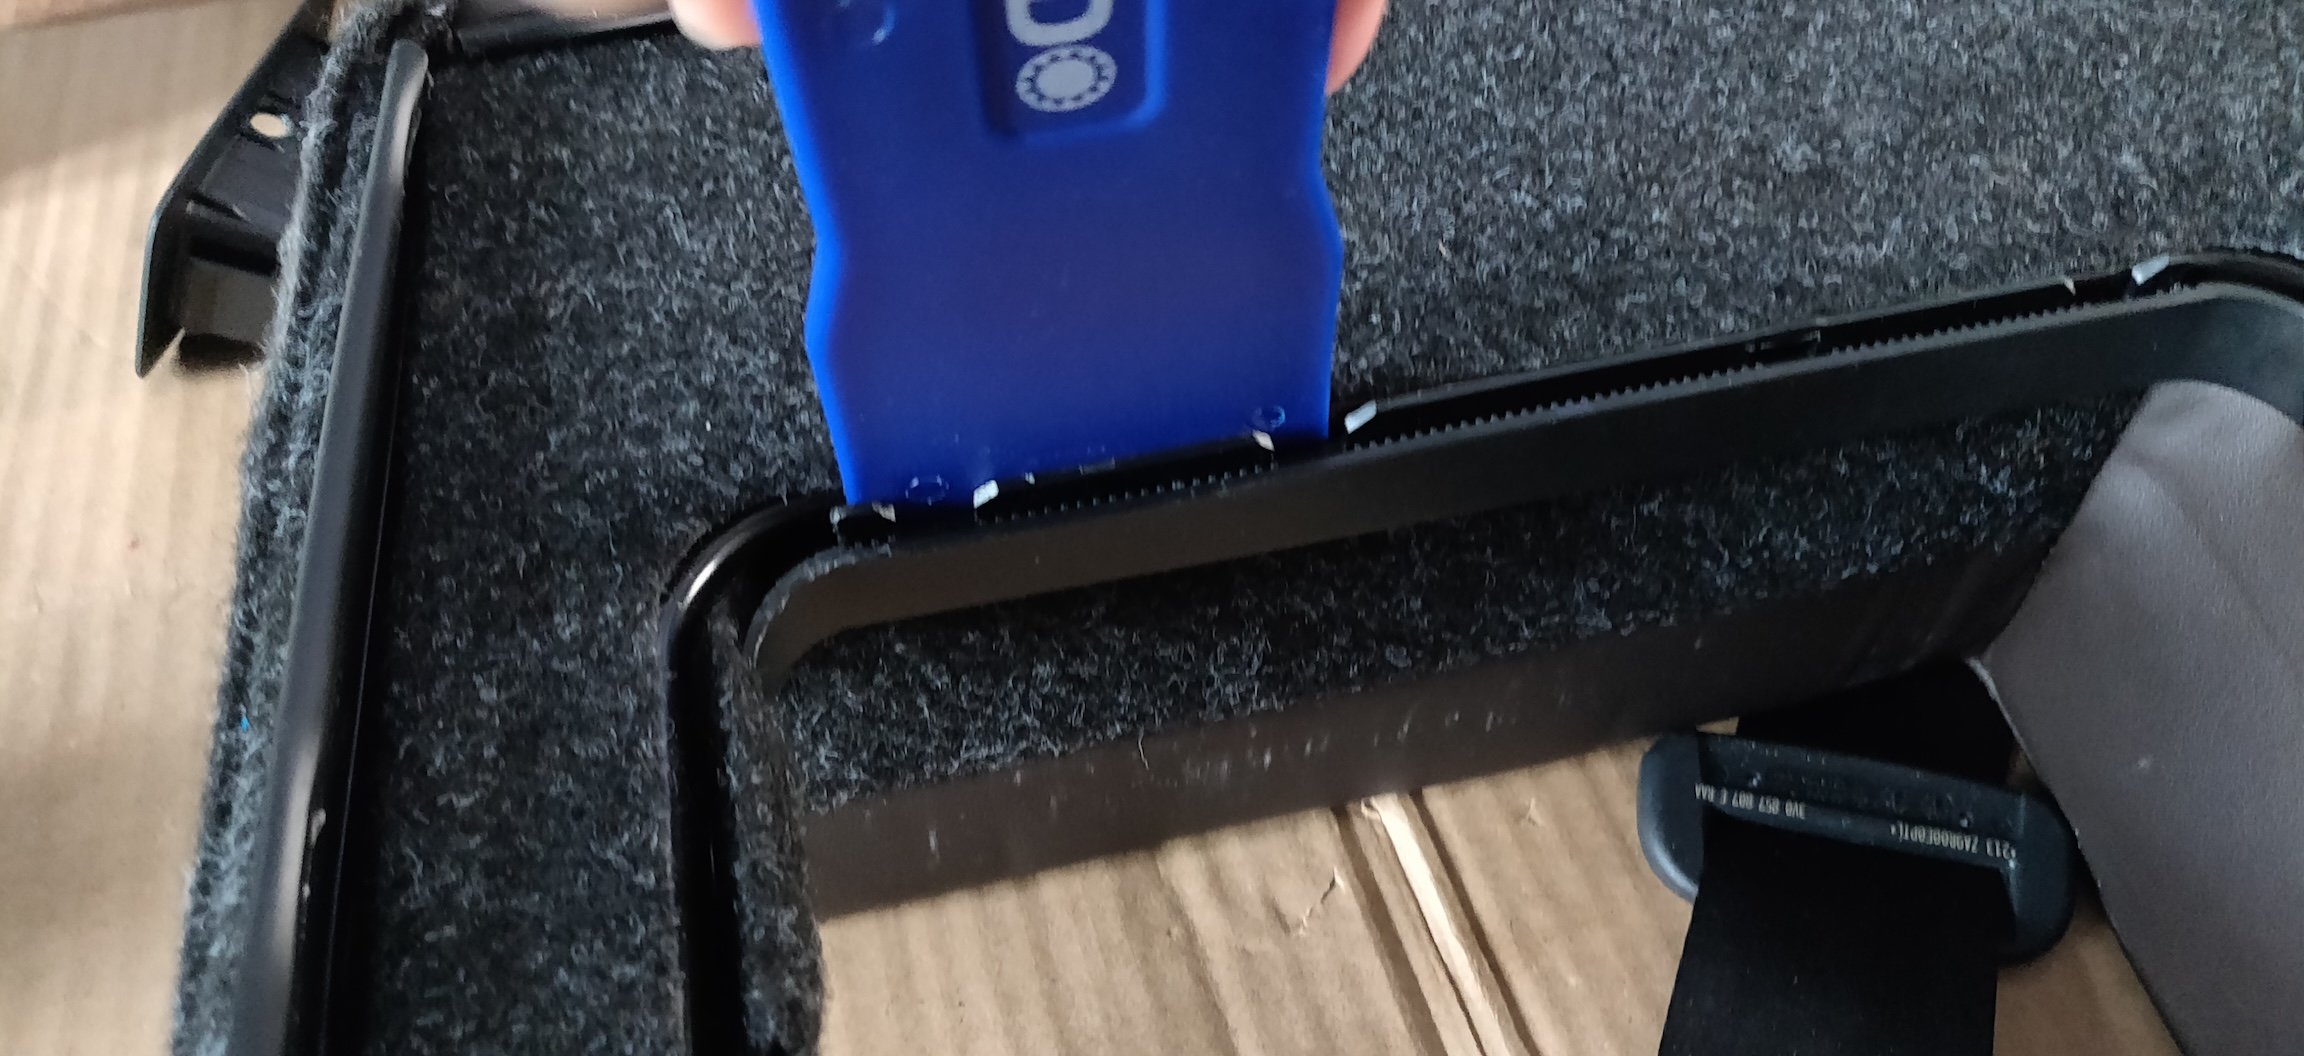
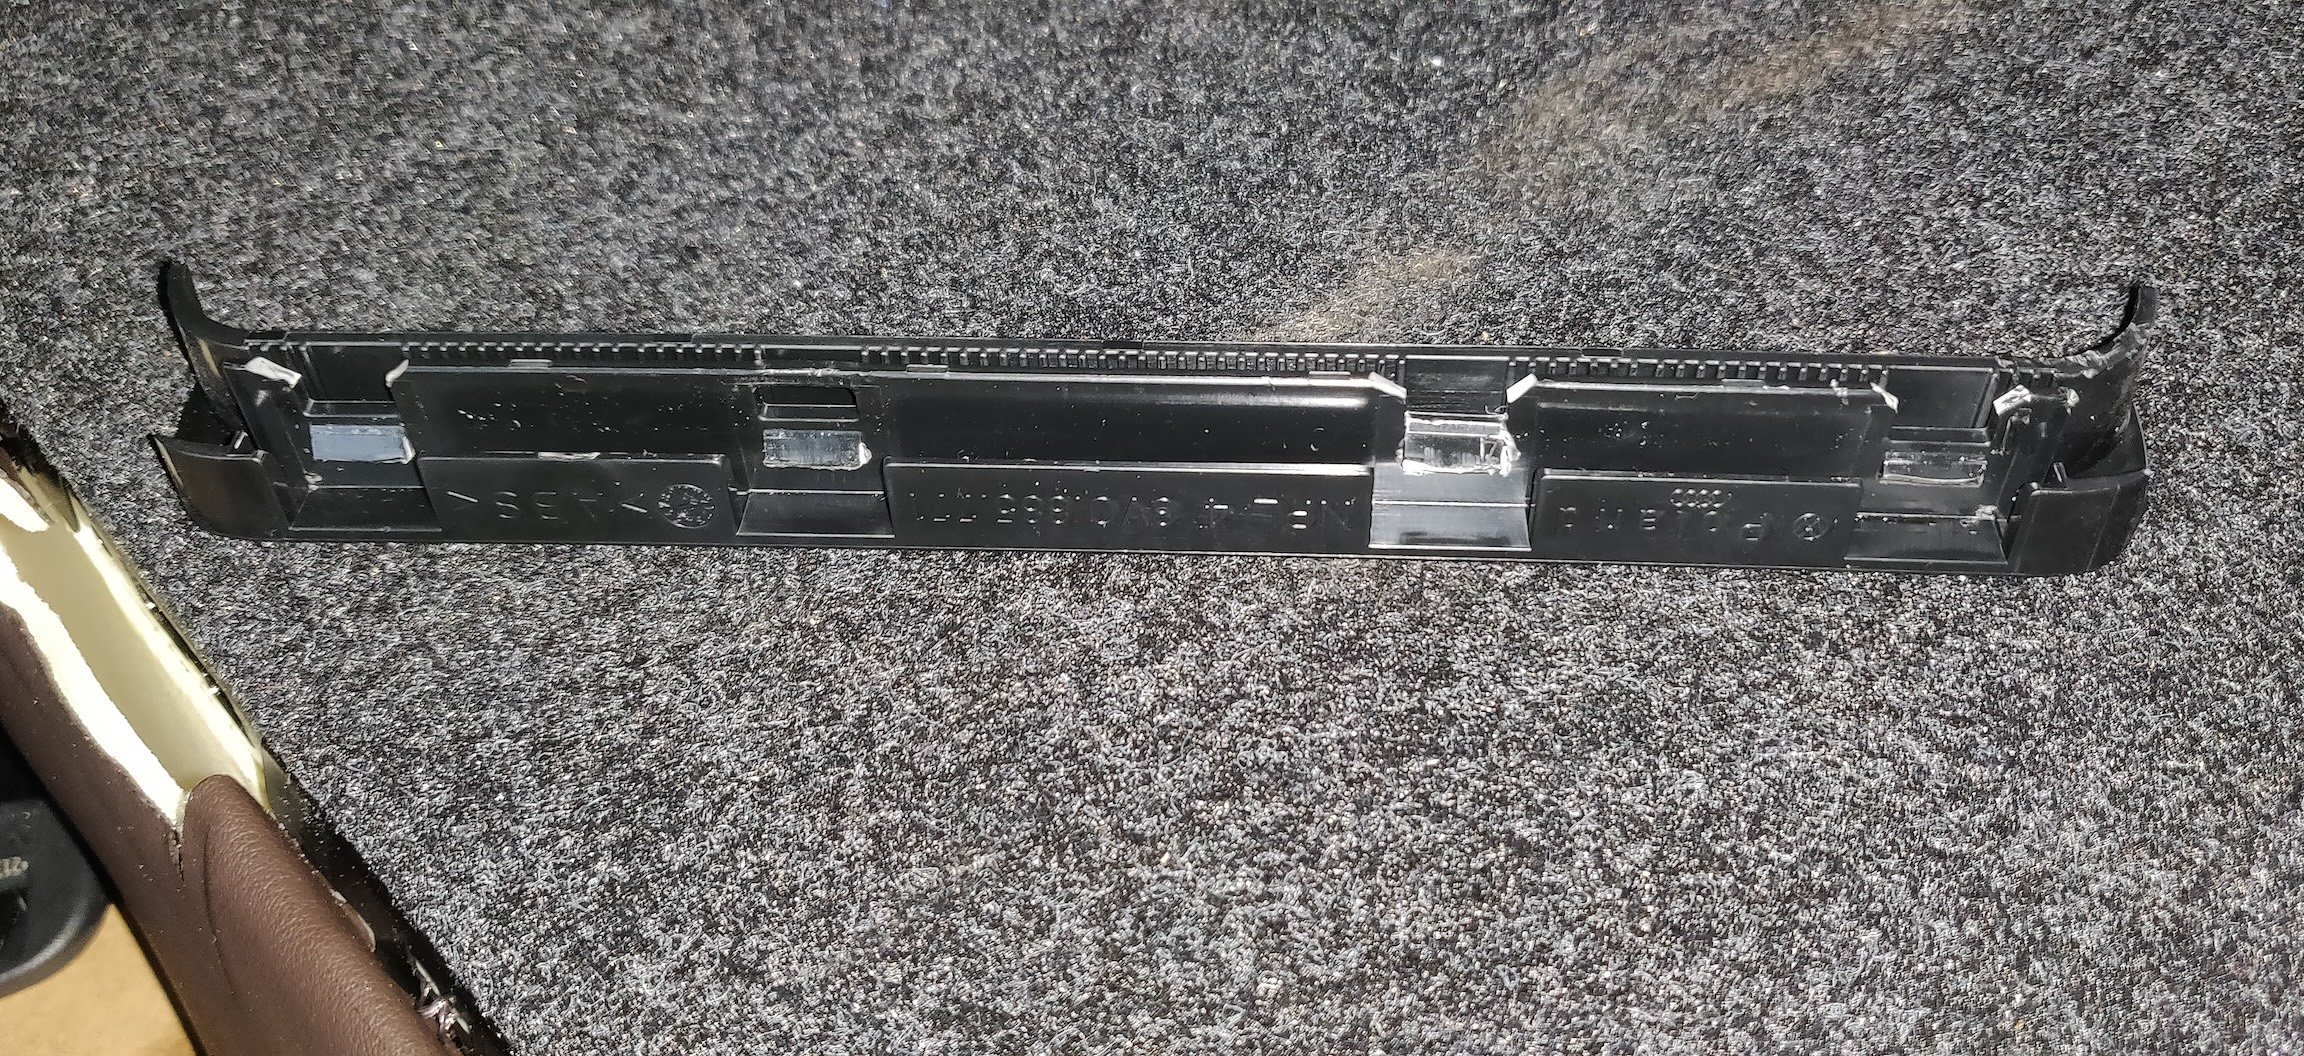
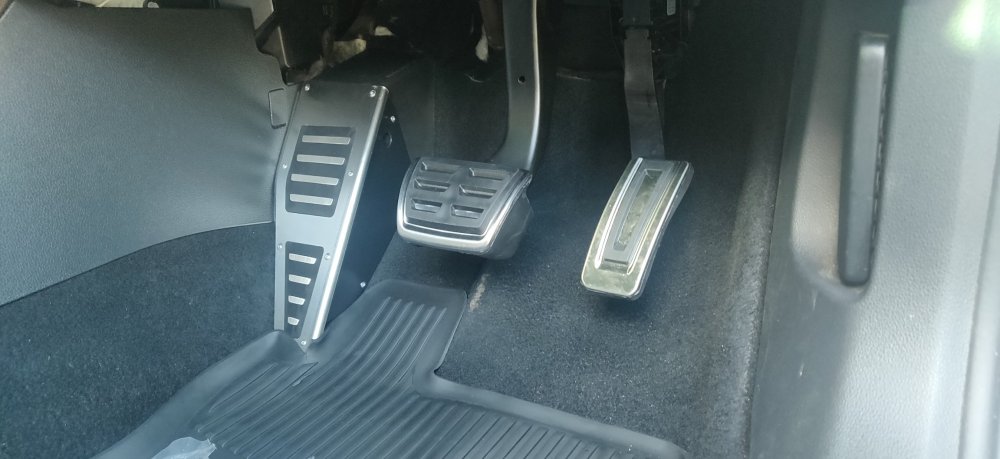
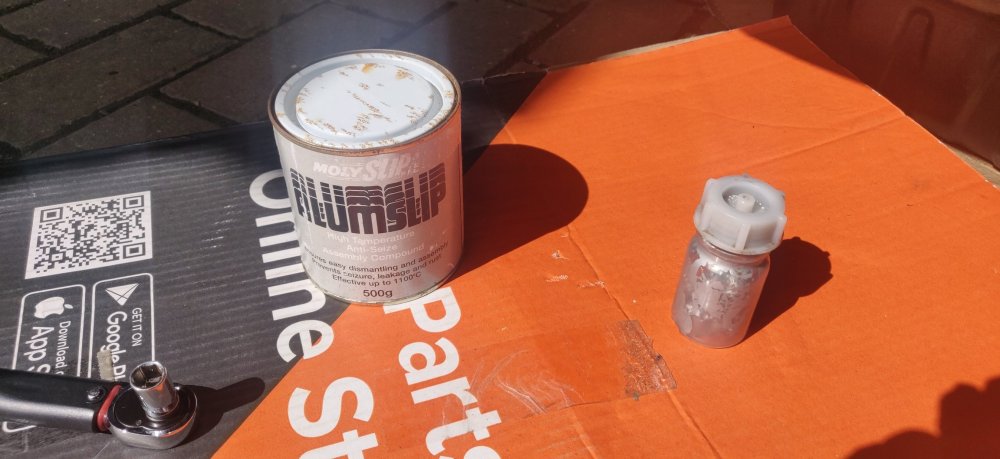
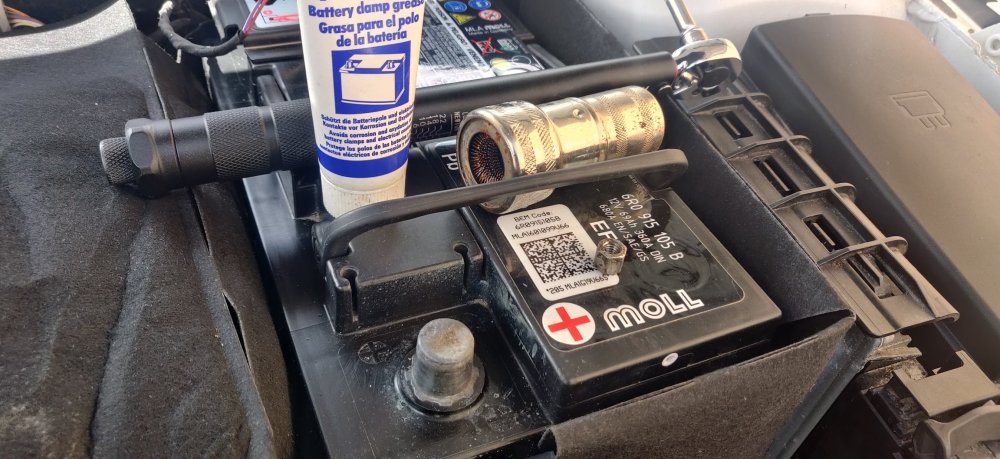
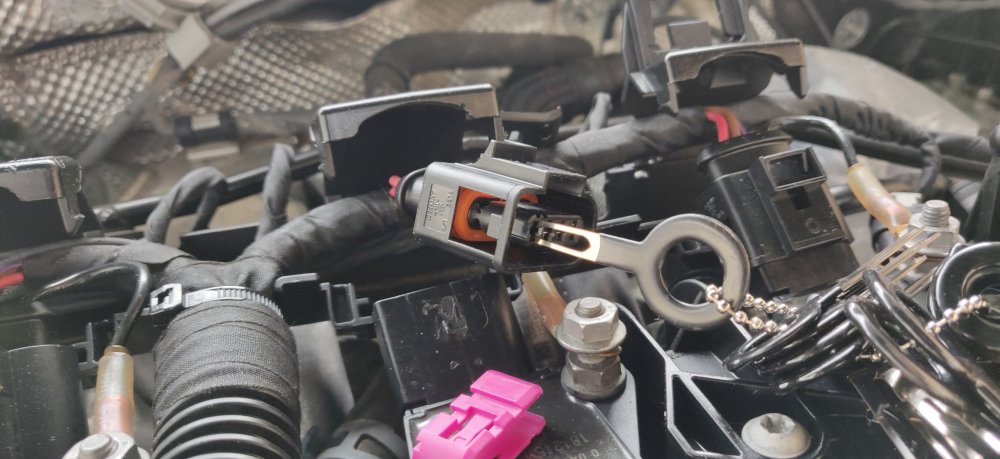
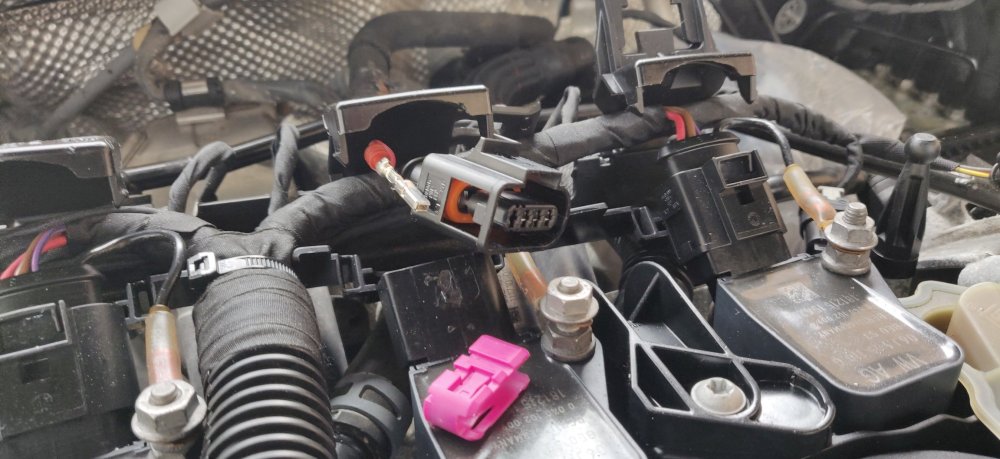
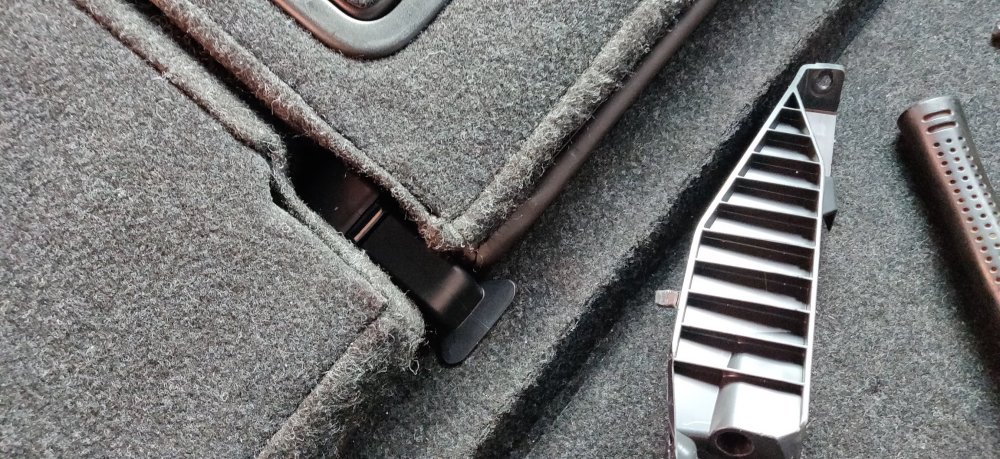
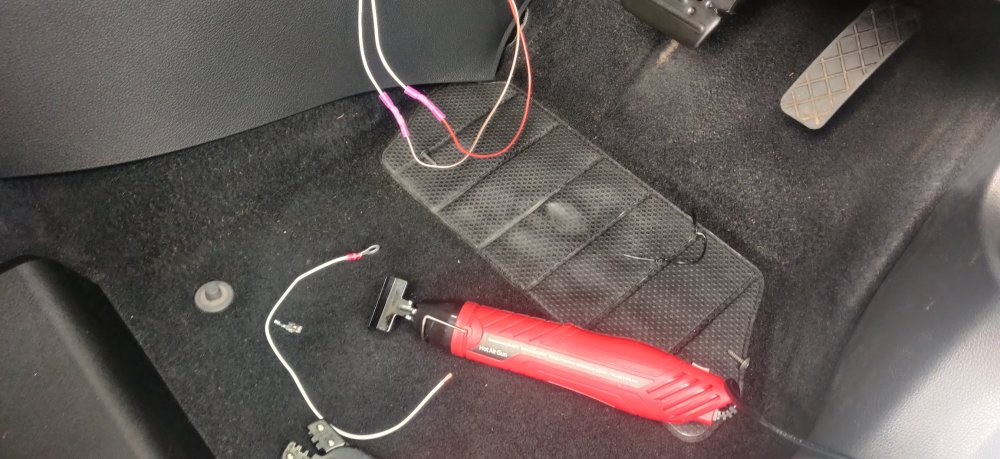
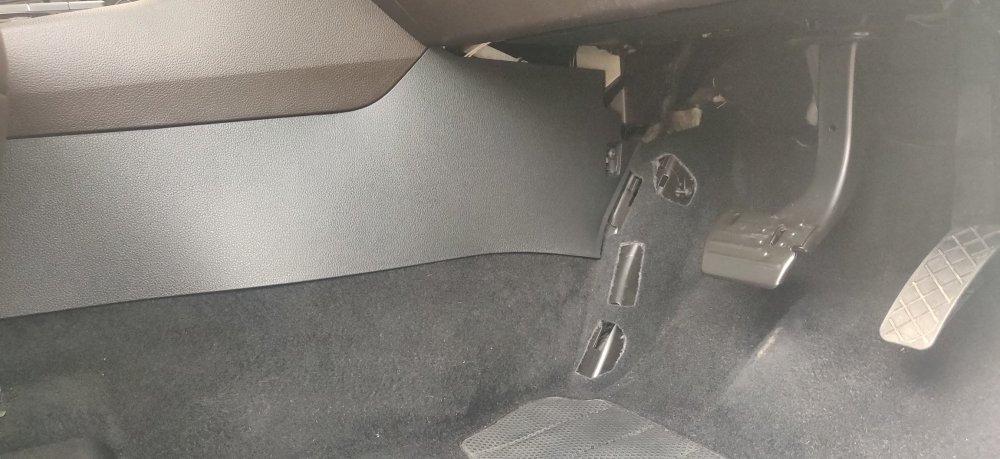
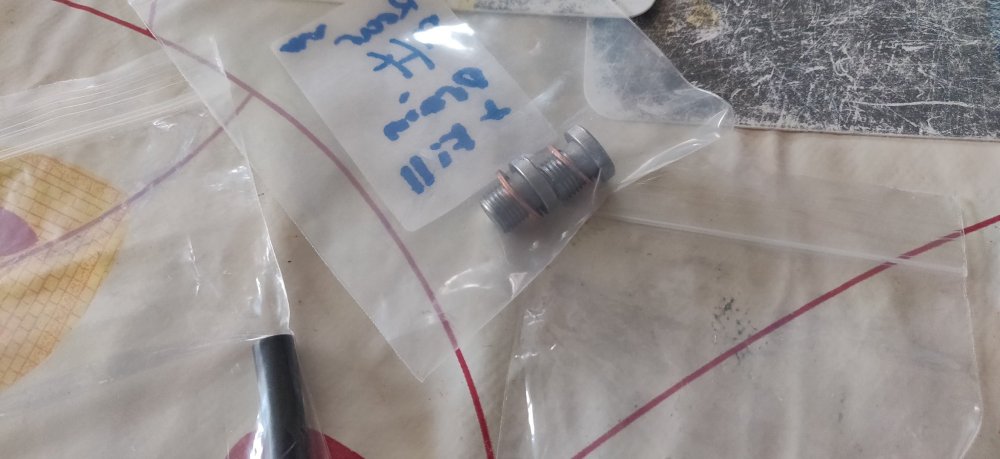
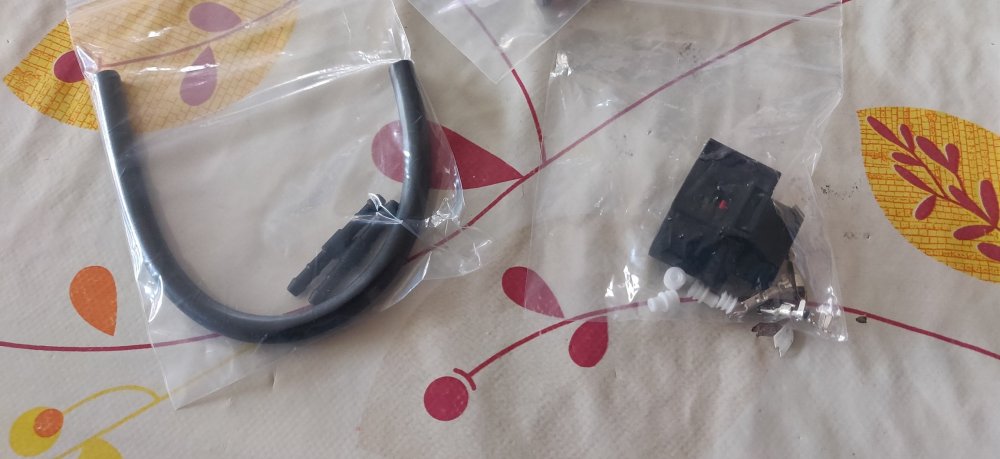
Bits and bobs, with some chintz from China: Metal pedals, no real reason: With metal foot rest. Again, no real reason, the original doesn't have much wear (I guess most of the wear was on the carpet). It was £43.82 which I didn't think was too bad. This was all ordered before so much of the horrors of the rear suspension, so more innocent times. Some additional chintz: Some DSG paddle extensions. I wanted some proper ones where the DSG paddles themselves are removed and a pin is involved, removing the old and replacing with new. However, the Skoda Superb DSG paddles are just a little bit different from the others for sale, so just played it safe and got the stick on ones. This was £11.20 from AliExpress, so I thought pretty cheap. This also arrived: The front right hand level sensor, which I got initially as a panic from apparently bending the one on the car. It's sort of fixed itself, so I'll probably just monitor it, and leave this sensor on the back burner, as it's quite nice and shiny and it'll make sense installed amongst other shiny things. This was £27.60 from eBay. Some pics of bolts: These are M6 x 35 for the Haldex controller and pump. Stainless because I don't want that drama again (hopefully). I know a few won't be used for now with one of the bolt holes buggered. £3.84 for 5 of them. So anyways, spent a bit of time sorting out that coil pack connector whilst it isn't raining: Just a case of removing the remaining terminals, putting them into the new connector. Didn't take further pics, but insert the purple locking tab and fit it back onto the coil pack. I'll probably mess around with some dielectric grease once I start putting this back together properly. I then jumped into the drivers footwell: The footrest has a couple of plastic hooks which clip into the metal bracket where the footrest goes. From there, it's a bit of a faff regarding the screw: Visibility isn't possible, so this was a bit of guess work. I eventually used a rubber mallet at the top of the foot rest to just see if that helped locate the foot rest further. No idea if its solidly attached. Then, got the mat and fitted it: Which of course, fouls the new footrest. Had a moment of madness and decided sod it, just cut a bit of the mat away to get it into place. I can probably clean it up a little bit more to make it look ok, but I guess the original footrest wouldn't have this issue. Fitted the other pedals: The brake pedal was nice and simple, as it has two pins which locate into the pedal quite precisely. Less the case with the throttle, which looks like it sorta slides over the existing pedal, which was a bit of a struggle, but hopefully I haven't buggered anything up. Maybe an argument for genuine stuff? Took the steering wheel off (as it's not really on per se), and got some rubbing alcohol onto the DSG paddles to clean up ready for the tape: Once dried, slapped the tape on: Then peel off the red backing for the double sided tape and just slide the extensions on: It's pretty much on I suppose. So that's the cheap chintz sorted, so back to under the car. Normally, it's copper grease everywhere, but for aluminium bits, especially with stainless bolts, I use AlumSlip: This is the stuff I use for the Lotus where applicable, and to be honest, not much stopping me from using it everywhere, as I seem to use it sparingly for no reason. So slathered the AlumSlip onto the new stainless bolts, removed the old ones on the pump and fitted the new ones: Seems fine and fits without issue, and tightened to 9.5Nm as per the workshop manual. Top bolt needed some extensions and fumbling due to access: But that's done. Lovely rusty pump. For the controller bolts, just slathered the bolt and winded it in and out a few times: Just to be sure that's clean enough: Dry fitted the controller for now, still want to clean up the connectors and figure some sort of grease to stop dirt getting into the grooves and making it harder to disconnect in the future. So with that, went at the battery tray and tightened the nuts and bolts to 9Nm: Then hoiked the battery into place. Pretty idiot proof as there's slots and everything for it. Dab of grease and tightened the clamp to 15Nm: Then slipped the cover over the battery. It might have been easier to put the cover over the battery before putting it into the car to be honest, but I just slid it in and assume the wires and stuff will keep it attached. Gave the battery terminals a quick clean and grease: Not my first rodeo, hence the tool for it. Workshop manual specs the terminals at 6Nm, which is probably a good reference for any cars: As eager as I am, there's still a few things not plugged in yet so didn't want to rush with the negative terminal yet. That's me for the day I think. I'll need to reattach the rear level sensor, the Haldex controller, and then connect the suspension DCC up, which also means the front suspension actually needs fitting. So that's probably the next big thing on the list! Maintenance: £2064.64 (+£31.44) Upgrades: £1283.43 (+£55.02) Miscellaneous: £665.56


-
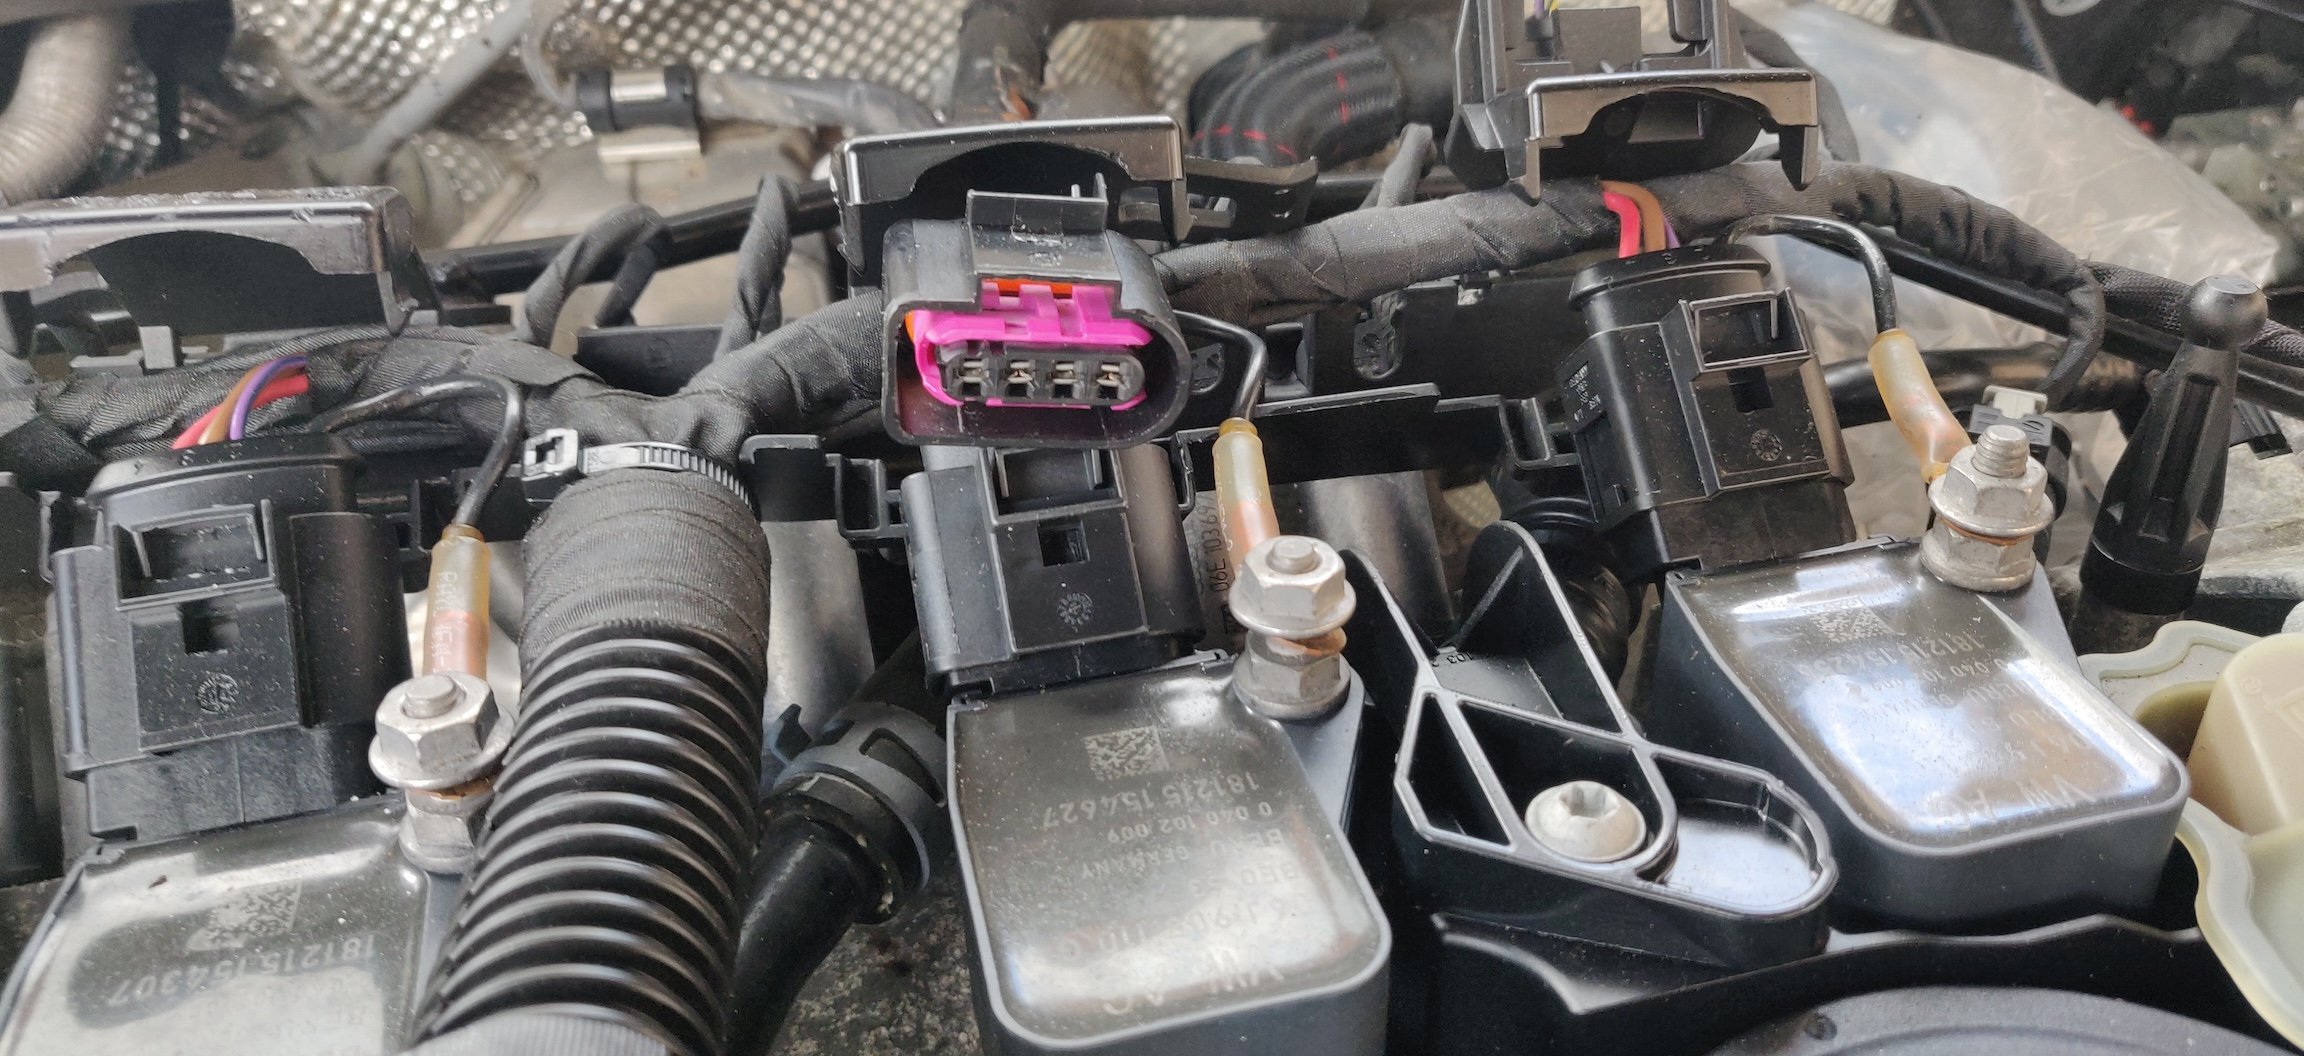
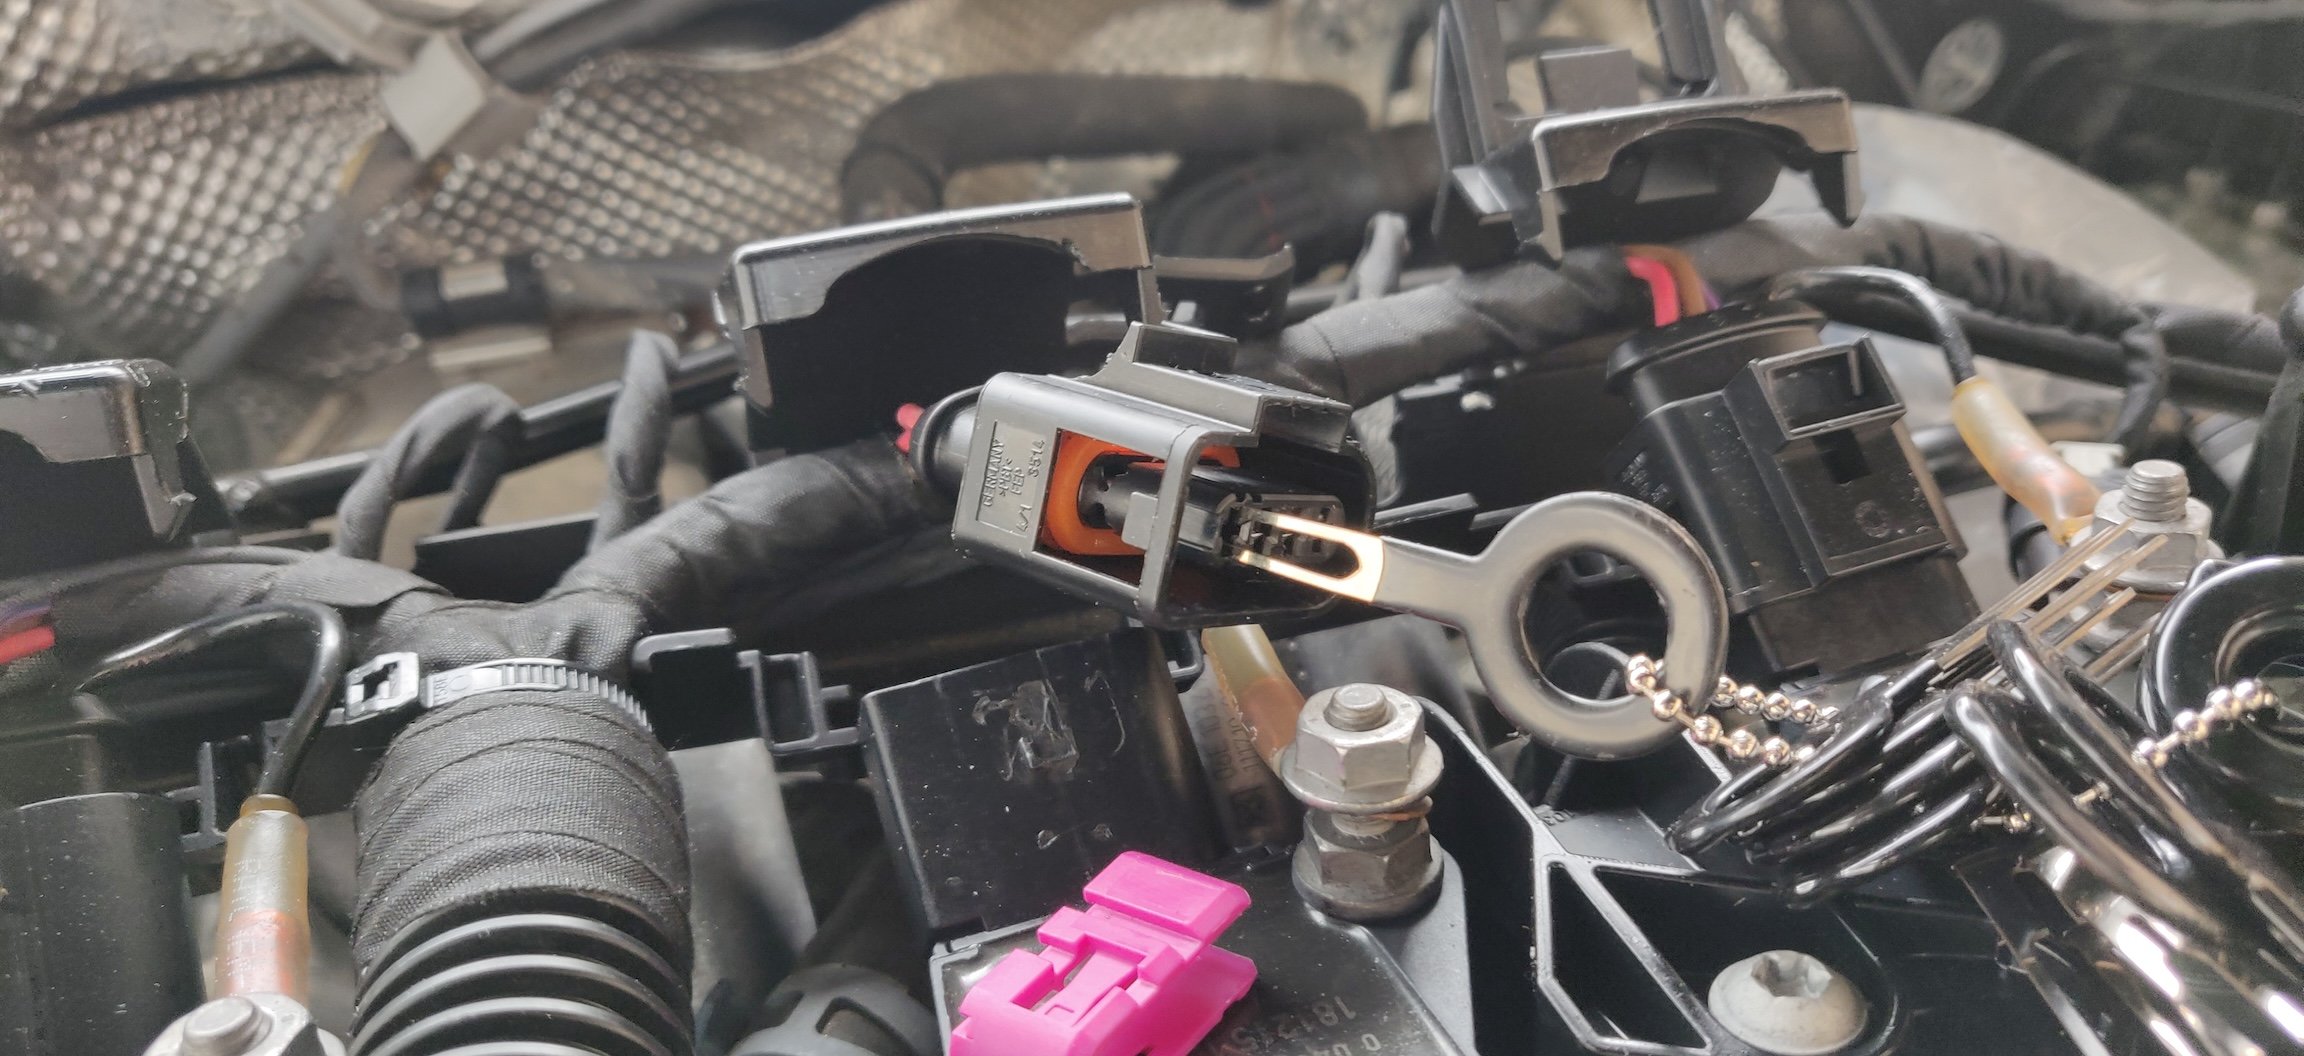
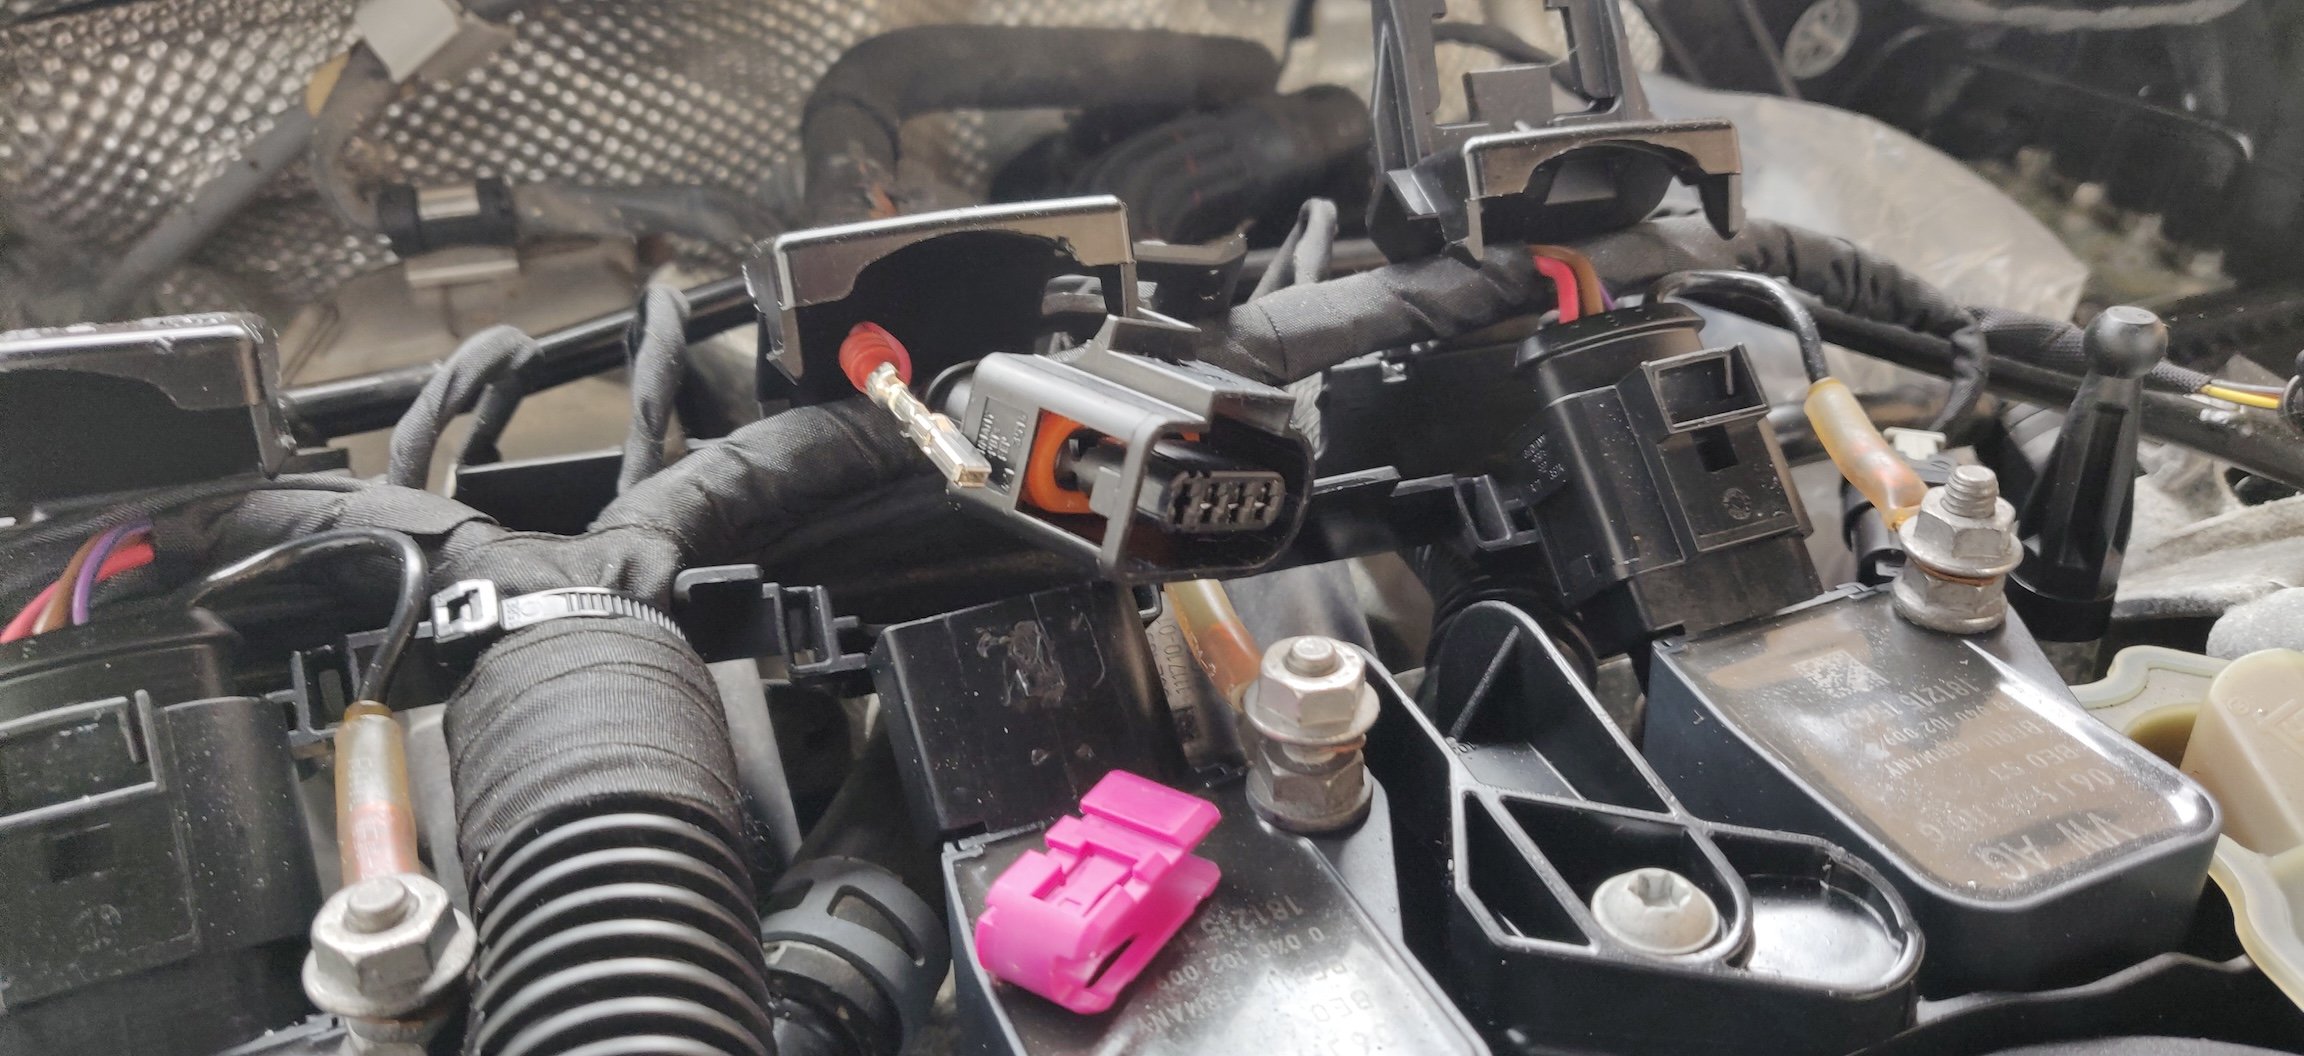
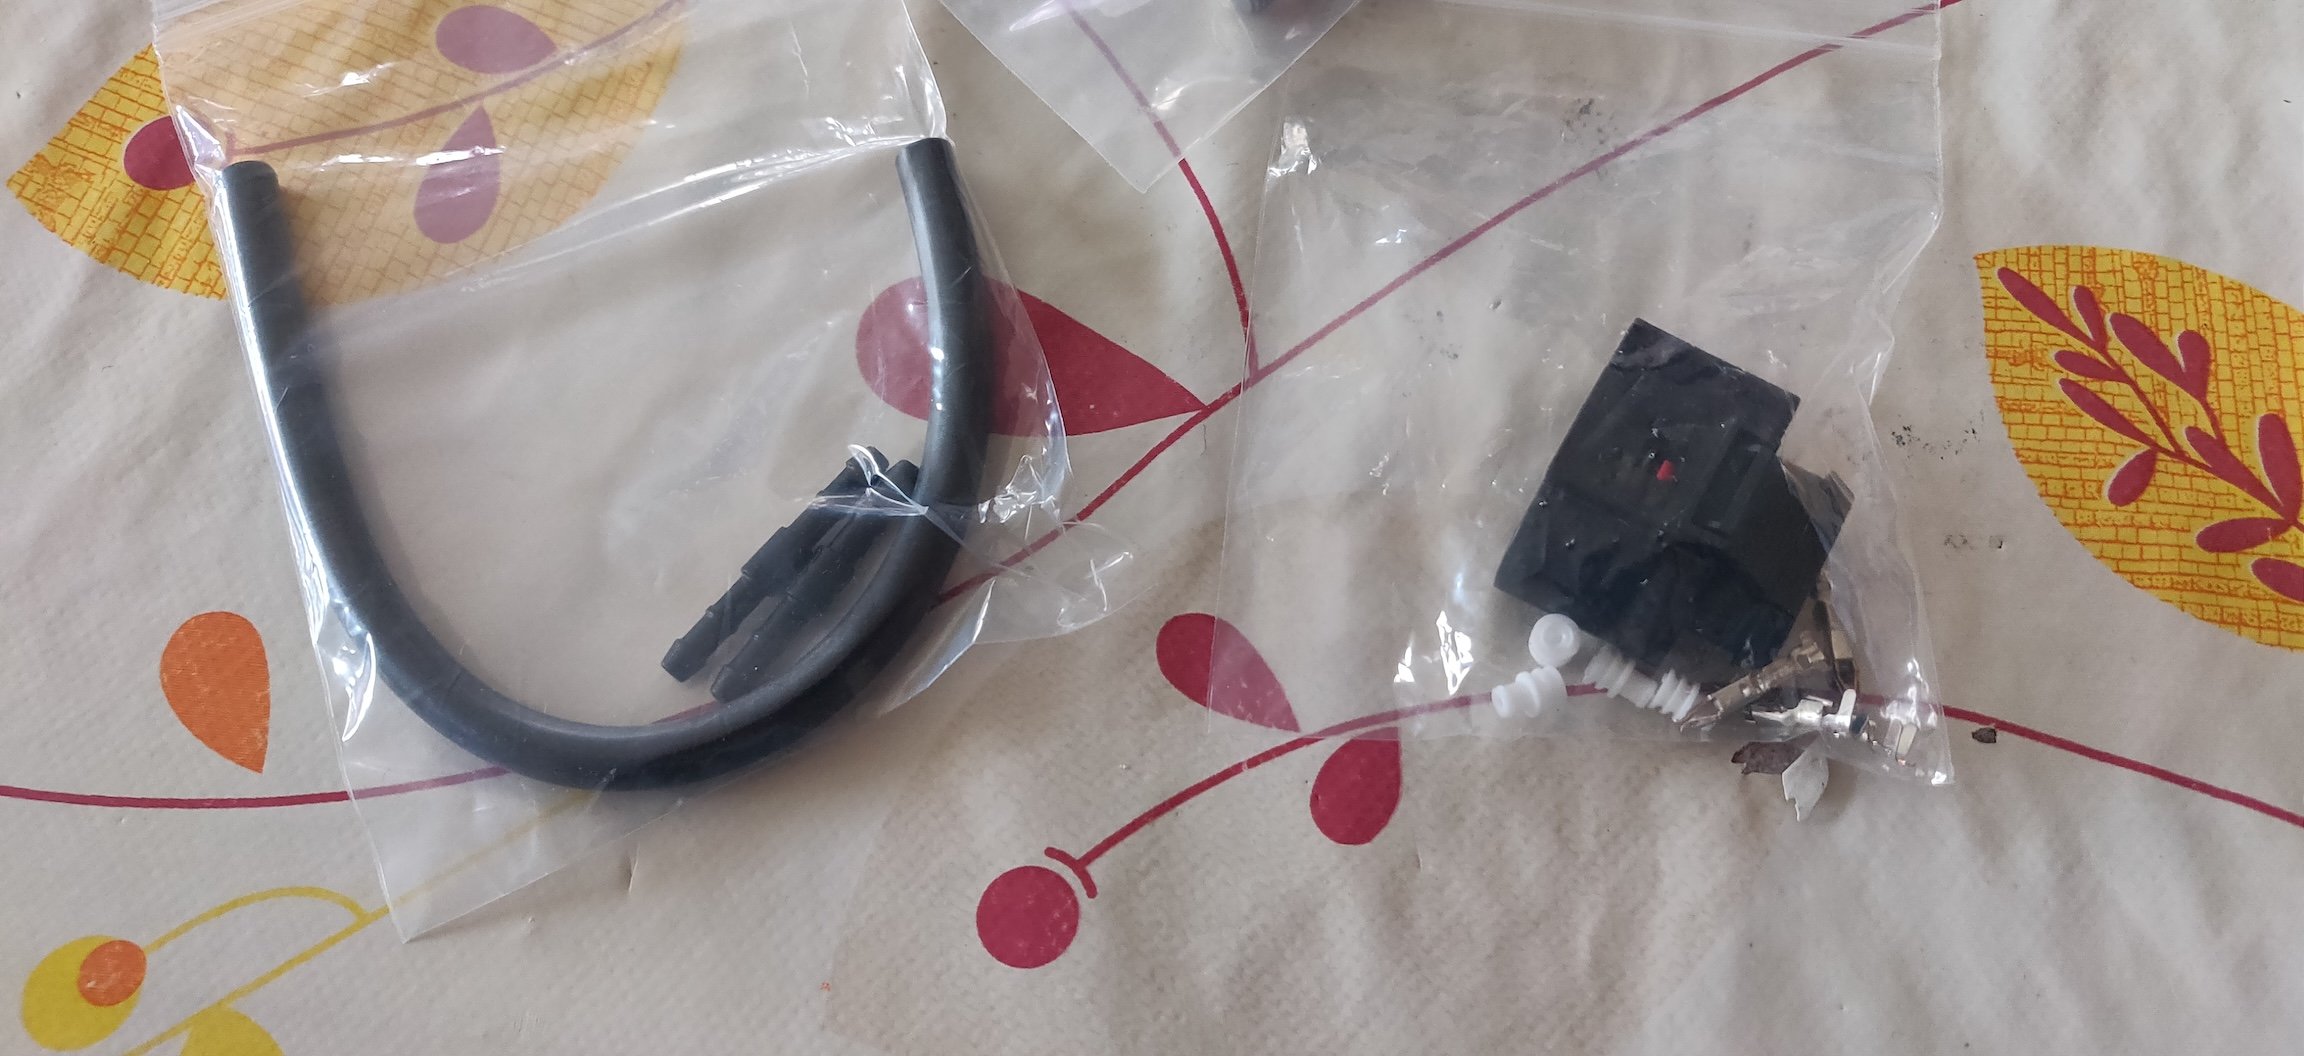
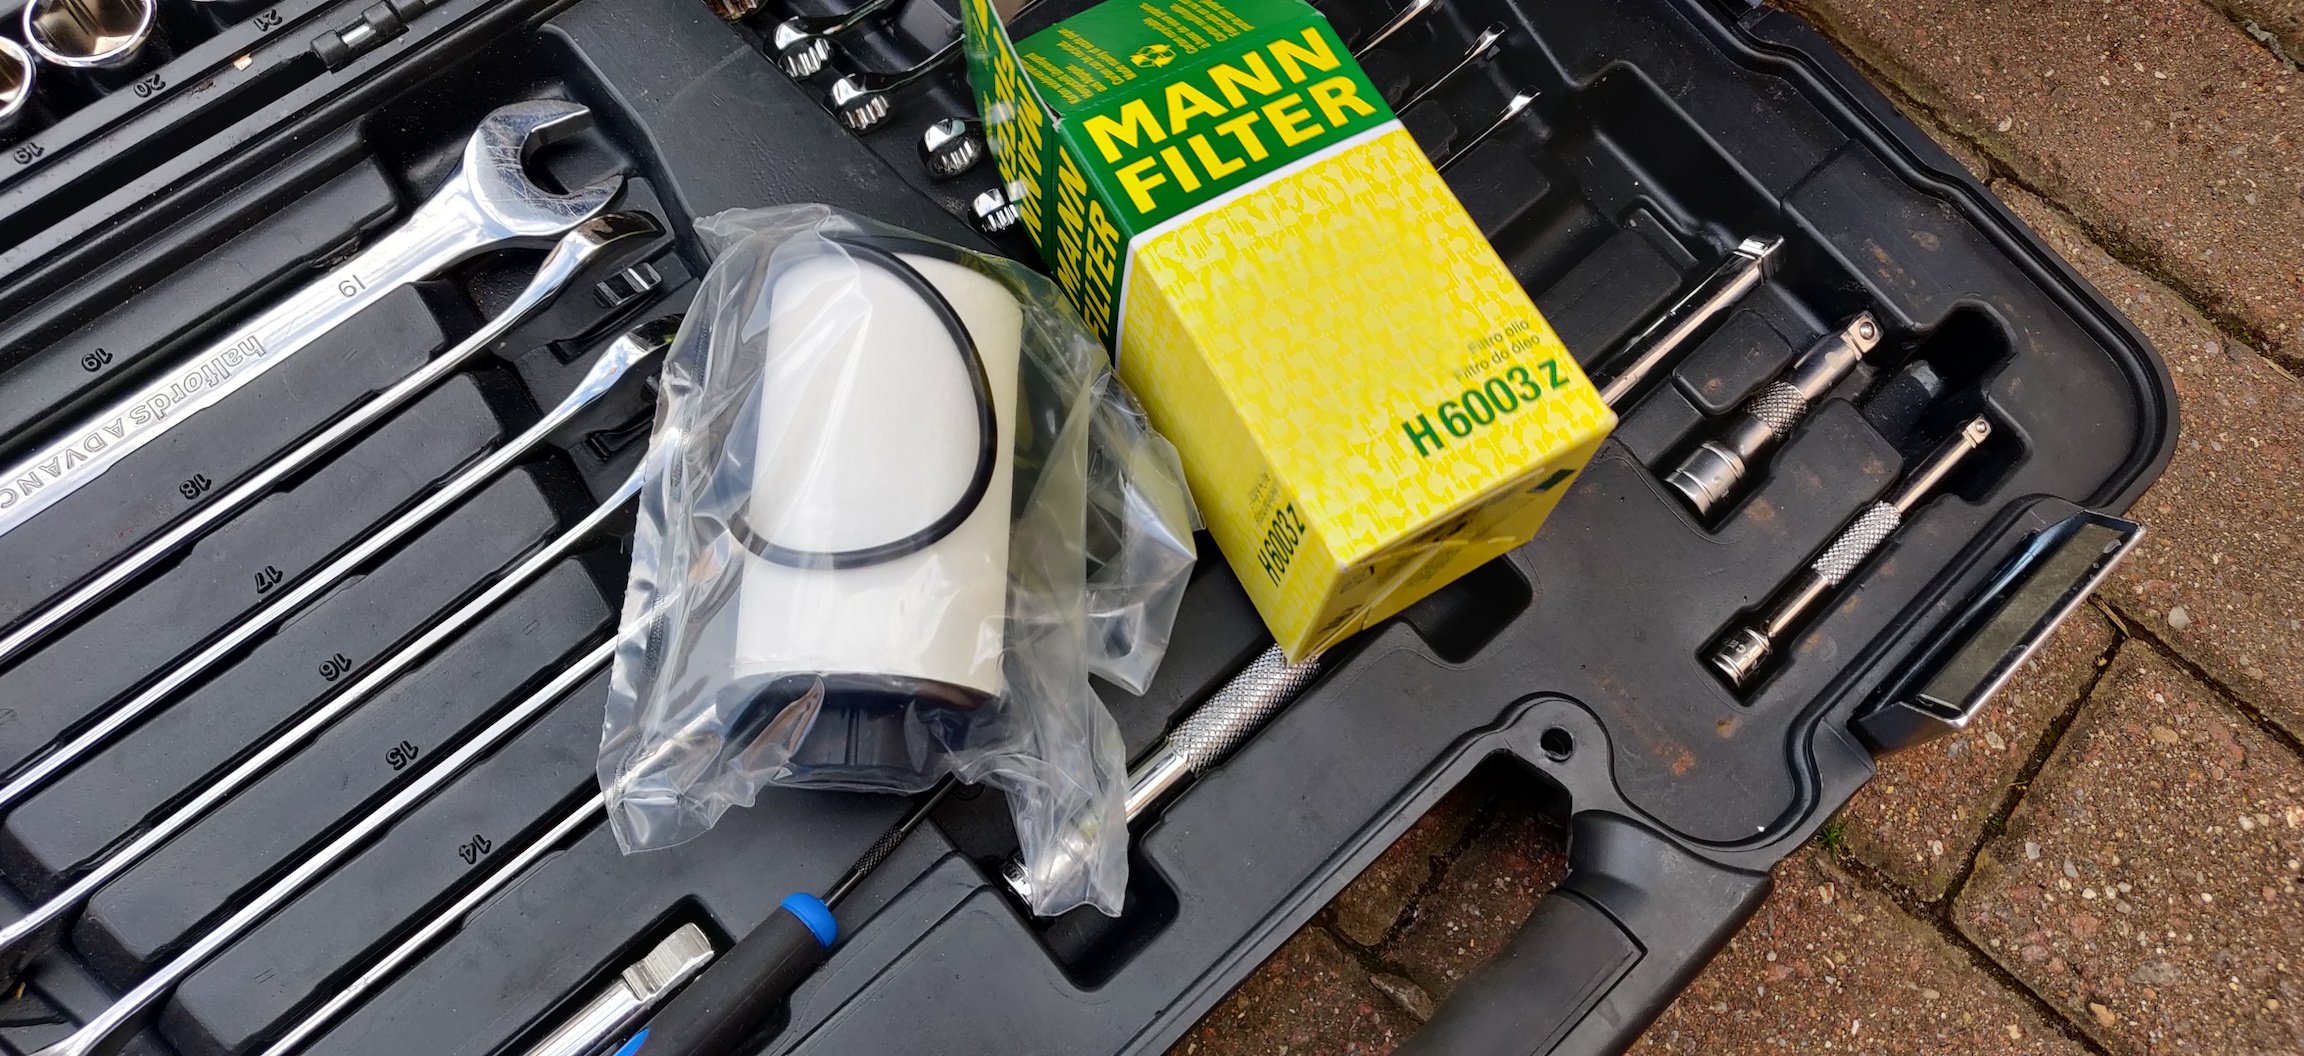
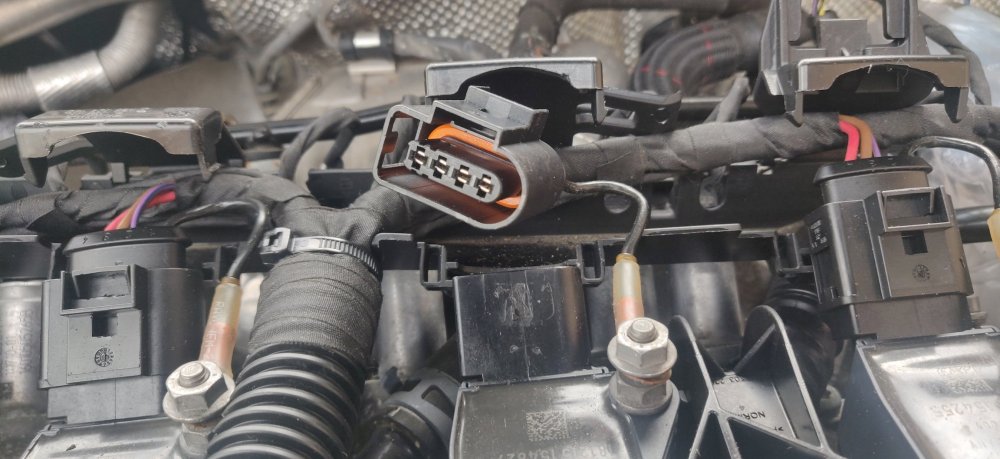
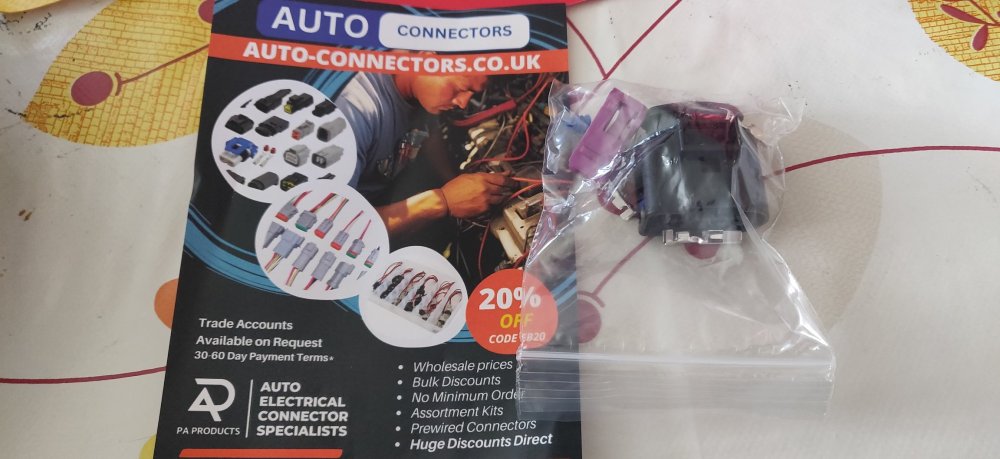
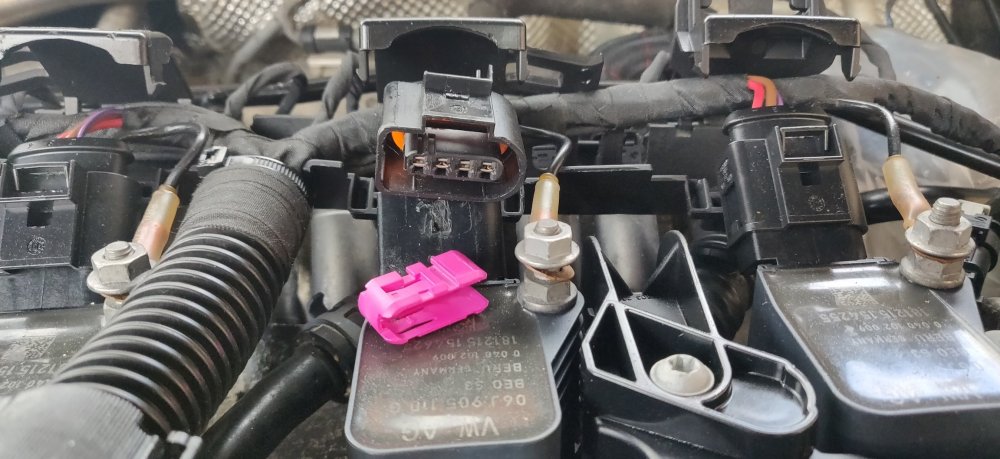
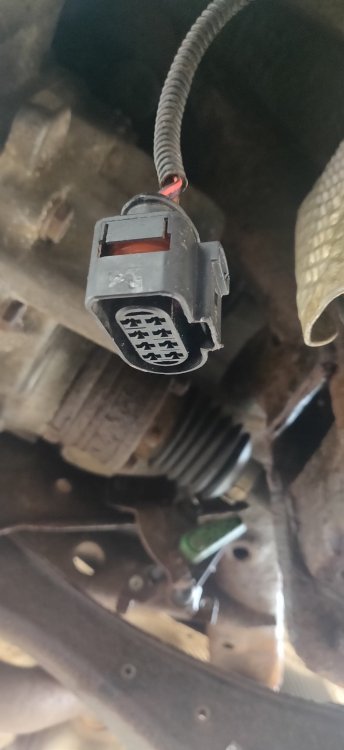
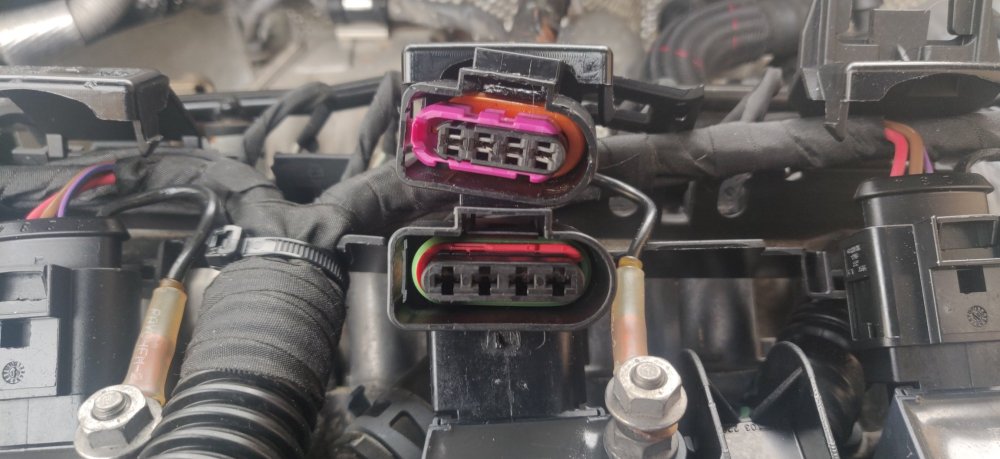
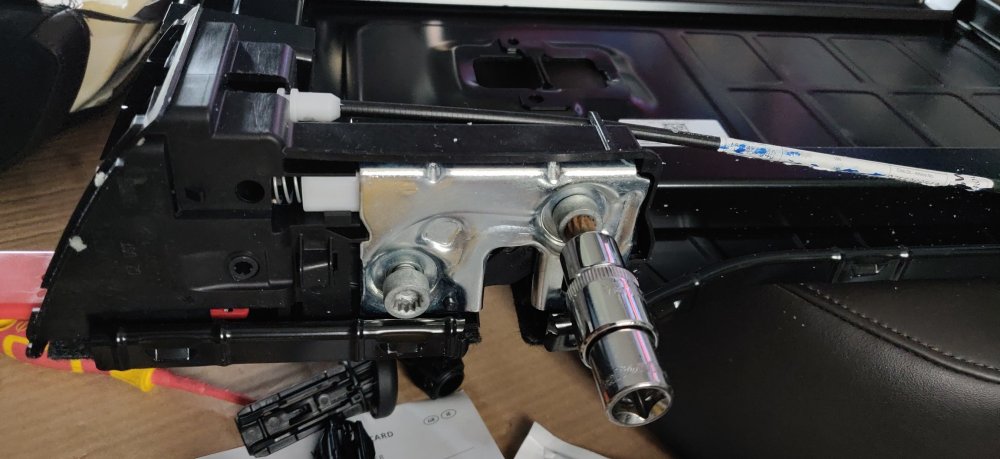
Random thing arrived today: Slight plug with the website it was from, but a match for the coil pack. This was £5.99, probably could have gone and went with AliExpress for it to be cheaper with a much longer delivery time given there's no rush. So just to confirm: Clicks into place in the coil pack without issue. It's a new clean connector so came out without issue, but this Youtube clip: Nails the process for these connectors and how to disconnect them. Hopefully no more damaged connectors(?). So the process to replace the connector is to remove the purple locking tab: Another thin screwdriver to wedge it out business. Then, it's a case of fumbling with the terminal removal tools to find one of the right size: So once one fits in the top and bottom gap of the terminal, push it in with some intention, and eventually it'll sink into the socket, which should then unlatch the metal tabs on the terminal: The terminal can then be pulled out, so just a case of putting that back in the correct terminal in the new connector: That should be the steps. Repeat a few more times for the whole connector and then reinsert the locking tab and that's that. Not got there yet as the heavens opened. It'll be a day of sun and rain so I'll leave it at that for now. Maintenance: £2033.20 (+£5.99) Upgrades: £1228.41 Miscellaneous: £665.56


-
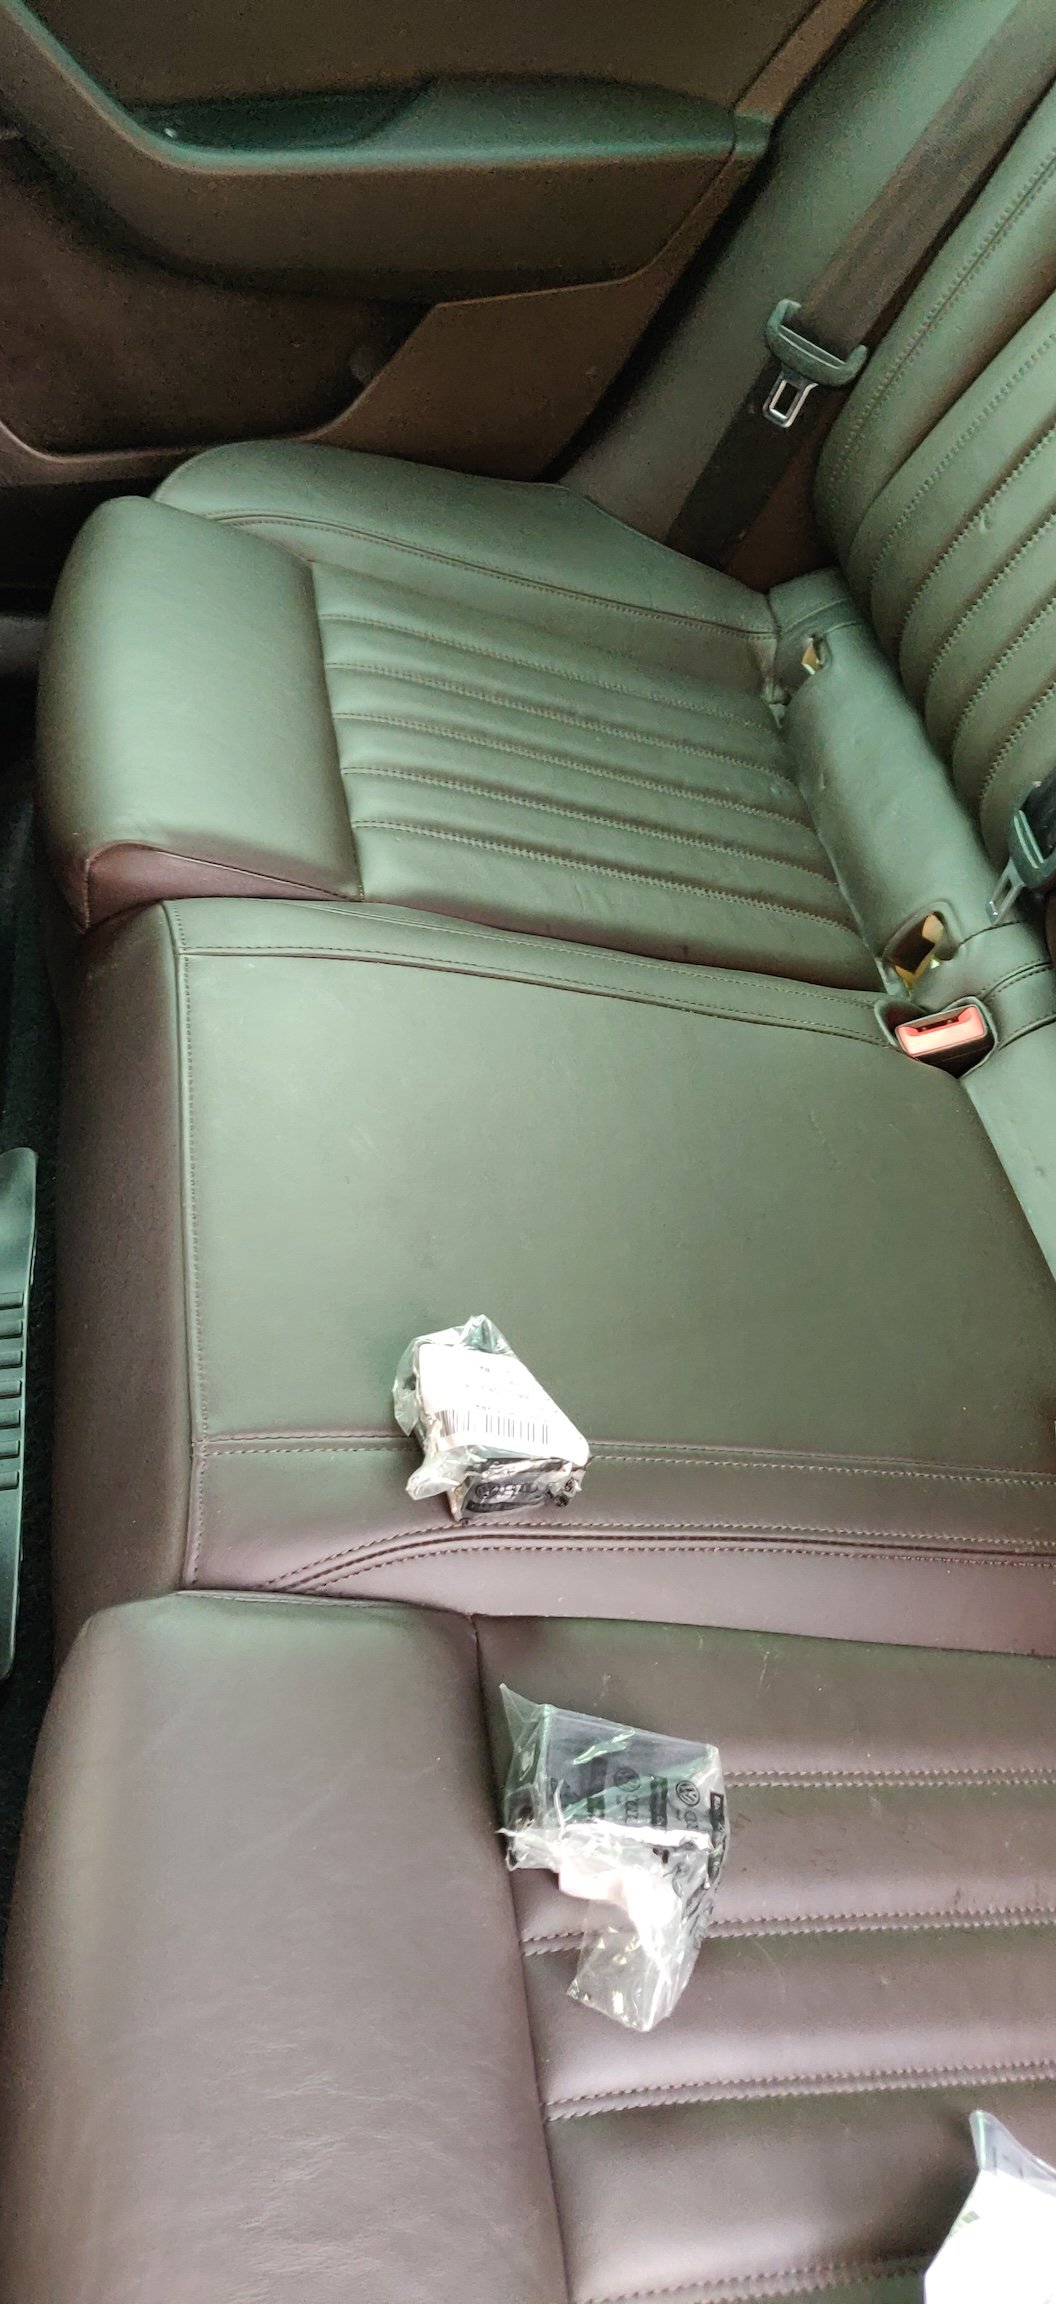
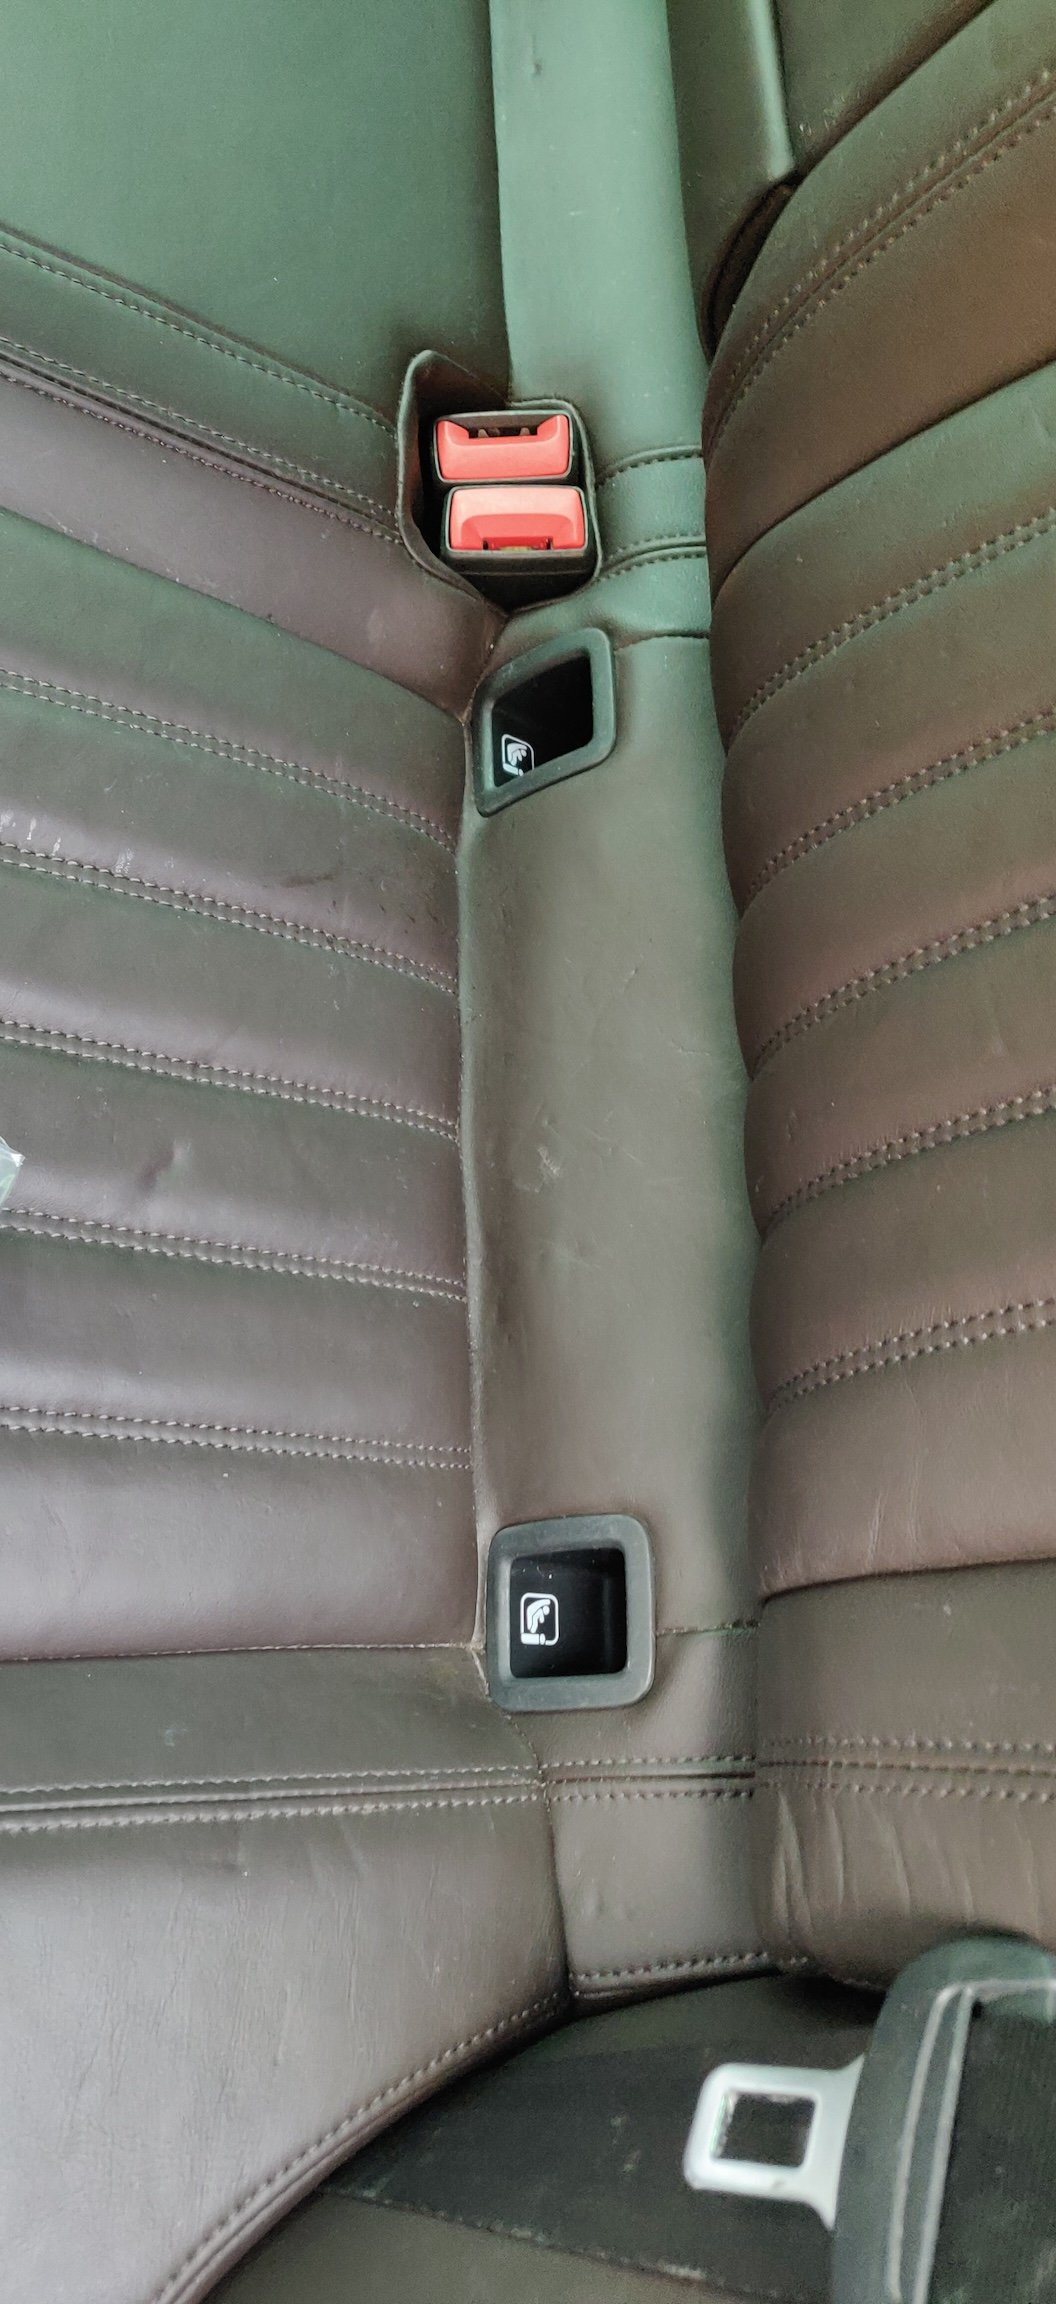
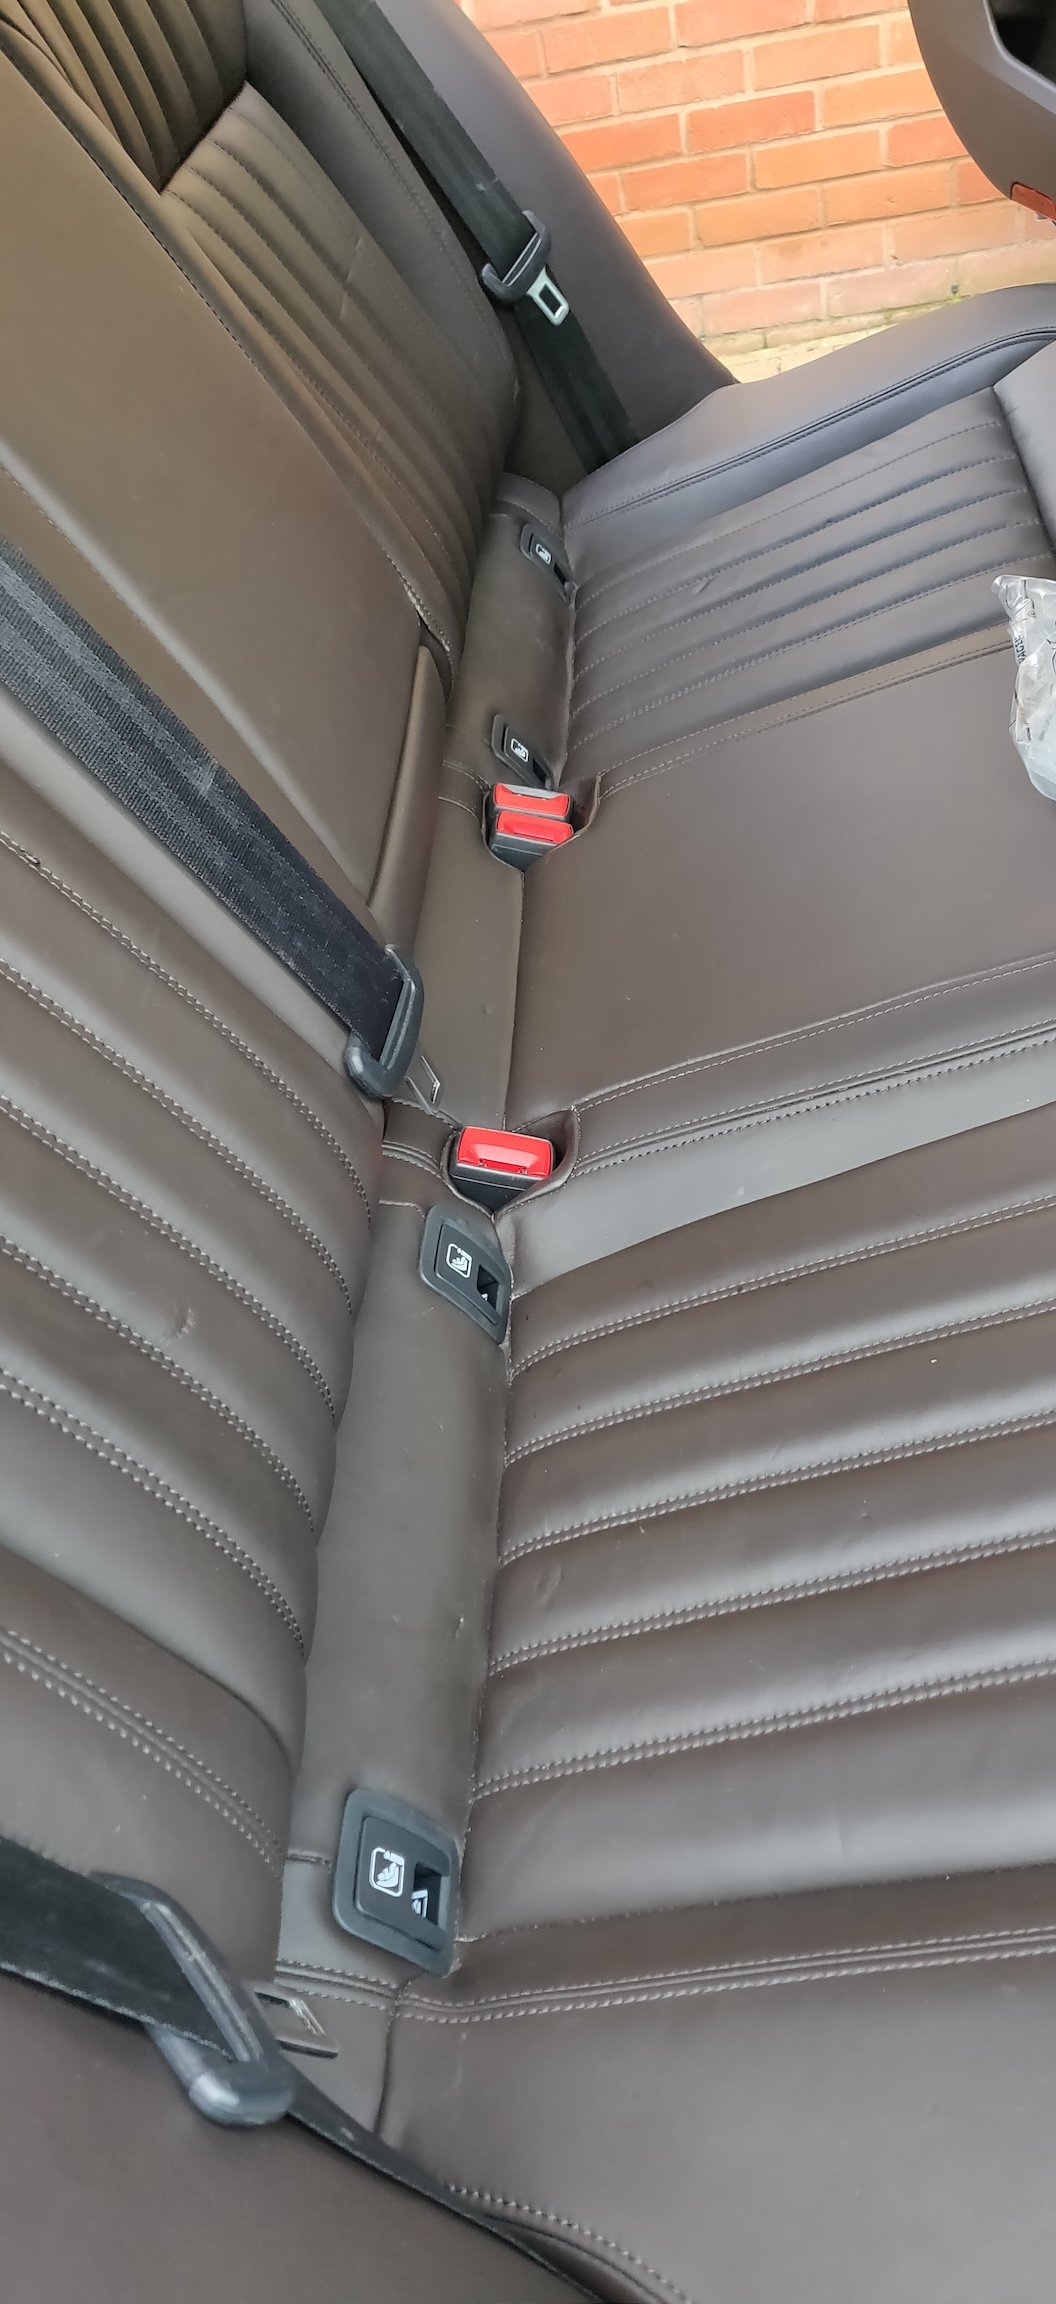
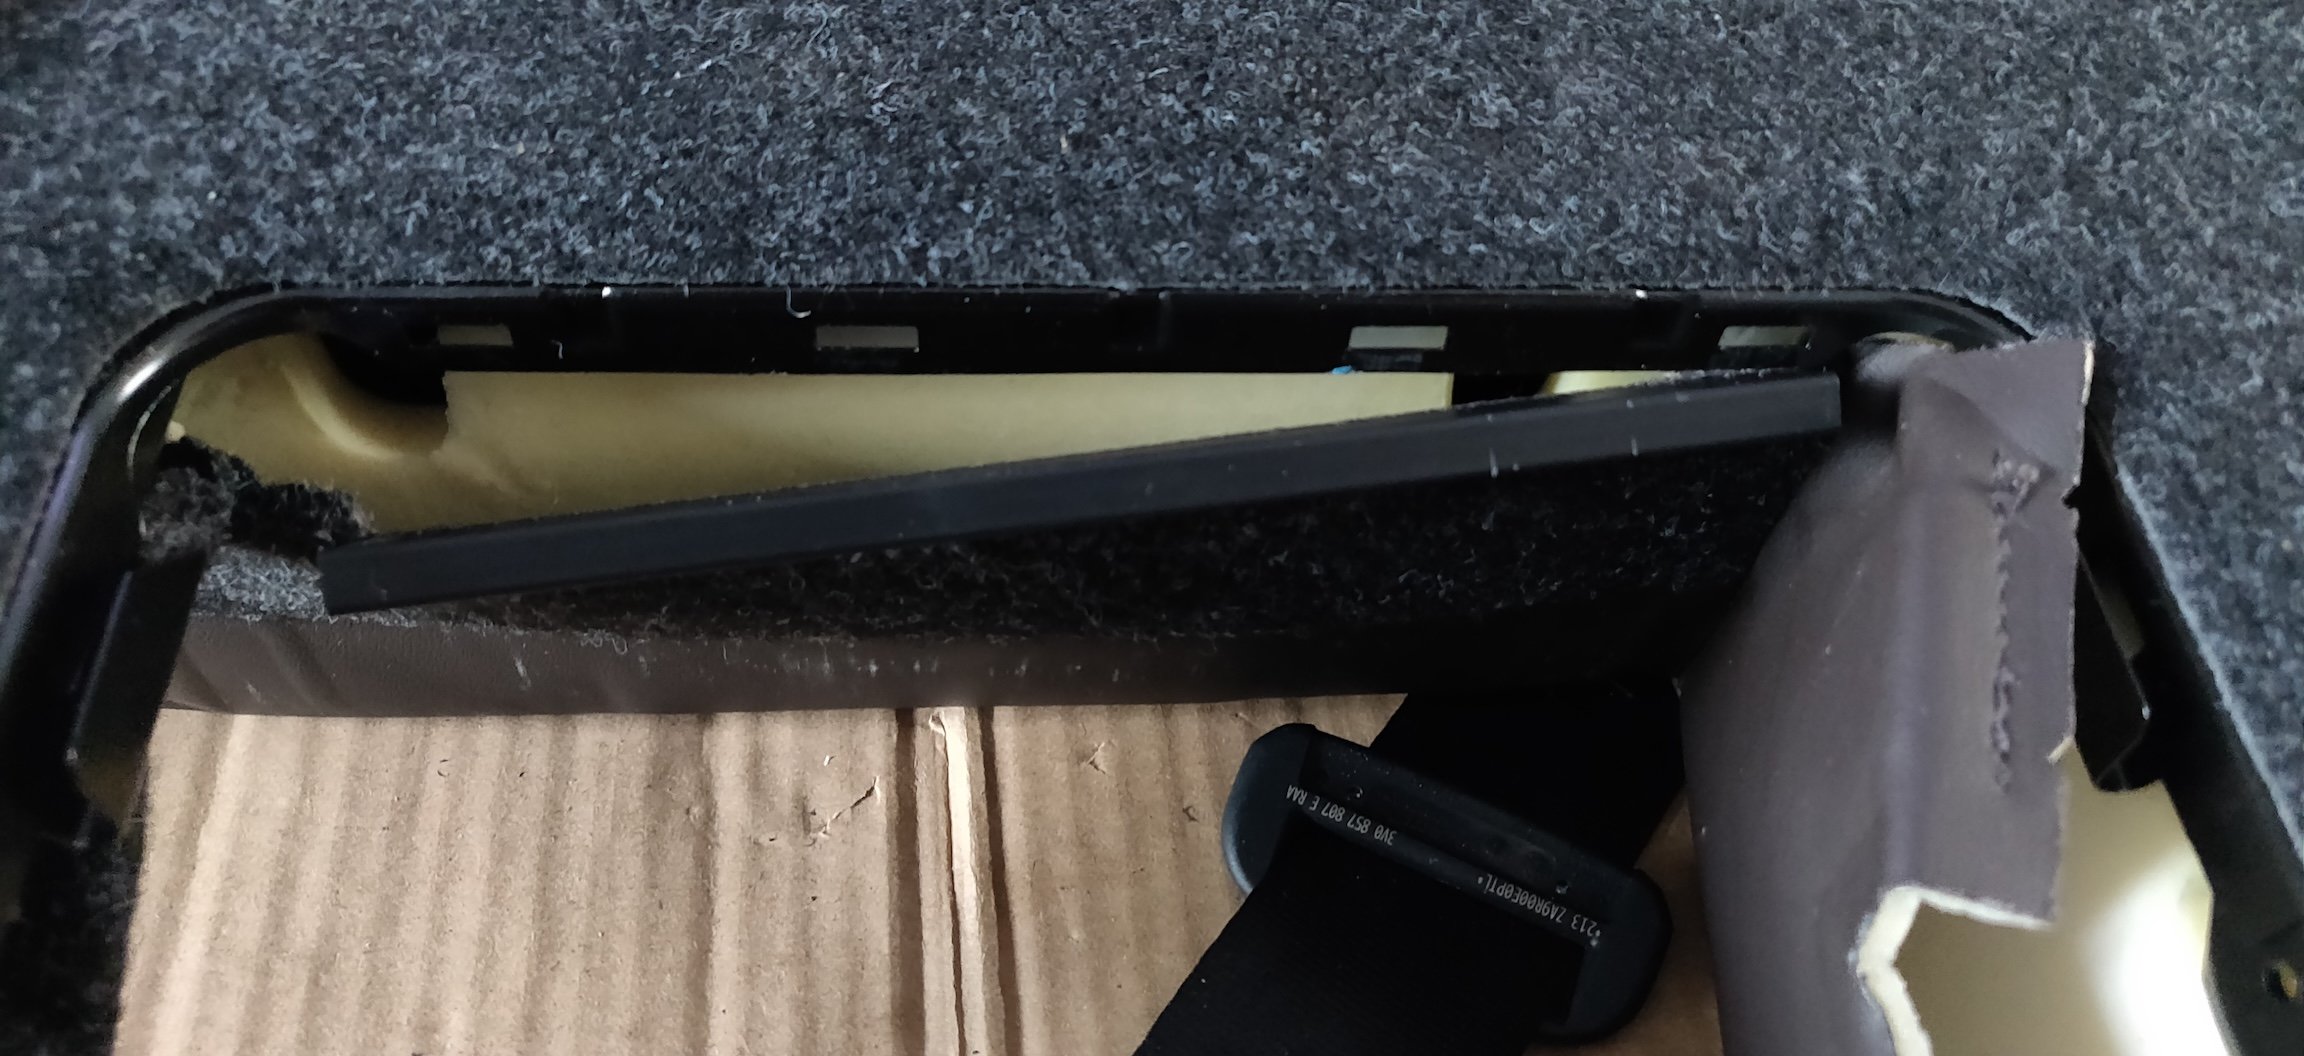
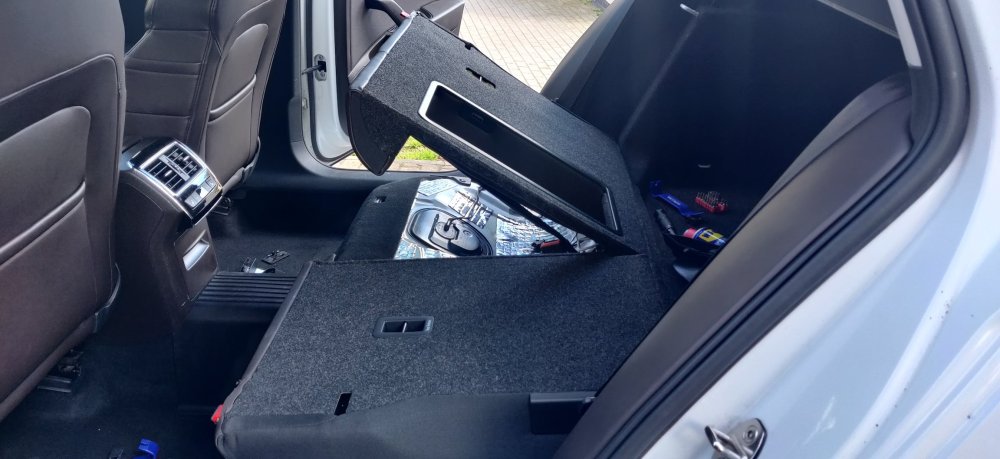
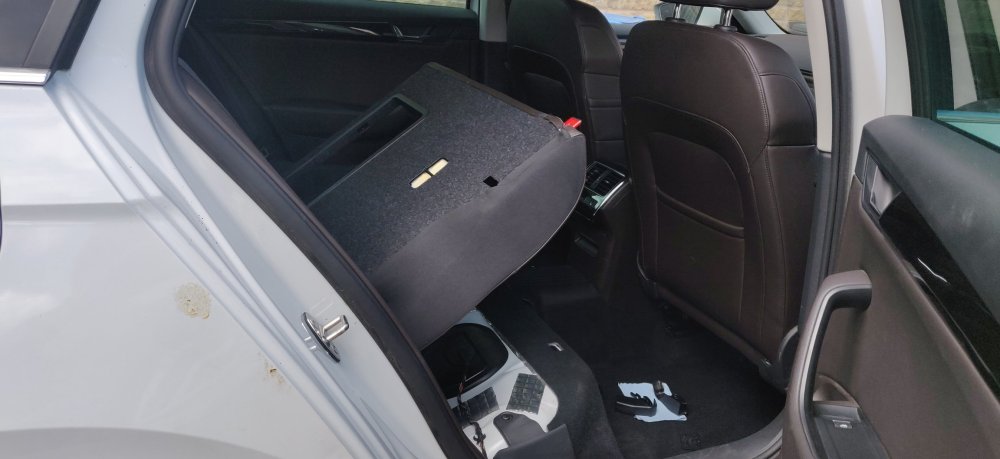
See if I can squeeze in a post before work. So went to the car and just went at the rear bench: Pic isn't much different, because it's all out of sight. Started on the drivers side, and just pushed the bench towards the rear of the car at an angle, with the intent of trying to get the metal bar to hook underneath the tab that protrudes out of the bodywork. It sorta clicked, and from there, it's just guesswork whether it actually is fitted. Tried to lift the bench once in and it not budging felt like a good sign. Doing the opposite side, I found that the front and the rear hook ended up going in at the same time. Either that, or it just clicked into the front. Again, couldn't tell, but the rear of the bench wasn't lifting, neither was the front, so went back to the other side and clipped it into the grommet at the front. Then the Isofix trims just click into place after a push: Which again, hopefully implies that the bench is installed as otherwise the trims wouldn't have clipped snugly onto the Isofix brackets. Repeat a few more times and insert the Isofix covers with another click: Started rounding up more new bits, such as this bag, containing another bag, containing: Rear hinge cover to complement the new front. This was less necessary as the old one just has a few scratches rather than damage, but was only a pound or so: Like the front, the clip hugs the actual metal hinge bracket, so needs some bending and manipulating to get it to go around and clip into place. Only really the release levers left: Just remember to tuck in that bit of leather under the trim: Repeat for the other side: So that's that: The rear of the interior is complete! Was it worth it? Probably not! So basically, if one wants to retrofit the remote rear seat release, the easiest approach appears to be to buy some scrapped Octavia rear seats that contain the gubbins already installed (it seems to be more commonplace), and purchase the levers for the boot, which look like they will also contain the Bowden cable to the seat. You'll have to pretty much dismantle chunks of the rear boot trim in order to fit that lever and snake the cable to its destination. From there, transfer the seat covers from the Superb to the Octavia frame, and that should be the path of least resistance(!). My purchase of the Bowden cables for the seat frame, a replacement seat frame, and additional Bowden cables, and additional covers were ultimately a waste in the grand scheme of things, mainly due to that spring mechanism on the seat frames that do have this feature, which kaiboshed any planning and budgeting for this retrofit. Here's some of the spoils: Pic doesn't include the THREE seat frames also involved, nor the slightly mouldy Octavia seat foams and covers. If anyone wants anything, let me know, otherwise I'll be packing this all into a bag to be thrown away. Maintenance: £2027.21 Upgrades: £1228.41 Miscellaneous: £665.56


-
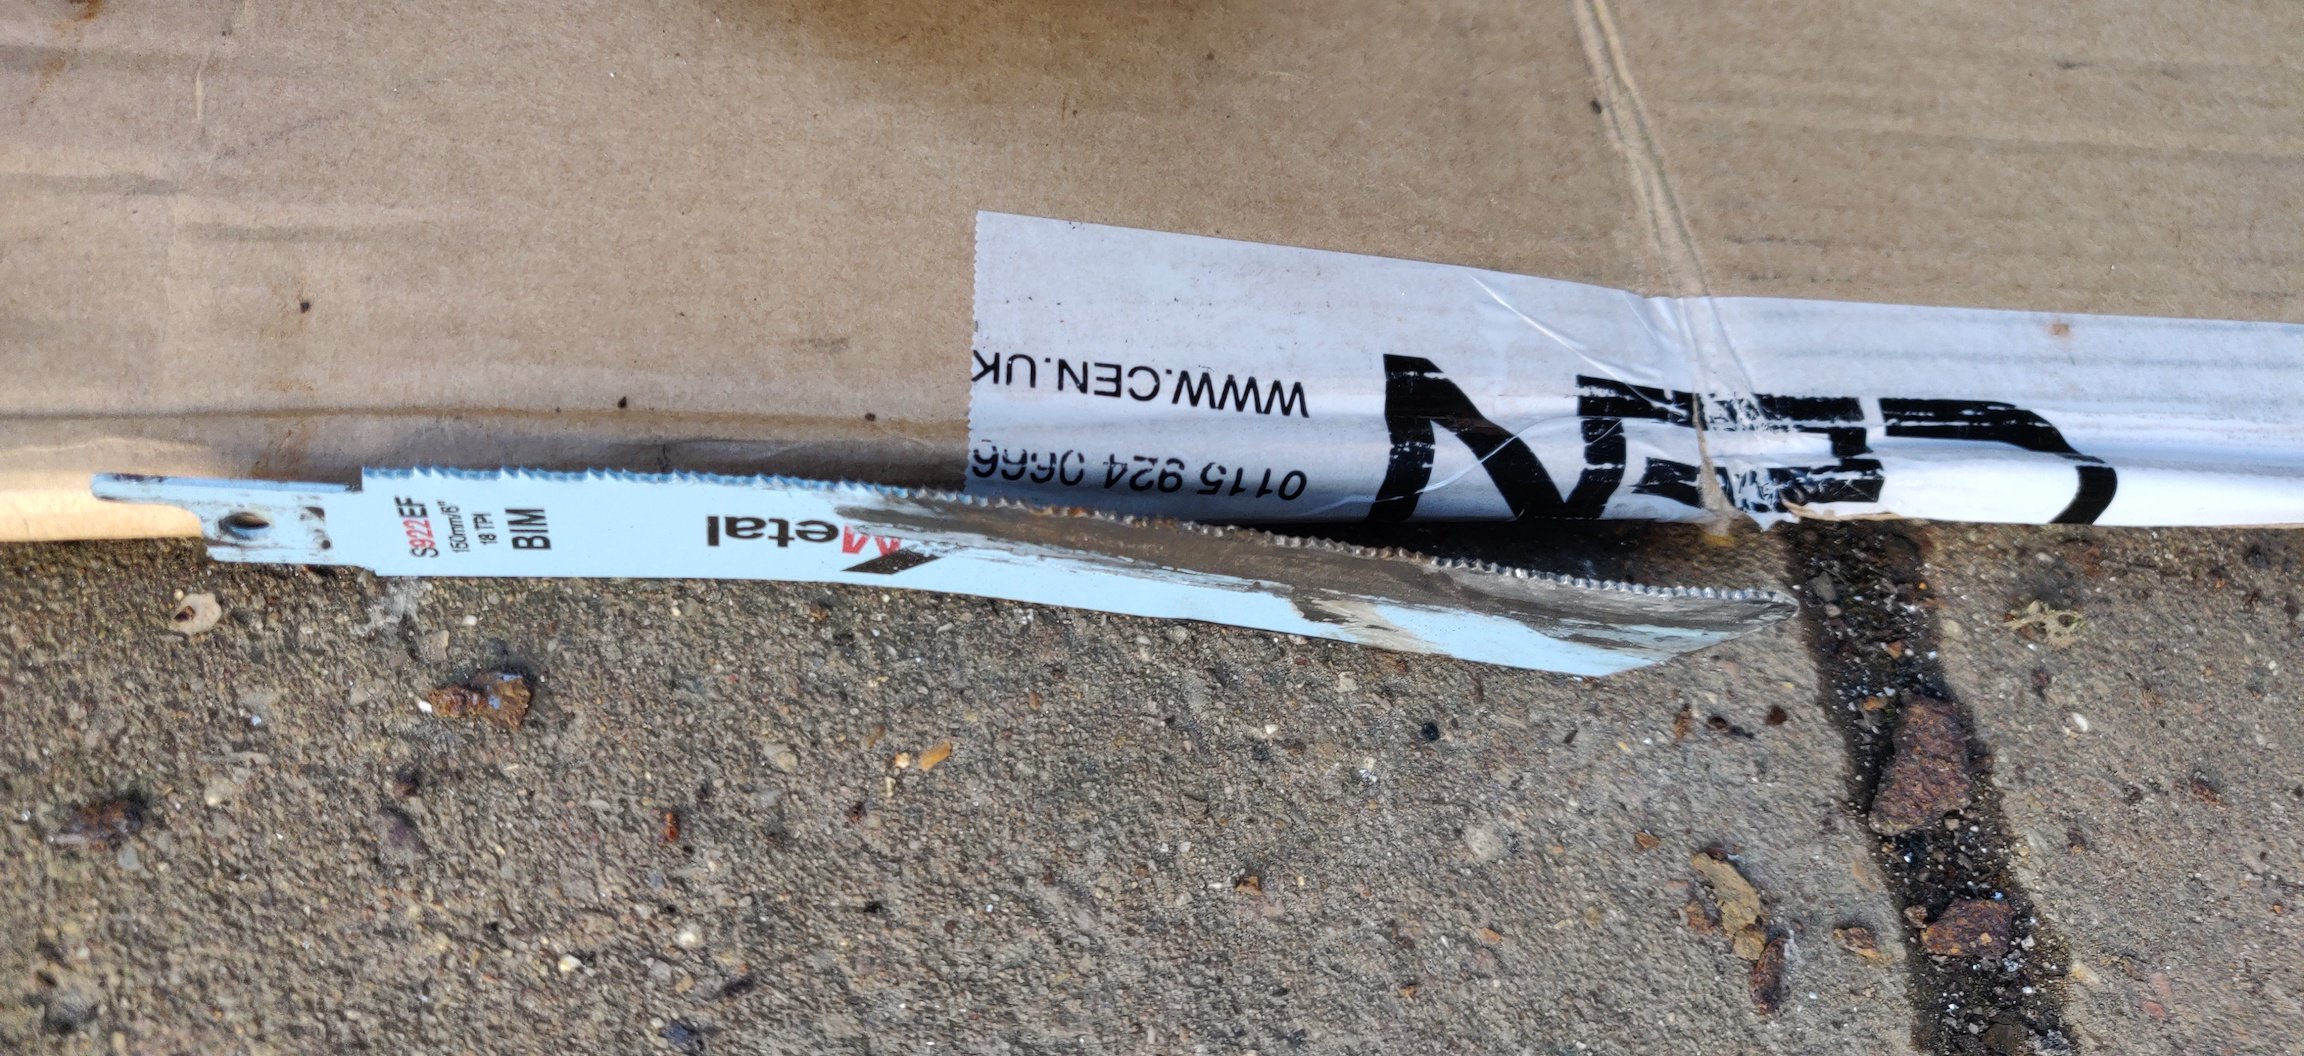
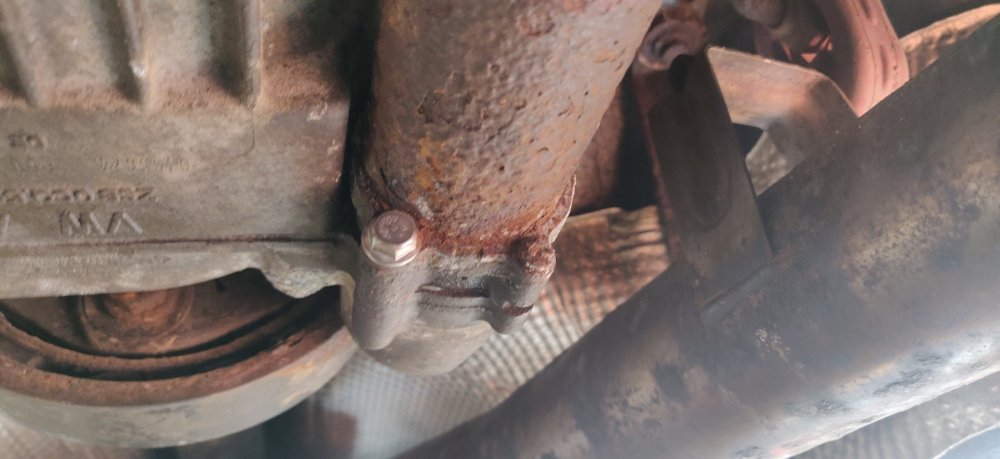
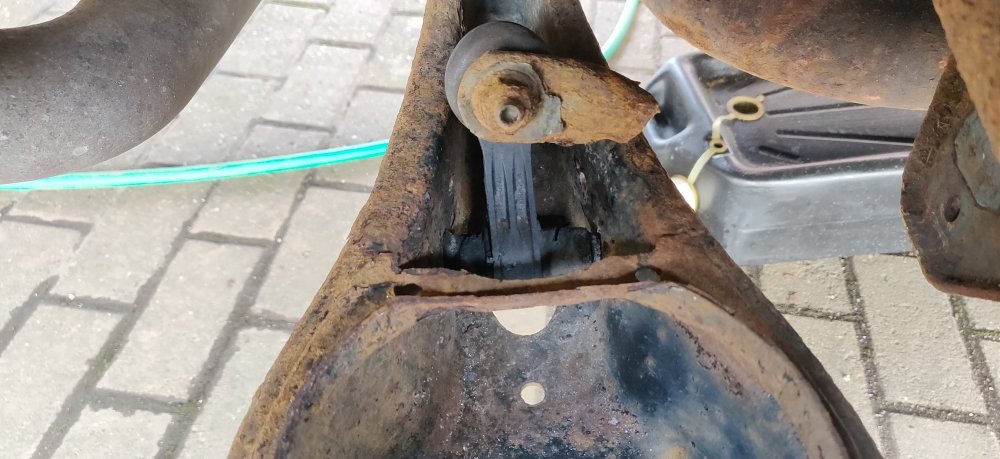
As soon as I saw that first anti roll bar link bolt seized into the bush into the link, I knew a degree of stubbornness would be required, because it won't be the only fastener affected down there. Don't really have much choice in this position but to push on!
-
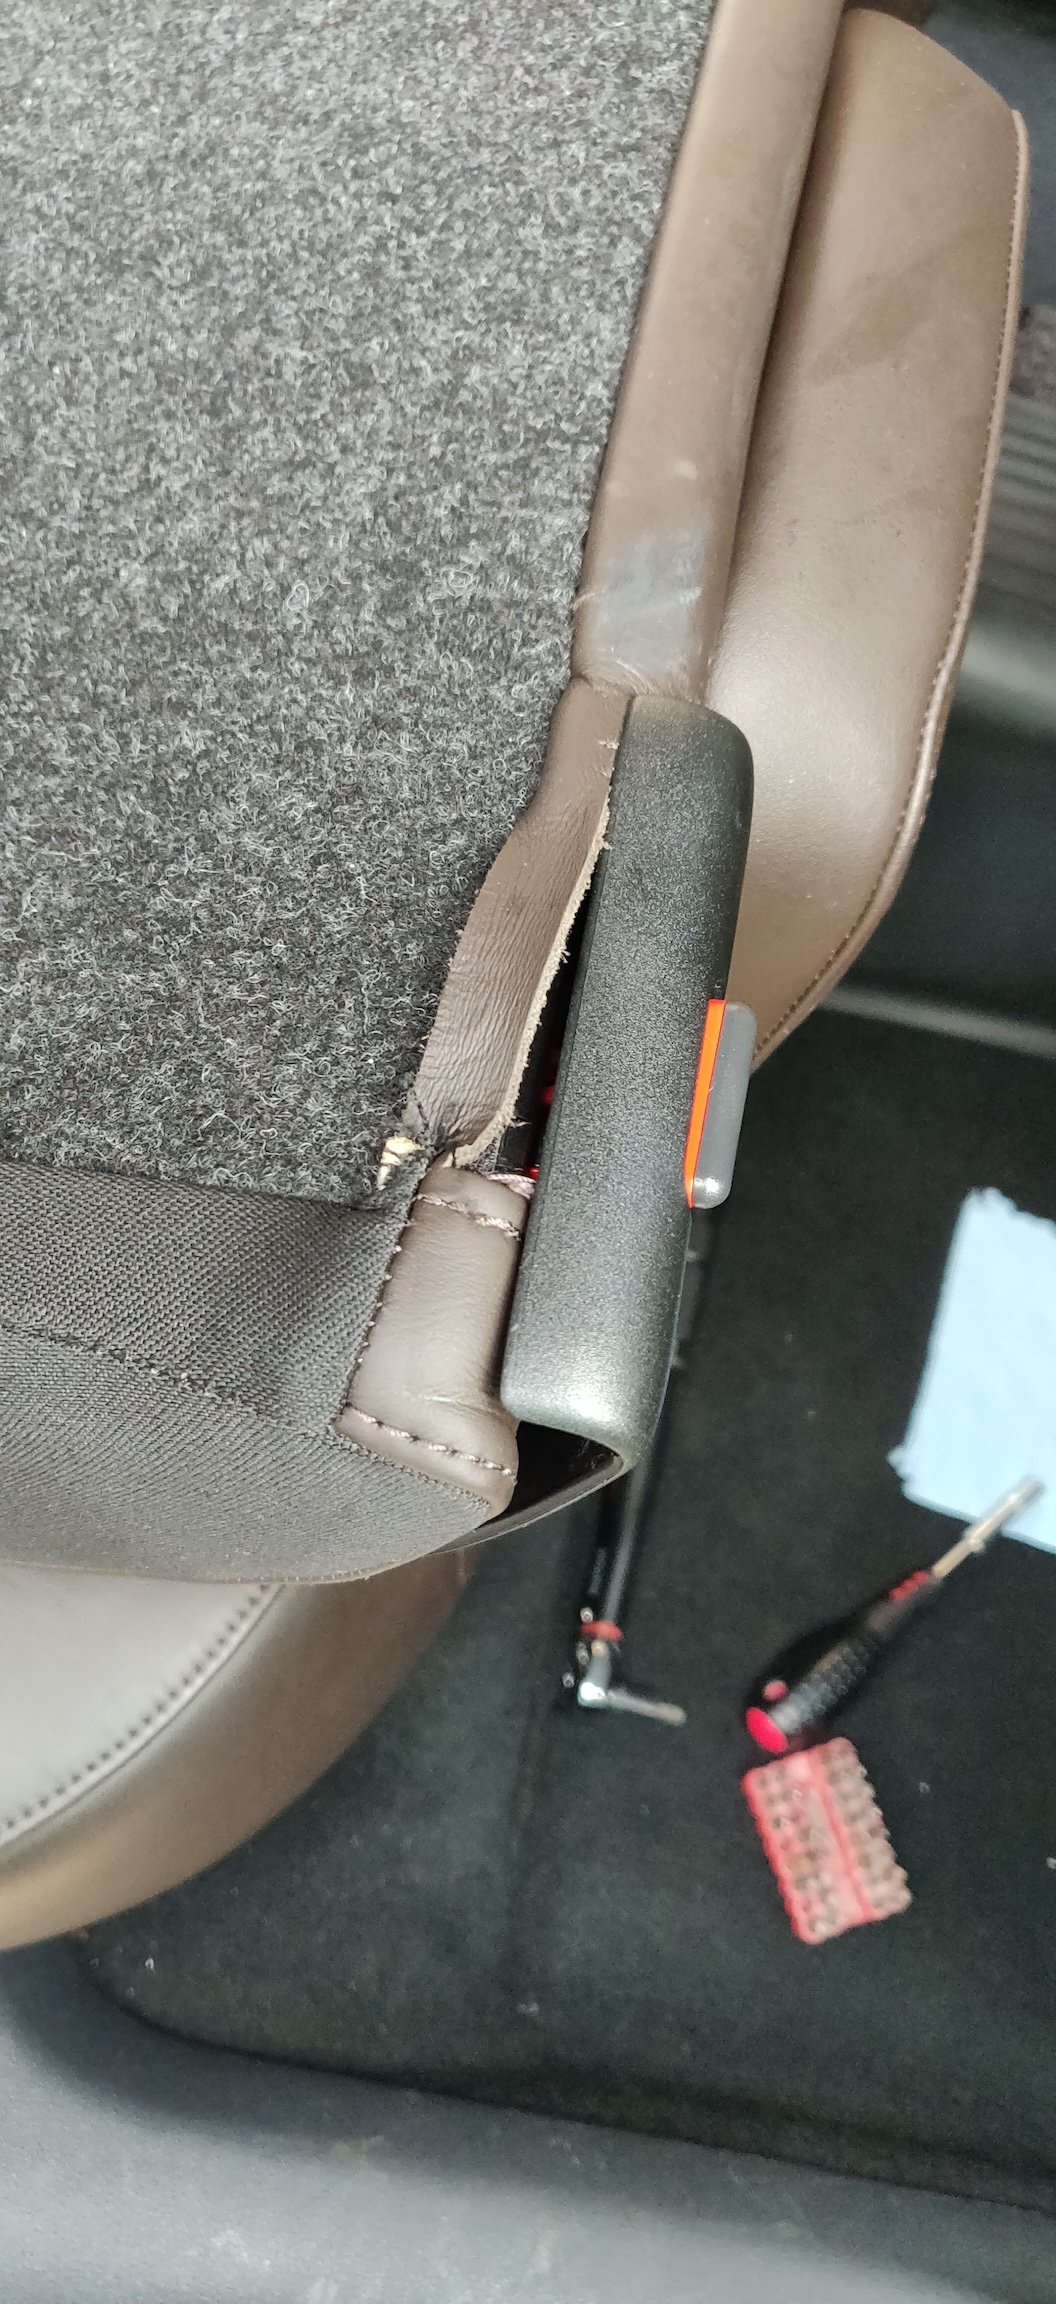
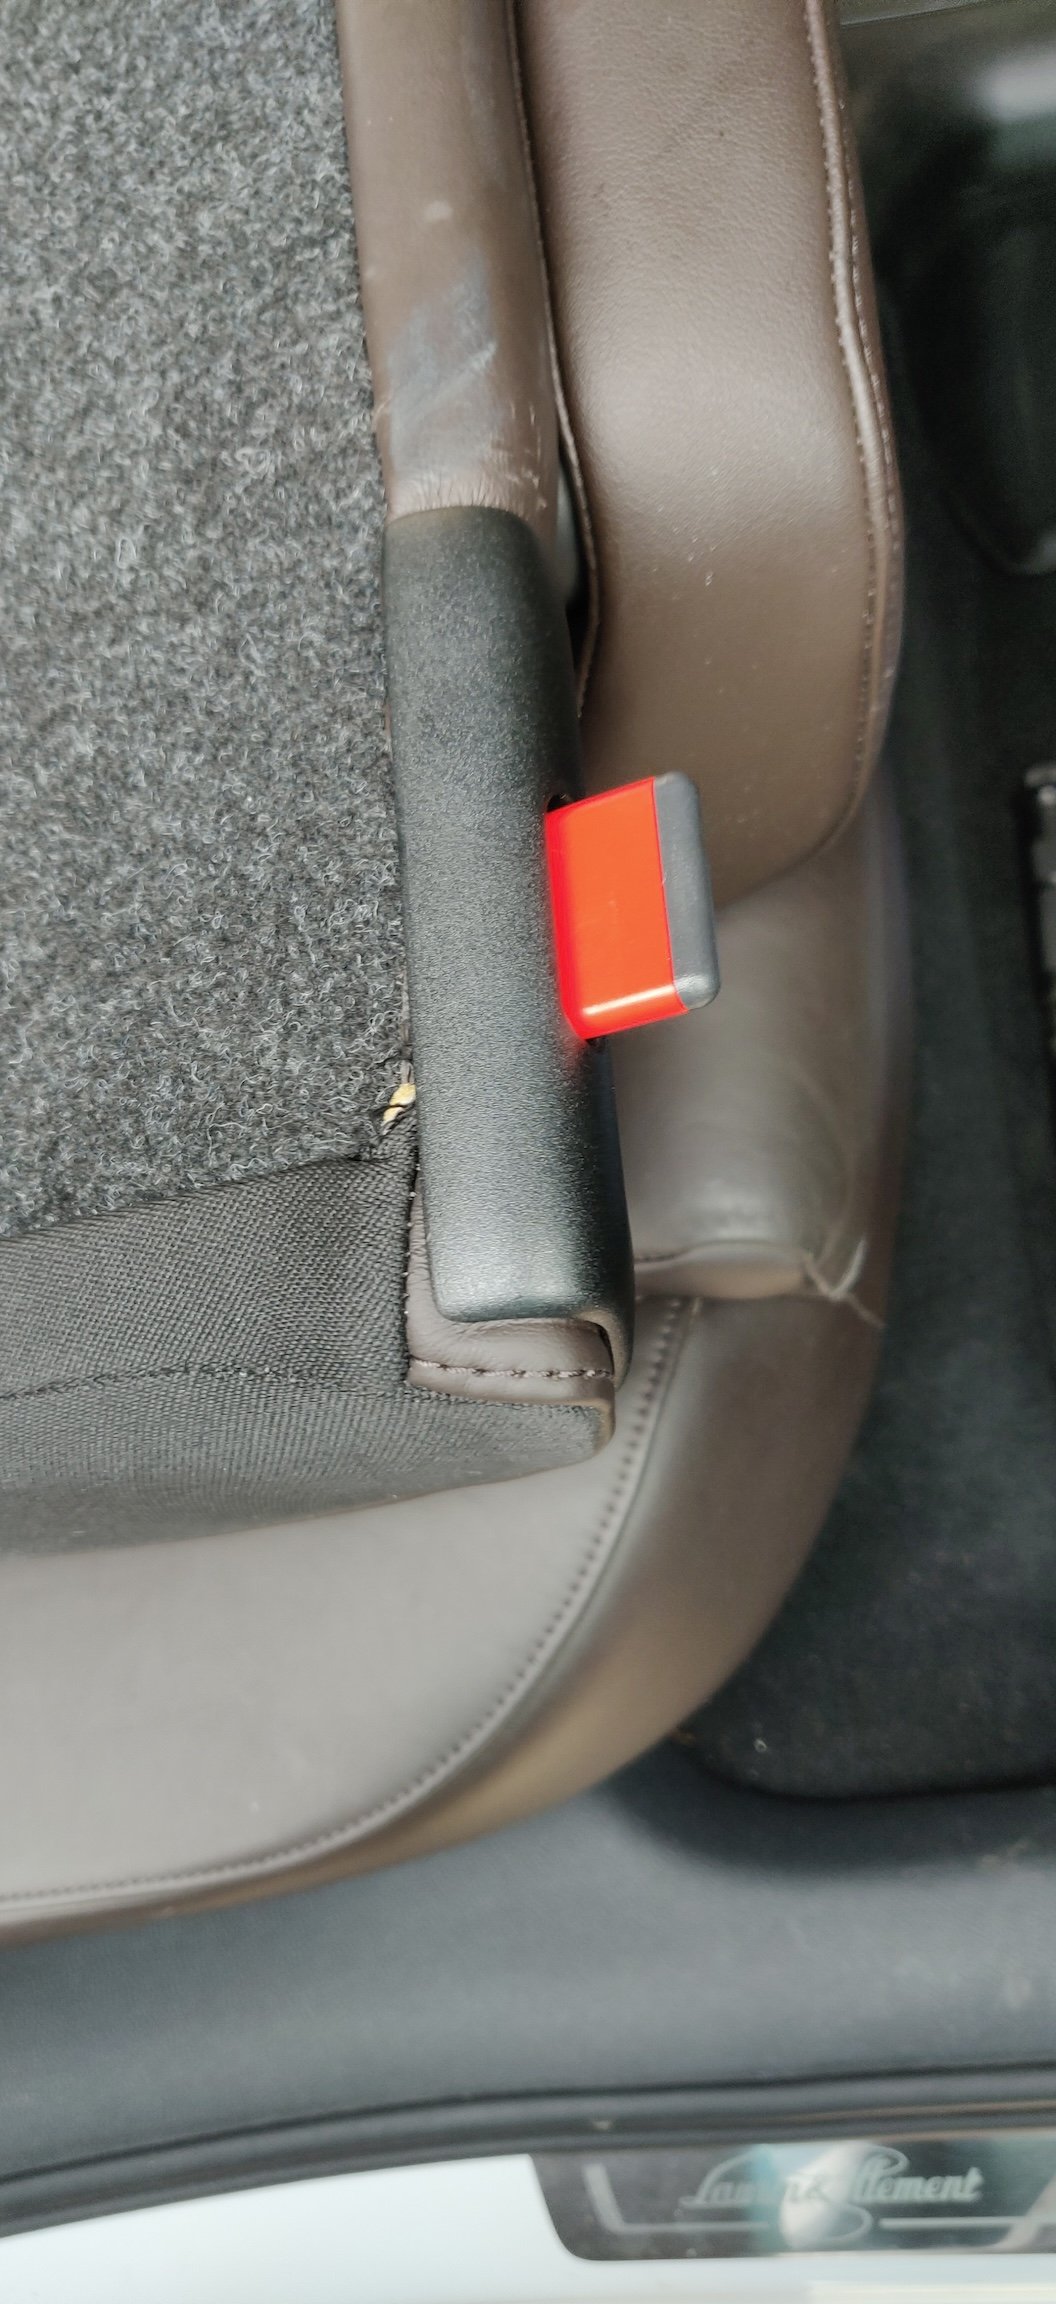
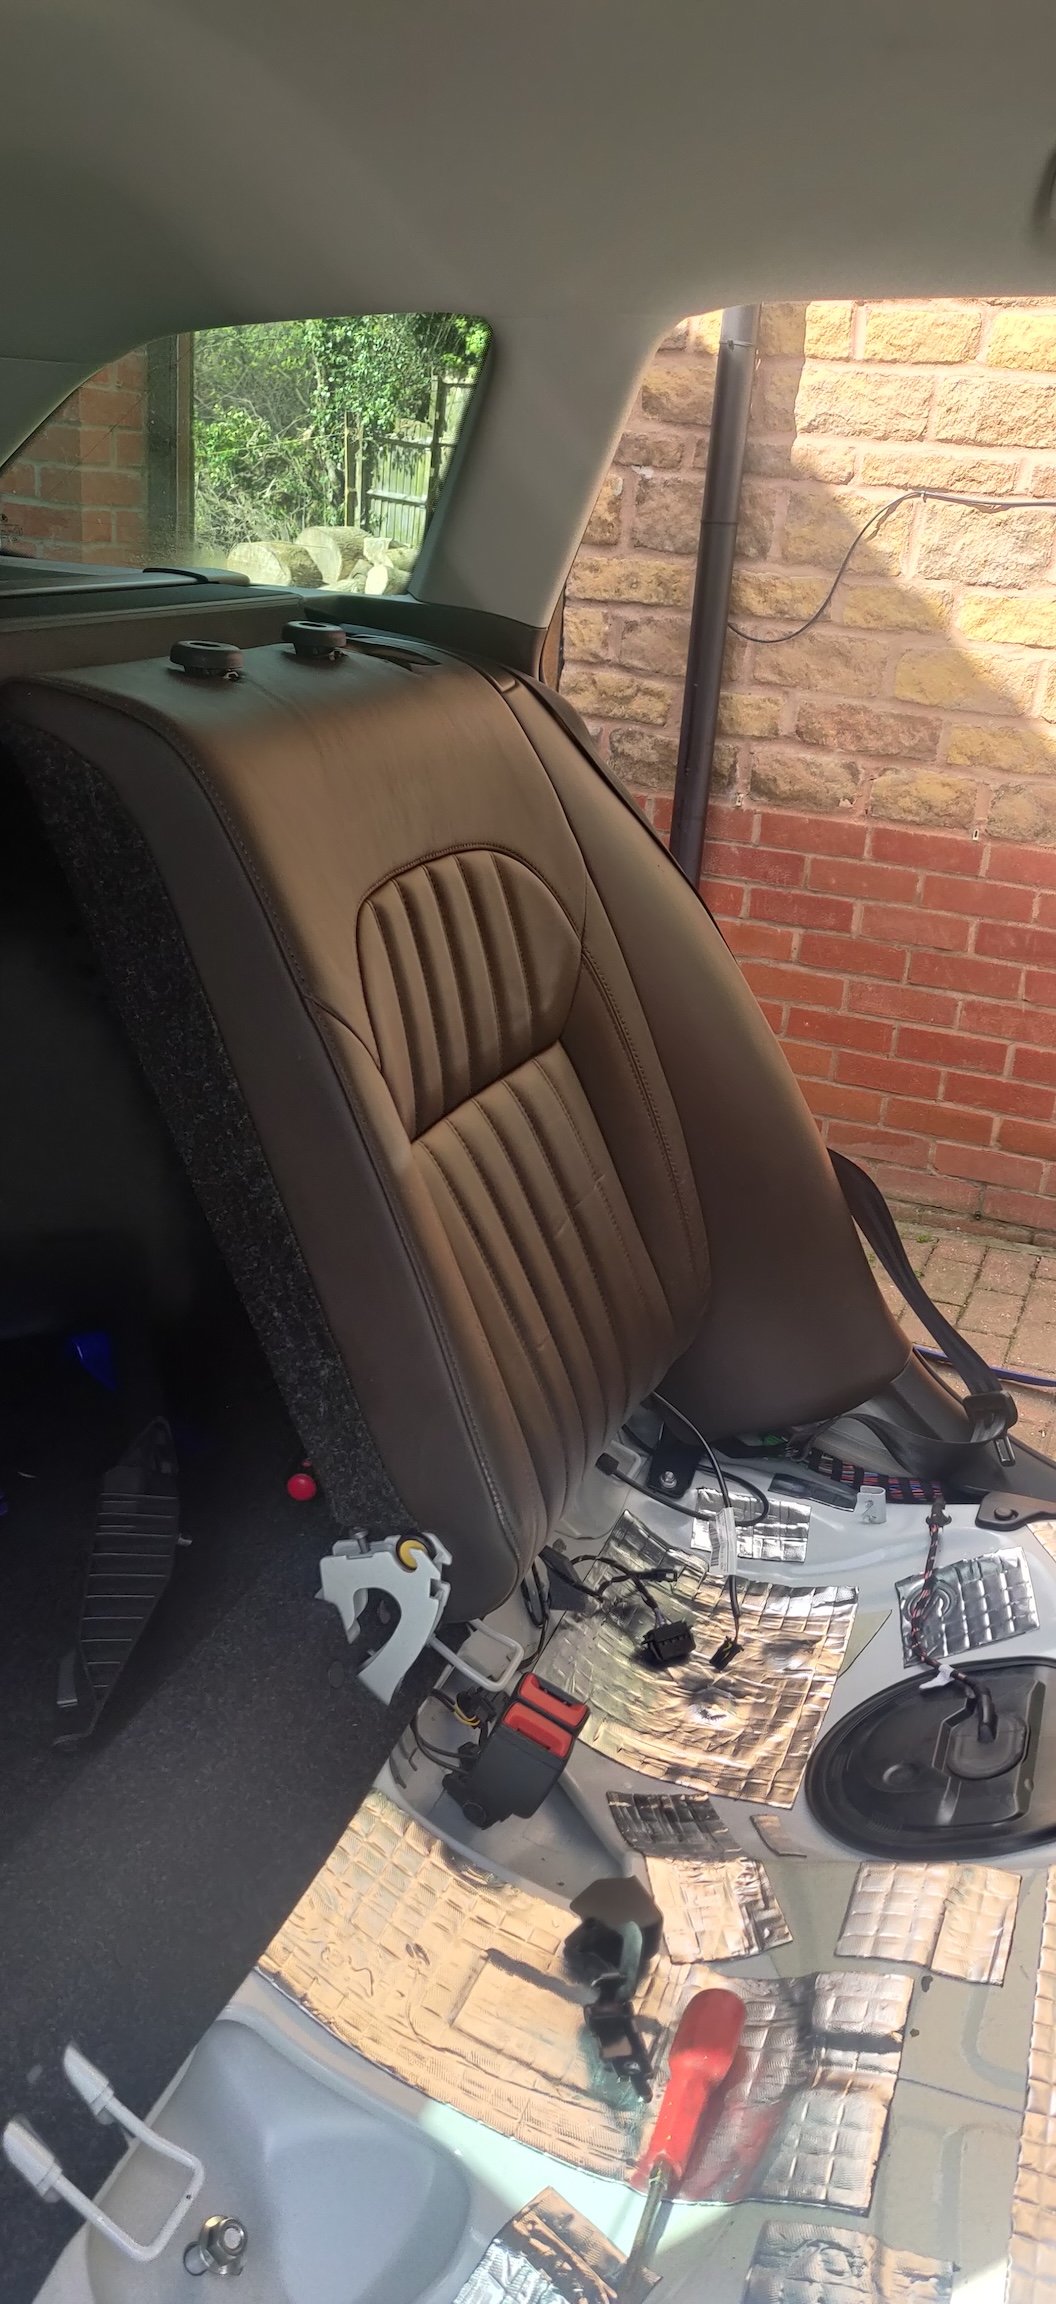
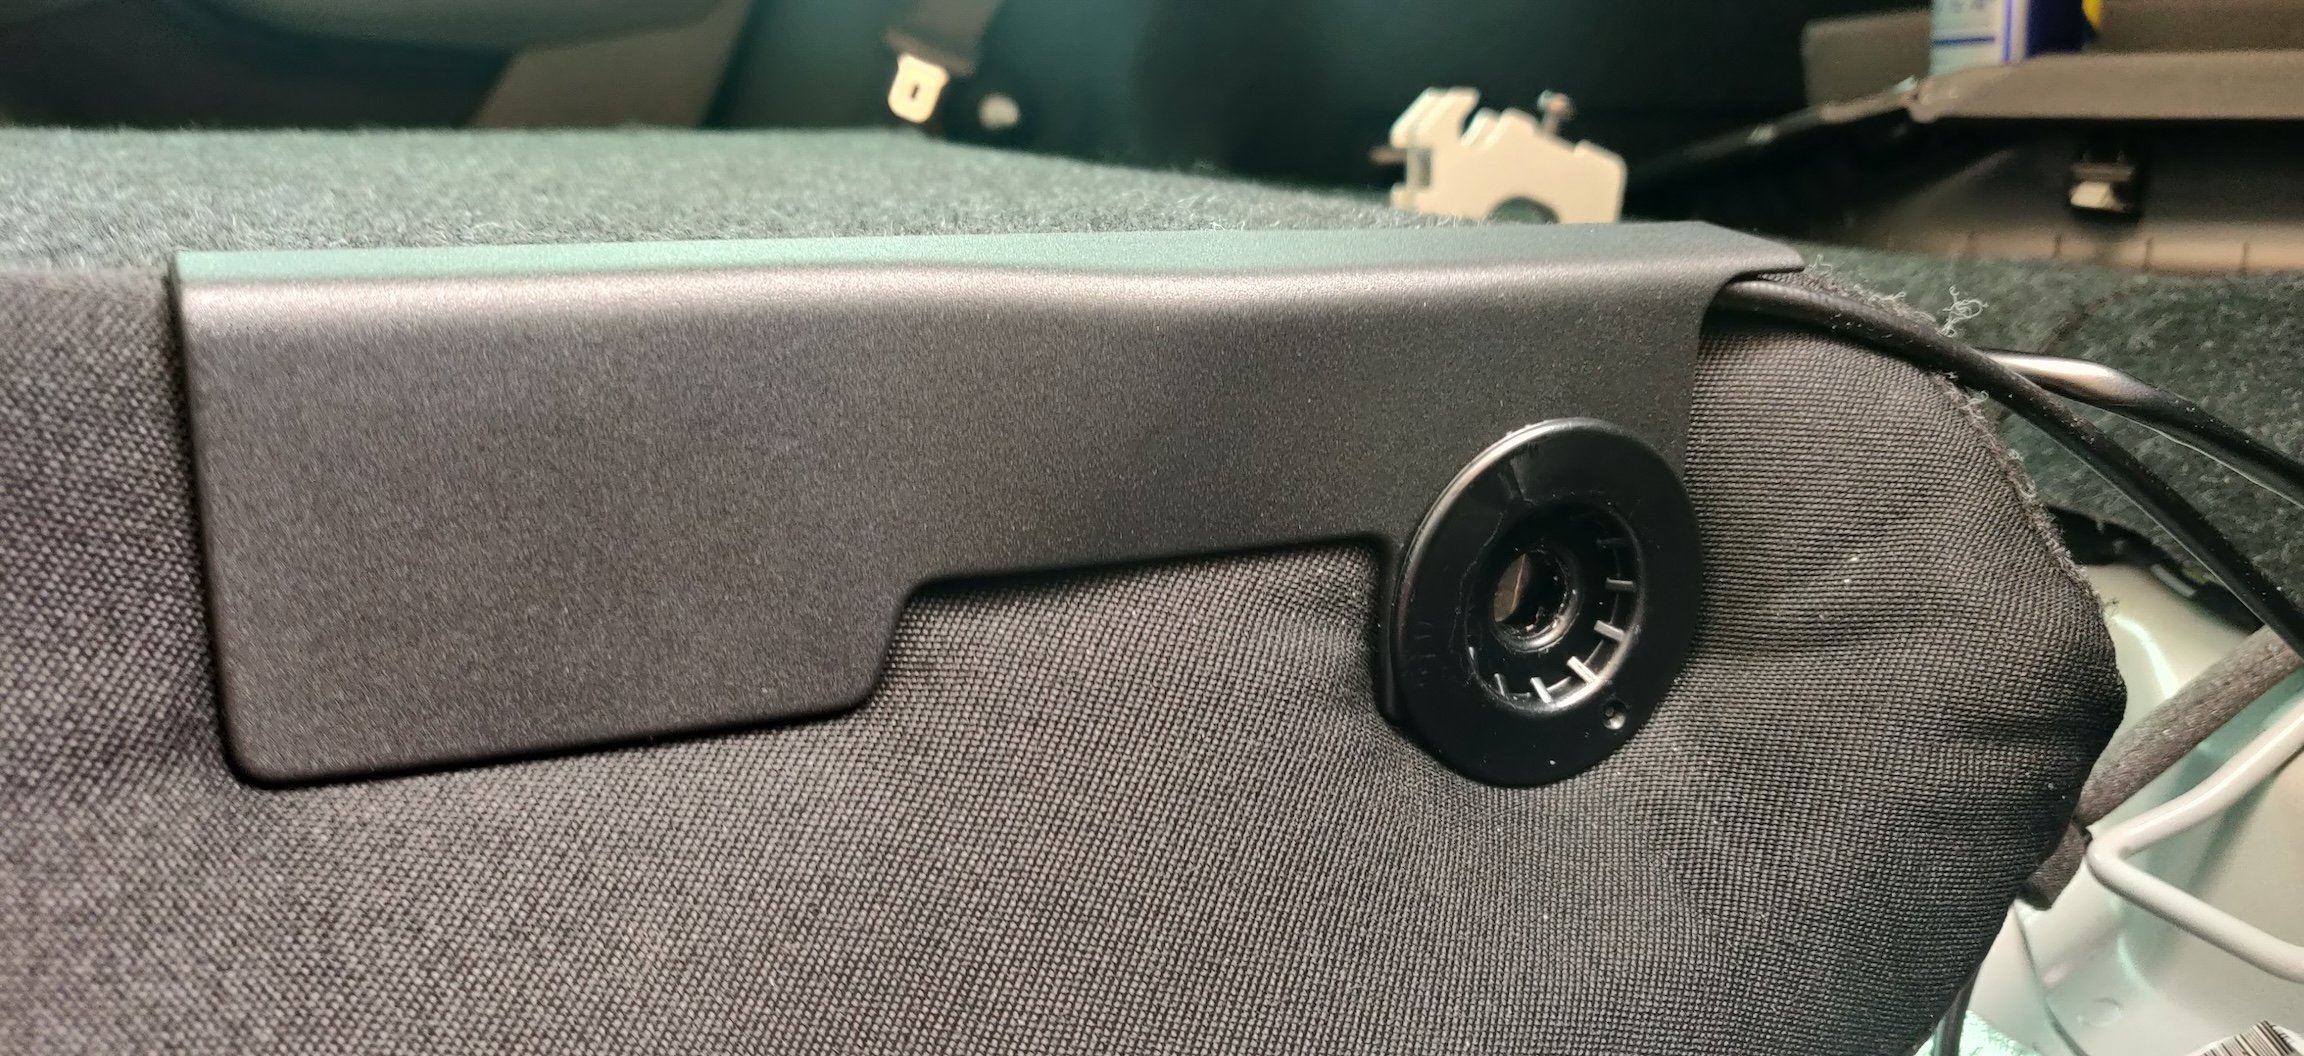
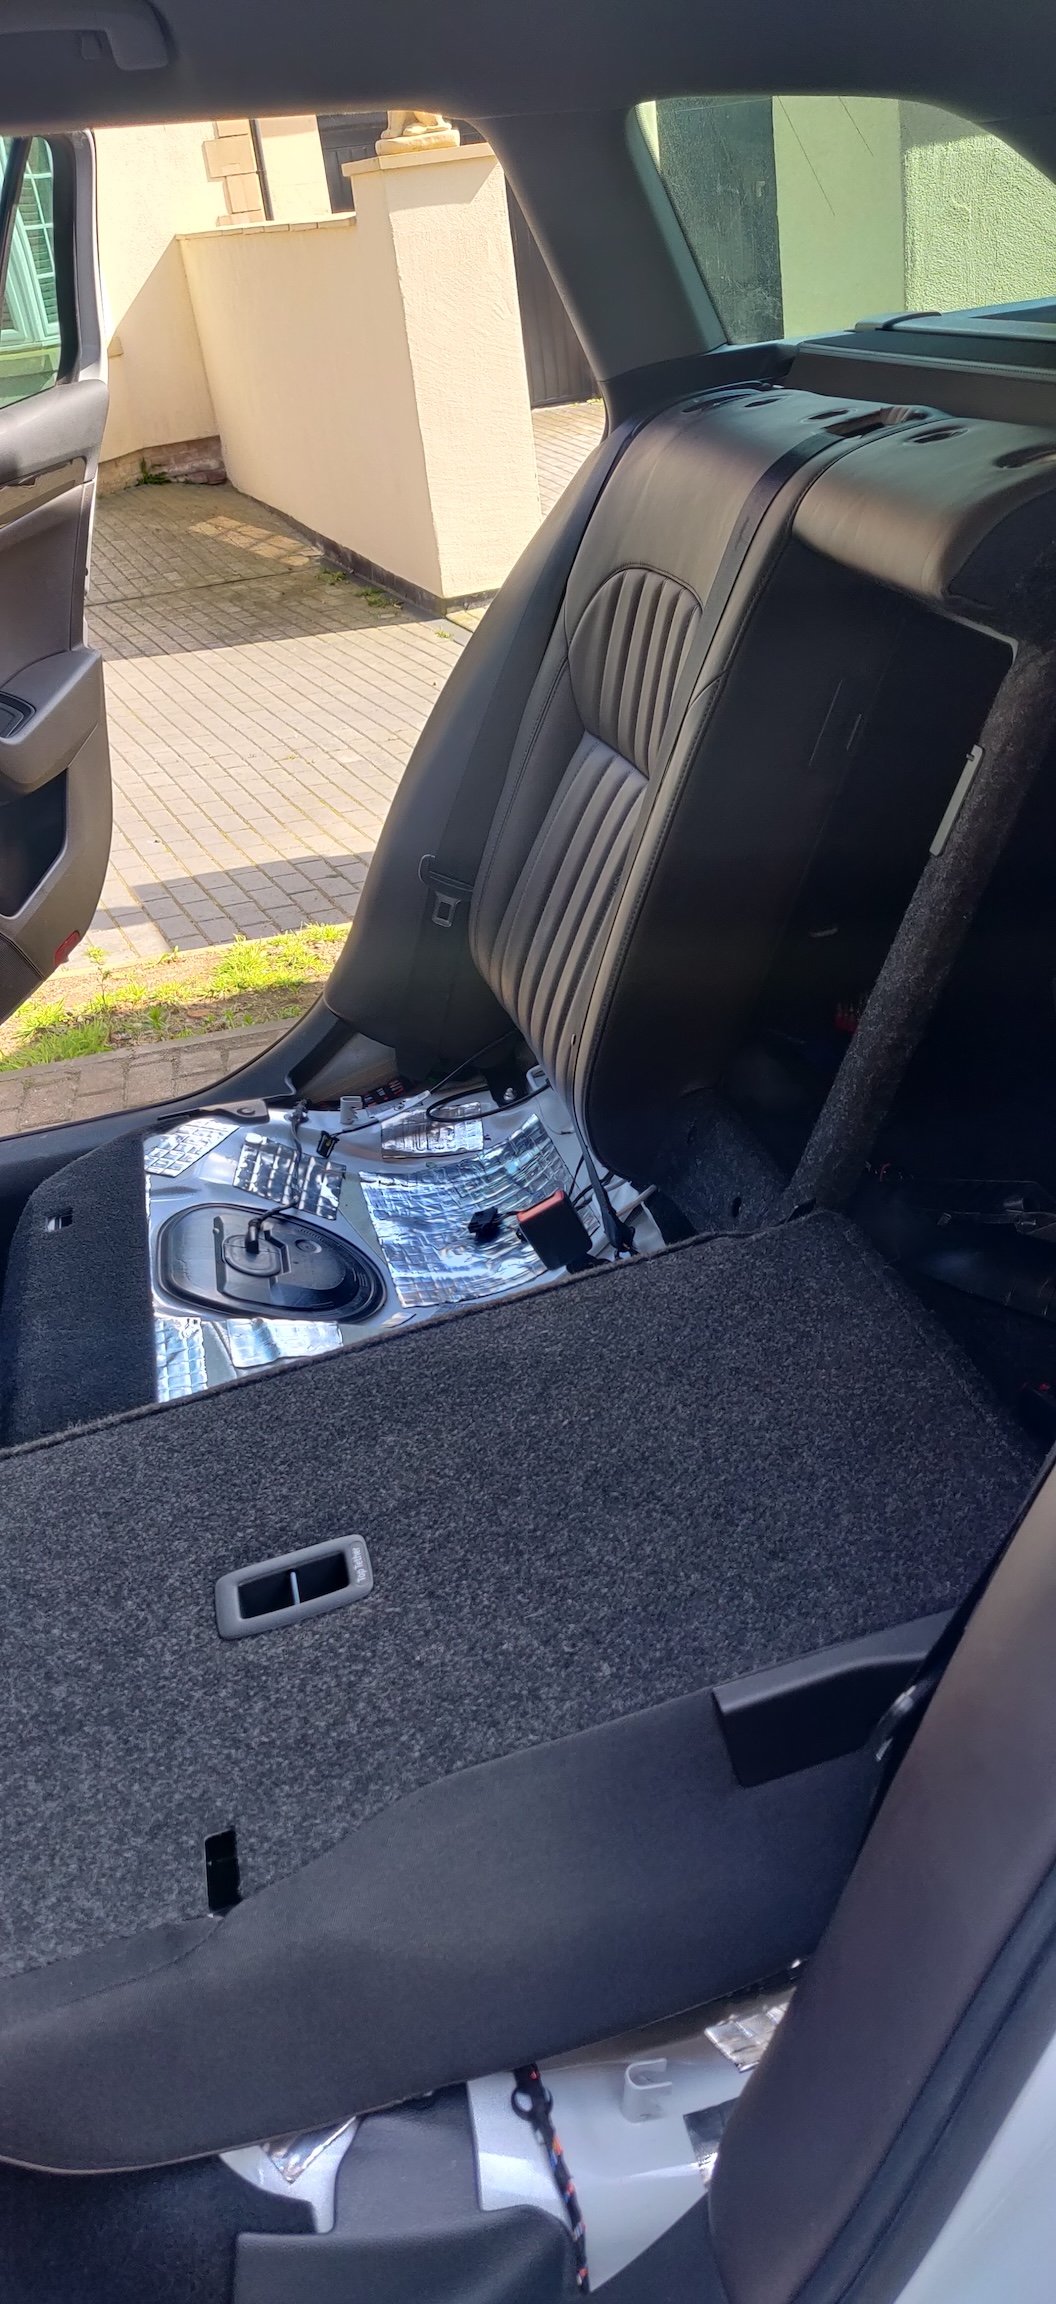
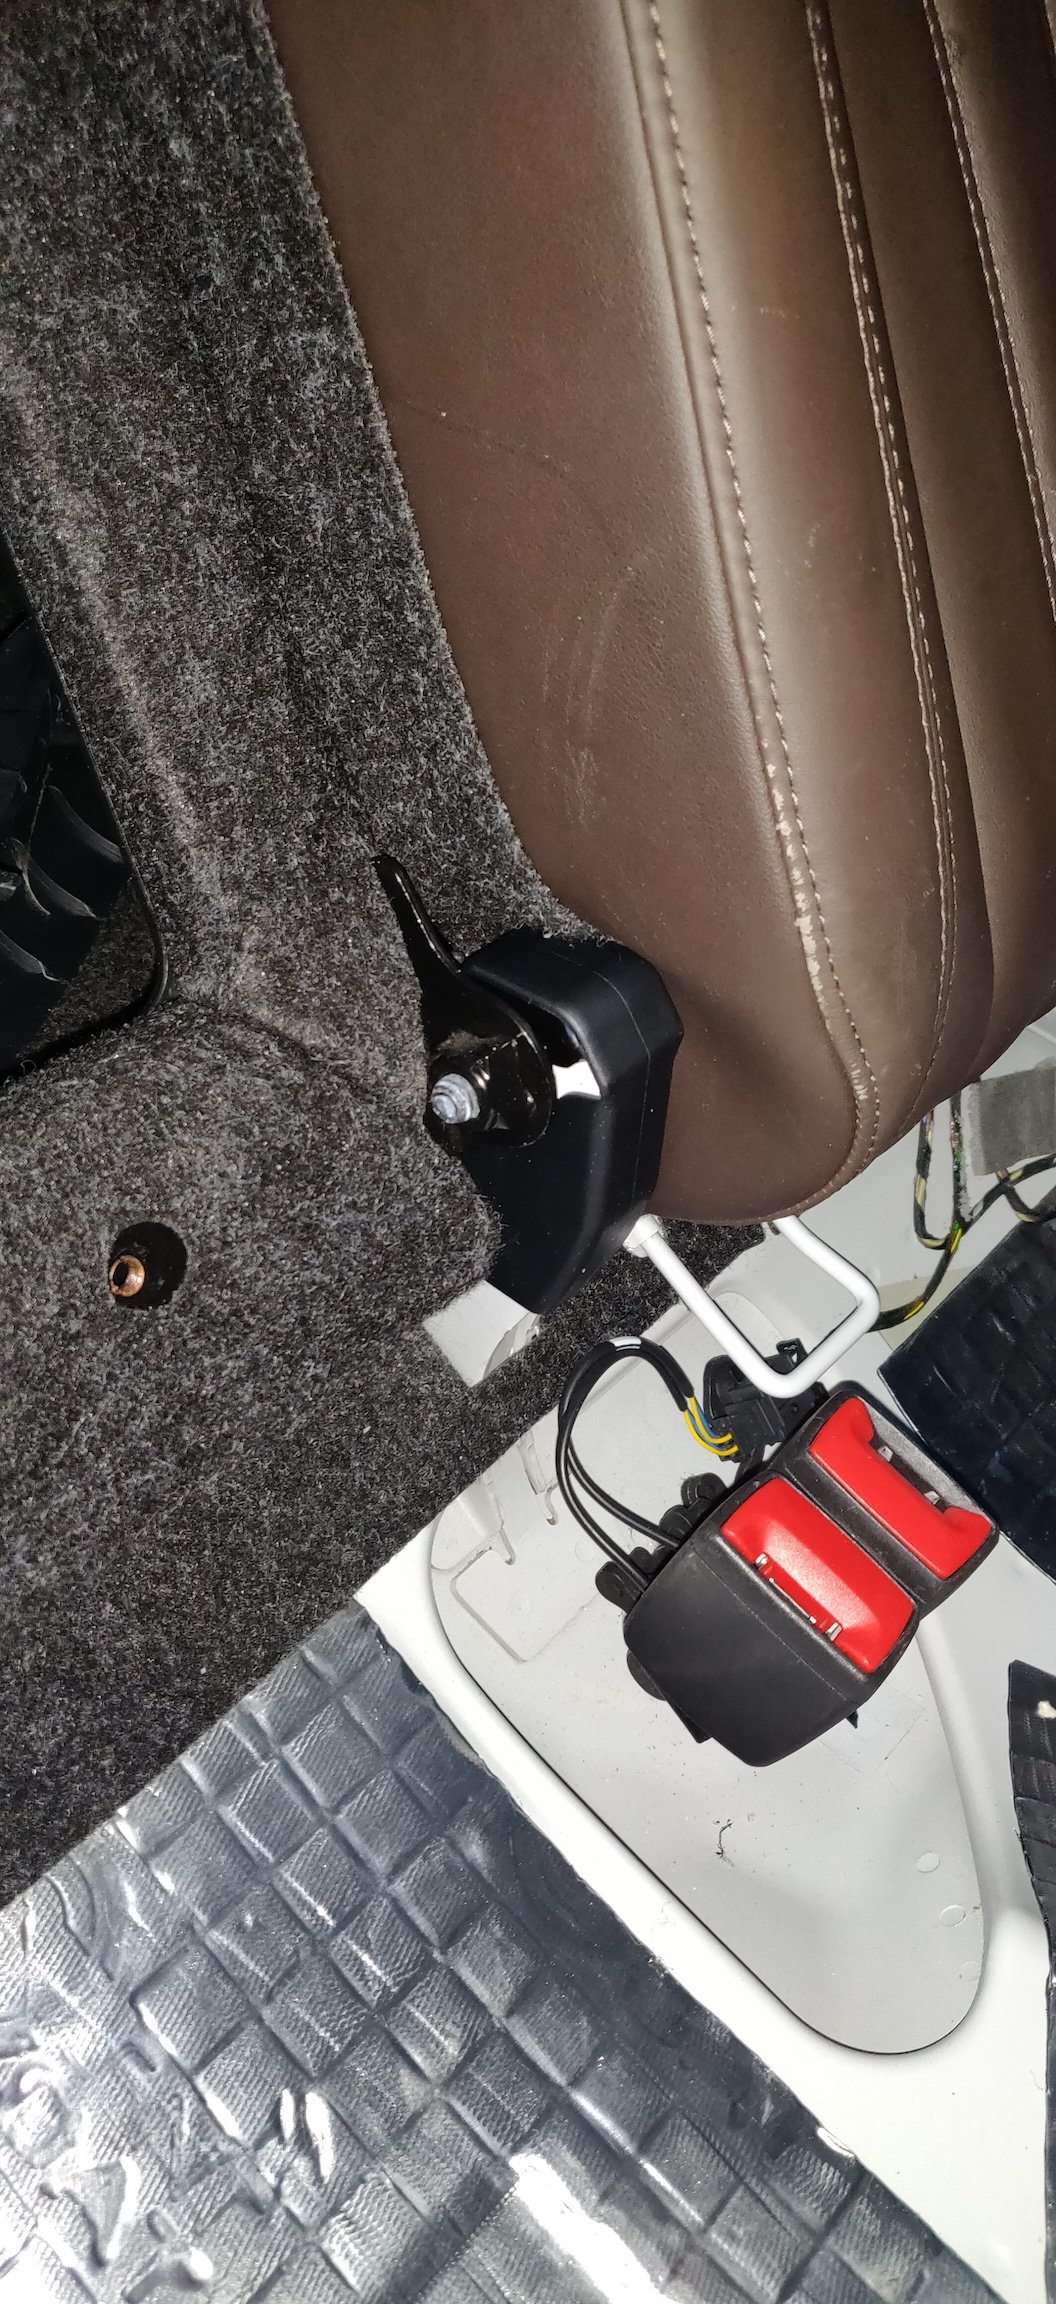
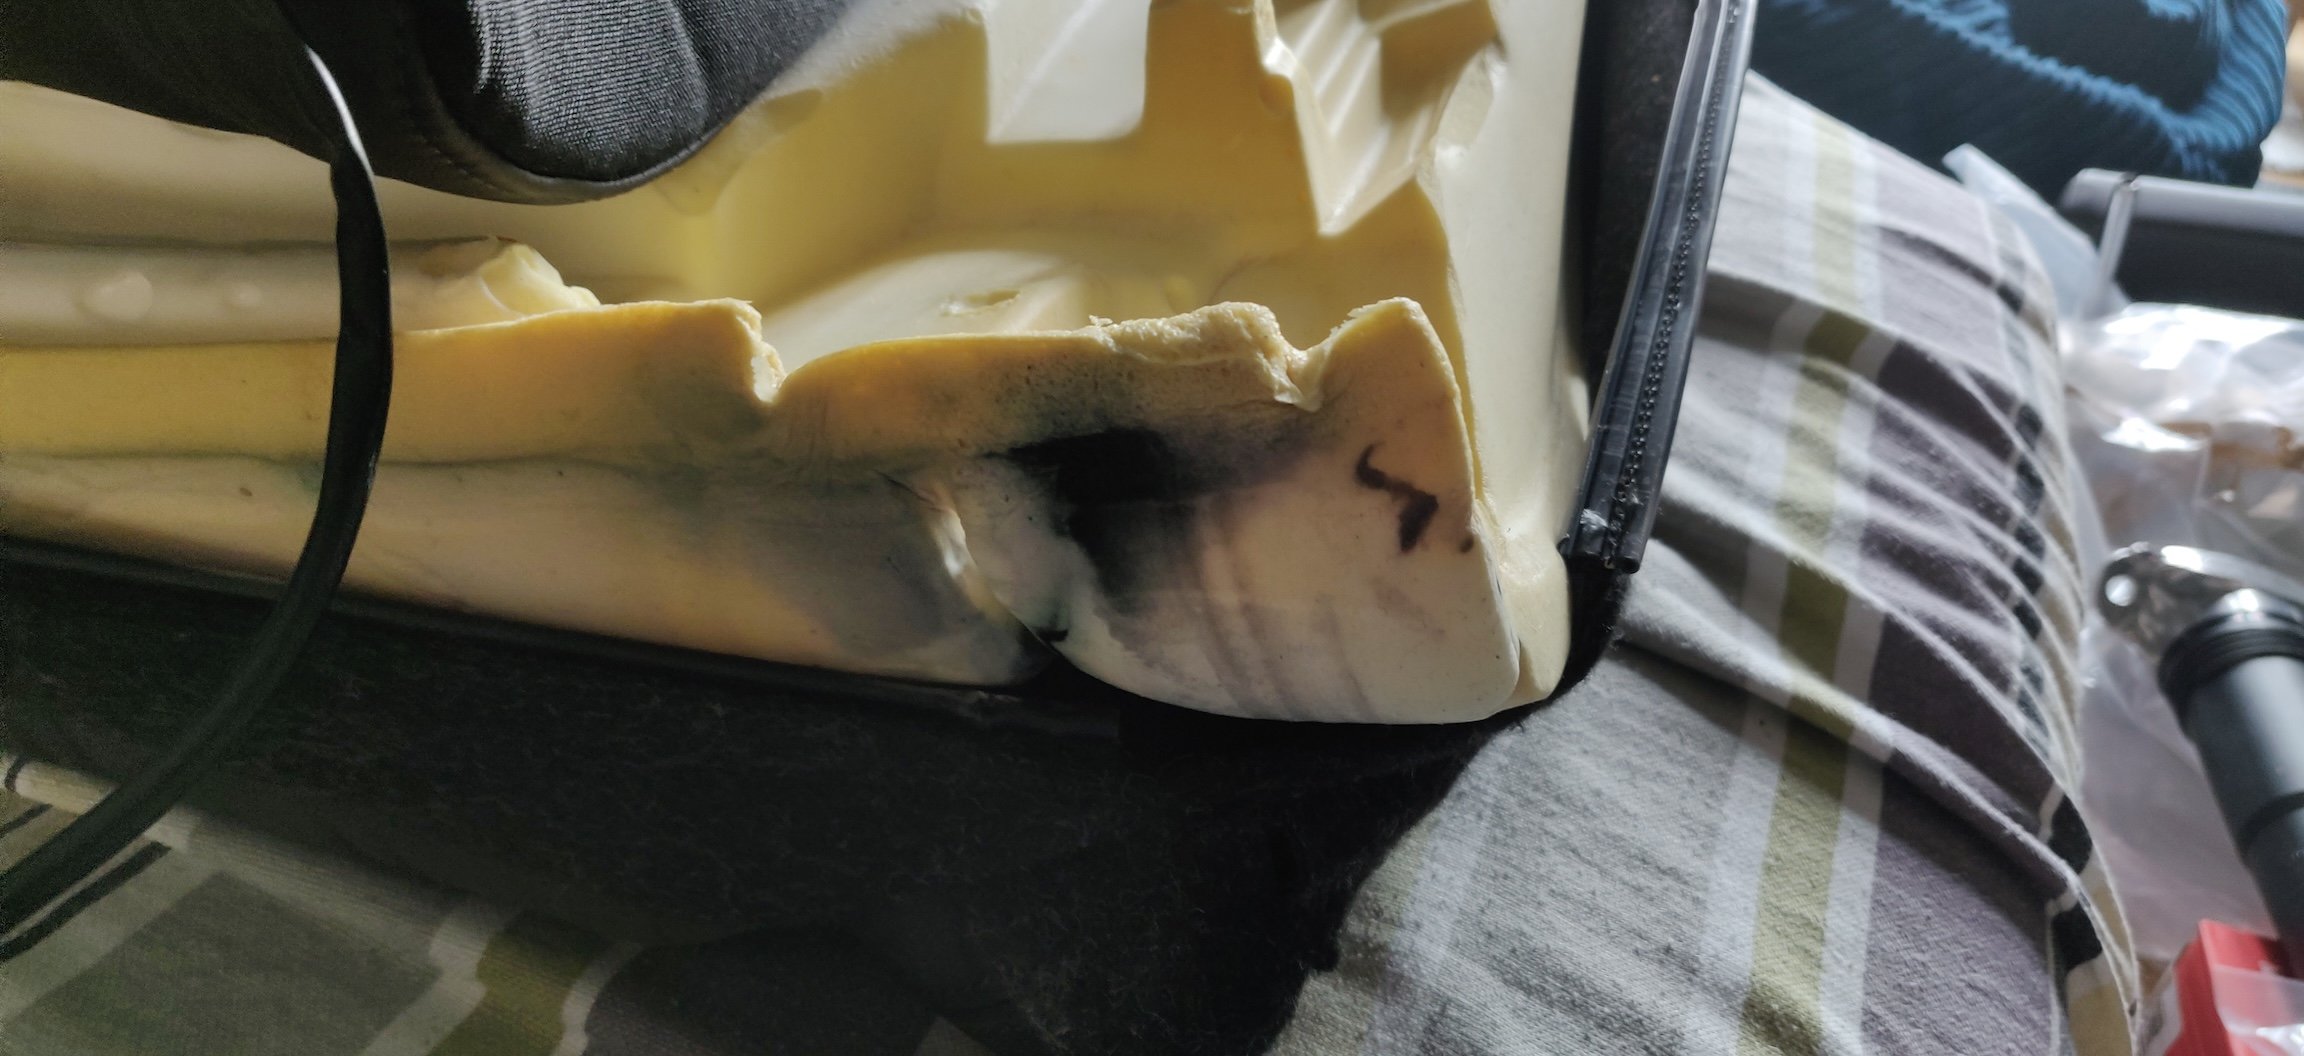
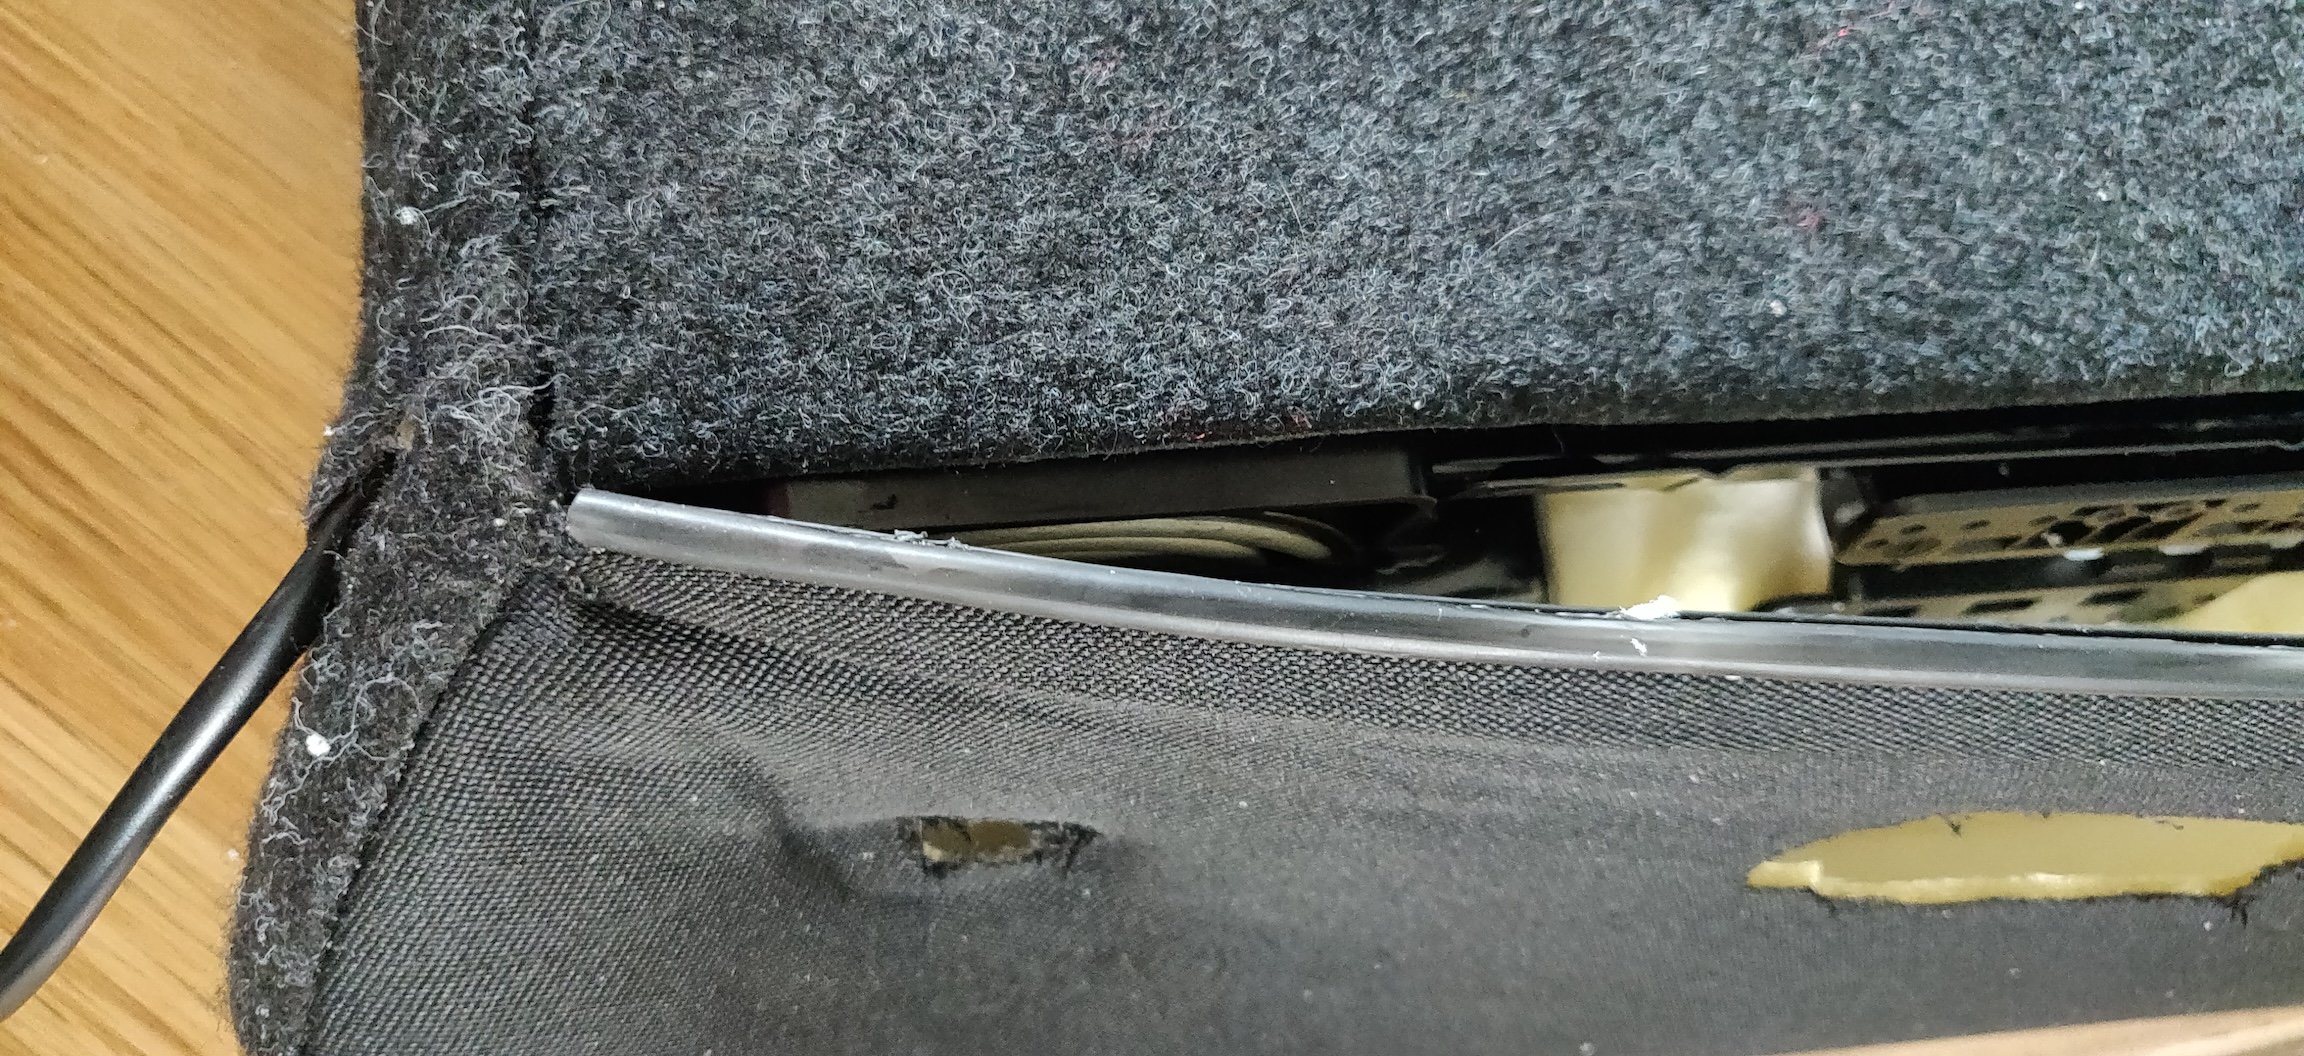
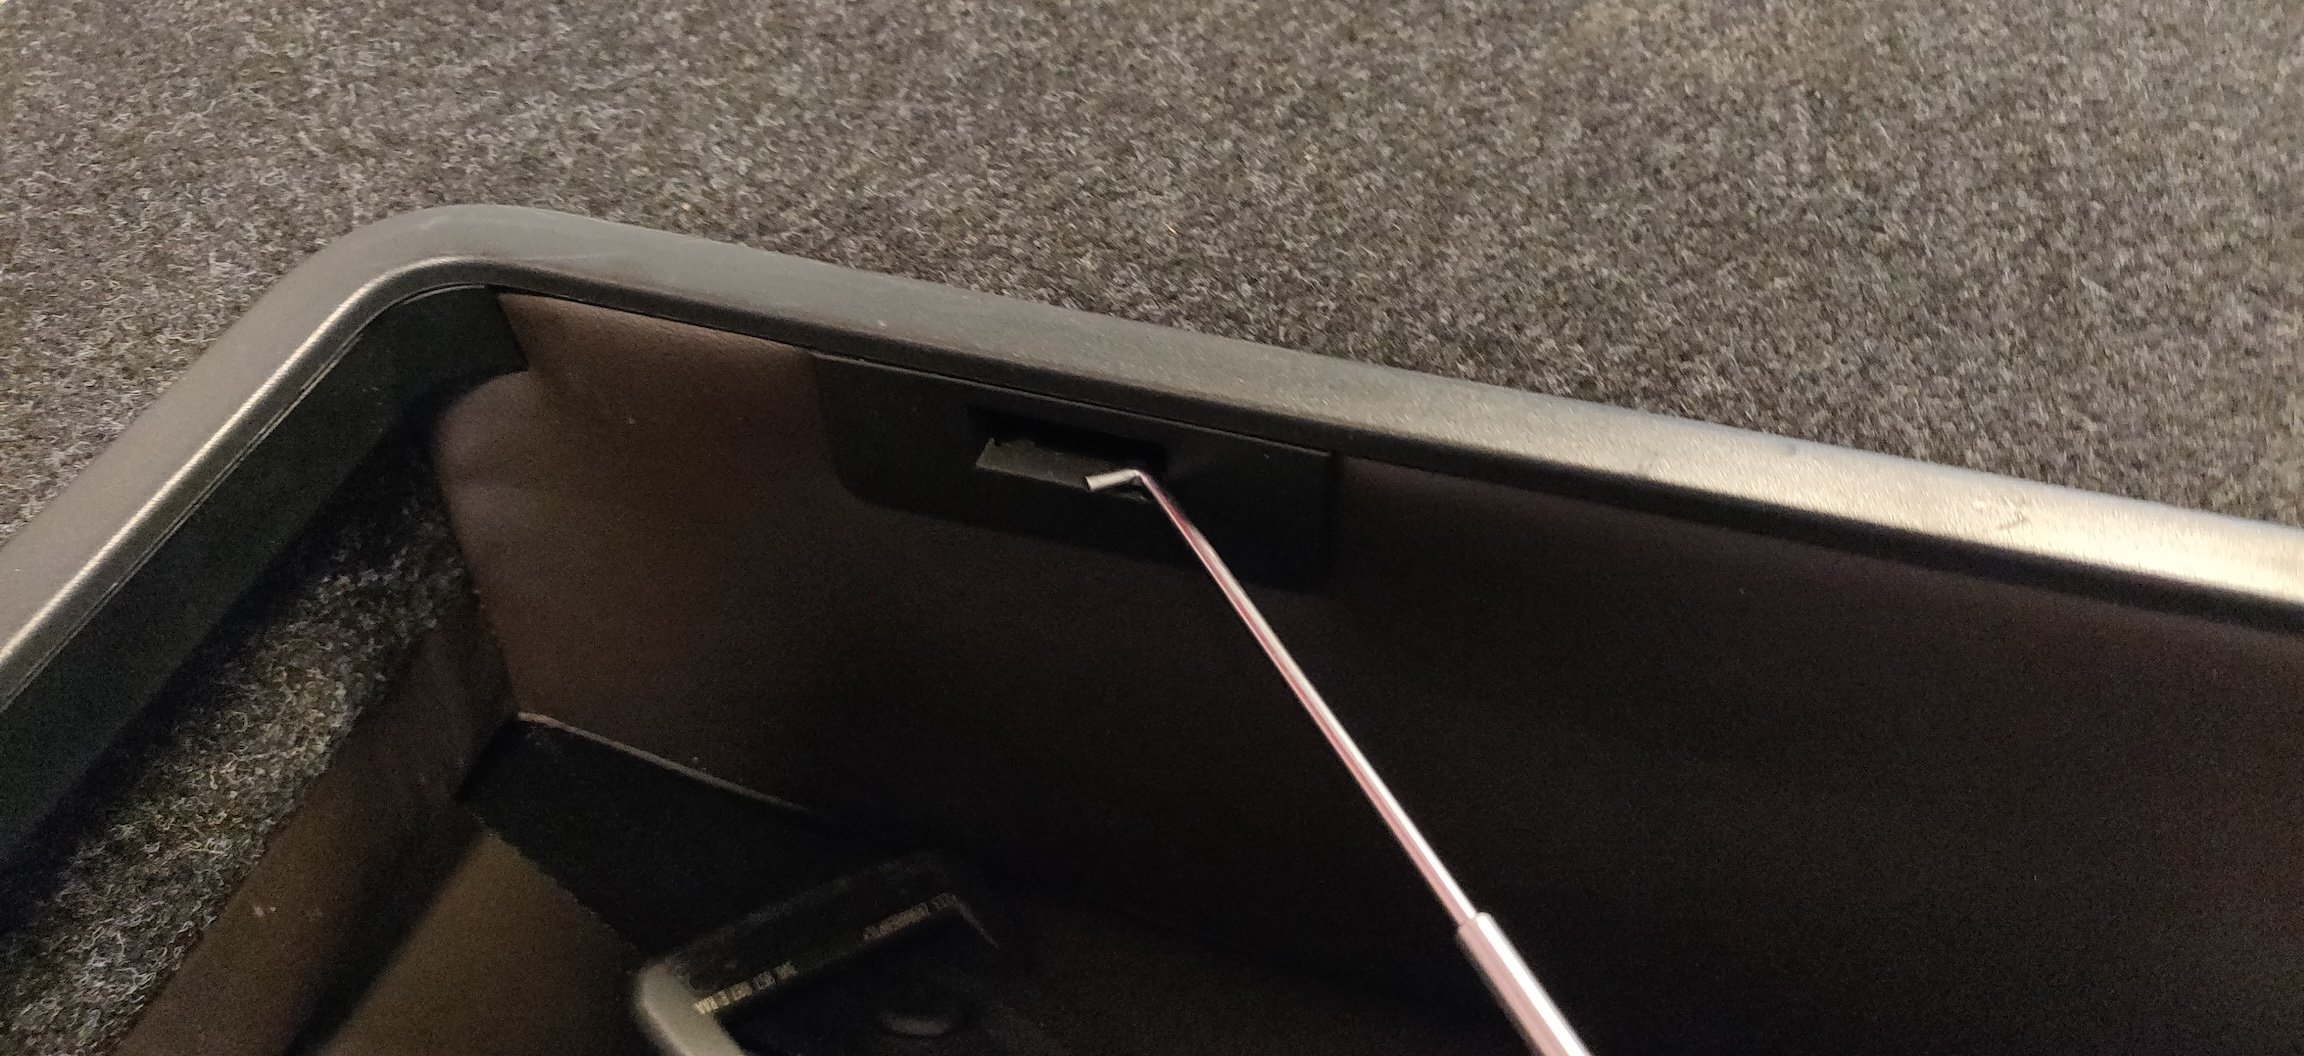
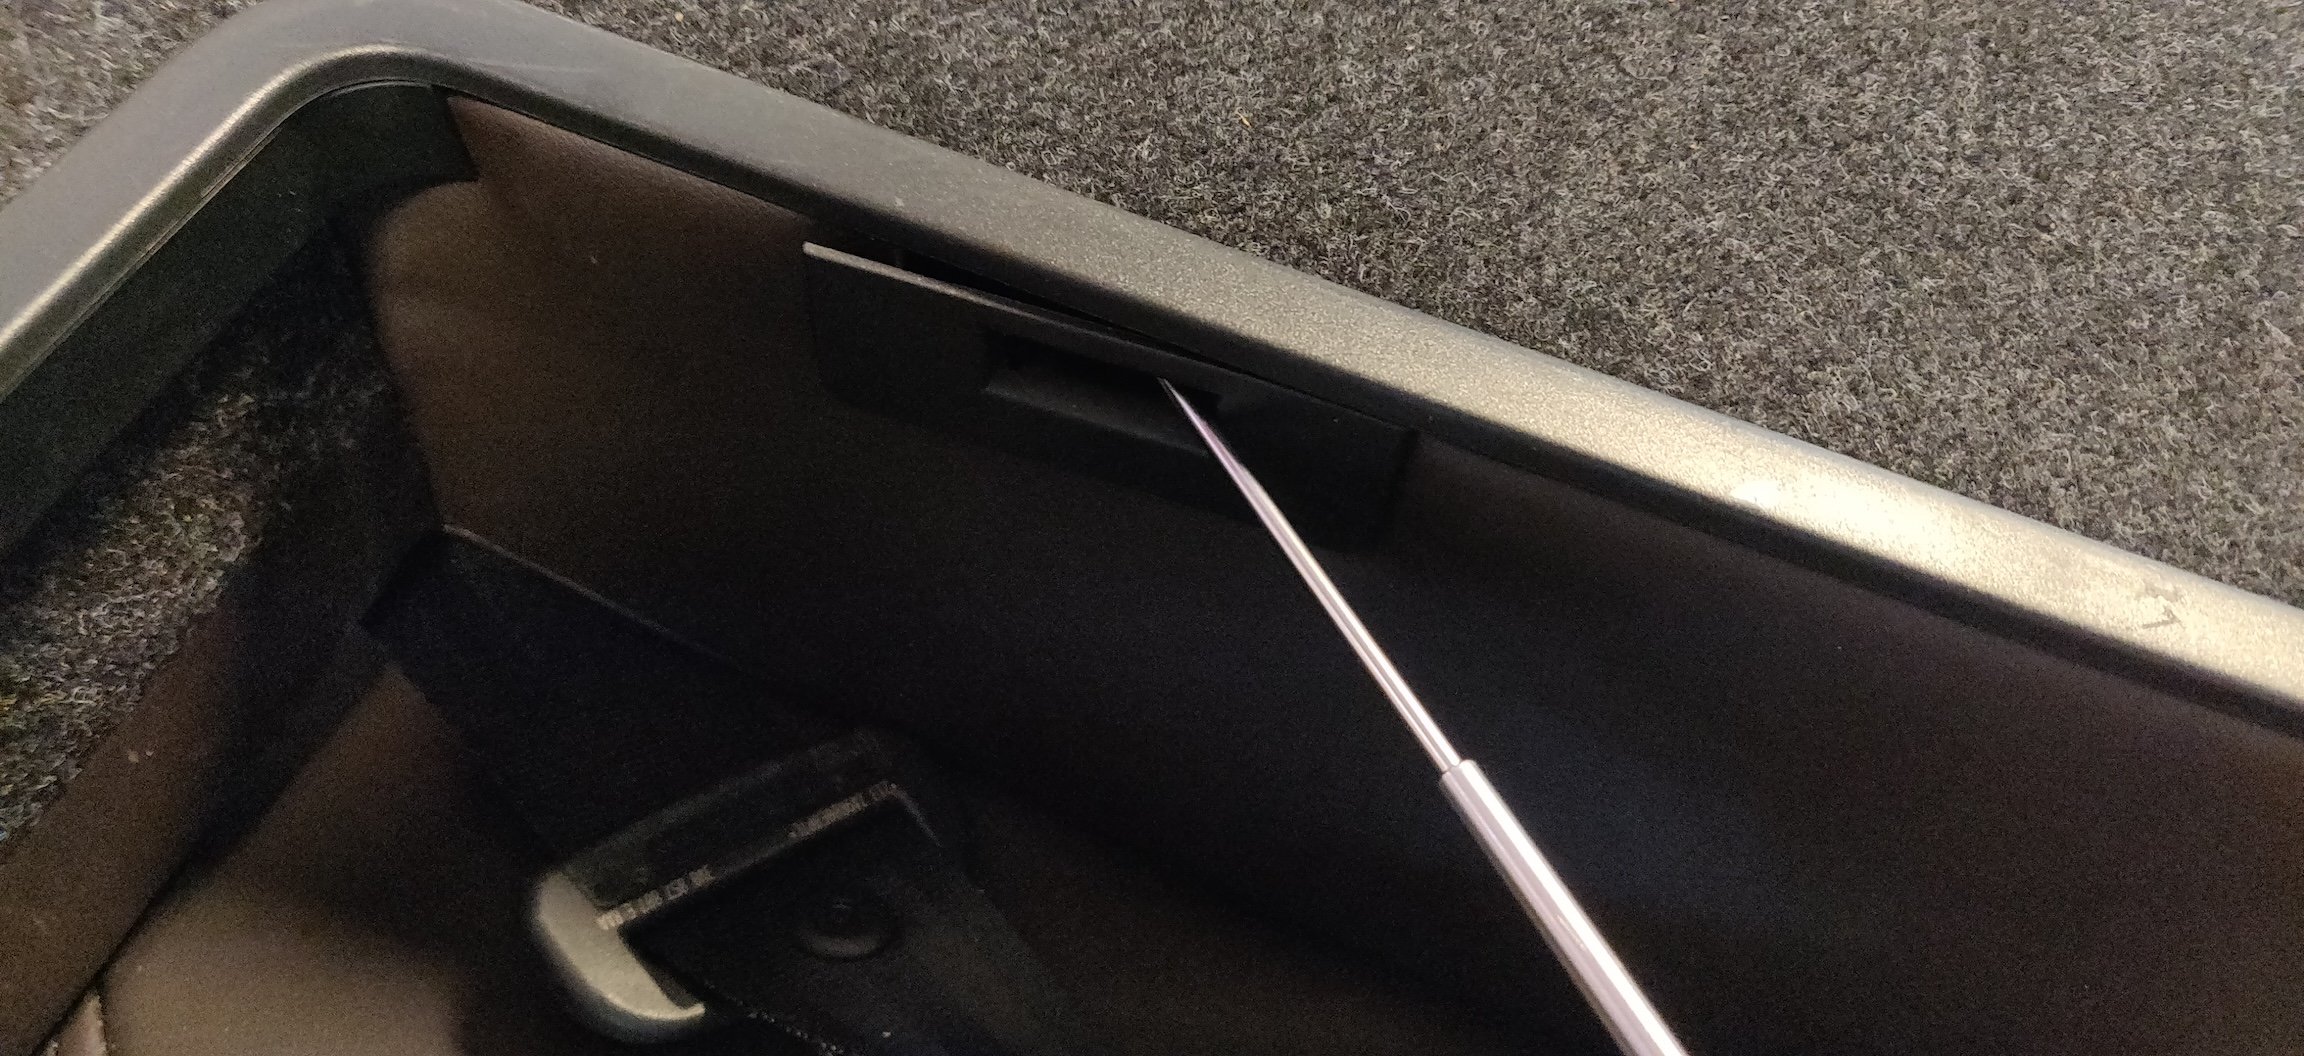
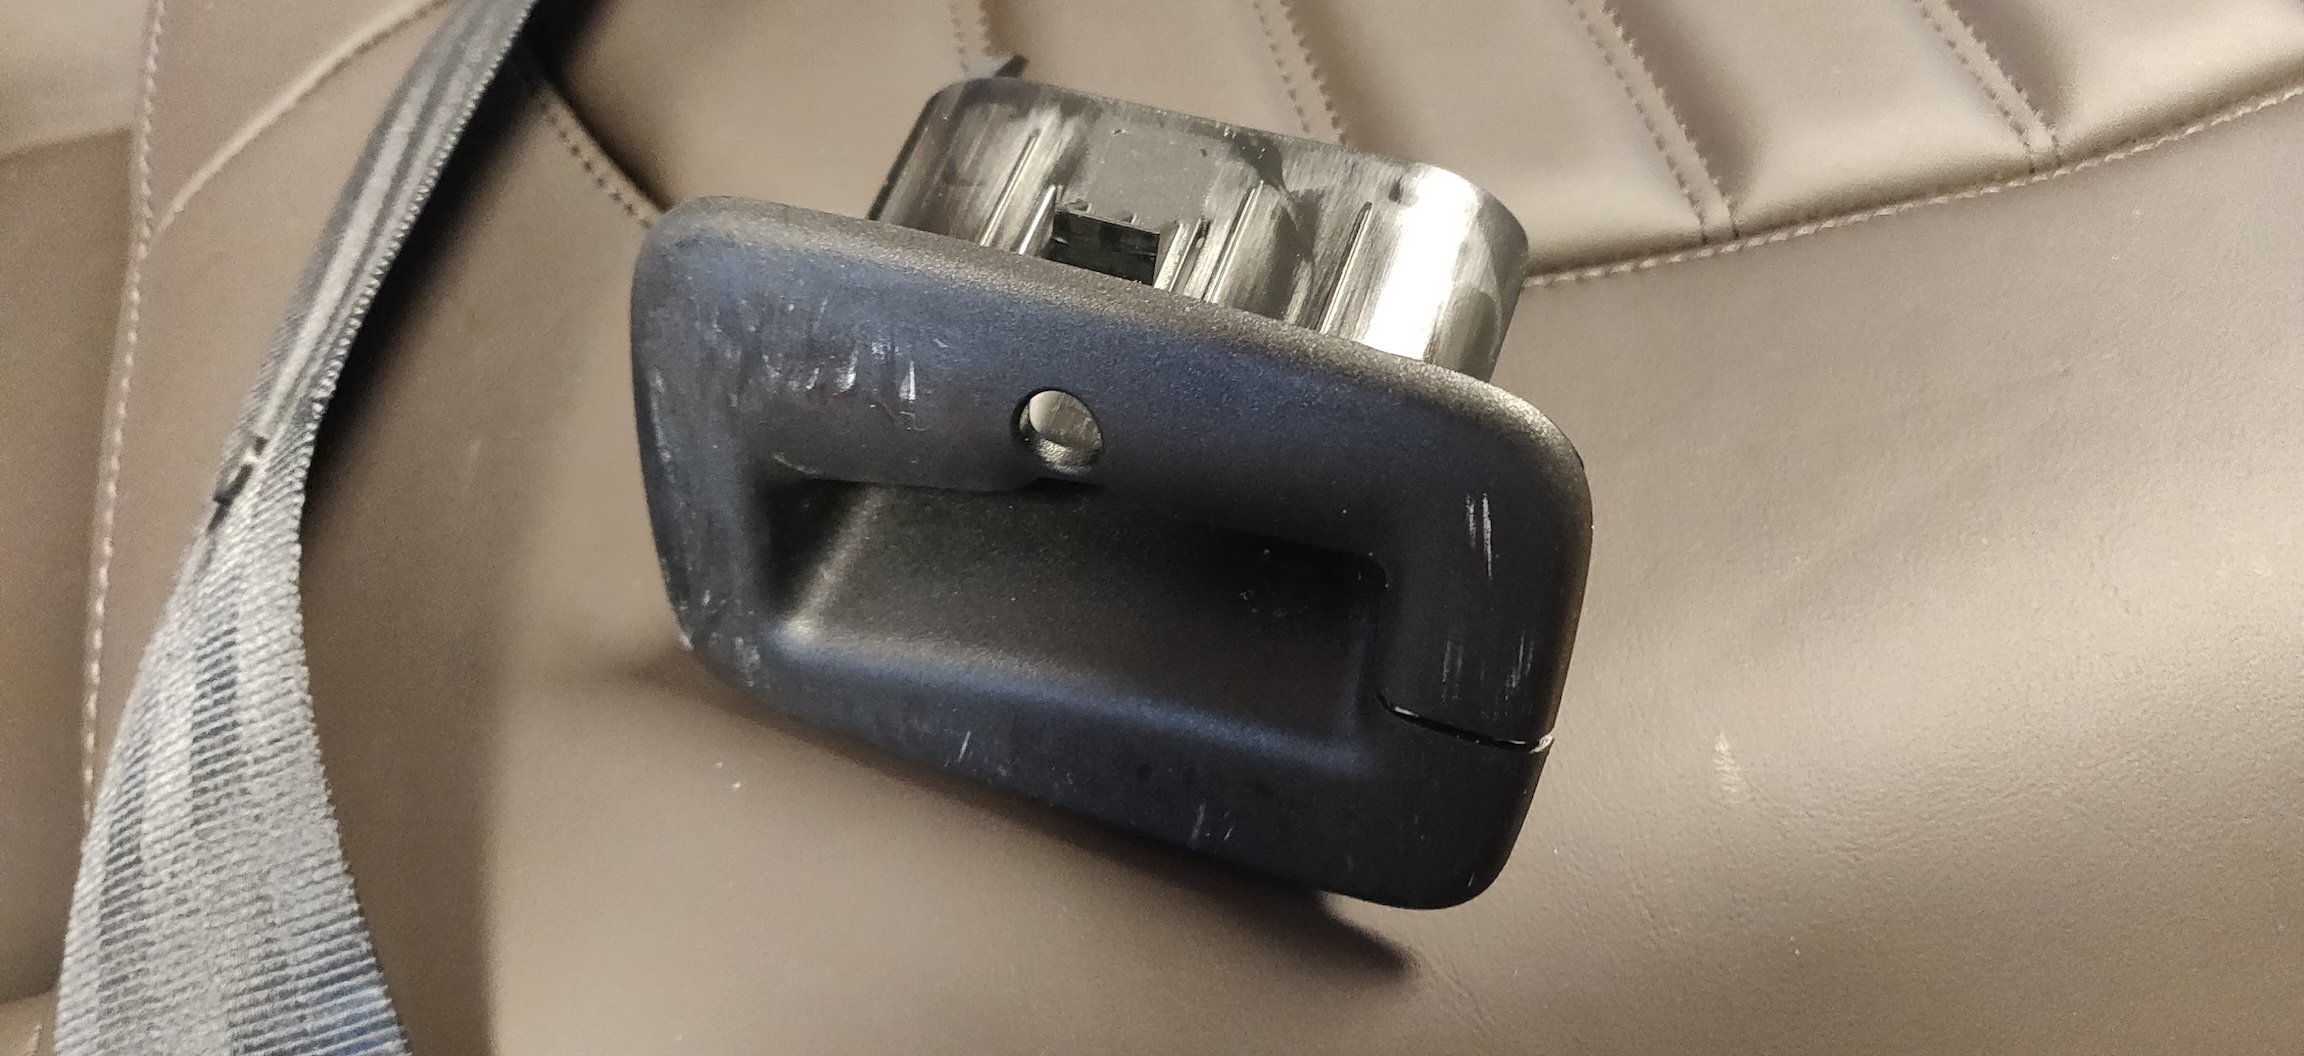
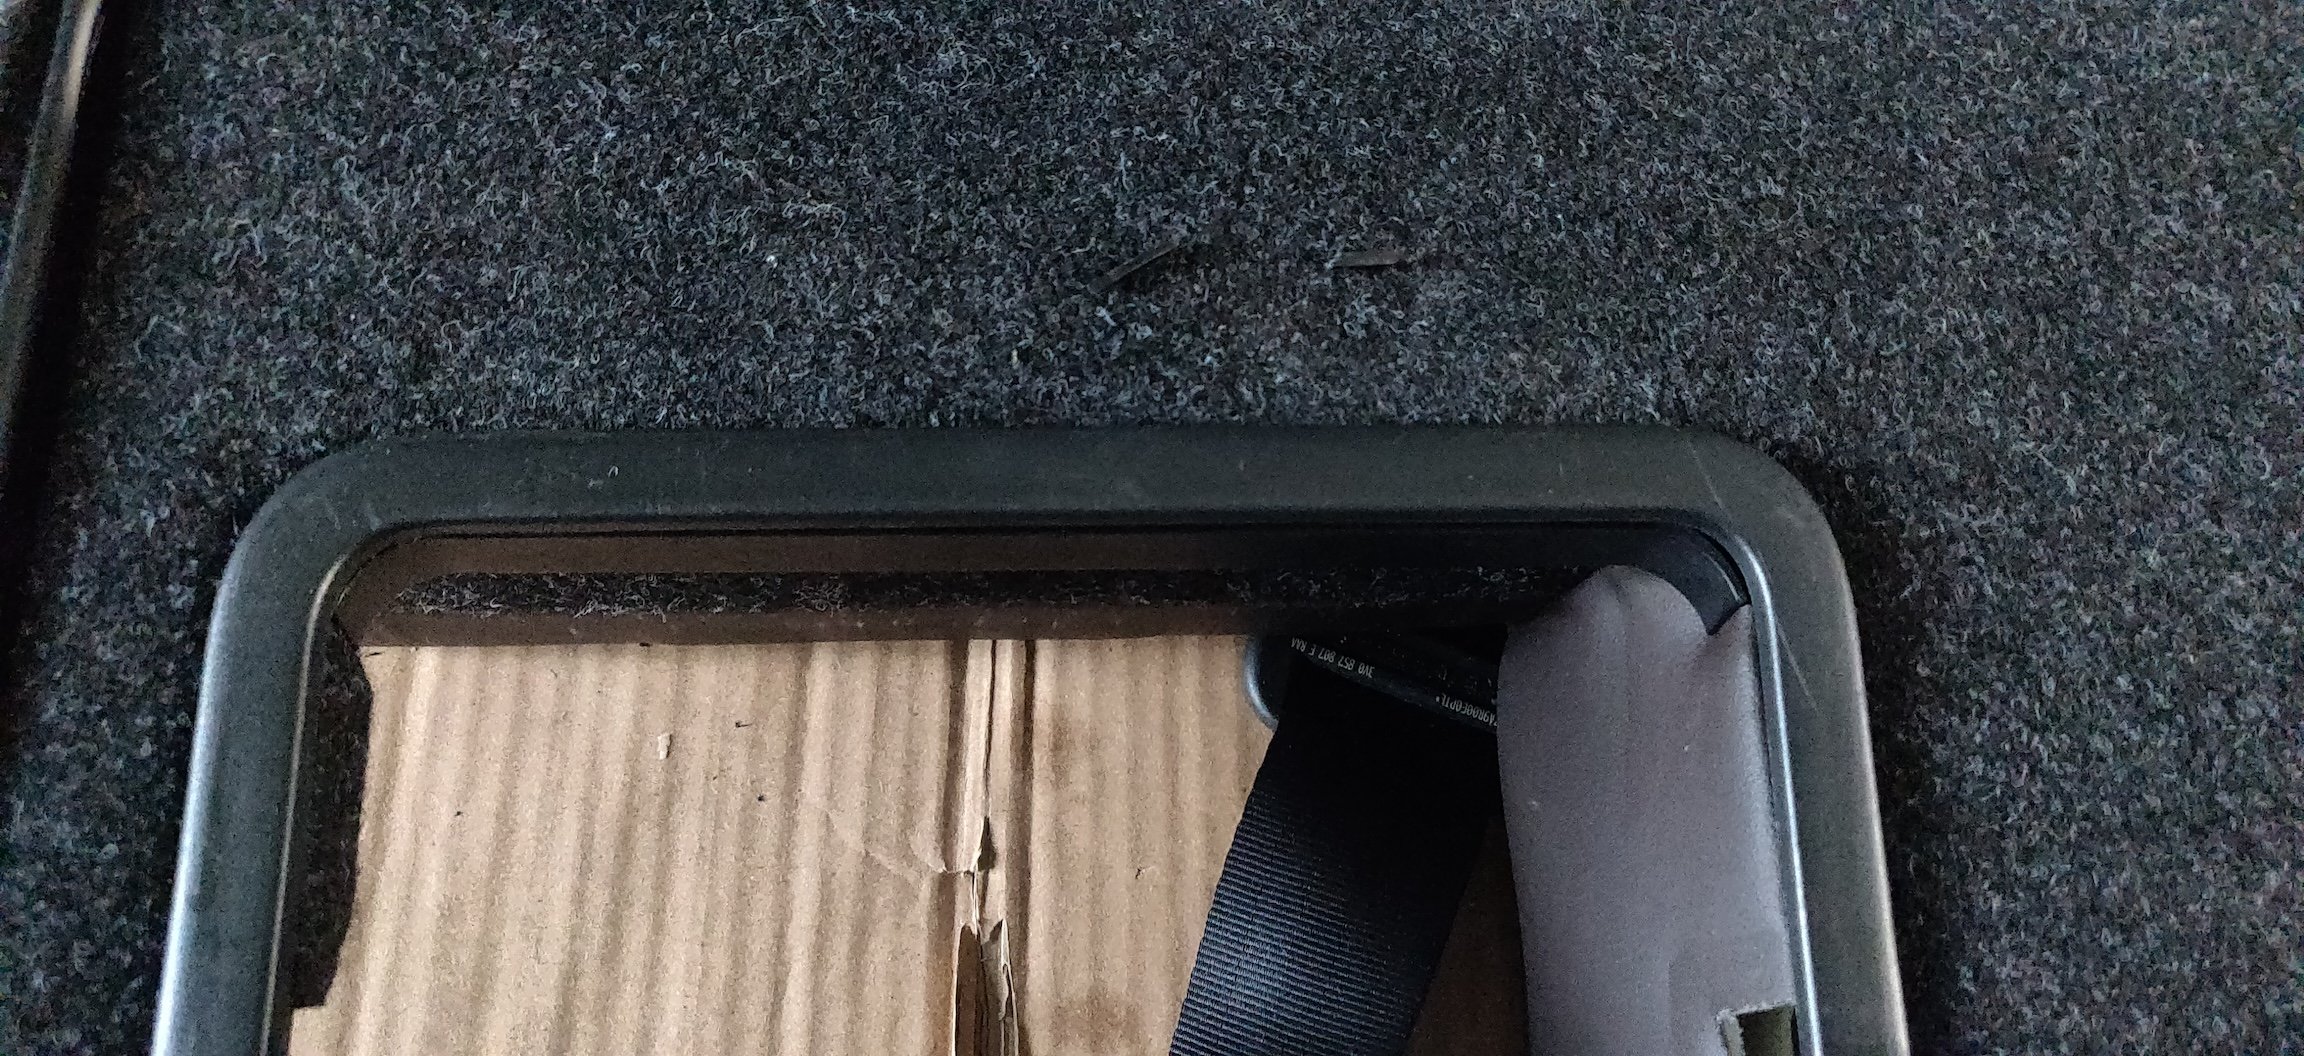
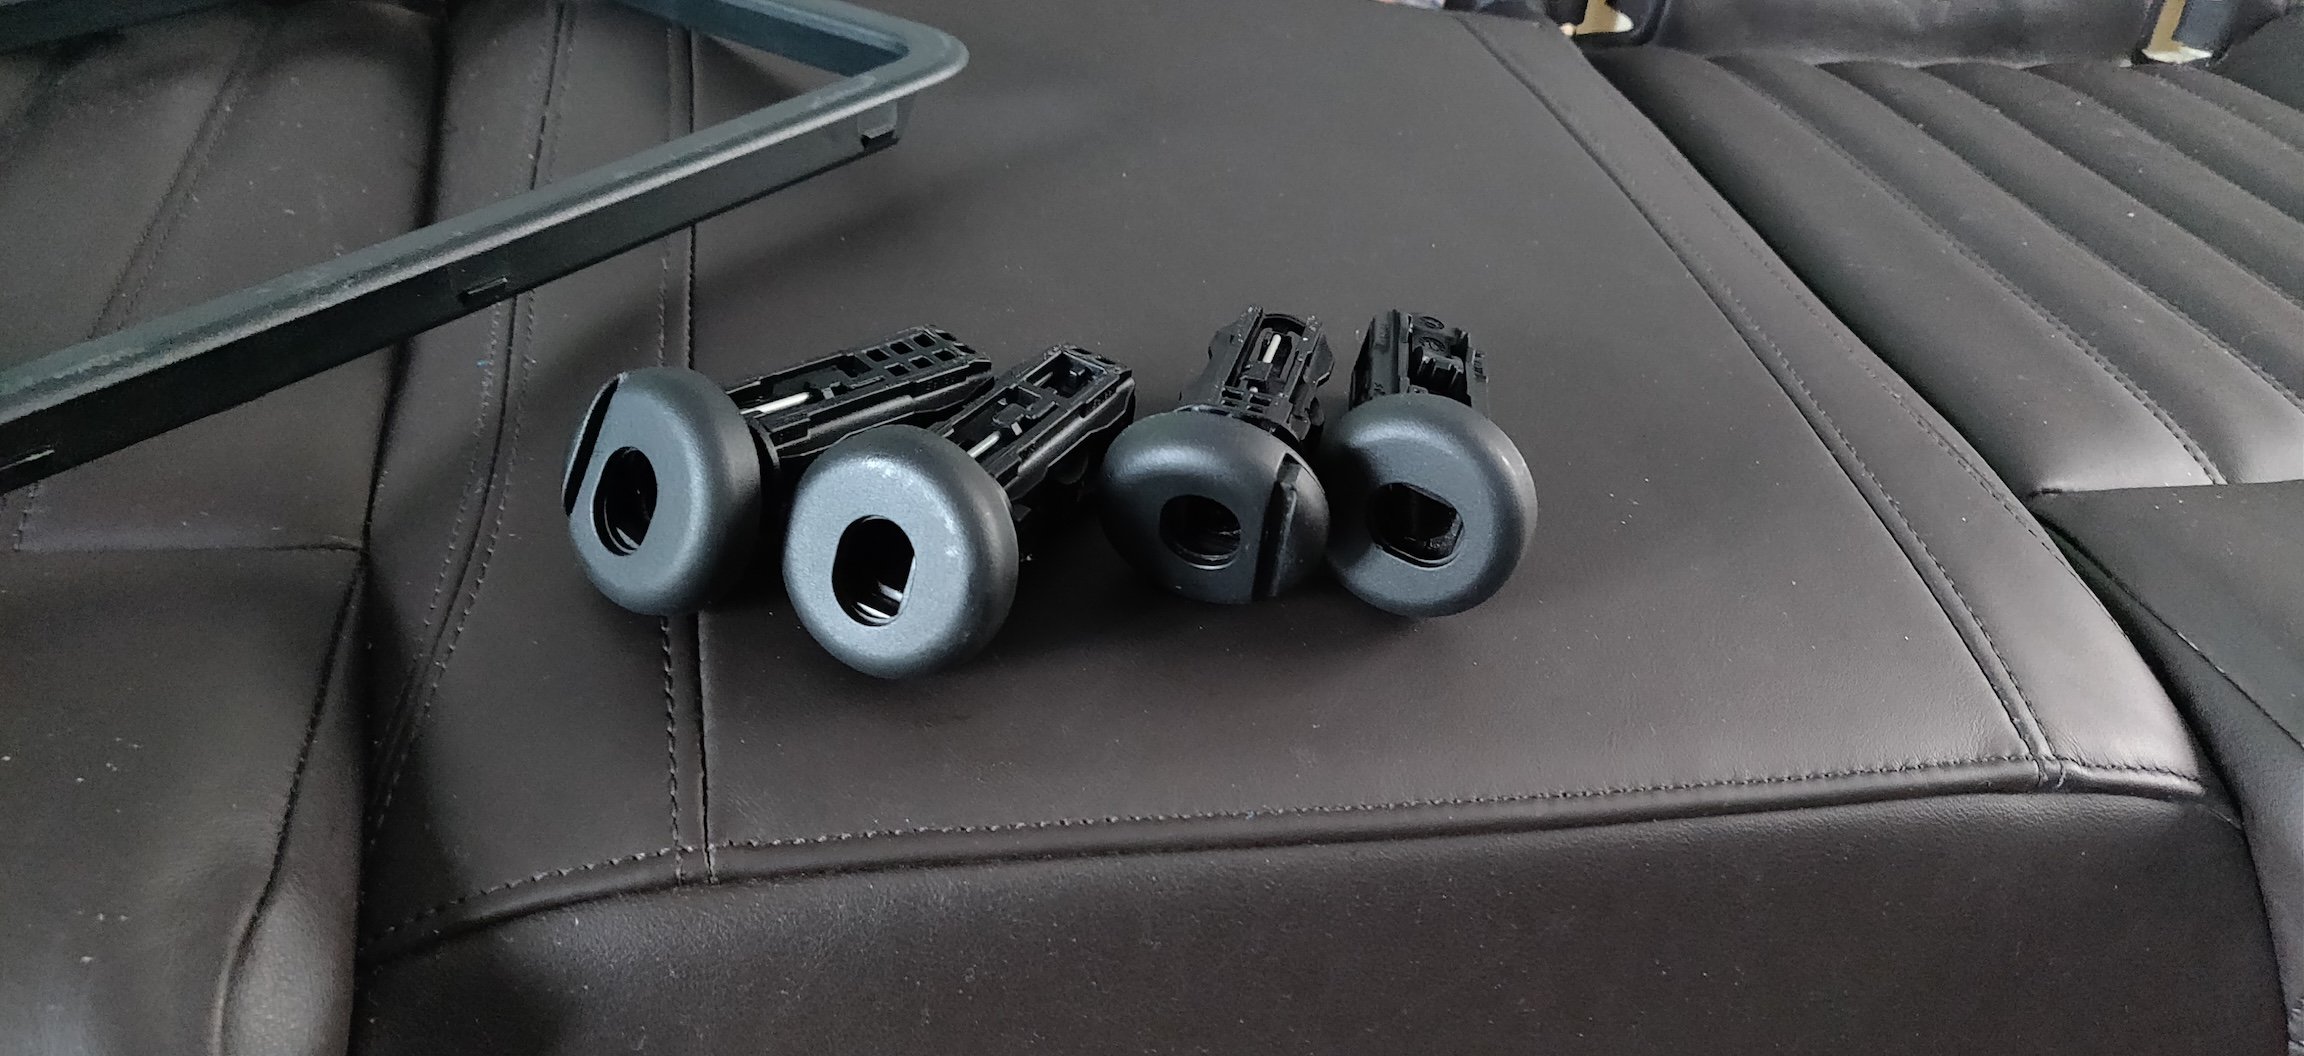
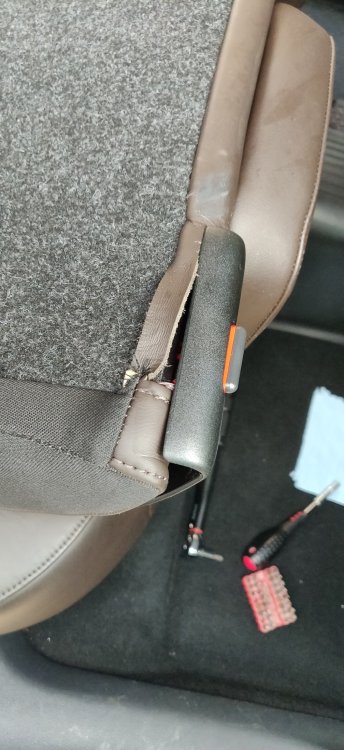
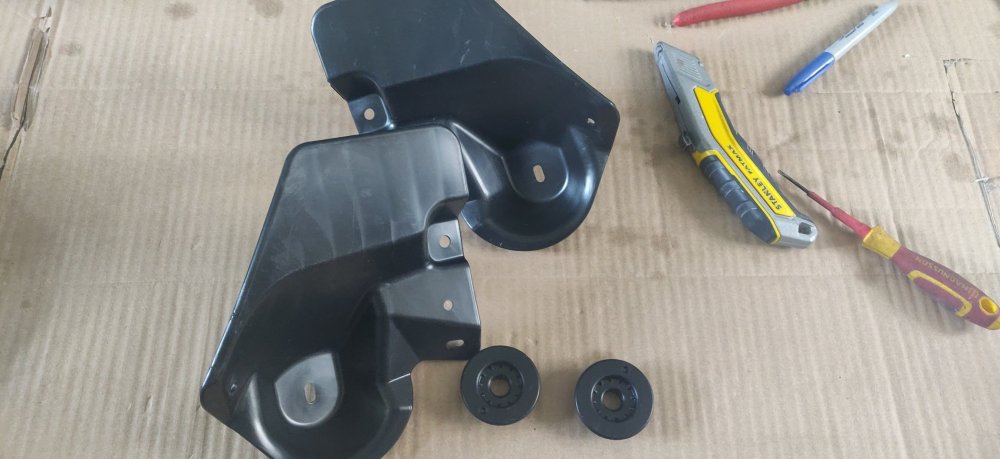
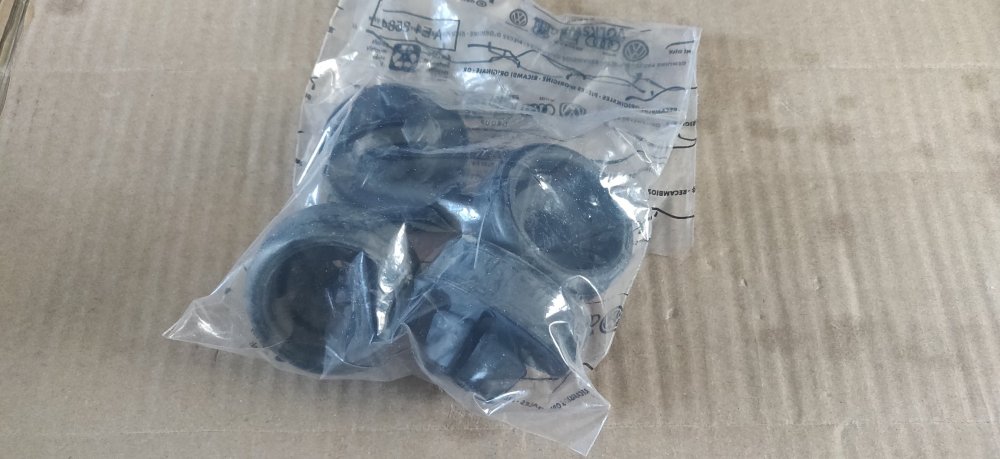
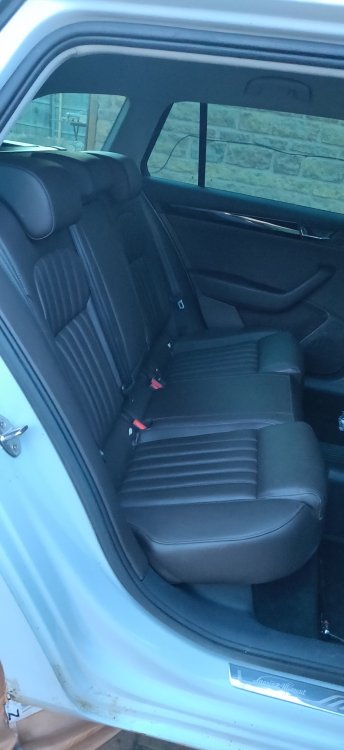
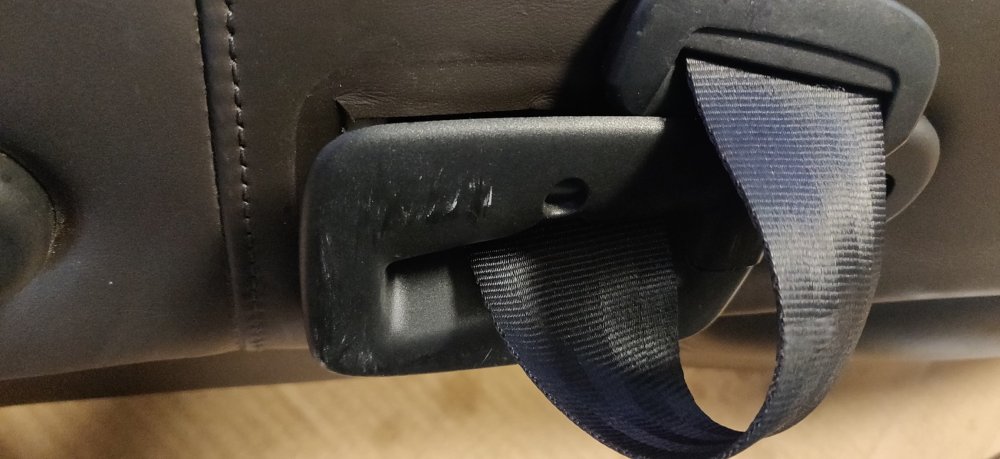
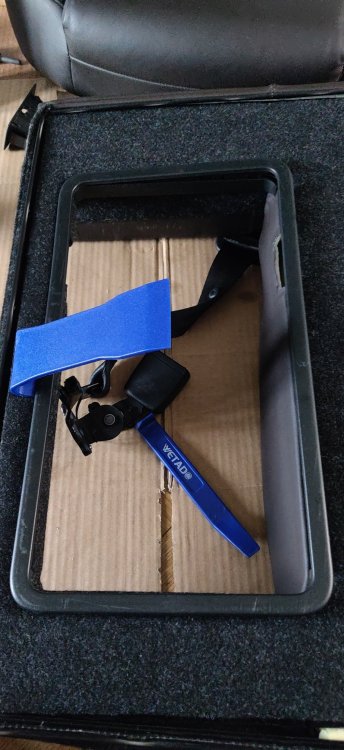
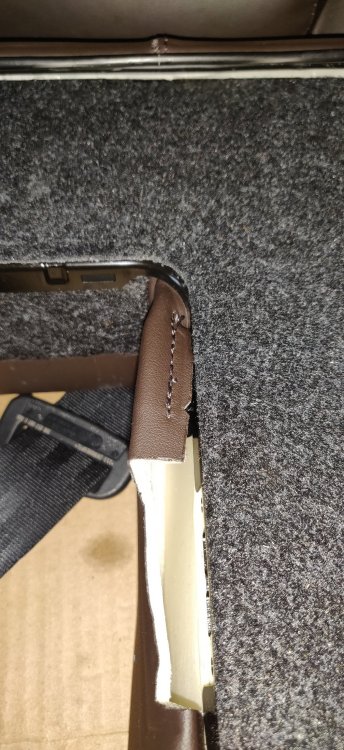
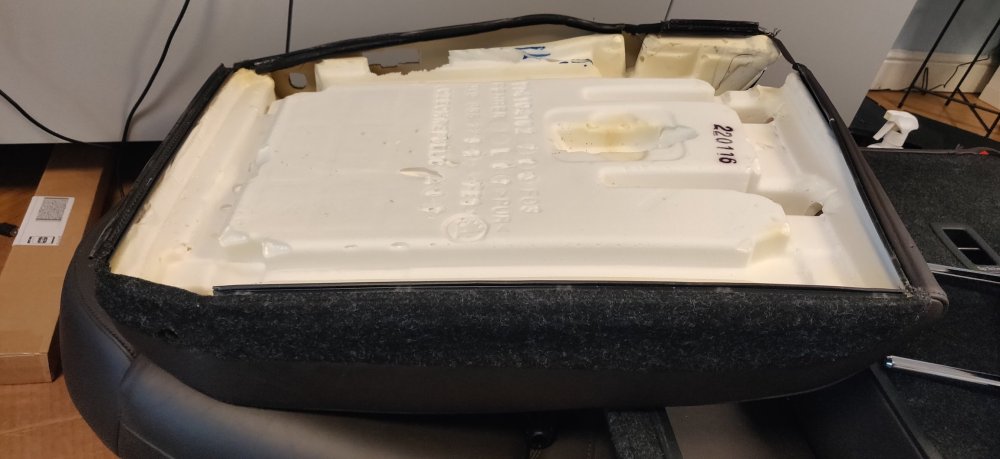
So the lllparts arrived today: The two bearings for the rear seat to repair the chewed ones, and the "spoiler" bits that go on the front of the rear arch. One had a bit of overspray and a few scrapes, and they were cheap enough. Also got these: Some aero covers for the lower suspension arms. This is based on https://www.golfmk7.com/forums/index.php?threads/how-to-retro-fit-the-mk8-rear-suspension-aero-covers-or-stone-guards-to-a-mk7-golf.375175/ which suggests there's some benefits from fitting these. Having said that, I can't remember if the arms have the requisite holes for this, despite actually being down there for most of last weekend! Also got: These are the four rubber jacking bits. They are 8V0 804 631 B which are supposed to be used where I've put the axle stands, but also require another part 8N0 803 855 which has decided to become gold dust by the time I've ordered the above. Not sure what to do to be honest. I sense some more money down the drain. The whole order came to £92.94 altogether. So immediately went to attaching the bearing: Then took the seat (the smaller one) and fitted it: The spring loaded bit is rectangular which mates into the rectangular post where the seat hinges on the body. Had to take it out again to rejig the Bowden cable into a more appropriate place: The cable is then fitted in: Relatively straightforward, just getting the end of the cable and slotting it into the metal part within the seat, and clipping the end of the cable into the slot within the plastic frame. So with that, put the seat in place: Then gave it a test drive: 20240415 08 Test drive.mp4 Just to see if videos work when attached as well I suppose. So with it looking like it works, took the seat off, got the cover and wiggled it into place: Then clipped it into the plastic Bowden cable bit on the seat: So pretty much tried it for the other side: However, it wasn't going on straight. It looks like the bearing is actually quite a tight fit against the cover, and the Bowden cable bit on the seat appeared to be about 2-3mm too much to the left! So not much choice but to take the cover off around there, take off the mechanism and move it slightly before reinstalling: So with the other seat installed: The test drive left it: Sorta just hangs there half way. Then a small light bulb moment: Installed the centre arm rest, tightened the bolts to 9Nm, which then probably gave the seat enough weight: Took the hinge covers bought earlier ready to be refitted: So yeah, the front hinge is a bit of a mess. Presumably because the step to remove the front hinge cover doesn't exist, so I assumed the metal part of the hinge cover came up freely, but I must have gotten angry and subsequently bent the plastic to buggery. So with that, started fitting some of the other bits onto the seats: So the seat belt guide just slots over the belt and it clicks into place. Same as the headrest guides, just get them straight and they pop in. The seat belt for the centre seat is then tightened down to 40Nm: Reasonably idiot proof there, has a stud which stops it spinning and locates it roughly straight. So before sorting out the seat bench, took the grommets off that hook onto the front: There are 4 tabs that I got a thin screwdriver to get at as seen above. Couple on side and some luck gives a bit of access: So with a wedge kept underneath and slowly worked around, it'll eventually start to pop up: In my case, the carpet blocks it from coming out freely, so had to be wiggled underneath the carpet. The replacements are then simply clicked into place. I started to get excited: Connected it up and started to install it before I realised: I'd forgotten to sort out the hinge. So the bench goes back into the house, and attempted to fit the metal part of the seat hinge bracket. Unfortunately, I couldn't get the bolt to actually start to tighten for some reason. The metal part for the hinge bracket wasn't going in straight either with a a half centimetre off, so something was off. I eventually found it to be due to the larger seat not actually being fully located home. So took off the seat, and after some wiggling, the cover popped out: Also left a whopping scratch on it. Bit miffed given it was new. Not sure what I actually did, just ended up reinserting it all, making sure the bush was fitted and straight, and just reinserted the seat again. After lots of pushing and wiggling and rotating, it eventually goes in all the way: So before, the white part of the hinge was still showing, about 5mm or so, which probably explained the issue. That made inserting the seat onto the hinge bracket much easier, then the metal part of the hinge bracket went on without issue: Presumably, the metal bracket was fouling on the seat frame hence it wasn't going on fully. You'll notice I took out the centre armrest, mainly due to the weight of the thing, but it also makes the process of sorting out the hinge bracket much easier as there's a bit more space and clearance. The T30 torx bolt for it is tightened to 9Nm: The replacement front hinge cover is quite a tight fit: It'll bend and eventually click into place. Reattached the armrest again, and sorted out the headrests, then put the bench into place with the connectors all sorted: So back to where we were before. Was getting dark at this stage, so getting the bench in will be for later, I imagine it'll be faff, as it involves getting the metal rods in the seat foam hooked into the body before it then clicks into the grommet. So that's the rear seats pretty much done: Despite that, the living room still looks a bit messy. Lots of bits to be thrown away though. No idea if there's any value in bits like the seat frames (without covers, etc.) That's me for the day. Maintenance: £2027.21 (+£23.19) Upgrades: £1228.41 (+£69.75) Miscellaneous: £665.56


-
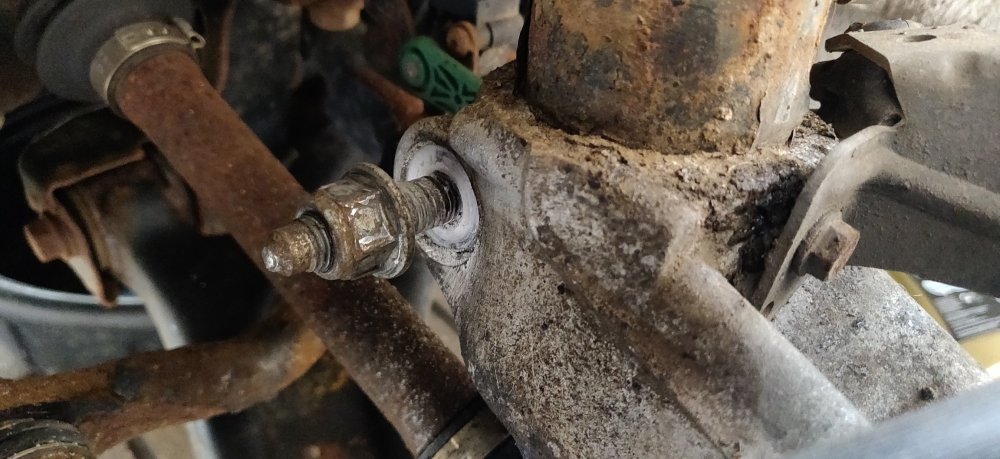
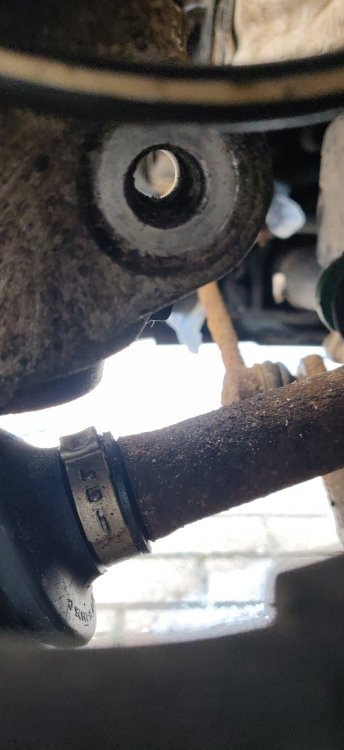
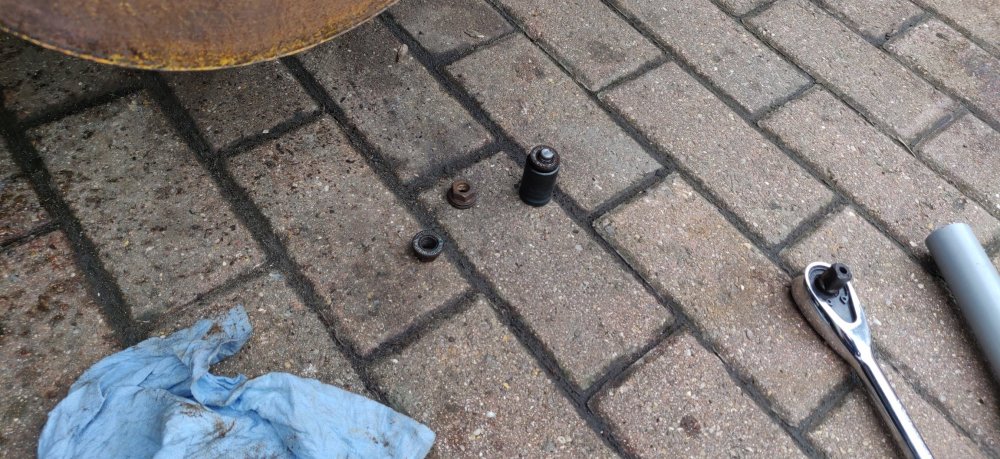
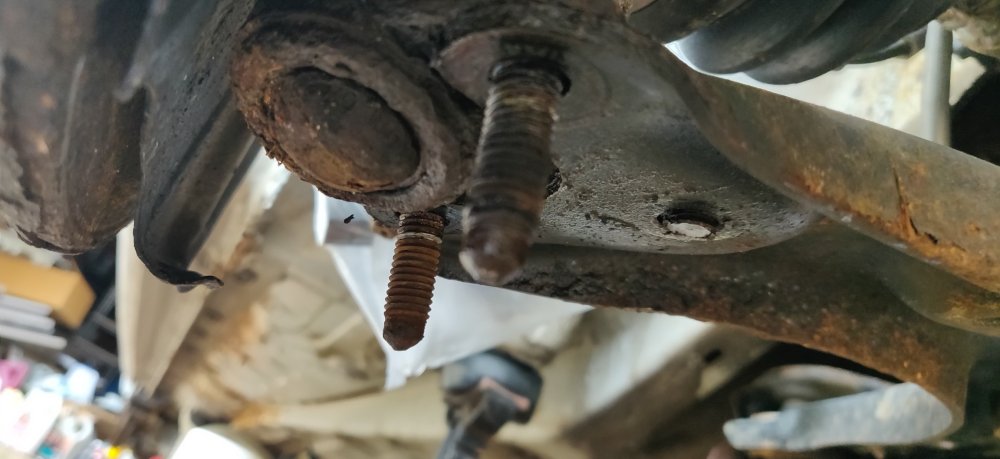
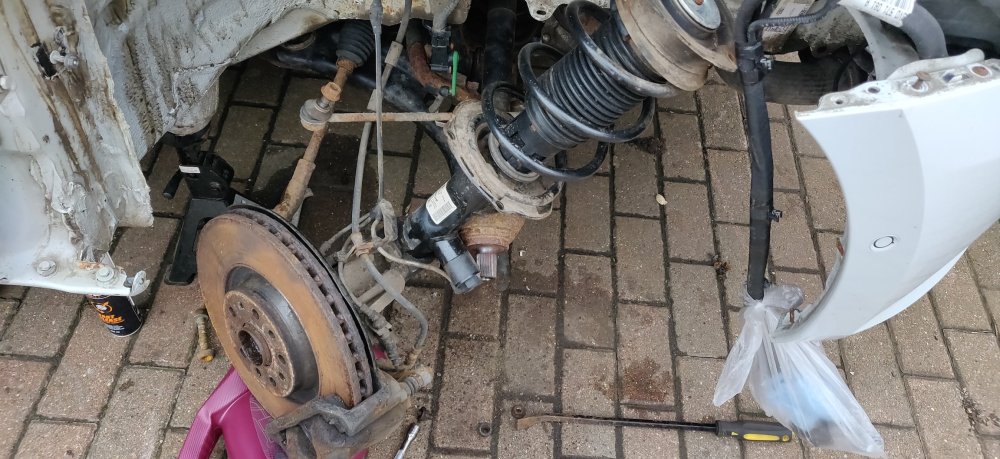
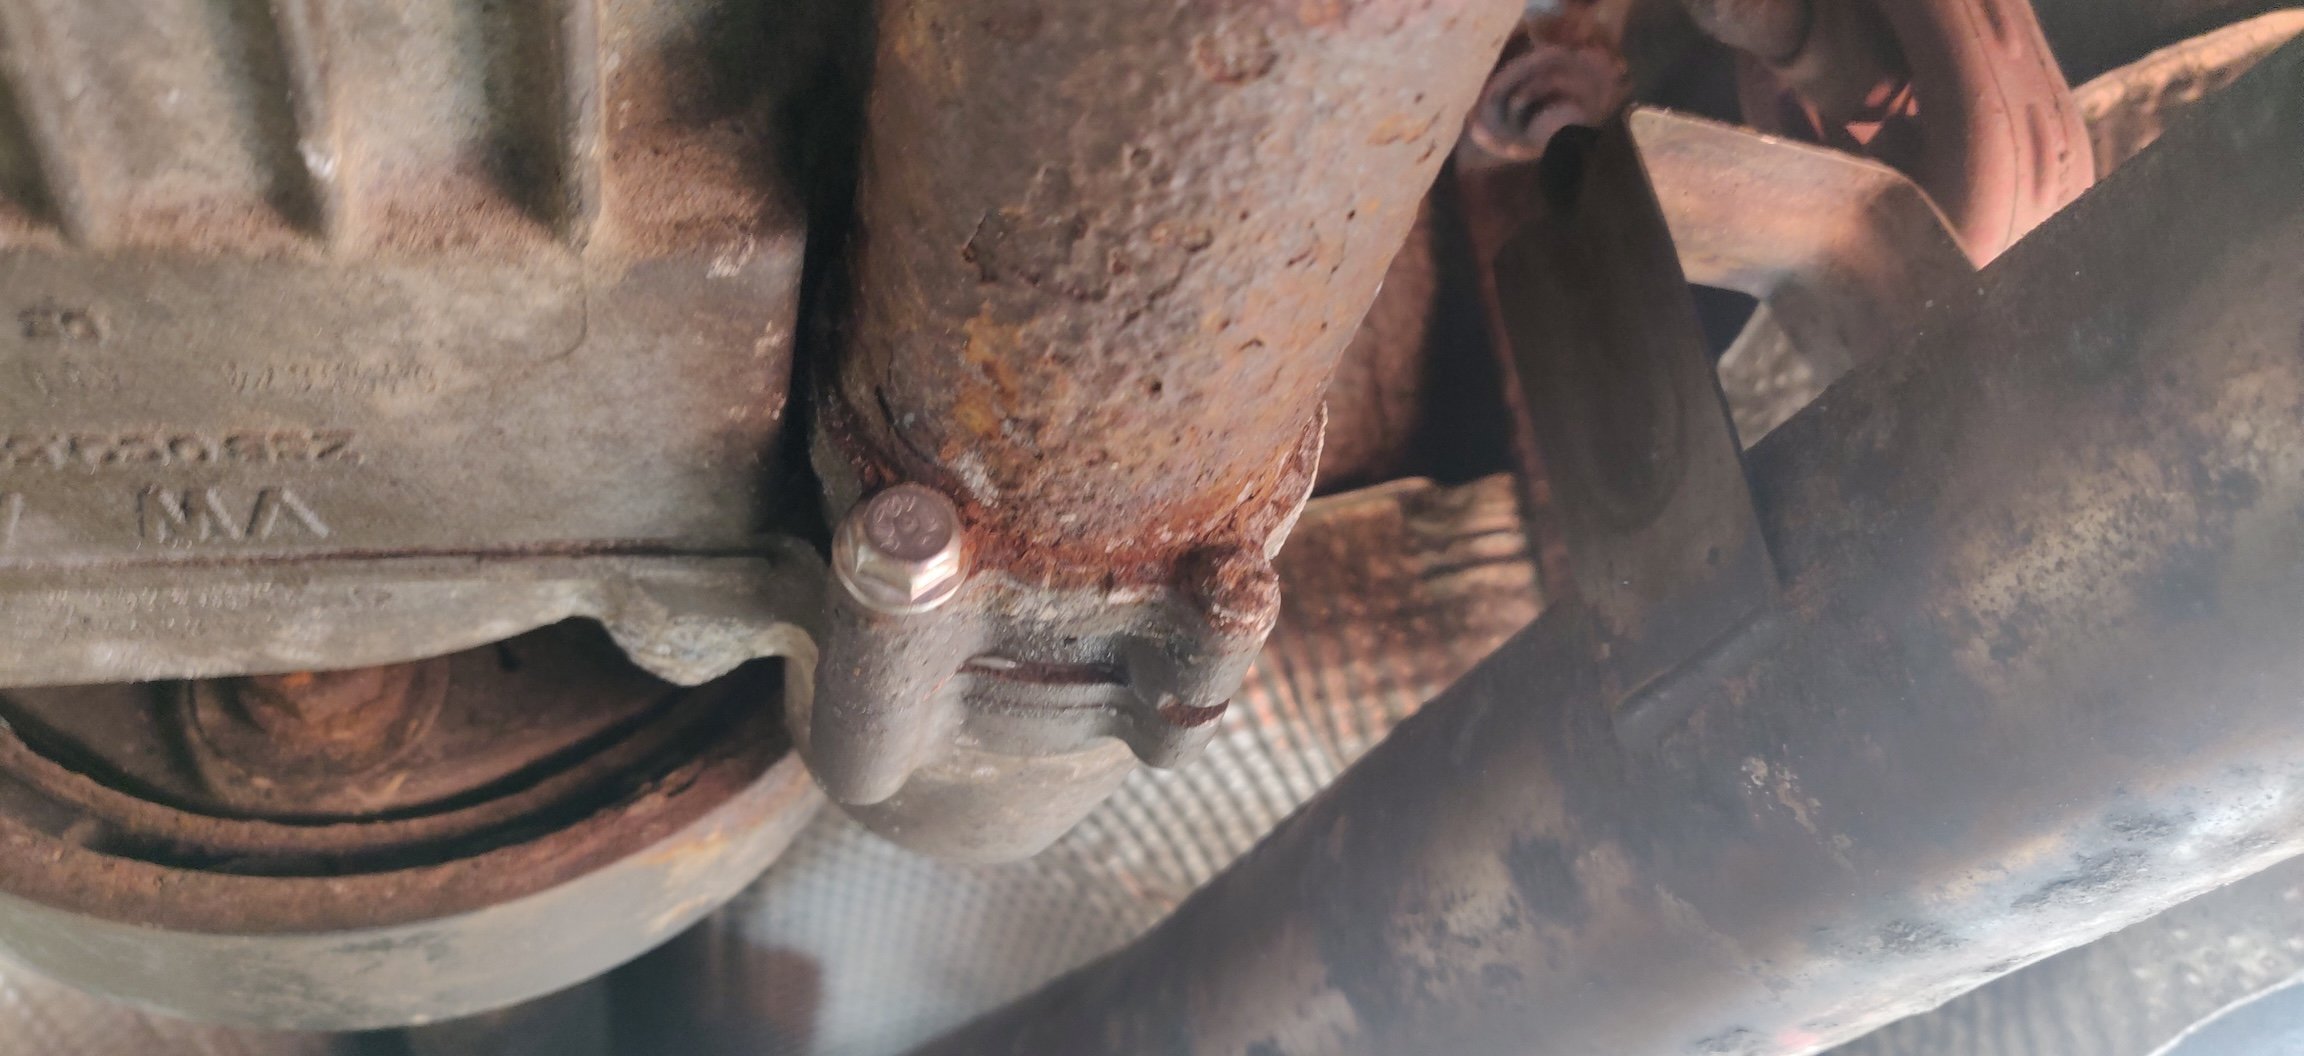
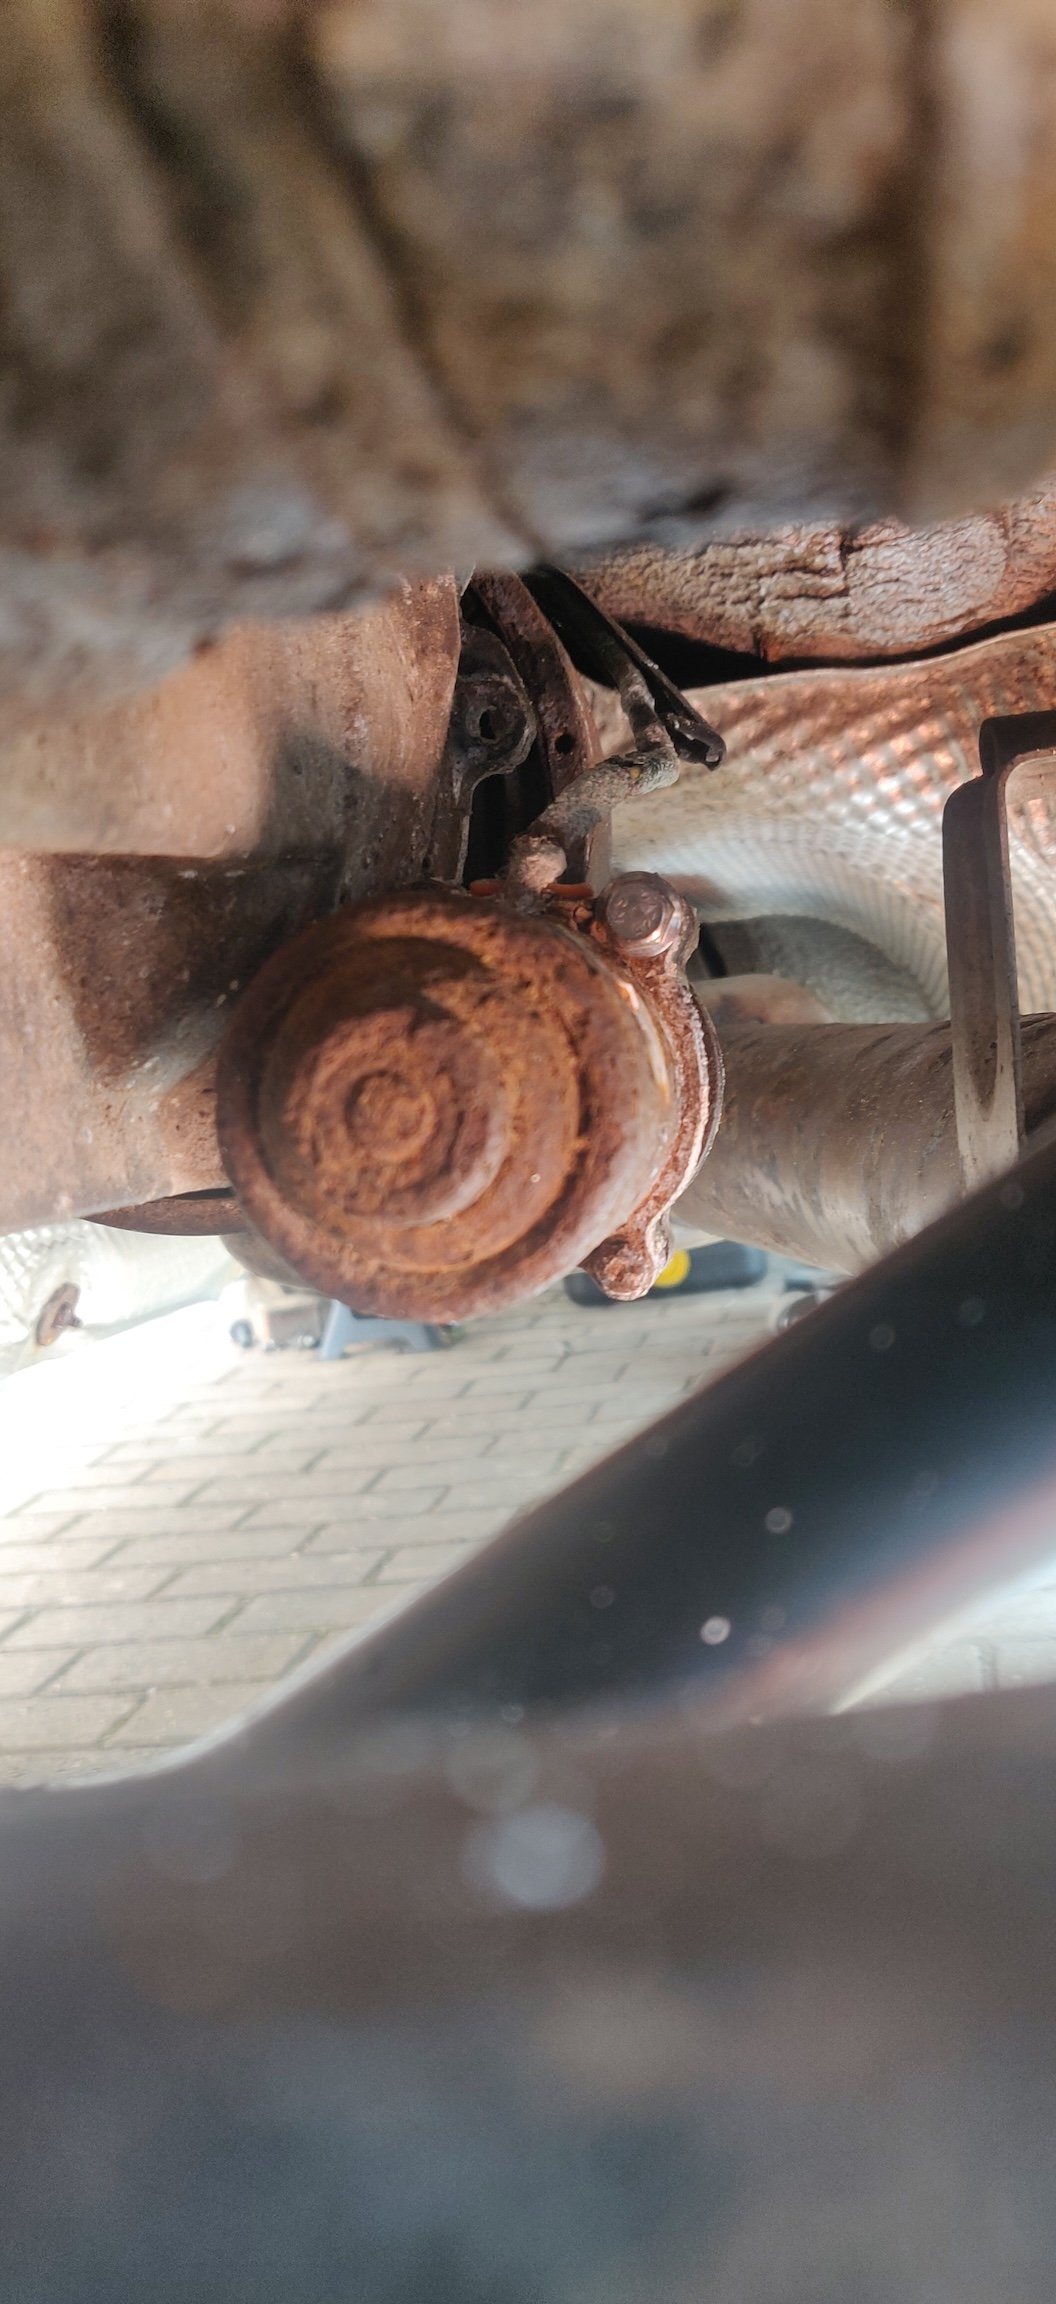
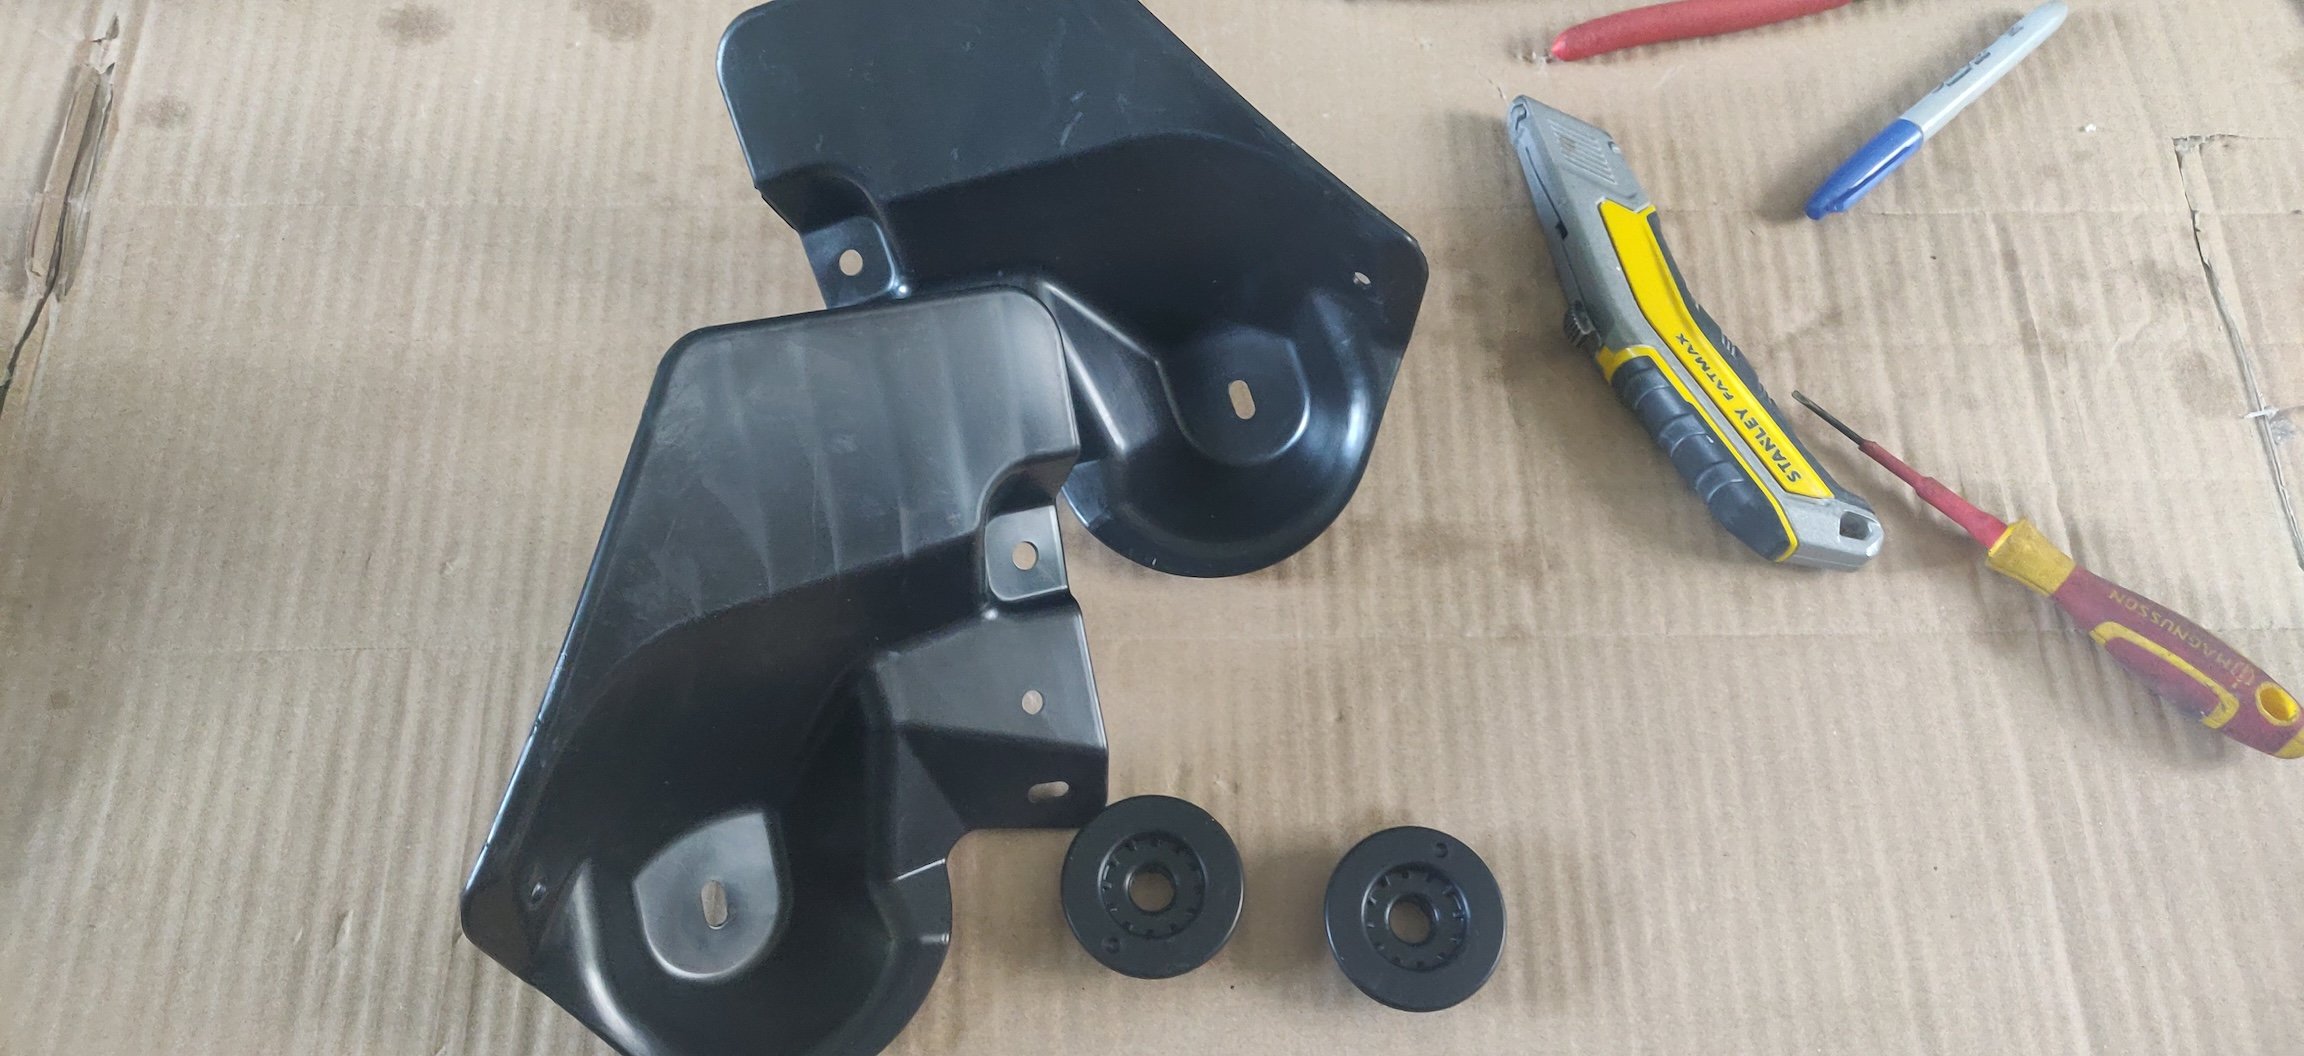
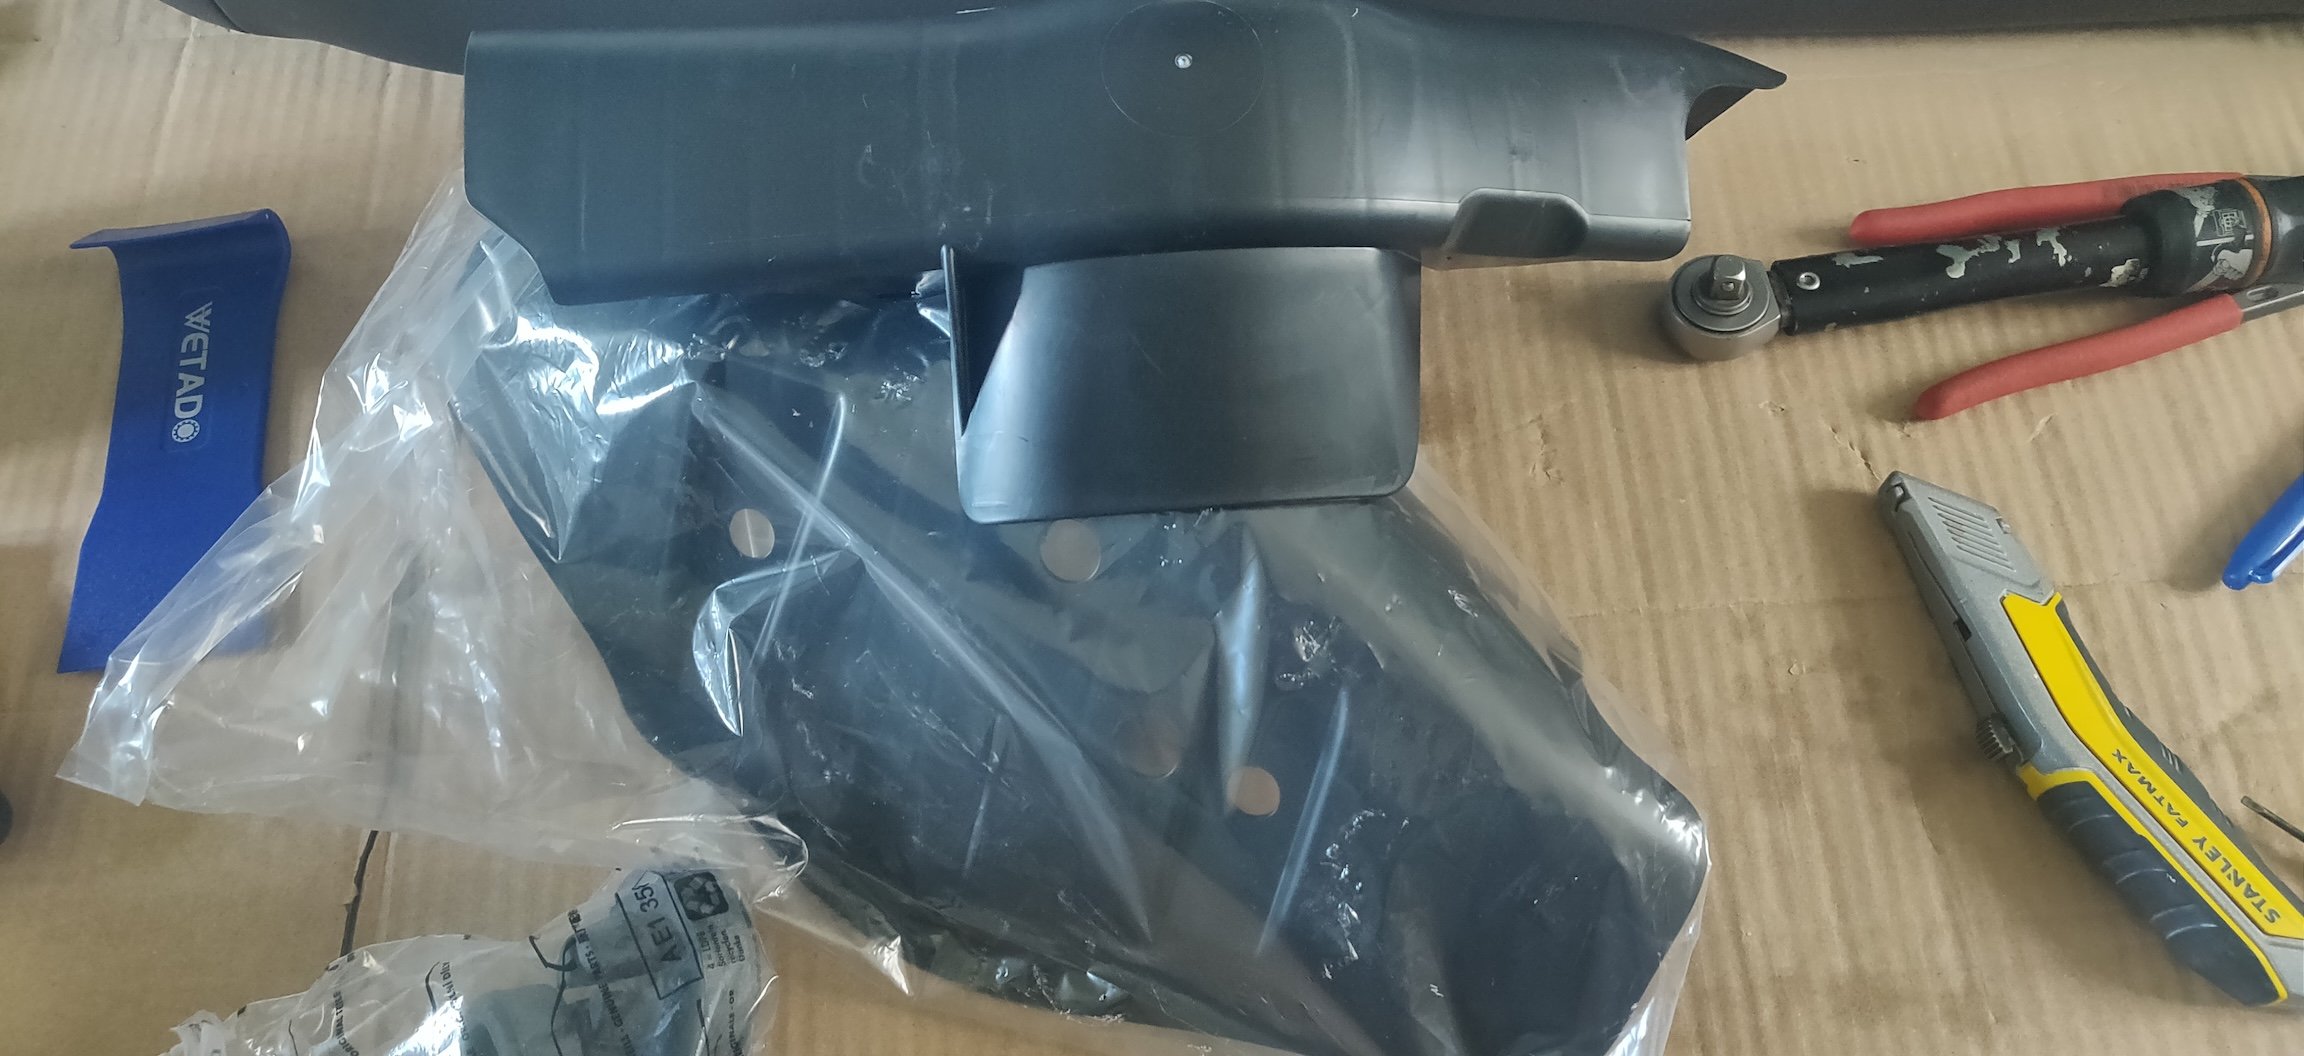
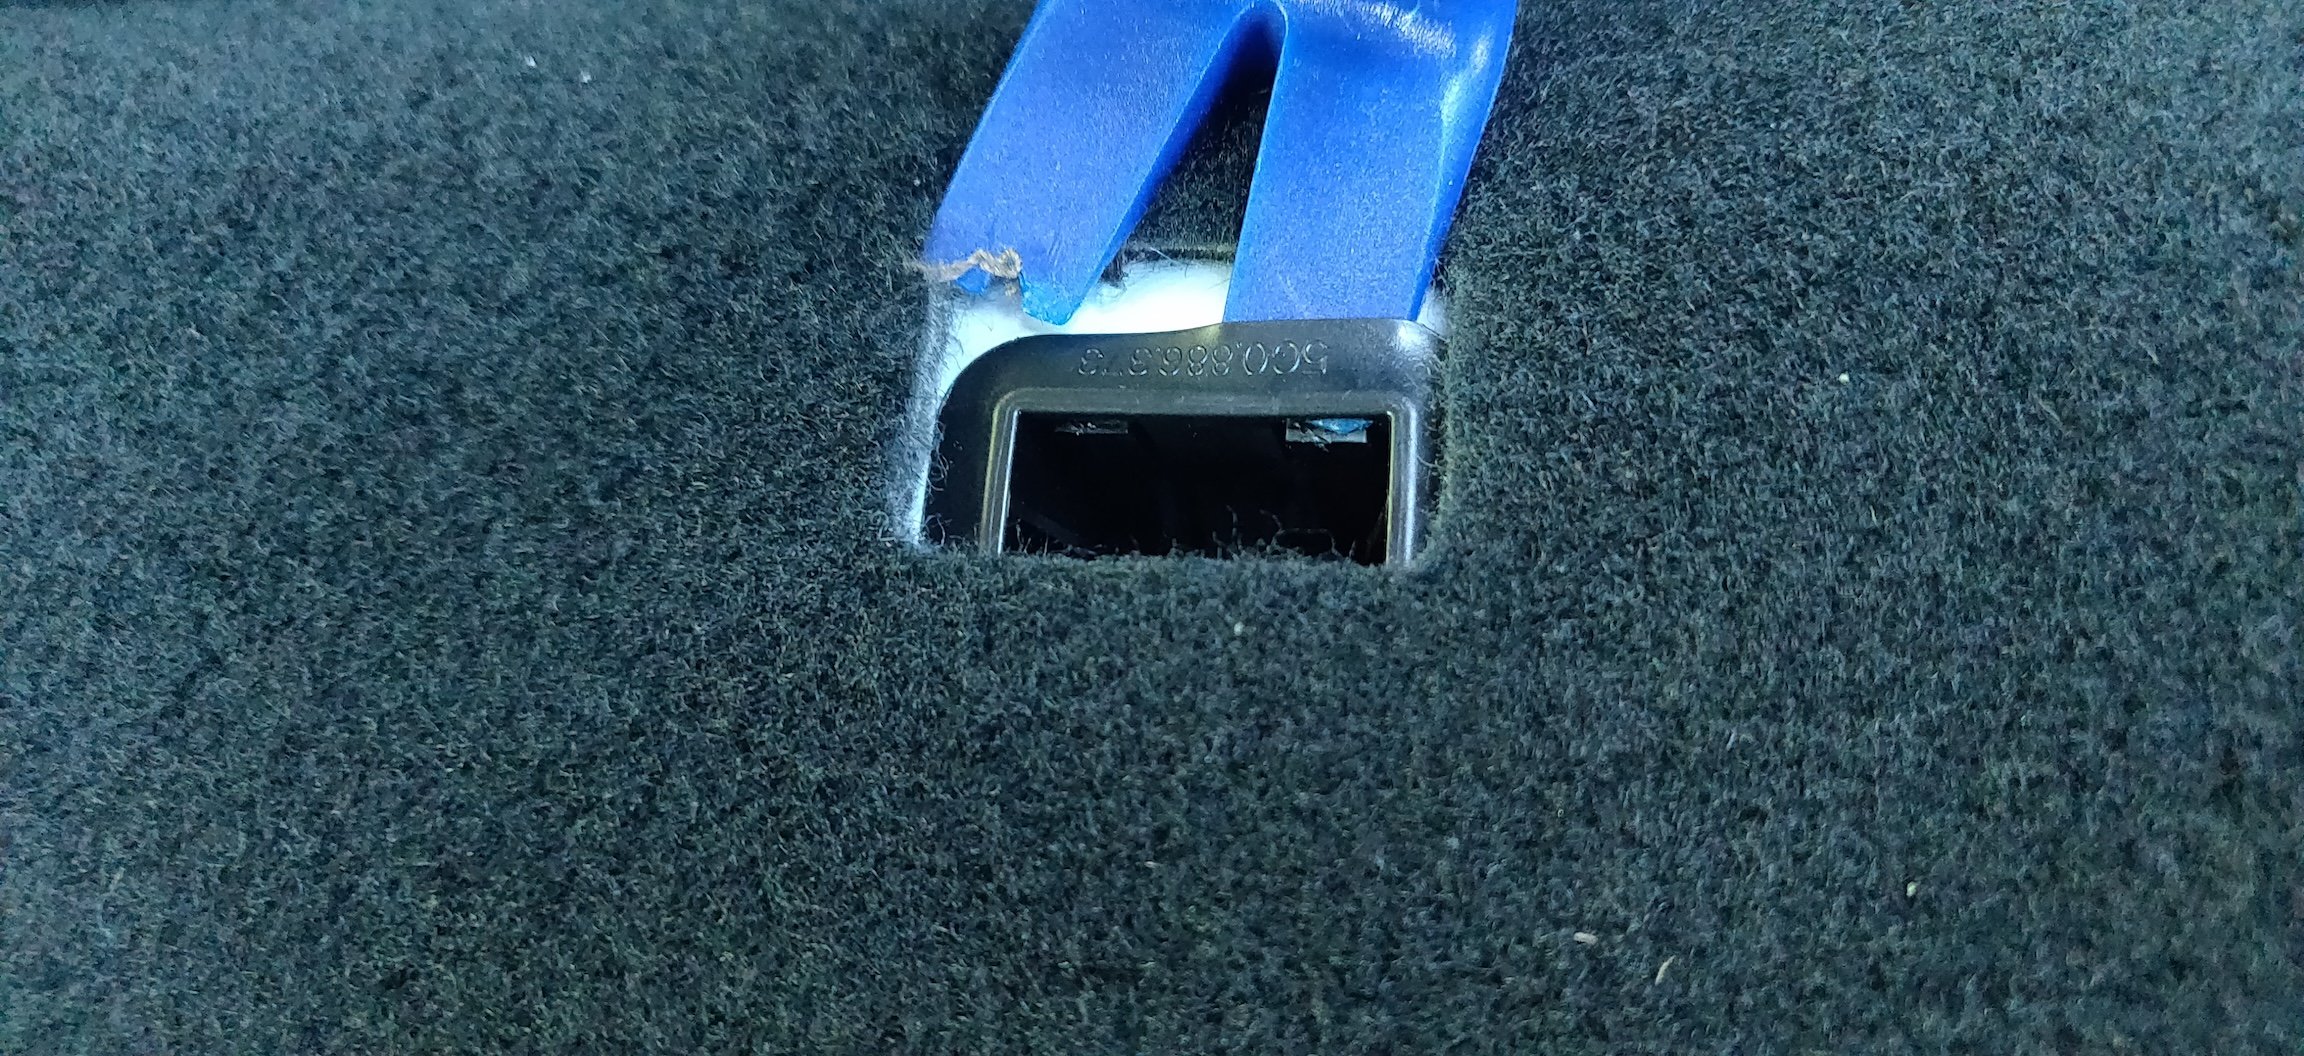
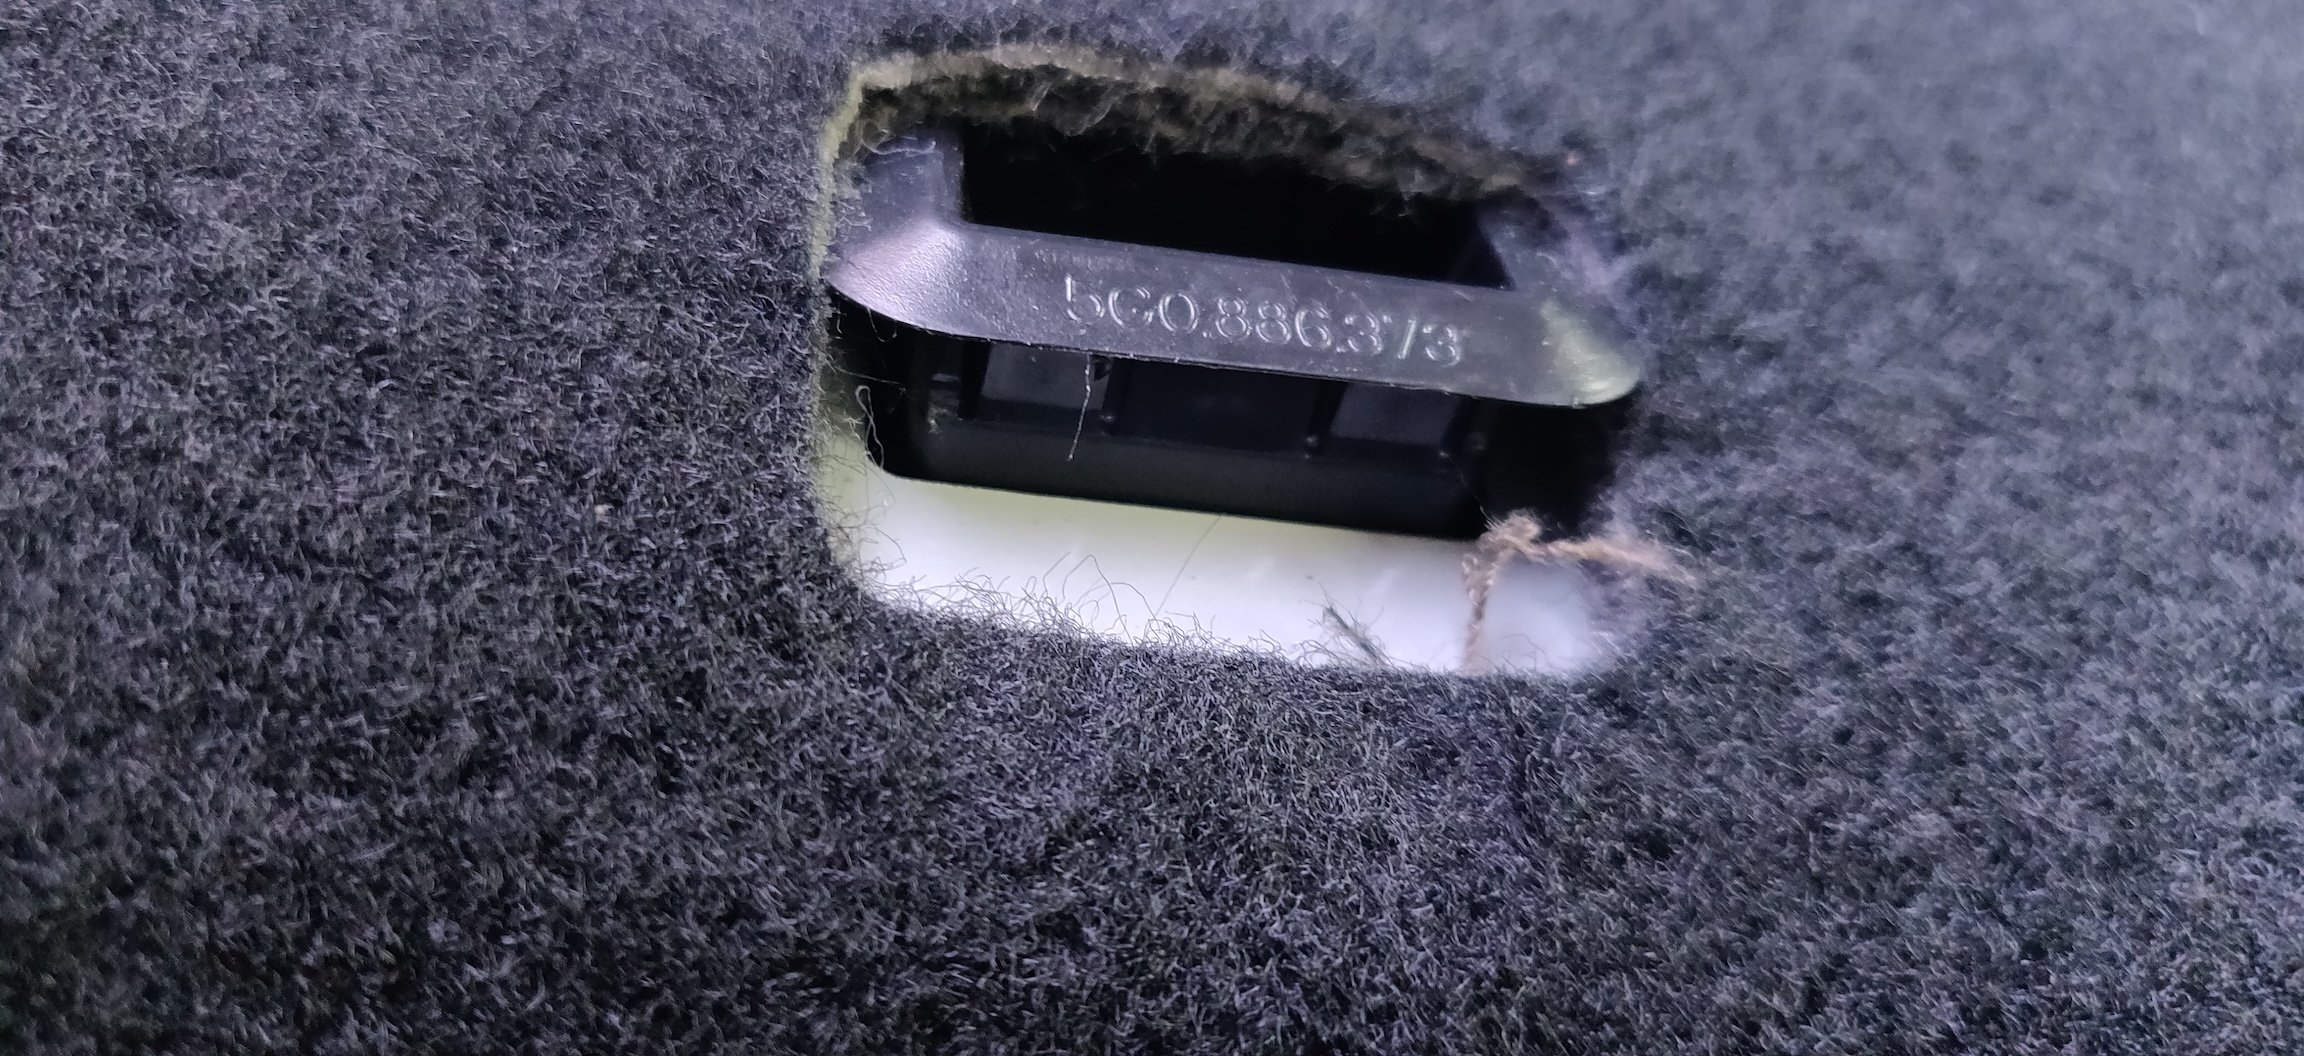
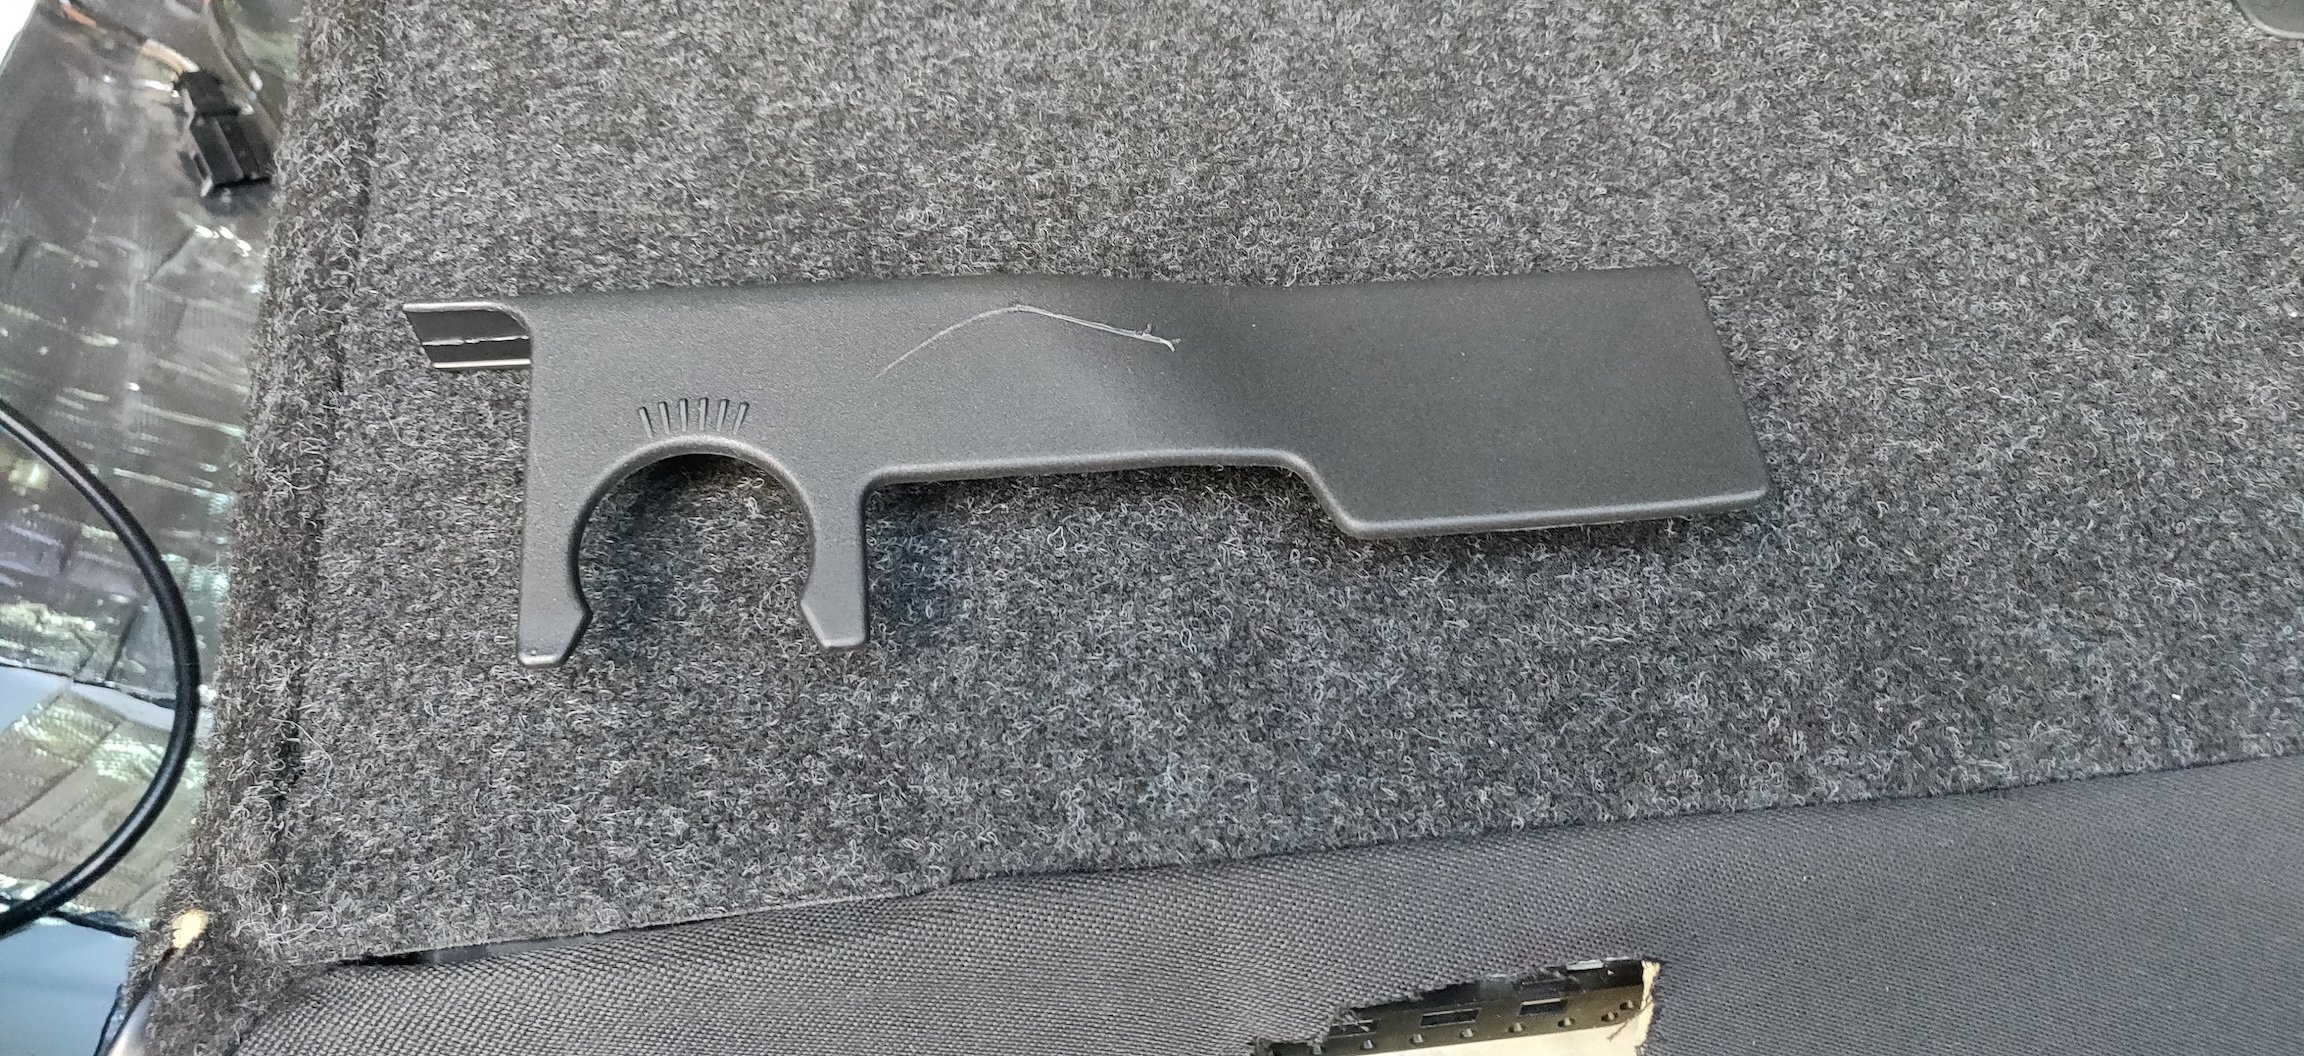
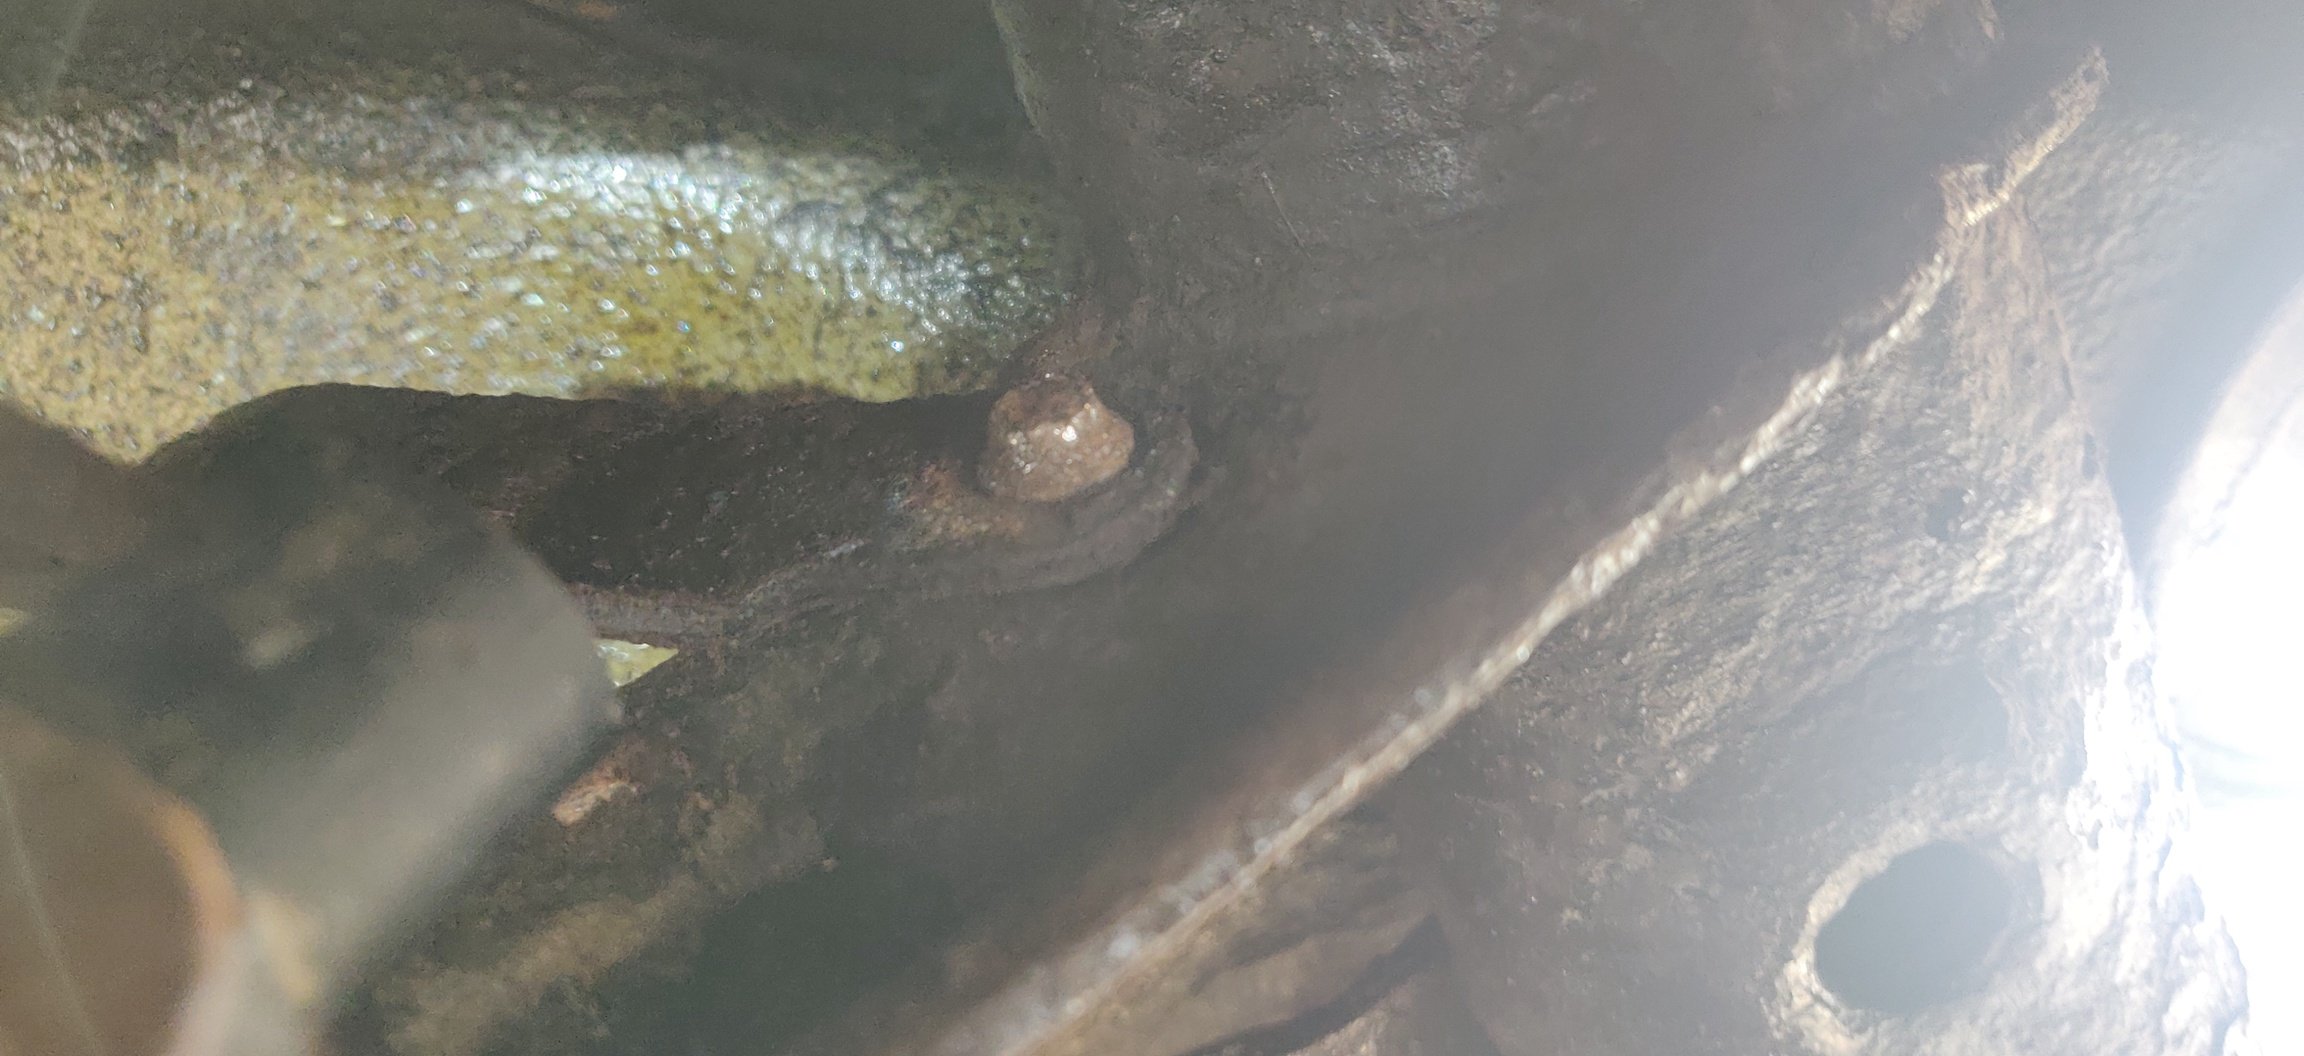
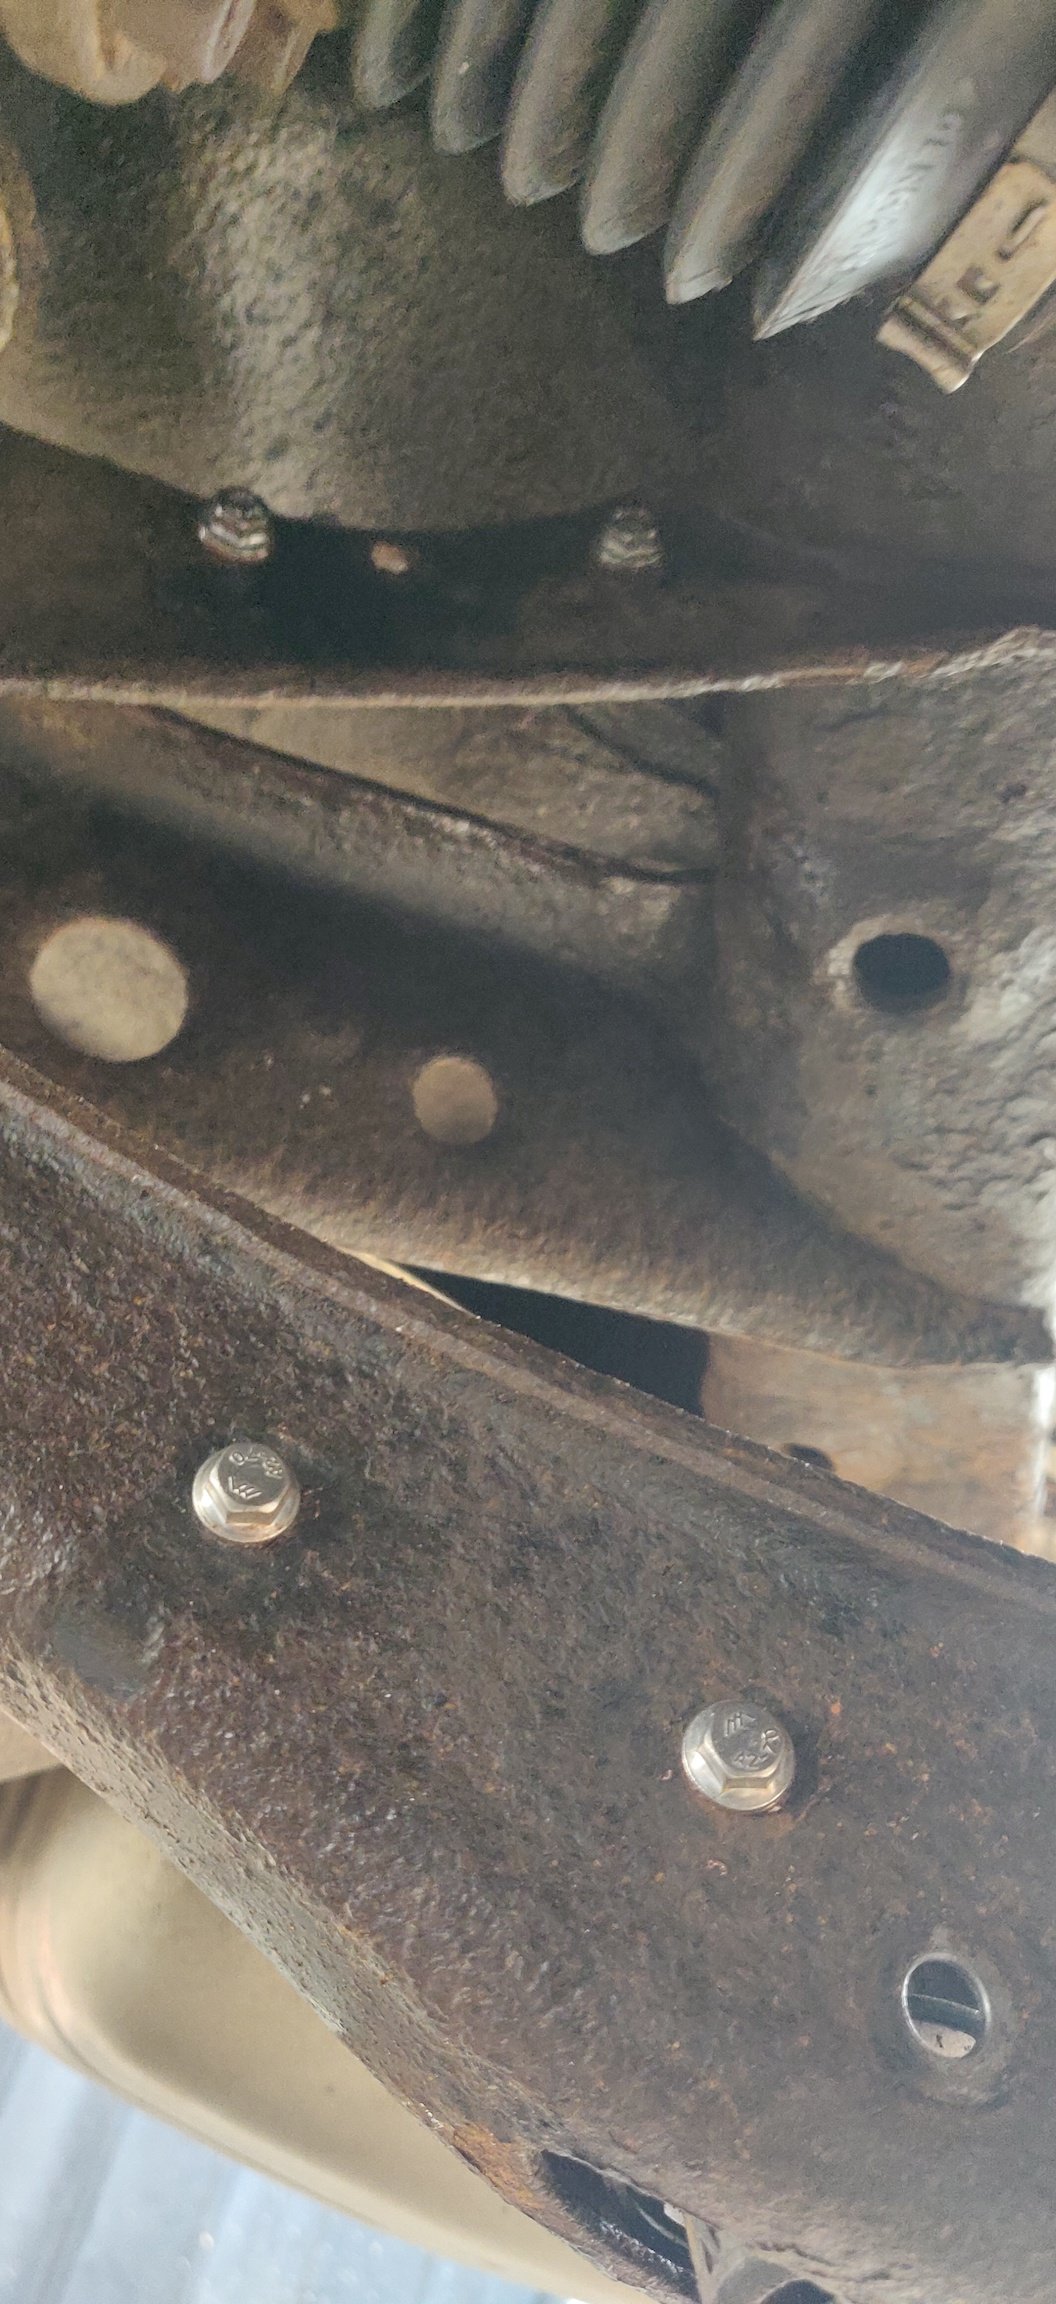
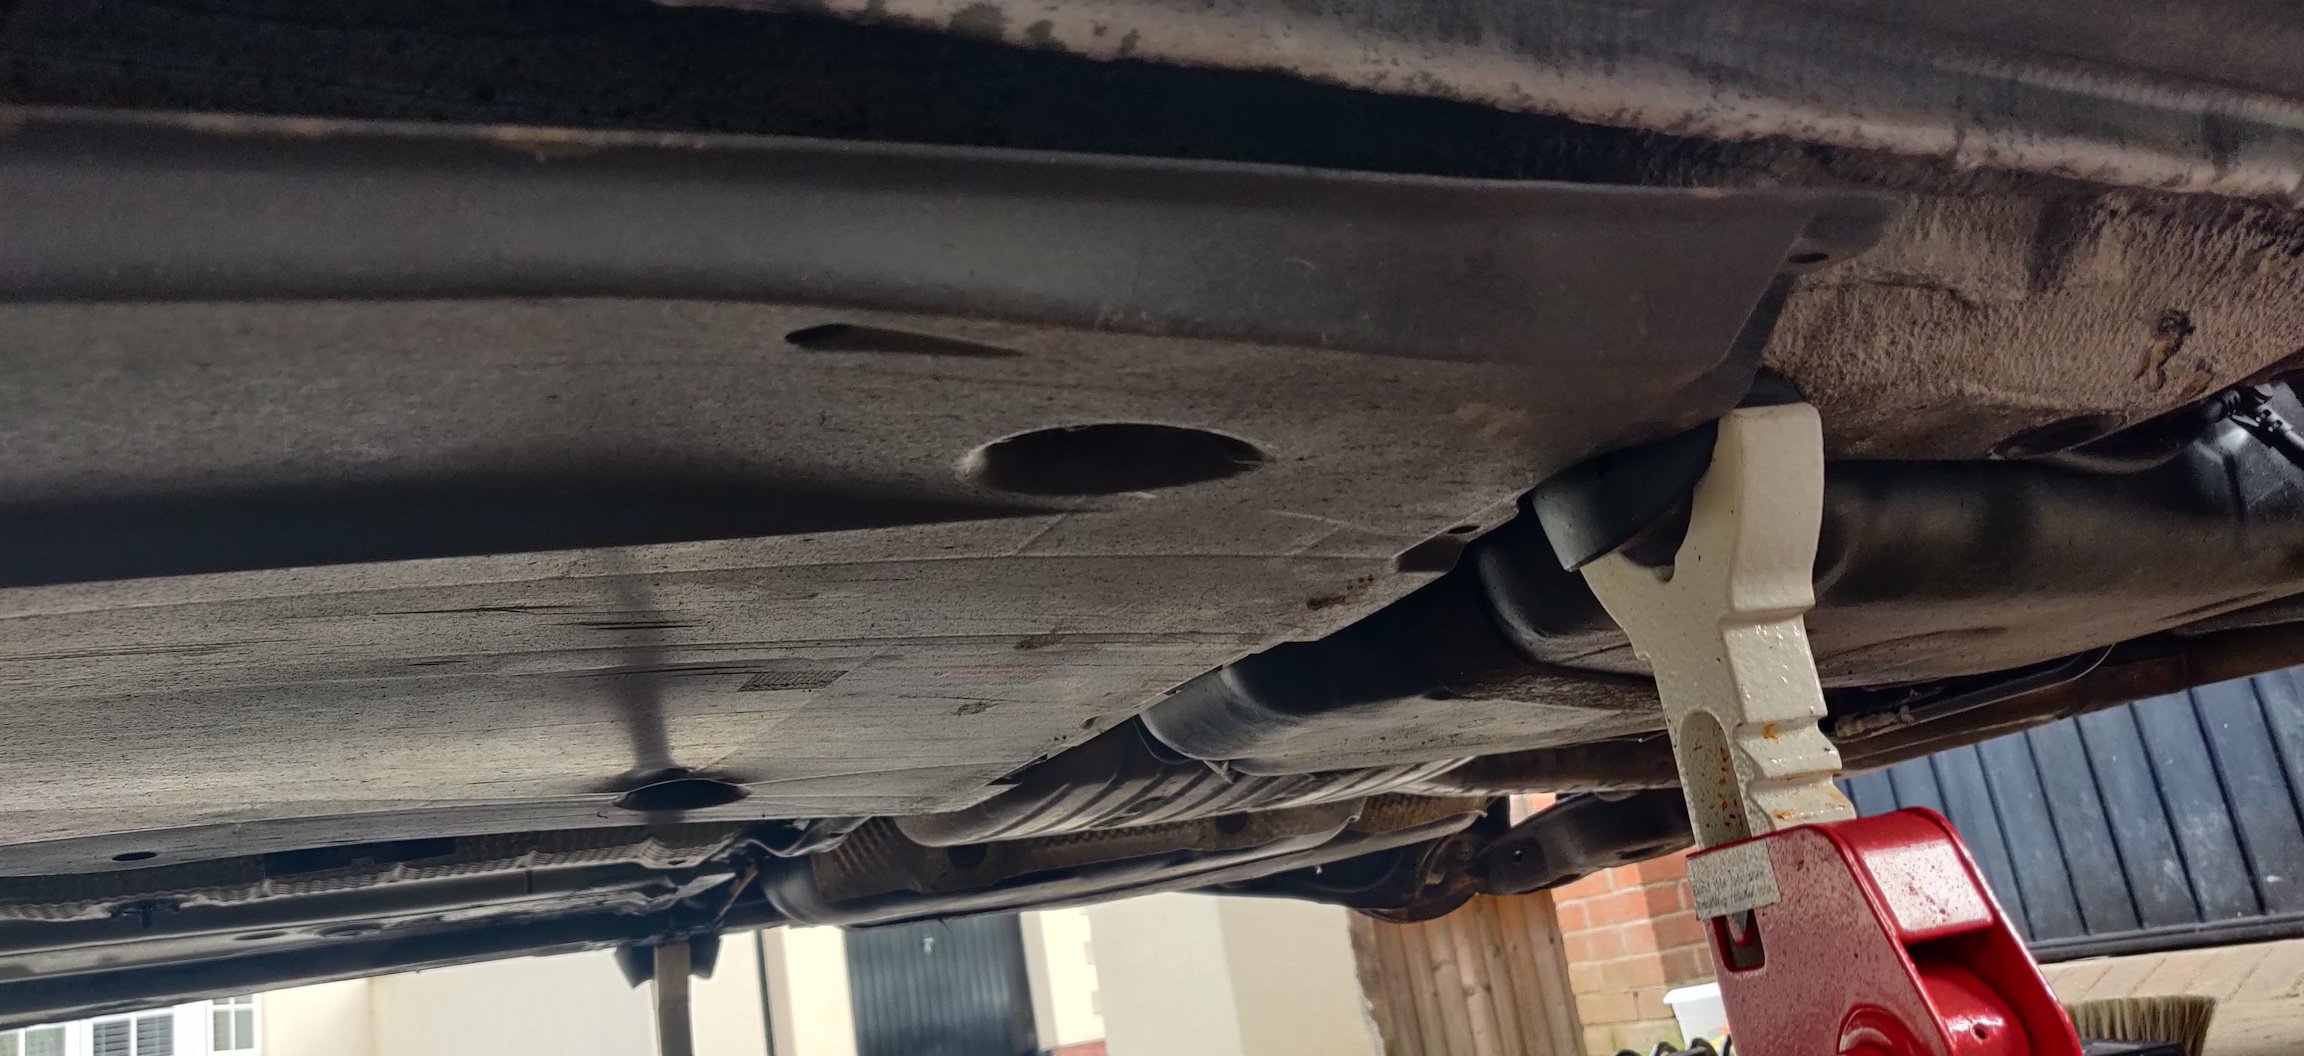
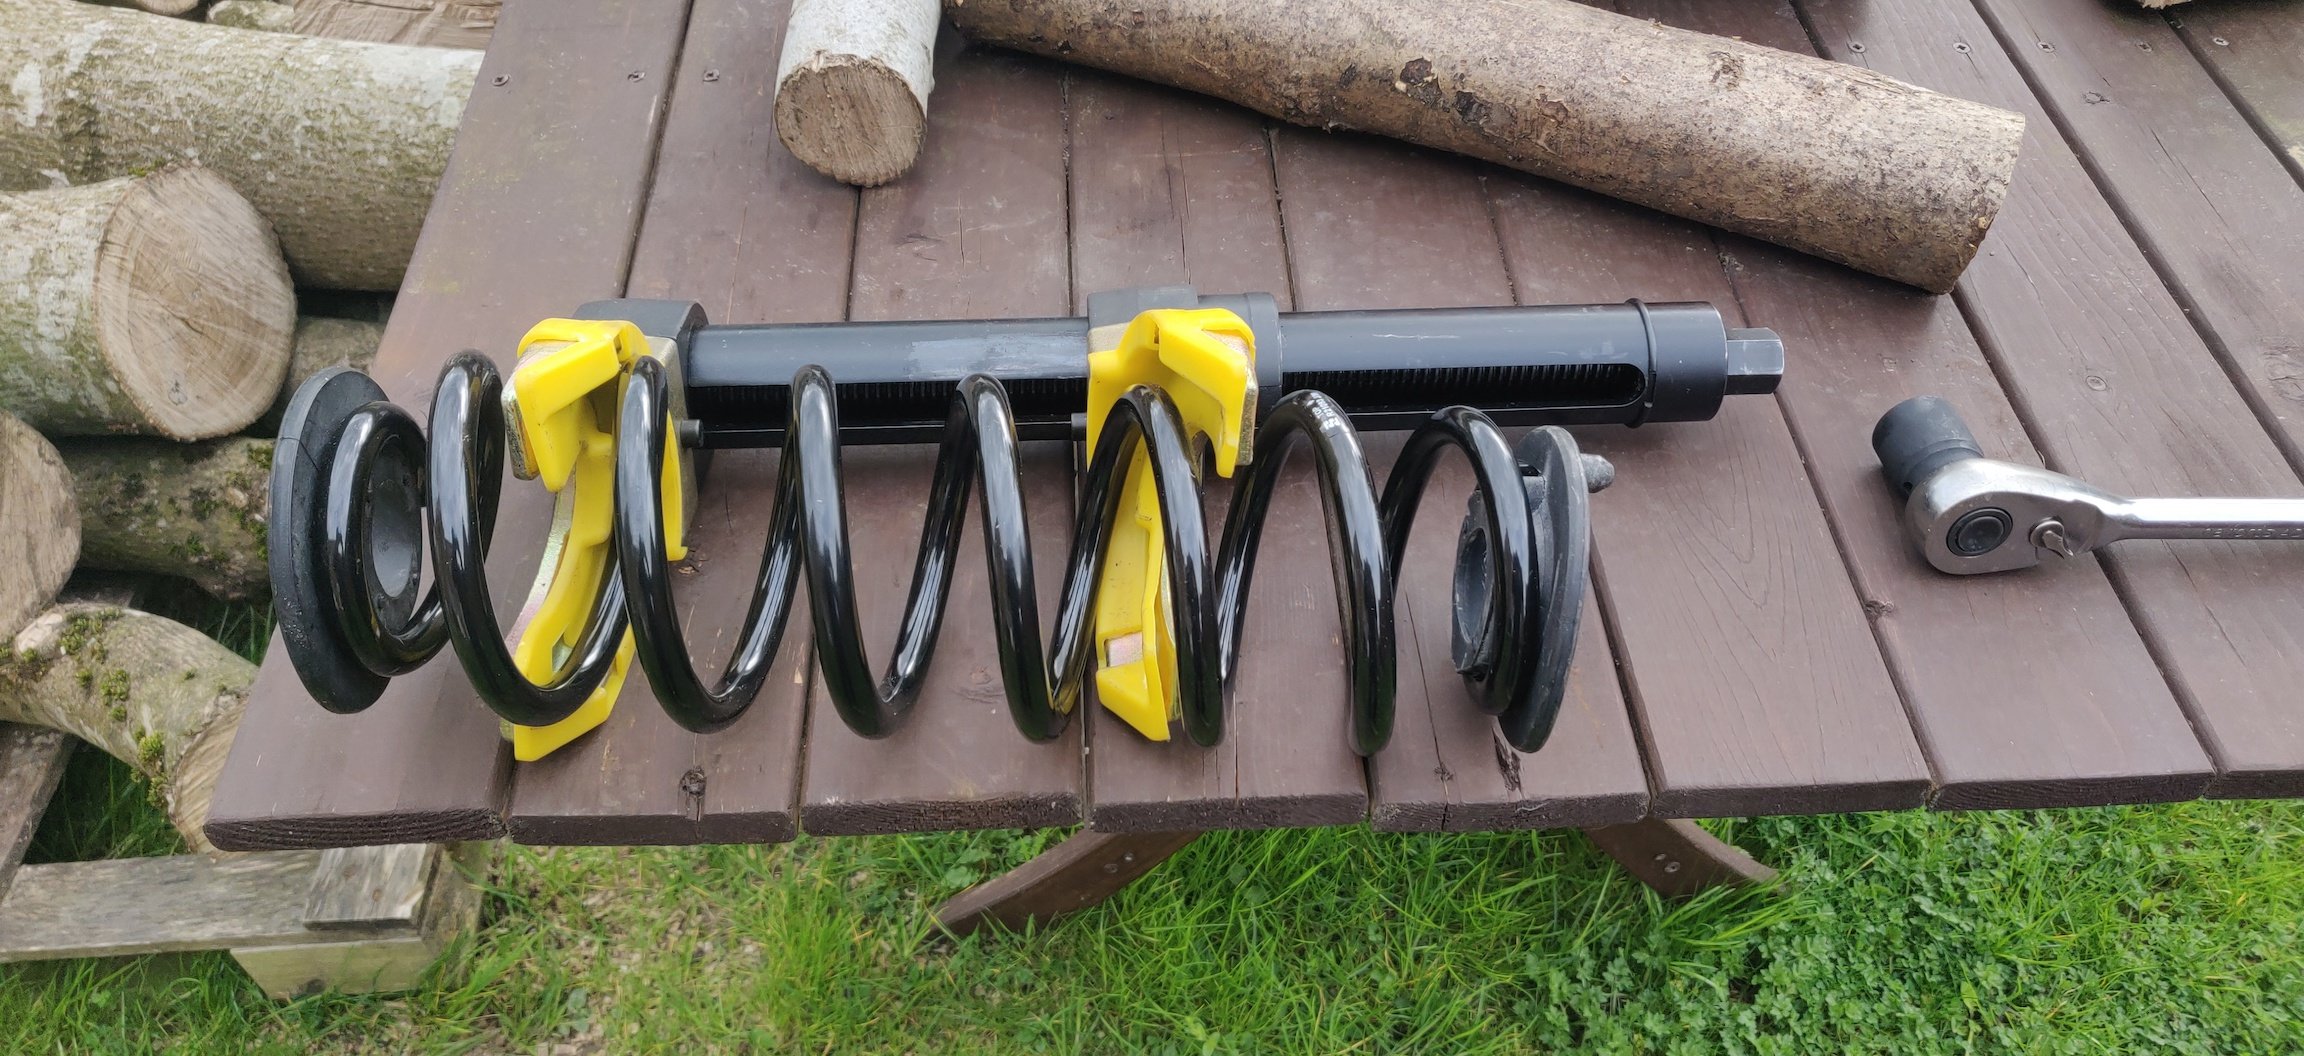
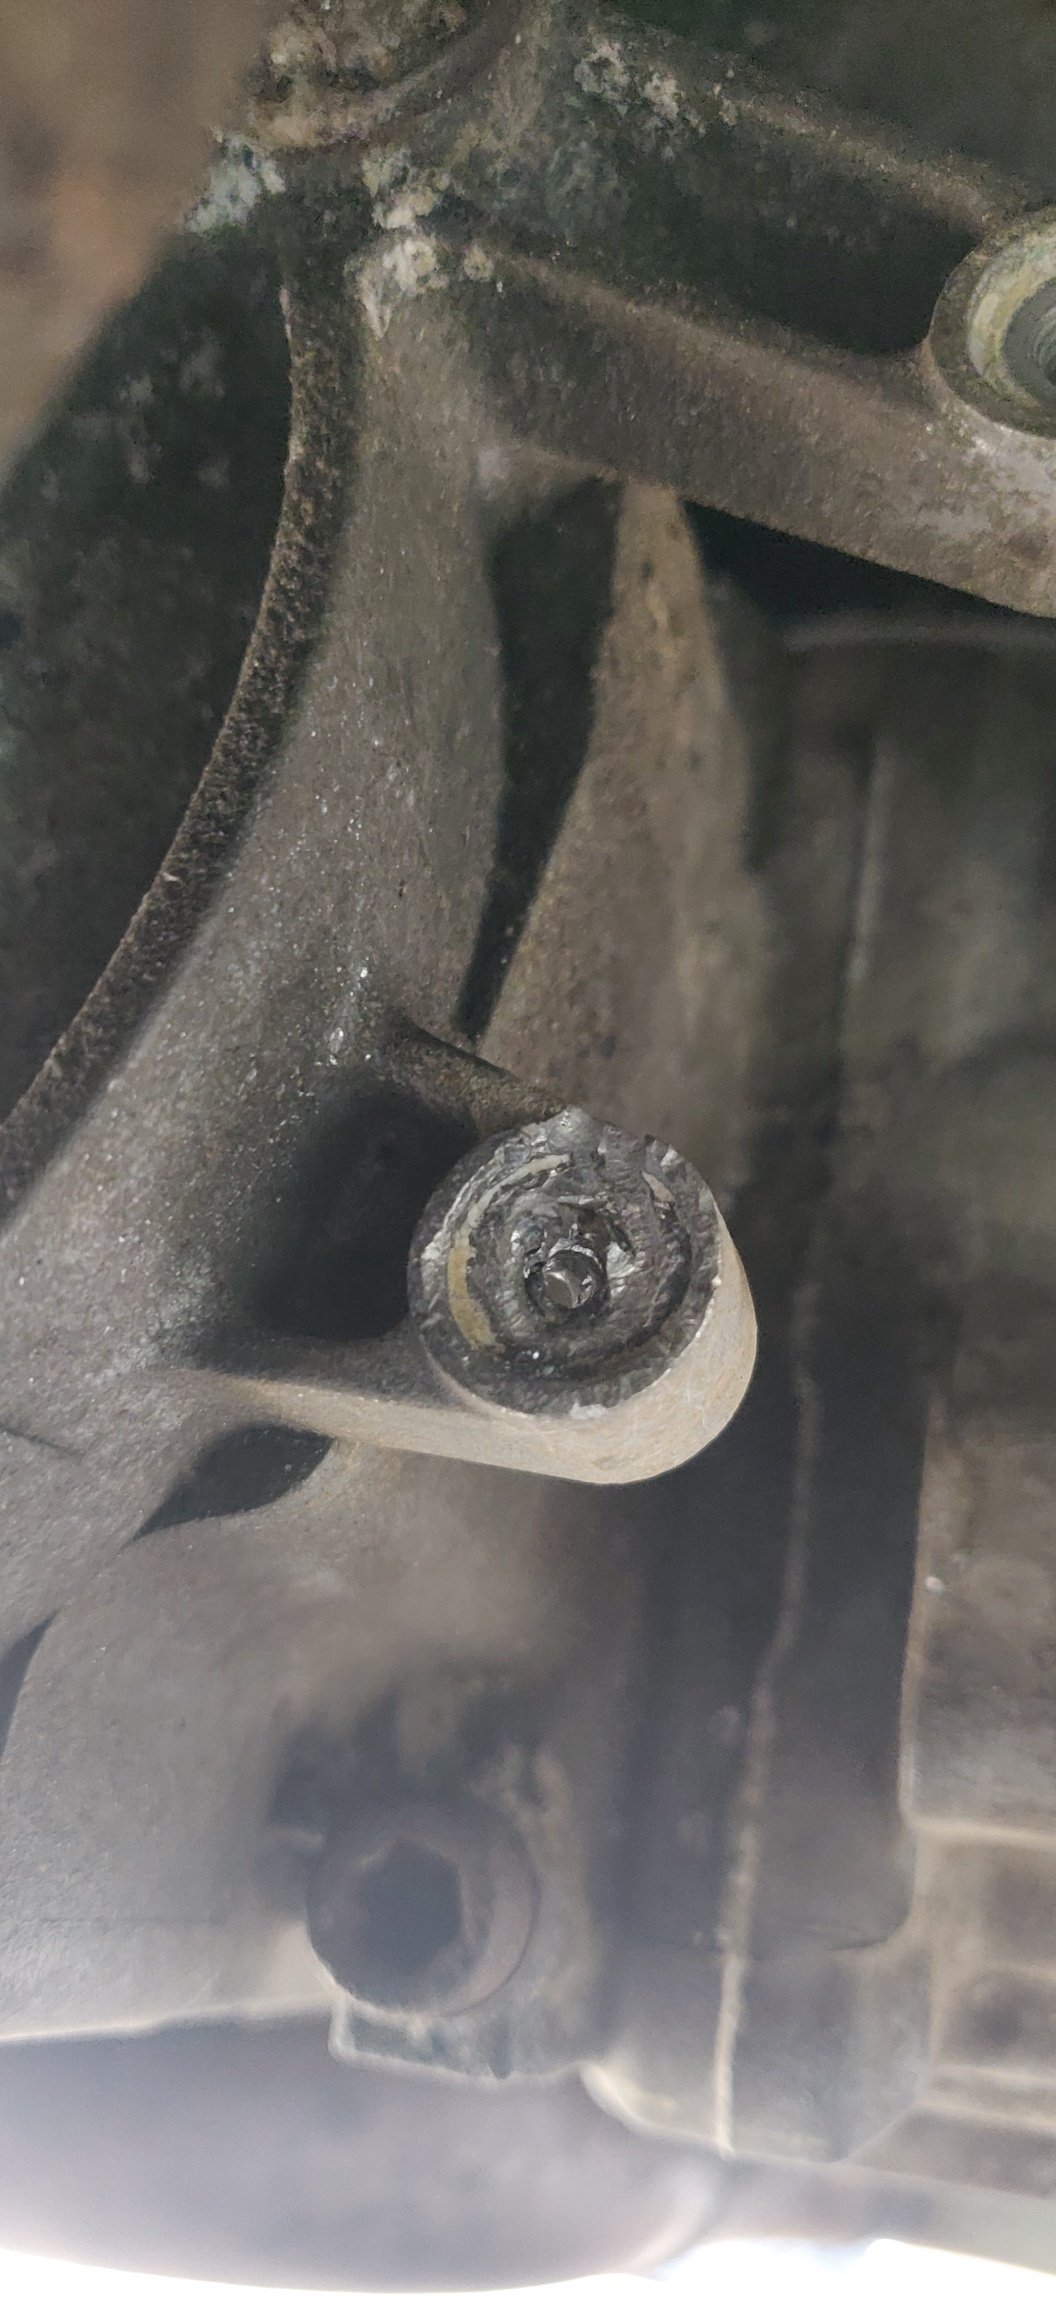
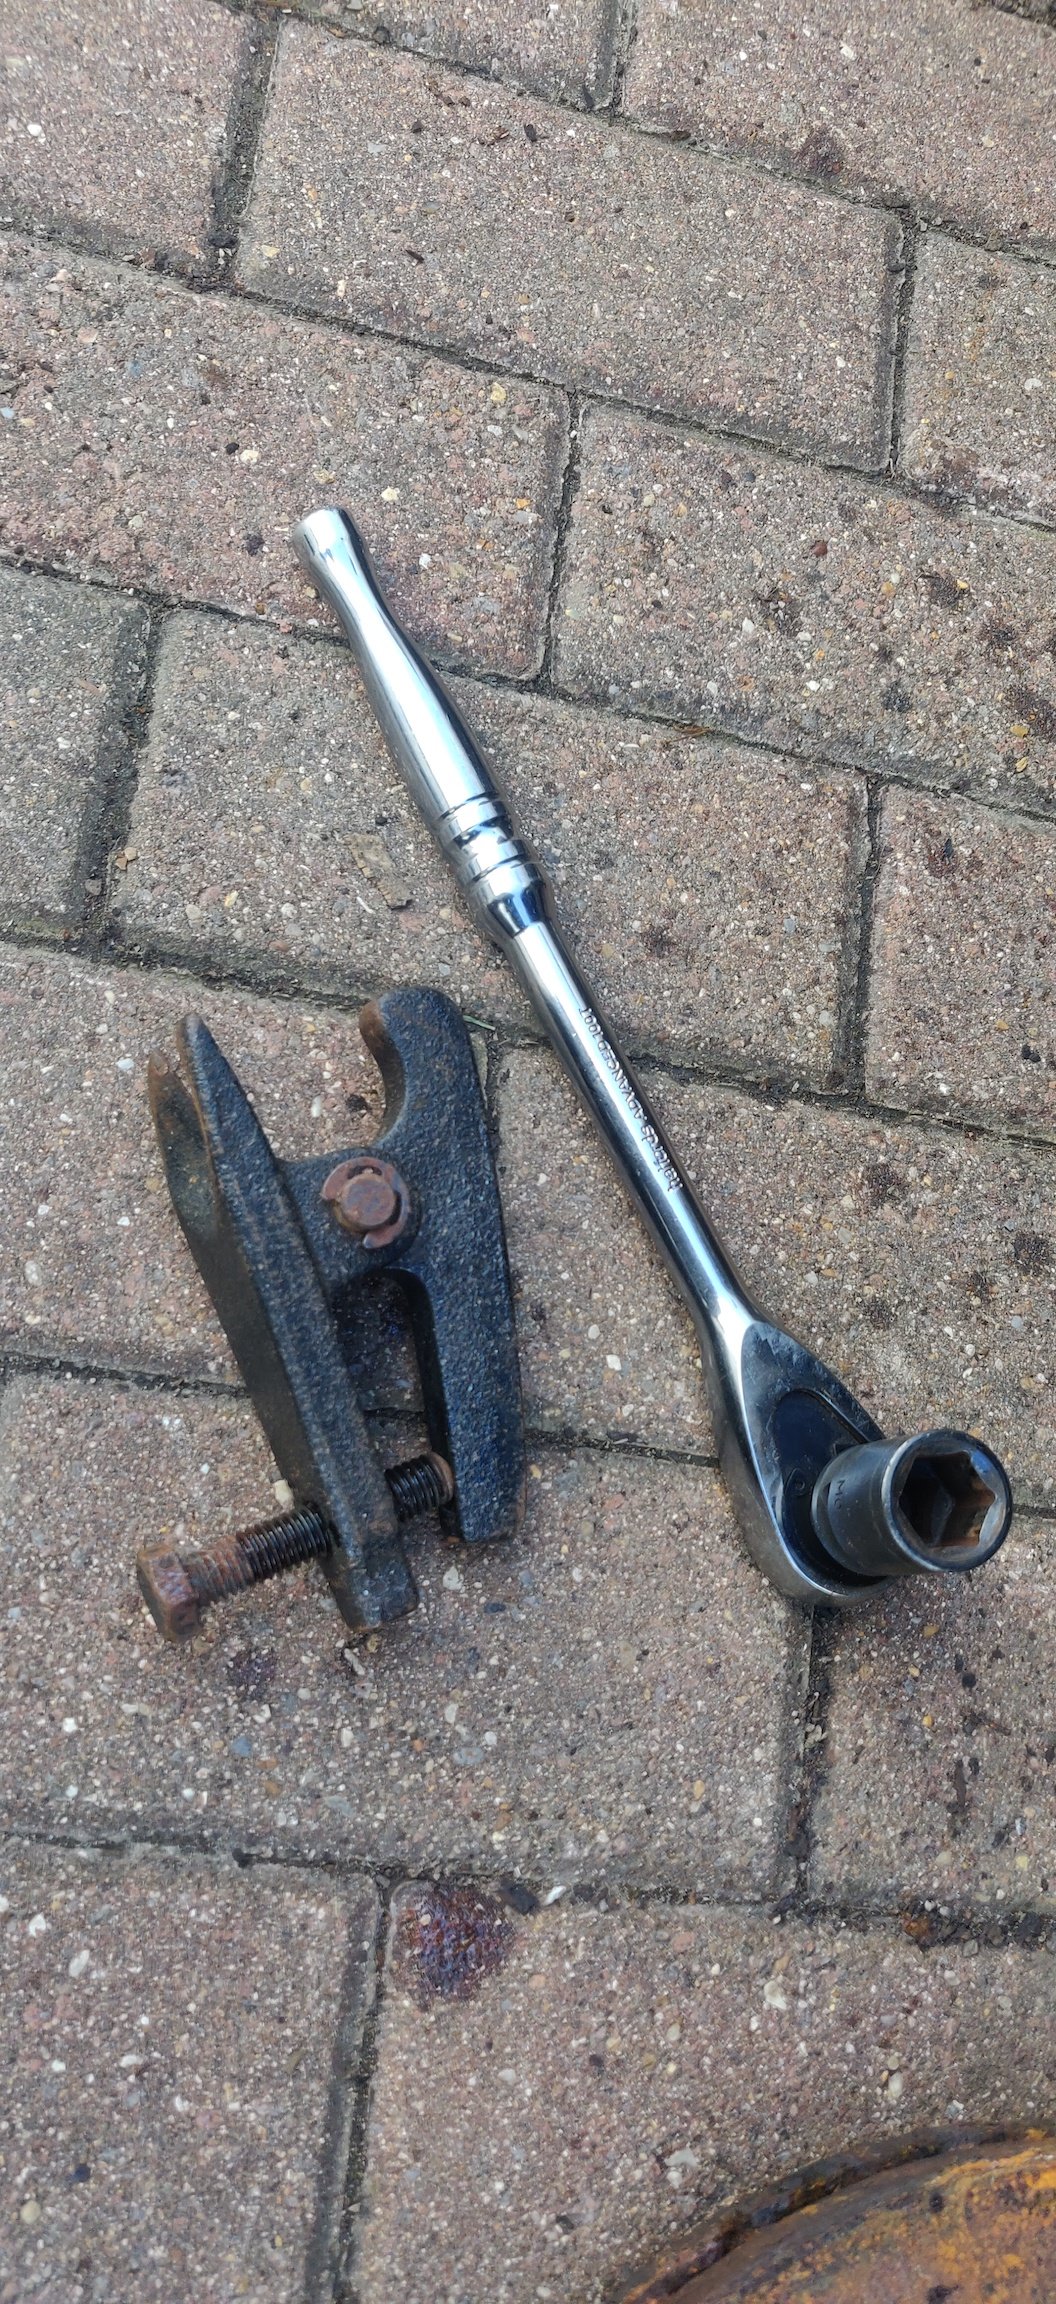
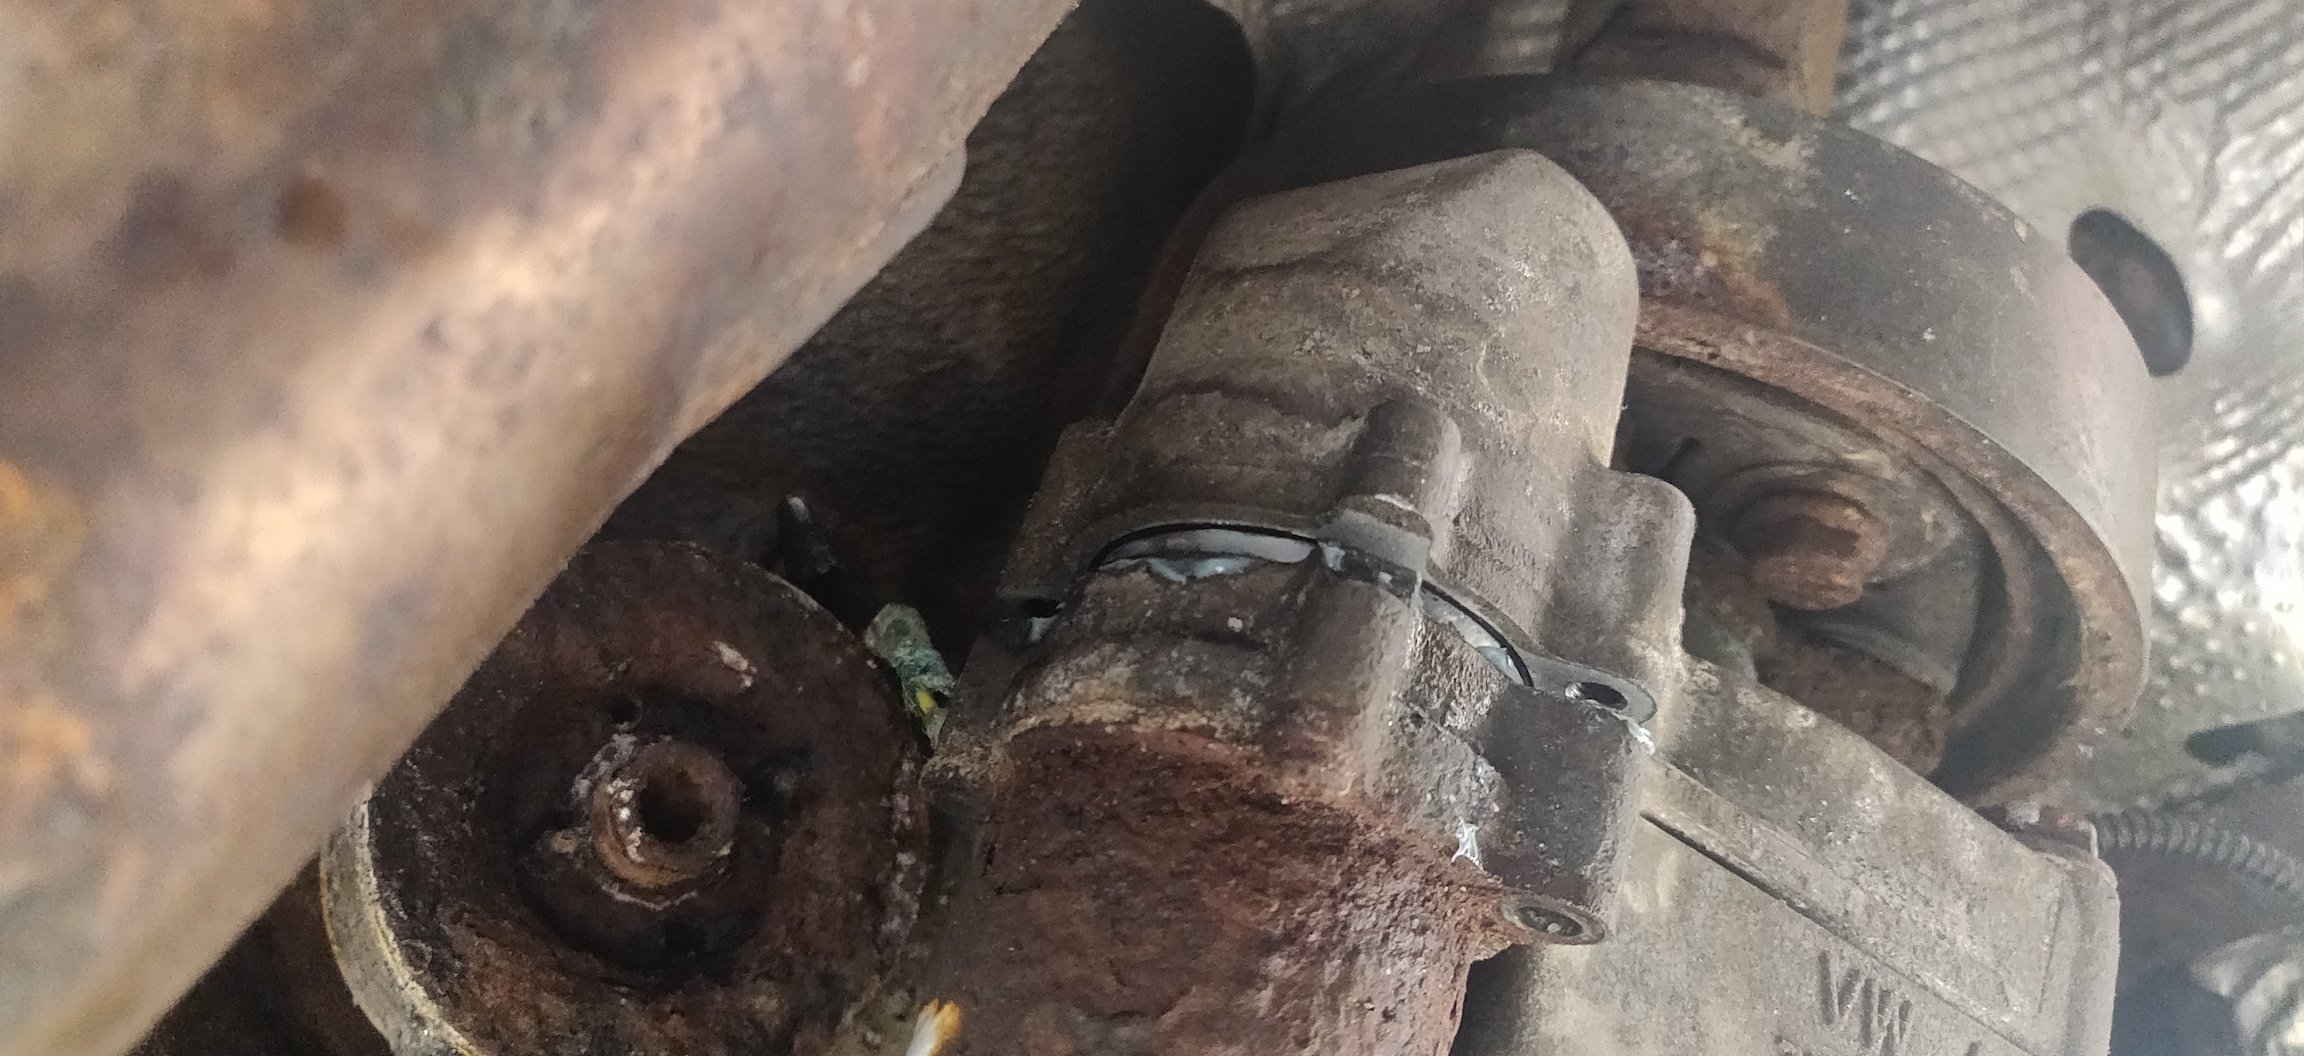
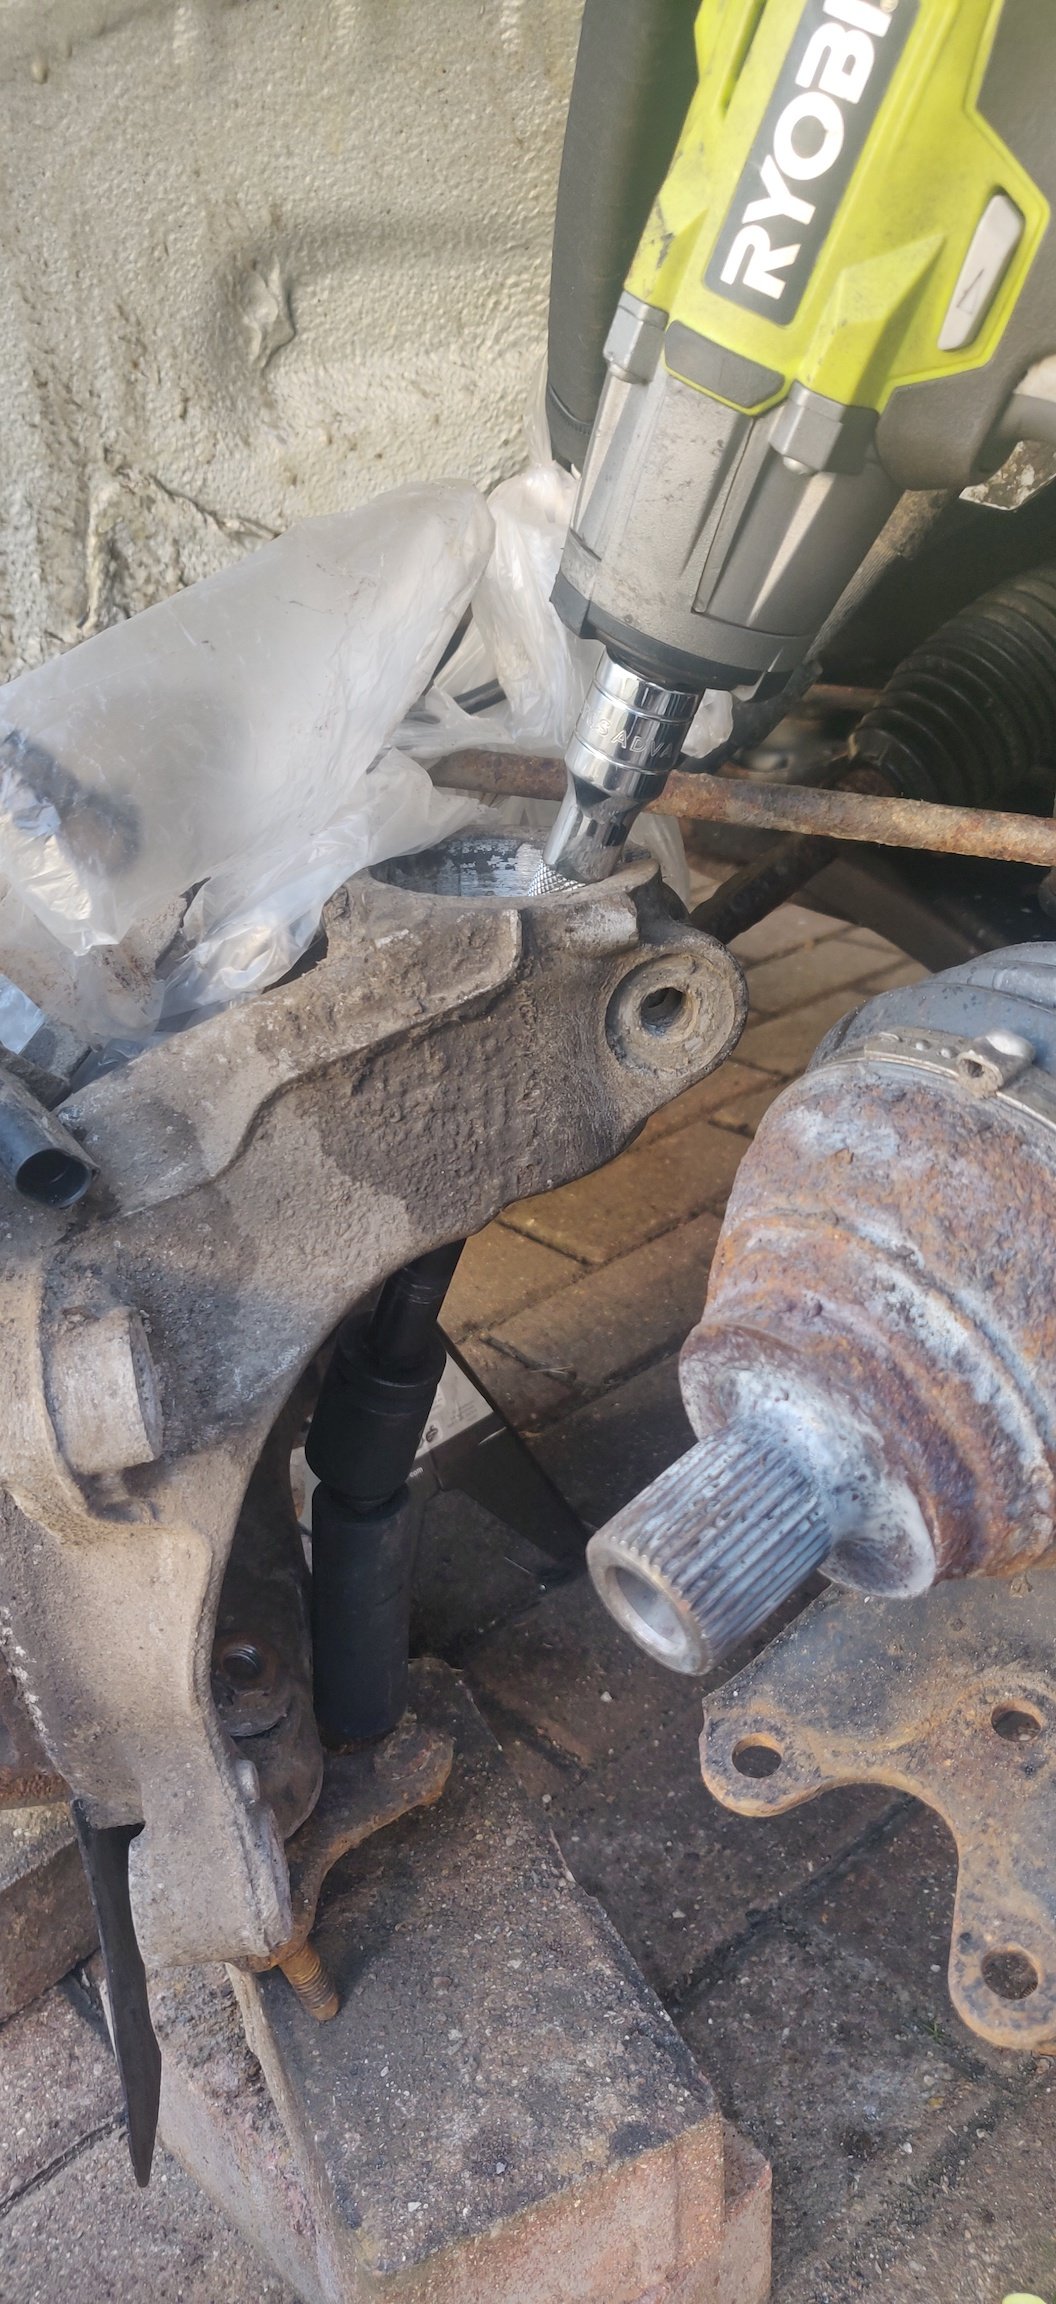
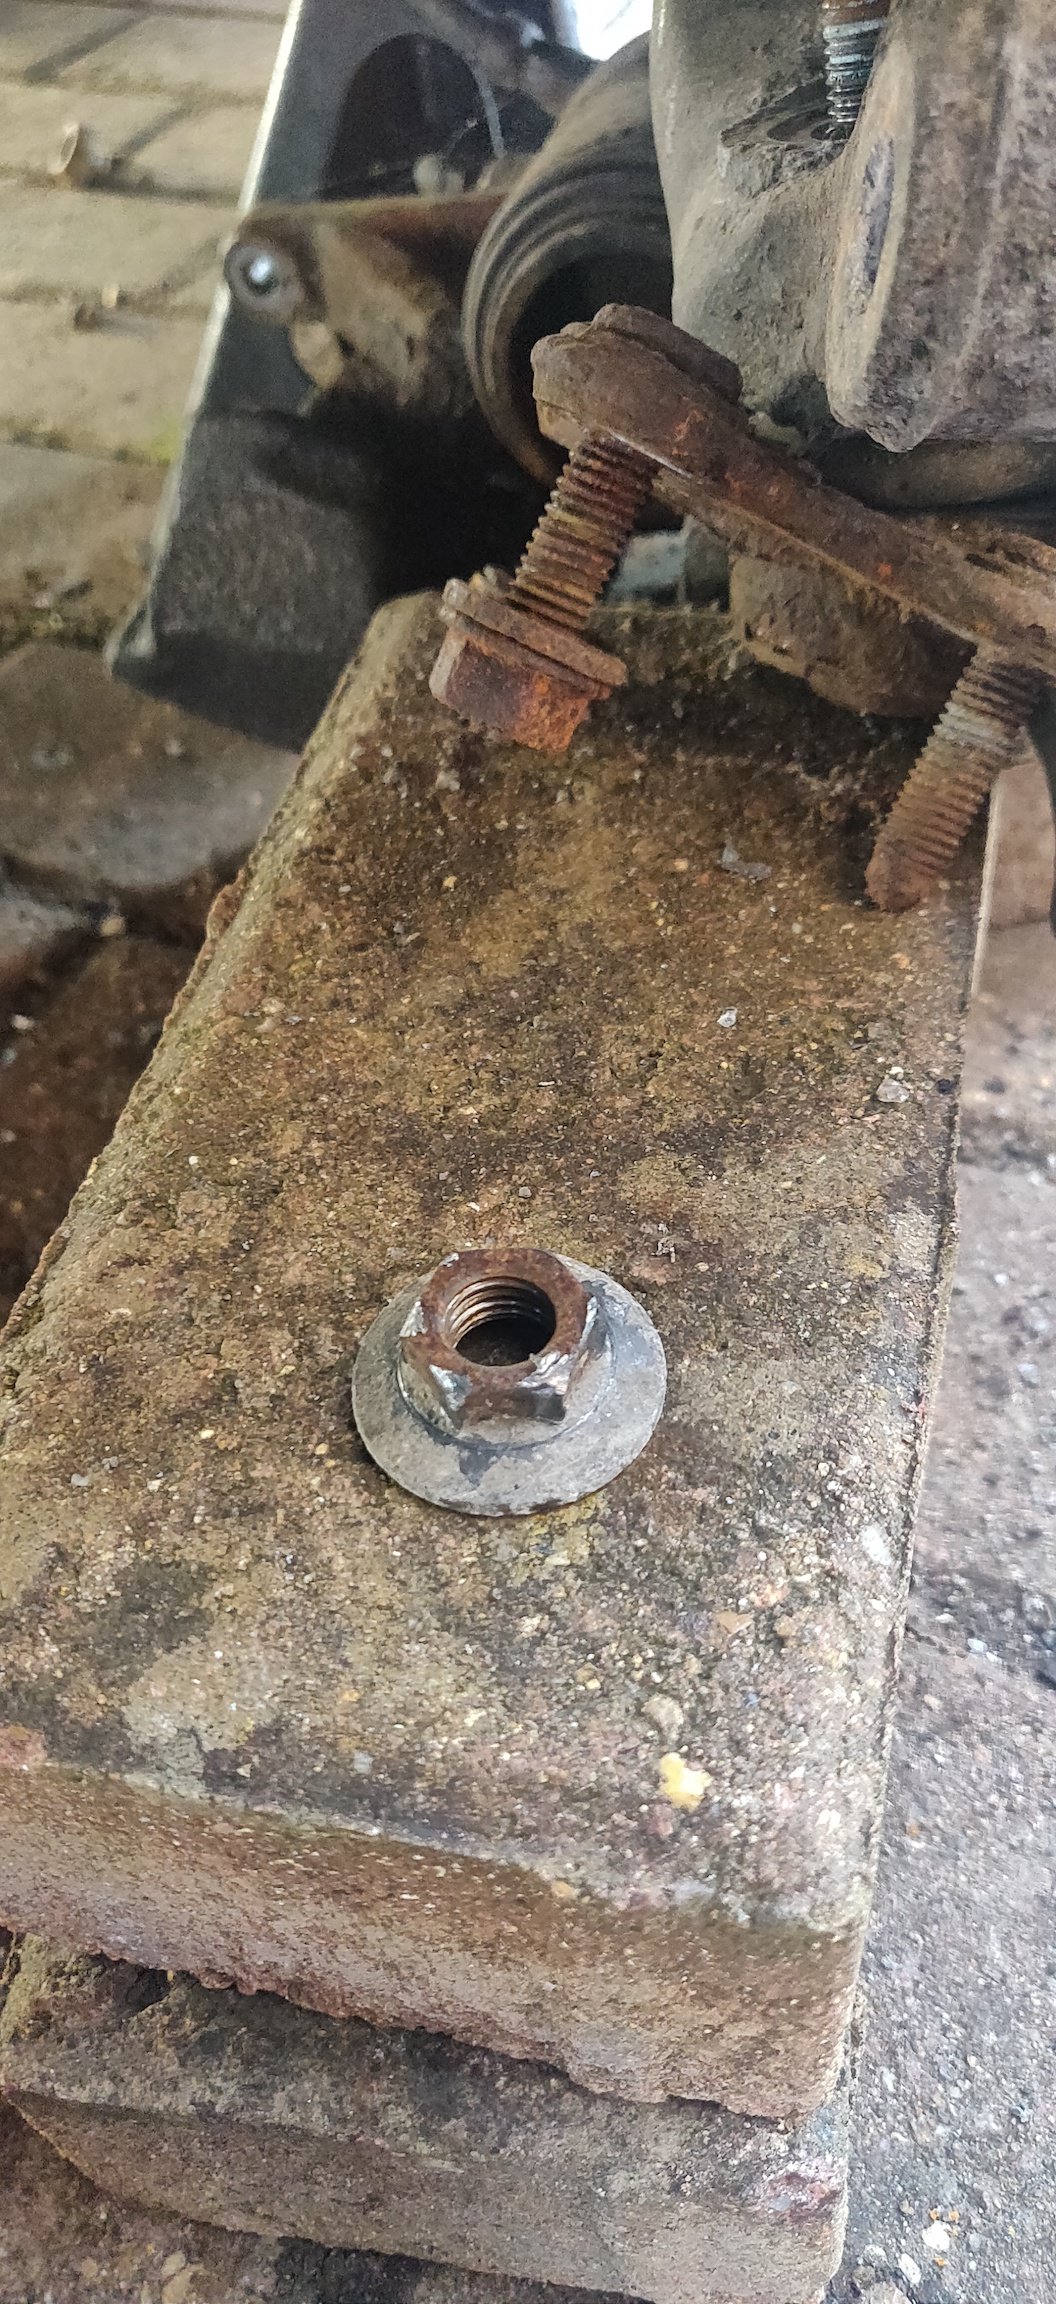
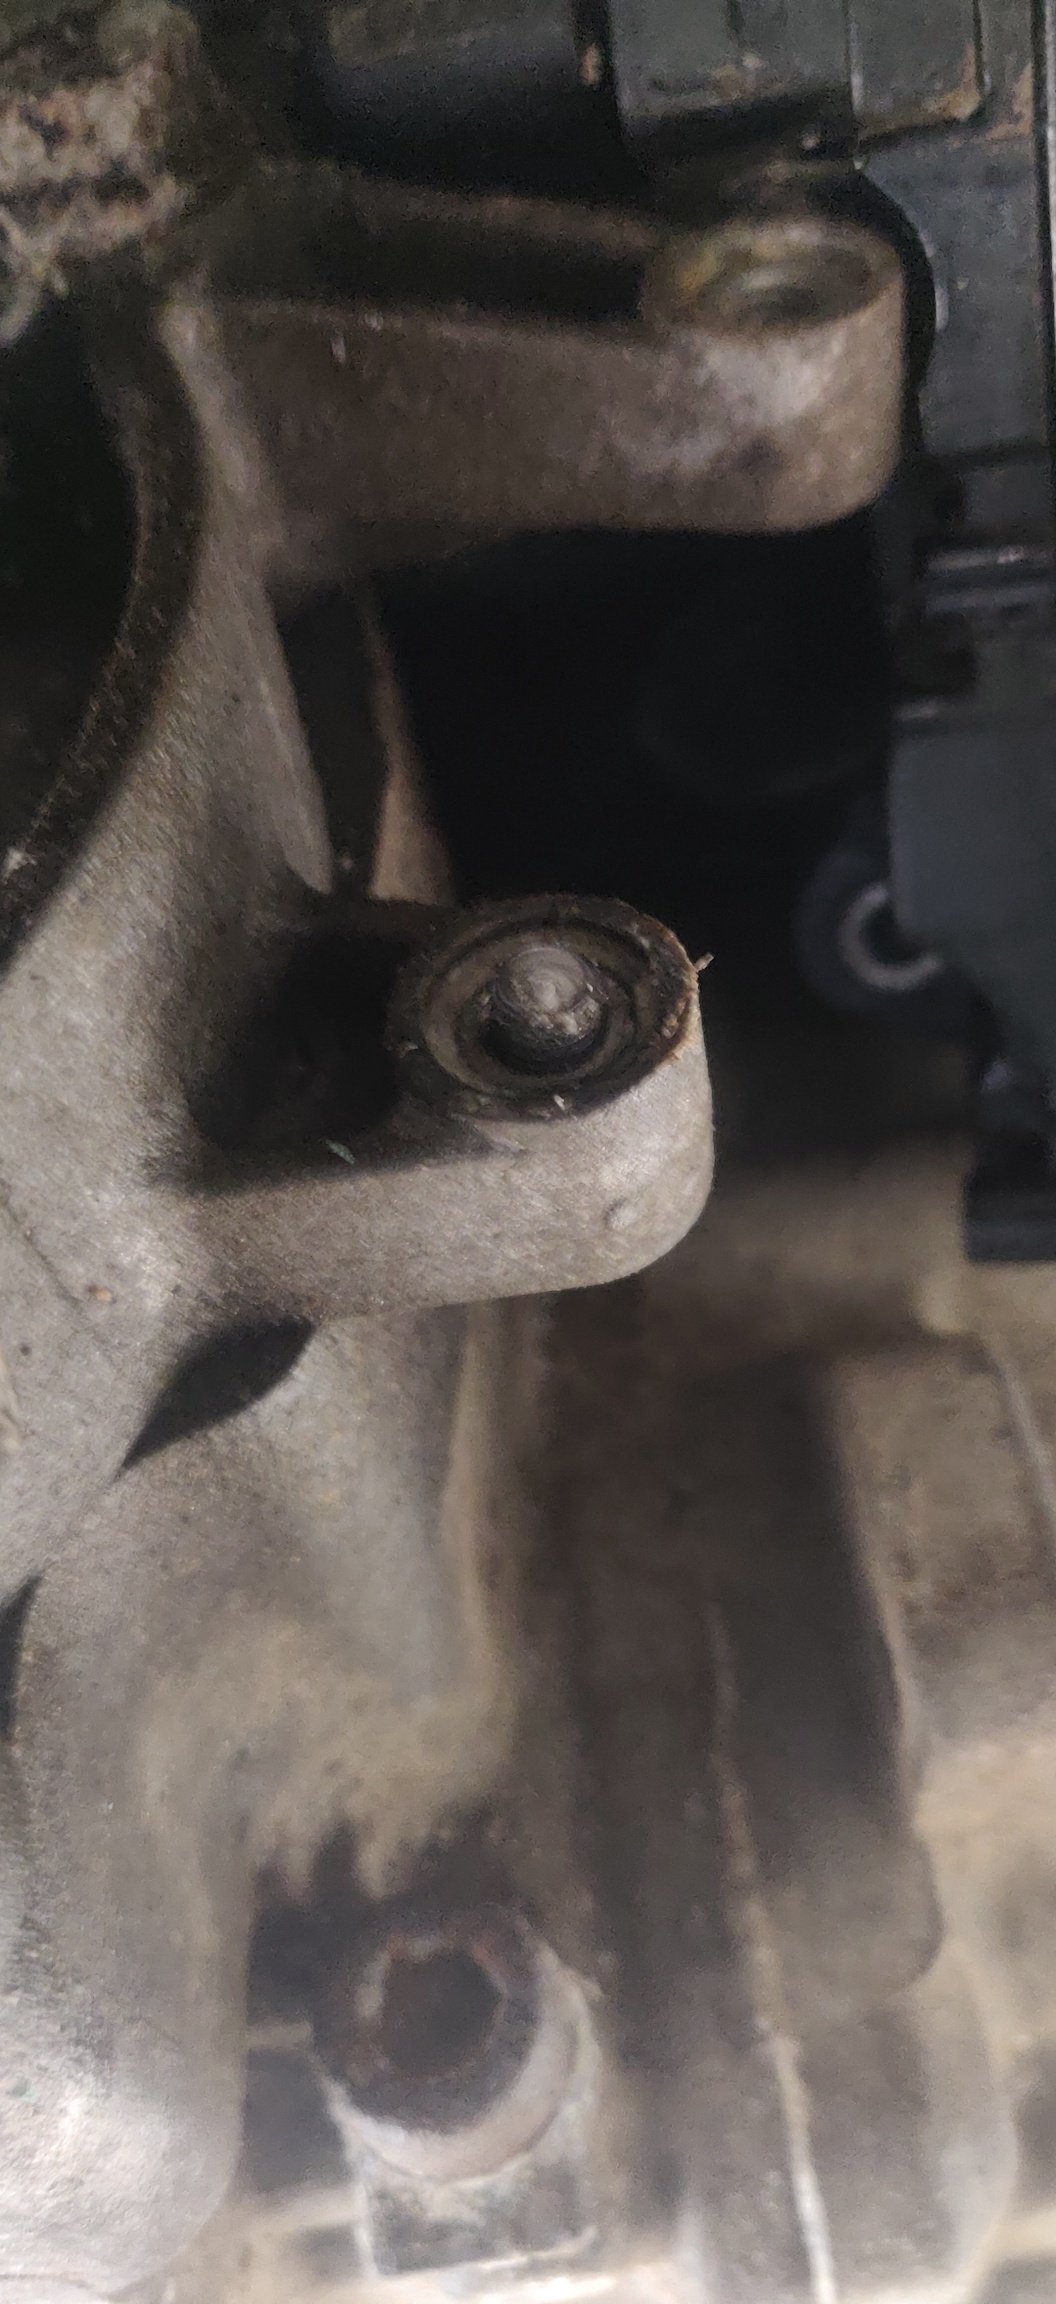
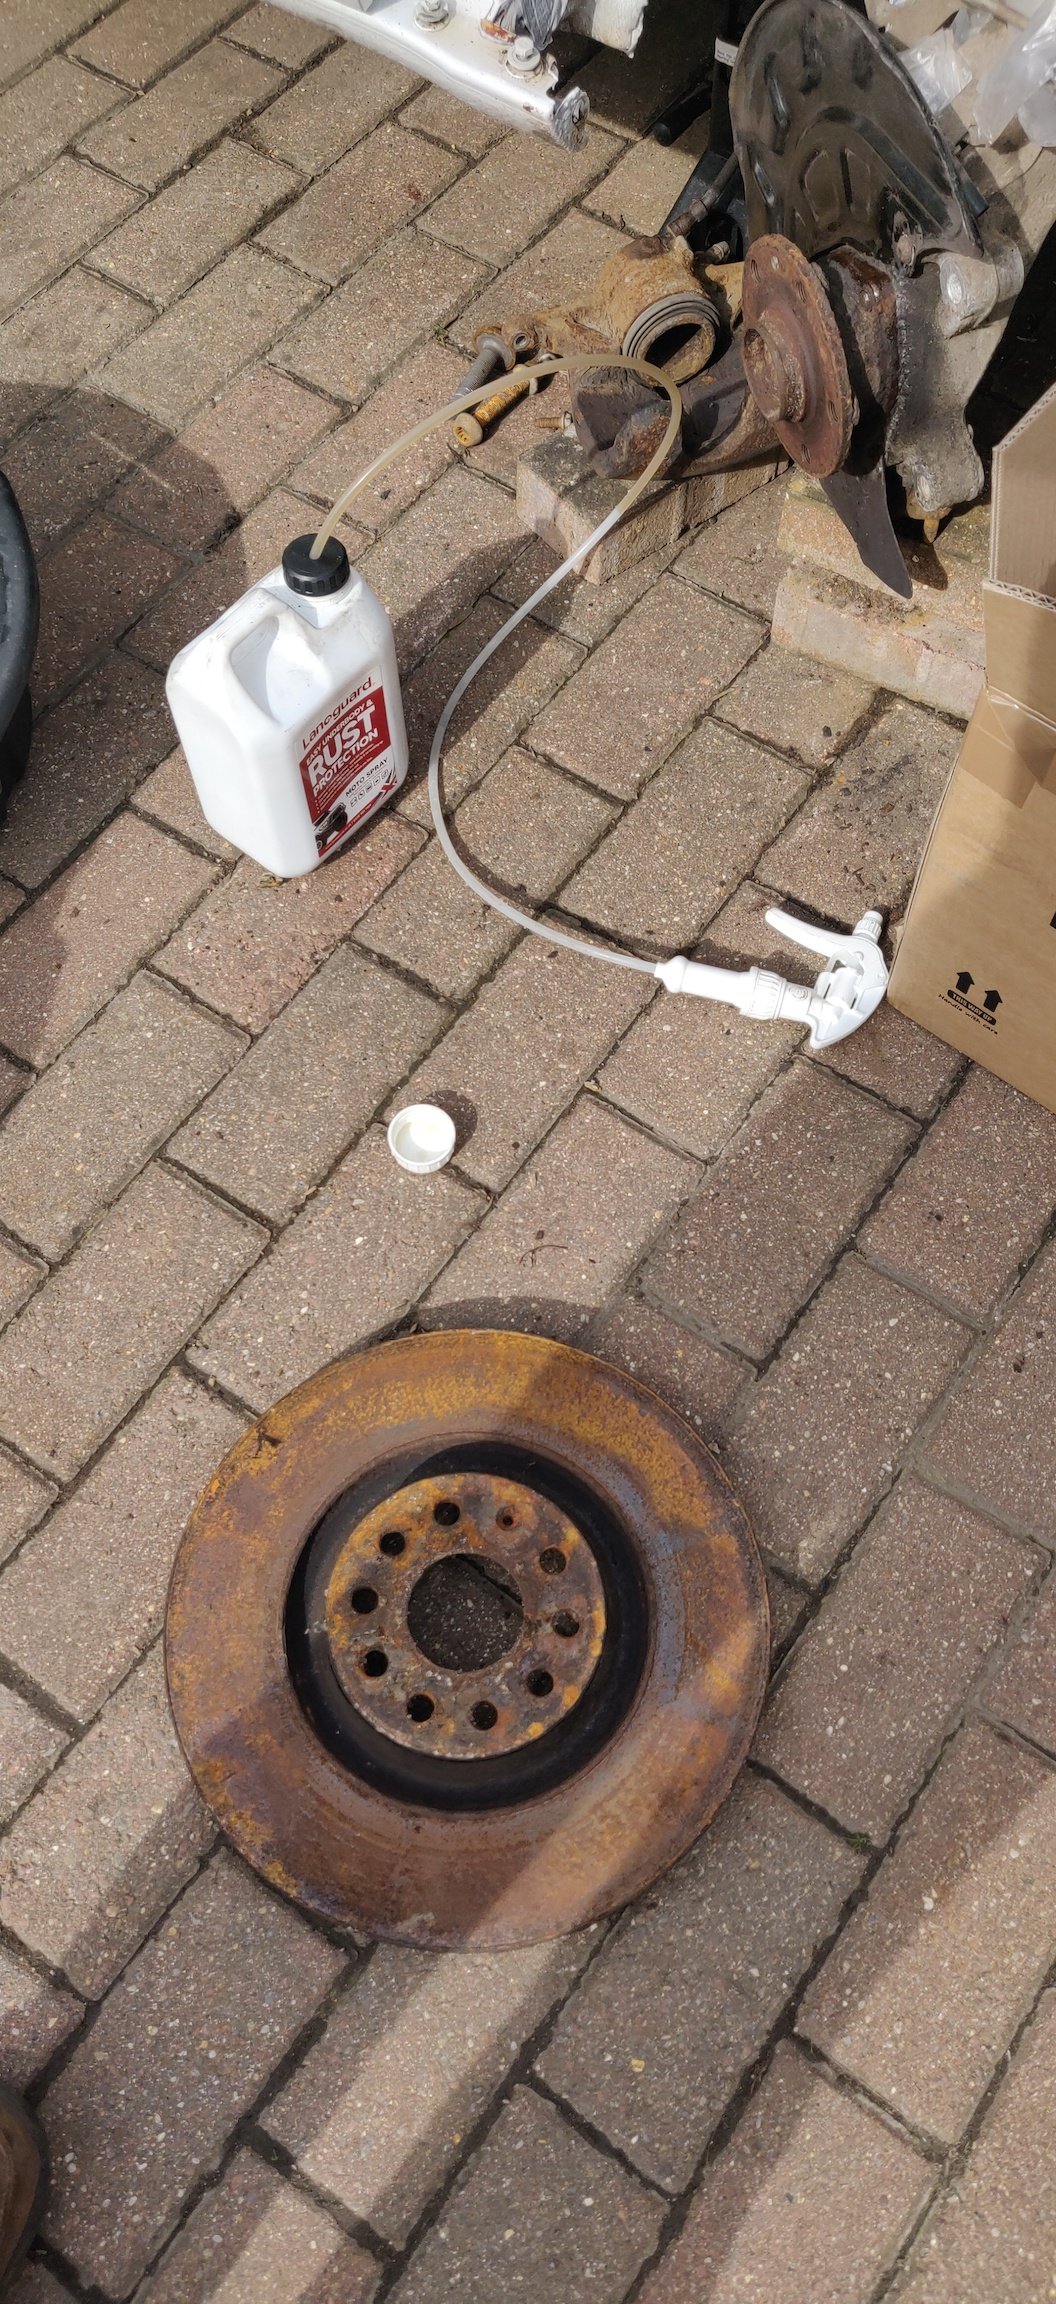
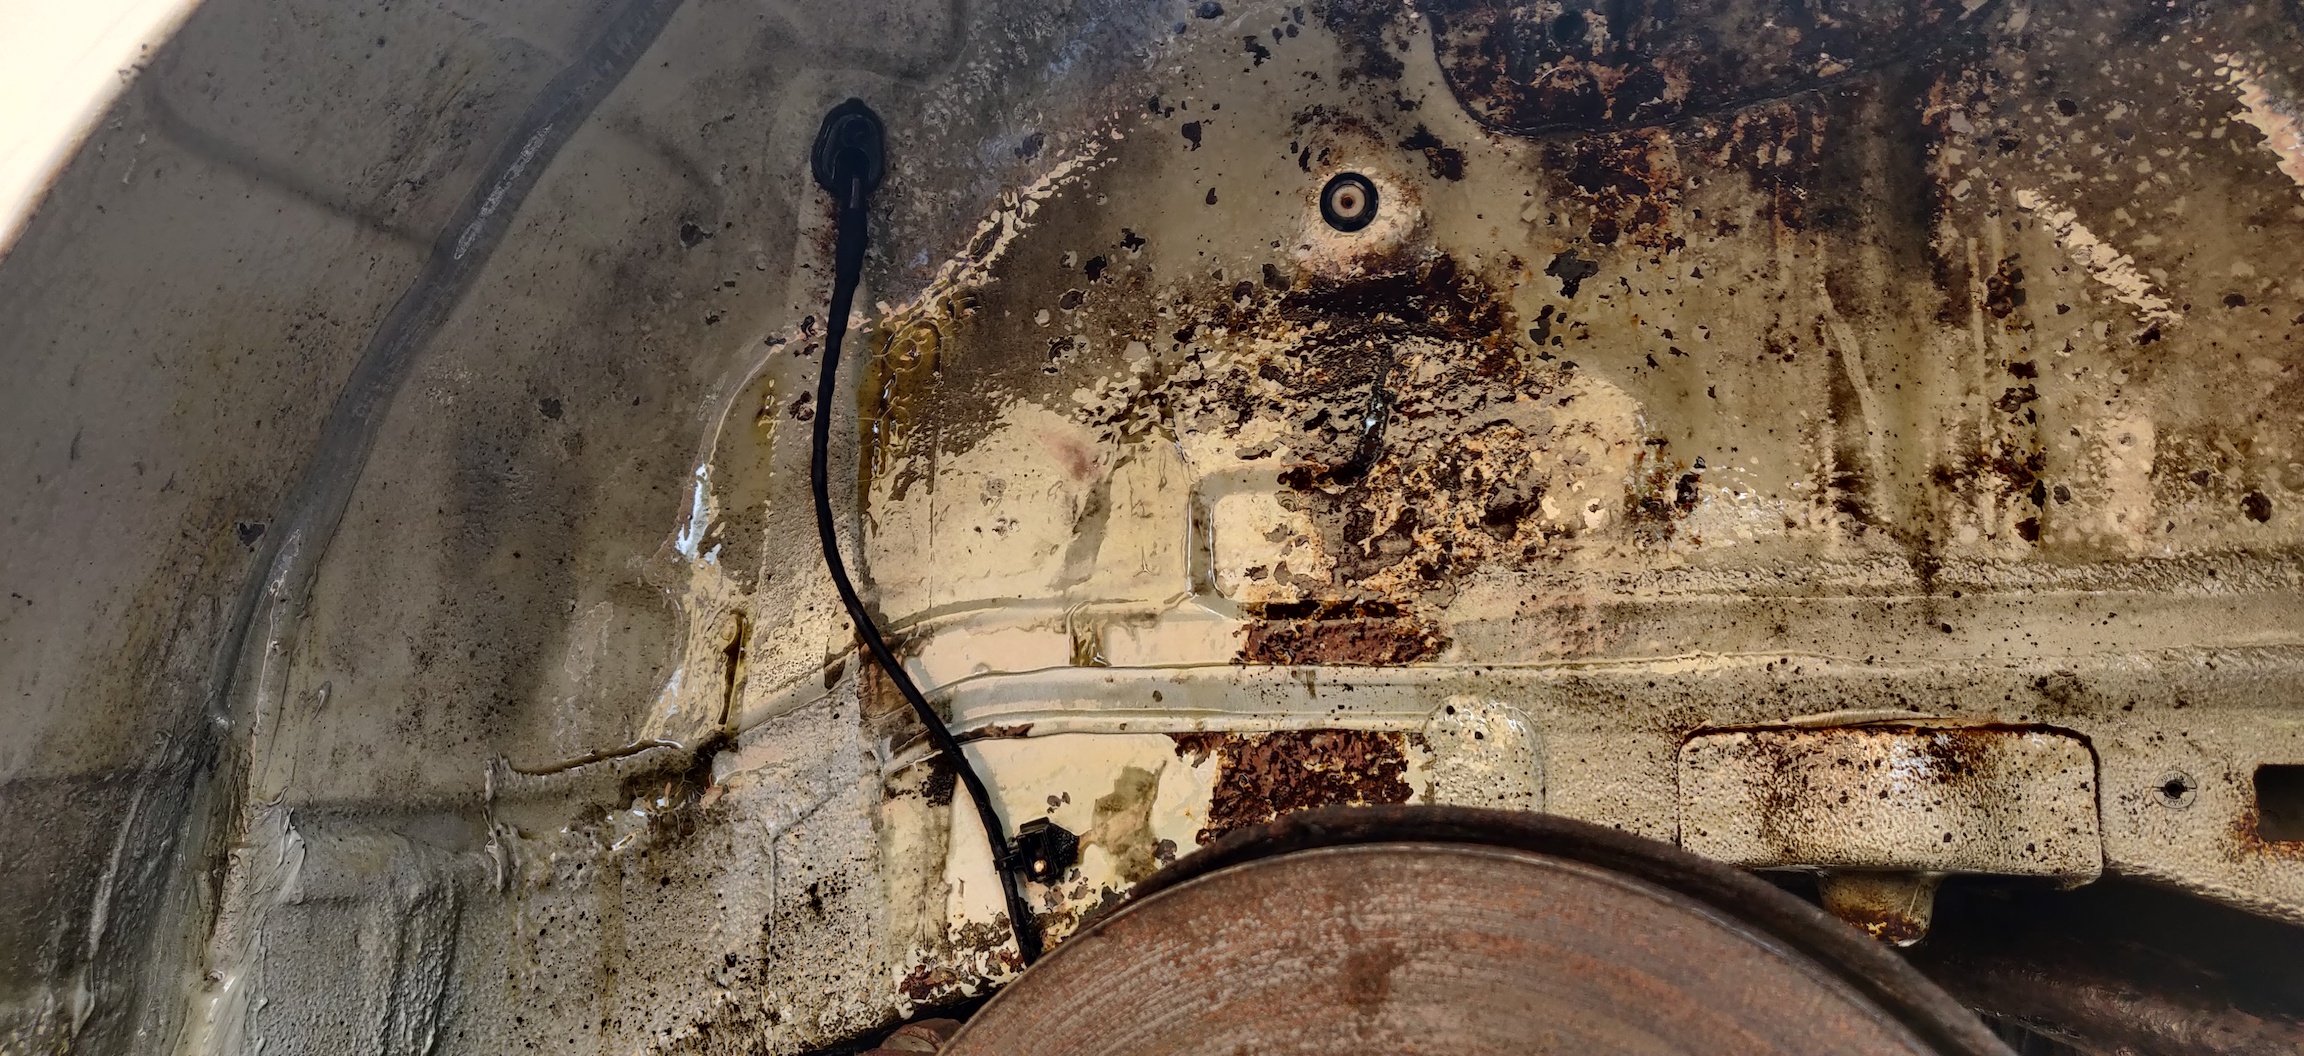
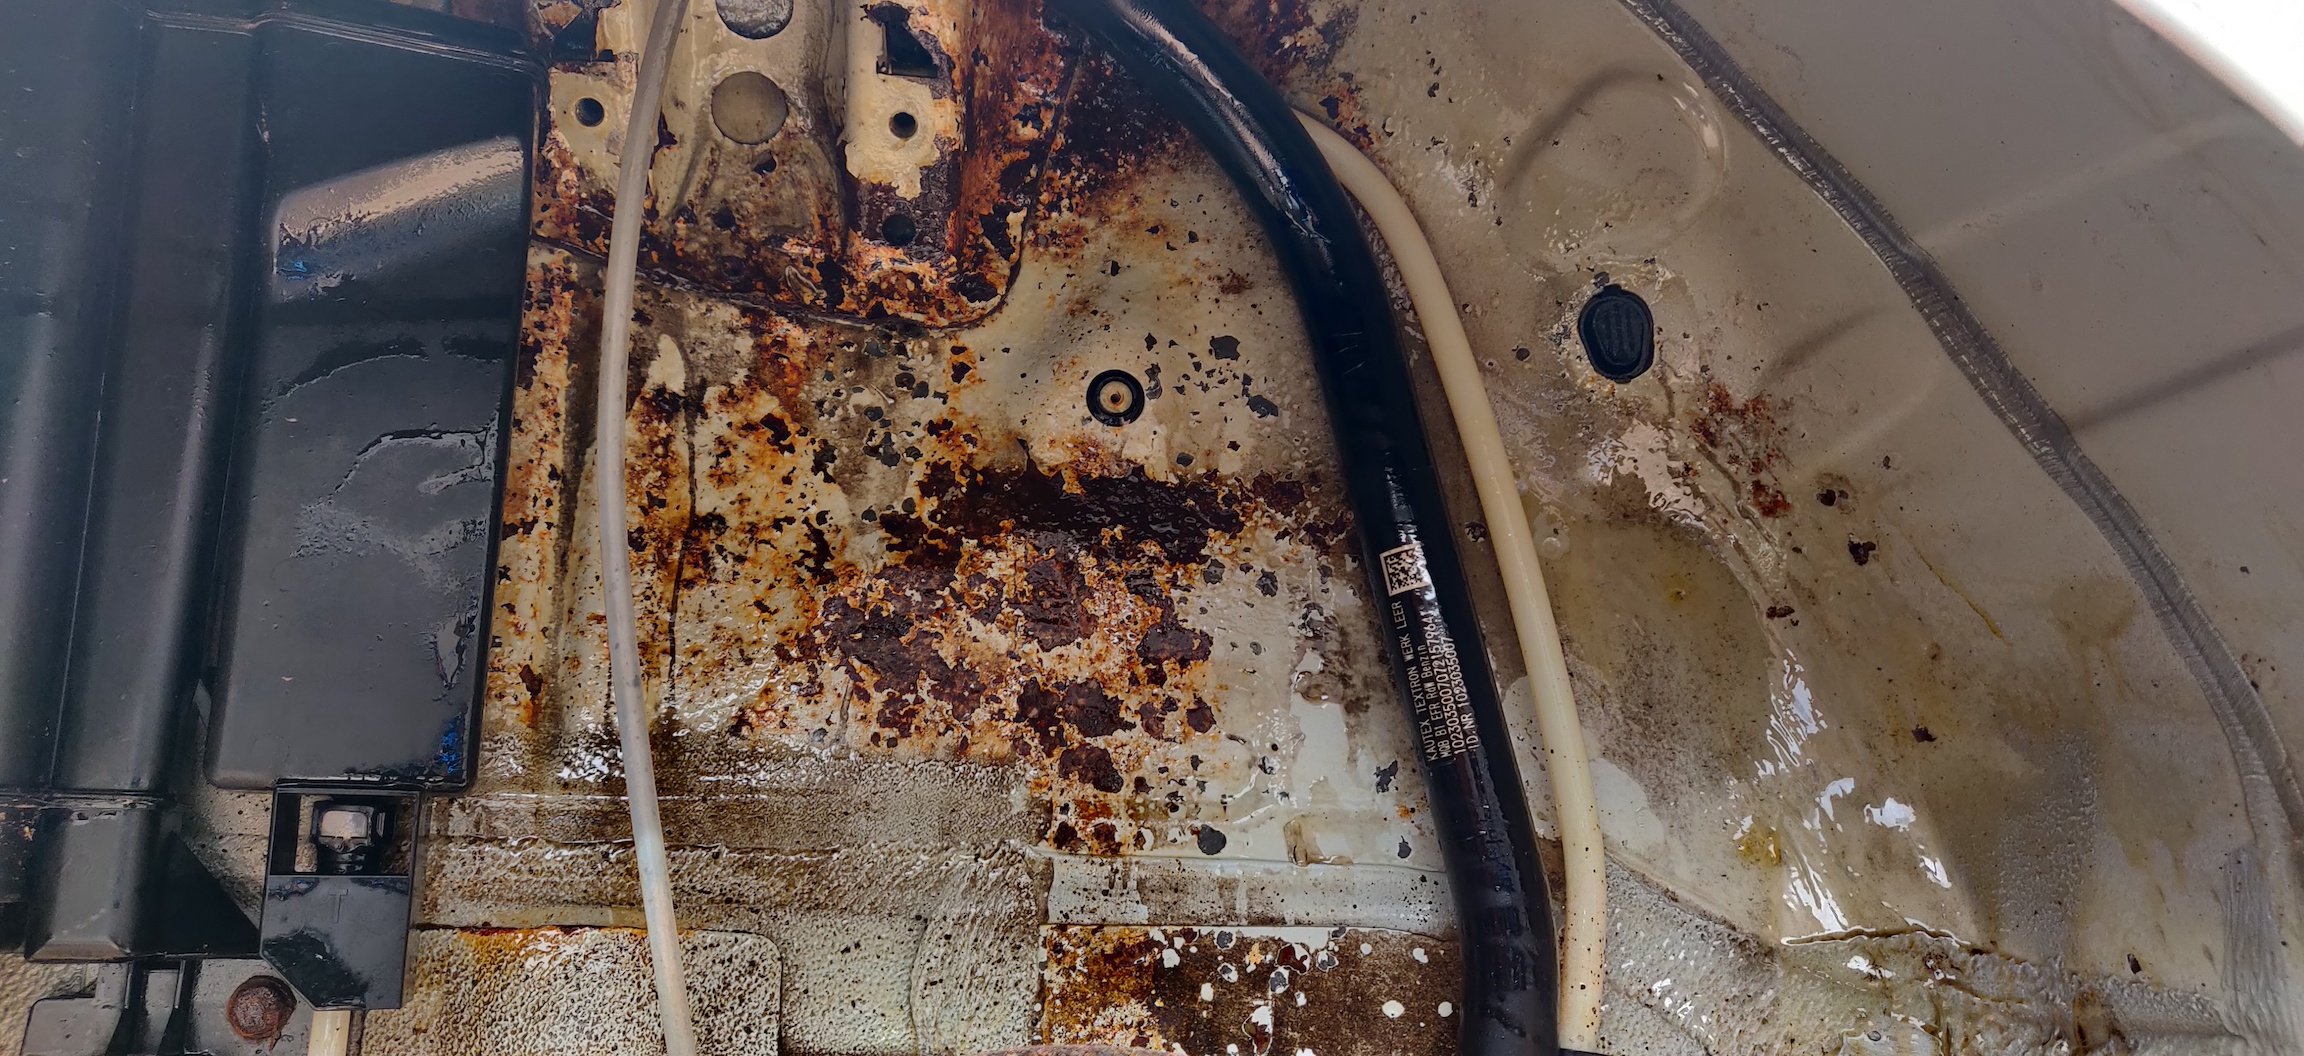
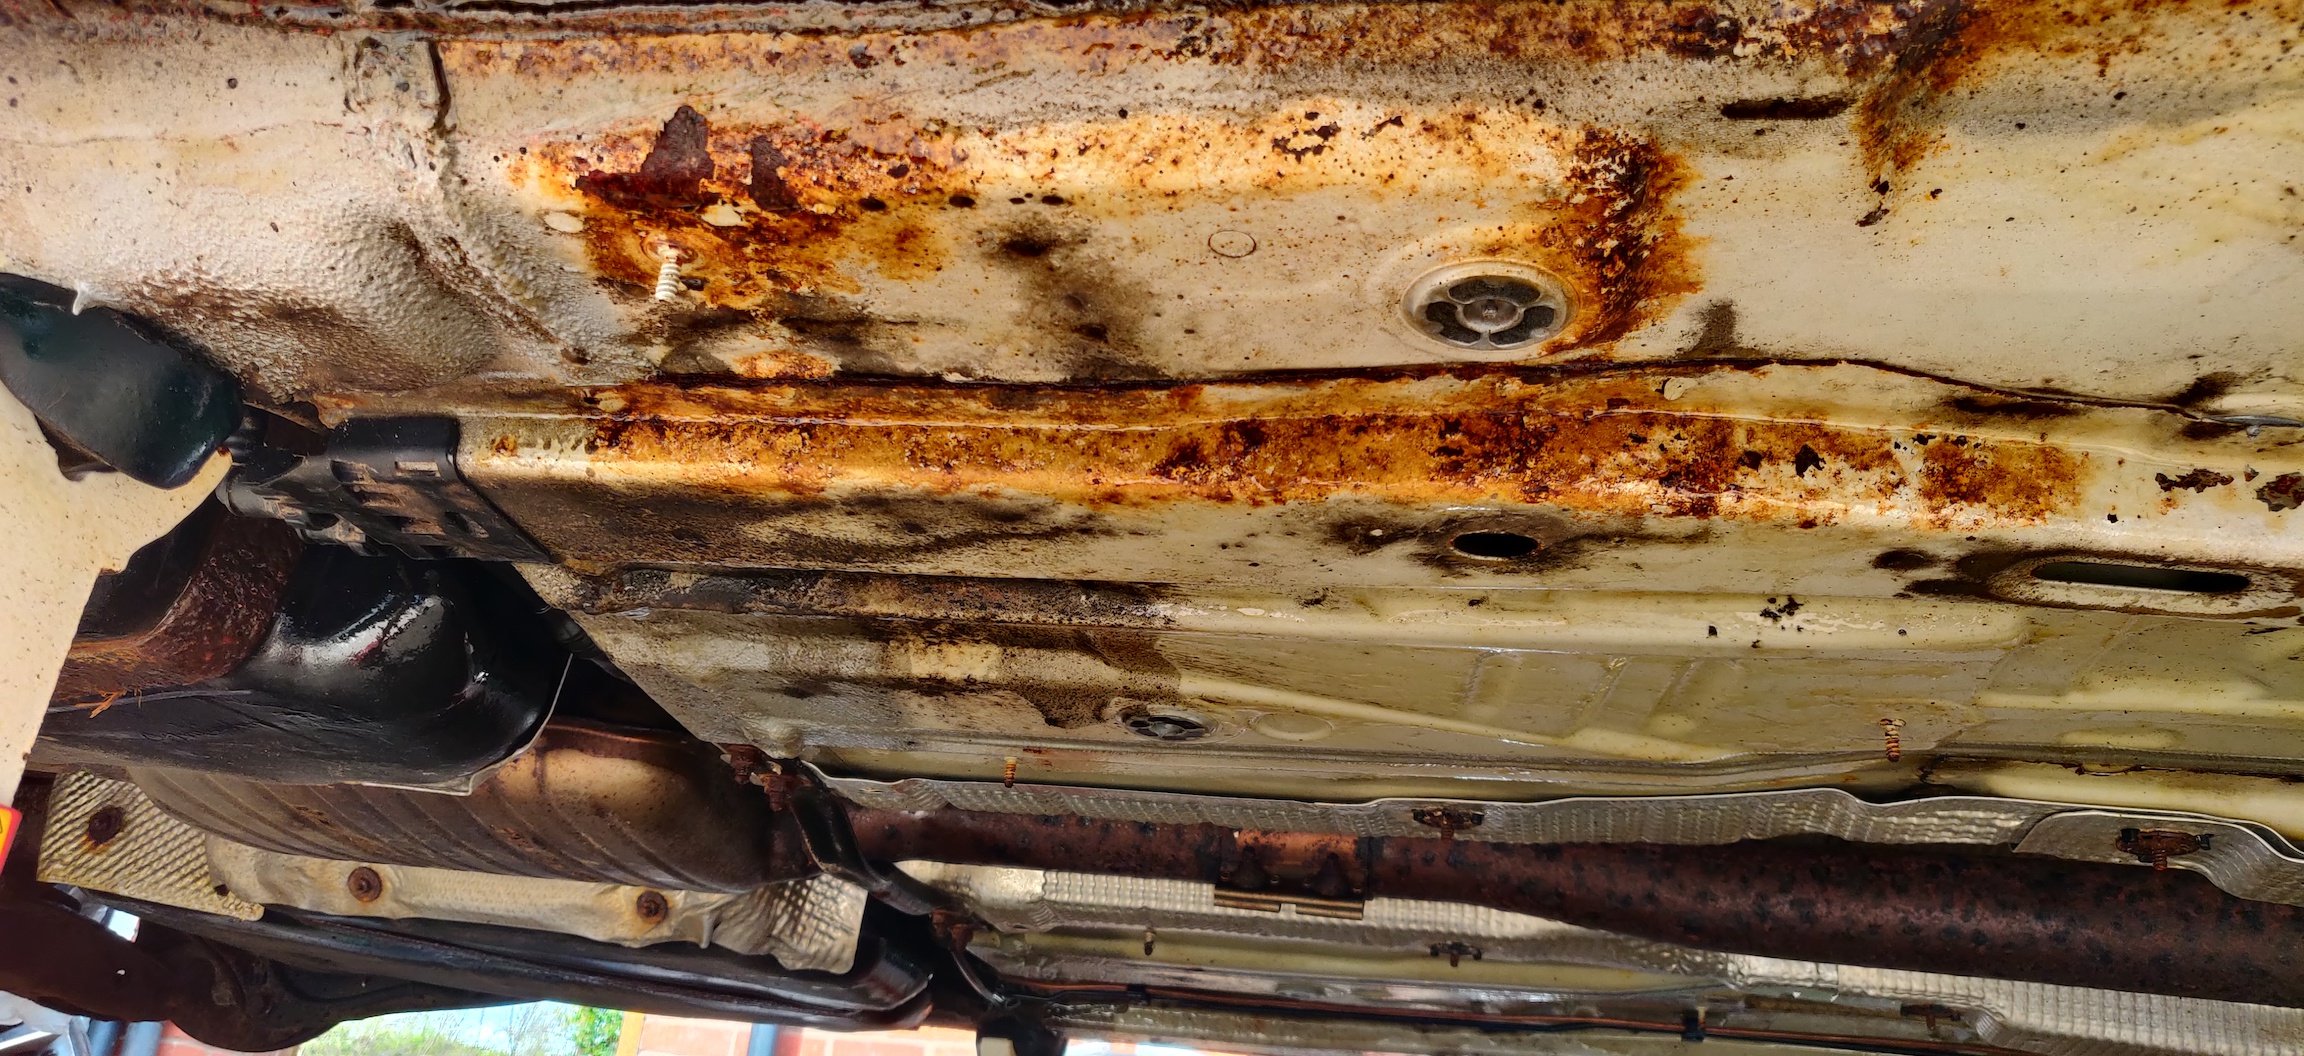
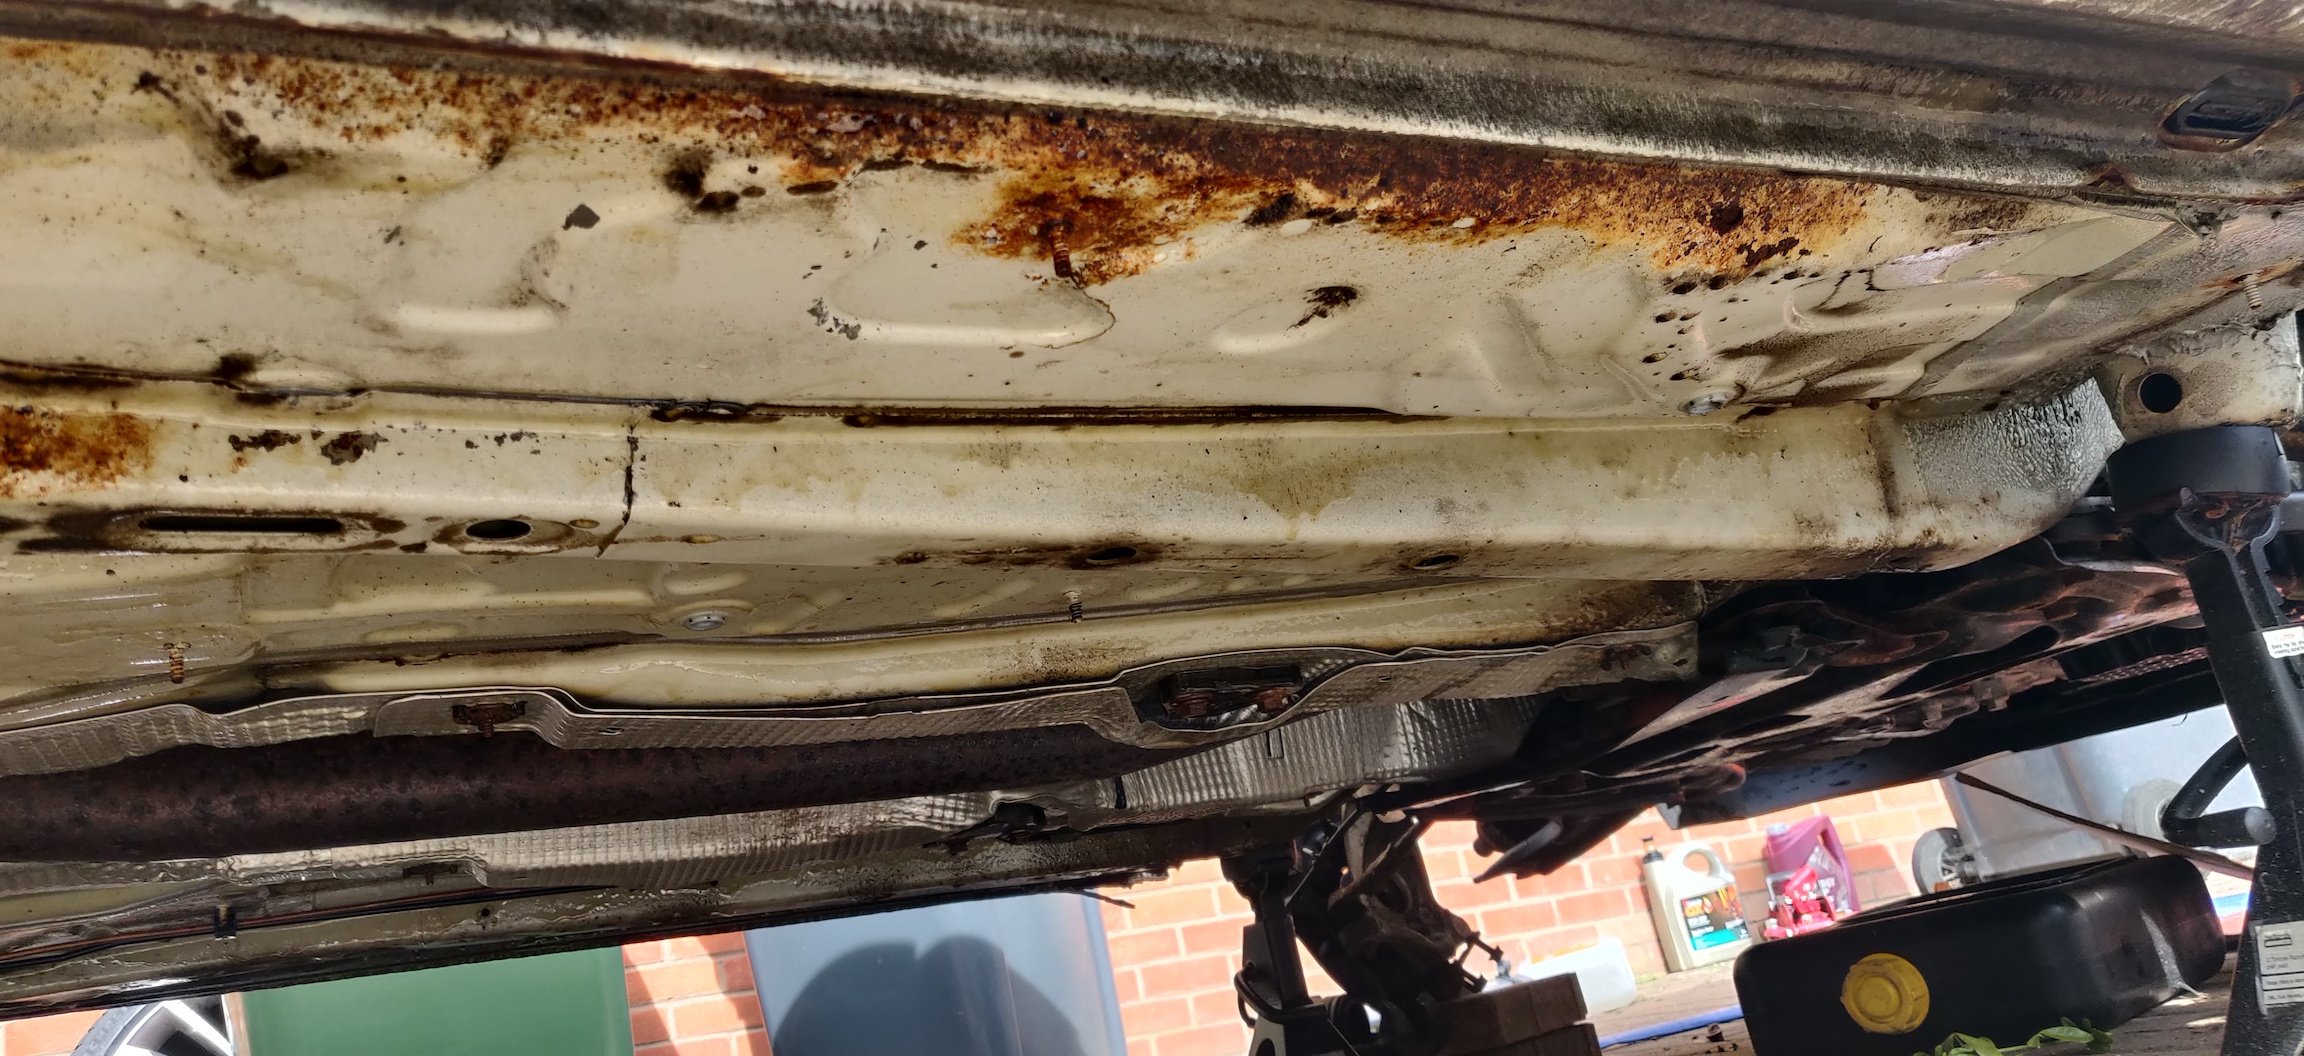
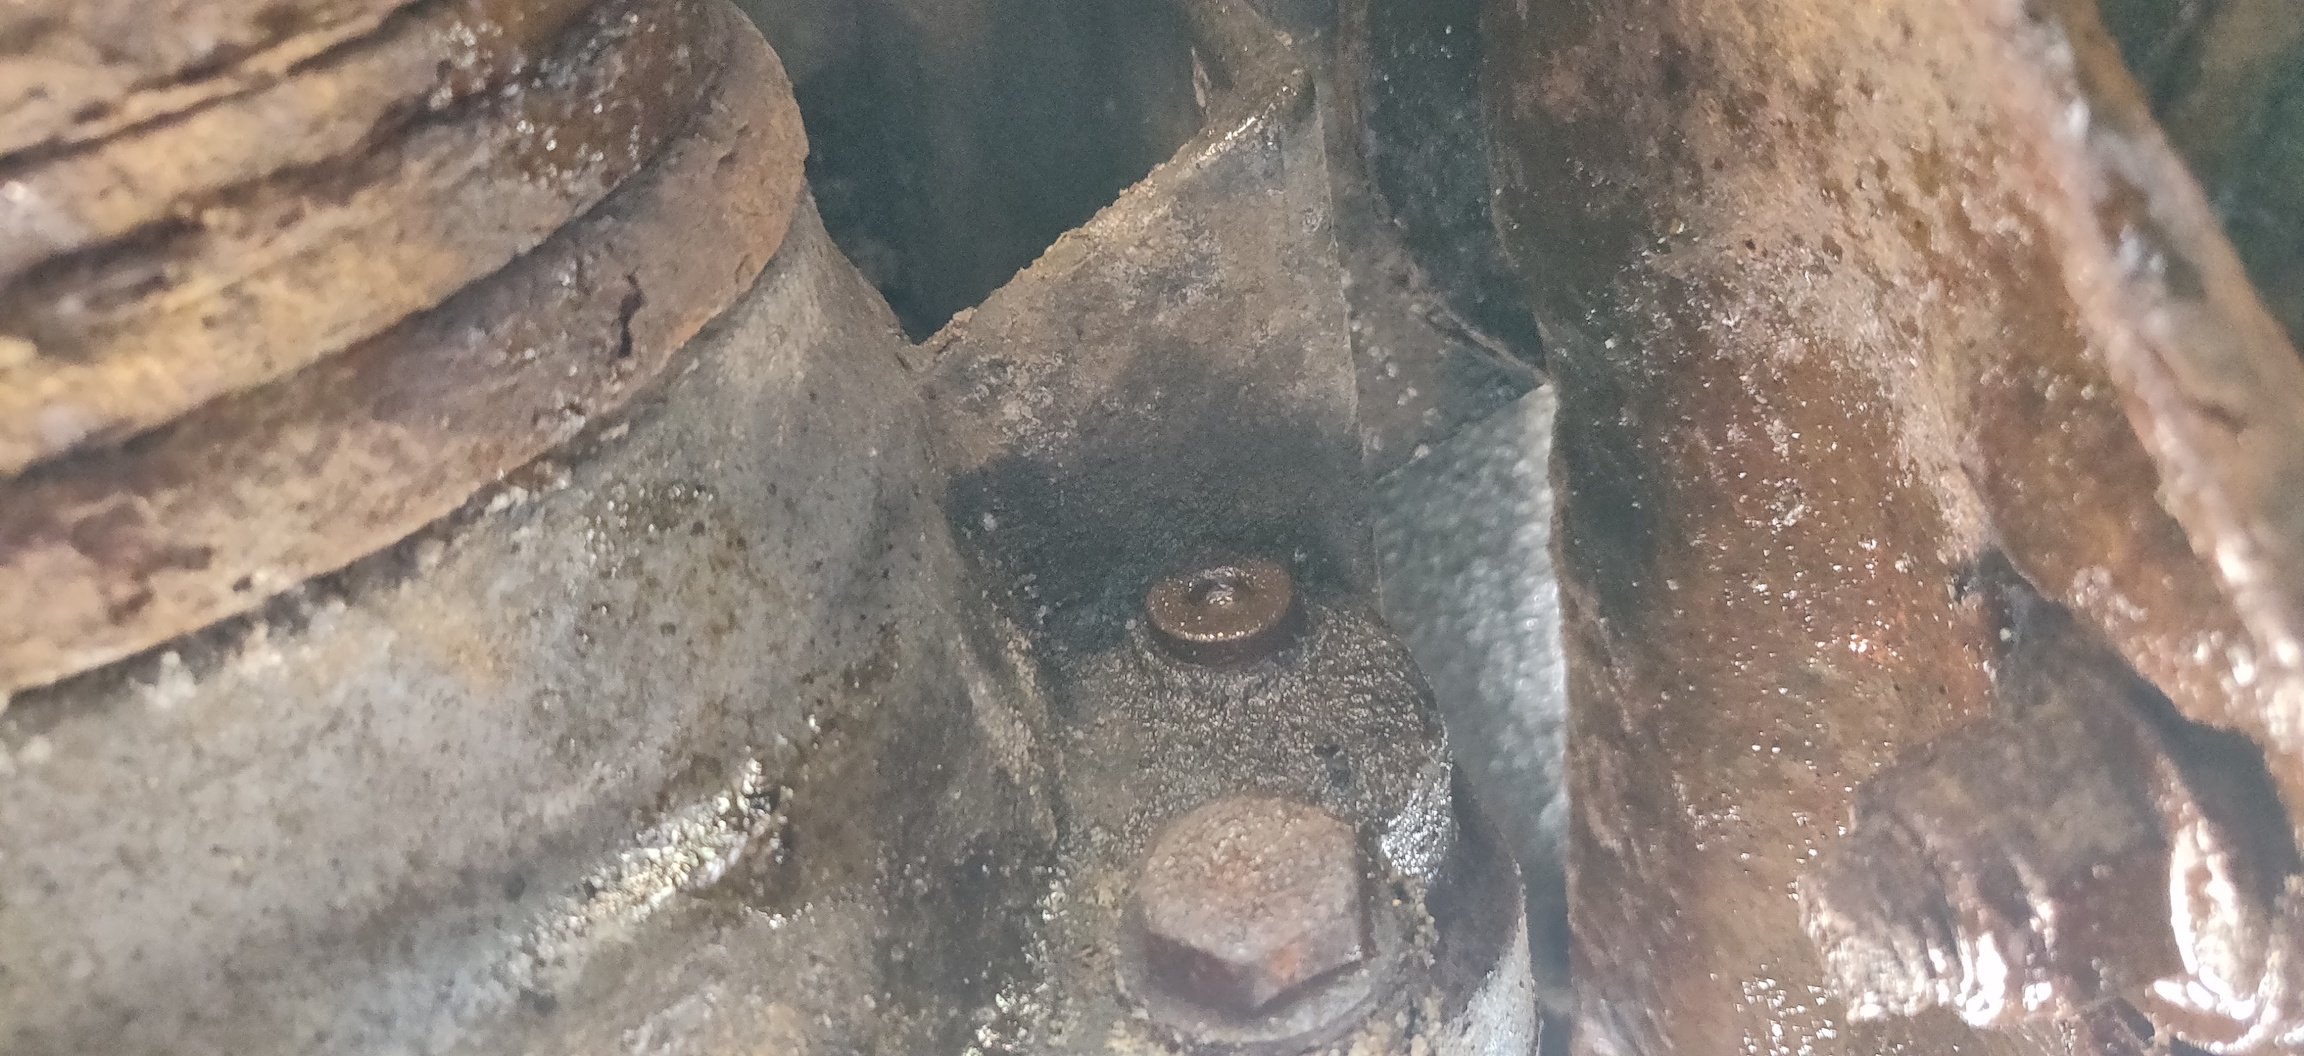
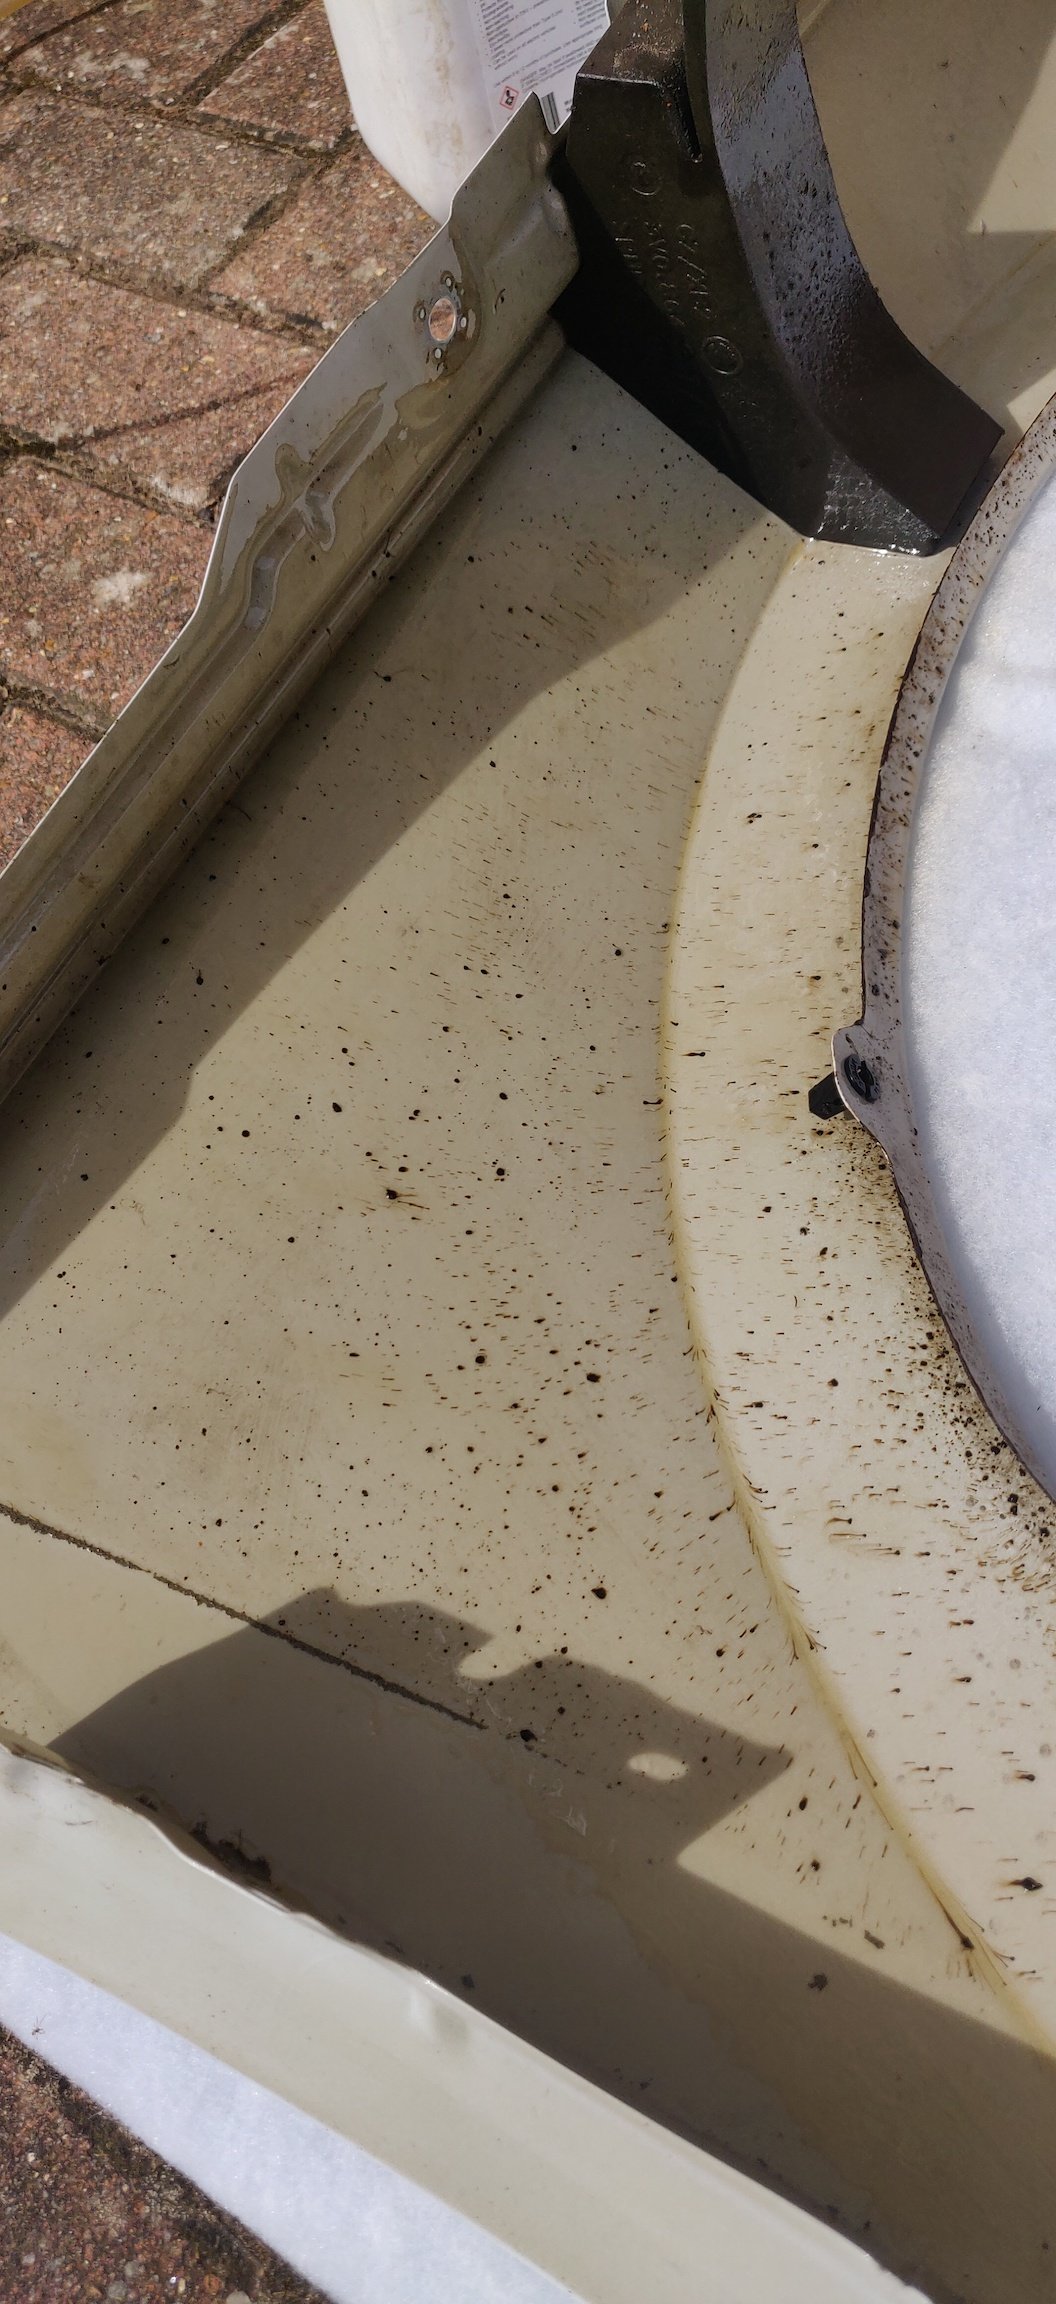
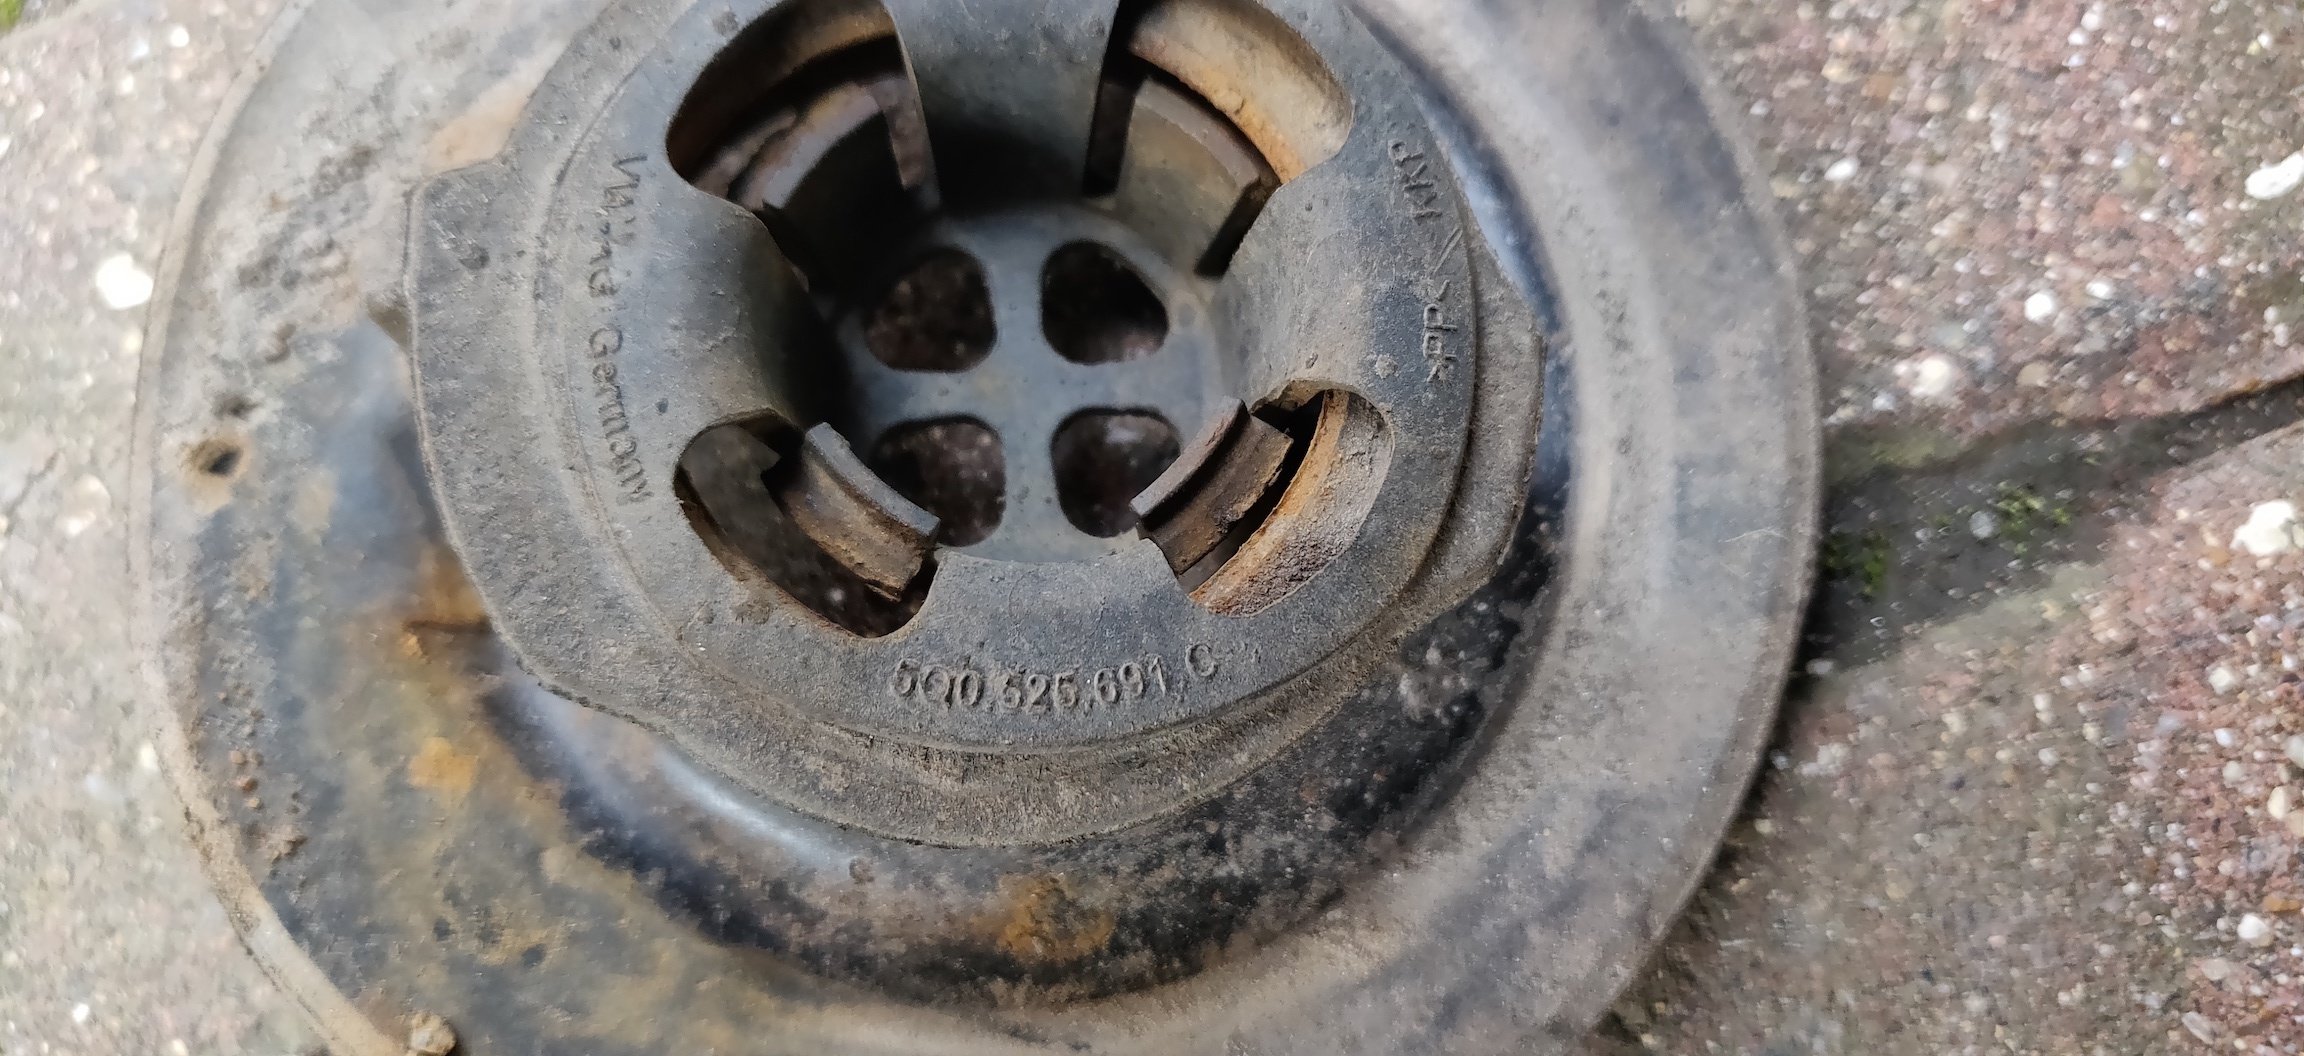
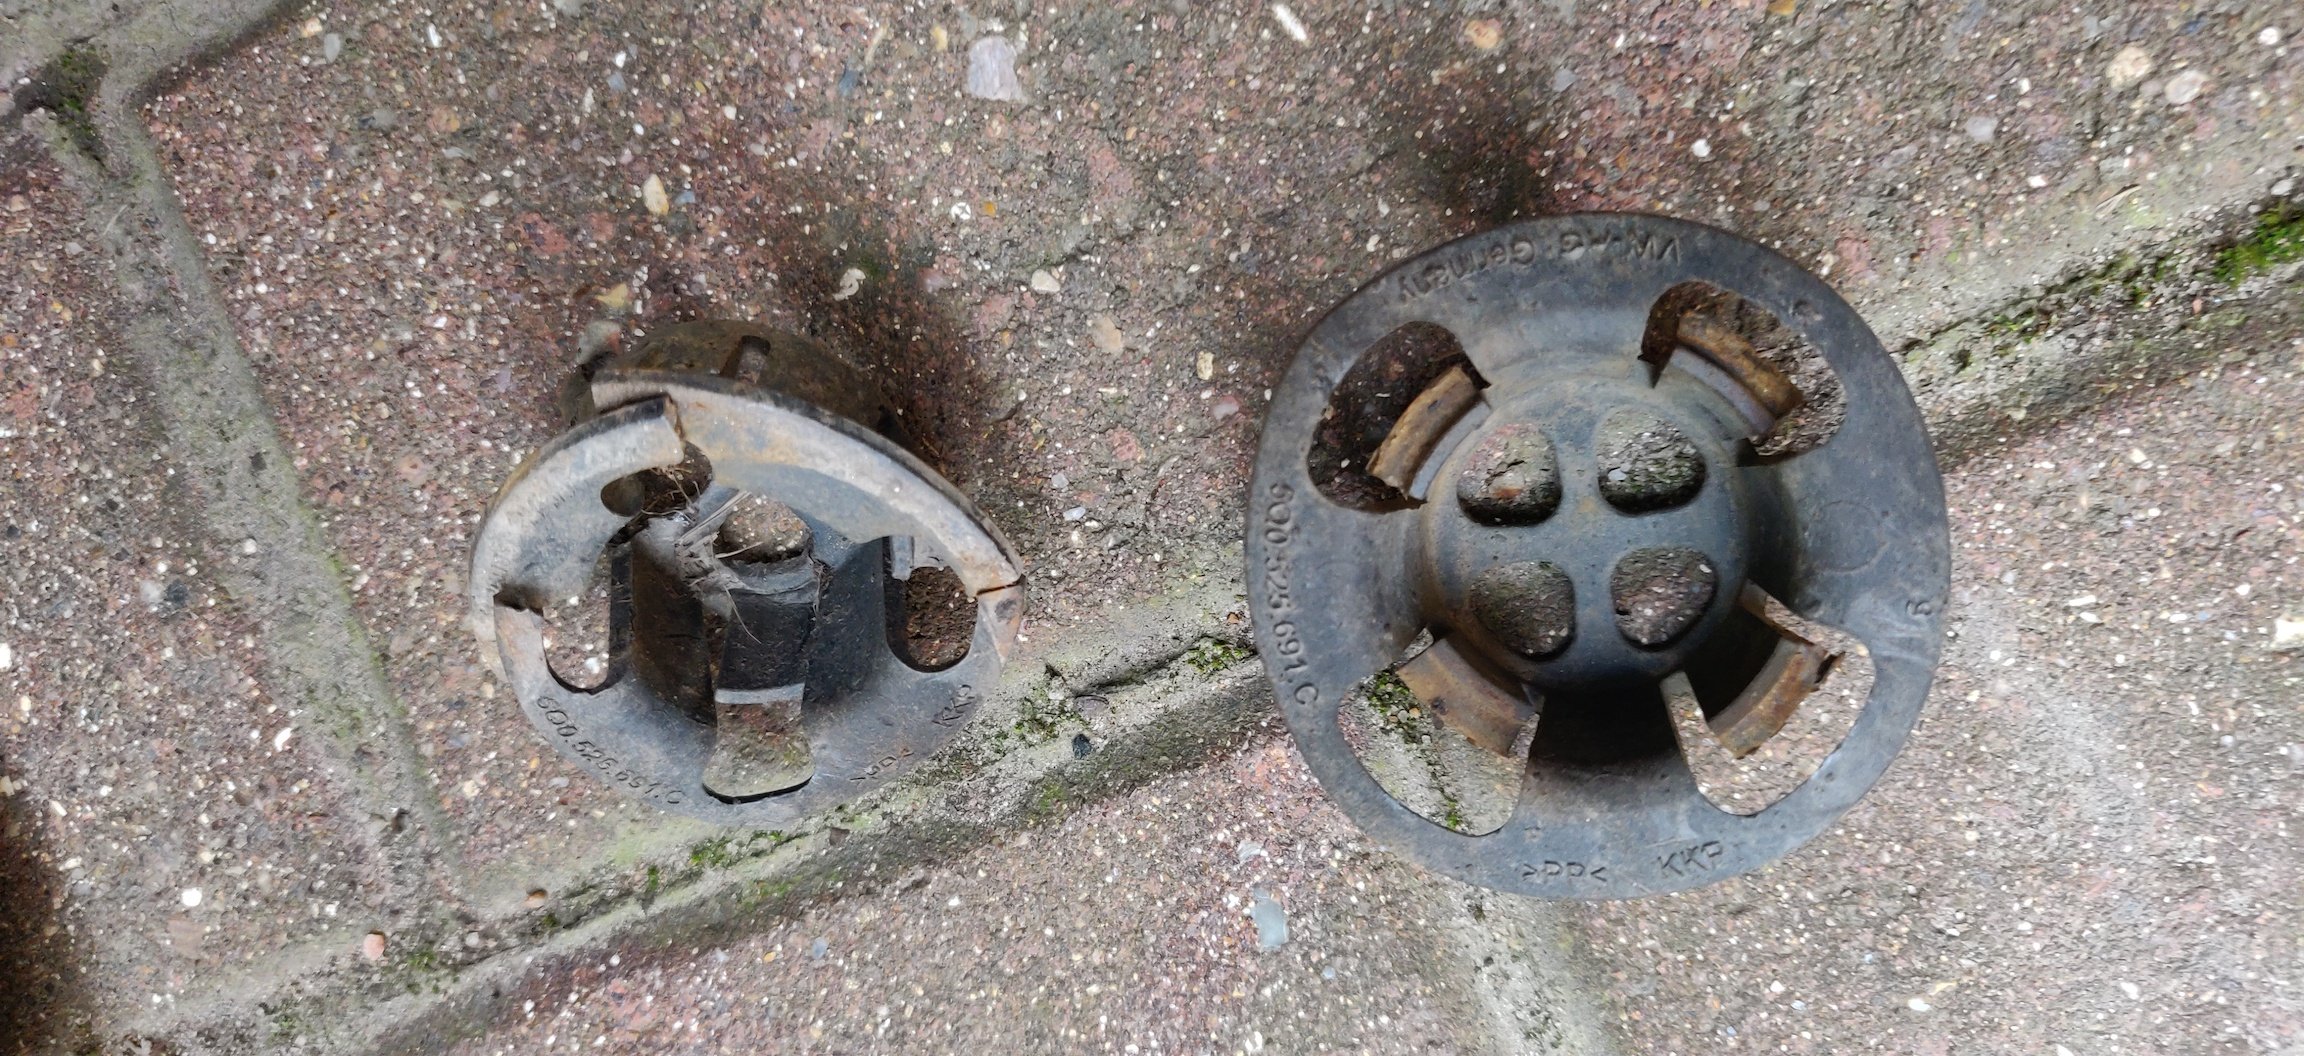
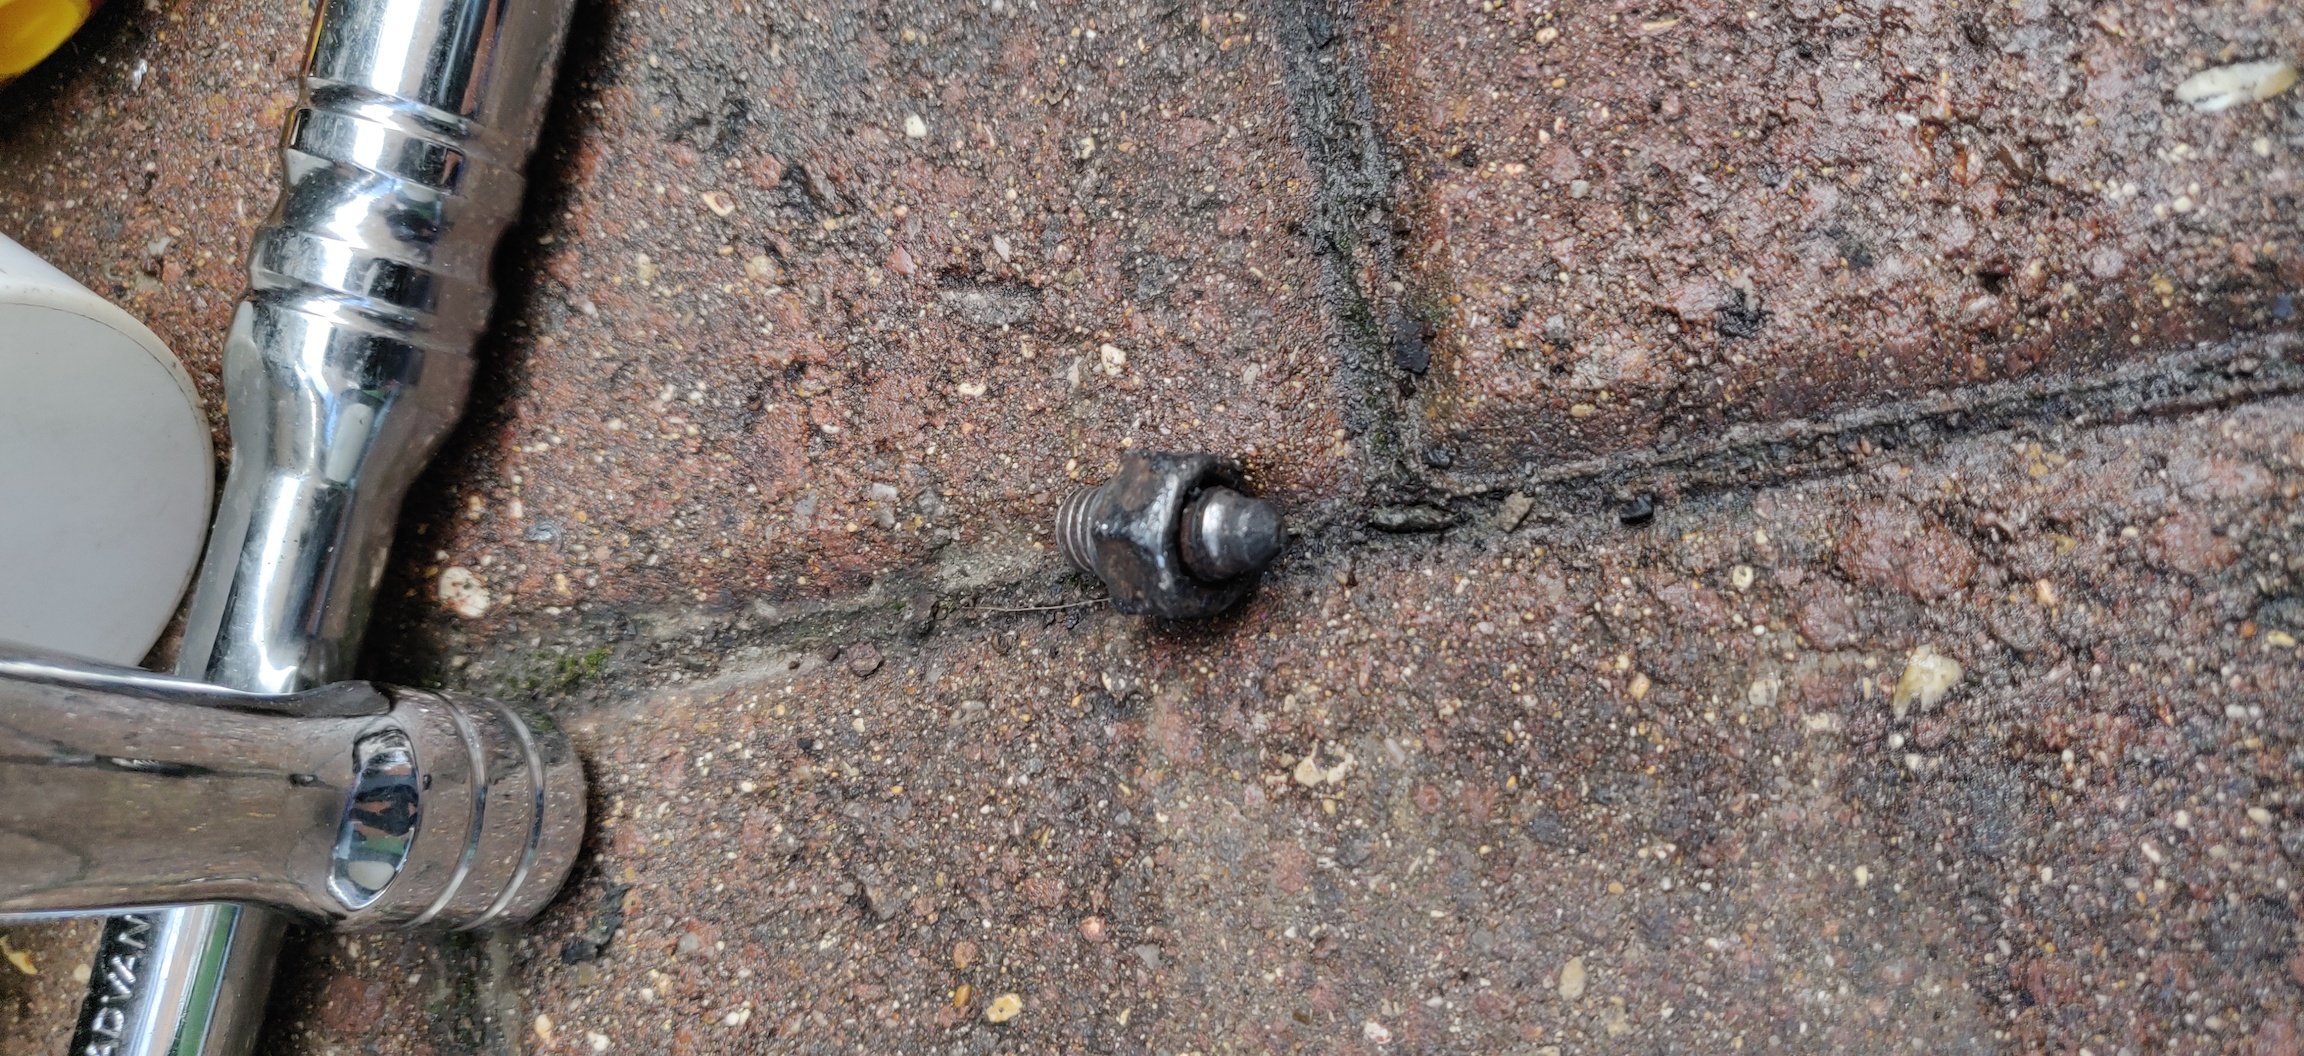
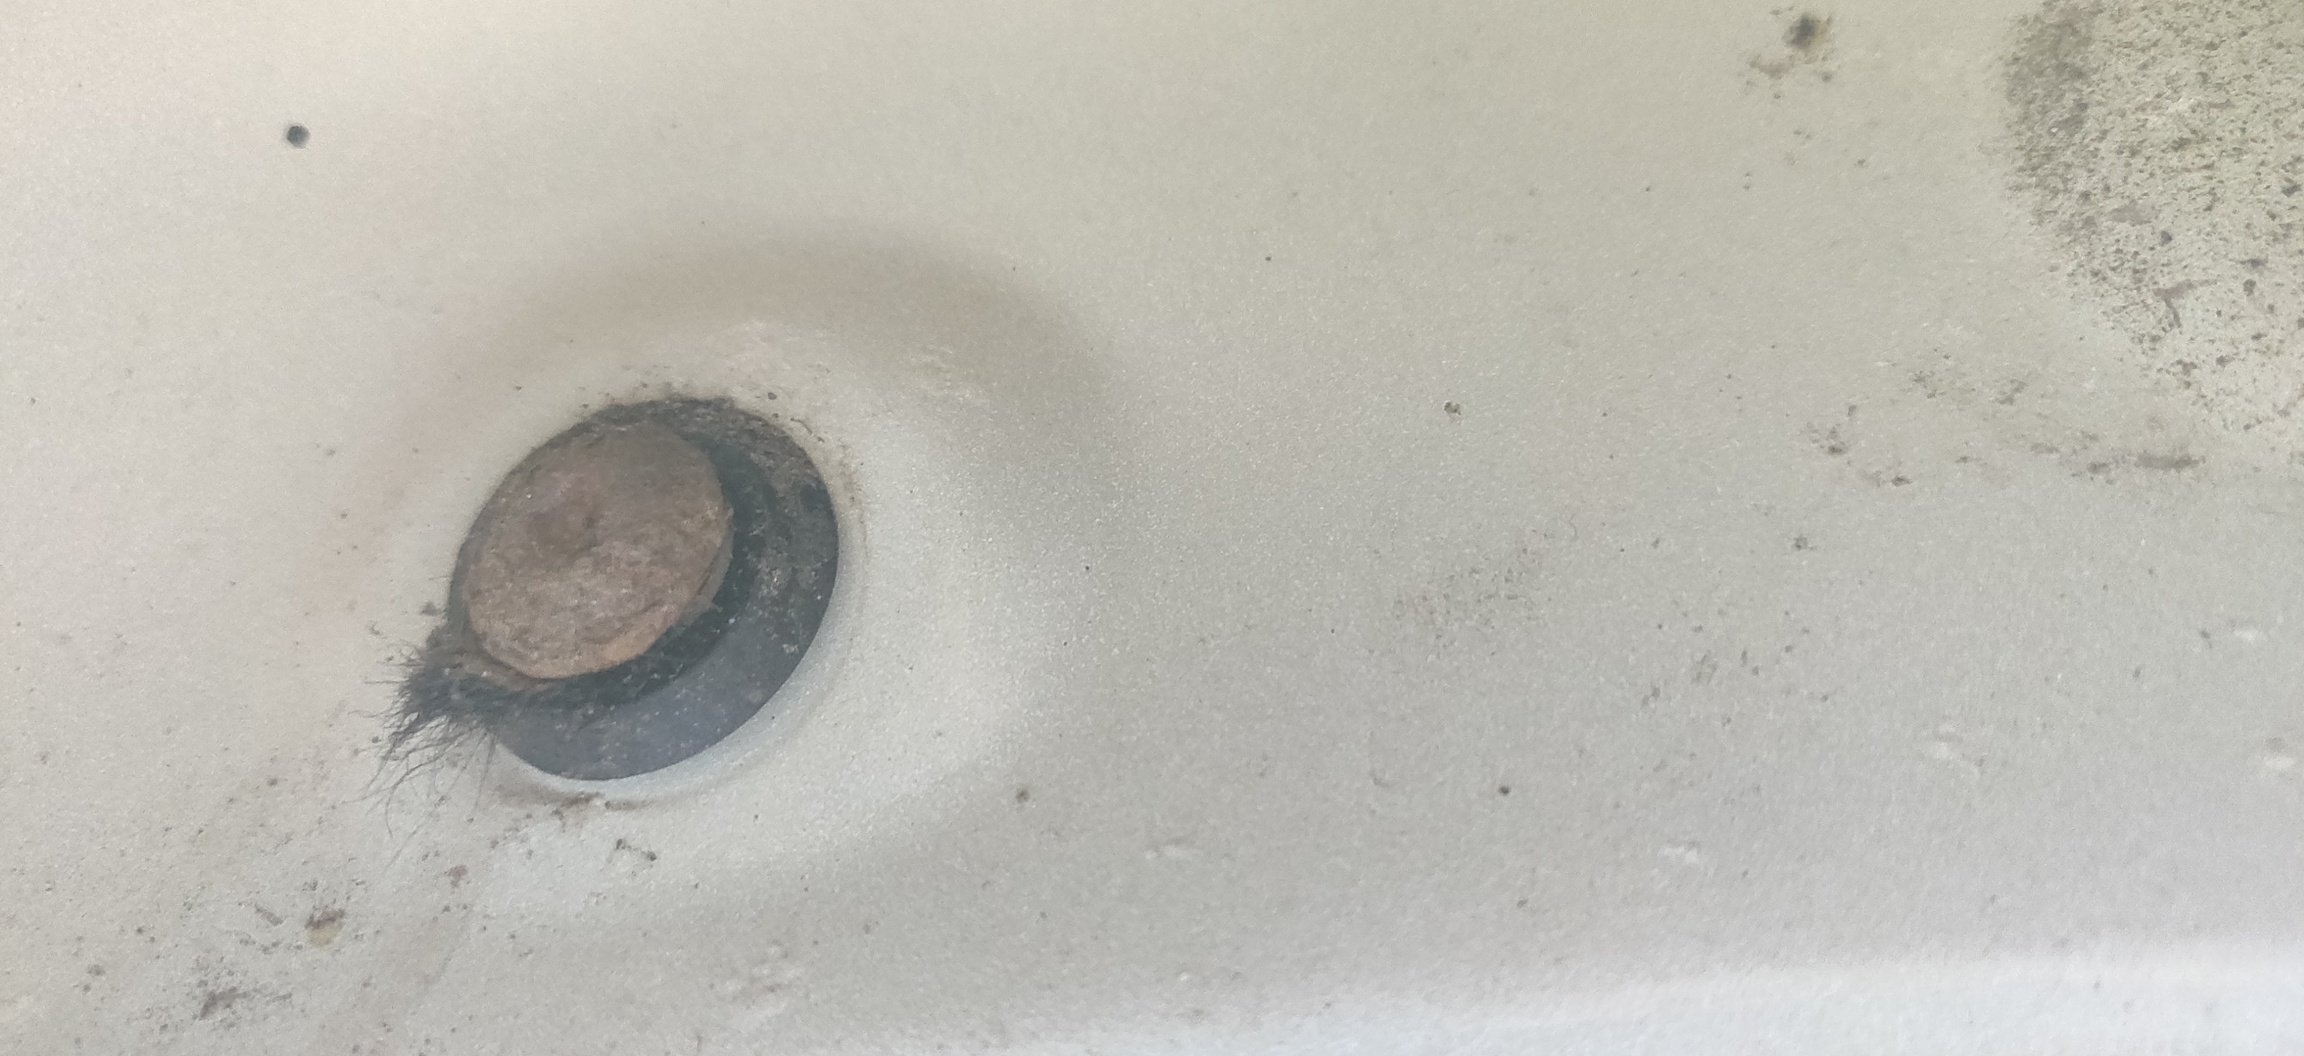
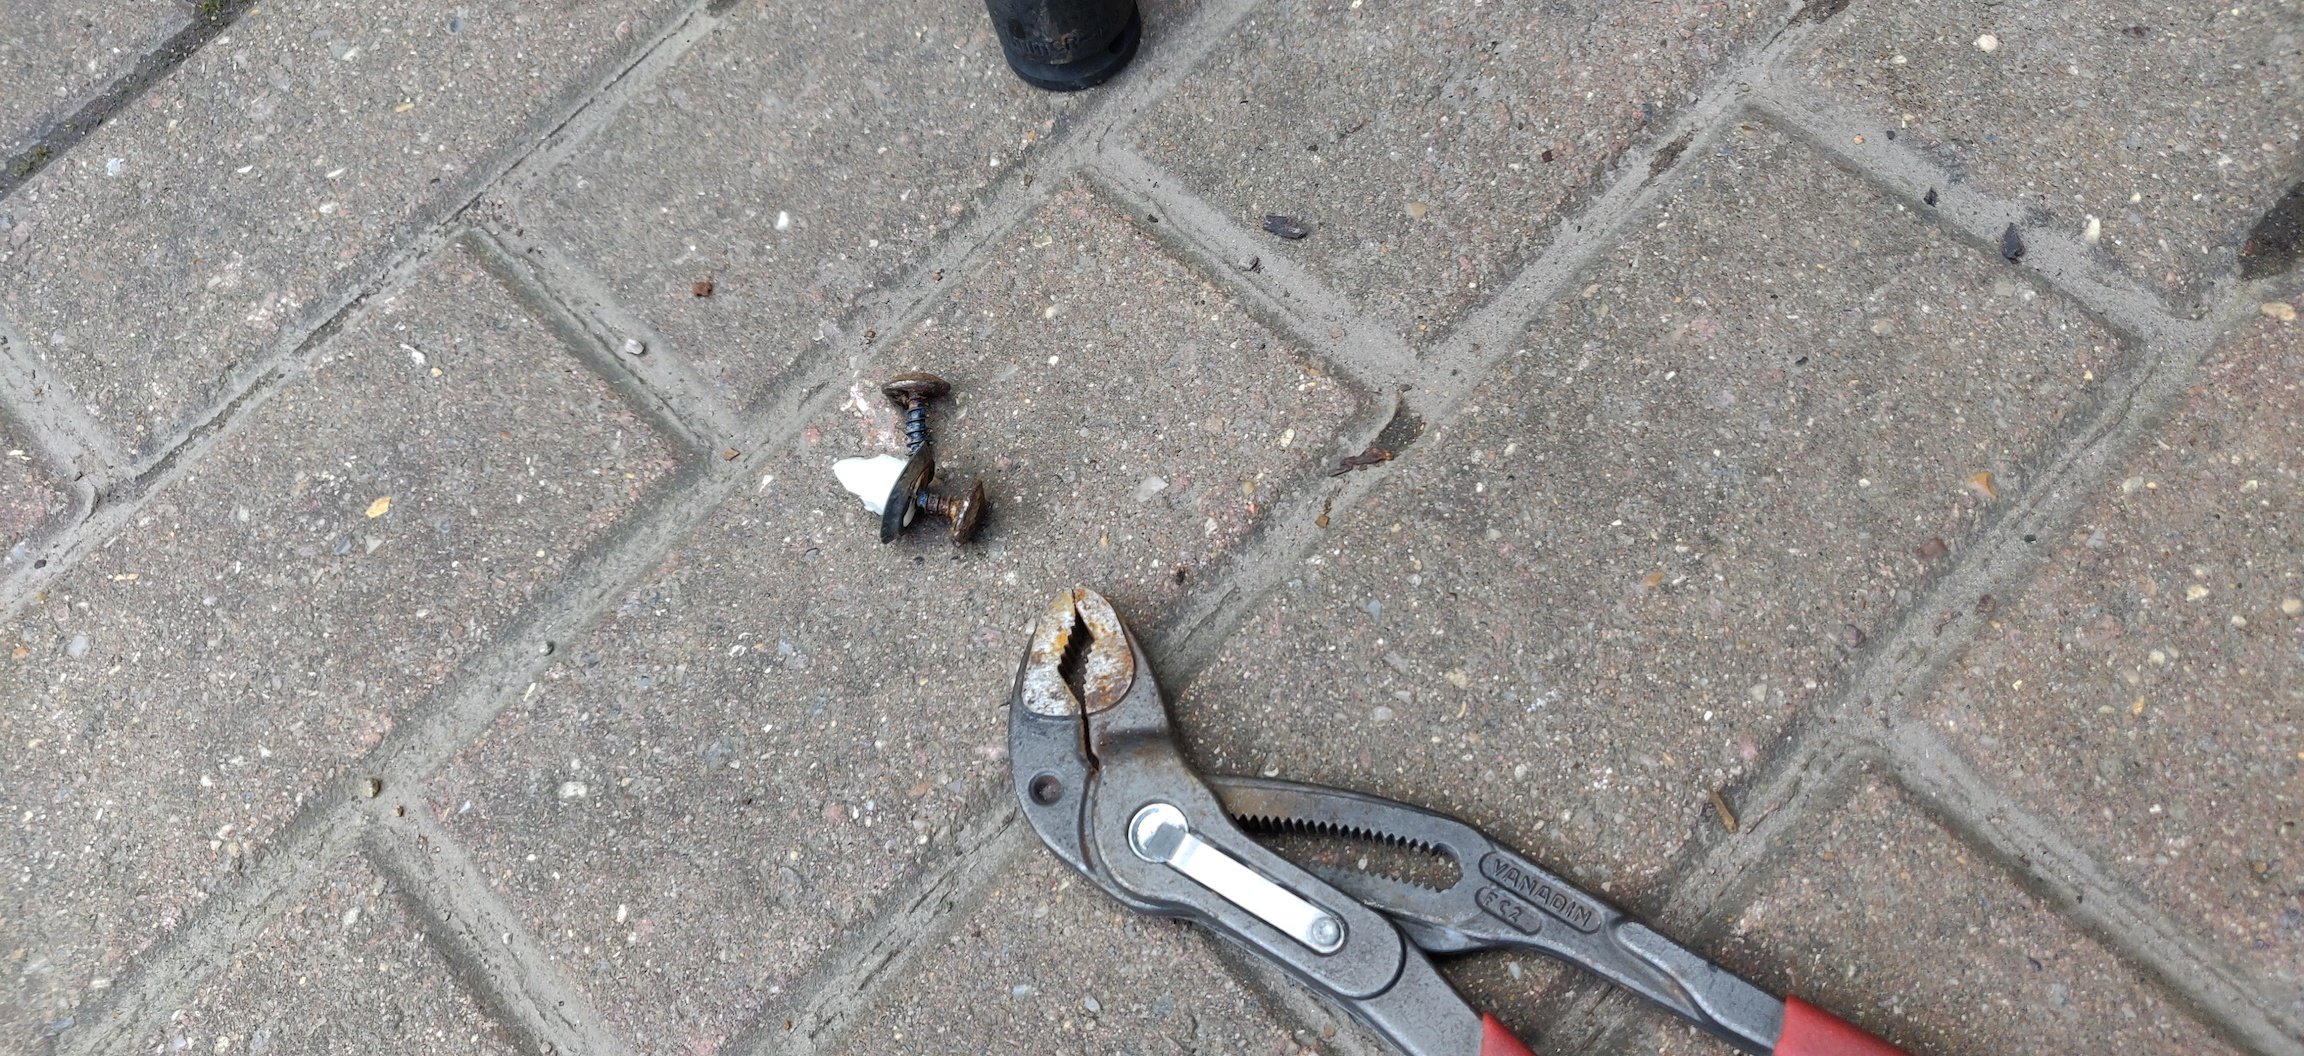
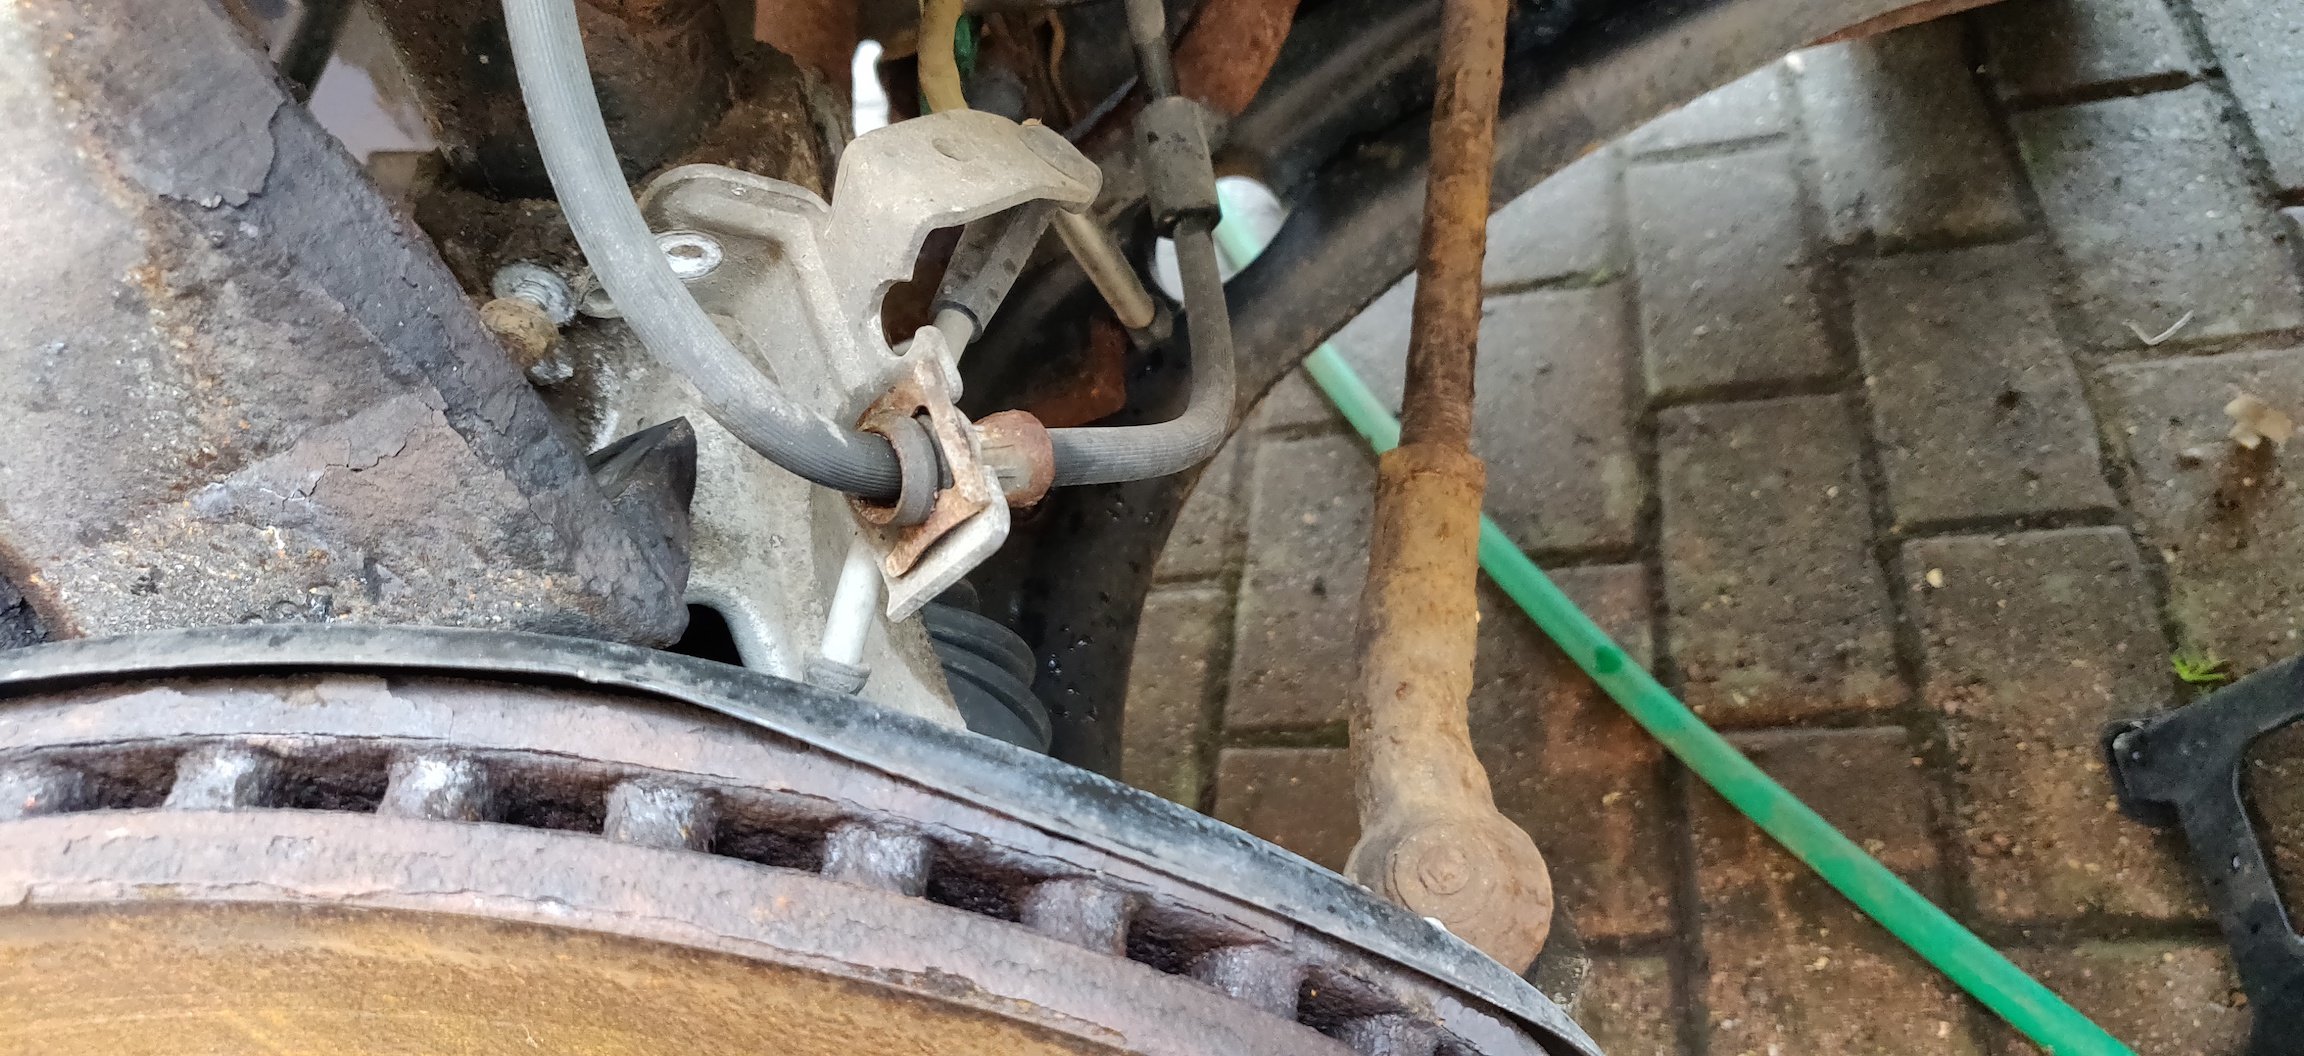
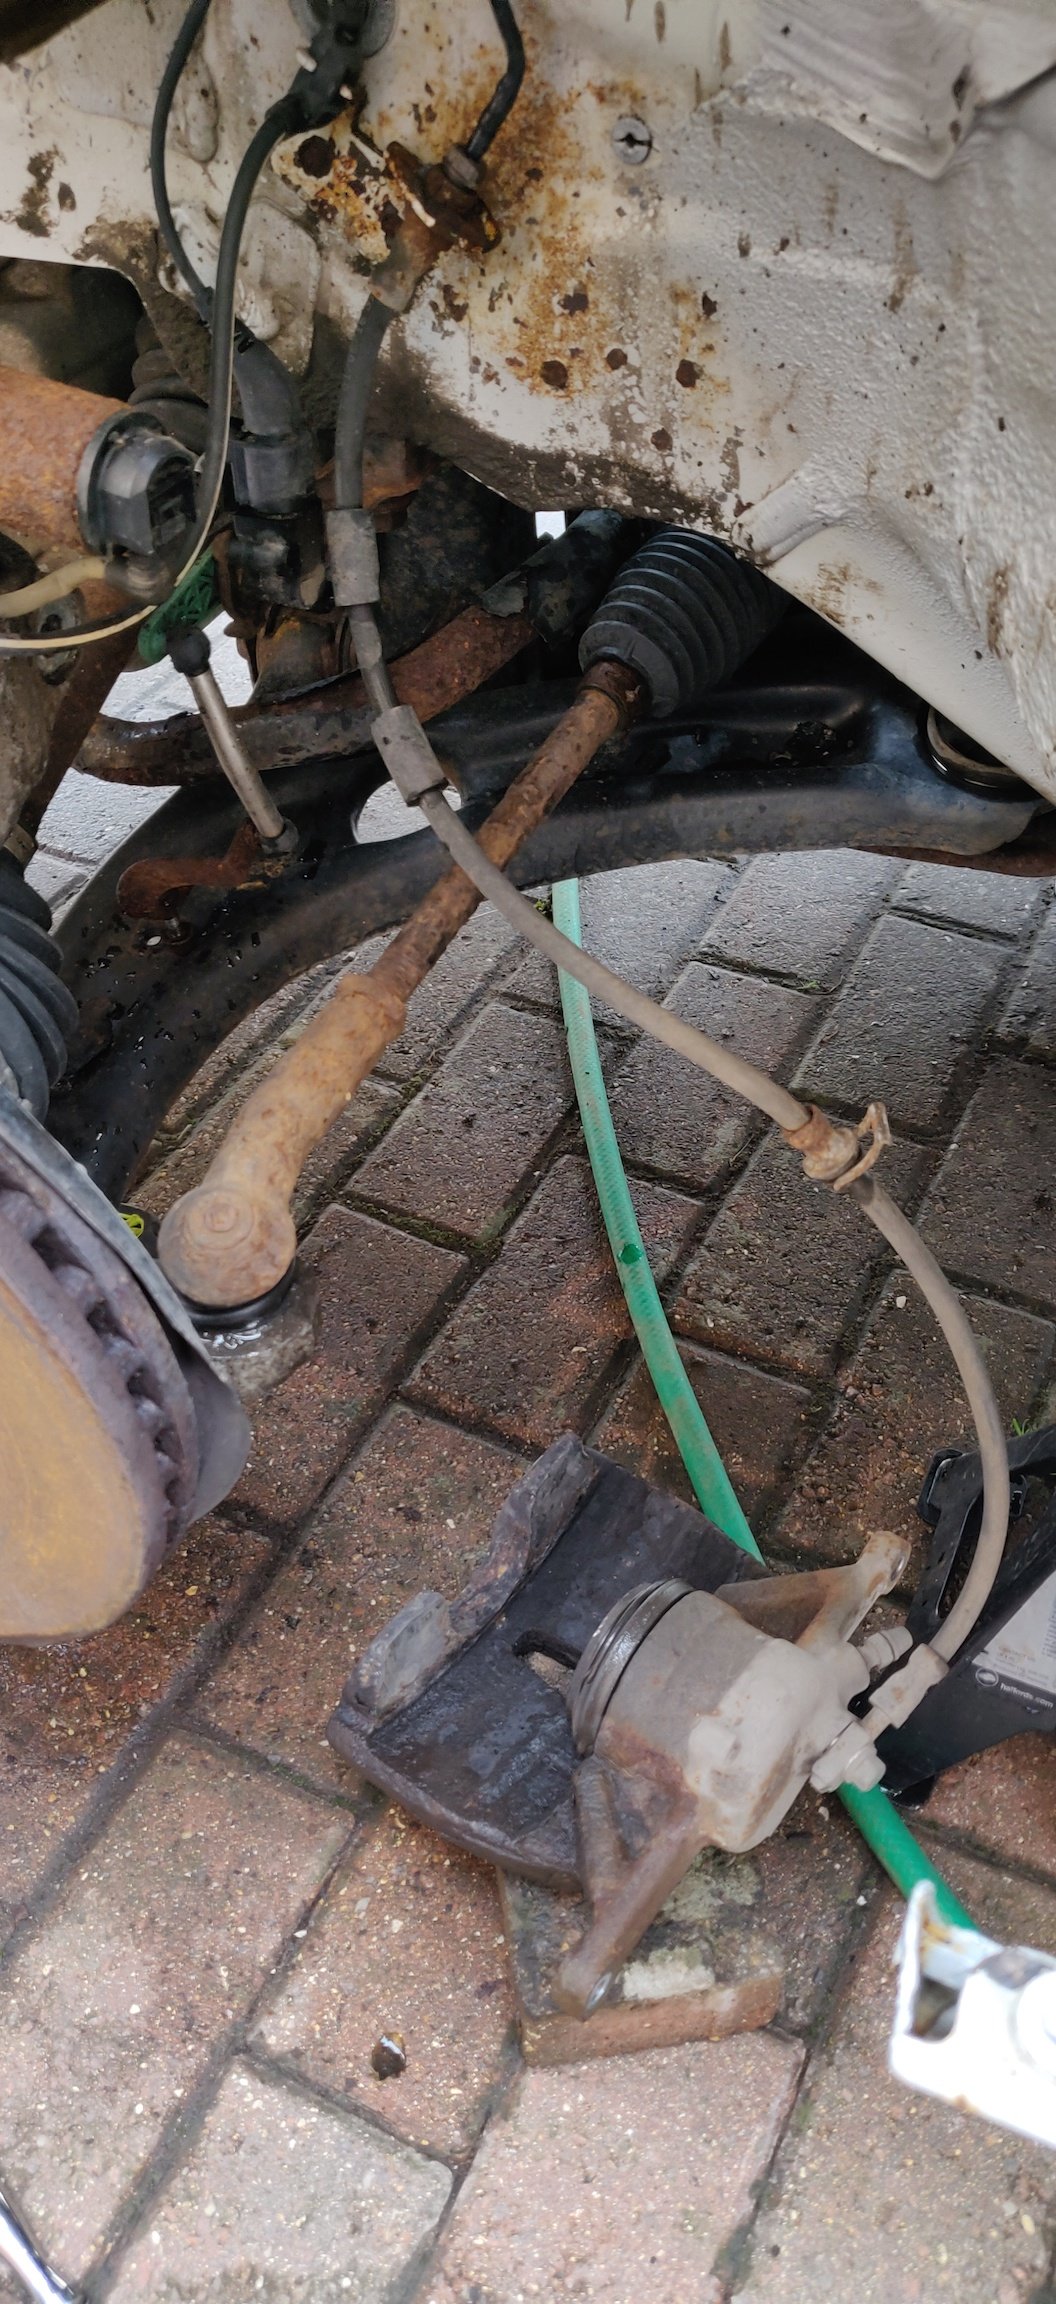
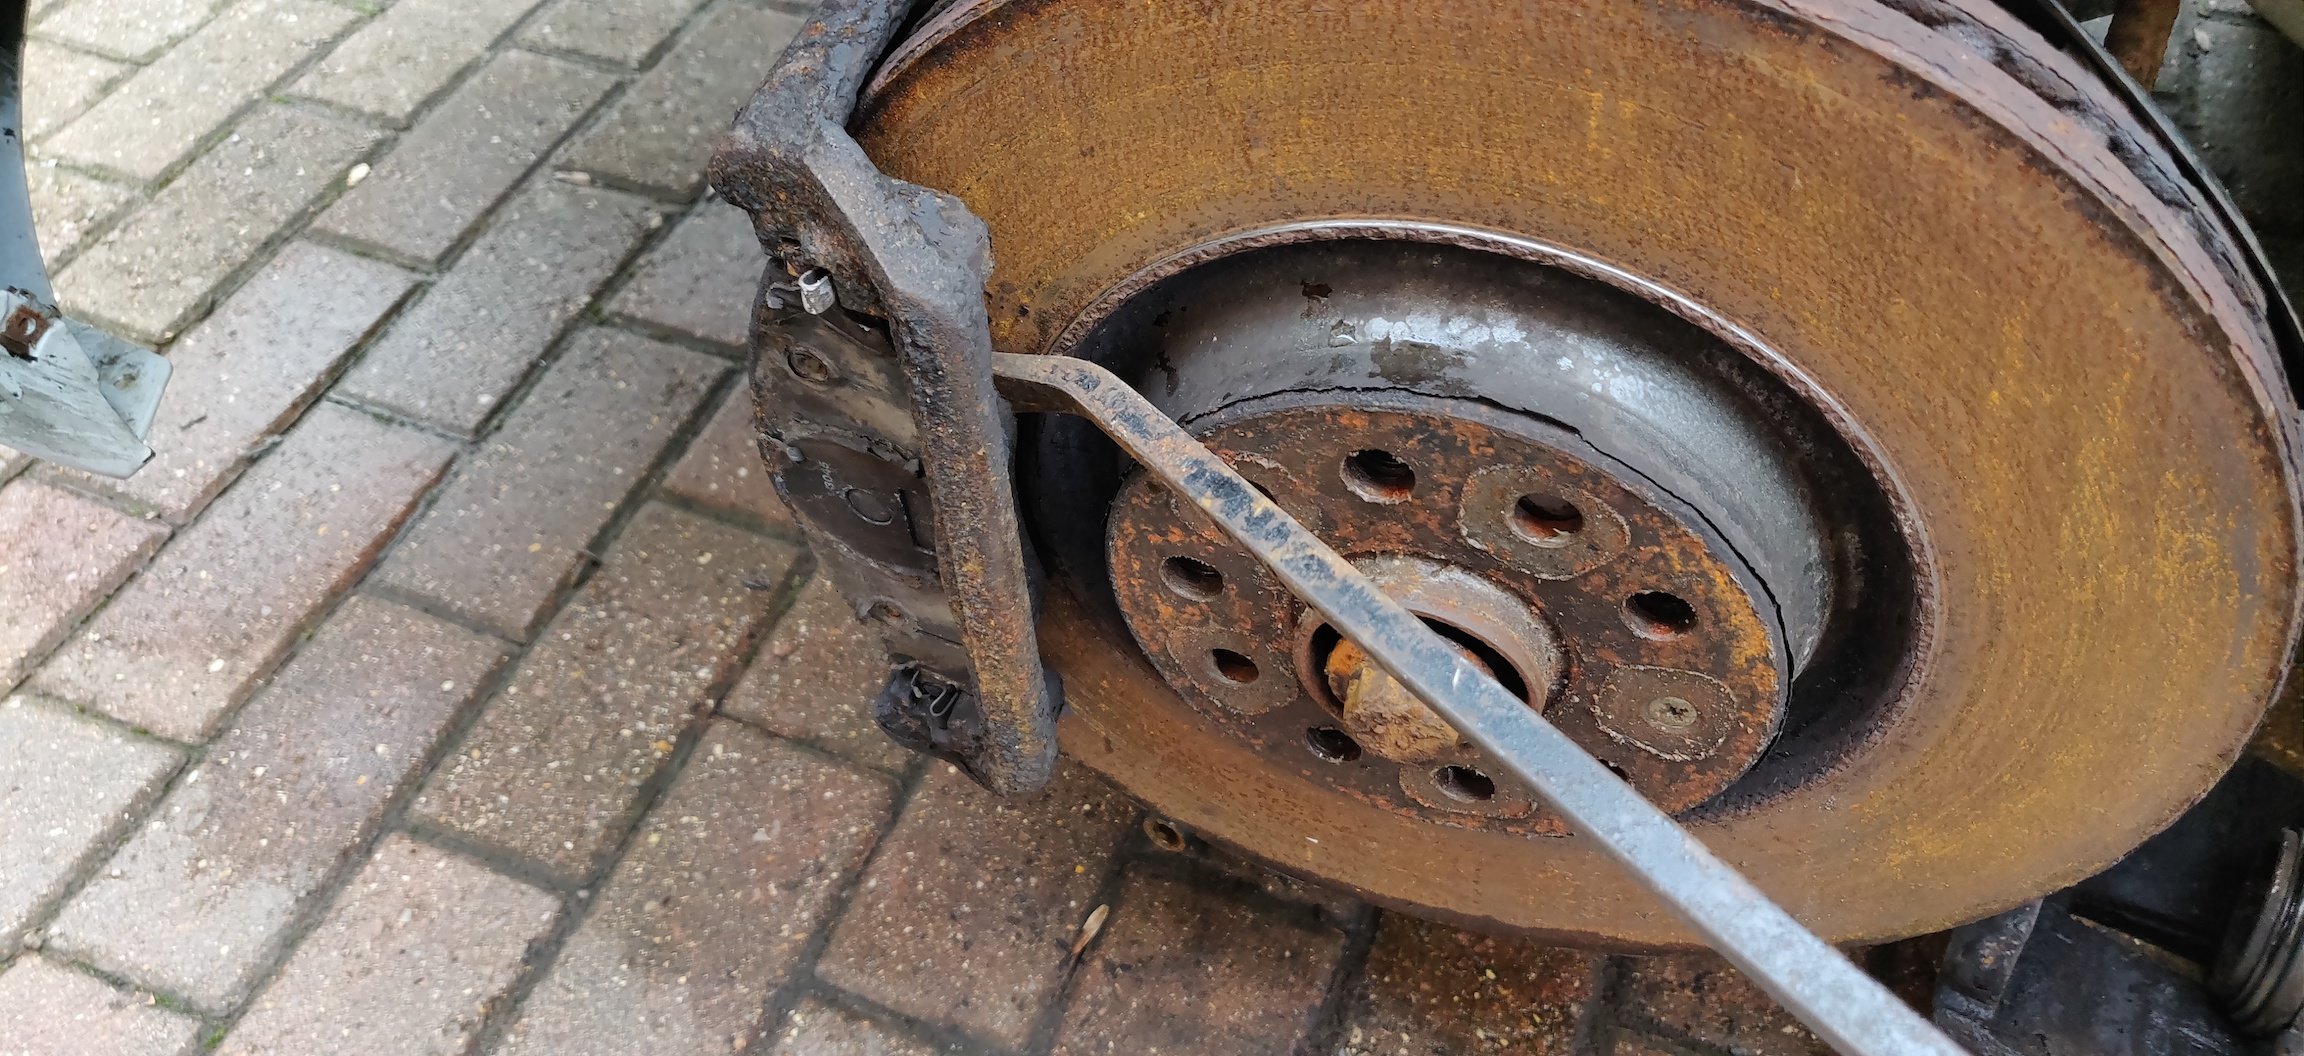
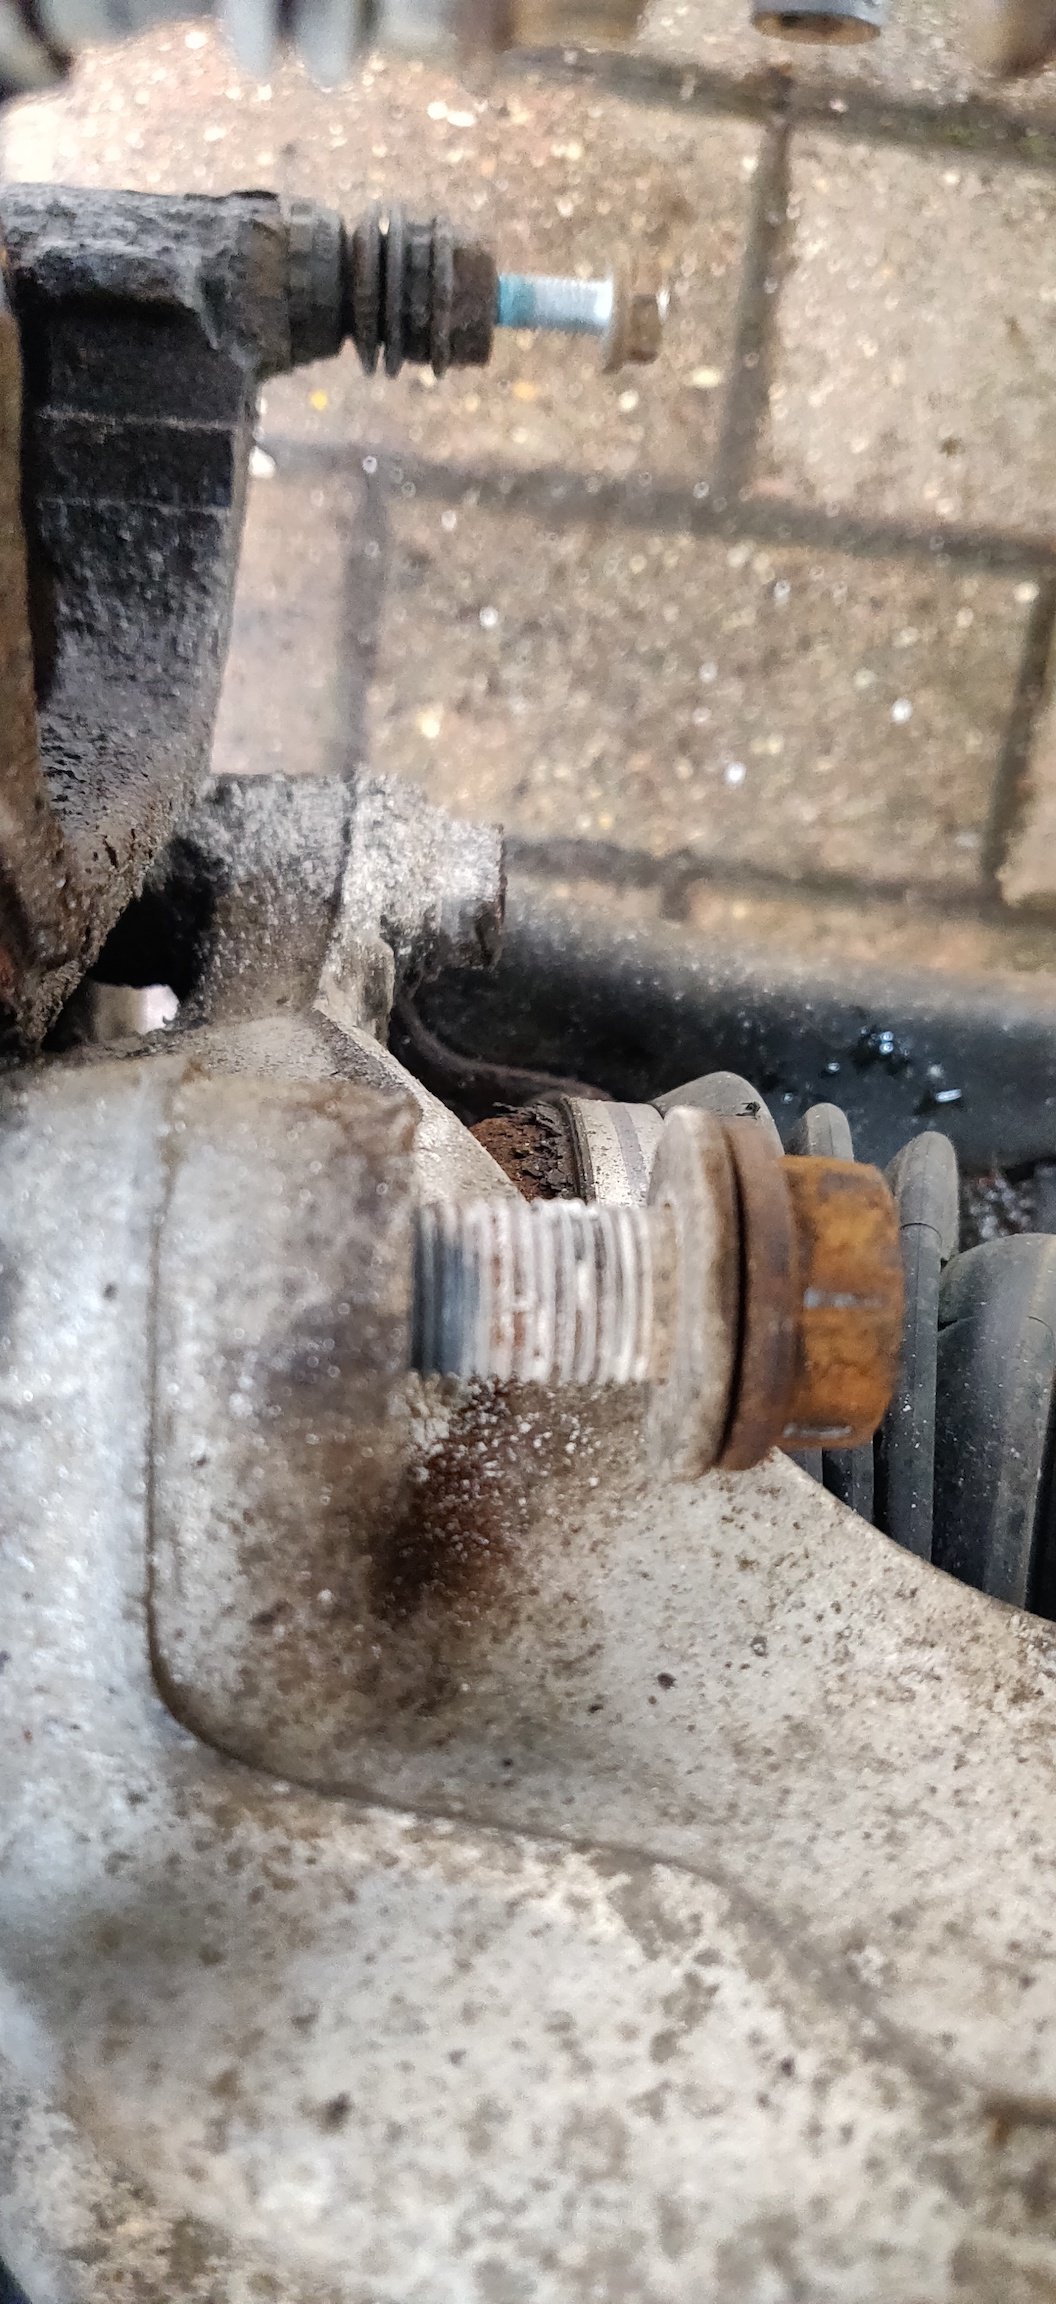
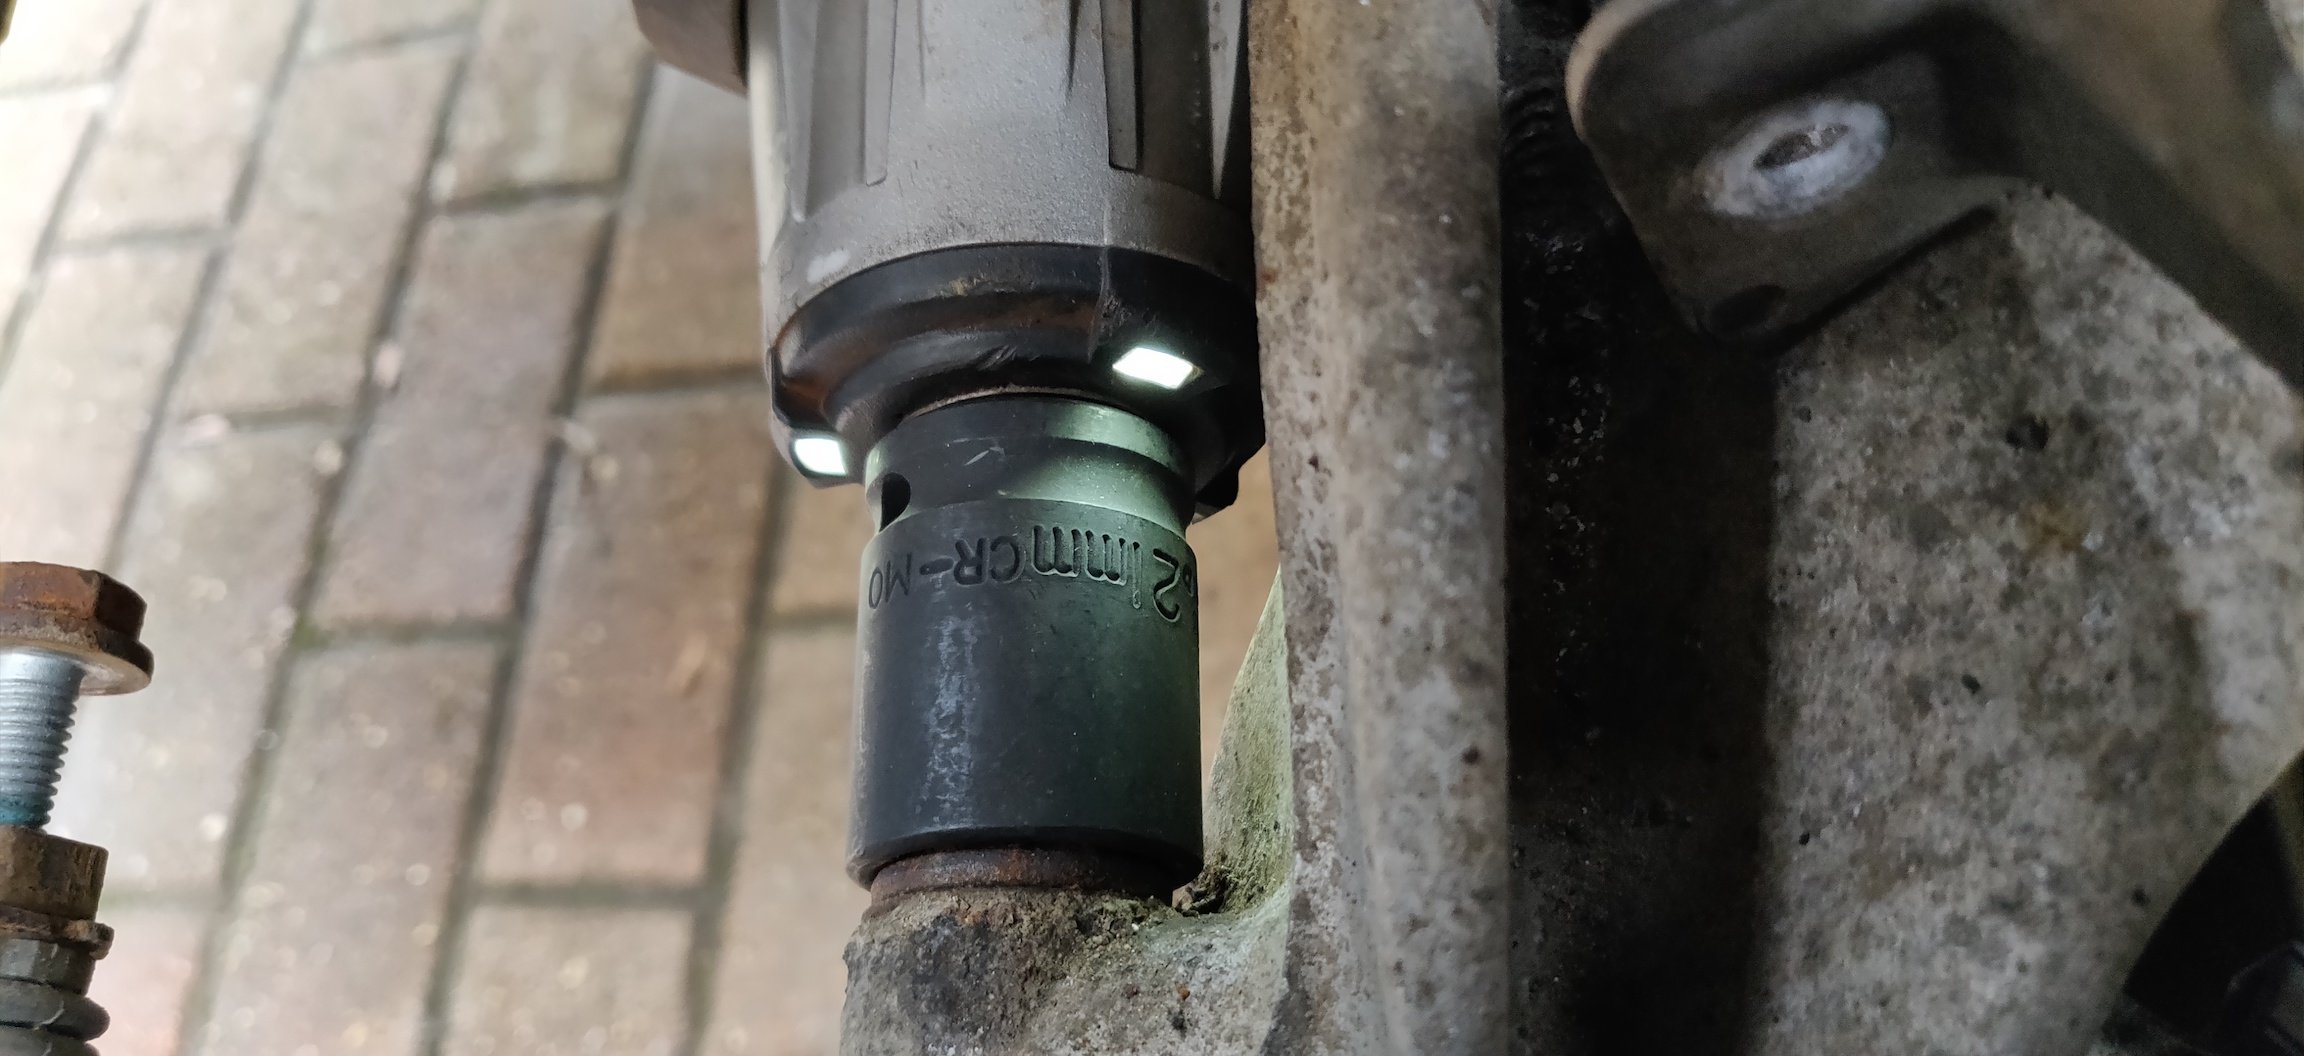
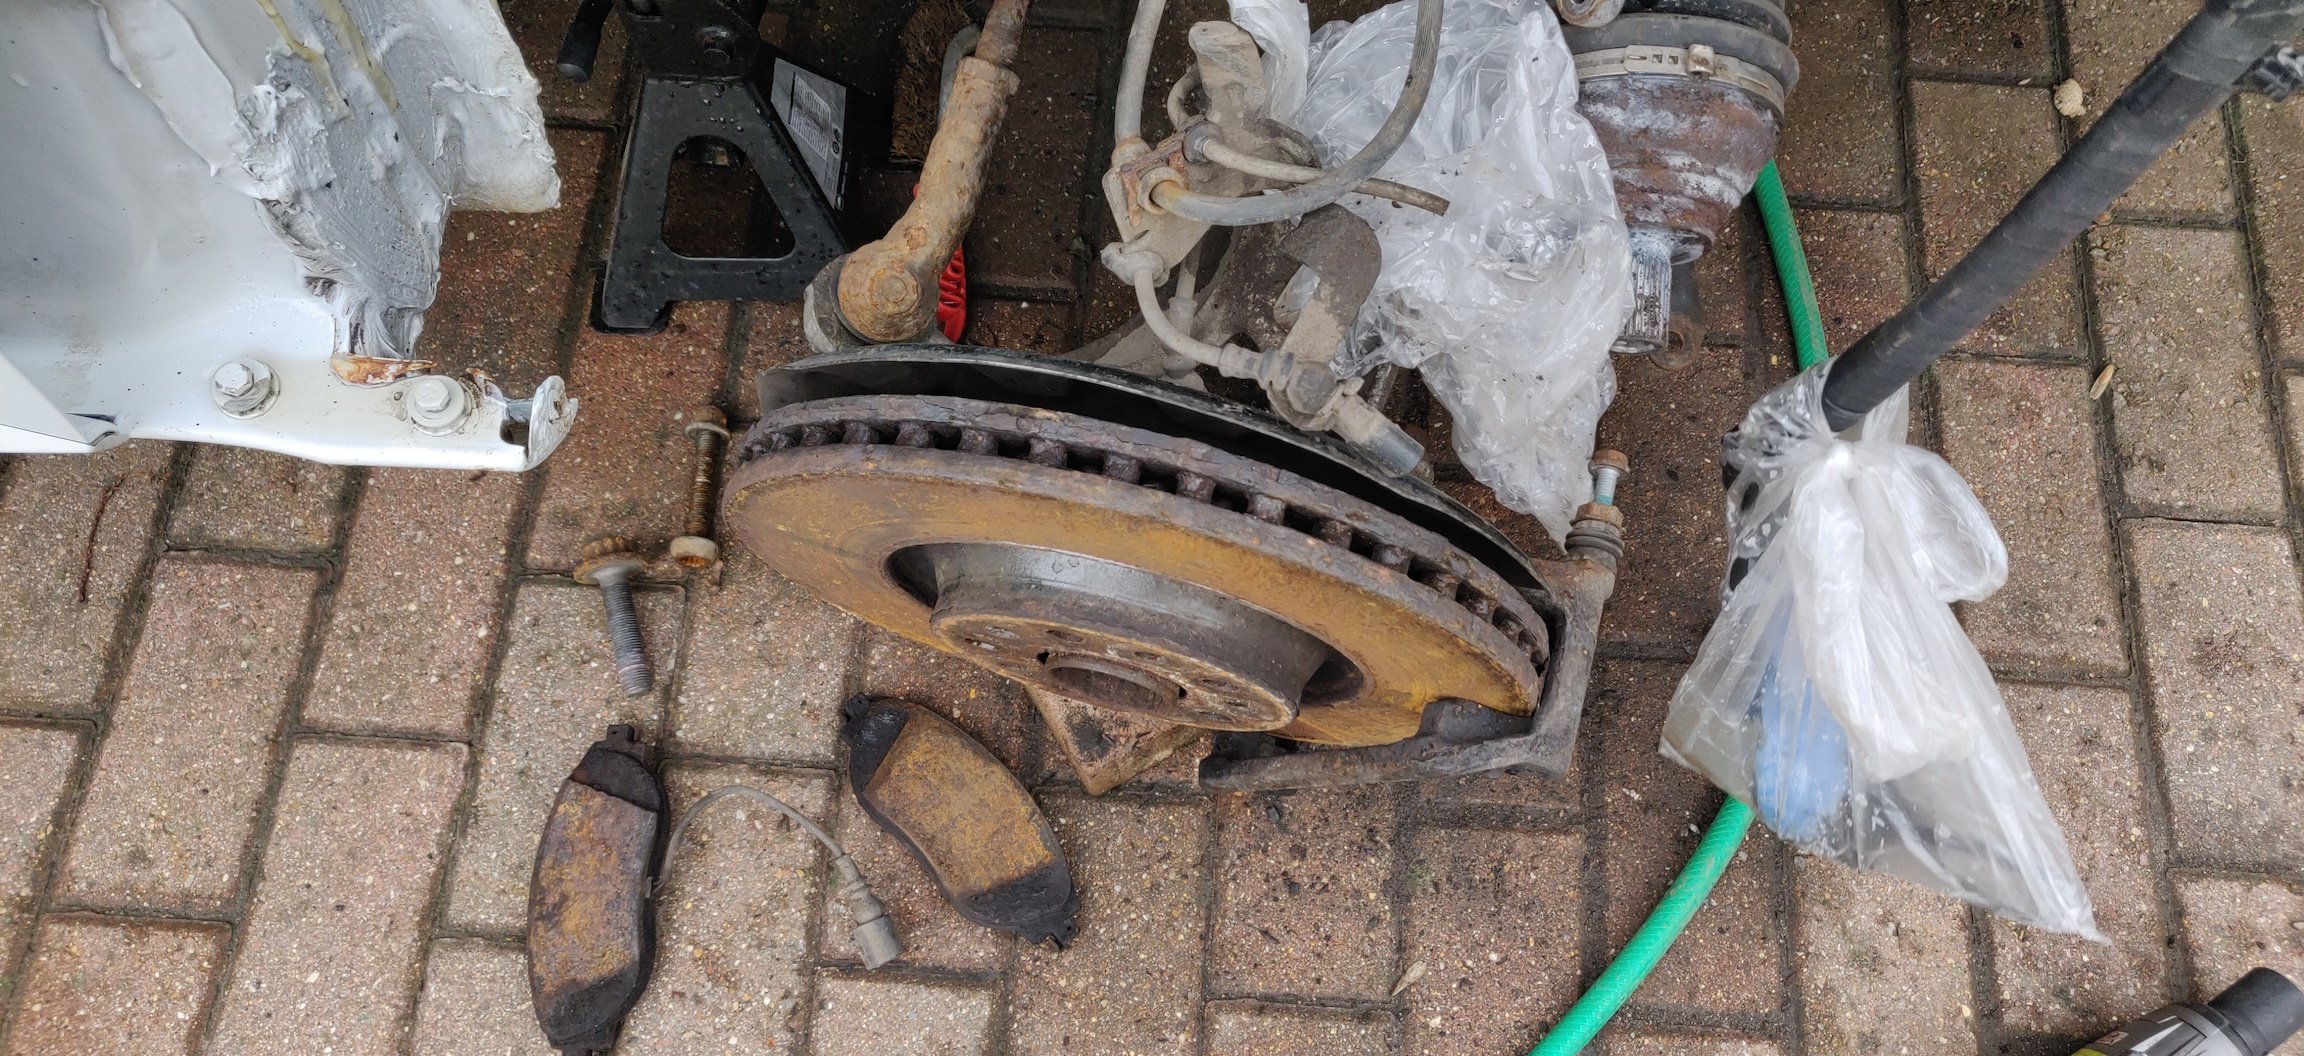
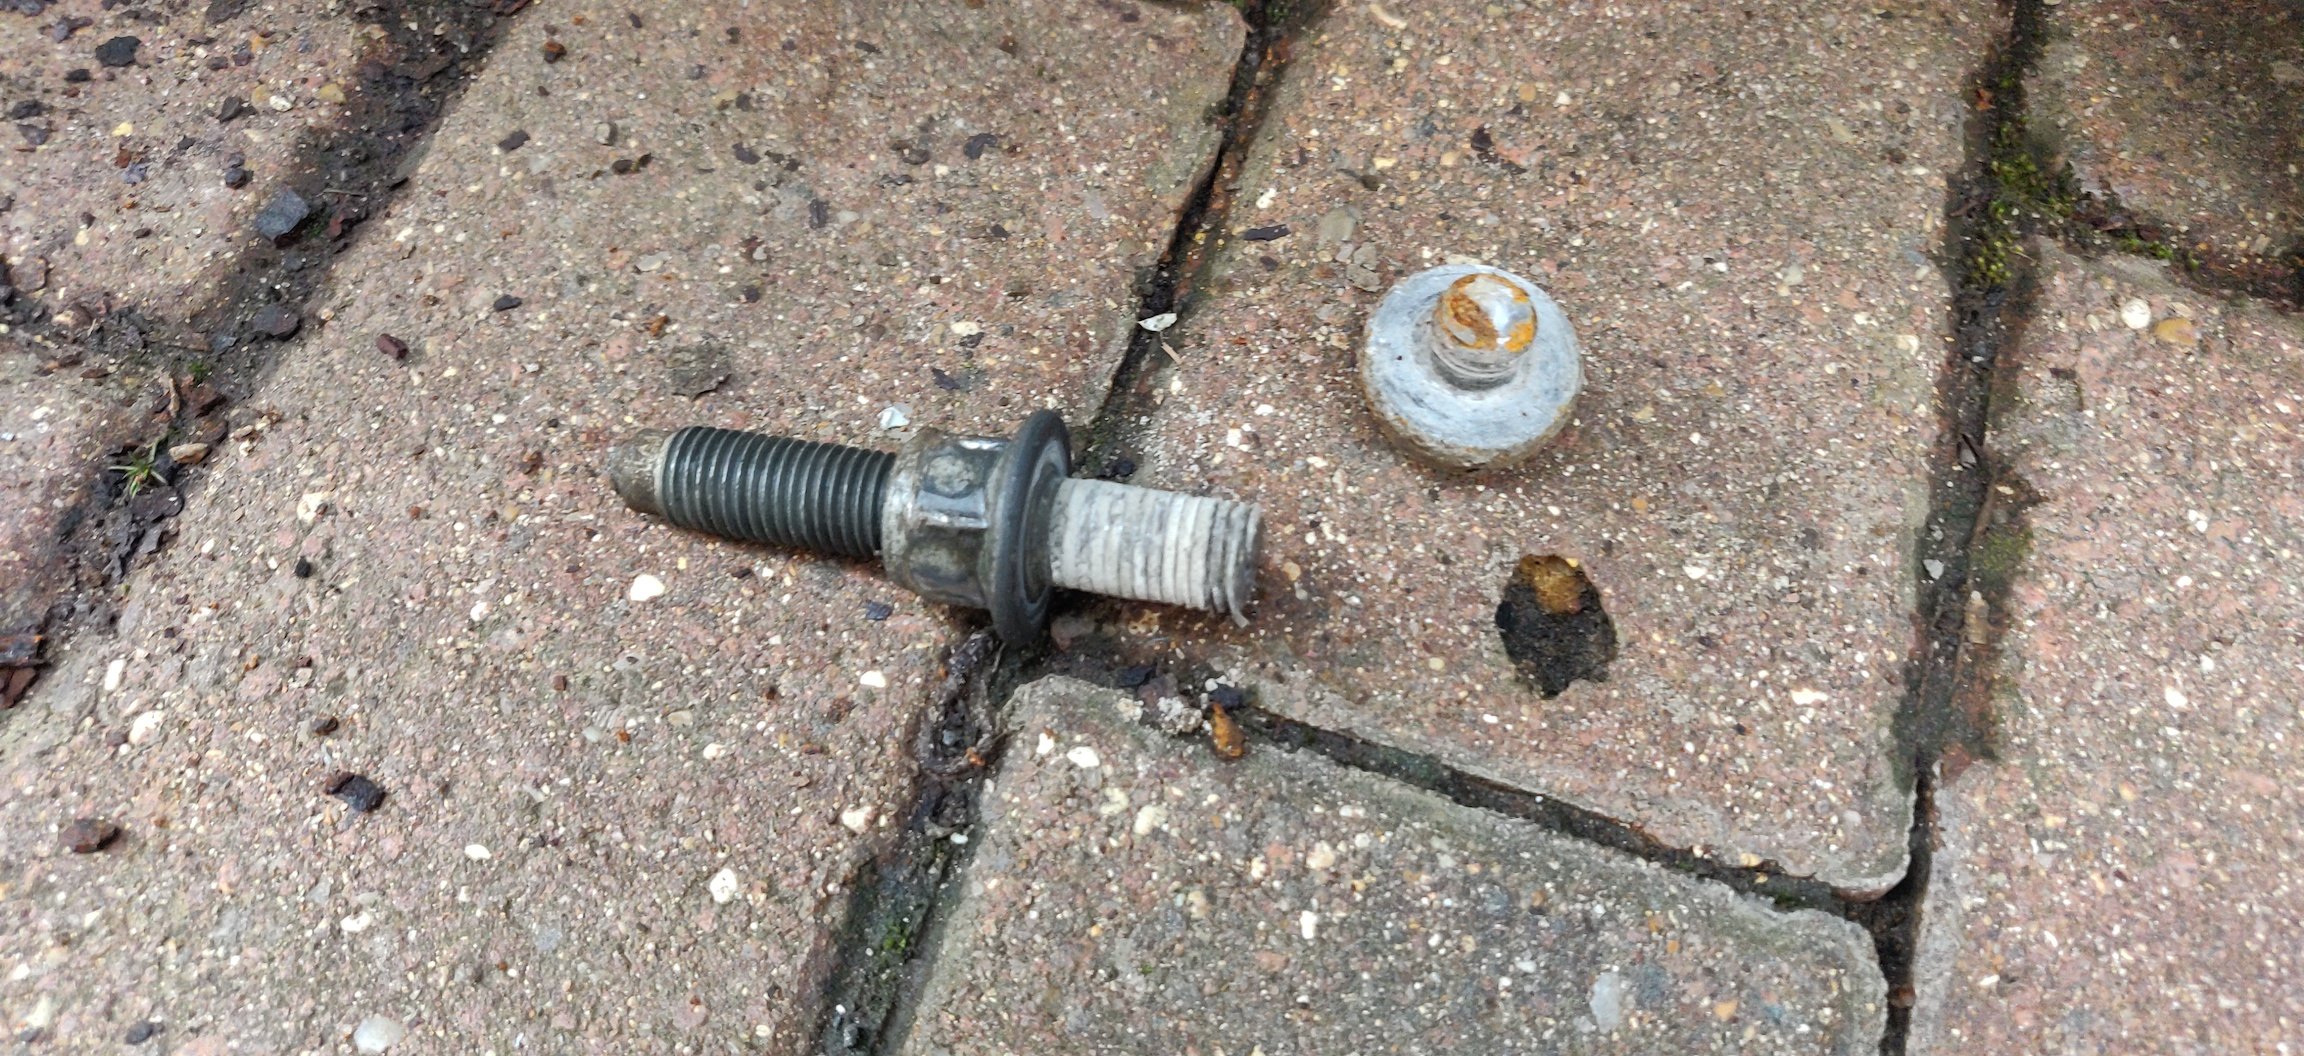
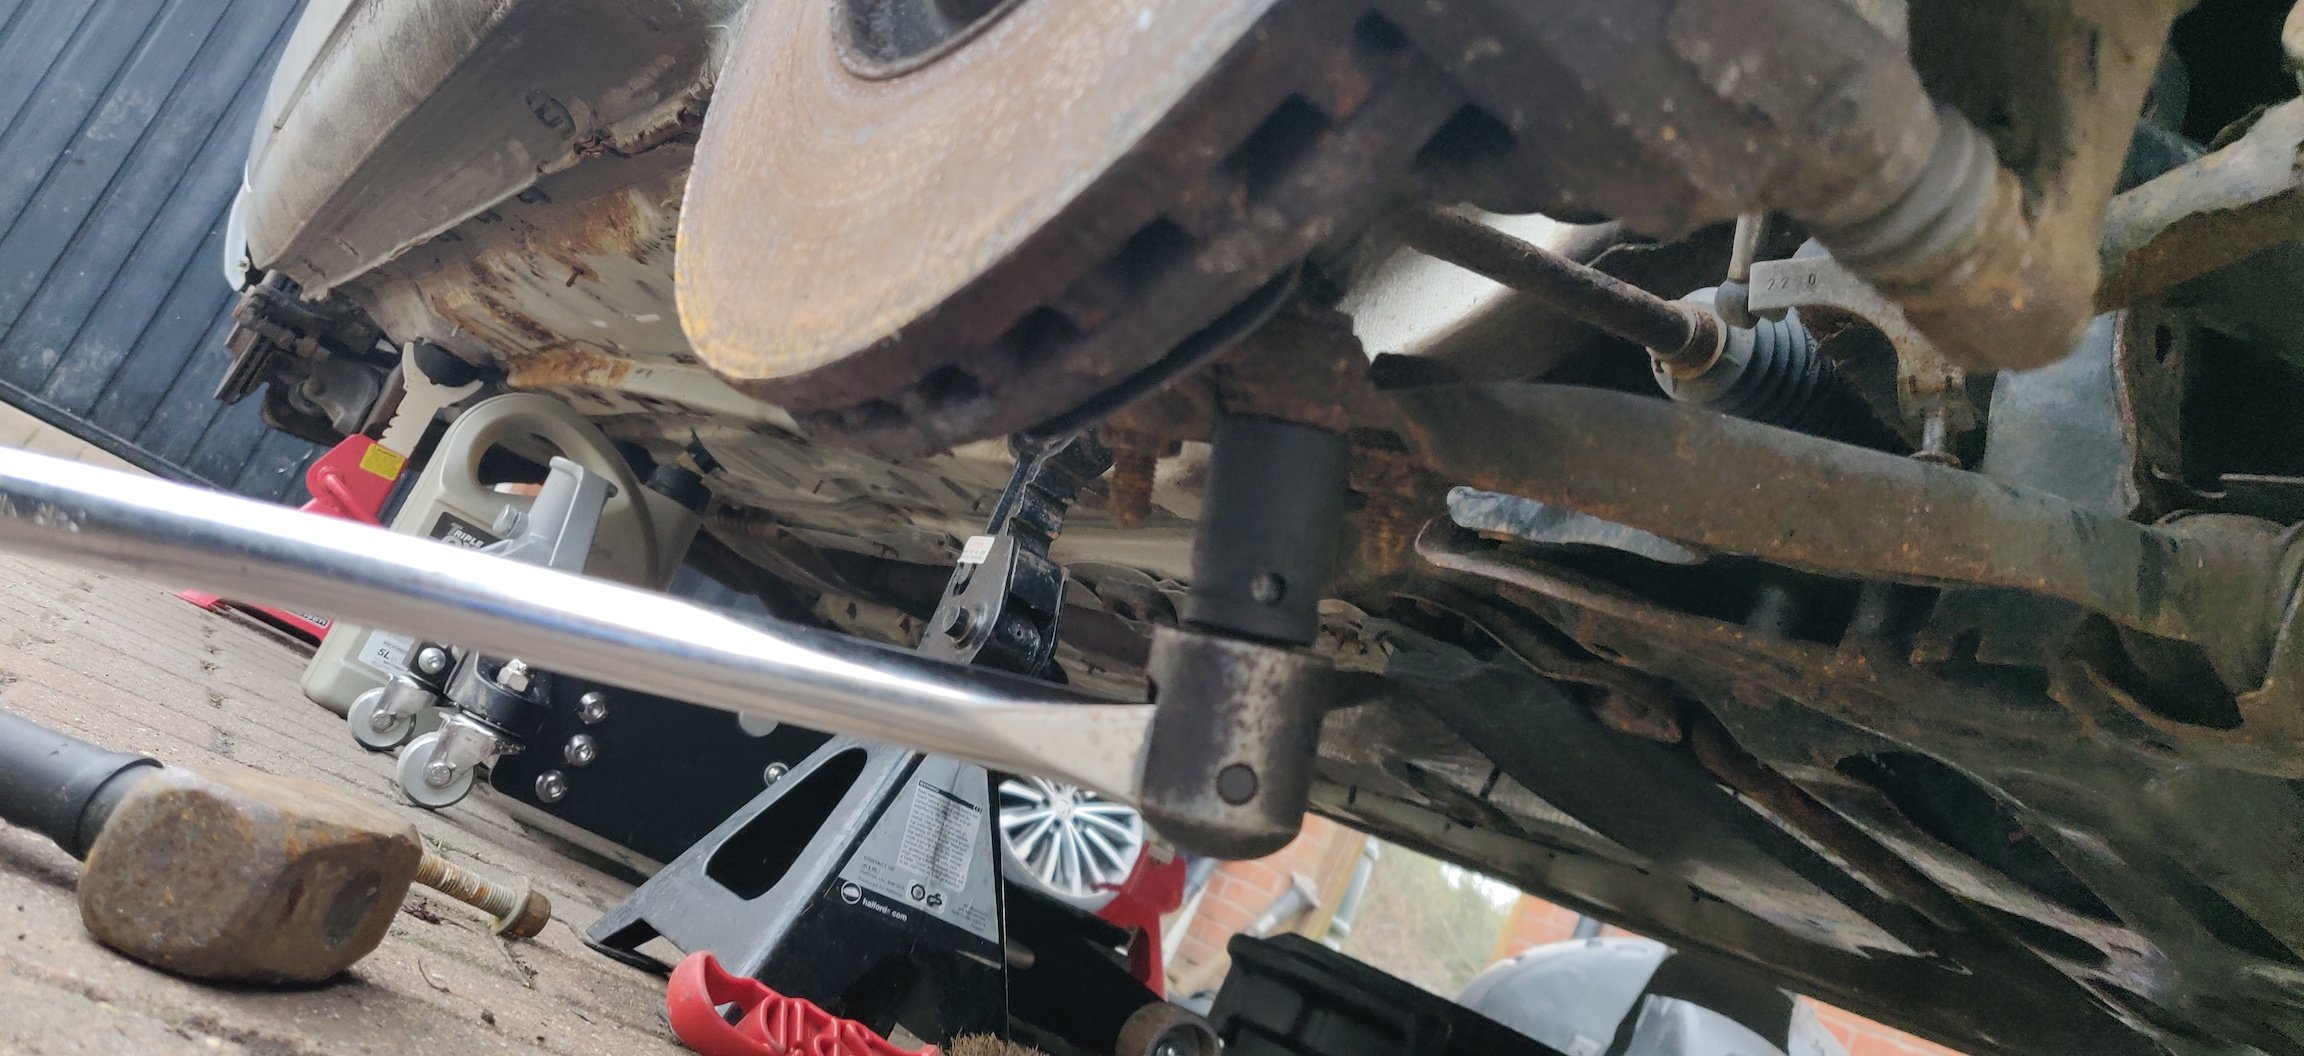
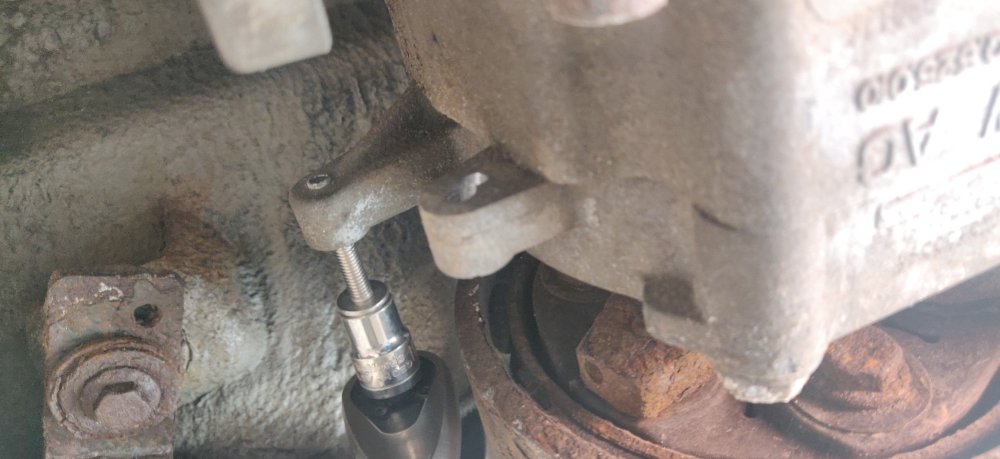
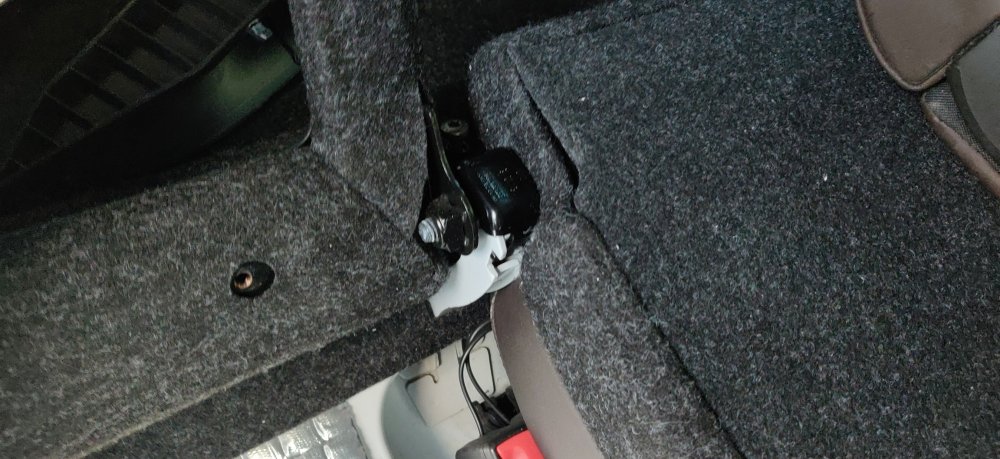
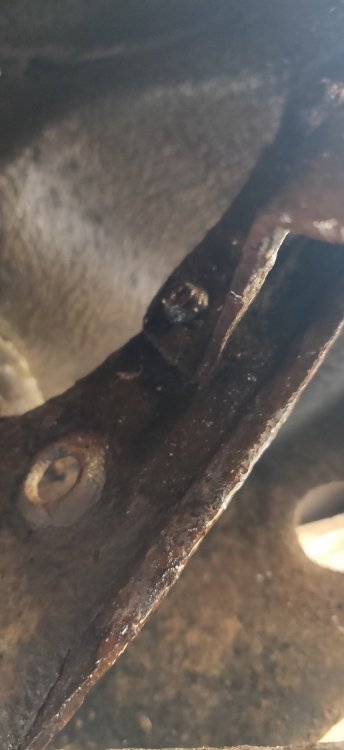
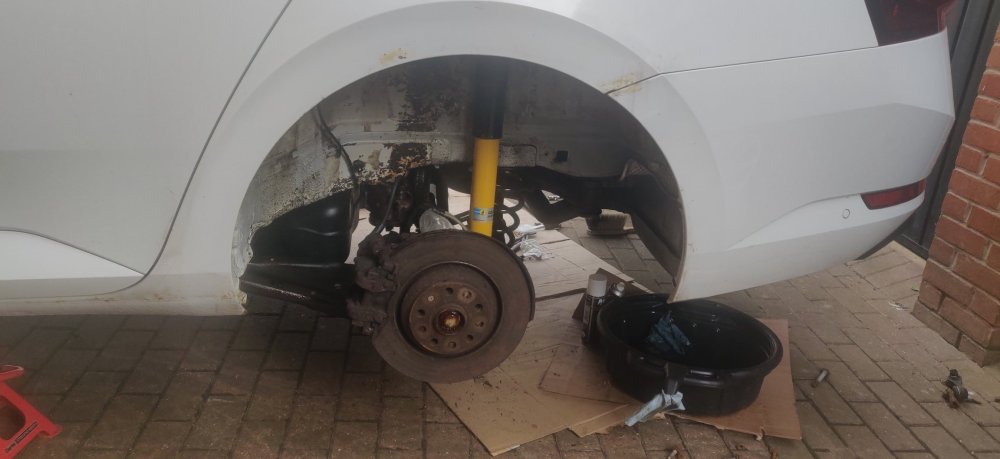
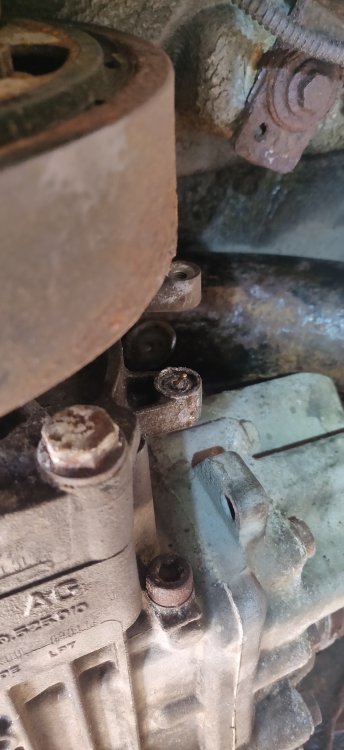
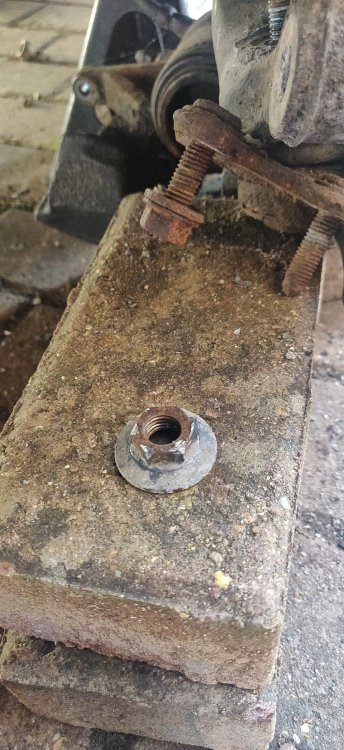
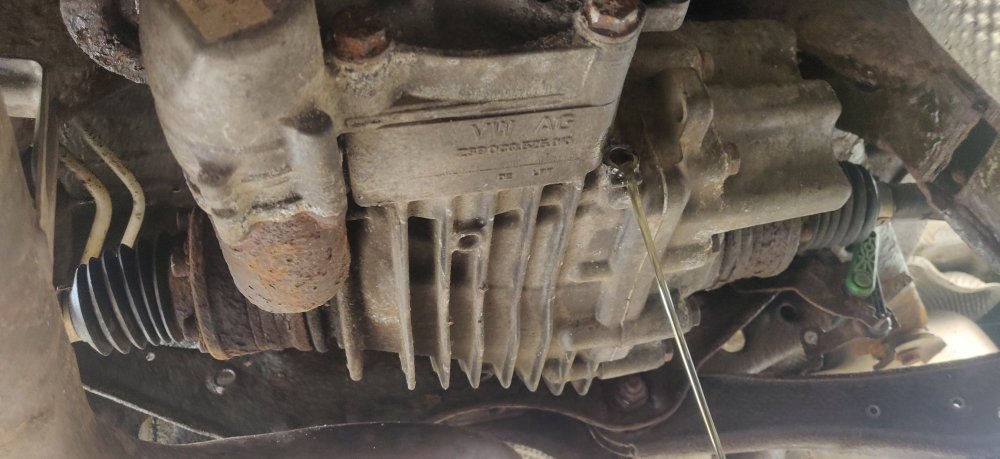
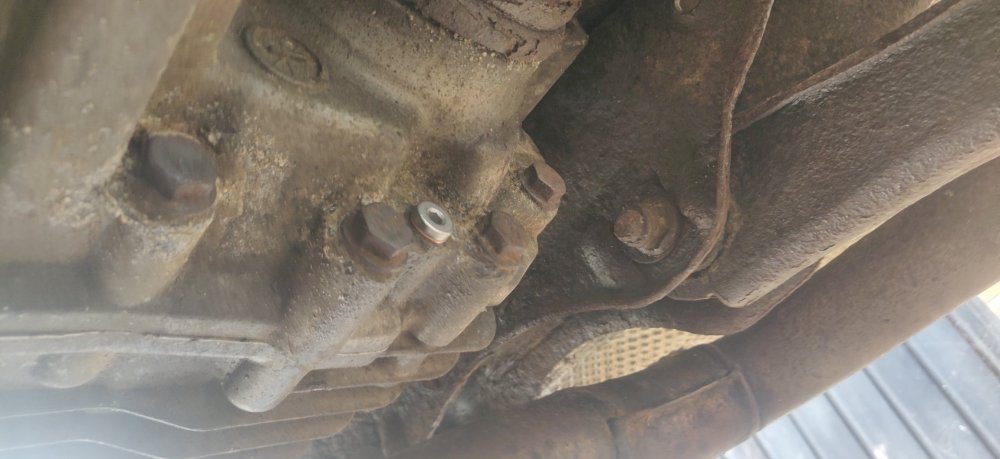
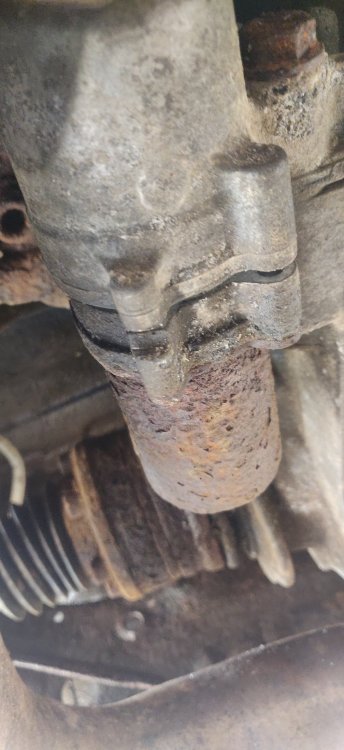
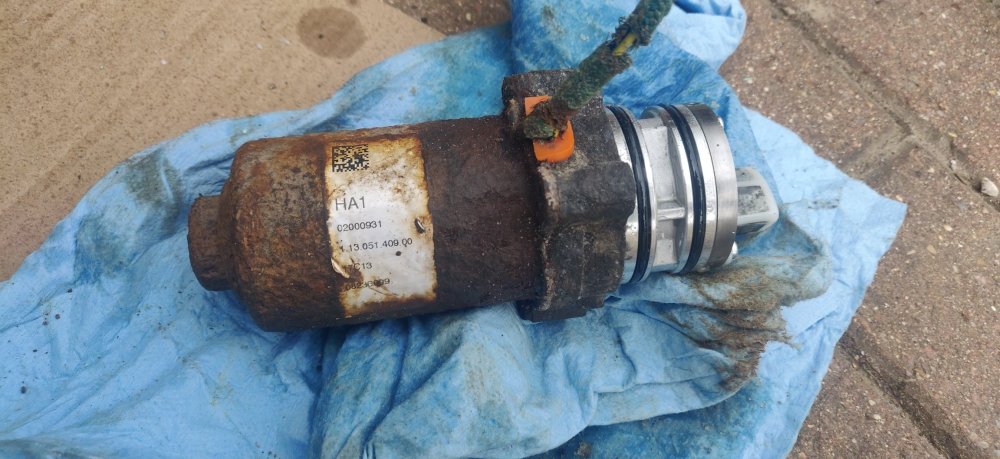
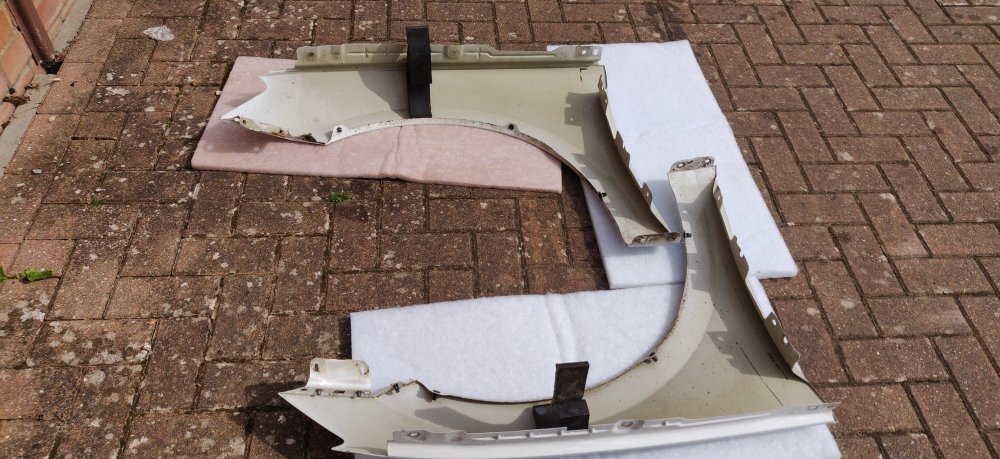
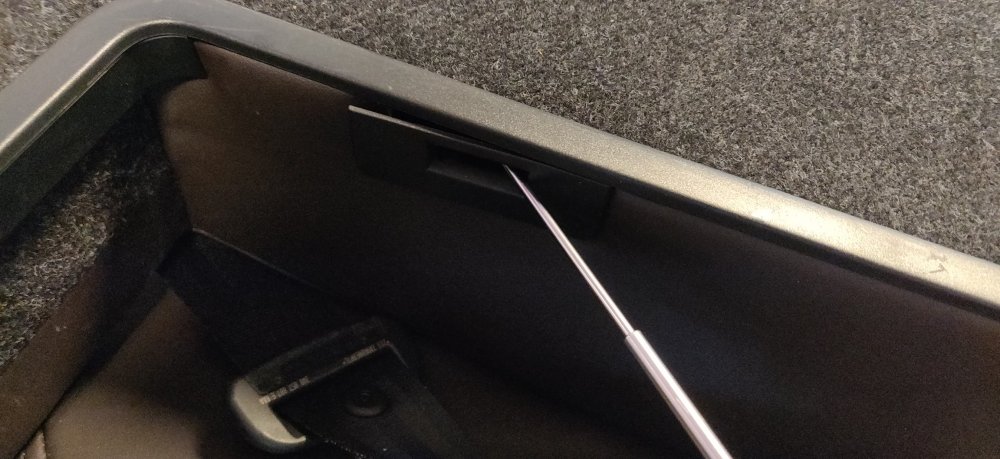
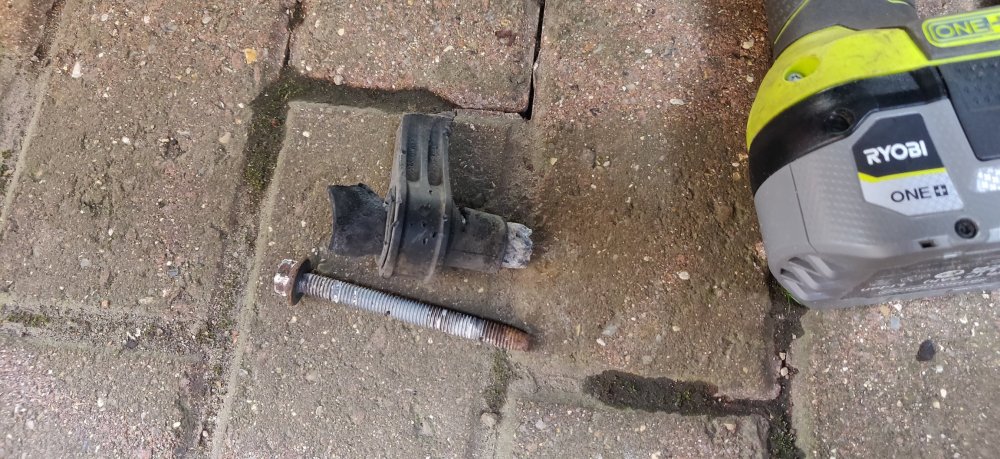
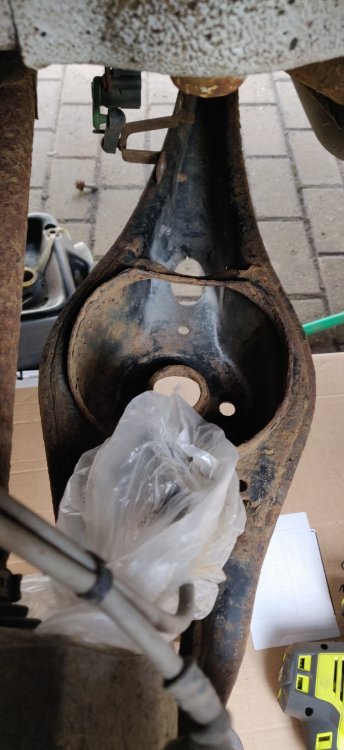
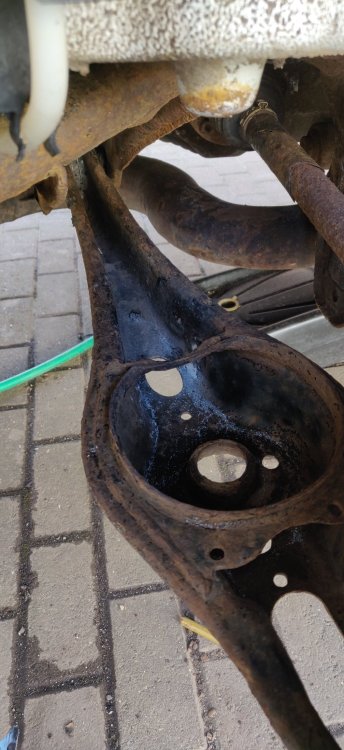
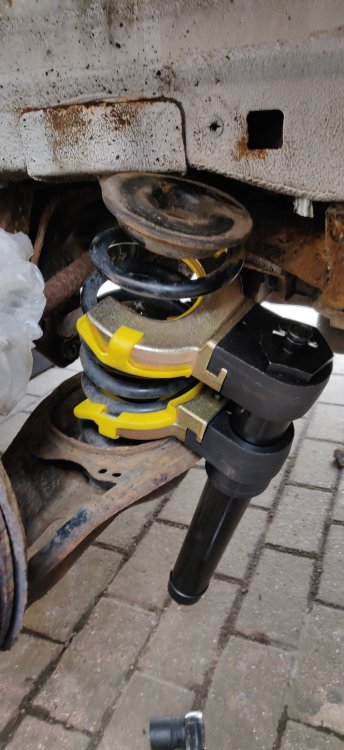
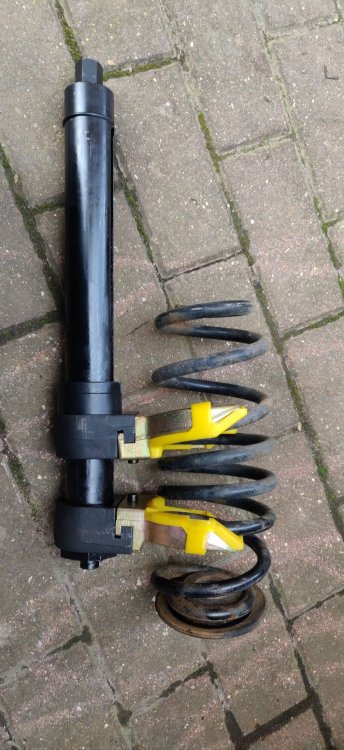
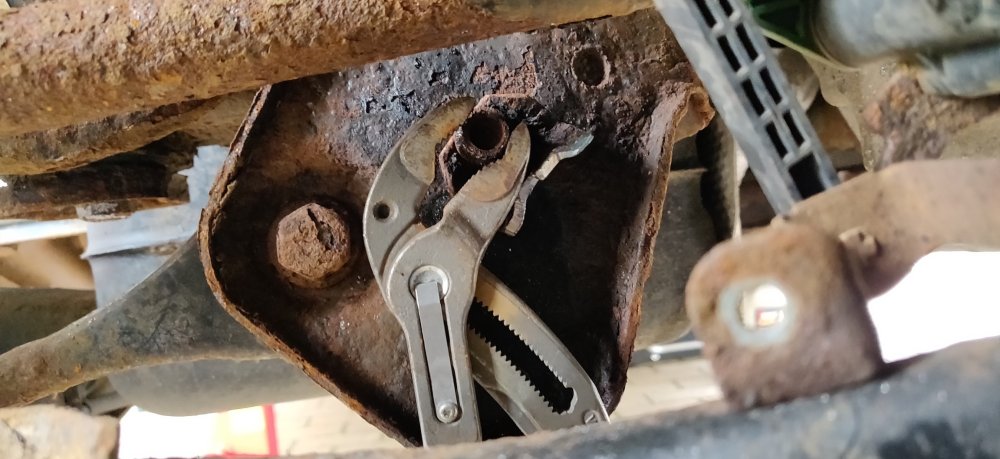
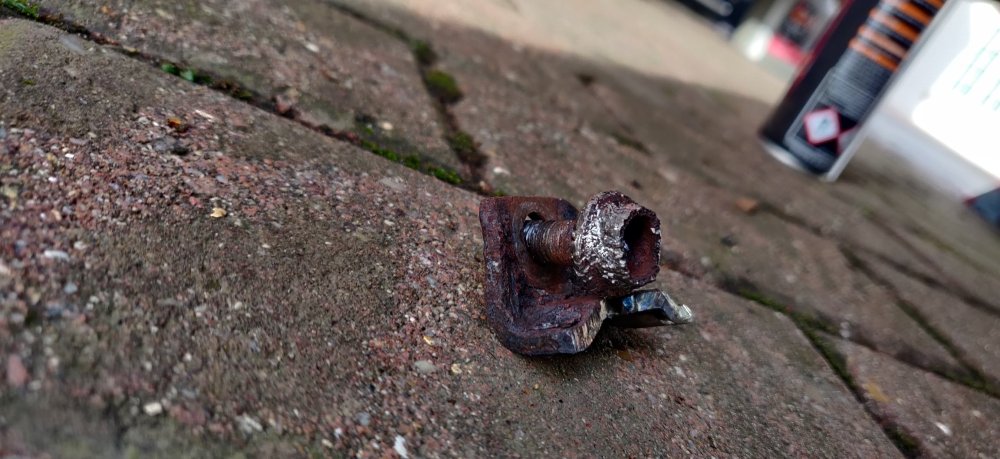
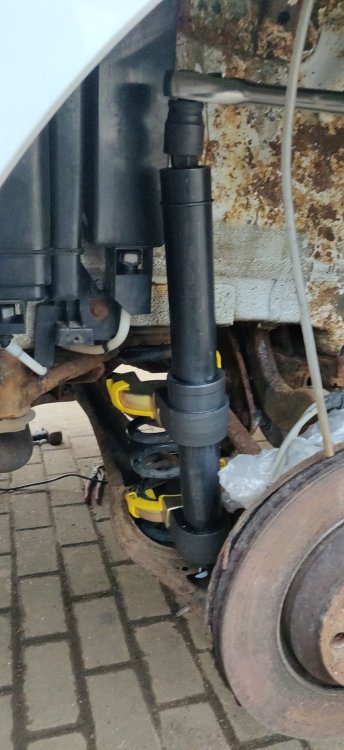
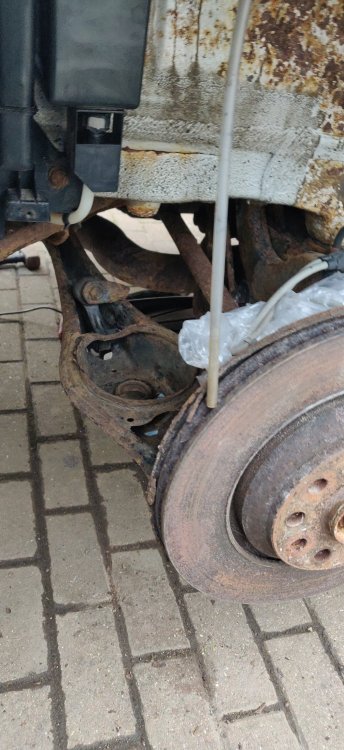
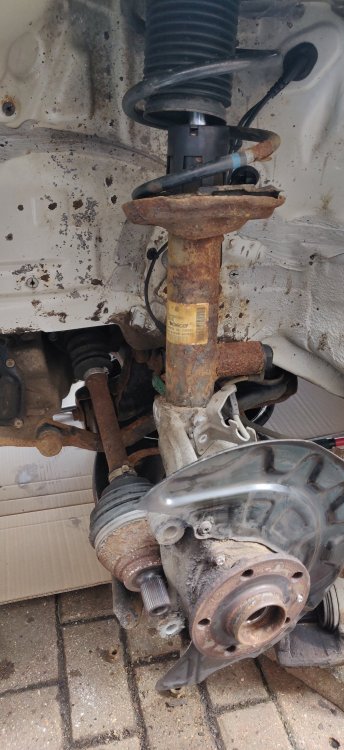
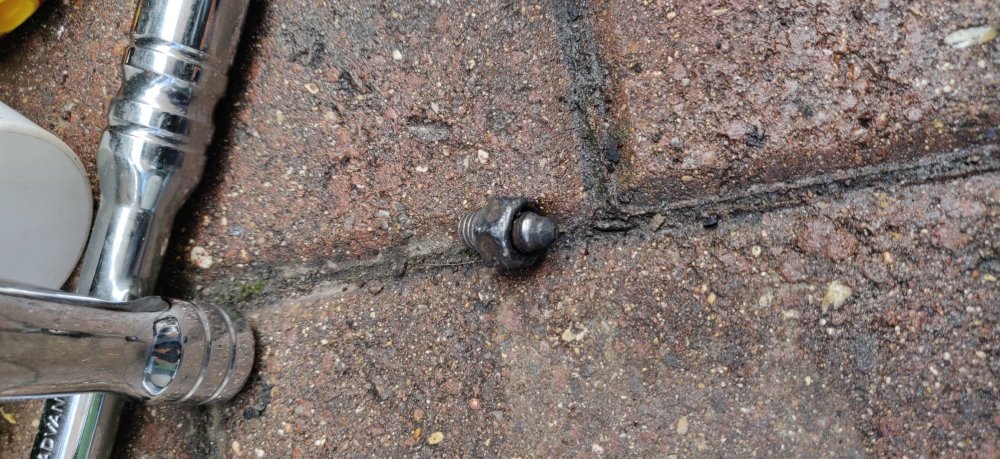
After lunch, did another look around the house and spotted the foams that should go in the wheel arches: Nice and simple, just squish them into place really: I realise that I haven't actually tightened up the bolts for the wing, so I'll probably have to take these foam bits out again, but no bother. For some random reason, I decided to take on the top two bolts of the rear level sensor: This was a terrible idea. They look horrific: Even after giving them a clean, they already looked pre-rounded for all intents and purposes. A 10mm socket had no purchase, nor did 9mm, and 8mm was starting, but then slipped straight away. So another one of those sorta bolts. The bottom one was the closest, so a few large thwacks with a hammer and chisel, nothing. However, got a bit of luck: Just enough space and clearance to get the pliers on and then it started to rotate. It was tight for almost all of this, so this took about 45 minutes (seriously) to eventually undo, with it sometimes slipping and so on, and only really getting about 1/8 turns whenever it did grip. The top one was even harder to get at, but it did look like an 8mm bolt had a bit of purchase but then slipped. So I was reminded of these that I've had since the Peugeot 205 days: A set of Irwin bolt grips, which are used for rounded bolts. They're very effective when hammered into a bolt and then it bites into whatever remains of a bolt and usually gets them out. You can probably guess that this was not the case with this car! I resorted to using a bunch of extensions to get to an area under the car with space for a hammer: The Bolt Grip started to grip onto the bolt, but after a few turns, that was it, it then span freely. The Bolt Grip had removed whatever remains it was attempting to grip into, so it too was defeated. At this point I ran out of ideas, then noticed after sliding around the car, that the back of this, where the rivet nut is, was quite visible and accessible. Gave the area some Plus Gas, some cleanup, and then, some fire. I decided out of sight out of mind, so the heat wouldn't affect the level sensor if its on the other side of the subframe. This doesn't actually make any sense, but I didn't care at this point. This left me running out of PlusGas. Now, normally, an aerosol is usually enough to last me 2-3 years, so the fact that a couple of weeks with this car has used one already is spectacular. I'll tally it's cost of £6.50 into the mix, given it ended up only being used on this car. So any of the factors above probably helped, as I was able to get the Knipex pliers at an awkward angle but more importantly able to rotate slightly. After a few turns resulting in about half a revolution: The bracket for the level sensor then started to come free and rotate. This was the breakthrough, as being able to rotate that bracket allowed much more access with the Knipex pliers. So another 45 minutes (seriously!) of gripping and turning: The level sensor and those two sodding bolts are out of the car. Took the level sensor back to the house and will give it a bit of a clean. Took the replacement bolts purchased what seem like ages ago, gave them a huge slathering of copper grease and inserted them into the 4 rivet nuts: Gave them a few turns in and out, to simulate cleaning those threads out, as I can't seem to find my tap and die kit (and there's probably not enough access anyway). Whilst I was down there, did the same with the bolts for the anti roll bar clamps: The top ones were stiffer to turn, as expected given one rounded of and gave me grief the first time, but a few goes in and out hopefully has them cleaned up enough. Will still go overkill with the grease again, don't care if its too much anymore. So at this point, took the bolts off and decided to go and get the roll bar in place: The pics don't really highlight how much of a faff this actually turned out to be. Because the previous one had actually snapped and I cut through one of the links, it probably had less things to foul on its way out. With this one including links installed, it wasn't straightforward, the roll bar fouling the rear diff, or the exhaust, or the suspension arms, or the subframe, or the driveshafts. Some side by side and up and down and rotating eventually gets it in place because the pics above kind of suggests I managed to pull it off! So with that, the bolts are then put in: Don't see any reason why flanged bolts weren't used in the first place given they seem to be fine. Haven't torqued these to spec yet, and to be honest, I'll probably just Google torque specs for 8.8 bolts as I'm not using the OEM ones for this anti roll bar. Whilst I was down there, decided to get the undertrays in place: Before attaching them, slathered some Corrosion Block Grease onto the contact areas, as the outer ones had rust on them, implying that water and/or salt was getting in between them and probably helped with the whole rusting of the car. Was only really able to attach the rear parts onto the car, as the front area fouls the axle stands: So just kind of left them alone for now: Should be simple to get those fronts sorted out I think: So some more things nearly attached now! No more rust, amirite?! Given how long those two bolts took, it was getting late in the day now, but decided to see if I can get one more thing in: So got the spring compressors in, and looked at previous pics about how to compress them. By that I mean how many coils and roughly where. So for the left one, about 4 coils, leaving one near the top and a couple near the bottom: The pic implies success, but to be honest, I think this side took about 3 or 4 attempts to get it right. I still don't think its correct, as the rubber on the bottom appears to have been pinched on a tiny part of the spring. I may have to sort this out for my own consciousness more than anything else. It's a little nerve wracking given the compressors have to compress QUITE A LOT. I guess most people undo the hub nut to get the arm completely free and down. It probably would make this a lot simpler to be honest, but it assumes that the bolt will actually disconnect from the hub and I think I have already noted on a previous post, that I would bet my mortgage on the bolt being seized into the hub bolt. I recall that for the right side, one distinction is the fact that I used the compressor upside down: Now that I think about it, I wonder if the left side would benefit from this as well. Second attempt at this side left me with this: The lower (upper?) part of the spring compressor was too close to the end of the spring and was crushed against the suspension arm and the spring, so couldn't be removed. So had to compress it again, remove it, uncompress it, wiggle the compressor, and repeat it all over again. So basically, persistence is the only way to get through. However, both sides got done, so whilst I was there, got a couple of the new bolts, greased them up to buggery, and: Dry fitted the rear suspension! Not sure if the DCC connector is on the right side, I'll have to swot up some pics for reference. Repeated on the other side: I then gave the springs and the compressors a good coating of the XCP Rust Blocker, and called it a day. So a bit of an up and down day, but at least some of the troublesome bolts are sorted, just the one failure with the Haldex controller. There's the bit of the rear spring rubber being pinched, so probably should try and address that. Otherwise, seeing the rear suspension attached feels like a decent milestone. Far from finished though, I'll need to get the bolts for the anti roll bar links and rear suspension aligned and attached, then all the suspension bolts involved tightened. There's the level sensor, then the Haldex controller to be attached to the car, although hopefully that's straightforward in comparison (bolts for the controller are on the way). I'll probably sort out any missing wheel arch clips and see if I can get the rear wheel arch liners attached, as the Lanoguard is only a few more days away from being dry. Maintenance: £2004.02 Upgrades: £1158.66 Miscellaneous: £665.56 (+£6.50)


-
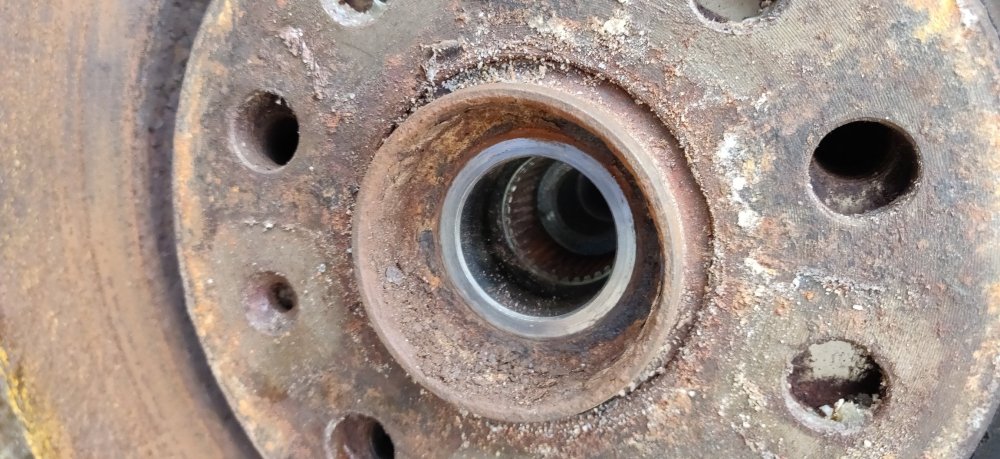
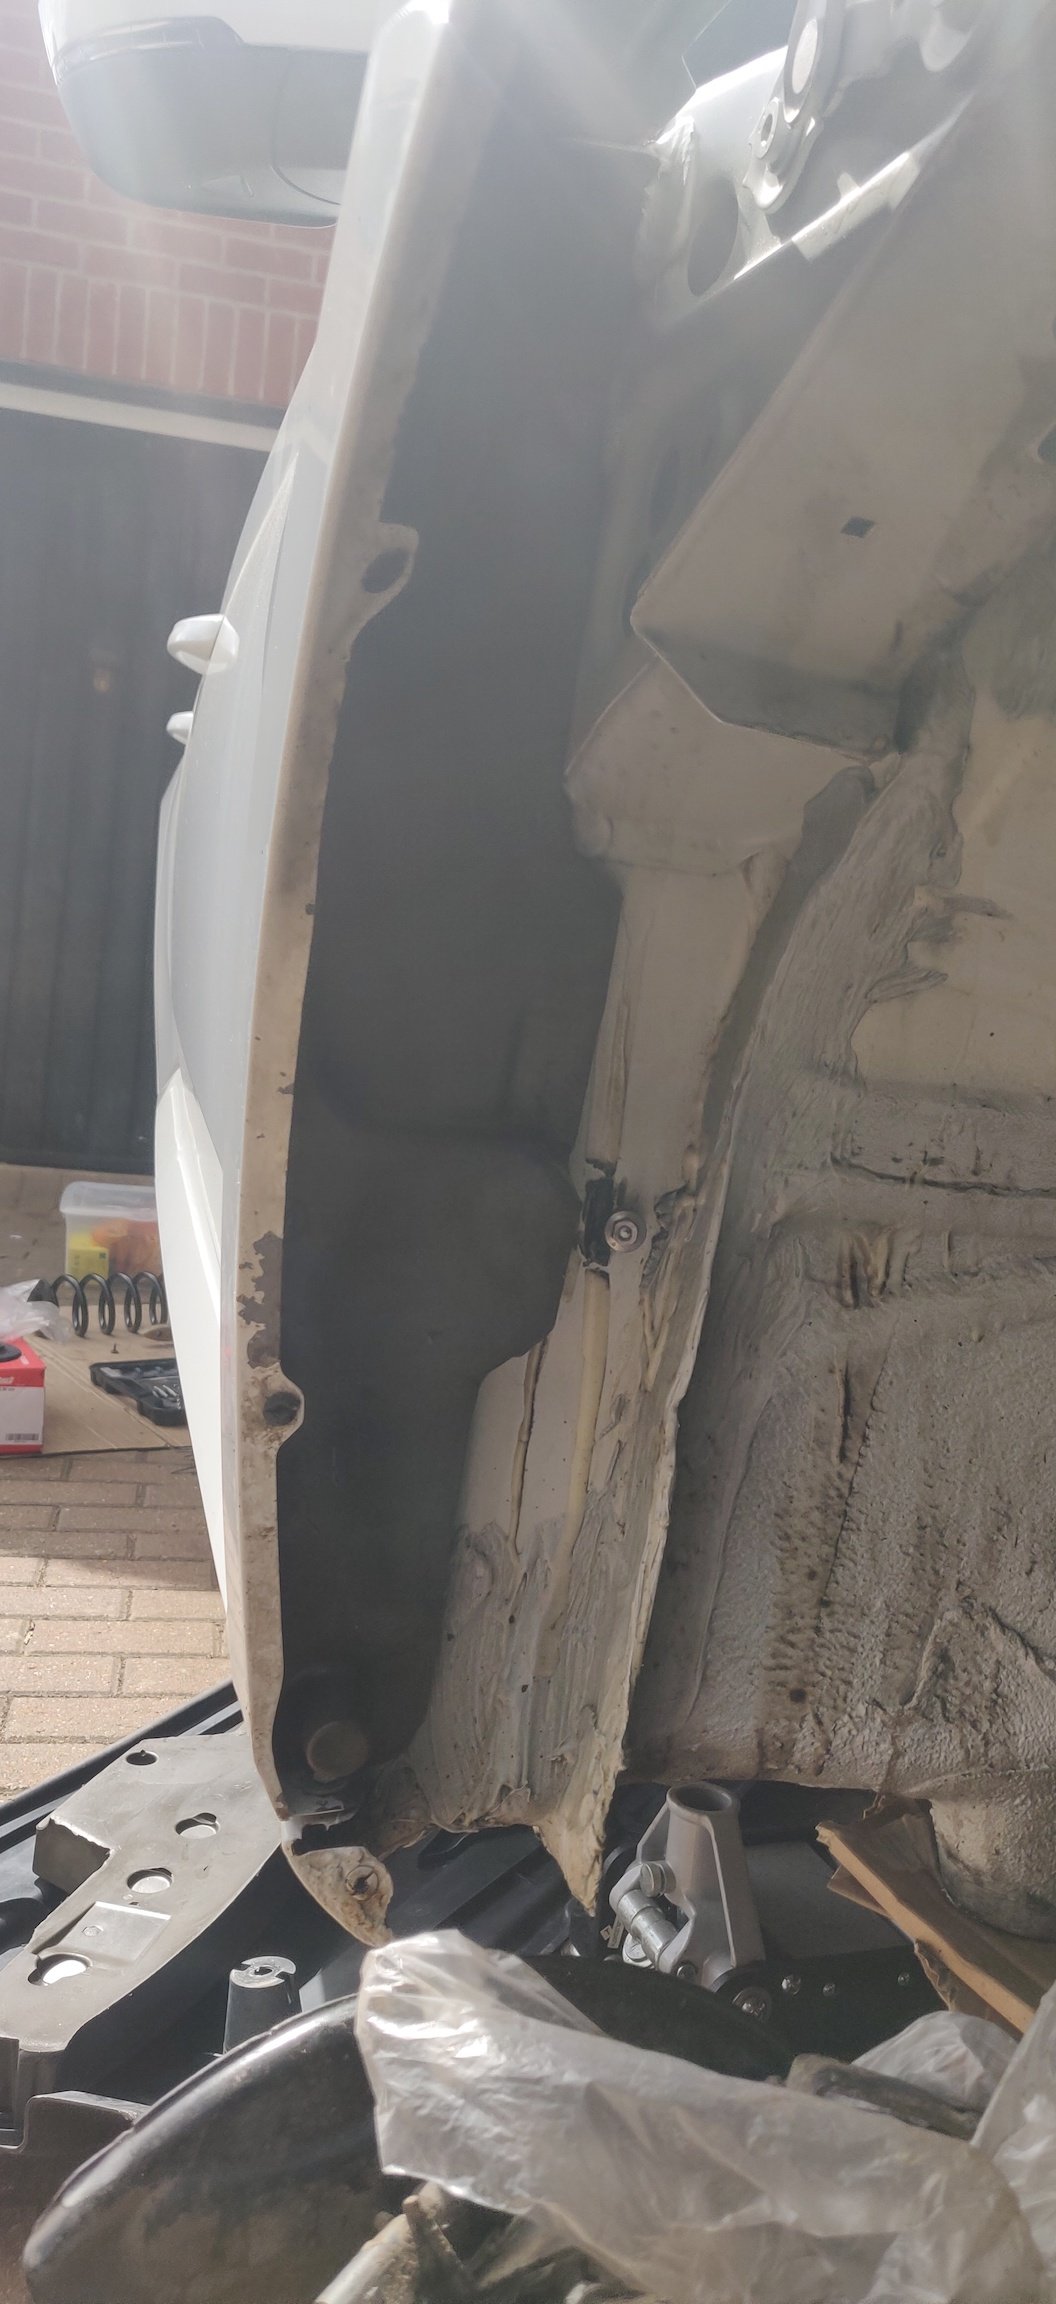
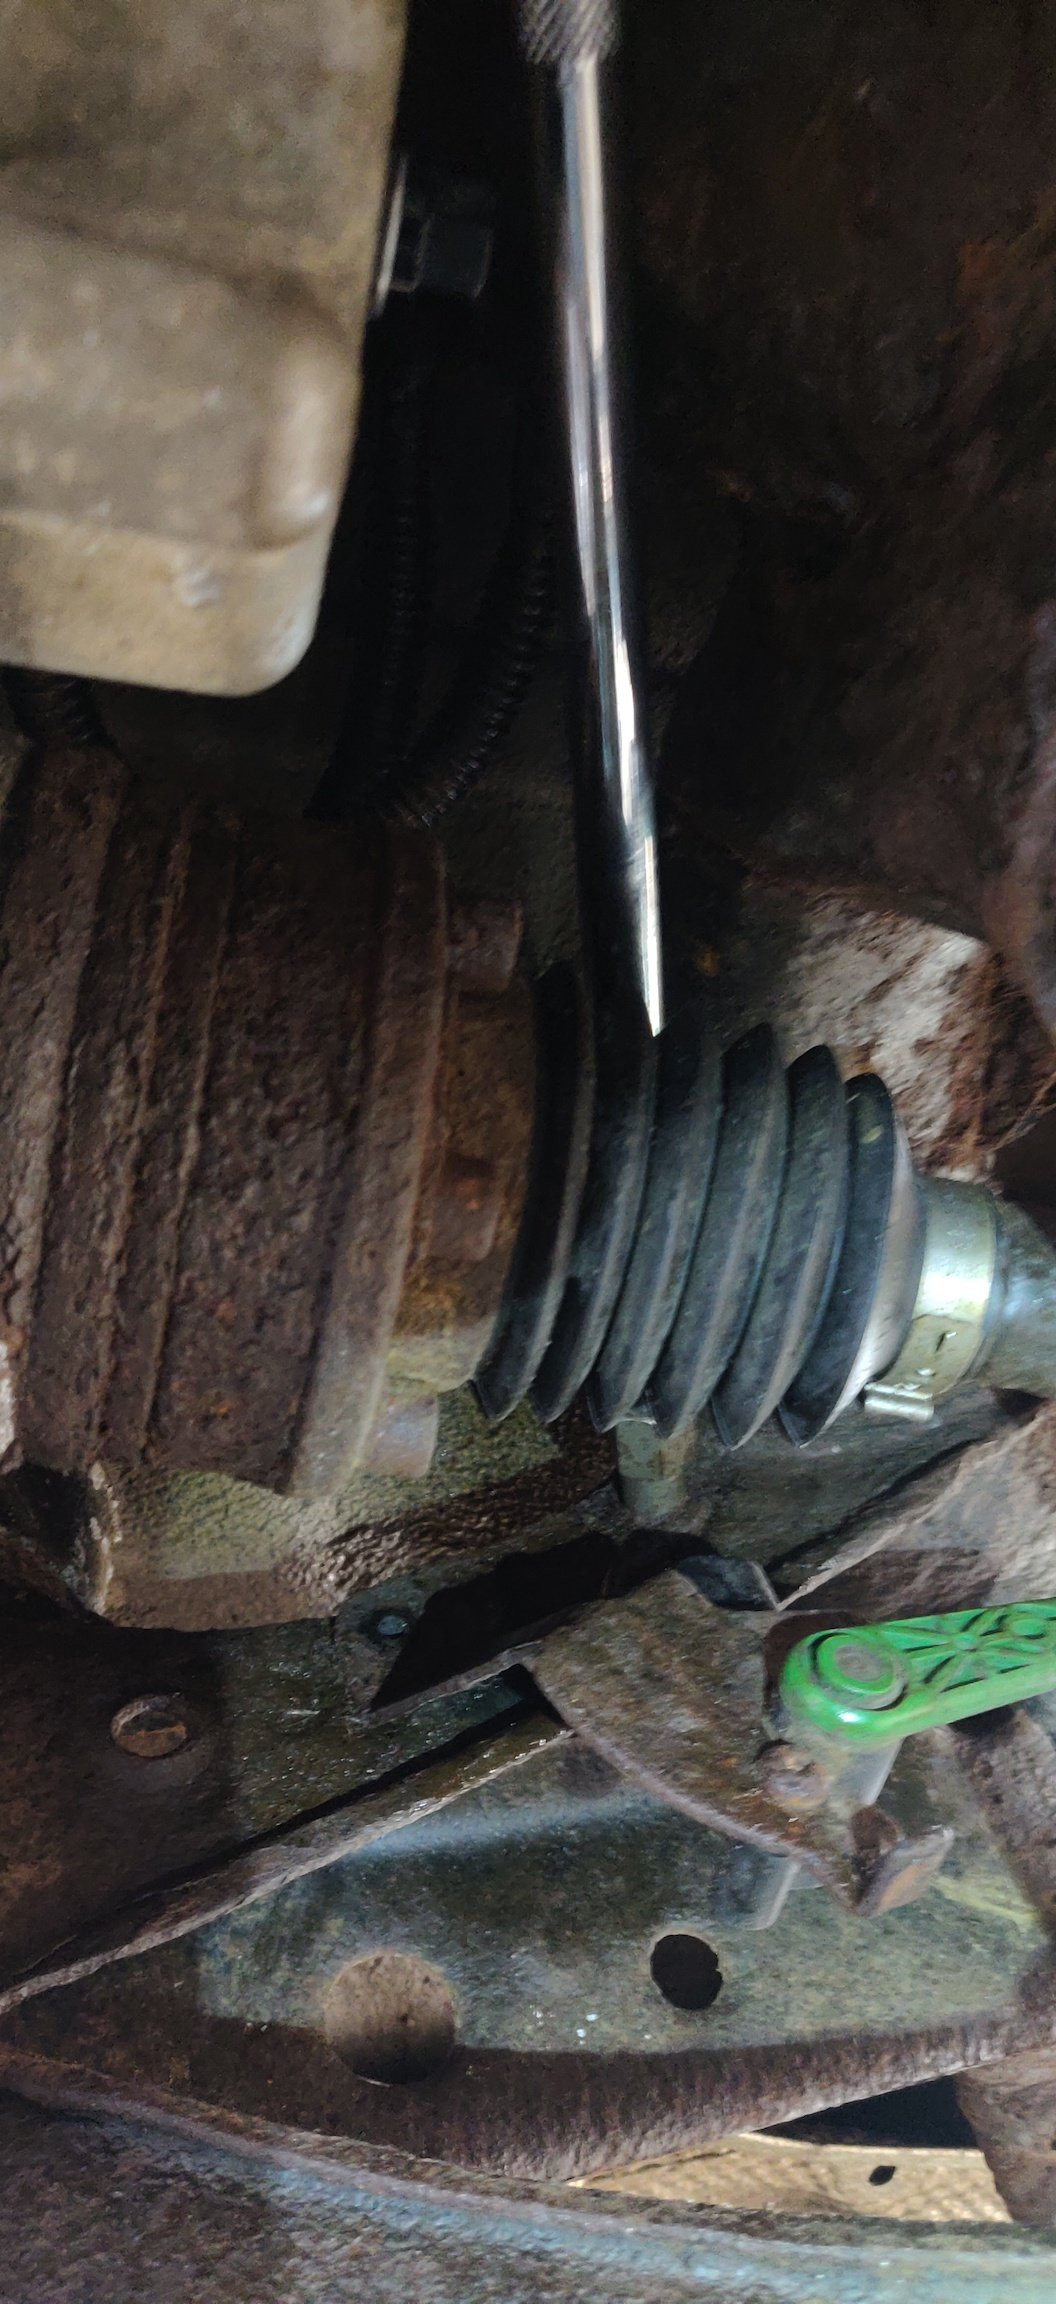
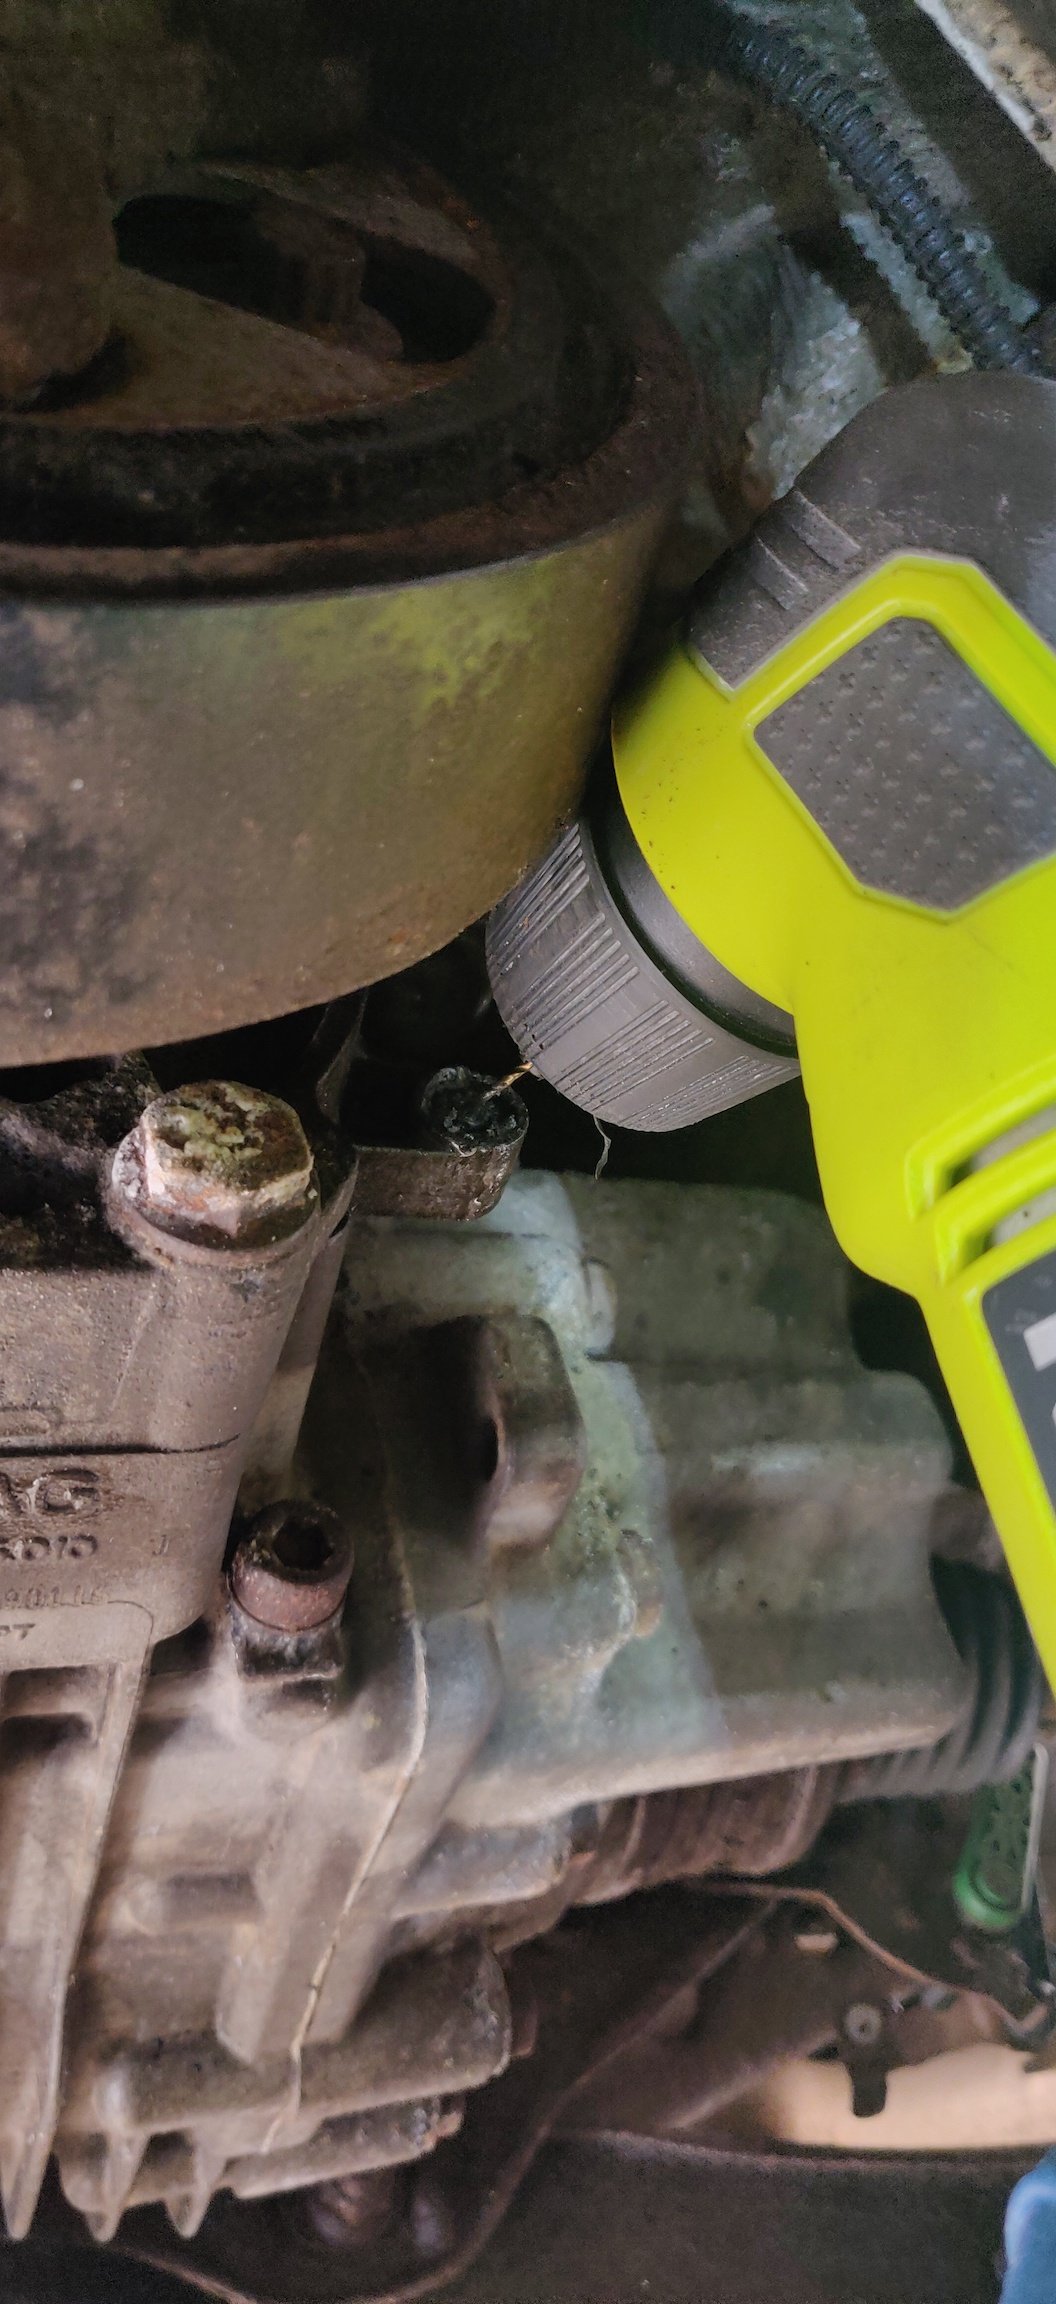
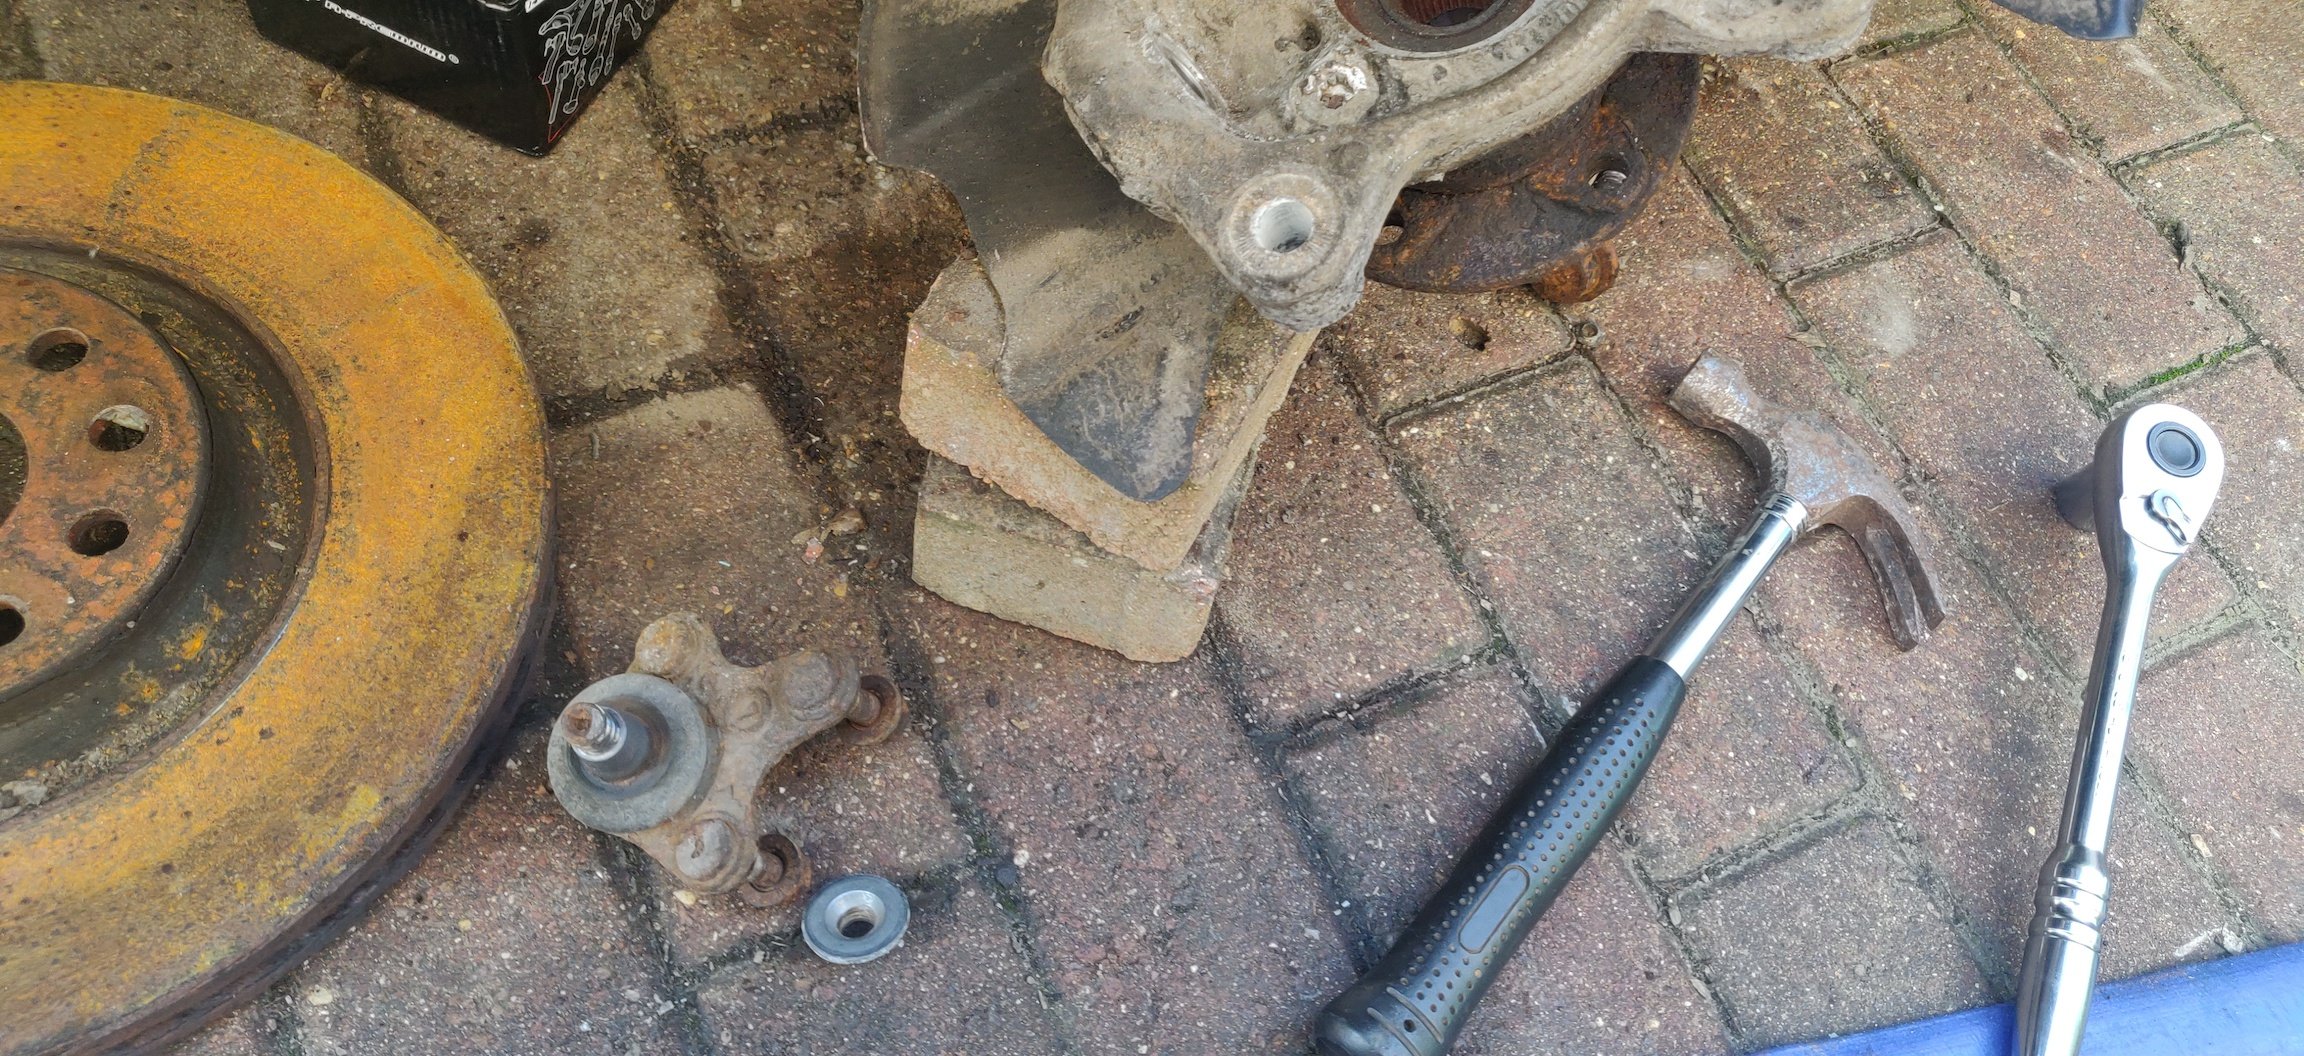
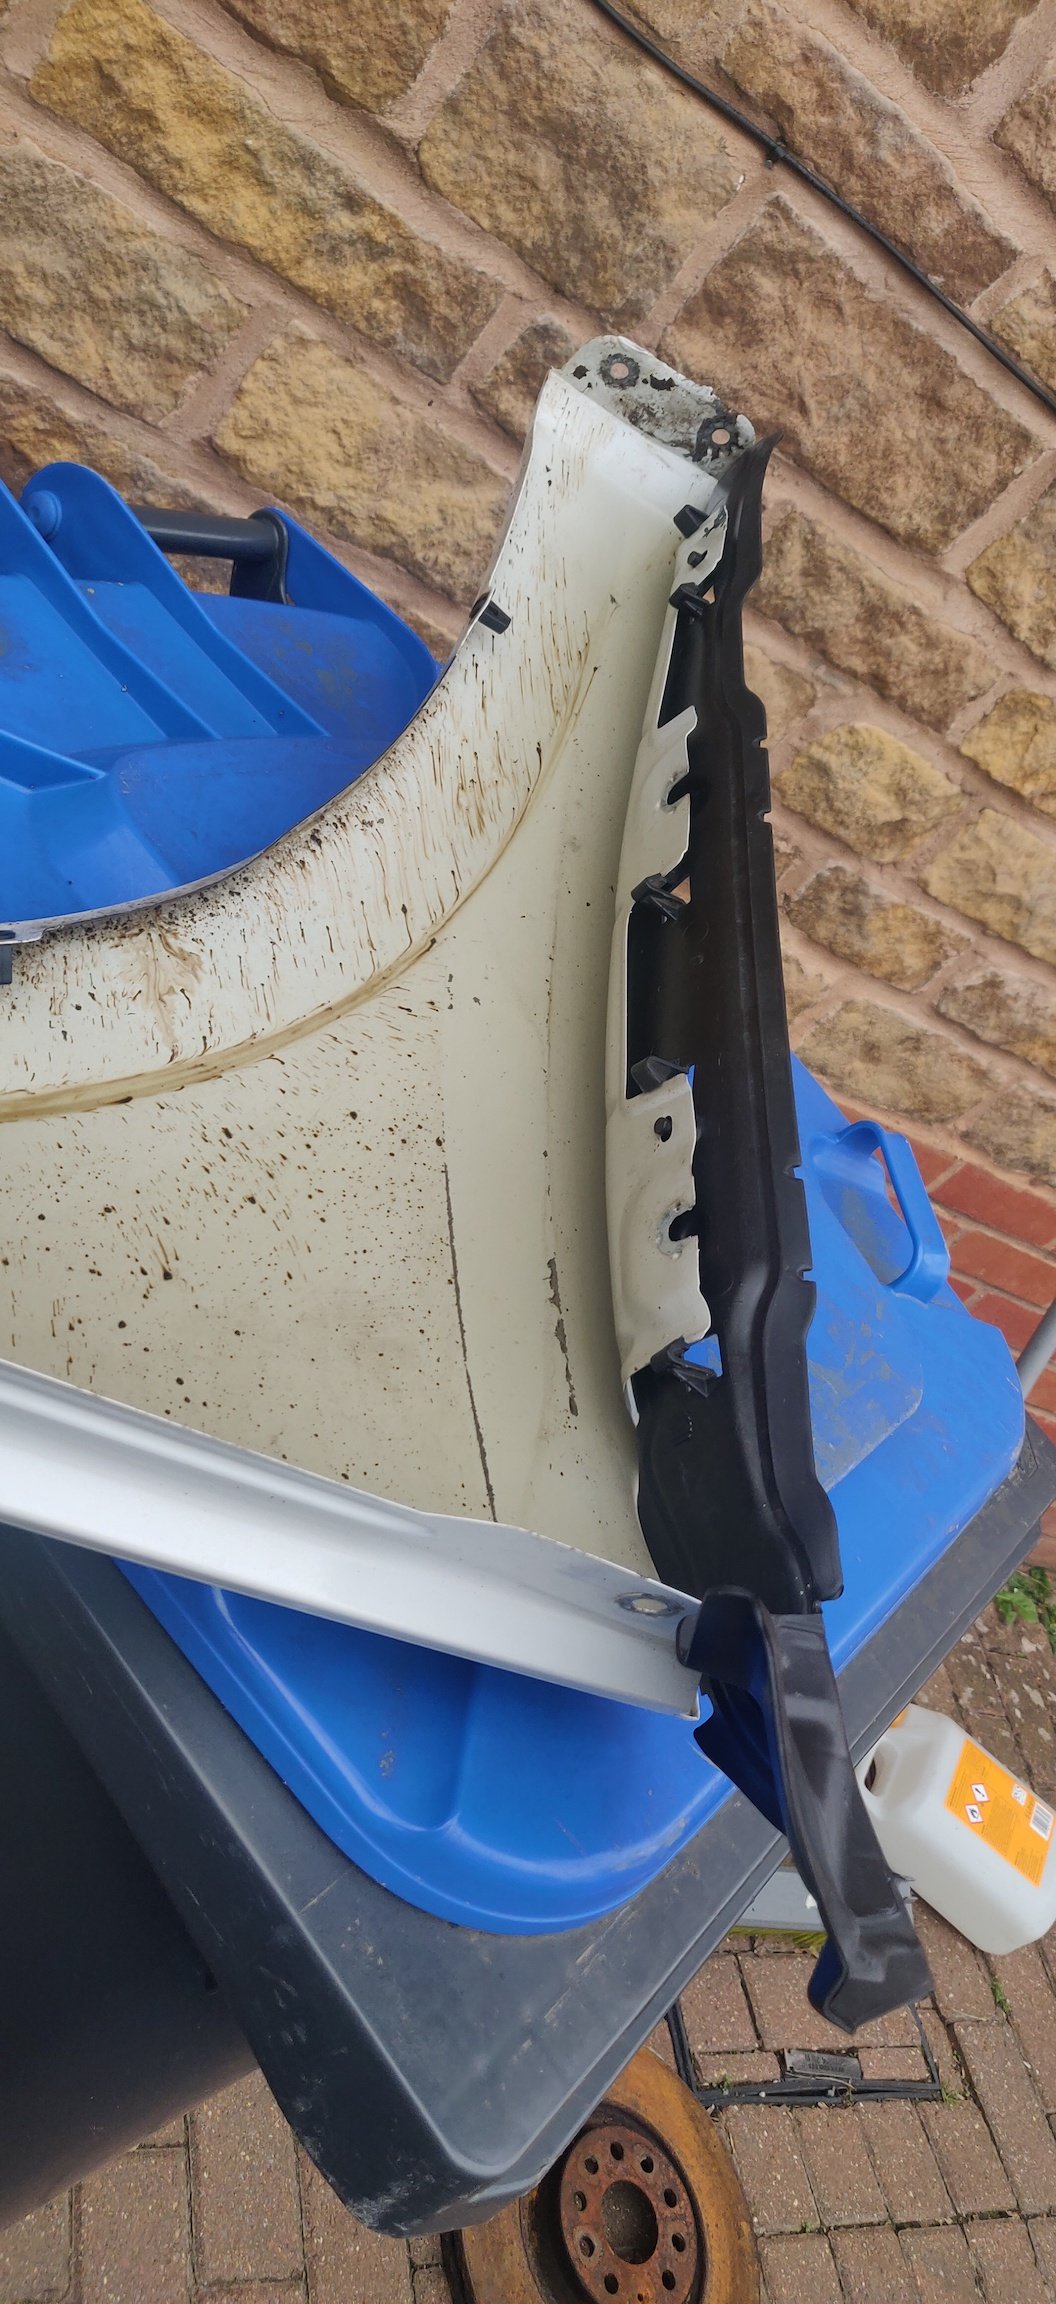
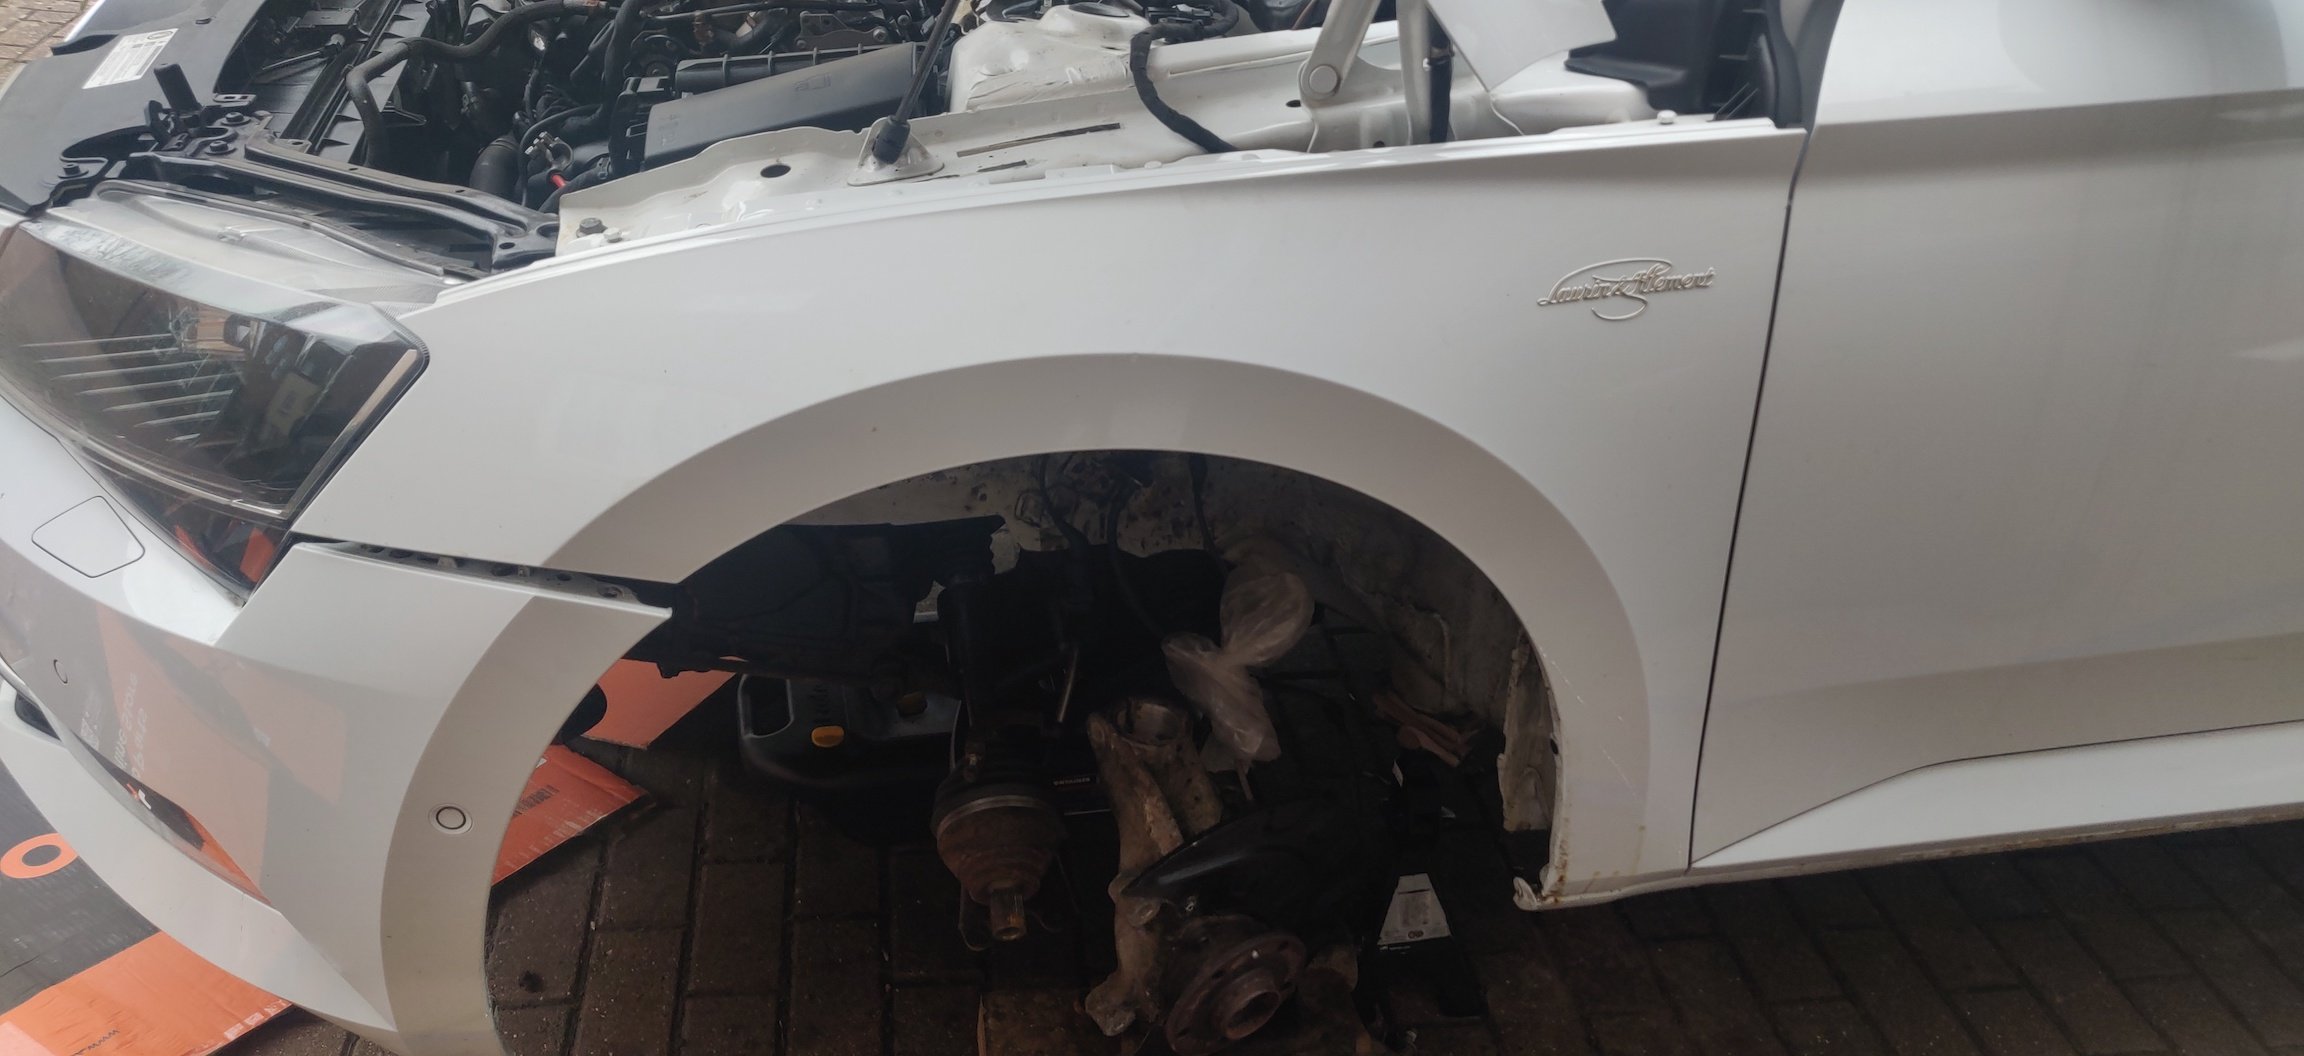
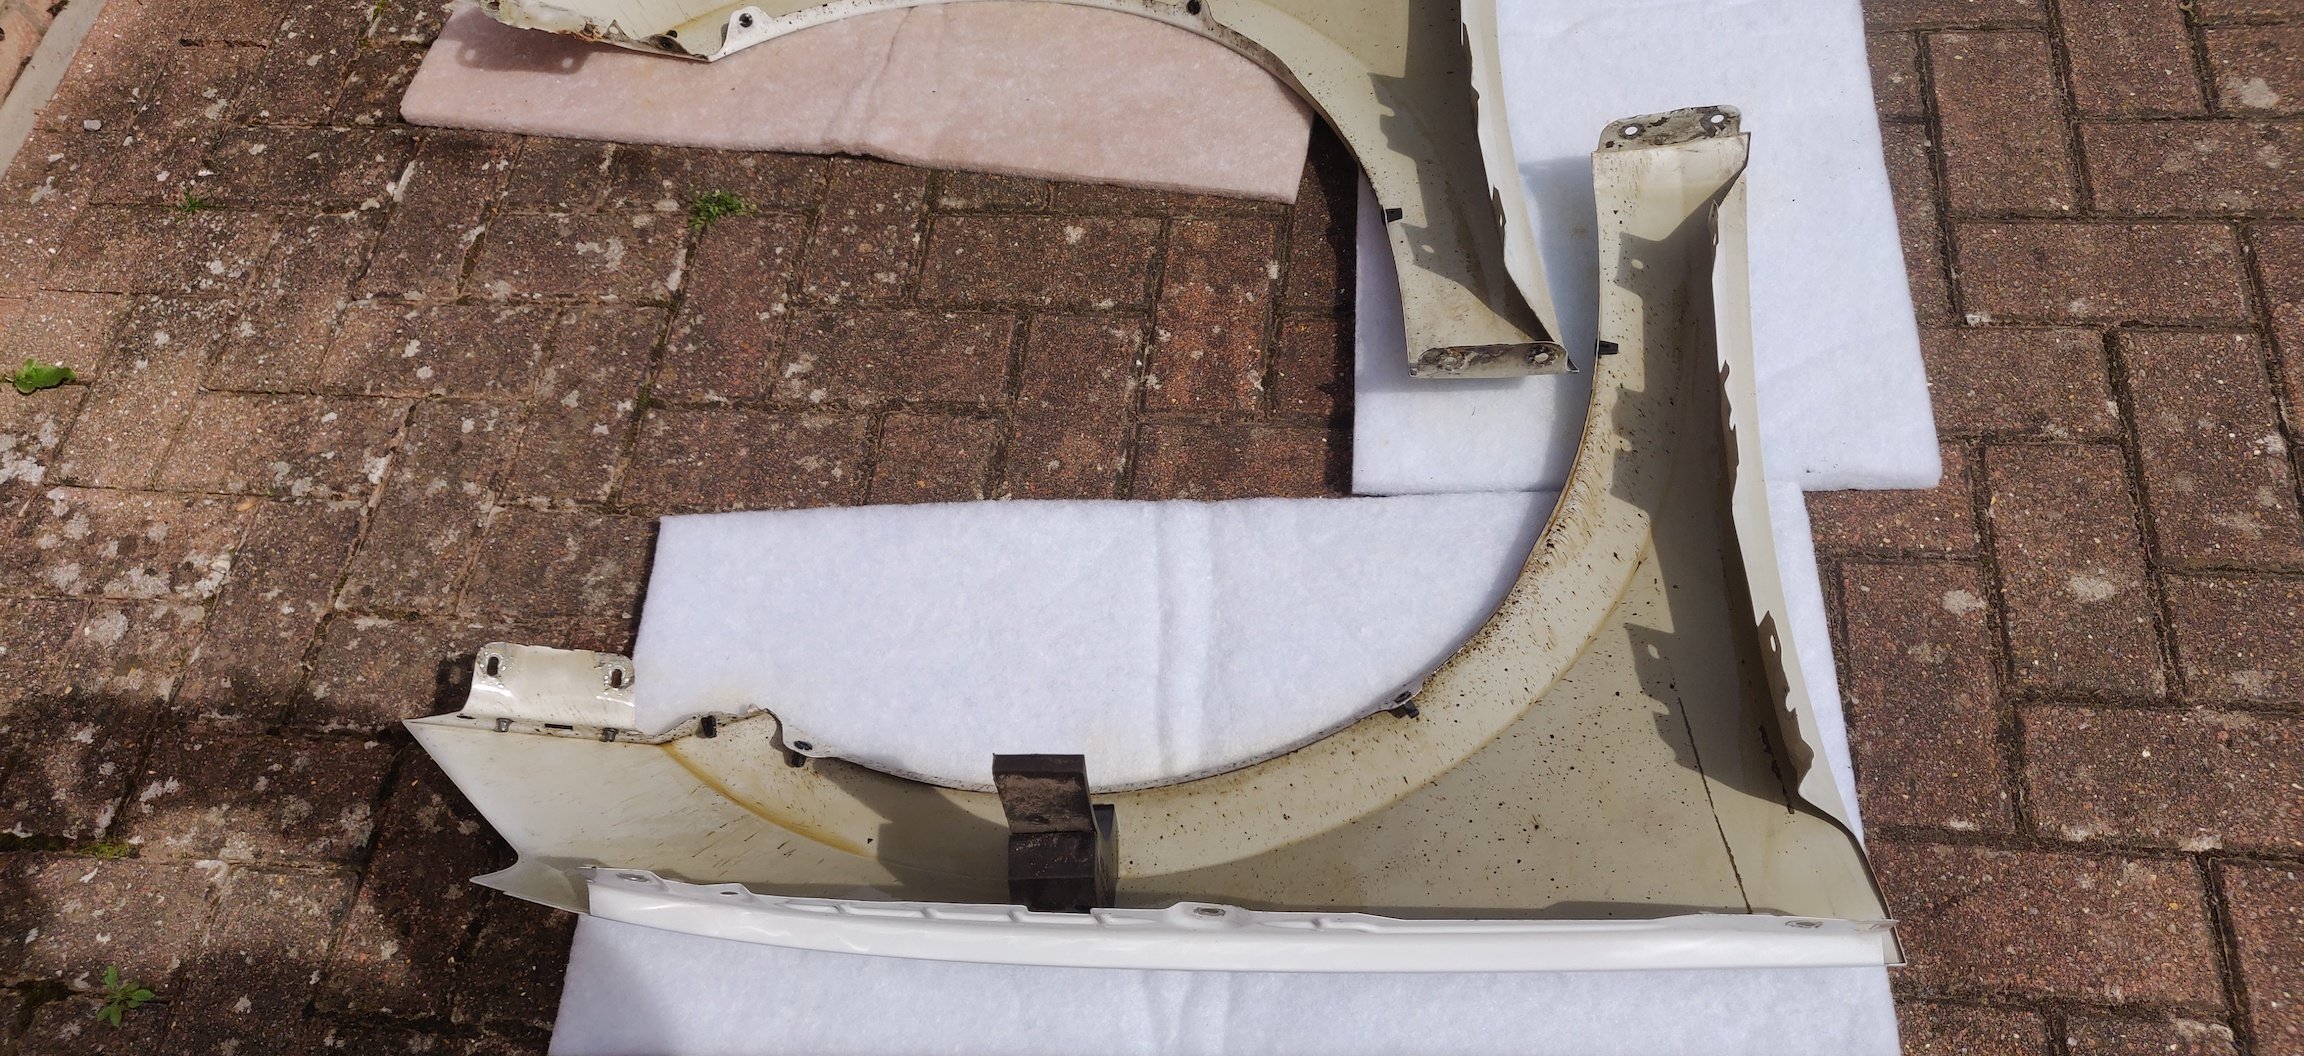
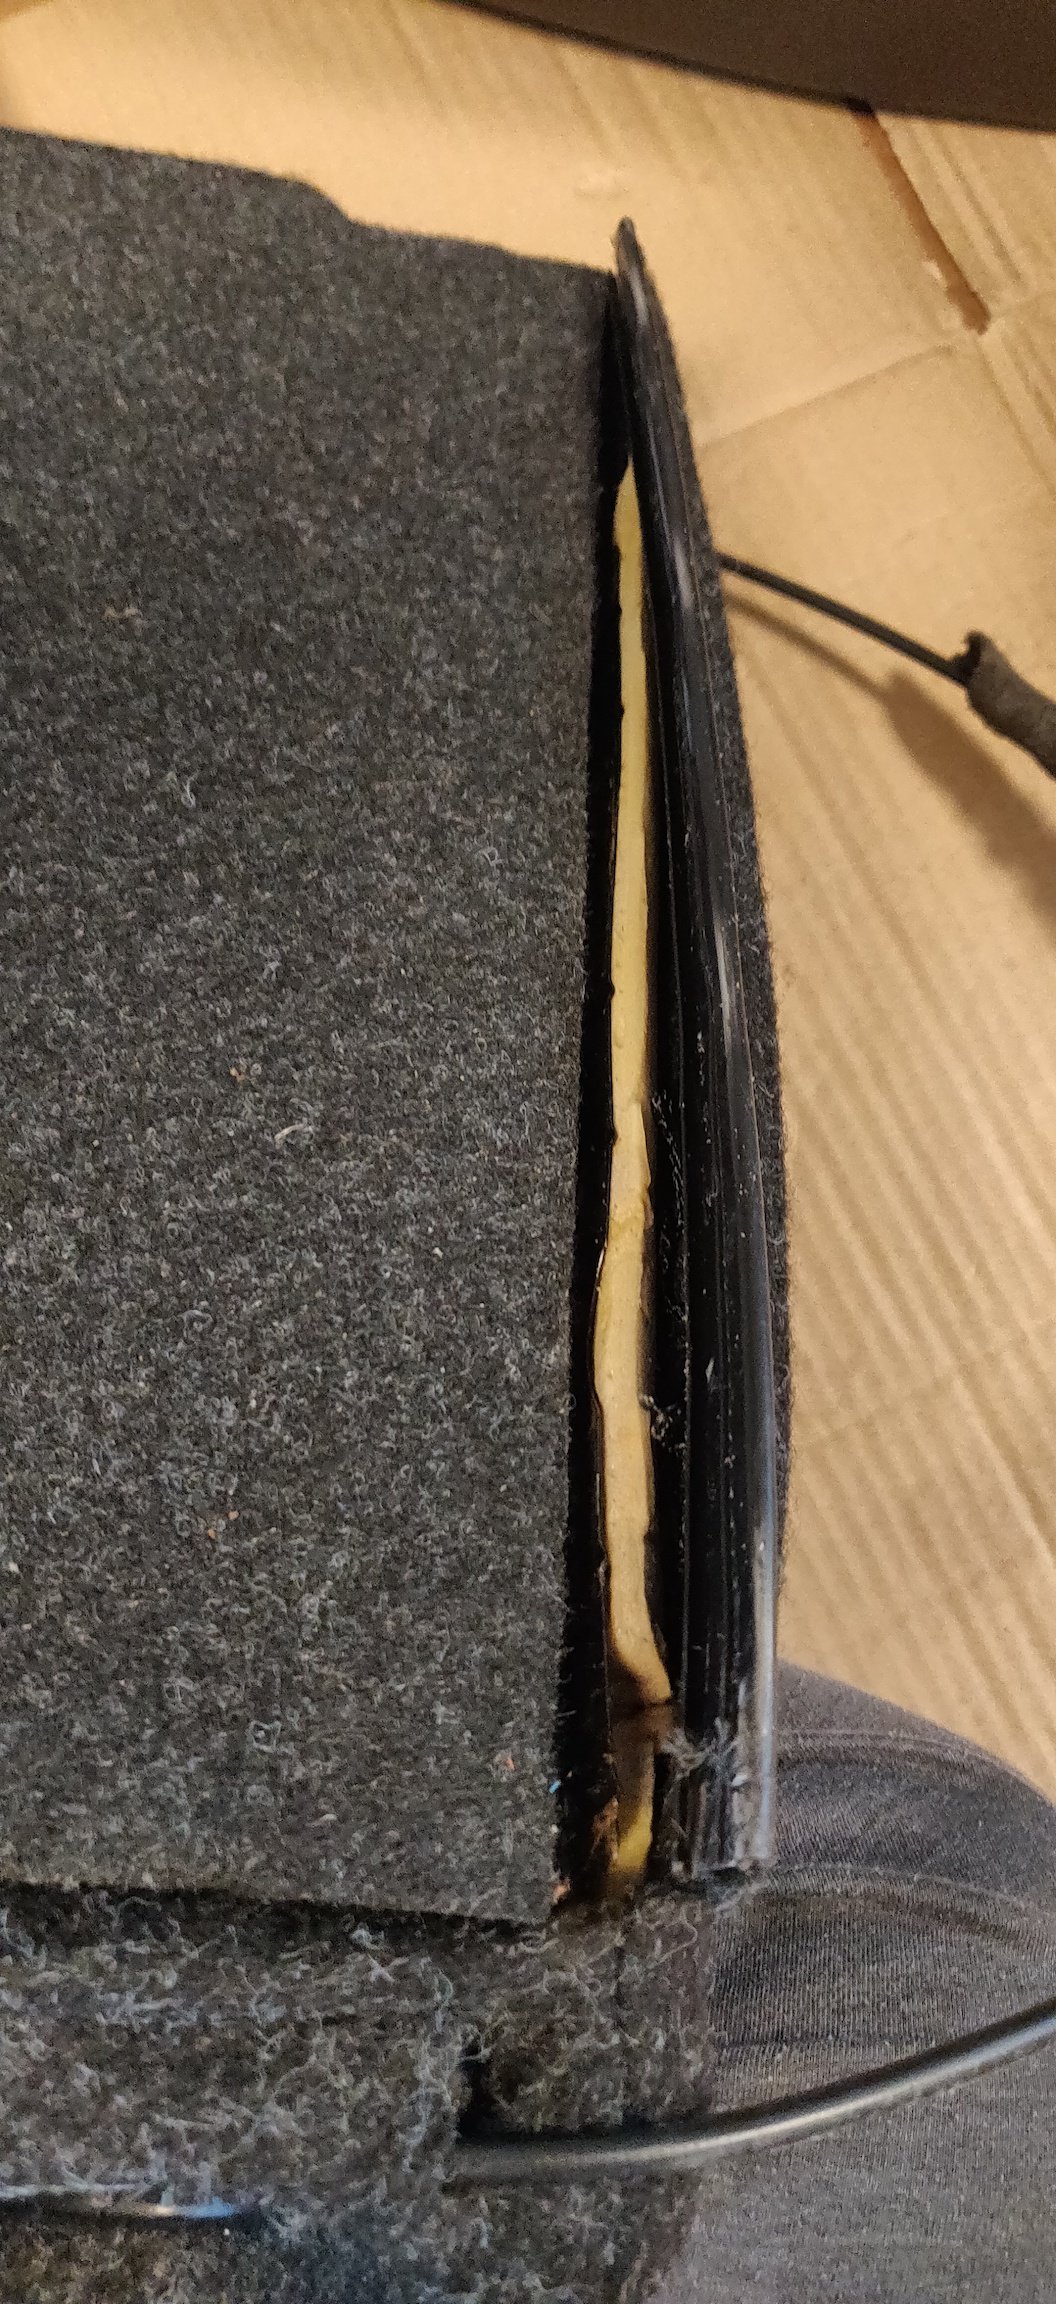
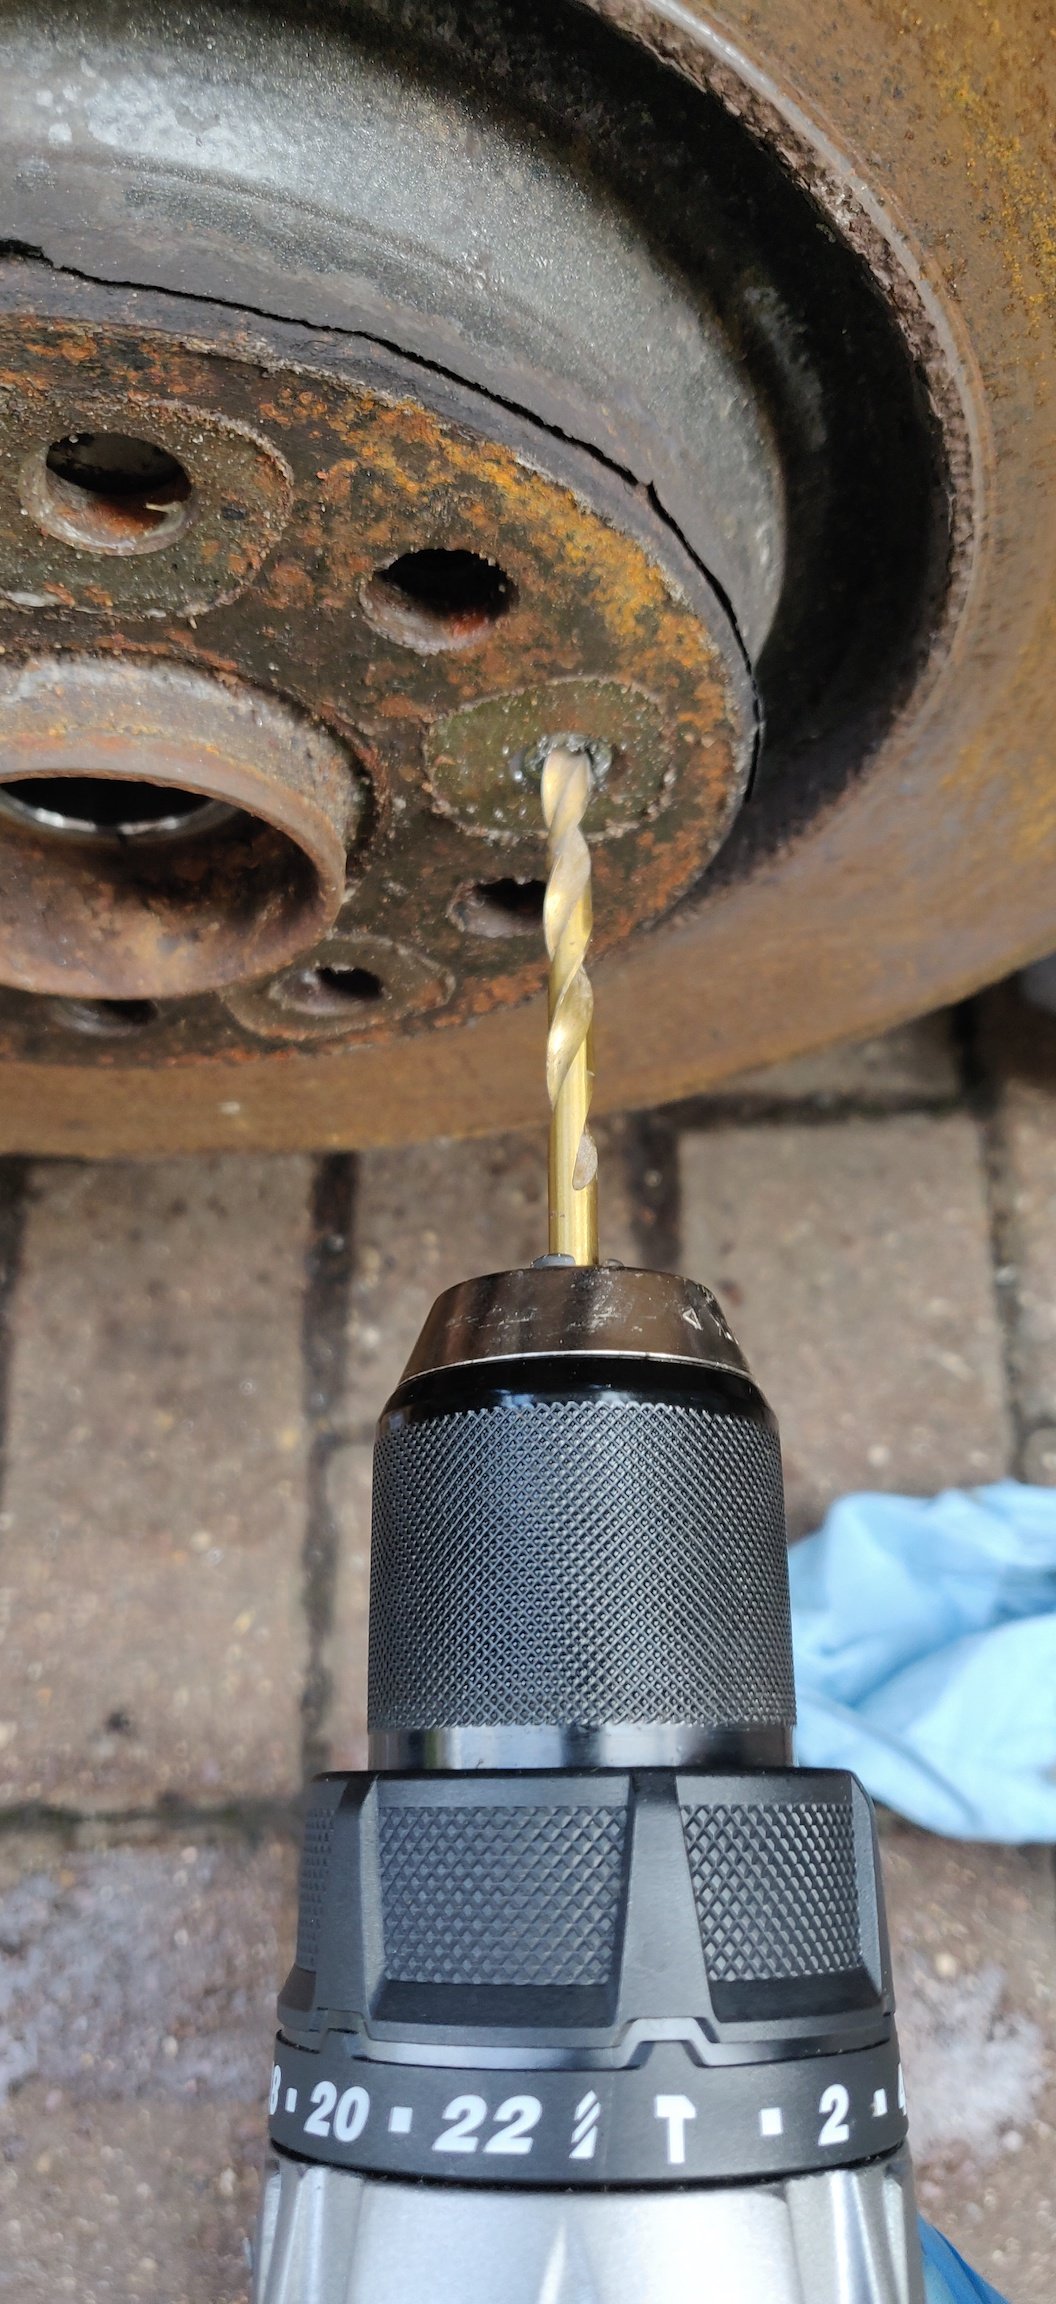
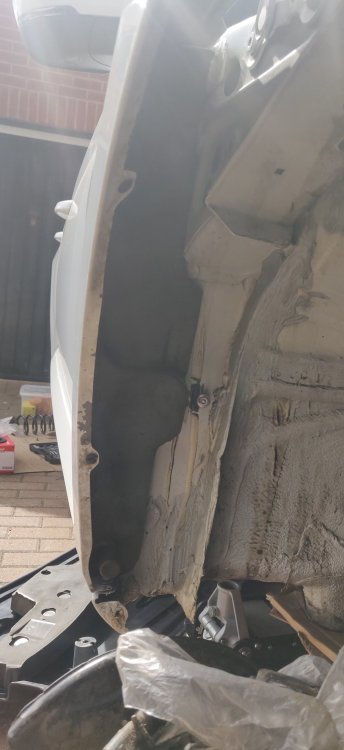
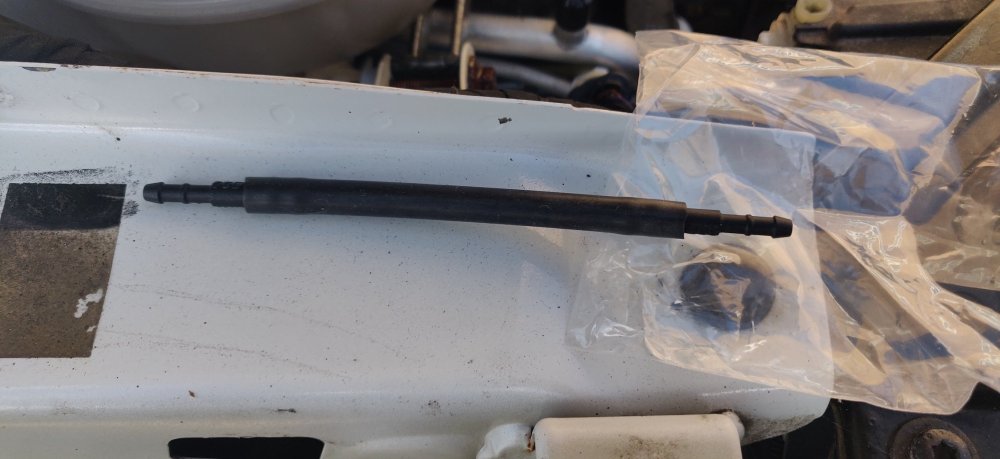
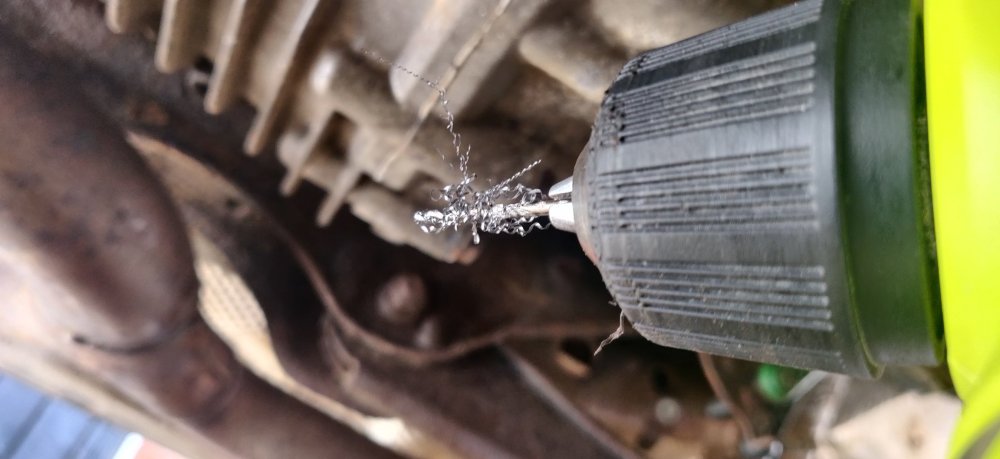
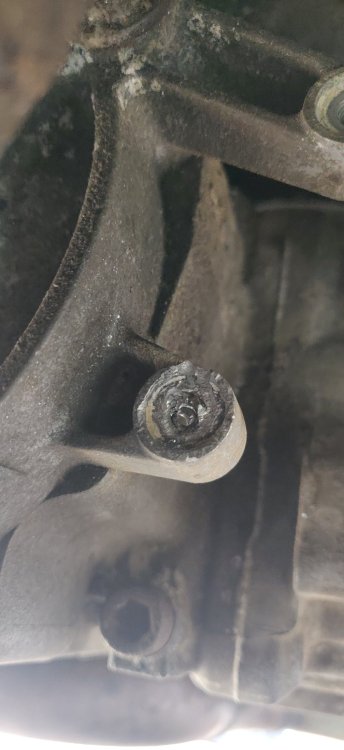
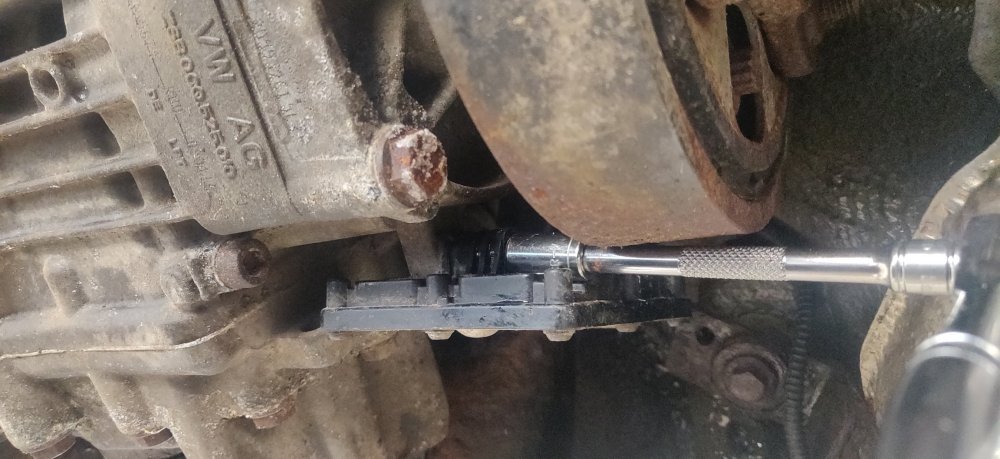
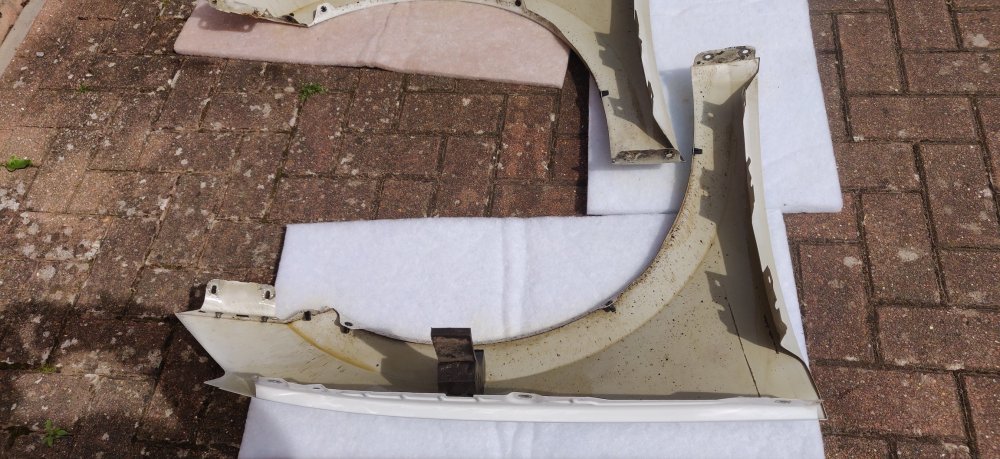
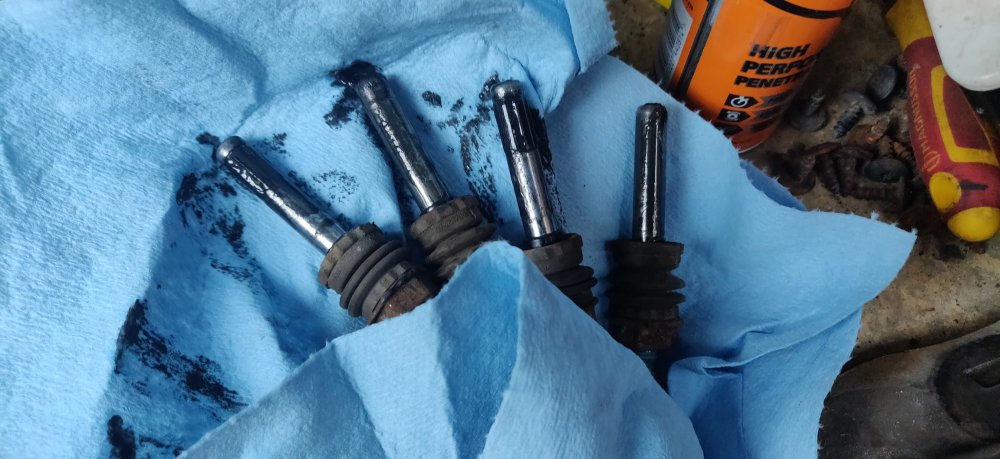
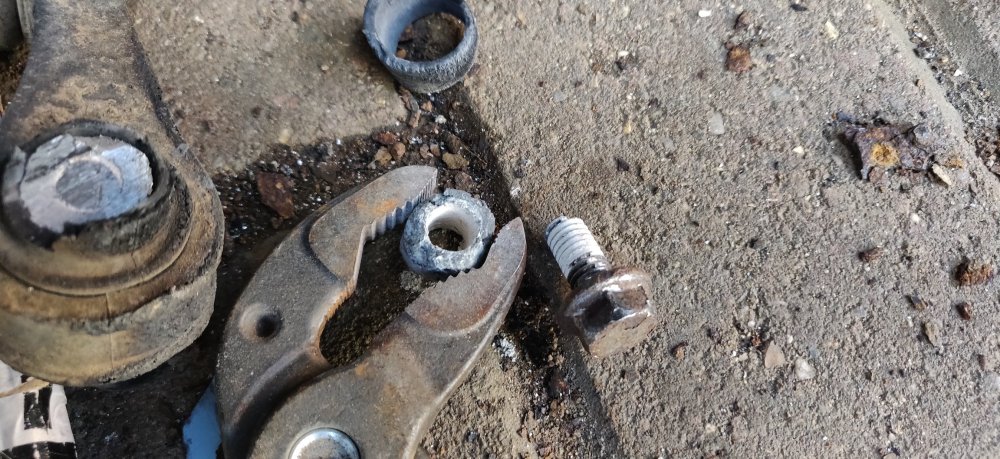
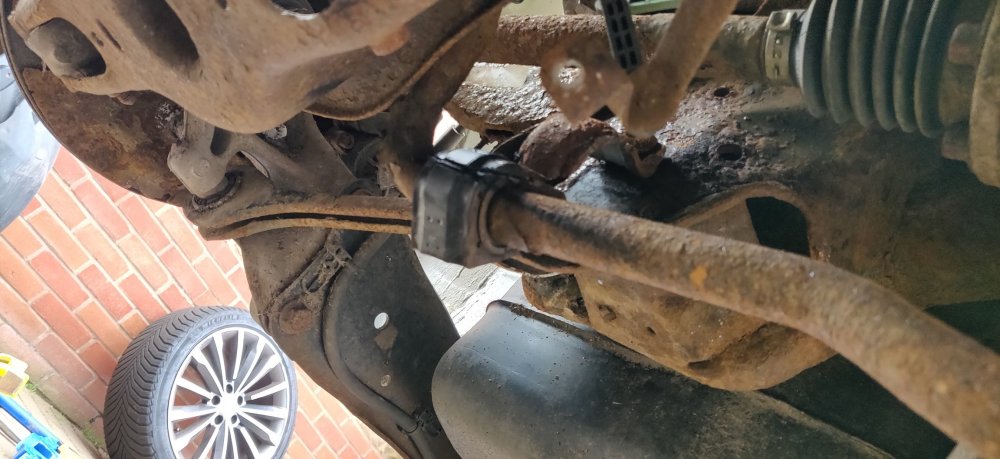
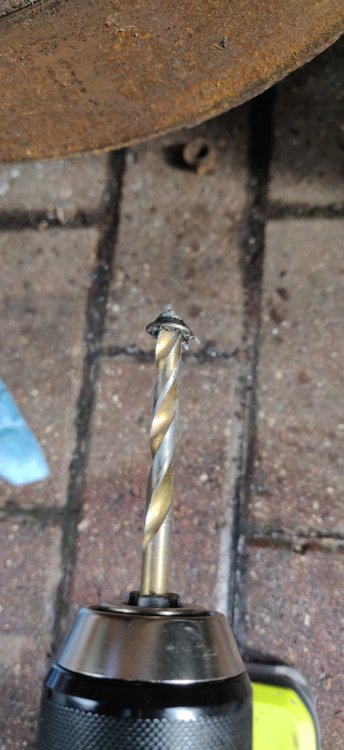
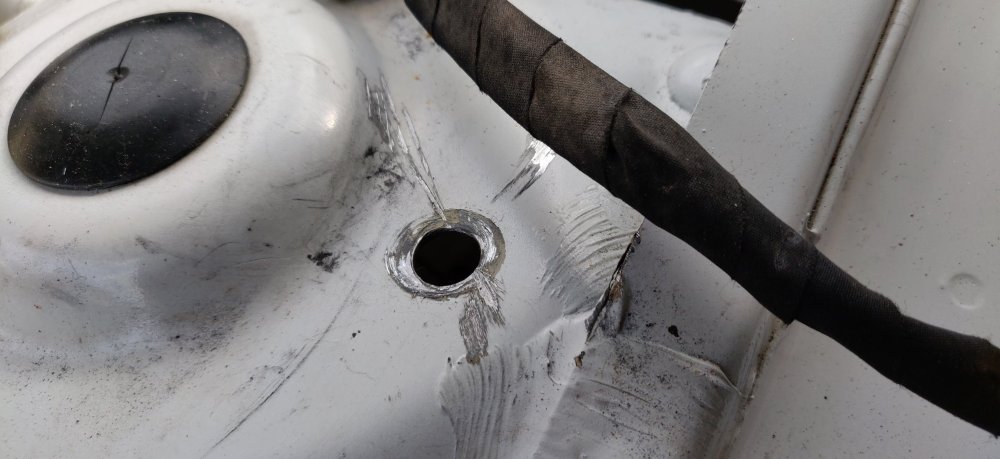
So, for the morning, I stared at the bits and bobs for the car and am reminded of the washer hose. Which meant I had to take the front right wing off again: There it is tucked away there. It wasn't holding in place basically, so meant it was leaking. I got the repair section and cut the repair hose in half: Connecting the two connectors ready to splice into the old connector area: So cut the corrugated pipe with a pair of scissors. No turning back now. The repair connectors have a pair of barbs on the connector, which appear to click into place in the corrugated pipe, so presumably is locked in place at two separate areas: This meant it was probably easier to just cut away at the repair hose instead of the corrugated pipe for any adjustments: I then got whatever looked like closest to self amalgamating tape, so in this case, some electrical tape, for no other reason than to feel better, because I've no idea if this works. I took the connector back into the house: Apologies for the confusing pic, it's taken with it lying on top of a brochure of some sort. Basically, it turns out that the white locking plastic bit was the wrong way around! Once rotated and reinserted, the connector held fast, so that was all basically a waste of time and money, best case scenario. I'll not entertain a worse case scenario where the repair is leaking and so its now worse... Reattached the front wing, and that was enough procrastinating: Time to saddle up and take on that god forsaken bolt for the Haldex controller. I rummaged my right angled, tighter access drill. Yes, I keep getting Ryobi stuff. So then it was a case of slowly getting at the remains of the bolt: It wasn't possible to get it straight on, and I didn't want to entertain removing the propshaft coupling for just a stupid M6 bolt, so when taking things at an angle, need to take it slow and steady. Anytime I got impatient, a bit snapped, pretty much. Eventually got a start on it: Once I went from 1.5mm to 2.5mm things started to take apace: Lots of bits flying into my face, so remember safety glasses! I basically continued and continued: Then with some wiggling of the bit and then further increases in size: Continued attacking: \ Saw some light. Now normally when I take these extreme measures, the heat and the fact that the bolt barely exists usually means the remains are easily extracted. Of course, with this car, that was not the case, and the remains are almost fused into one, can't see where the steel or aluminium is. So at this point I gave up: Many bits died for this, so its annoying that I have to leave it. Basically, I'll bolt up the top as normal, and probably just have to make do with a cable tie bodge for the bottom, as it at least goes through. I guess technically, a proper repair would be to drill that bit all out and helicoil something in. But to get that sort of access to do so, would mean the entire clutch housing would need taken out, or the propshaft coupling removing, and that amount of work is probably telling me I may as well replace the entire clutch...let's see where we are in a few years time! Anyways, in an attempt to cheer myself up, went to see if I could tackle those balljoints: Got my ball joint tool which has done the job from Clios to Elises, so surely should be sufficient here? With only the track rod end keeping the hub attached, rotated it to get access to the balljoint, and attached the nut a few turns: Unfortunately though, the tool didn't work. It looks like the ball joint is a little too wide for the tool to get decent purchase onto, and where normally some gentle hammer taps help get the tool in place when needed, the hub wasn't anchored to anything, so the hammering didn't help. Exasperated, I just got a claw hammer, and just gave the balljoint hell: Which resulted in it popping away, and undoing the nut and falling out. Anticlimactic. Definitely DO NOT do this if you intend to reuse the balljoints, as this is a one way destructive approach, mangled threads, nuts, the works. Same applied on the other side: So a sort of victory I suppose. This whole endeavour thus far has taken 3 hours, seriously, 2 and a half hours was on that bolt. Getting hungry, but decided to go and get the pressure washer on the wheel arches: This was mainly because there's technically nothing stopping the wheel arches from being reattached to the car (aside from replacing some clips I suppose). The rear arches are a nightmare, took an hour to do the pair, and they still bits of grass and mud on them! If anyone knows if someone has created plastic versions of these wheelarches, I'd be interested. I'm happy to sacrifice road noise for reduced rubbish and dirt/salt/moisture traps. I still have loads of SilentCoat stuff which would probably do a better job alongside plastic wheel arches. Anyways, leaving these to dry whilst having lunch and a break. Maintenance: £2004.02 Upgrades: £1158.66 Miscellaneous: £659.06


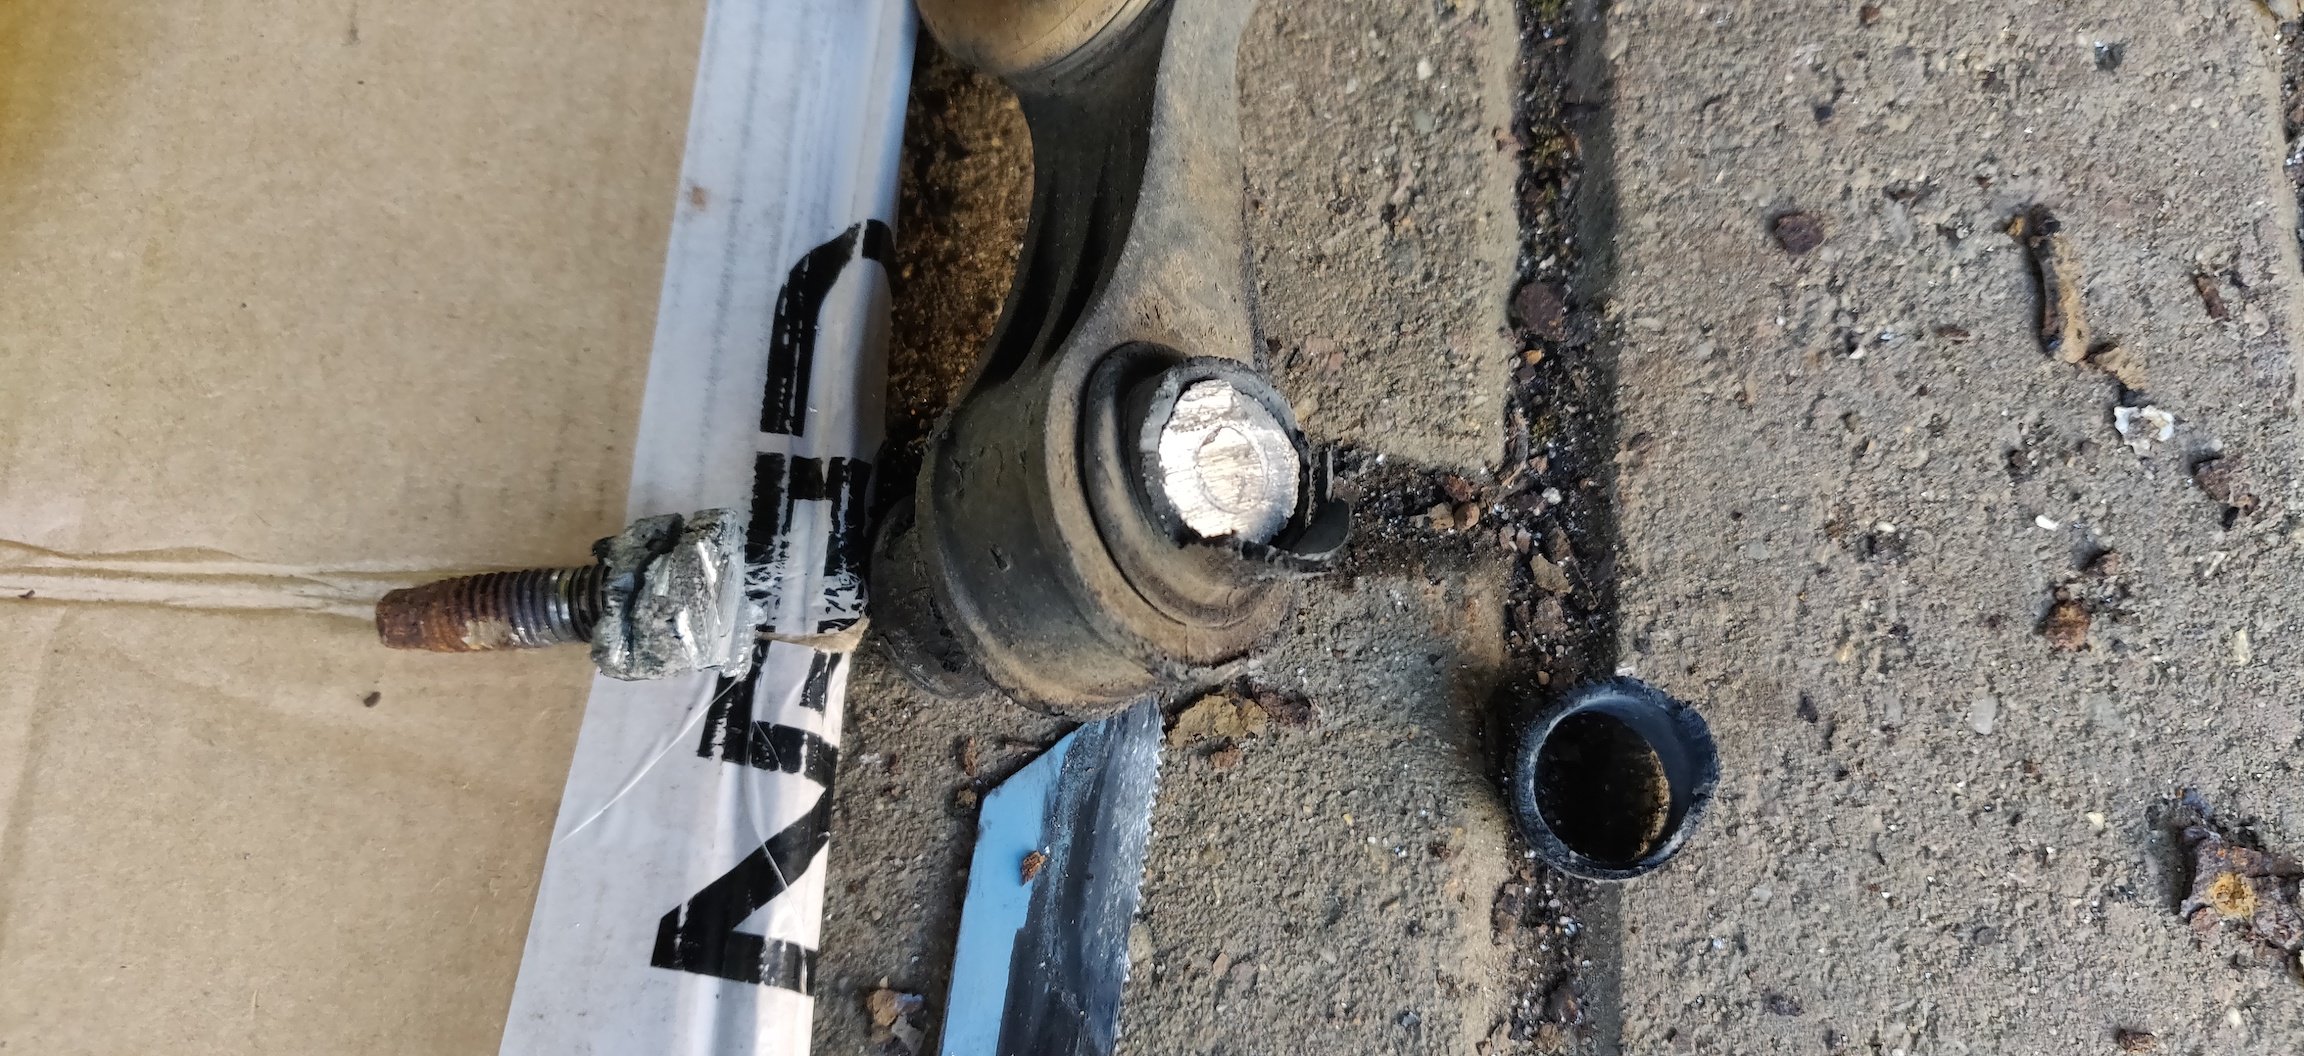
-
Yeah, I am genuinely amazed at how this car almost knows how best to annoy me! You're probably right regarding one job at a time, but as the last few posts have probably implied, there's pretty much not a master plan at all, difficult to plan if a simple bolt decides to ruin my day after all. I do have a paint pen for marking some bits when tightened, which I may use, however, I'm finding that this diary is probably going to do a good job keeping me on the straight and narrow. As long as I quote torque specs for bolts, it hopefully implies I've done them! You're right, I'm hoping over the next few years depending on whether the car is a keeper, I'll at least know a decent chunk of the components underside should be straightforward to remove.
-
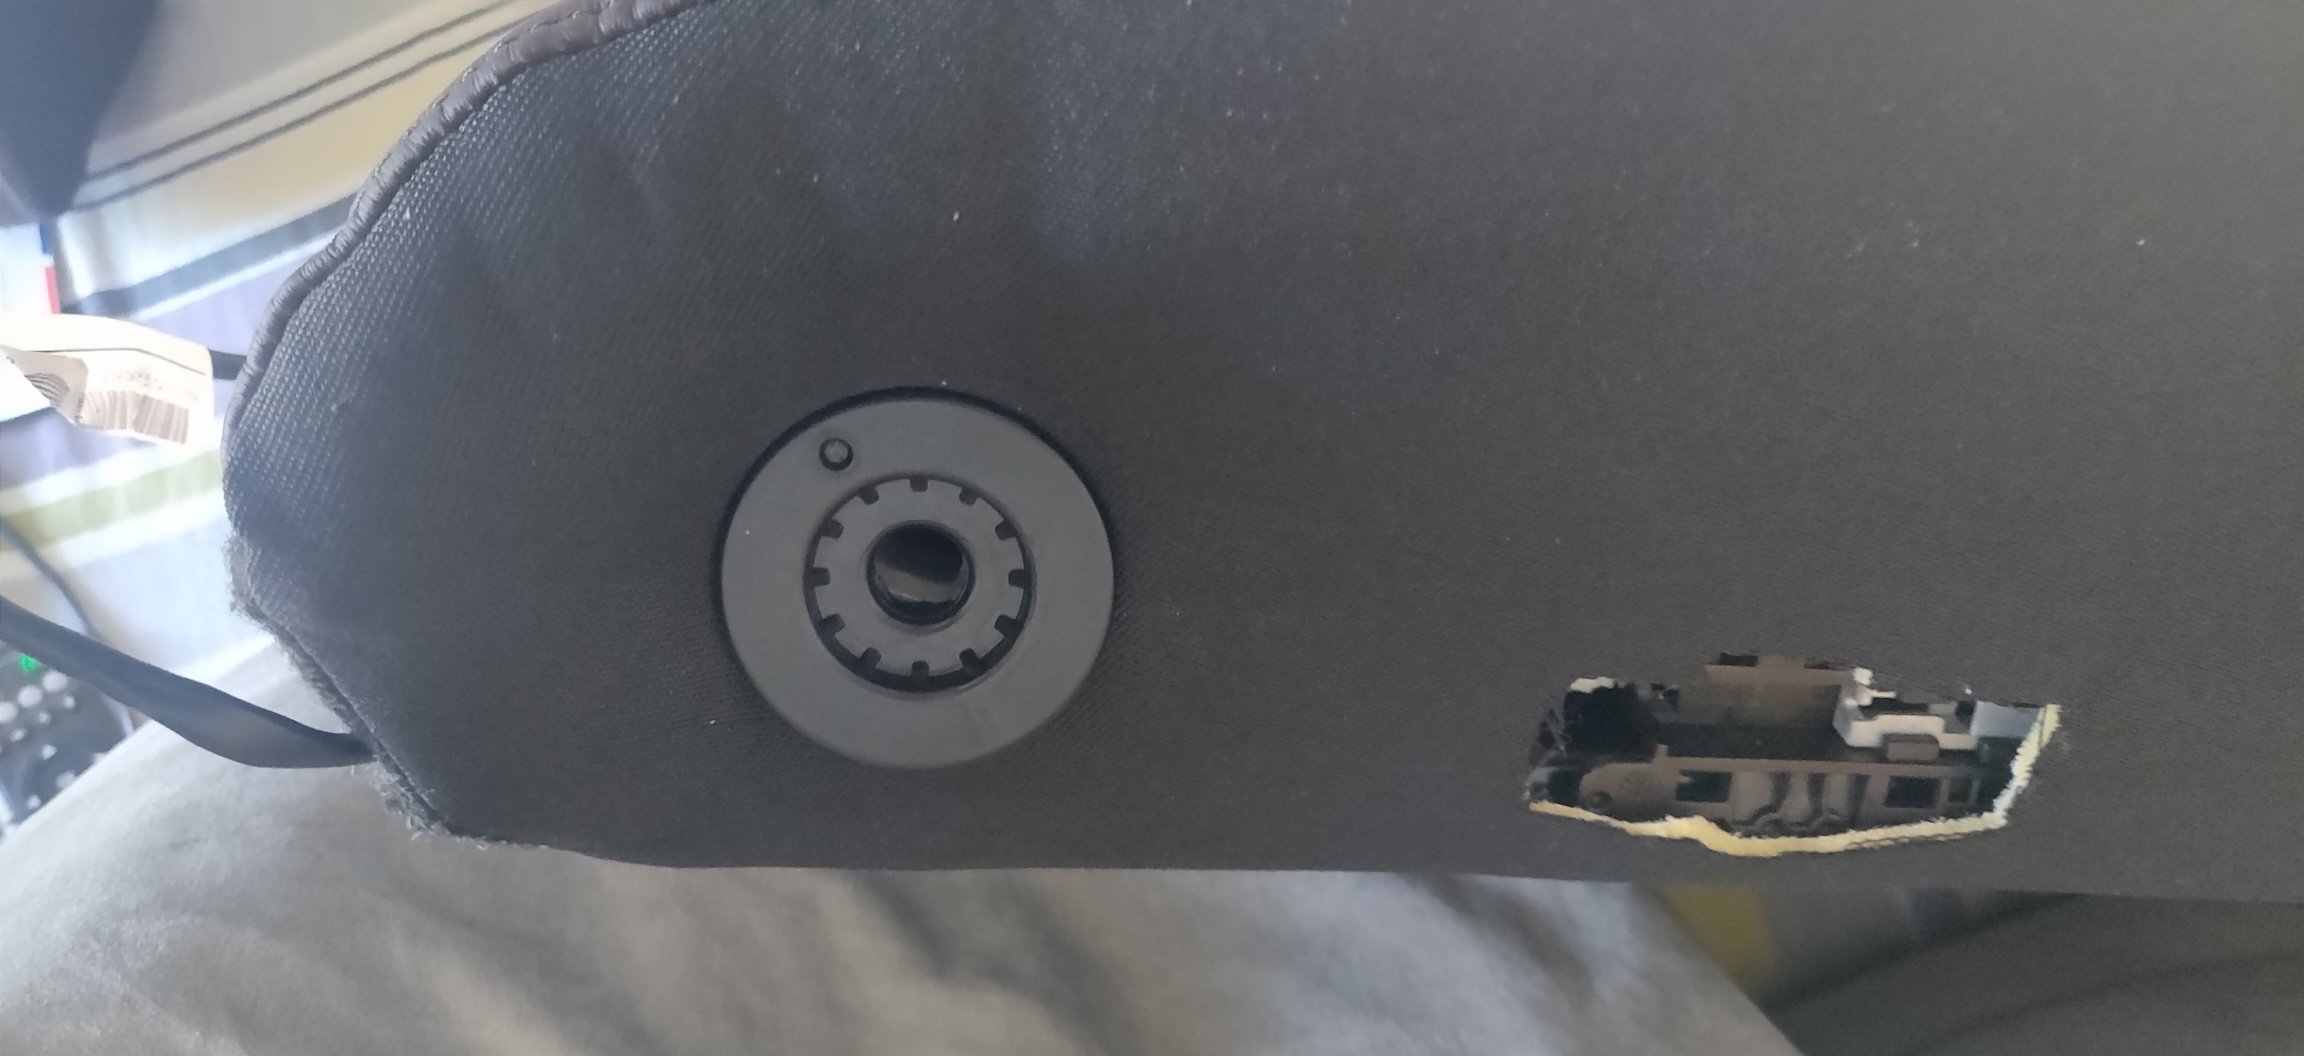
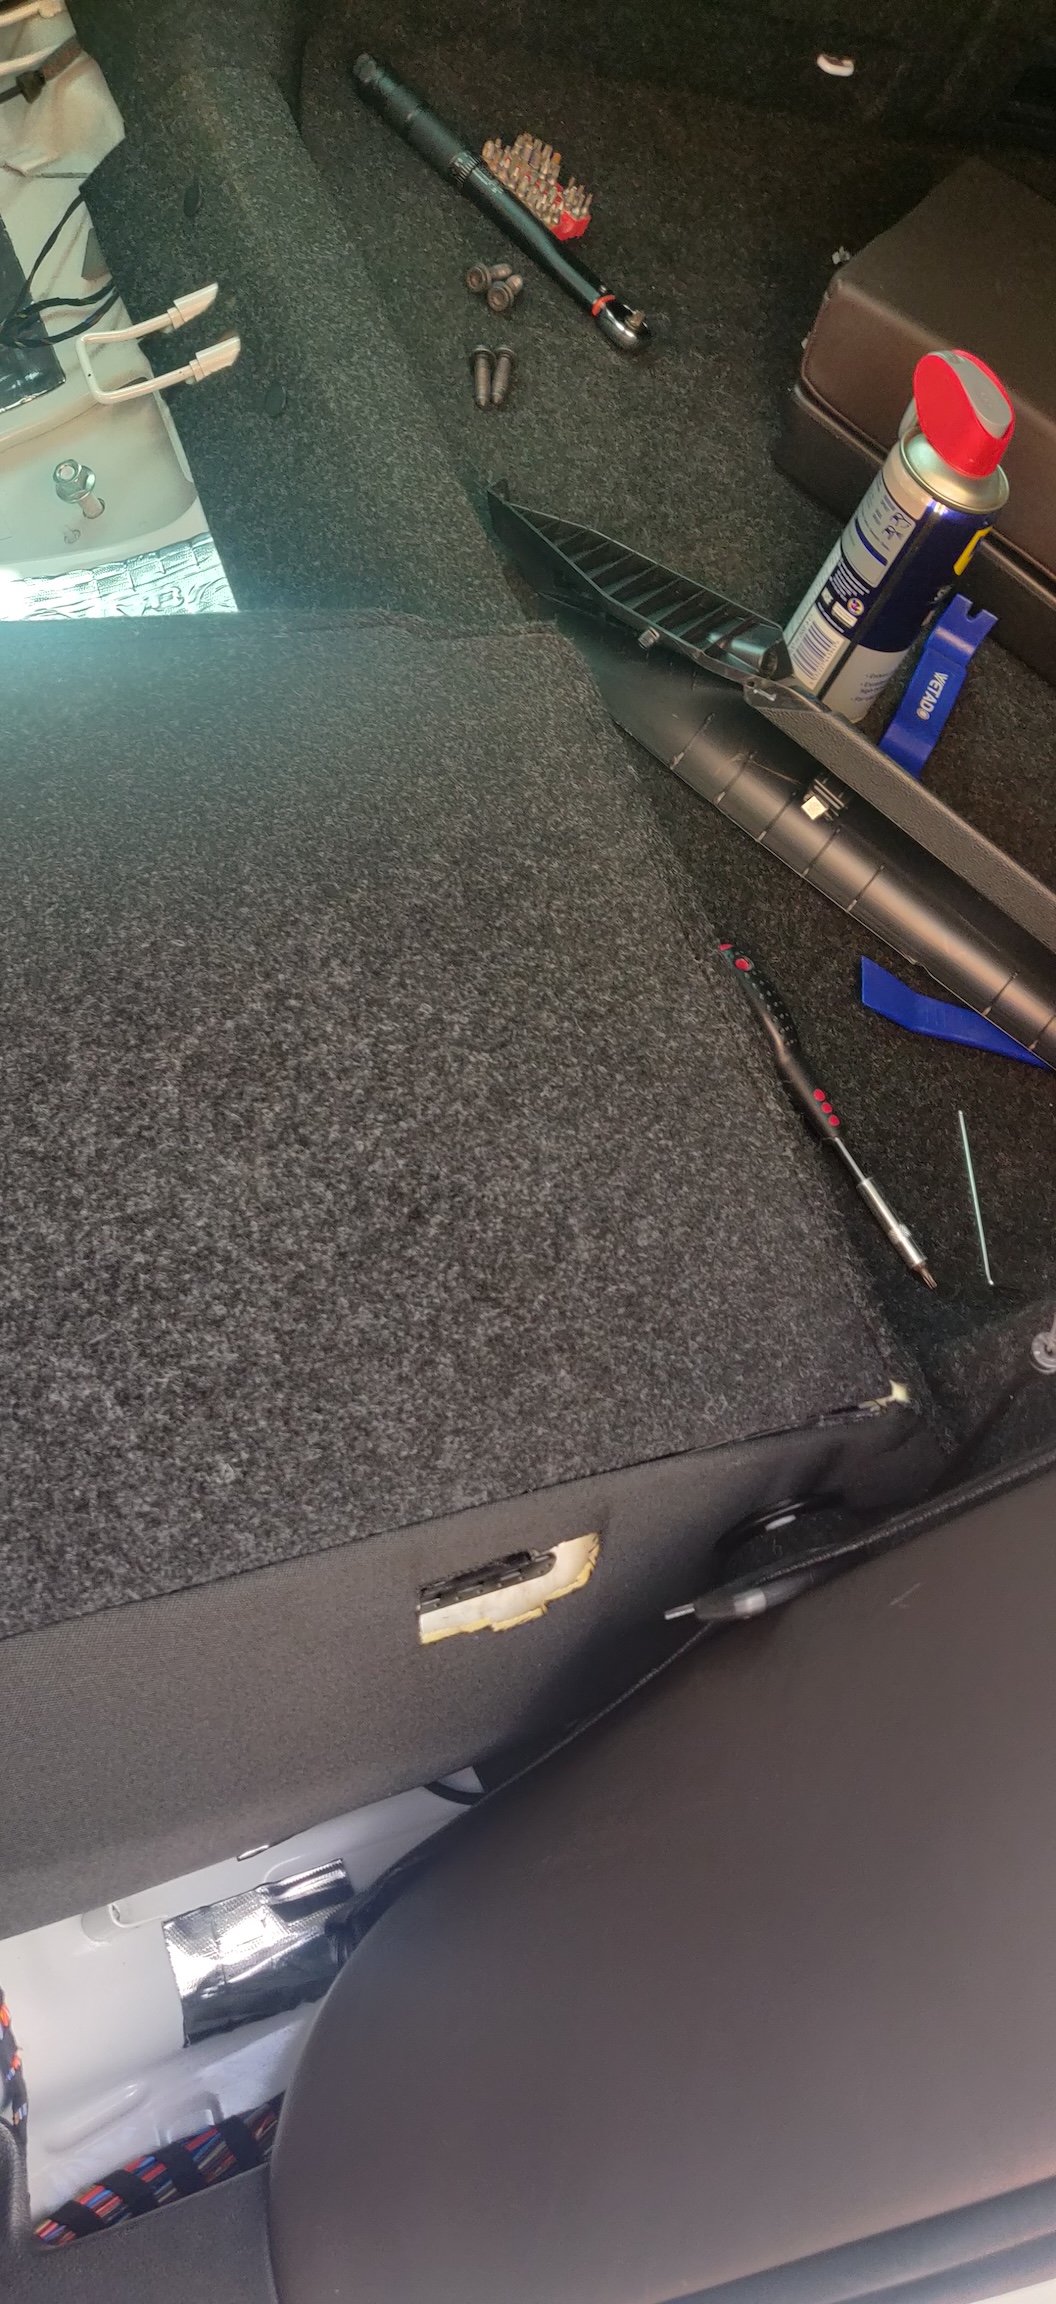
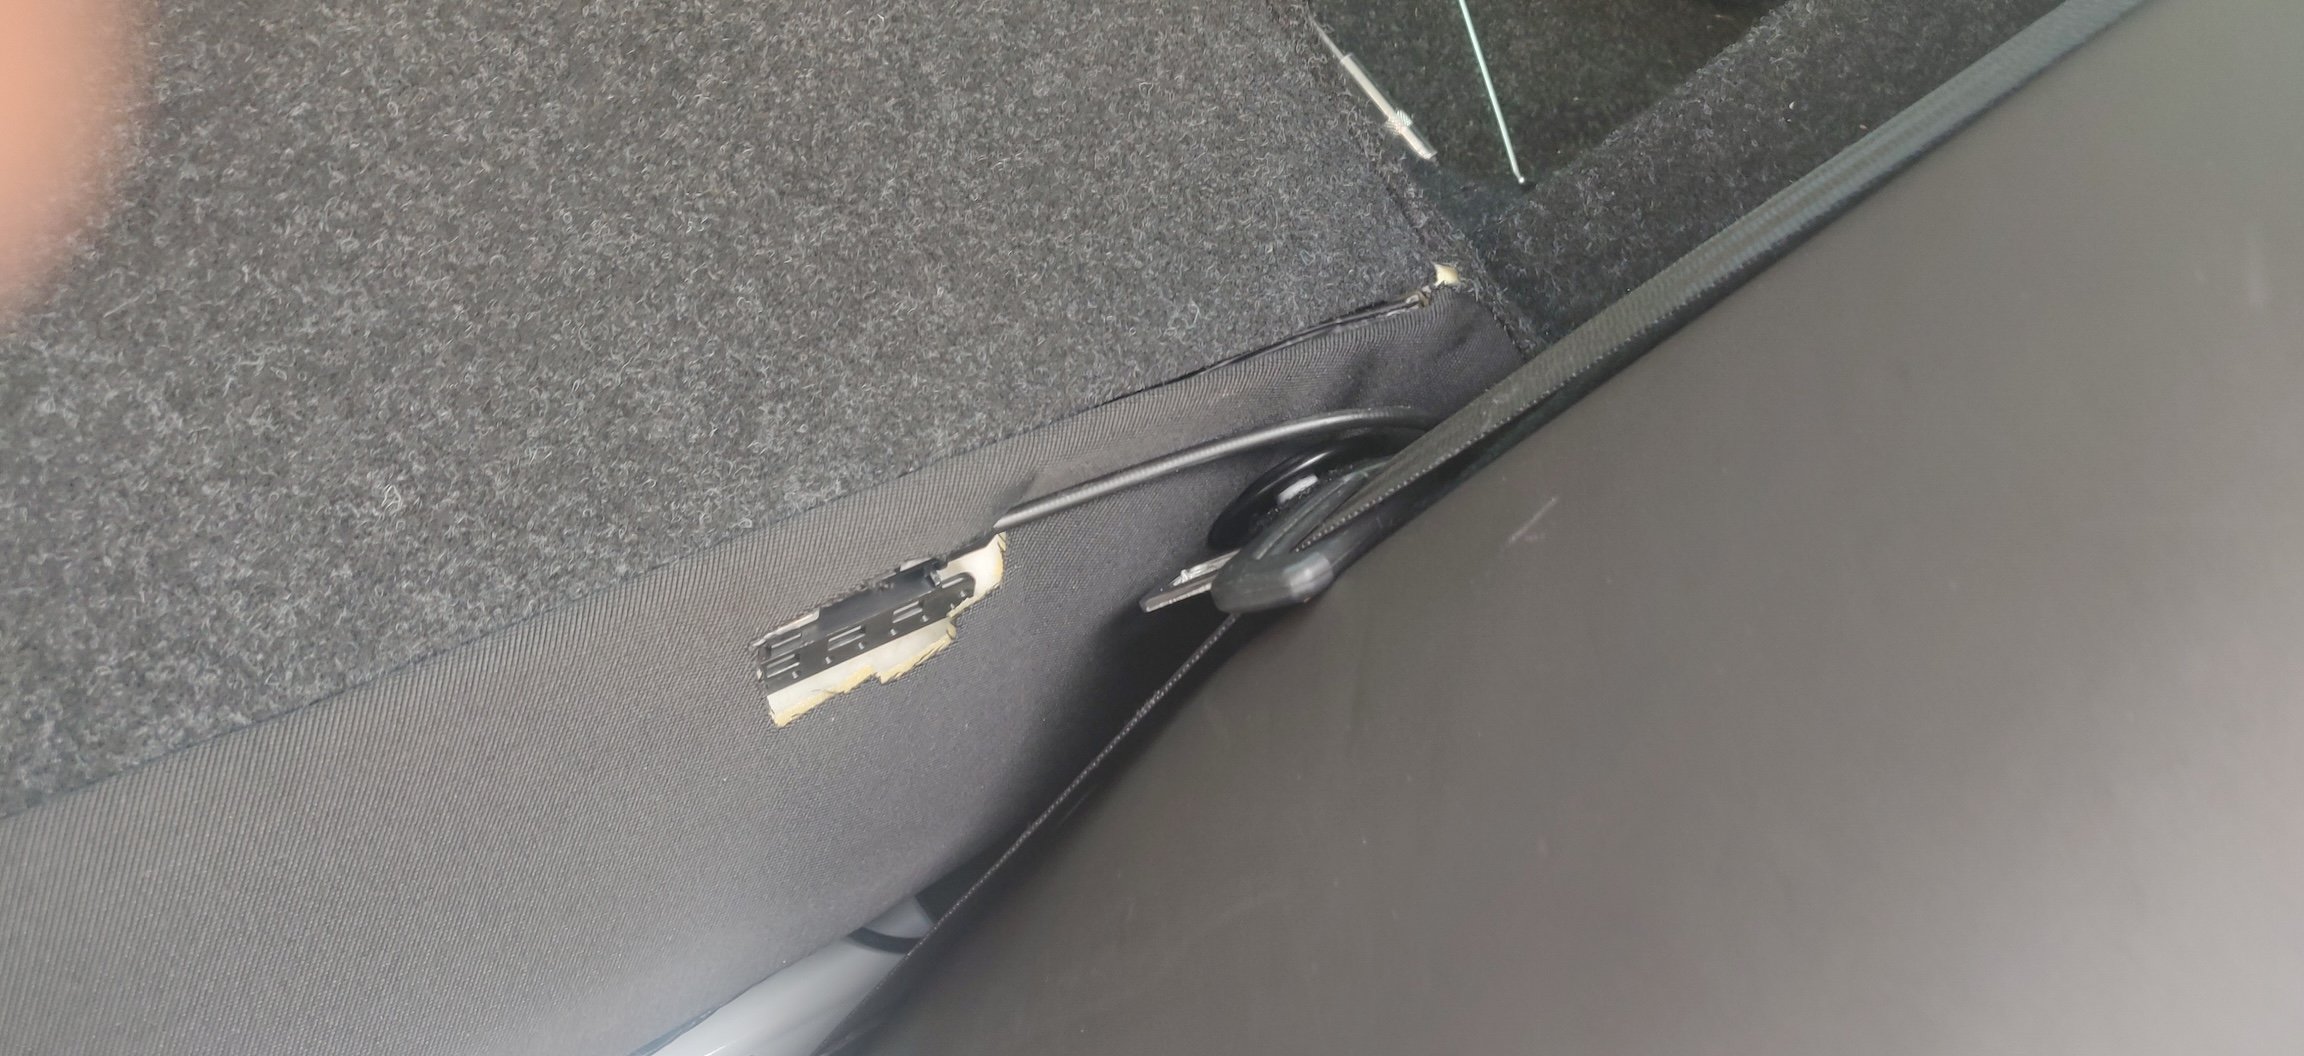
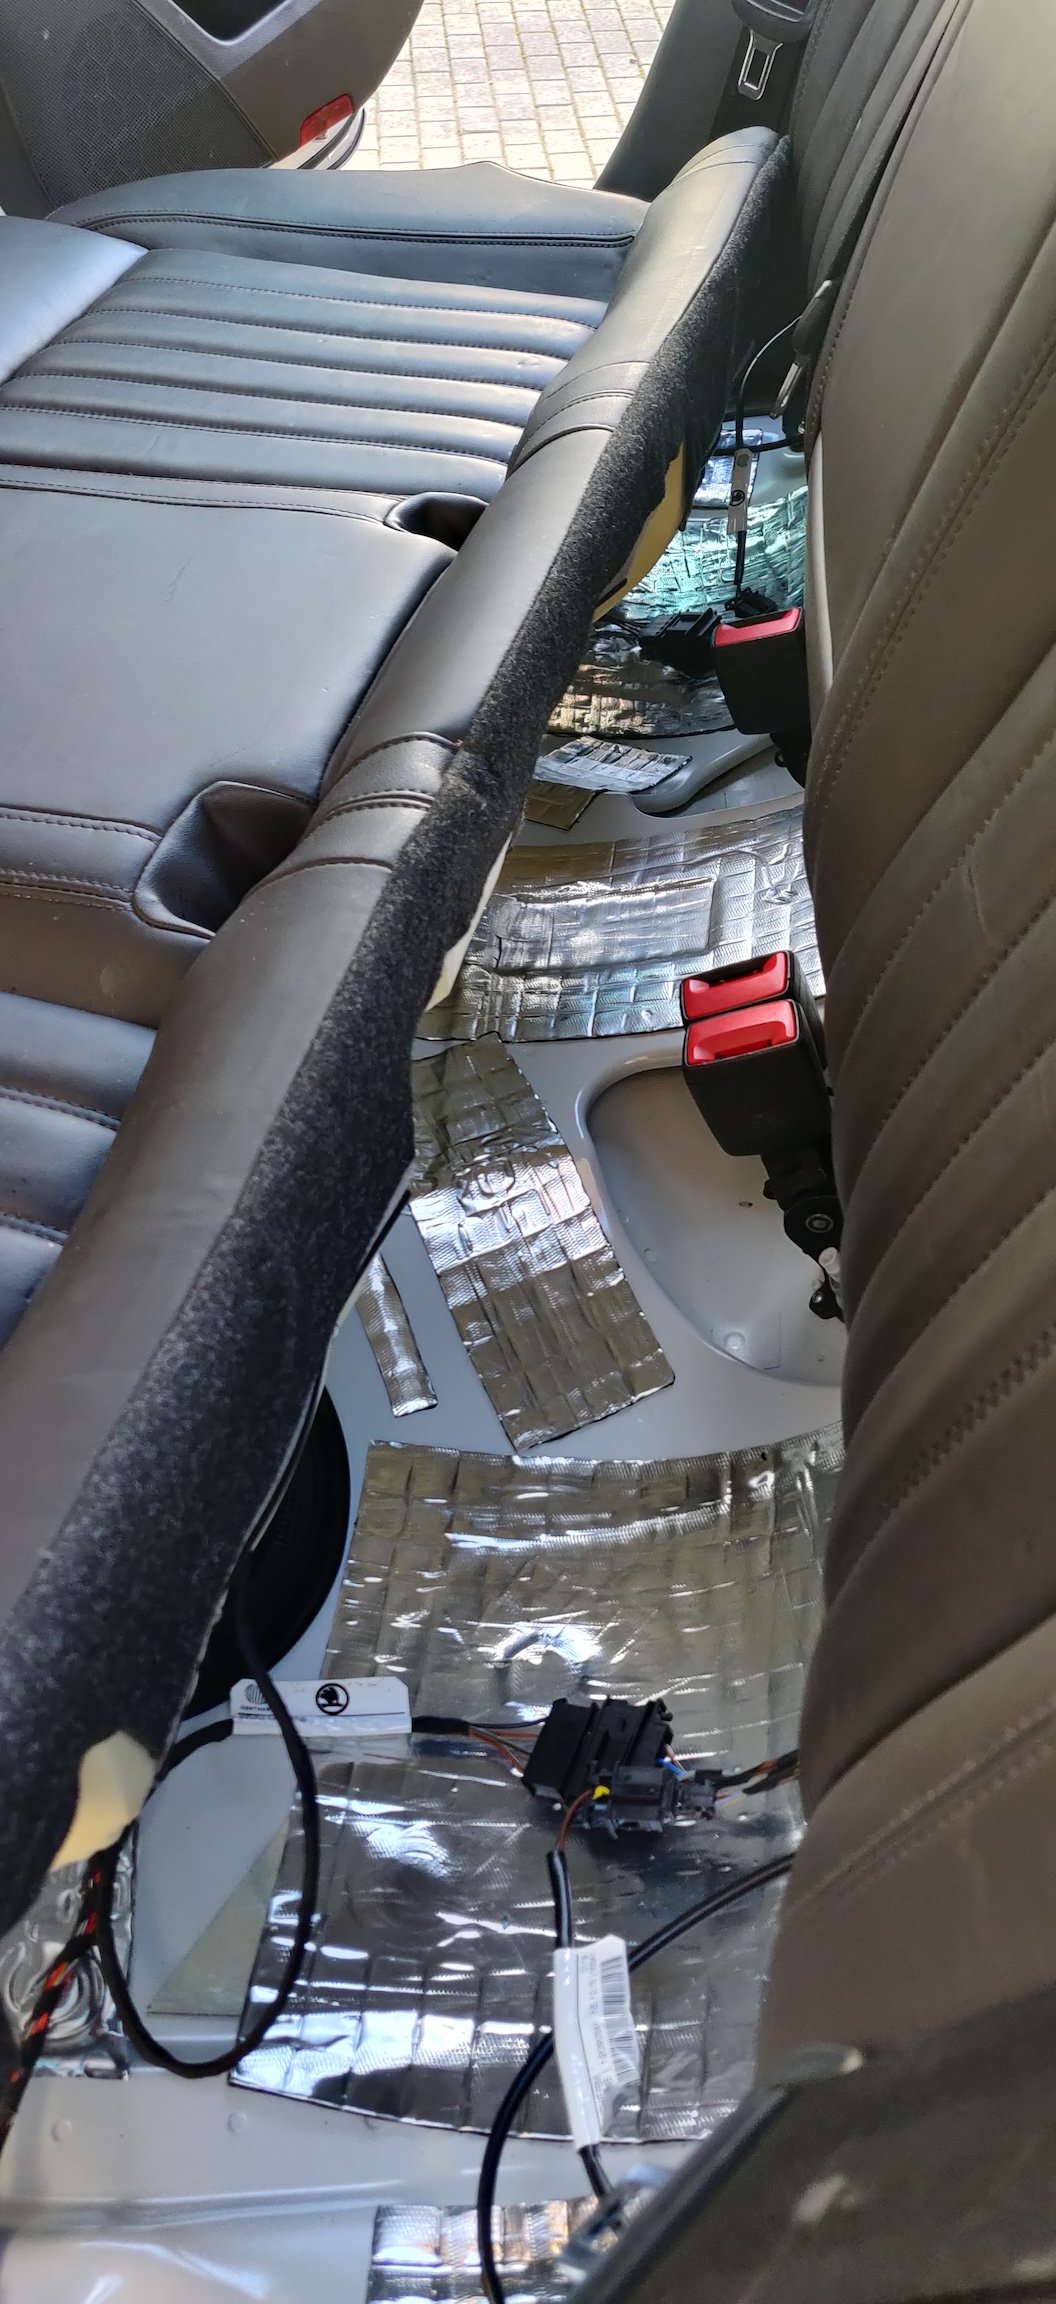
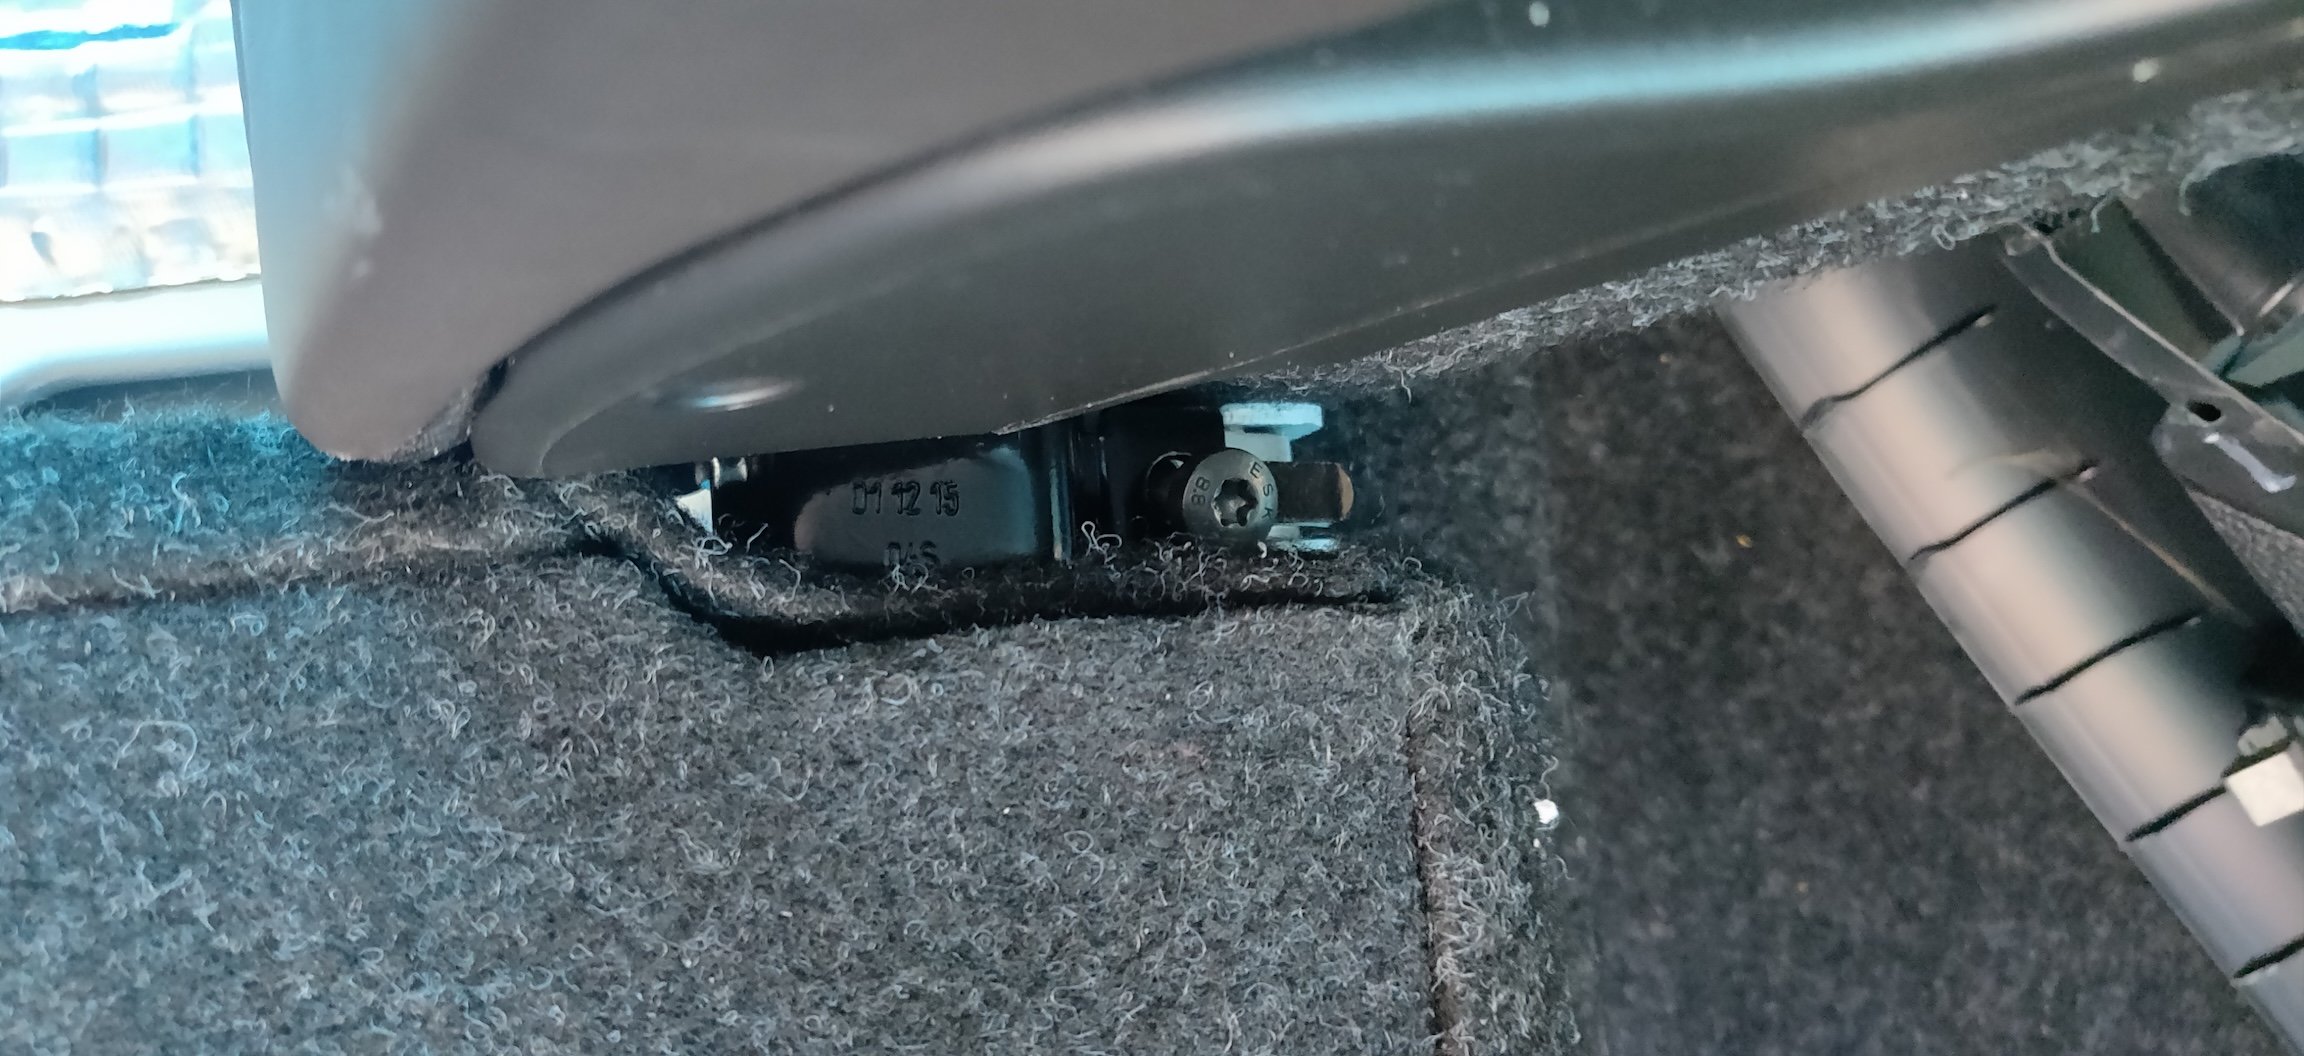
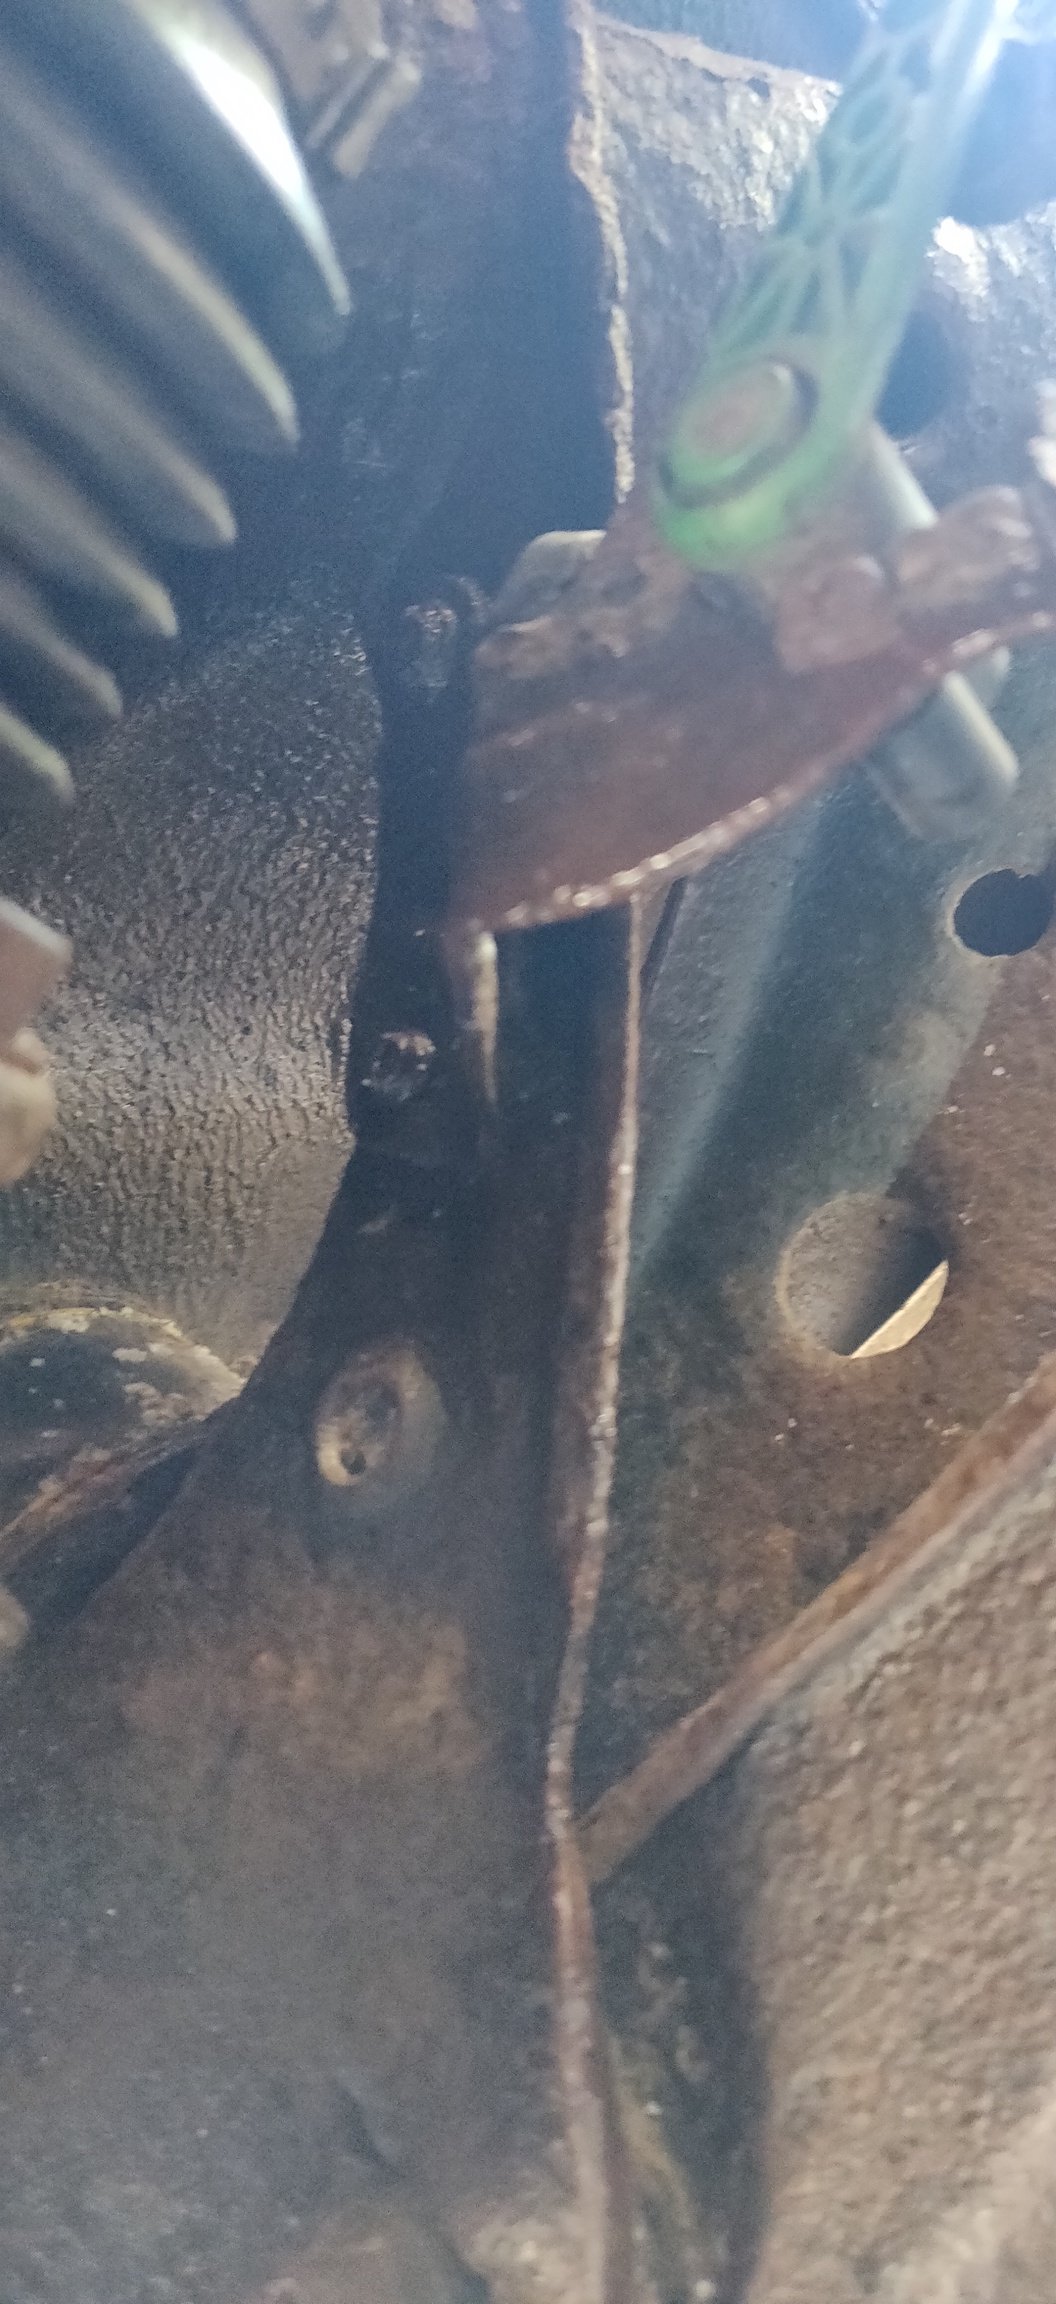
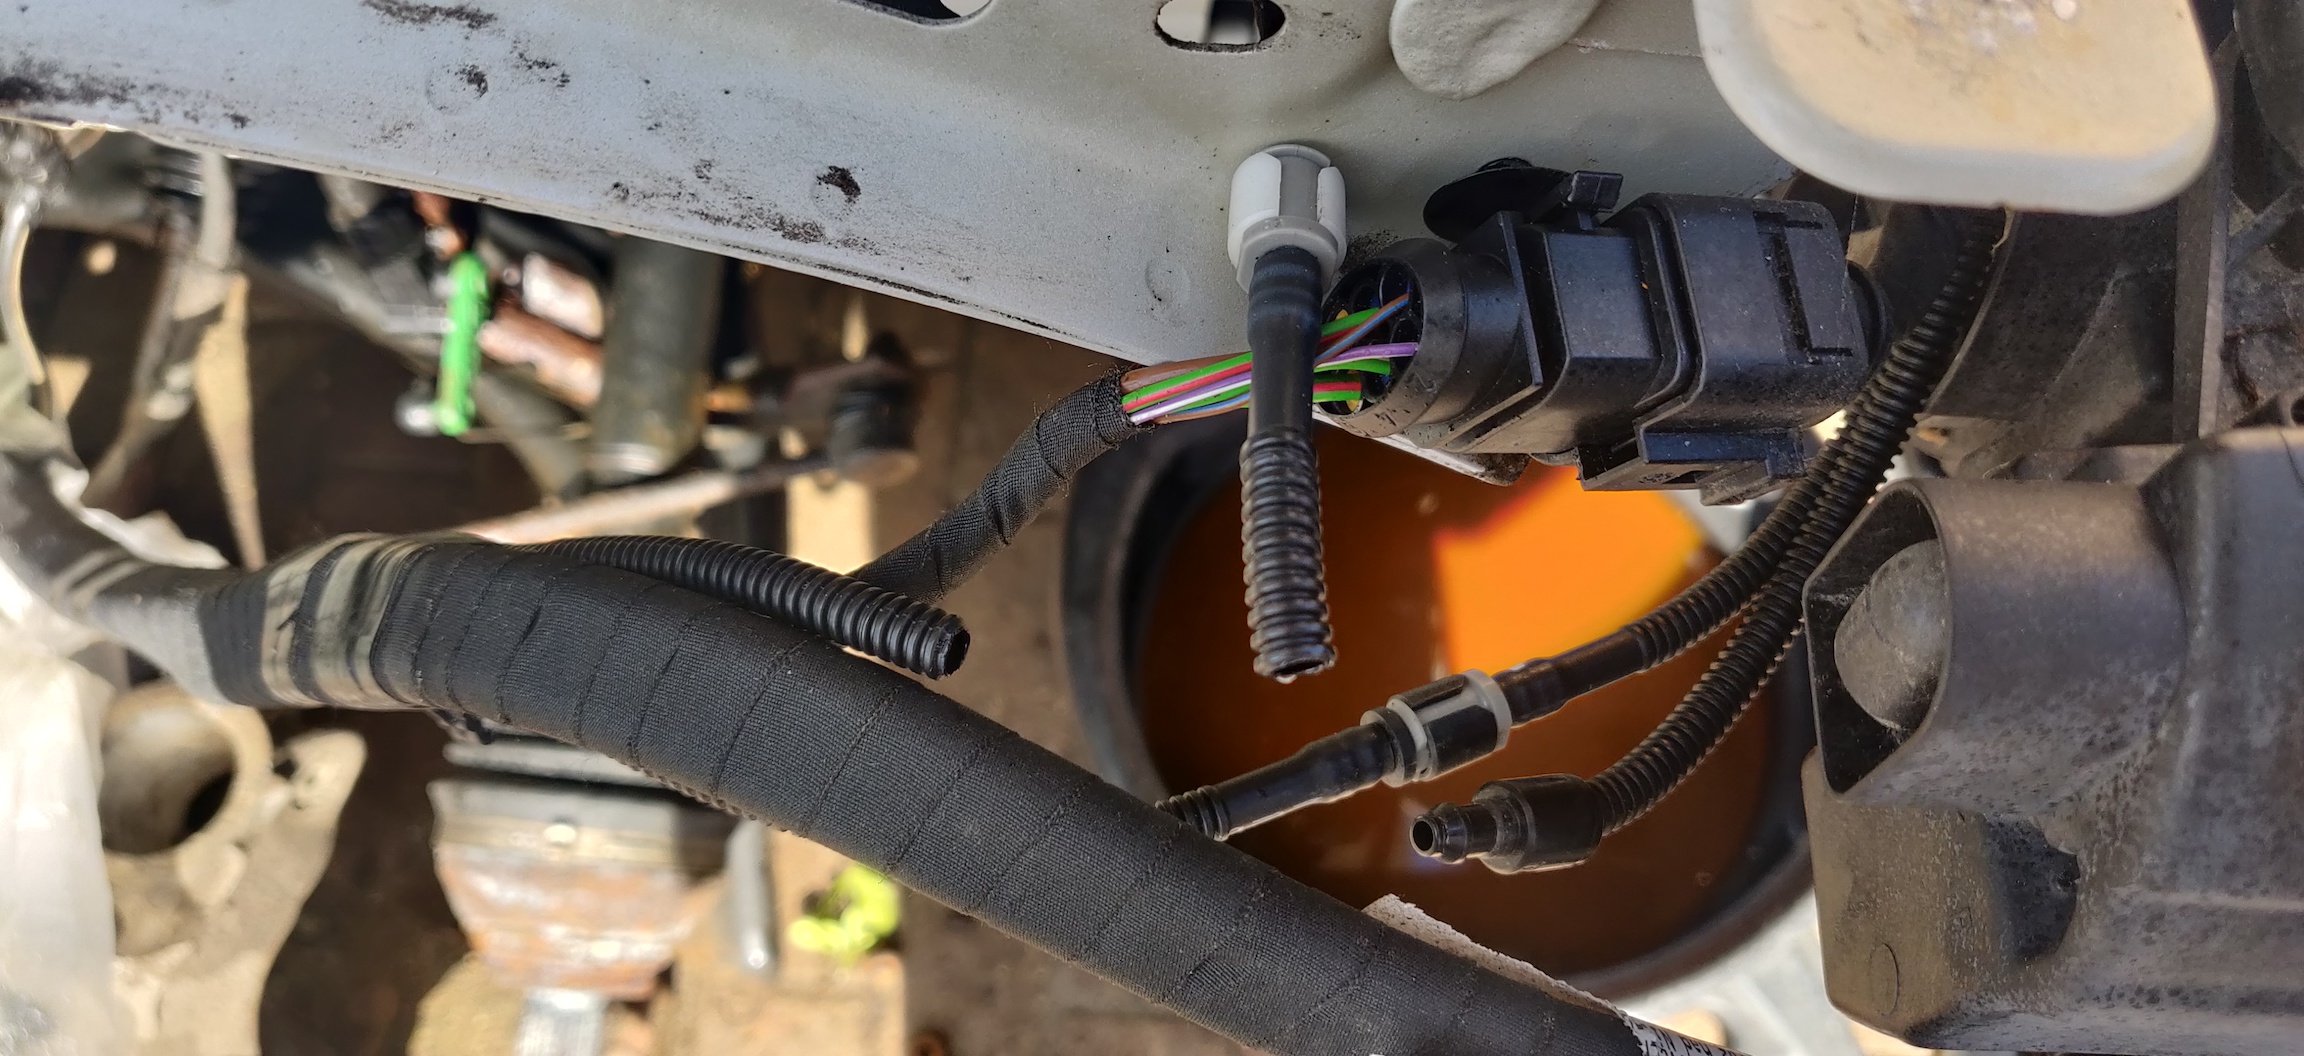
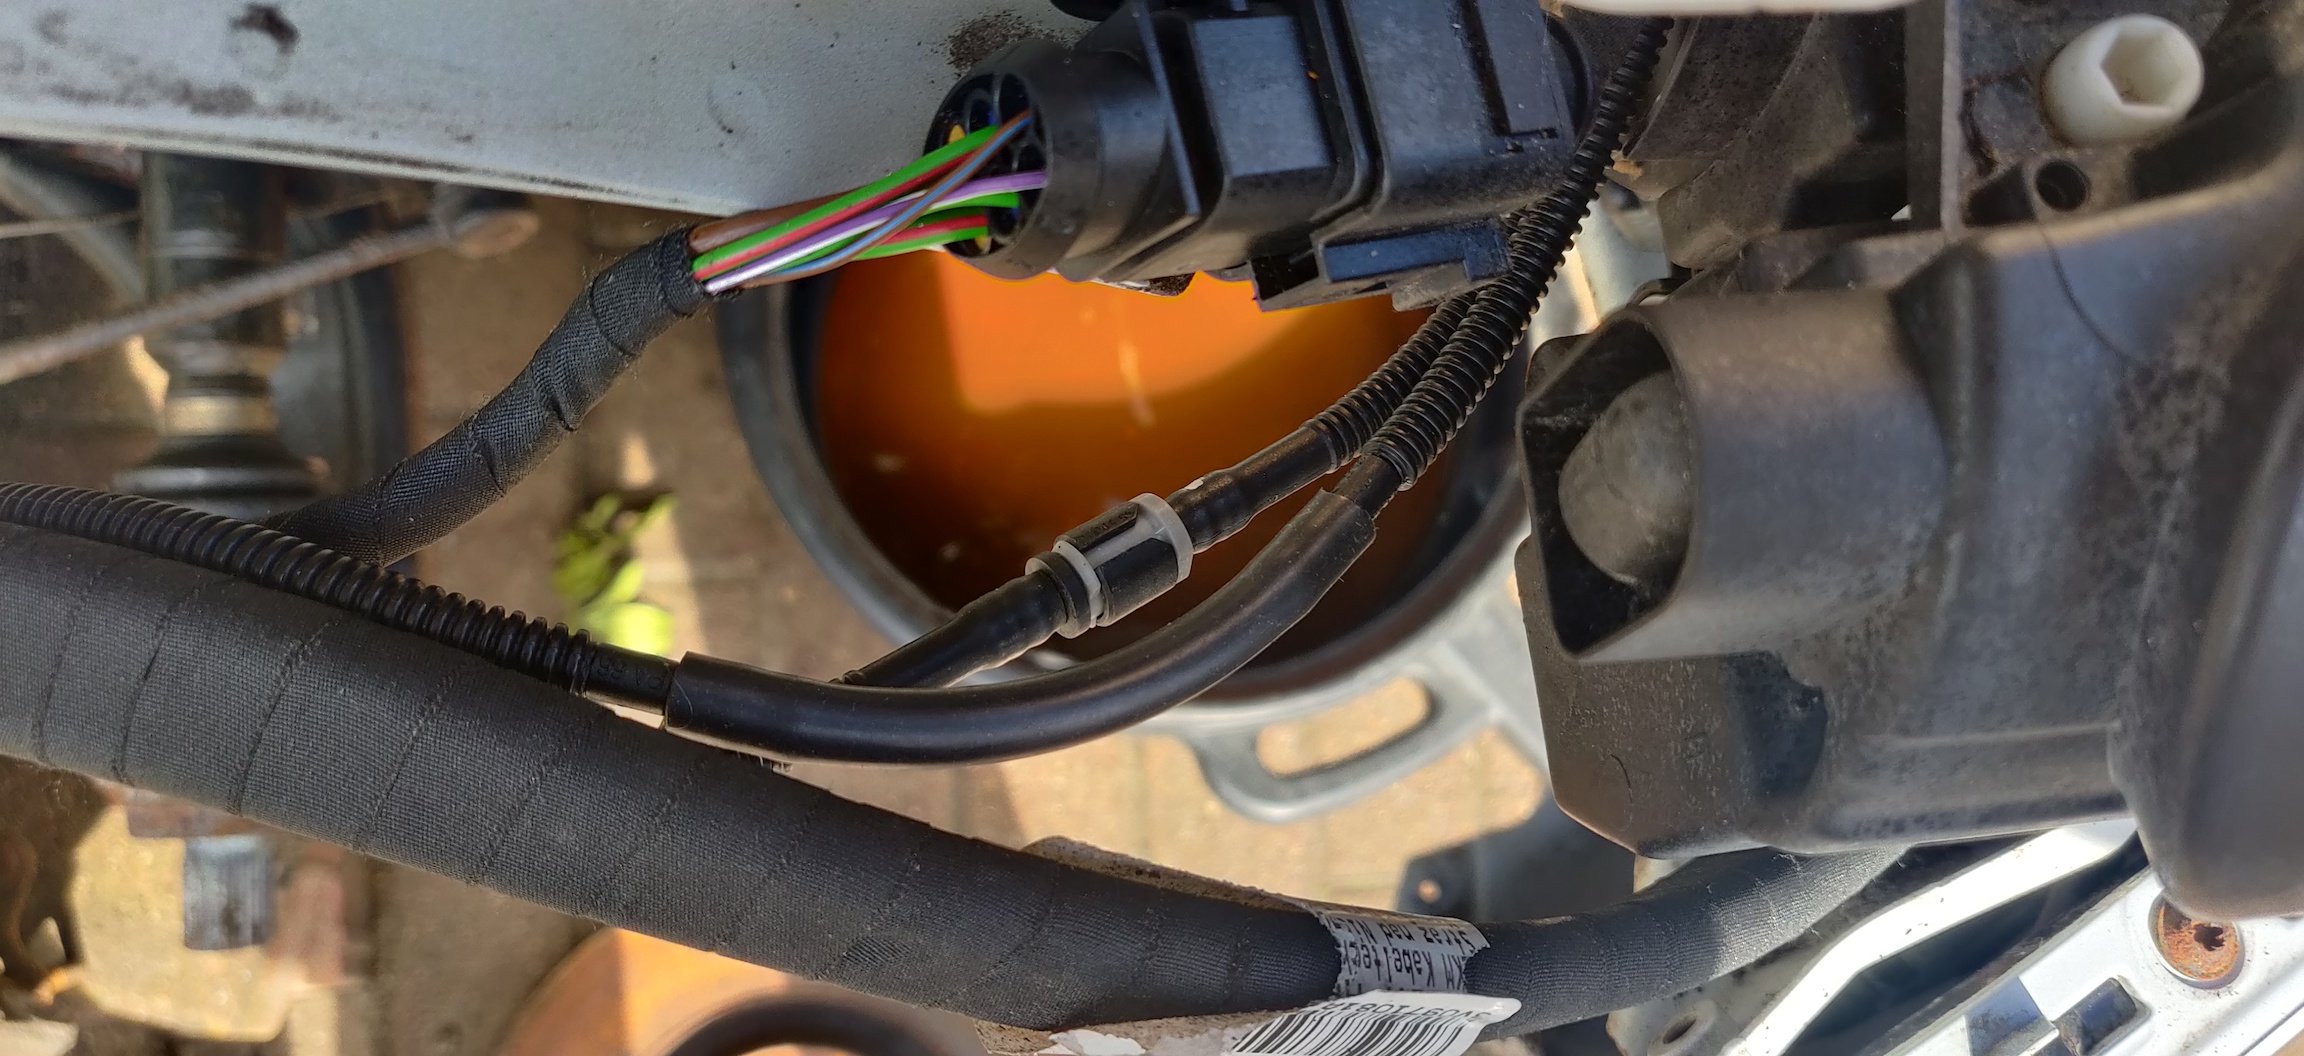
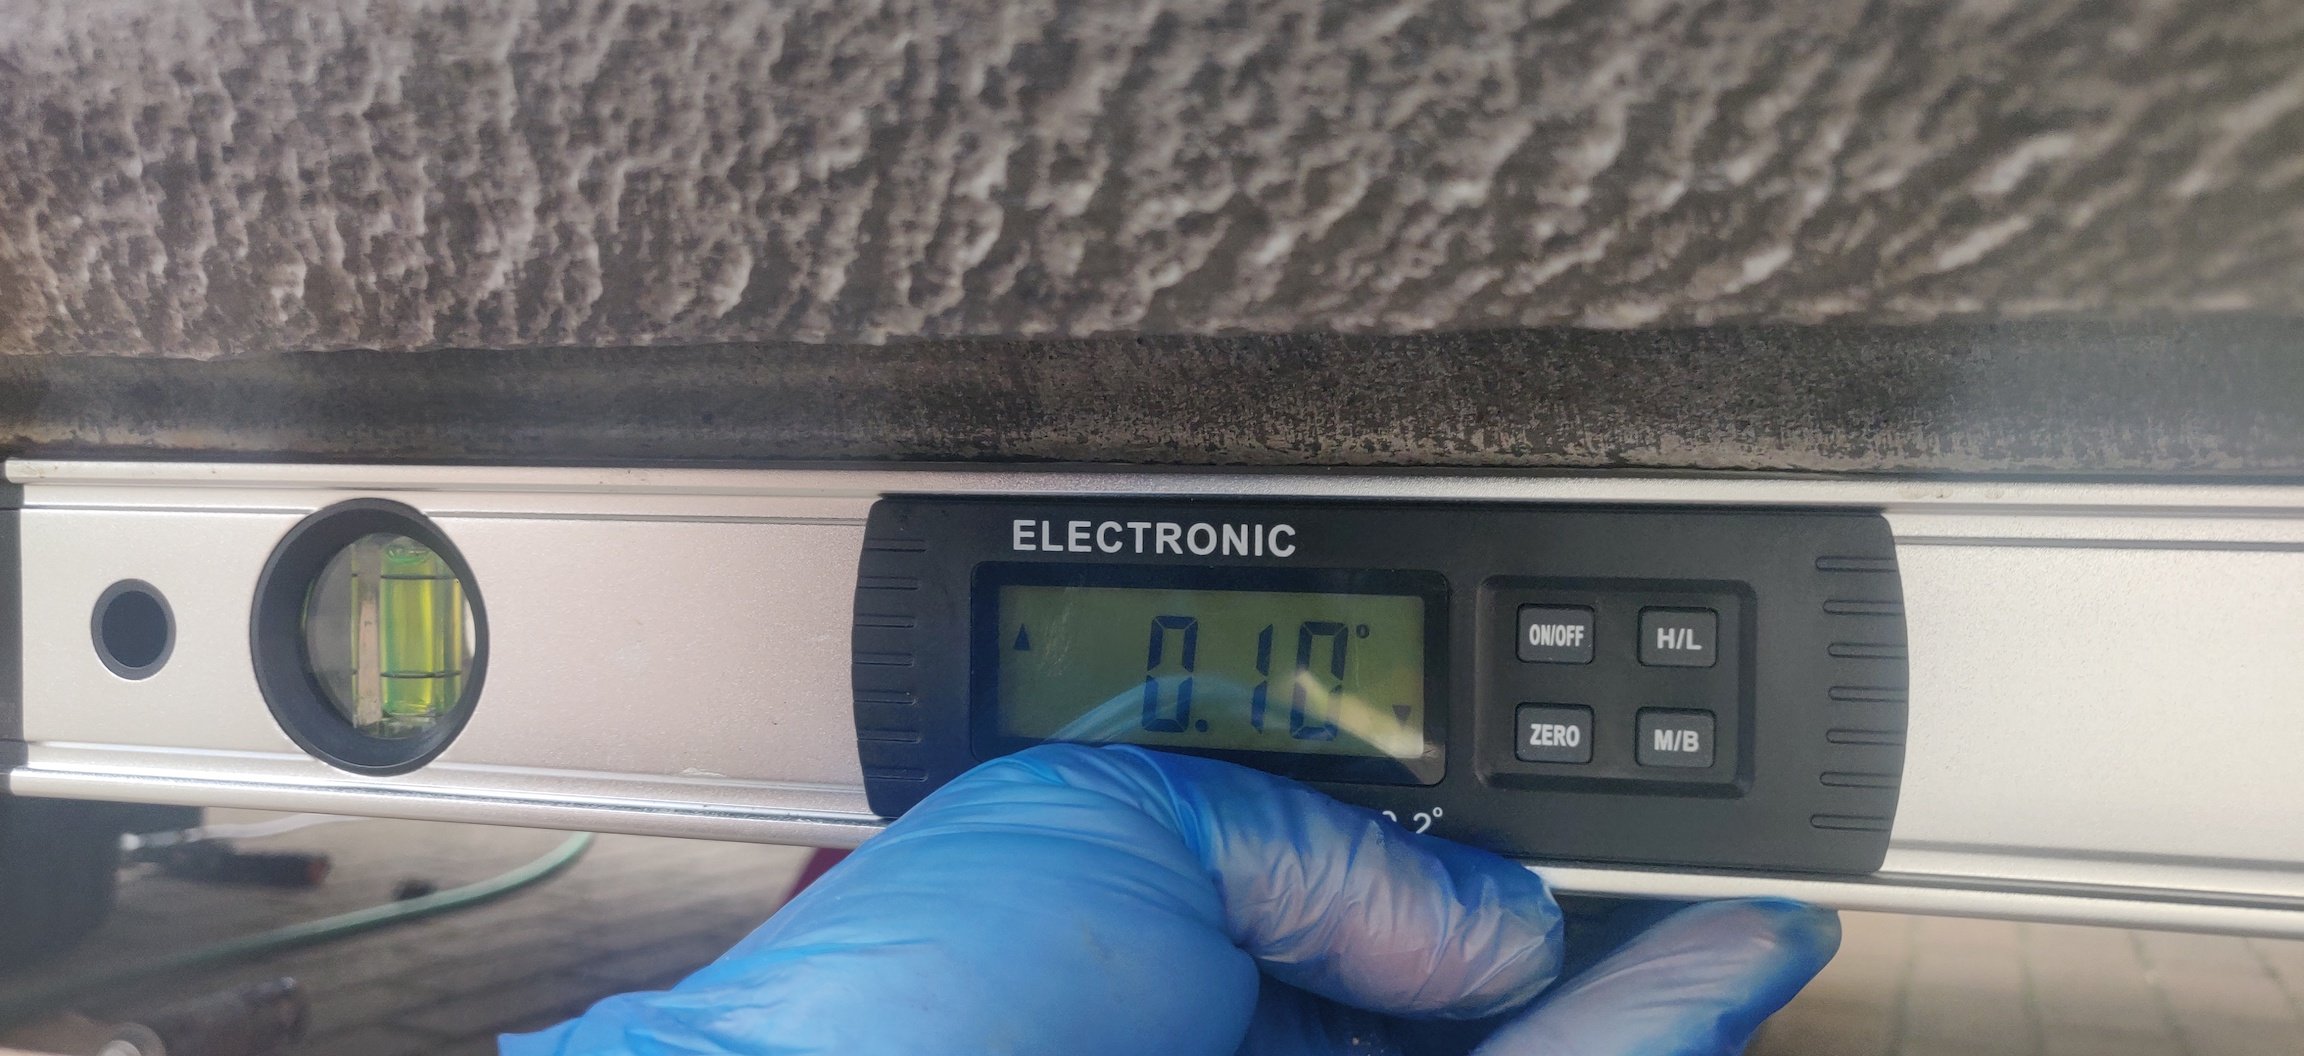
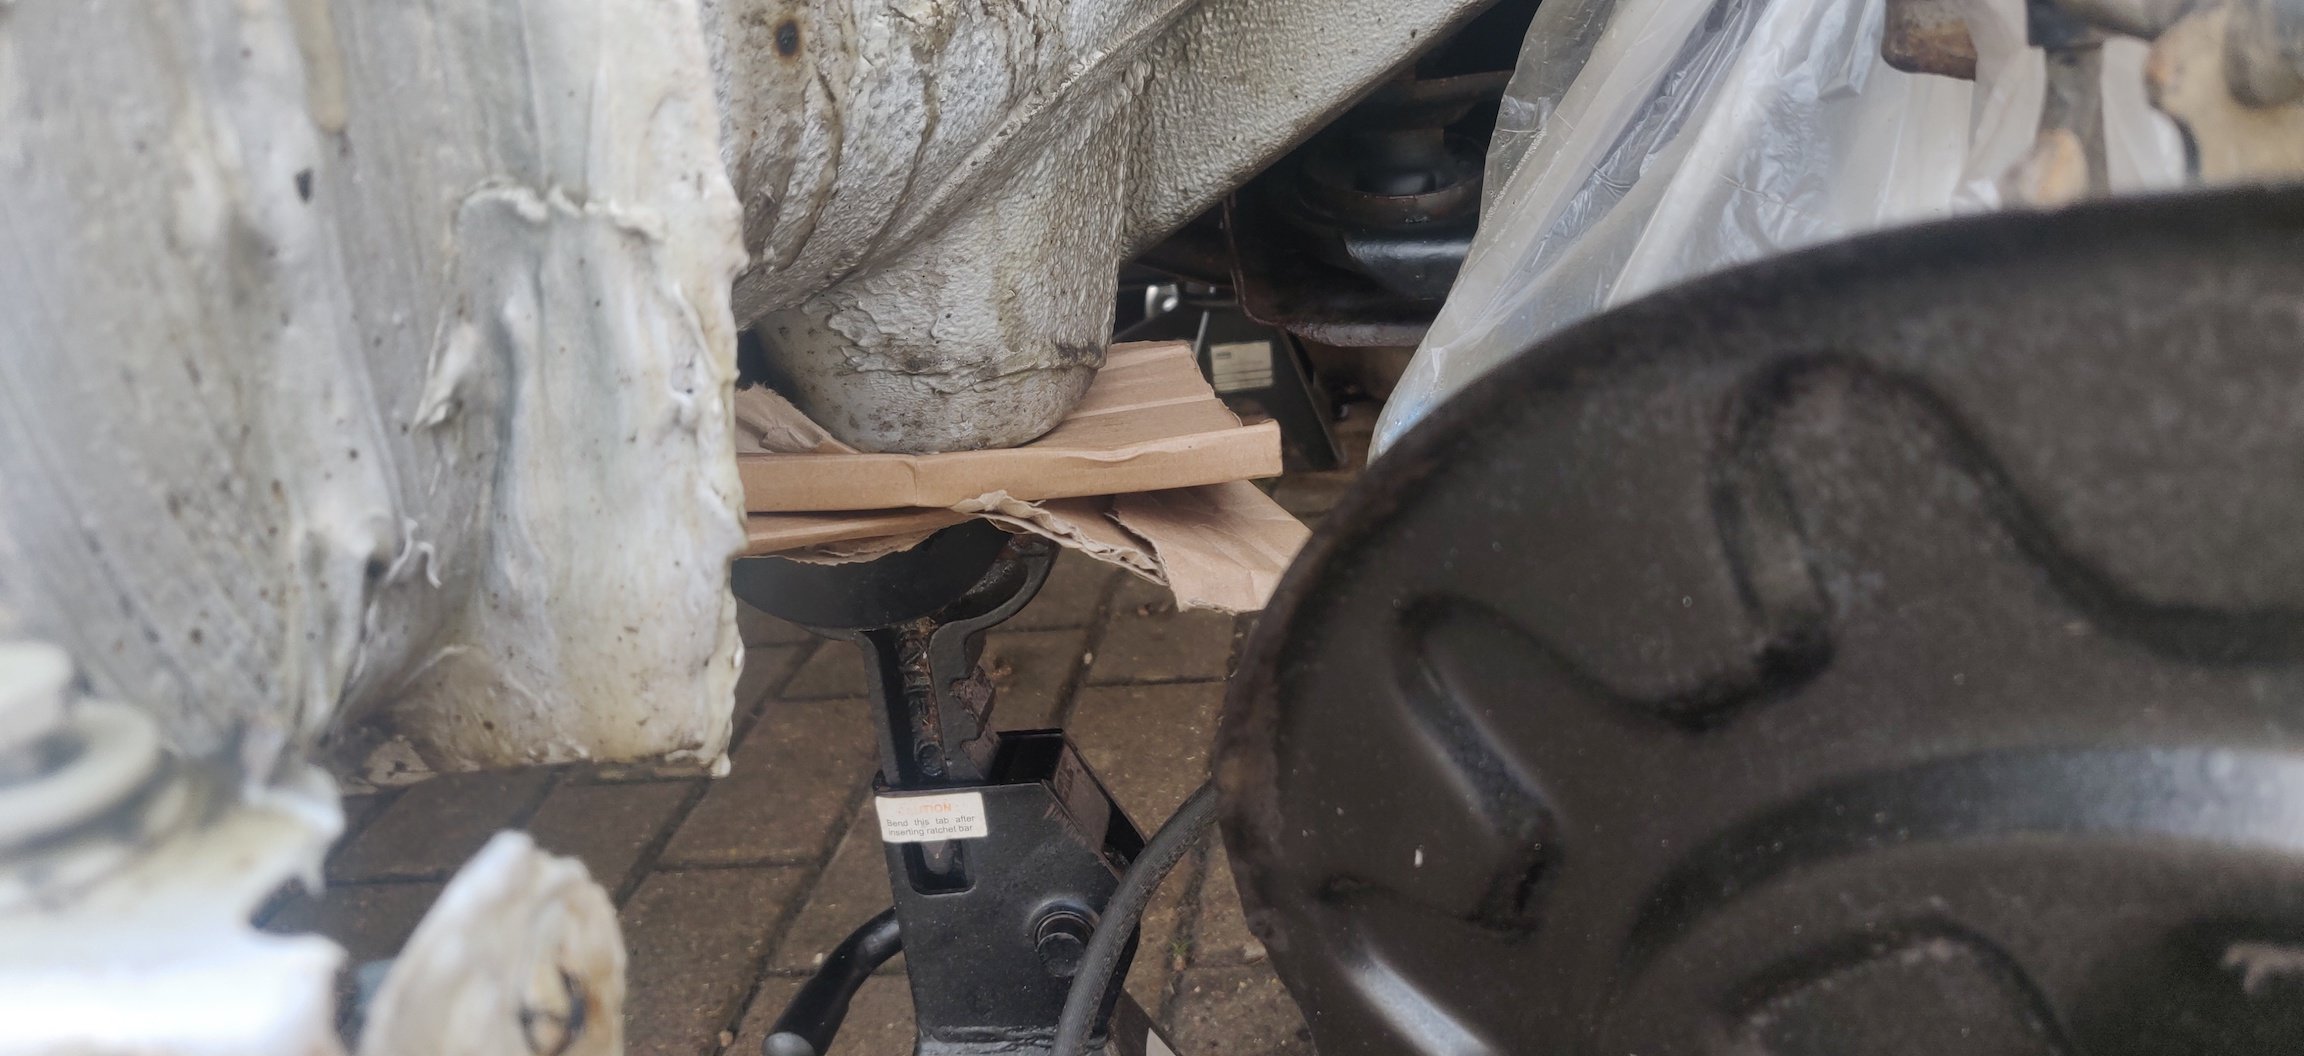
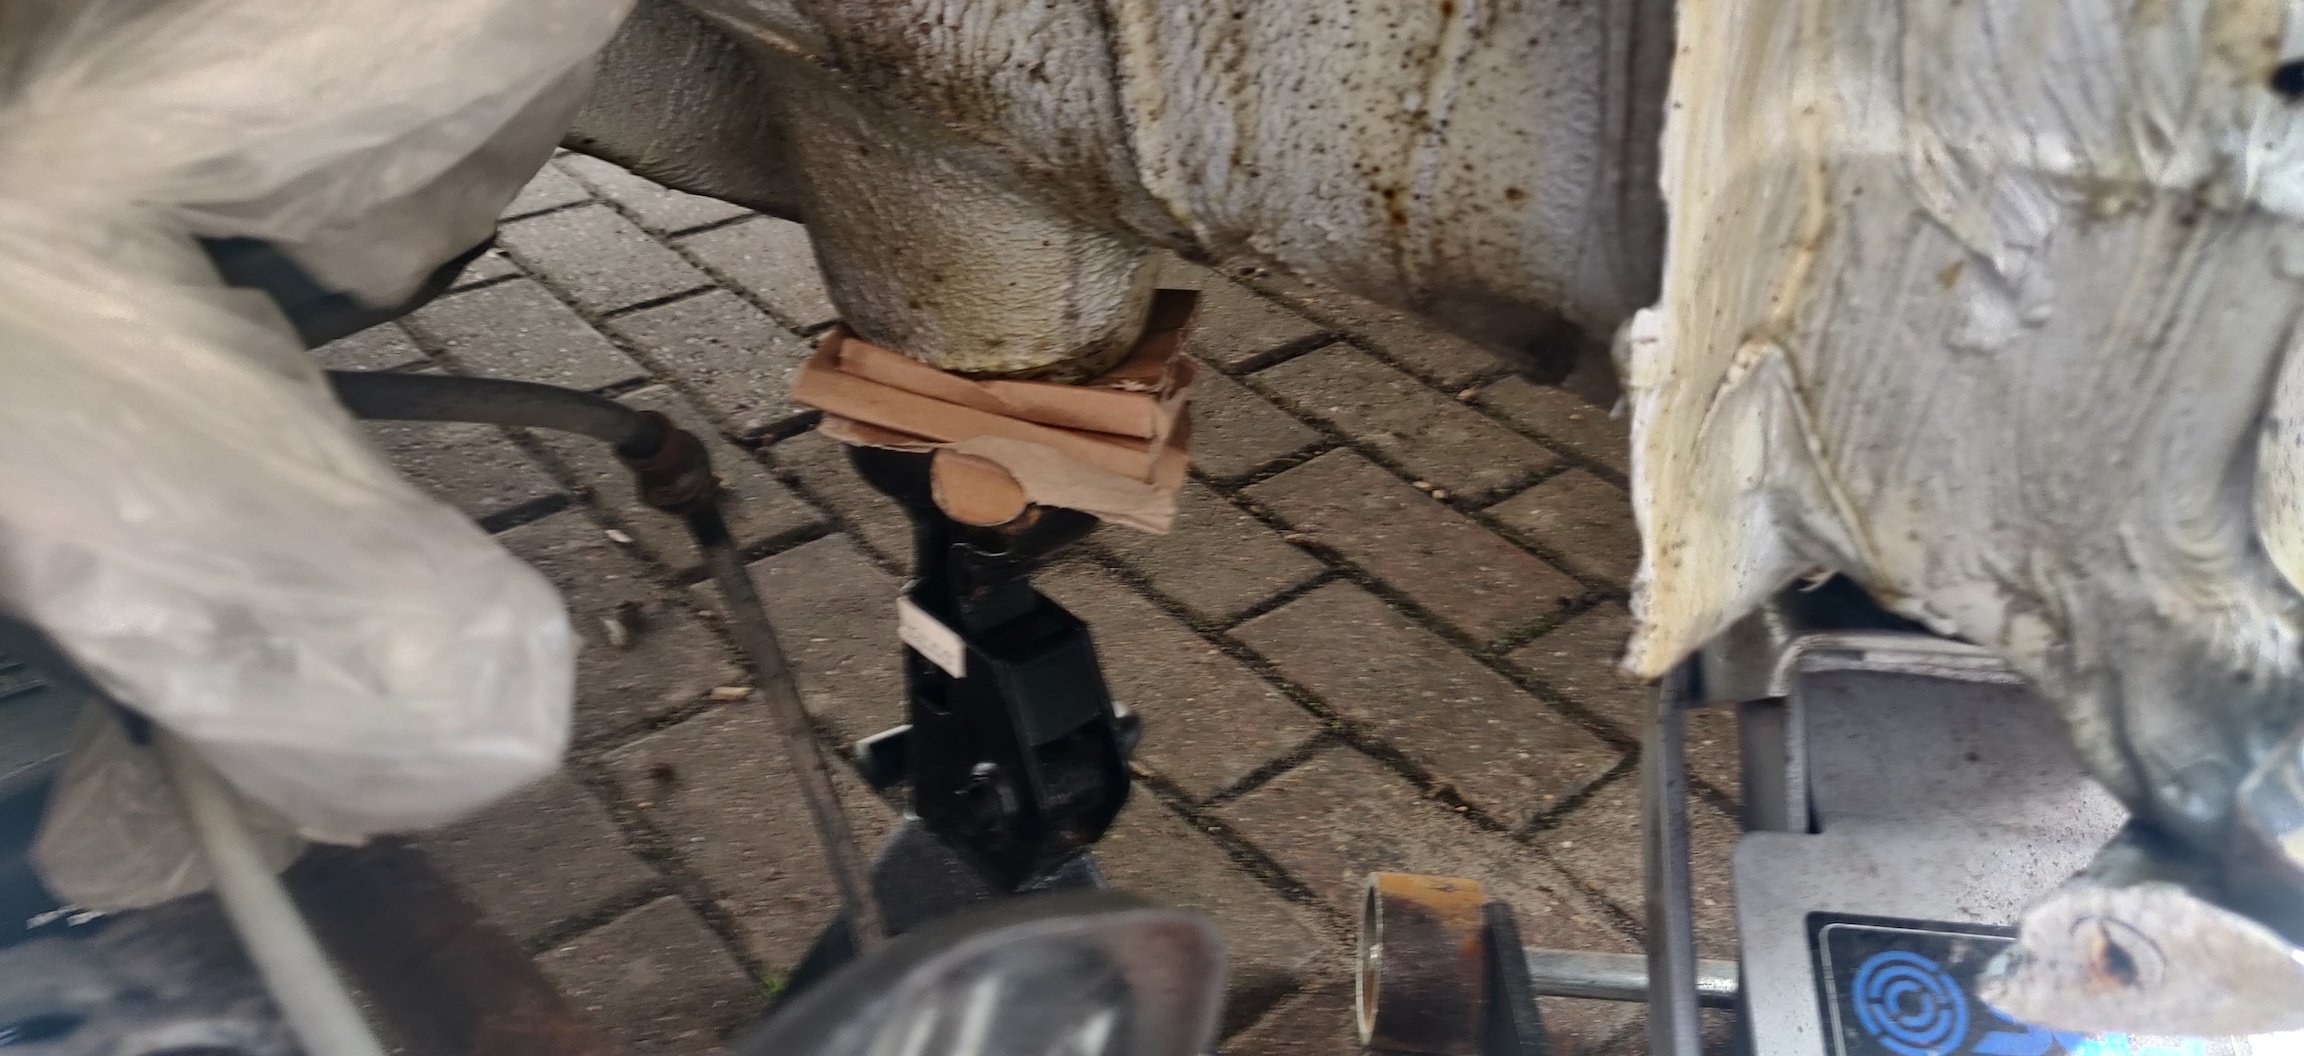
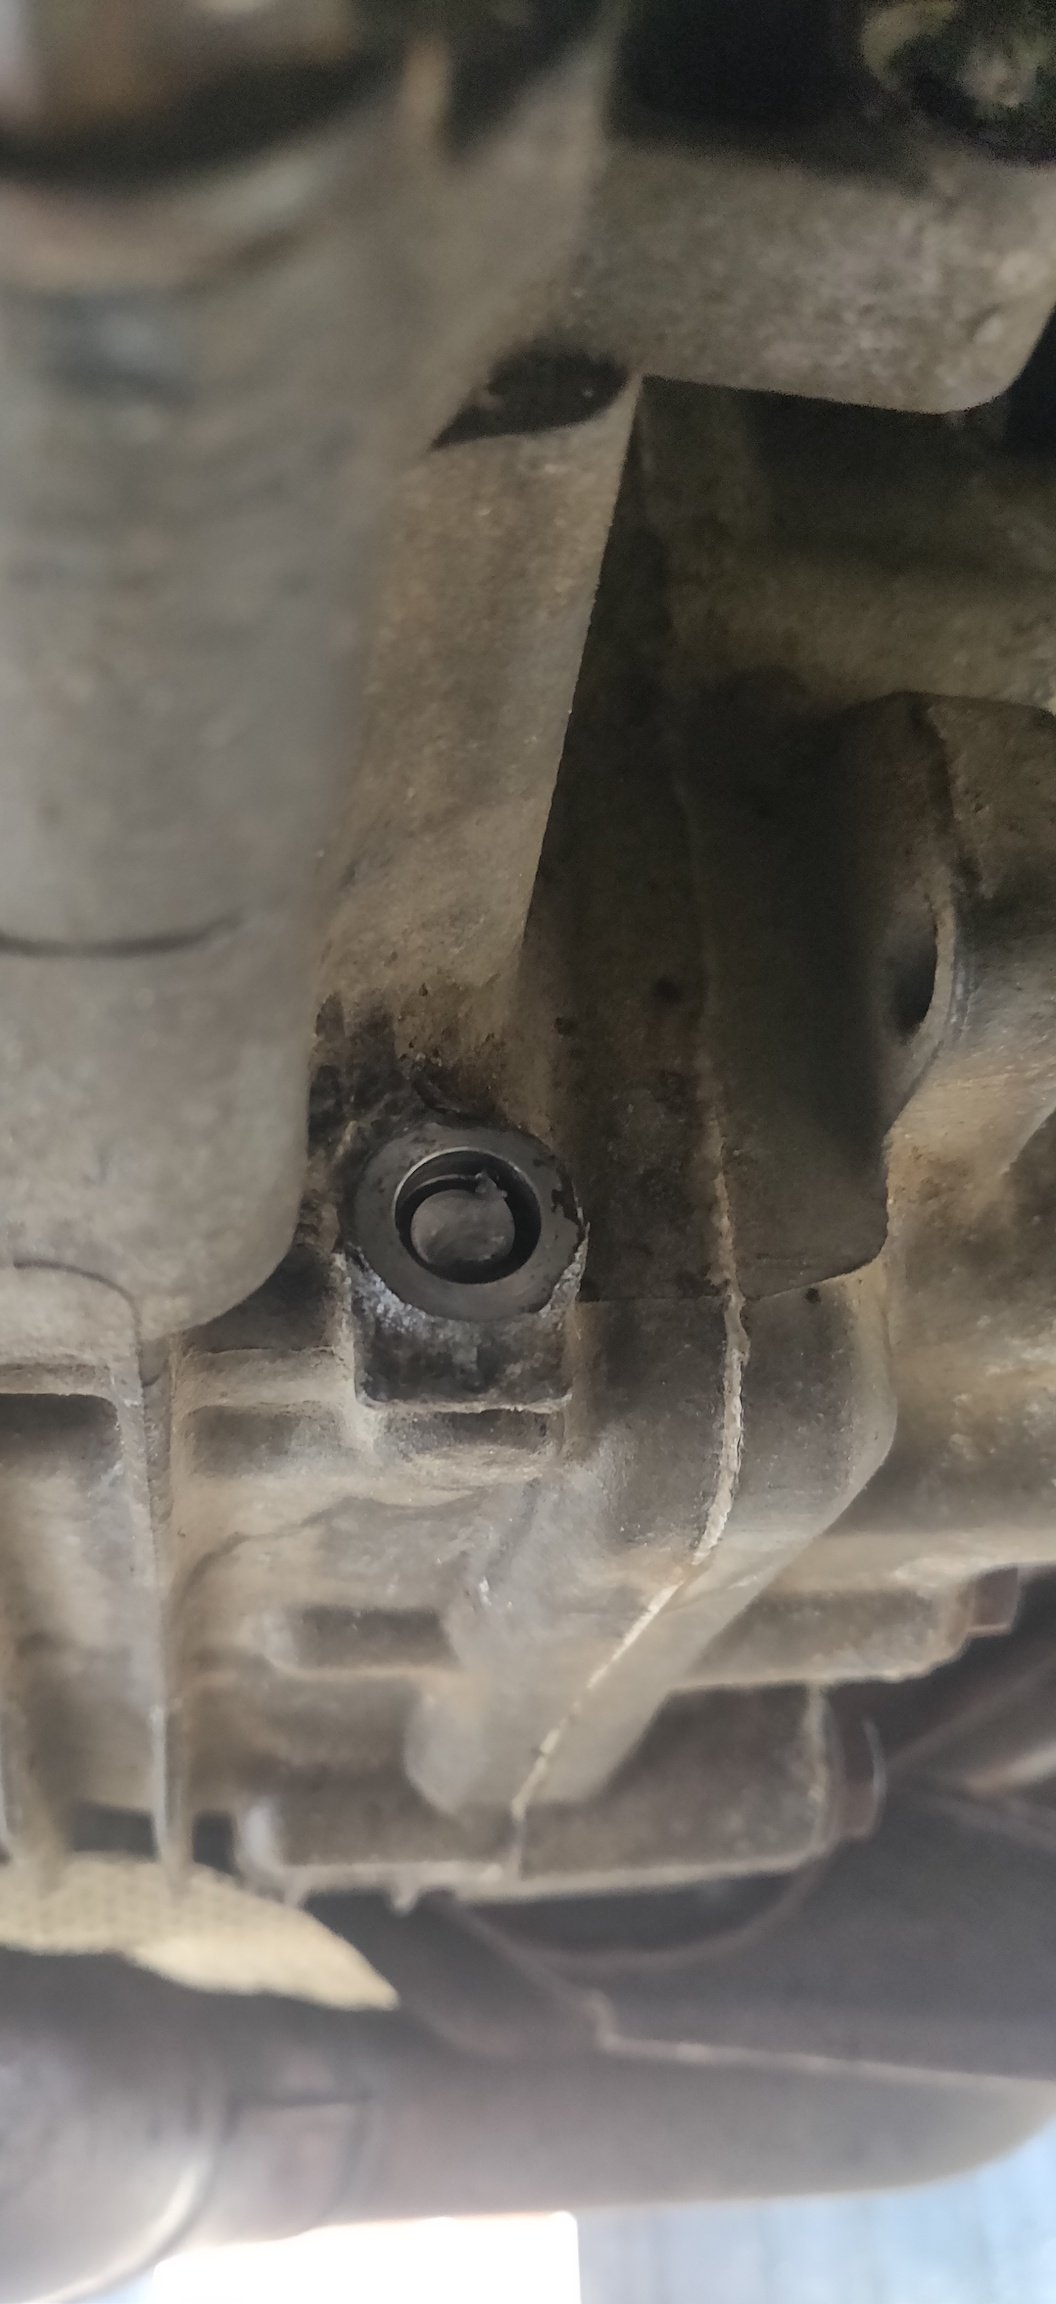
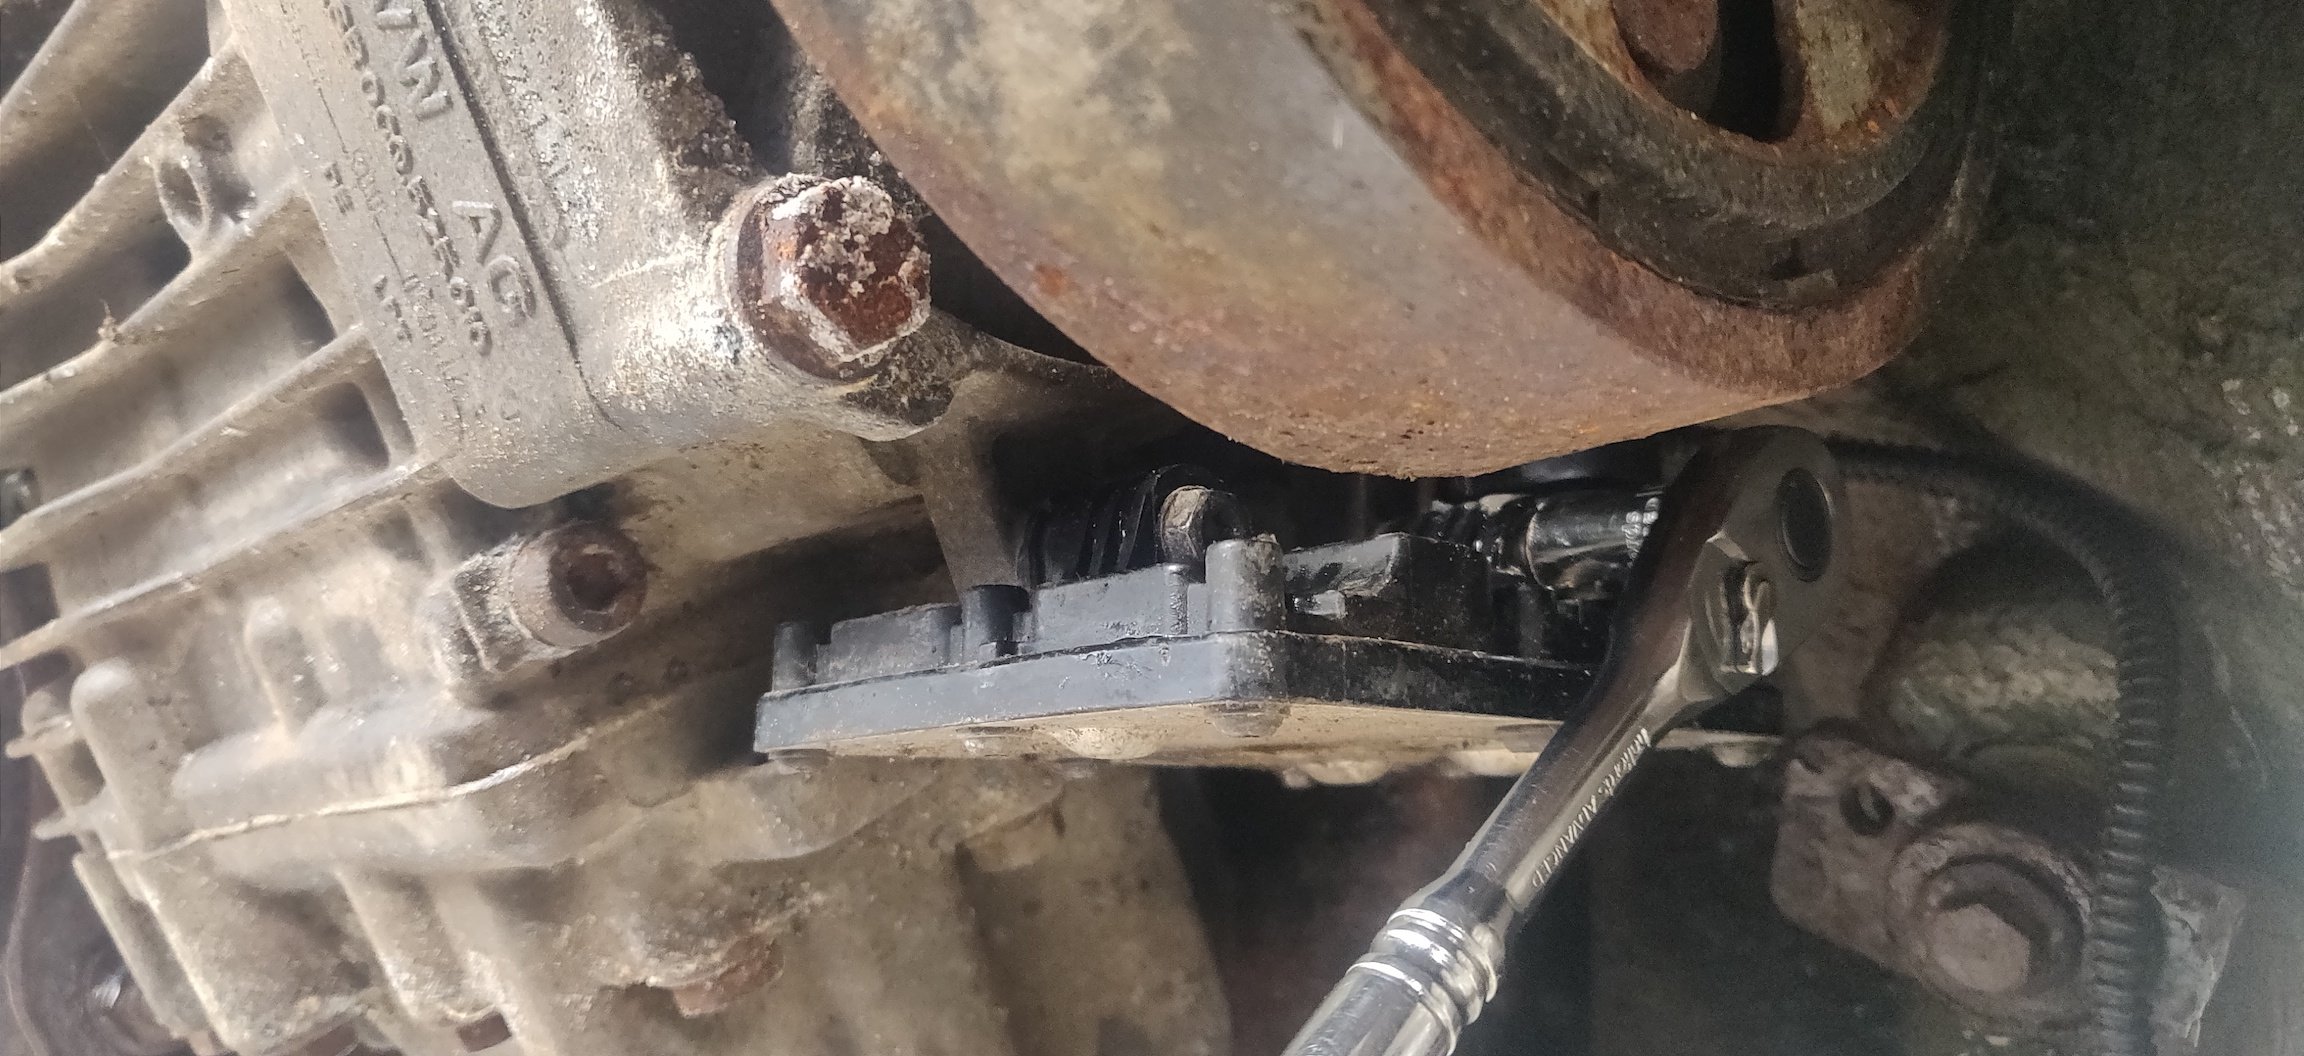
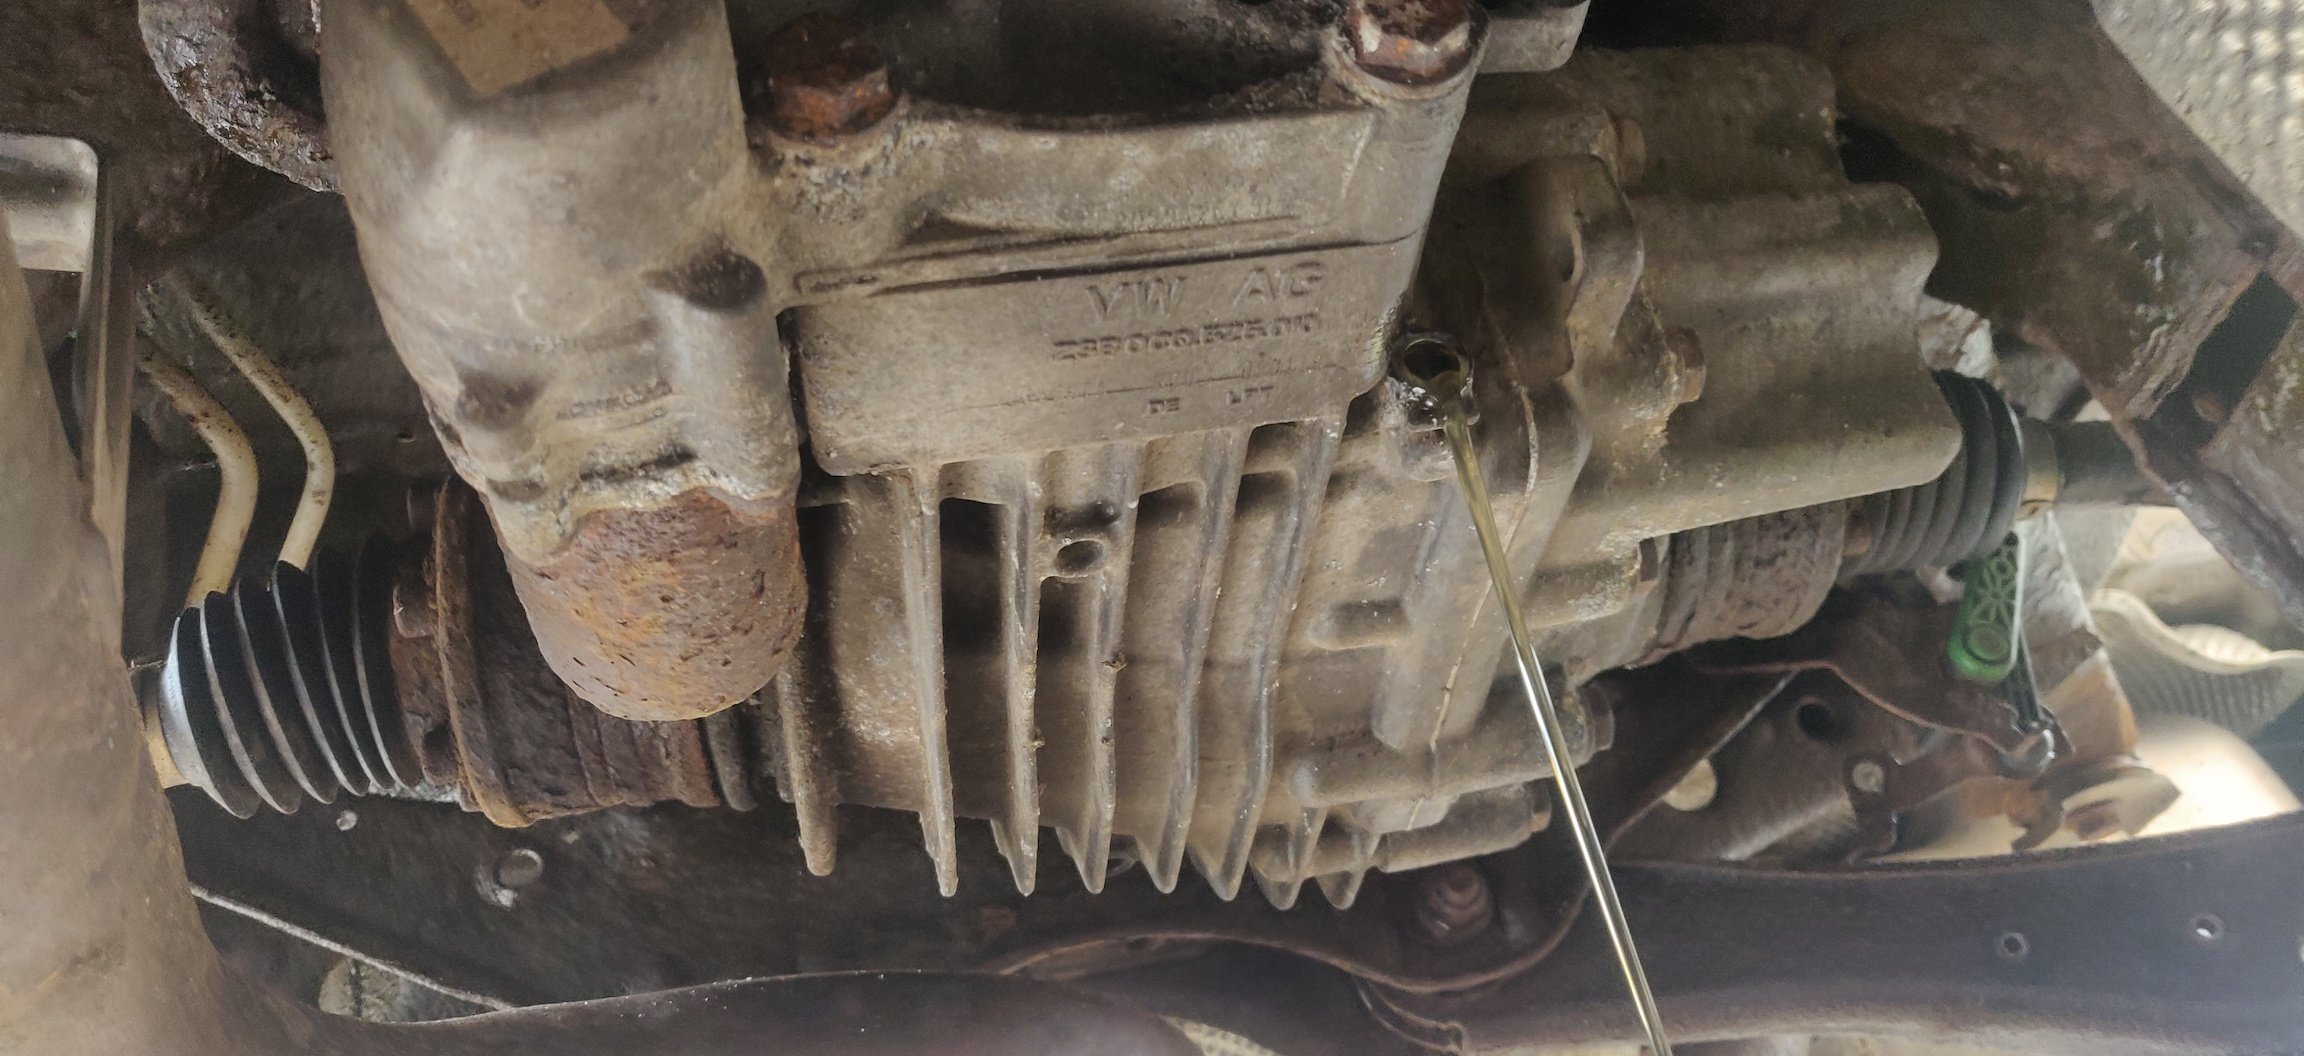
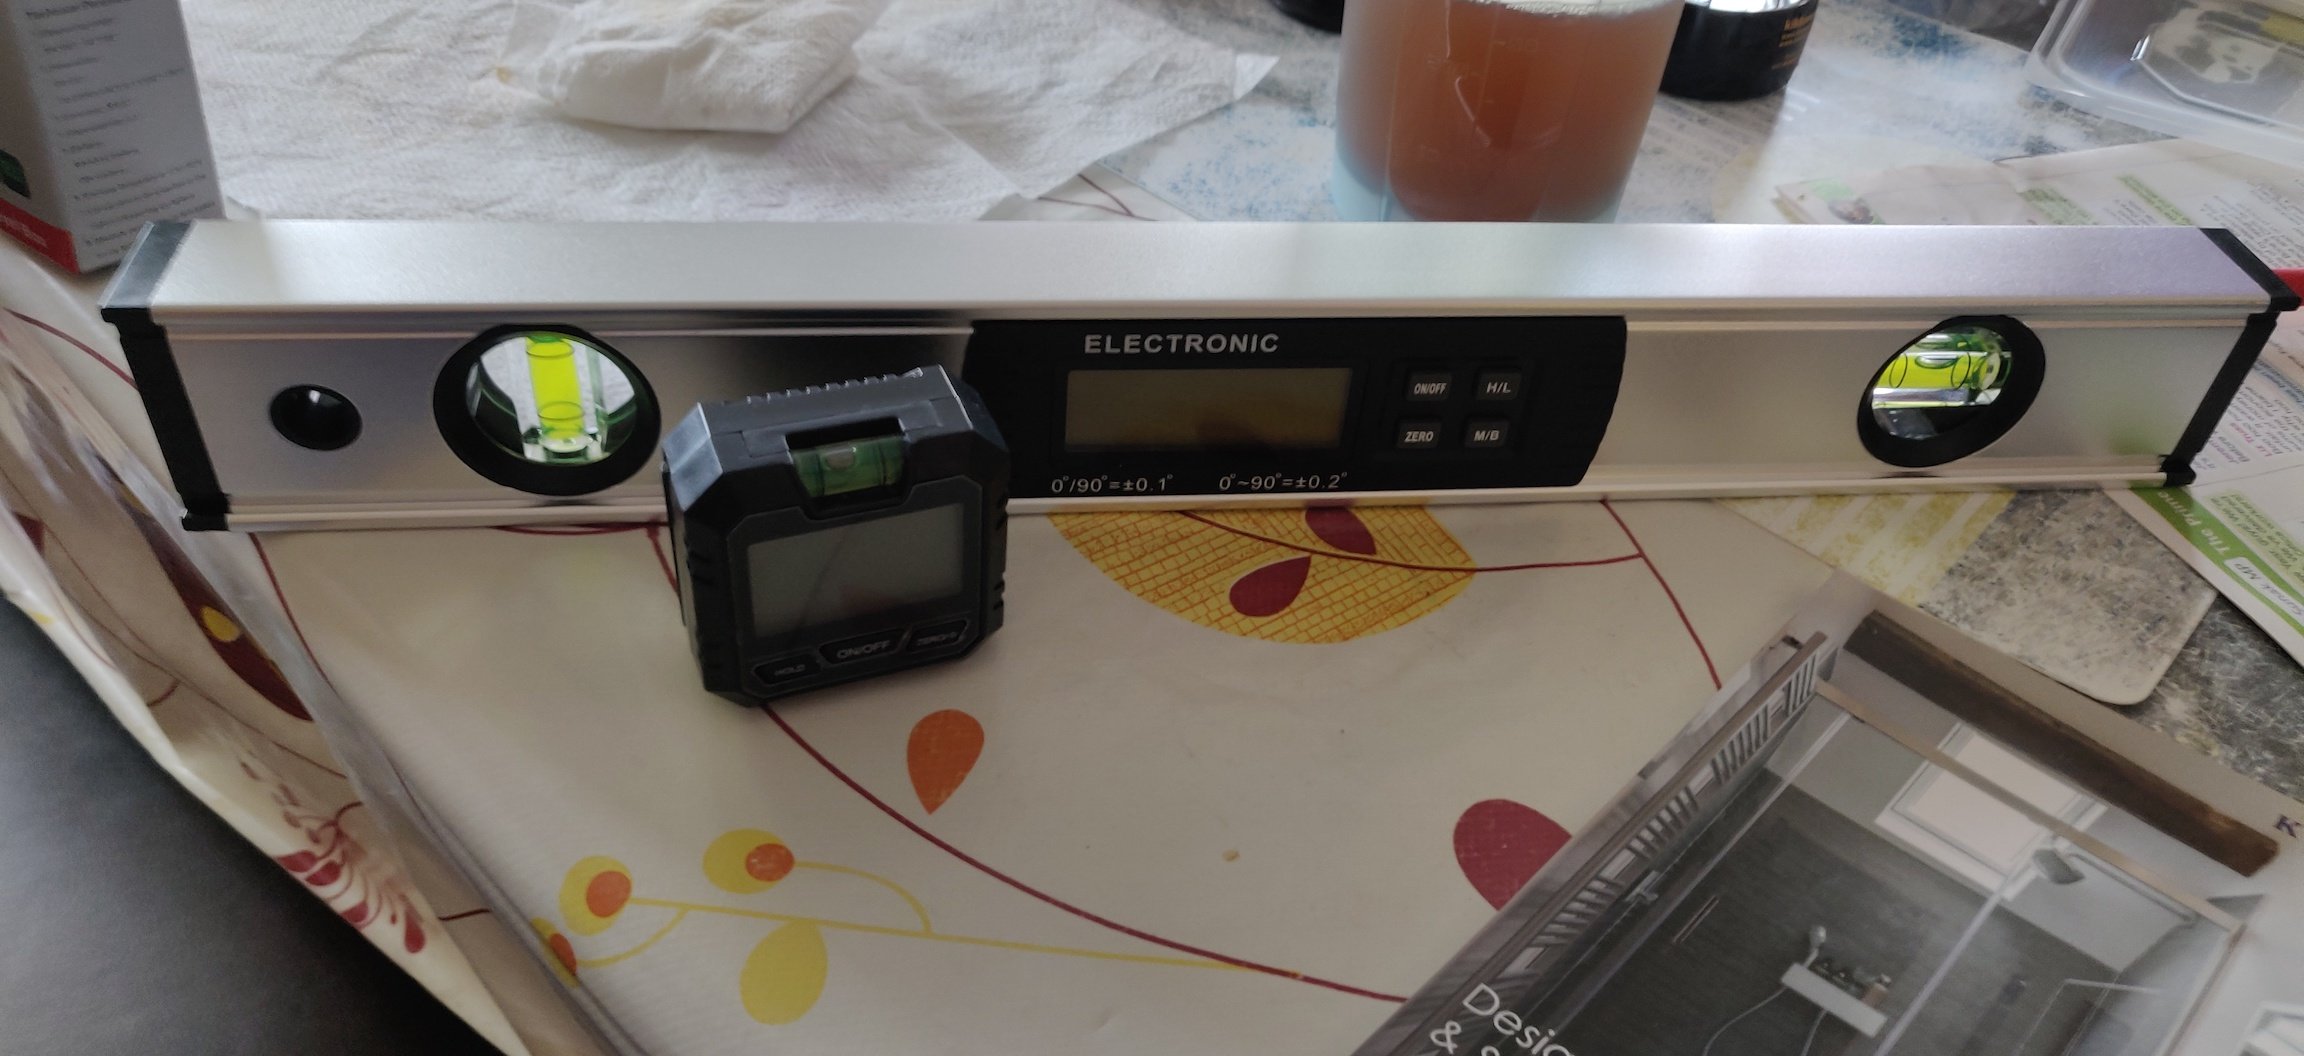
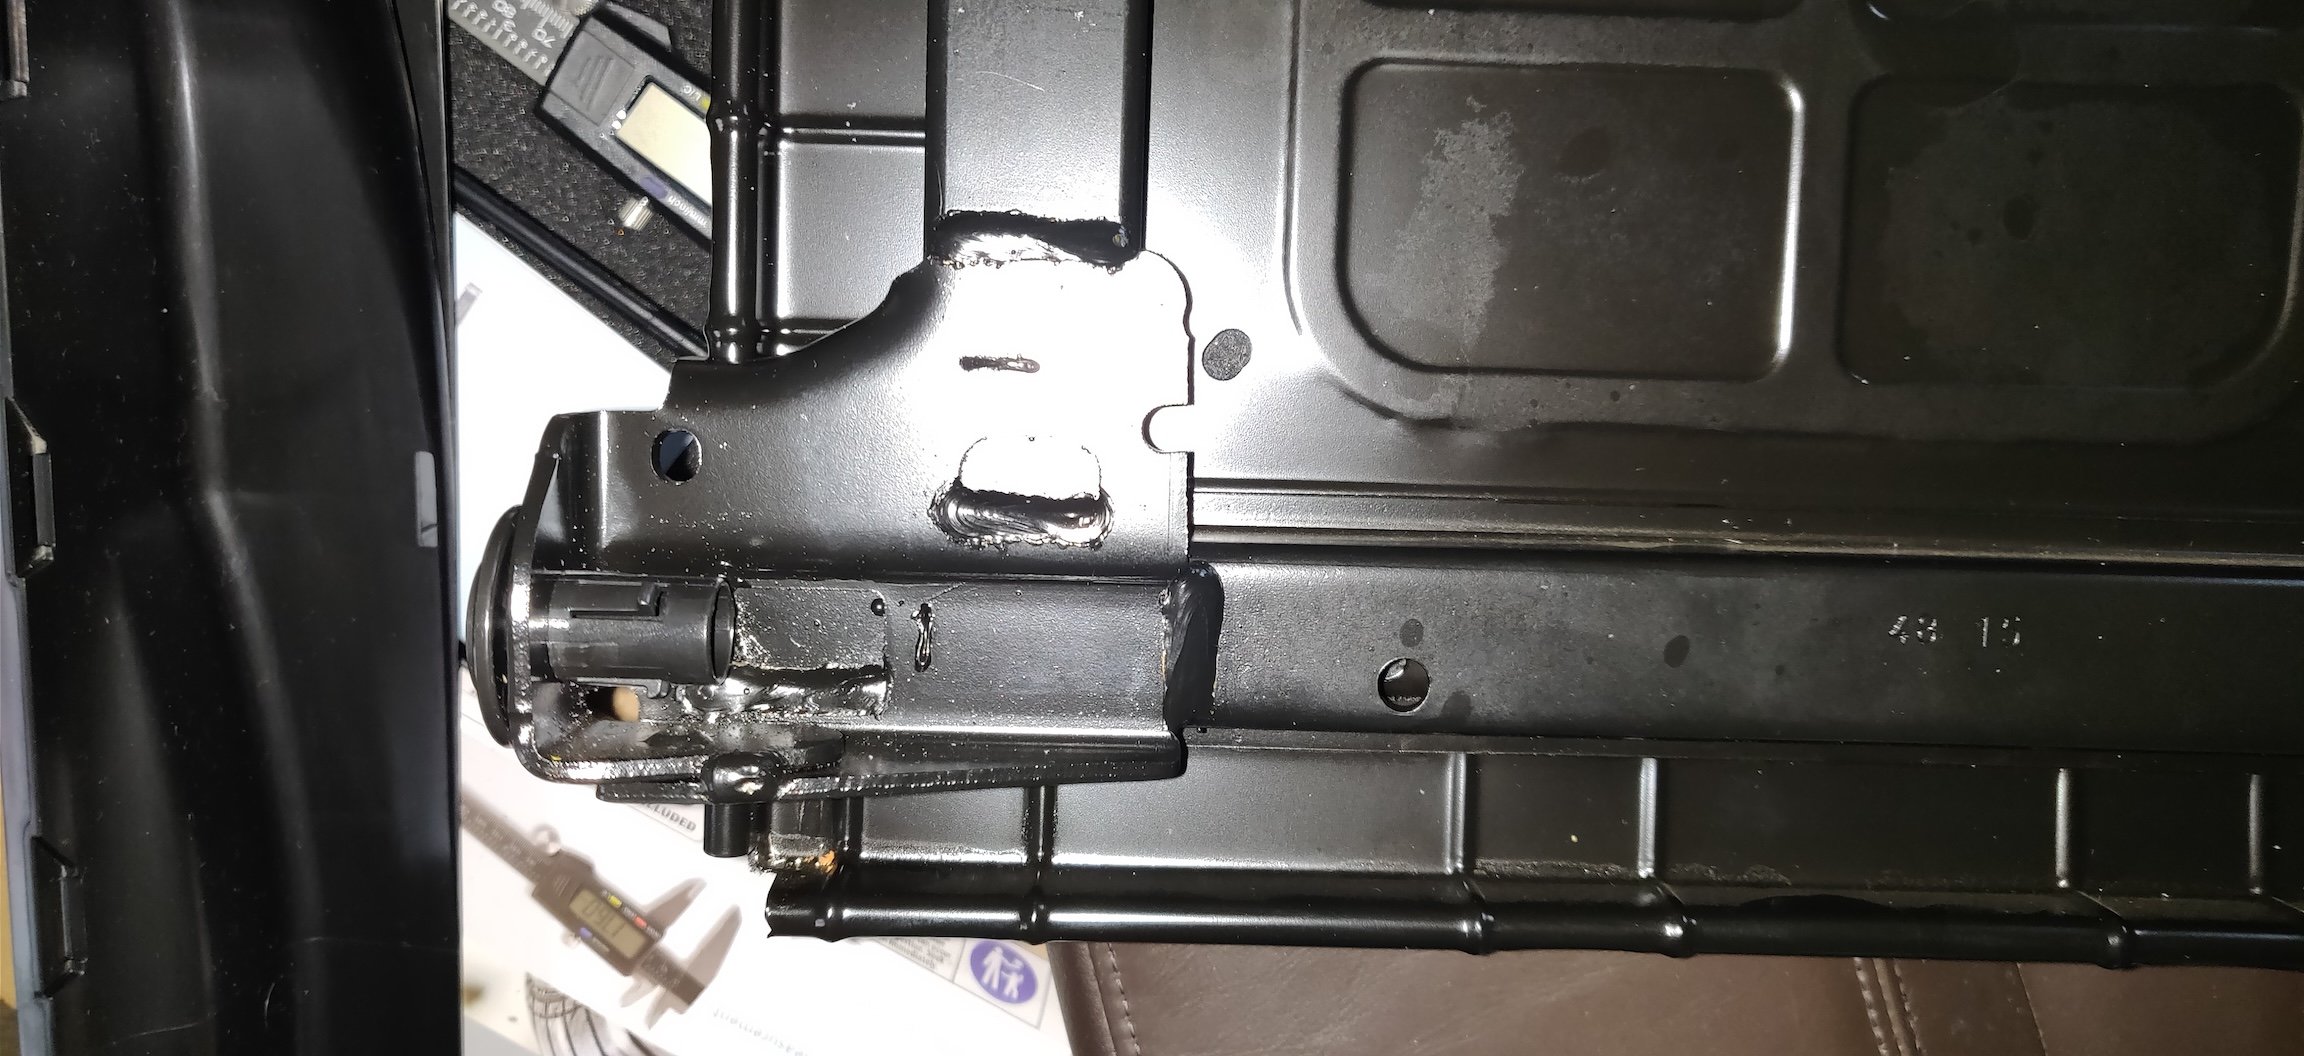
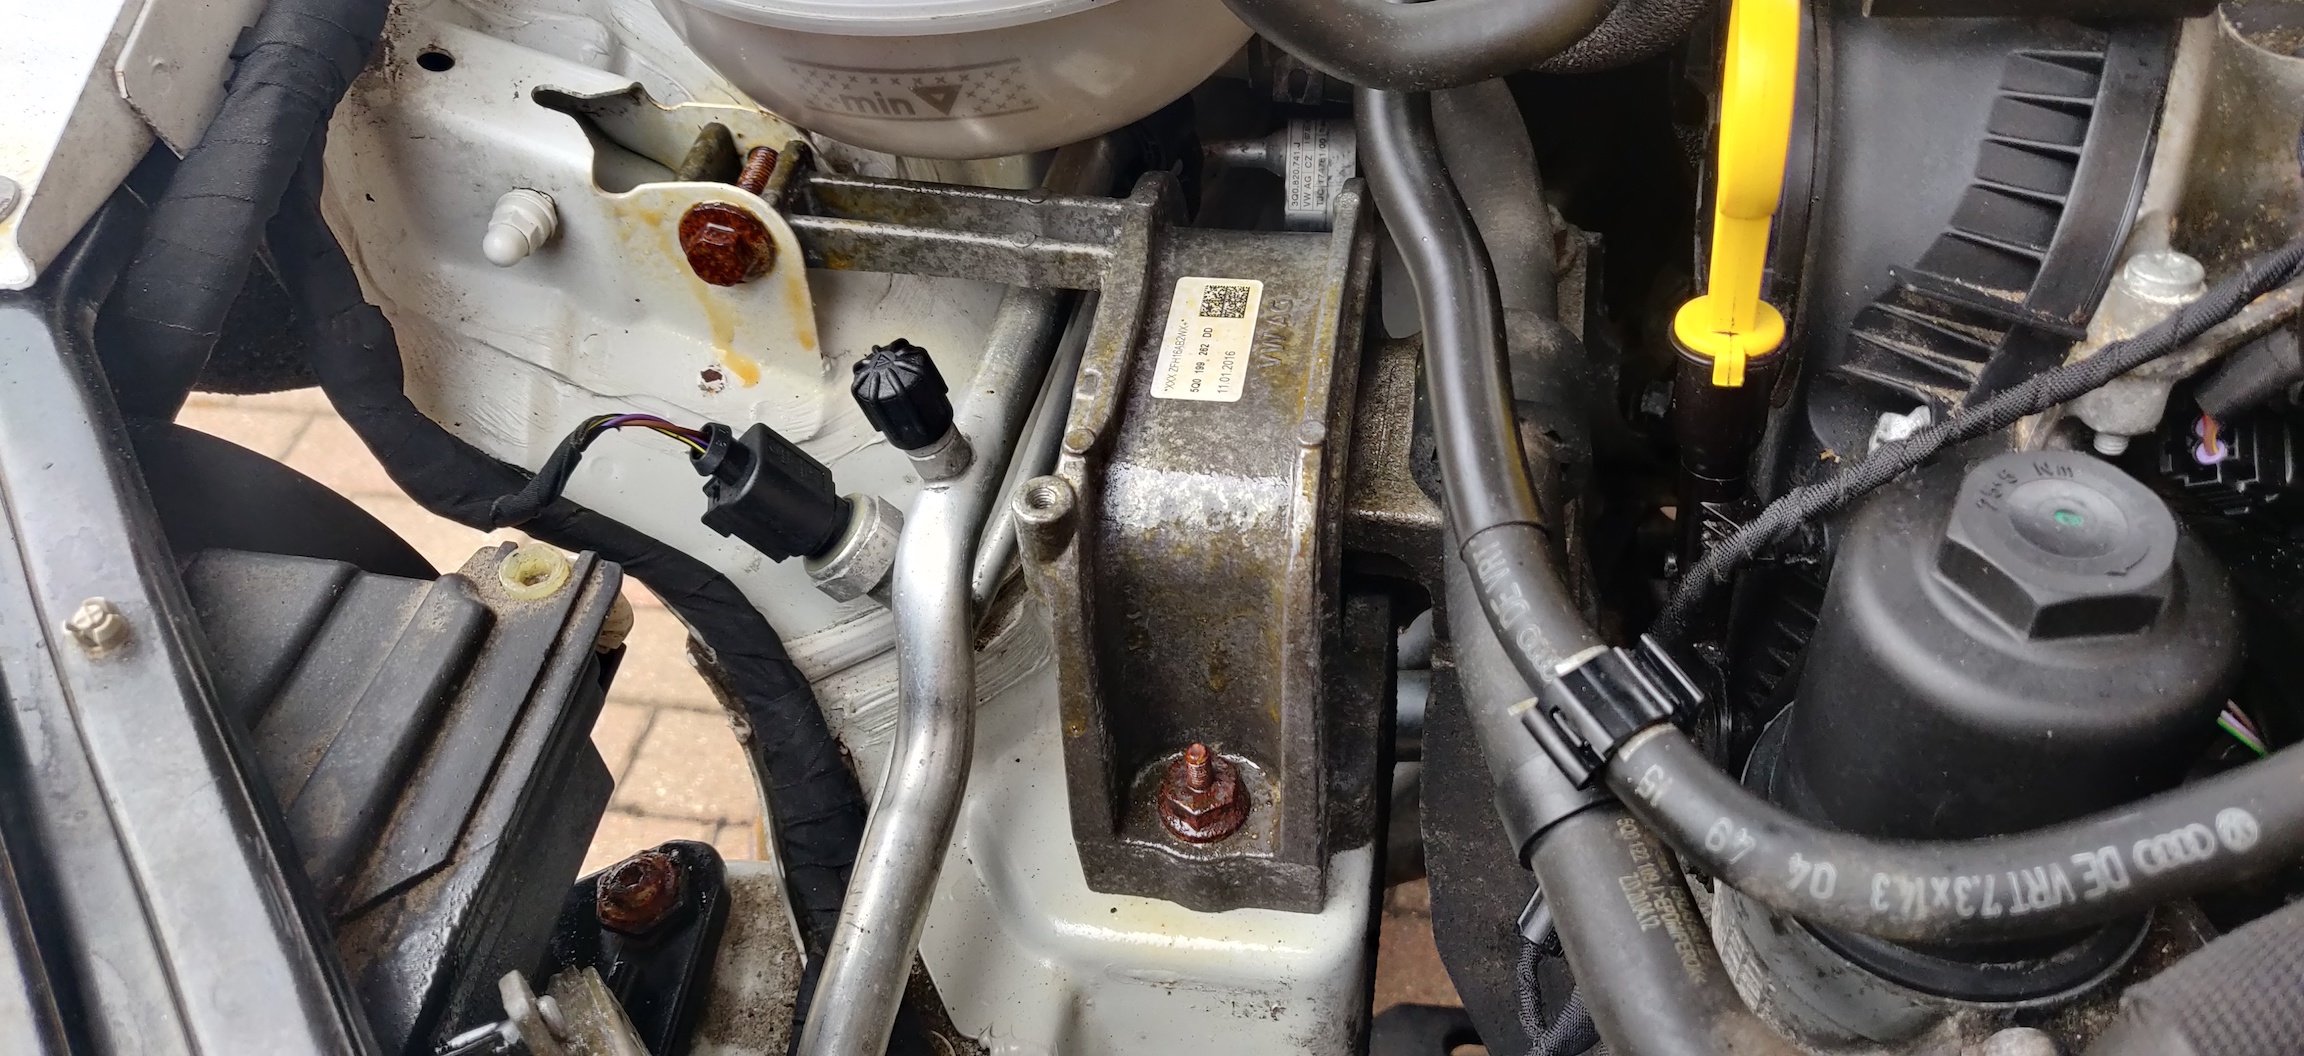
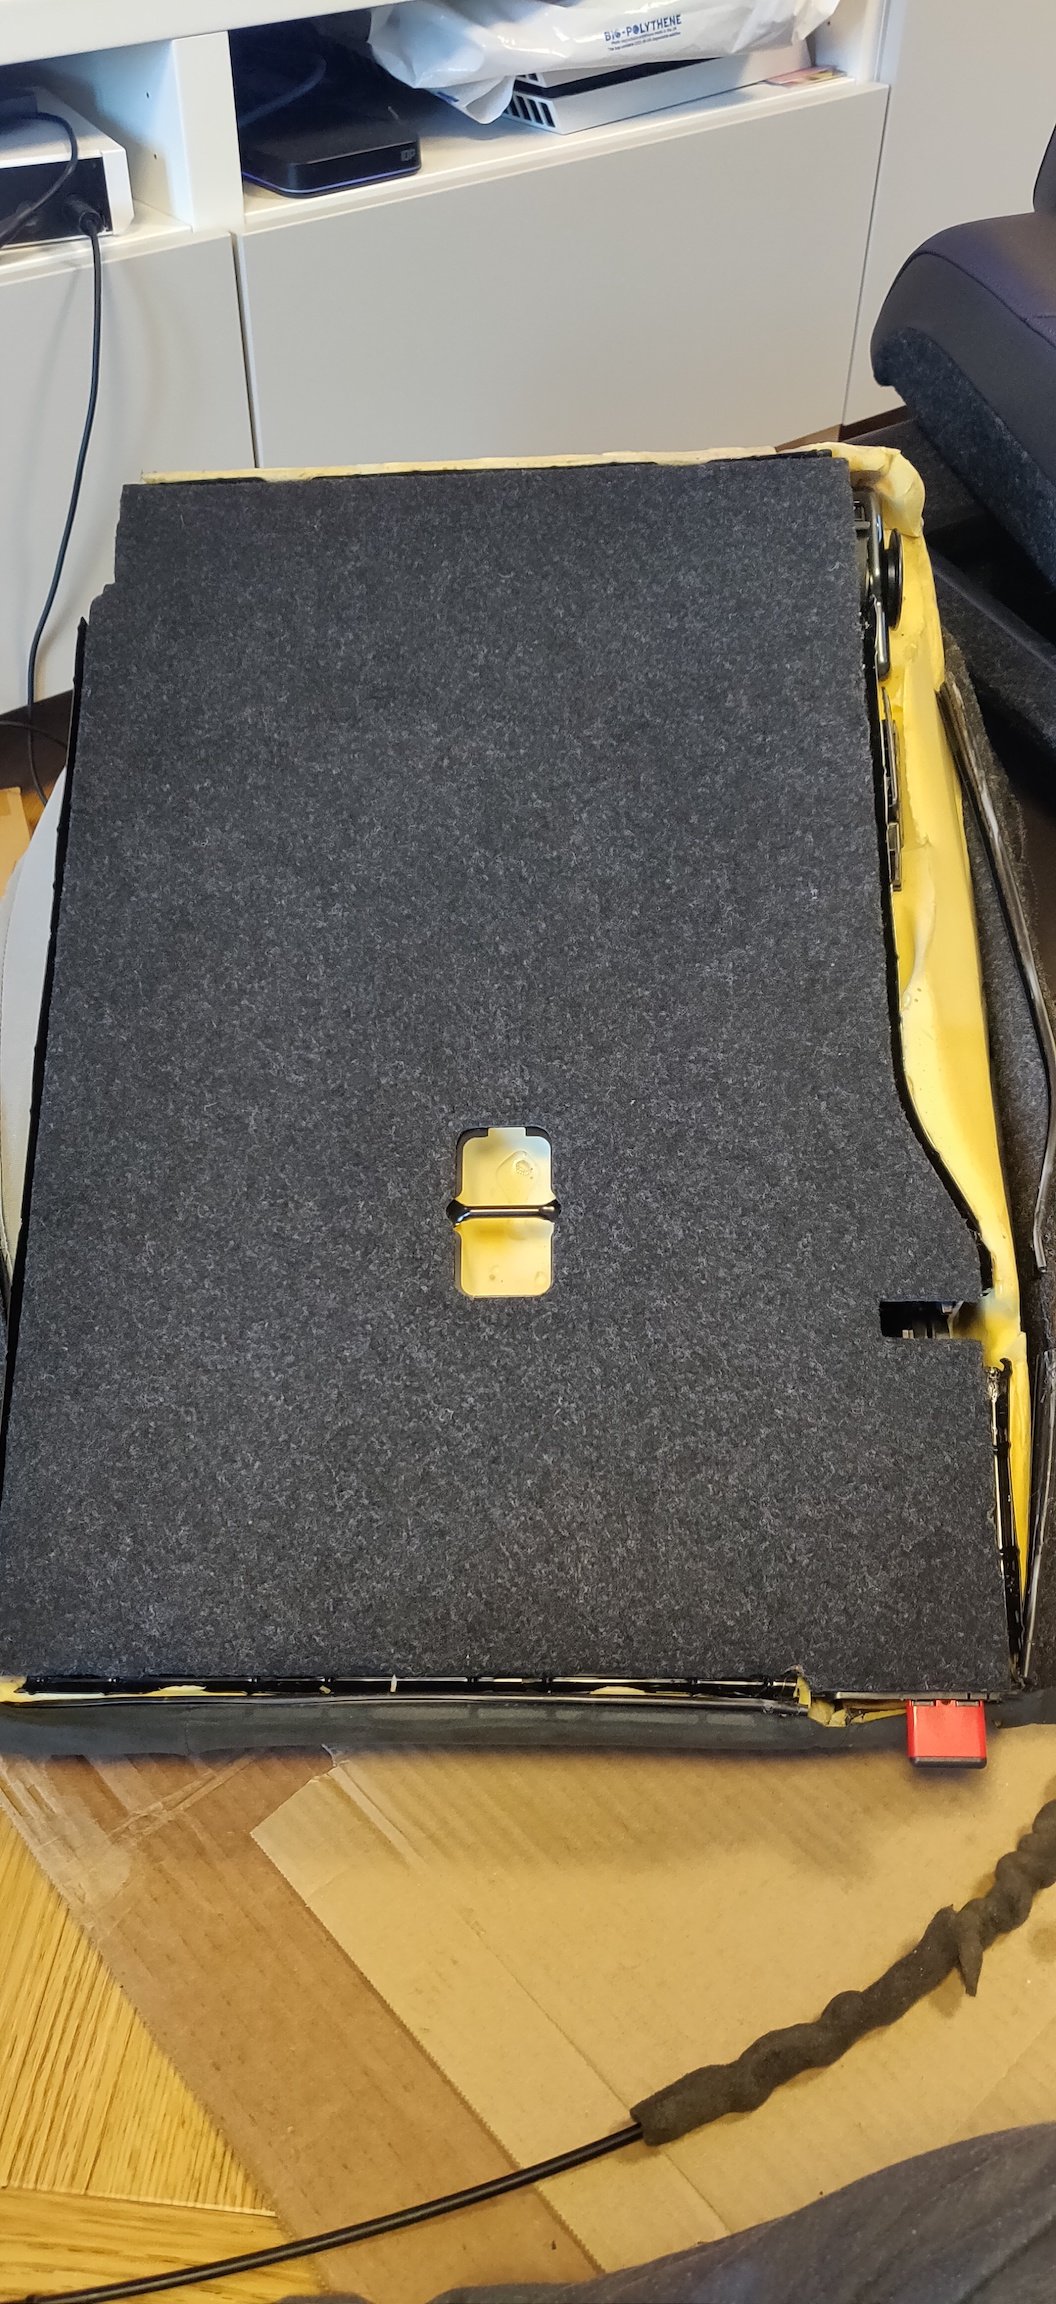
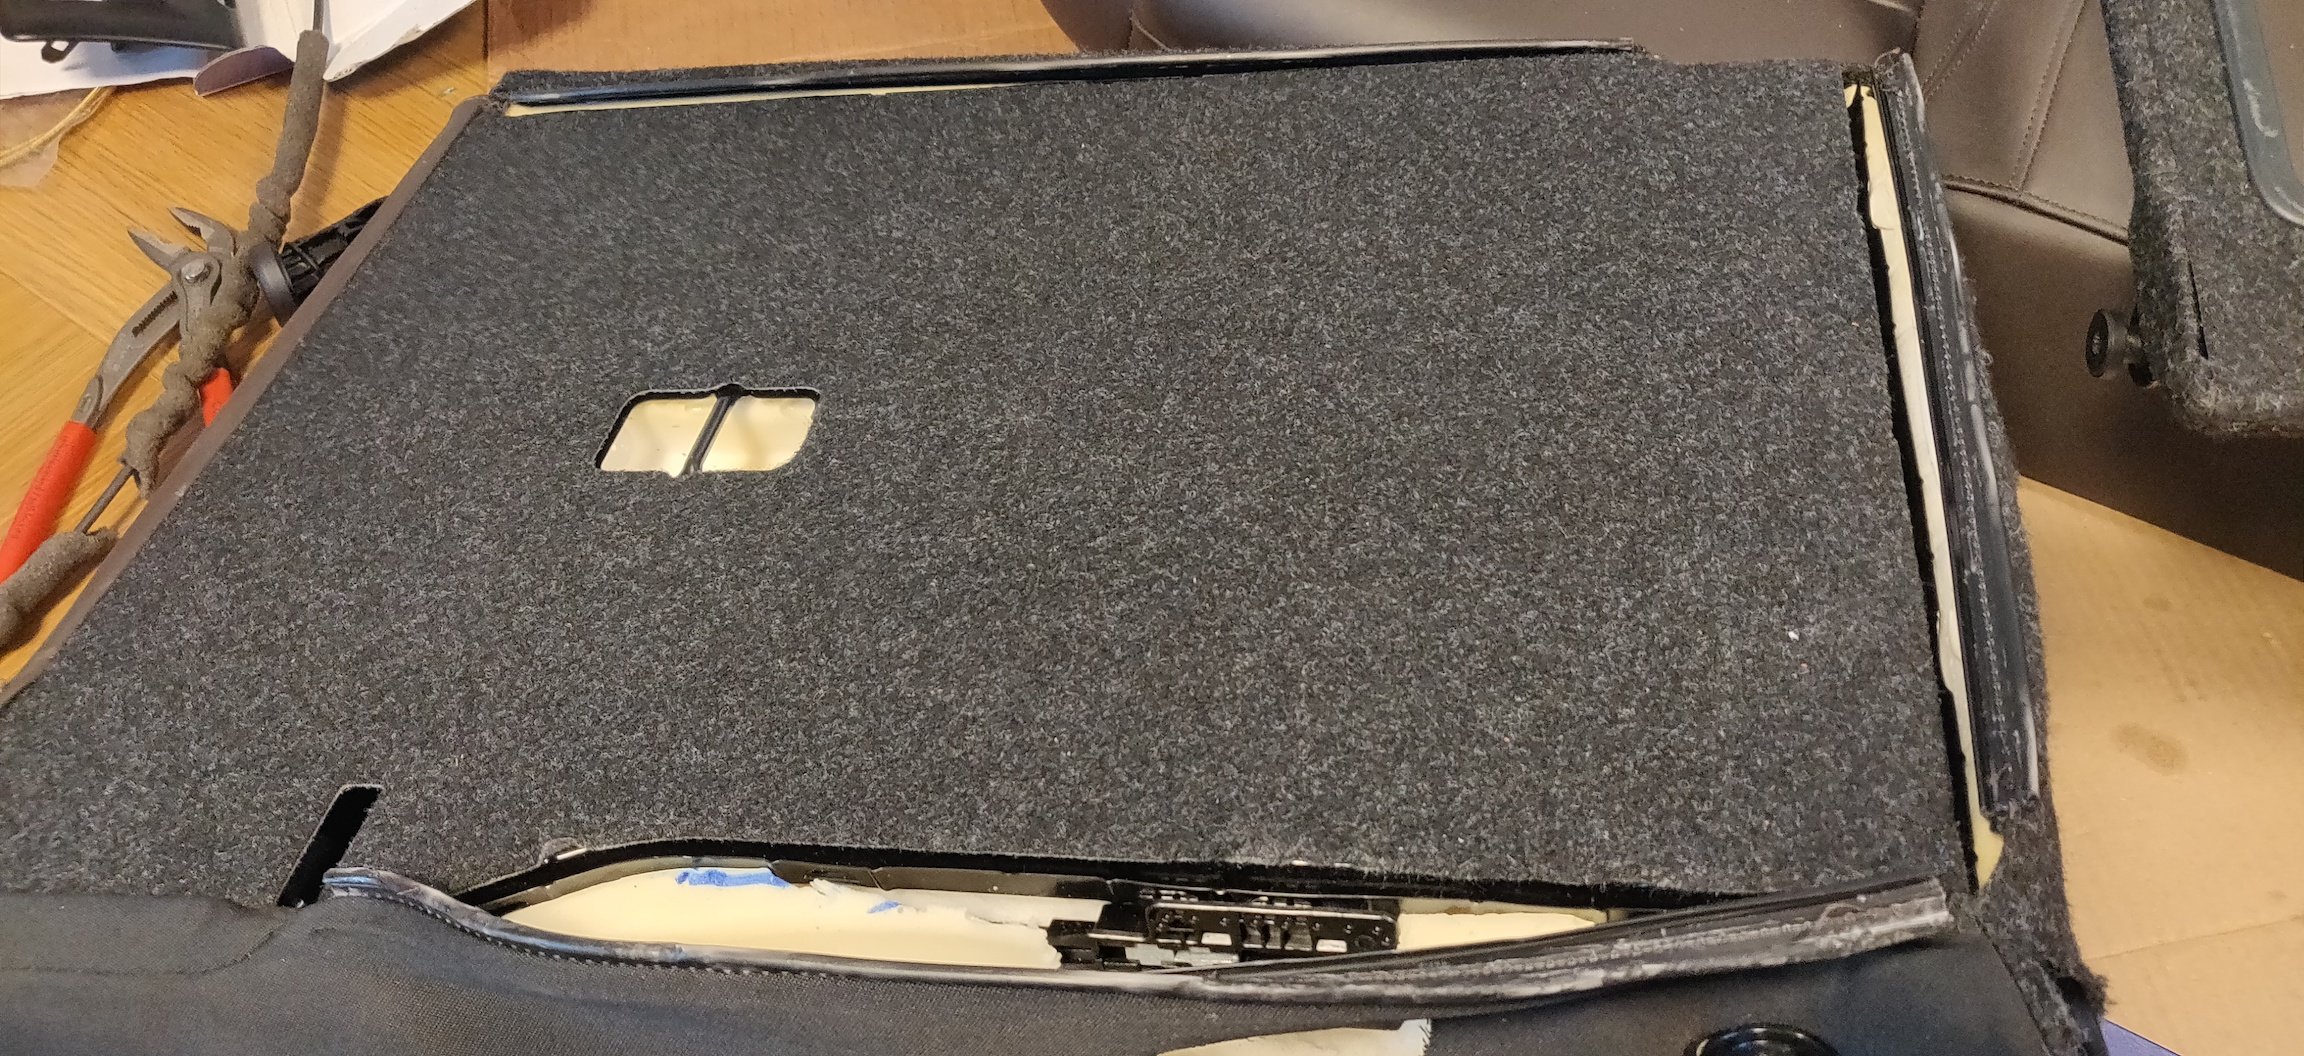
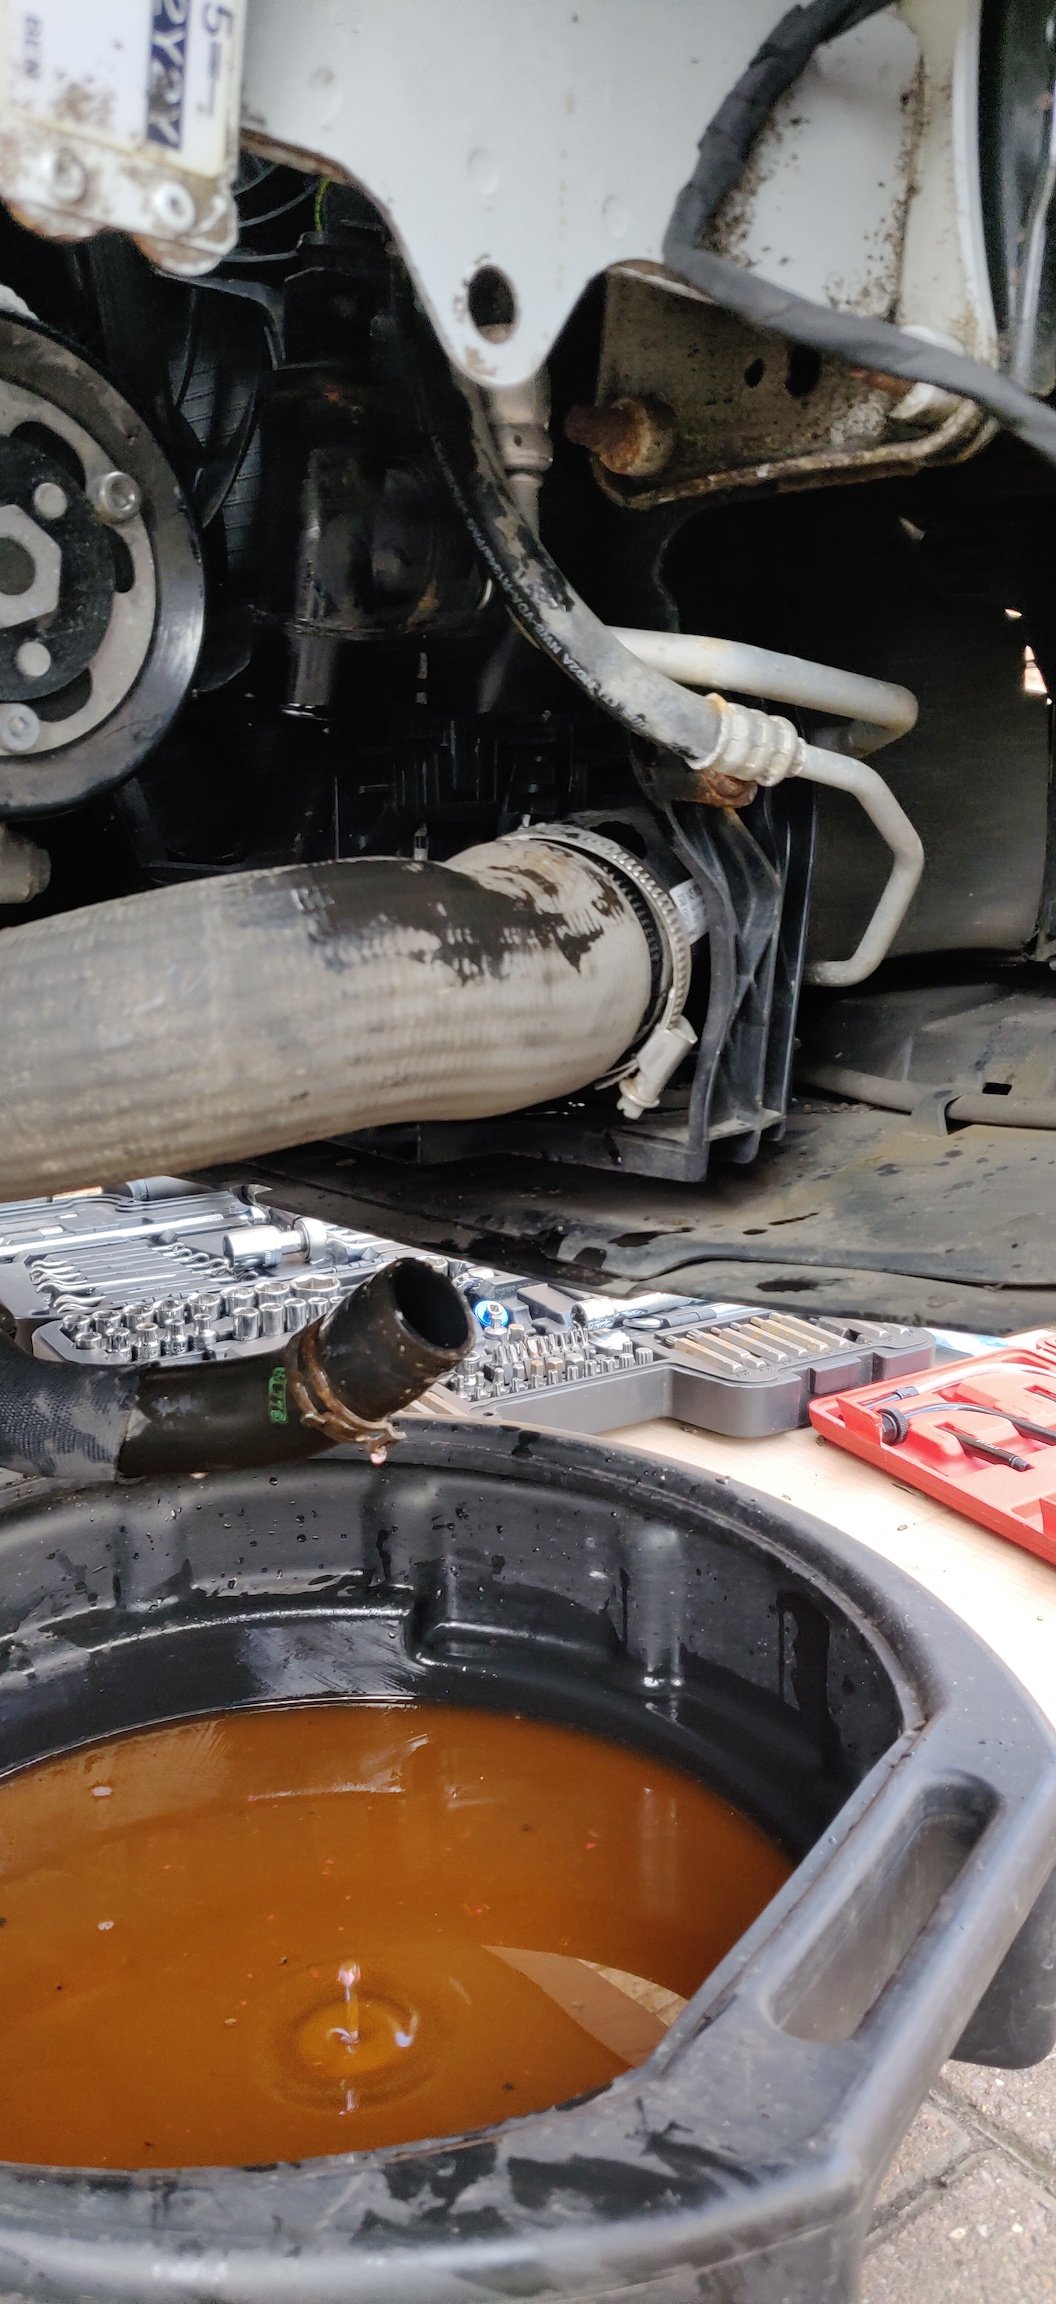
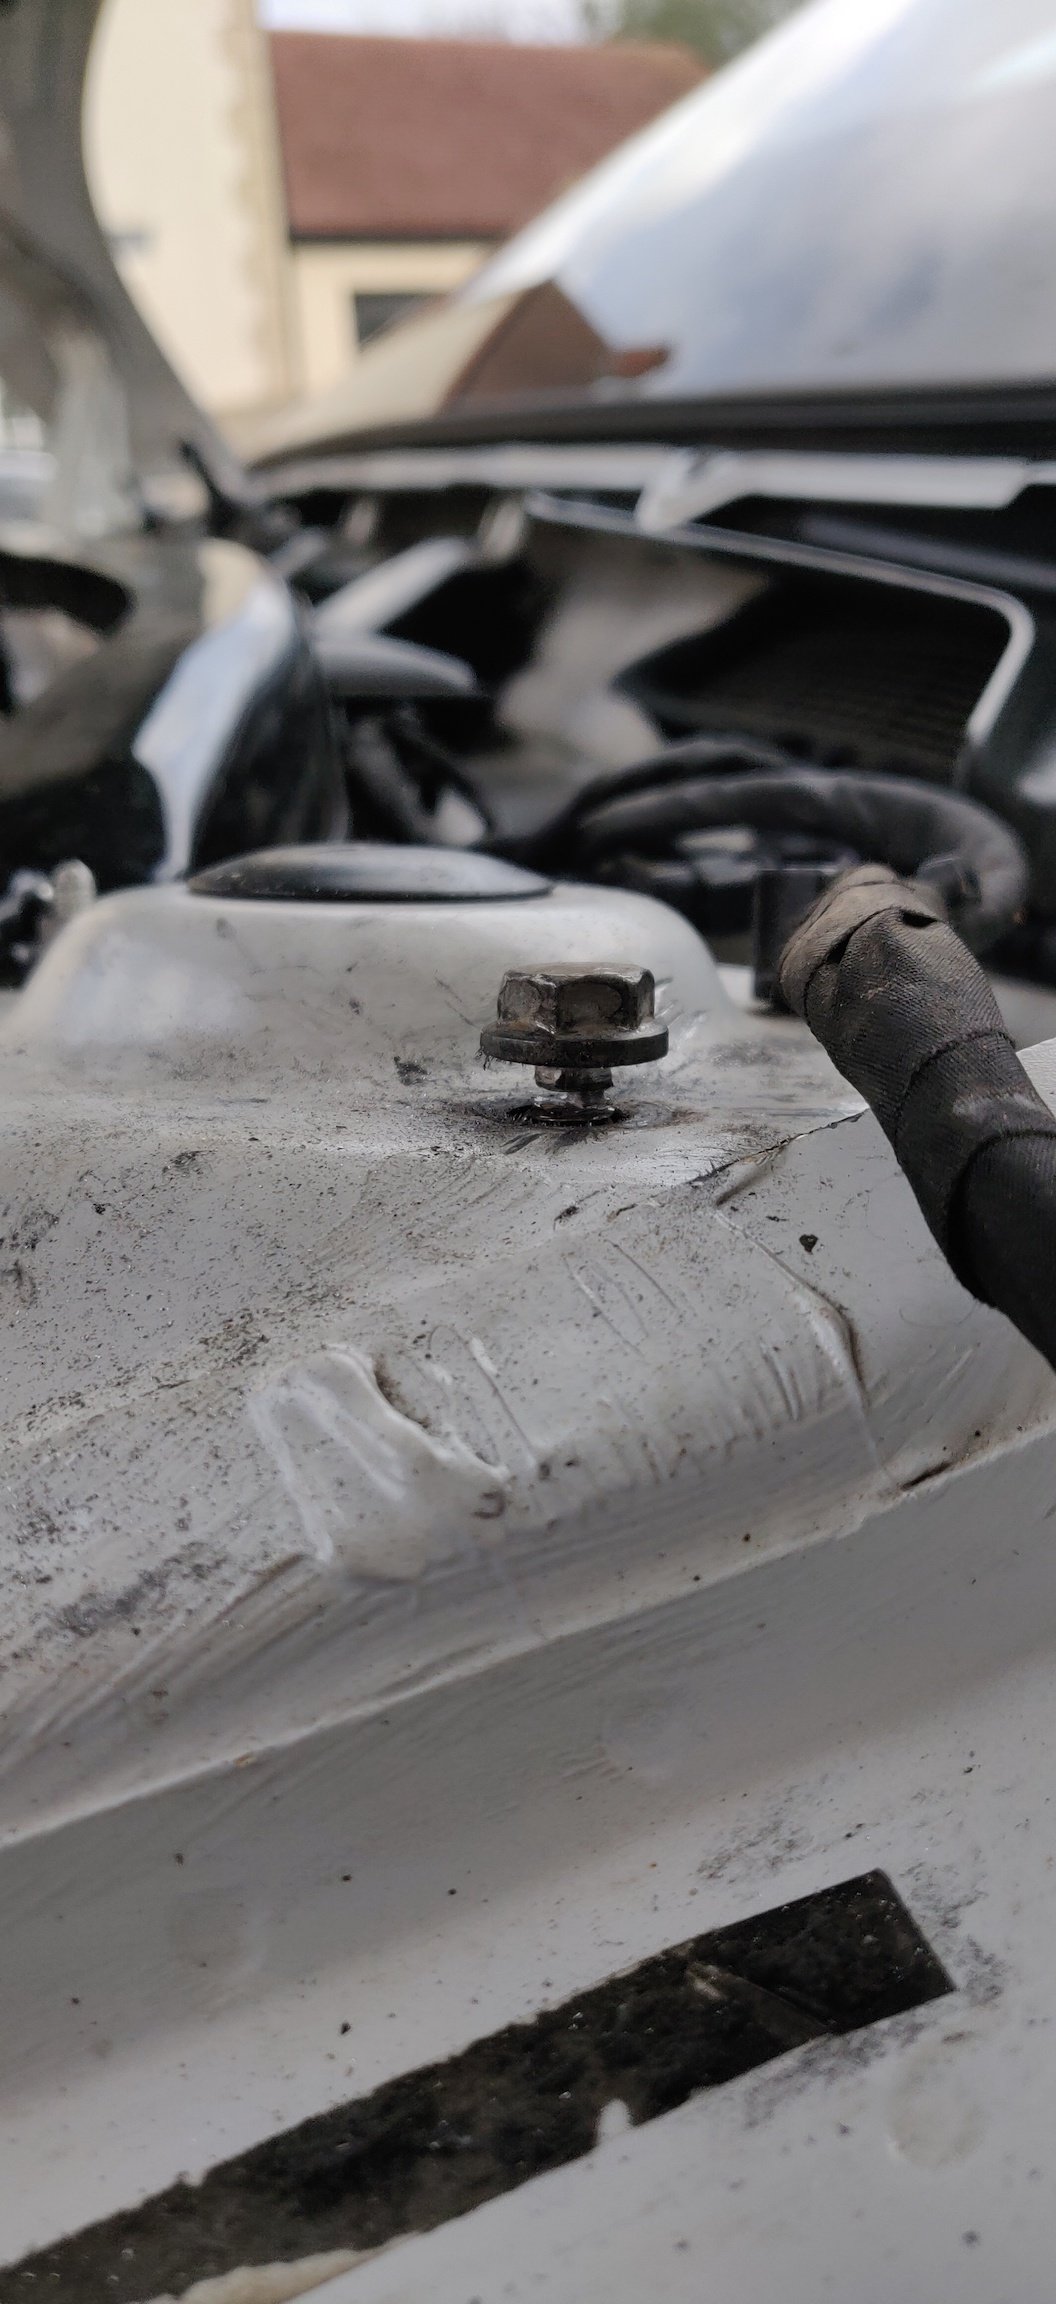
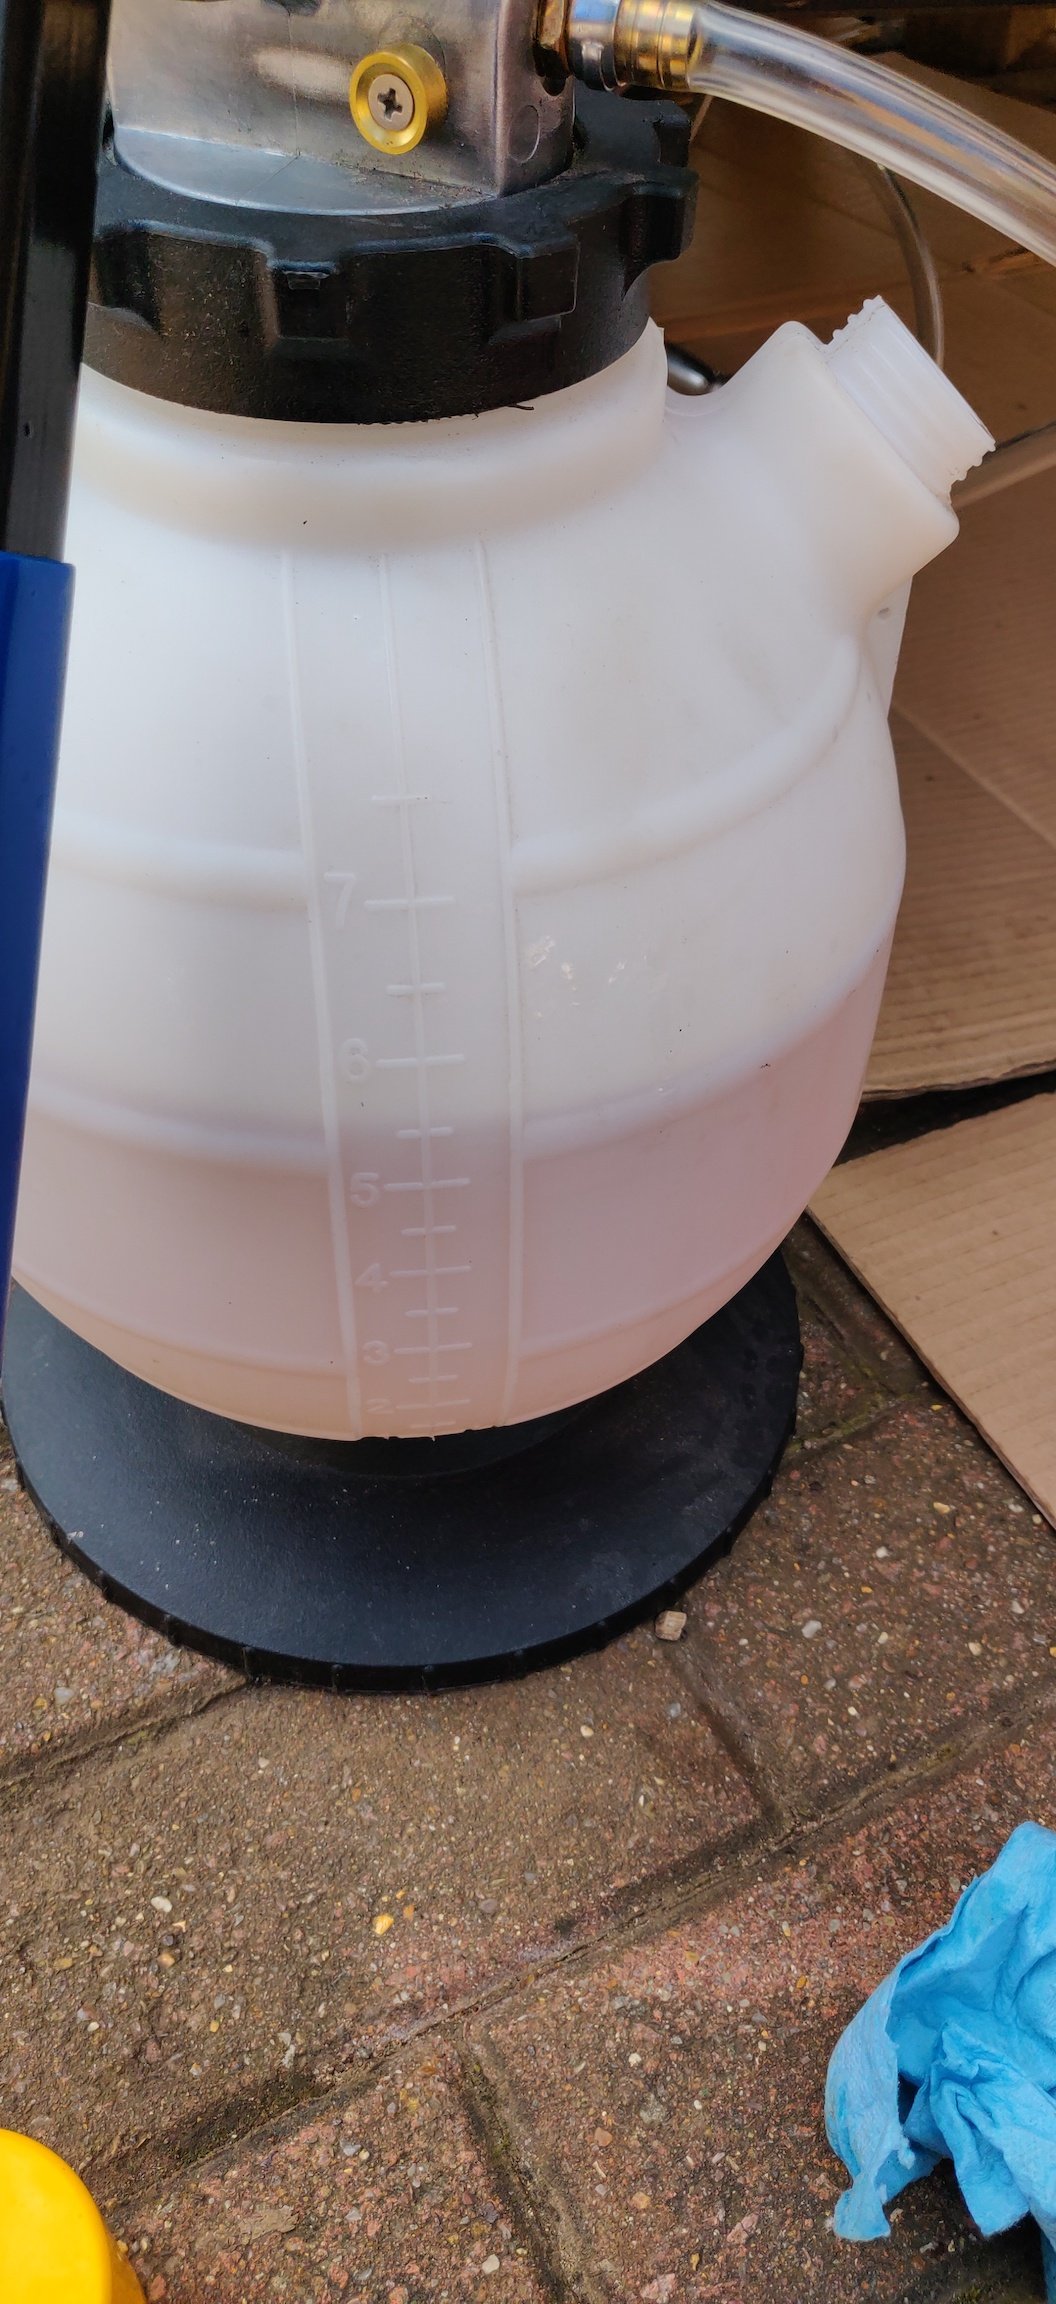
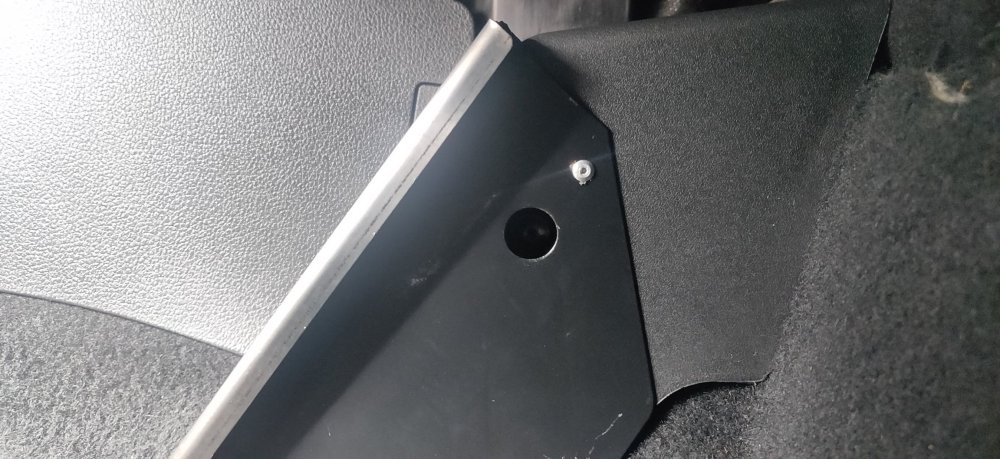
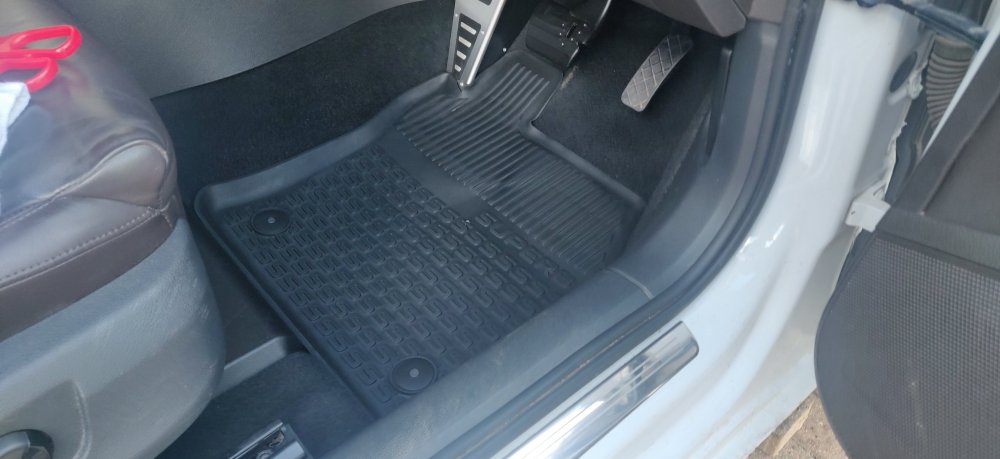
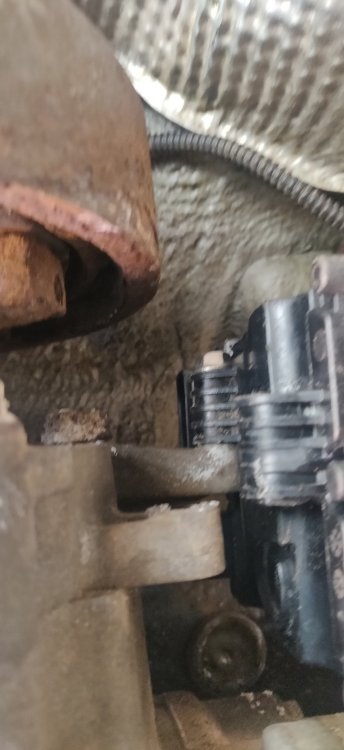
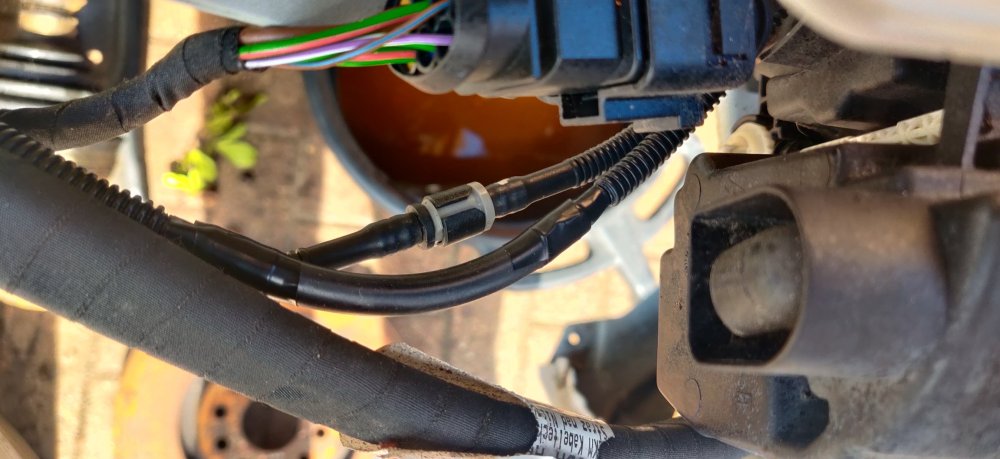
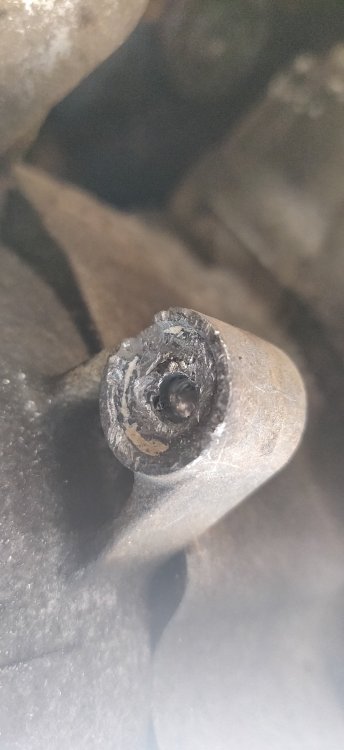
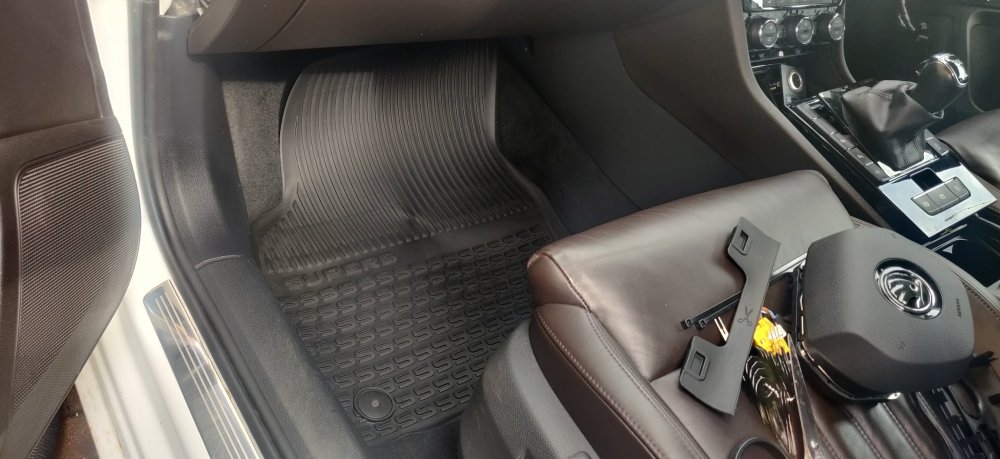
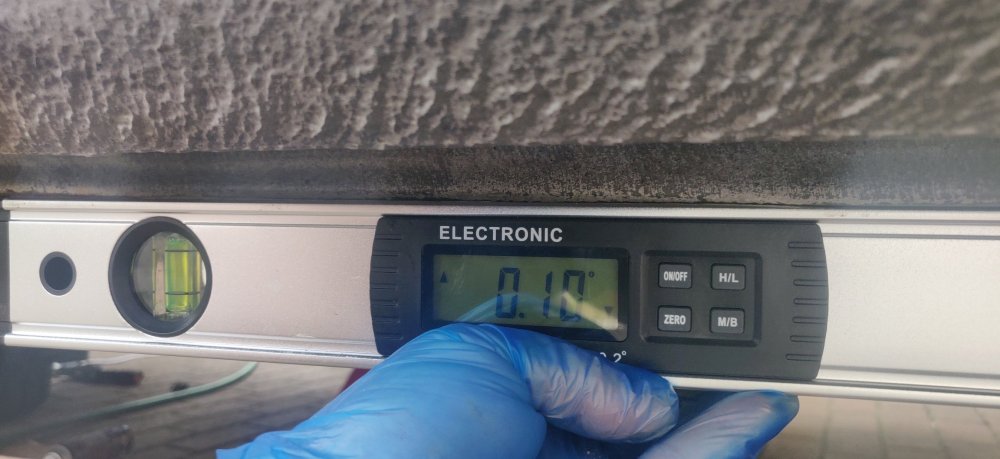
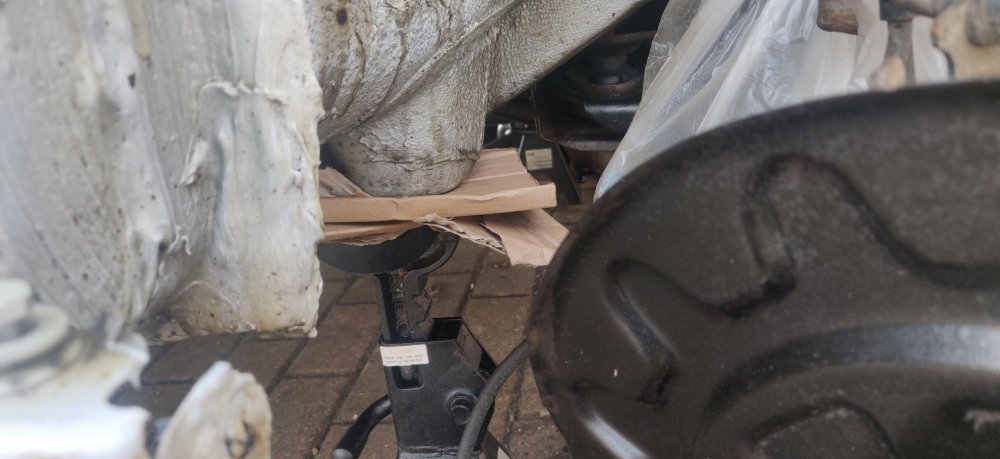
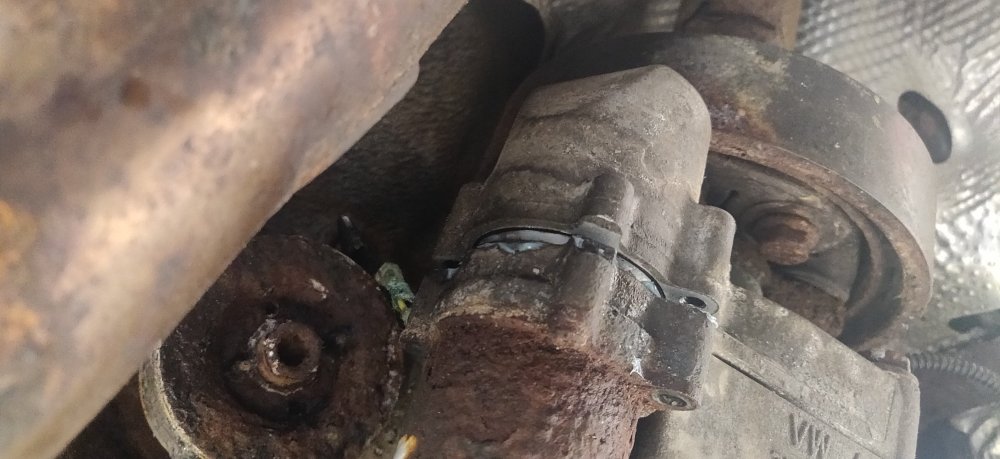
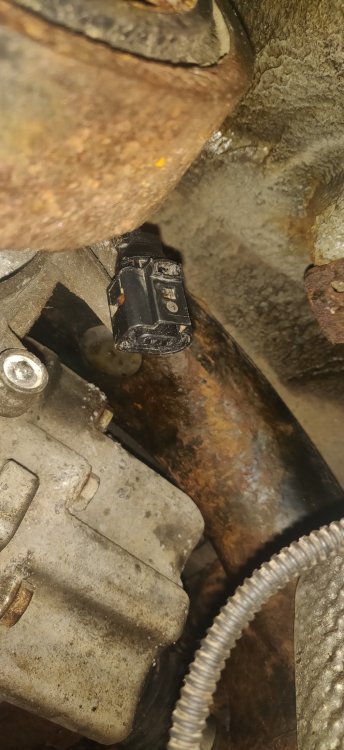
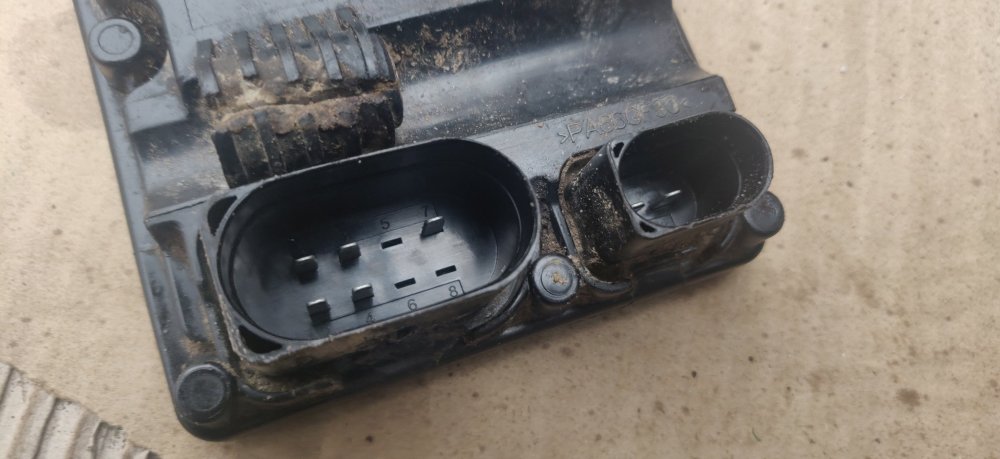
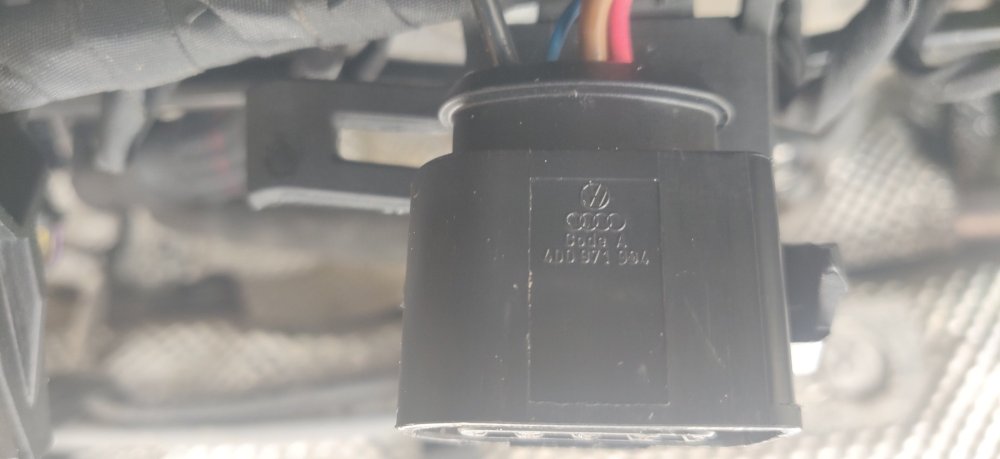
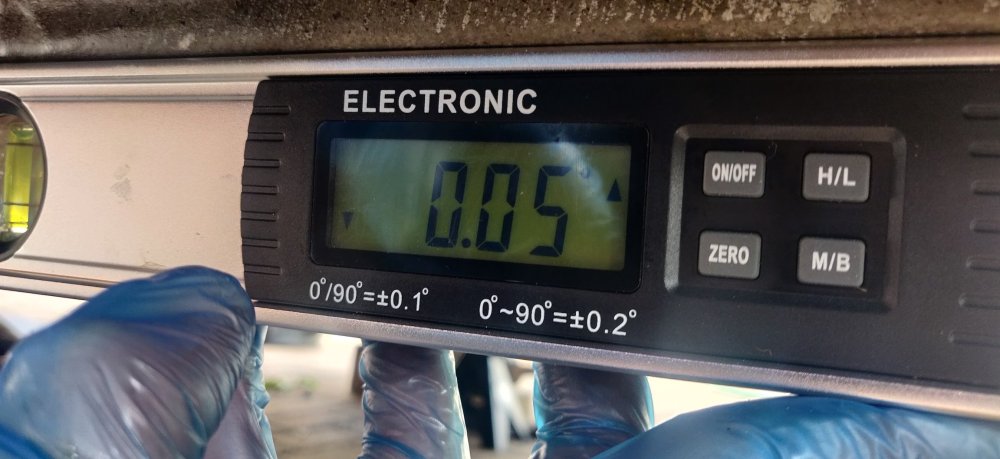
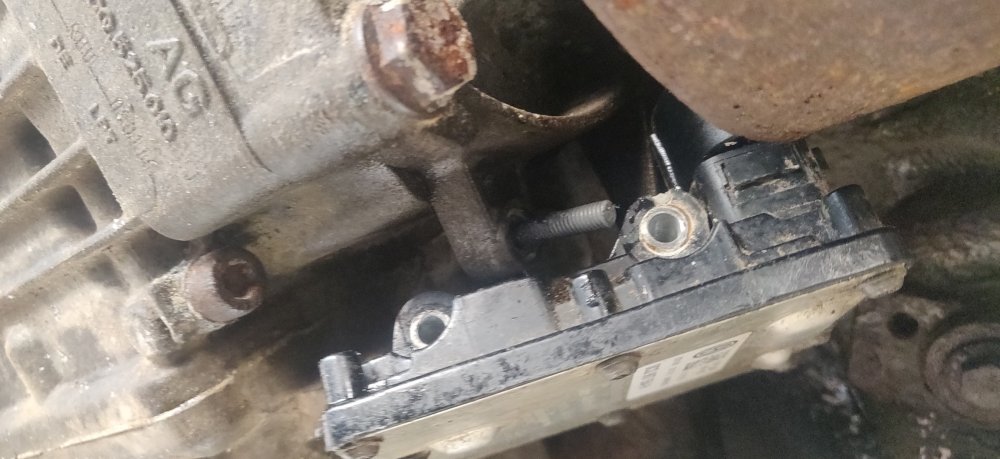
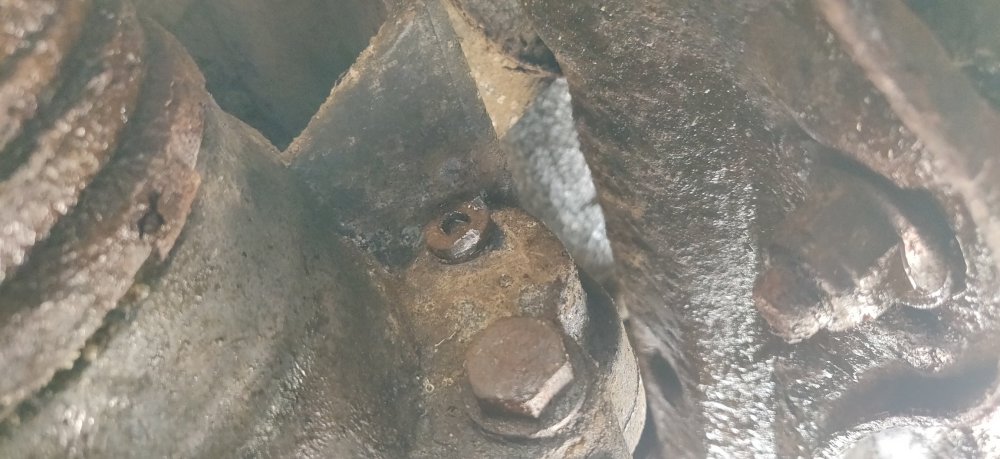
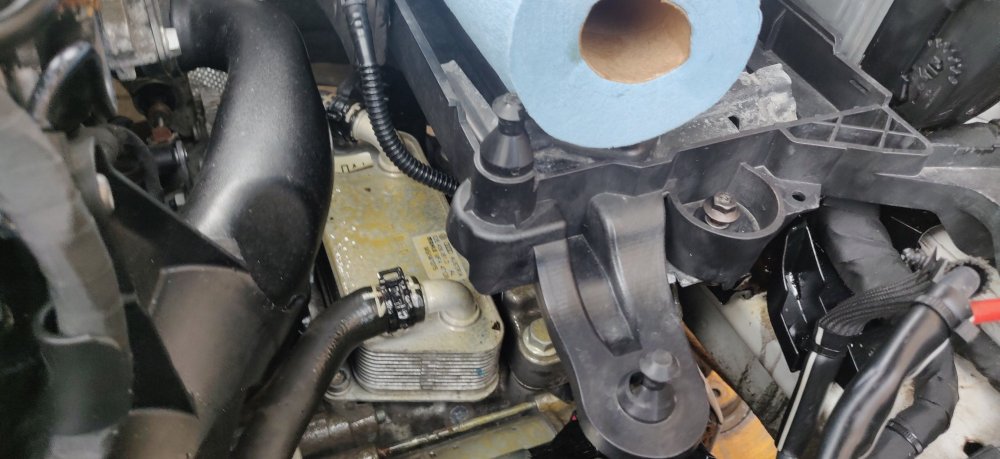
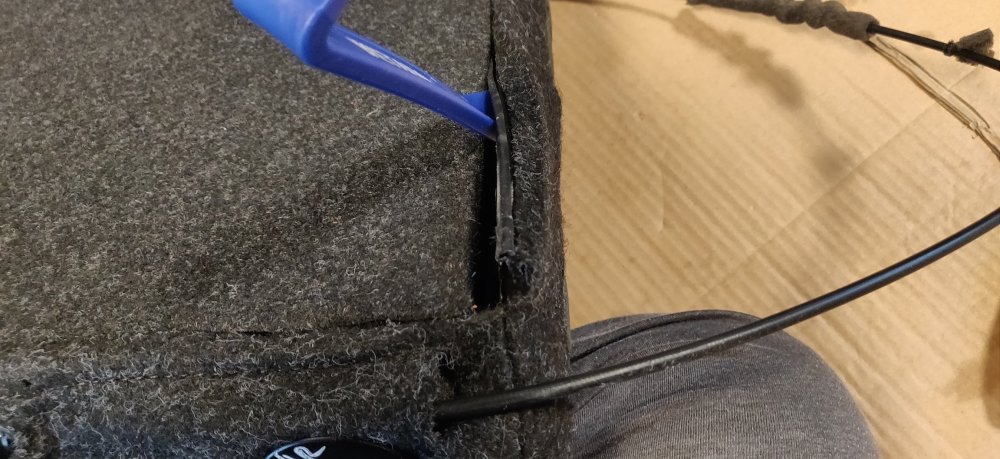
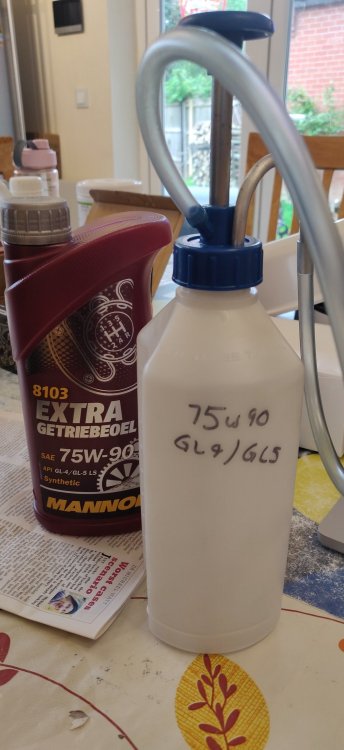
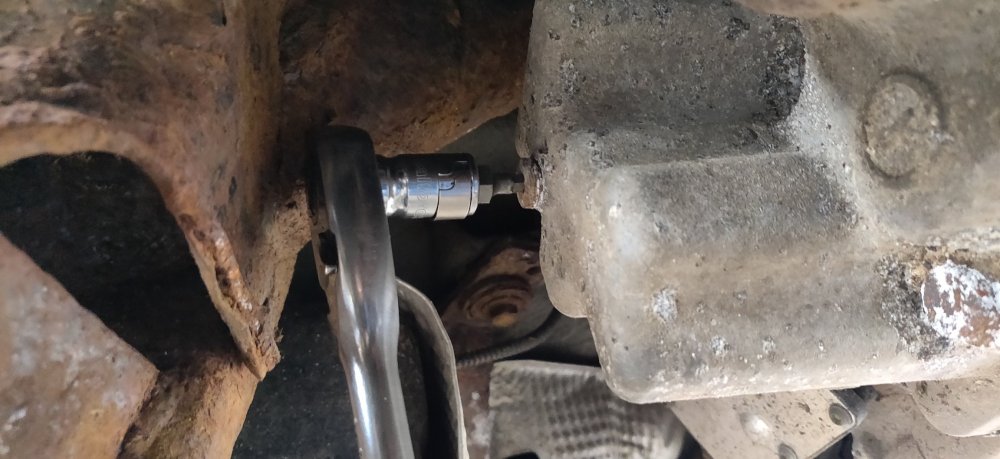
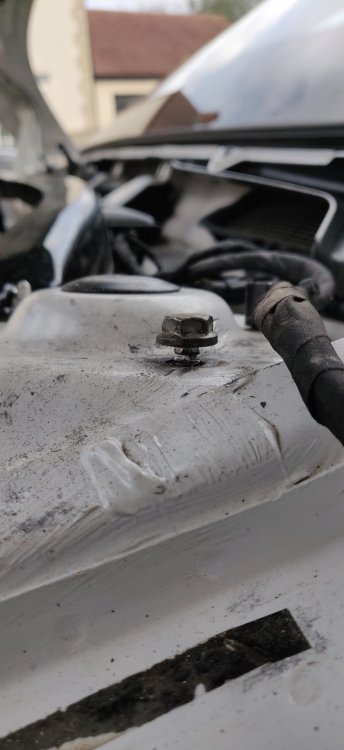
After a spot of lunch, not particularly wanting to be horizontal, caught up on a few things inside: Left the two wires ready for shrinking with a heat gun for quite a while now, so time to get at it. Forgot to take a pic of the result, and just tucked the wiring around somewhere and put the side trim back on: I'll probably revisit the wiring to make sure its tucked away nice and appropriately. Gave the carpet another round of hoovering, and started with the passenger side all weather mat: To be honest, was hoping it would be a bit deeper. I then noticed that the mats I have don't include the rears, and have only the fronts, for both left hand drive and right hand drive. Frustrating really, might be quicker and easier to take the hit and purchase the rears separately than wait for potential resolution of that order. At least there was the centre tunnel: So not much I can do for the interior. So went and got the inclinometer: I've used the sill as a possible reference, but ominously, it isn't super flat. Just tried best endeavours really, and used a trolley jack to jack up the front until it got as flat as I could after wiggling the inclinometer a bit. It was hugely unscientific, but a tenth of a degree is probably flat enough in all honesty: The other side was to 0.05 degrees, and the sill on the left side looked a lot more straight. Anyways, to continue the whole unscientific vibe: Wedges of cardboard was used to make up the required raised height. I ended up lifting this side up and readjusting the stand and rubber as it wasn't confidence inspiring being off centre. Repeated for the other side: So with the car reasonably level (or at least more level than it was before), started to begin reassembling to pump ready for filling: Was the usual case of a cleanup, replacing the o-rings, with a film of oil applied on those o-rings, and I have the mating surfaces a small smear of corrosion block grease. The wiring is then looped over the top of the Haldex unit, and gave the connector a quick clean: The flash highlighted that it isn't super clean yet. I then spent an inordinate amount of time attempting to free the remaining larger connector to the Haldex controller. This: Helps illustrate how the connector should disconnect, especially with how the tab is supposed to work. The clip also cites how dirt is probably getting in the way, which is certainly the case on my end. I think I got it free with applications of brake cleaner, and eventually with the Knipex pliers pulling alongside the screwdriver on the latch: Gave the connector a quick clean, will probably go through it again with the other connector. So the controller is freed, and the gunk and muck around the connectors is quite visible: Will need to give this a cleanup, and probably use something like silicone lubricant or something to try and stave off dirt getting into the bits again. So at this stage, both parts of the rear can be filled with oil. So started with the rear diff: Got the pump filled with 800ml of 75w90 and inserted the pipe into the fill hole: Then a case of pumping, similar to the DSG pump really. In this case, I ended up refilling the pump and the oil still wasn't dribbling out, so almost a litre went in. I'm not sure if I need to continue topping it up or whether its ok. Probably be awkward as I then fitted the fill bolt and torqued to 20Nm. Next was the Haldex, so the pump with its two screws were tightened to 9.5Nm each. Then it was the drain bolt. So time to try out the RacingLine magnetic bolt: Disaster. The workshop manual specifies 40Nm, and for some stupid reason, decided that was also applicable here. So as I tightened, it then made a strange sound and then started to turn loosely. So turning the bolt head the other way then revealed the mess above. Definitely was too tight, so only then I went and consulted their website and found https://www.racingline.com/_files/ugd/653f35_617ecc2f06f34d62a3ca312cc95e490d.pdf which specified 15Nm! Why this wasn't clear on the packaging or something, anything, or more importantly why I didn't RTFM first, who knows. Panic stations: \ So didn't really have an idea how to tackle this. It's in there quite a bit, so no pliers are possible. I figured maybe there's enough to get a hammer and drift punch at the bolt to maybe start spinning it free. I lucked out: Didn't actually need tapping with a hammer, the drift was able to rotate the bolt with it being quite loose. Huge relief. So with it freed, calmed down and decided it'll be sorted next time I go at this, in 2 years time. For now, just used the original drain bolt, and tightened that to 40Nm. Not actually sure whether it will seal to be honest, probably should have been patient and procured a proper replacement. Didn't take pics of the actual filling of the Haldex. Got the pump I purchased, screwed it into the bottle, and pumped away. To be honest, the pump only just about fit in the fill area, and it's quite a mess afterwards. I'll probably purchase the same pump I used for the rear diff for future refills, simply because its a little less cleanup afterward. Now, with the oil there dribbling out, got the RacingLine fill bolt and nipped it up. It should be 15Nm, but not tightened yet due to double checking the level once the oil is warmed up and gone through the pump. Decided then to do something different: Or, at least I was going to. Looks like randomly getting a connector that looks correct wasn't enough. The bottom was the intended replacement, but the actual inside connector is different. So looked around the connector: With a part number 4D0 971 994 being revealed (pics not showing it too great). So another thing to sort out. With that setback, I was reminded of the front wings that have been lying there most of the afternoon. Time to see if I start reattaching them: Firstly got the black plastic bits reattached to them. Just a case of lining it up and clipping it into place. Other than slotting the front wing between the front bumper and the front mounting bit, the wing itself aligns in a fairly intuitive manner: So just greased up all the bolts and reattached. Haven't torqued it up yet, something for later. Repeat for the other side, and so the front wings are sorted. I spent the remainder of the light of the day attempting to remove that bottom bolt of the controller. I tried fire, Knipex pliers, hammer and chisel and the thing did not budge. This is as far as I got it after an hour: Sod's law it probably isn't even that much anymore but it's holding fast, and you can see the aluminium casing is taking damage with it. I'm hoping that I have it flat enough to get some purchase with a drill on it, and that also a drill actually fits. Sod's law it might not, but I can't see any other approach that could work. The aluminium corrosion on this car is truly exceptional. Before it got too dark, I tried to get at least one more win: So went to see if I can tackle the ball joint nuts. Frustratingly there isn't enough space for the impact wrench, and with the hub freed, there isn't a sensible way to undo this without the hub just going with it. Firstly, got my screwdriver and scraped away as much of the crud as possible to see what socket goes on. It turns out to be 18mm. I remembered that I actually have a longer 18mm impact socket, so with a few other extensions: Contrived a socket, universal joint, and two extensions to get it out through the top of the hub and to the impact wrench. Then some deep breaths, and buzzed at it. It came free. The other side was similar but got a bit hairy: That one almost got rounded, for some reason the socket wasn't going on square. Doesn't matter as long as it's out as they're going to be replaced. So tomorrow I'll get the ball joint separator and see if the ball joints can then be replaced. I suppose from there, I'll probably give the driveshafts and hub a cleanup before the big thing of getting the suspension on happens! Although, the elephant in the room is that one remaining bolt... Maintenance: £2004.02 Upgrades: £1158.66 Miscellaneous: £659.06


-
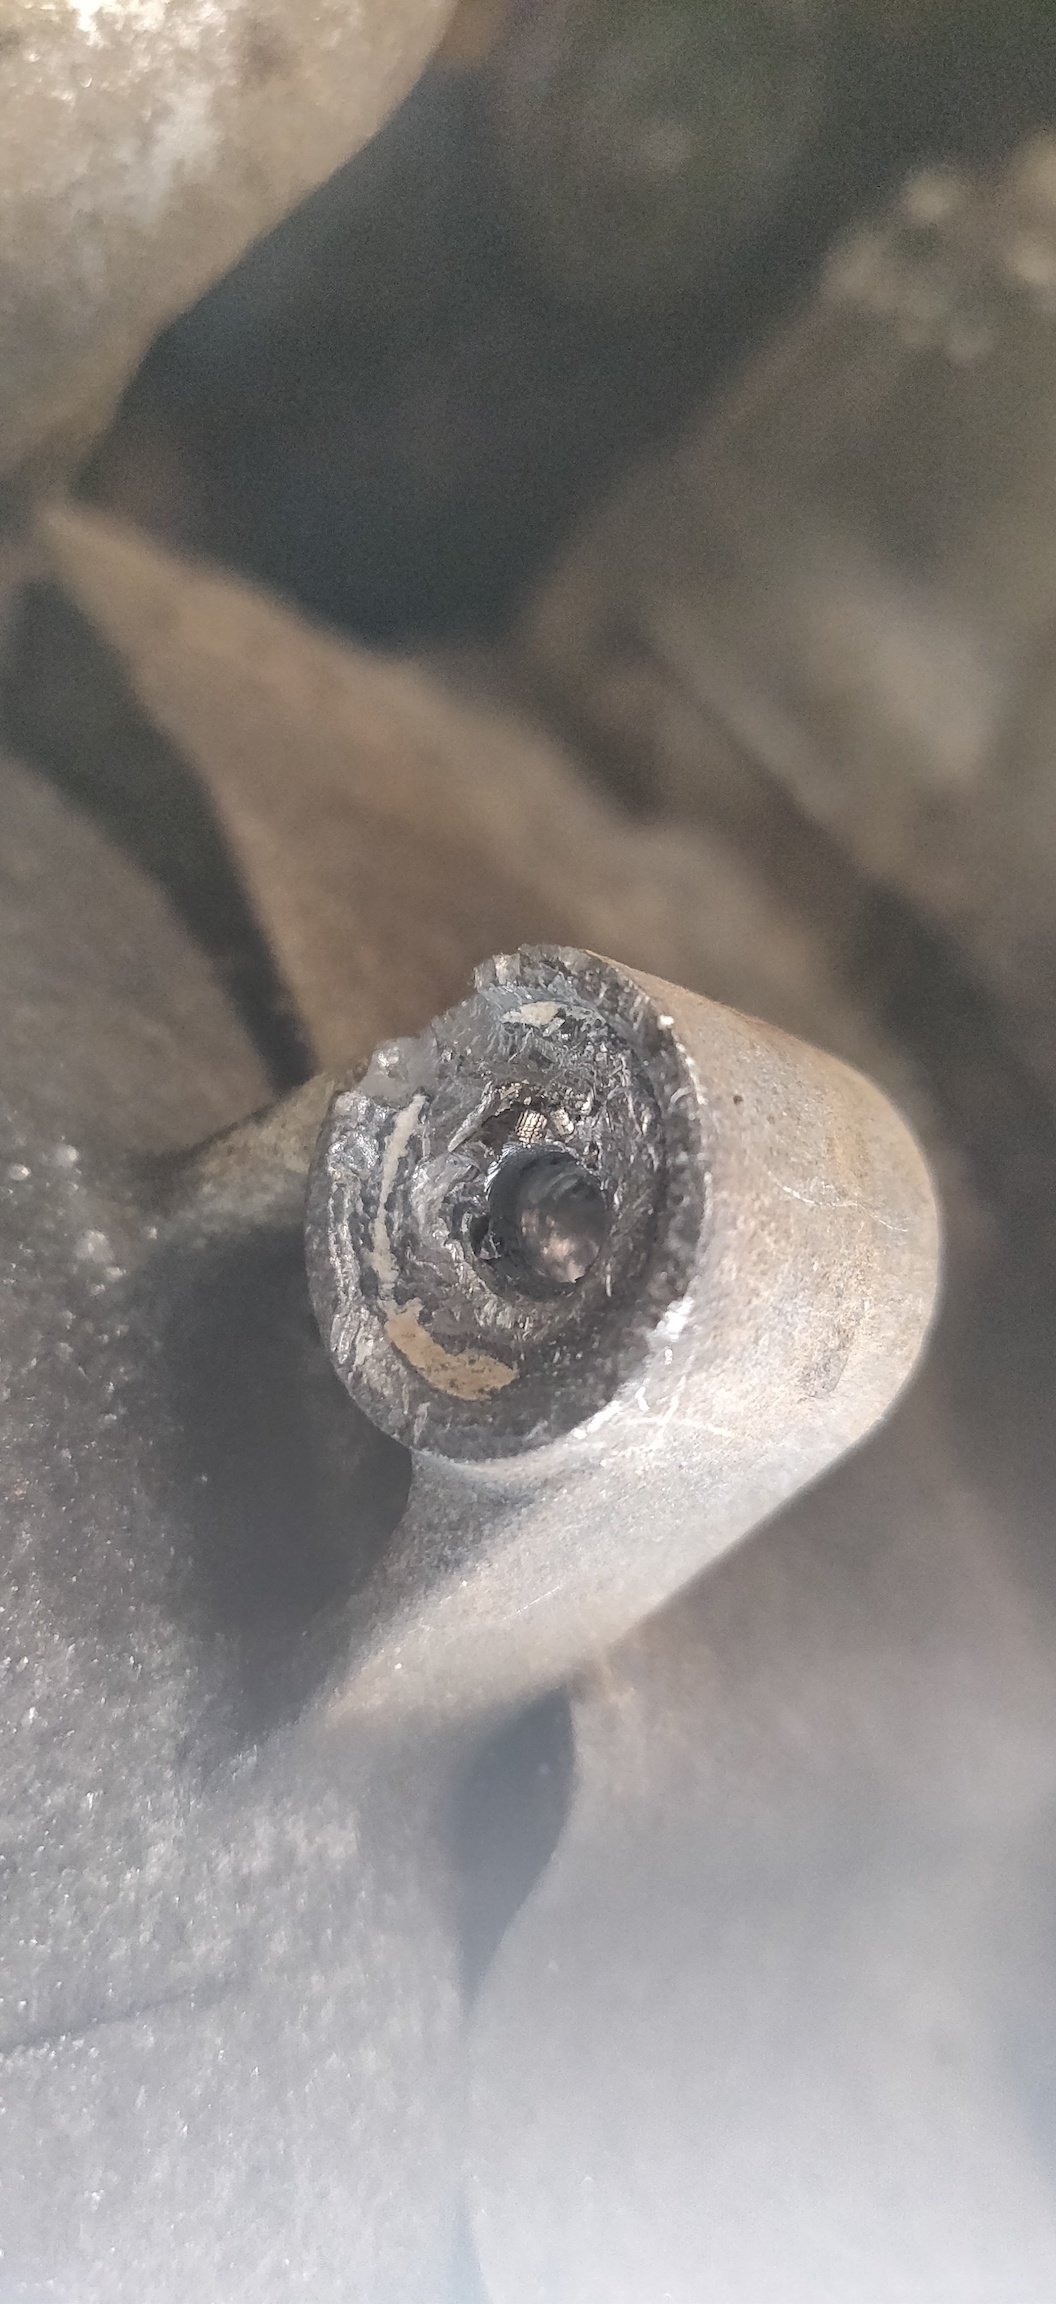
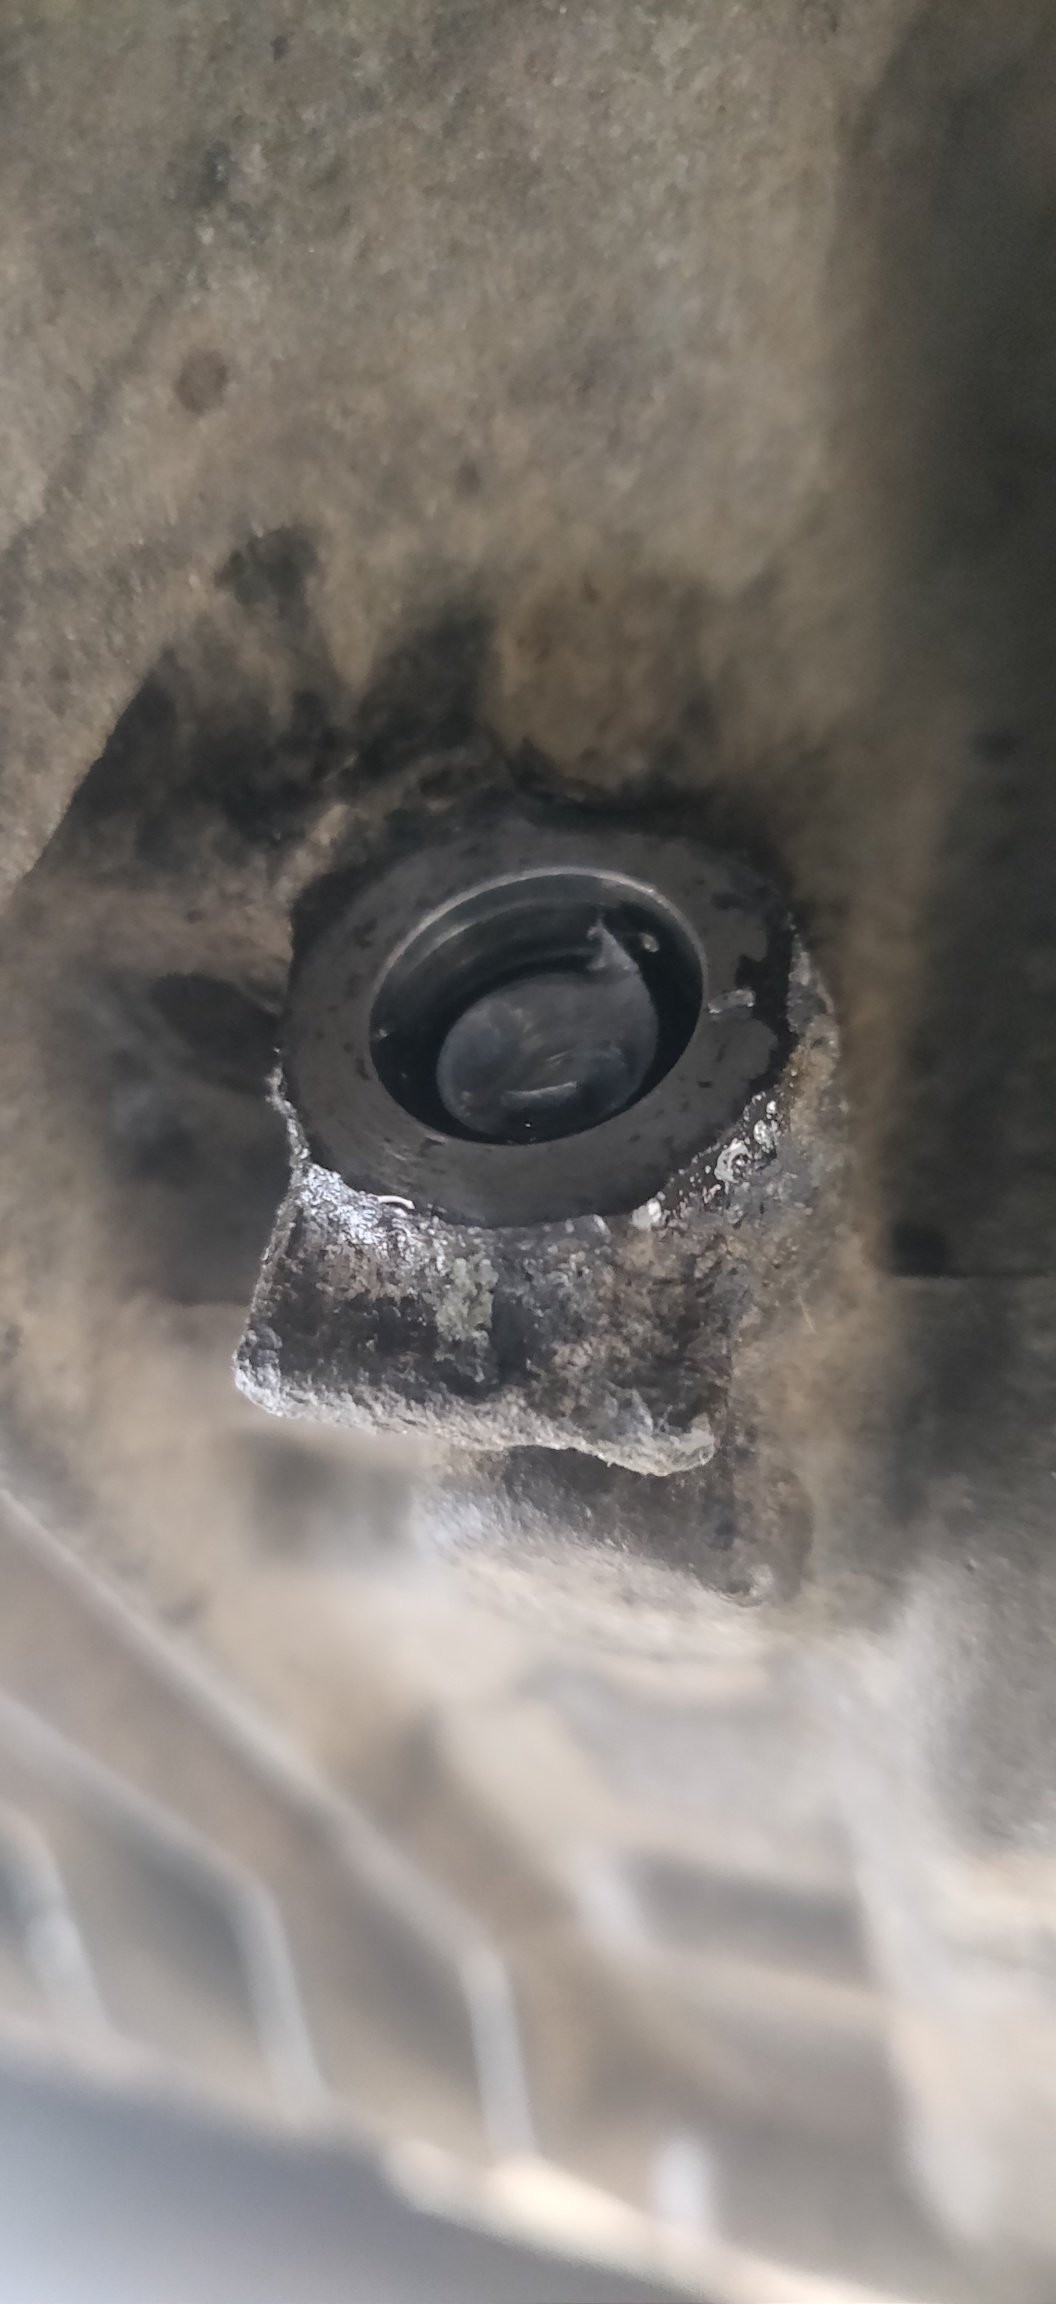
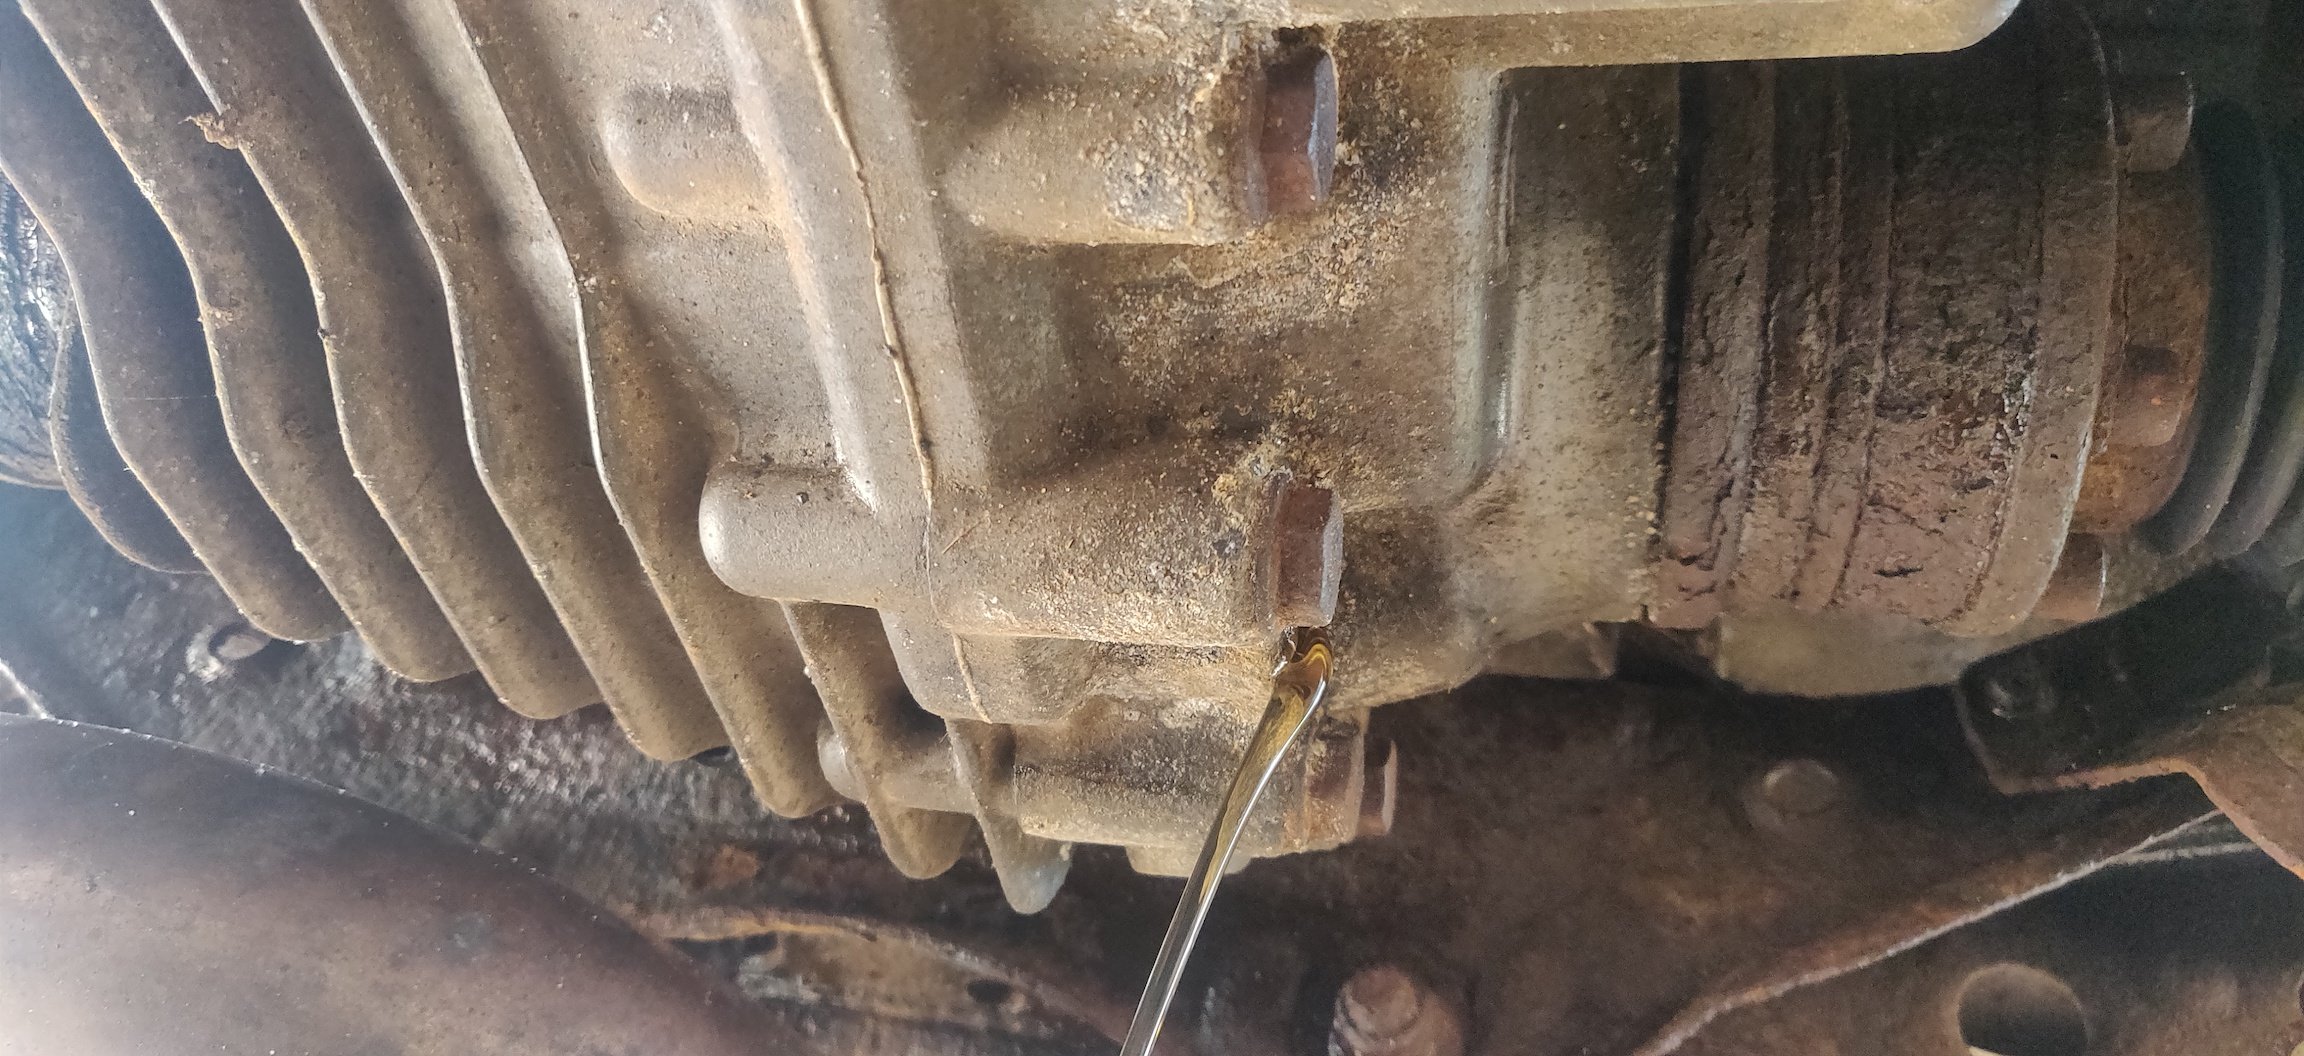
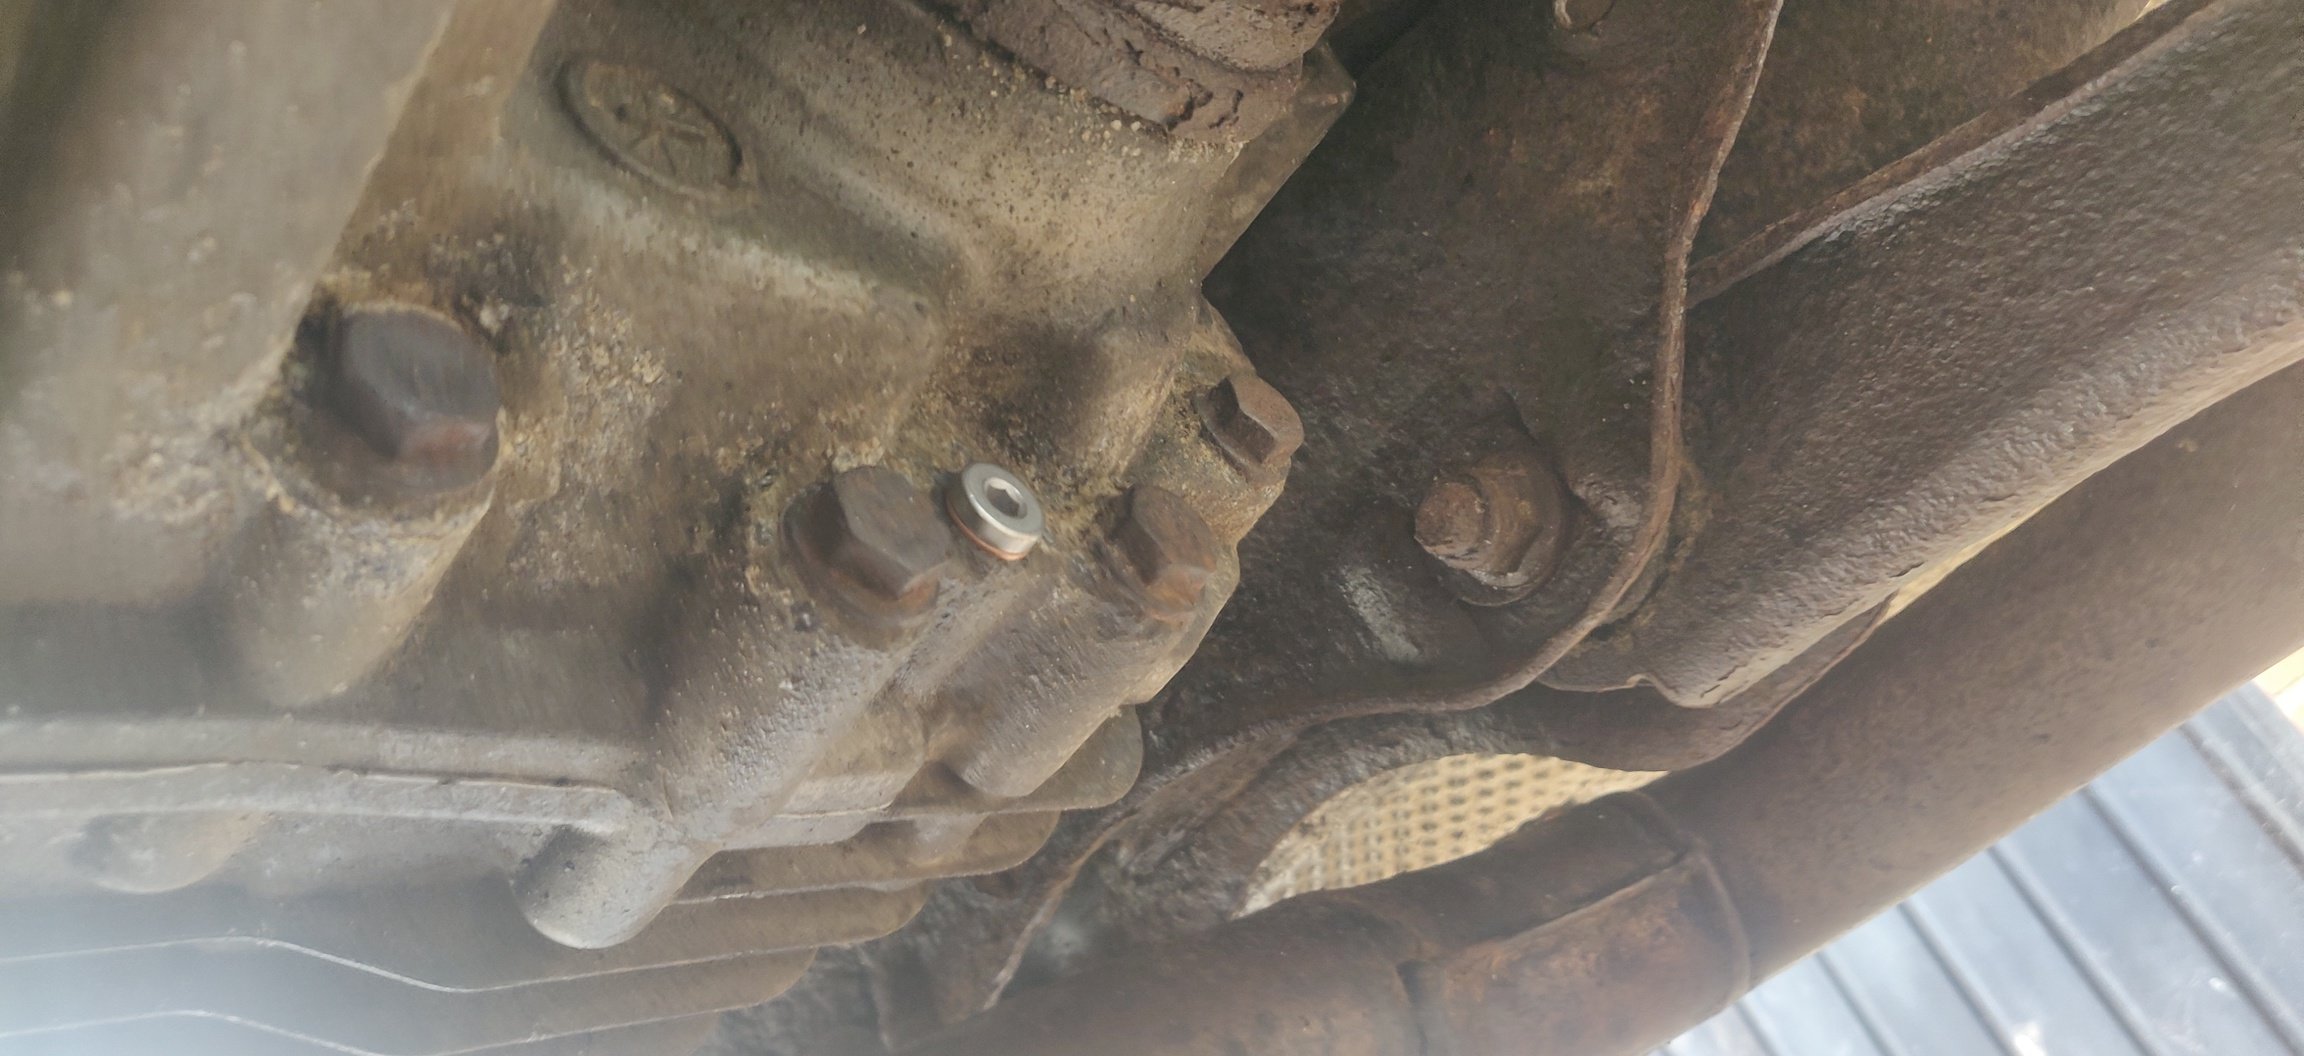
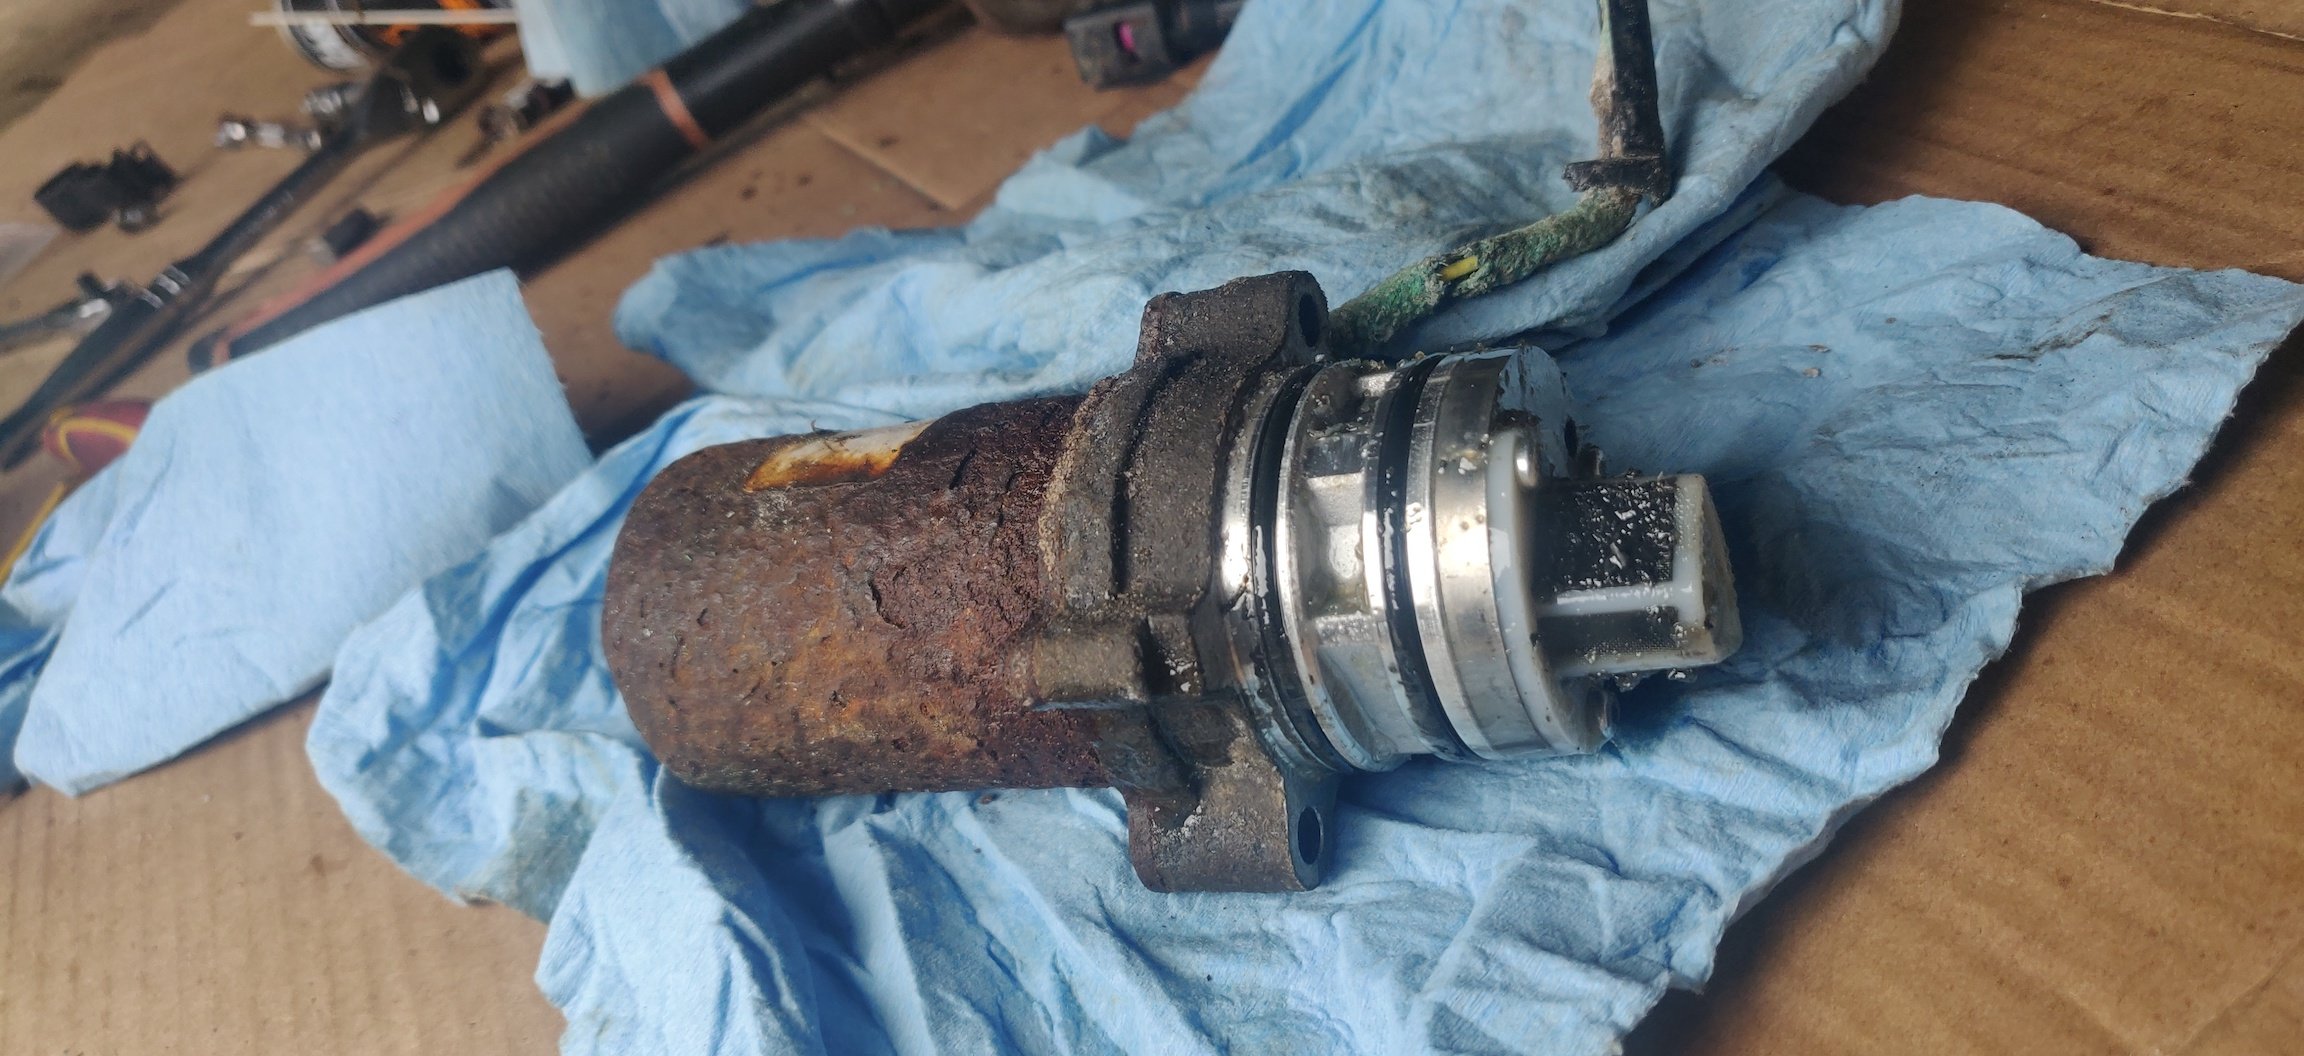
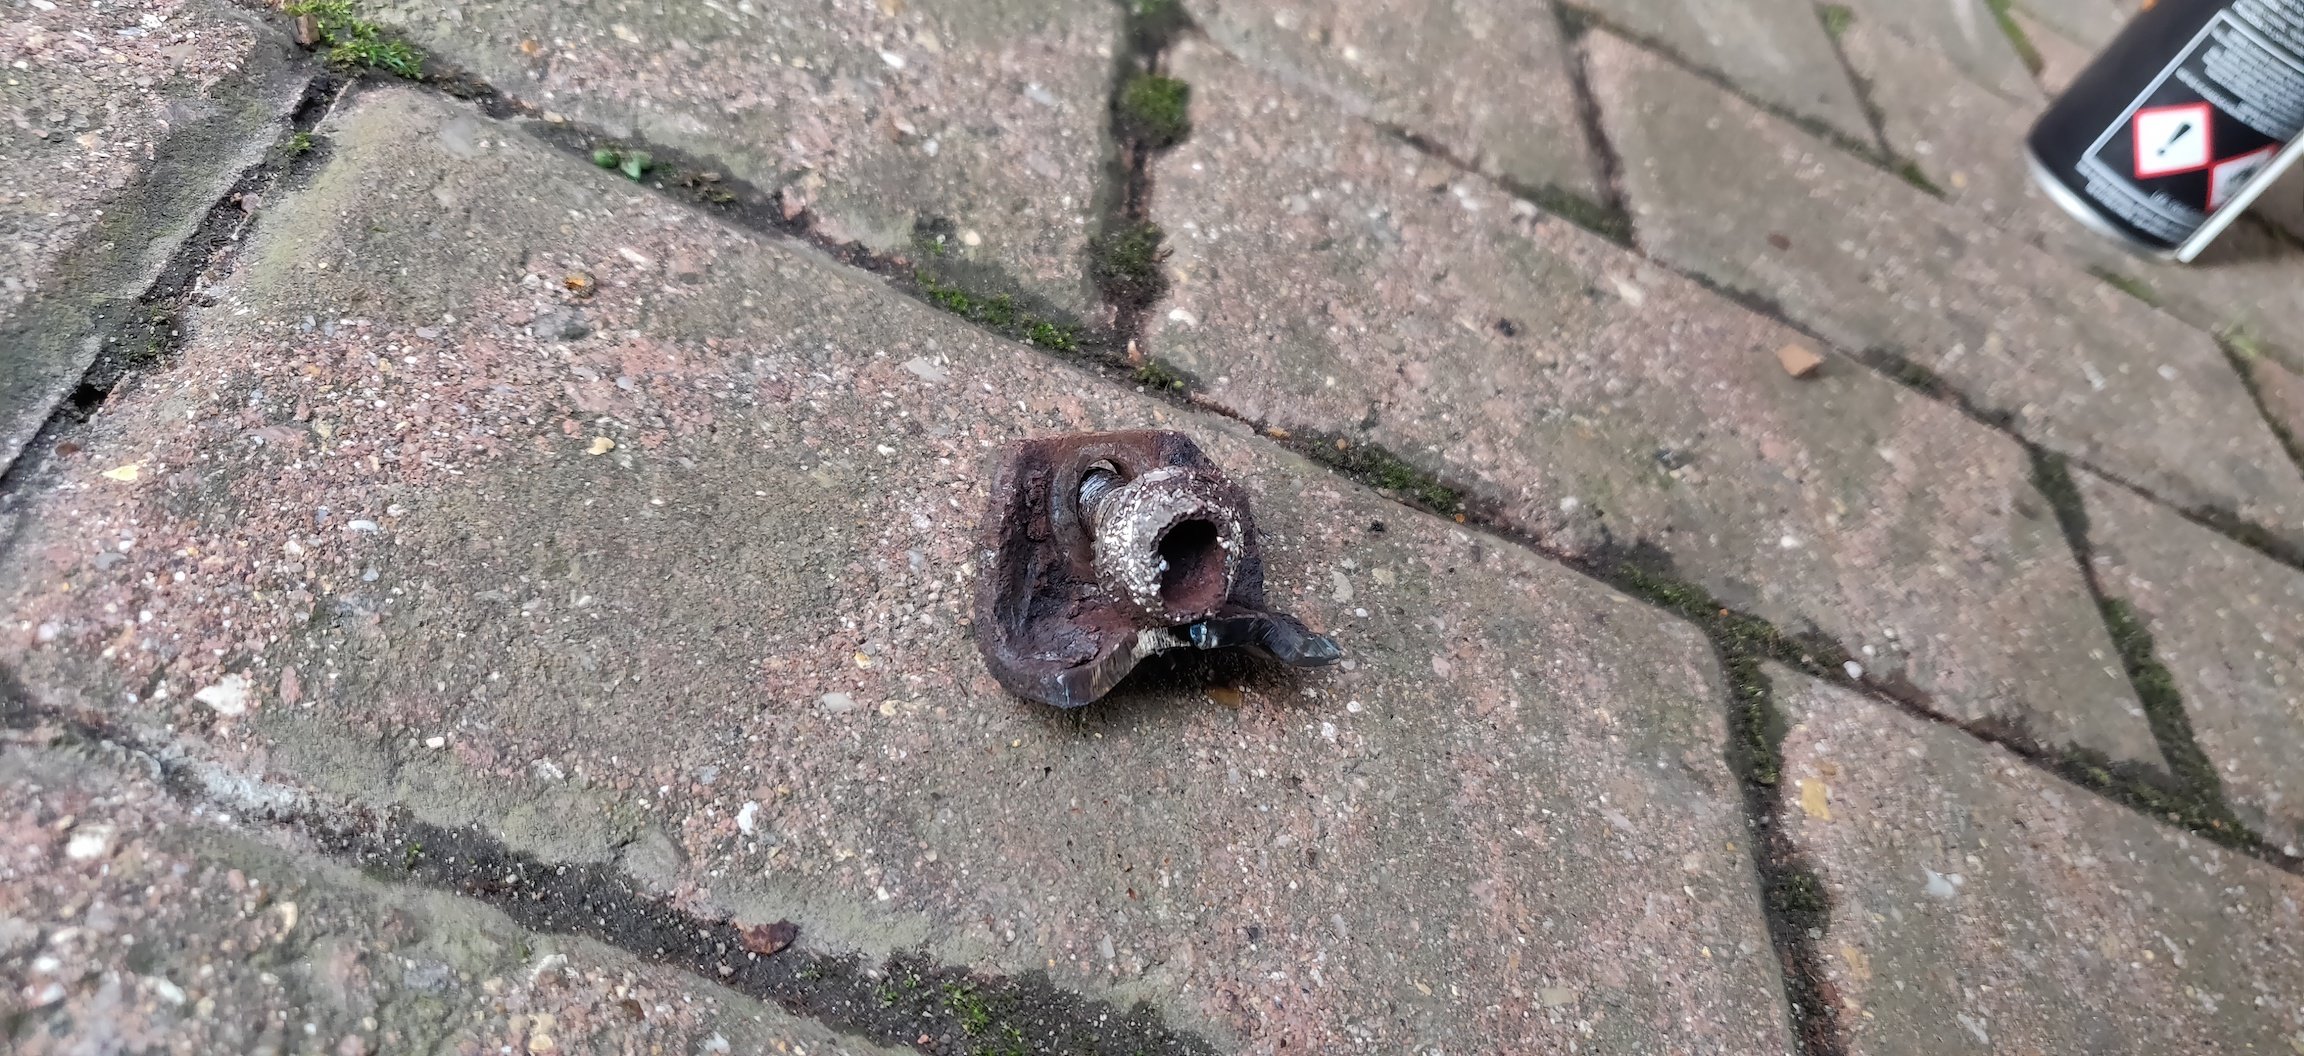
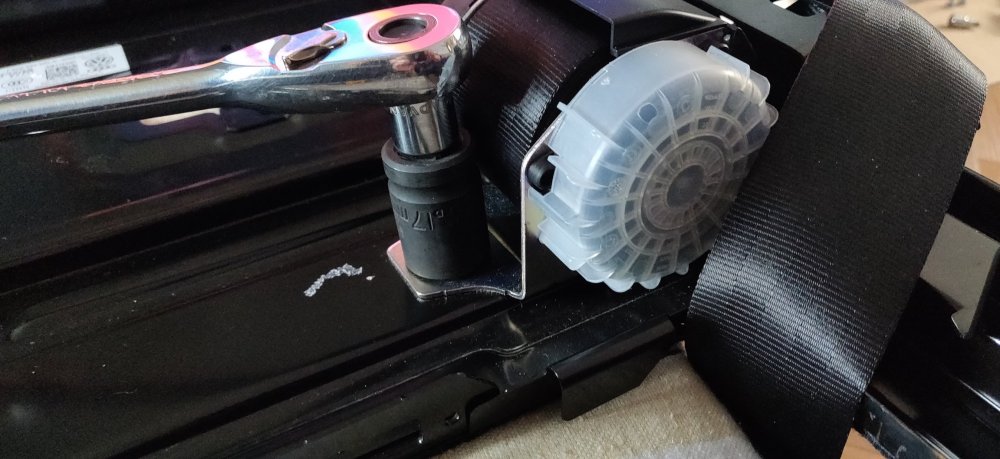
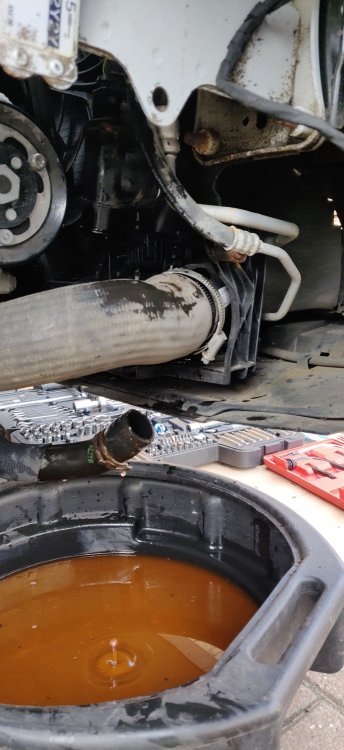
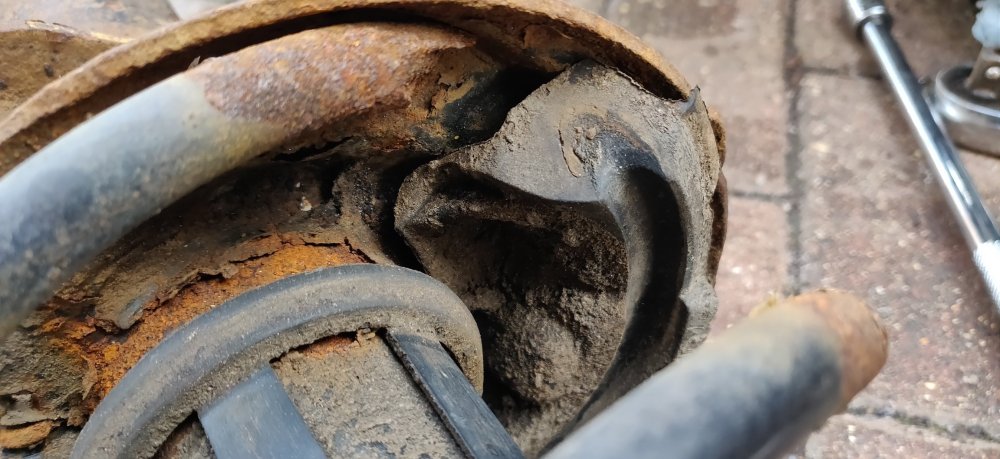
After the shower and a break, went underneath the car to drain the rear diff: The drain bolt is the same as the fill, but unlike the fill bolt, didn't round and pretty much no drama. So whilst it was draining, started to look at the Haldex. For all intents and purposes, tried to follow this: Which is pretty much the most comprehensive Haldex change guide pretty much. One great takeaway is to disconnect the controller in it, which makes disconnecting the pump wiring easier, so a 10mm socket onto the top: Bit tight, but cracked free and out it went. Can't say the same about the bottom: Got the extension on it and you can see it isn't on dead on, so ominous. Which then decides to: Shear off. It does mean the controller is free so I suppose I could carry. Whilst there though, and given there's a chunk of thread, went at it with a Knipex plier to see if I can spin it free. Well: I've been messing around with cars since 2010 and this is the first time I've ever witnessed a bolt being sheared twice. This car is pretty special! I decided to put the remains on the back burner and went to disconnect to the drain plug: Pretty beefy 8mm hex required so came out without much drama. The fill bolt was already freed a few days ago, so no worries there. Given the drama of that bottom bolt, the rear diff had then pretty much finished draining, so put in a replacement drain bolt: Sticks out like a sore thumb how shiny it is compared to it's surroundings. Tightened to 20Nm and ready for a fill. Didn't take pics, but with the controller freed, disconnected the small connector, and wanted to disconnect the larger one, but couldn't get it to budge. With the pump plug freed, then tried to disconnect the wiring, which I ended up doing clumsily. One clip came free, but the other appears to have snapped free. Regardless, went at the pump directly next. Two bolts, the same ones for the controller by the looks it, so two 10mm bolts. The top one was interesting, being covered in an unusual amount of rubbish and crud. Had to scrape it away with a thin pointy thing (think screwdriver) to get enough purchase for the 10mm socket. Then some prying and gentle tapping with a hammer: It should then start coming free. Then it was a case of some wiggling and back and forth: Then out it comes. Obviously make sure the pan is underneath to catch any extra drained Haldex oil. The pic shows all sorts of horrors as is: Bit gunky. I was less concerned about that and more about this: I already mentioned the snapped clip at the bottom, but the fact that the sheath for the wiring has this much corrosion, is quite extraordinary. I may have to budget a replacement pump: Just the general mankiness of the pump and that exposed wiring due to the sheath being damaged is just ominous. Something for the future. Anyways, went to cleaning the pump: Some T10 torx bolts and the filter wiggles free, with a a gunk moustache on both sides. Attacked both with brake cleaner and shop cloths: Gave the area the pump sits in a quick wipe, and also to see what happened with the plastic clip bit for the wiring: The fact that it's hard to spot is a sign of how grim its gotten. Couldn't think of any other way than to tap at the mess with a hammer and punch: Which eventually freed the remains. What was left: Just a load of corrosion there, which I guess ended up bunging up the plastic clip. Gonna have to give this all a thorough clean. Doesn't really matter as that bit of the clip is broken anyway. I took a lunch break at this point, so I'll stop the post here! Maintenance: £2004.02 Upgrades: £1158.66 Miscellaneous: £659.06


-
Bit of an up and down day. Rounded up these: A pair of inclinometers, to use for checking the level of the car, and trying to get it as level as possible for the oil level checks. But today was mainly to start with this: Website varies in regards how long Lanoguard takes to dry, so essentially, the sooner I get a layer down the better. Moved the brake discs away so they aren't affected, and got at the wheel arches: The trigger spray can produce a stream or a mist, so I went with something more to the mist side of things. Pictures don't really show much: It lays with a clear to yellow-brown finish. But in general, it's relatively easy, the mild weather probably helped: Bit of guesswork with the nooks of the rear wheel arches, as I didn't really want to get my head in there too much. With the underside, tried to be strategic: Basically, from one side went as far in to the opposite sill pretty much, to get a good angle and go outwards from there, then when done on the other side, hopefully means the sills and the underside in general are covered: Then a case of just crawling underneath and trying to get to as many nooks and crannies: So with that done, took the front wings out of the garage: The inside had a bit of crud and gunk, so gave them a really quick clean, as I haven't figured a way to do it without risking scuffing the outside. But with it hosed and agitated with a brush, left them to dry before applying Lanoguard on them. So went under the rear of the car and had a look at the rear diff: Unfortunately, the fill bolt immediately rounded when trying with a 5mm hex. It's at an awkward place, so basically just went with a bit of fire for about 30 seconds and then went at it with a hammer and chisel around the edges: The chips allowed for the chisel to get more purchase and also helped in gauging the bolt actually starting to come free. So eventually loosened up, which was a great relief. It did take about 20 minutes to do this though, which was annoying. But that did mean the front wing was dry, so gave them the quick once over with the Lanoguard: So again, sprayed out pretty clear so pics don't really help: Now, because Lanoguard is based on lanolin, which I believe is something from the fleece of sheep. So essentially, if the smell of sheep isn't a bother, then great. But if not, it's not a pleasant place to hang around. That, with the misting of it means it will go everywhere. So obviously, make sure you at least have some sort of safety glasses on, and ideally as much cover as possible. I had my jump suit on, which is only going to get more messier through the day as I'll be underneath, so wasn't too fussed. But with it in my hair, decided to stop at this point and shower! Maintenance: £2004.02 Upgrades: £1158.66 Miscellaneous: £659.06


-
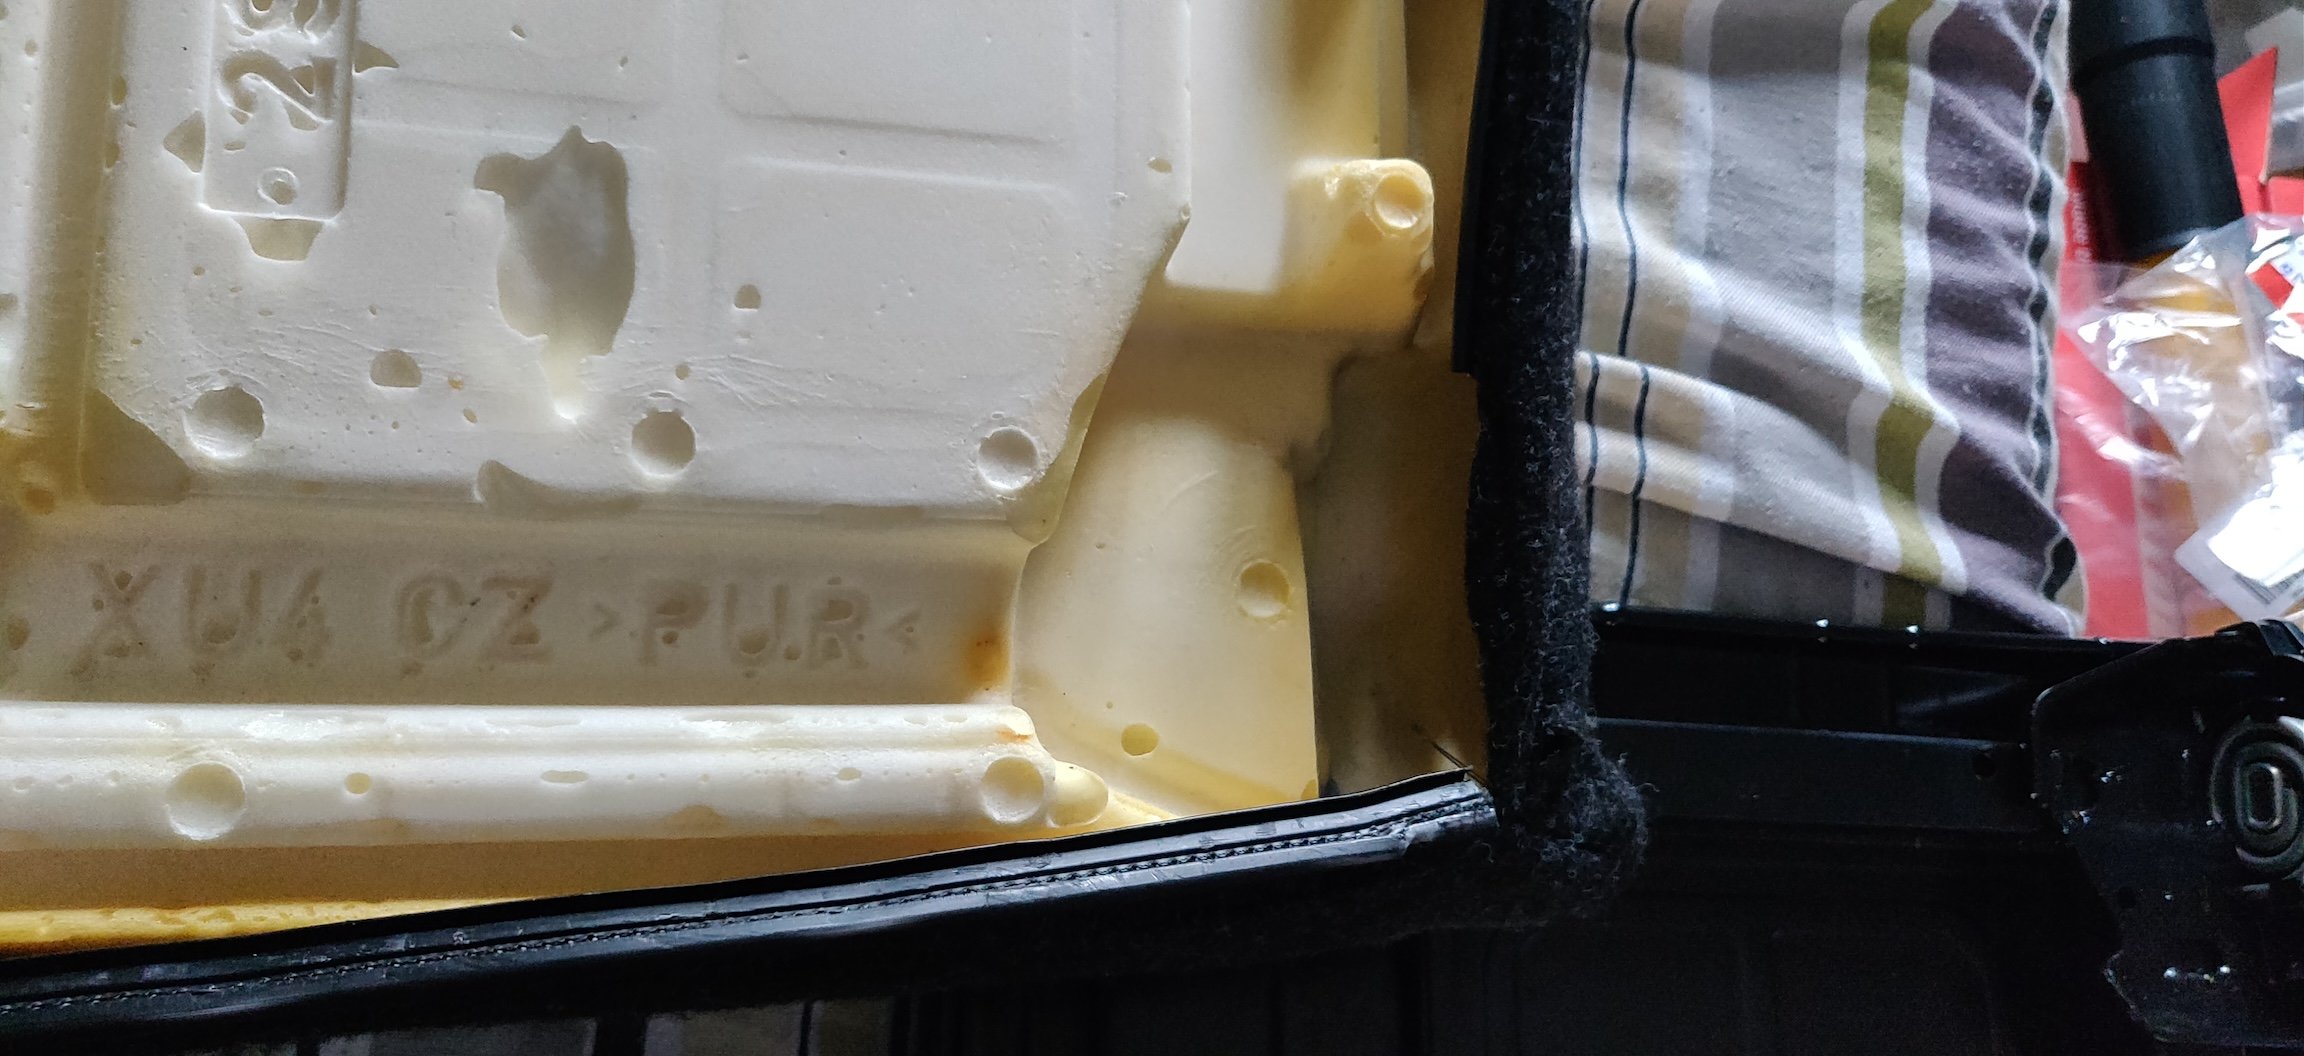
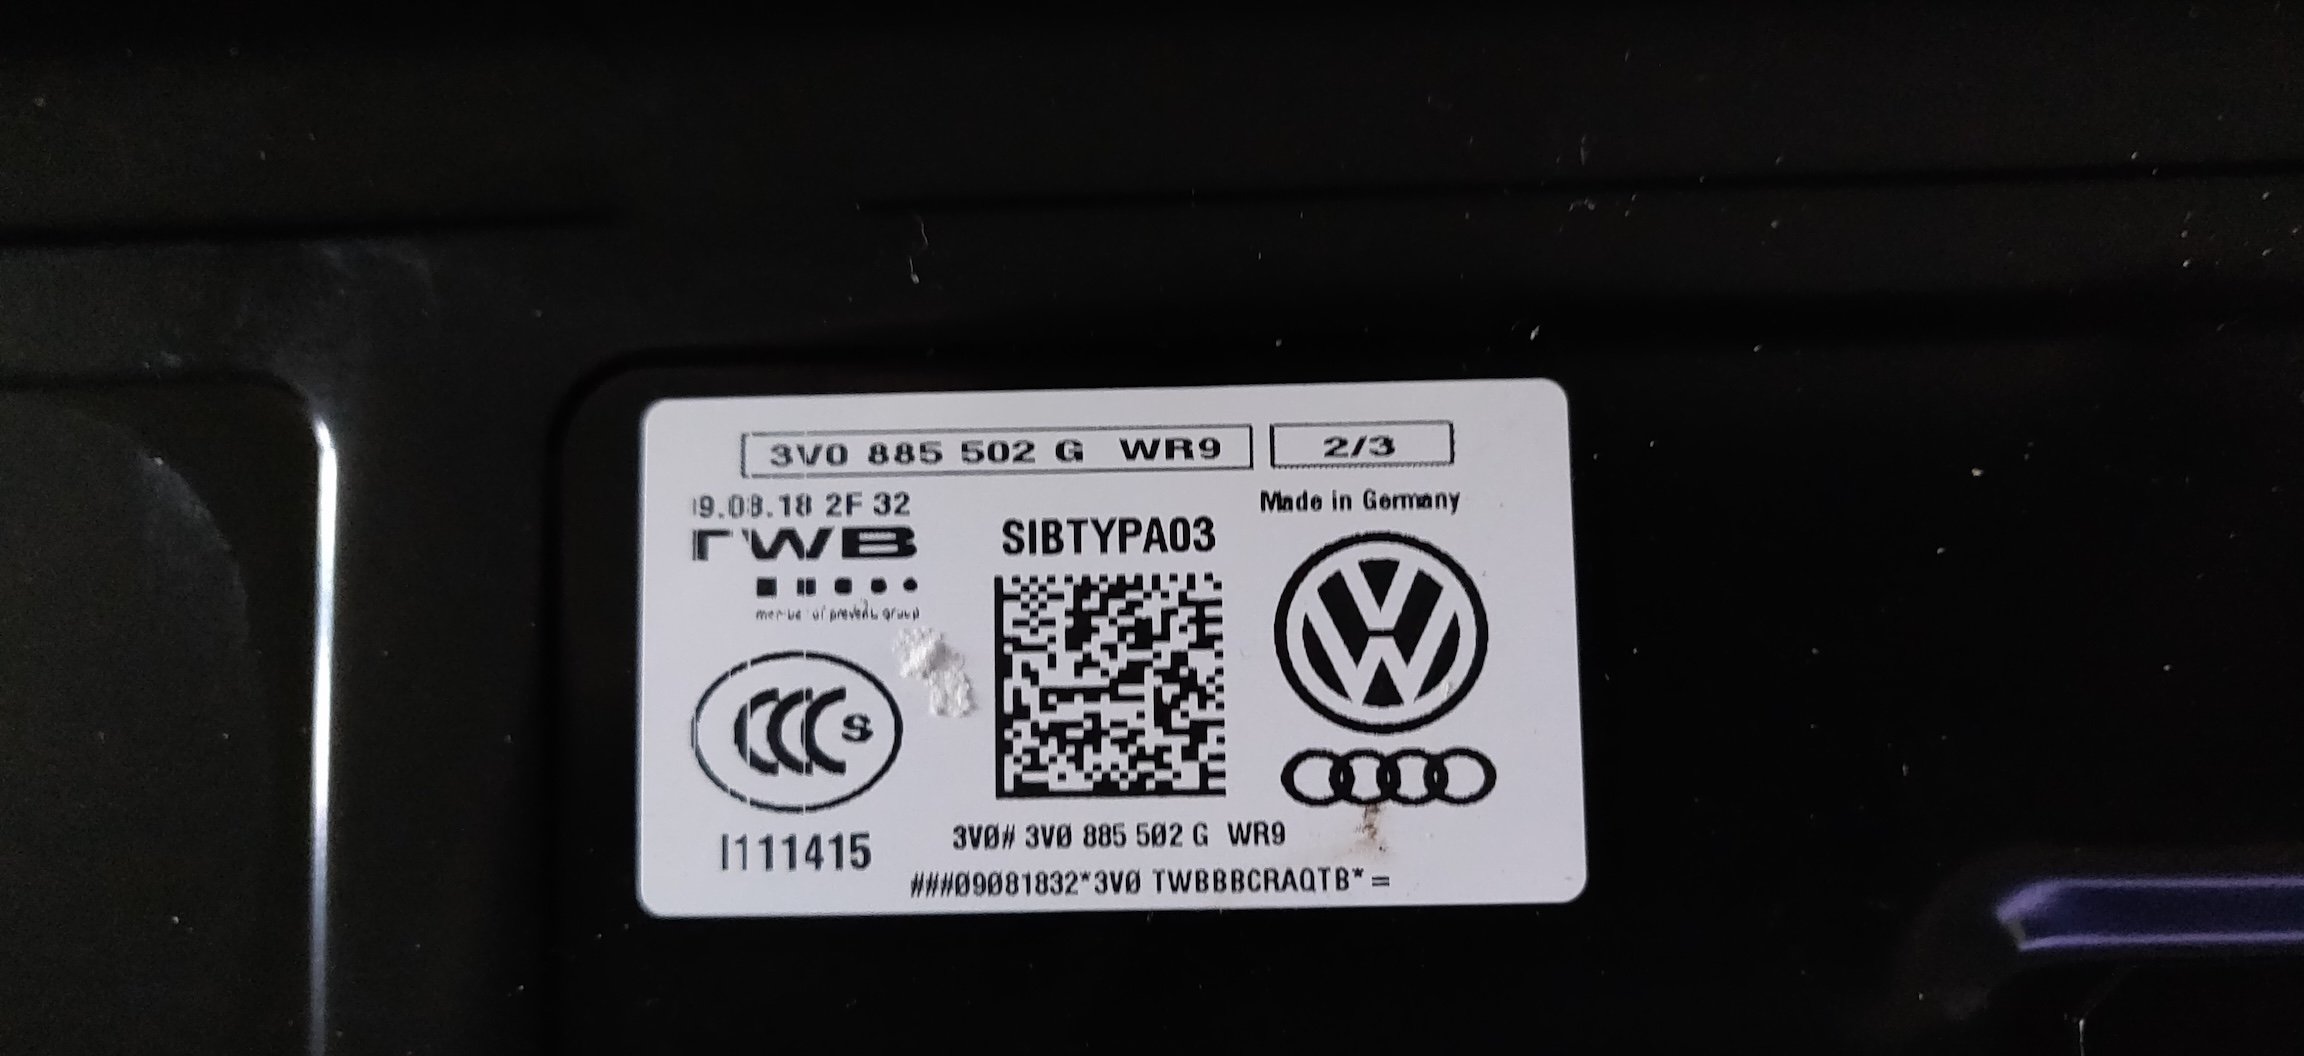
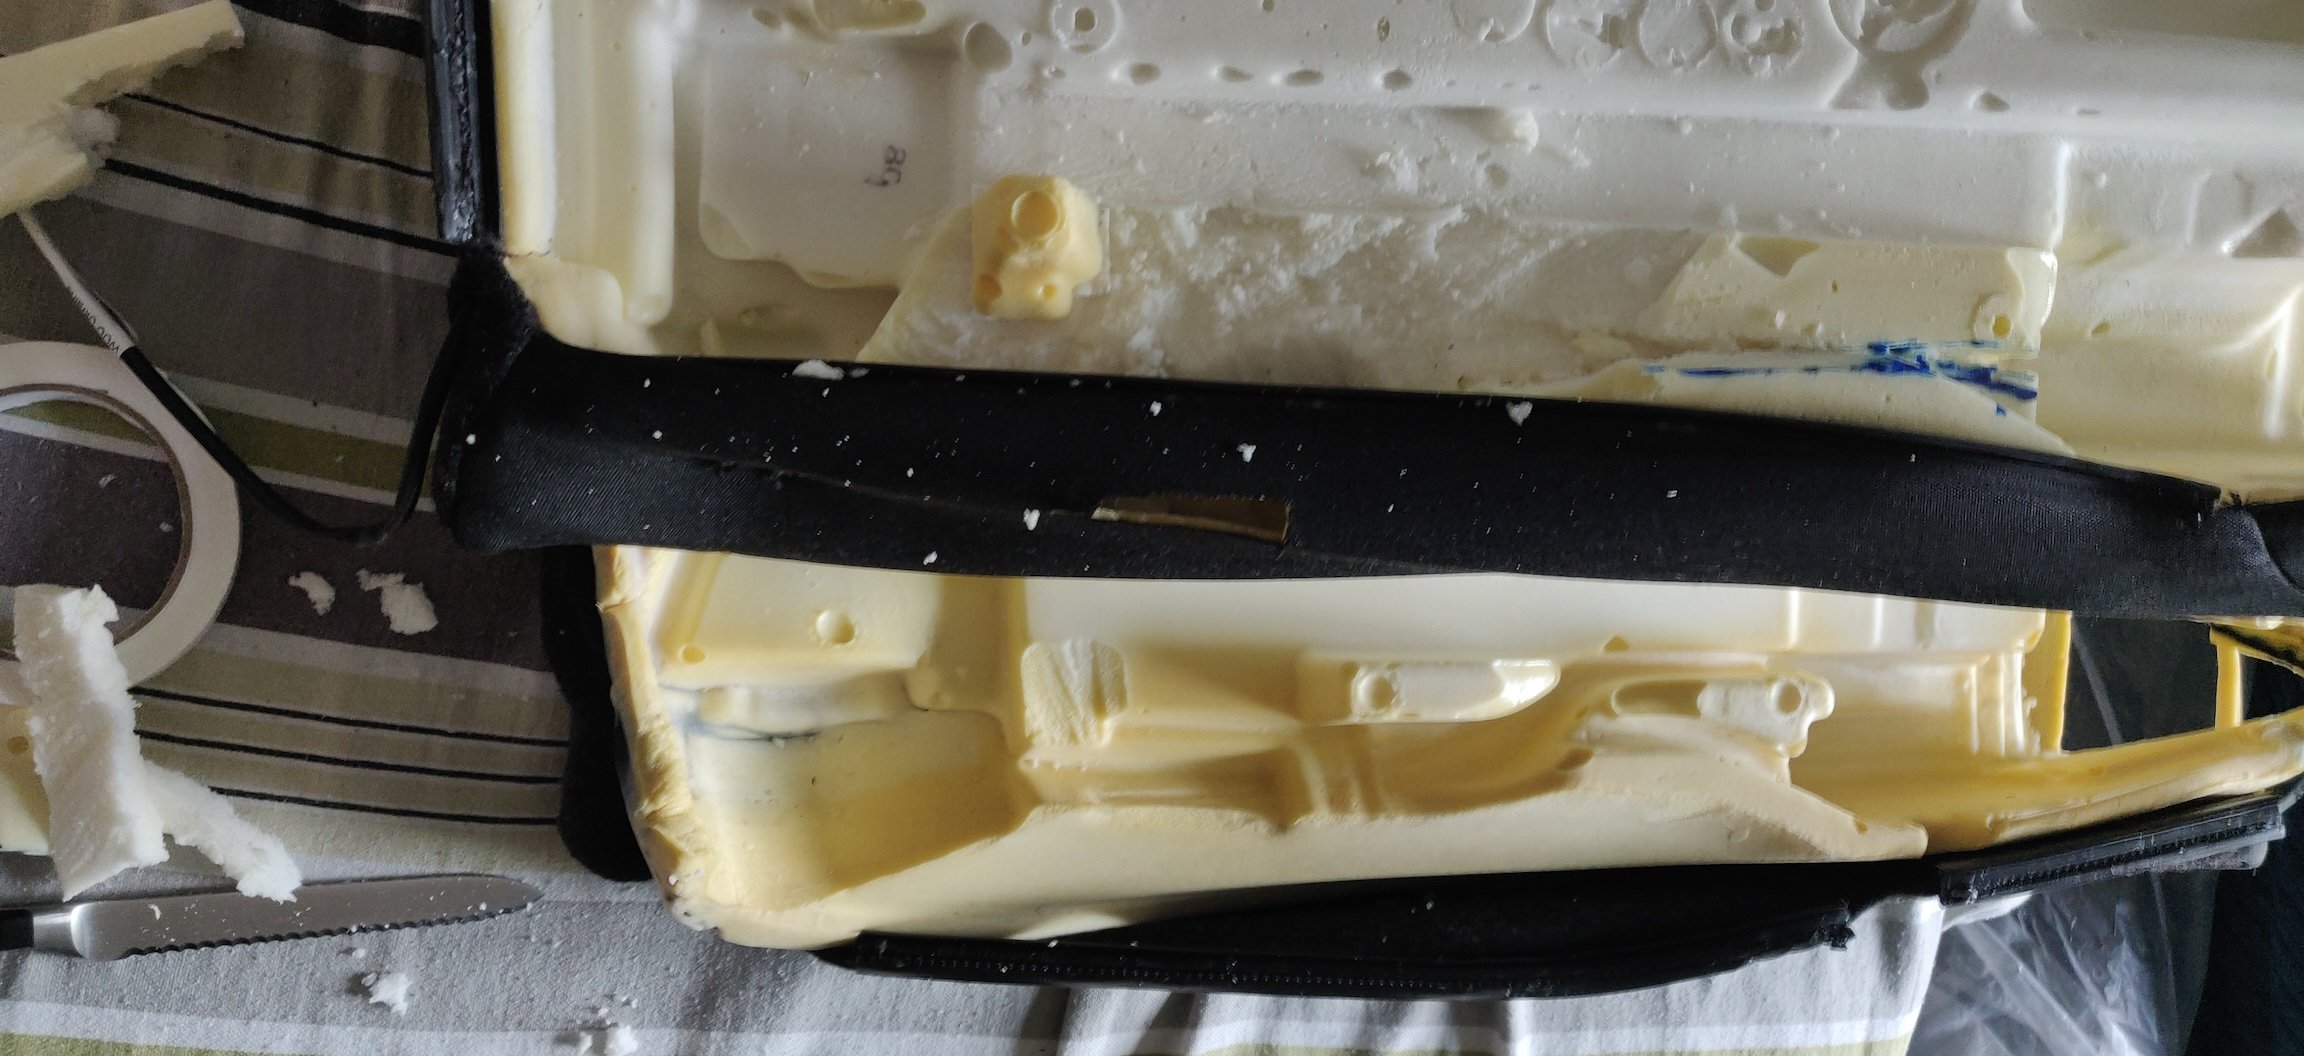
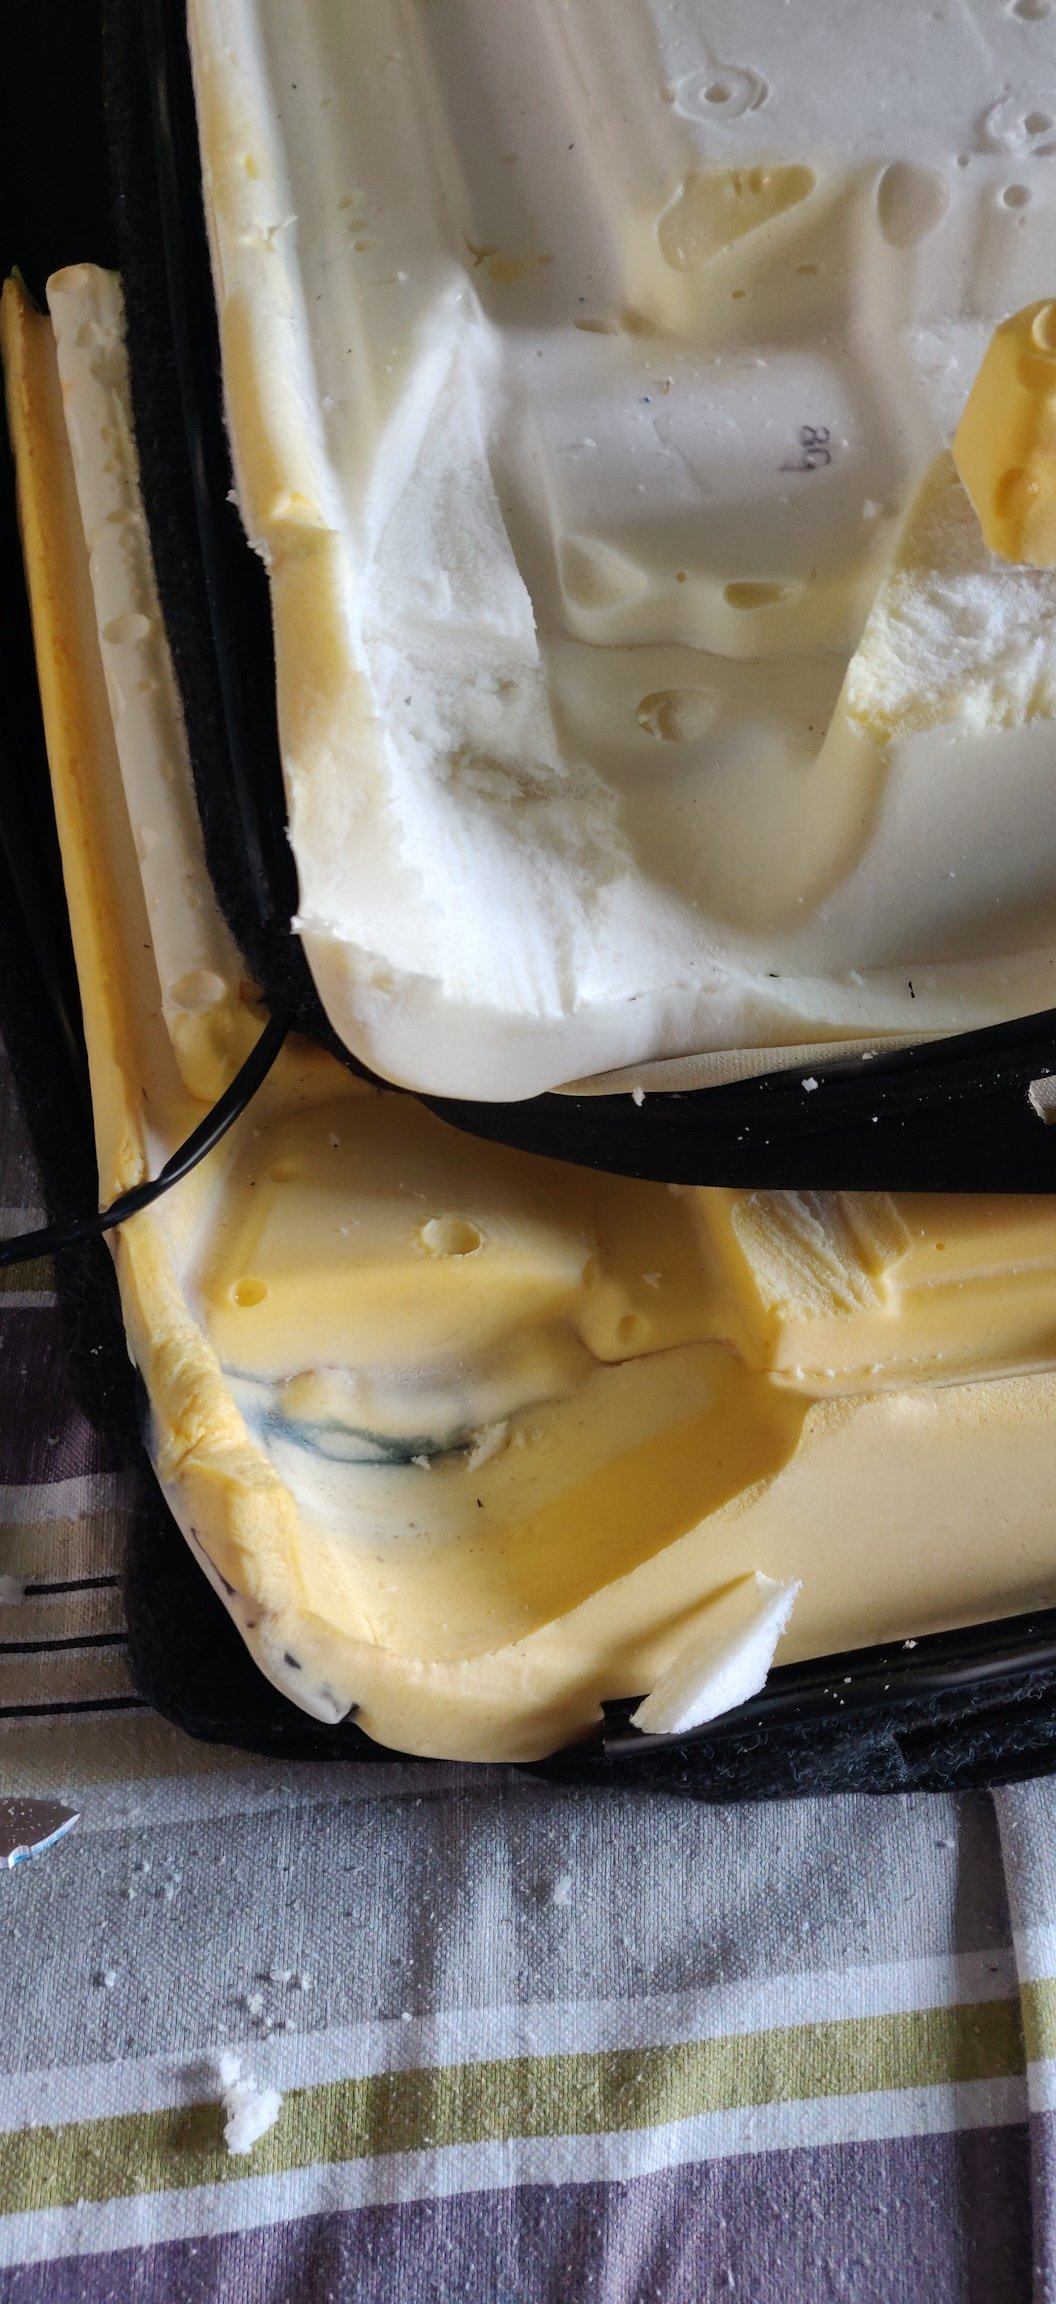
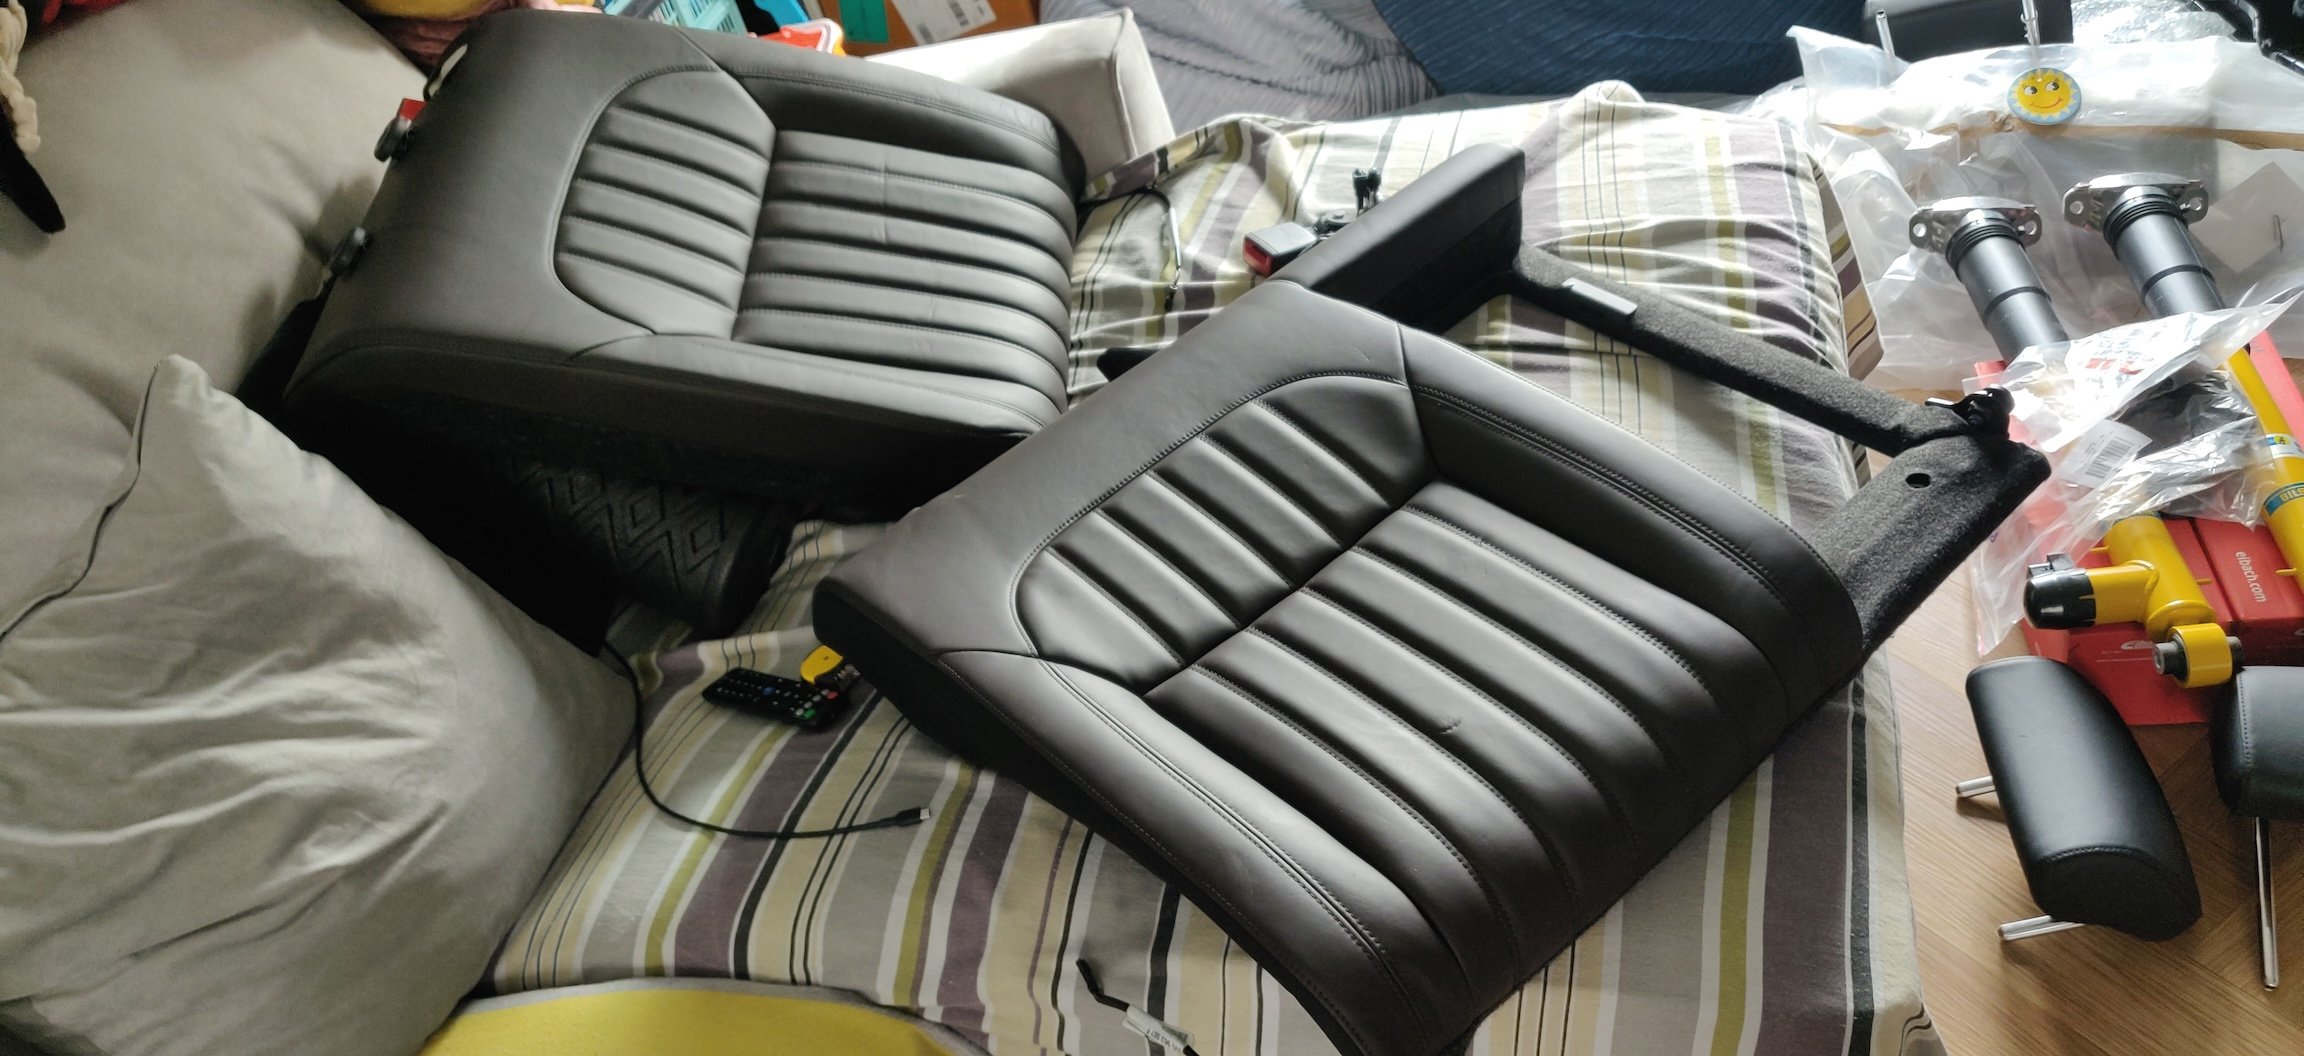
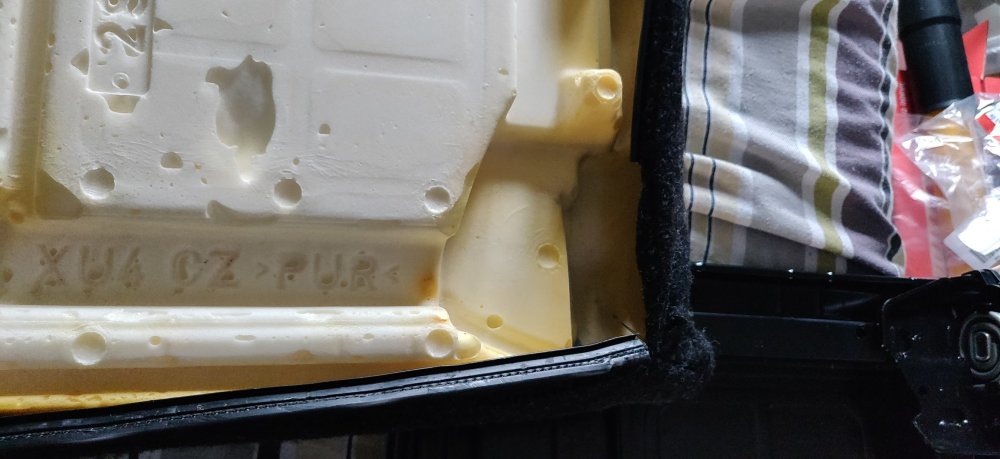
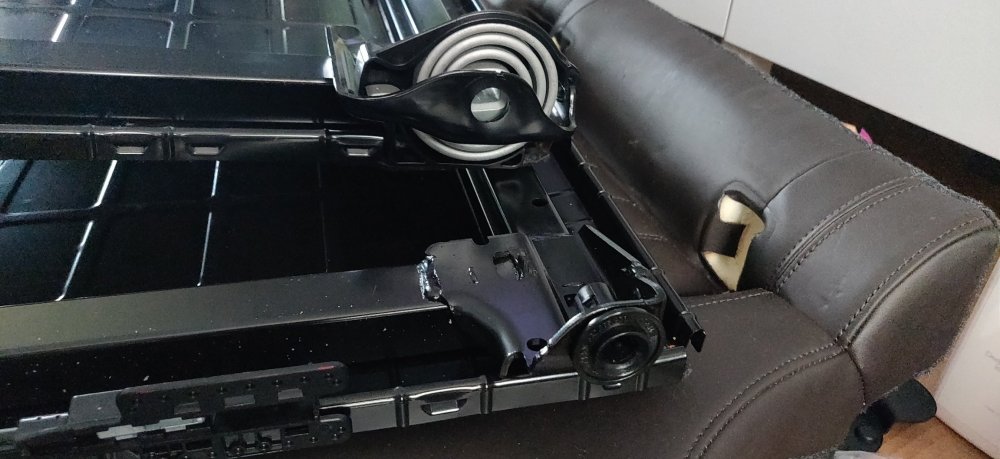
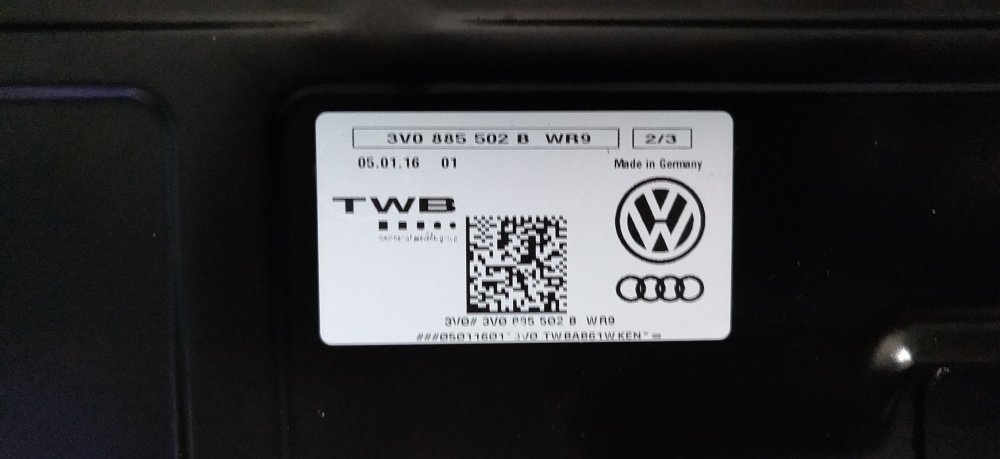
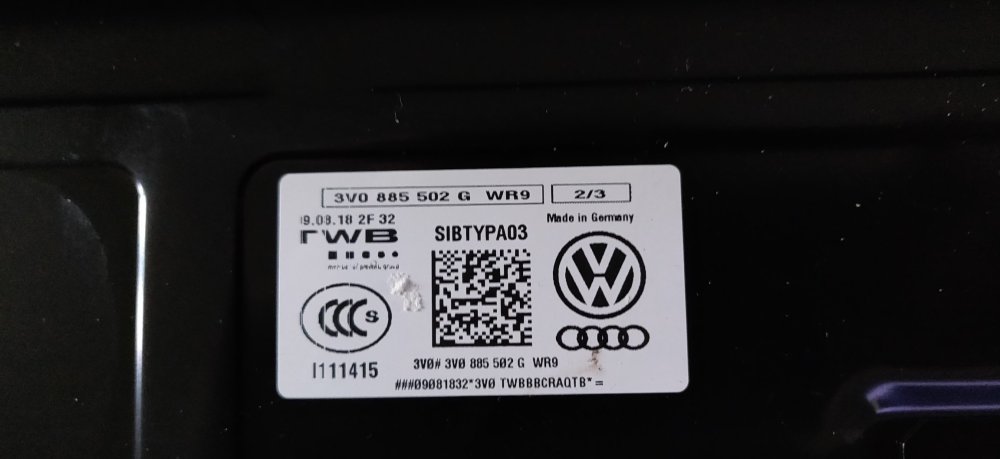
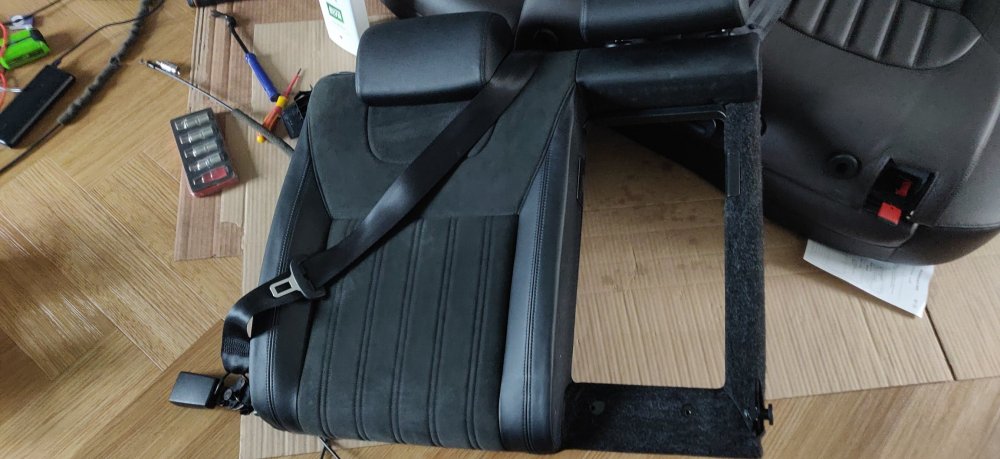
From the previous post, both of the rear seats have been disassembled, so time to compare: This is the seat foam padding from the Superb, without the spring loaded hinge. Contrast to: The foam is obviously different. Will look at that later. Just like the other side, the hinges are also different: With the non remote release one being smaller: The Octavia one having a larger hinge area and a spring, which looks different to the one on the right side. Have to guess it needs to be tougher as its a larger heavier side. It's stark side by side: Like the other seat, I removed and thus mangled the black plastic bearing on the sprung loaded seat. Probably could have got away with wiggling the cover out of the bearing in all honesty, but hey ho. Would the cost savings of the extra metal and spring made any difference compared to just having a single frame design? Who knows. So for reference: The Superb frame without the spring hinge is 3V0 885 502 B (with WR9 presumably being a colour code, for the carpet or the frame maybe?) The Octavia: Has part number 3V0 885 502 G with the same WR9 code. I guess there are variants based on the centre arm rest and whether that is in place or not, but yeah, still not sure why the hinge or its spring couldn't be something that was added on. Anyways, with the Bowden cable mechanism on the Superb being brand new, decided to transplant that: Onto the Octavia frame. An M10 spline bit to free them. The seat belt mechanism was also transferred over: It's a 17mm nut onto the captive bolt of the frame. The two did look different, and I also couldn't really pull the belt on the Octavia fully. This might not have meant anything, but decided to just use the same one from the Superb for consistency I suppose. The seat release mechanism is tightened to 23Nm and the seat bolt to 40Nm. Then it was time to tackle the foam. One idea I had was to pretty much cut the corner away from both and transplant it over, but pulling the cover of the Octavia further: Foam looked a bit manky. Guess it could be years of being holed up wherever it was with some water or moisture in the air makes a recipe for mould. Didn't want to introduce that into the car. I still transplanted some bits: The yellowing of the Octavia foam kinda obvious to the Superb one above. I essentially eyed the corner of the Octavia foam and tried to mimic it on the Superb: With regular test fitting to see if any more needs doing. Some tweaks were required, but eventually got it to a point where just some gentle squeezing of the foam getes it into place: So with the seat cover generally in place, time to start assembling the armrest trim. Firstly, compared the two front lips: The Octavia one was used in the end, the one on the right: Just a case of getting the seat cover edges clipped into place (just slotted in by hand), and with the top one pushed upwards into the door frame, the lip is then sort of sandwiched between and pushed into the door frame. It eventually clicks into place. The Super frame trim was the least damaged (so it was a case of the frame damaging the lip on one, and vice versa for the other). The trim itself simply clicks into place: If I get super bothered, I guess one could throw money at replacement trims, but would be overkill. Interestingly, the Superb belt guide was in a horrible state in comparison to the Octavia one: So that made the choice easy. Slide the belt through the gap on the side, and then click the guide into place. Then a case of getting the seat cover outer plastic channels into the metal guides. Near the hinge area though: The non remote release seat has the channel go all the way along the side, whereas the remove one has the channel end just where the hinge is. So got a knife, cut along the thread attaching the channel to the fabric, and then carefully with a pair of scissors: Snipped the plastic channel away. Then used some double sided foam tape to attach that loose dangling bit of fabric to the frame (I think the Octavia had some glue of some sort). So after giving the frames a vacuum and the rear carpets a once over with some Interior Shampoo: Left the seats as above. Once the replacement bearings arrive, then I can click those into place, and do a proper test run. it's more a case of relief than excitement at this stage unfortunately. Not sure how long the lllparts order will take to arrive to be honest. Anyways, a lovely weekend is promised, so will hopefully get to applying Lanoguard to the underside and wheel arches, and hopefully also the Haldex and rear diff! Maintenance: £2004.02 Upgrades: £1158.66 Miscellaneous: £659.06


-
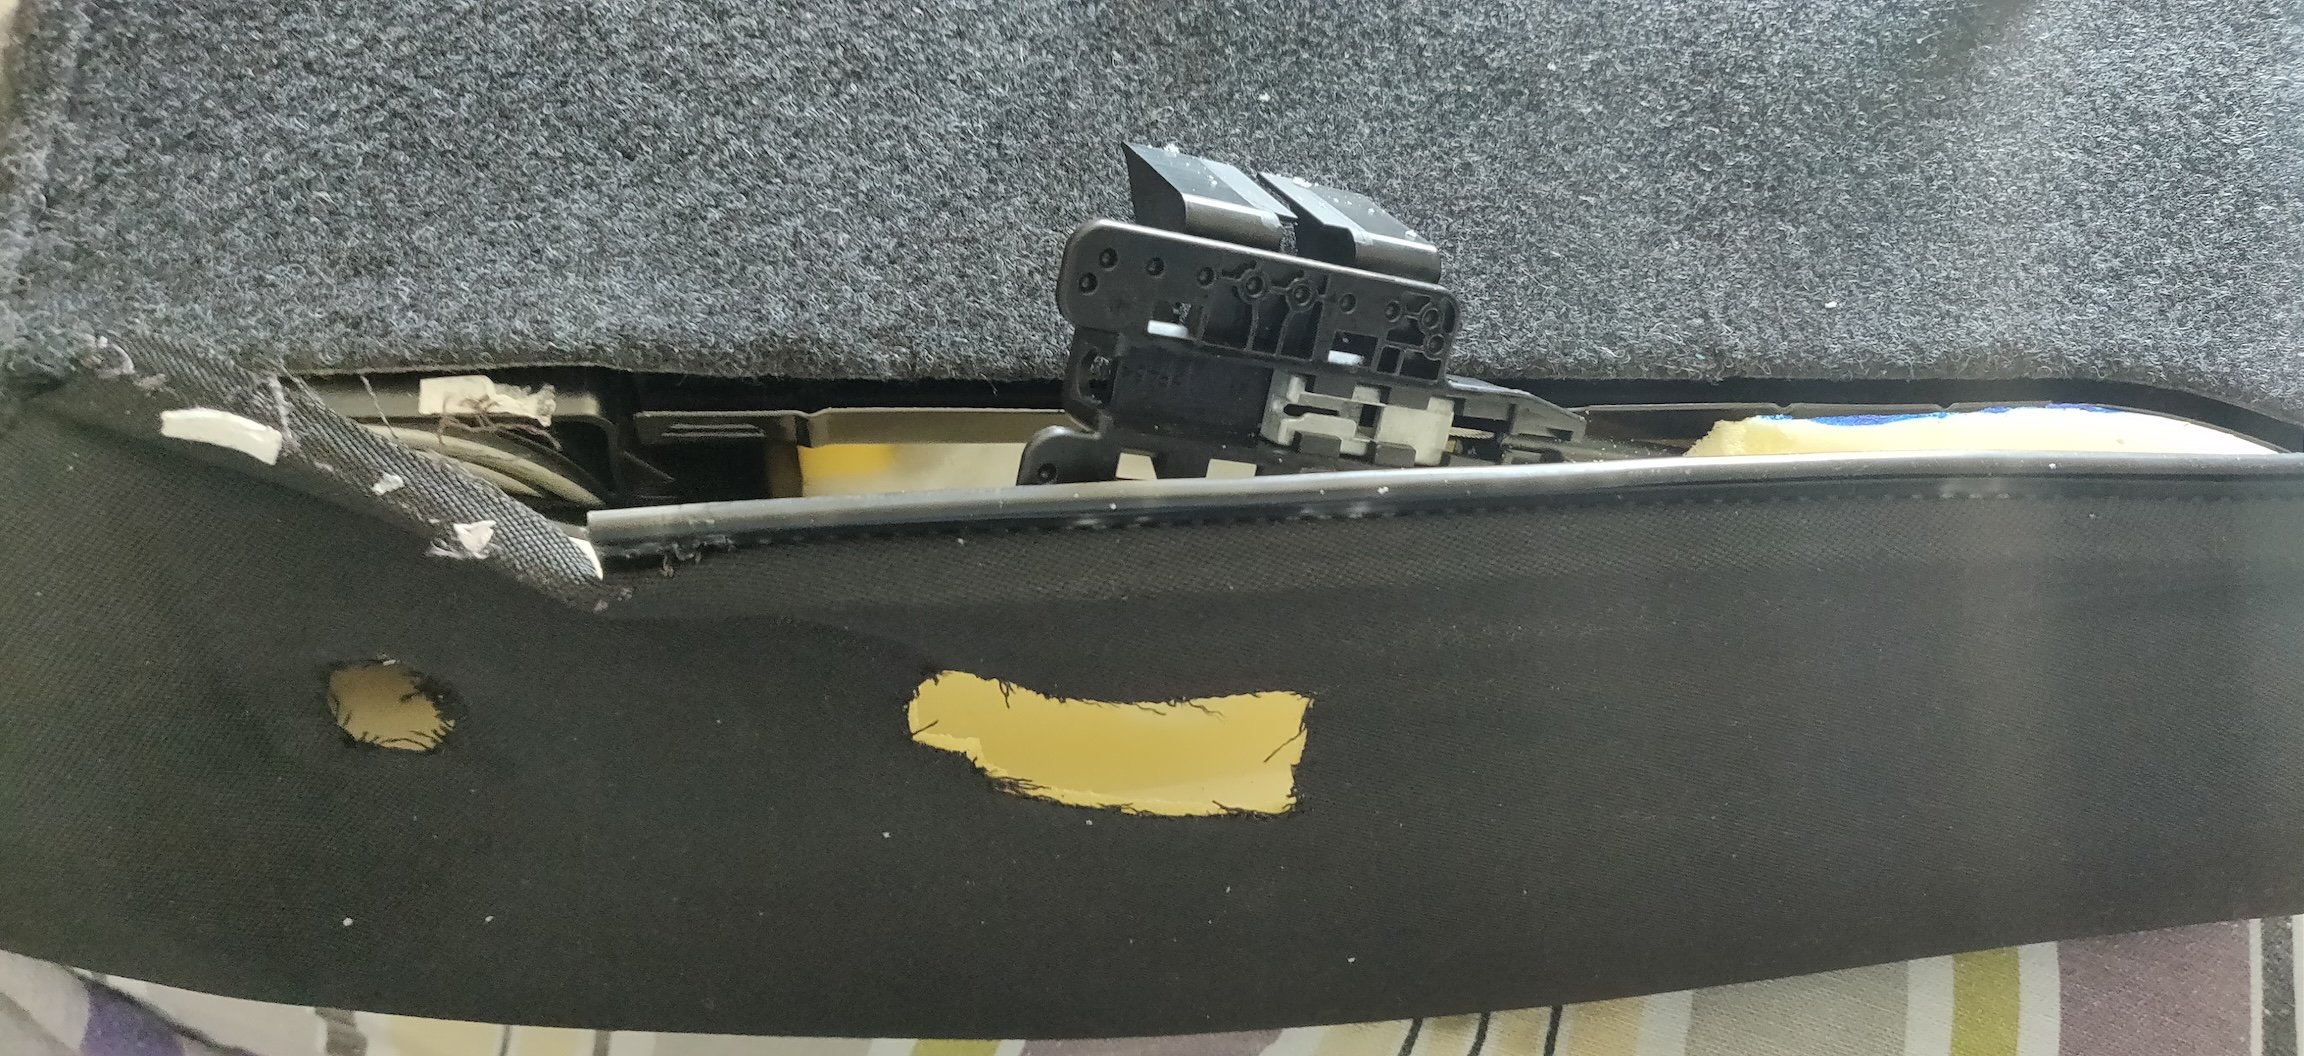
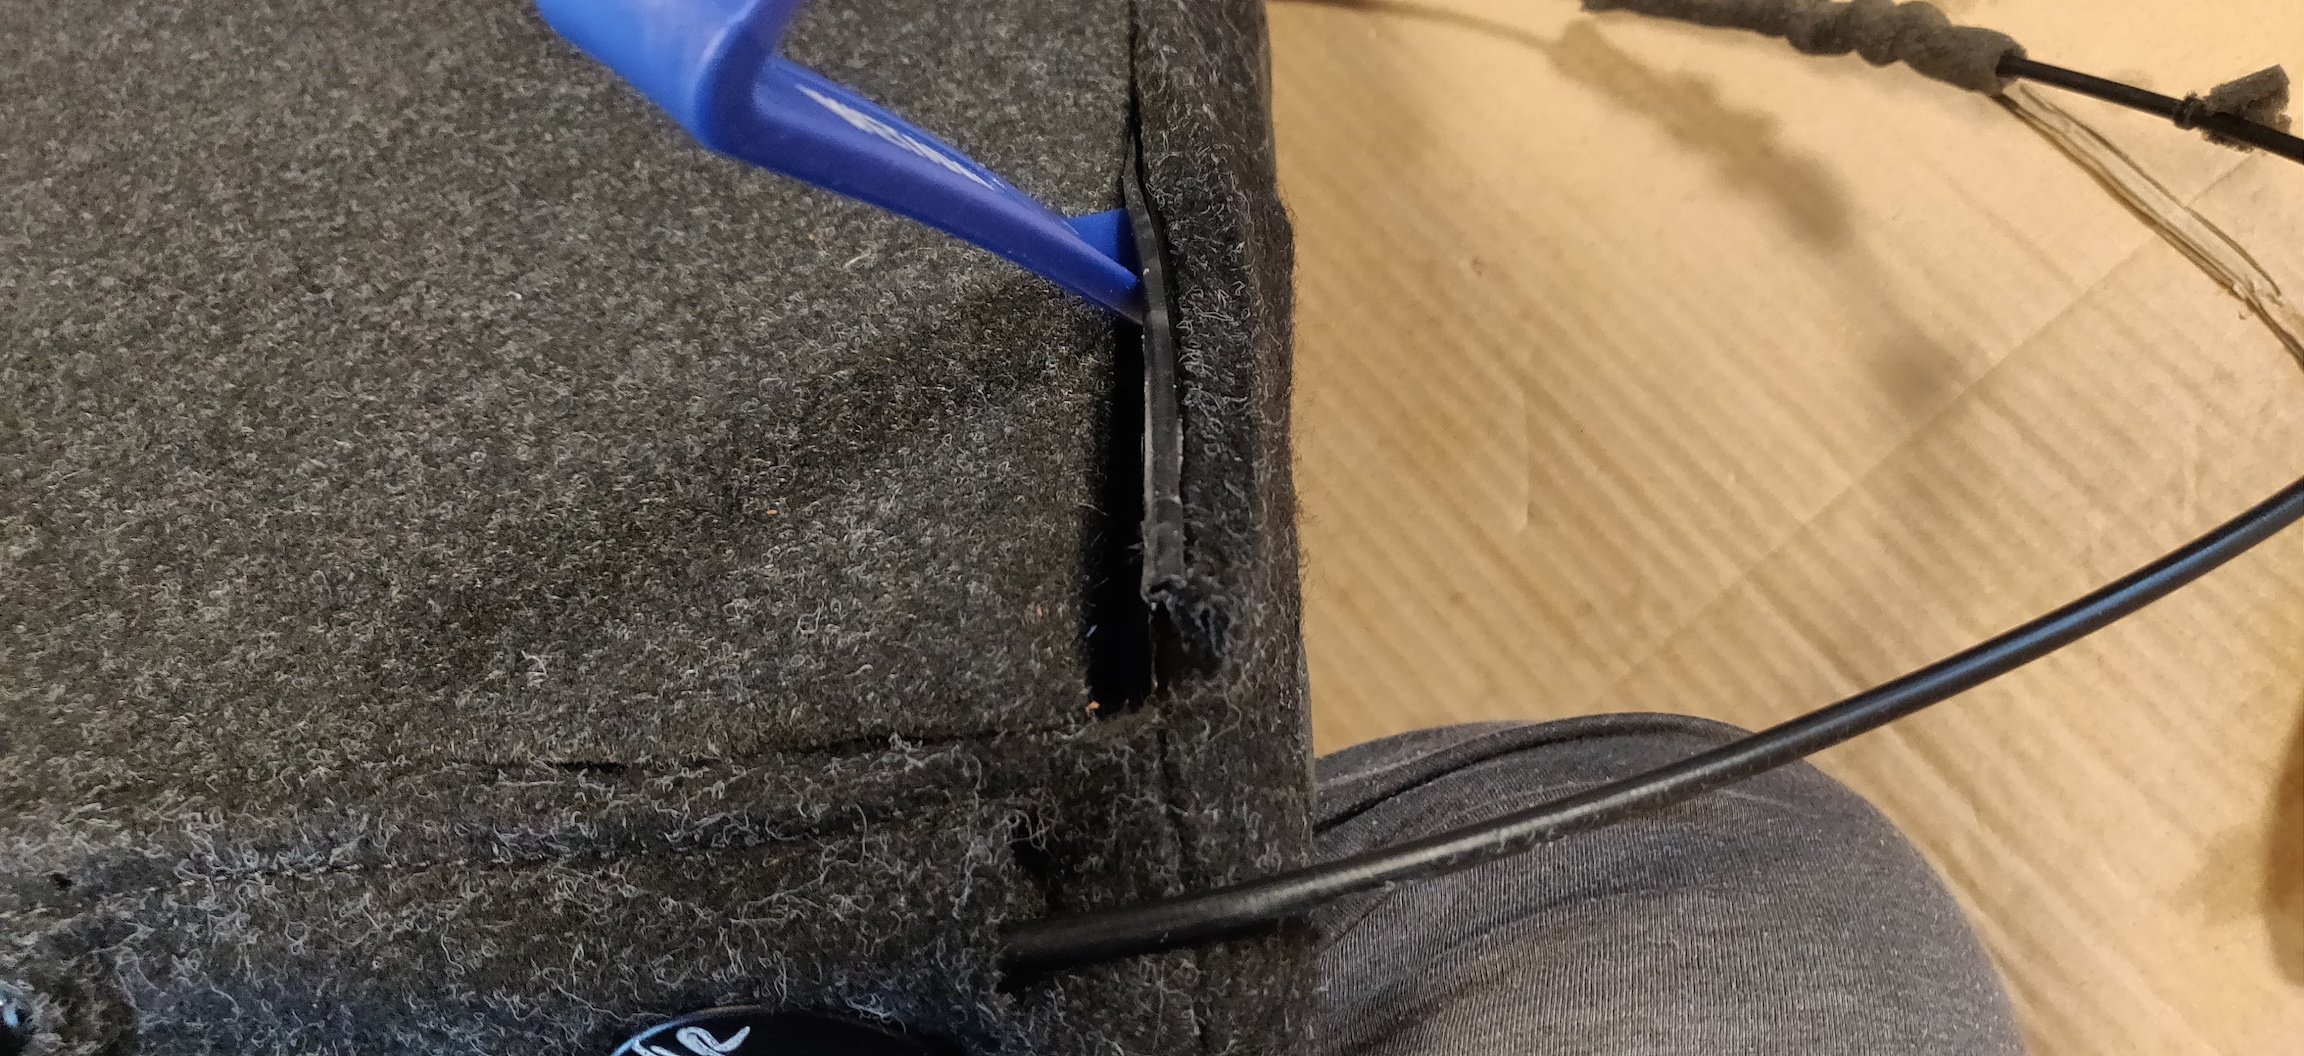
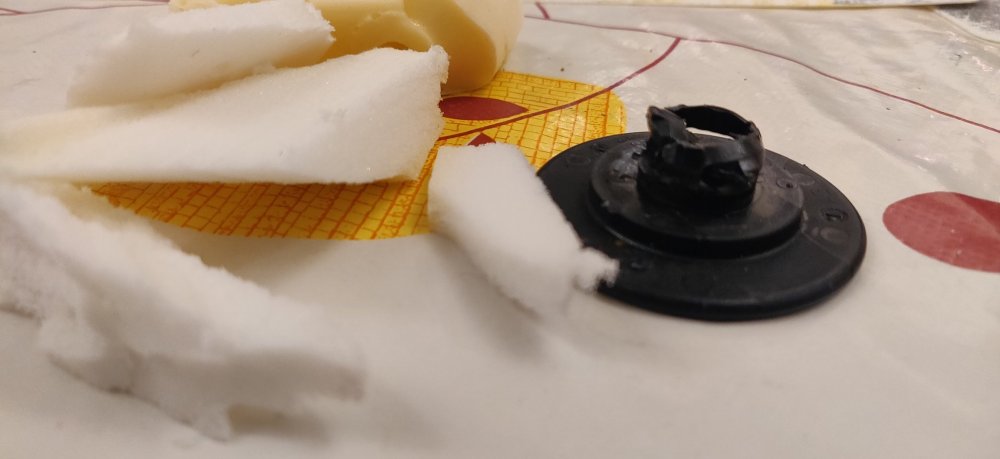
With the rear seat now available, time to essentially separate the covers from both of the frames and for all intents and purposes, reassemble the Superb covers onto the Octavia frame. So firstly, to make the rear seat generally easier to lug around: Two T30 bolts will undo the centre armrest which makes the rear seat a bit lighter. Kind of needs to be removed anyway given the whole cover is to be removed. For the armrest area, the trim has a few awkward bits to remove. Firstly, the side bits, which really does need that hook tool I purchased a while ago: The angle of attack is above, where it slots in, and essentially with some sort of random pulling: If it pops out like so, then that's it, the bottom side can then pretty much be removed by fingernail or a trim tool: This is what is happening, so actually makes more sense with it visualised, where the hook is detaching one of the tabs keeping the trim in place. I then distracted myself by removing the edges of the cover as per usual: No different then violent use of a screwdriver and all sorts of what feels like horrible damage. I continued to distract myself with the belt guide at the top of the seat. There doesn't seem to be any reason or rhyme here, but after some poking with the trim removal tool, the guide trim starts to lift free: The hole in the front also allows a tool of some sort to presumably go at the tab directly under it, which is probably what the poking around eventually did: The guide can then be removed and there's a gap in the side to slide the belt free. All this is mainly because I dreaded the surround trim that was next. Expect destruction: I used https://www.vwgolf.org/removing_and_installing_cover_frame_for_through_loading_aperture-999.html as the basis for how to approach this, which kinda showed a wide tool to remove the frame, starting at the top left: Which certainly started to separate it, but at the expense of bits of plastic immediately snapping. Once started though, the process can be carried on around the frame: This is fortunately on the Octavia one, hence not worrying too much. I'll essentially end up with two lots of bits, so I can hopefully pick and choose the best bits out of this cannibalised Frankenstein's monster of a rear seat. With the frame removed, there is this front lip remaining: With the obvious damage in place. Taking the high road, this won't be seen when assembled so not the end of the world. The workshop manual web page was even more vague about how this is removed. Eessentially just went at it with the trim clip: Once slotted in, sorta wedge it out an angle and with some grunt, it just popped out: Now, eagle eyed readers might notice I've taken pics of different seats. Don't worry about details! With the frame out, the rest of the seat cover can be removed: This isn't clipped into channels with the force and grunt of the outside, and can be removed with fingers: This is repeated around the frame: With the top of the frame being different by being pulled straight down: With that, the seat cover is technically free. I say technically: The headrest guides are clipped into the seat frame, and in doing so keep the cover still attached to the frame. These can get a little finicky: There are two plastic tabs on the side of the frame that are not super visible on the pic above. I used the hook tool to push the tab in, and repeated it on the other side. Then eventually with this back and forth, whilst pushing the tab outwards, it eventually gives away: The manual says to use two screwdrivers for the tabs and another to push it out, which I suppose makes sense if you have three arms. I actually found this one of the annoying steps of all this, but eventually: Which officially means: The seat can be freed! Once it's off the frame, some additional manoeuvring is needed for the central seat belt, just a case of weaving it through the seat cover opening. So yeah, repeated this for the other seat, and was ready to start the reassembly process, almost. Good place to pause this post I think! Maintenance: £2004.02 Upgrades: £1158.66 Miscellaneous: £659.06


-
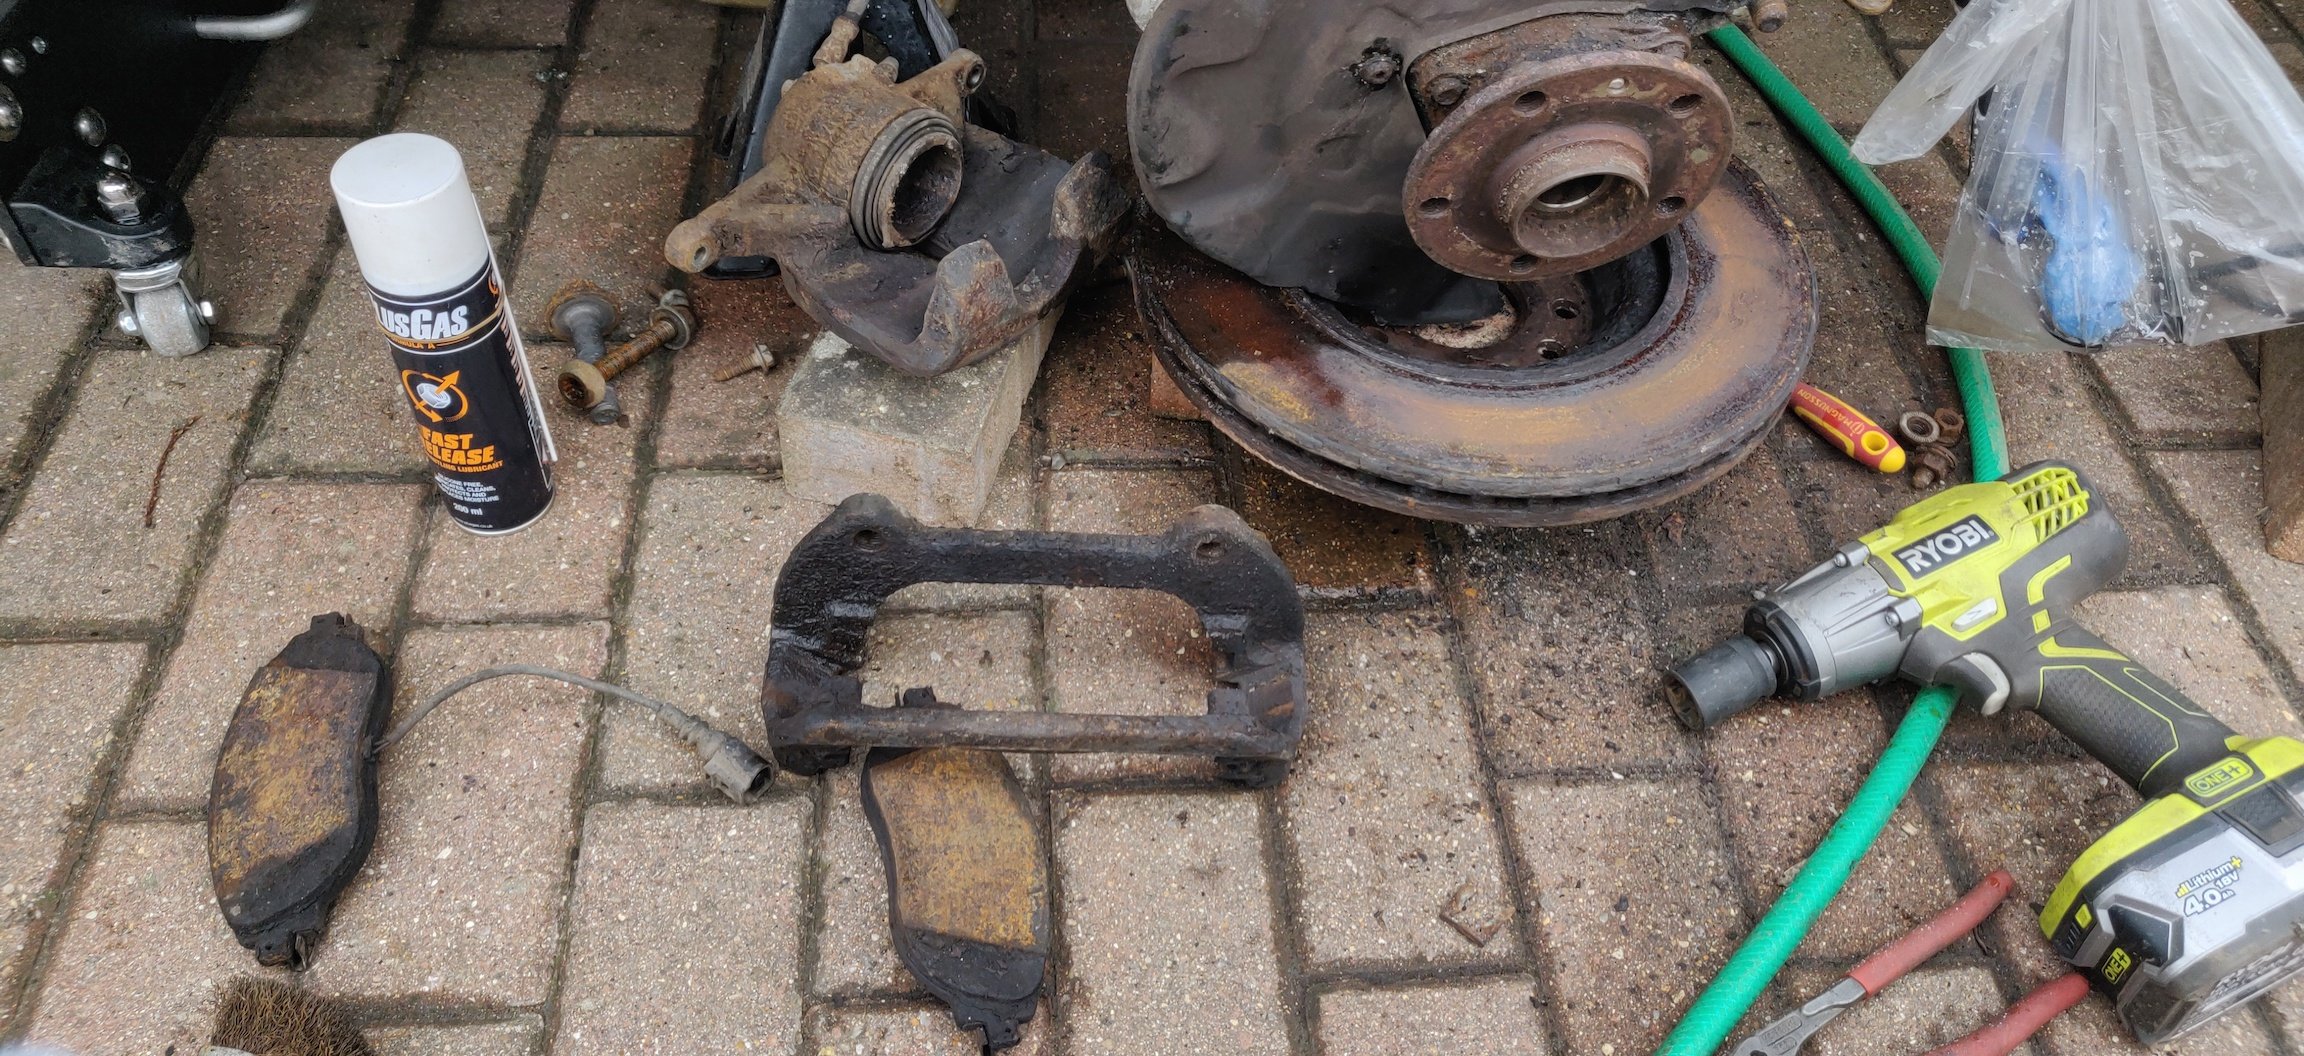
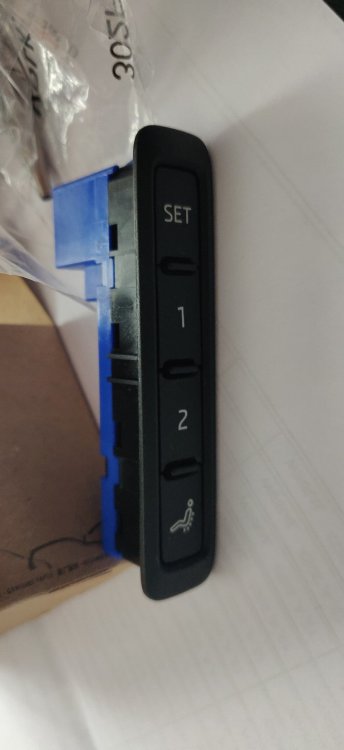
Lots of pics over the last couple of days, so I'll post when I get a spare moment. The Royal Mail package from lllparts was not exactly what I was expecting: For whatever reason, I had a moment of madness and thought "ooh this could be a nice retrofit". So got some buttons which replace the 3 with a massage symbol. With some further swotting on this forum, it looks like I'll also need to get a specific seat control module and then some coding, so not super straightforward. Was £28.49 from eBay. Will keep it in my box of back burner things. This also arrived: For all intents and purposes, the other side of the rear seats from the Octavia that I got a few days ago. This was £63.38 with free delivery, so a little annoying considering the smaller one was £20 to deliver. A quick check: There is a similar looking thing like the other side, so a spring of some sort on this side, which again probably also means that part of the seat frame is different from the one currently used. Lastly: Got a flap wheel from Amazon for £6.99 for a drill. I wasn't brave enough to get one for the angle grinder, as I can't shake the feeling I'd do some major damage with it. I'd probably still need one eventually if I ever brave getting the chassis underside to bare metal for Epoxy Mastic. But not today. So got the two caliper/pad carriers out in the garden and attacked it with the drill: Wasn't expecting perfection, didn't have the patience to get everything to bare metal, and some of the nooks weren't reachable with the flap wheel. Gave them a quick wipe over with some panel wipes: Then spent about 45 minutes giving them a coat: I used some E-Tech caliper paint, which I used for the GR86 as part of the first things done on the car (alongside the suspension bolts). It's a hell of a lot easier to paint with calipers in situ and actually squeaky clean! These took a bit more effort around the rusty bits, with the cleaner areas easier, which is kind of obvious really. Nice weather is promised over the next few days, so left the carriers outside to dry. In a year or two's time, I'll be replacing most of the brake components, so will probably take these to a professional outfit to properly blast and coat, but for now, this will more than do. Next post will be attacking that rear seat! Maintenance: £2004.02 Upgrades: £1158.66 (+£91.87) Miscellaneous: £659.06 (+£6.99)


-
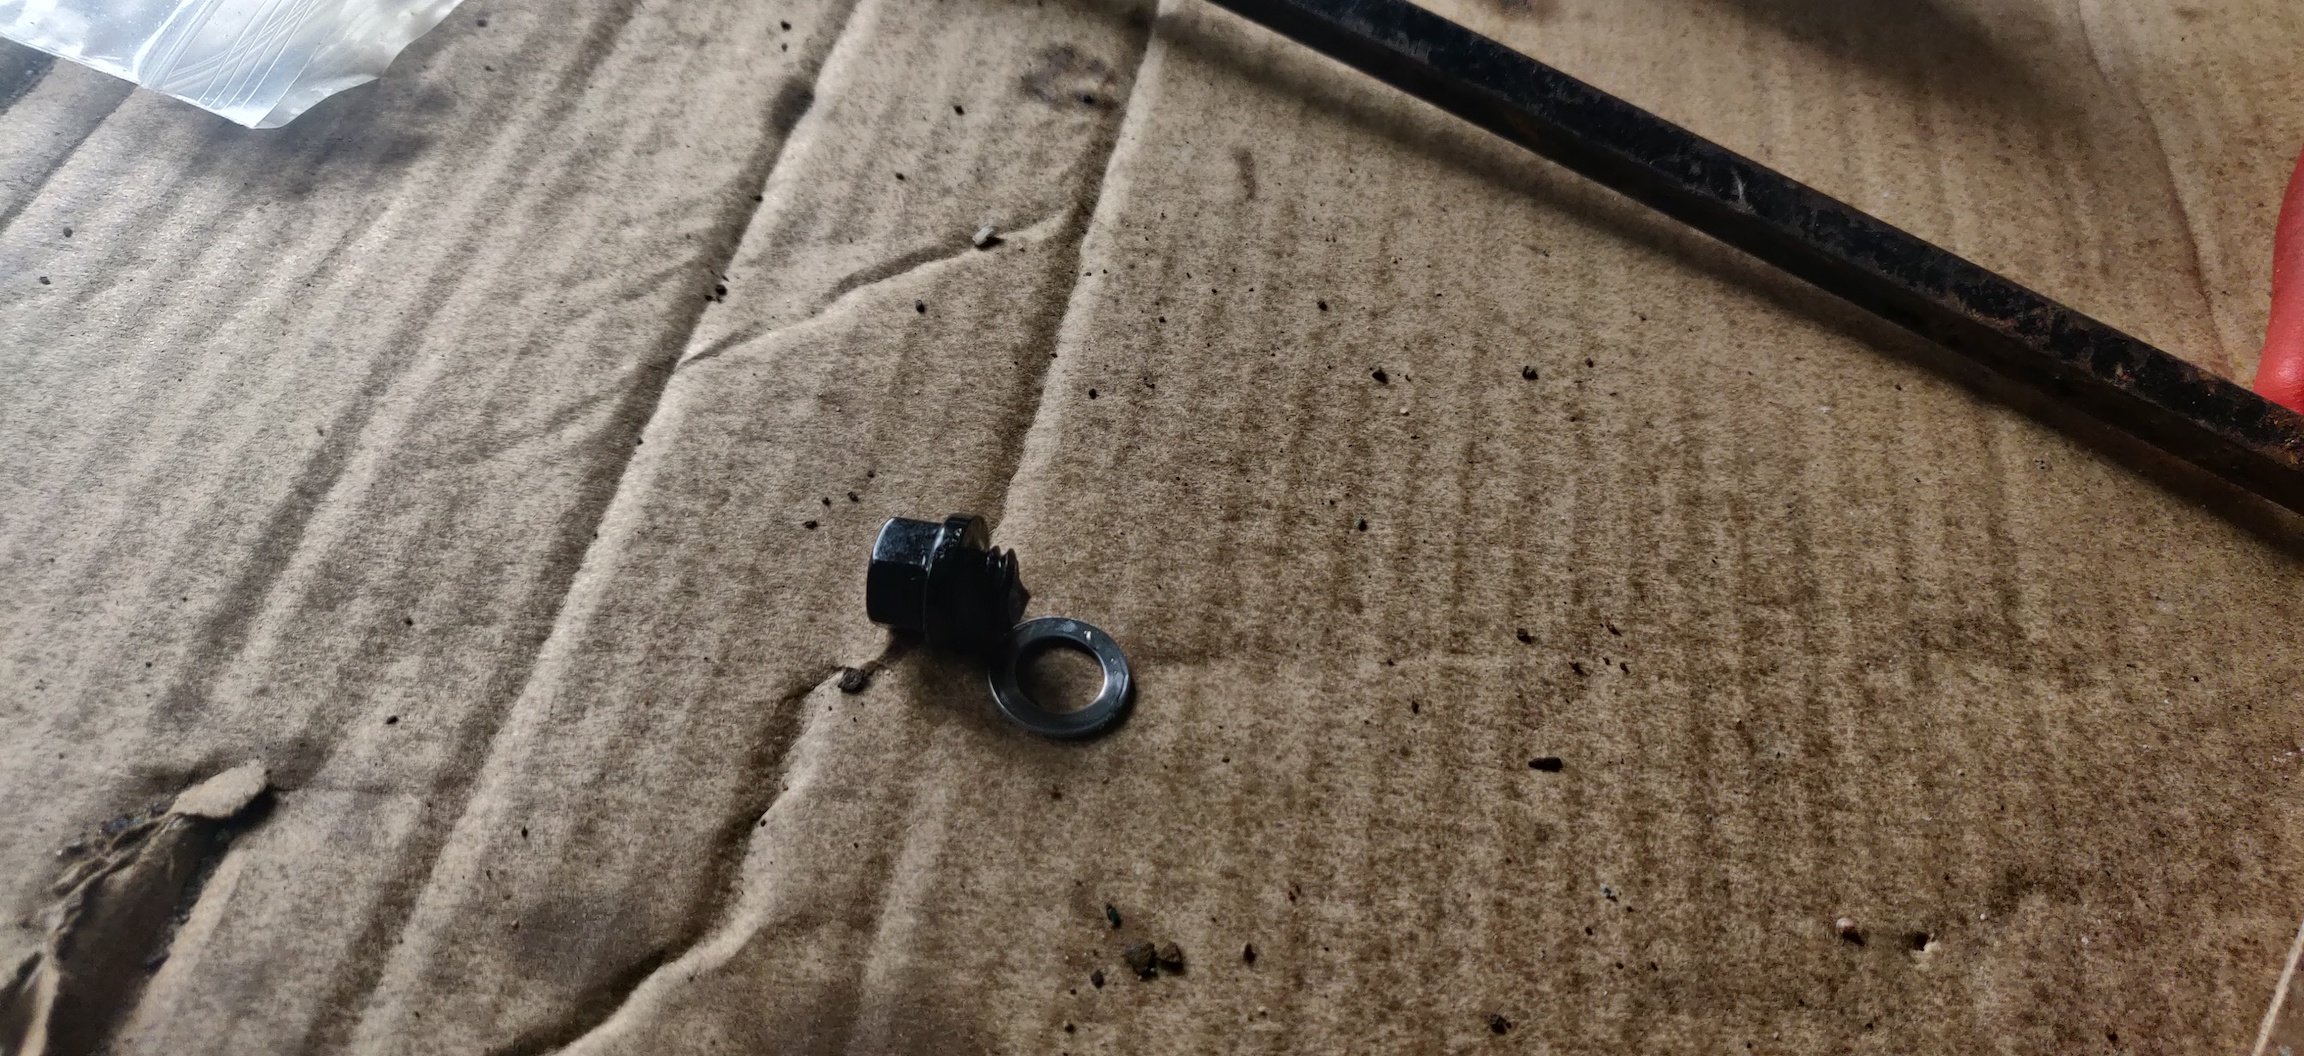
Couple of minor things arrived today, just noting them down in case I forget: Some repair pipe for the washer hose, and a connector to repair the broken coil pack connector. I figured for the washer hose it'd be easier to get something to get rid of that union that wasn't connecting up tight, as it looked far too complicated for washer hose in terms of delicately extracting and repairing. It was £6.99 from eBay specifically sold as a repairs for corrugated pipes. The connector is for the second one from the right with the broken tab. Technically should get a replacement coil pack as well due to it having a broken tab as well. Hopefully just a case of removing the terminals from the old and inserted into the replacement. £3.95 for the one connector (with crimps and water proofing rubber bits). Interestingly looking at my records, I ordered a couple of these circa 2017, which would have been for my brother's old Audi A3. Same deal with mangled connectors. Also got these: A couple of replacement bolts and washers for the rear diff. Some cross referencing with lllparts came up with N90 281 802 which was M10 bolts, both look the same and also look the same as the fill bolt for the Haldex. I entertained getting some stainless ones which were the right 10mm length, and hex head to reduce future drama when removing, but decided not to as eBay had them for £7.10 for the two, via Audi Leeds. Maybe one day I'll swap them out, but don't have to worry about it for another 4 years after this. Amusingly, Royal Mail cited that an lllparts shipment was due today, but they decided to drop a "we missed you slip", instead of just, you know, ringing the doorbell. They're going to try tomorrow apparently, so we'll see how that goes. Maintenance: £2004.02 (+£18.04) Upgrades: £1066.79 Miscellaneous: £652.07
-
So decided to end up going to route 2. Firstly, after work and with some non raining weather, decided to give the XCP a quick blast around the engine bay: \ The spray goes on as a mist at a distance and pretty sticky film if close. There is a clear coat variant which doesn't leave the orangey-brown you can see, but was kinda after this so I know what's been covered. Basically focussed on aluminium bits and nuts and bolts (a lot are pretty rusty, hopefully the XCP helps in that regard). On the right side, mainly sprayed onto the top of the gearbox and nook and crannies. It meant that I can finally start reassembling the engine bay, starting with the battery tray: Then the weather took a turn, so that was that. Back in the house, started to disassemble the Octavia seat: Familiar territory, so a case of unclipping the cover from the metal guides: Continuing around the whole frame: Then the cover and padding can then be lifted. The two are attached by hog rings, but this is probably destined for the tip, so no need at any stage here to be careful. Compared the revealed spring and hinge to the old frame: It's immediately obvious how different it is: So the hinge area is larger, and there's the spring thing inside some plastic frame. So even if this can be separated and there's a part number, it's highly unlikely it'll be mountable onto the other side frame if the whole hinge area is different. The below is of the part numbers: Not the best pic, but essentially the non sprung one is 3V0 885 501 compared to the sprung one being 3V0 885 501 A so very annoying they couldn't just use the one frame design. Definitely means that realistically, I'll have to do the same for the right side seat, so buy one from an Octavia with the rear seat release mechanism and so also the spring in that hinge. Then take out the cover and padding from the Superb and onto that Octavia frame. So time to remove the seat cover from the Superb: So here's the Superb cover ready to go onto the Octavia frame: With that hinge being larger, the foam needs some more cutting: Probably could have used the foam from the Octavia as a reference, but just hacked at it until it fit into place with less resistance. Took the plastic hinge bearing out as well, but ended up mangling it in the process: I have ordered replacements though via lllparts as part of the desperate search for answers, hence being a bit hamfisted with the above. So yeah, once the padding was sitting reasonably, clipped the cover back on: So yeah, once the replacement plastic hinge bearing arrives, I can probably then try a test fit before I fit the rest of the bits onto the seat. Time to shop for that other seat... Maintenance: £1985.98 Upgrades: £1066.79 Miscellaneous: £652.07


-
Some more random stuff: So for whatever reason, unable to find any ACF50 which I normally use on the Lotus anywhere where steel met aluminium. So just got some of this stuff. Will be using it on most stuff that isn't the chassis, so once the Bilsteins are installed for example, I'll be giving it a spray over with this stuff. Whether any Lanoguard then goes over that, really depends on overspray rather than intent. It was £14.95 on eBay, so hopefully does a good job. Youtube and the Internet does sing its praises. I also mentioned in an earlier post that I might get desperate in figuring out this hinge on the rear seats: So this is it. Went on eBay and scoured for Octavia rear seats with evidence of the remote release on it. A good giveaway is the Bowden cable still actually attached. It was £26.10 but unfortunately £20 postage on top, so just under £50 for something entirely to be sacrificed. The hinge area immediately looks different: With closer inspection: There is a rectangle shaped recess in the hinge, which no doubt locates onto the rectangular shaped part of the bit that sticks out on the body. This is definitely where it winds up some sort of spring. Compared to the normal seat: Where the plastic part is deeper and there's nothing in there. So it's a bit annoying that there isn't an obvious part number for that bit. All I can get is that seat back frames for the Octavia and the Superb appear to be the same. So as it is, there's probably two choices: 1. Lift off the corner where this hinge is, and determine if this hinge is replaceable and more importantly if it has a part number so I can source one for the other side. or 2. Take off the Superb seat and cover and transplant it onto this frame. As this is the smaller of the two rear seat backrests, and I've actually removed the seat cover and padding off before, option 2 probably isn't as horrific as it sounds. If no part number is apparent though, then I'll essentially be stuck also sourcing the rear seat for the other side, so I've probably spent double or treble the cost for this retrofit, and entailing the destruction of a set of rear seats. Not great. It also means the new bits like the Bowden cables and so on probably aren't necessary if the Octavia ones are in good nick, which is another slight annoyance. Maintenance: £1985.98 Upgrades: £1066.79 (+£46.10) Miscellaneous: £652.07 (+£14.95)


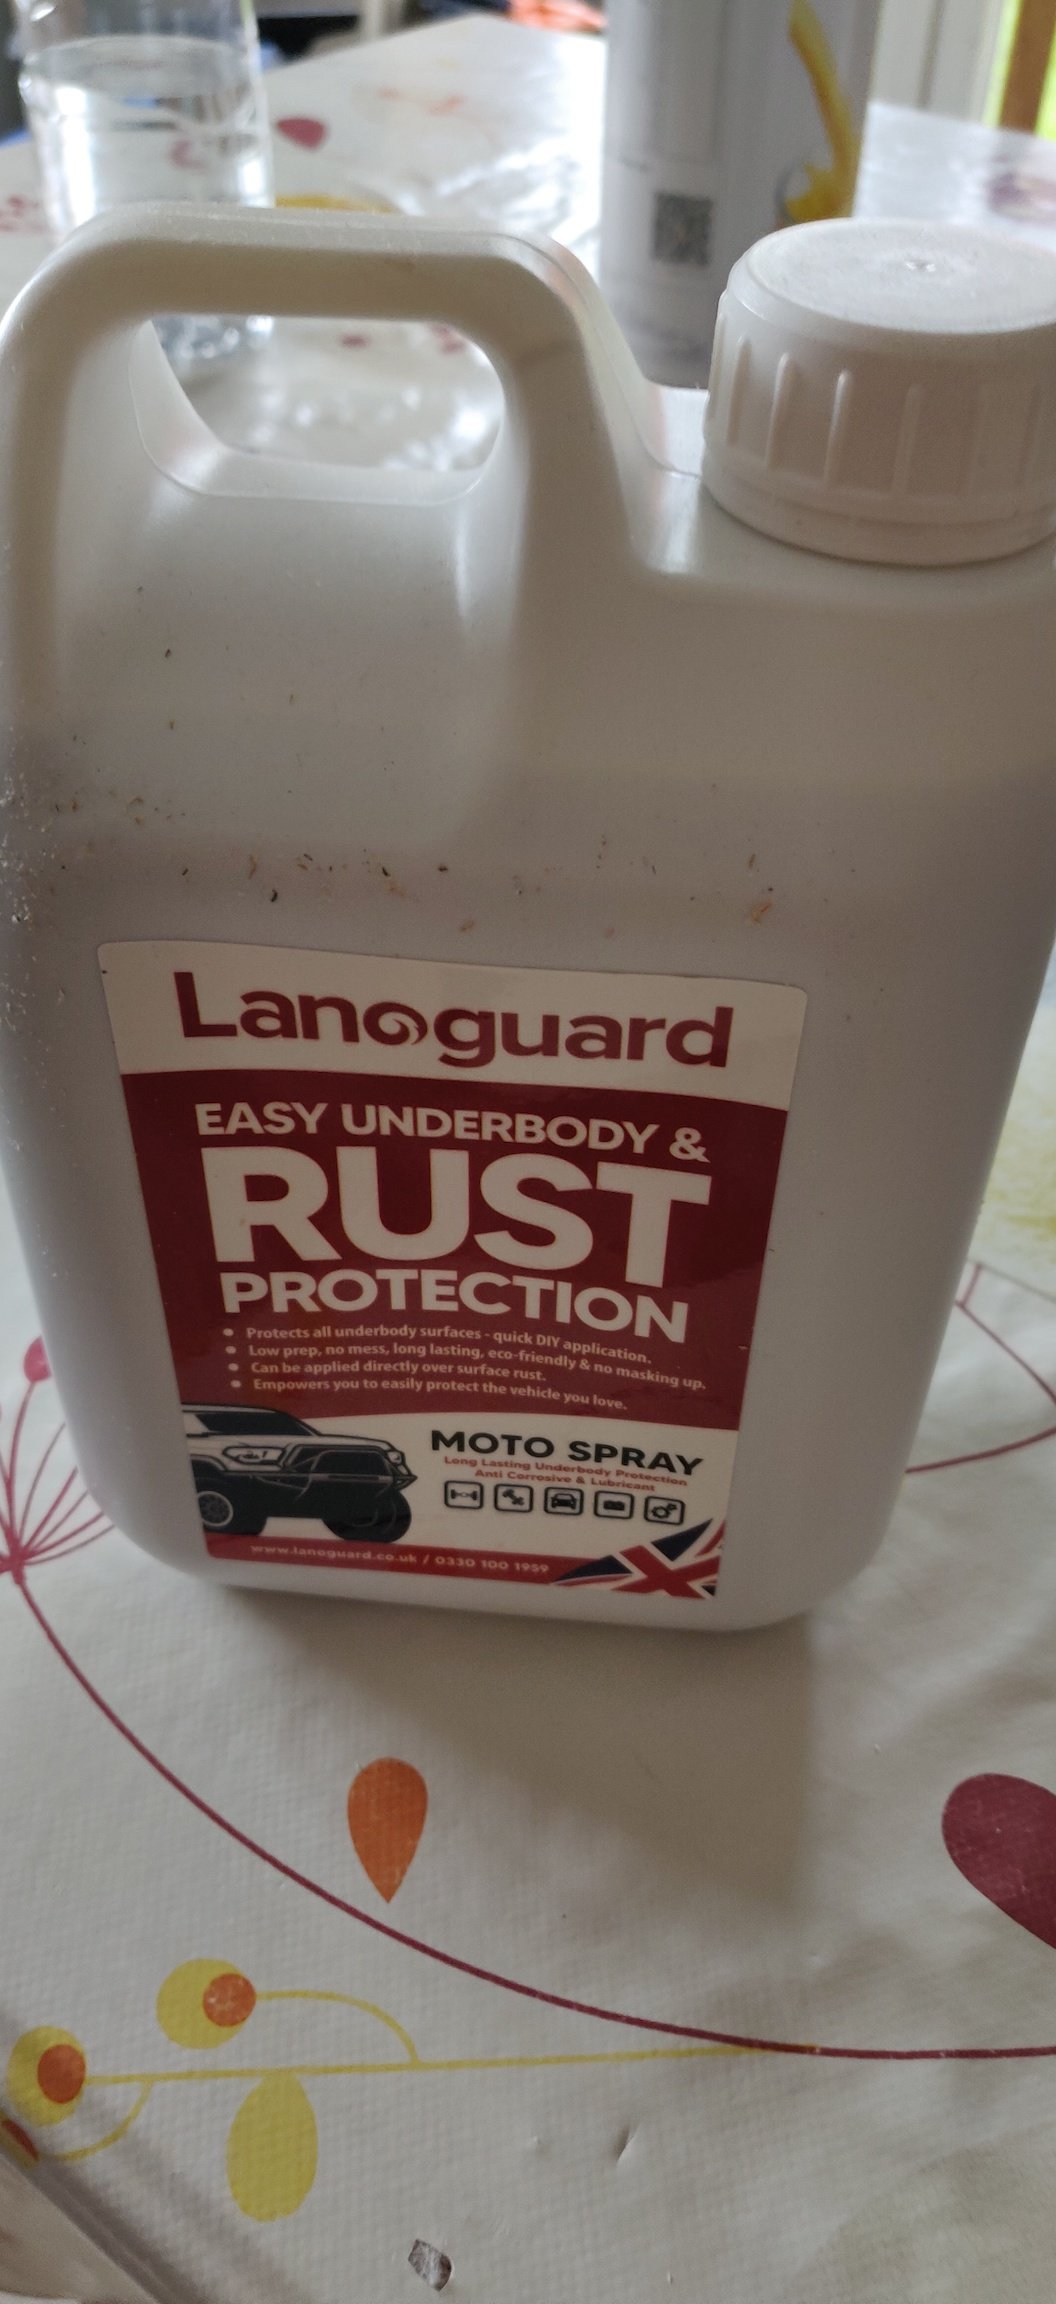
-
Yeah, I'll keep it at 4 years, Haldex at 2, as it simplifies the service schedule from my perspective.
-
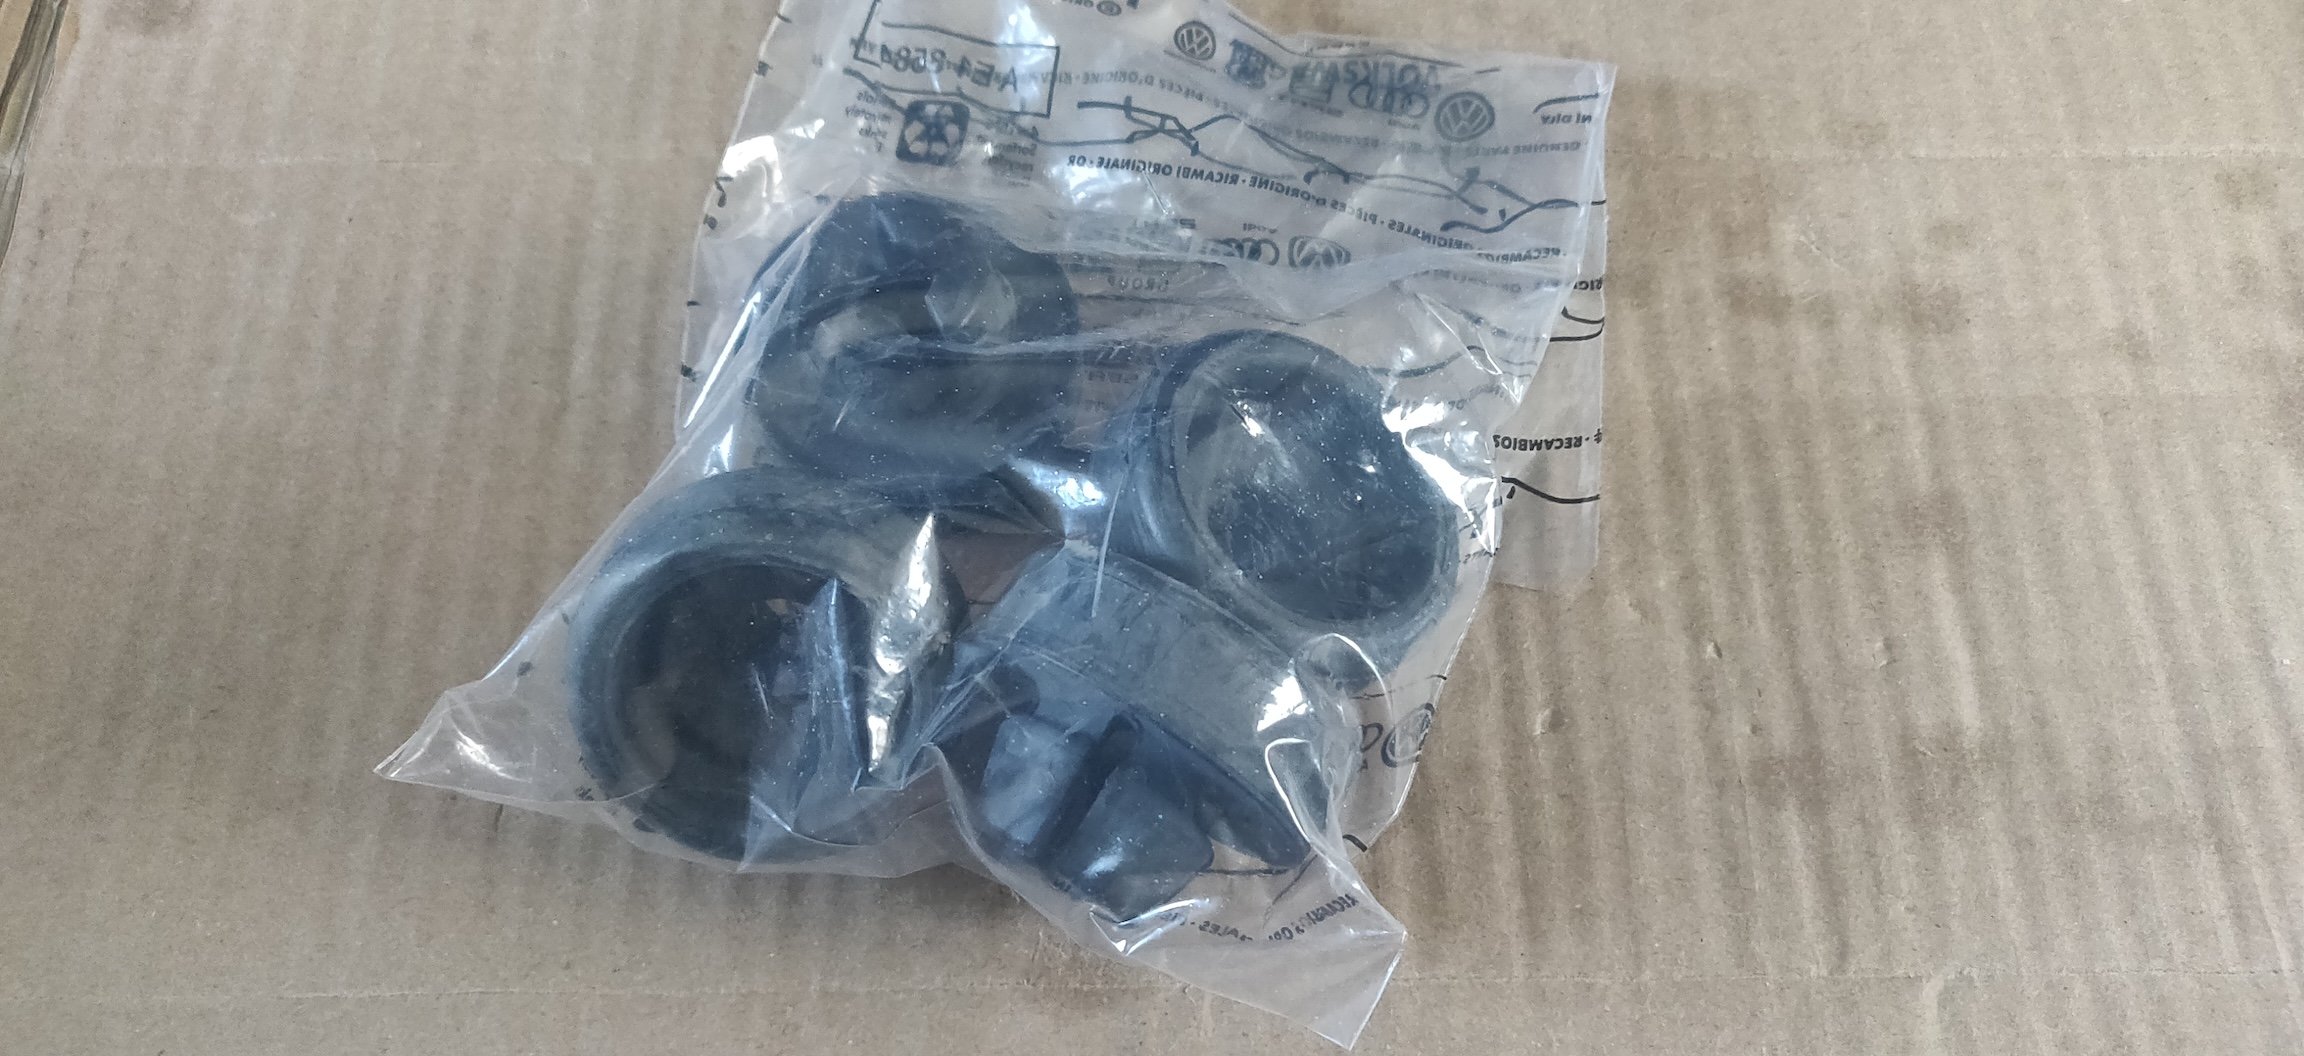
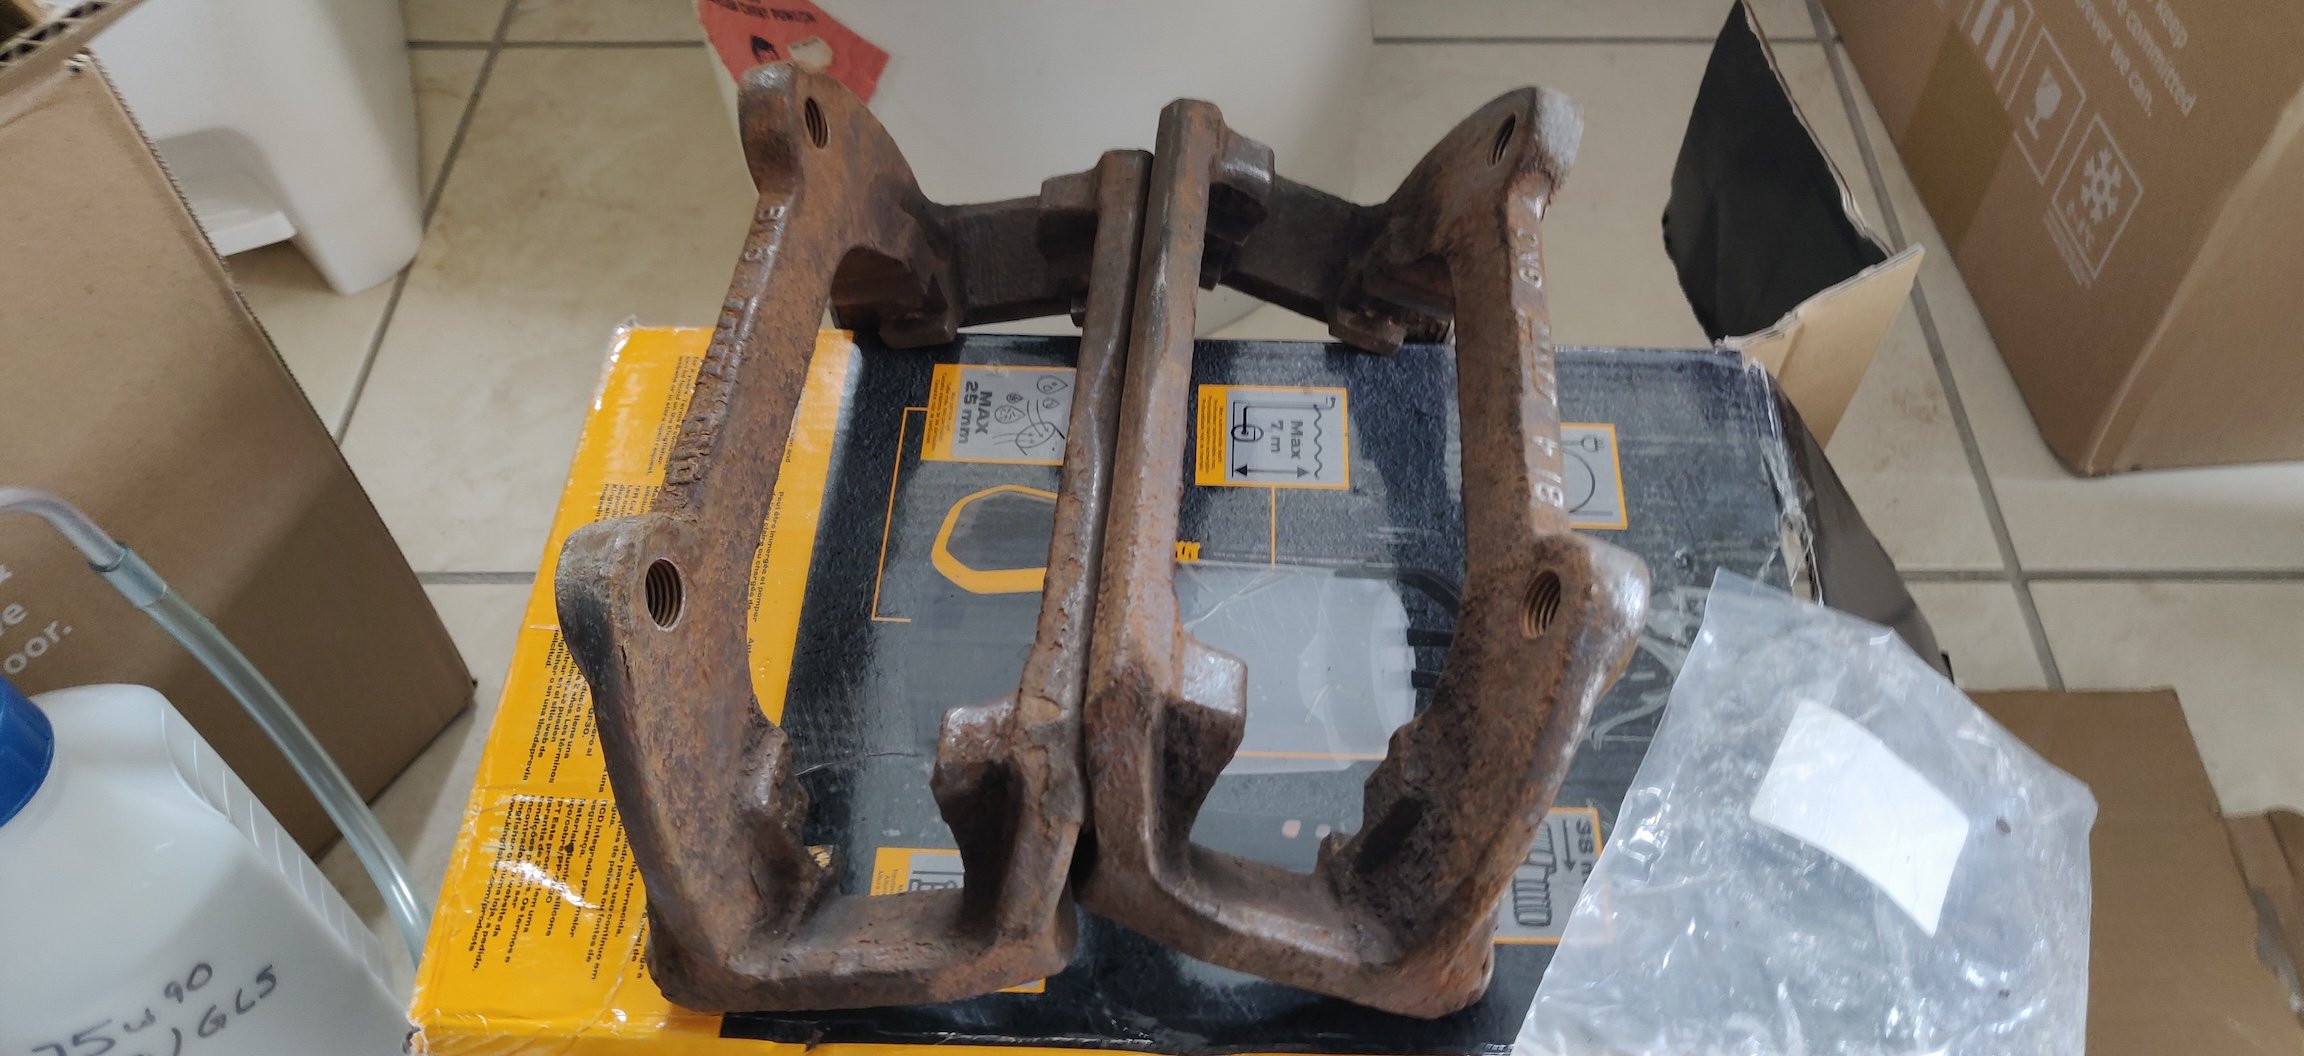
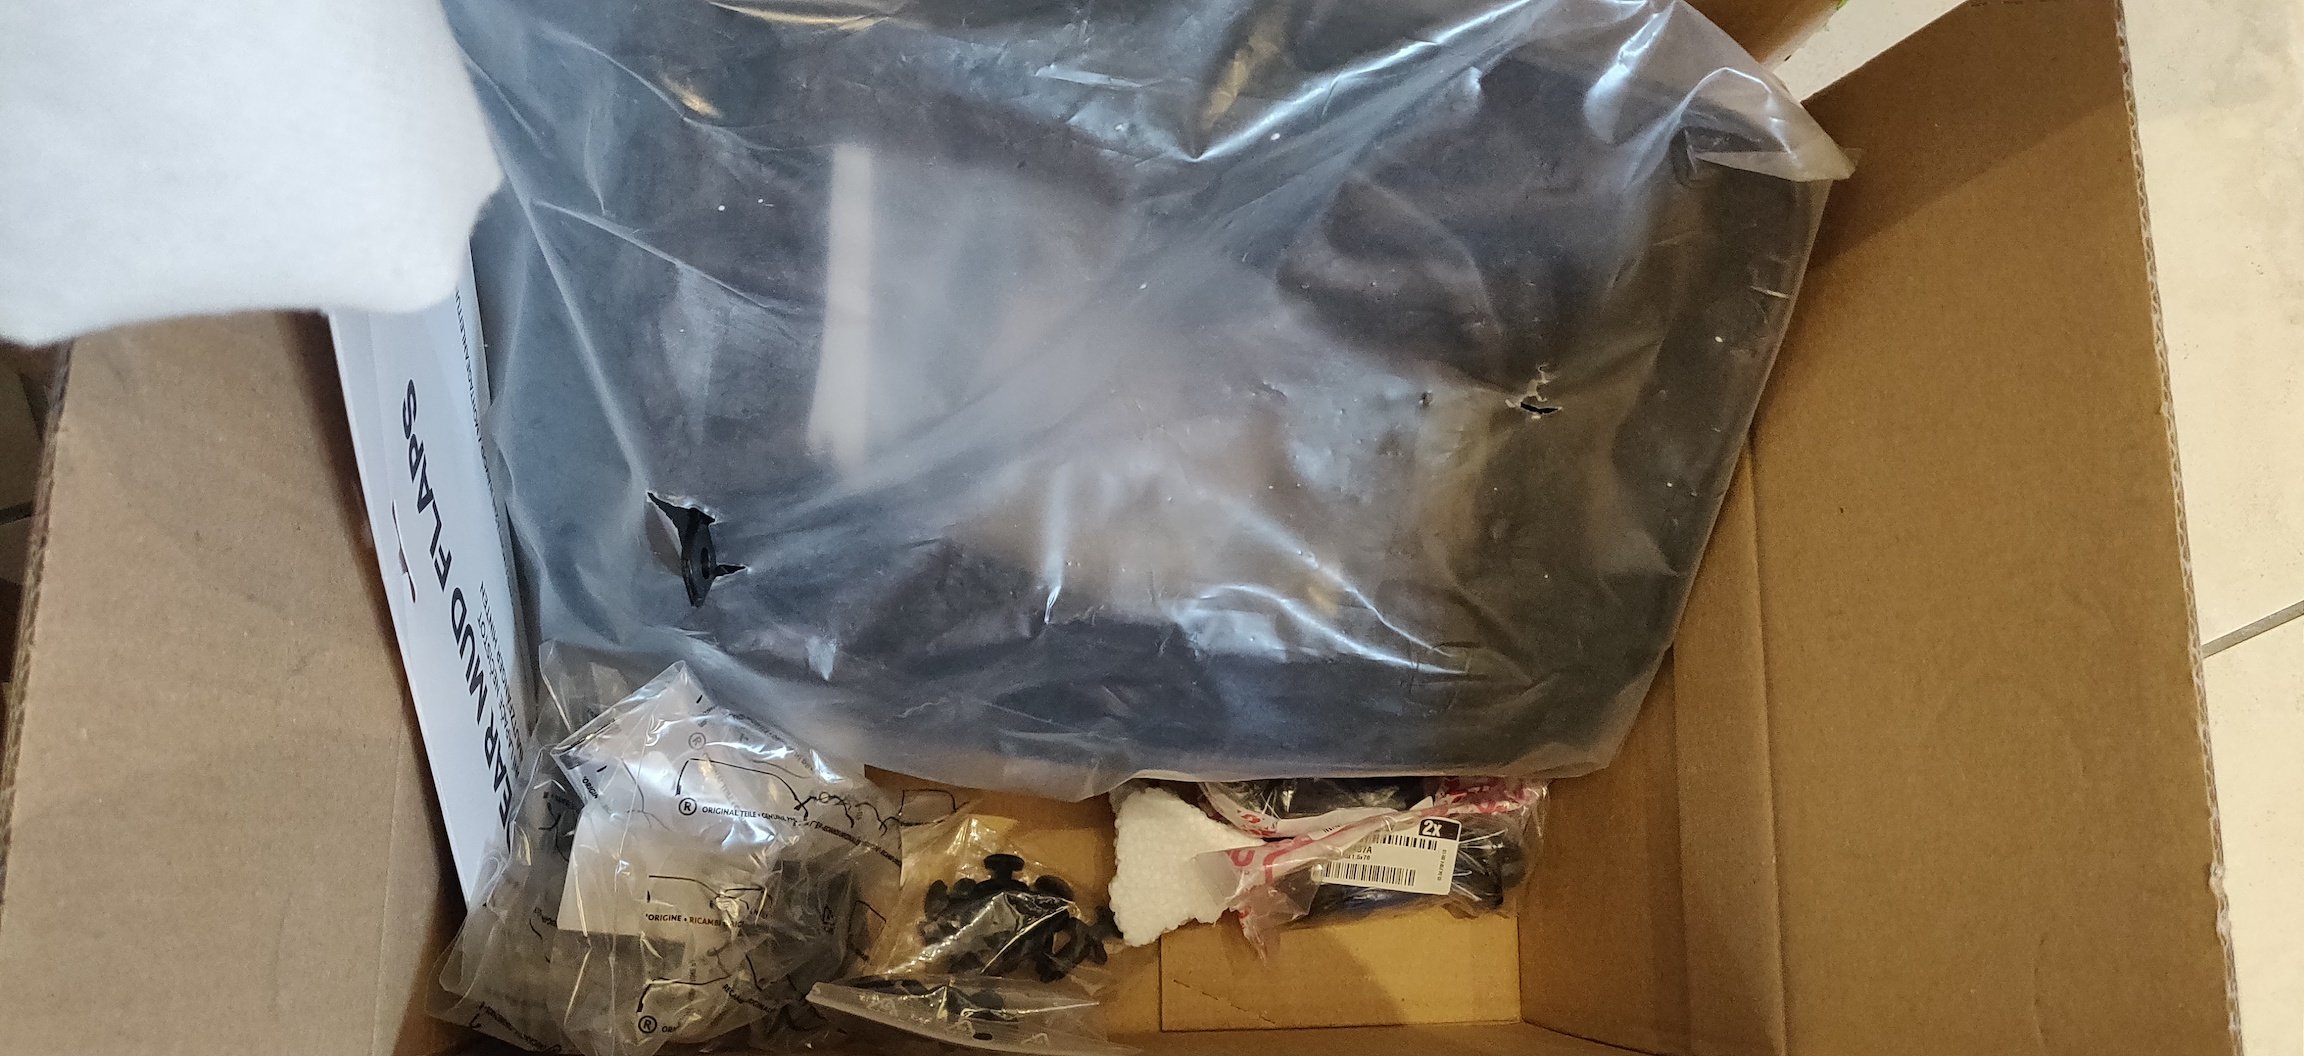
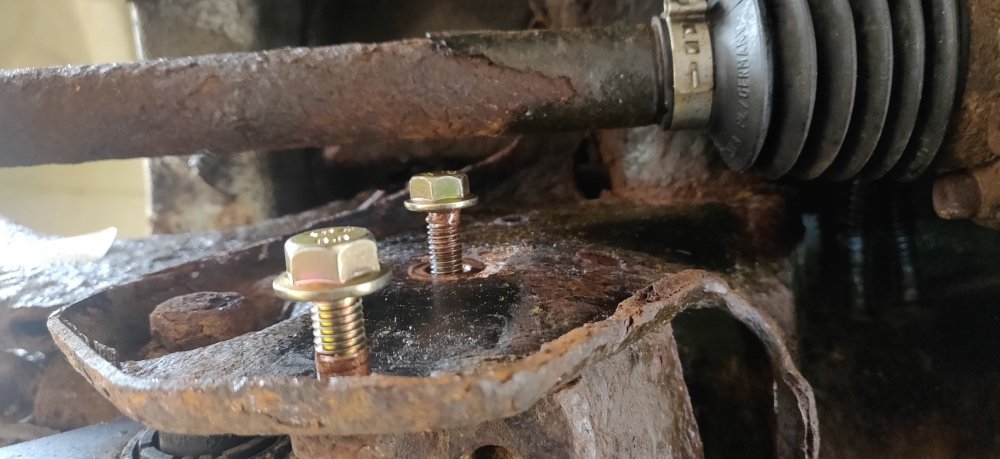
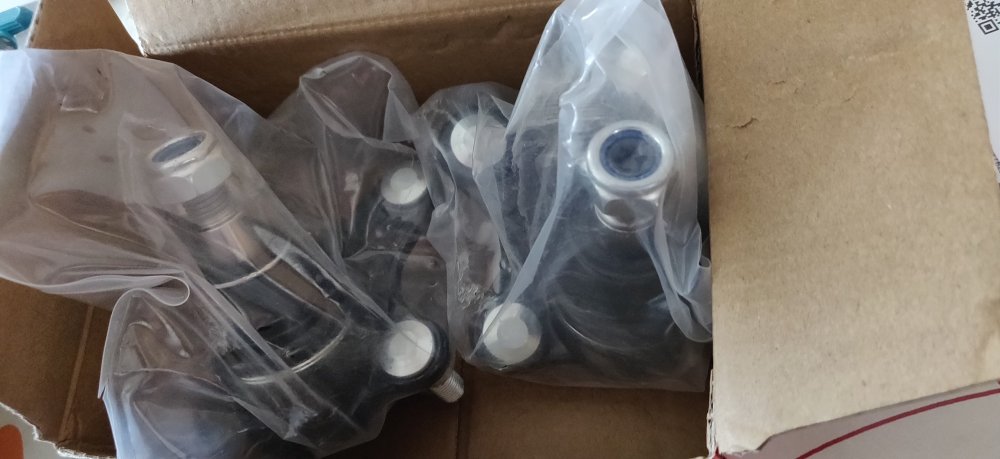
Some bits arrived today: Some eBay special balljoints. I might have mentioned this already, but eventually the rest of the suspension beyond the dampers will probably be replaced, especially given the amount of rust seen. So eventually the lower arms would have been replaced, so didn't want to commit anything on these balljoints. Got the pair for £19. Also this: A 2l top up of Lanoguard, as I already have the spray trigger from using it on other cars. I'll probably go over the underside as best as I can and the wheel arches probably a couple of times over the course of a weekend I reckon. Hopefully that'll at the very least stave off any further rot, until I mentally prepare for a proper job. I imagine this stuff is more a triumph of marketing given its relative stranglehold in terms of pricing. It was £62.94, £56.99 with £5.95 shipping. I'm hoping two litres will probably be enough for 2 coats, then another two next year, so I suppose it's actually not terrible value for money. This box also arrived: More stuff from Skoda Parts. Essentially, front mudflaps to replace the broken one, but also got some rear ones as they're only about £12 front and back. When I had my Peugeot 205 GTI, mudflaps became so rare that some people were pricing them at around £200! Don't think this Superb will have that same aura though... Also got some aftermarket driveshaft bolts, some clips for the mudflaps (and maybe other things), and the plastic covers for the rear seat hinges. The front was a little bit bent, and these were only a few pounds. It came to €54.87 which the credit card determined to be £46.96. So stuff ready hopefully for the weekend. Over lunch, started looking at the brake pad carrier/caliper mount: Took the sliders out without drama which were sliding absolutely fine. Pic shows them well greased. Well greased, huh. The mounts themselves are just in the sort of the state that is best described as never cleaned. Caked in a layer of grease, brake dust and general mankiness. Didn't really want to throw too much brake cleaner at it (even though I will have to), so for the afternoon, just soaked it in a soapy bucket of Fairy Liquid: Probably needs soaking in something more aggressive, and if anything elbow grease. Will probably get some sort of rust removal attachment for the drill or angle grinder to clean this up, especially where the pads slide, as they're far from clean. I then spotted something in the workshop manual. About the rear differential oil refill and drain areas. There are two bolts on the rear differential that look the same as the Haldex fill bolt. This seems to be something that isn't really mentioned in anything. Some swotting up on the forums here suggests the use of 75w85. I don't have that, but do have this: The Ford Focus used GL4/GL5 spec manual transmission oil, 75w90 in this case. I'll probably be using this to replace the rear differential oil on this car, as I imagine it'll be close enough, plus as per the pic, I already have a pump used for this, so no major additional expense. Will probably get a couple of replacement bolts for the drain and fill, which look to be the same. I'll assume the rear differential is no different to a manual gearbox in terms of service life, and I'll consider it as part of the 4 year interval services. Makes sense to tackle both over the weekend as they're right next to each other. I'll have to get the car as level as possible not just for this but for the DSG as well. Maintenance: £1985.98 (+£128.90) Upgrades: £1020.69 Miscellaneous: £637.12


-
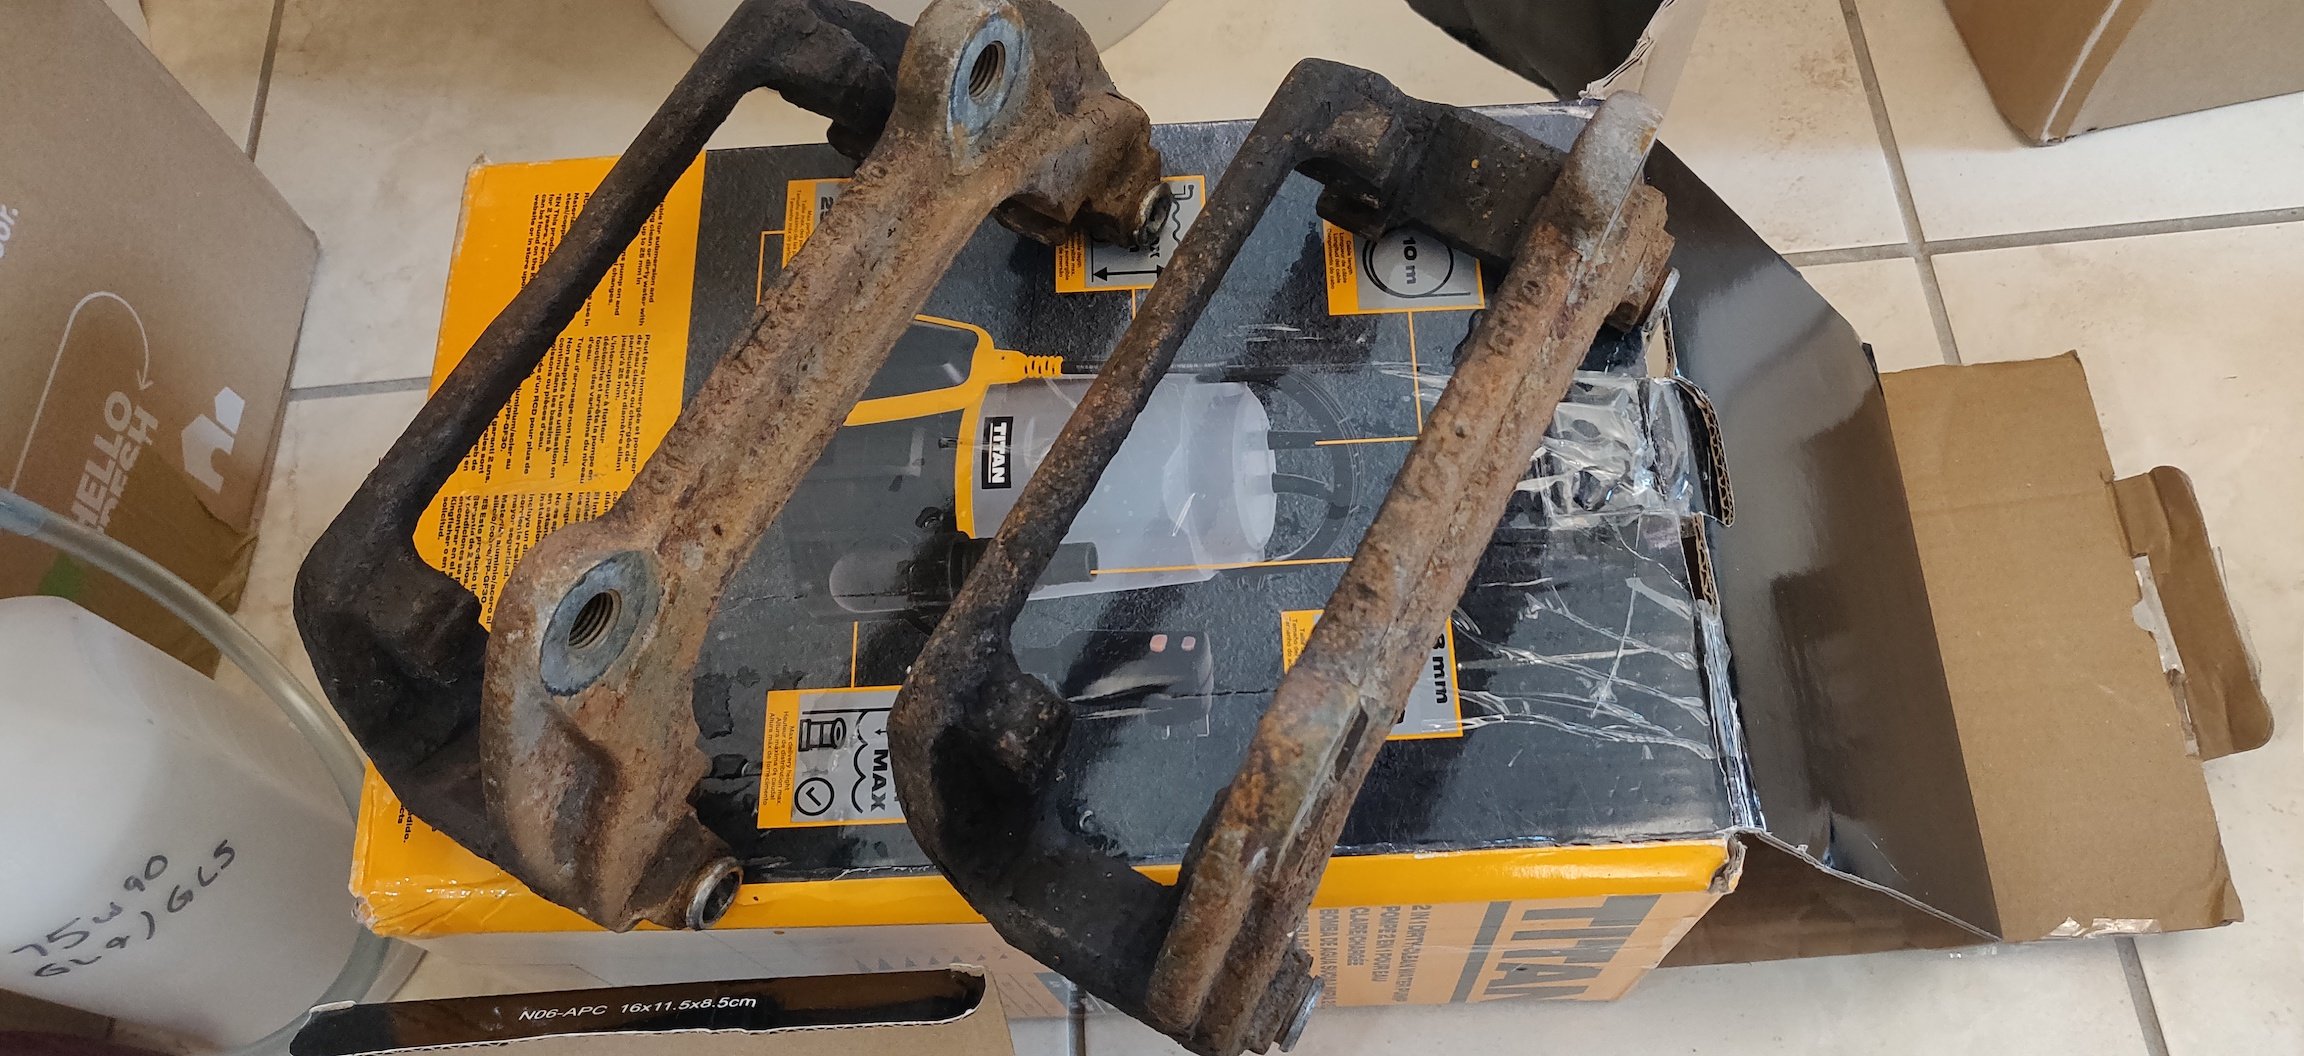
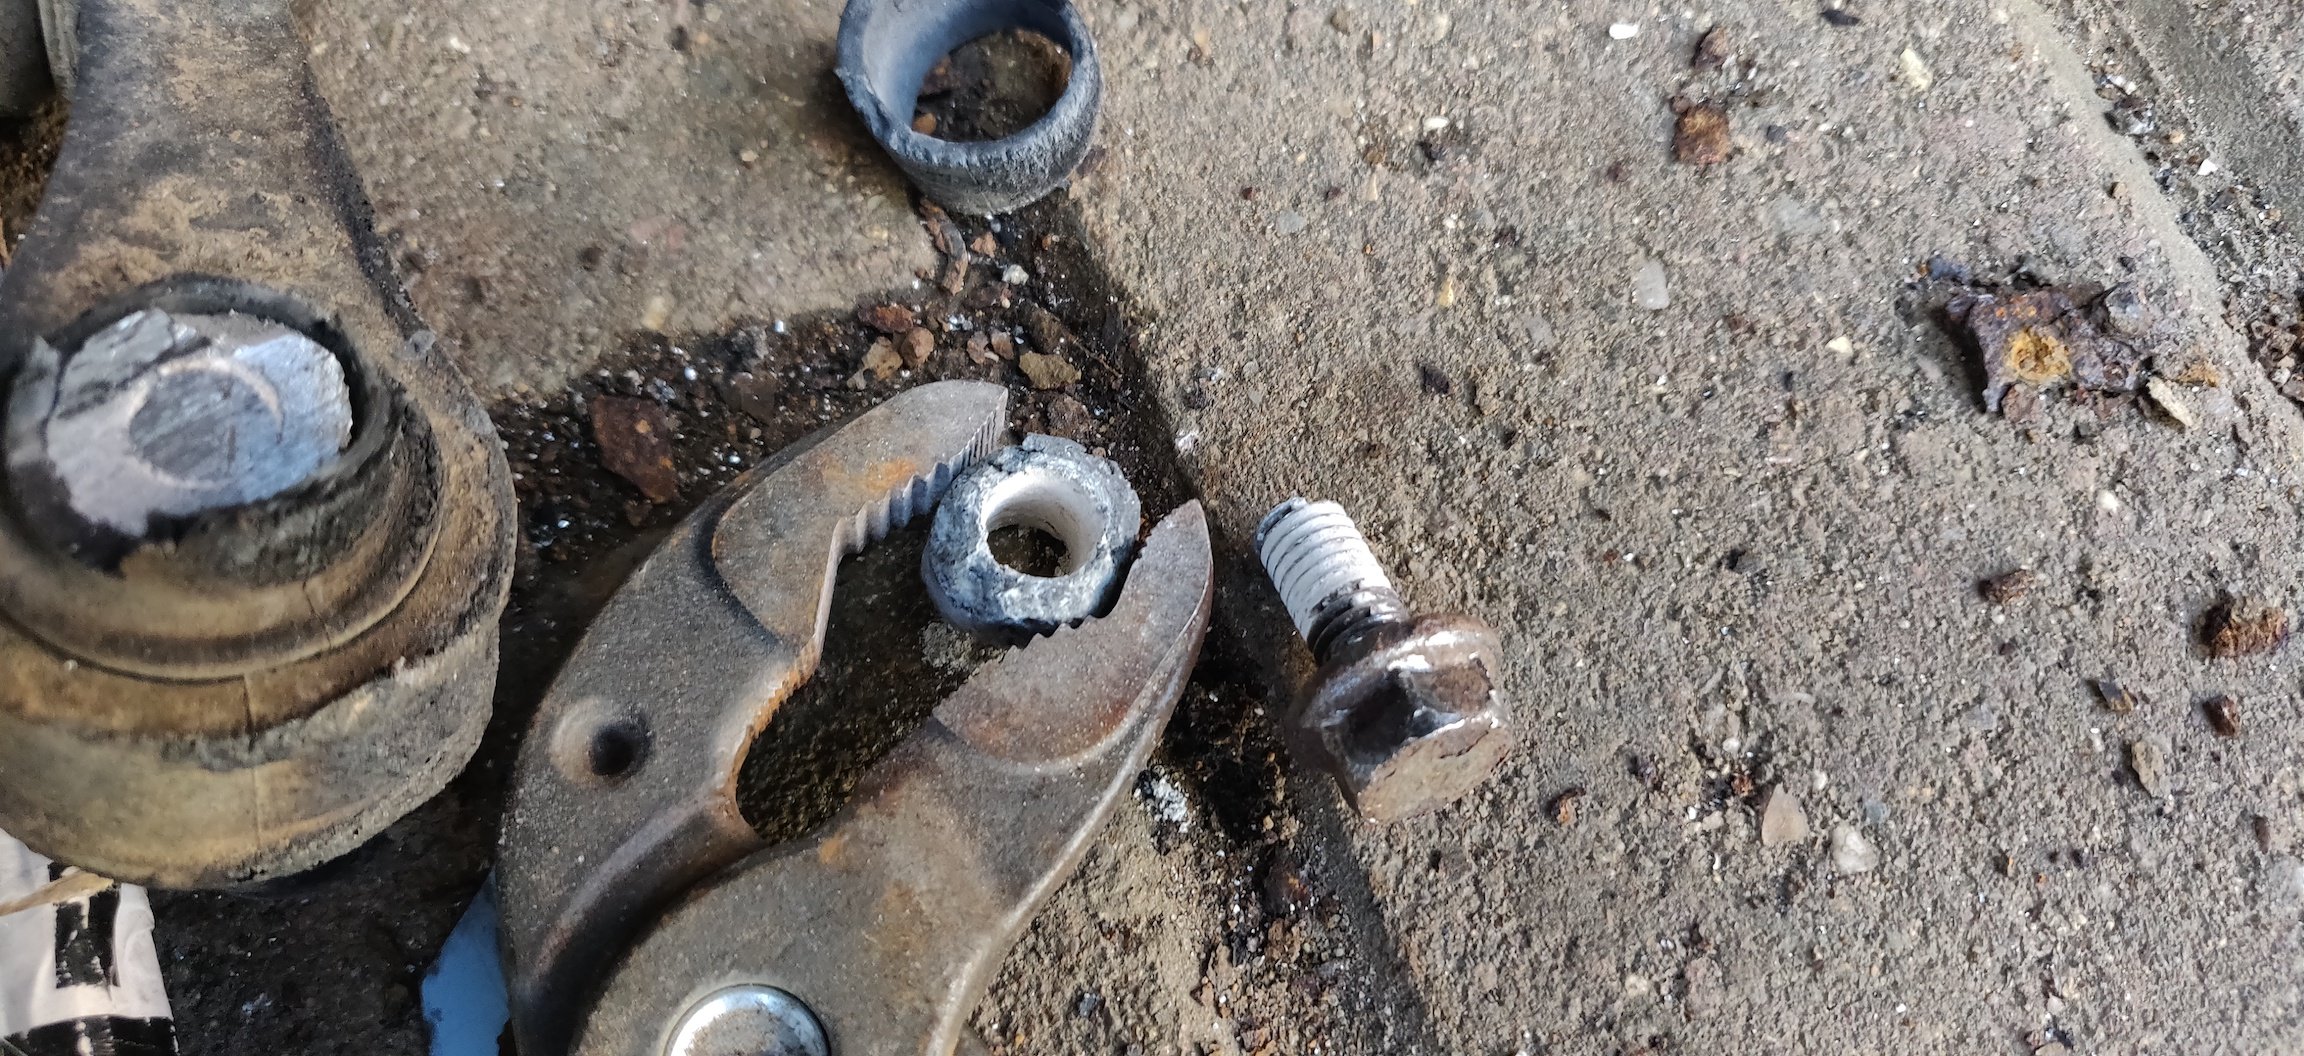
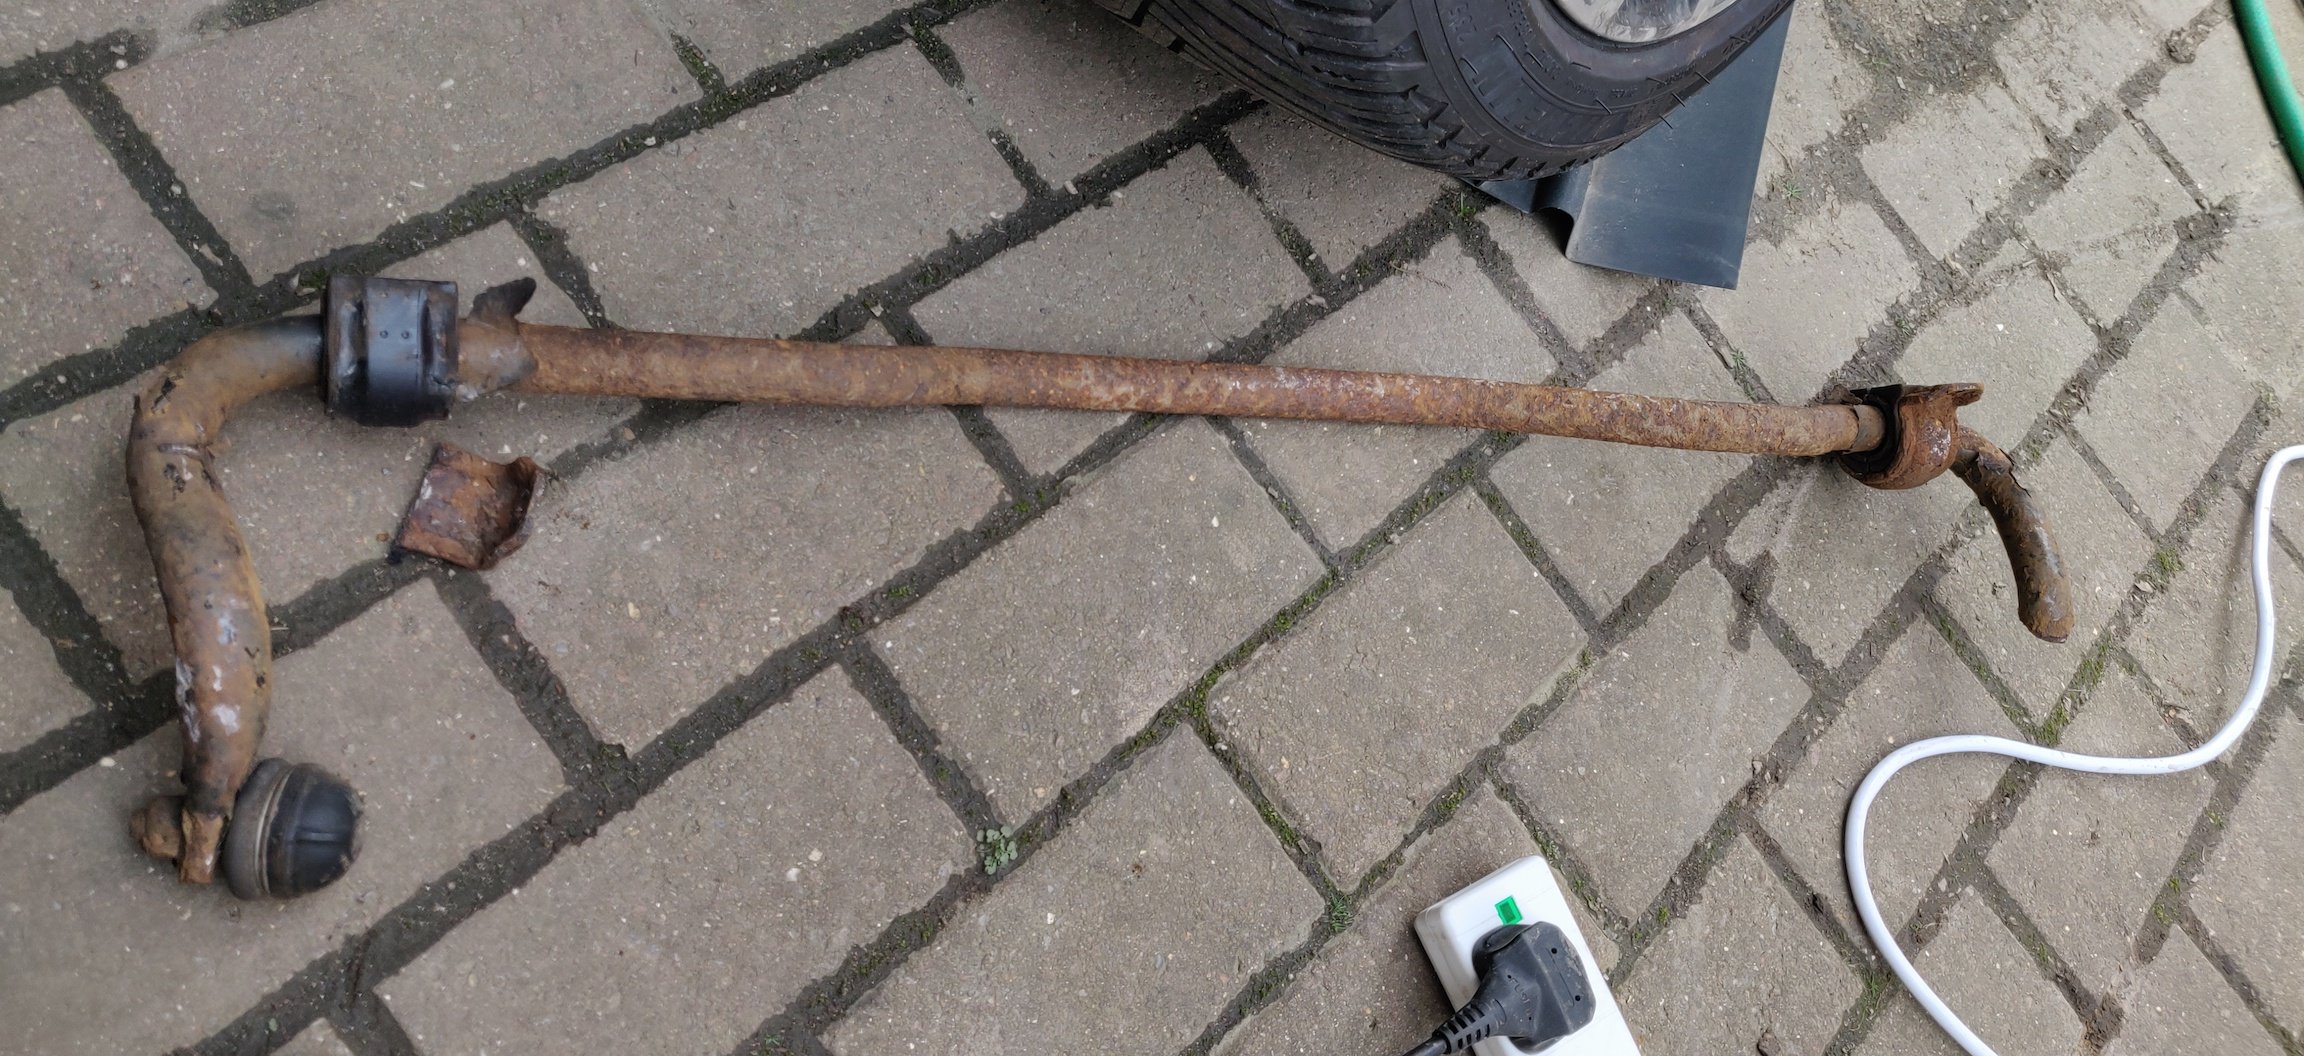
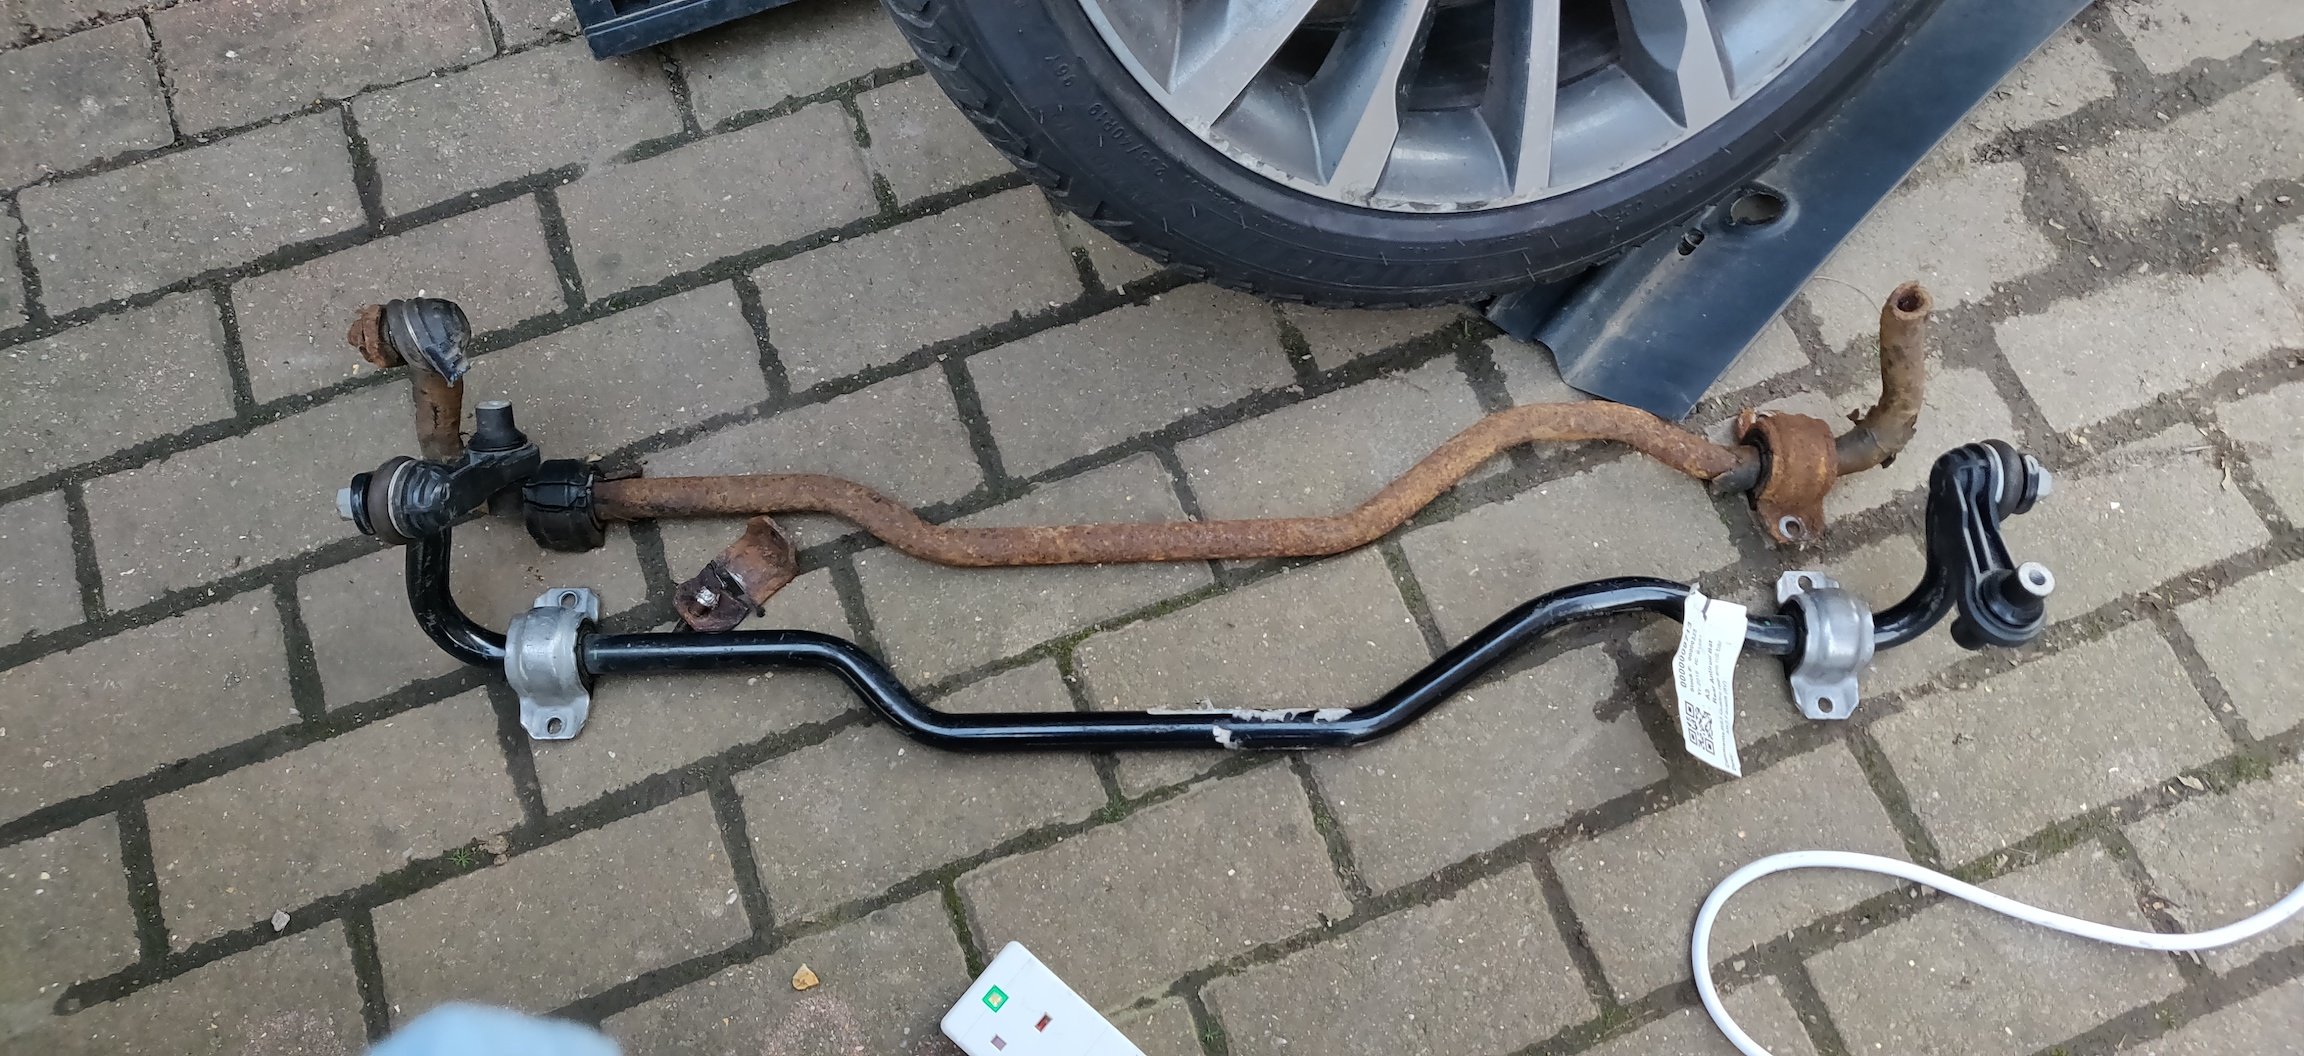
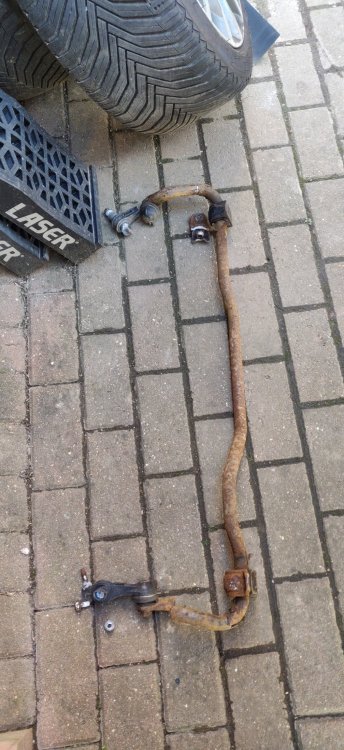
Weather forecast was for some slight sunny spells with rain from 10am onwards. Spent the morning sorting out the GR86, changing to summer tyres and giving it an oil change. Once the wife and I had given it the test drive and a quick few errands, we came back to still sunny weather, with only a few spots of rain. So decided to see if I can get those rear anti roll bar drop links out. With the sawzall, started getting some cuts in on the left side link: Once I got about halfway, the sawzall started to struggle, so took a little breather, and started attacking with the lump hammer on one end and an impact on the other. Didn't do much except start heating up the rubber surround of the side of the link, so allowed it to be removed: Once I took the sawzall to the other side and got that halfway through, a tap with the mallet then miraculously worked: So basically, whatever seized that bolt in place had now been unseized: So that's one side. Feeling optimistic now, started at the other end: After trying the same tactics, it wasn't really as willing, and bent the sawzall blade in retaliation: This was actually a blessing in disguise, as once I replaced it with a new blade, the new one was almost cutting through it too quickly: The sawzall was able to cut through the side completely, so essentially, sometime over the last couple of days, the previous blade must have been blunted from my initial use, or perhaps via the suspension top bolt. I imagine it was my initial use of too high a speed which may have blunted it prematurely. This ulimately meant it was probably just easier to go ahead and cut through the other side: So with that, the link itself and the threaded end of the bolt can be extracted: The remains of the bolt head and a bit of the link was still there, but I had a feeling that could now be buzzed out with the impact wrench: So the pliers were involved yet again to grab onto the remains, with the impact wrench buzzing it out. The bolt on this side had much more of the aluminium dust corrosion than the other side. So the suspension arms are free: Just par for the course in terms of rust for this car: The right side has a lot more of the aluminium dust remains, so I guess another round of engine cleaner for these. But yeah: What should have been 6 bolts to undo became a roughly 5 hour job once I think about and tally the timings. Not sure what the VW group were thinking not having anything grease wise despite knowing steel bolts are going through aluminium bushings. I would suggest investing £100 or so in replacement suspension nuts and bolts and apply copious amounts of copper grease (or alumslip if you're feeling fancy) to the bolt shanks before reassembly. It'll save a weekend or two (or however many hundreds a garage may charge if they're doing stuff on the hourly). So that's a big milestone reached. Next steps are to sort out the Haldex oil change, and start going through everything with a layer or two of Lanoguard, and maybe spray something like ACF50 or XCP Rust Blocker on some of the other bits (such as the Bilstein suspension that is ready to go on). Then I can start reassembling the wheel arches and front wings. The ball joint that broke will need sorting out I suppose. The front brakes will need a good once over with a wire brush and brake cleaner given its all disassembled. I suppose due diligence tells me to do the same for the rears, but I'll have a think about that. It may be easier to replace the calipers than give them a good cleaning out and paint, but I'll see where the mood takes me. Still need to sort out the DSG oil level, and also try and figure out the rear seat remote release mystery. The internet hasn't given me any more insight so I sense I may need to do something desperate, but we'll see. Maintenance: £1857.08 Upgrades: £1020.69 Miscellaneous: £637.12


-
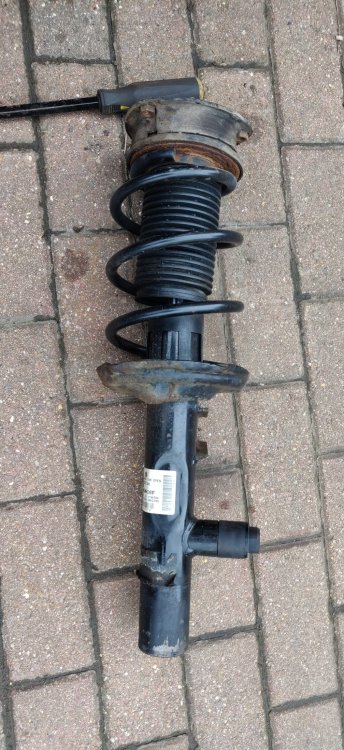
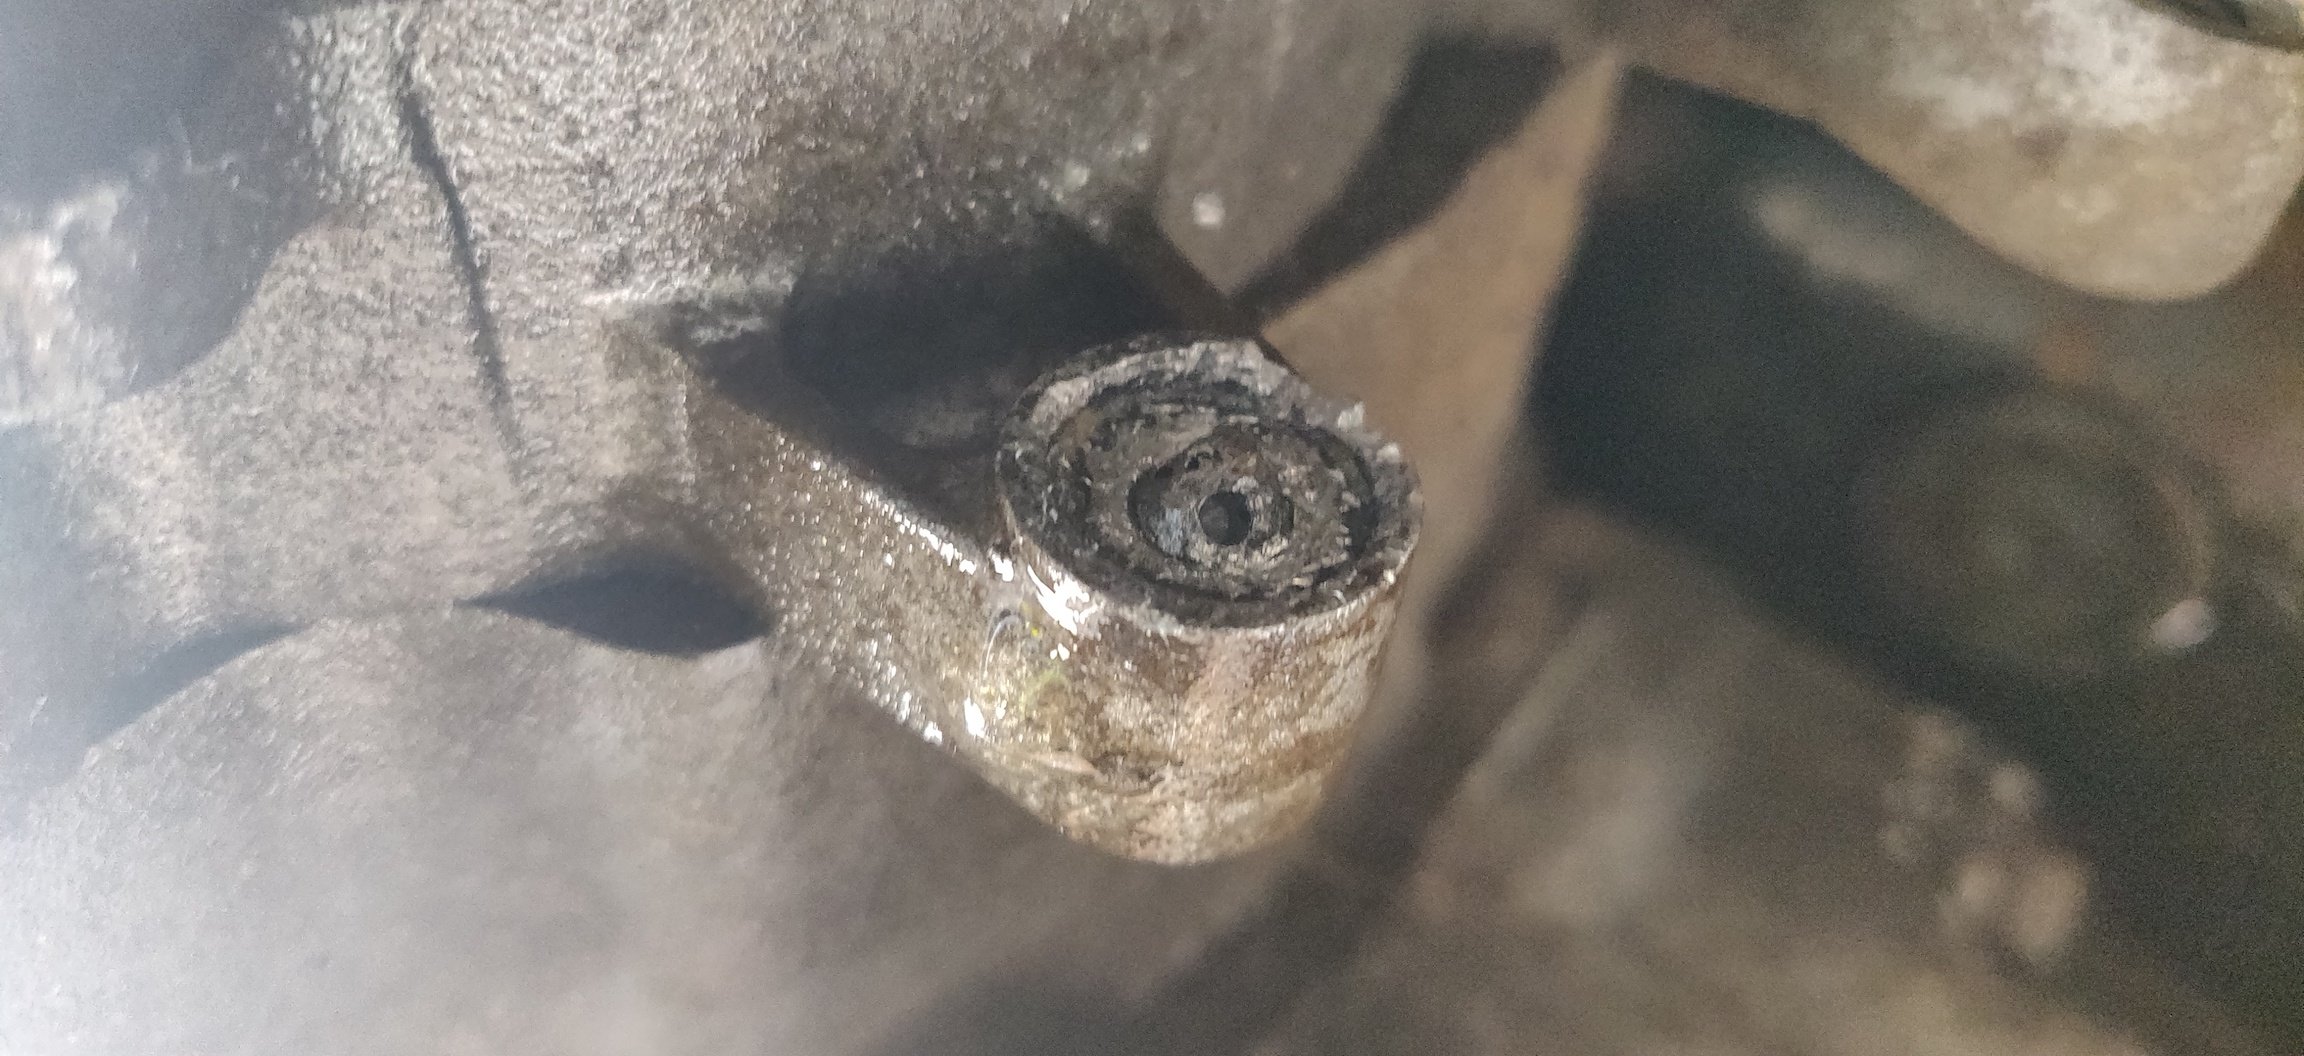
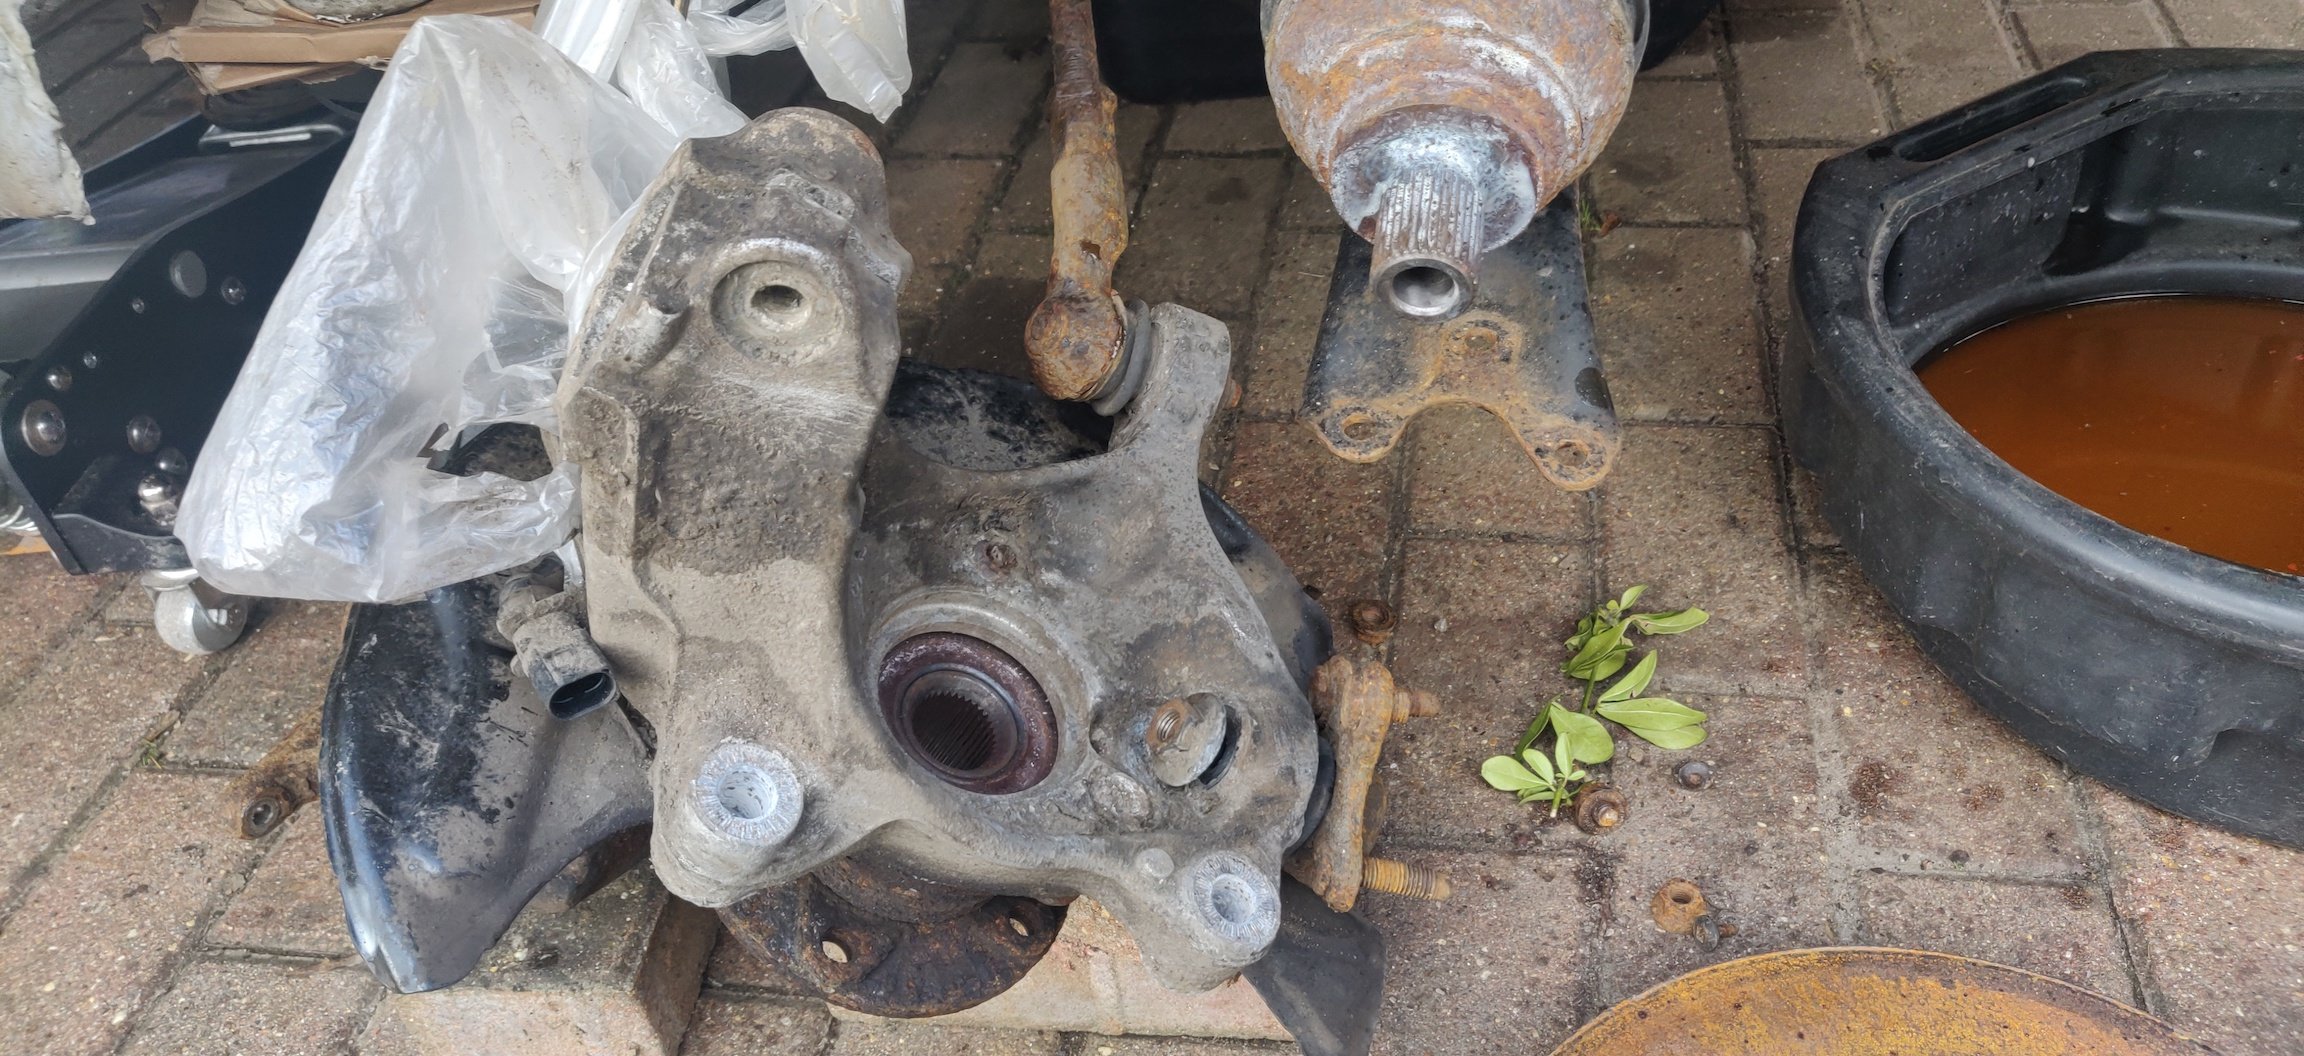
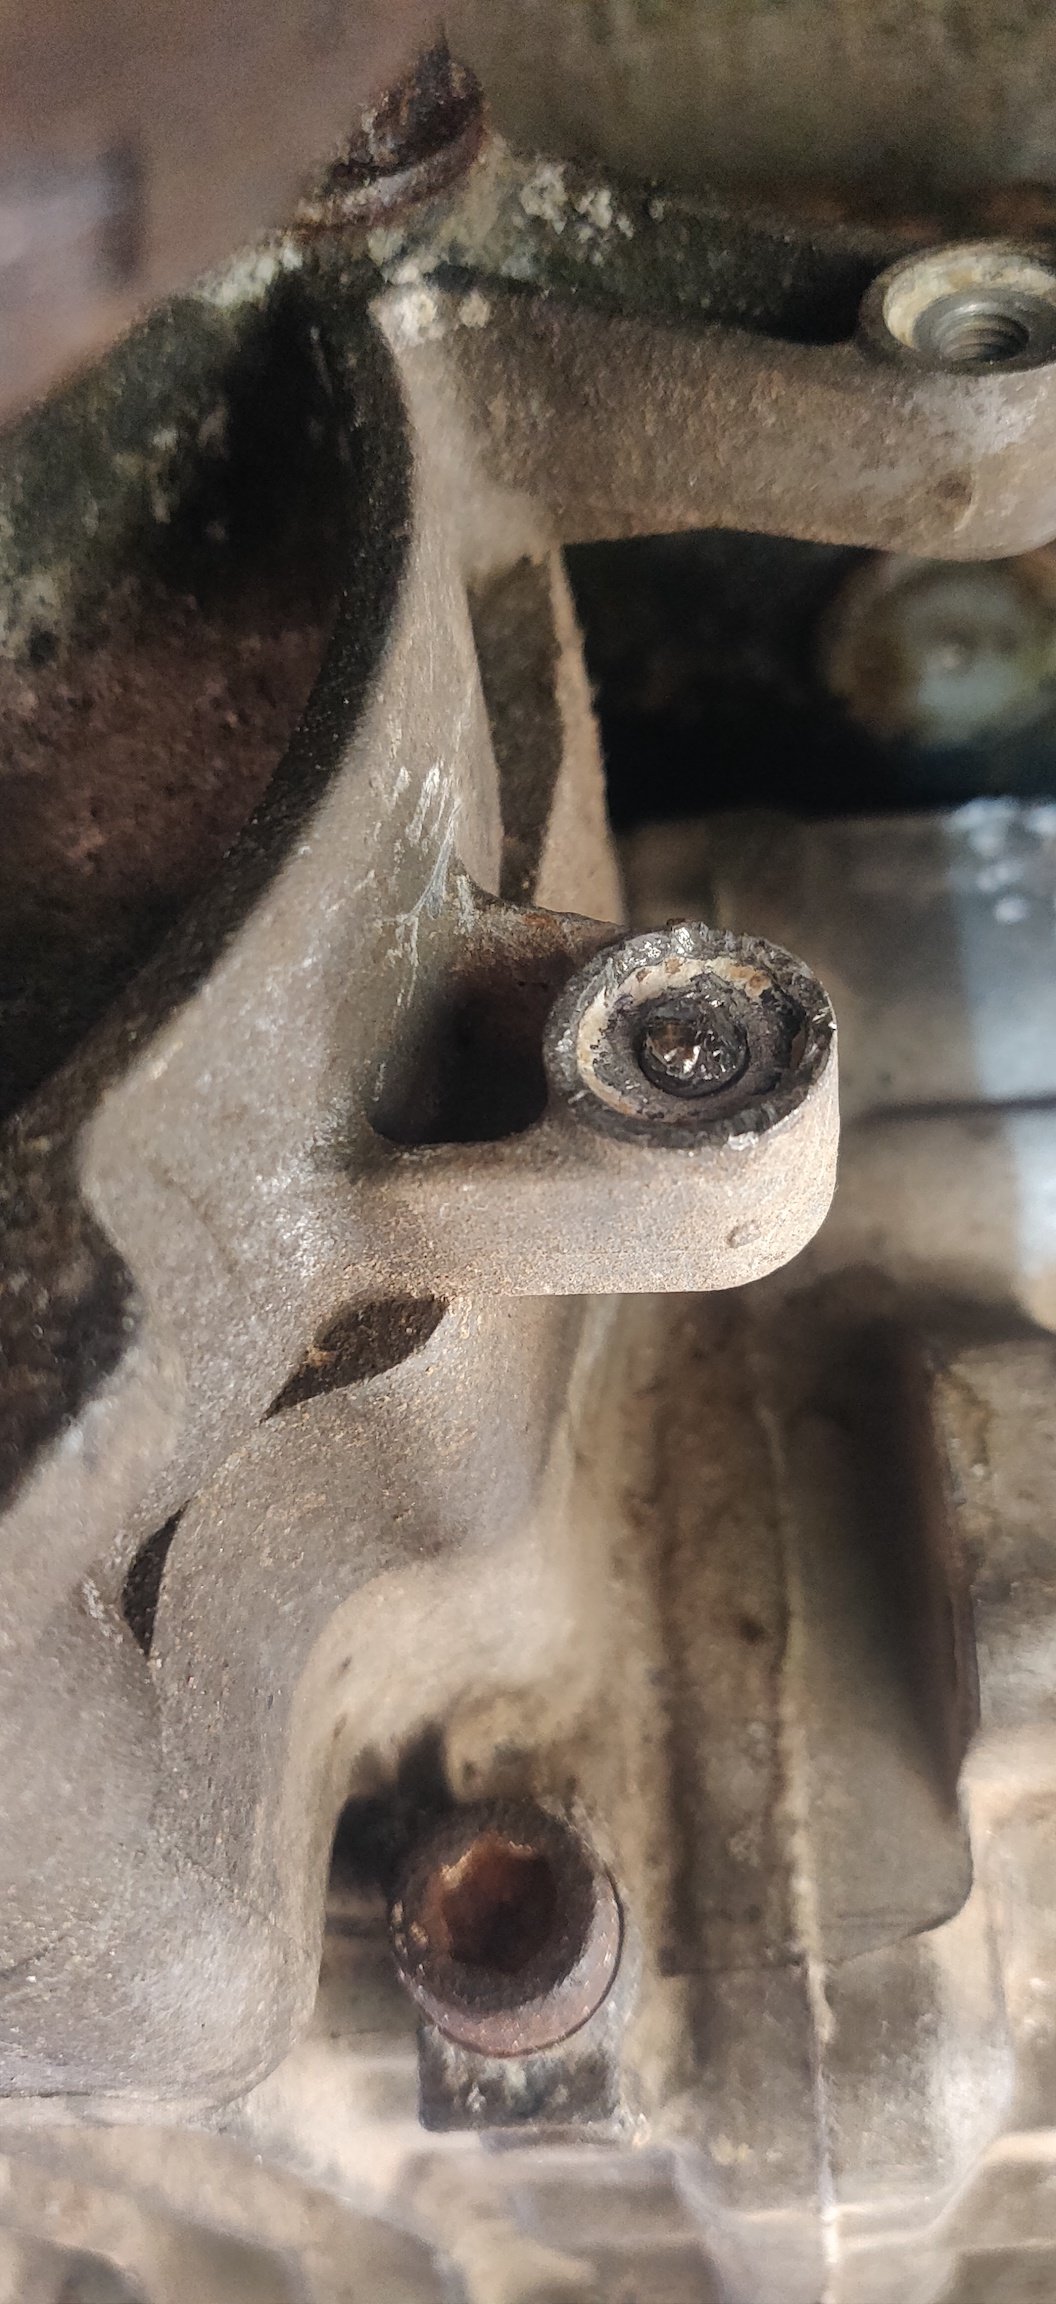
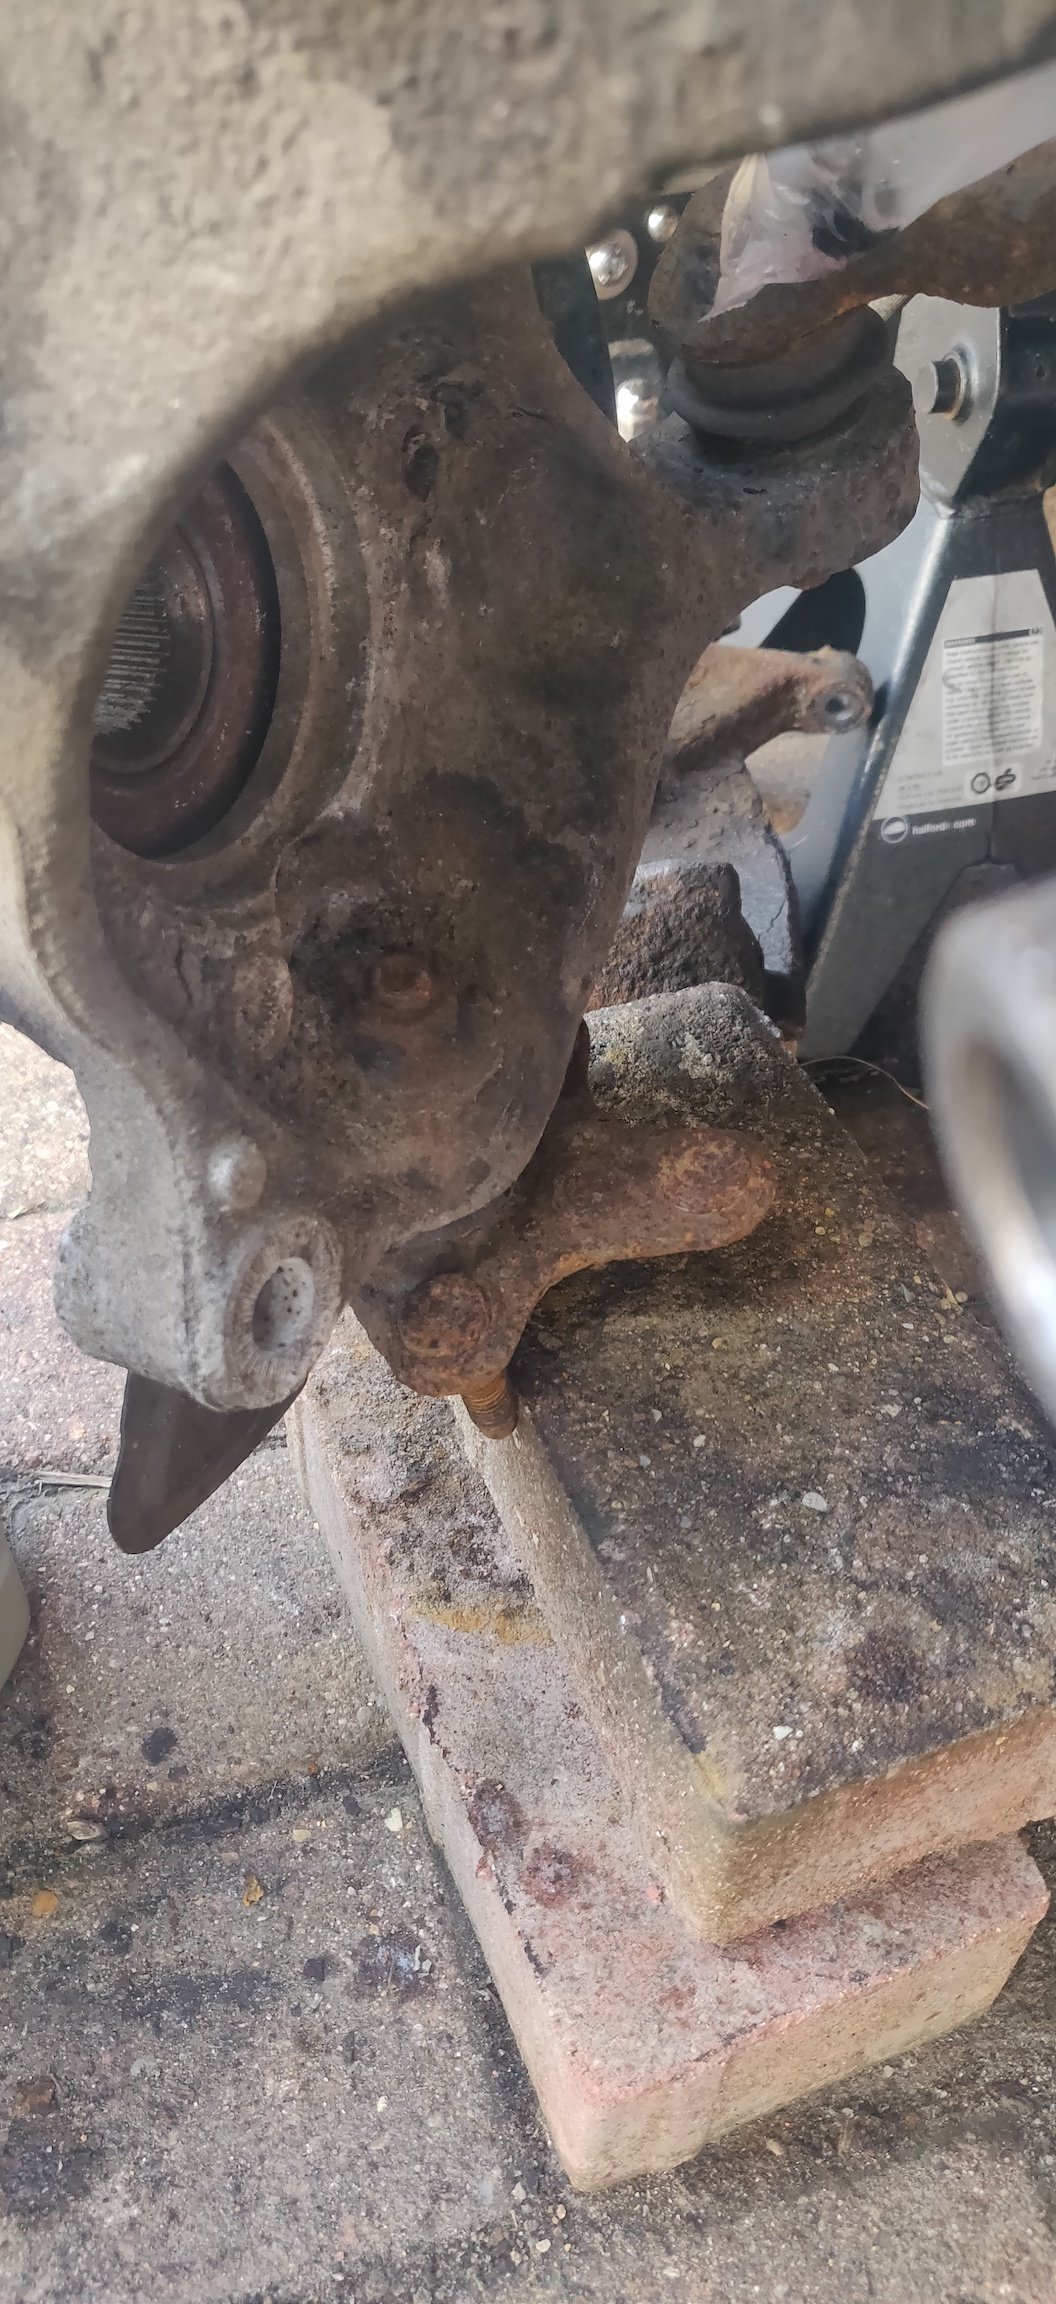
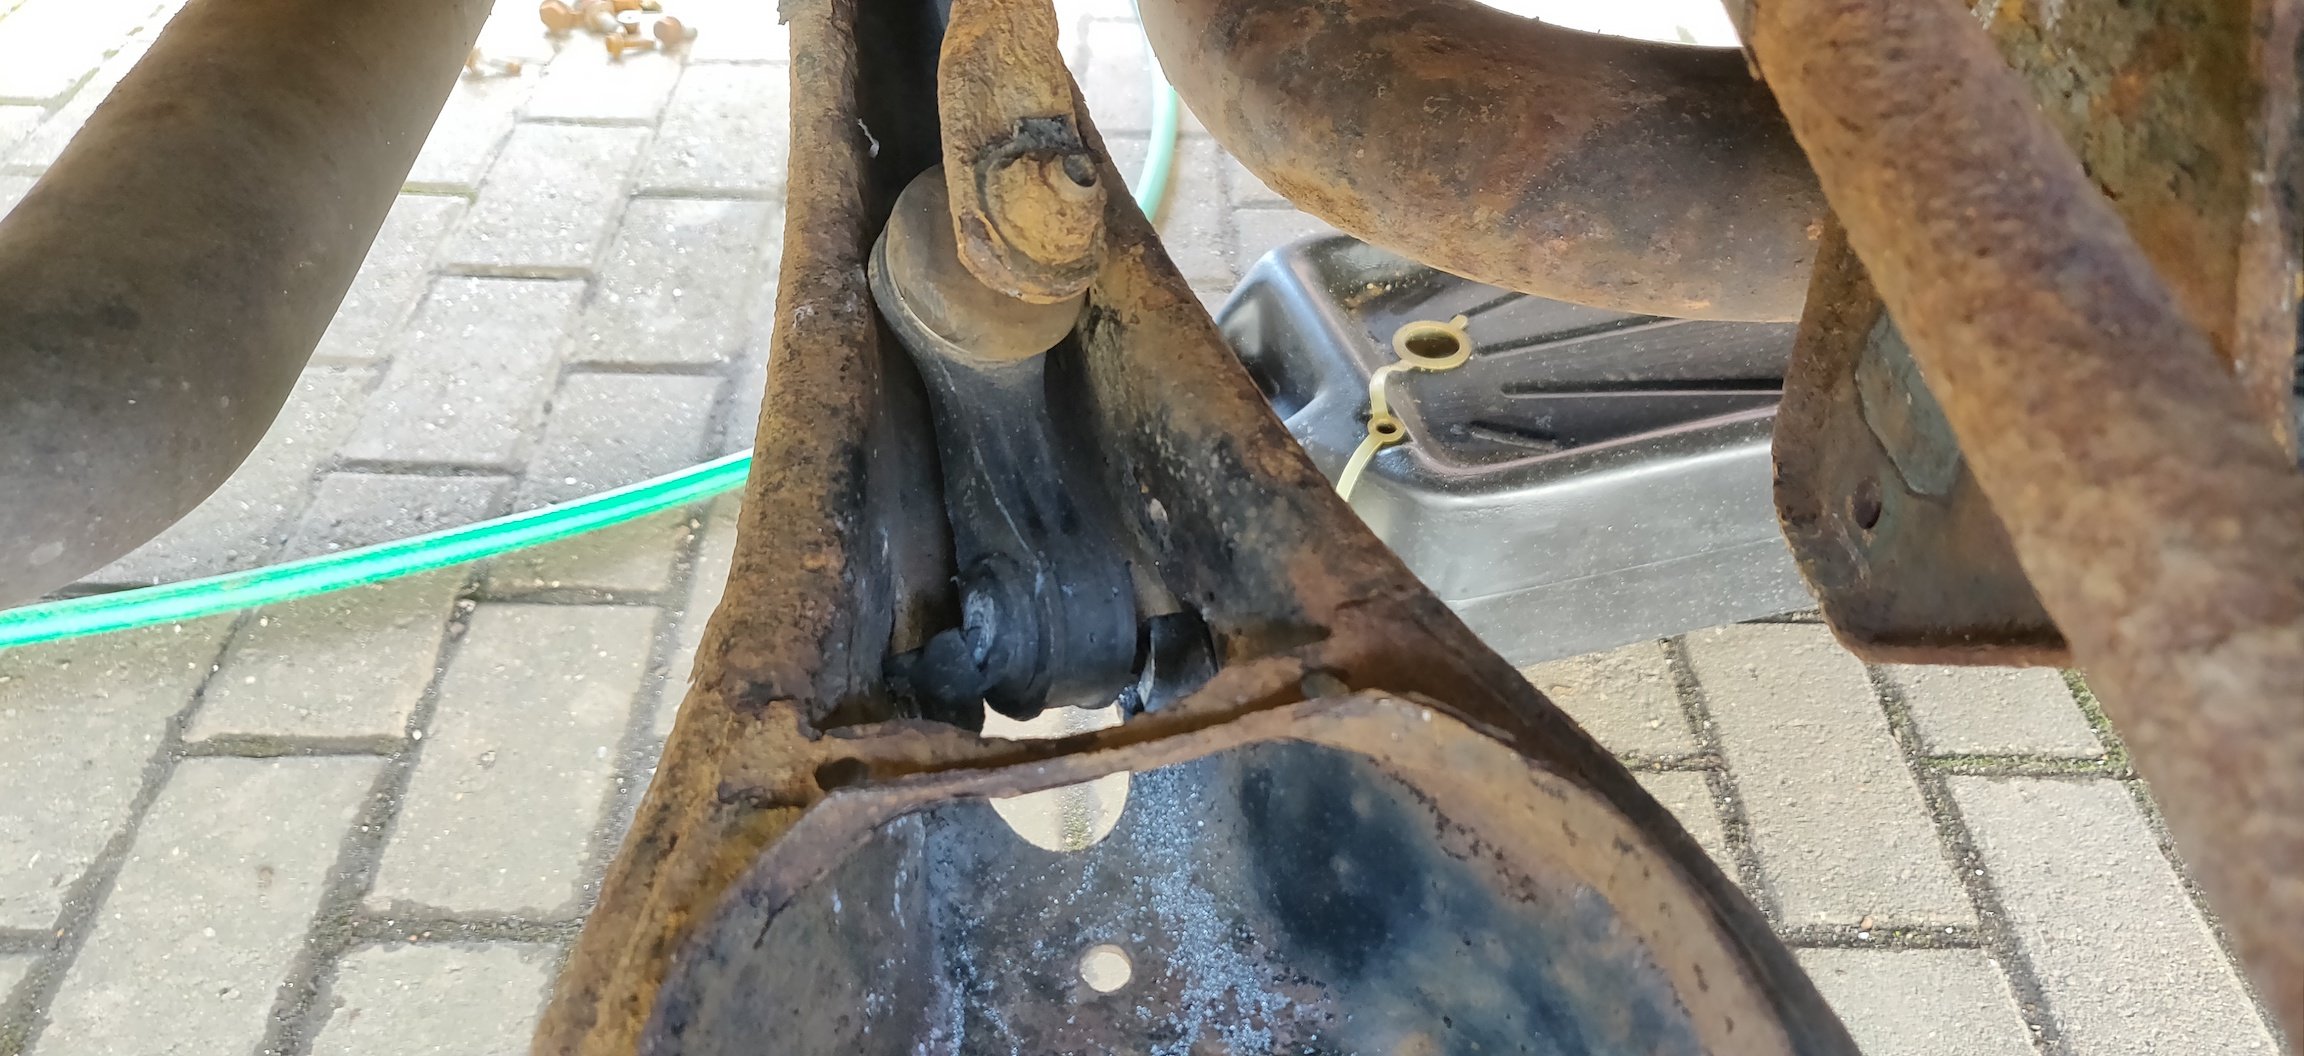
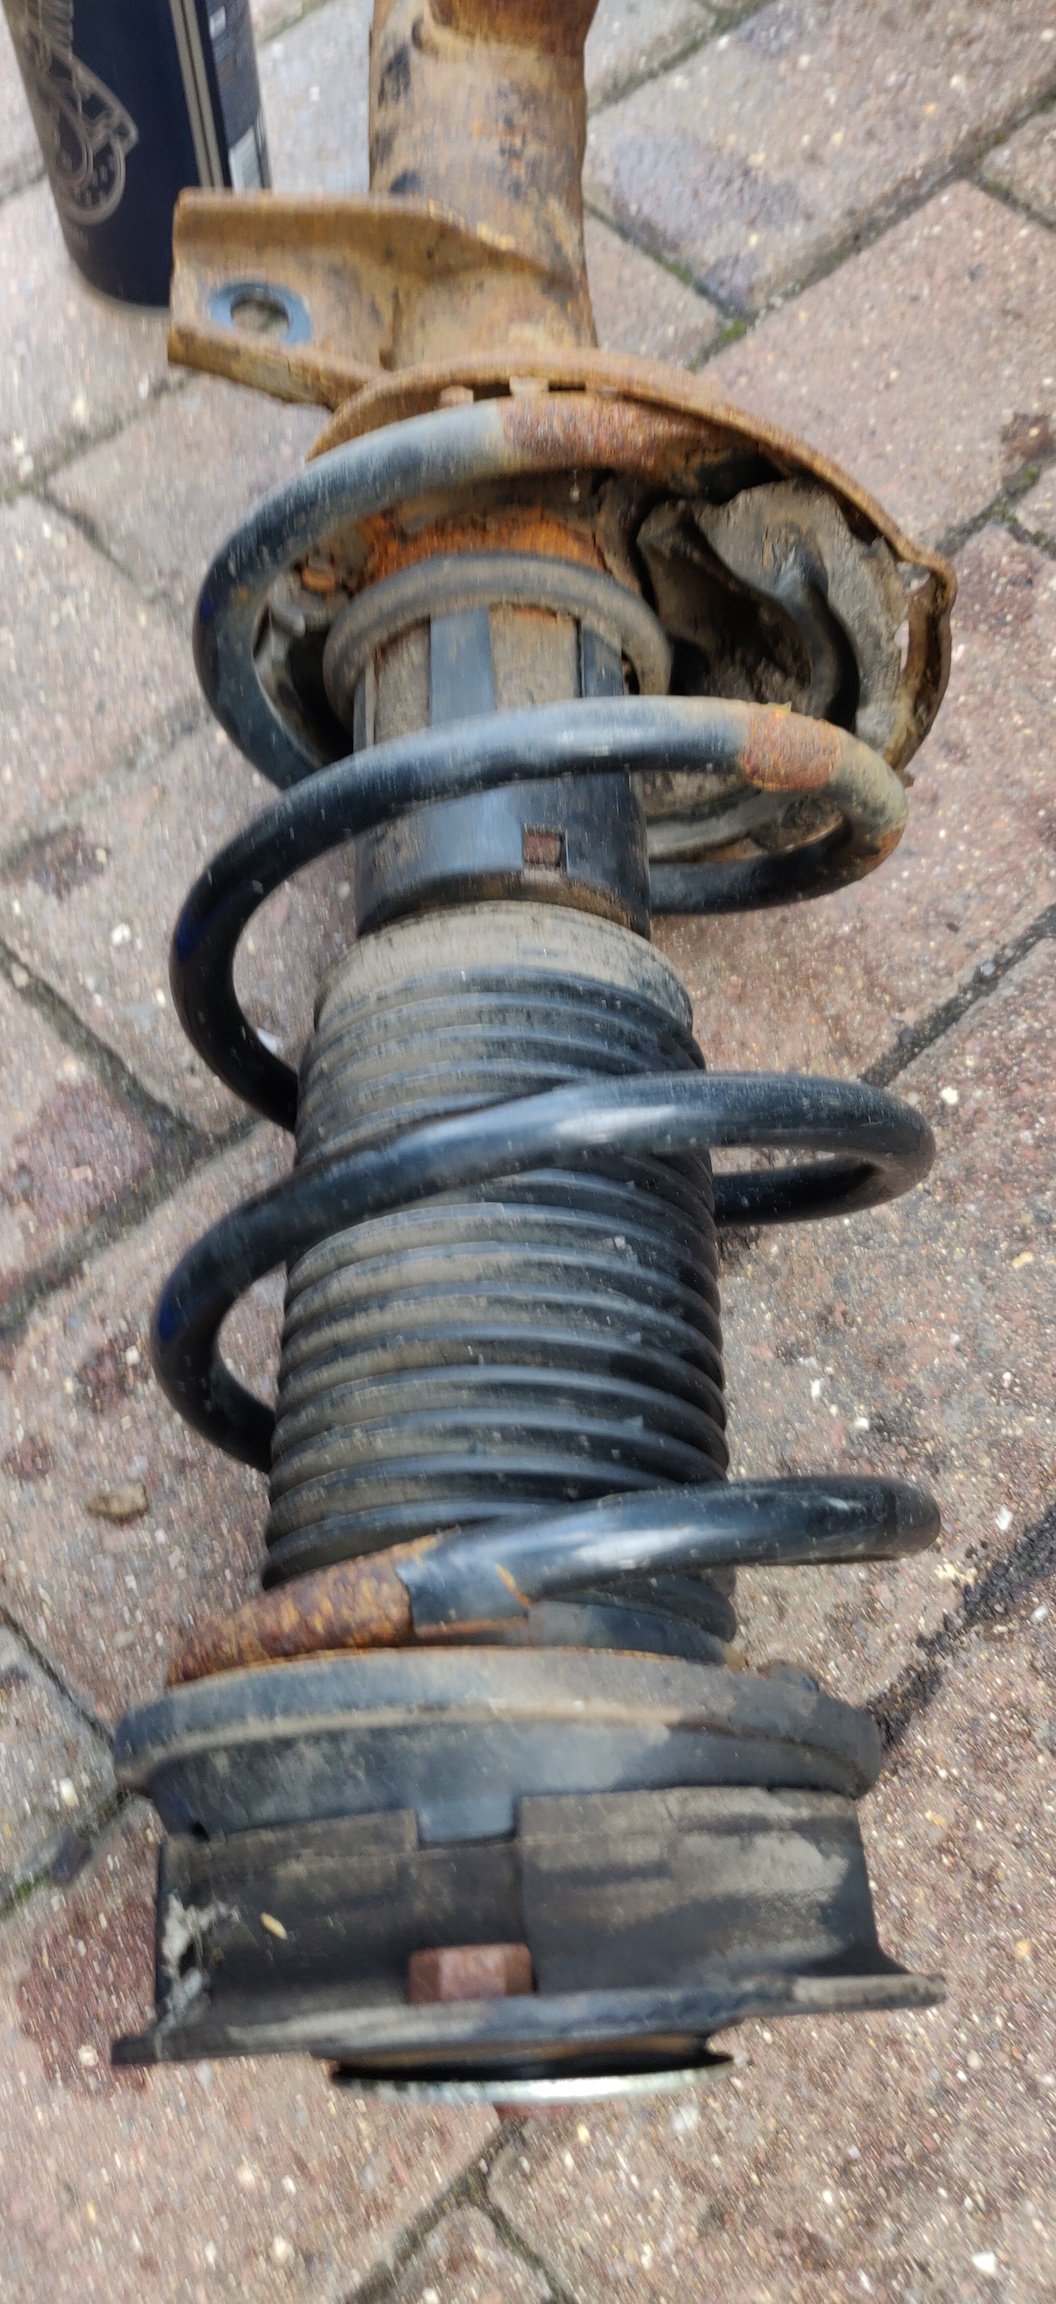
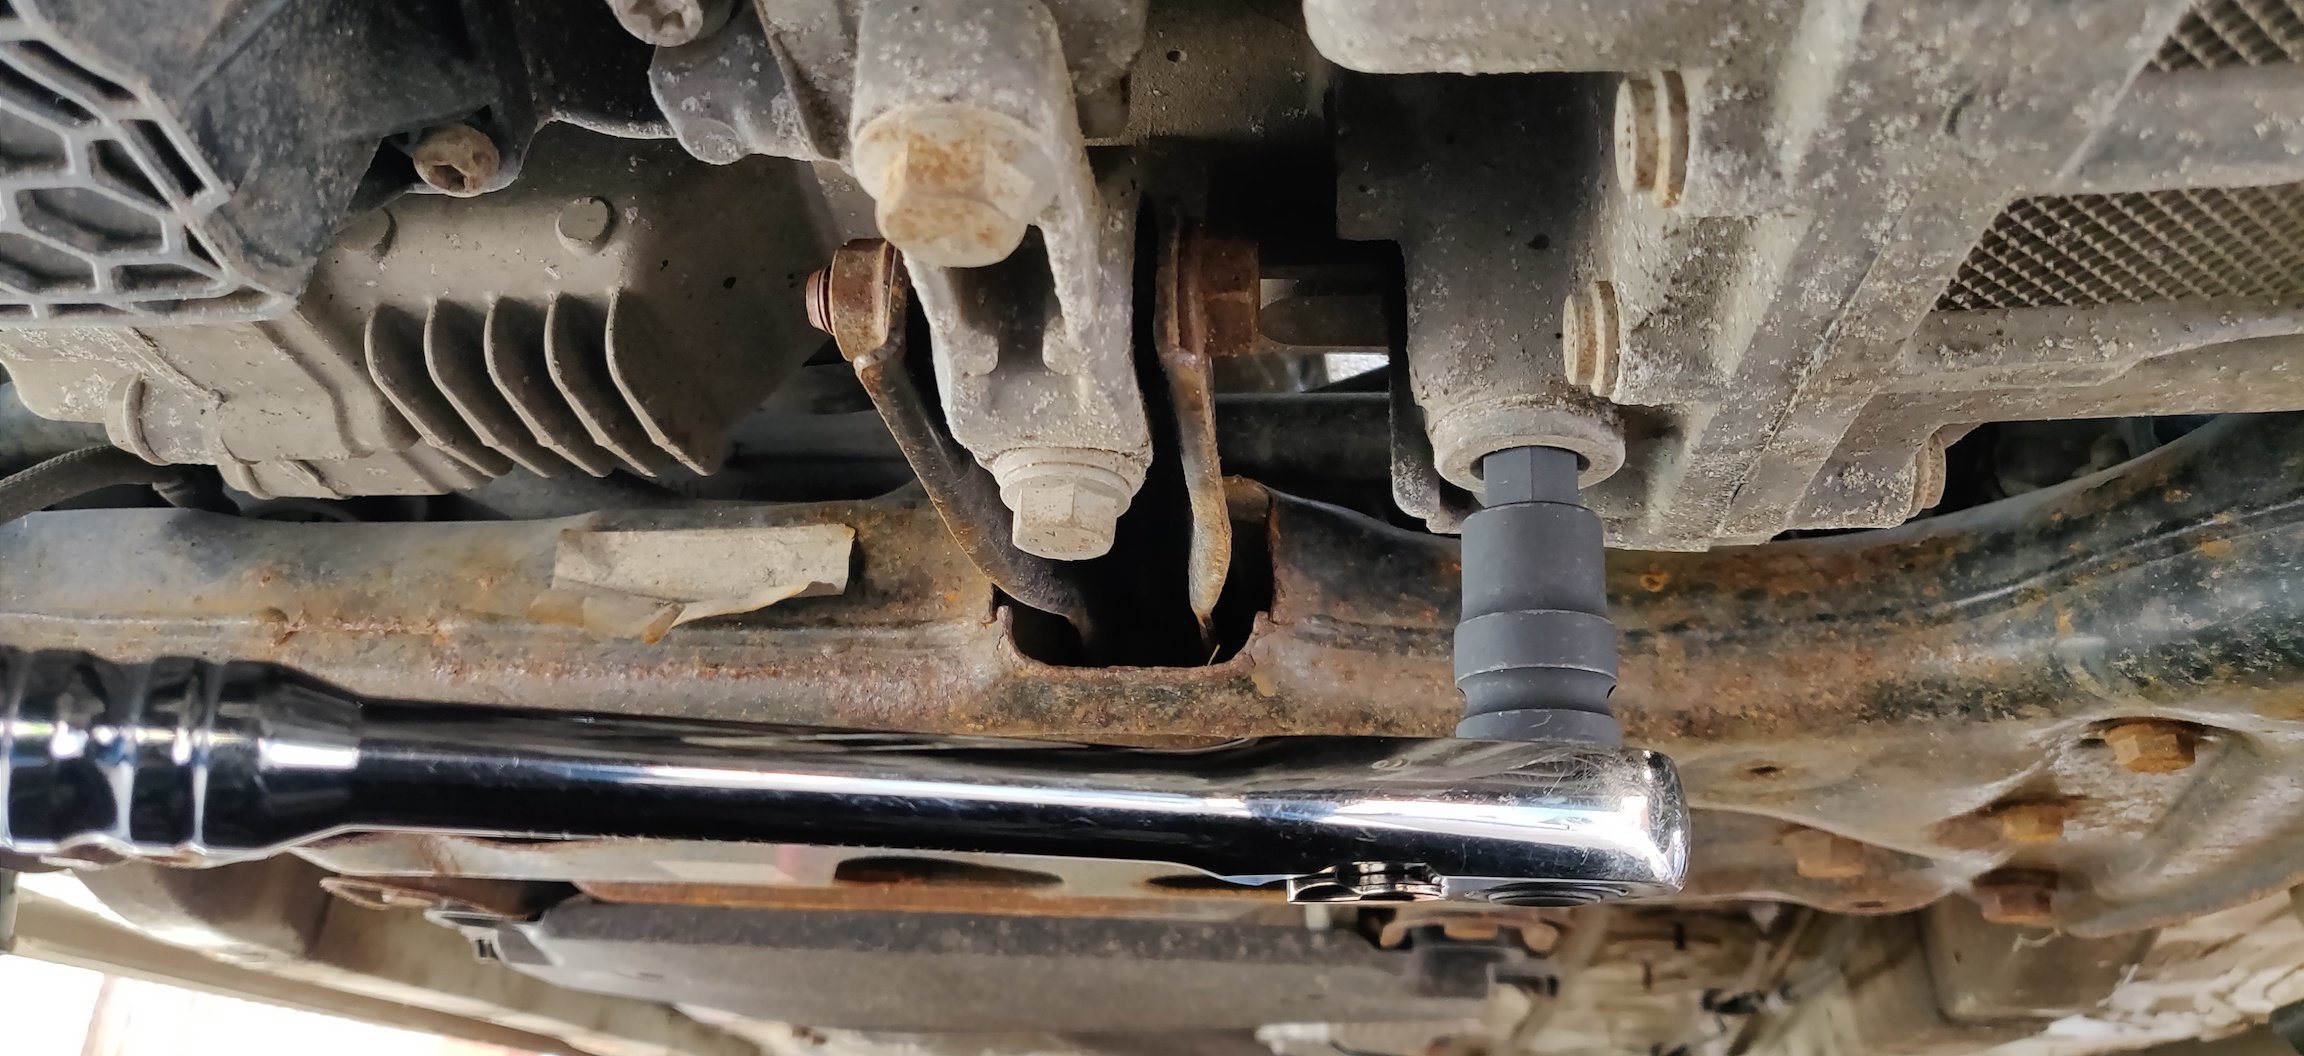
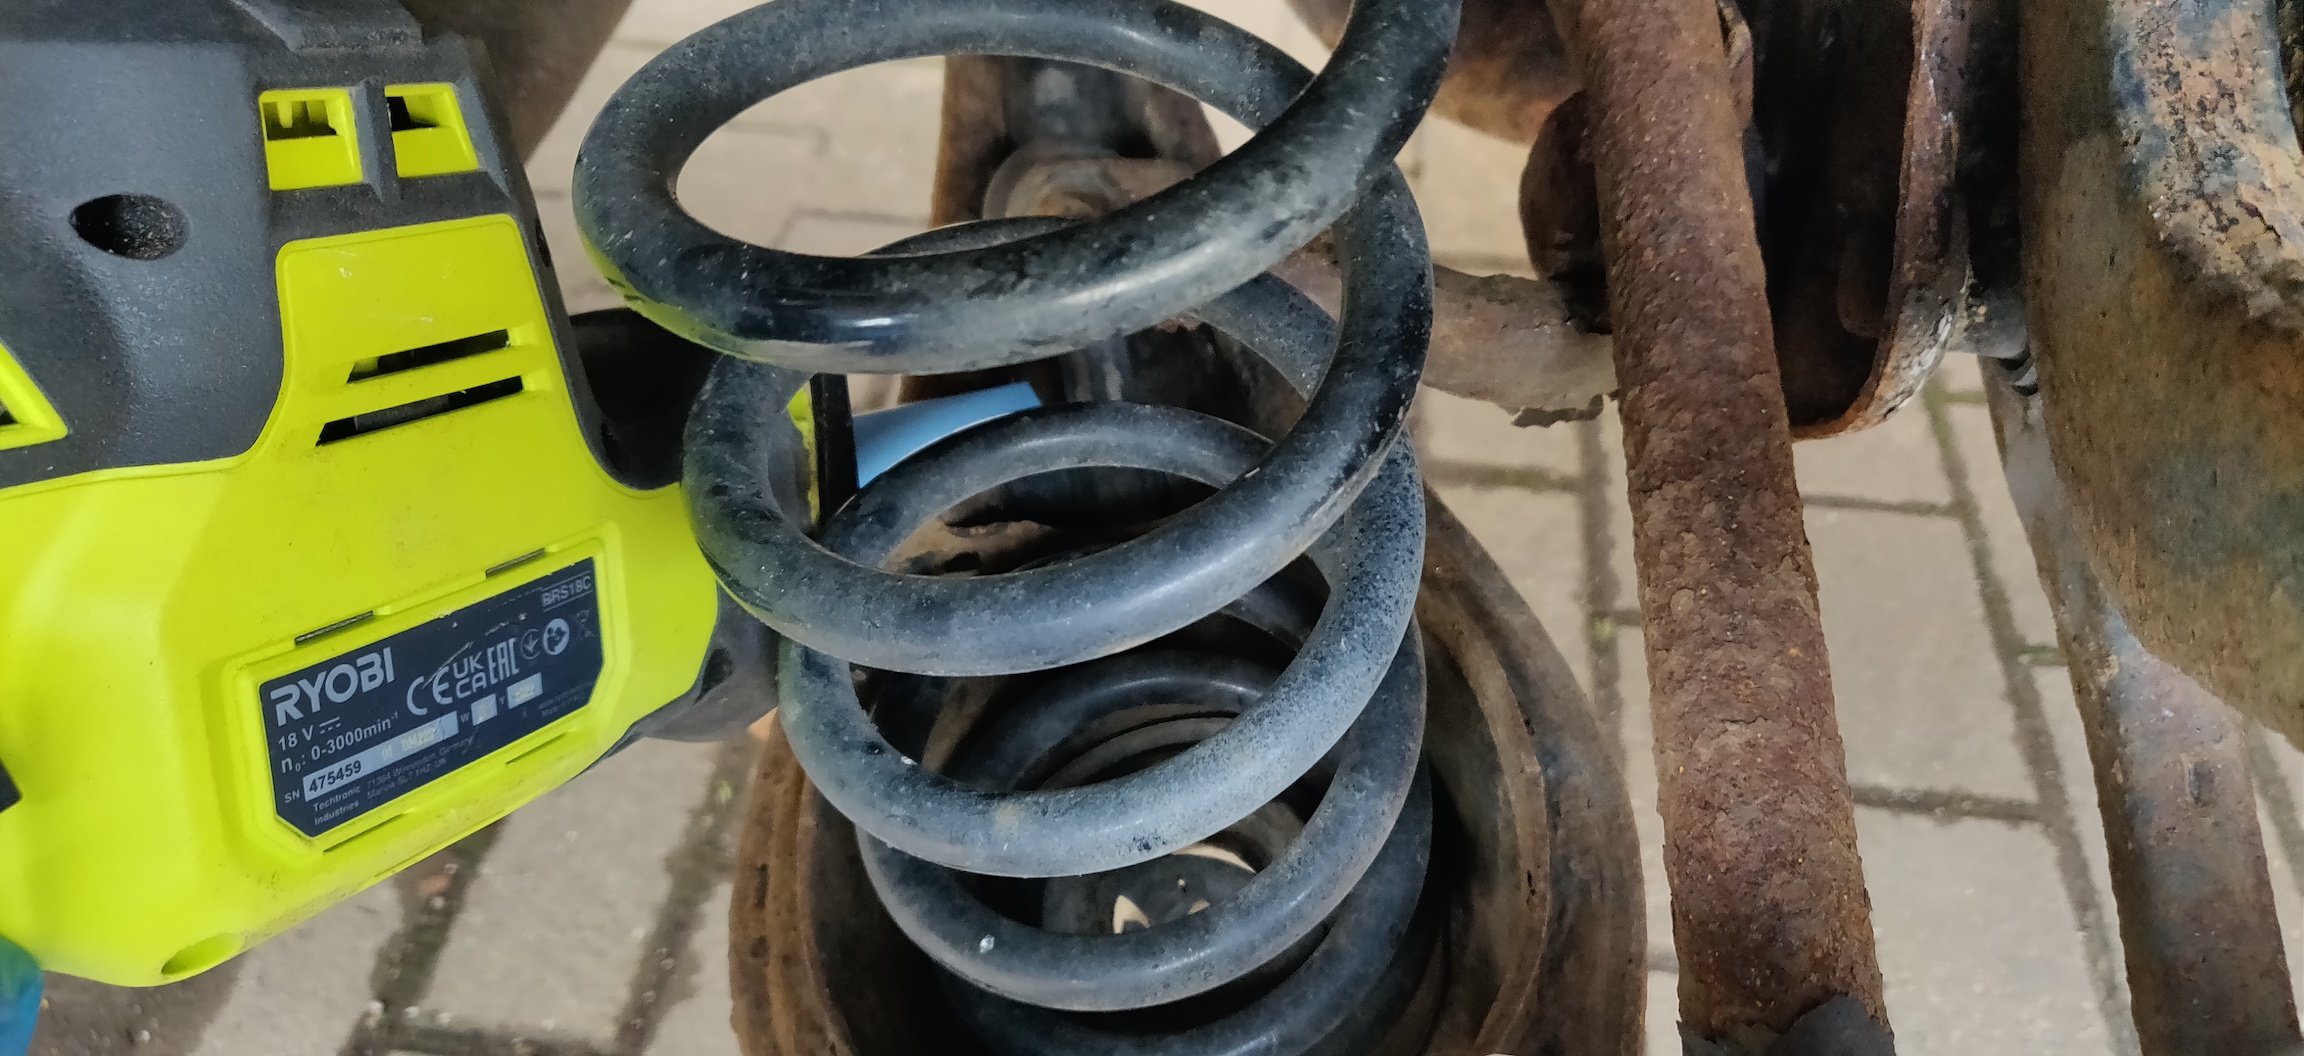
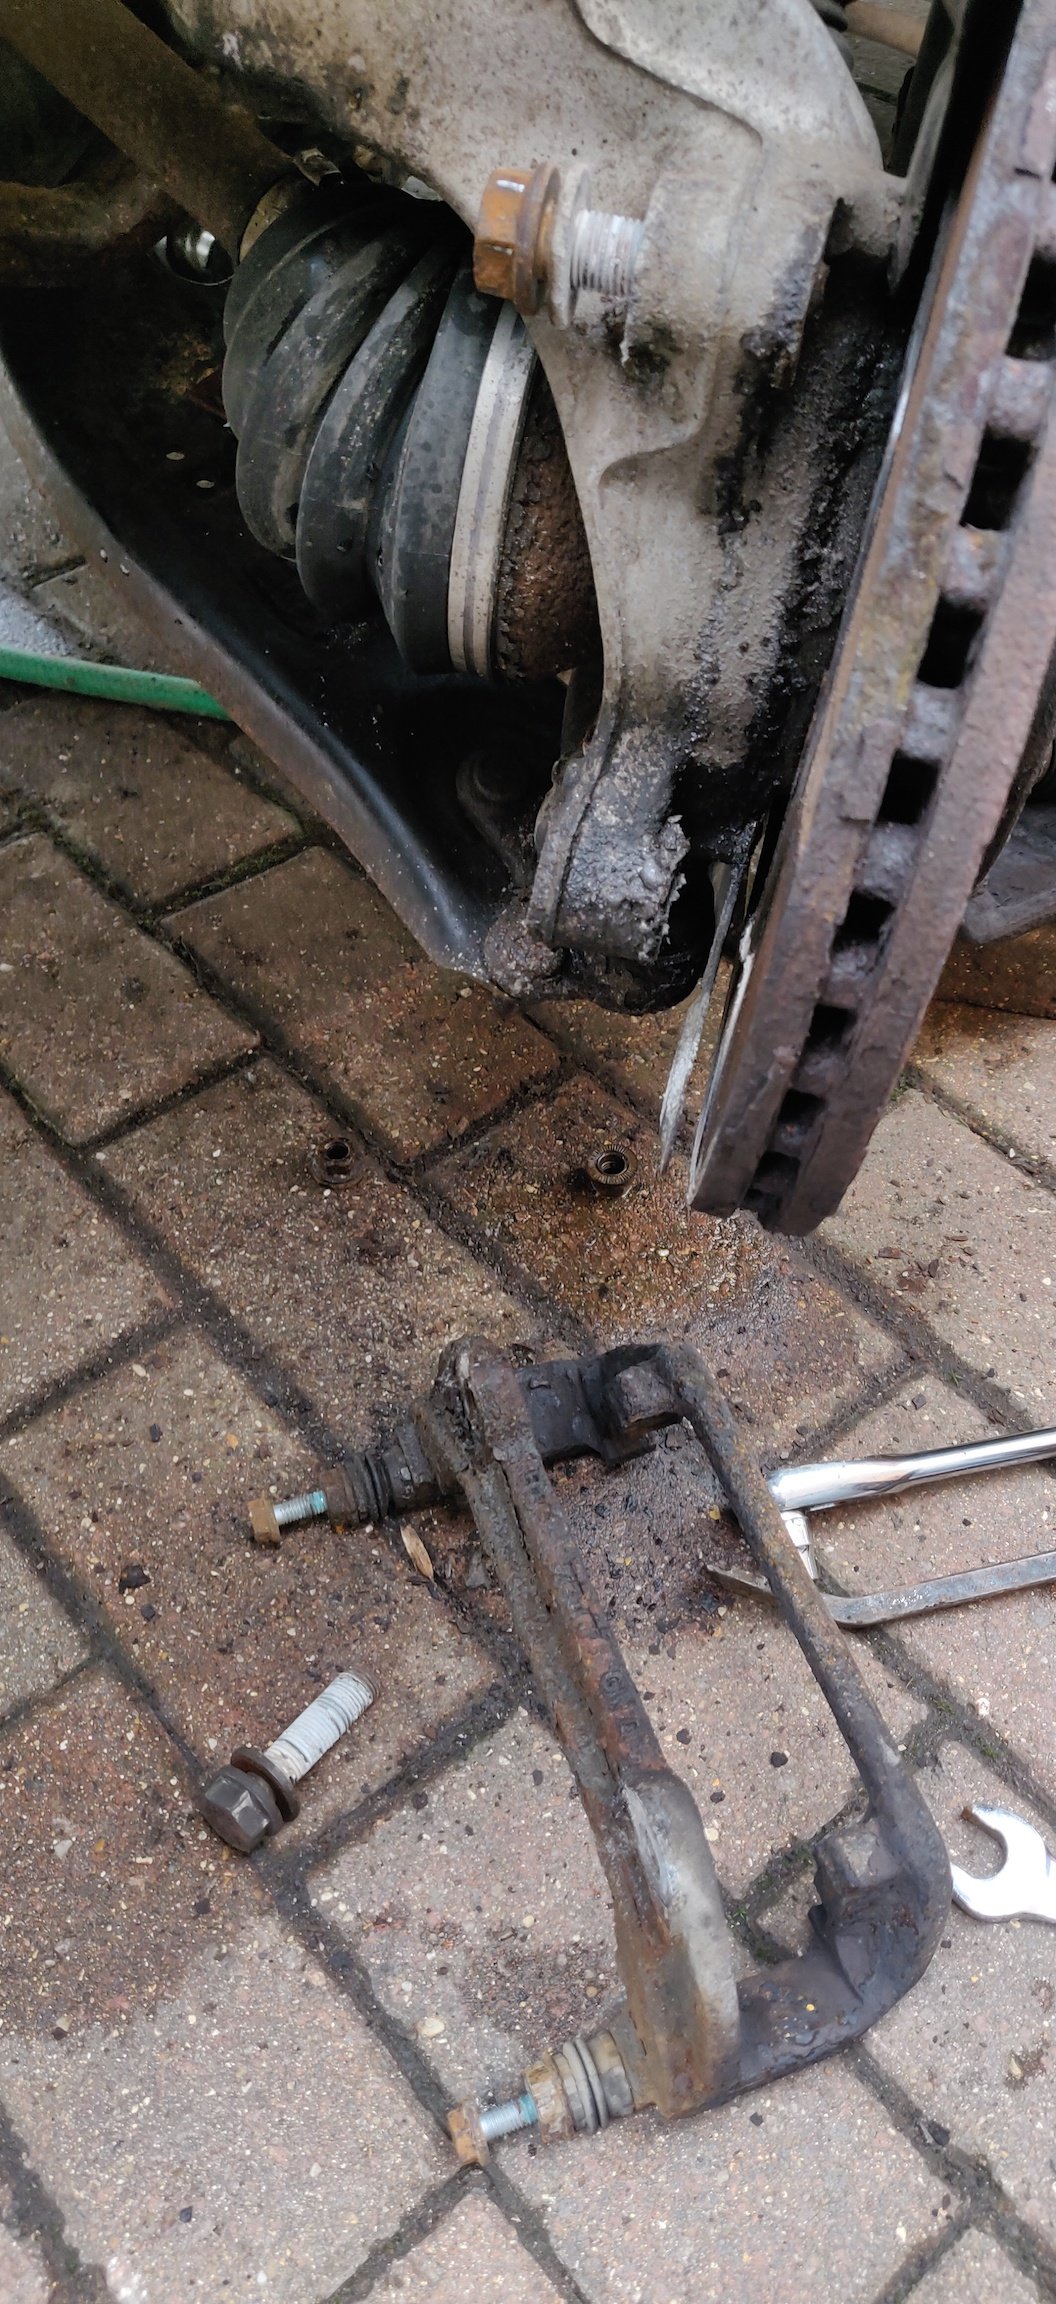
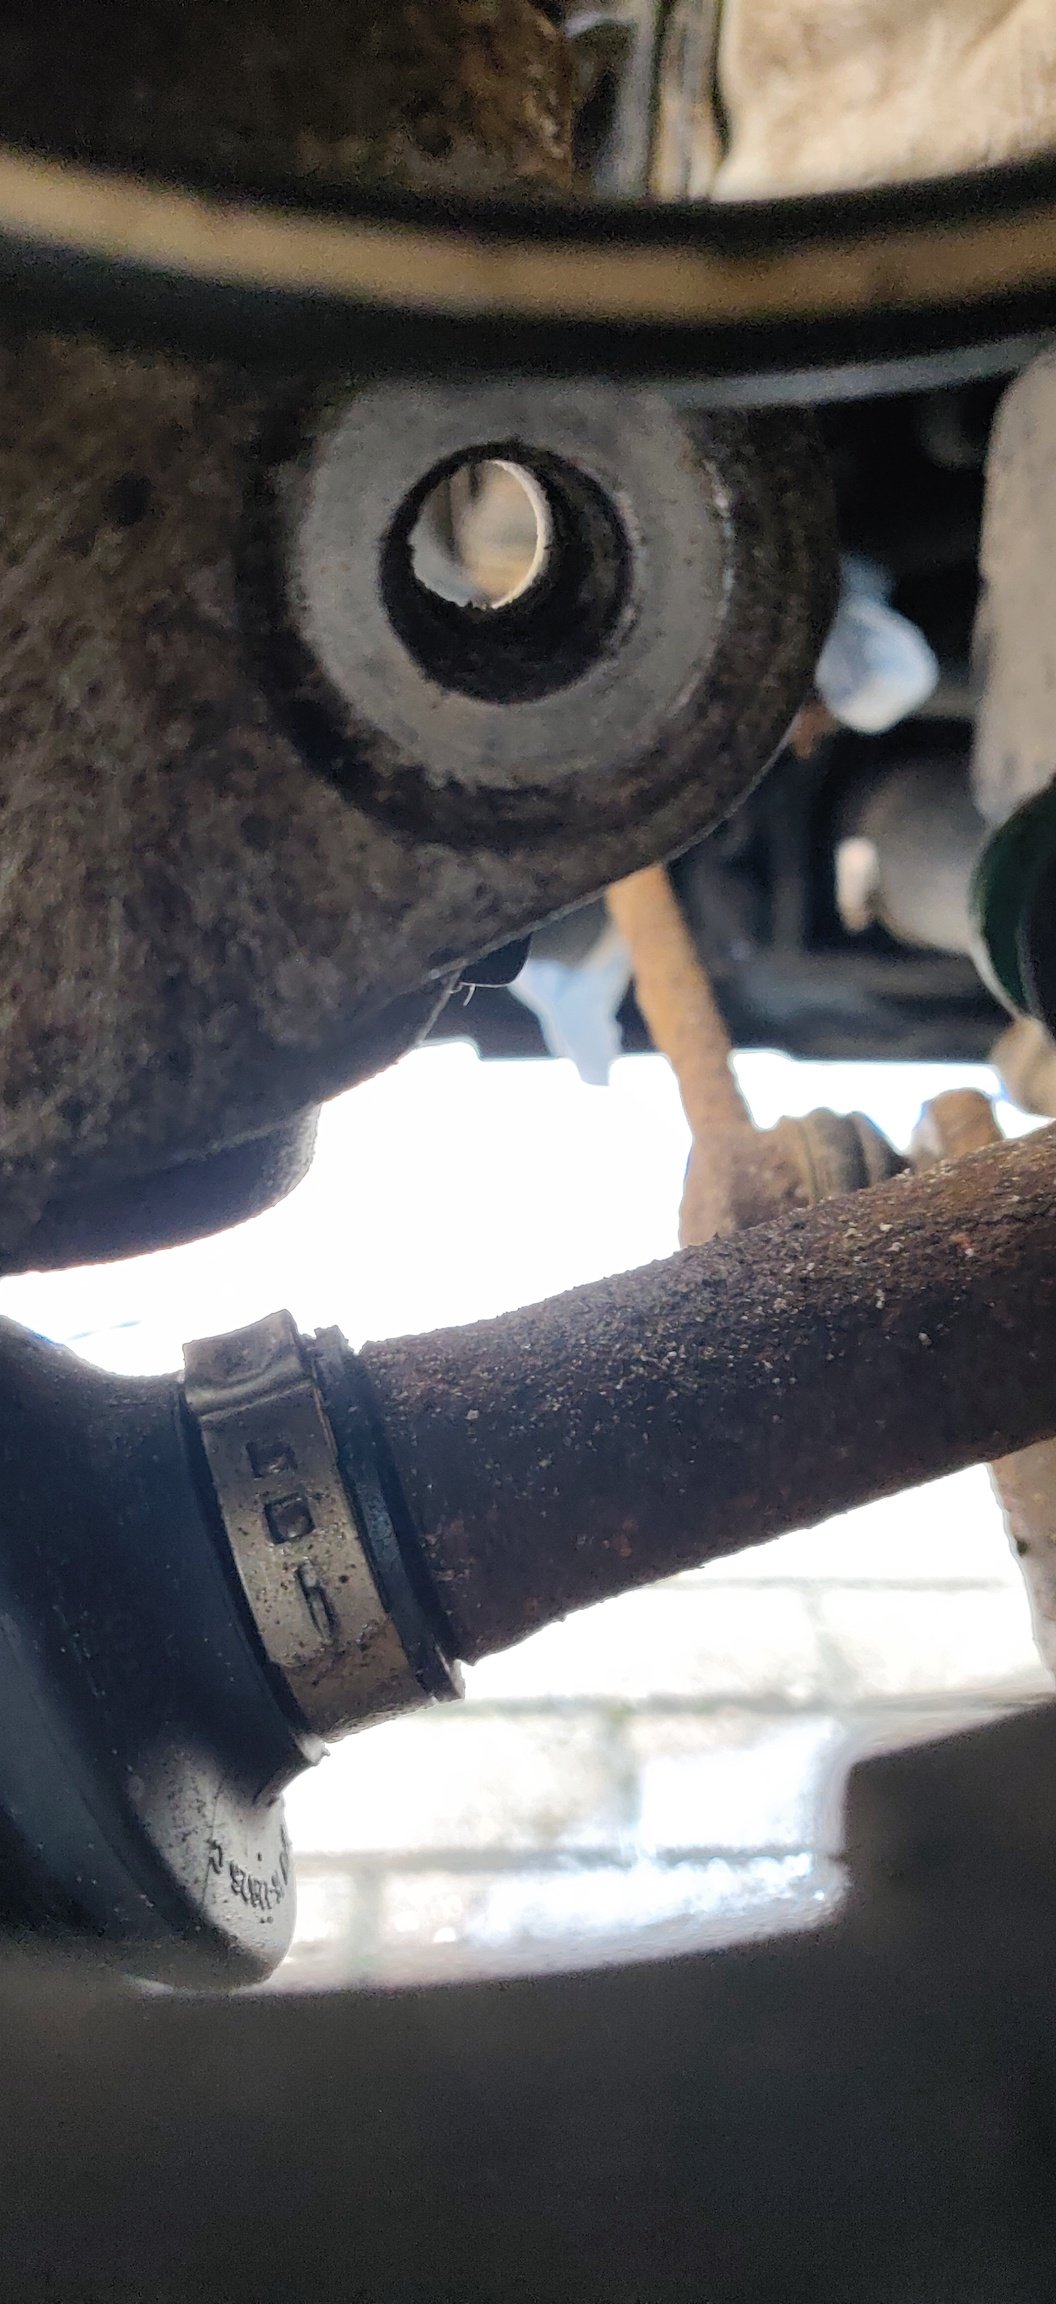
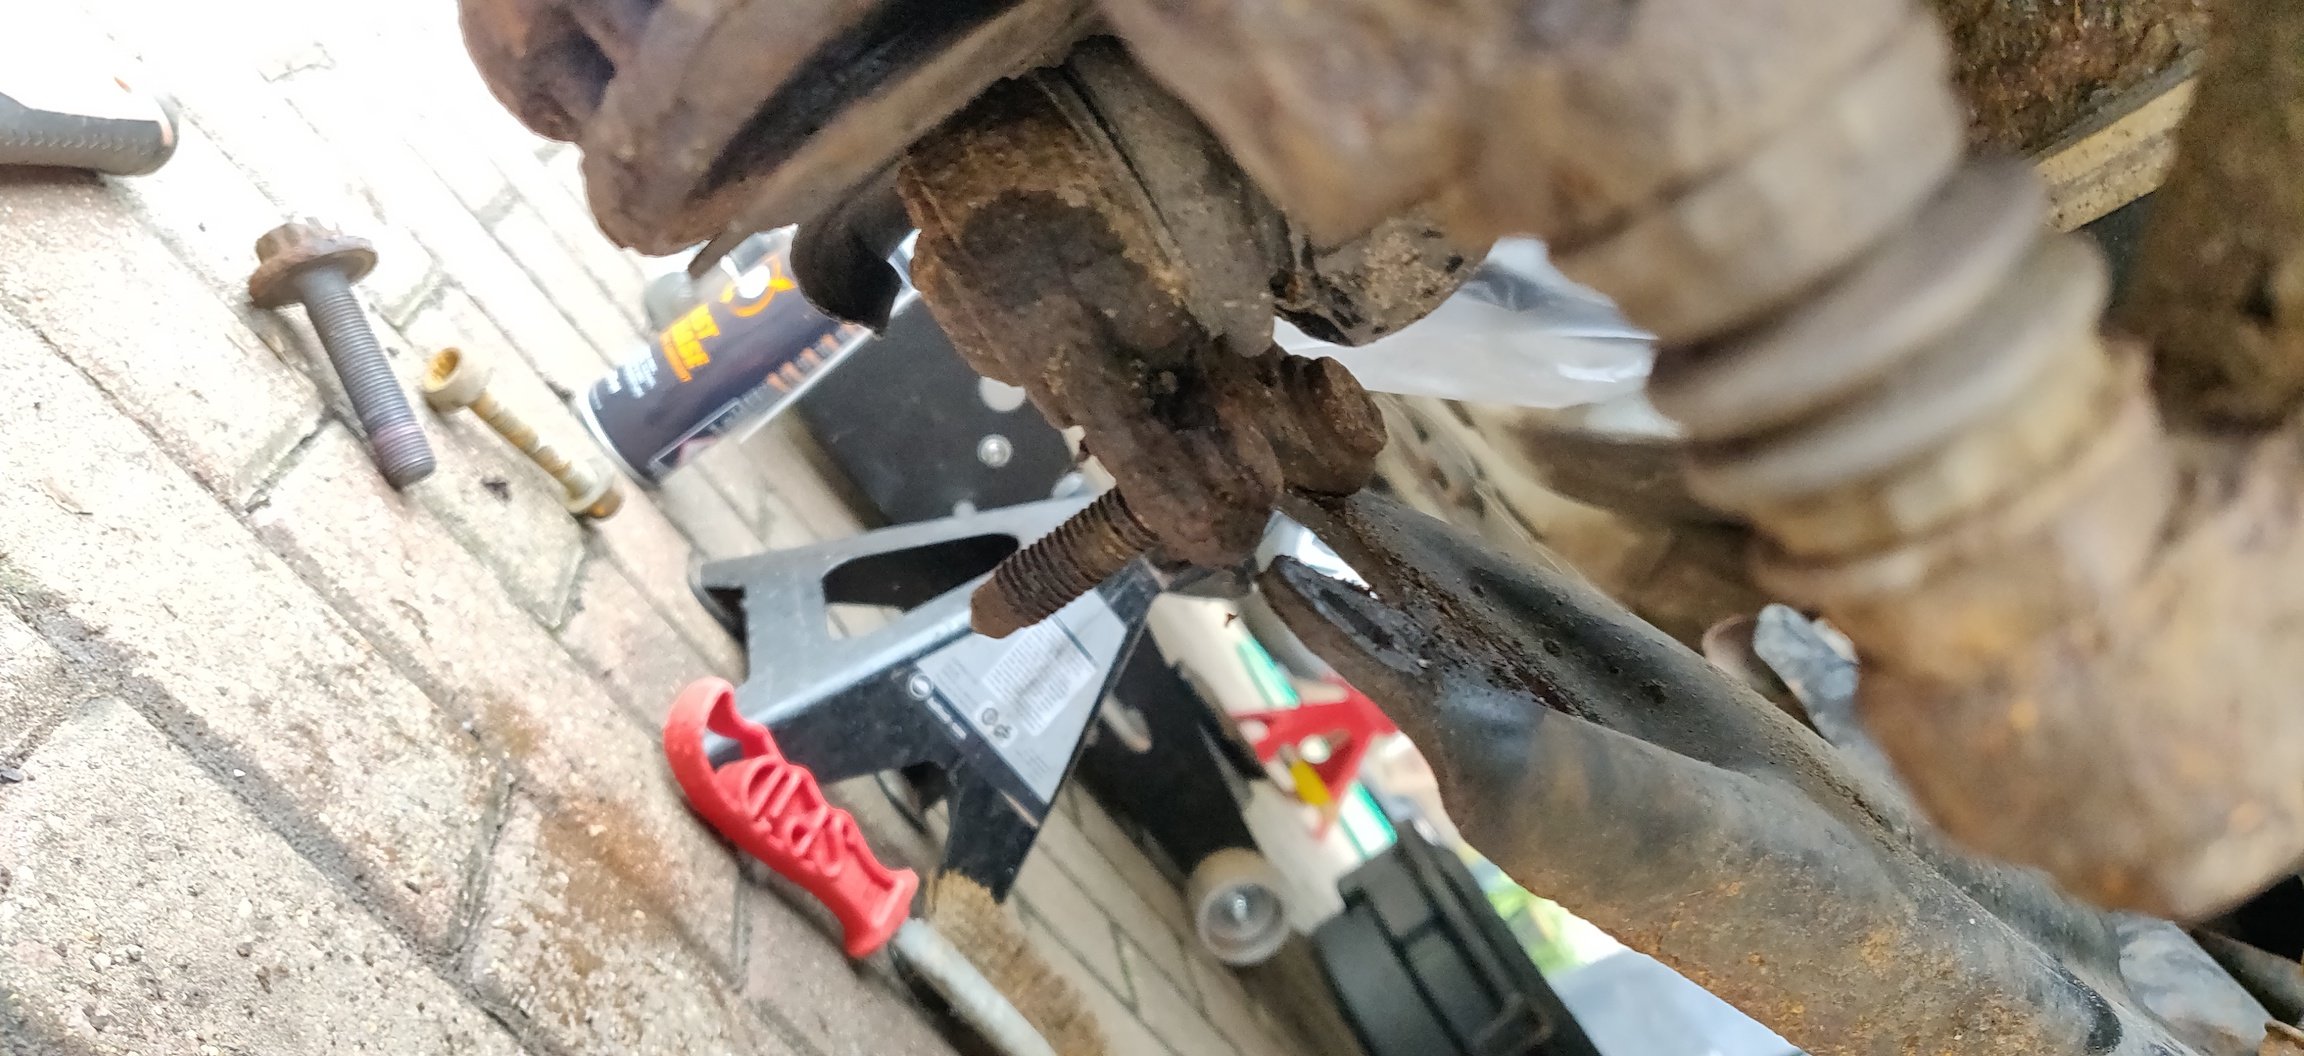
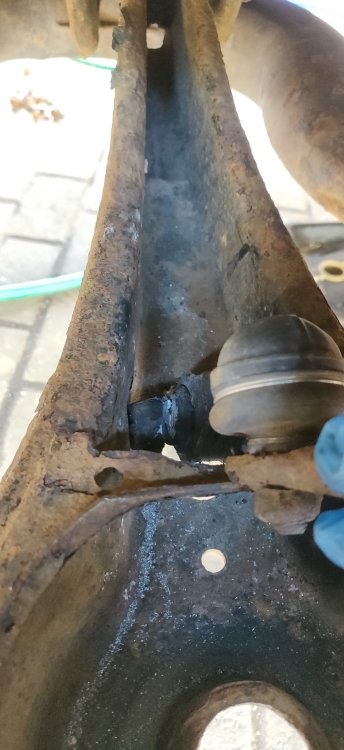
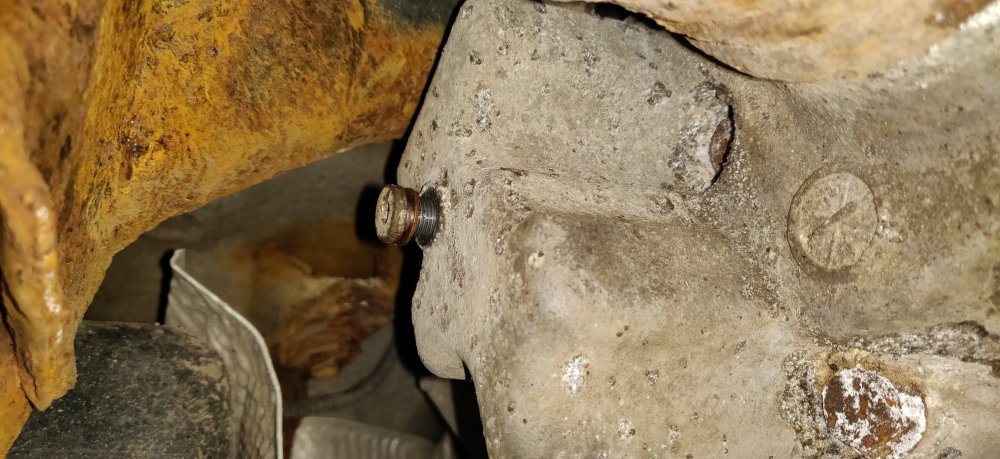
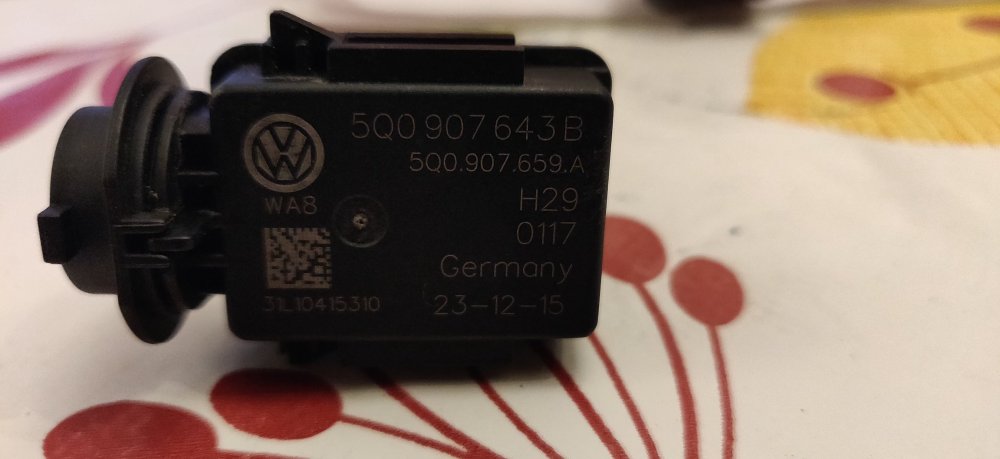
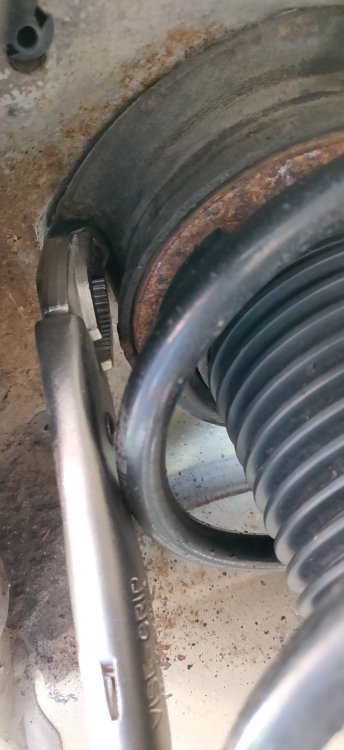
So in order to have a chance at tackling that one remaining rounded socket on the anti roll bar clamp, I needed to remove the springs. Given I actually have replacement rear springs, they would need to be removed anyway. Logic would suggest that with the strut removed, the suspension bolt attaching the lower arm to the hub could also be removed, and in doing so, lower the arm enough to free the spring. Alas, this was the same logic that applied to the Ford Focus, and I anticipate the same issues involved. Given the anti roll bar bolts have seized onto the bushes, I would bet my mortgage on the hub bushes to suffer the same fate. In fact, attempting to use the impact wrench on the bolt yielded no movement. I suspect even if I used the breaker bar and undid the bolt and nut, it'll be seized onto the bush, meaning it'll need destroying. If that was done, then the hub pretty much needs to be removed in order to press in a replacement bush, or another specialist tool to press it in in situ. Either way, it'd also mean sourcing a new bush. So I was pretty much stuck with needing to compress the spring: I lucked out with the purchase of this spring compressor, as it just about fits. So once in position, got a wrench with a 23mm socket and tightened away. It'll need some compression before the top clears away: The bottom was still attached to something: This thing, which has tabs that can be squeezed in from the underside, looks to keep the rubber seat in place. Once unclipped, the spring comes free: So it looks like about 4 coils need compressing to get enough clearance. The same assembly tool on the other side: Looks to have a suffered a bit. This was most likely when I applied fire to the anti roll bar link, the heat near and hot enough to melt bits of the right side assembly tool. I'll need to find out whether these are critical. In any case, this gave enough access to the clamp with the rounded bolt. Initial attempts with the Sawzall wasn't frankly quick enough. I guess with enough patience, it could be done. The Sawzall did make quick work of the anti roll bar link on this side though, but the links are made of plastic for this car. So rather than persist with the Sawzall for this obstacle, checked to see if the angle grinder has enough clearance to get in: It does. A cut along the bottom half of the clamp allowed the bush to come free. This meant that after some wiggling: A sigh of relief, as the anti roll bar is out at last. I cannot remember the routing I took to get it out, which would have been useful to note, as it was a faff even with a broken end on it. Another couple of cuts on the clamp left enough room to get some pliers on: The next 45 minutes was painstakingly squeezing the pliers to try and get purchase, and slowly quarter turning the stiff bolt. There was the occasional application of fire and plus gas which either helped it along or acted as a decent placebo. Persistence got through: The Knipex pliers are effective if you can get the purchase: The bolt was probably not going to allow for this any longer if it remained. Whilst I was down there, took a look at the Haldex unit: The filler appears to be a 5mm hex bolt, with not a lot of space due to the subframe. Wanted to get as big a wrench as possible as I didn't want to risk rounding this thing. But it came out without much issue: So put that back in place ready for a proper drain eventually. So next was the right side spring. Unfortunately, the spring compressors were only able to grab at 3 coils, which isn't enough to get the spring out. It is almost there, but even with a pry bar involved in folding down the lower arm, there still was not enough clearance. Then an idea struck me: I used the spring compressor the other way around. This allowed the grabbing of four coils, and once compressed: Out it slid, not much drama one that was figured out. So to install the new springs, it'll be pretty much a case of getting 4 coils, but sod's law this will take a few attempts, as removing them did not mean any considerations for alightment and positioning of the compressors. So the anti roll bar links are in clearer view: Access is still pretty tight for the Sawzall, and the metal lip on the lower arm means an angle grinder isn't practical here either. Once I've recovered sufficiently, I'll try the Sawzall on the inside of the links, around the bushes, which hopefully will mean the bolt going through is cut enough to mean the link can be removed. Sized up the new one against the old: It looks like it should fit. It's amazing how a 2016 vs 2019 can make such a difference. That was pretty much it for the day. With the springs out, and the front left strut out, gave those areas another round of the Engine Cleaner and brush and rinsed it off. The wheel arches are as ready as they'll ever be for a couple of goes with Lanoguard. Whilst I was there, I took out the old air quality sensor: The replacement was installed, just a connector and a small latch underneath to attach it to the plastic clip which attaches to the car itself. This is marked 5Q0 907 643 B, with the replacement installed being 5Q0 907 643 C. Hopefully that doesn't make a difference, but time will tell. So other than the rear anti roll bar links, today hasn't gone too badly, quite good in comparison to last week really. Once these links are removed, that should be it in terms of obstacles right now. Weather tomorrow will dictate whether any further progress is made, but it's getting there slowly. Maintenance: £1857.08 Upgrades: £1020.69 Miscellaneous: £637.12


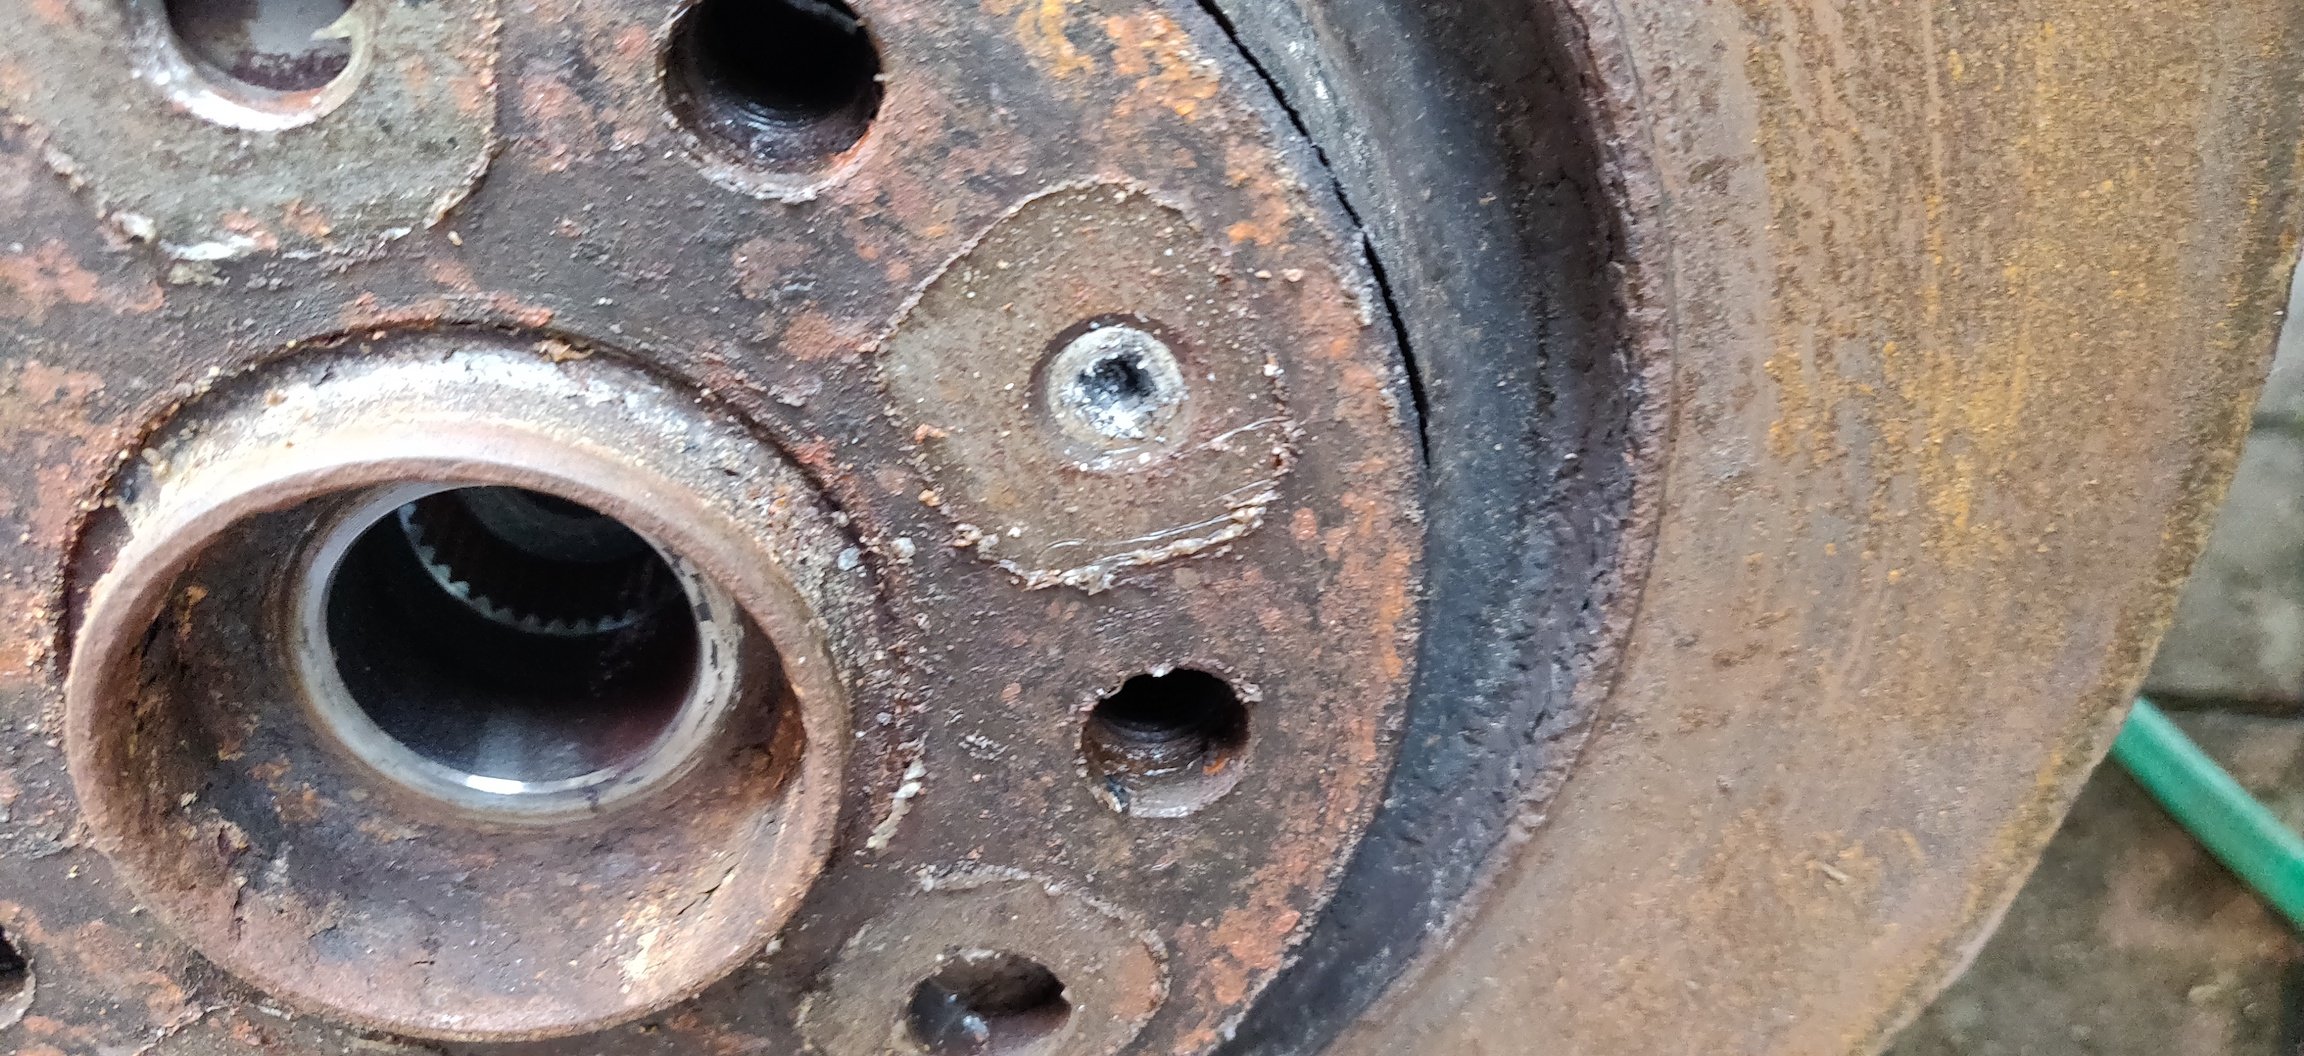
-
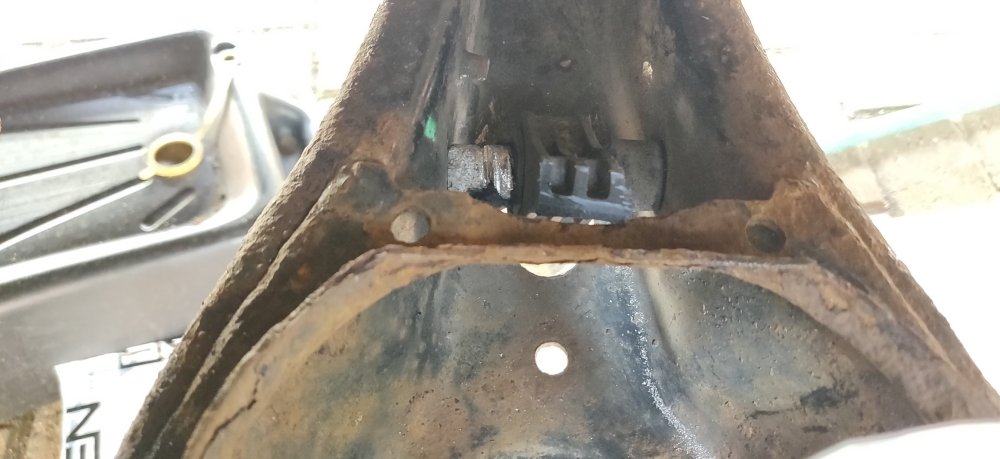
So with the DSG oil replaced, only thing left in terms of servicing is the Haldex oil change, and once the engine bay is reassembled, the Air Filter will be done as part of it. Just the remaining elephants in the room, so tried to get some of them addressed. For the coolant hose on the right of the radiator, one initial idea was to remove the hose underneath, which was using a pair of standard hose clips (so 7mm). Whilst they did start to undo, for some reason, the clips are attached in an unexpected way, so couldn't really sort that out quickly. So retightened them, and just had no other approach except to persist with the pliers on the spring clip. Eventually, was able to get the spring clip rotated to somewhere more accessible. Then slowly and carefully got the spring clip moved downwards and then eventually: The coolant hose was finally freed. A little bit more coolant out, not as much as I was expecting. Will need to double check the workshop manual. So one down. So looked back at the front brake disc. Found my drill bits, normally I start at about 2.5mm or 3mm and progress upwards, but here, just started straight at the 5.5mm: Then after a while, up to 6mm: The bolt head then snapped off free onto the bit. So that's that. The brake disc just needed a gentle tap: The brake disc looked stuck onto the hub, but probably as expected. Couldn't get any purchase with pliers on the remainder of the bolt, so I'll just it there. With the strut still attached on this side, tapping out the driveshaft was actually easier than the other side, a few gentle taps and once the tone of the taps changed, just gave it a wiggle: Then it came free without drama. So the only thing left is that one remaining top strut bolt. Attempts with a mole grip: Did not work, nor did squeezing a socket on the bottom end and attempting to undo from the top. No easy way to do it, and fire did not look like a good idea in that general area. From the bottom, the bolt could be pushed up slightly. This bit of clearance was enough to try out the reciprocating saw/sawzall: It slowly cut through the bolt, the key appeared to be not to go at full speed but somewhere between a third and half to get it cutting. Given the wiring and hoses to the bonnet are in the vicinity, this was a little touch and go, but I was getting desperate at this stage. Eventually, the top of the bolt popped out and flew across the engine bay. I haven't found it, so something I'll need to check on later, but: The bottom part fell through to the floor. No idea why this became so problematic, took about an hour to get this out. But a milestone reached: All the struts are out, and amusingly, the final one is really the only one that needed to be done: Guess the end of the spring just disintegrated and is lost to the ether. The remains of the battle: I'll probably just dab in some touch up paint around this area and move on. Regardless of recommendations, will be greasing all bolts when reassembling. The remainder of the day involved removing the rear anti roll bar, which will be the next post. Maintenance: £1857.08 Upgrades: £1020.69 Miscellaneous: £637.12


-
So after some lunch, and some gardening, and some laundry, the driveway was dry enough to get underneath and spot the DSG drain bolt: I basically followed the guide here: Which is pretty much all that's needed really. Any pics here are pretty much the same as in that post: So a 14mm hex socket undoes the drain bolt, and in my case, some oil started to come out, but with the 8mm hex on the fill level bolt: Then a lot more flows out. So with the oil draining out, removed the filter housing: A Mann filter ready to go, steps are basically akin to an oil filter: So a bit of oil on the o-ring on the filter, some on the o-ring to be put into the housing, and the filter is clicked into place: I used some shop cloth to soak up some of the oil within the housing, not sure if this is necessary. The housing is then tightened to 20Nm, and that's that. So still waiting for the oil to drain away, looked at the anti roll bar links and checked if my reciprocating saw has enough clearance: It just about does, but perhaps might be easier with the springs removed, which will probably need to be done eventually. I then recalled the rounded bolts in the right rear wheel arch: These are the remaining screws for the wheel liners: Now, with the liner aggressively removed (as seen with the remains on the pic above), a pair of pliers had enough to bite into them: Both were able to slowly rotate and free. One of them took the retaining clip as well. I'll probably want to remove that other retaining clip and replace them both with new ones. So, enough distractions, back to the DSG oil. With the tool purchased a few weeks back, checked the drain bolt against the possible adapters: As soon as I tried "ATF107" it was immediately too small, so just ended up trying random ones: So "ATF106" is the correct one. Essentially, just hand tightened via the knurled part is enough. Make sure the fill bolt is back in place first of course, tightened to 3Nm, which is pretty much less than hand tight in all honesty. It was then a case of filling the tool: I think I ended up putting slightly over 5.5l, takes a while a litre at a time. I didn't take any more pics unfortunately, but the tool pushes onto the adapter and a nut is used to tighten down onto the adapter. With the valve turned a quarter turn, I then pumped the oil via the handle. This took quite a while, as it was only pushing a few millilitres at a time it seems. I think about 15-20 minutes of pumping before it wasn't pumping anymore. I suspect it would end up less than the 5.5l due to the hose, and due to always have a little bit left over along the bottom. Made the mistake of disconnecting the valve before the adapter, which then resulted in lots of oil over the adapter making the knurled area difficult to undo. Decided to fit the valve again and then focus on the knurled adapter. Then it was a case of quickly fitting the previously removed bolt once that the adapter was removed. Hopefully didn't lose too much during this. Worse case scenario, still have some leftover I suppose. What I need to do next is to mess around with the trolley jacks to raise the front slightly to get it level before getting the power back on and checking the levels. I have some inclinometers which hopefully I can use along say the sill to determine levels. With the DSG filter in place, there's nothing stopping the engine bay being reassembled really, so there's nothing stopping getting the power back on. Maintenance: £1857.08 Upgrades: £1020.69 Miscellaneous: £637.12
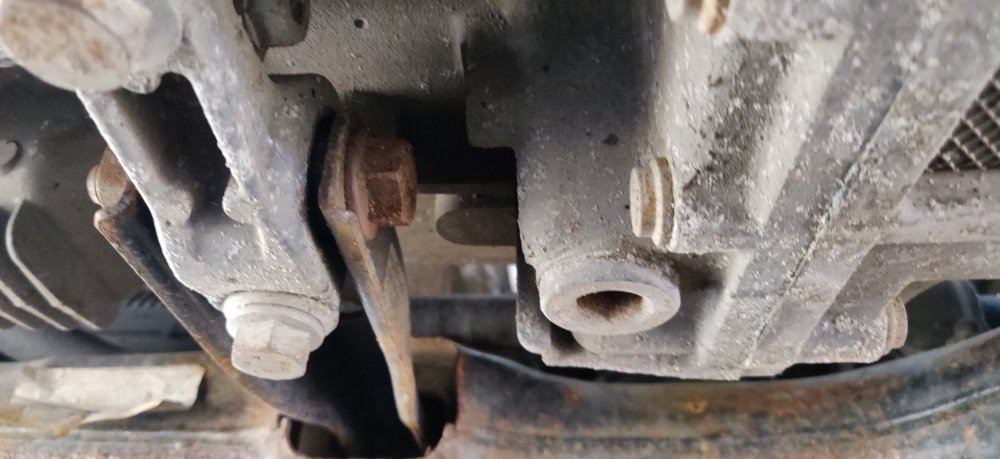


-
Busy day today, I'll use this post for the morning. With the strut on the front left out of the car, decided to give the car a go over with some Autoglym Engine Cleaner. Whilst doing so, did a once over with the engine bay. So its a case of spraying it, using a brush to rub and agitate the engine cleaner, then give it a mist to rinse: The engine bay has a few annoying bits that'll trap water (the top of the gearbox and the inlet manifold for example), so I'll probably need to dab some cloths or something to clear up excess. There's the elephant in the room of whether I should have done this. I at least put a plastic bag over the inlet at the rear, but have taken a chance in regards things like the electrical connectors, etc. But doing the same process with the rest of the wheel arches: Some bits have cleaned up alright: Other's less so. The Autoglym stuff is water based I believe, so less aggressive than something like brake cleaner, which I suppose I could use if I wanted it absolutely sparkling. Did the same within the wheel arches: Which again, probably requires a bit more aggression for absolute cleanliness: All the colours in the rear wheel arches are amusing: So with that done, the plan is to wait for this to dry so I can then get underneath and sort out the DSG oil change, as well as maybe tackle some of stuck bolts. So whilst waiting, decided to disassemble the breaks. This is mainly to get a chunk of the weight off of the hub, hopefully making reassembly a little easier. Especially so as the right hub needs the ball joint removing, and it'll probably be easier to do with as little in the way as possible. So the guide bolts on the top and bottom are first: I wasn't able to slide the 17mm spanner all the way in, so not sure if that's the right size, but with a 13mm on the impact, the guide bolts come out without much drama. Decided then to get a 10mm and undo the bracket: This allowed the caliper to wiggle free (with the help of a pry bar) and for now rested onto the hub: In hindsight, the brake line on the bracket should have been undone before the bracket: With it hanging freely and the caliper now where it should be, it was a bit more of a hassle to undo the clip with pliers and just holding onto the bracket for dear life. Freeing the brake line then allows the caliper a lot more leeway, so moved it around and onto the ground: Used a brick to raise it slightly so that the brake line is nice and slack. Continued with the pry bar for the brake pads: Fortunately nothing seized here: So next is the pad carrier itself. The workshop manual specs these as 200Nm, which is tight indeed. So after a few fumblings with 17mm and 19mm sockets, turns out a 21mm socket is needed, and just went straight at it with the impact wrench: The top came out with some resistance, with a chunk of aluminium dust sprinkling down to the bottom bolt: The bottom did not budge with the impact, so had to do as per the other bolts witnessed before: Once loosened a few quarter turns, the impact did the rest: The pad carrier pretty much falls out from the hub. So pretty much only the brake disc left. But of course: The bolt rounded off almost instantly when attempting to be undone. Not my first rodeo here, I'll need to find my drill bits for the afternoon. So, the other side already had the strut out, which also meant the hub was pretty much only attached via the track rod end. Regardless, the guide bolts still came out without drama: With the hub loose, getting to the pad carrier bolts is a little easier: Compared to the left side, the impact was sufficient to free the bolts and the carrier: On this side, the disc also fell out, as the retaining bolt has already been pre drilled out from a previous life I expect. So for this side as per the pic, I left the hub resting on the brake disc which seems to be sufficient in terms of not straining the ABS wiring. So that was it for the morning, decided to break for lunch, these arrived in the mail: Some replacement JCS Hi Grip hose clips which I'll use to replace the spring clamps for the left and eventually the right bottom hoses, so that I don't have to deal with the quick releases and what not in the future. The hoses were £15.58 for 6 of them, 4 smaller ones for the left and 2 slighly larger ones (although I only saw one for the larger hose, probably be another random one somewhere). Maintenance: £1857.08 (+£15.58) Upgrades: £1020.69 Miscellaneous: £637.12
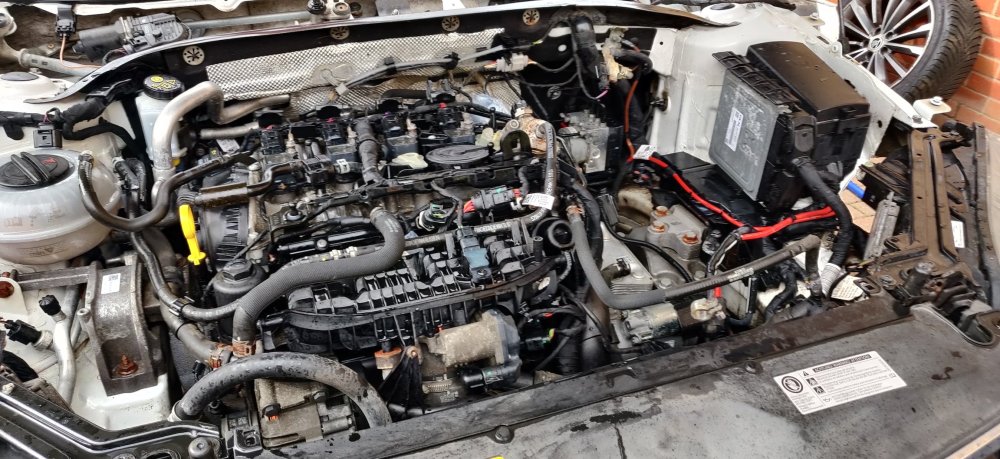


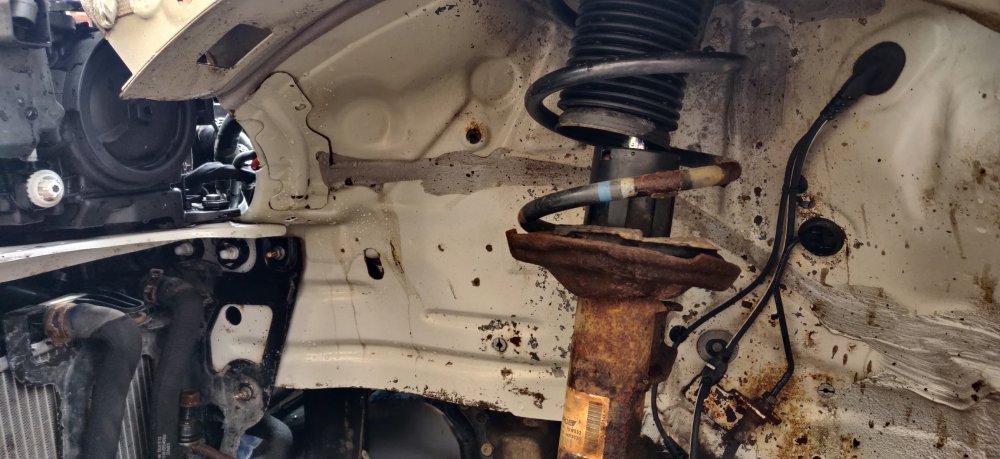

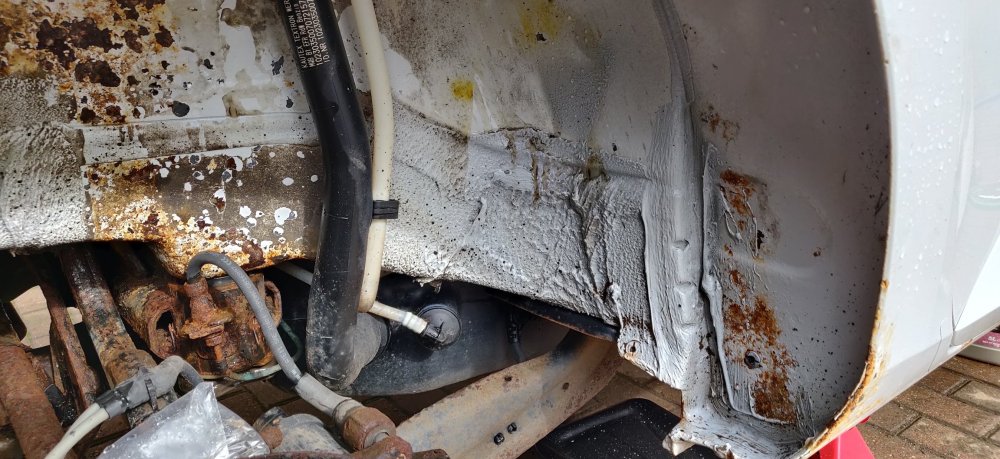
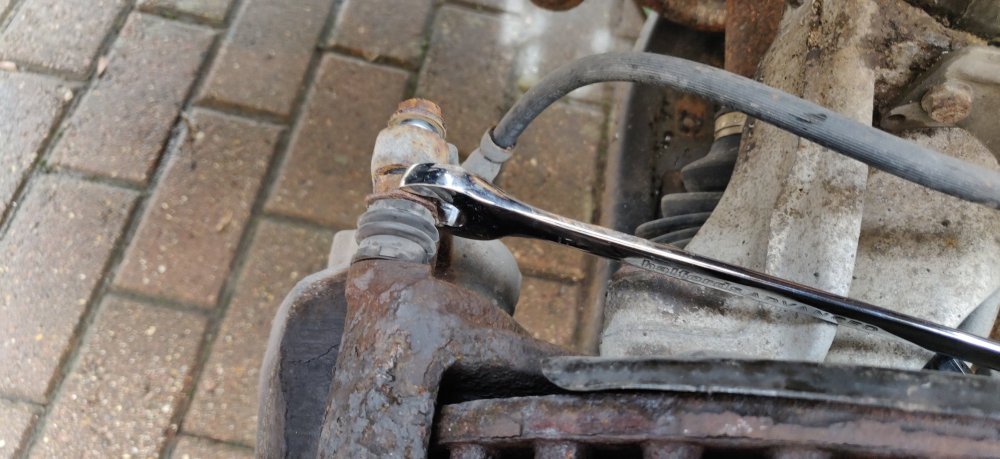
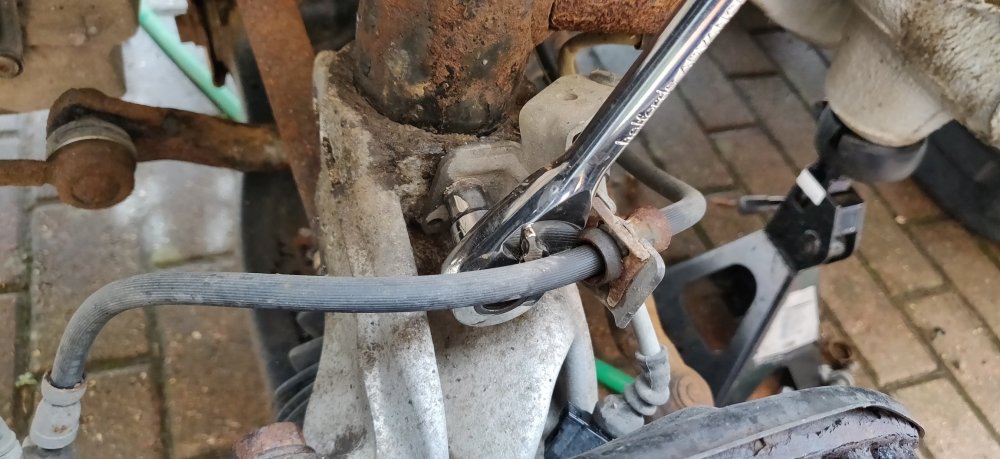


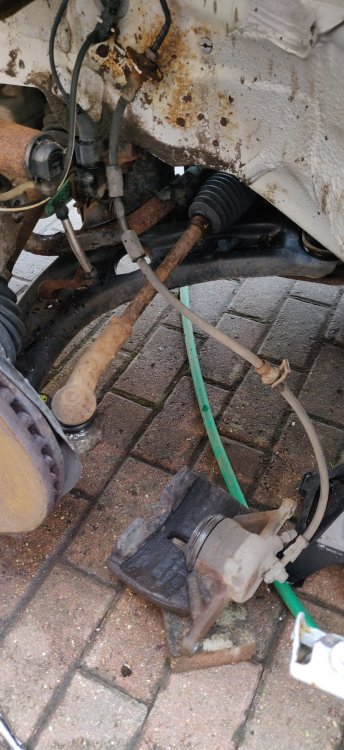

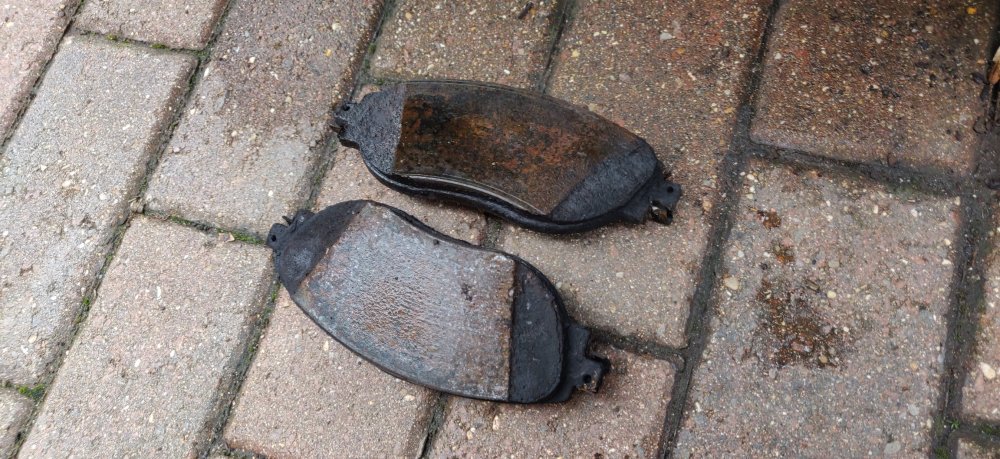

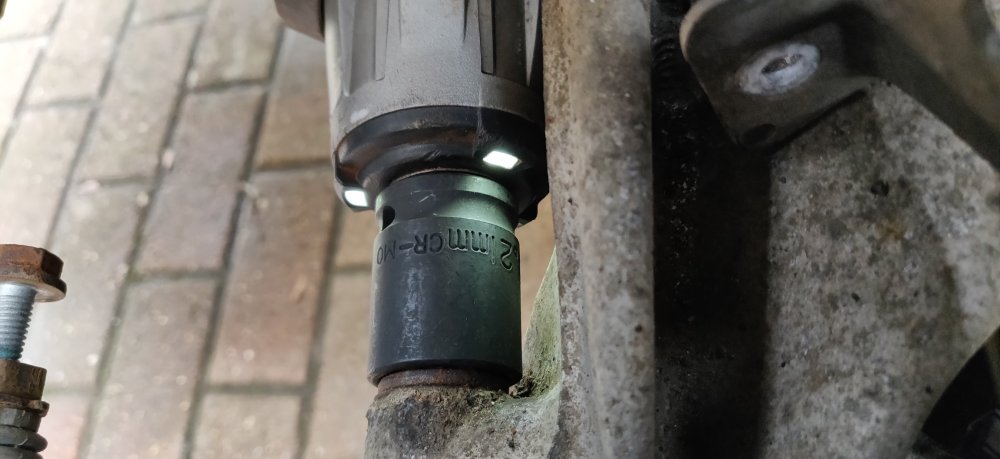
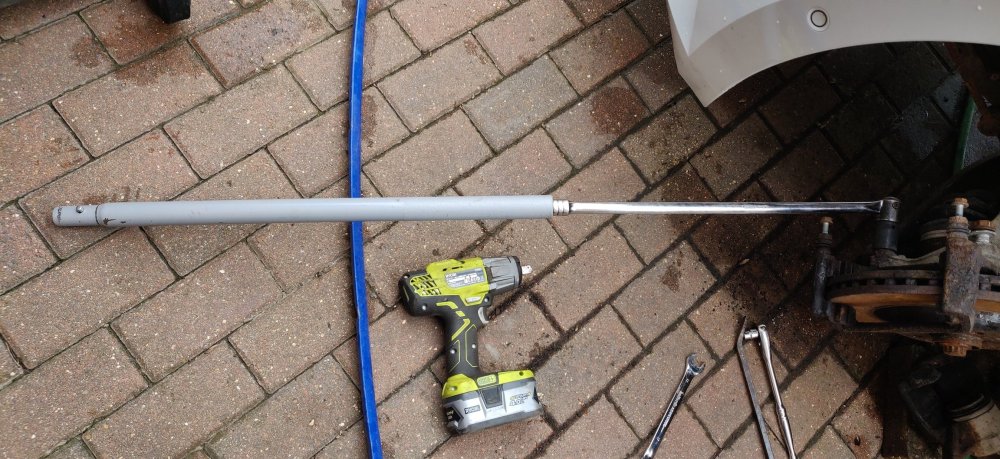
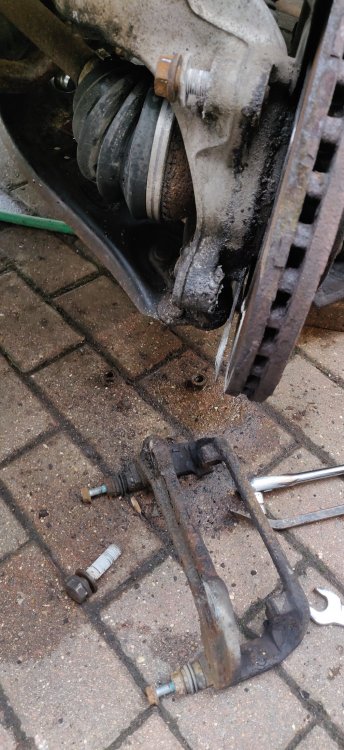
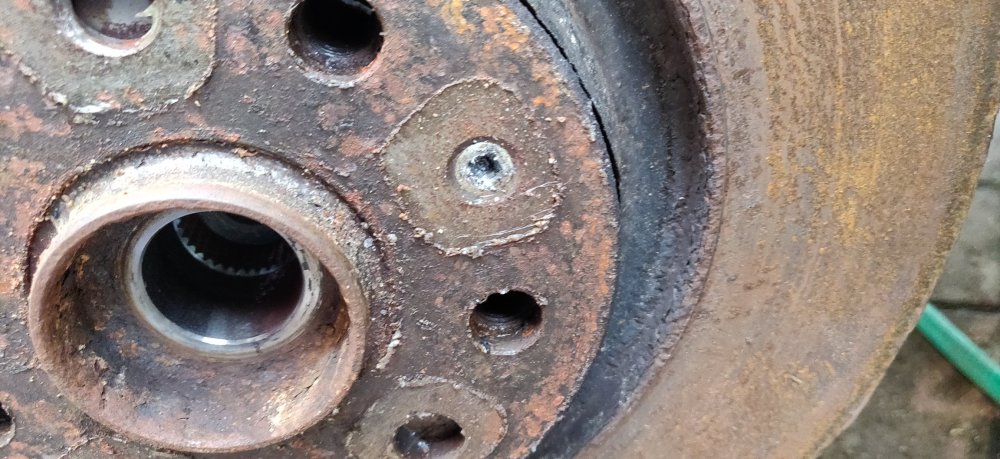

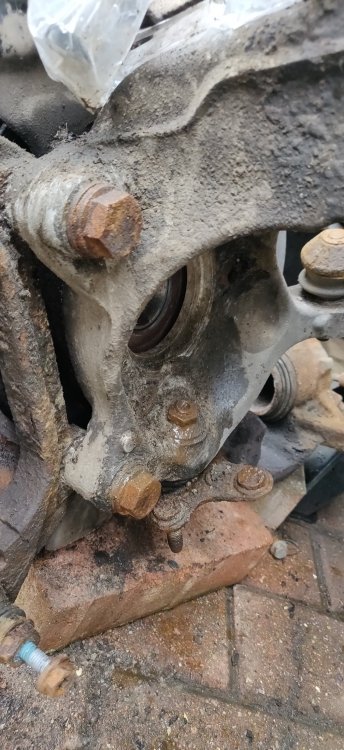

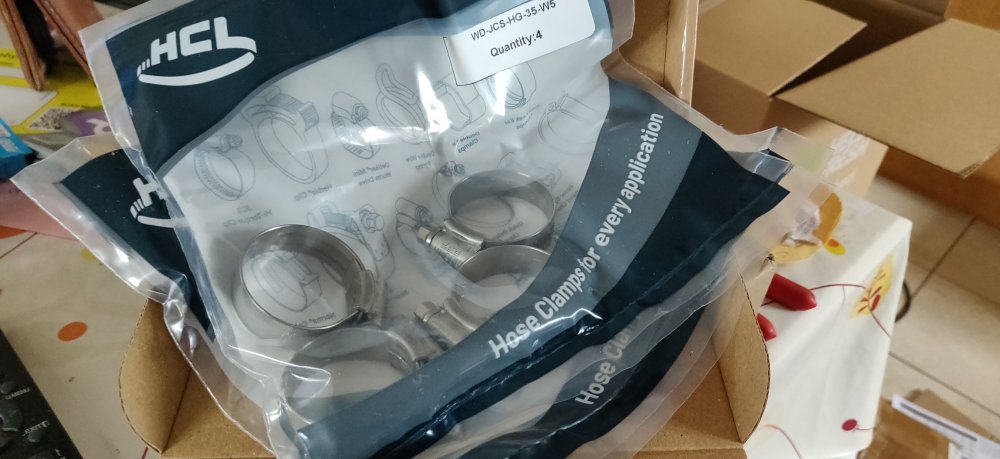
-
Someone or something is definitely out to get me. This arrived near the end of the day: Another impact socket, this time an 18mm long one. This was £5.45 from Amazon. The reason is this strut bolt: No amount of hammering has gotten this out, so my idea is to take the nut, and impact it down, with the hope that as it slowly tightens, it actually pulls the bolt outwards, and hopefully free. My initial attempts to do so bottomed out the existing impact sockets, so a longer one sounded like the best approach. So with the impact wrench attacking the nut, it took a few moments but the nut could be seen tightening. Then a popping sound, some white dust flew around, and the nut started to spin. Loosened it slightly, and it pulled out rather undramatically: So that's that sorted: No remains in the hole, so another small victory. So to remove the struts, it would look like the ball joint and the driveshaft need separating from the hub in order to get enough free movement on the hub to get the strut out and clear. So started going at the ball joint on the driver side: These were 16mm, and pretty tight, so went slowly with them, with extensions as well. So obviously this happens: As if to spite me, the last nut just decided to nope and shear the bolt clean: So another thing to source. Annoying because long term plans probably involve replacing these lower arms as part of a fuller suspension refresh, but hey ho, I'm sure eBay will have some cheapy ones to bridge that gap for now. Annoyingly, I decided to jack up the arm on the other side and use the impact wrench, and of course, all the nuts came free without issue. Regardless, it does mean the ball joint can be separated, I just pushed the lower arm down and wiggled it free: So the driveshaft next. I decided to put the bolt in about 2-3 turns and give it a few gentle taps with the lump hammer: The driveshaft didn't look stuck on thankfully, and was started to come free. It still required a silly amount of wiggling, messing around and loud swearing before it did come free: I ended up using an empty oil bottle to hold the hub steady, then scrambled for something else to hold it up to stop the wiring and brake lines from being strained. Found some bricks to do the job. So with the strut now in the open air, it was a case of wiggling it around a bit, and moving the strut spreader tool in order to clear the route for the strut, and eventually: The additional plastic bag is for the disconnected DCC connector, but a milestone of sorts: One front strut out at last. Ironically, not the one that actually needs replacing from an MoT perspective. Not sure if it's worth anything, it's less rusty than the other side. So I guess I'll now need to plan to tackle this: The top bolt for the ball joint is absolutely caked in rubbish, so I'll need to spend a bit of time cleaning this all up. I'll probably end up disassembling the brake caliper to make it easier to move and work on the hub, which will then end up meaning only the track rod end is keeping the hub attached. Sod's law it may well end up being easier to disconnect that as well in order to stick the hub on a workbench or whatever. If anyone has any idea regarding the rear seat spring hinge mechanisms, I'd be most grateful, as I can't see anything on parts diagrams, etc. Maintenance: £1841.50 Upgrades: £1020.69 Miscellaneous: £637.12 (+£5.45)