commievid
Members
-
Joined
-
Last visited
Everything posted by commievid
-
Thanks for that, so there's something. Guess I gotta swot some more!
-
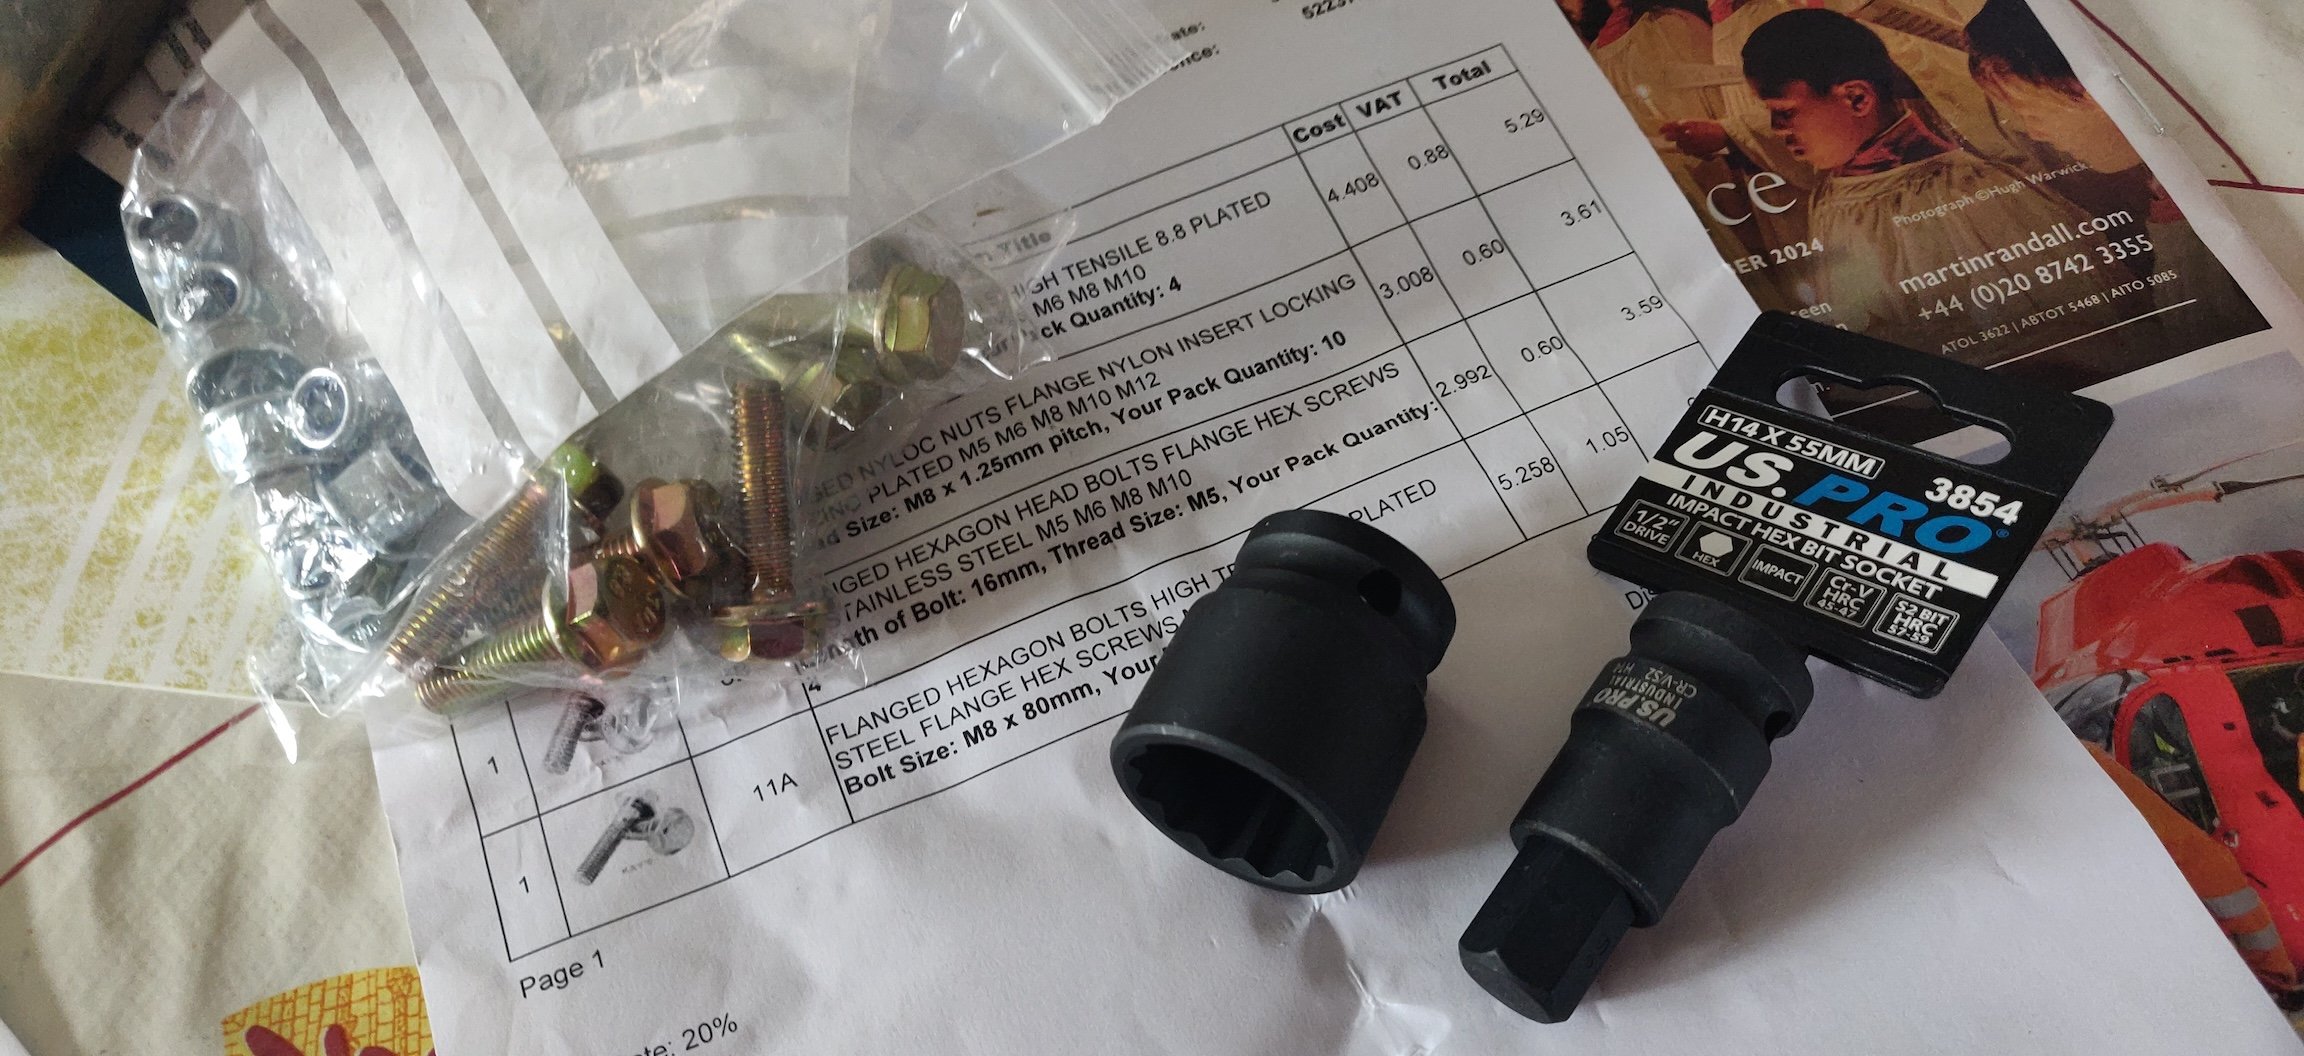
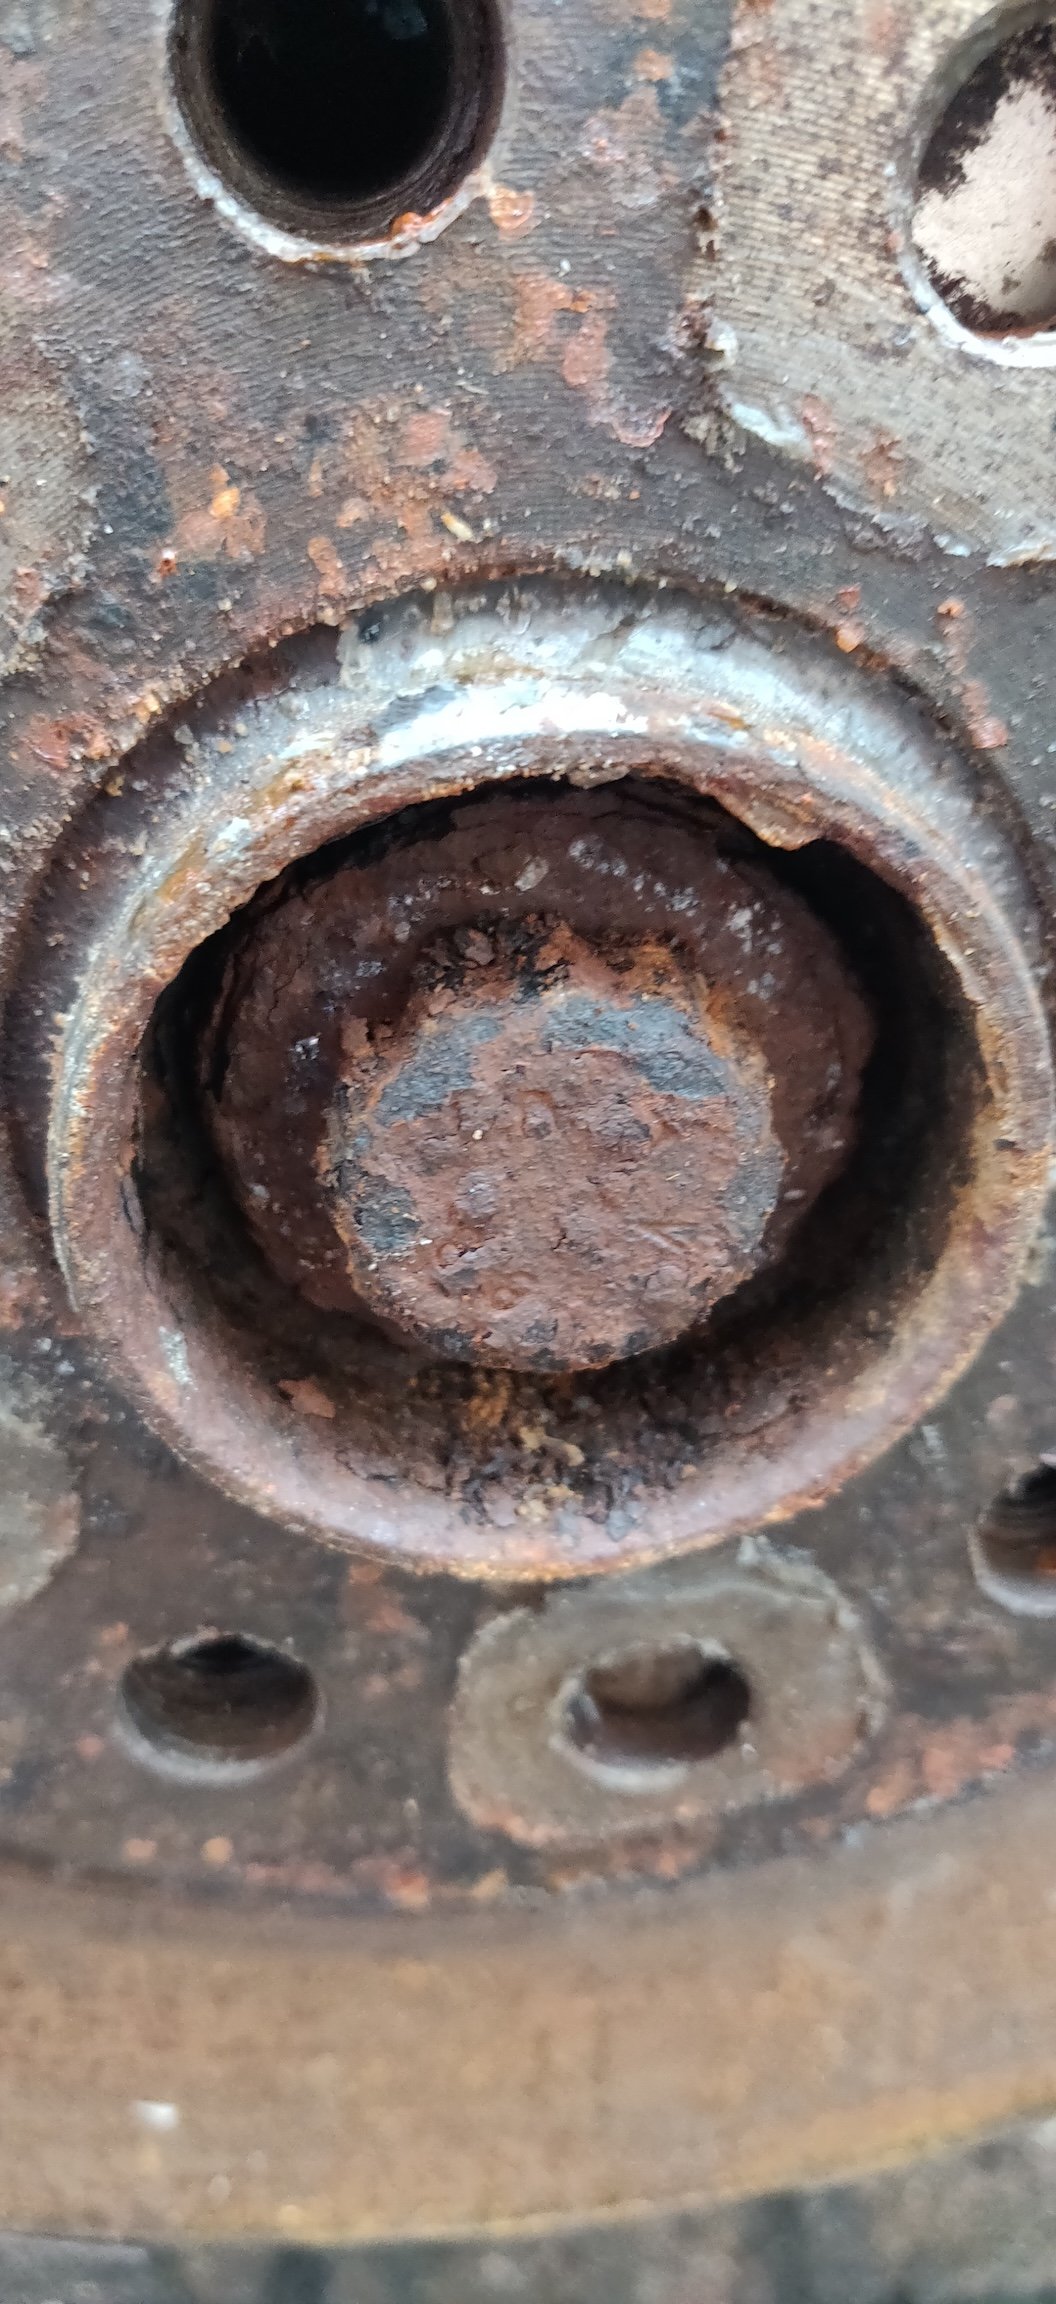
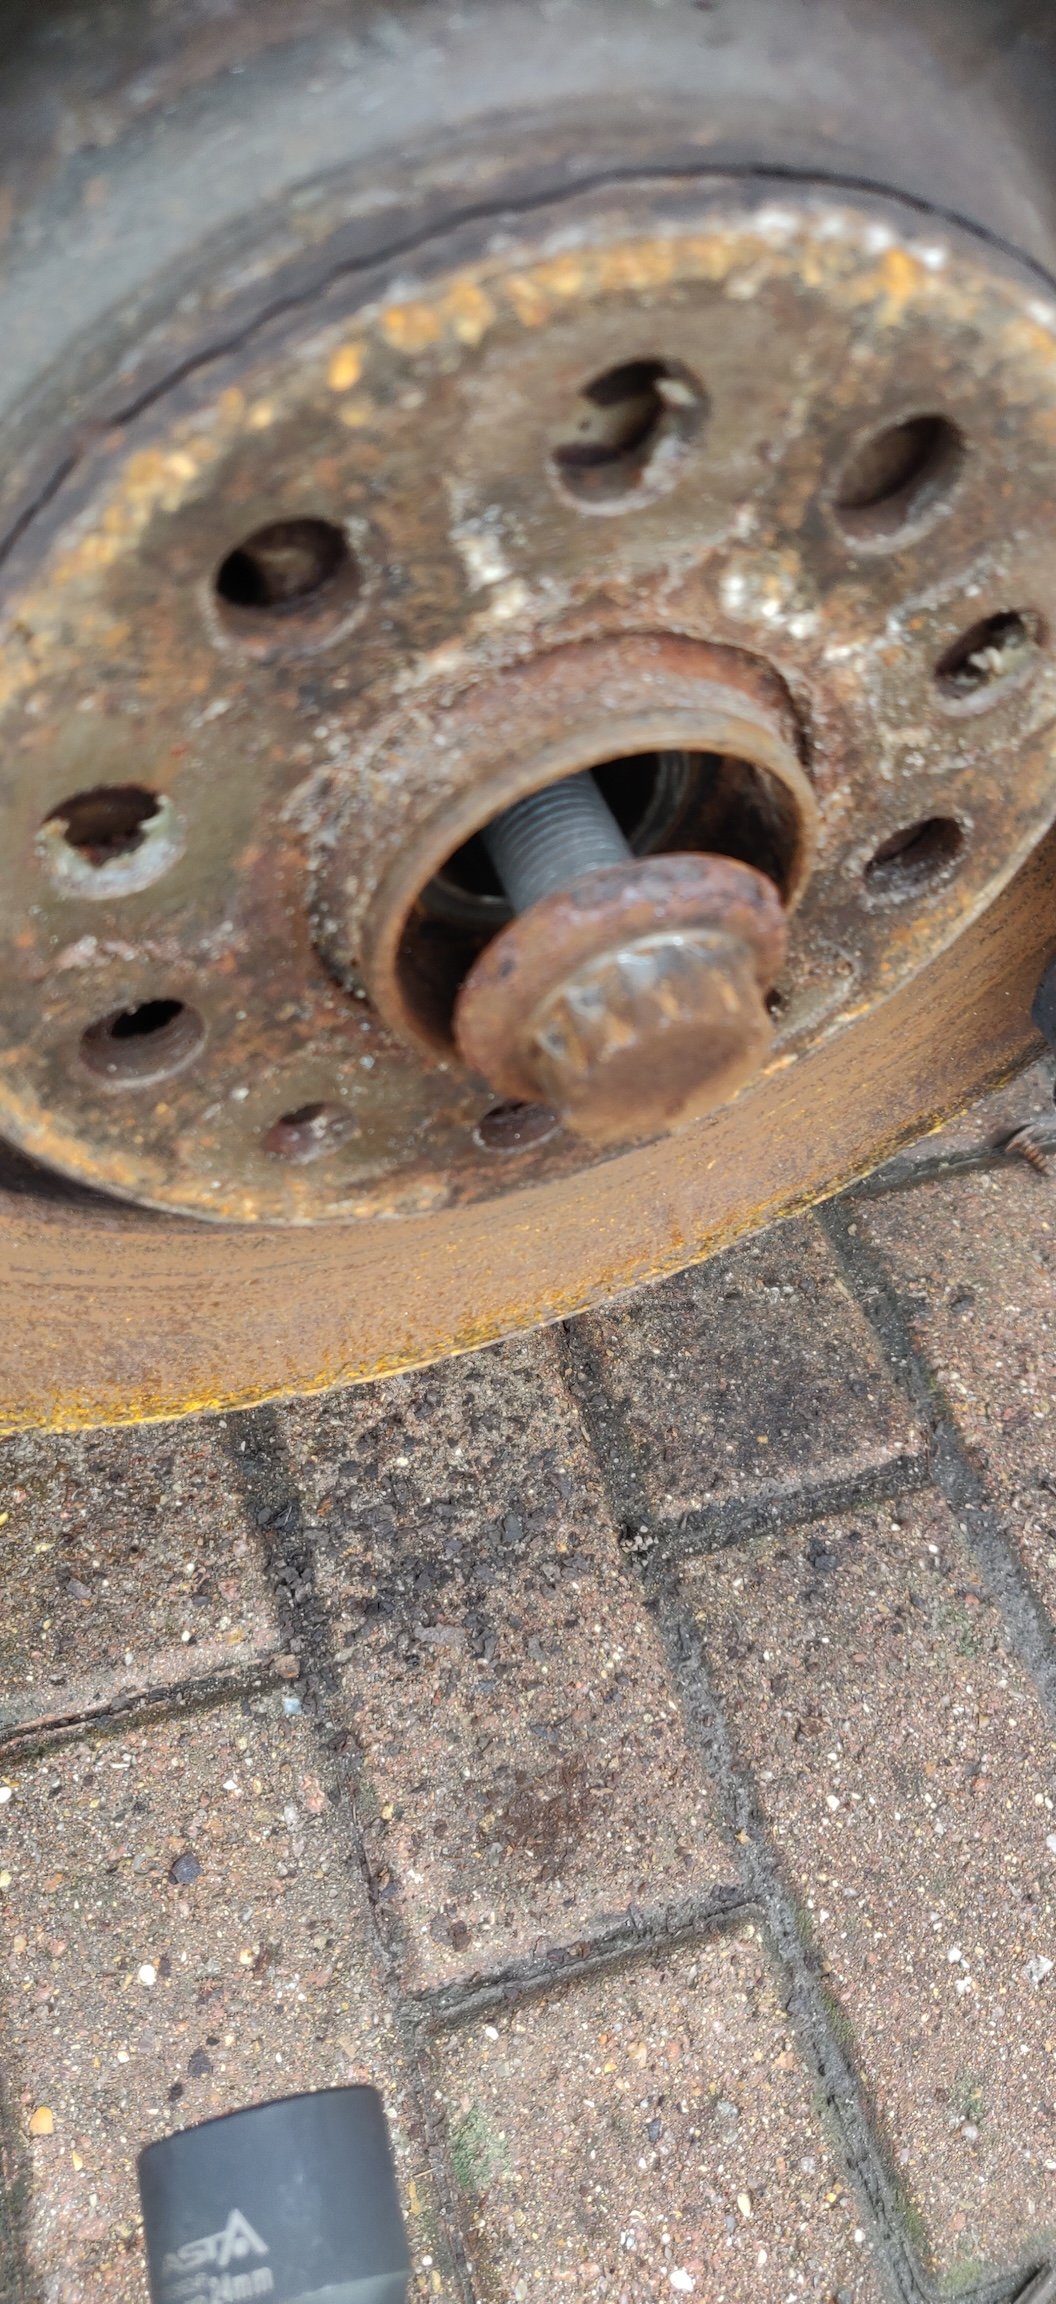
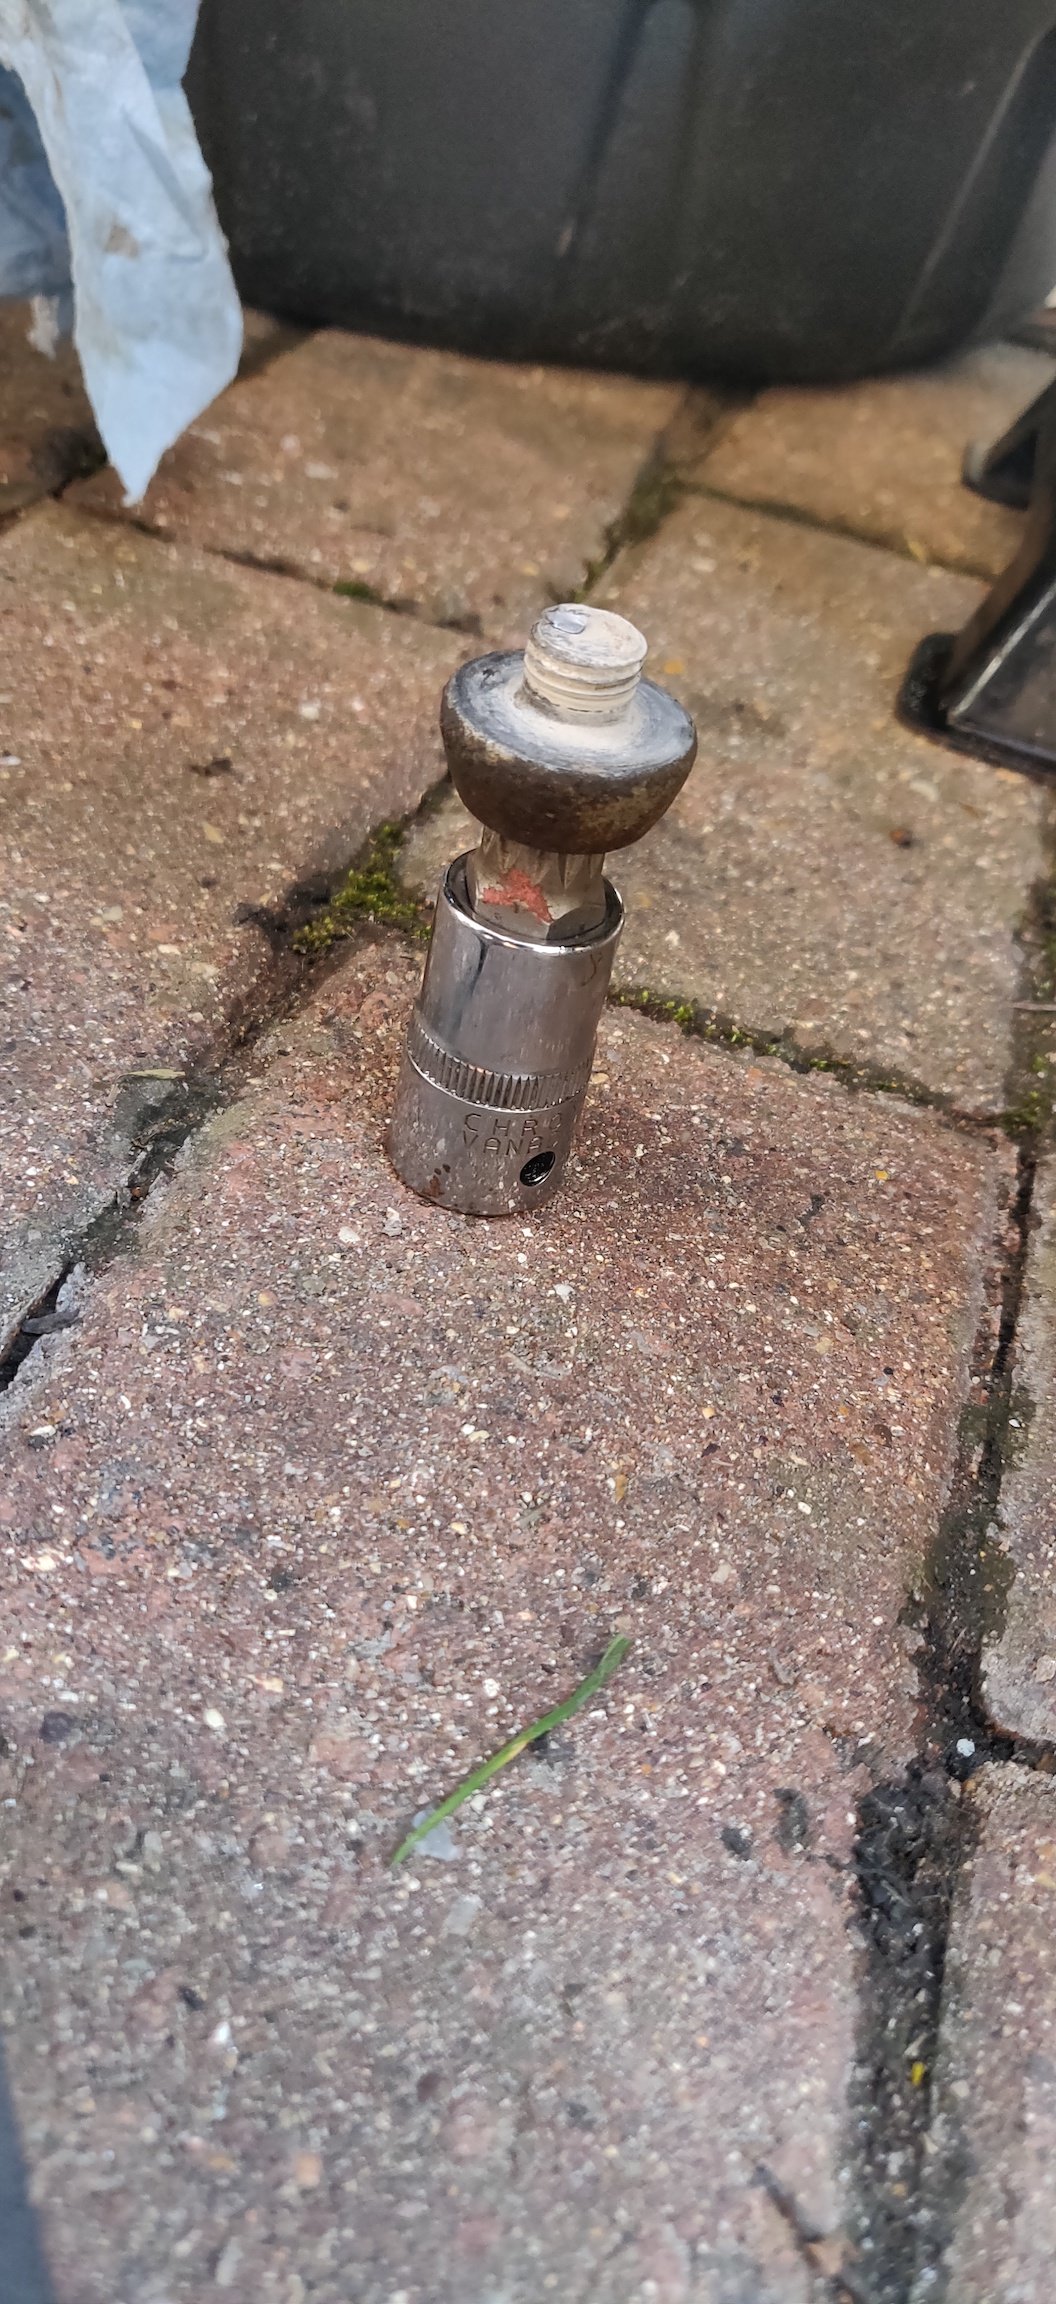
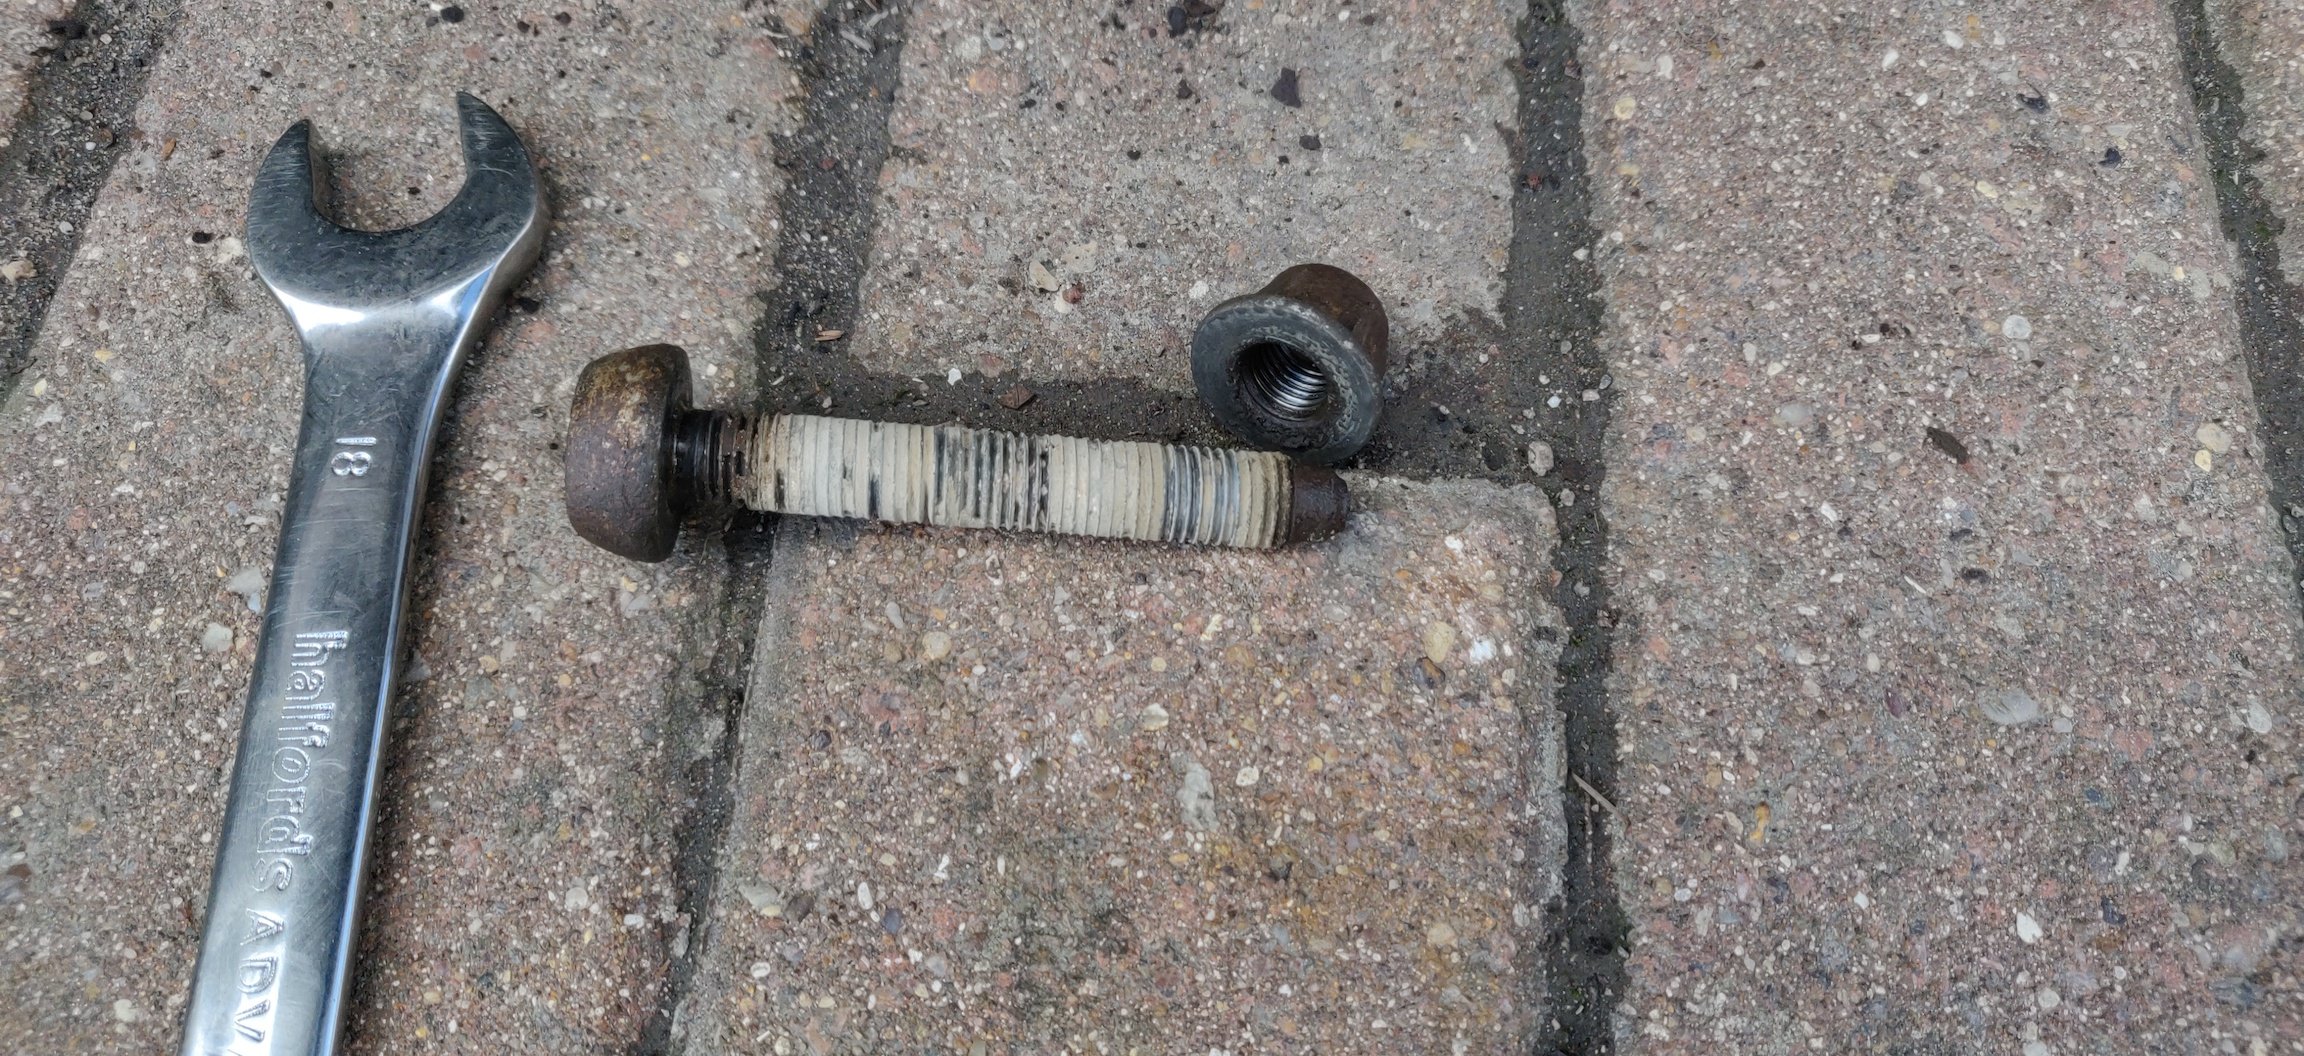
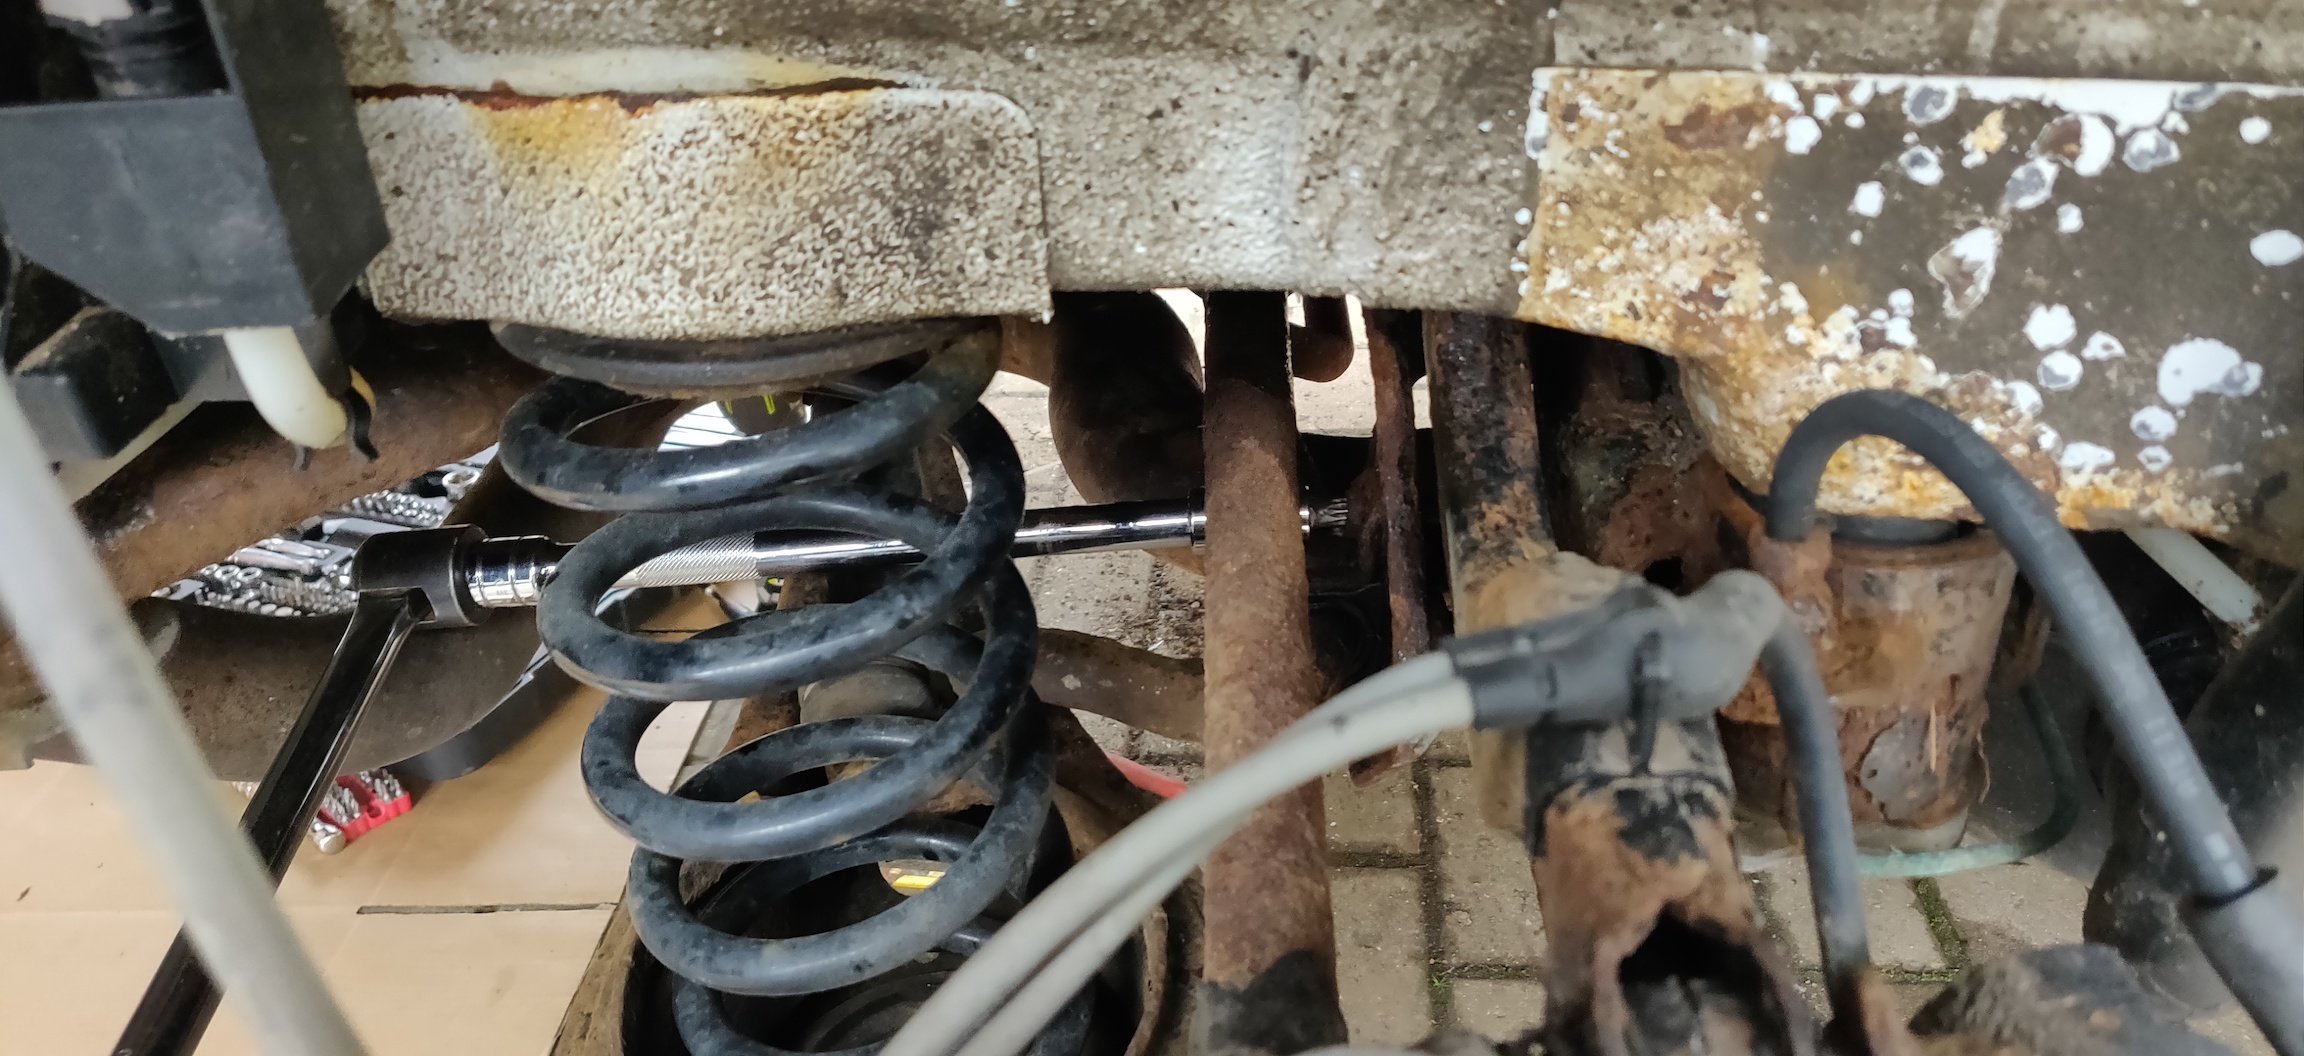
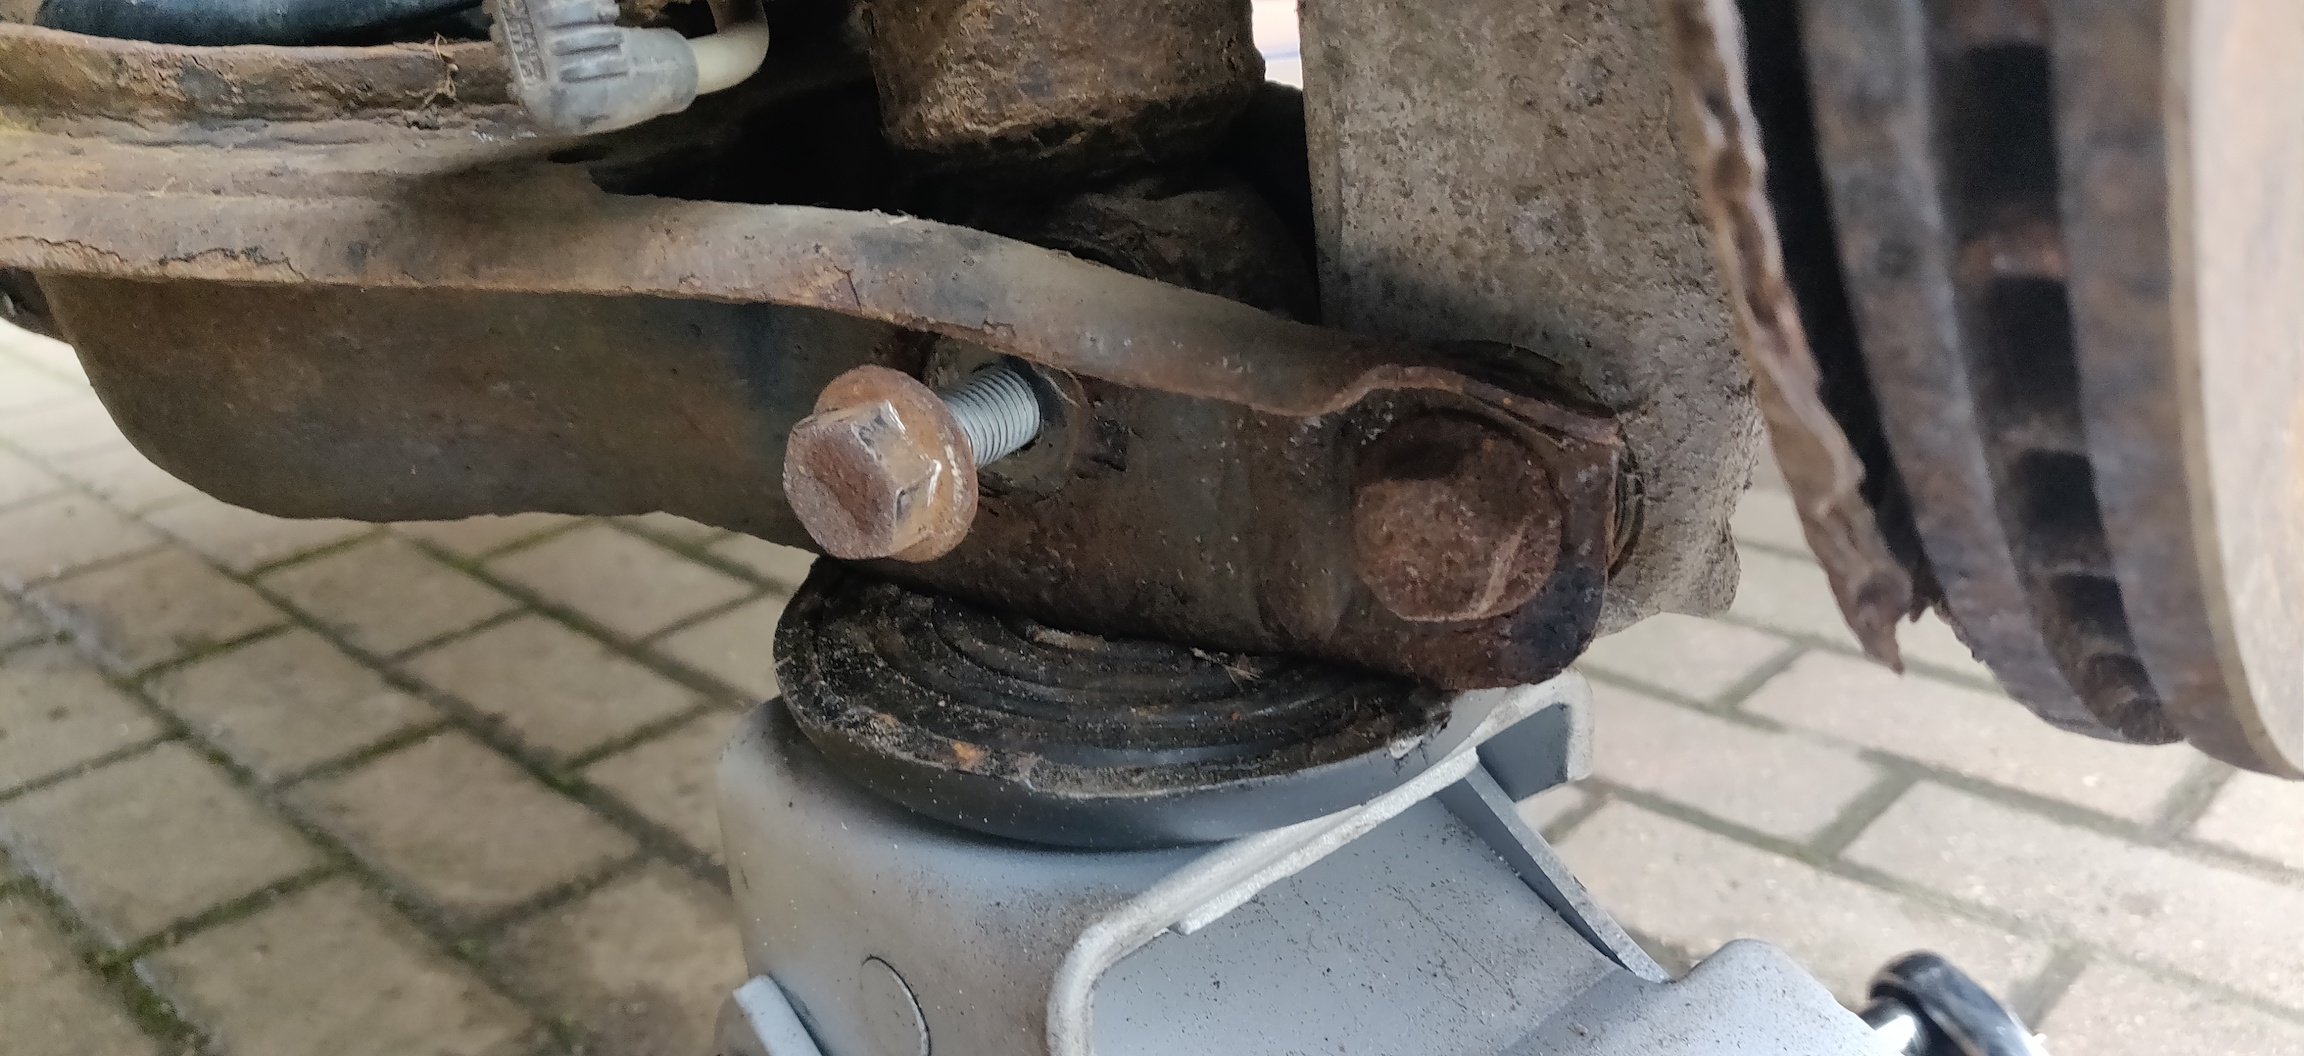
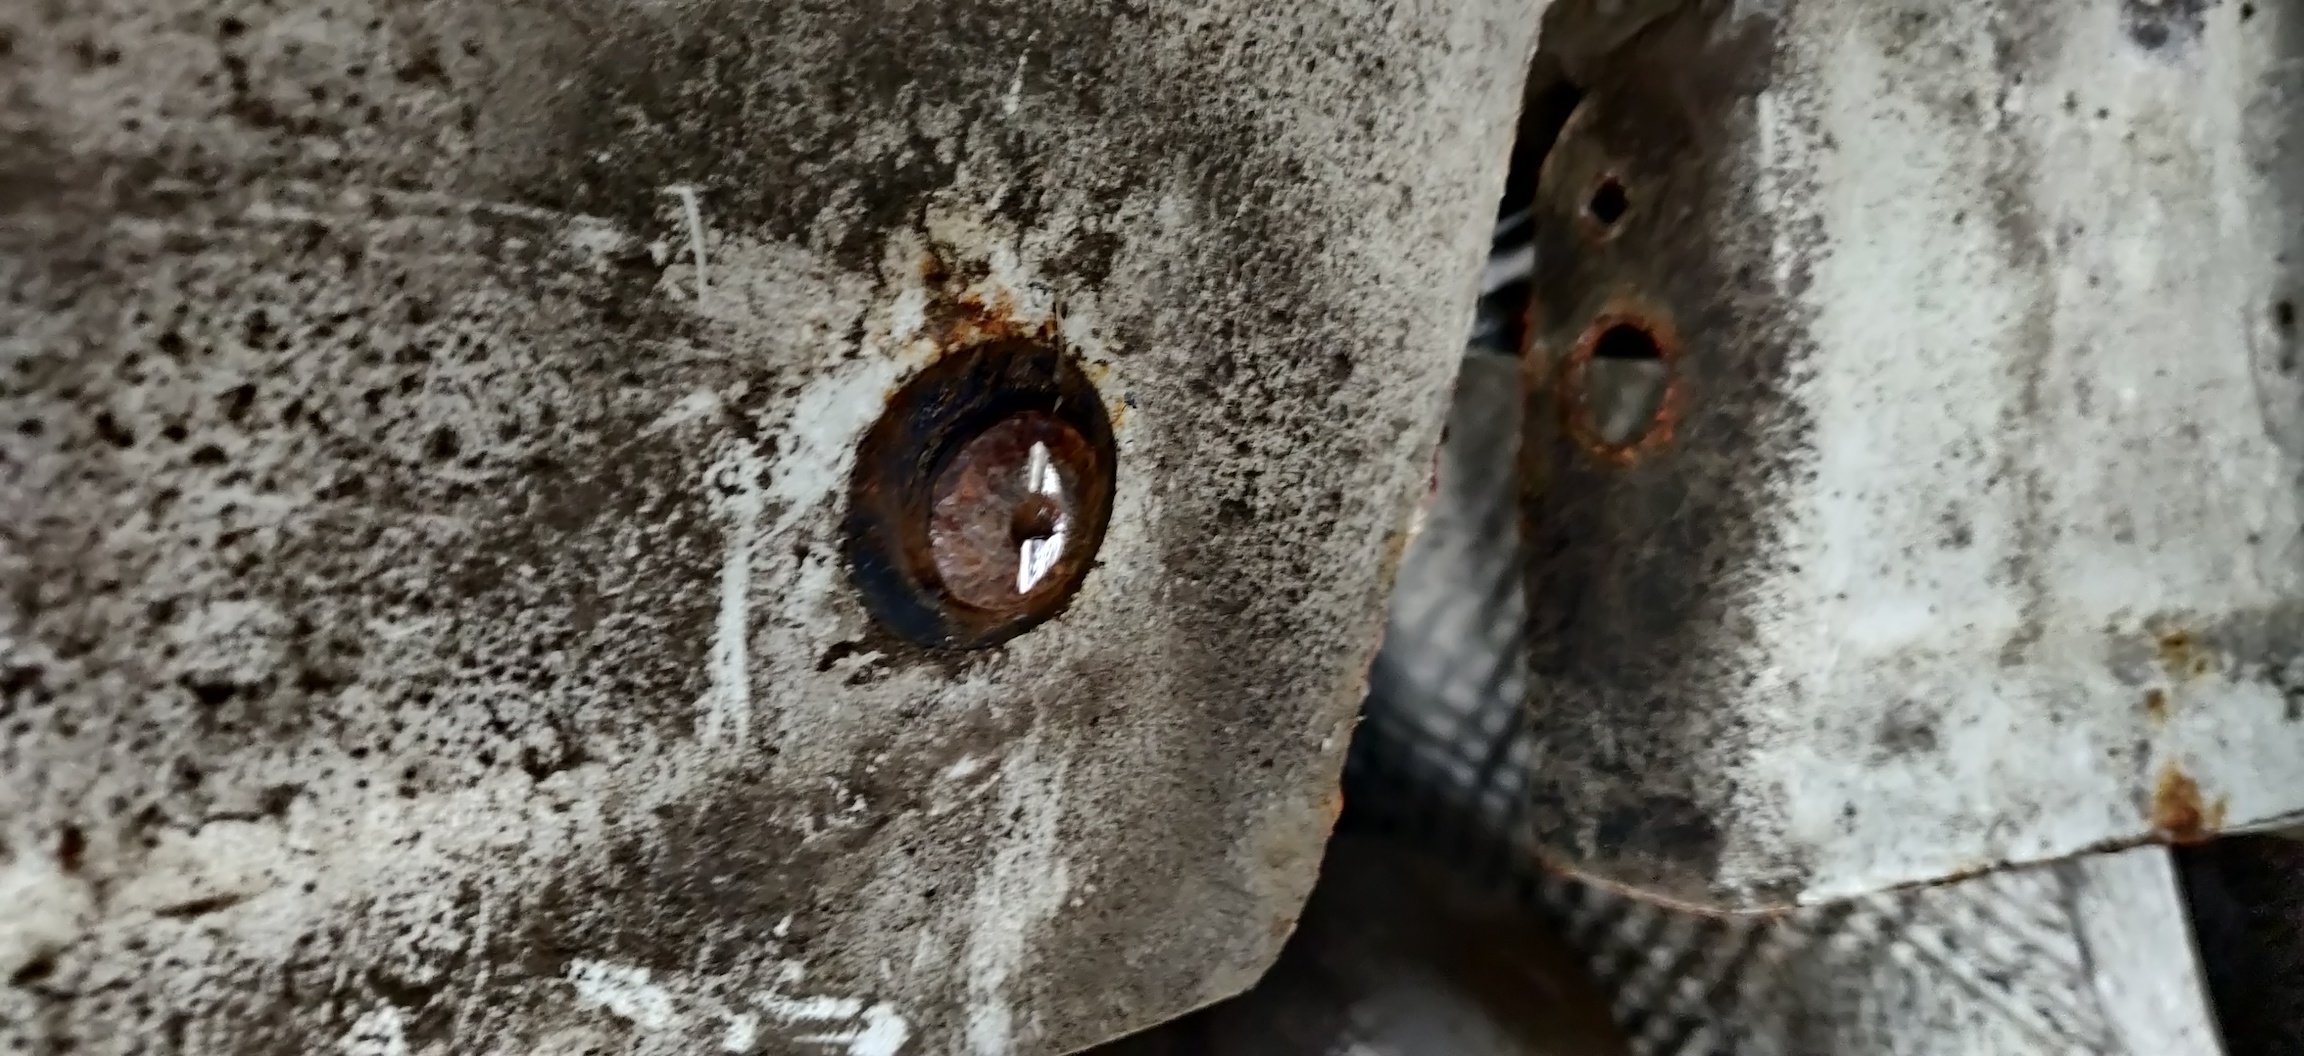
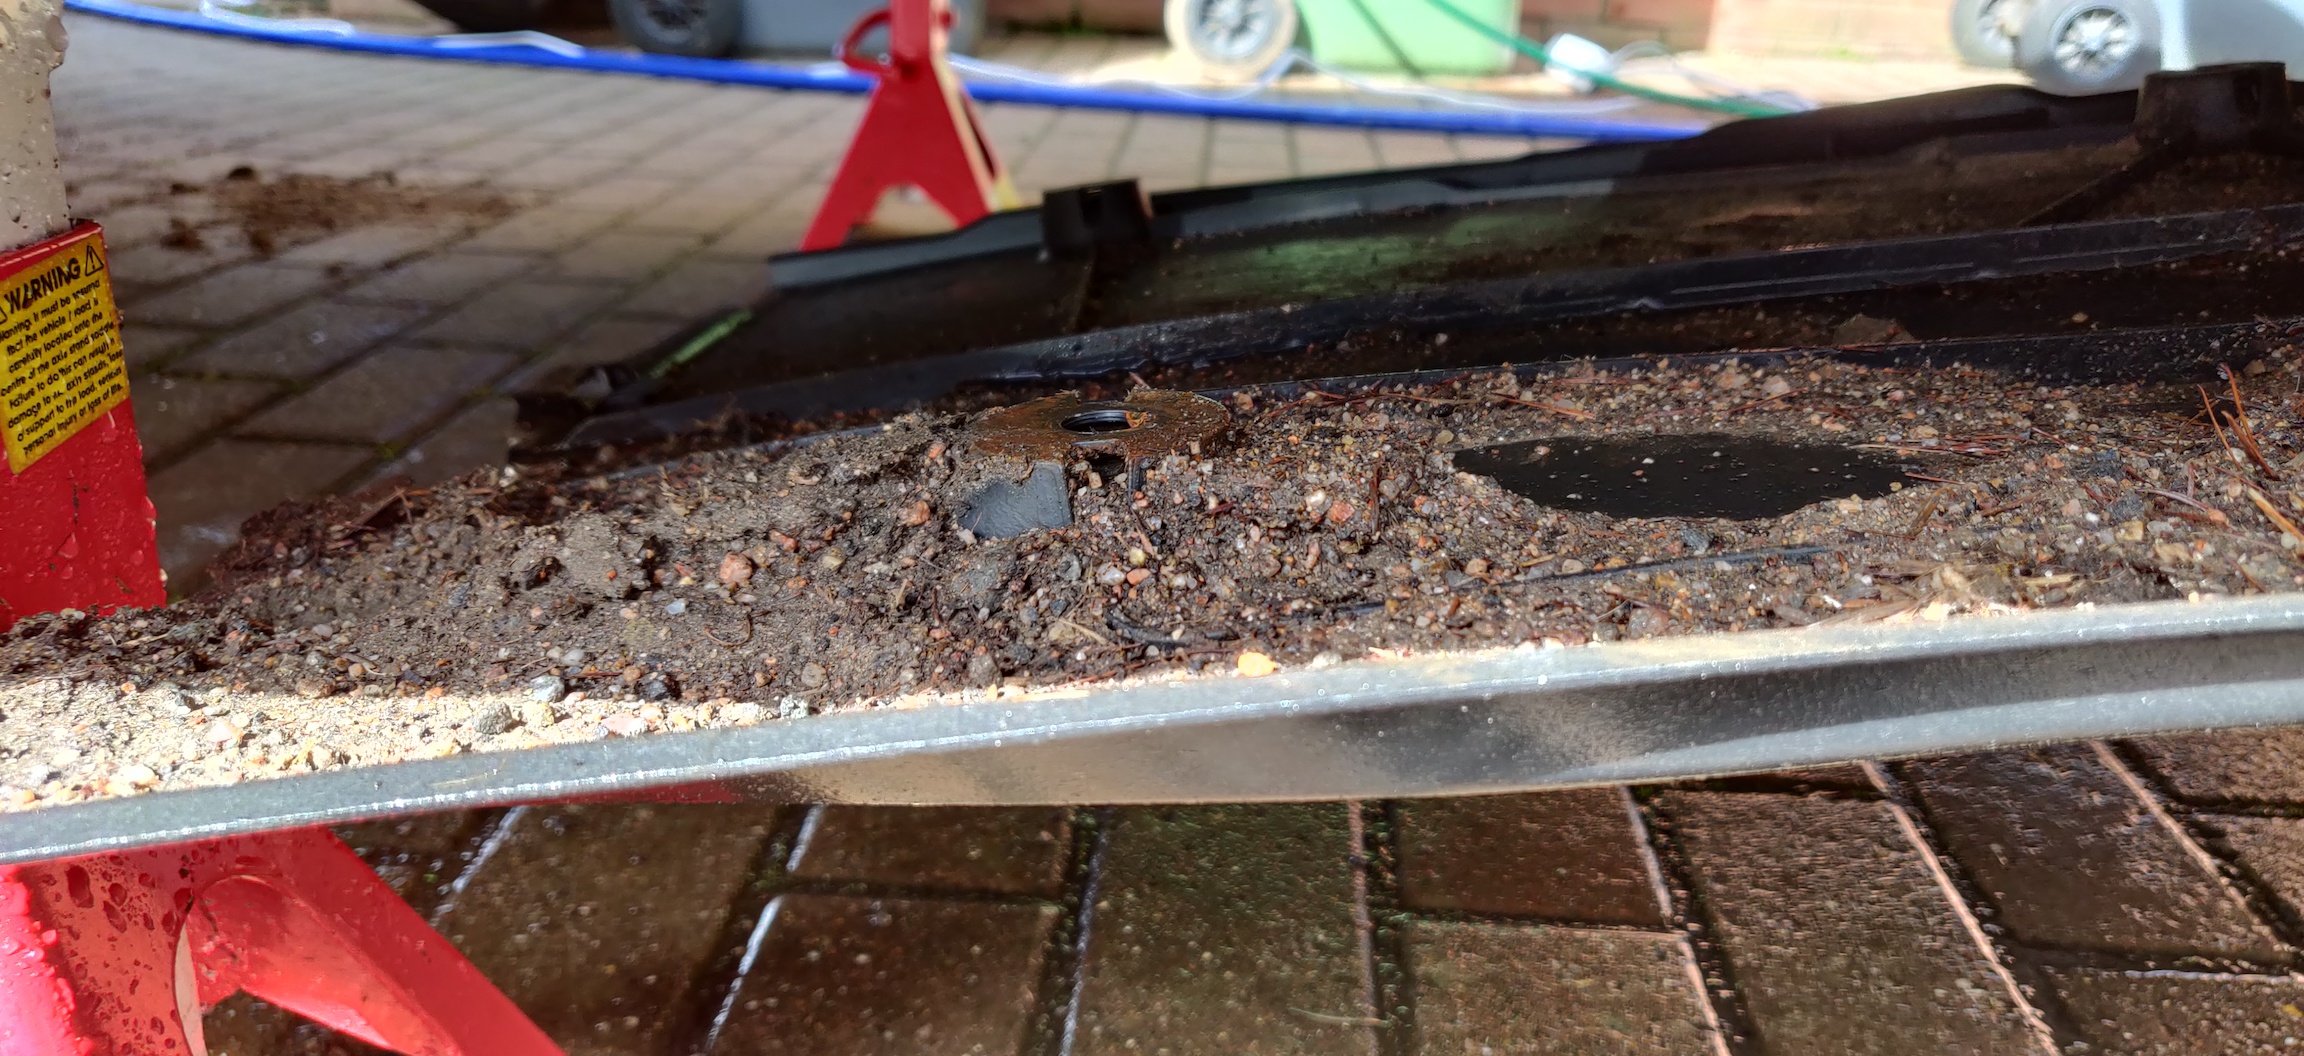
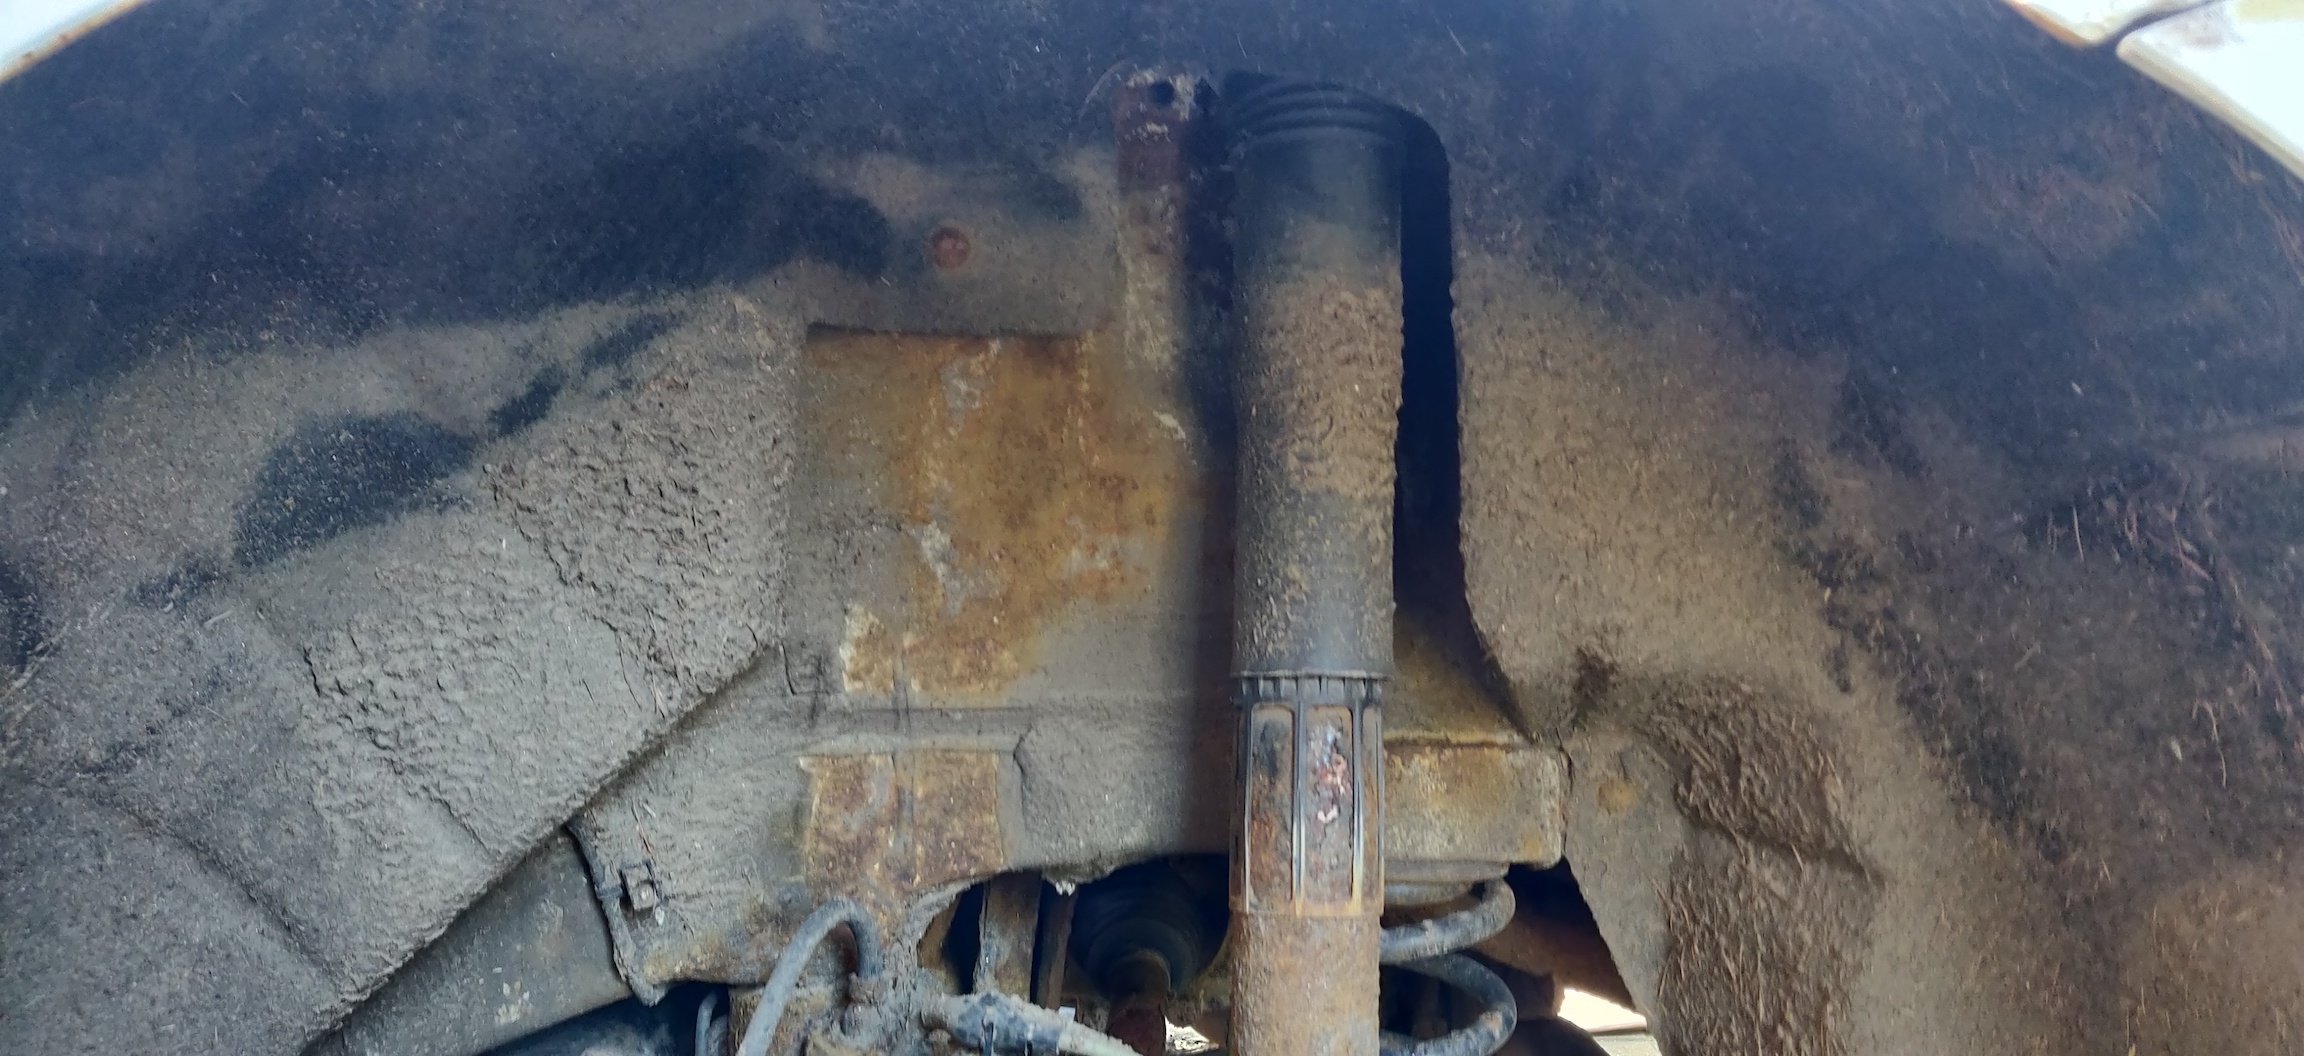
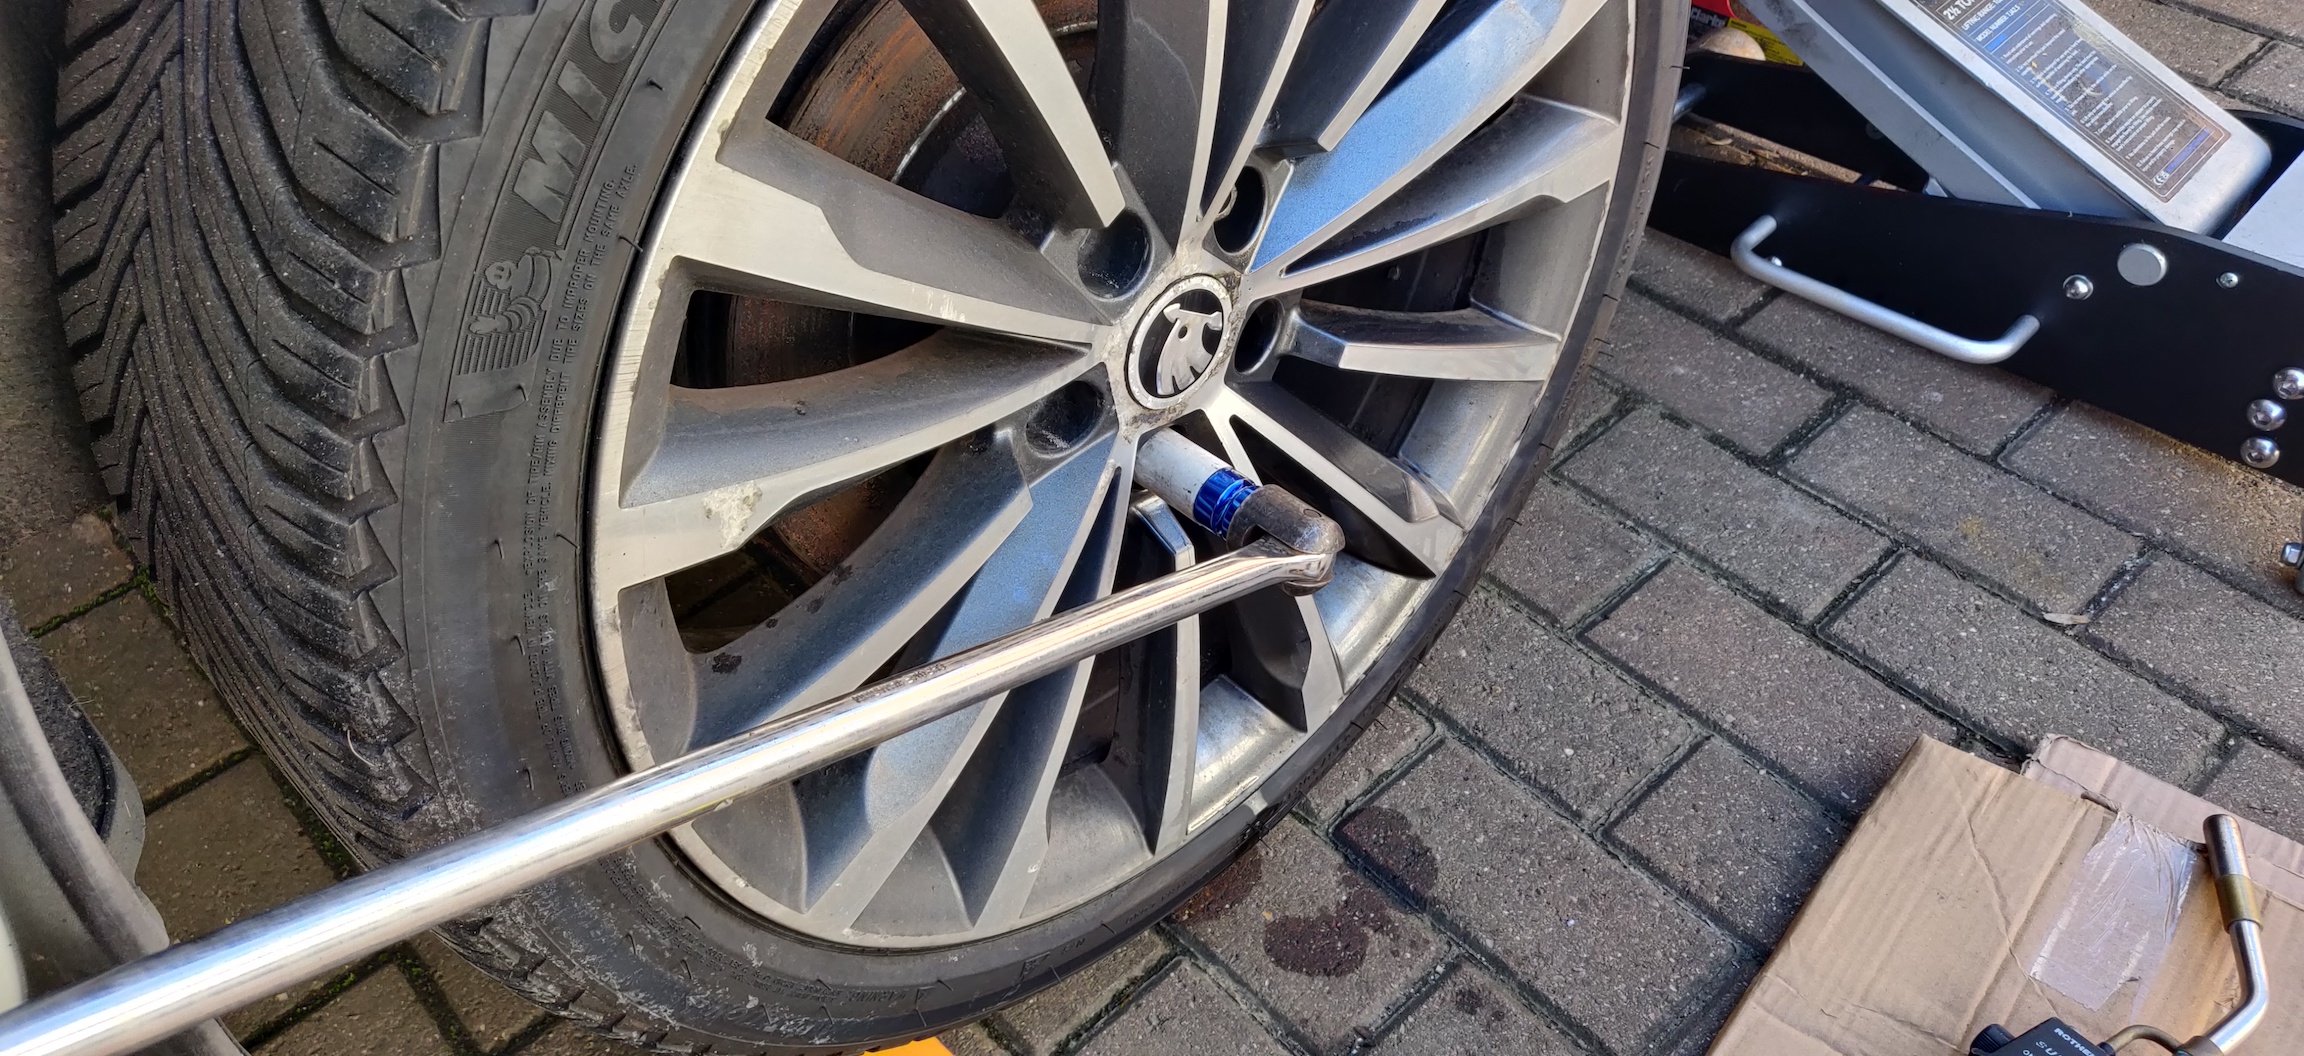
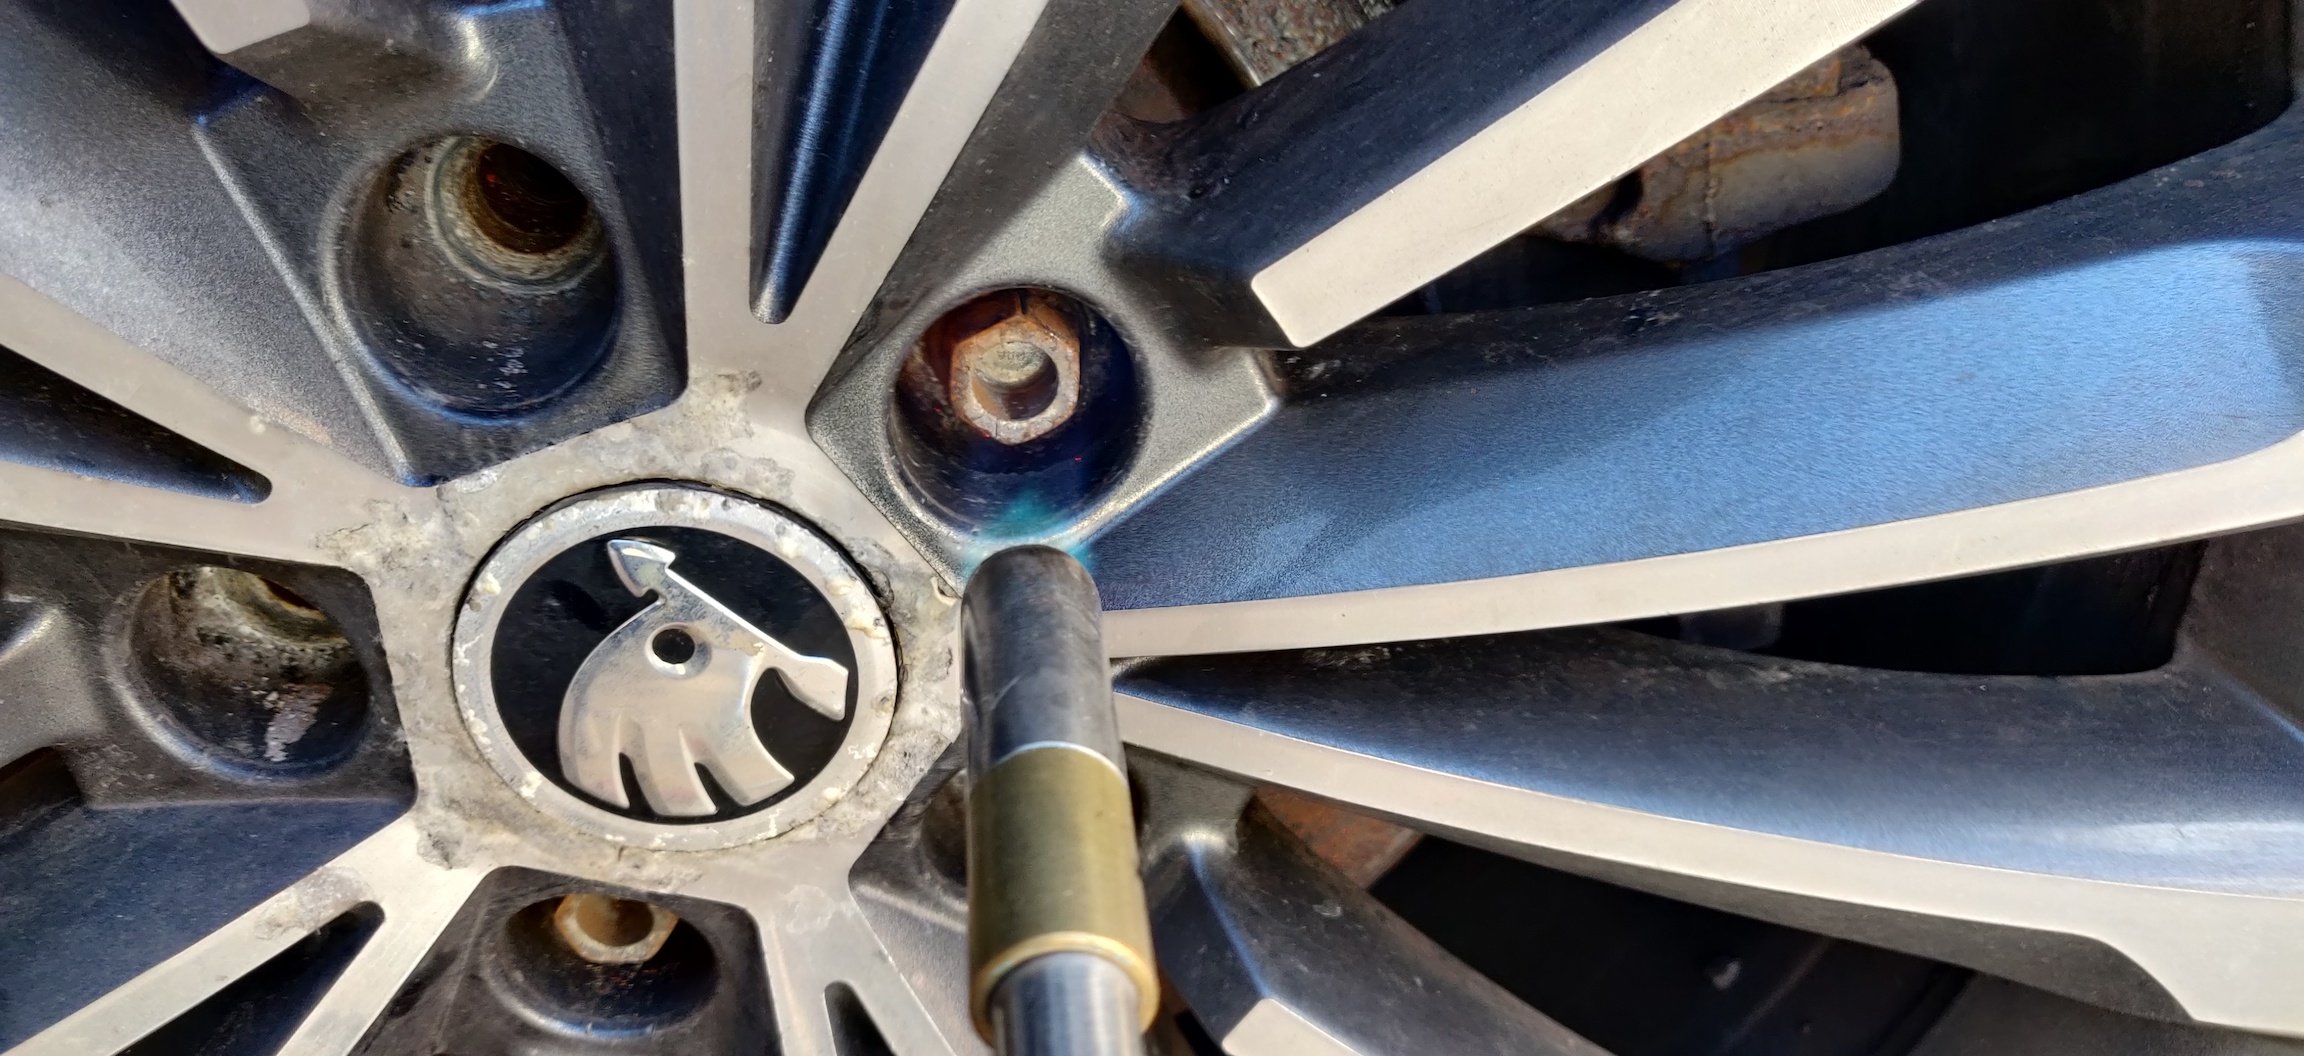
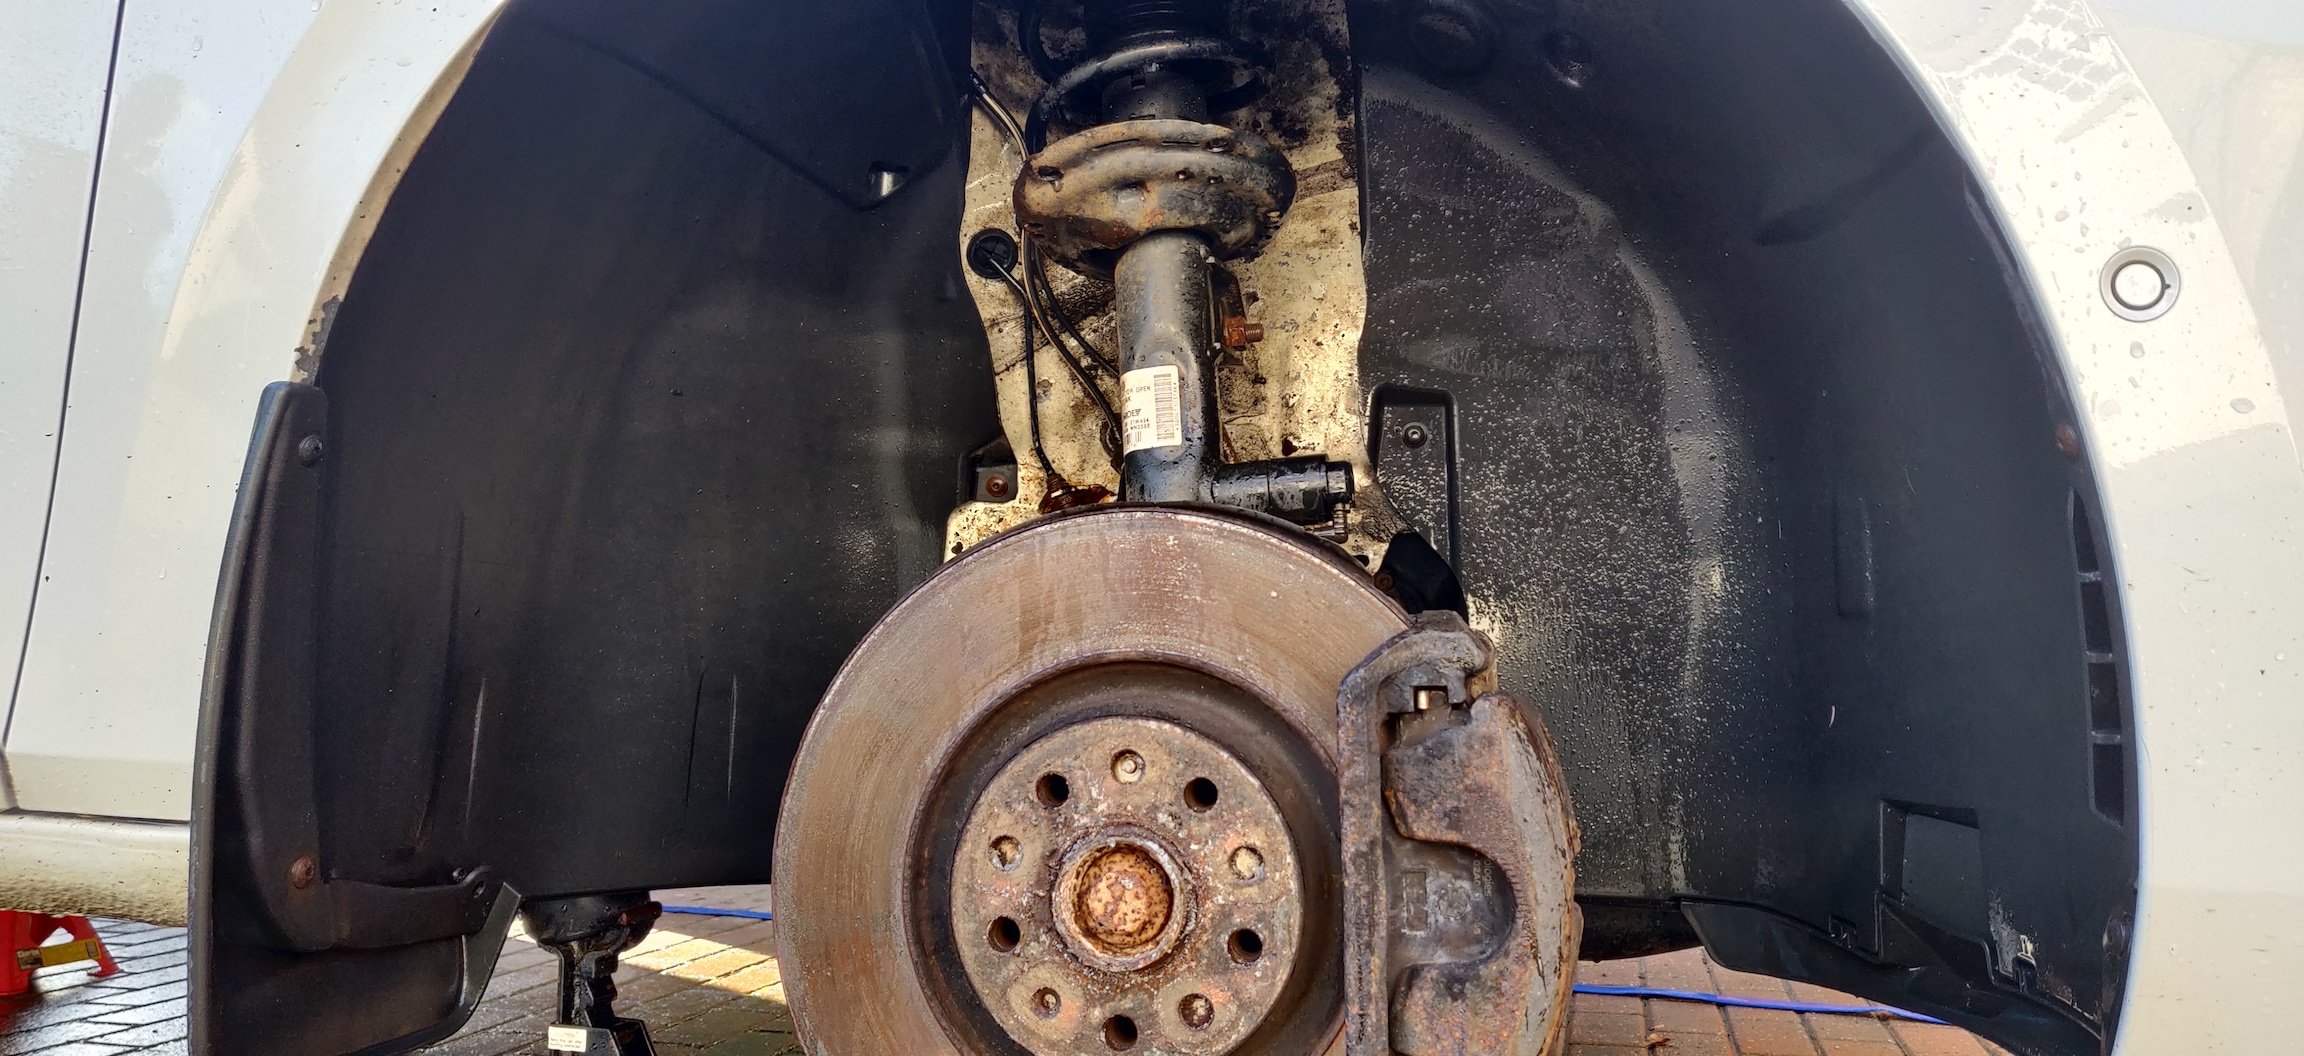
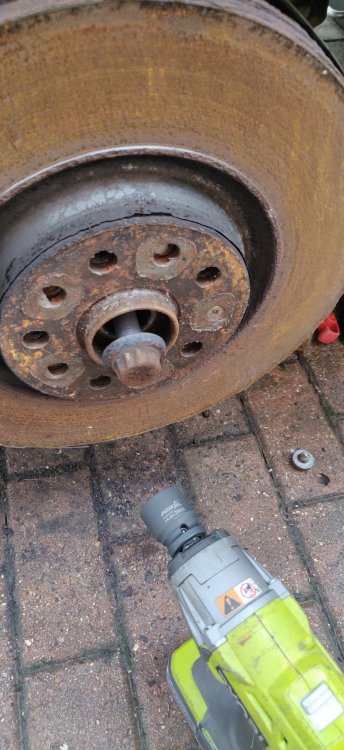
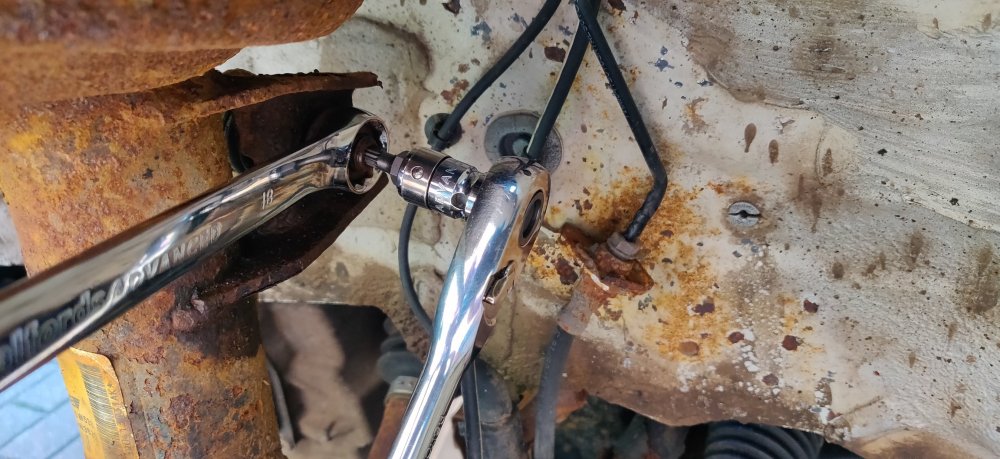
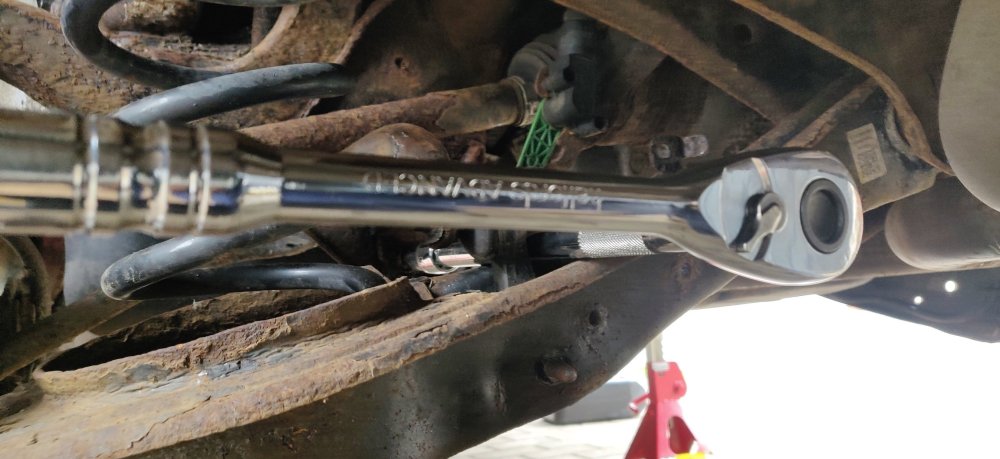
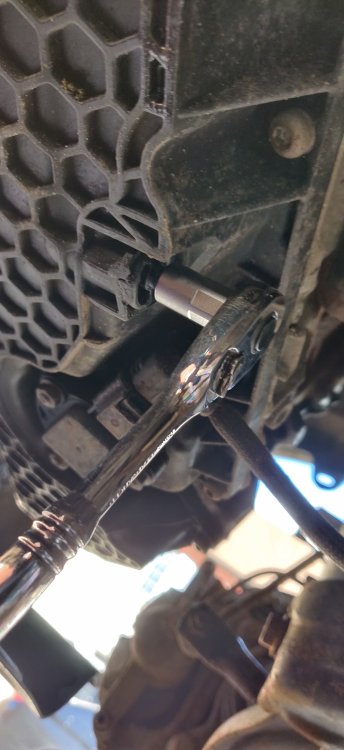
At this stage, got to take the little victories. Some bits arrived today: A 14mm hex socket for the DSG drain bolt, and a 24mm 12 point socket for the driveshafts. Frustratingly, I know I actually have a 14mm hex socket, because it's the same size as used for the Renaultsport Clio 172/182 dephaser bolt. But in typical fashion, it decides to not want to be found in the garage, and I'll probably find it now that a replacement has arrived. It was £4.45 though, so could be worse. The 24mm socket was £8.50, and its more frustrating due to having 30mm, 32mm and 34mm sockets in varying guises in the garage due to every other driveshaft fixing using those sizes. I have decided for the rear anti roll bar to use equivalent size 8.8 bolts. So cross referenced the parts diagrams and ordered up some M8 x 80 bolts, to replace the links to the suspension arm, which is N10 776 501 (technically 85mm long bolts, but honestly, don't think that 5mm will make a difference, he says...). Also some M8 x 30 bolts for the roll bar clamps. Supposed to be N10 765 801 but yeah, don't want to endure using these spline bits if I can help it. It'll depend whether the head of those bolts fit and not foul the clamp in any way I suppose. I also got some M5 x 16 bolts to replace the ones attaching the level sensor to the arm. Supposed to be N10 569 501 but again, already rounded off one of them and only just about lucked out getting that off. I wasn't brave enough to get stainless bolts for the anti roll bar bits, even though I'd argue it's probably the only part of the suspension where it's probably ok, as even if it snaps, nothing is going to fall off (case in point, the actual roll bar snapping on this car). All those came to £18.80, which I reckon would have been similar had I went for the OEM ones. So took that 24mm socket and went out quickly to have a look: Just looking at it was giving me bad vibes. I went at it with the wire brush to quickly scrape off the easy bits, and proceeded to get the socket aligned and in place with a few taps of the lump hammer. The impact wrench looked like it was struggling again, akin to the other times when the poor thing couldn't budge things. However, I noticed the labelling on the socket just rotate ever so slightly a fraction of a millimetre at a time, so after half a minute of impacting: It came free. Absolutely relieved. The other side had a similar story: It was stuck for about 15 seconds but then immediately spun out with more oomph than the other side. The workshop manual stresses that you can damage the wheel bearings if the weight of the car is on the suspension without this bolt tightened up. I presume because the driveshaft and wheel bearing need to be clamped in place quite tight to keep it centralised or something. Car won't be on its wheels for ages yet, so no rush to source replacement bolts. Back to work, so not sure whether the driveshafts are seized into the bearing at the moment. I suspect yes. Maintenance: £1860.30 (+£18.80) Upgrades: £1020.69 Miscellaneous: £644.62 (+£12.95)


-
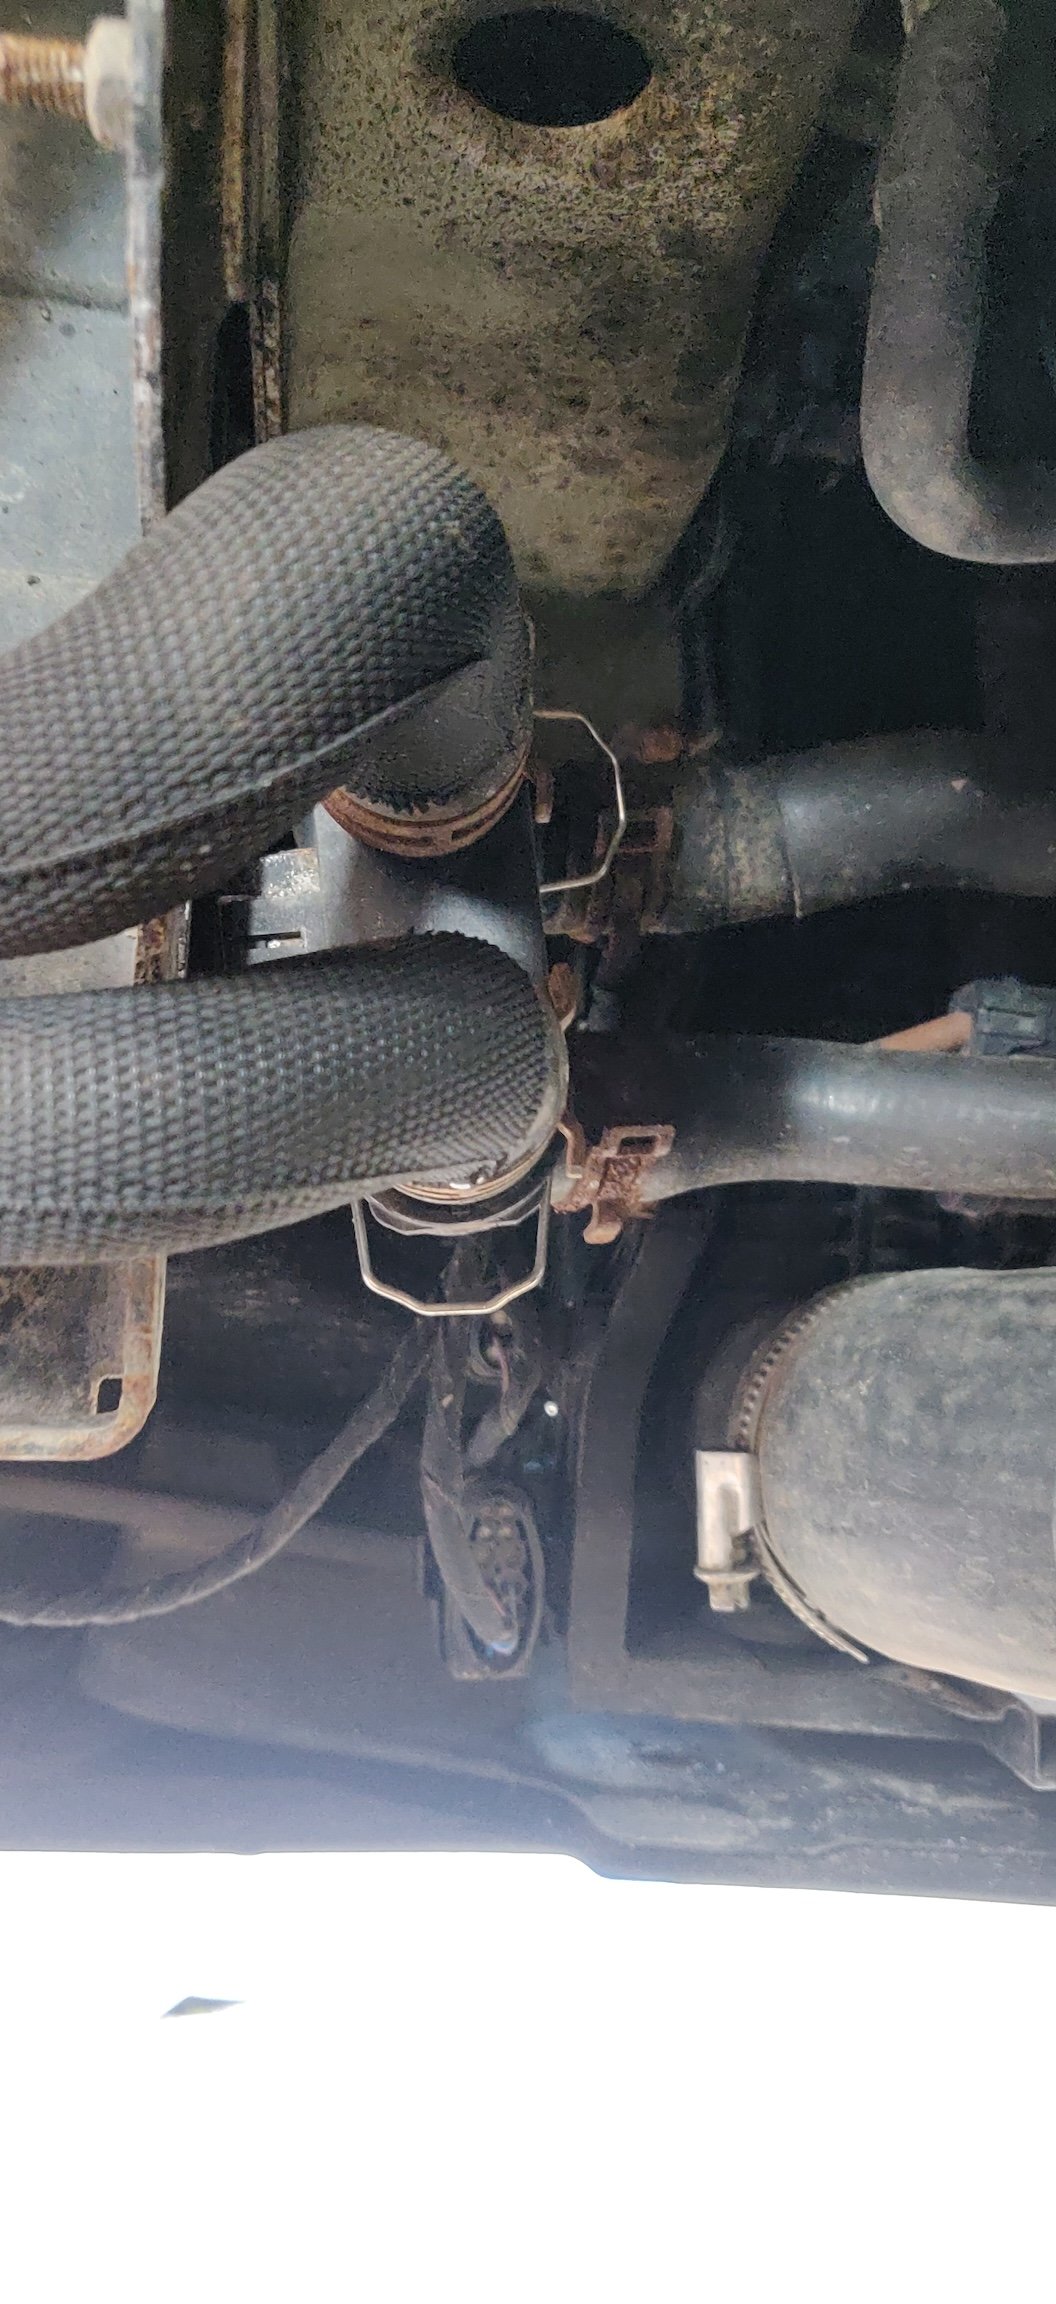
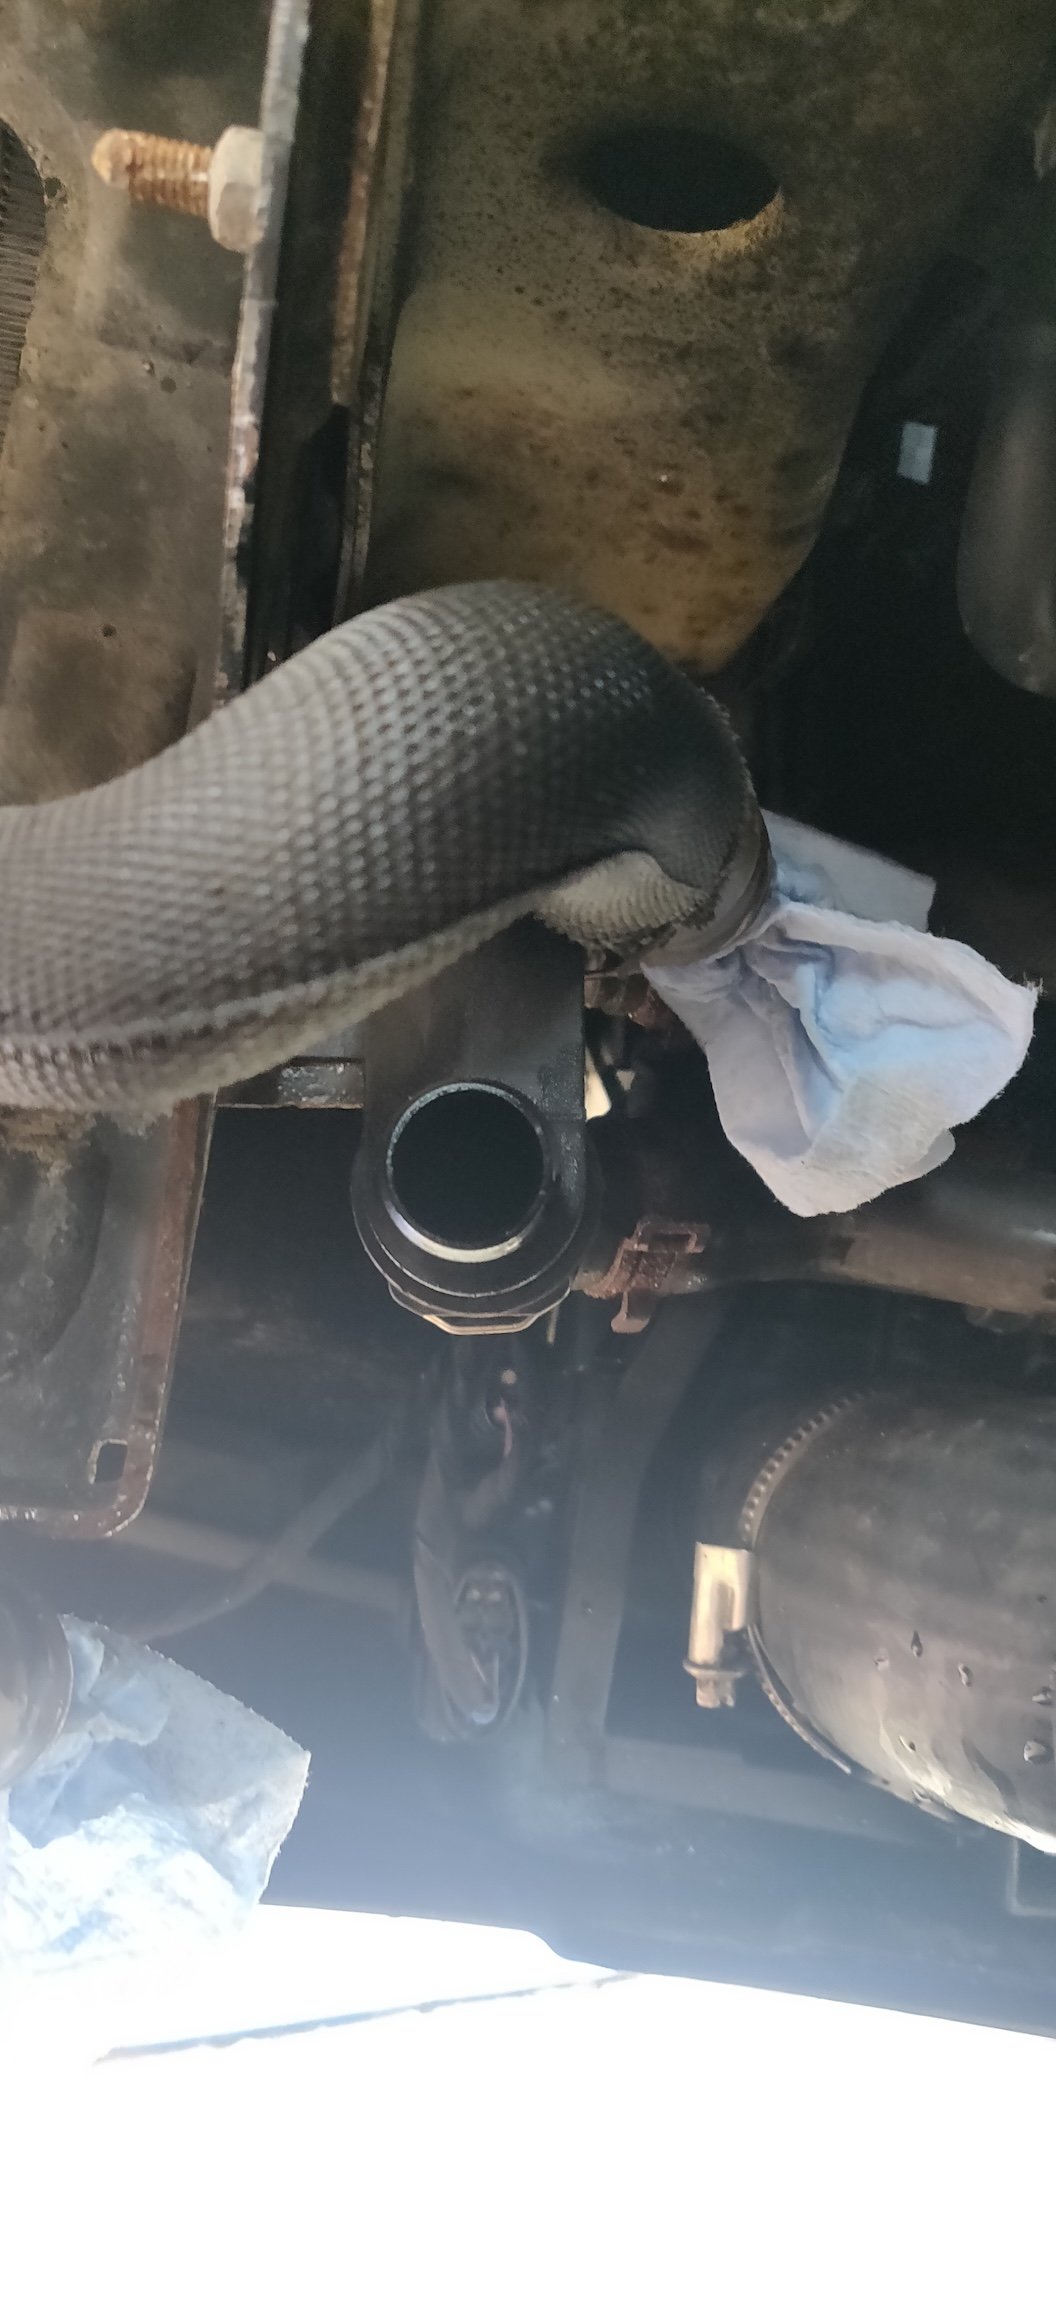
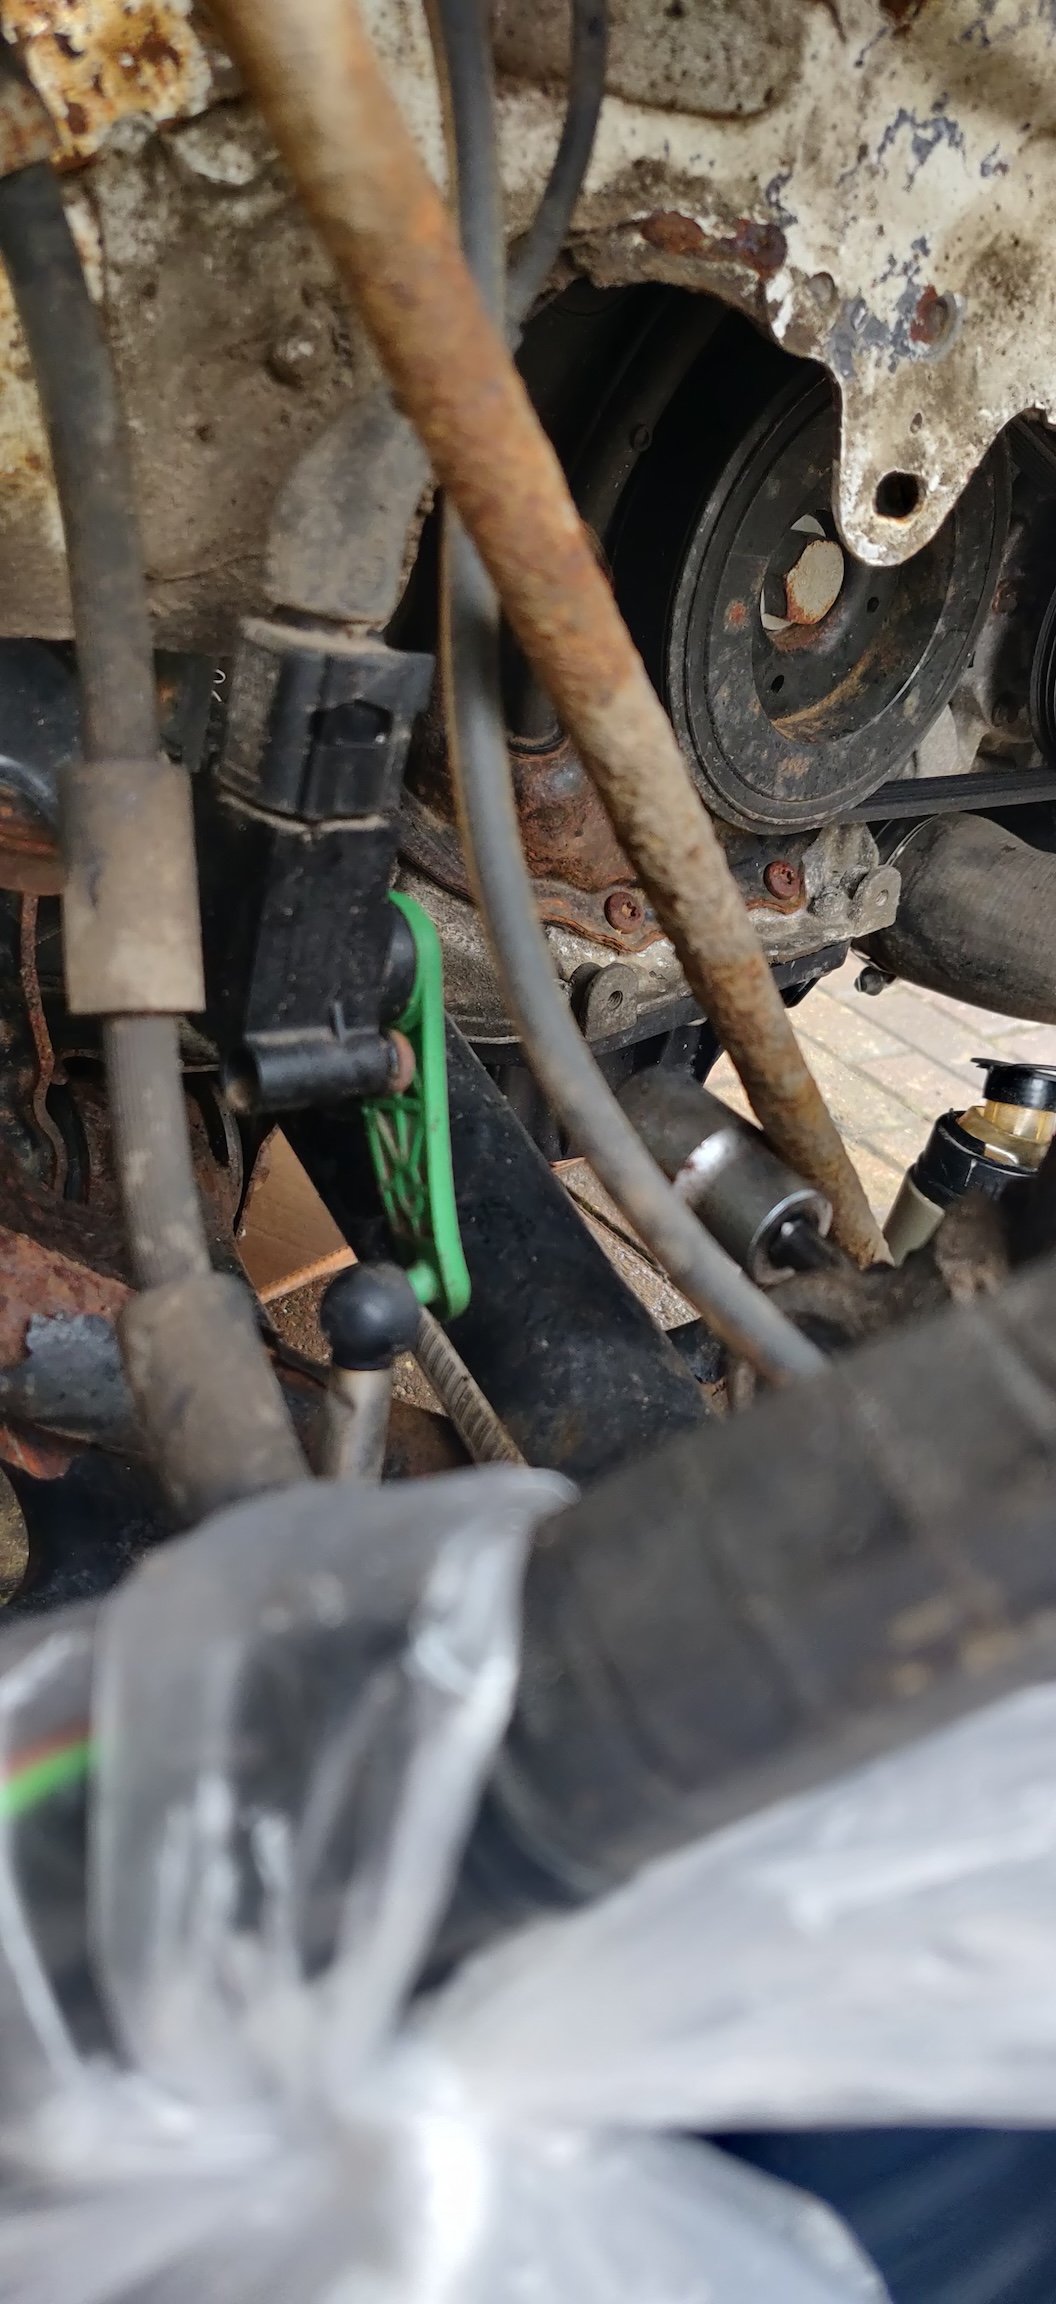
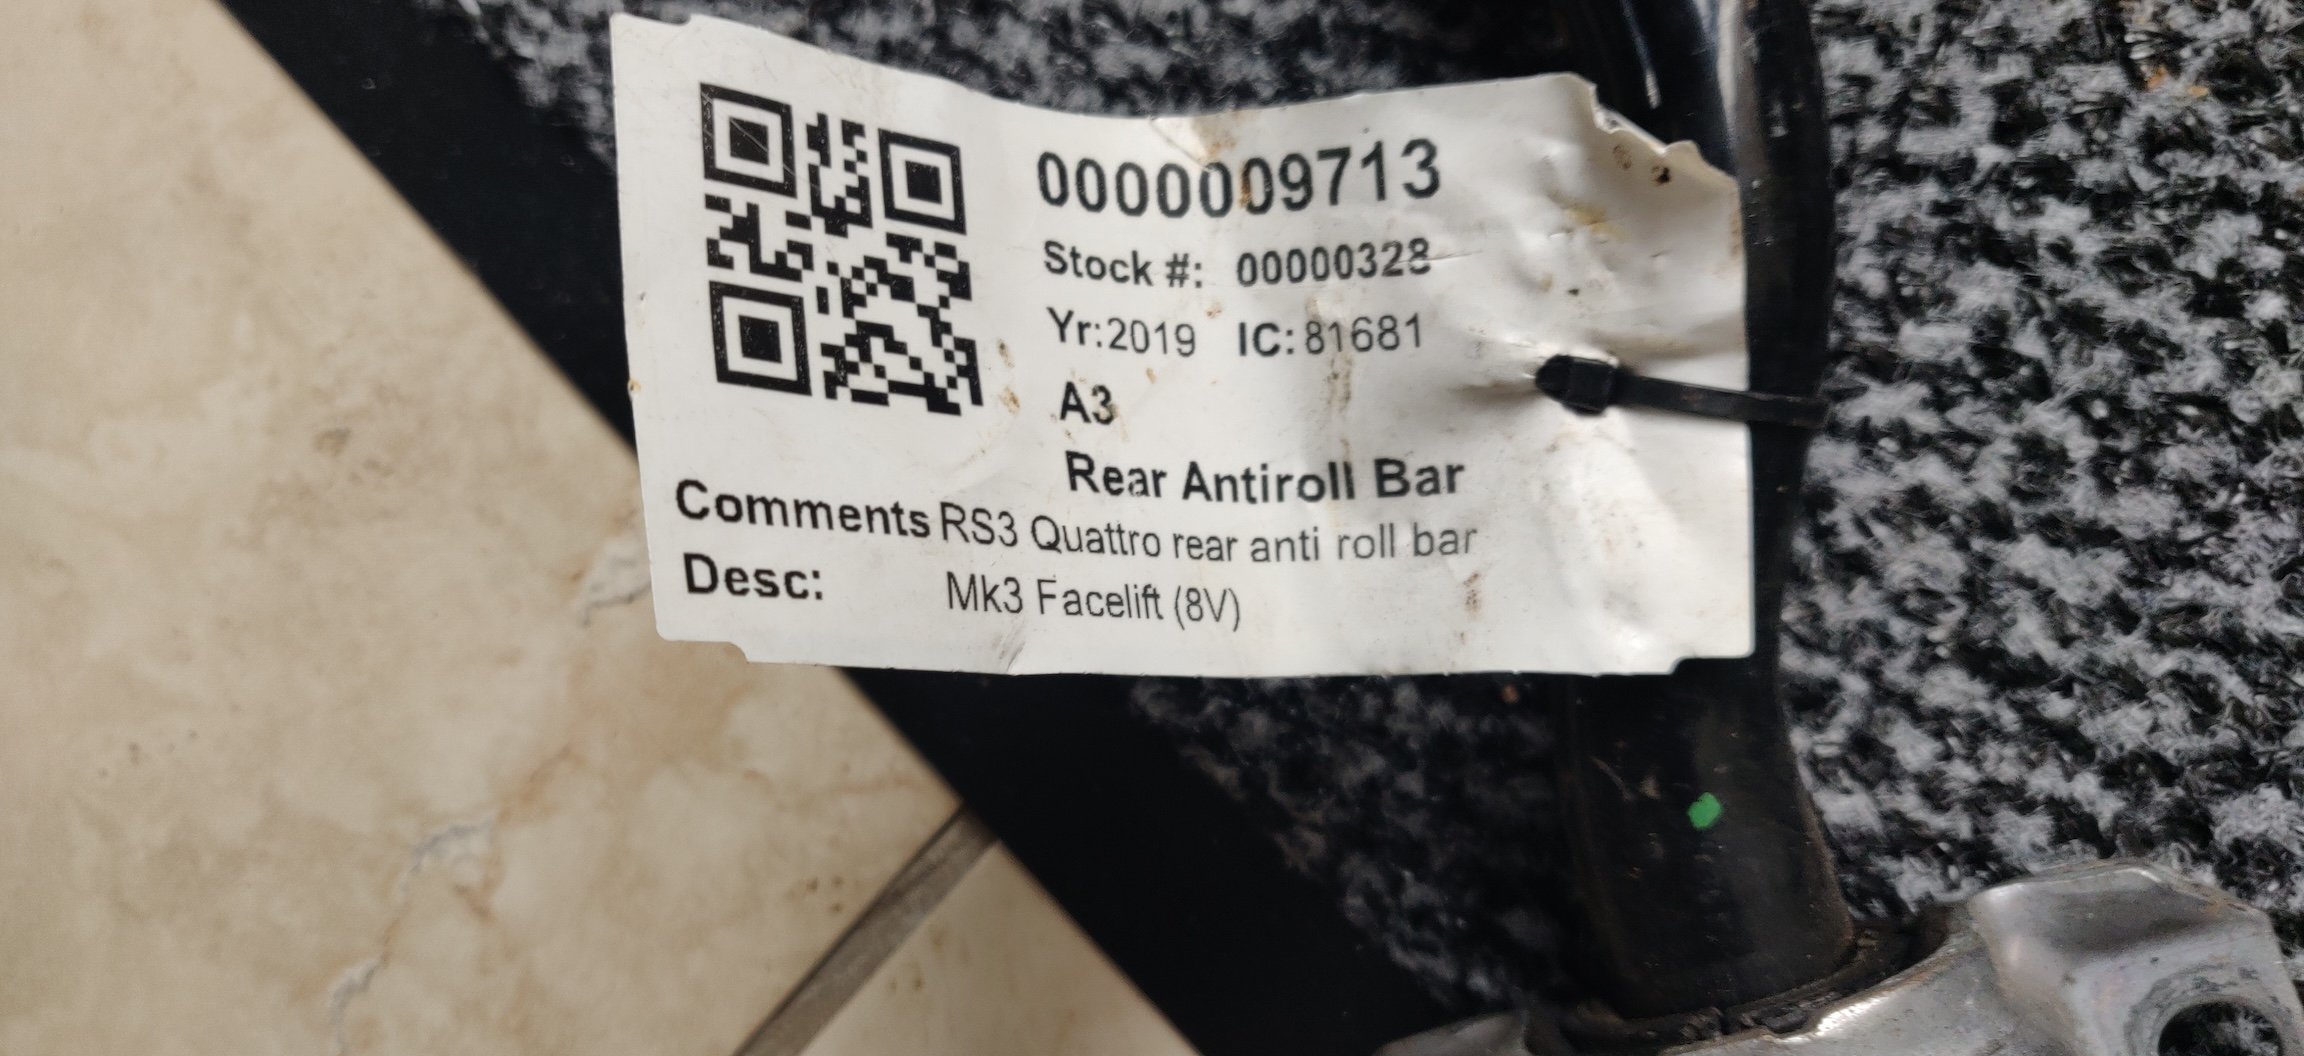
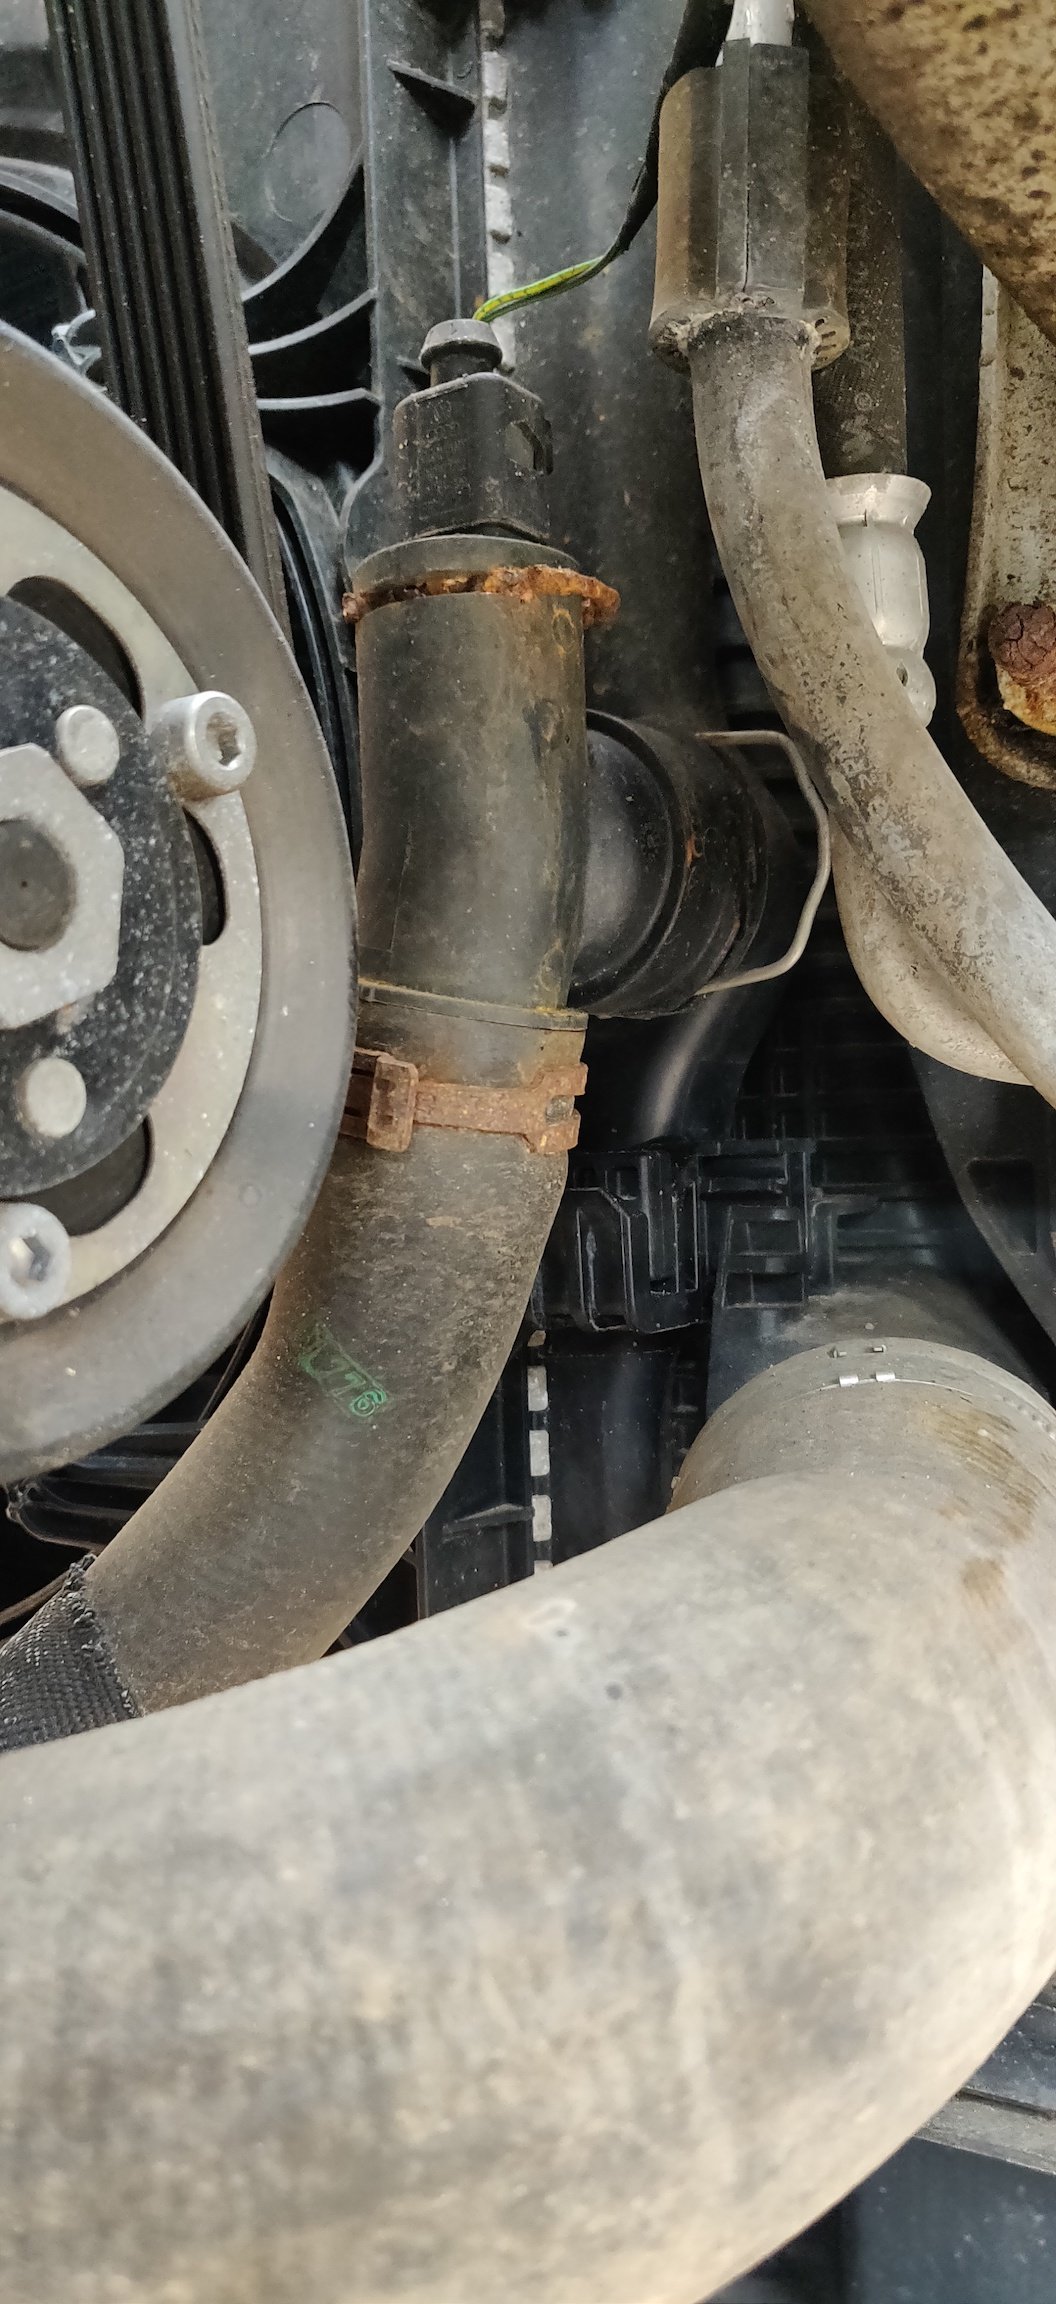
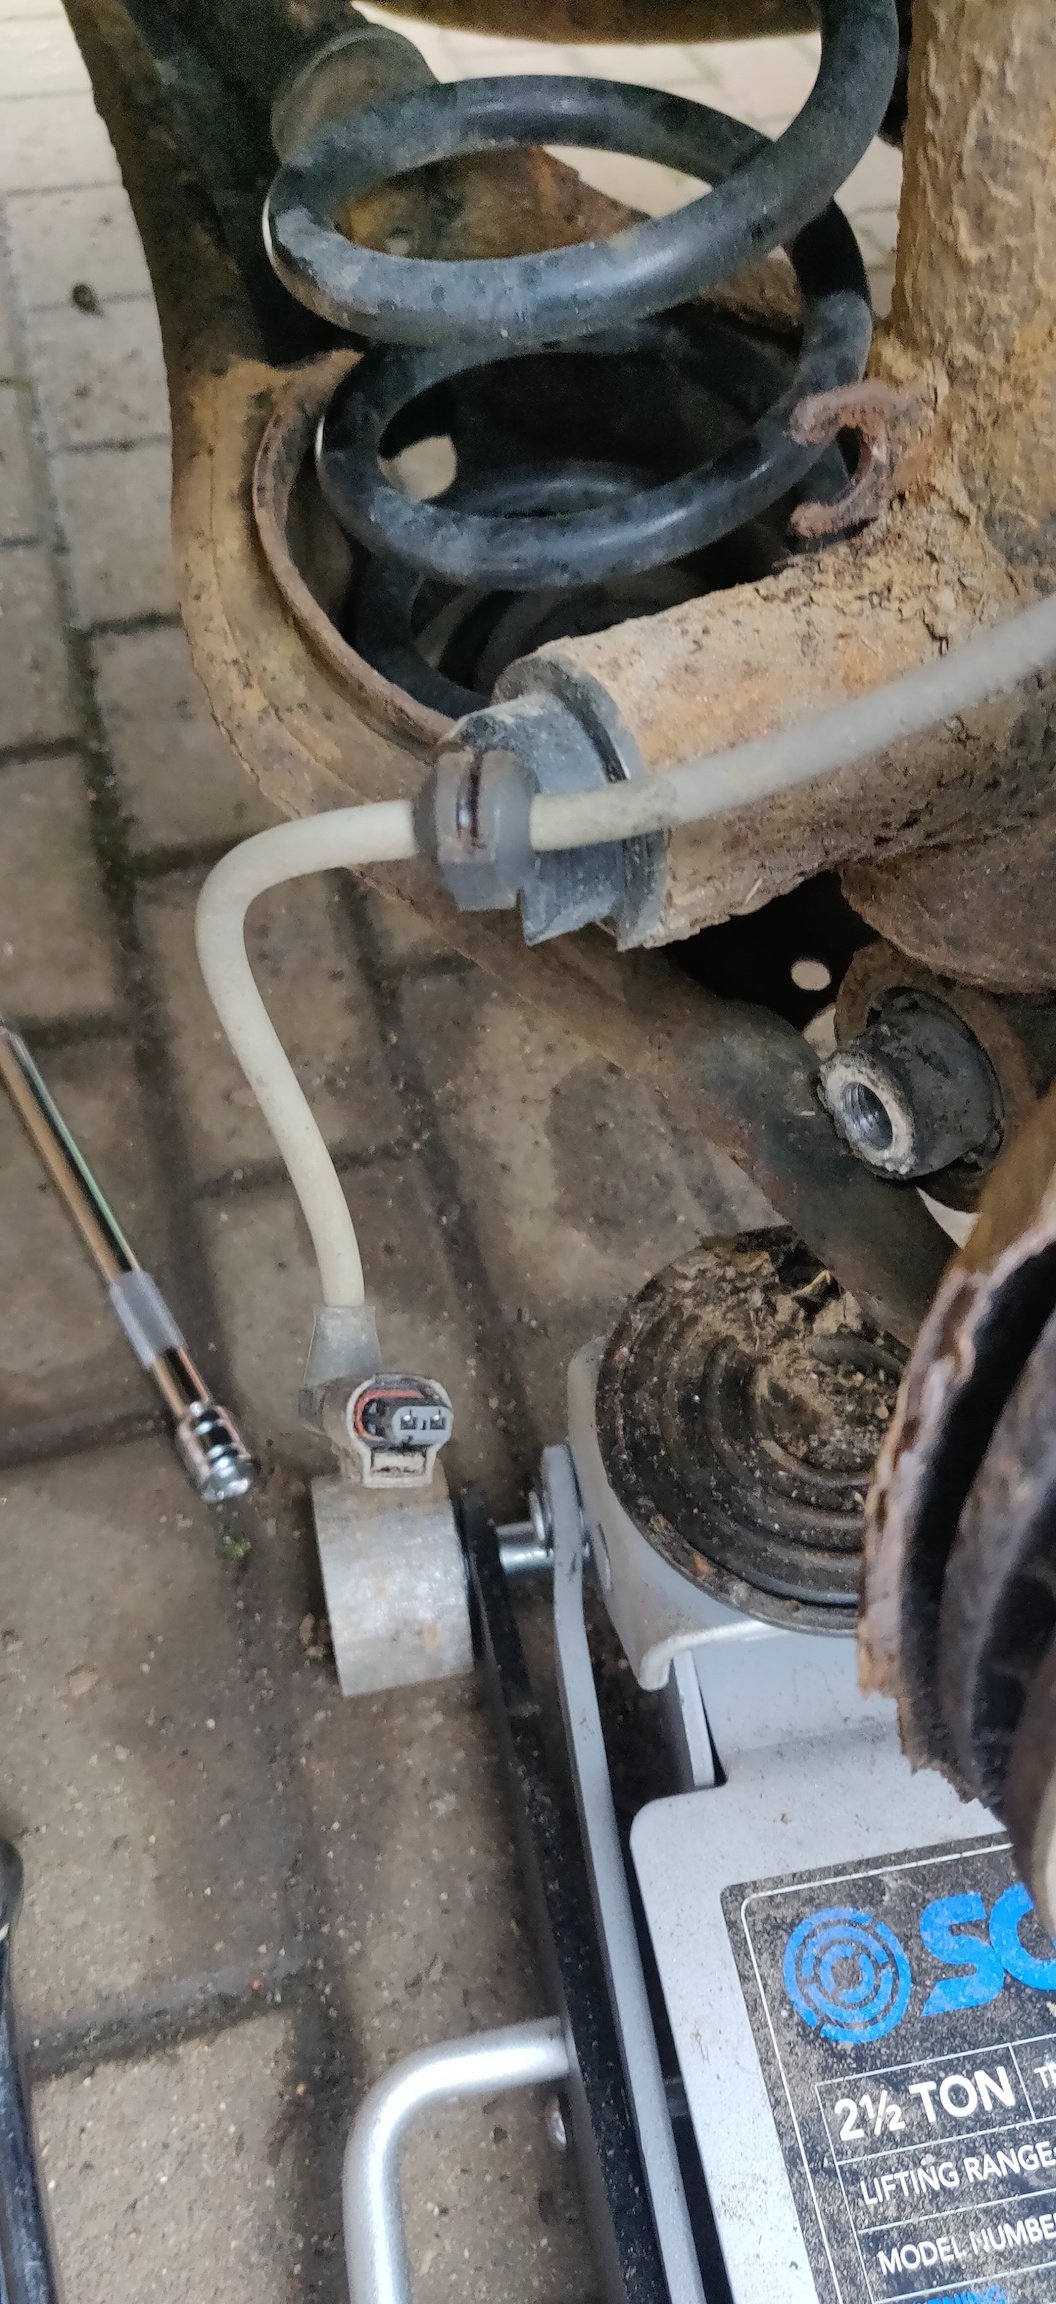
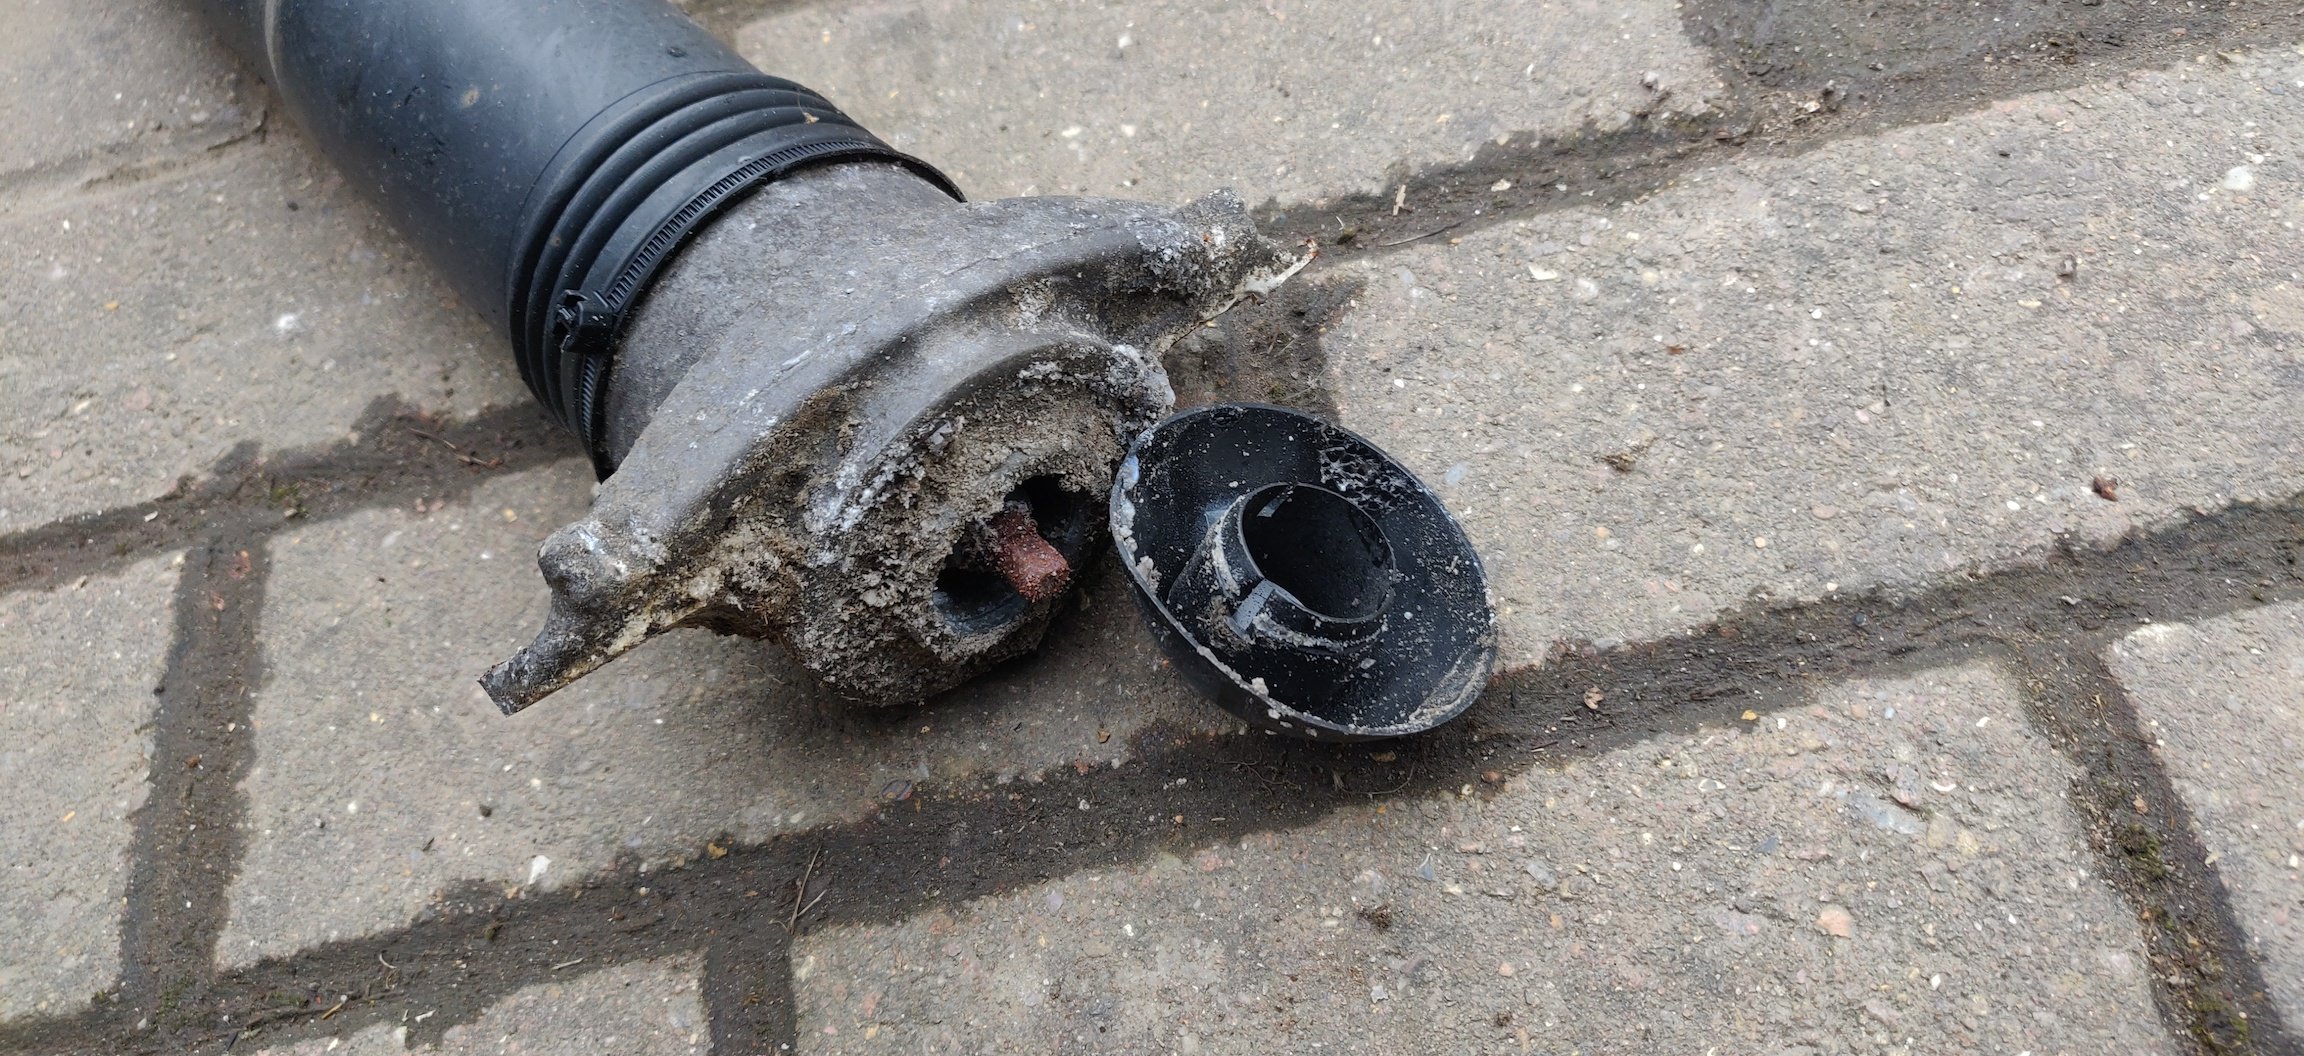
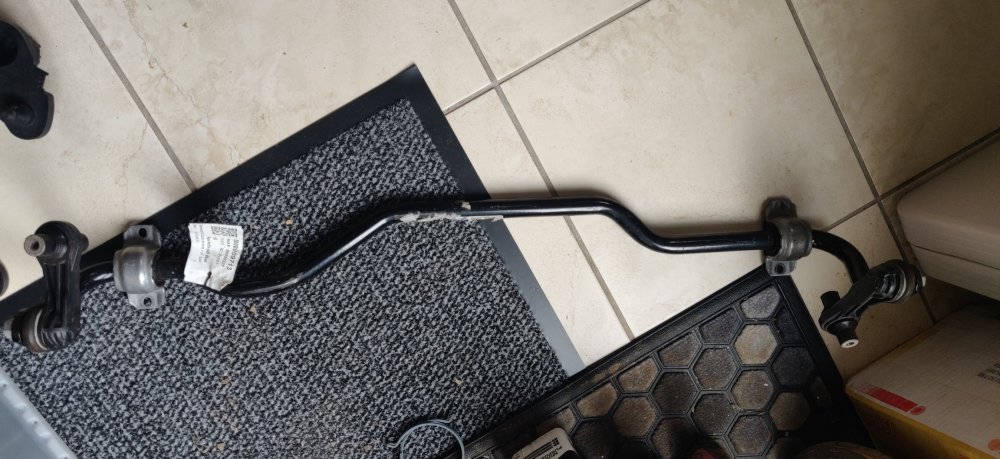
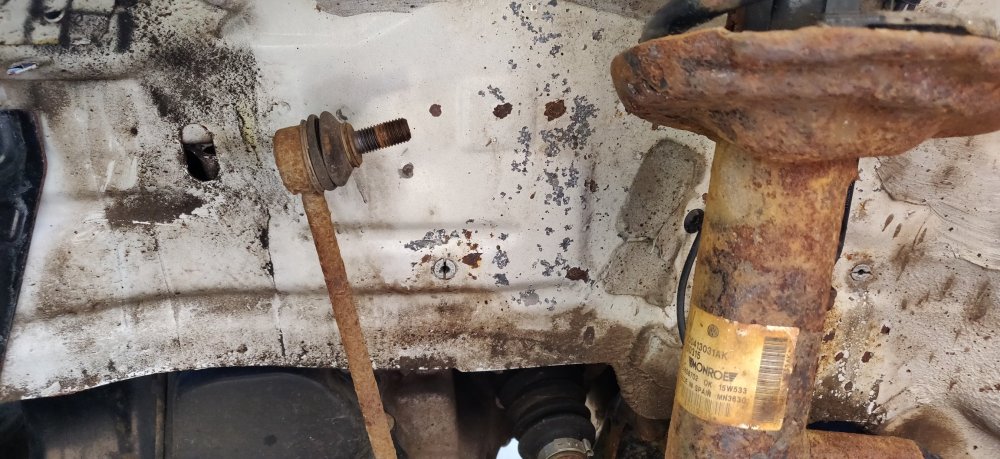
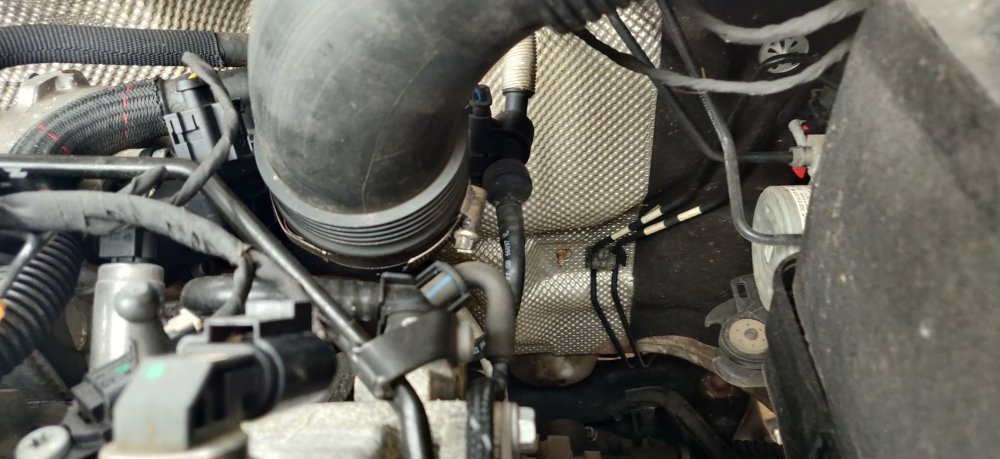
Calmed down a tiny bit and looked at the left side: The workshop manual cites both this and the radiator on the right need undoing, so again, tried it for this side connecting to the additional radiator, undoing the clamps but again not freeing. However, the hose spring clamps were much more accessible: Once the clamp was loosened and wiggled down the hose, took the pliers and squeezed on to the hose and rotated it. What I've normally experienced is that once the hose starts to rotate from its stuck position, it'll then be more easily removed, even if that still entails things like pry bars. So some of the coolant is now out, but I'll need to tackle the main hose. Once I get a spare moment, I'll probably remove the hose which I guess is for the intercooler, to see if that gives my more room to tackle that troublesome hose clamp. I'm super loathed to buy a remote hose clamp tool for this one hose, as I won't be using the tool again (or will I?). I'll probably source some JCS hi grip hoses to replace these, as these will be the ones I'll be using for future coolant drains. I tried to free the right suspension strut: But like an idiot, tried to do this with the hope that'll just come out. Alas, it's one of those cars where it'll need compressing or things disconnected and out of the way. So I'll have to source some driveshaft bolts by the looks of it to disconnect it from the hub. I also rather cackhandedly: I suspect my attempts to lower the hub to try and get the strut out have damaged the level sensor. Completely my fault as these should be undone in the first place. So another thing I may need to source. This arrived today: A rear anti roll bar. According to eBay and the label: From a 2019 Audi RS3? Why not? Hopefully it fits. Normally, what I would have done is taken out the old one and at least visually sized it up, but couldn't really do that. Decided to take a punt on this because: If it's from an Audi RS3 maybe it'll be a bit stiffer, so maybe some handling benefits? Looks in really decent nick, only a few scuffs that could probably just be fine with some Hammerite or whatever. Bushes, clamps and links are attached, so pretty much a straight swap if it fits. It was £35 So as long as it goes in, I think it'll be worthwhile. Maintenance: £1841.50 (+£35.00) Upgrades: £1020.69 Miscellaneous: £631.67


-
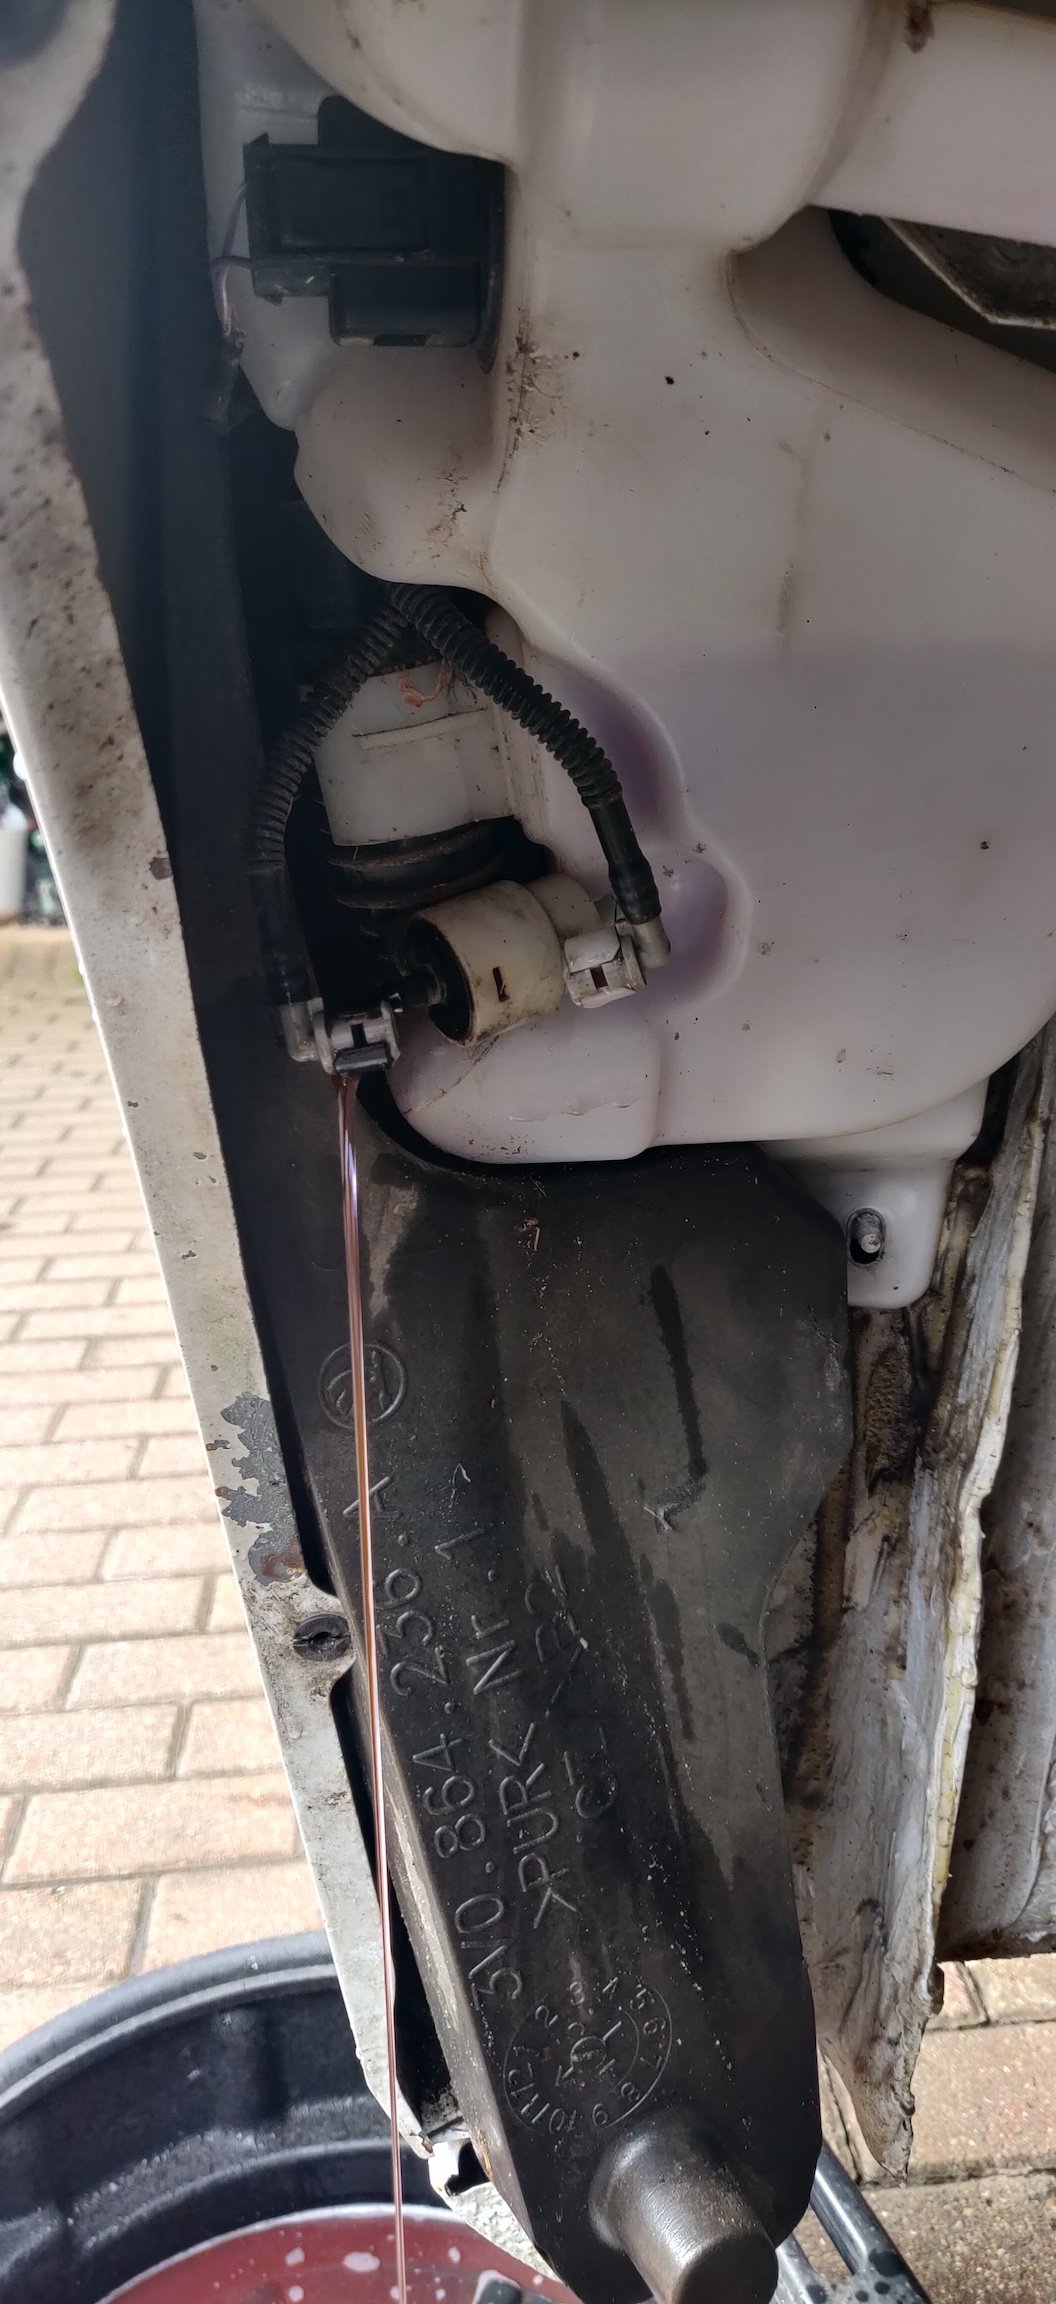
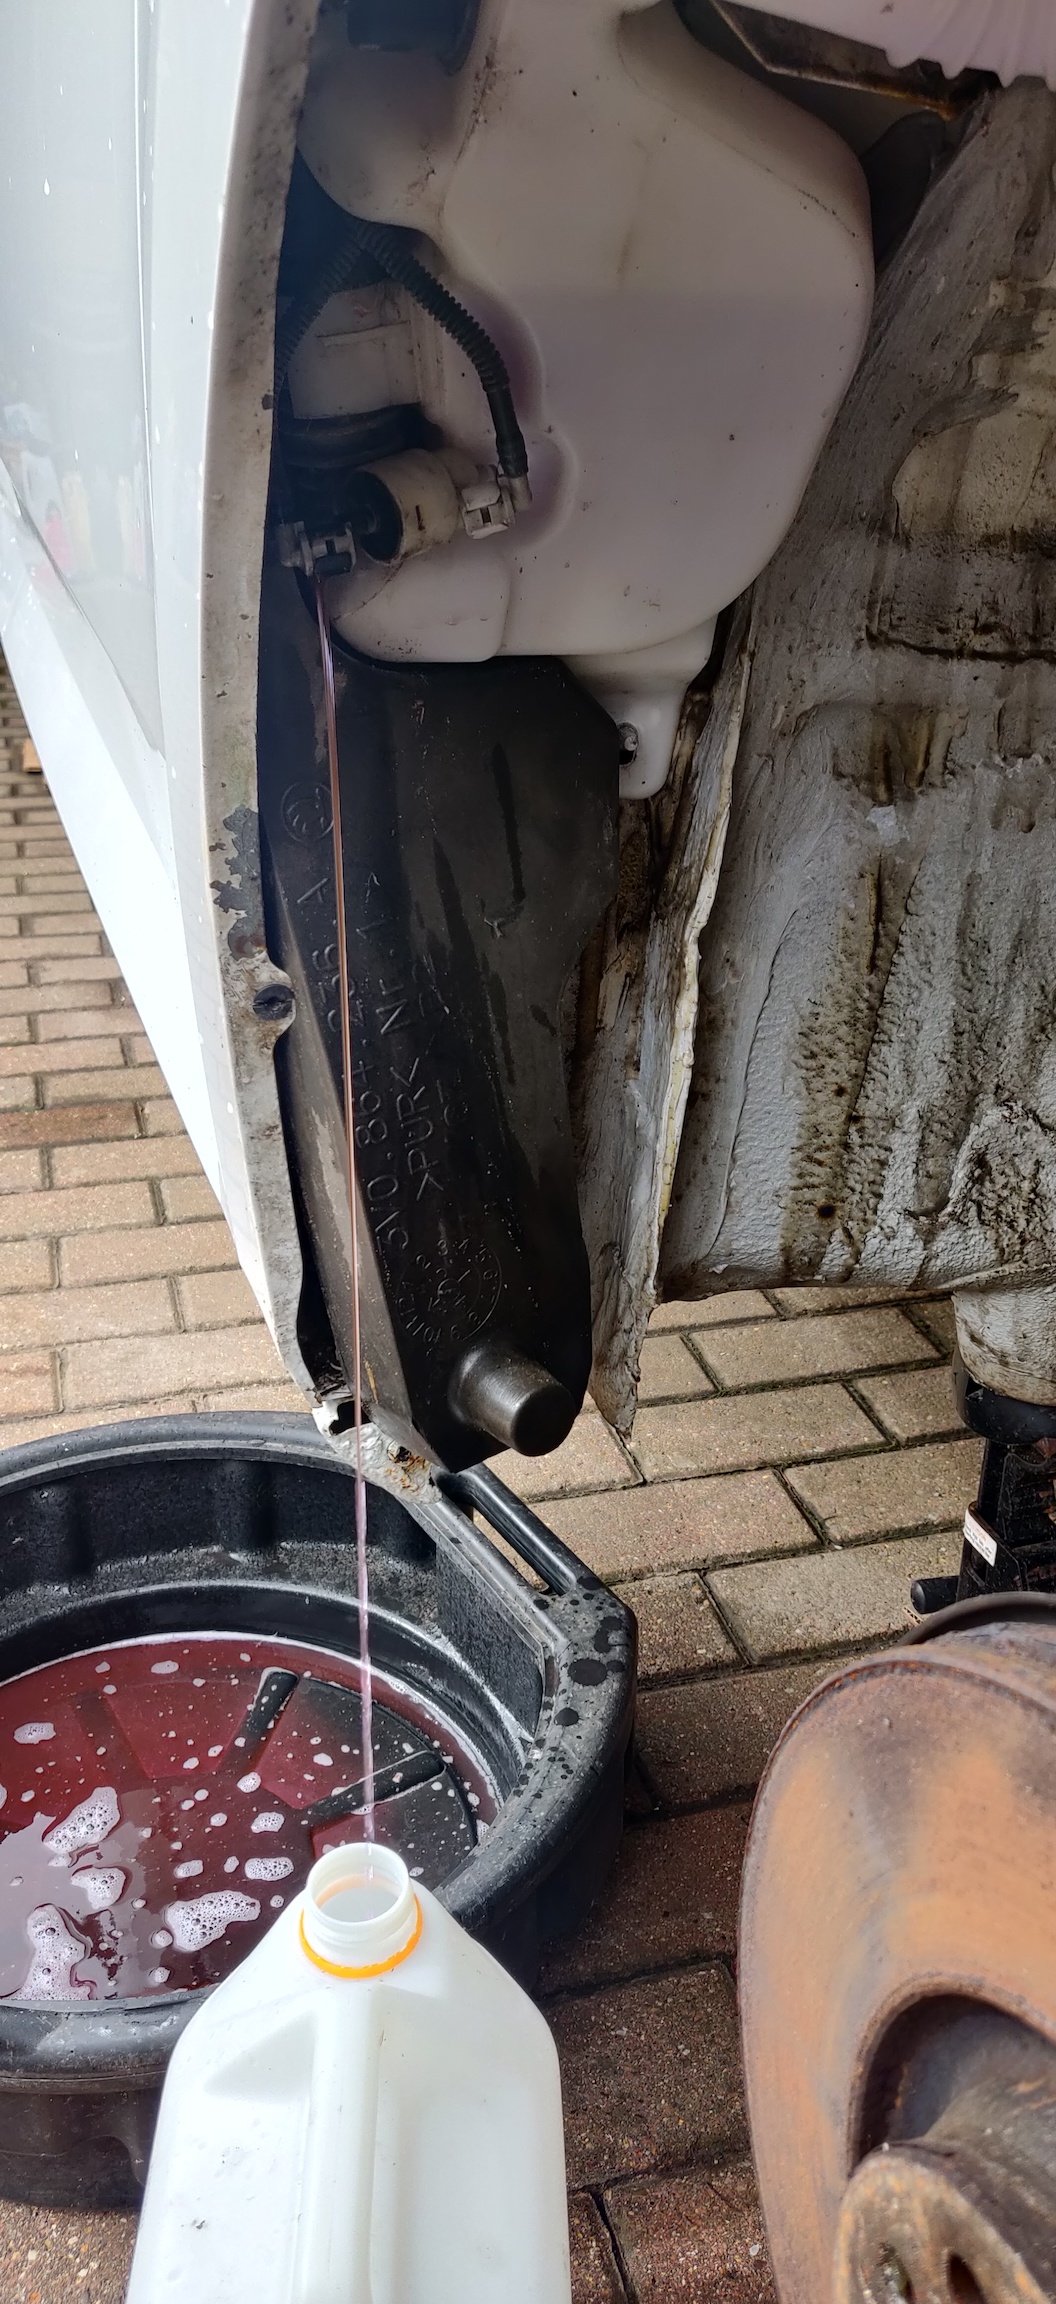
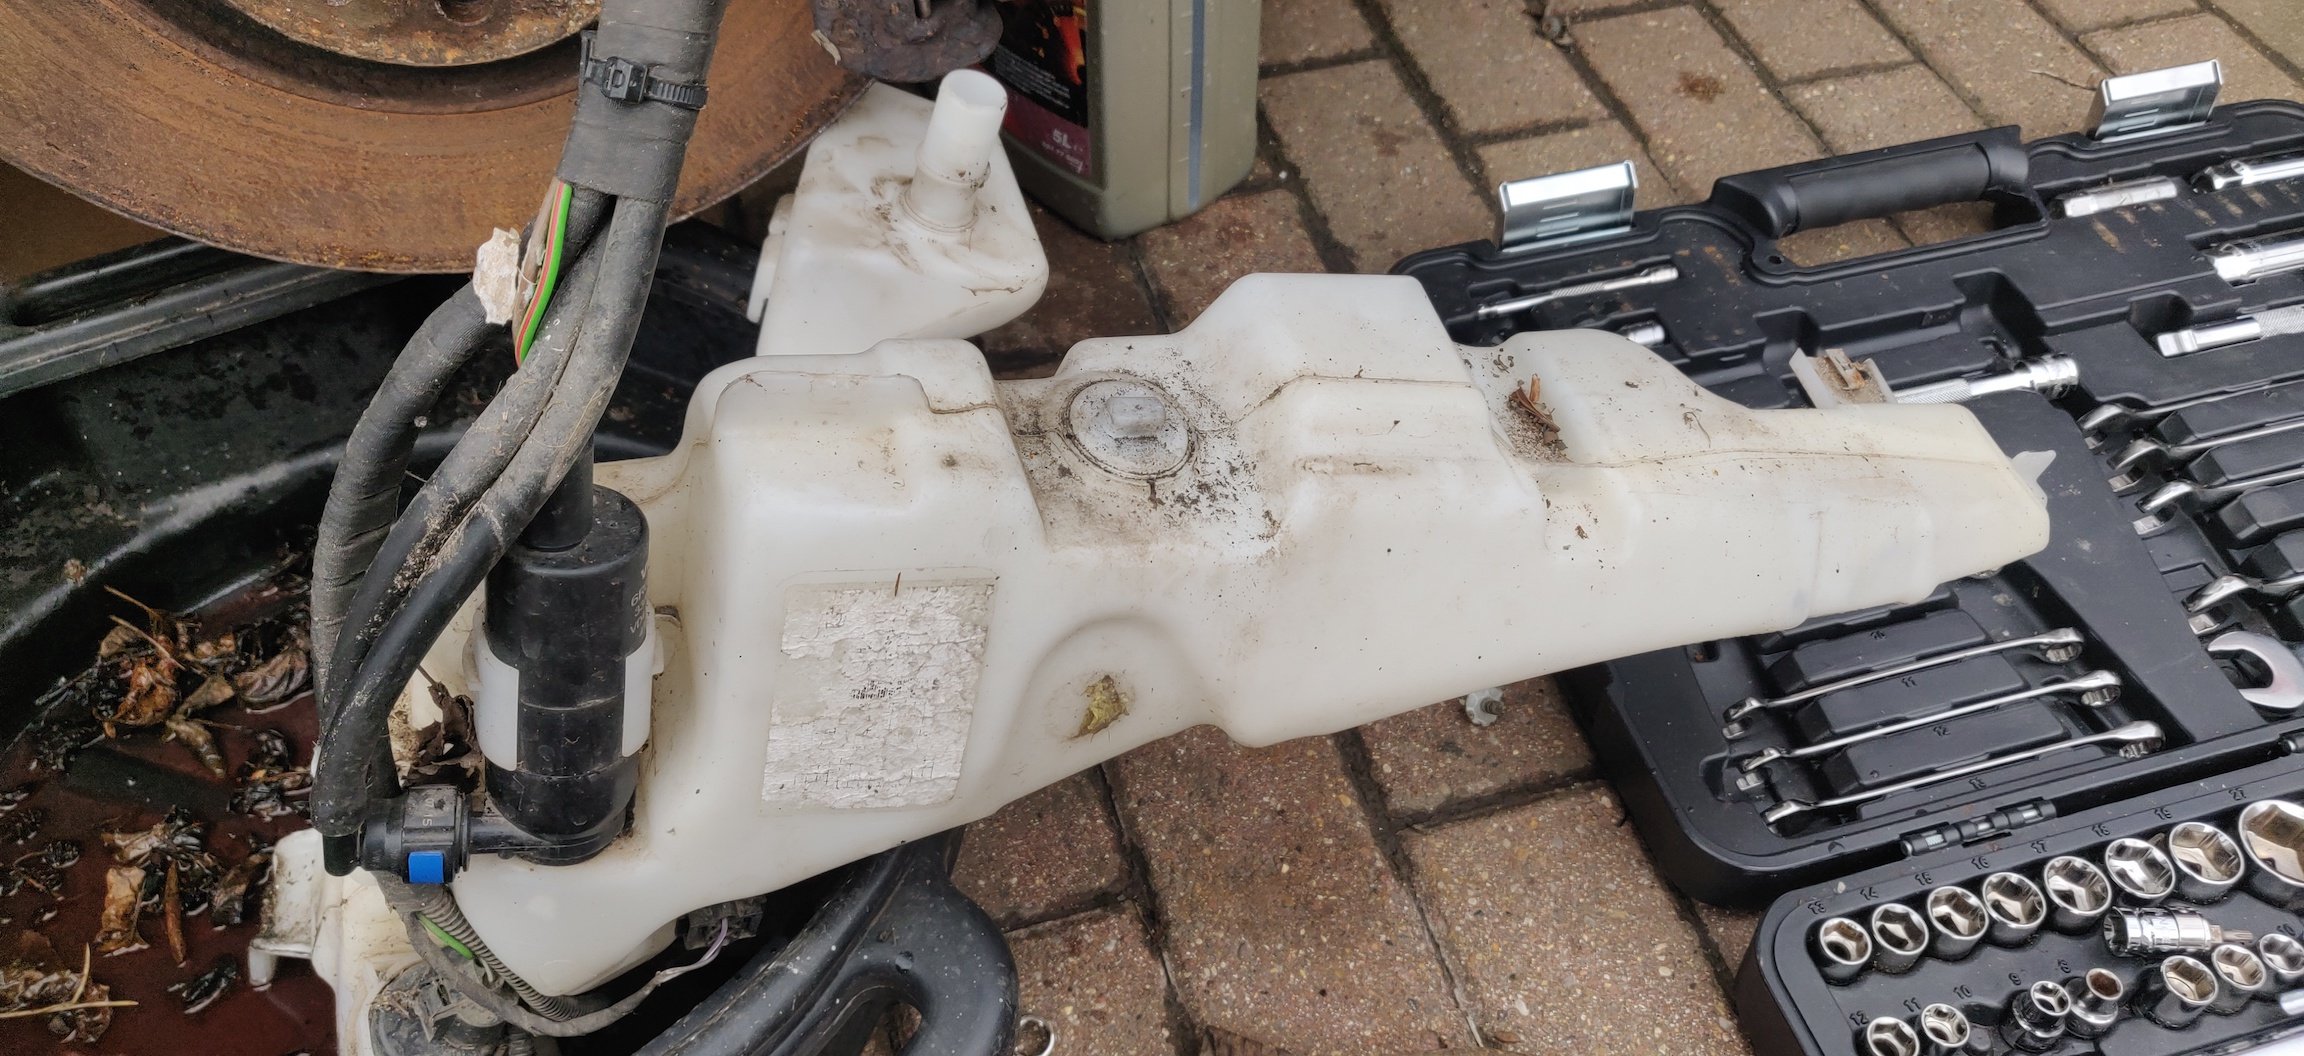
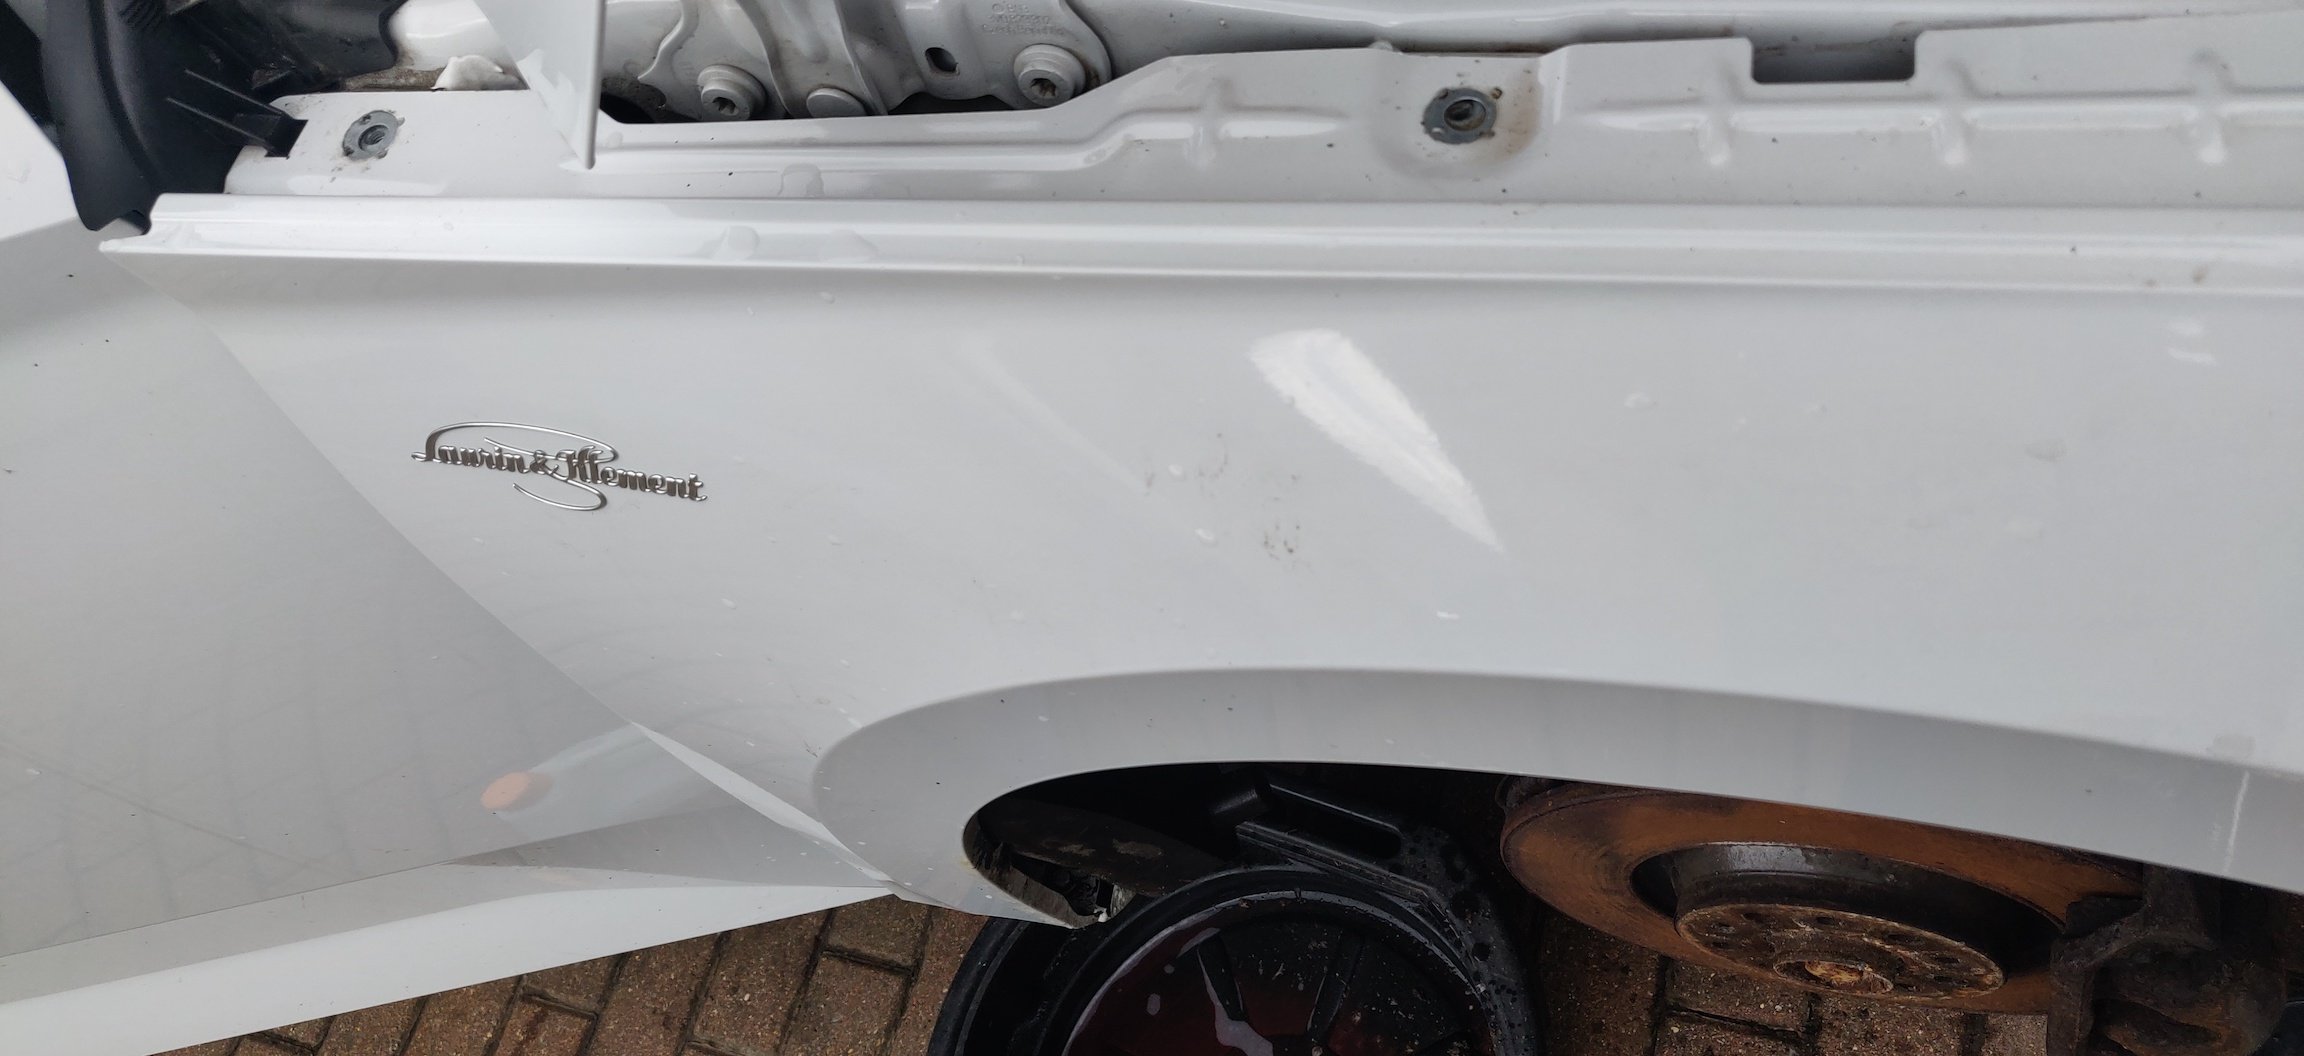
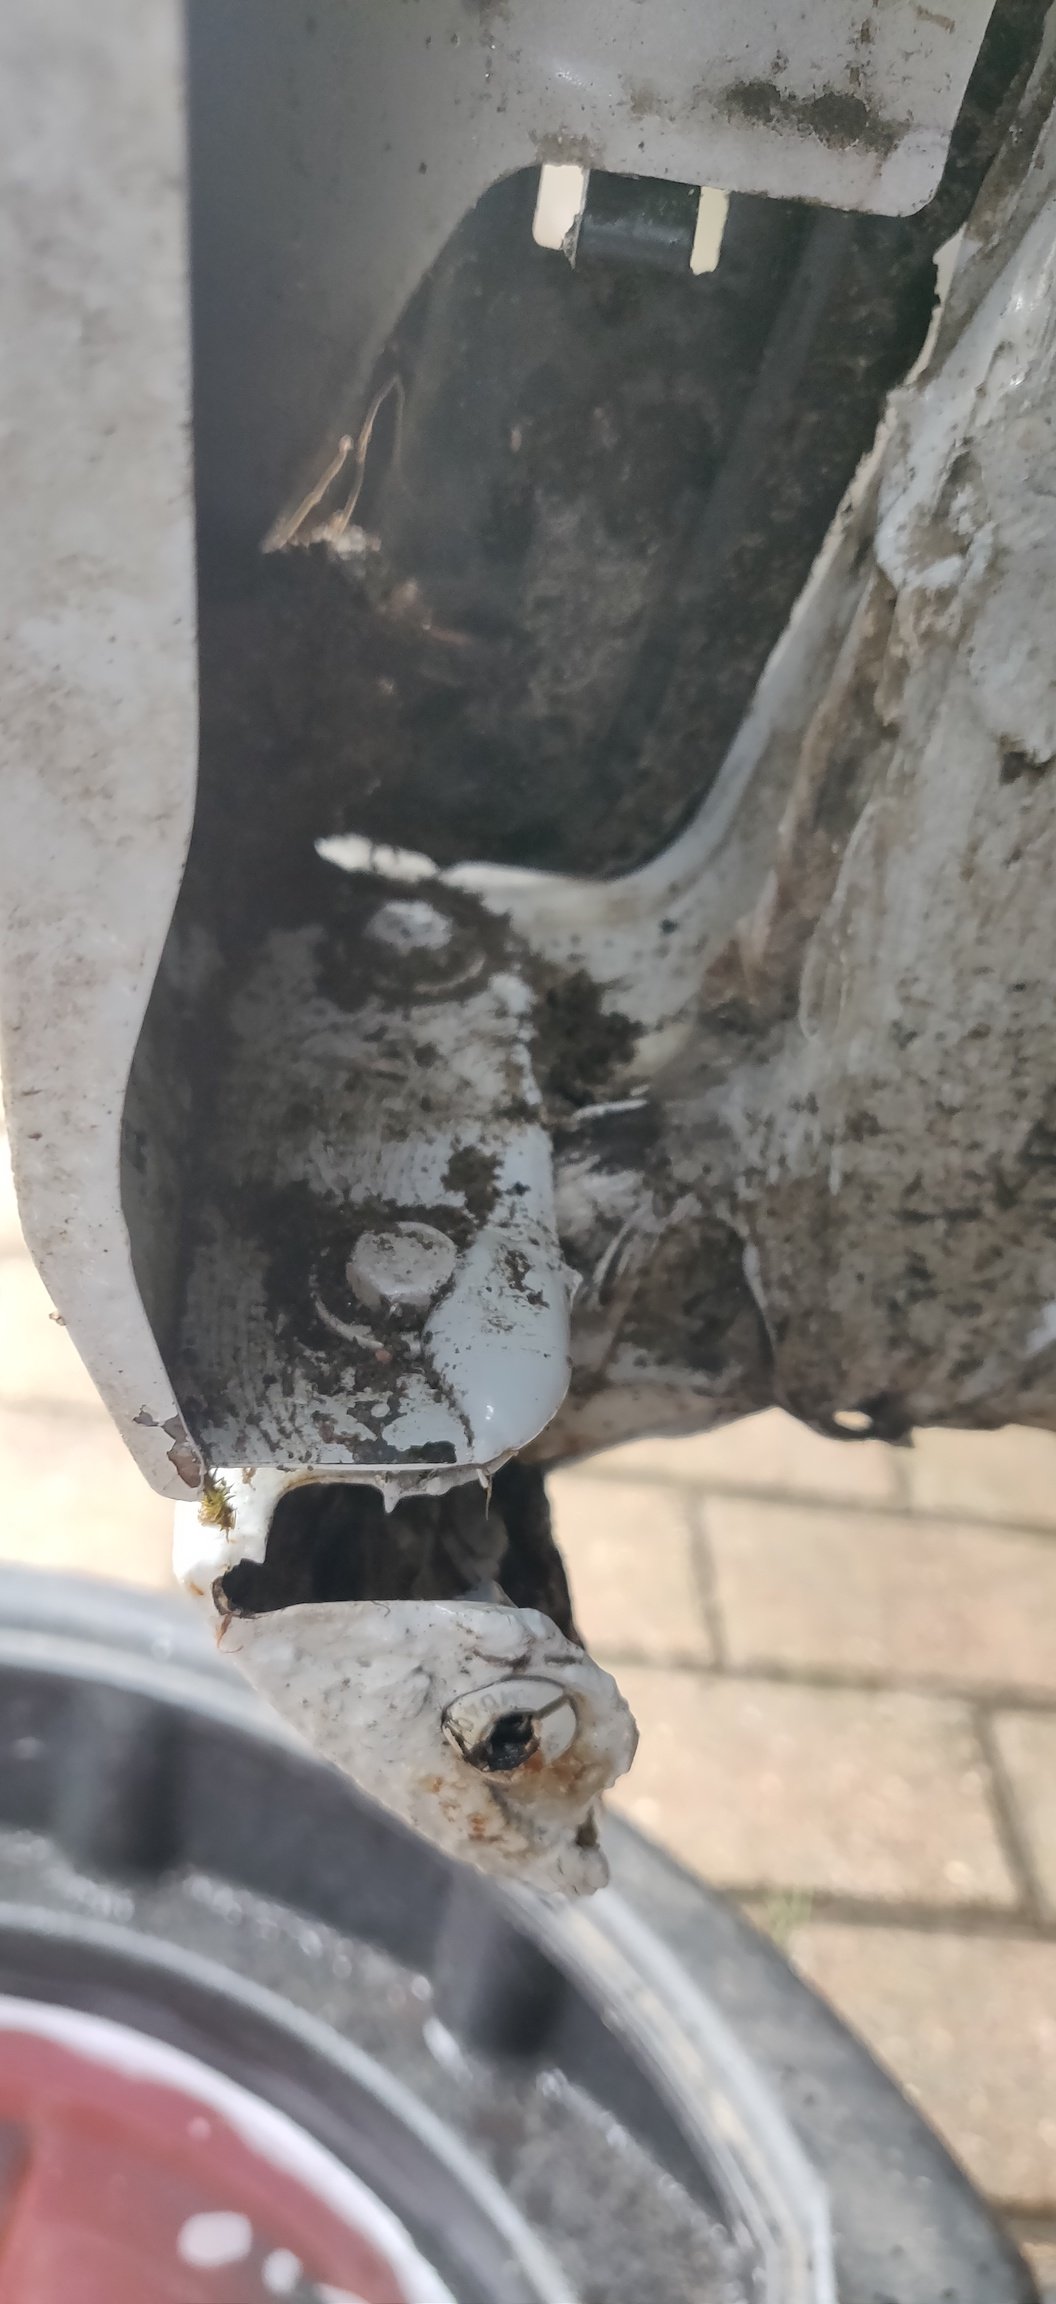
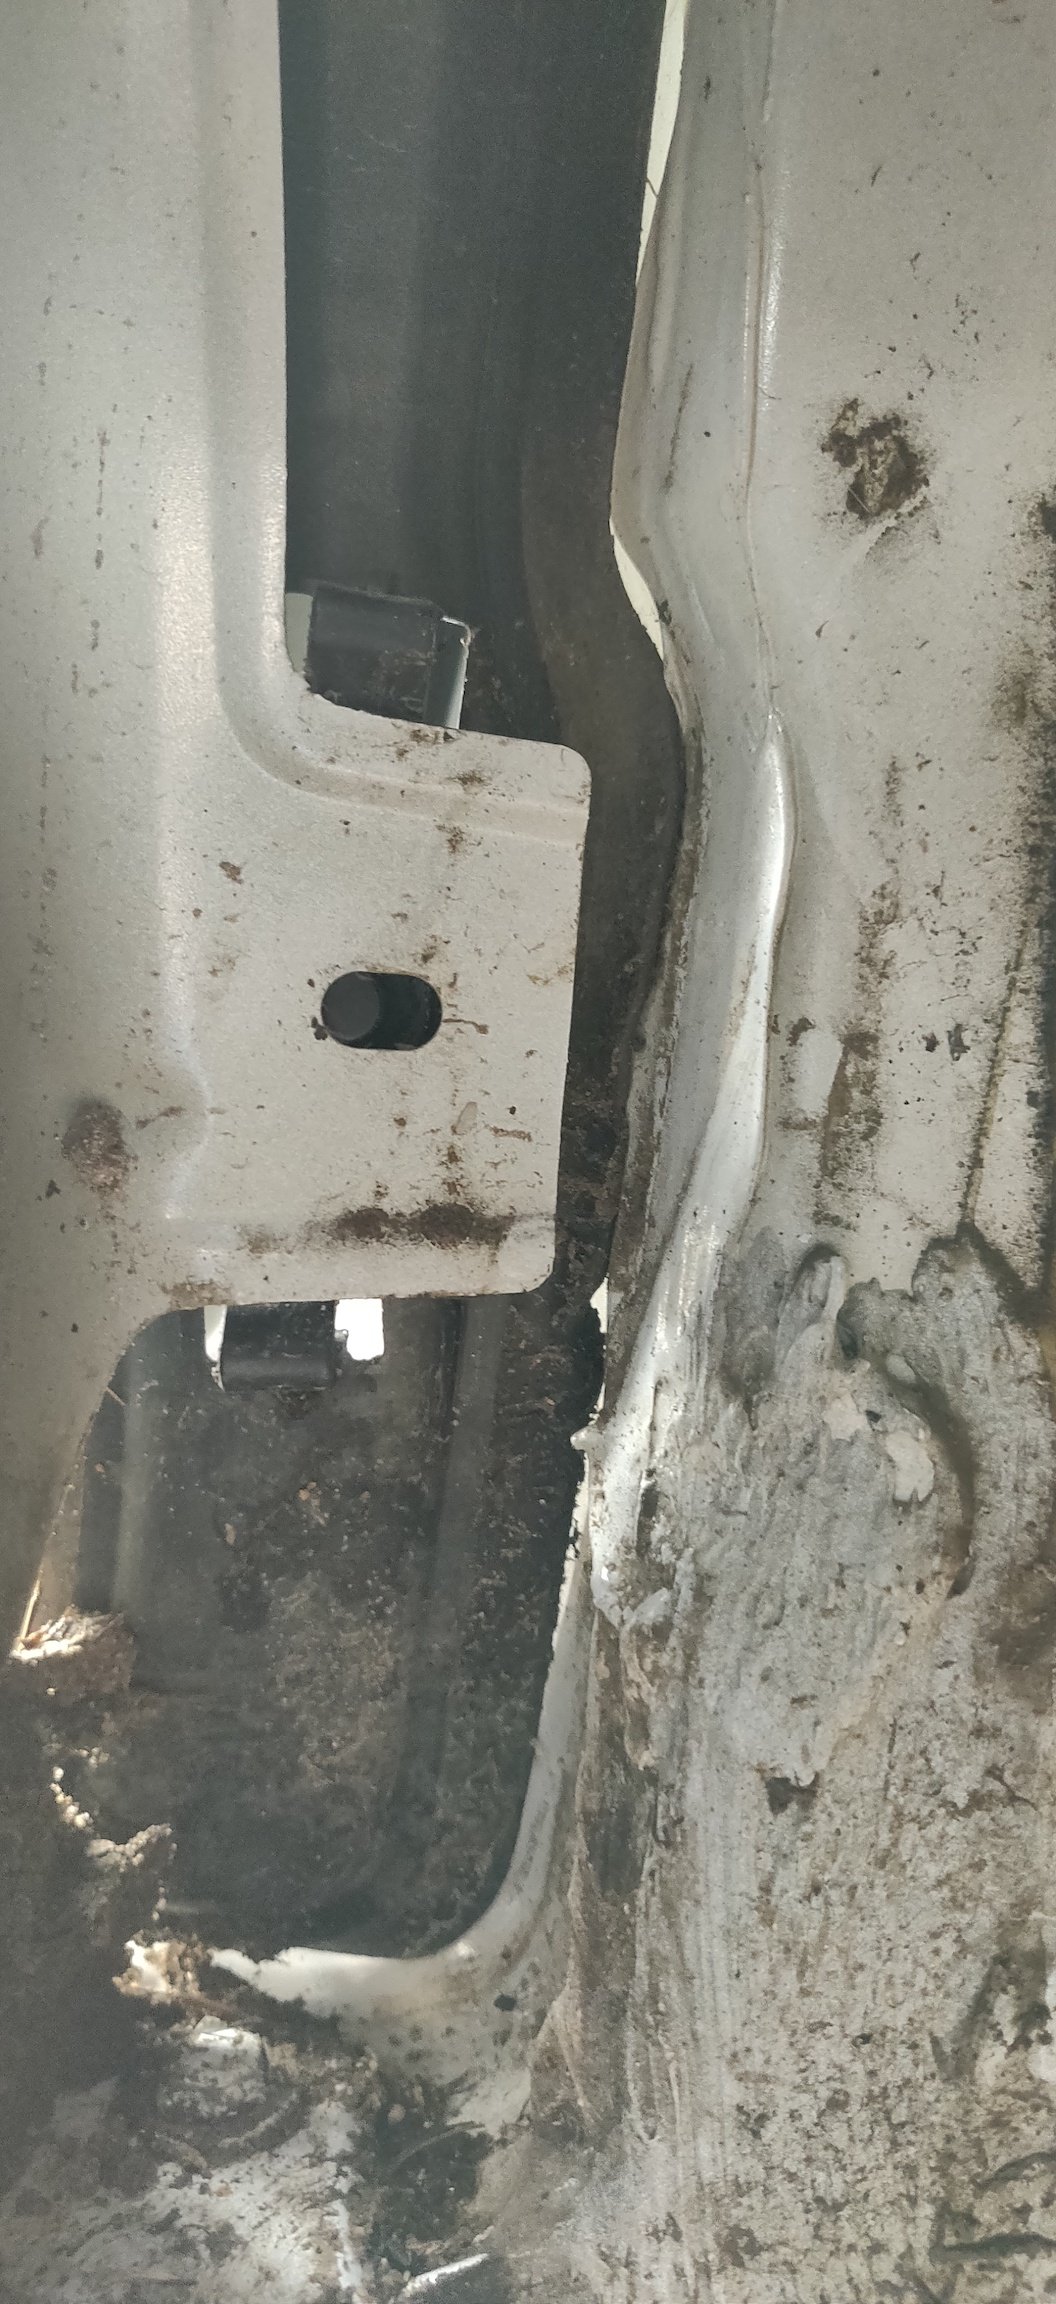
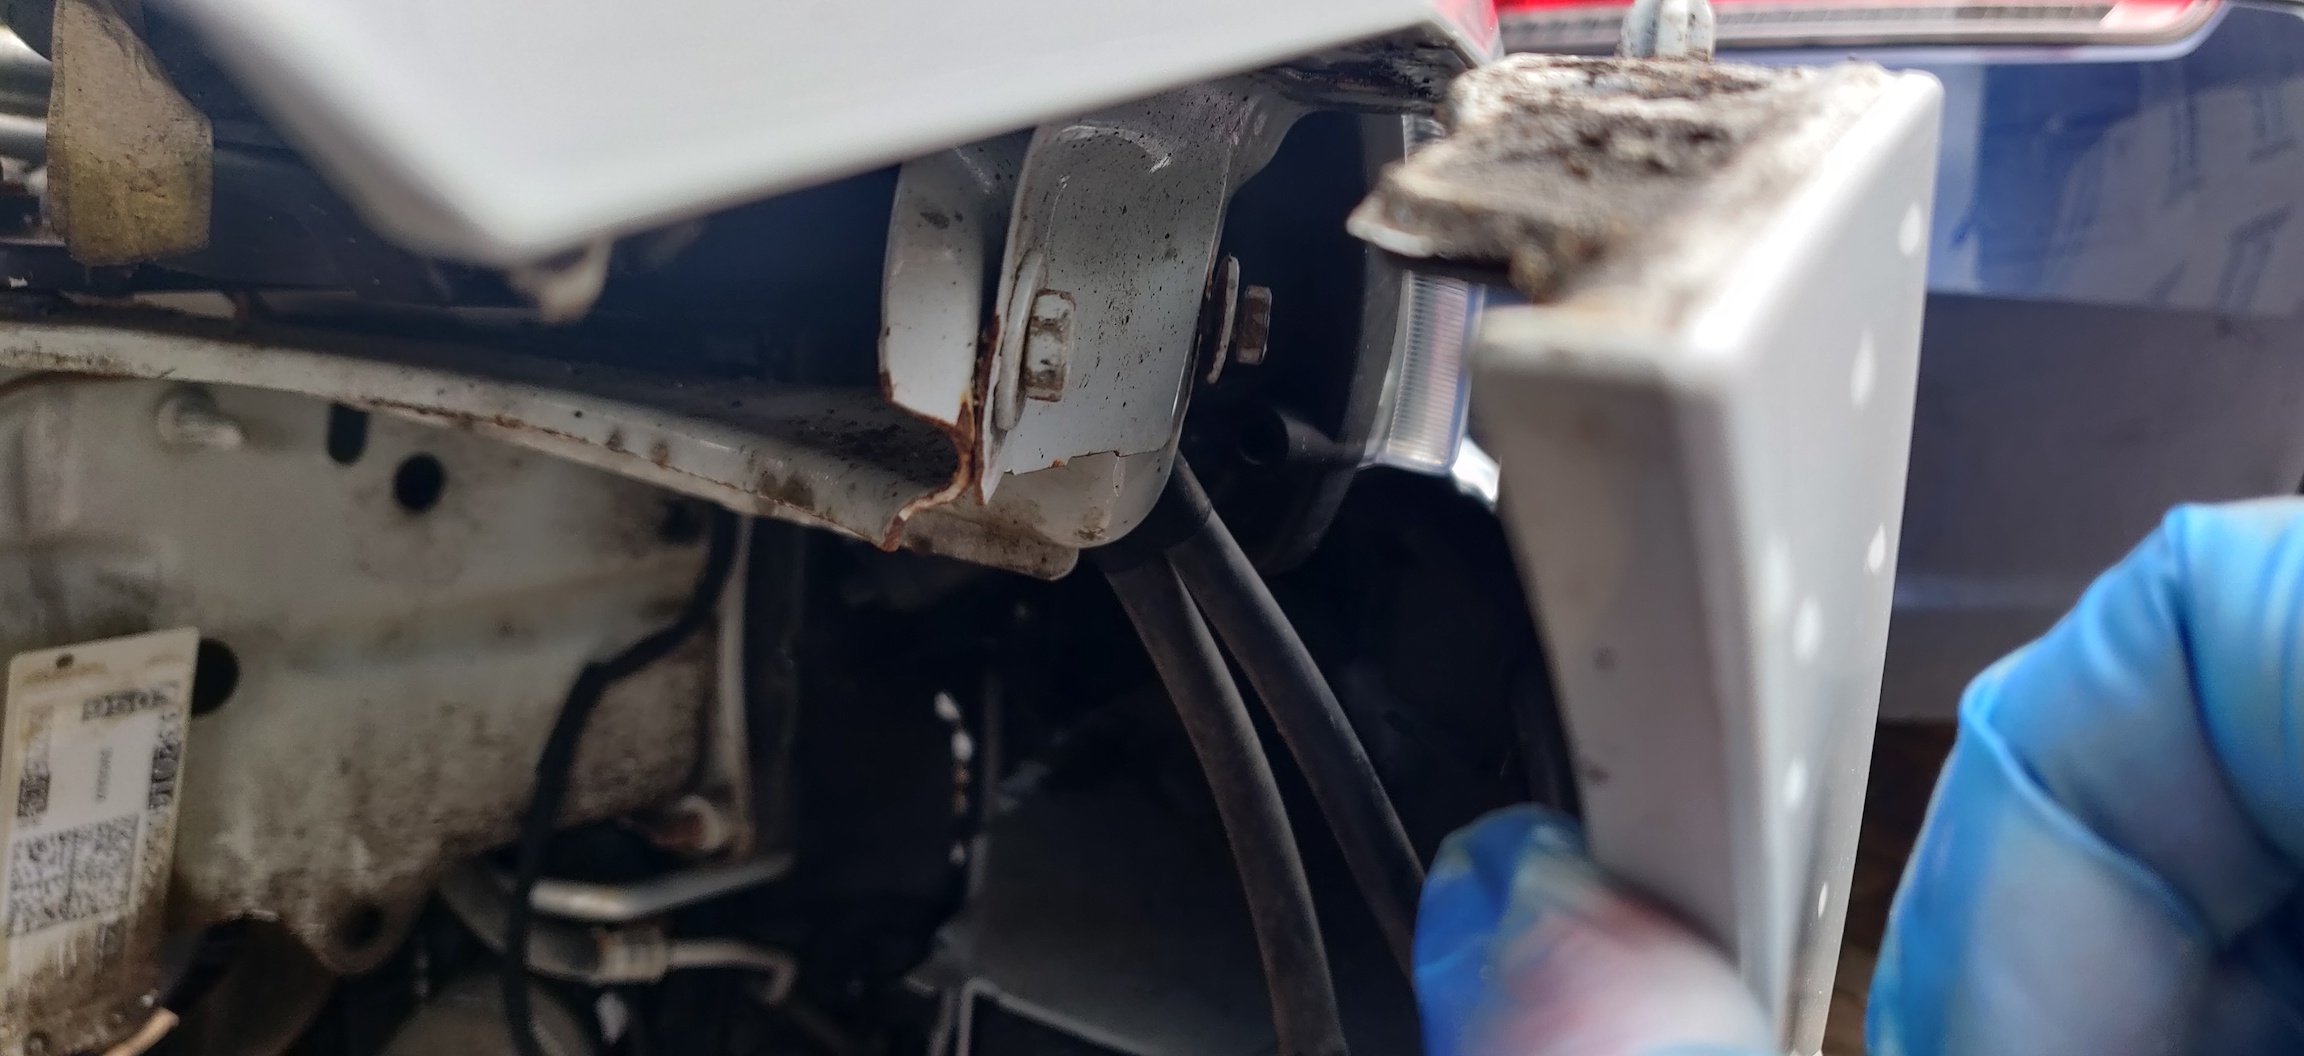
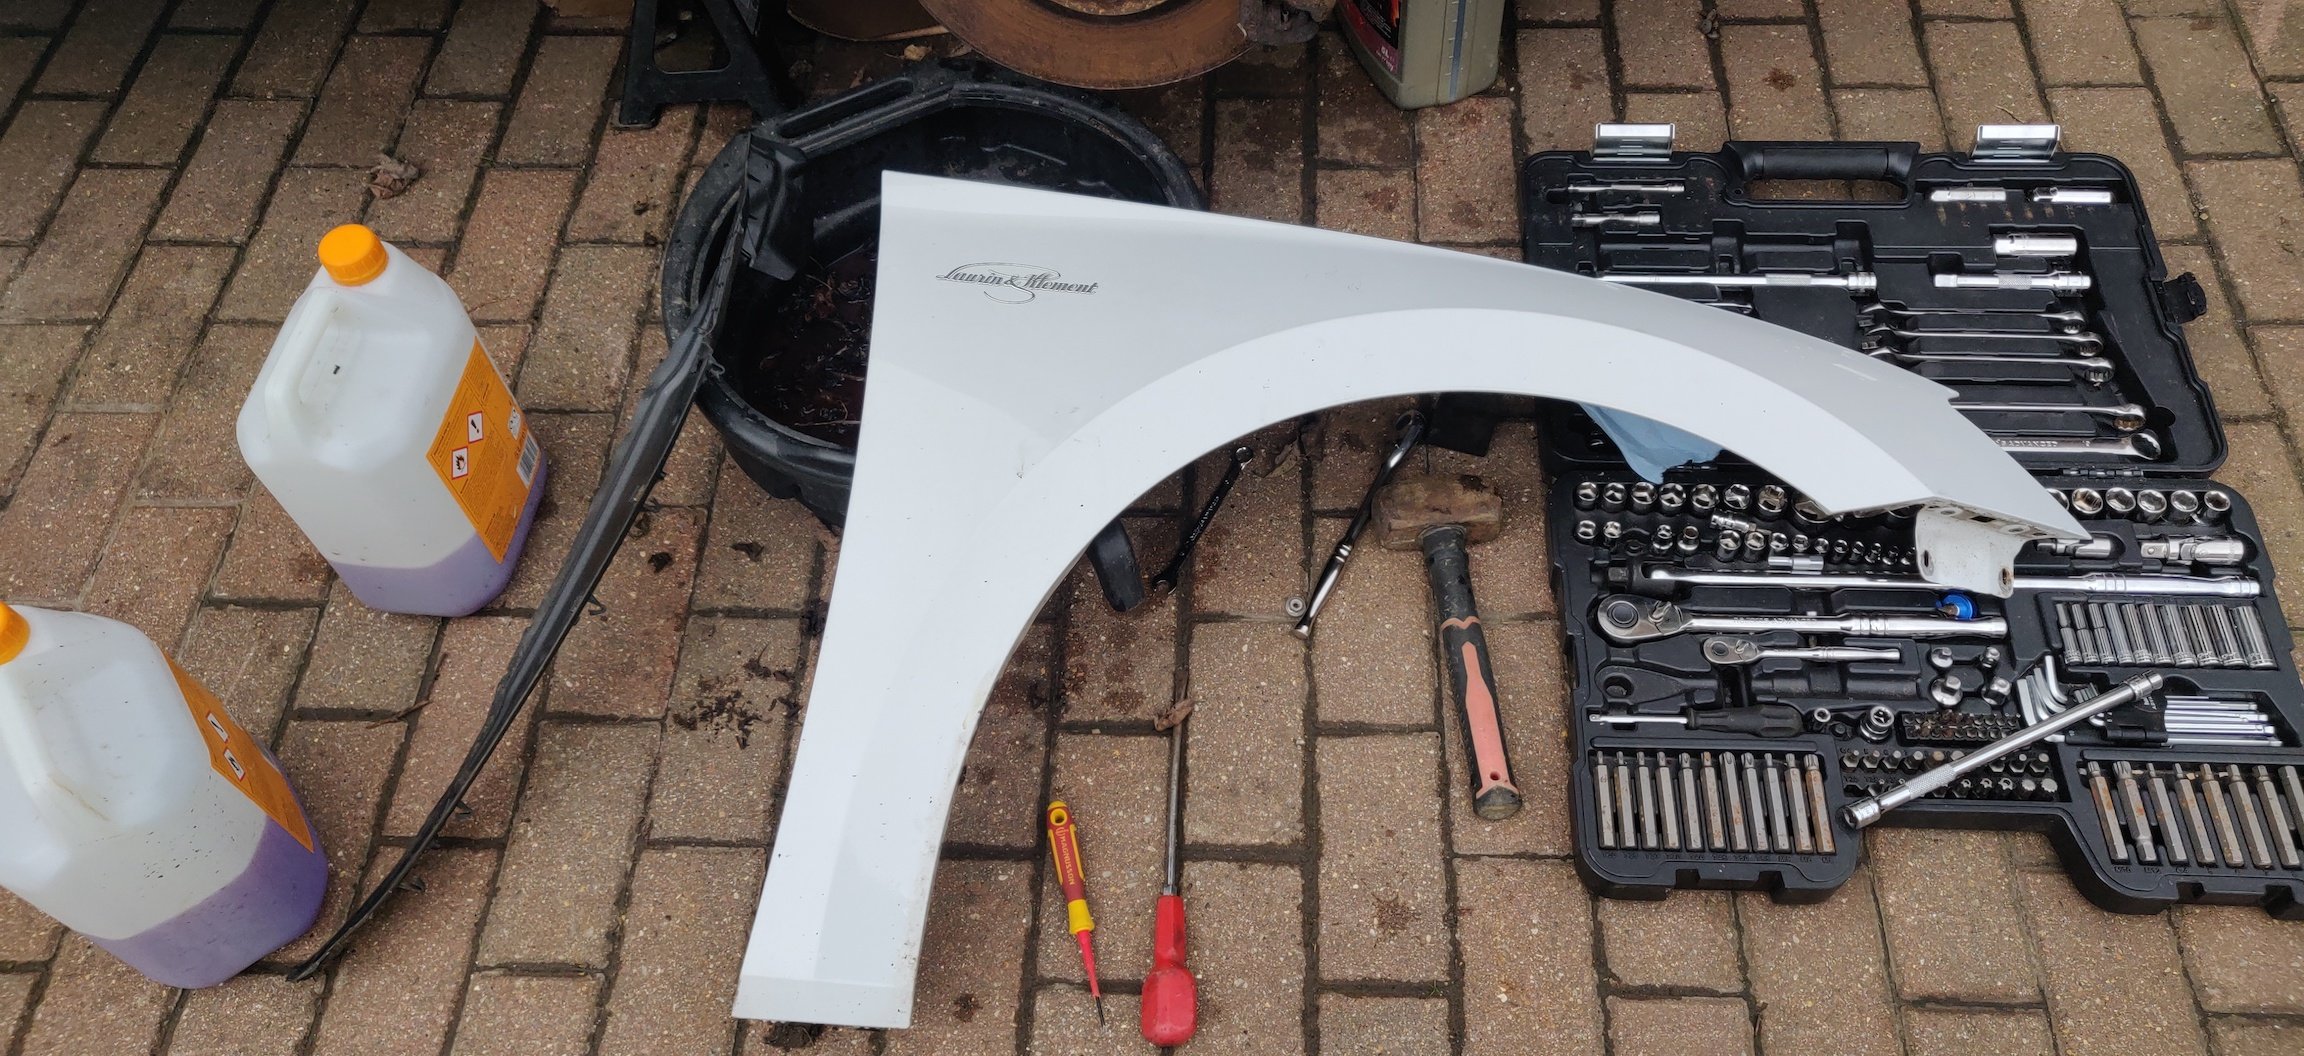
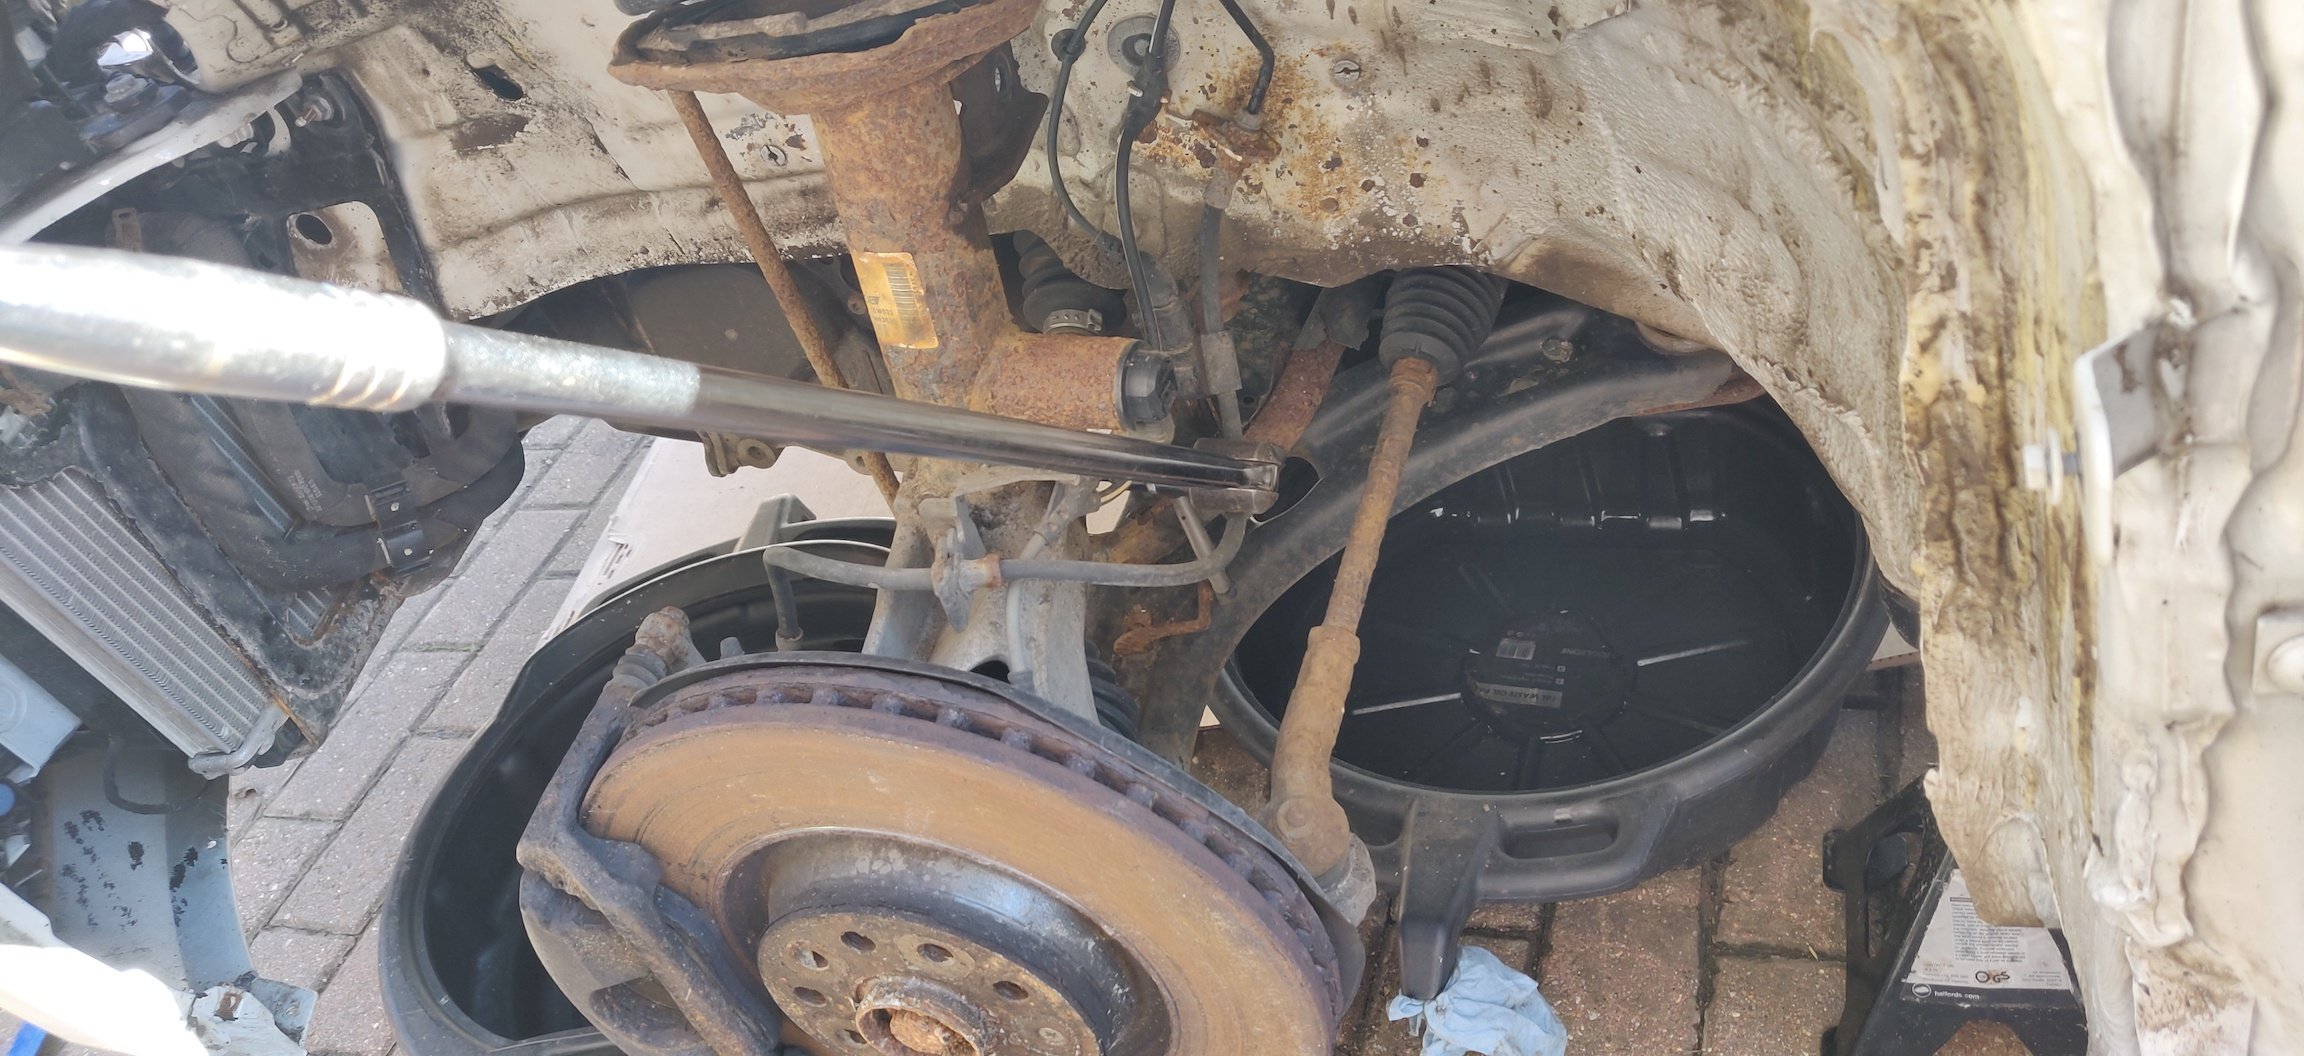
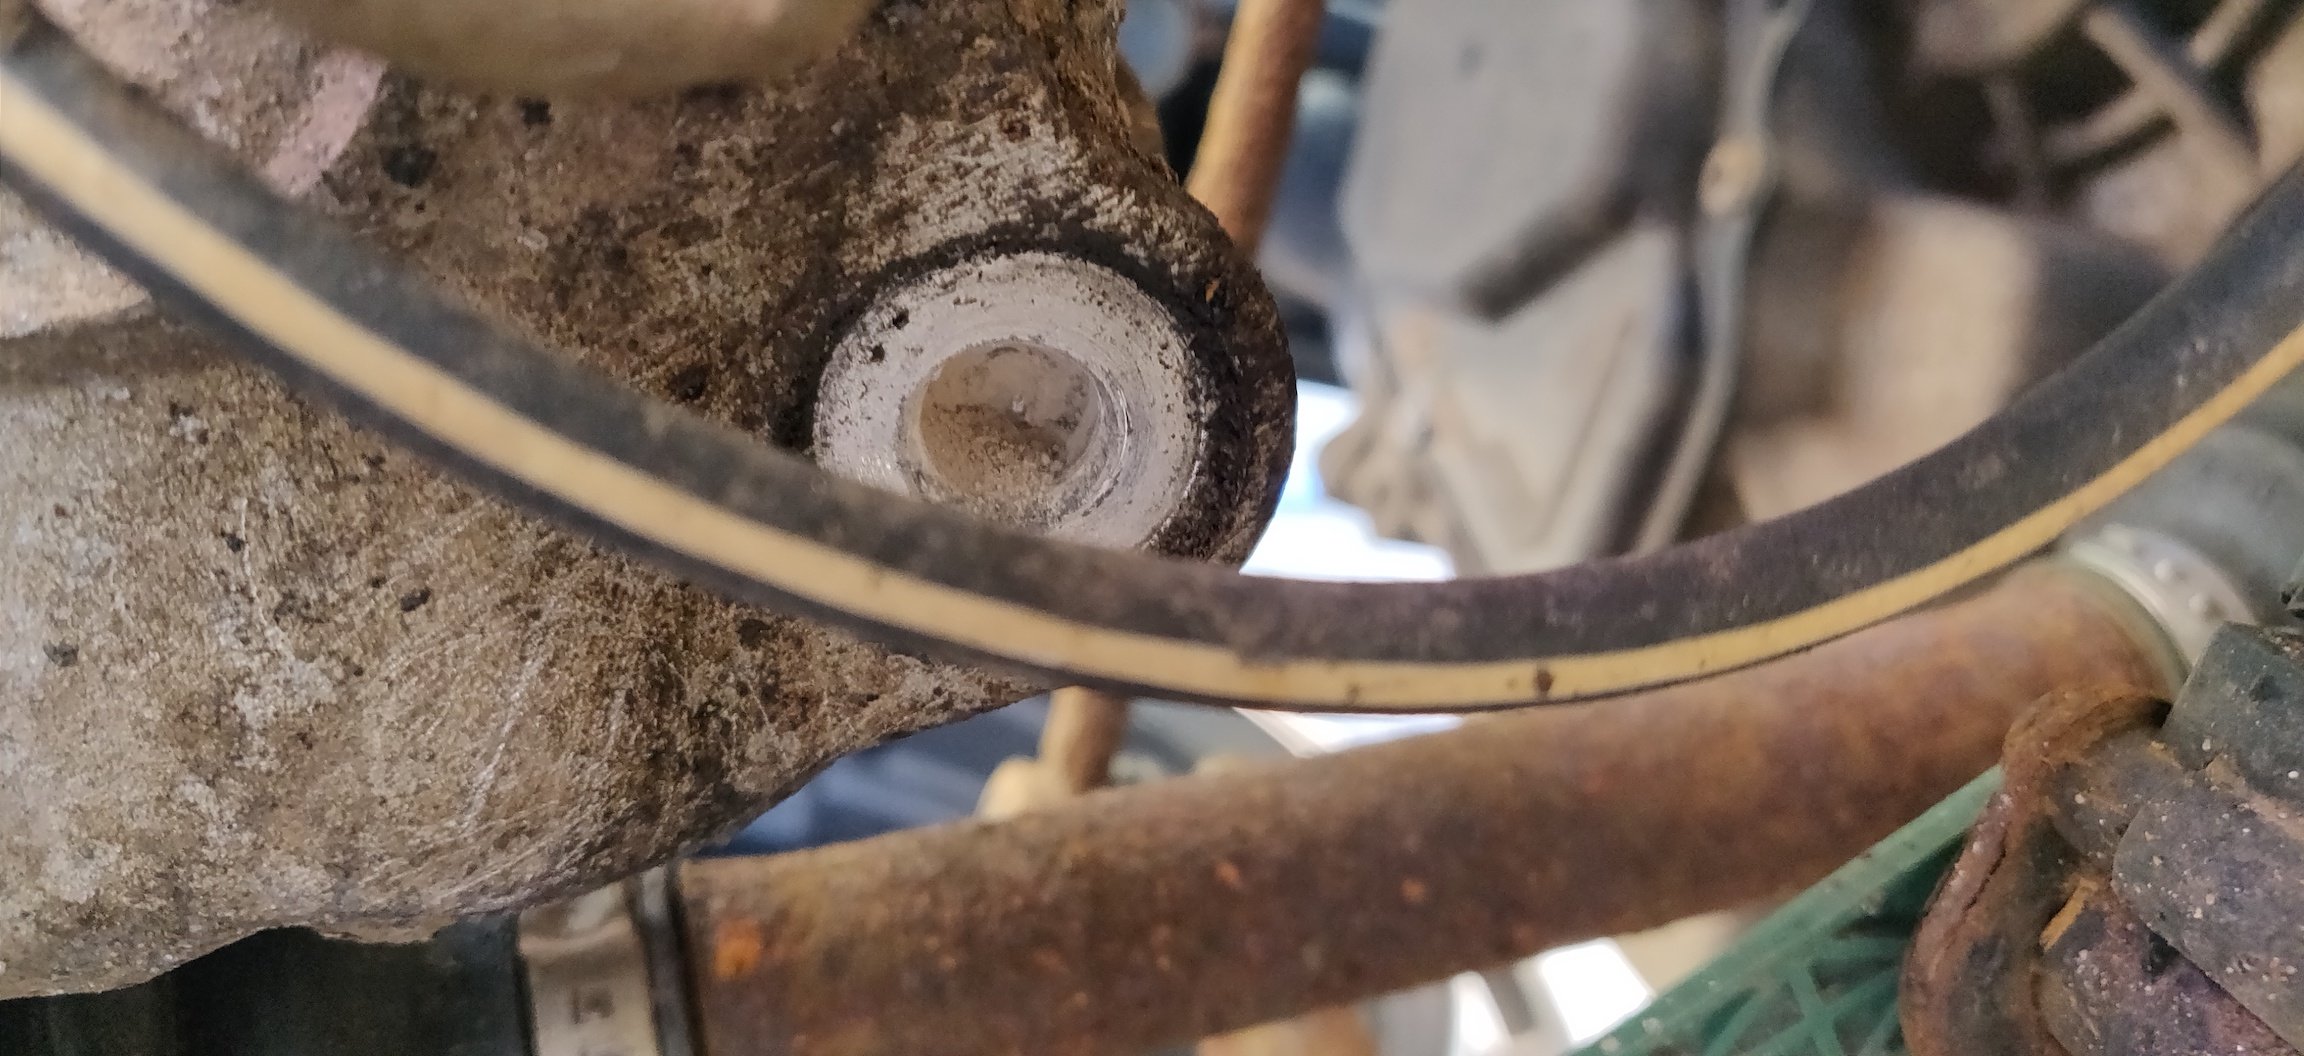
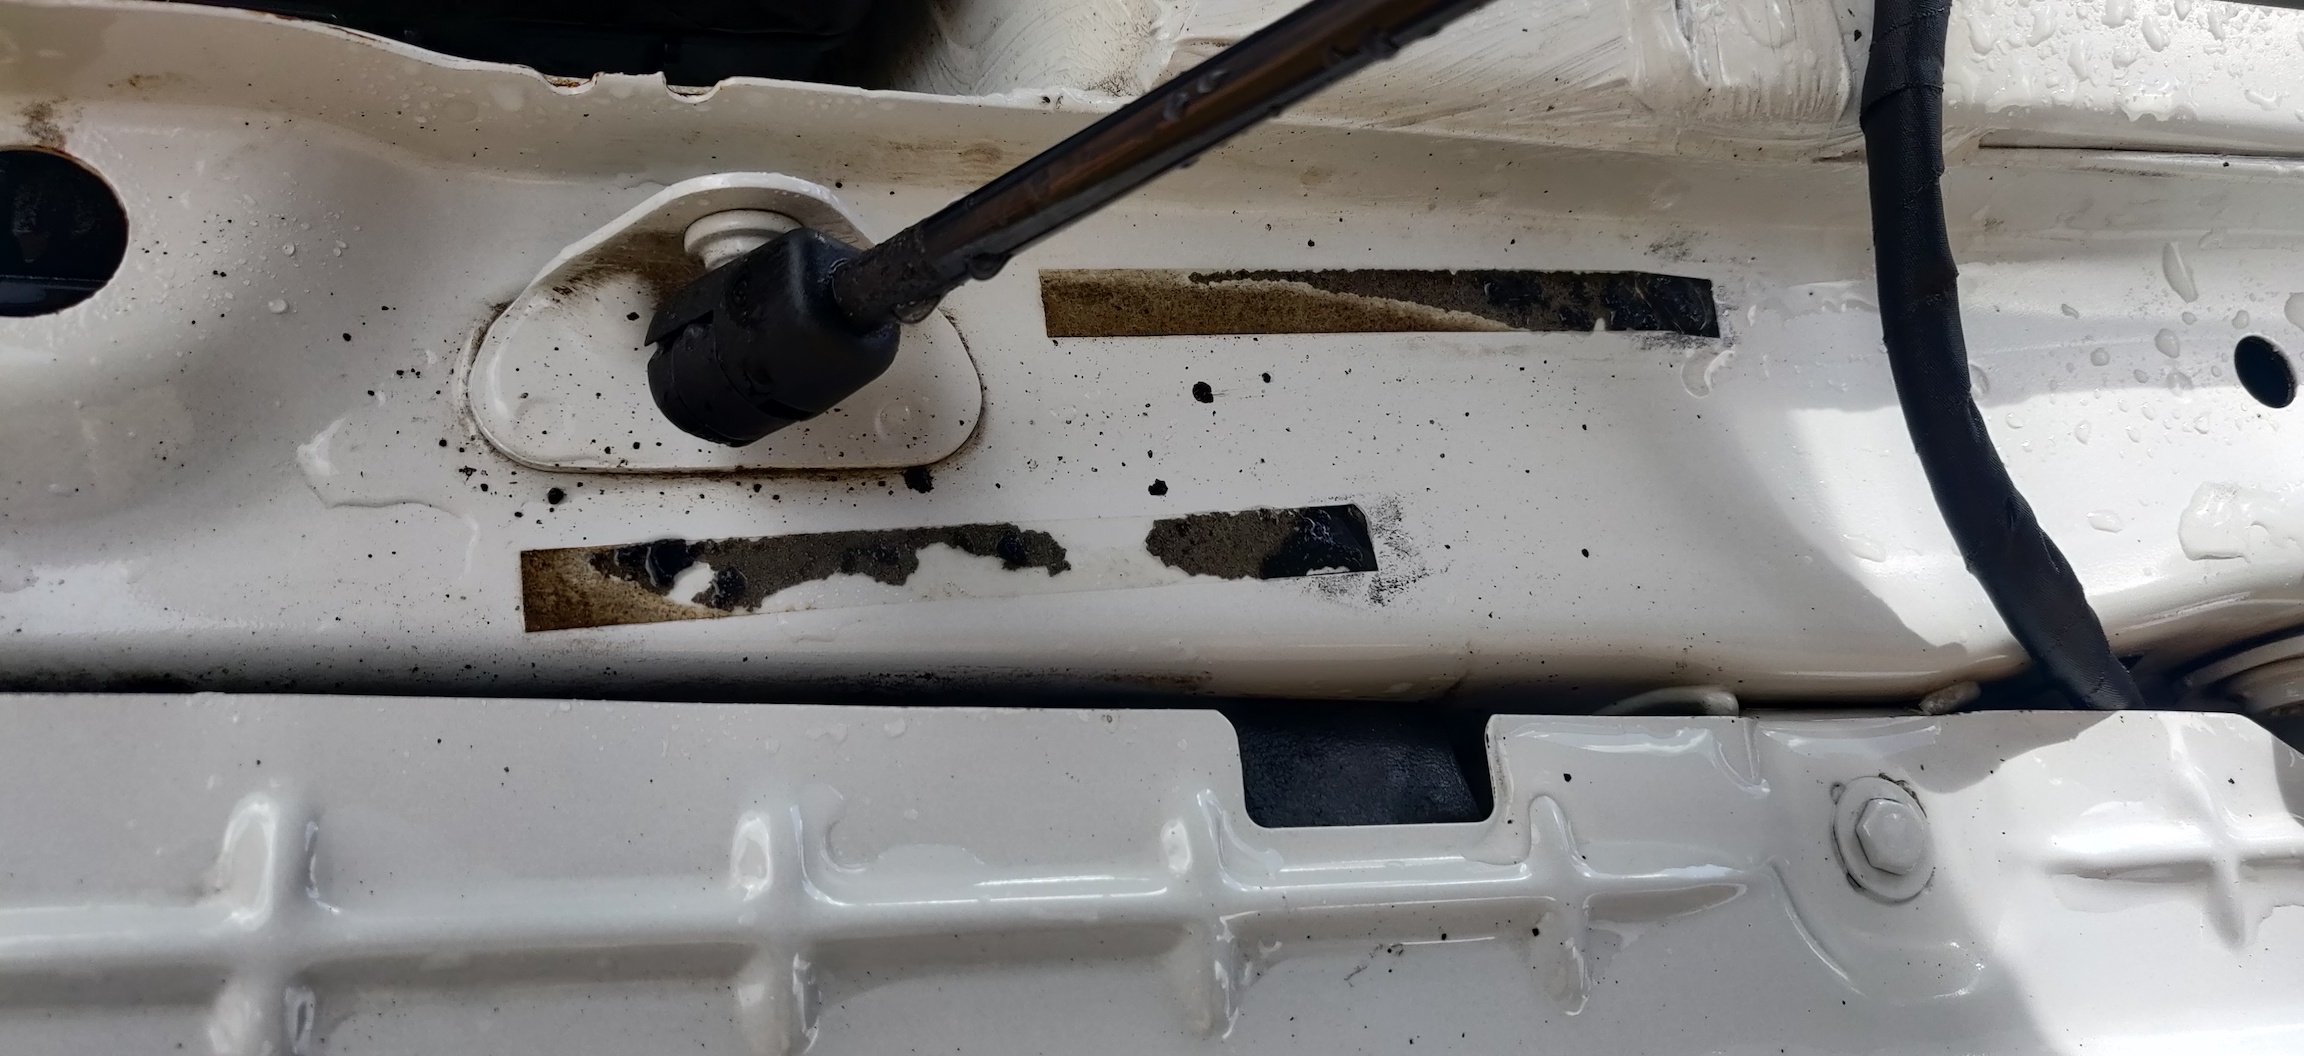
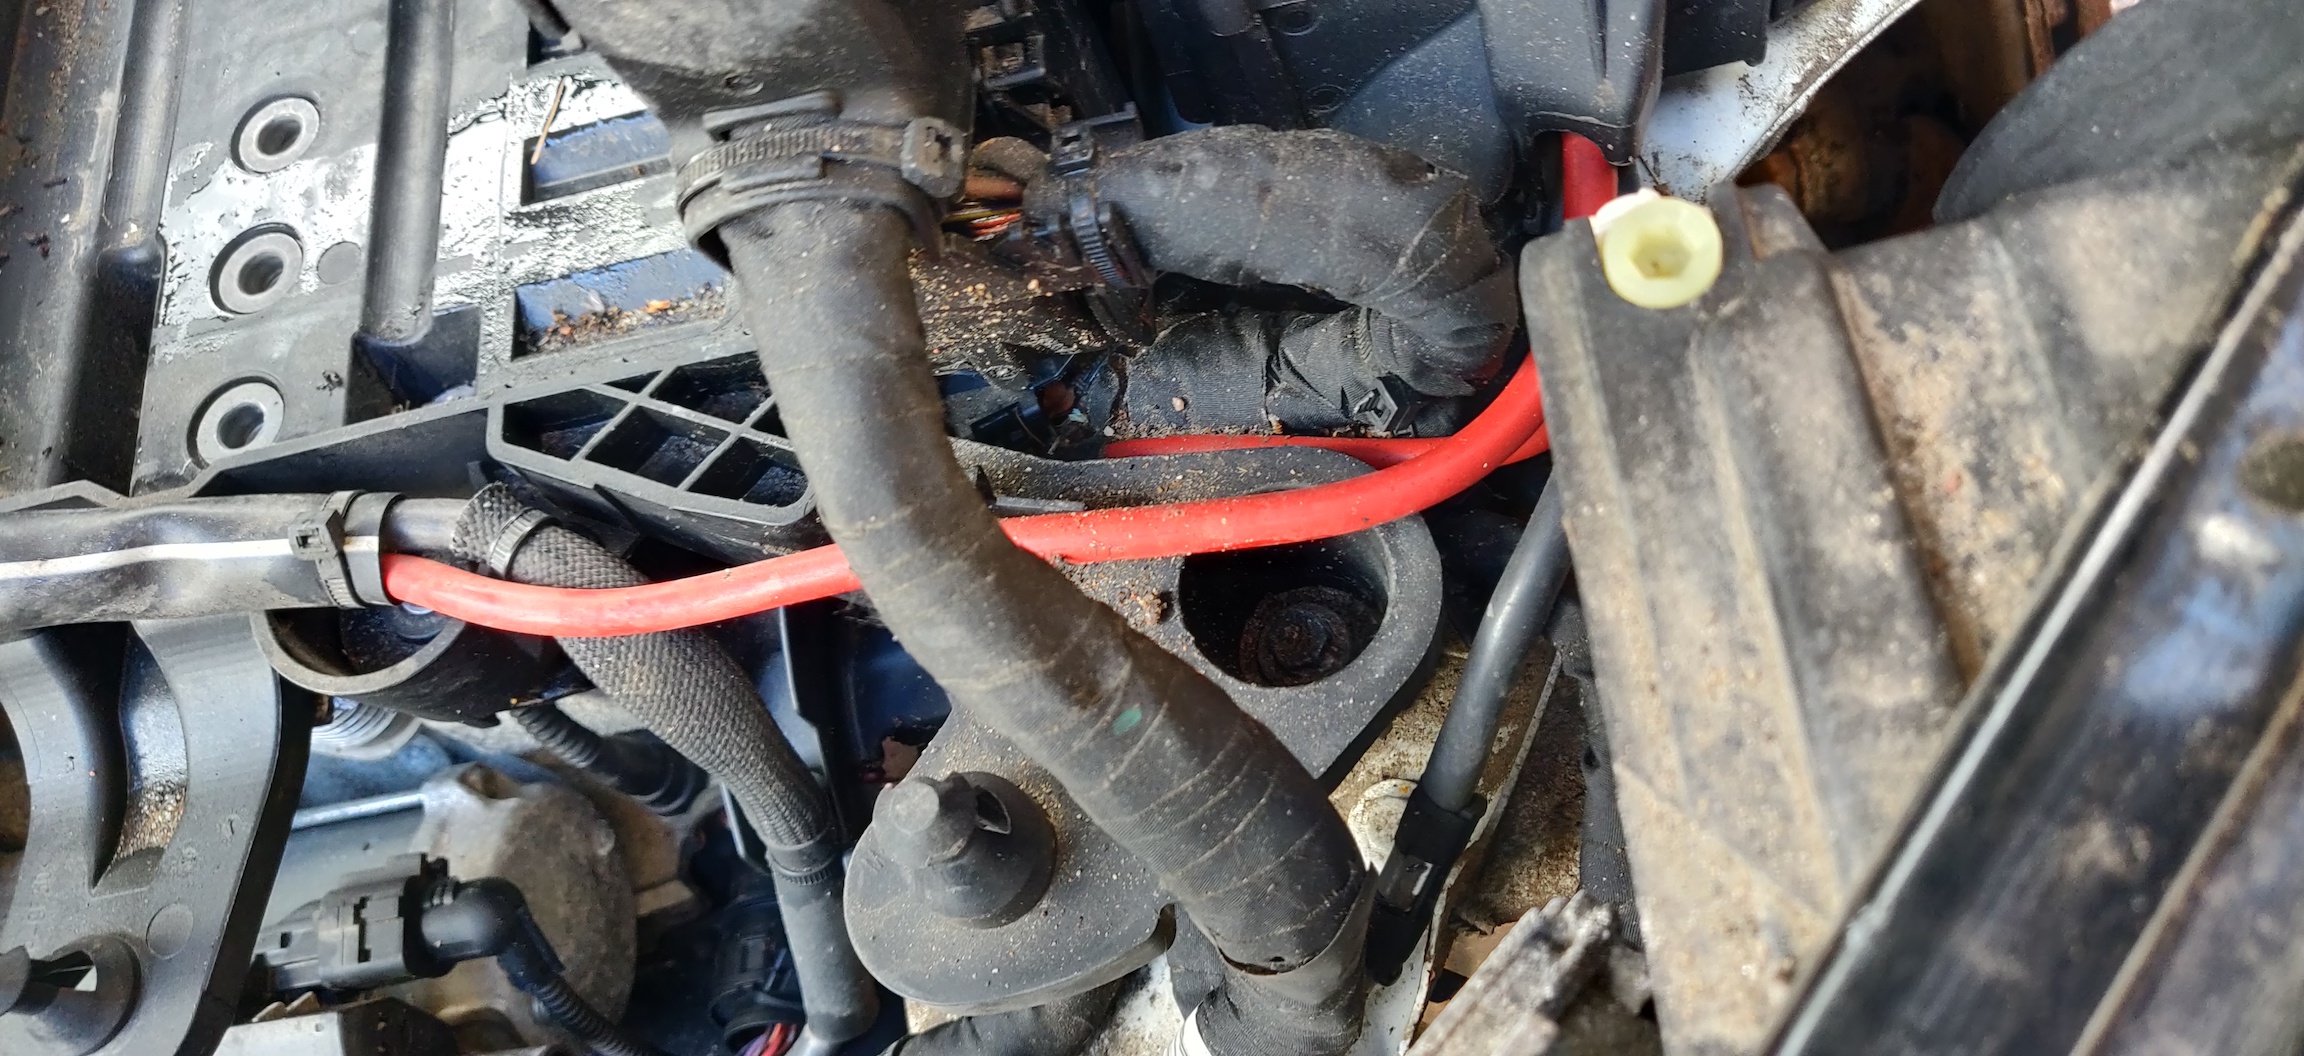
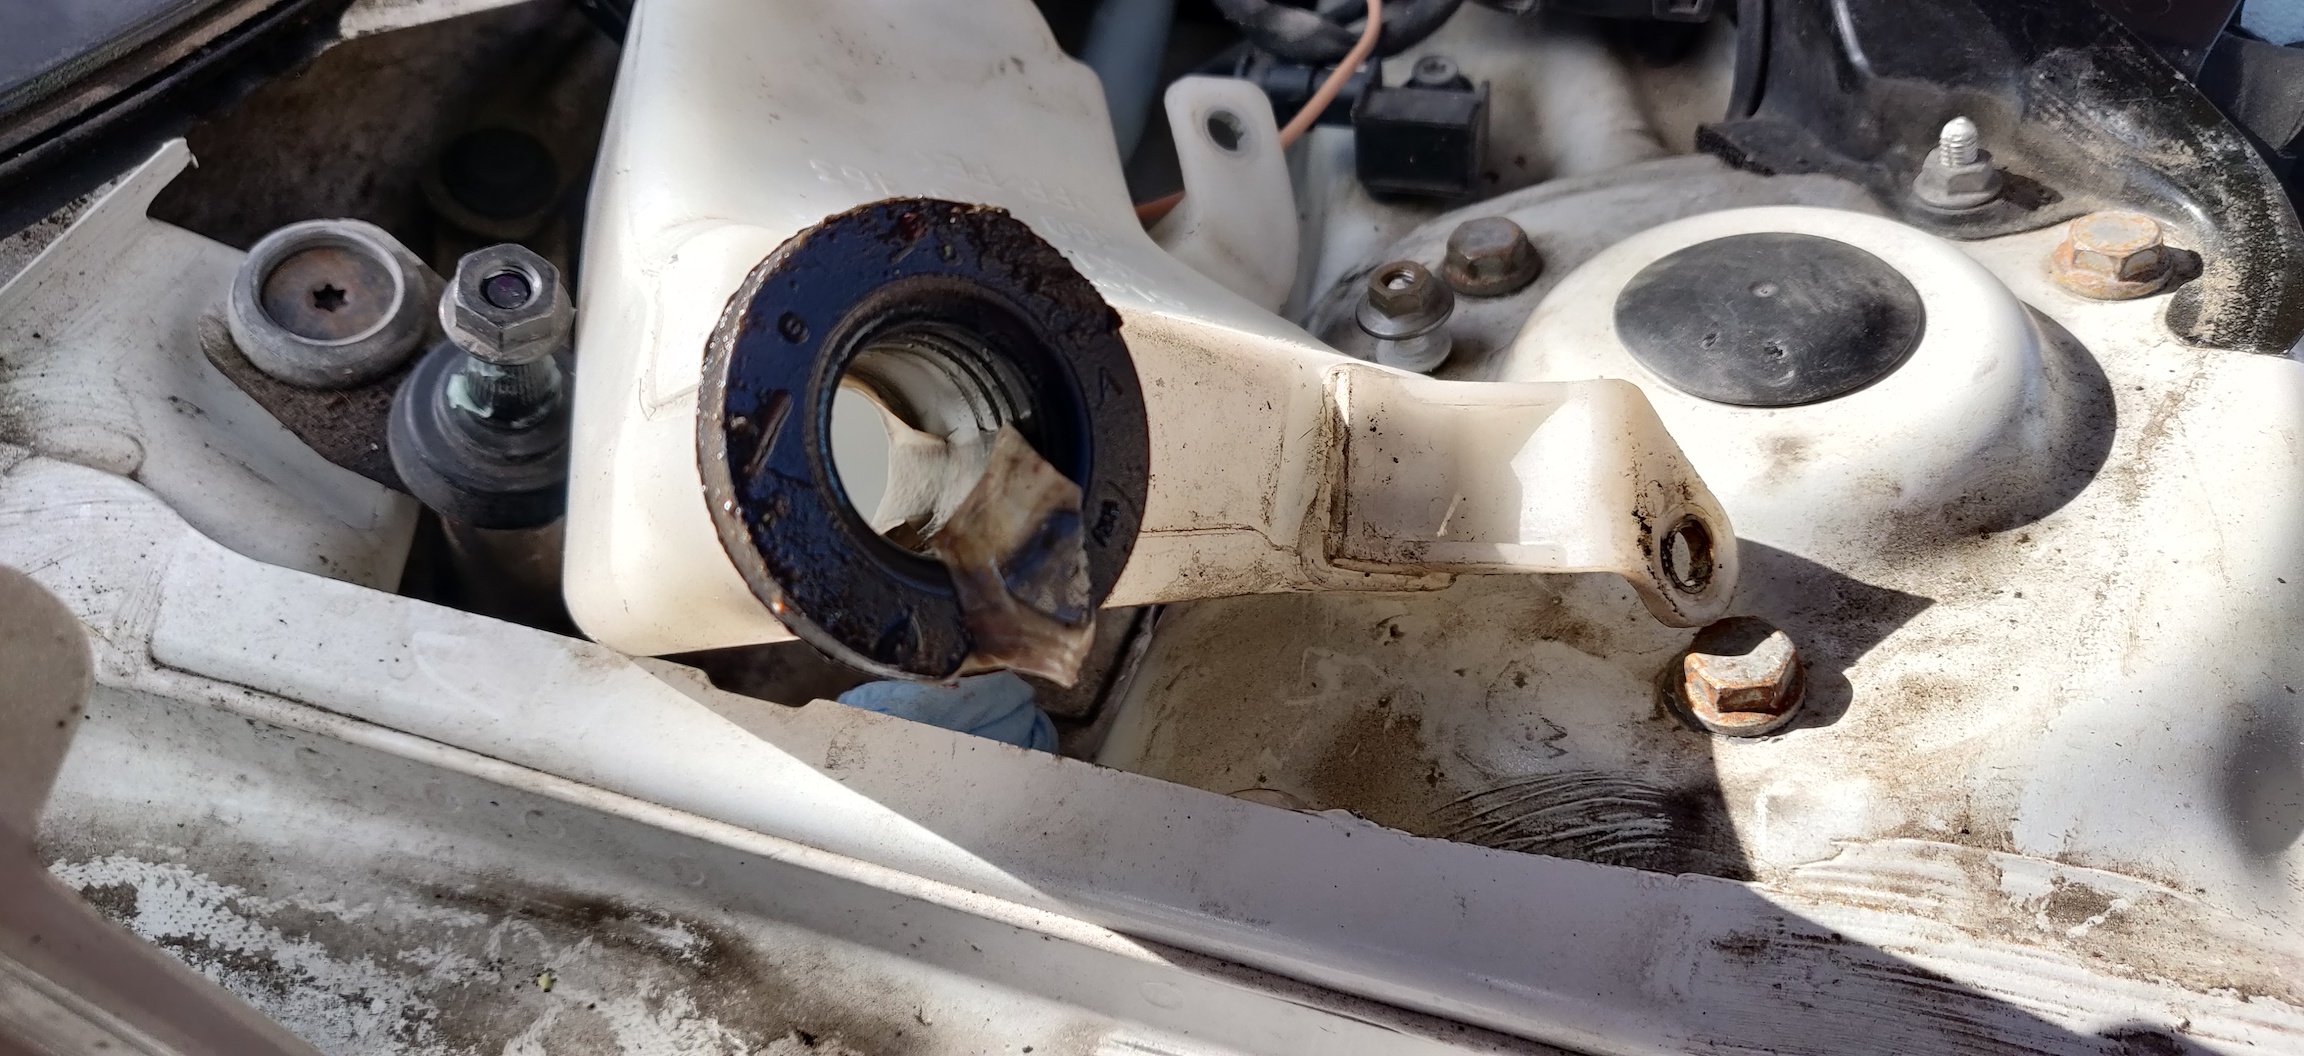
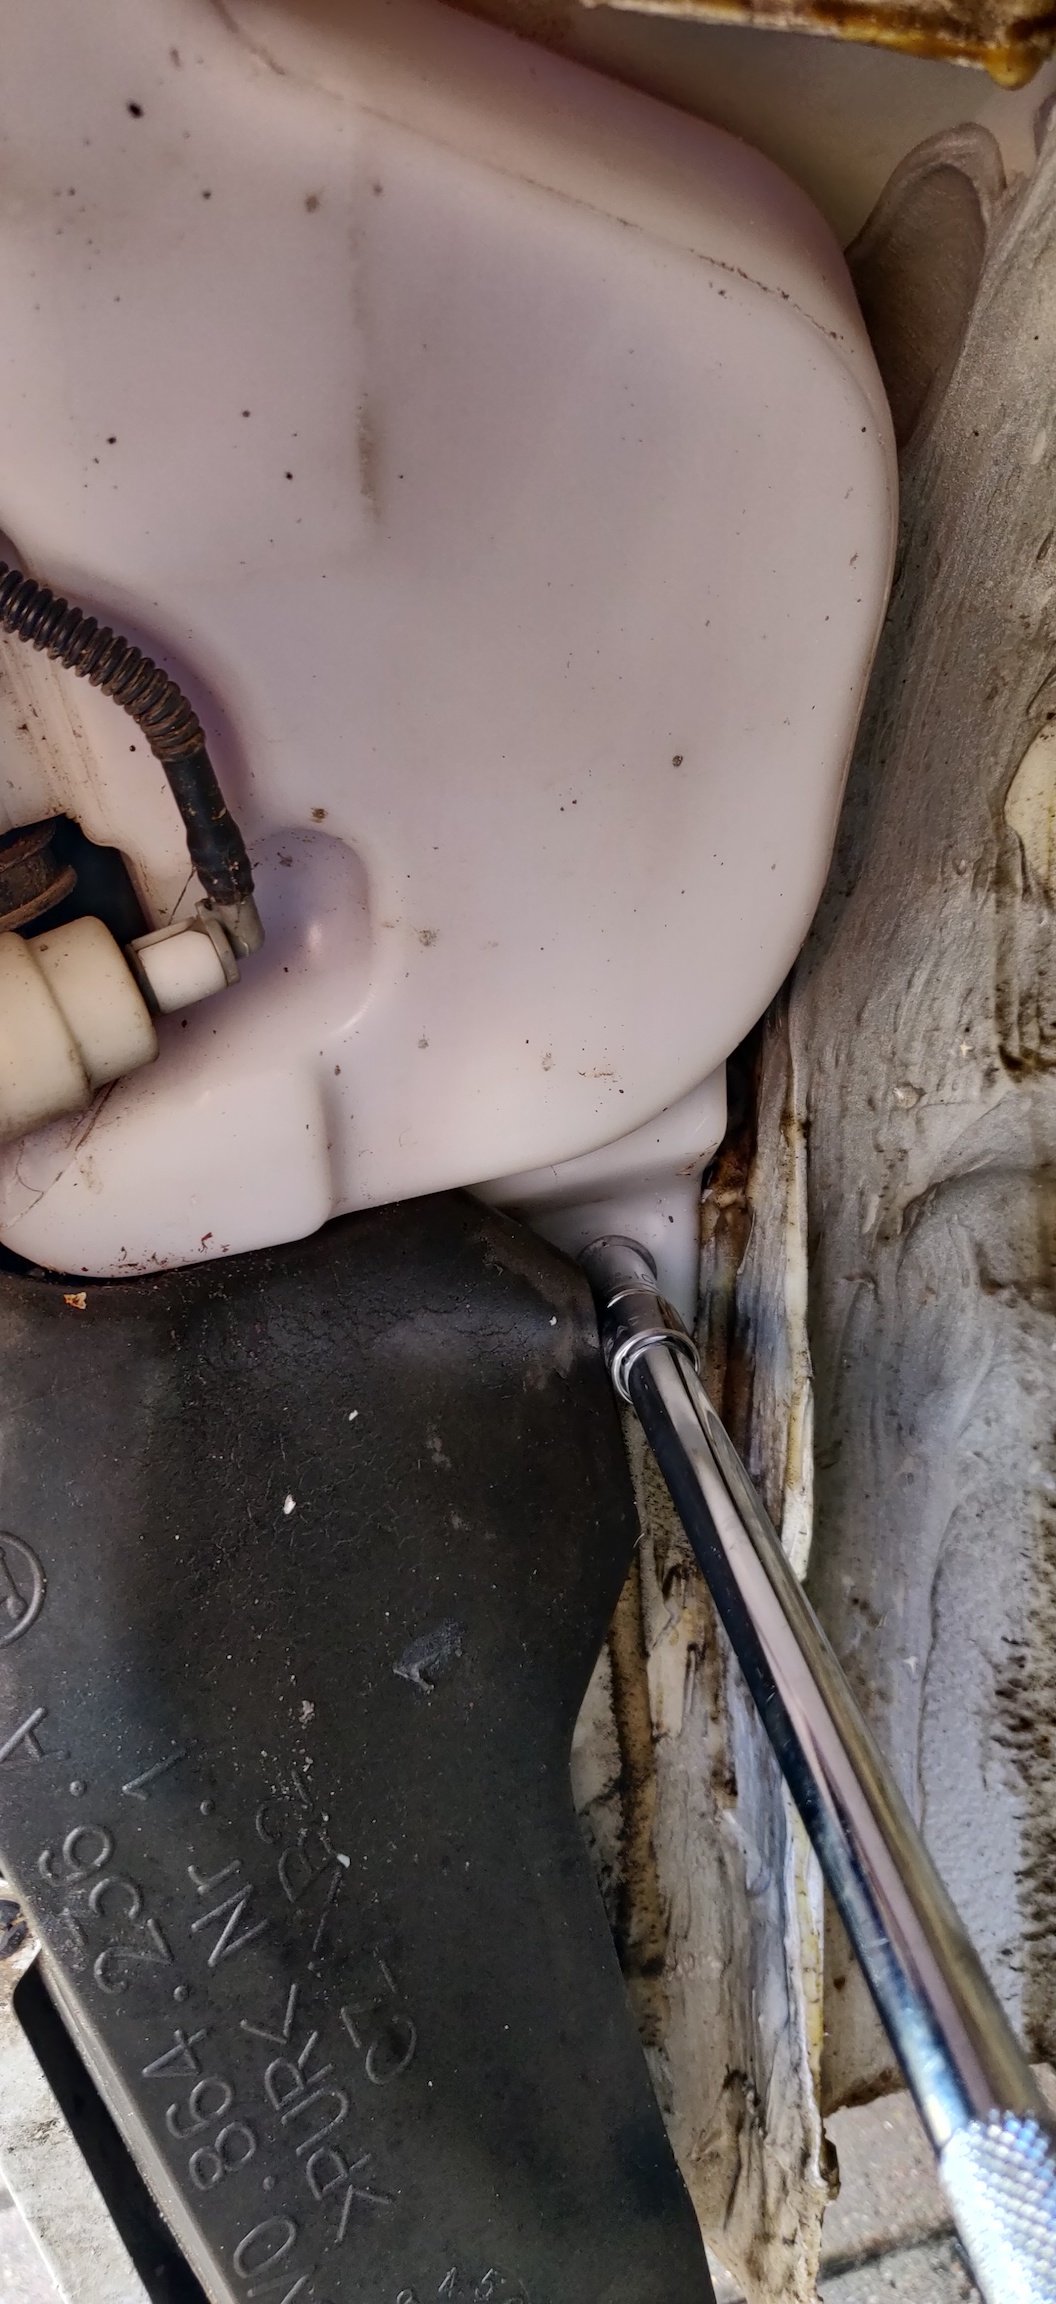
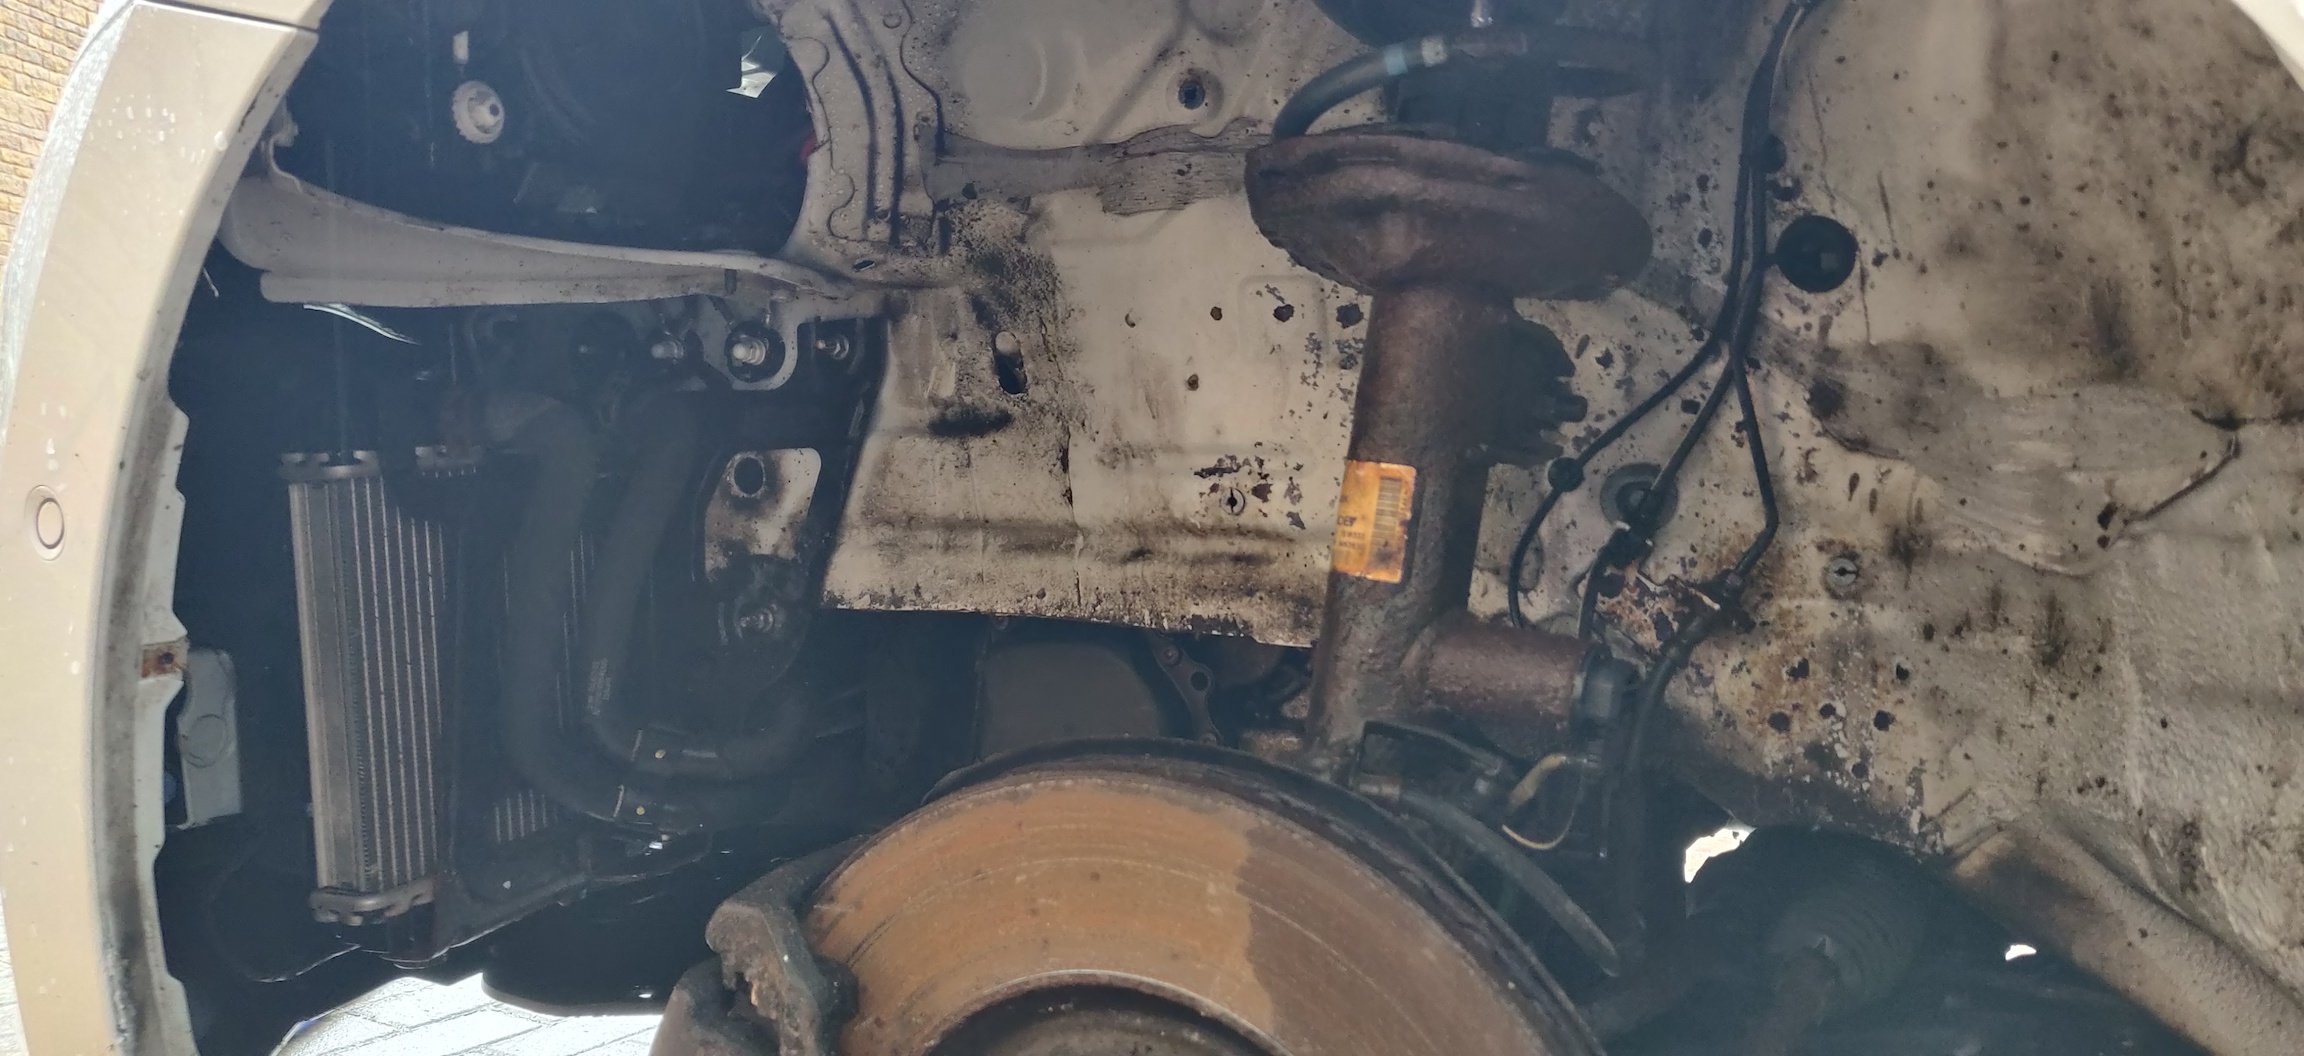
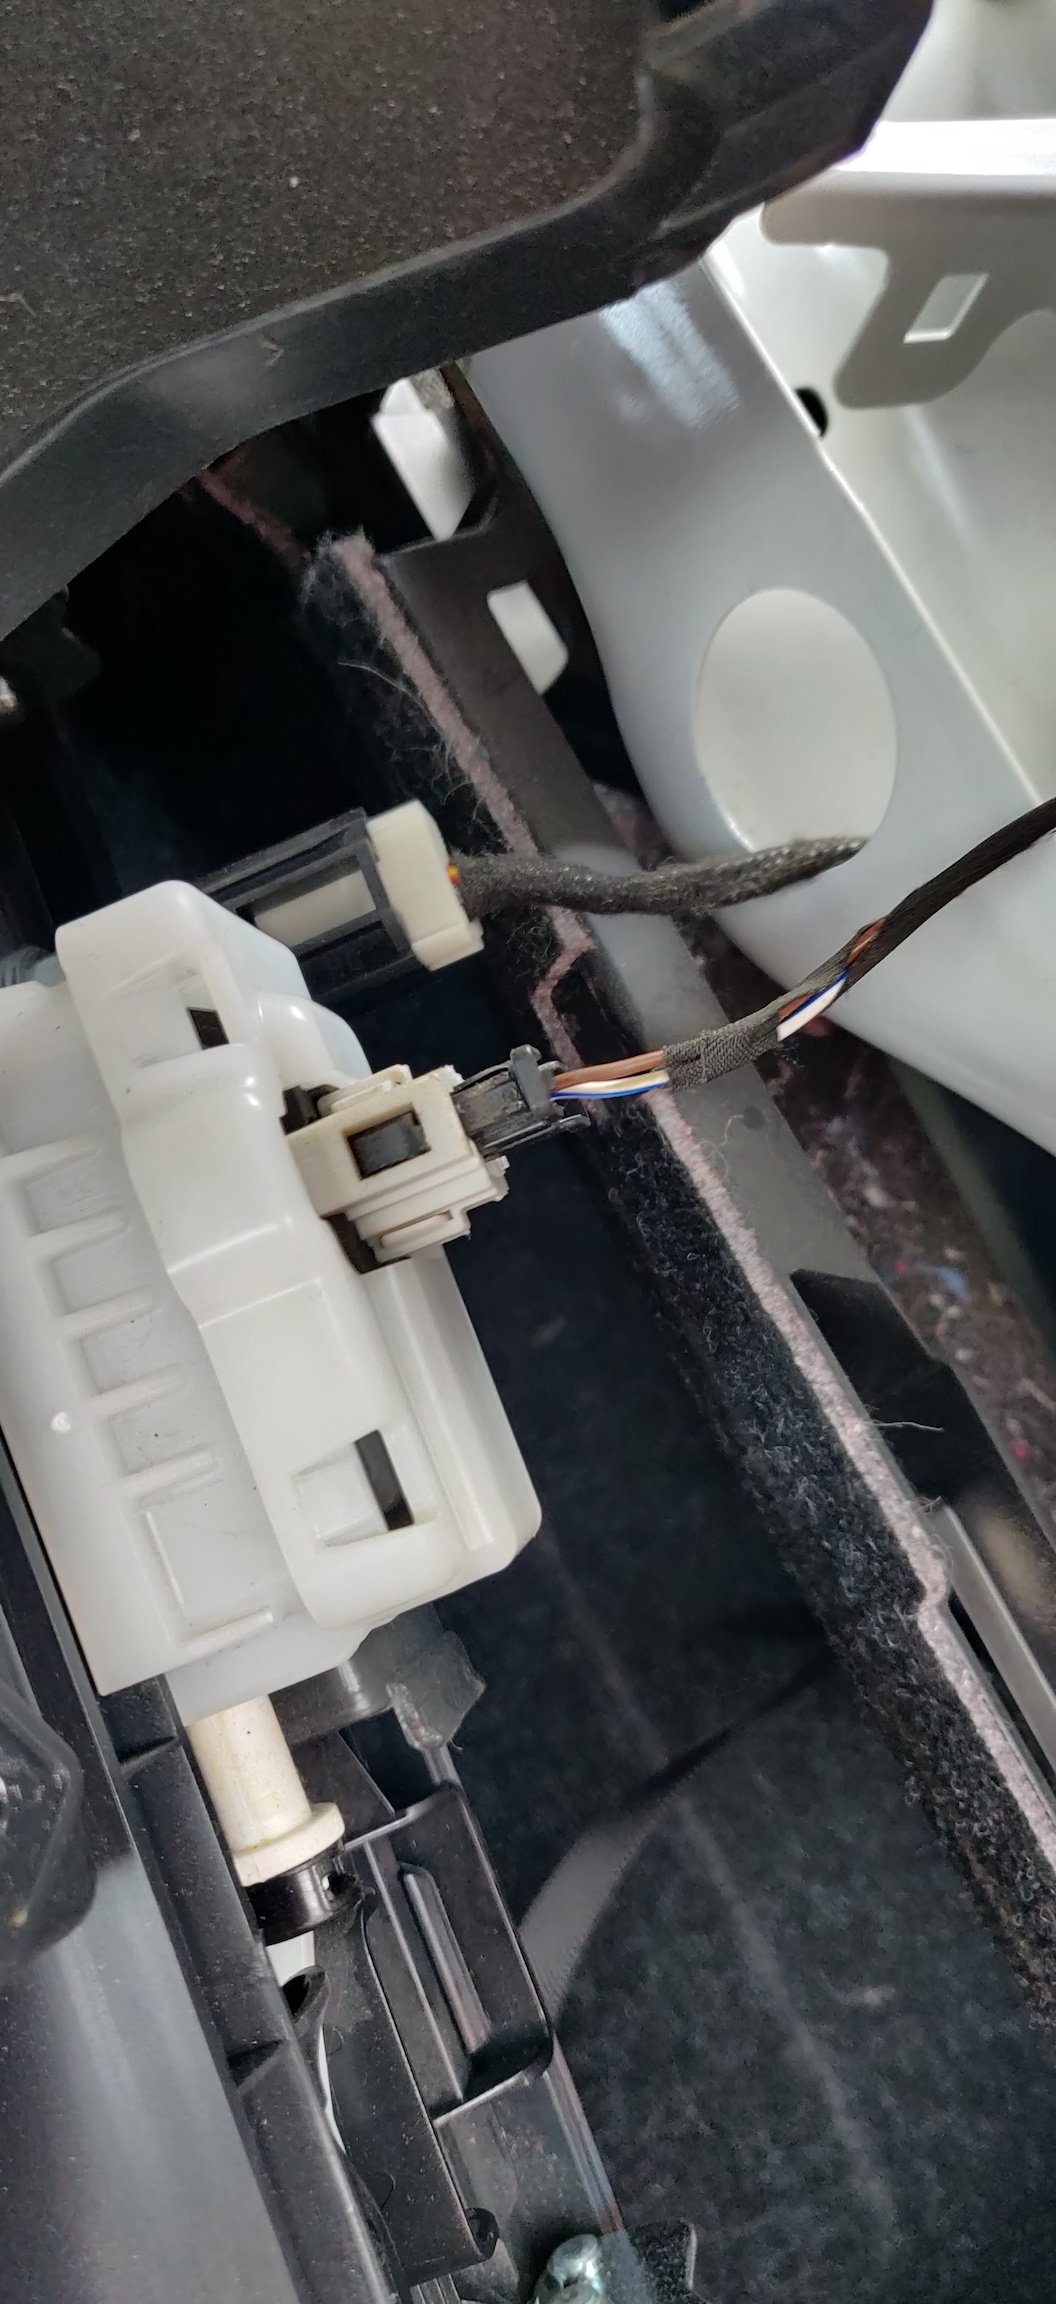
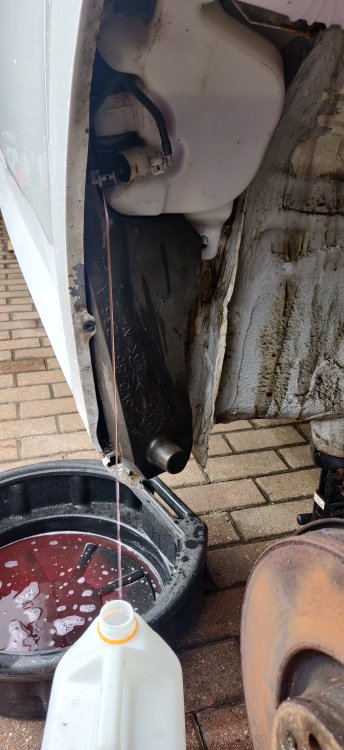
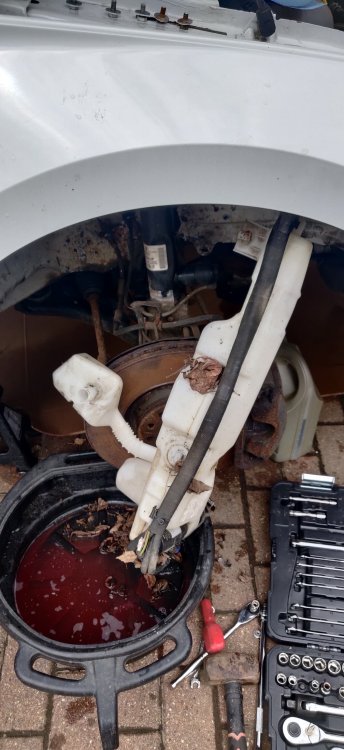
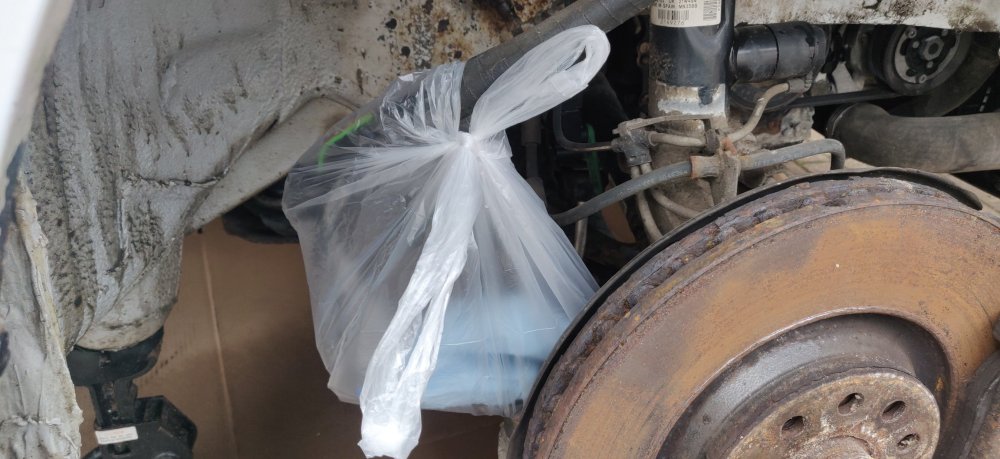
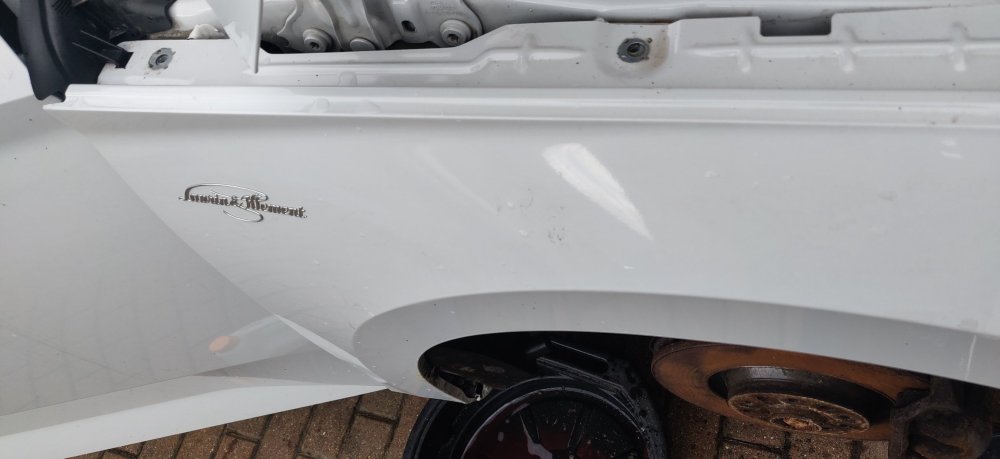
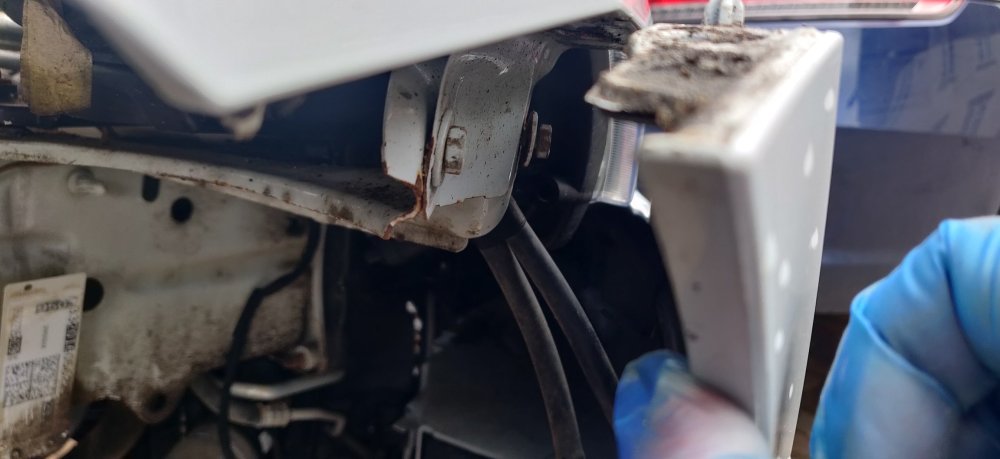
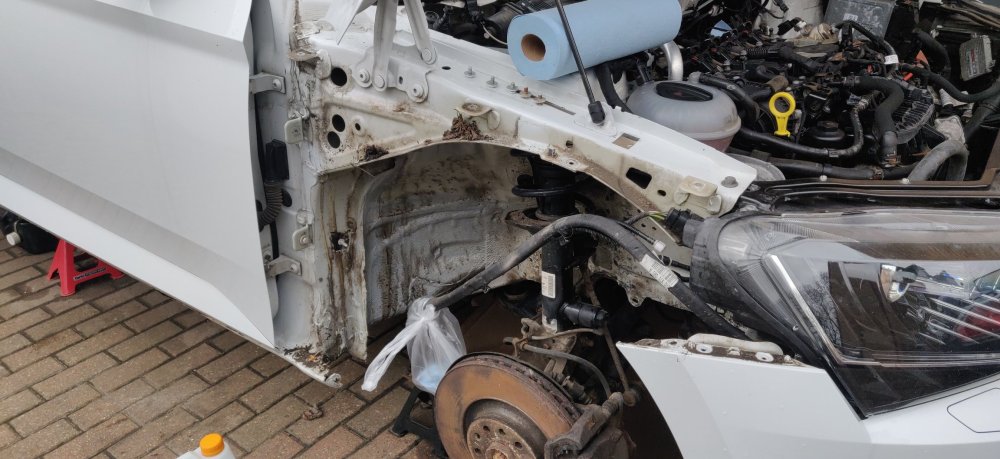
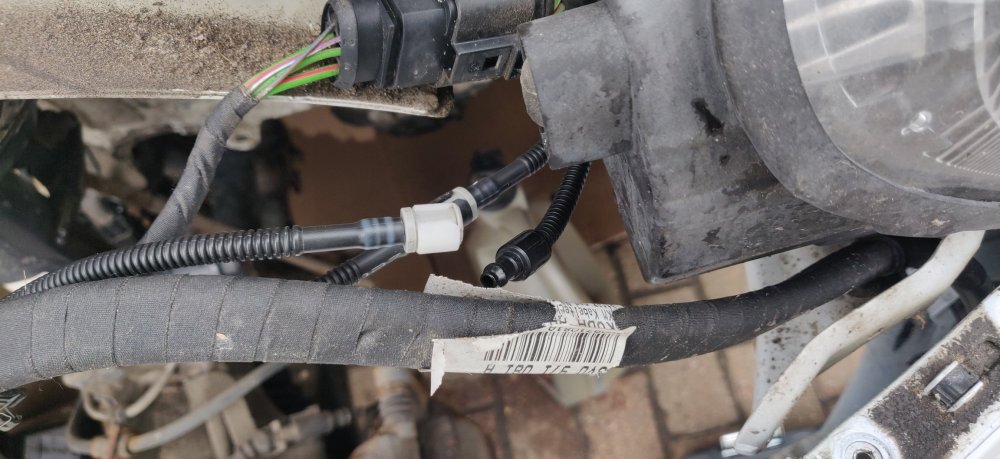
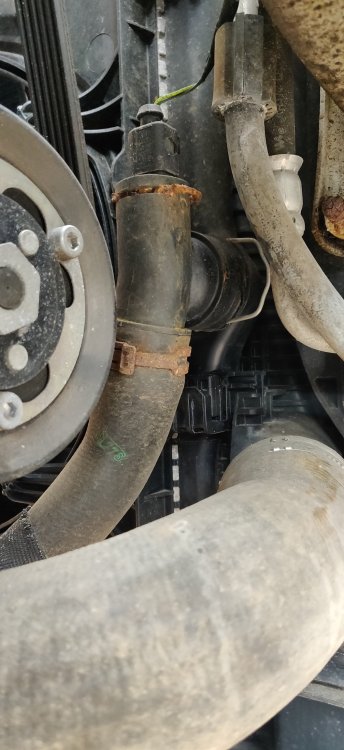
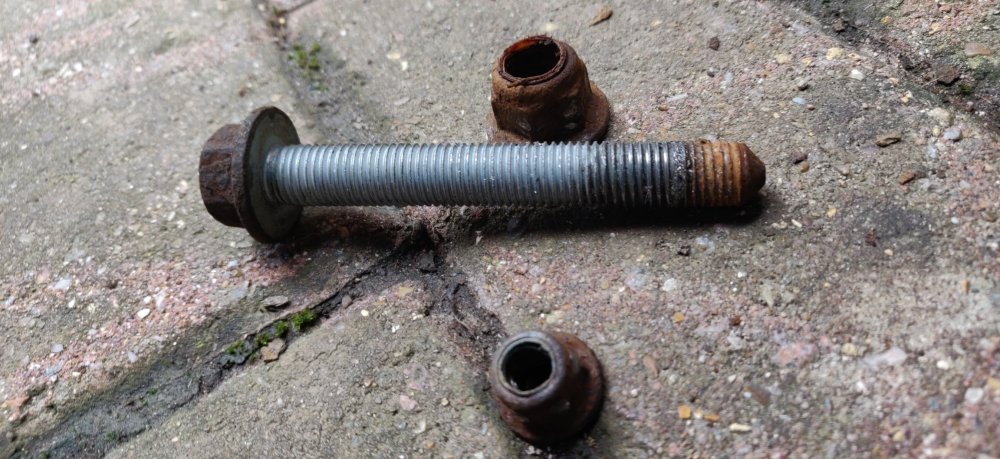
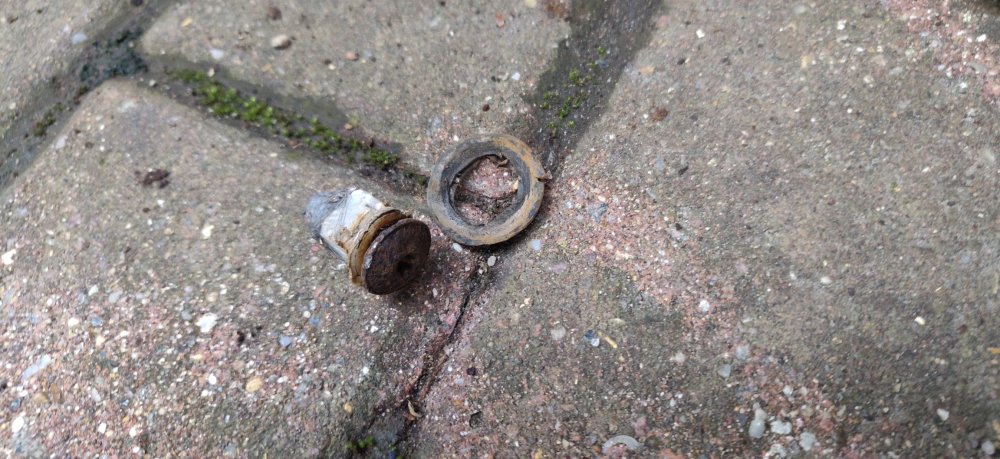
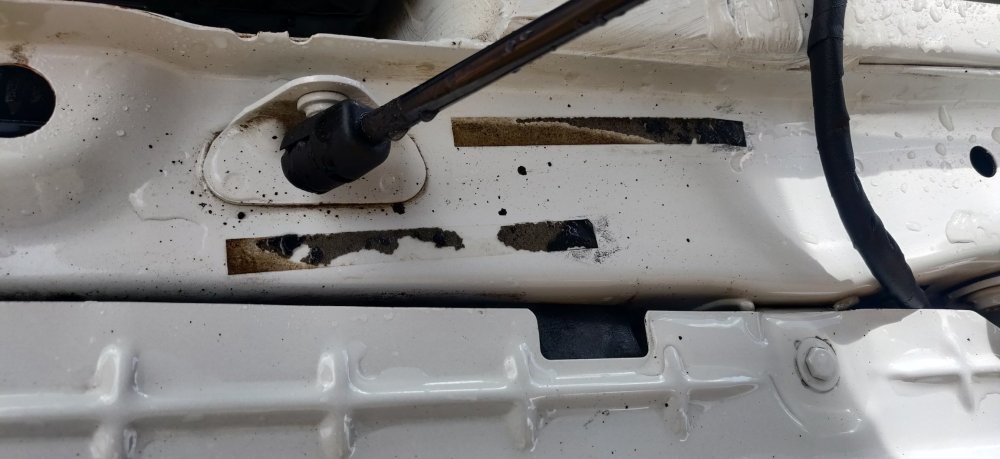
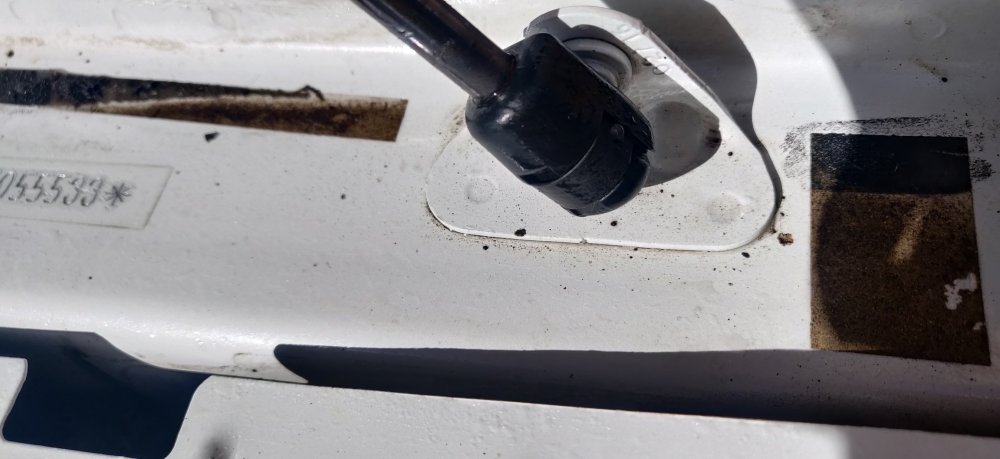
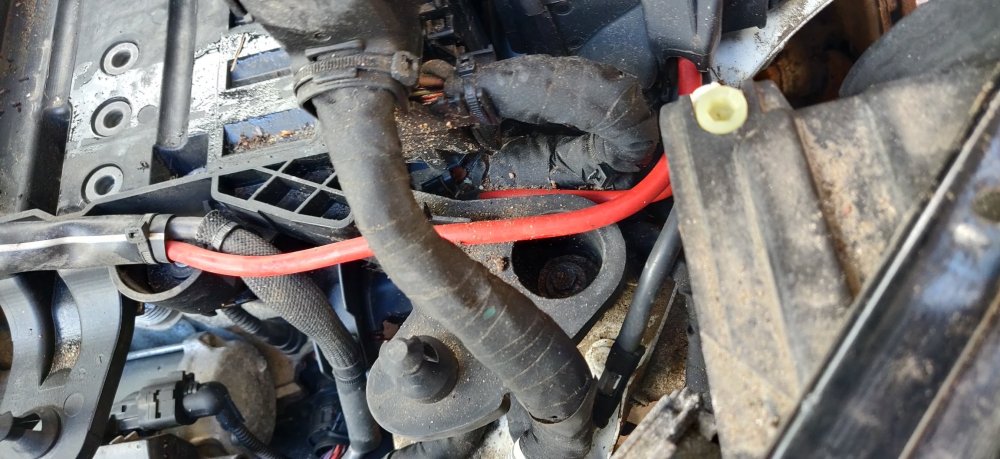
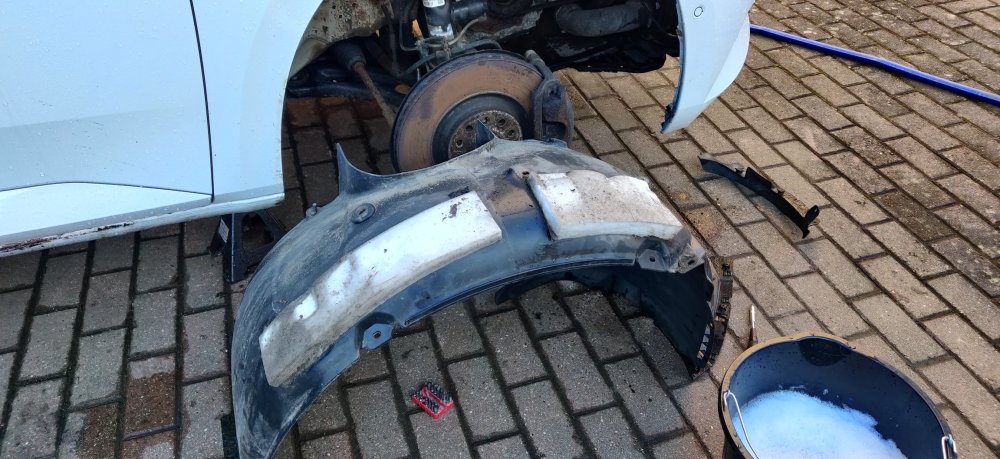
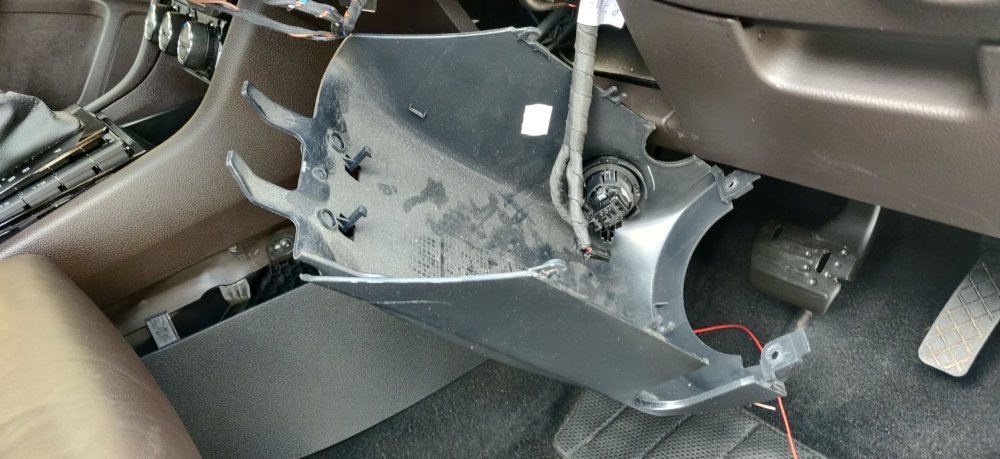
Not the best of days, car has really tested my patience. Small victory was removing the washer bottle, which as it turned out, just needed some confident prying away. Firstly, undid the two washer hoses from the lower washer motor: Which as you can see, starts draining the washer fluid, so waste not want not: So once the two nuts and the screw in the wheelarch was undone, pry the washer bottle out of the captive stud: Then for all intents, the washer bottle just plops out. Only with the hoses and the wiring keeping the thing on. So undo the three metal clips along the top: Which makes disconnecting the wiring connectors to the lower and upper washer motors easier, in addition to the hose, done by squeezing in the blue tabs on the sides of the connector and it should pull out (vaguely similar to the odd fuel line connectors on cars with under body fuel filters and so on). Like the DCC connectors on the rear, wrapped up the connectors and hose connections with a plastic bag, to stop any dirt from possibly getting into the washer hoses: Hopefully, I can get a good clean out of the washer bottle, and I guess the plan will be to flush out the washer system, just in case any of the crud I saw at the top is lurking in any of the pipework. Given I was there, decided to just go ahead and remove the front wing. It's mainly 10mm bolts, so three along the top: There are two bolts at the rear of the wing towards the front door: There's a weird blob on the front bolt which fouled it. I'm guessing some sorta overzealous seam sealer application? Just chiselled the thing away: So the bolt can be undone. Decided then to unclip the black plastic bit near those two bolts: This is continued up along the wing: Which is also where two bolts are. Then turning to the front: There are two T20 screws, which actually are bolts, which connect the bumper to the wing. This allows the bumper to be pulled out slightly: Which makes access to the last two front bolts much easier: That should be it: So stuck that into the garage, leaving behind: Hopefully just needs the remains to be wiped down. It makes access to the troublesome hose connector much easier: Unfortunately, it doesn't go back in with any conviction, and just slides out without any resistance. It could be missing a o-ring, can't really tell at this stage. Worse case scenario, I'll source a repair section off of eBay or wherever and just get rid of this connector. This was about where the day took a turn for the worse. Decided to see if I could remove the front struts, as for all intents and purposes, this would have been the bare minimum requirement for the MoT (unless a subsequent tester discovers the rear anti roll bar I guess). So normally, I struggle with the anti roll bar drop links, usually resulting in their destruction. See the posts about the rear ones. So I threw caution to the wind and got the Impact wrench straight onto the drop link nut, which was 18mm. This loosened it, but it did the classic spinning and not loosening thing. Now, the recess in the drop link was nice and clean, and fitted an M6 spline bit nice and cleanly. So I got that onto a ratchet spanner with a normal 18mm ring on the nut. I tightened with the ratchet spanner to actually loosen the nut: So out it came without any drama. Same result on the other side. Was pleasantly surprised. So the big strut bolt was next. This had an 18mm nut on one end and a big M14 spline bit on the other end. This did not get affected by the impact wrench at all, so required the breaker bar, with added trolley jack bar: After a few turns, disaster: Didn't know such beefy bolts can snap like this. I had a decent feeling why though. Checked to see if the nut could still be undone: So at least that was freed: The hubs look like aluminium, and I imagine years of a steel bolt through it, and well, you've seen the rust under this car, so could be years of salt and corrosion in this mess, making the bolt most likely absolutely mashed together with the hub. So I imagine fire and a hammer might be my only choice. I started to undo the three top of the strut as well, which again decided to end in disaster: Somehow, one remaining bolt has decided to spin freely, and the top mount captive nut appears to now be spinning freely. This is much more of a pain than the strut bolt I imagine as access is tight up there. Took some deep breathes and tackled the other side: The strut bolt came free from this one. The whole process was much harder, even with the trolley jack handle extending the breaker bar. This whole bolt having aluminium corrosion on it just emphasising the point I've made already. Just grease the sodding things. So to really get me at snapping point: I tried to disconnect the hose on the bottom right of the radiator to drain the coolant, as part of the servicing. The workshop manual simply states to undo this clamp and disconnect it from the radiator. It doesn't budge. So decided ok, I'll just disconnect the hose via the clip. No dice. The clip is oriented in such a way that the air con compressor is right in the way, and some manoeuvring with the pliers to try and release the clip kept slipping, and even worse, slipped and rotated further inwards away from the outside. It reached the point where it then had to be tackled from above, which only succeeded in getting the hose clip absolutely facing inwards now. It was then that I was screaming to the heavens. Sure, snapped suspension bolts are frustrating, but I'm now anticipating that this will happen with this naff car. But to struggle to empty the car of coolant? Blimey. Maintenance: £1806.50 Upgrades: £1020.69 Miscellaneous: £631.67


-
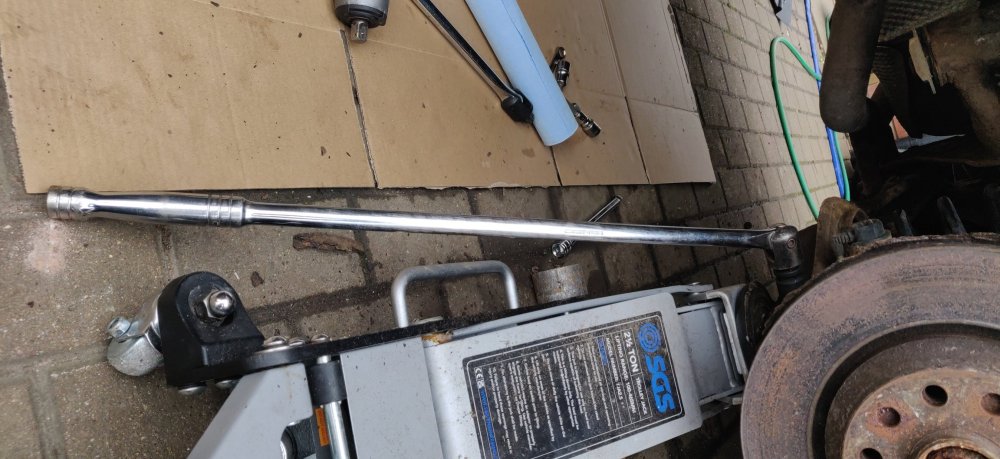
Had a spot of lunch (and some chocolate!) and went and jacked up the other side to gain access to the other top bolt. Same with the hammering on of the M10 bit to make sure its slotted in, and some extension gymnastics: Took no chances, got a big breaker bar and the trolley jack extension. Once it started to loosen, I then swapped it out with the ratchet spanner, and slowly slowly: Had a decent angle to see it slowly getting there. Then out it went: So the anti roll bar on this side now flops about, as the one remaining rounded bolt is still loosened, so it's just that one left. I think there's enough attack angles to get at it with a reciprocating saw, which I will most likely need to use for the anti roll bar links anyway. That's it for the day, so not perfect, as the DSG and Haldex haven't been touched yet. Forecast is rain tomorrow so a sad end to the Easter break unfortunately. Maintenance: £1806.50 Upgrades: £1020.69 Miscellaneous: £631.67


-
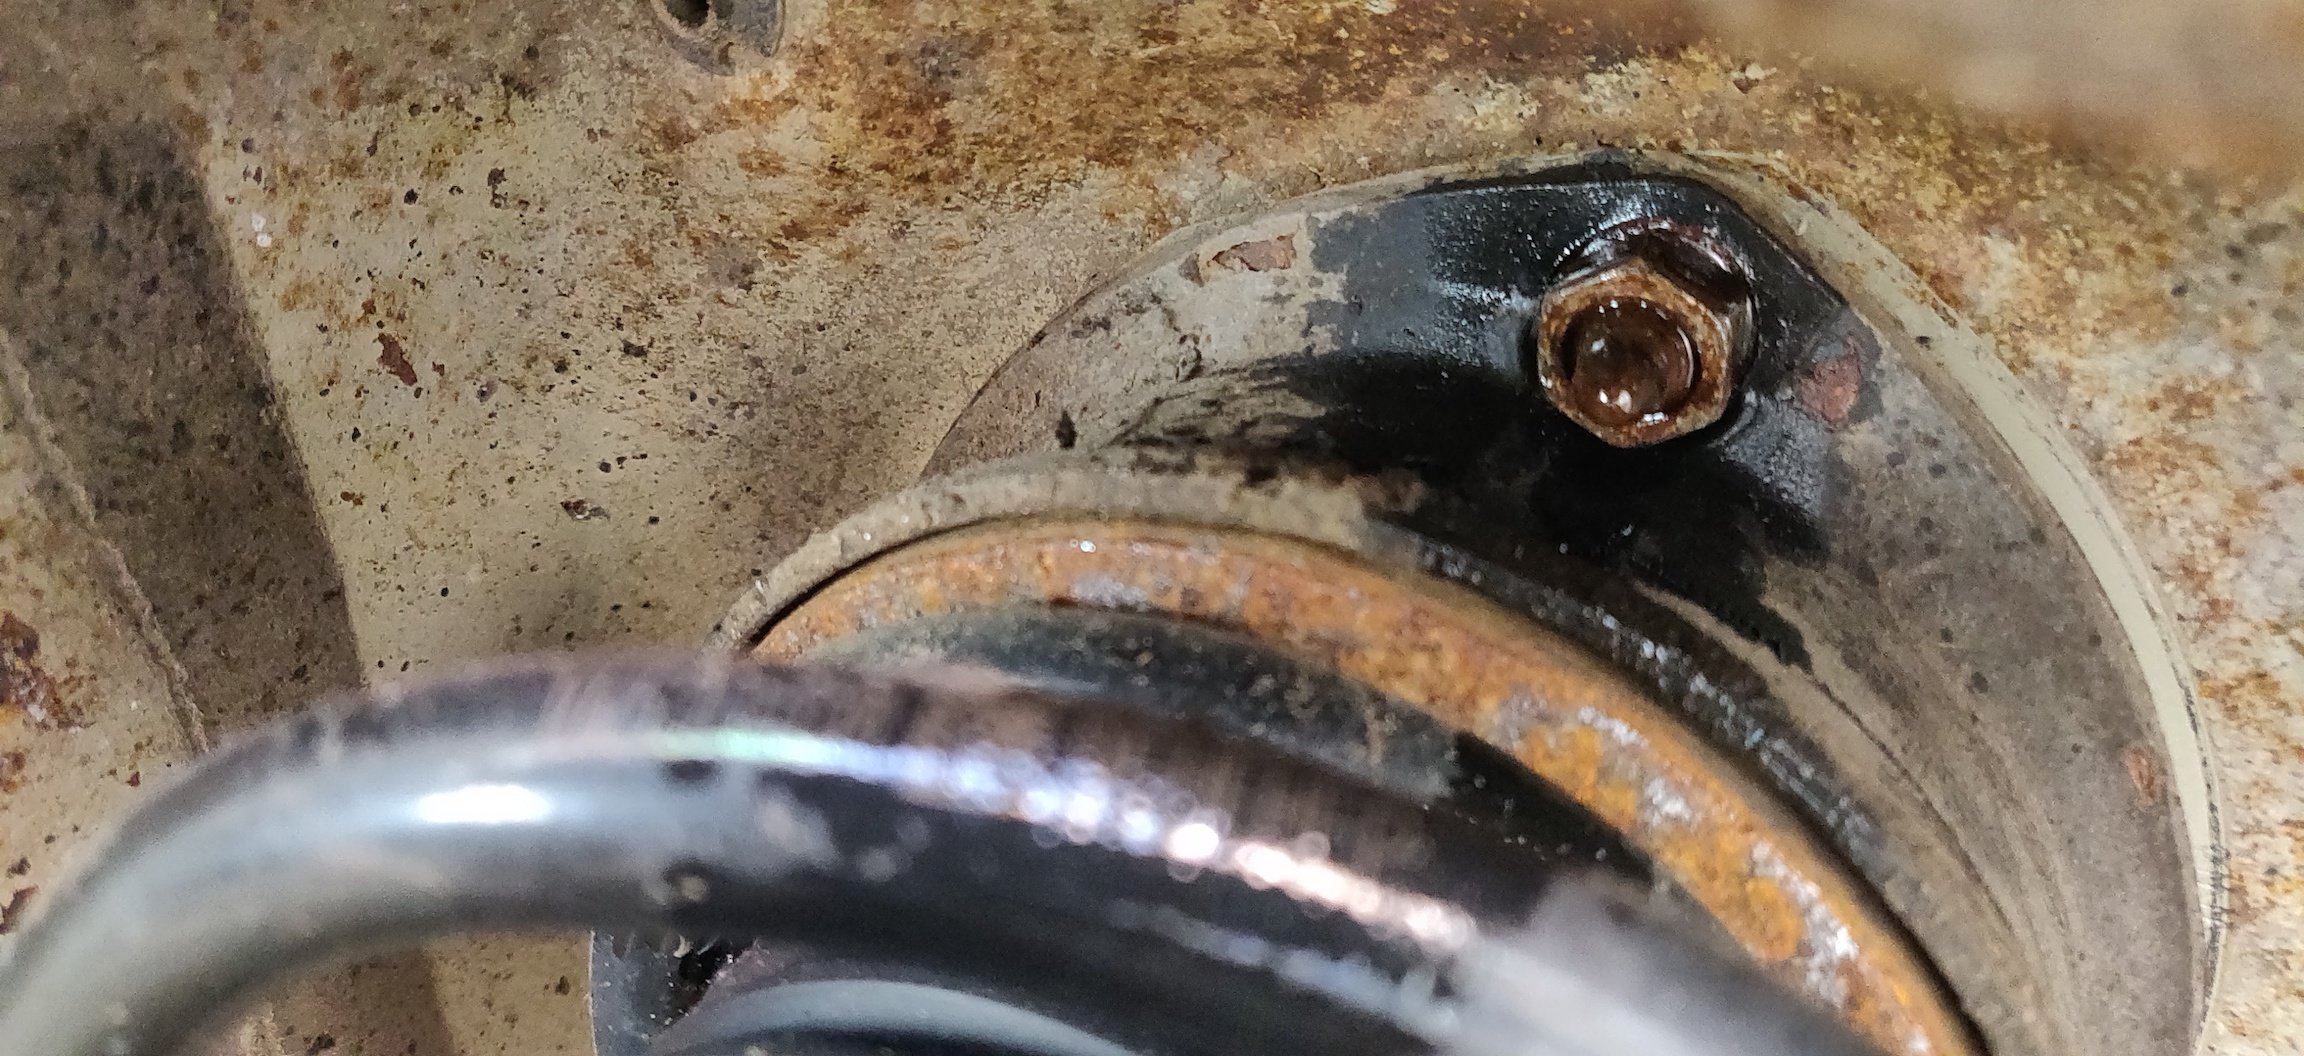
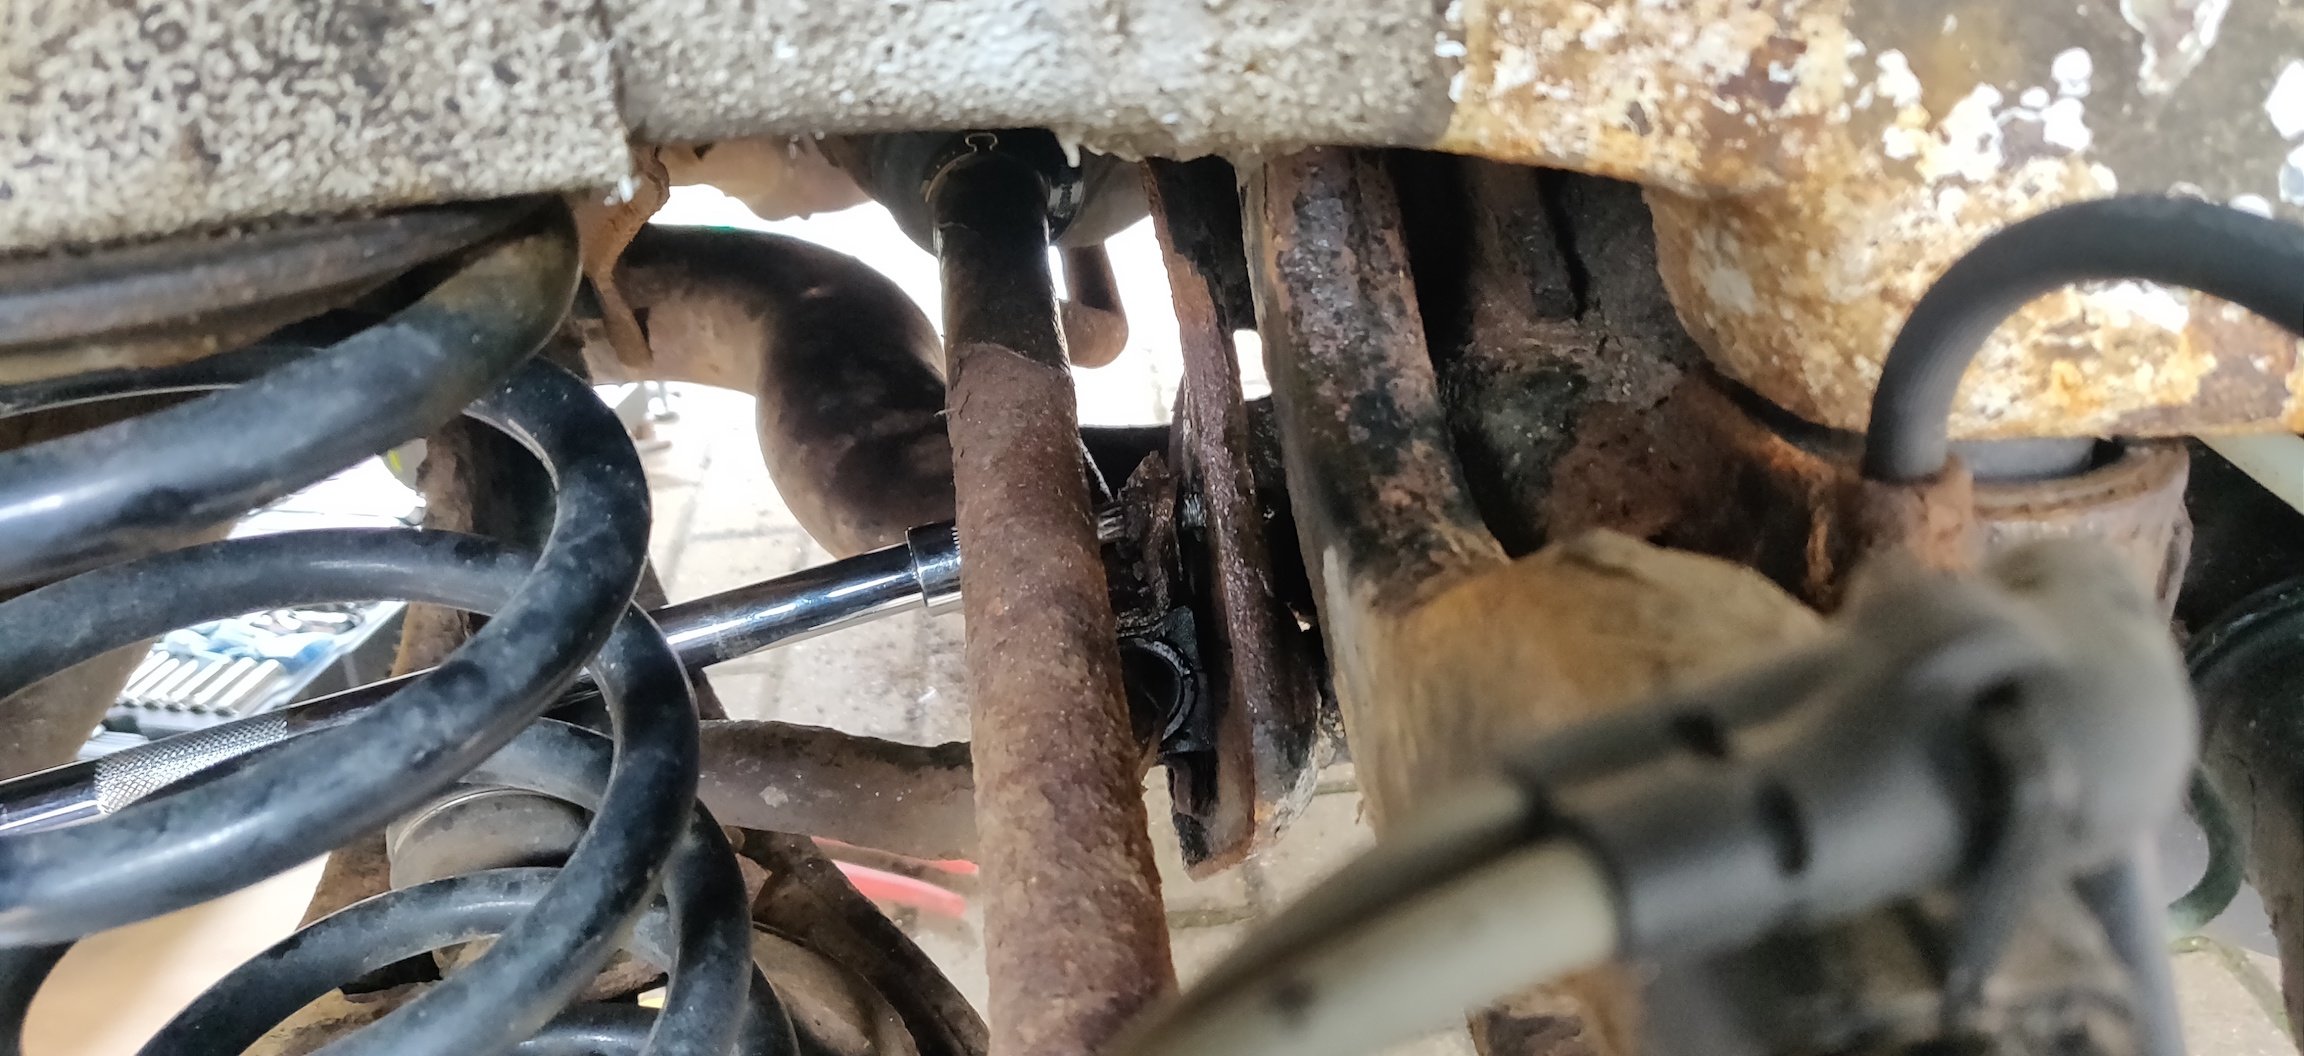
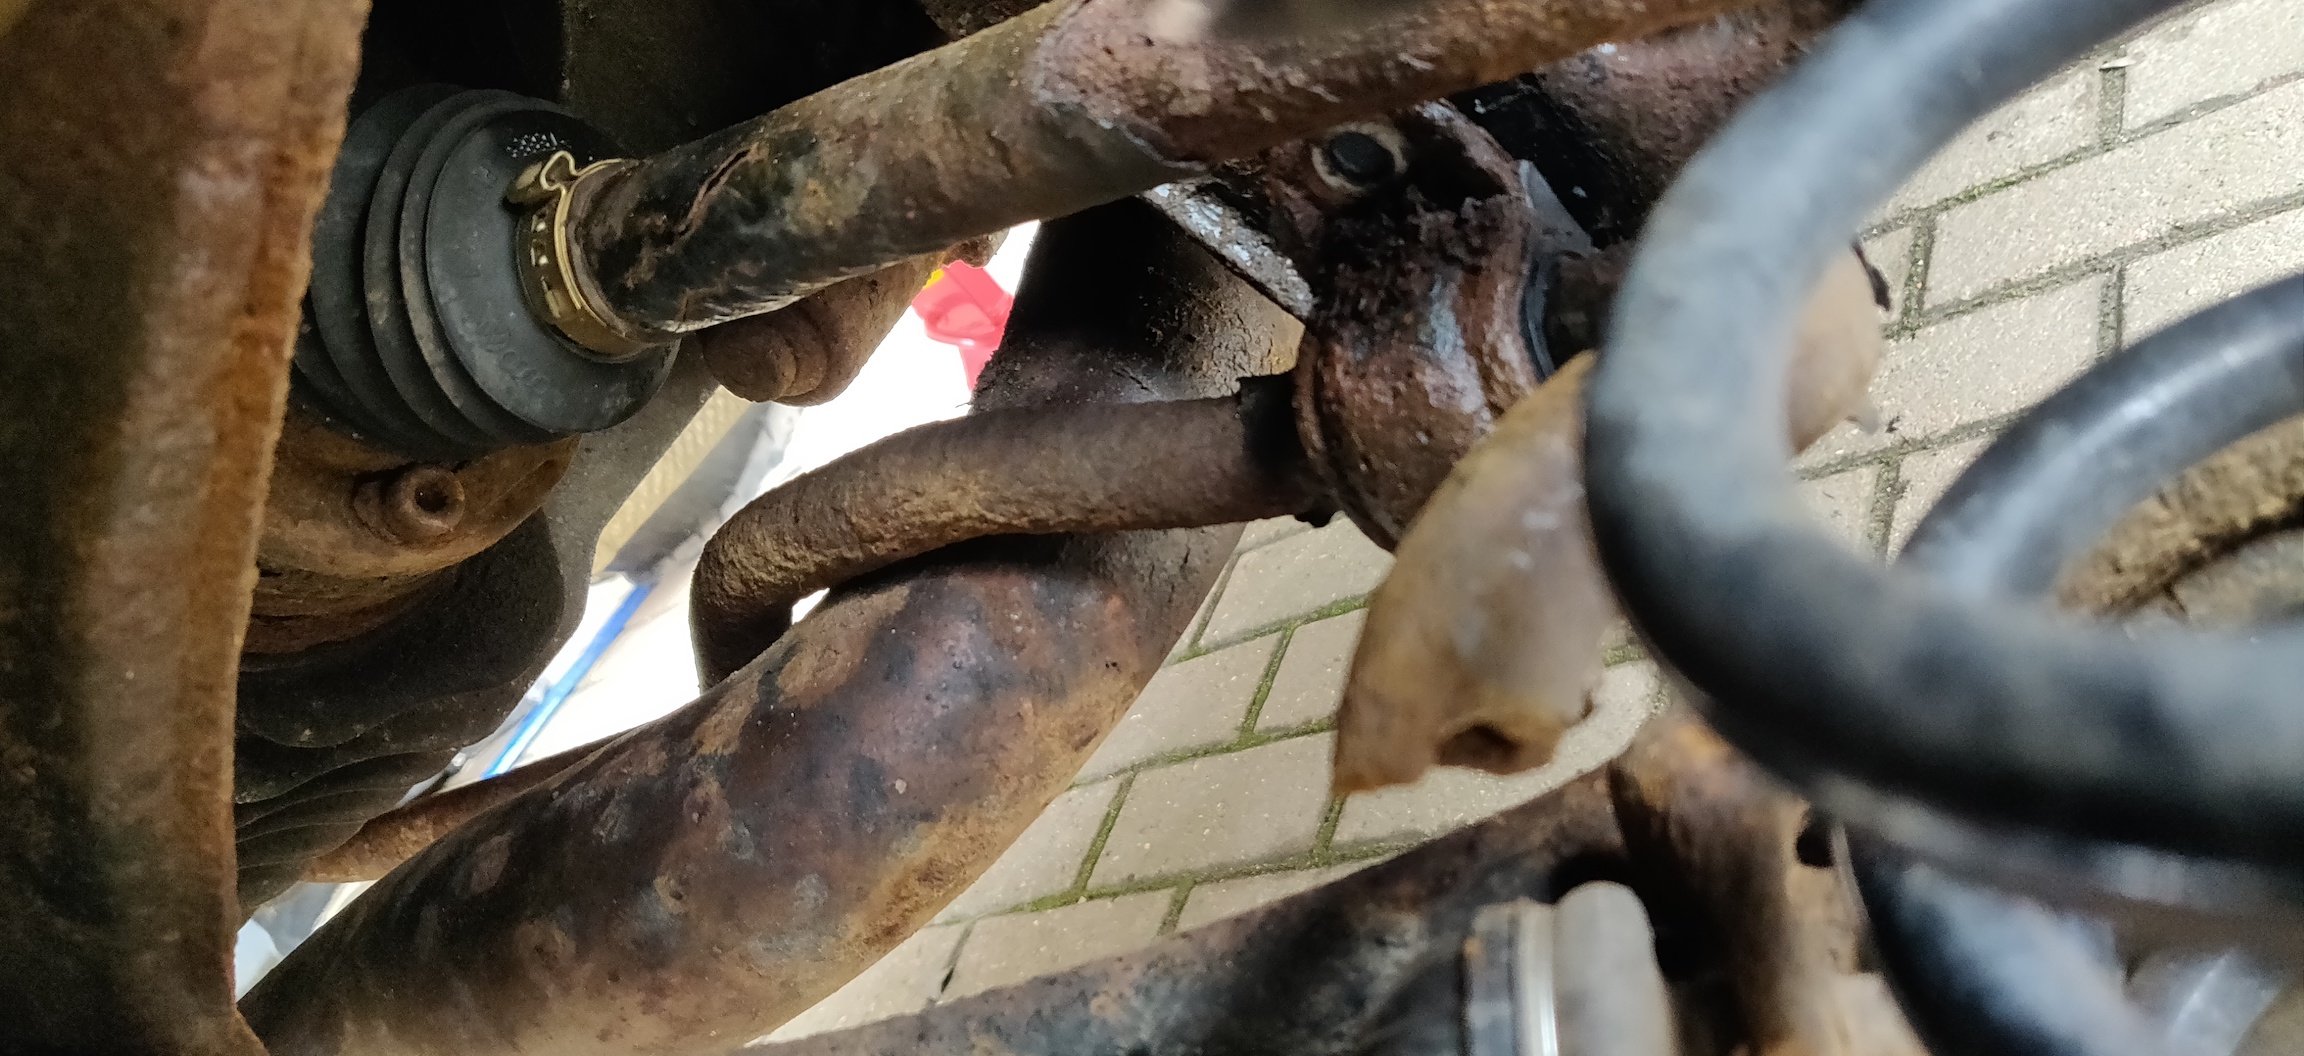
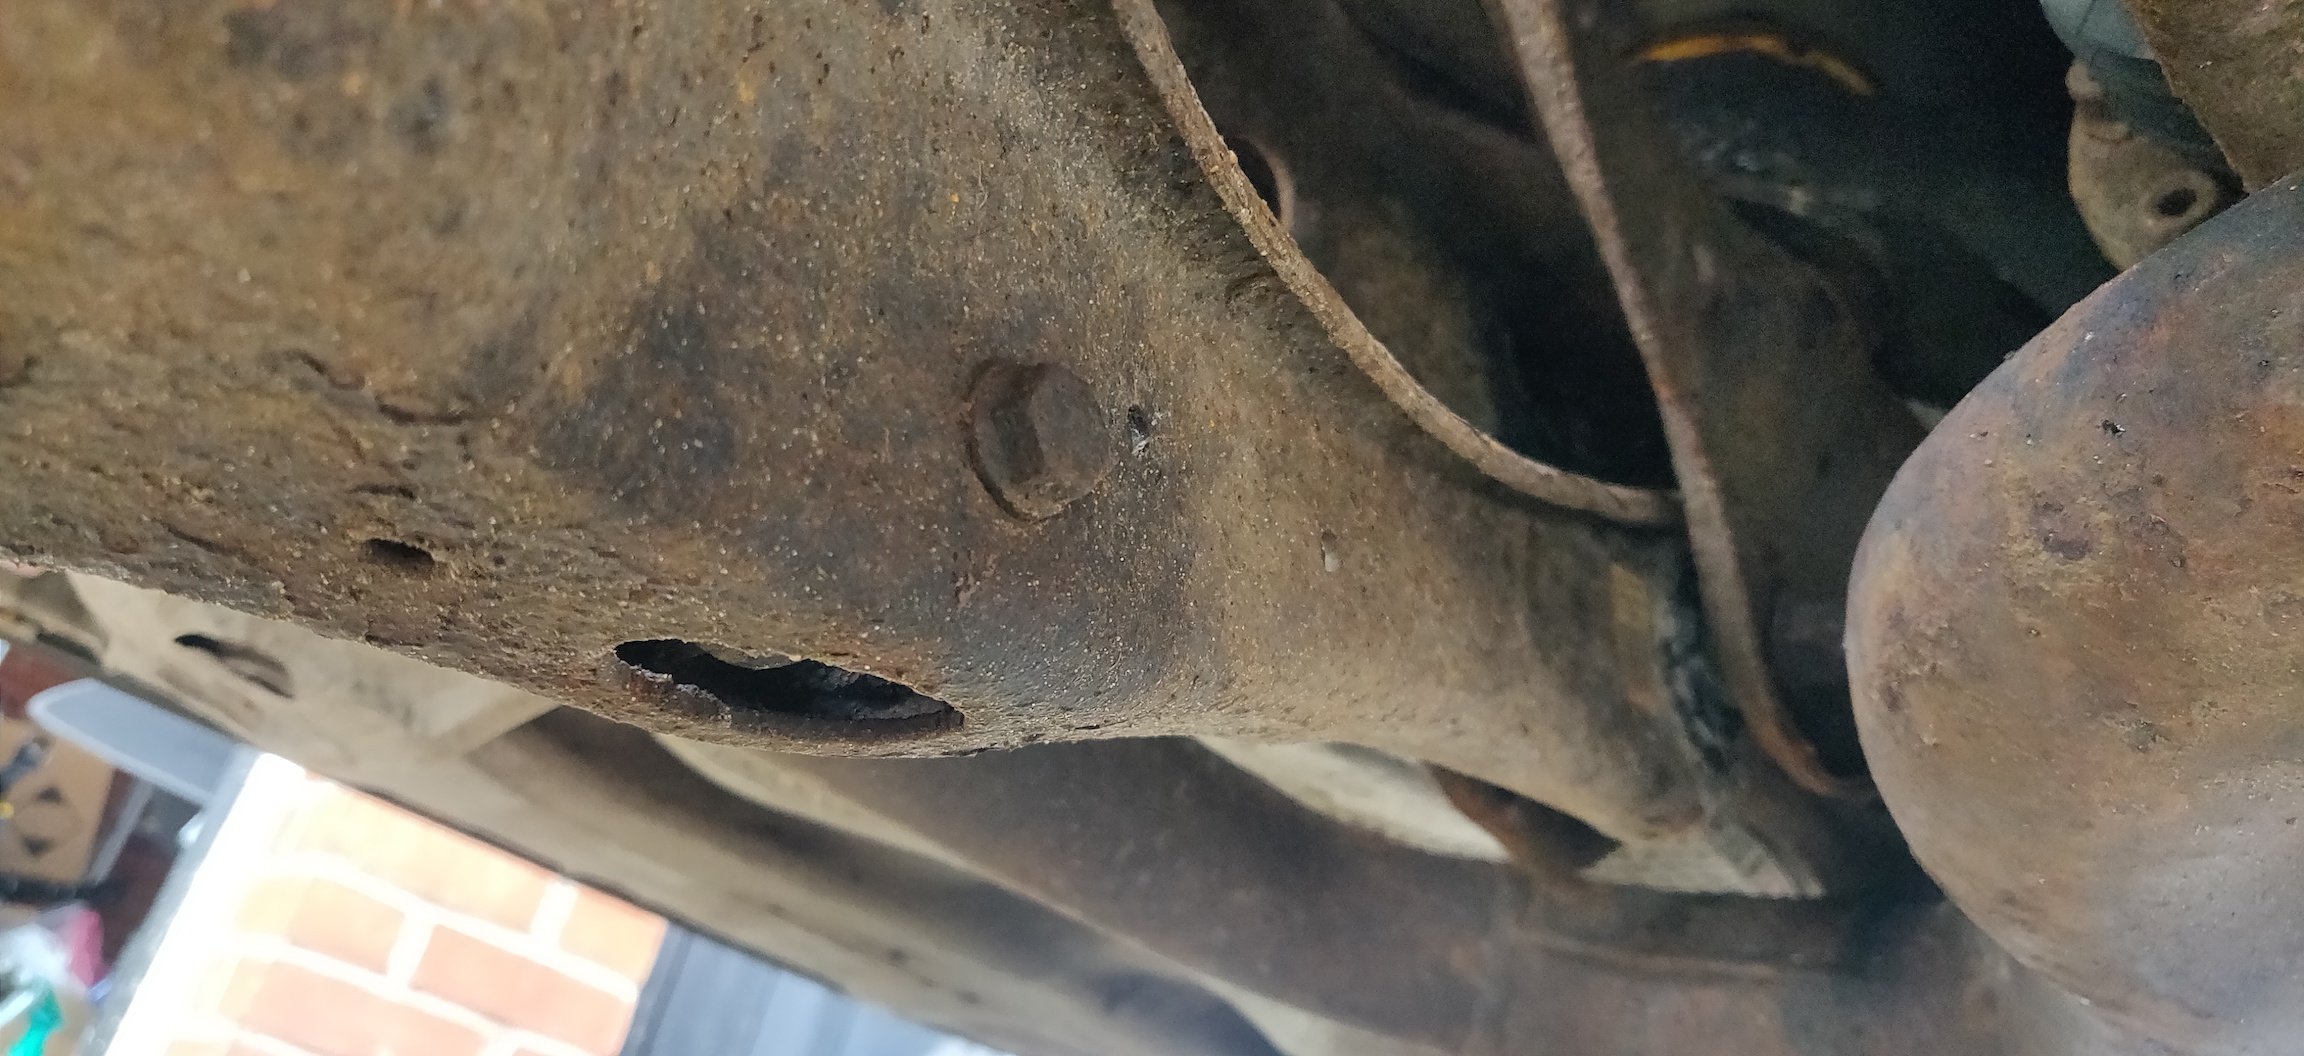
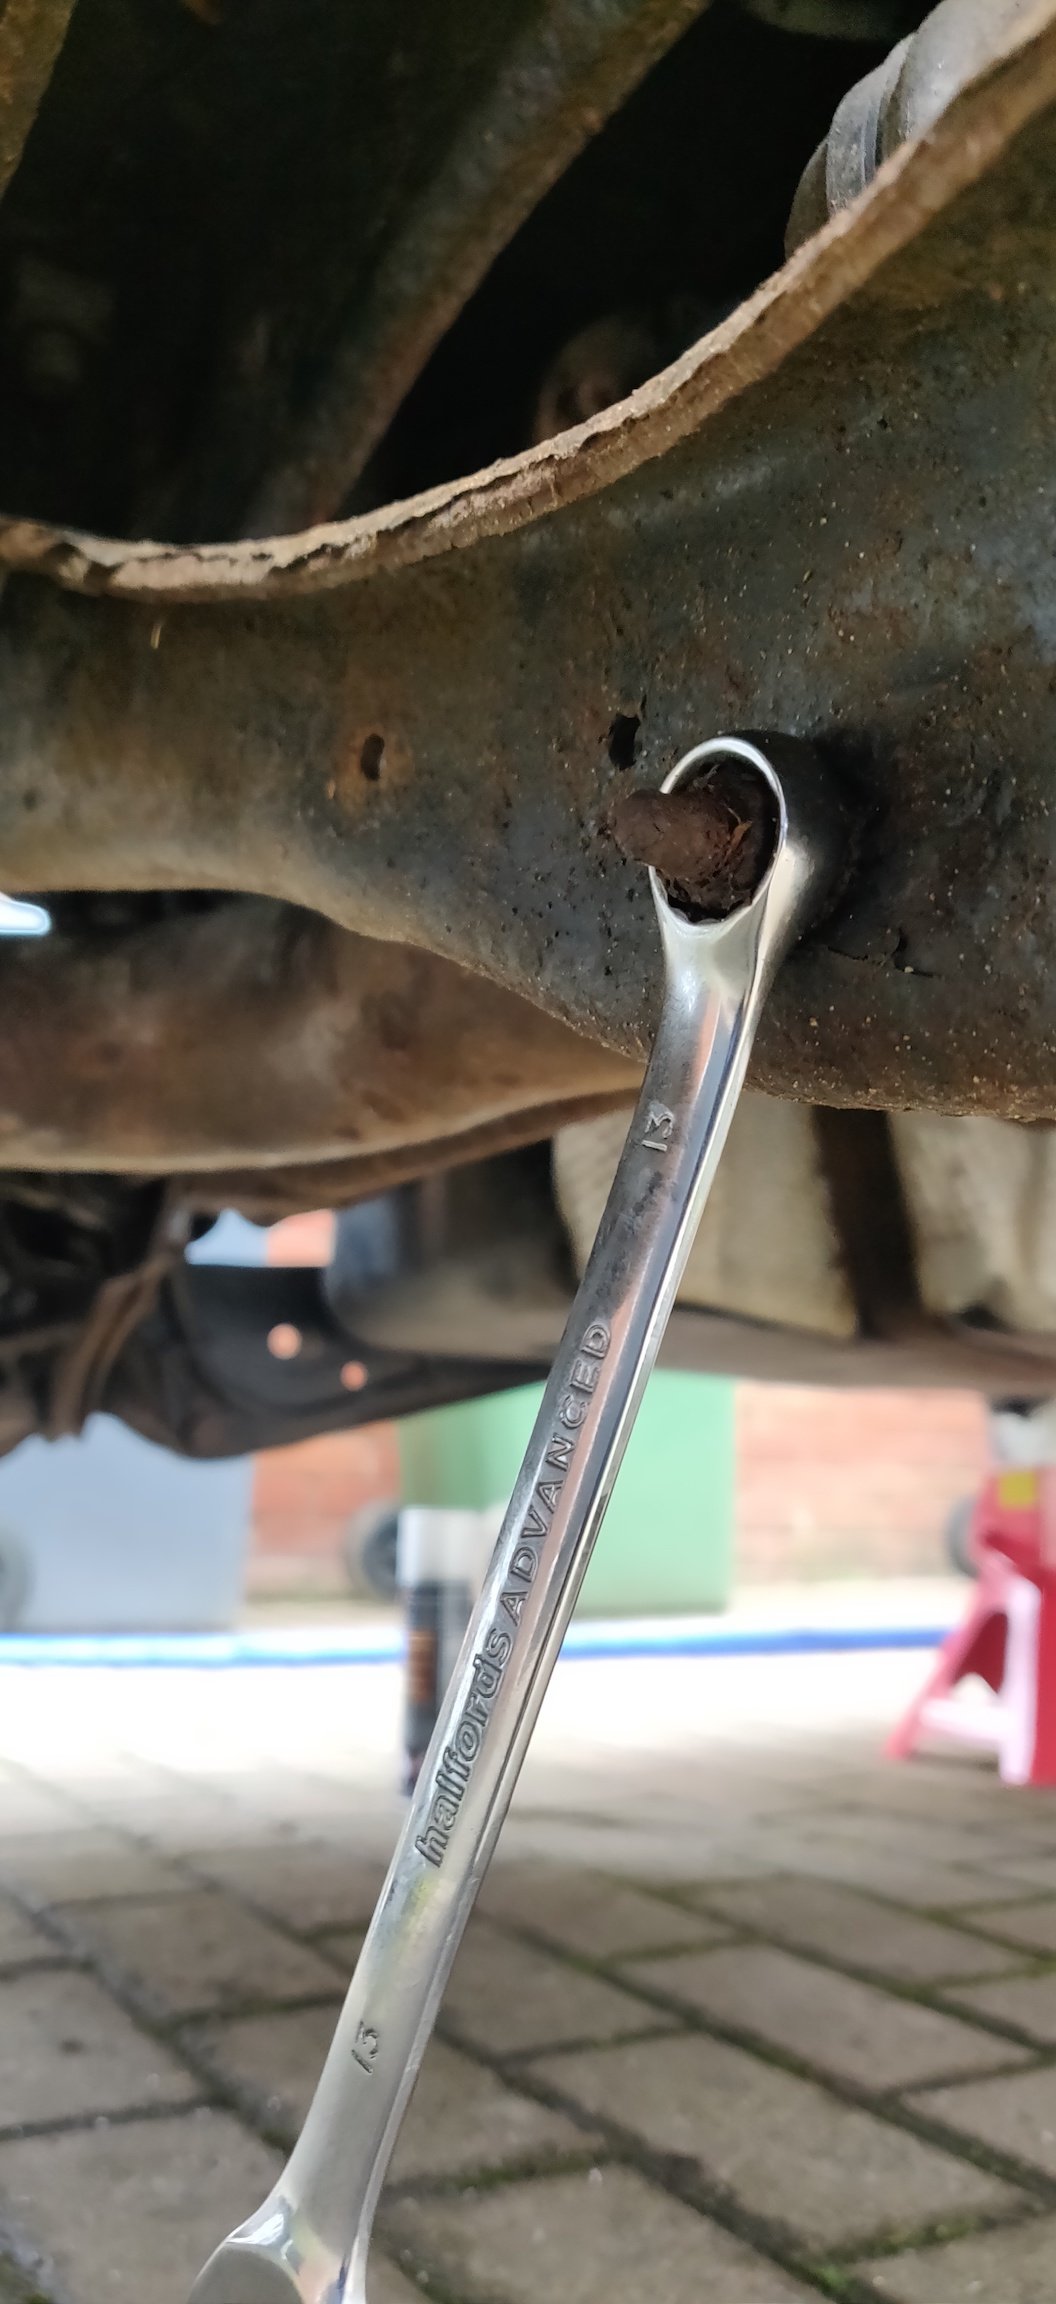
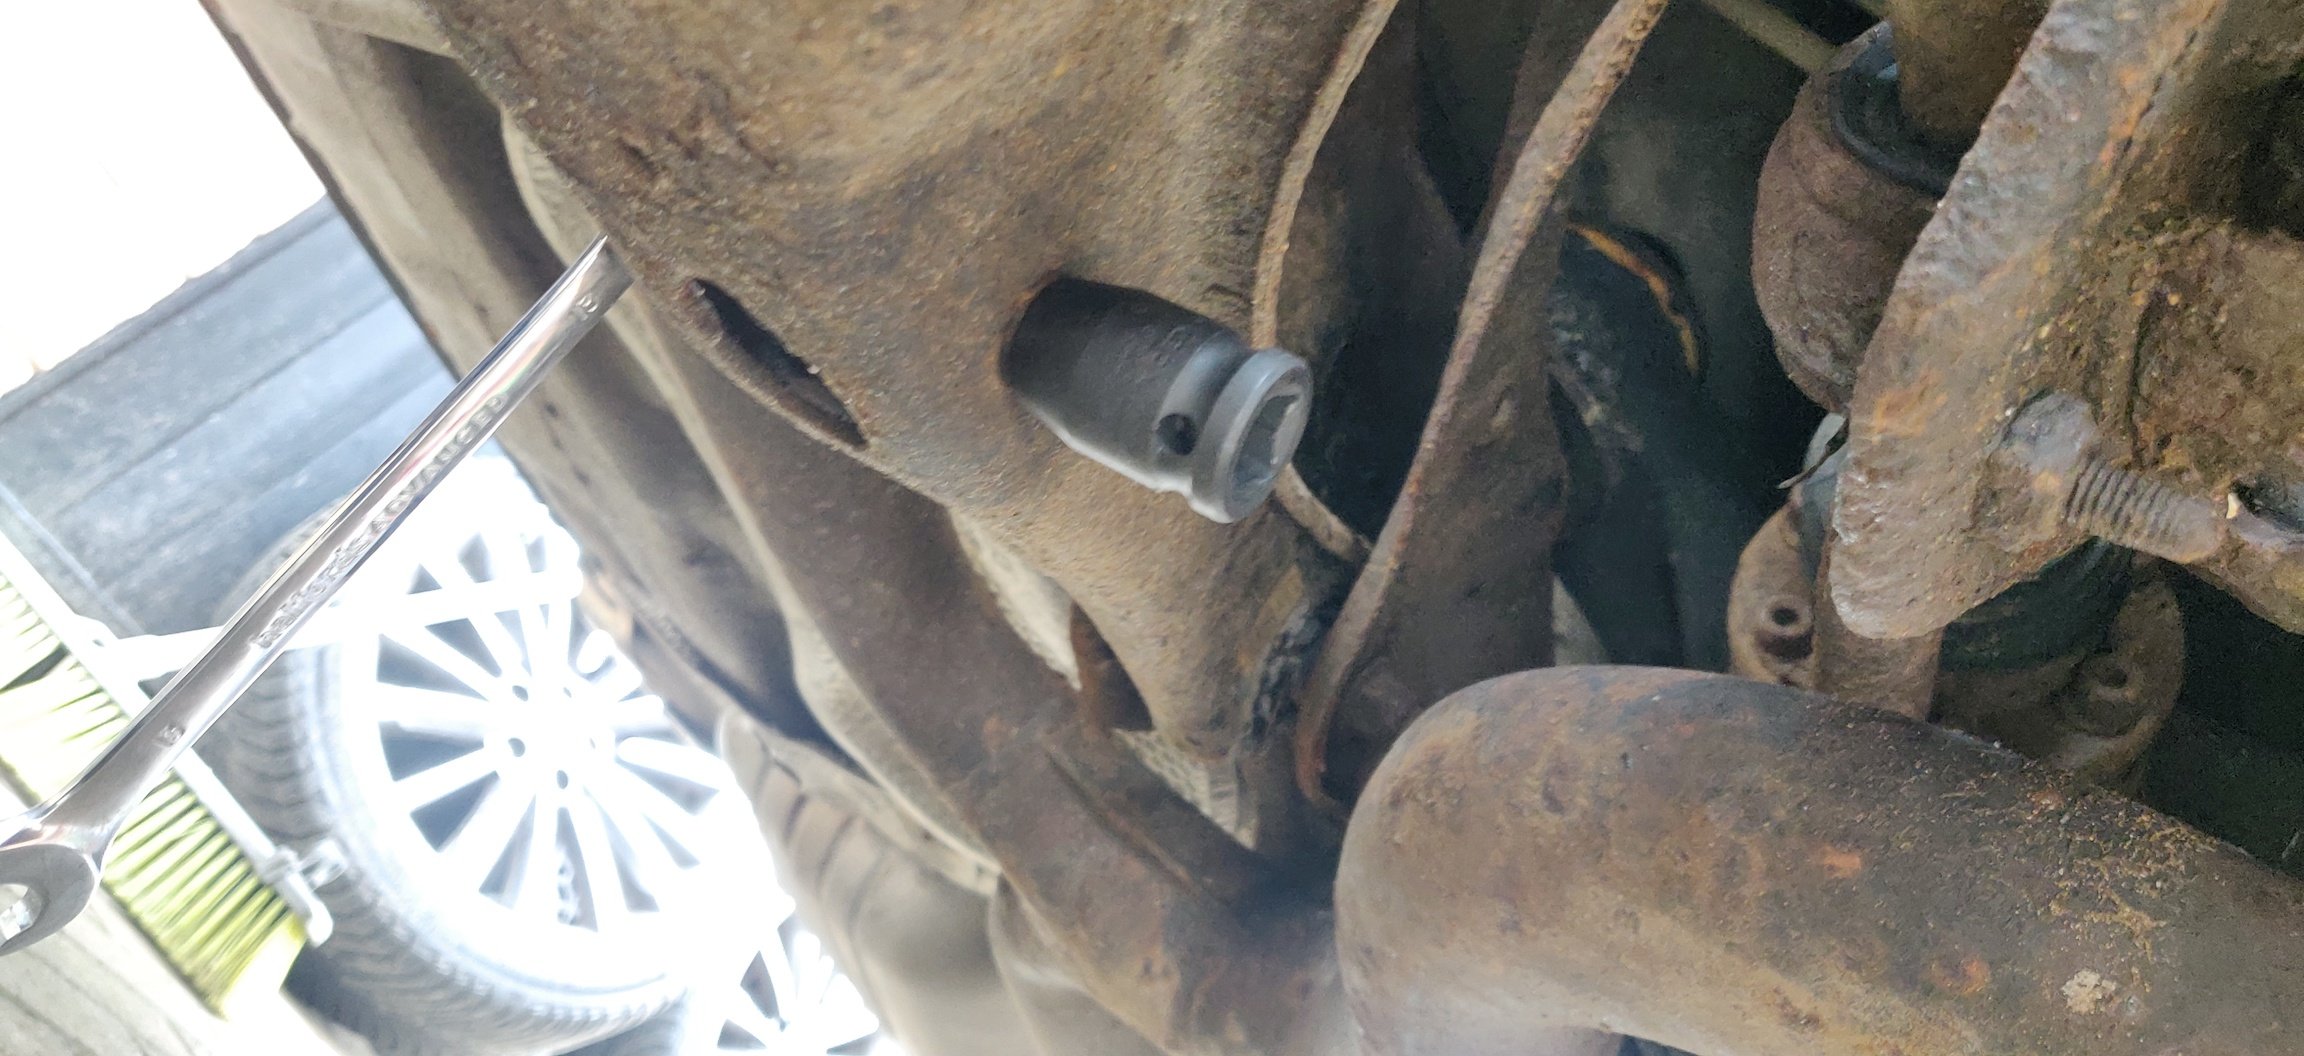
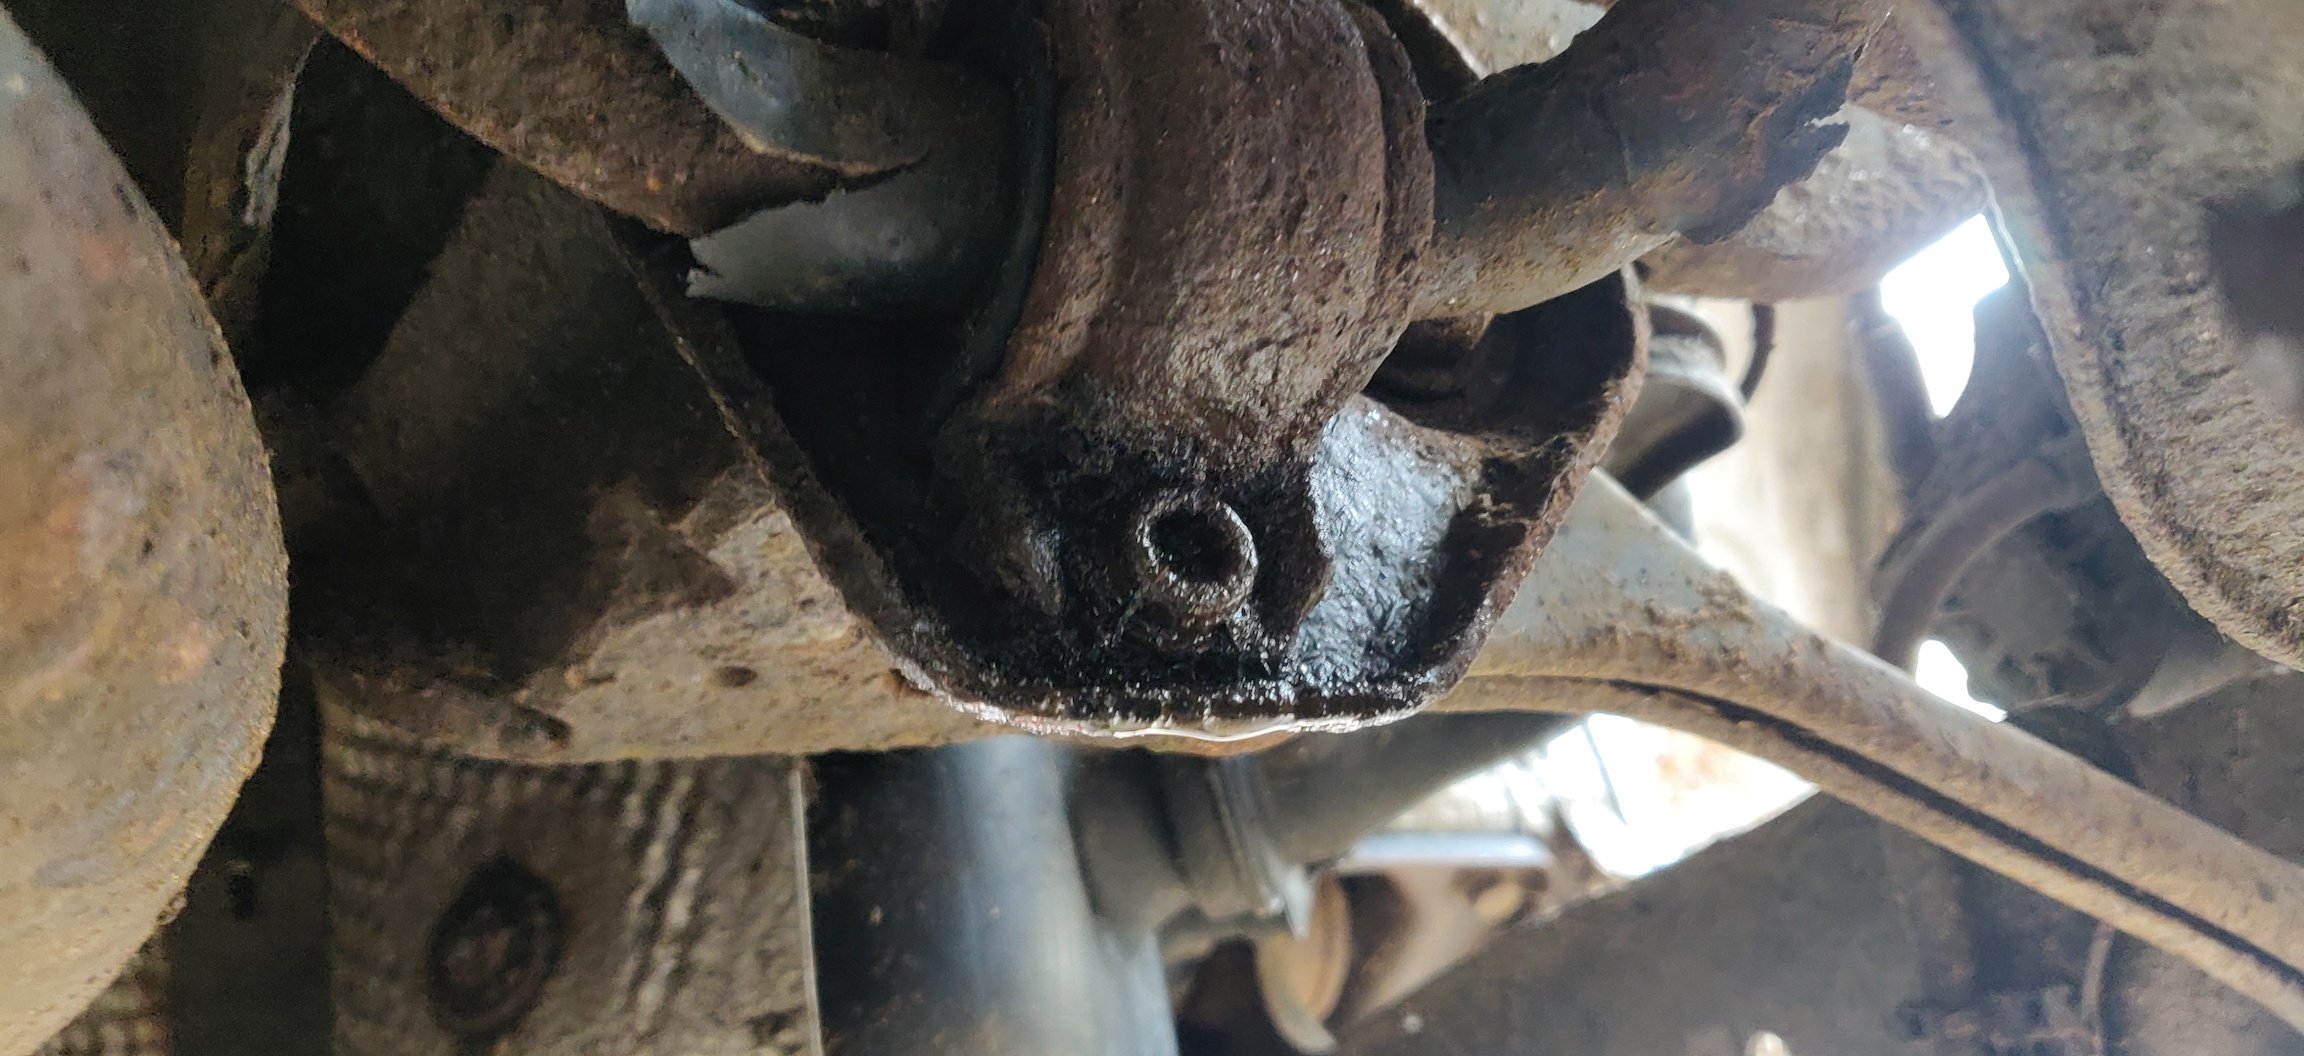
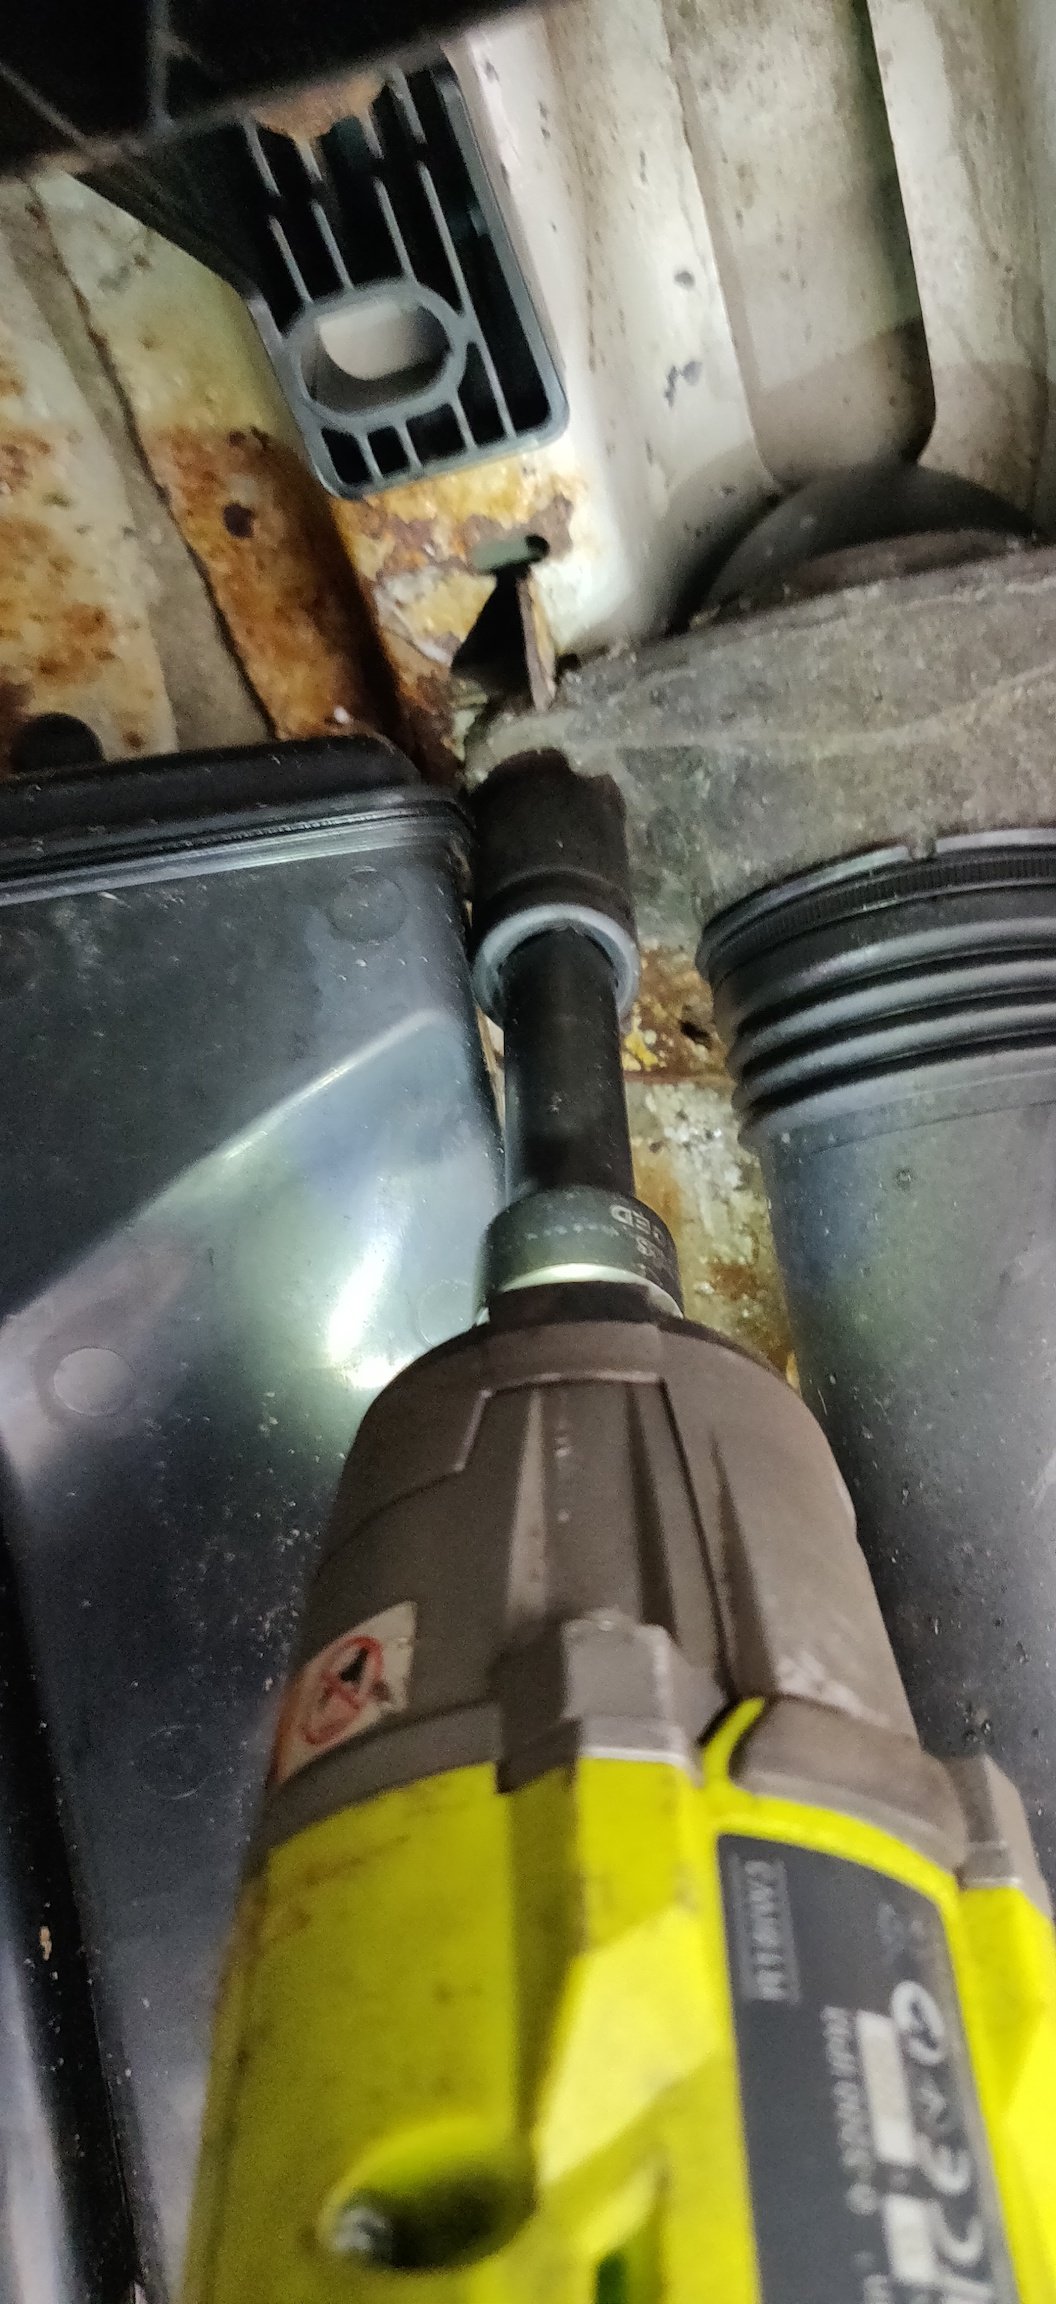
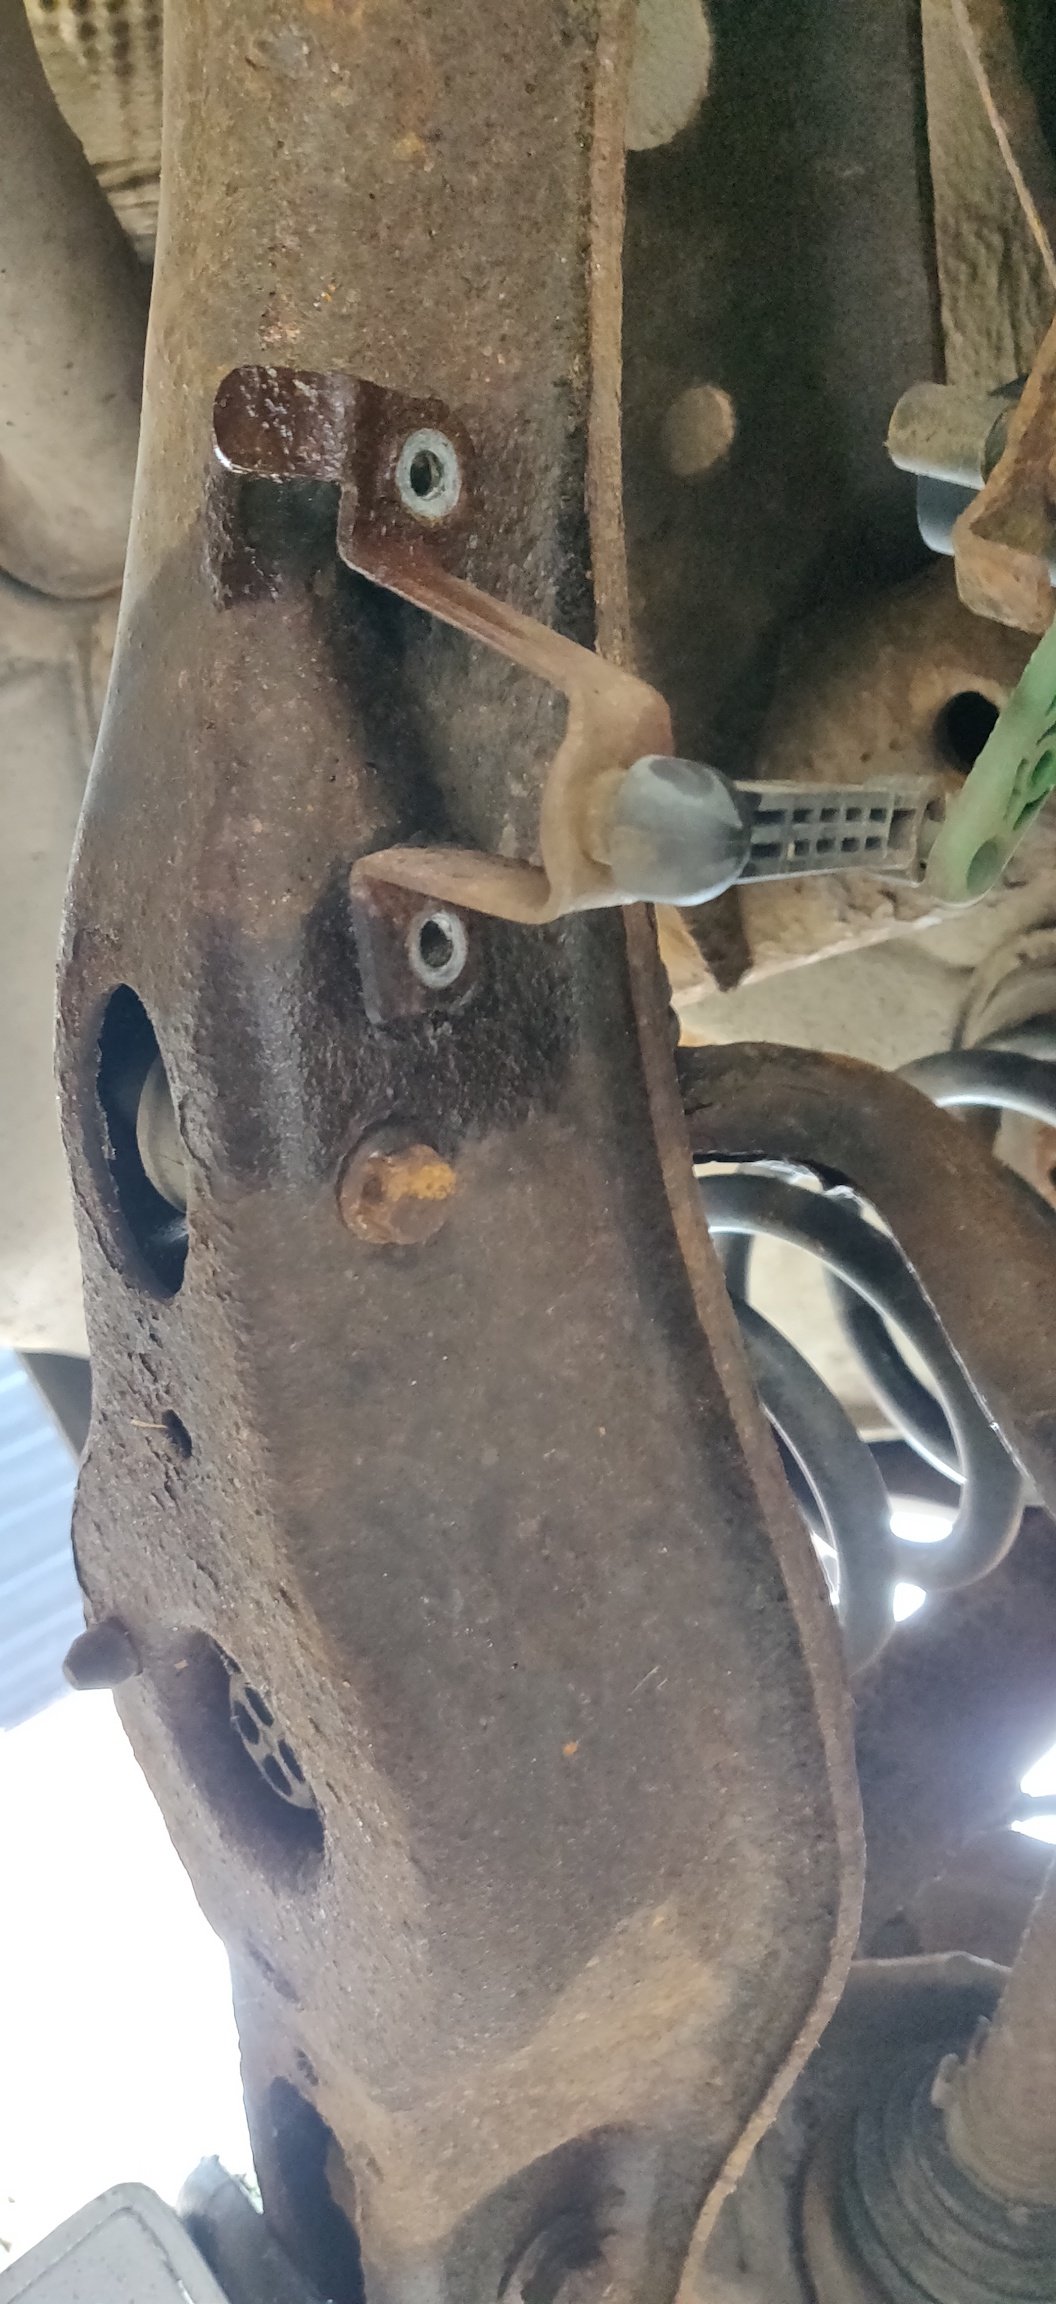
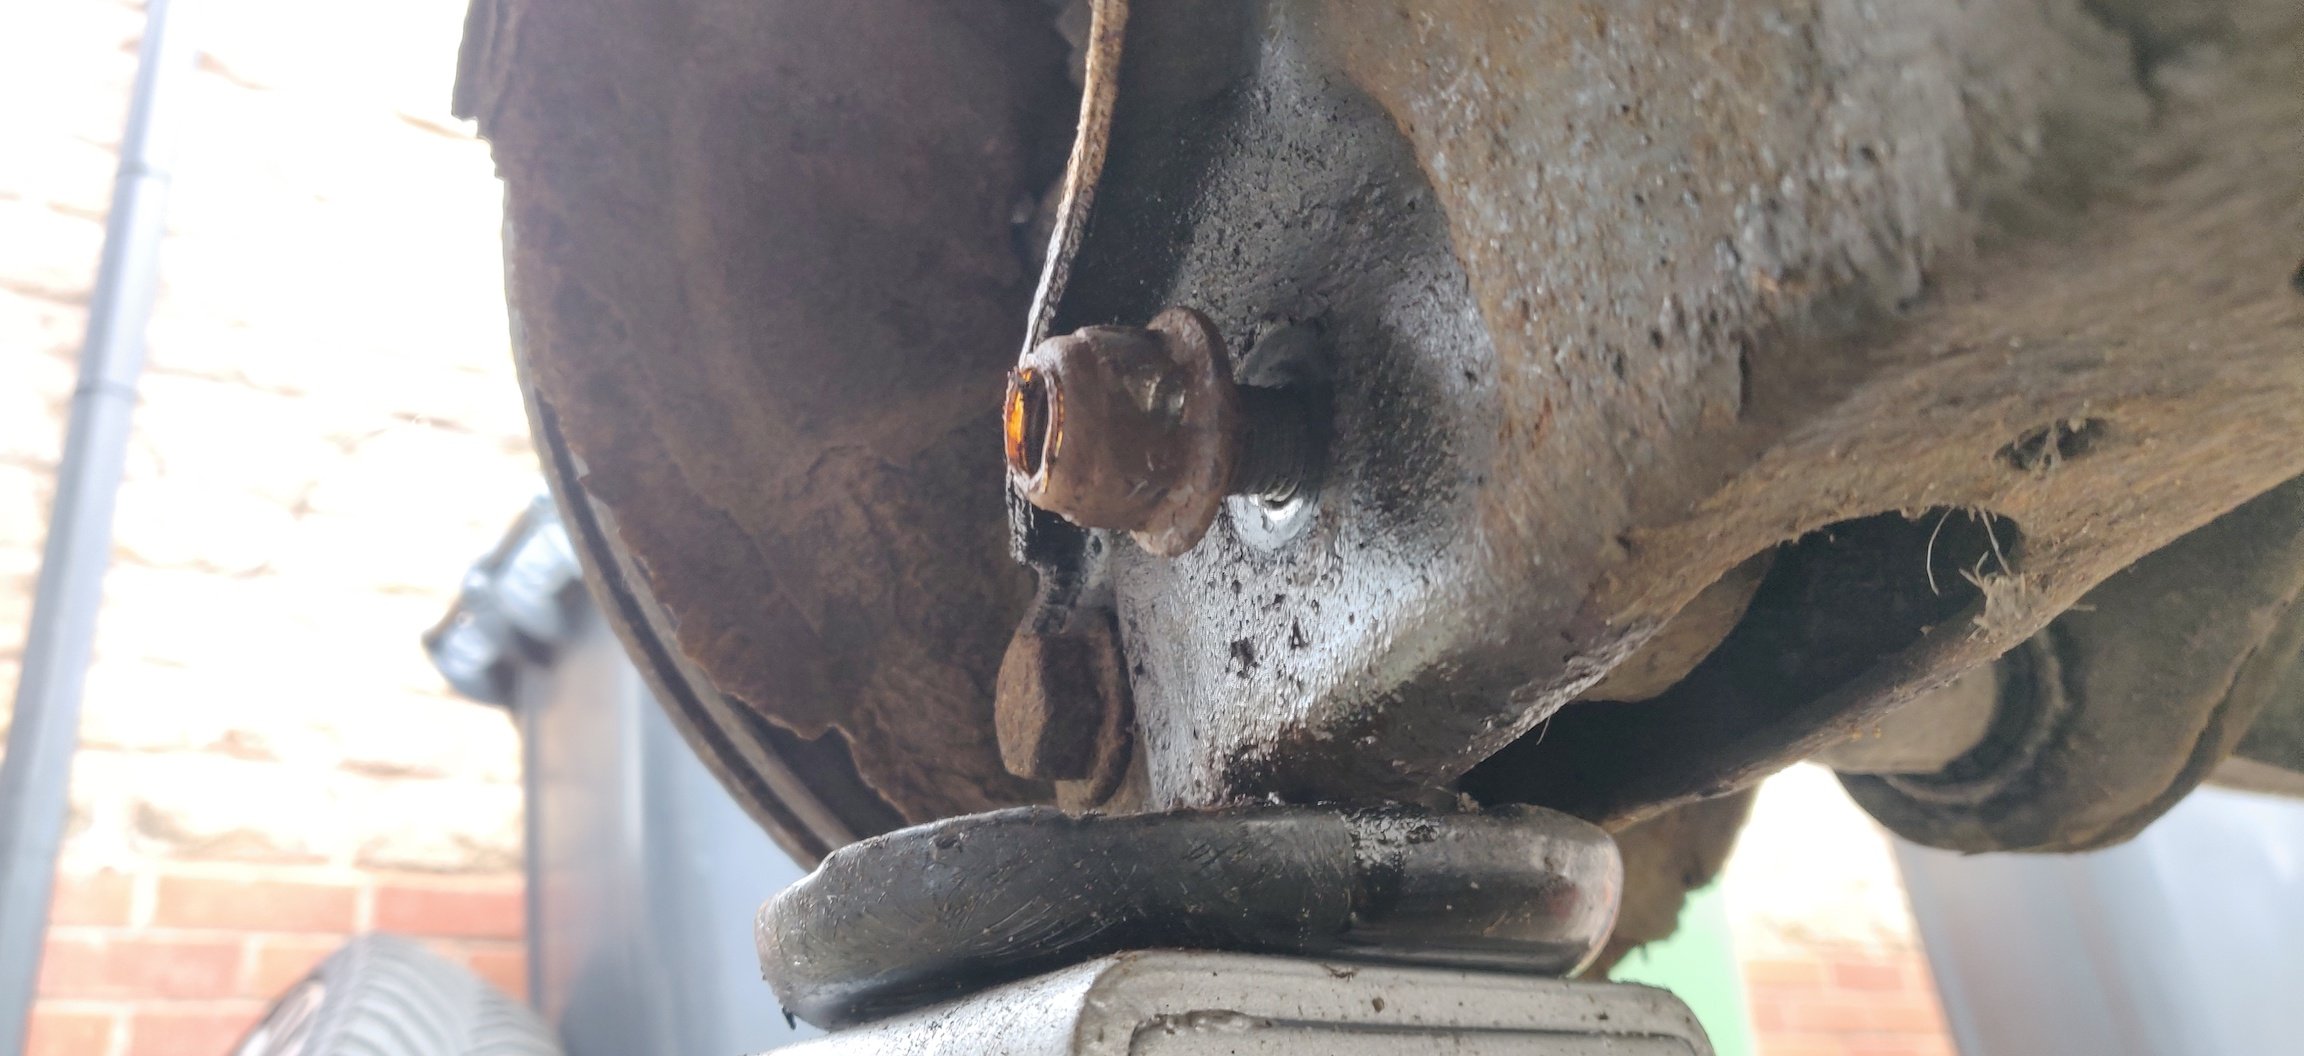
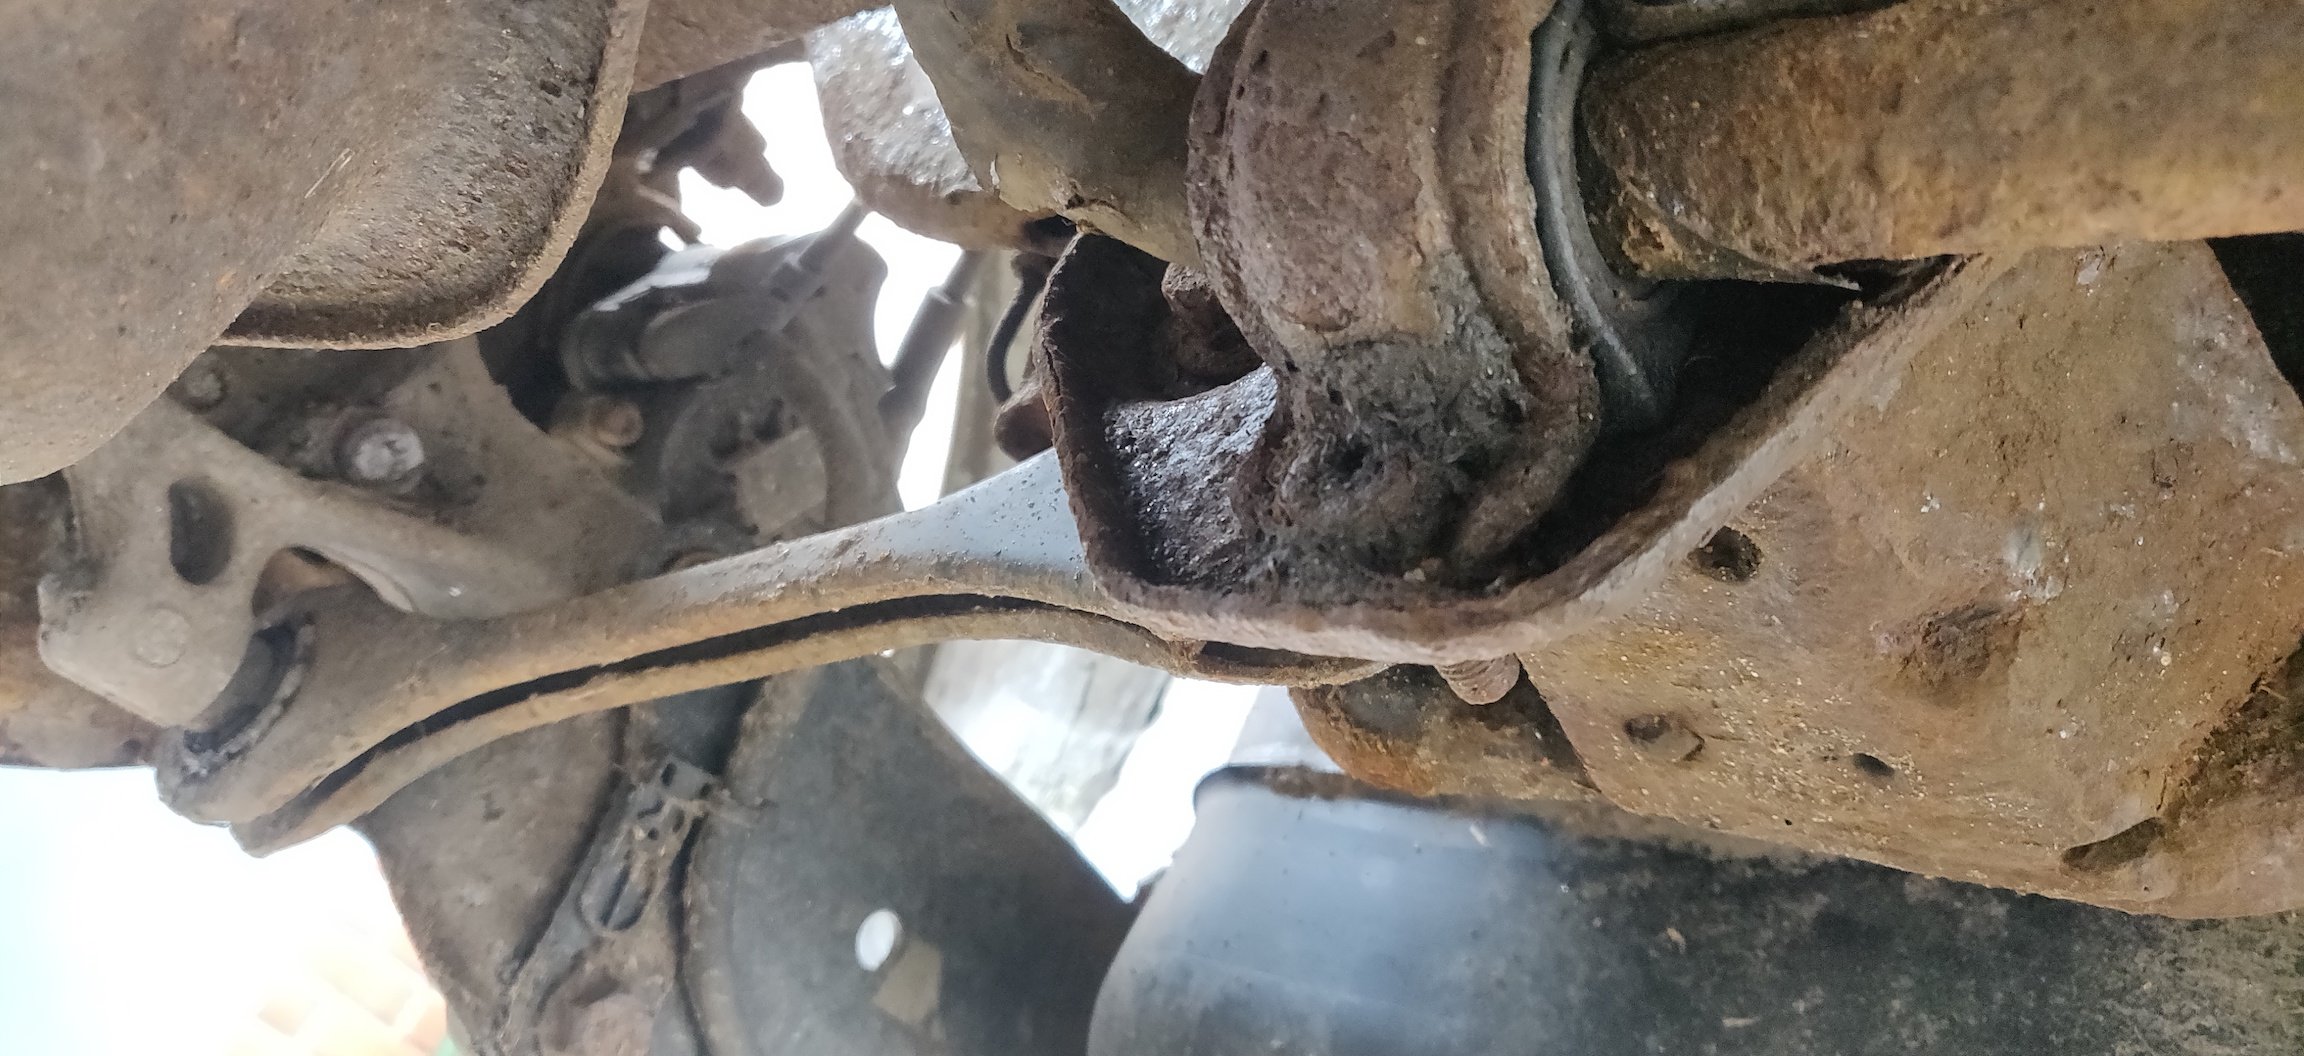
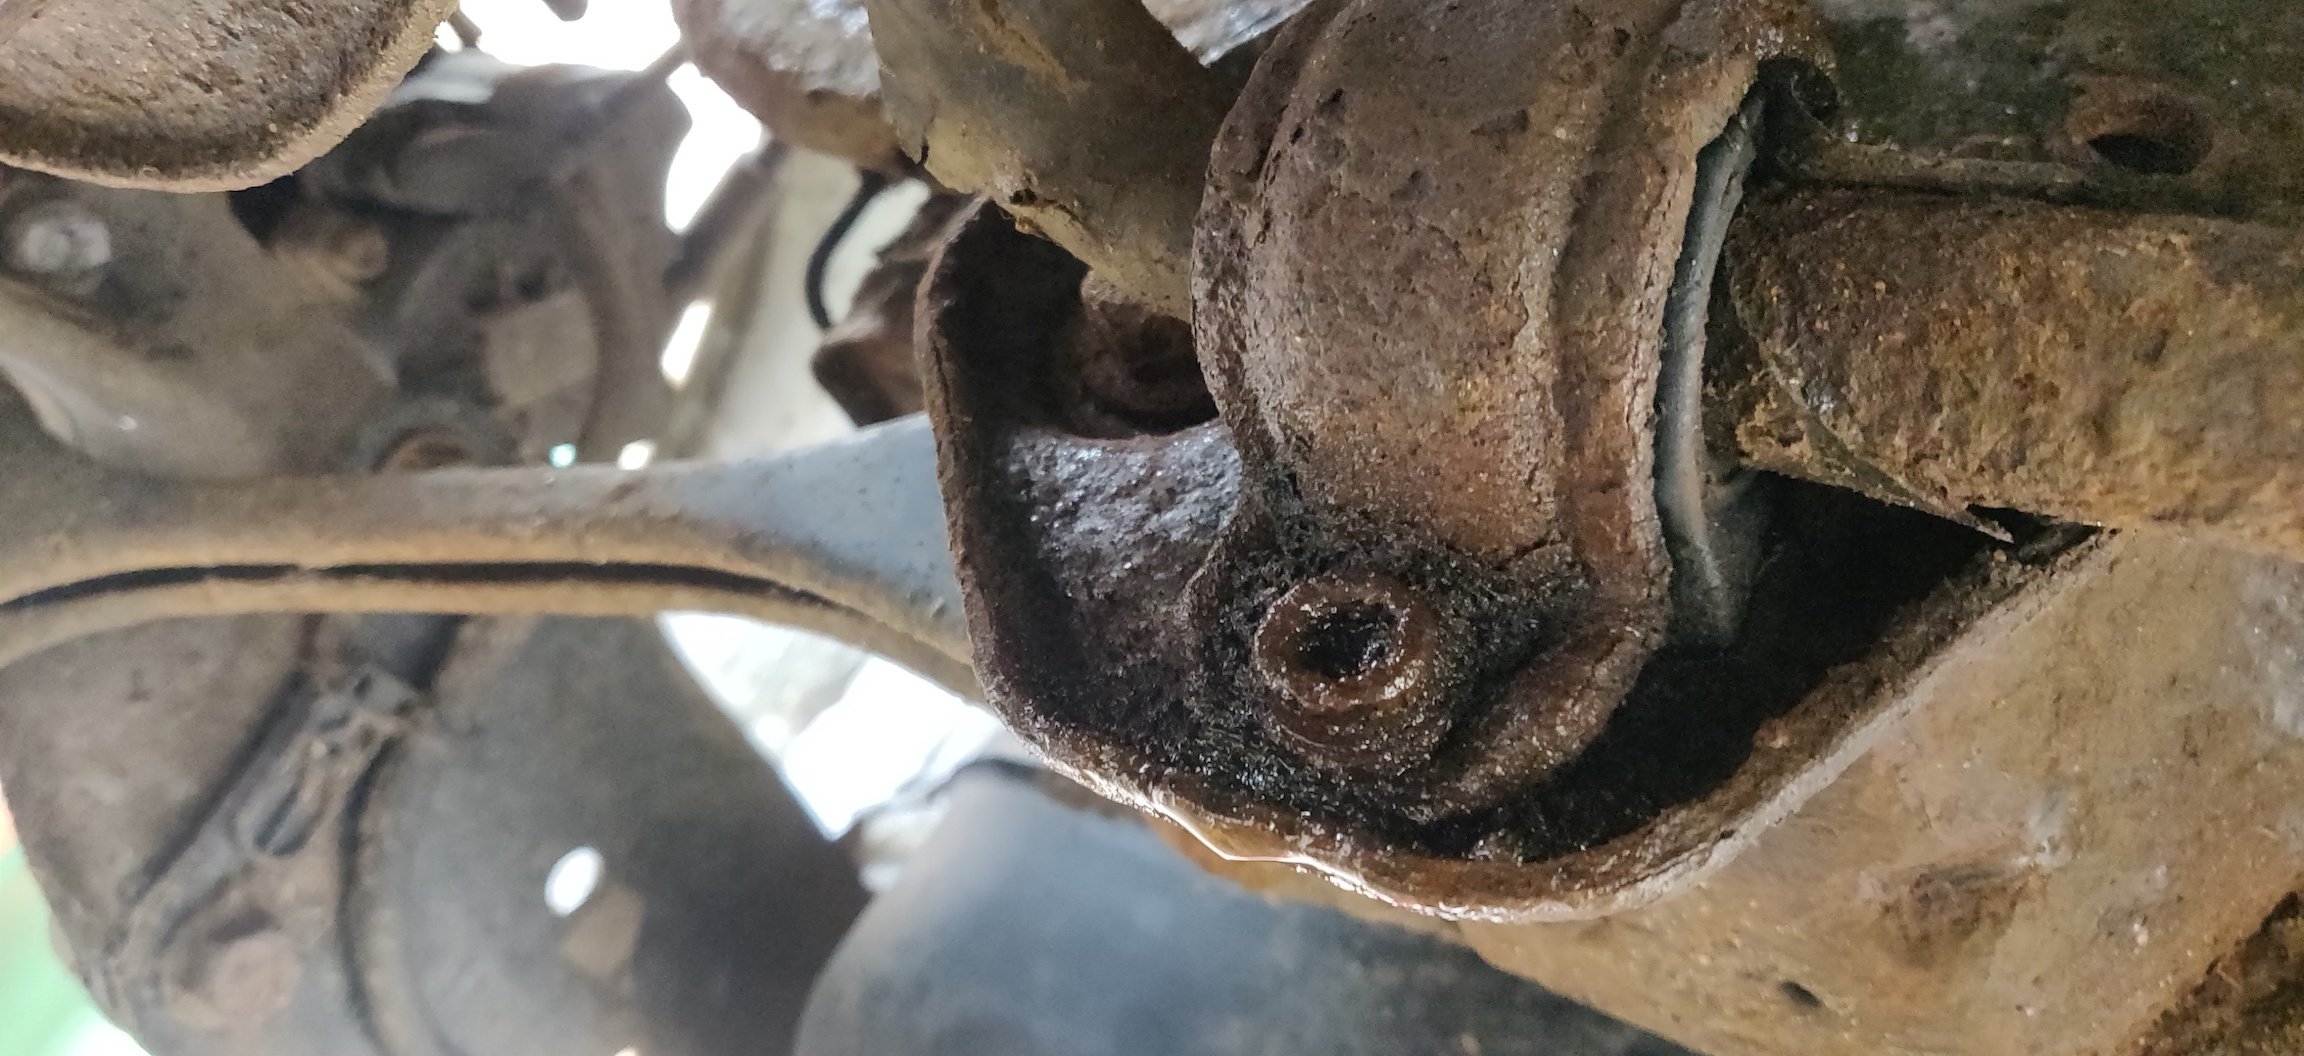
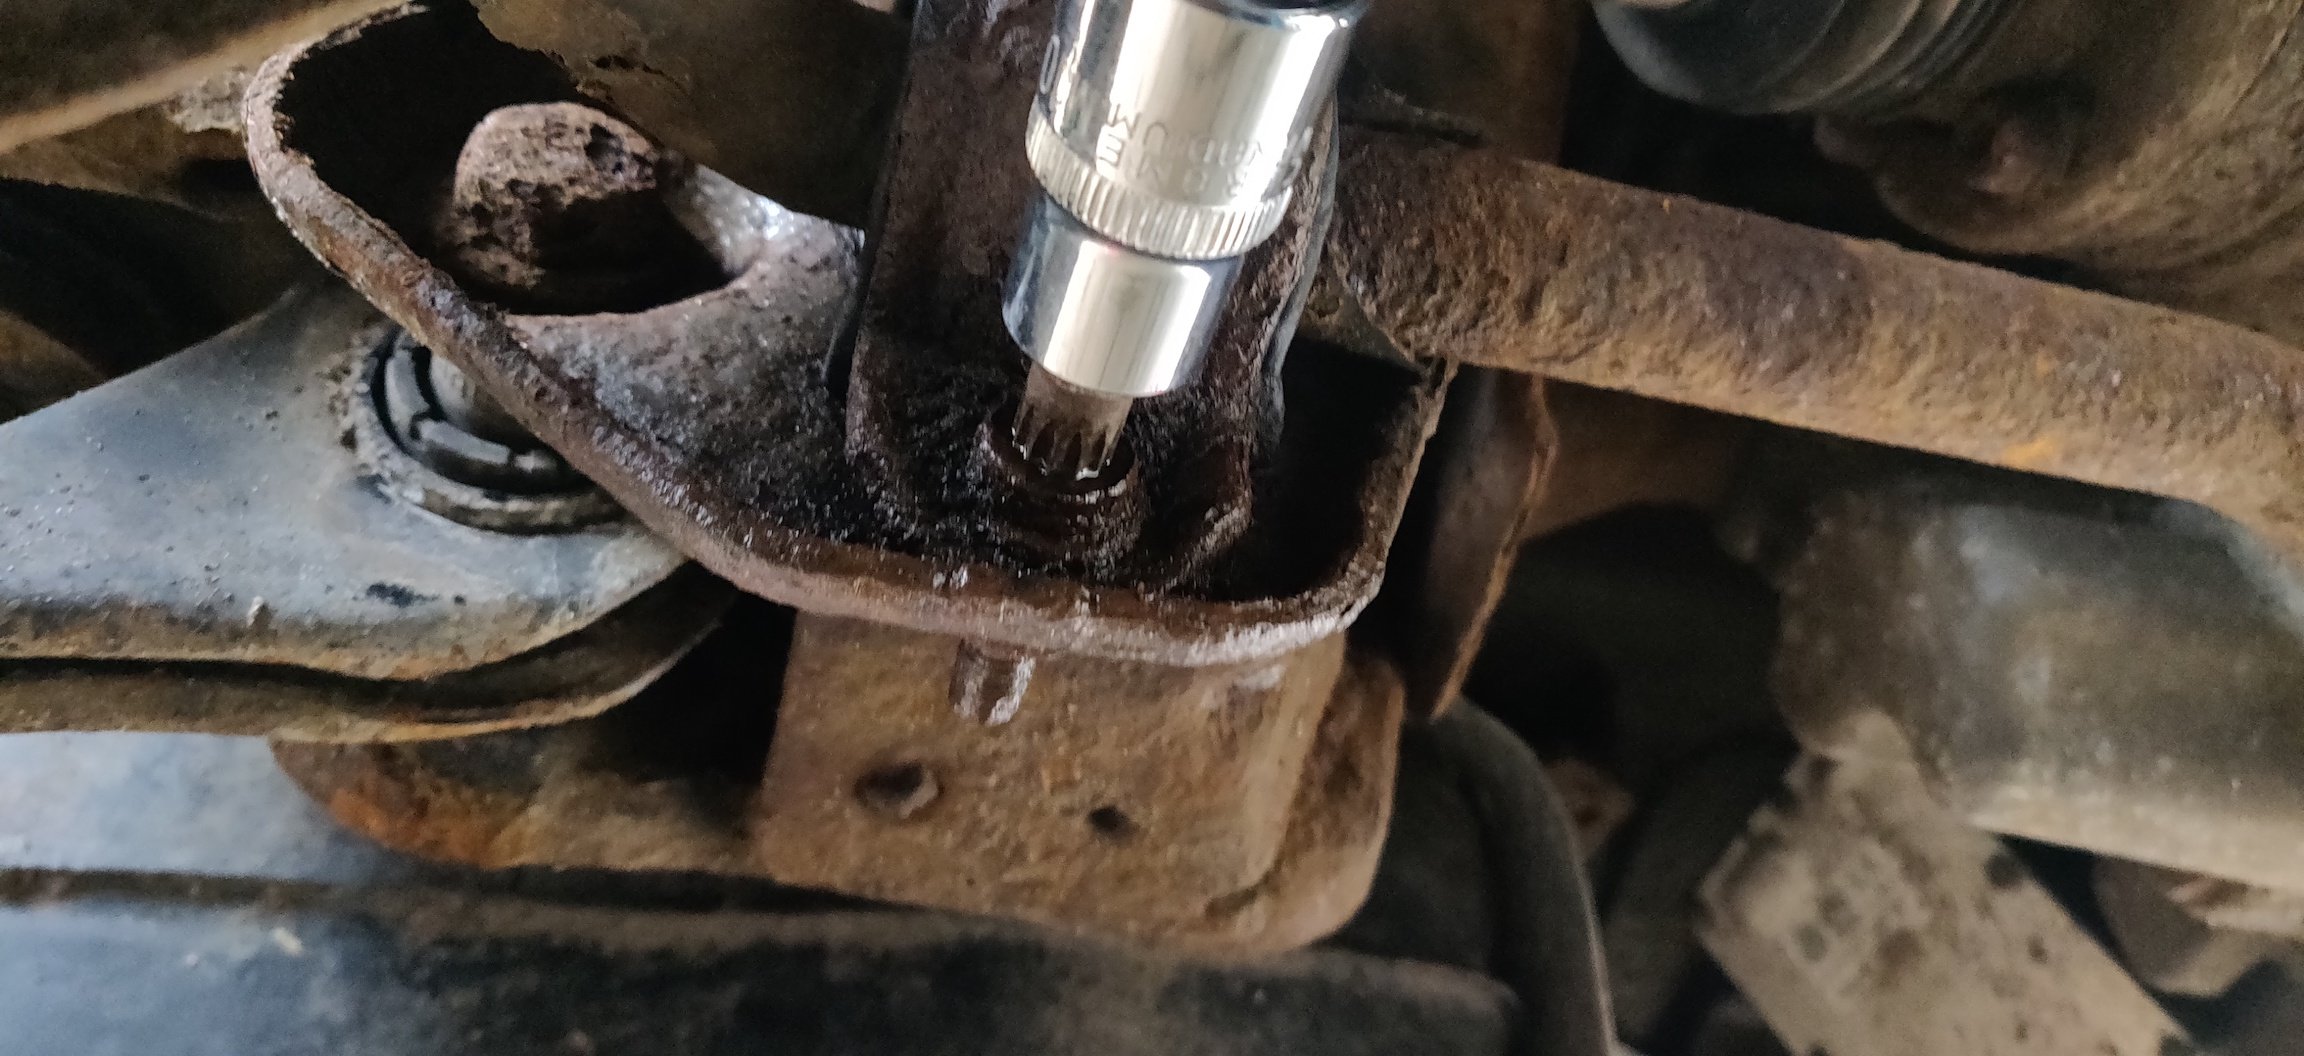
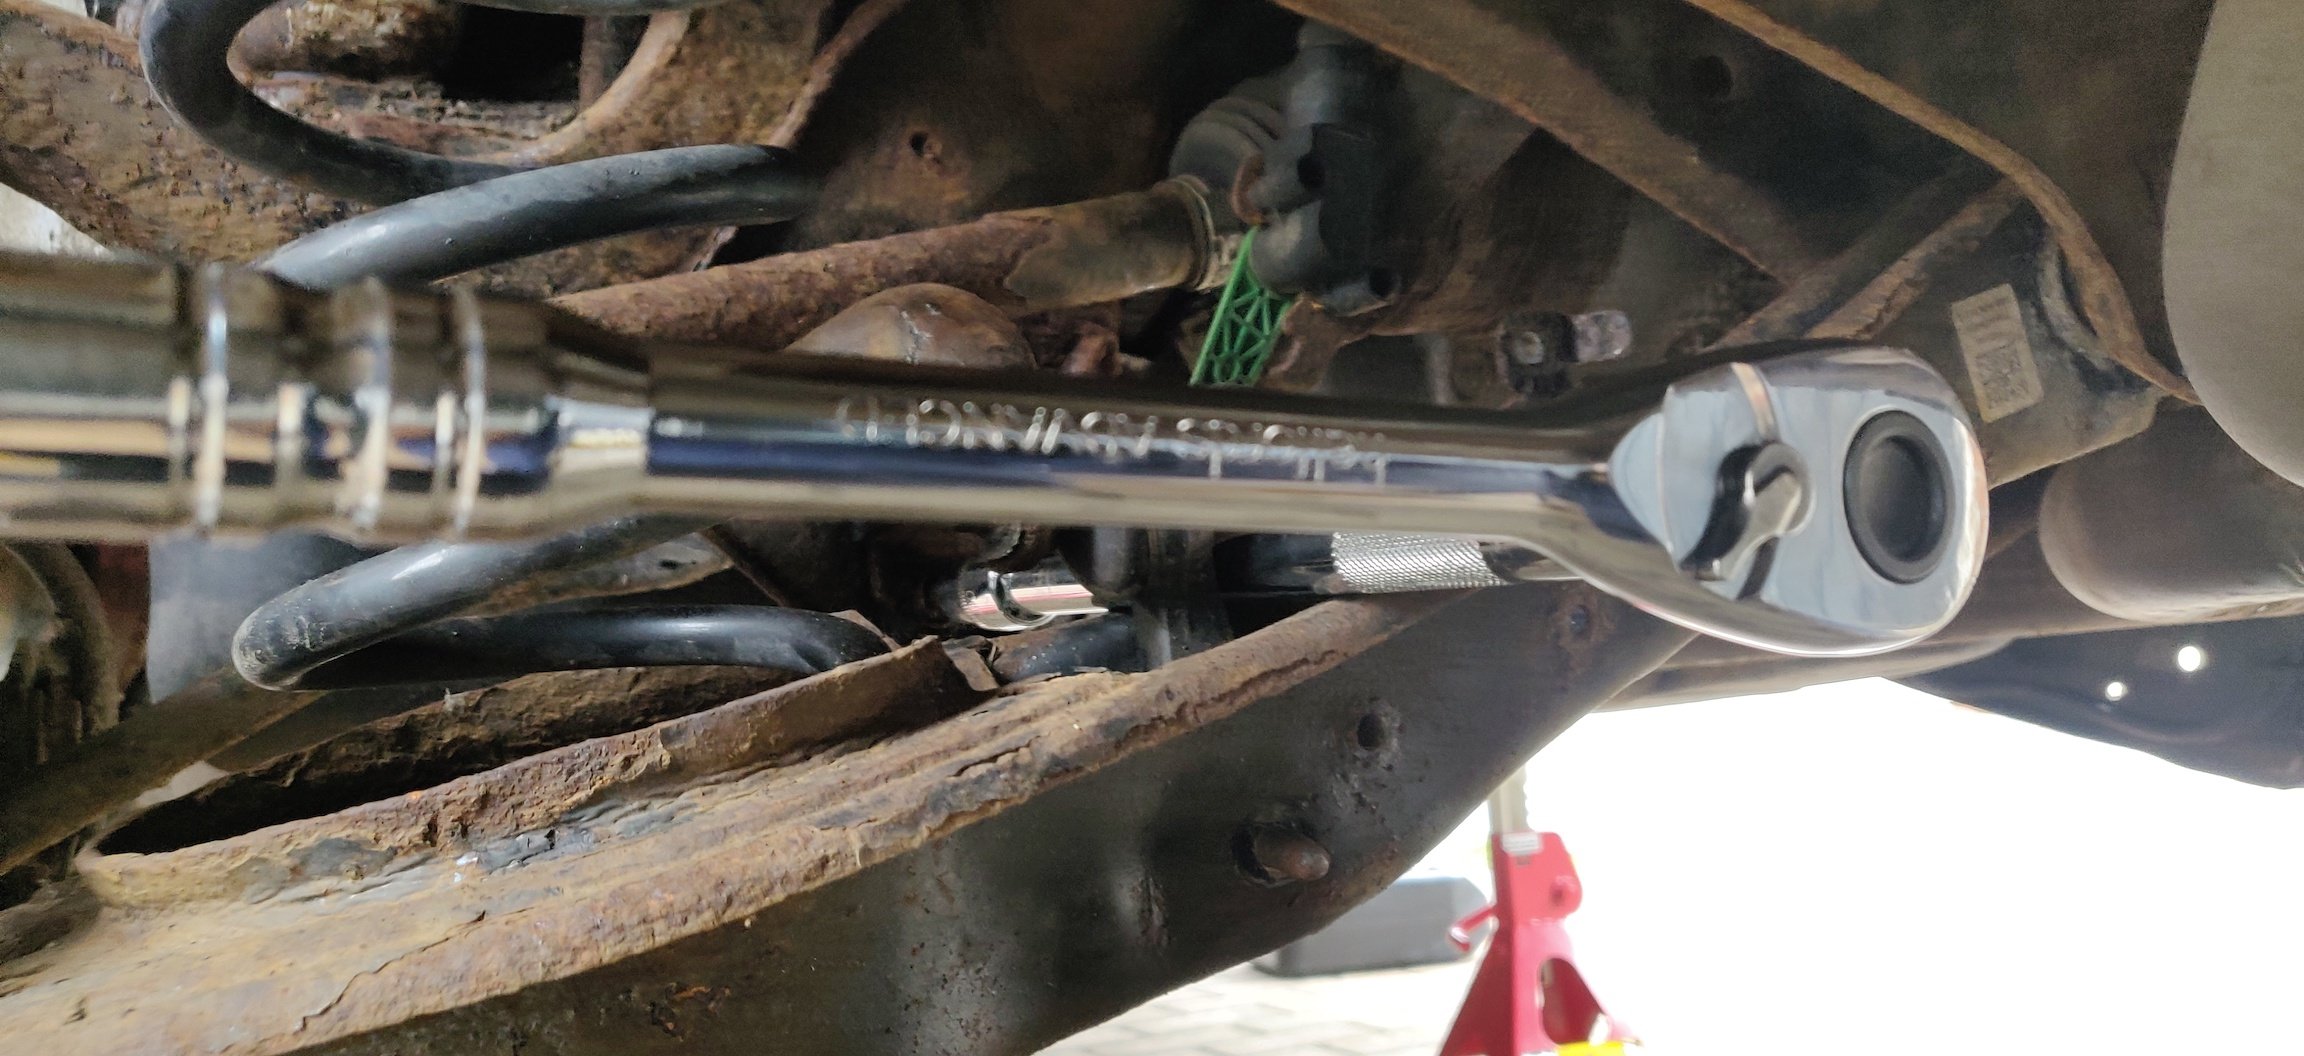
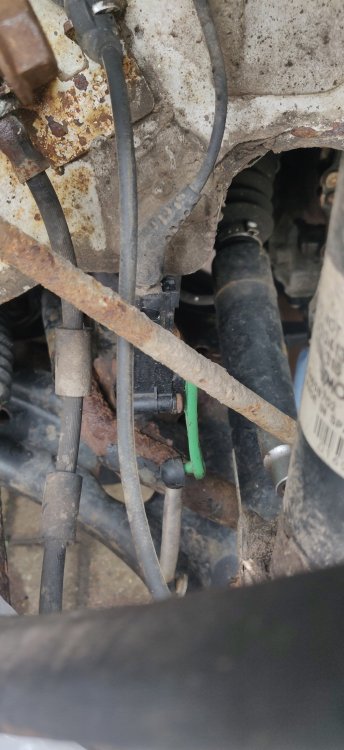
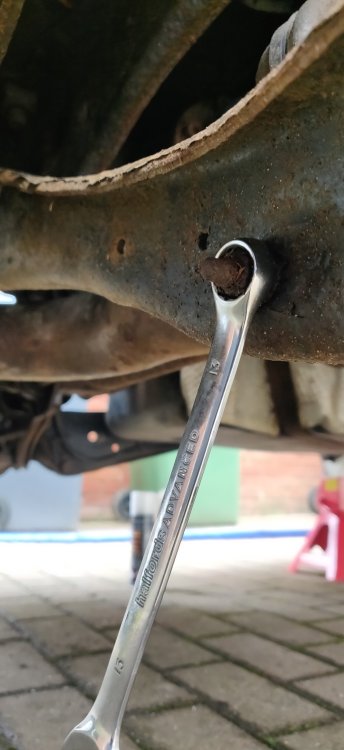
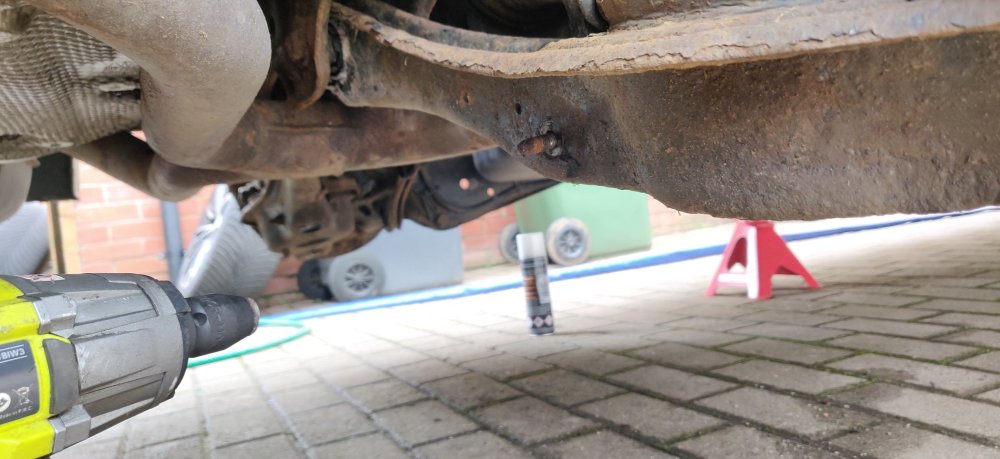
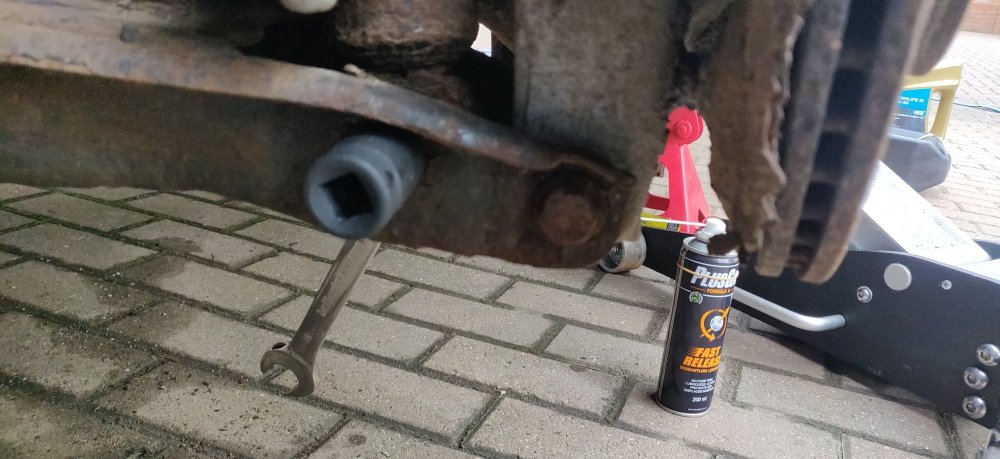
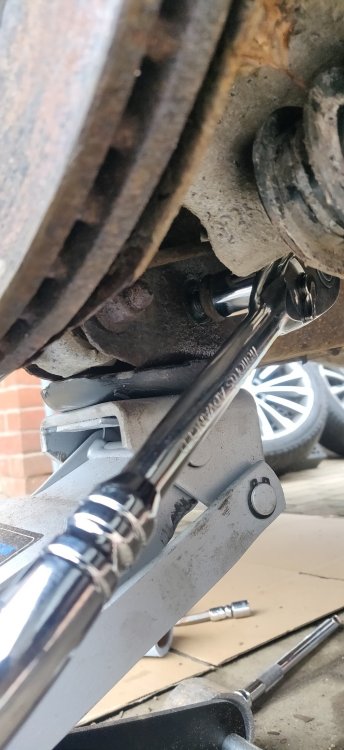
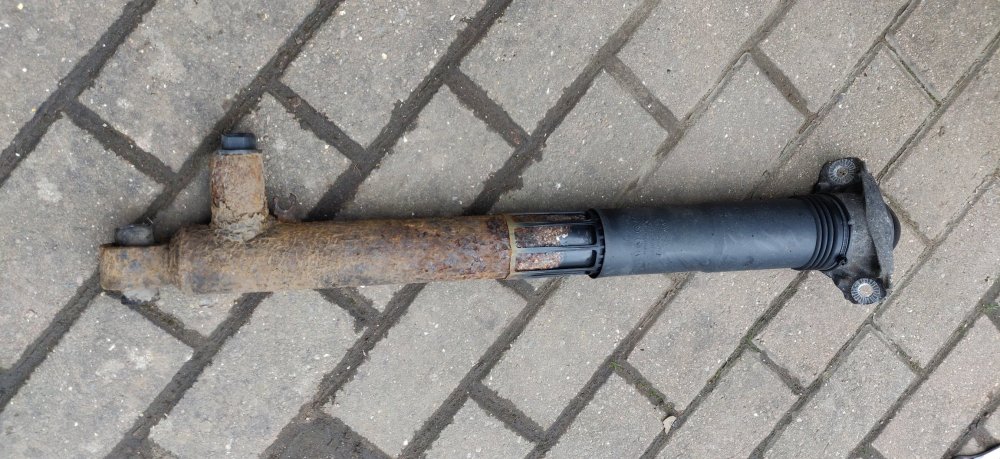
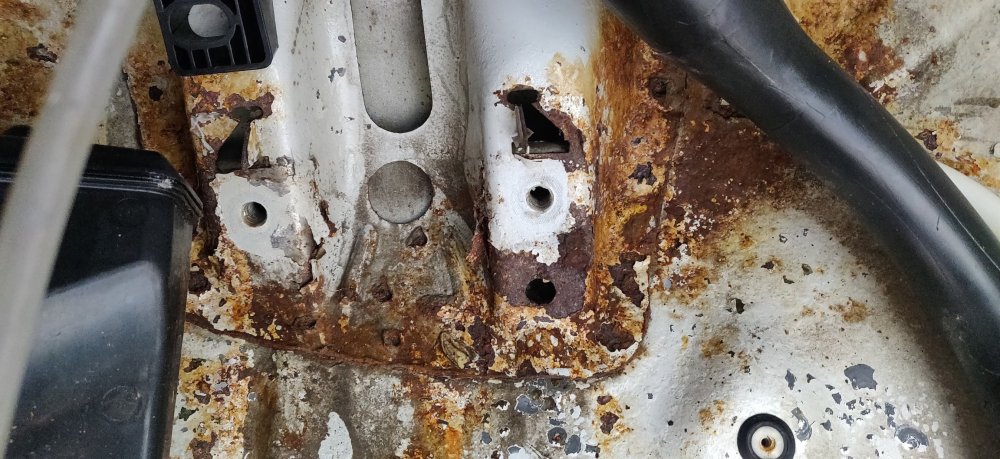
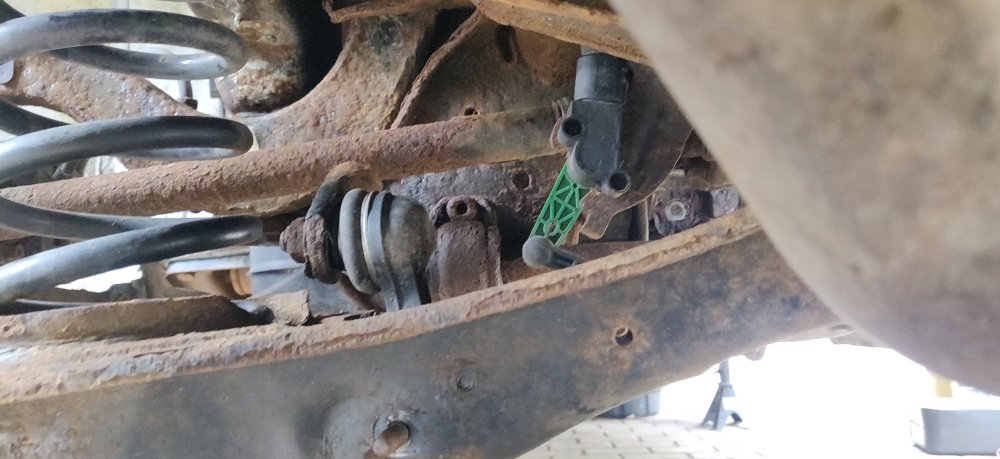
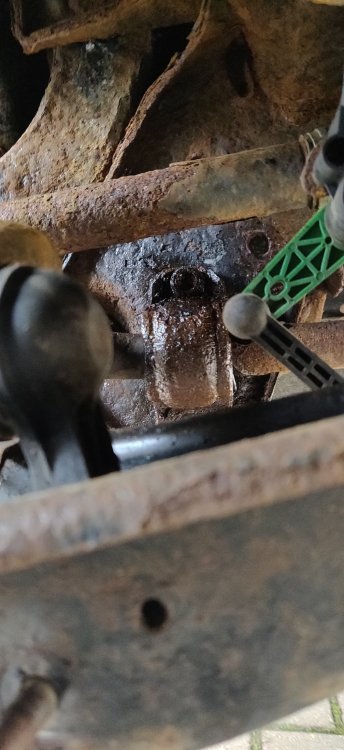
So, decided to try and tackle the rear anti roll bar. I emphasise try. When I first got the GR86, I immediately ordered about £100 worth of suspension nuts and bolts, because like the VW group, Subaru also like to use TTY bolts. I essentially removed the existing (and sadly still new) nuts and bolts under the car, greased up the central splines of the bolts with lots of grease, and then reassembled. Basically, for any cars with multi link suspension, or frankly anything where a bolt goes through a bush, it really should be greased. Otherwise, you'll end up in a situation such as when I had to deal with suspension arms on the Ford Focus, which eventually devolved into lots of fire and lots of swearing, as the rubber bushes had to be burned away. Given the pics in previous posts showing the rust on the bodywork, the suspension was unlikely to be better. Even on a good day, I've usually had to resort to angle grinders and violence to sort out anti roll bar bits. This is no different. Firstly, the anti roll bar link is attached to the suspension: Manky looking nut, this had plus gas sprayed on it last night. From the front: The bolt hex head actually looks in good nick. Took a guess at 13mm: Eventually slots in with the spanner once the loose dirt and rust was cleared. So checked the other side: 13mm as well. The impact wrench fouled the suspension, so had to use the spanner on the front side to act as a counterhold, and attempted to buzz out the nut: Which it did without much drama. Make sure you wear some eye protection whilst doing this: Because rust and dirt will start falling from wherever it wants. Now, this was on the right side, with the broken anti roll bar. I was expecting the bolt to be tapped out and the link removed. But no. As mentioned at the beginning, my fear of the bolt seizing into the bush has happened here. Even with violent strikes with a lump hammer, nothing was budging. I'll swot up on the workshop manual to see if there's something I may be missing, but I suspect either fire or a reciprocating saw may be required. So decided to look elsewhere: This is the roll bar bush mounting bit, the C shape bracket that attaches to the subframe. Even with plus gas applied, there's still a lot of dirt and crap. Decided to skip on by for now and look for anything that might be a small victory: So looked at the suspension bottom bolt. Not sure whether it's just a VW group thing, but they find almost some sort of kick out of using non-standard nuts and bolts. Rather than 17mm or 19mm, I had a guess that this suspension probably involves 16mm and 18mm bits, and lo and behold, the 18mm impact socket is what fits here. I jacked up the suspension arm slightly, as I've usually found that aids in getting the bolt out. So readied the impact wrench whilst holding the spanner on the other side. Now, the use of the impact wrench yielded nothing. Exact scenario as the wheel bolts on this side of the car. Had to resort to a breaker bar, which then acted as a counterhold: With the other side using a ratchet spanner, and the arm of the trolley jack to extend it. An almighty number of cracking sounds was emanating as the bolt was presumably being undone. You can see in the pic above that the driveway way taking damage as this bolt was being undone. Exhausting, but it was coming away: With the nut out, took the lump hammer and gave the bolt a few taps: This is what is supposed to happen, i.e. the bolt actually comes free. Once popped up, the jack was lowered and the rear damper was now hanging: Disconnected the DCC connector and the rubber but that attaches to the damper, and improvised a small plastic bag to cover the connector, as I've no idea how long I will end up spending on this rear suspension. The top of the damper is attached with 16mm bolts: No drama here, impact wrench buzzes them out without issue. So once done, the damper itself can then be taken out: Another small victory. The remains of the wheel arch is pretty much on par with the rest of the car: Hopefully when I get some Lanoguard on this it'll stop it from getting worse, because this is a MoT disaster in the making. Anyways, popped out the upper cover as I don't think I bought these, and will put them onto the new dampers: Although, given the state of what's underneath, seems a bit ironic that these covers haven't really kept it clean. Before I took out the other suspension, disconnected the level sensor on the left suspension arm, just in case: It looked like T25 bolts for whatever daft reason, and the right side one did round itself. I manage to luck out with the Knipex pliers, where a bit of tightening and loosening got the bolt free. I'll source some normal stainless bolts for this, see no reason for tiny fragile bolts for this. Now, the suspension bolt for the left damper had the nut on the other side to the rear. Did the same process, attempted with the impact driver: This side came out without any drama. Take the win. The bolt didn't come free as easily, used a spanner to spin it which helped to slowly get it out. This nut and bolt seems to be in better nick. Doesn't matter, as these are all for the bin anyway. Whilst I was there, disconnecting the DCC on this side, the one wheelarch bolt that remained on this side was spinning freely. I resorted to brute force: To get out the old plastic captive nut. I'll have to source a new one, and need to do so for the other ones that remain (I think two on the right side). Didn't take pics of the other damper being removed but was the same steps. So with that done, revisited those anti roll bar mount bolts: This side was even worse. Had to find a wire brush, and gave it a once over with some plus gas afterwards: Still a mess to be honest, but a closer look suggests maybe a spline bit: I basically just got an M10 spline bit and tapped at it with the hammer. It eventually slotted in, and felt like it was about right. The suspension arm was conveniently at a height that allowed an extension and spanner to rest on it: Then again with the trolley jack arm to extend the wrench, some deep breathes, and then attempted to undo the bolt. It then started to move, and after a few more turns, squeezed the impact wrench in and buzzed out the rest: So despite being caked in loads of dirty, the bolt that came out didn't actually look too terrible. So suitably inspired, looked at the top bolt, which entailed raising the suspension arm further: In order to gain access to the bolt: Just about see it between the anti roll bar link and the green plastic part of the level sensor arm. Tried the same spiel with the M10 socket, hammered in and some extensions. Whilst it started to undo, it then started to tighten up and then I slipped: The sorry git is now rounded, so I stopped for now, maybe even for the day, as I'm a bit miffed. Not sure how best to proceed here. I imagine if I can get an angle grinder in there, I could cut out bits of the mount. I basically need to do whatever I can so I can get some pliers onto the bolt and hope that I can get enough purchase to keep rotating the bolt. A least a couple of millimetres has come out, so it isn't completely flush against the mount. I doubt this would have happened with just some normal hex head bolts, like the ones used in the suspension arm. So a bit frustrating really. I'll try the other side later, but otherwise, this day hasn't gone as smoothly as I'd like. Maintenance: £1806.50 Upgrades: £1020.69 Miscellaneous: £631.67


-
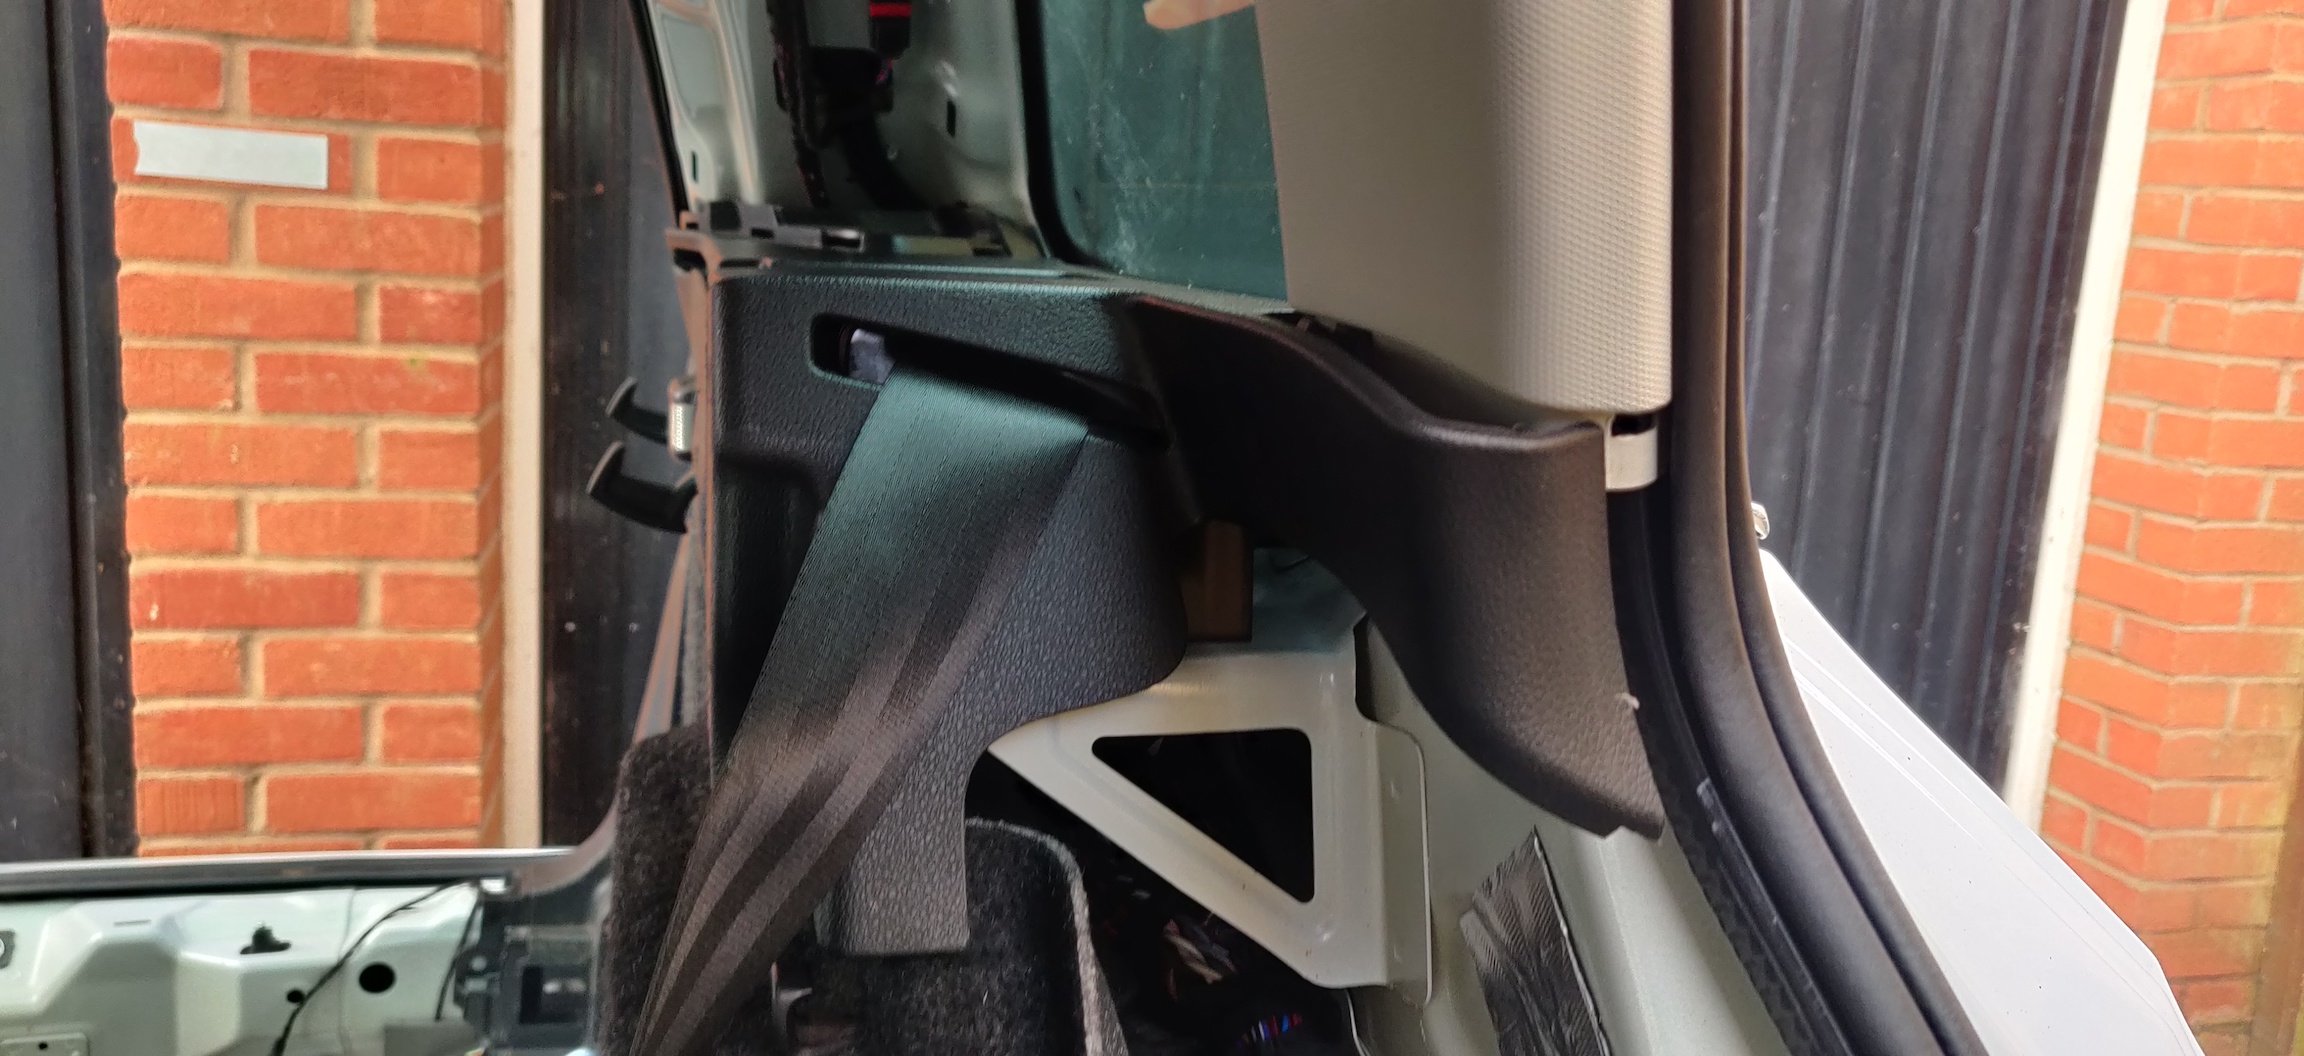
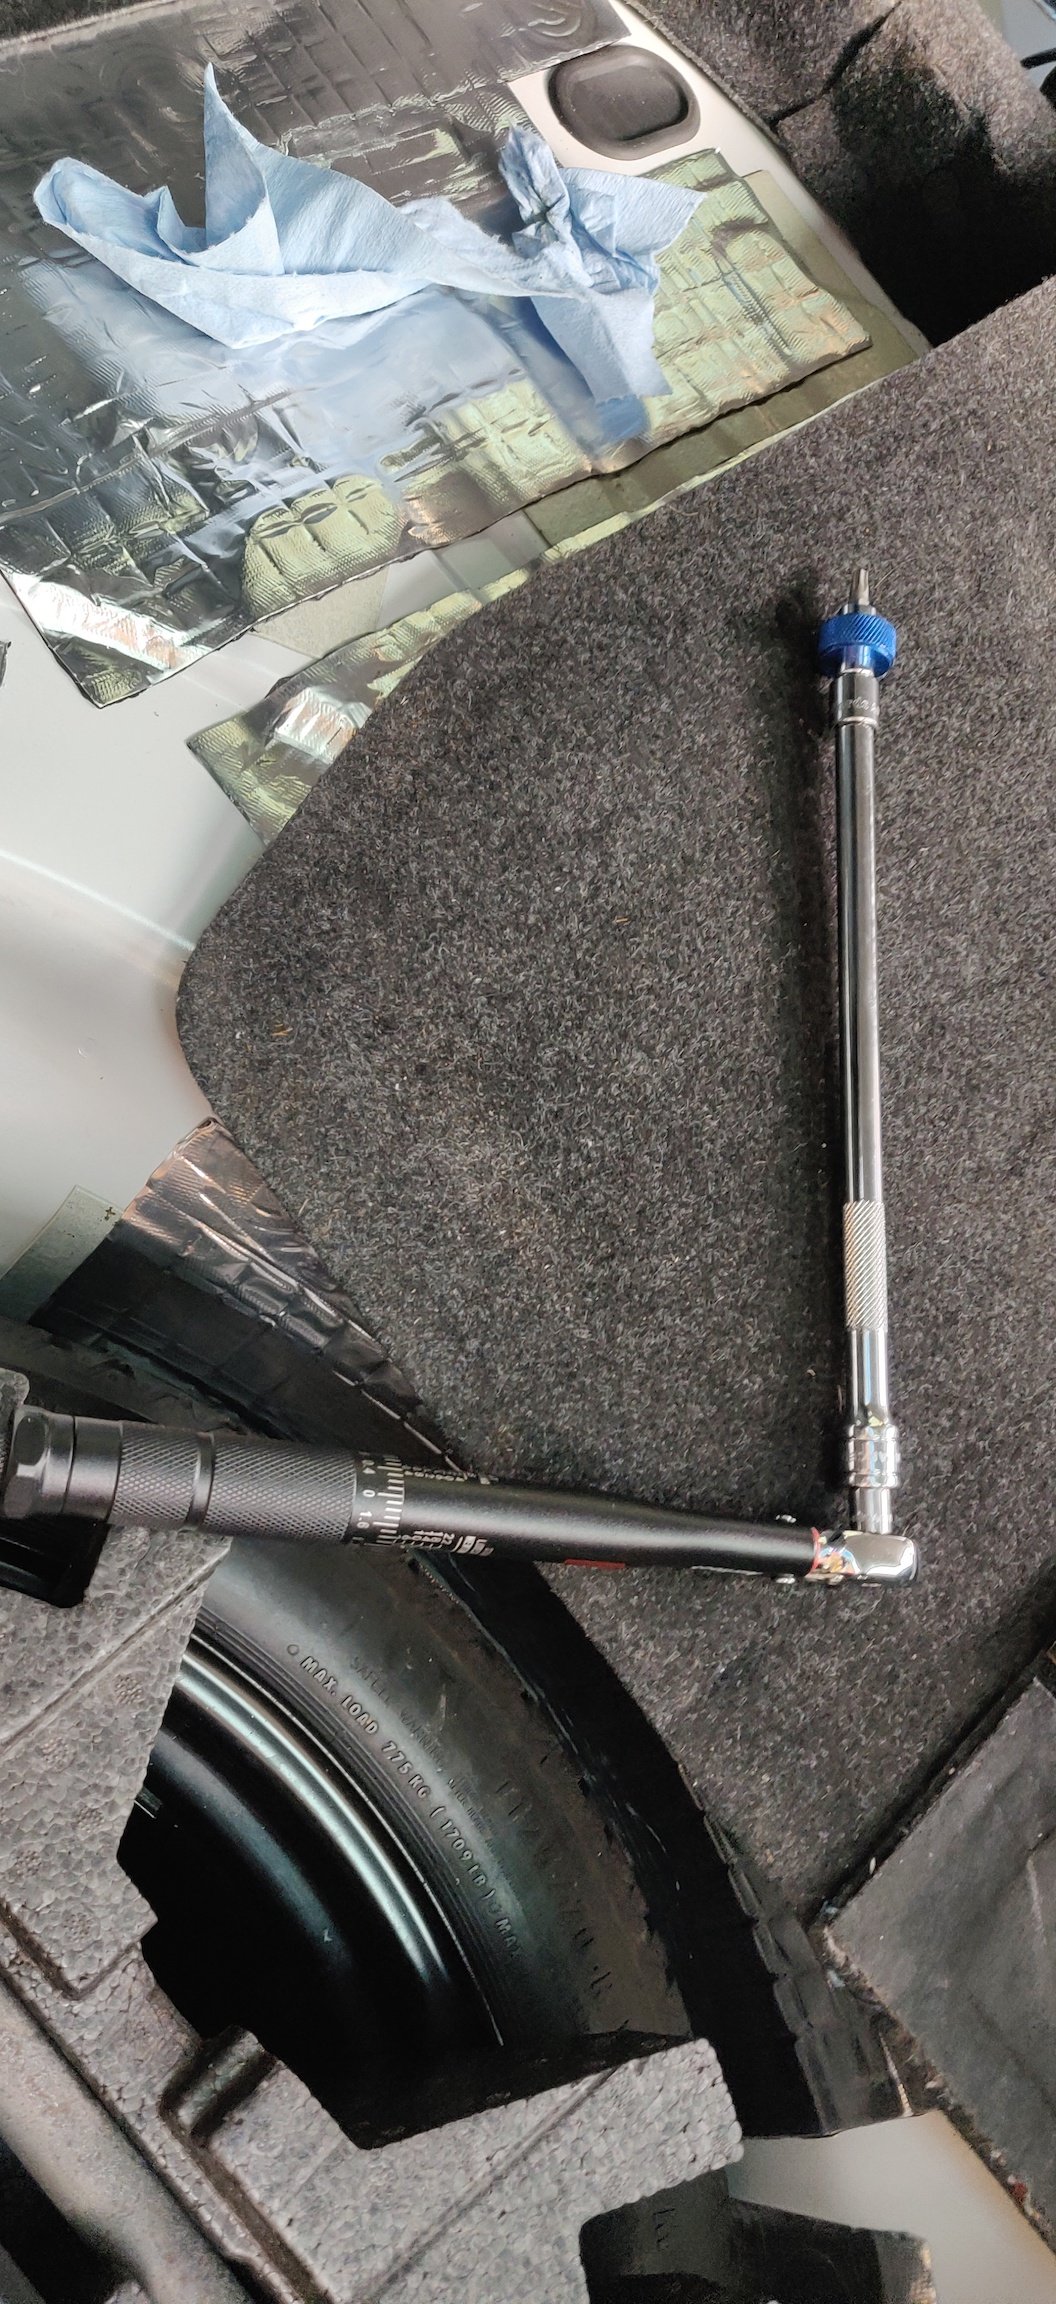
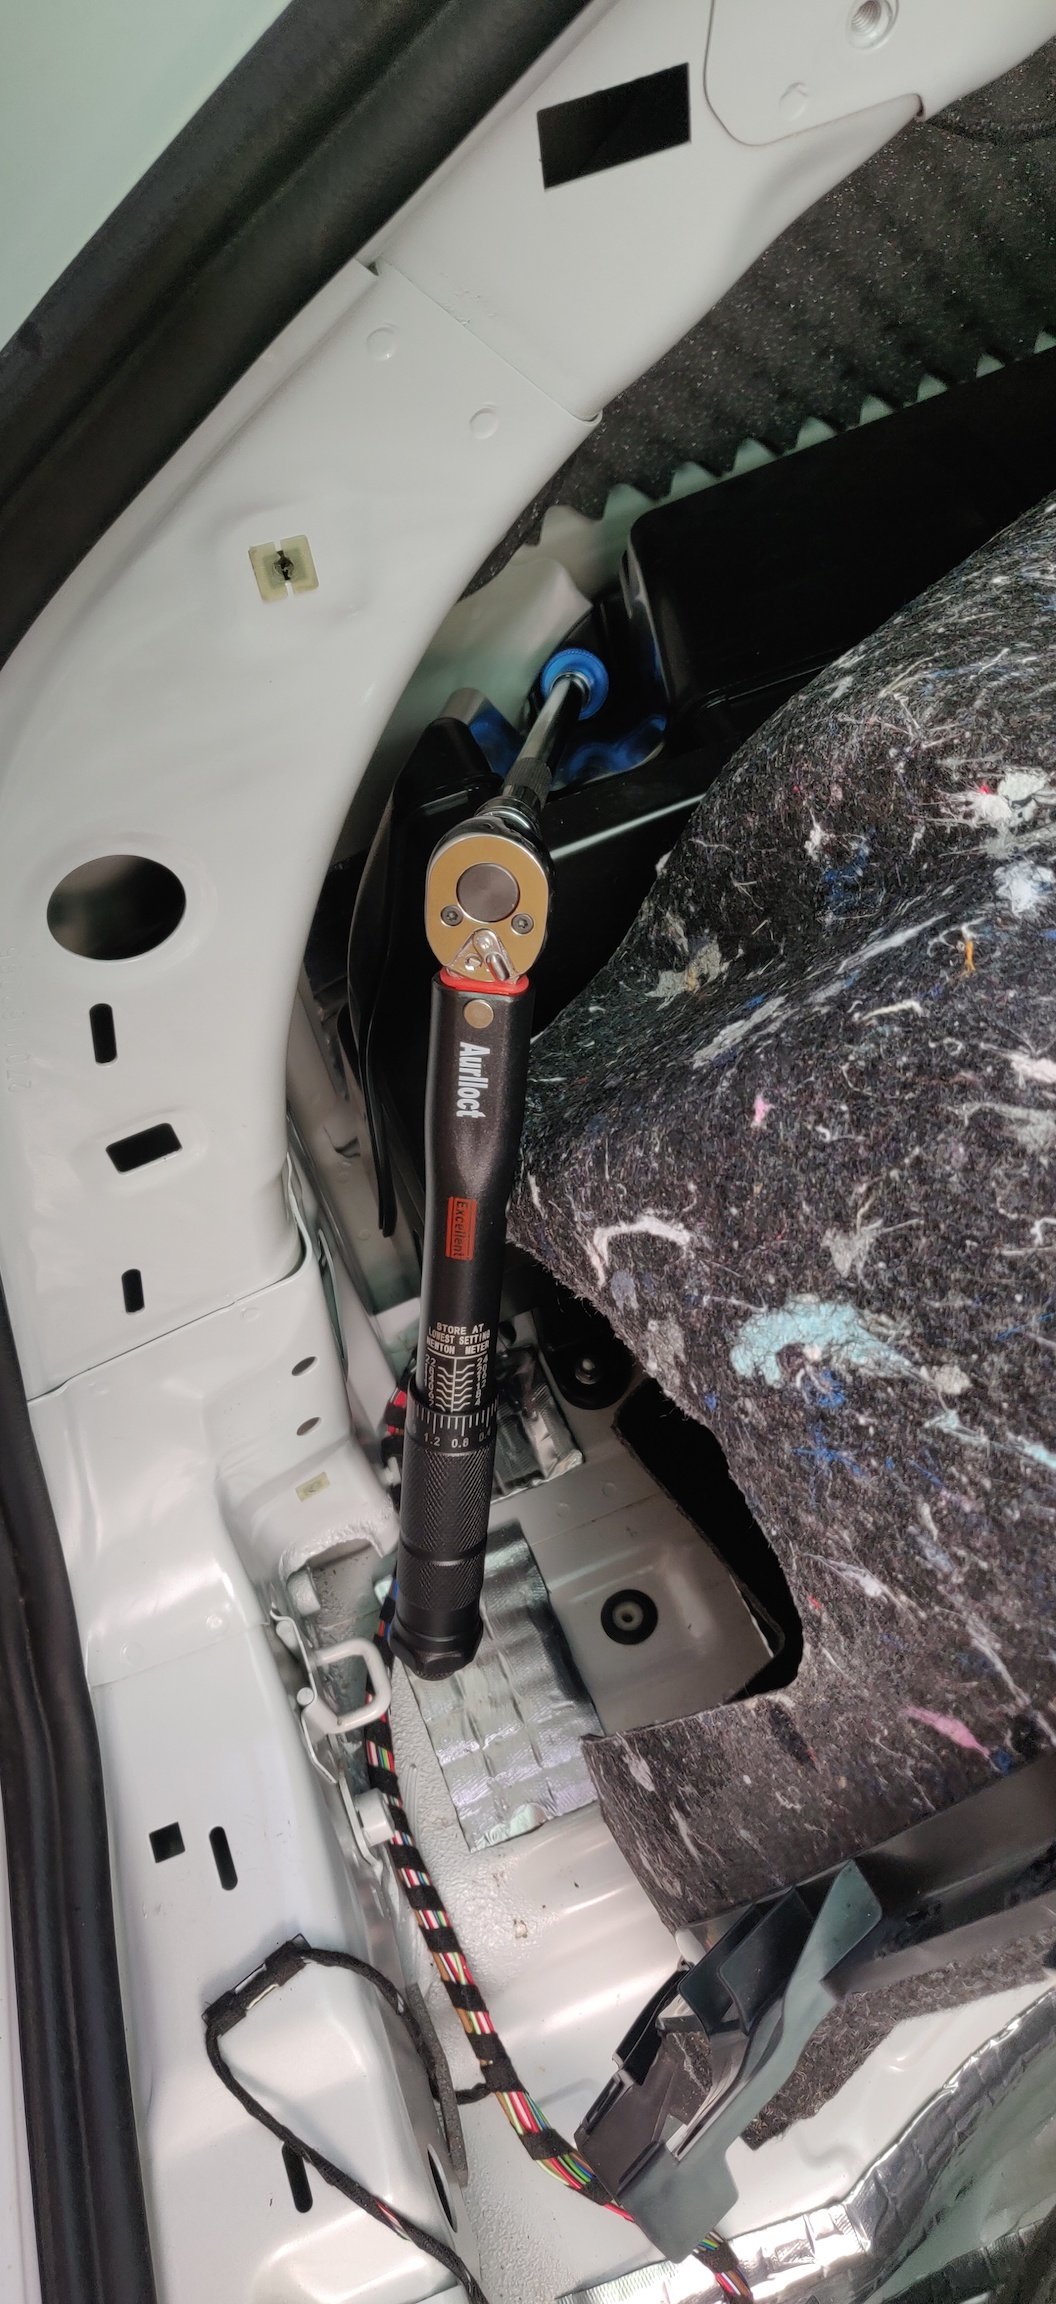
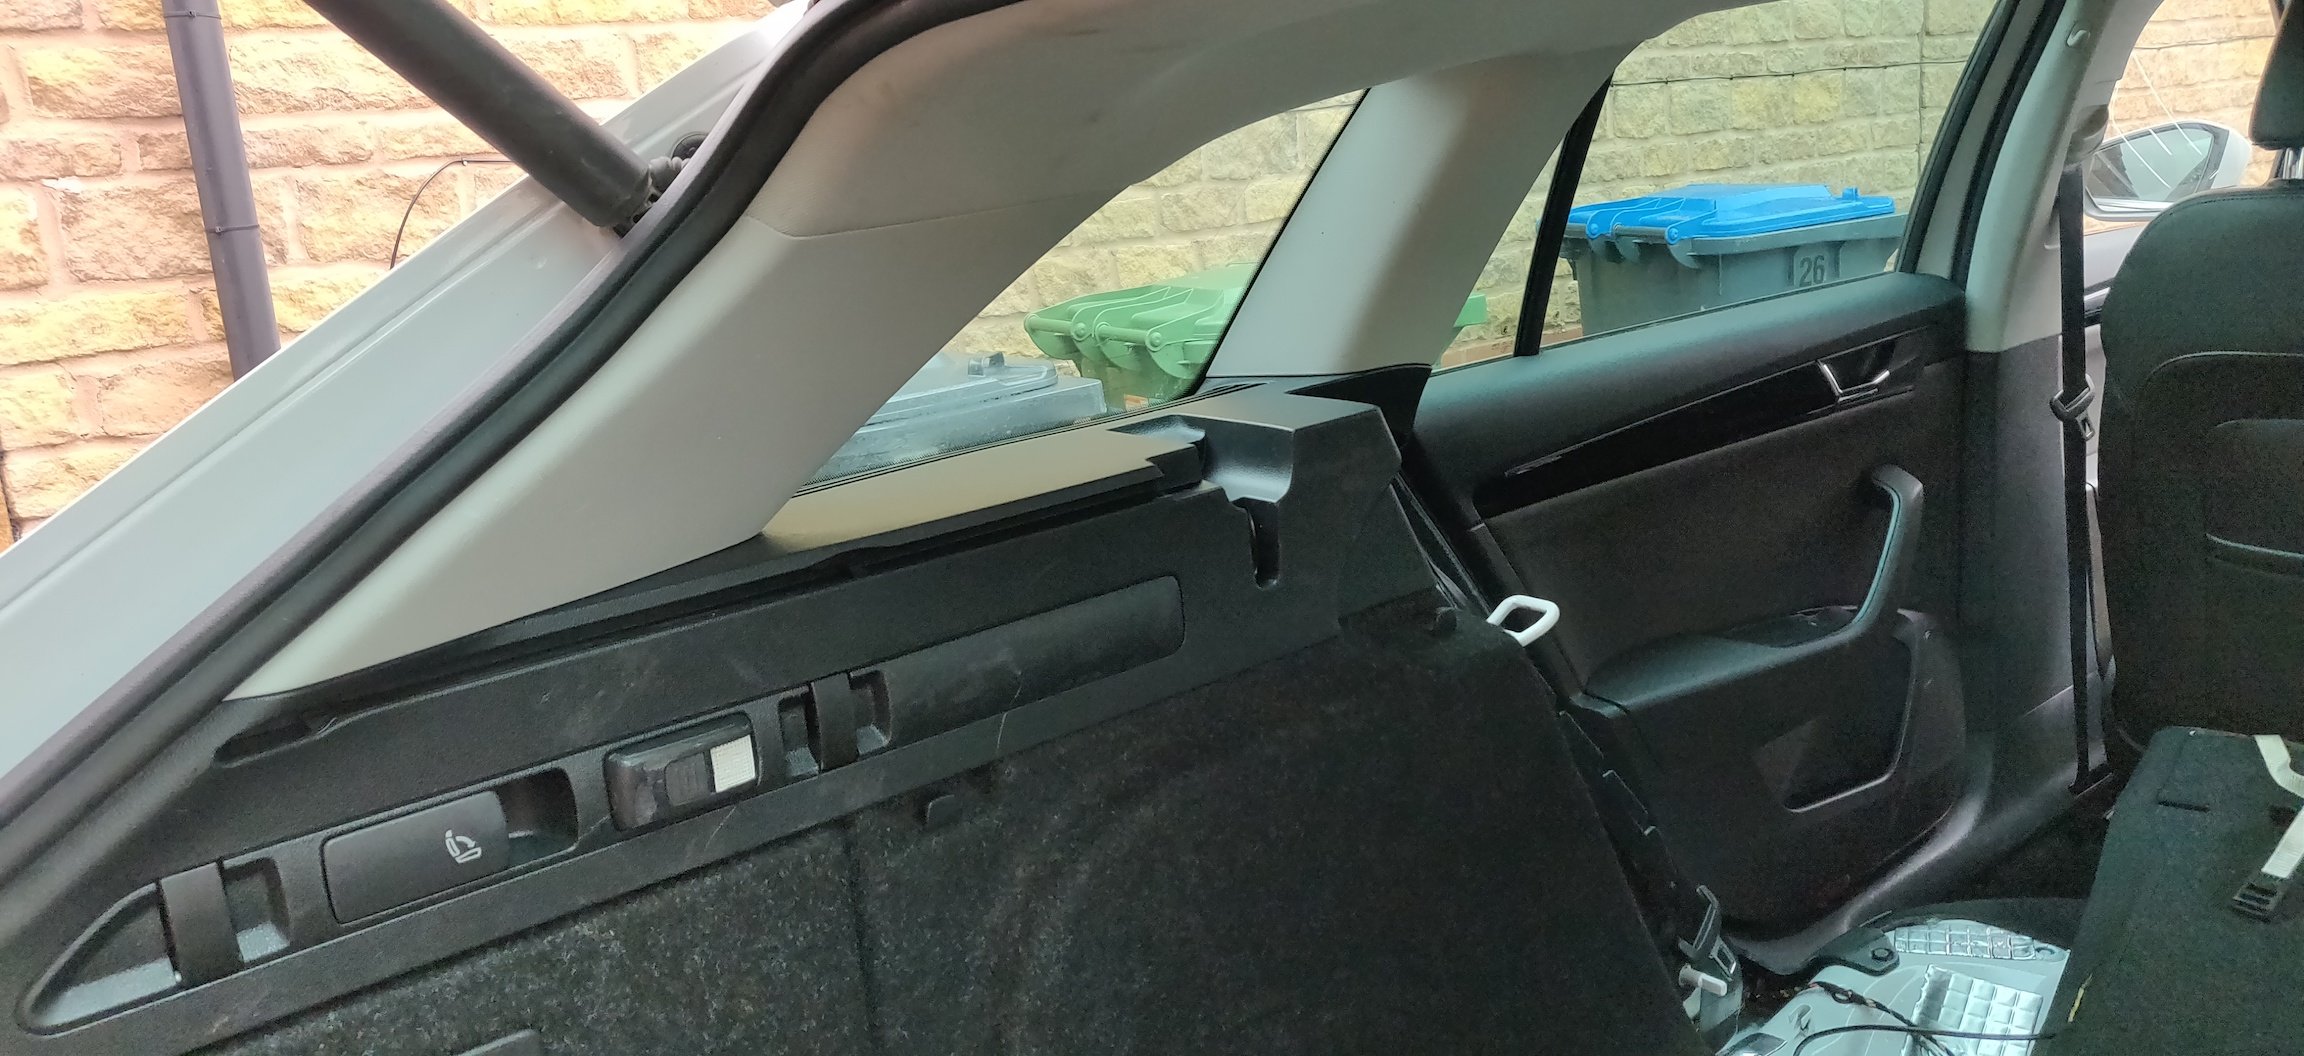
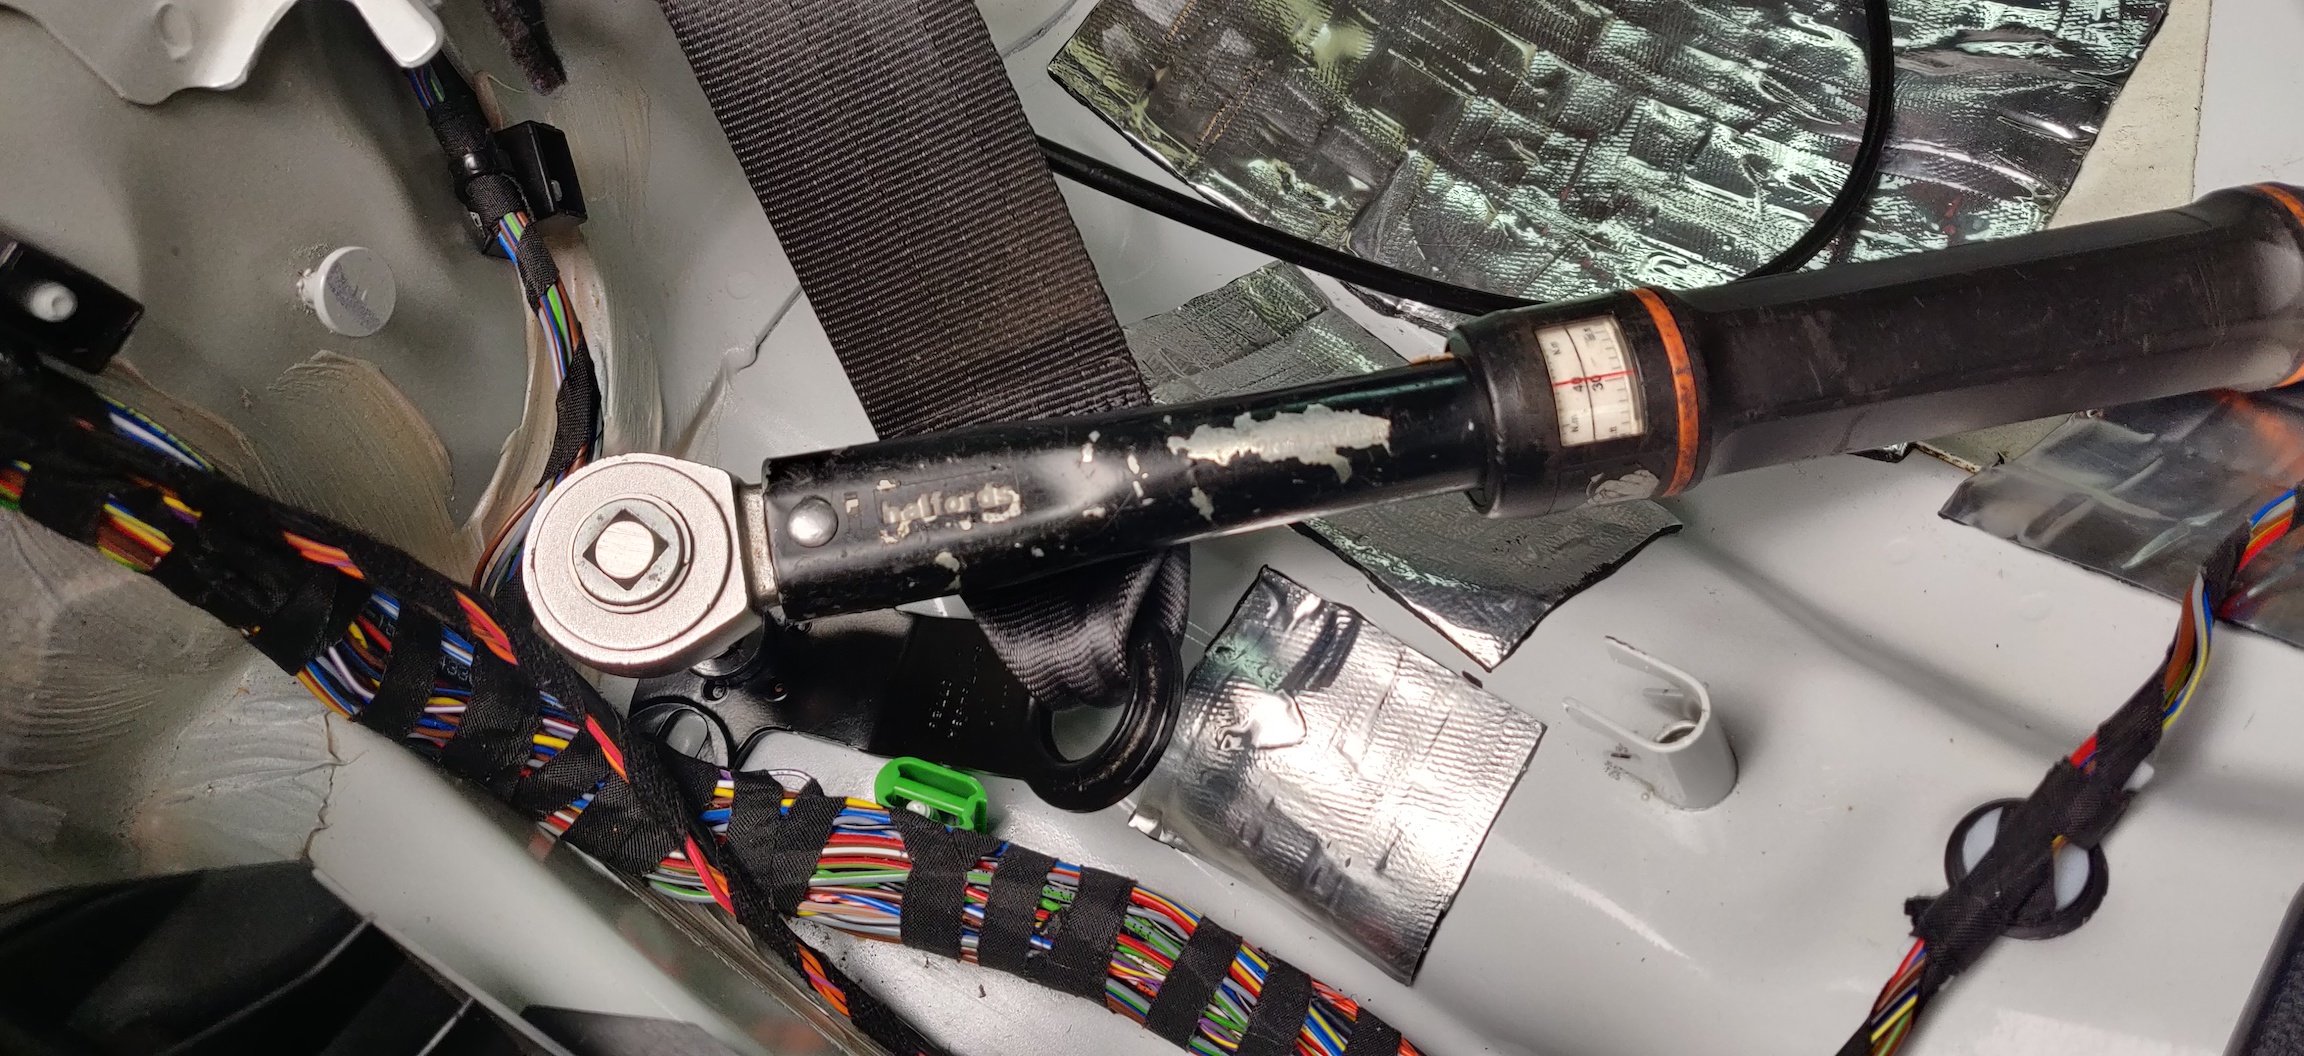
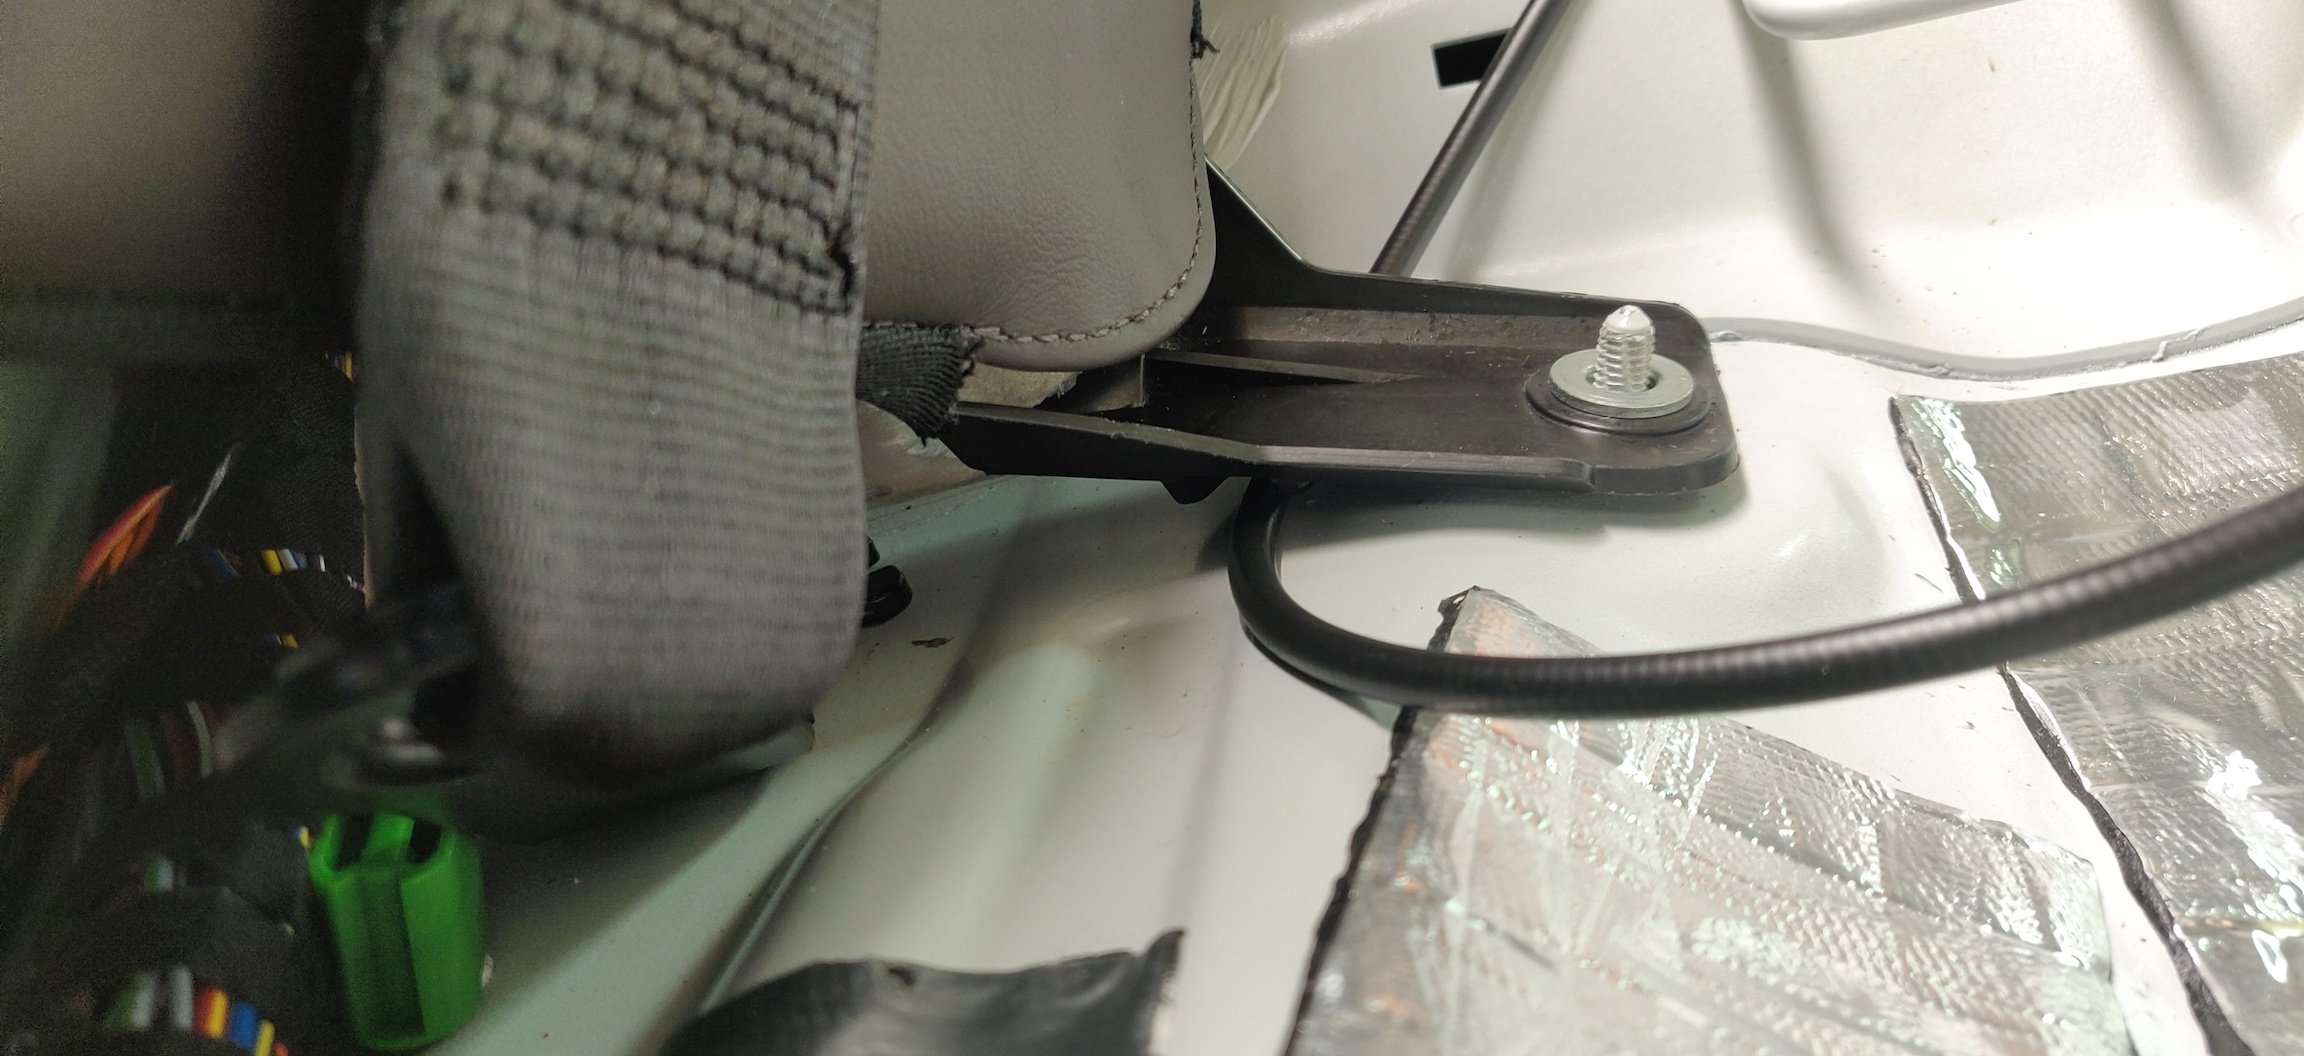
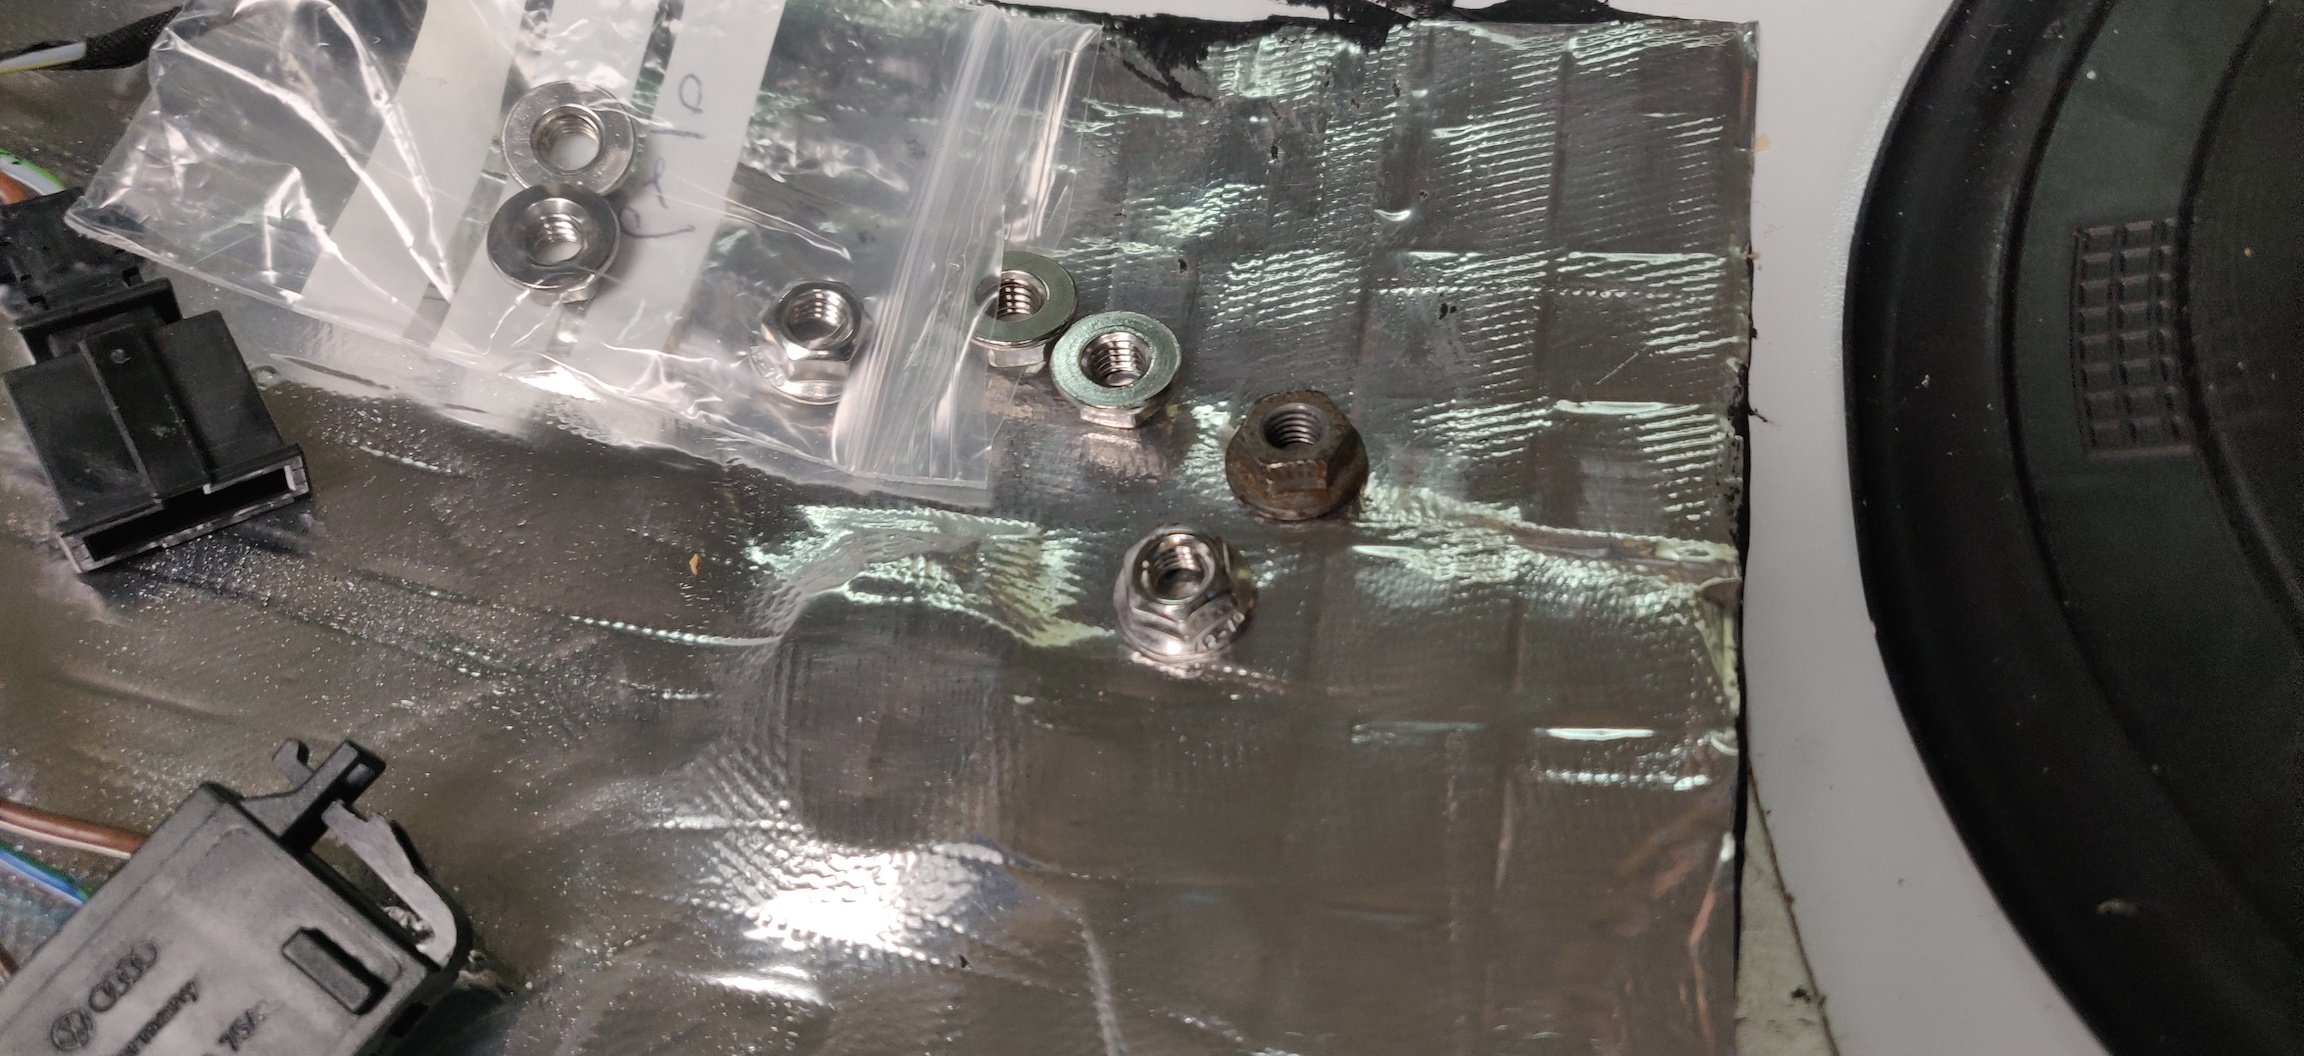
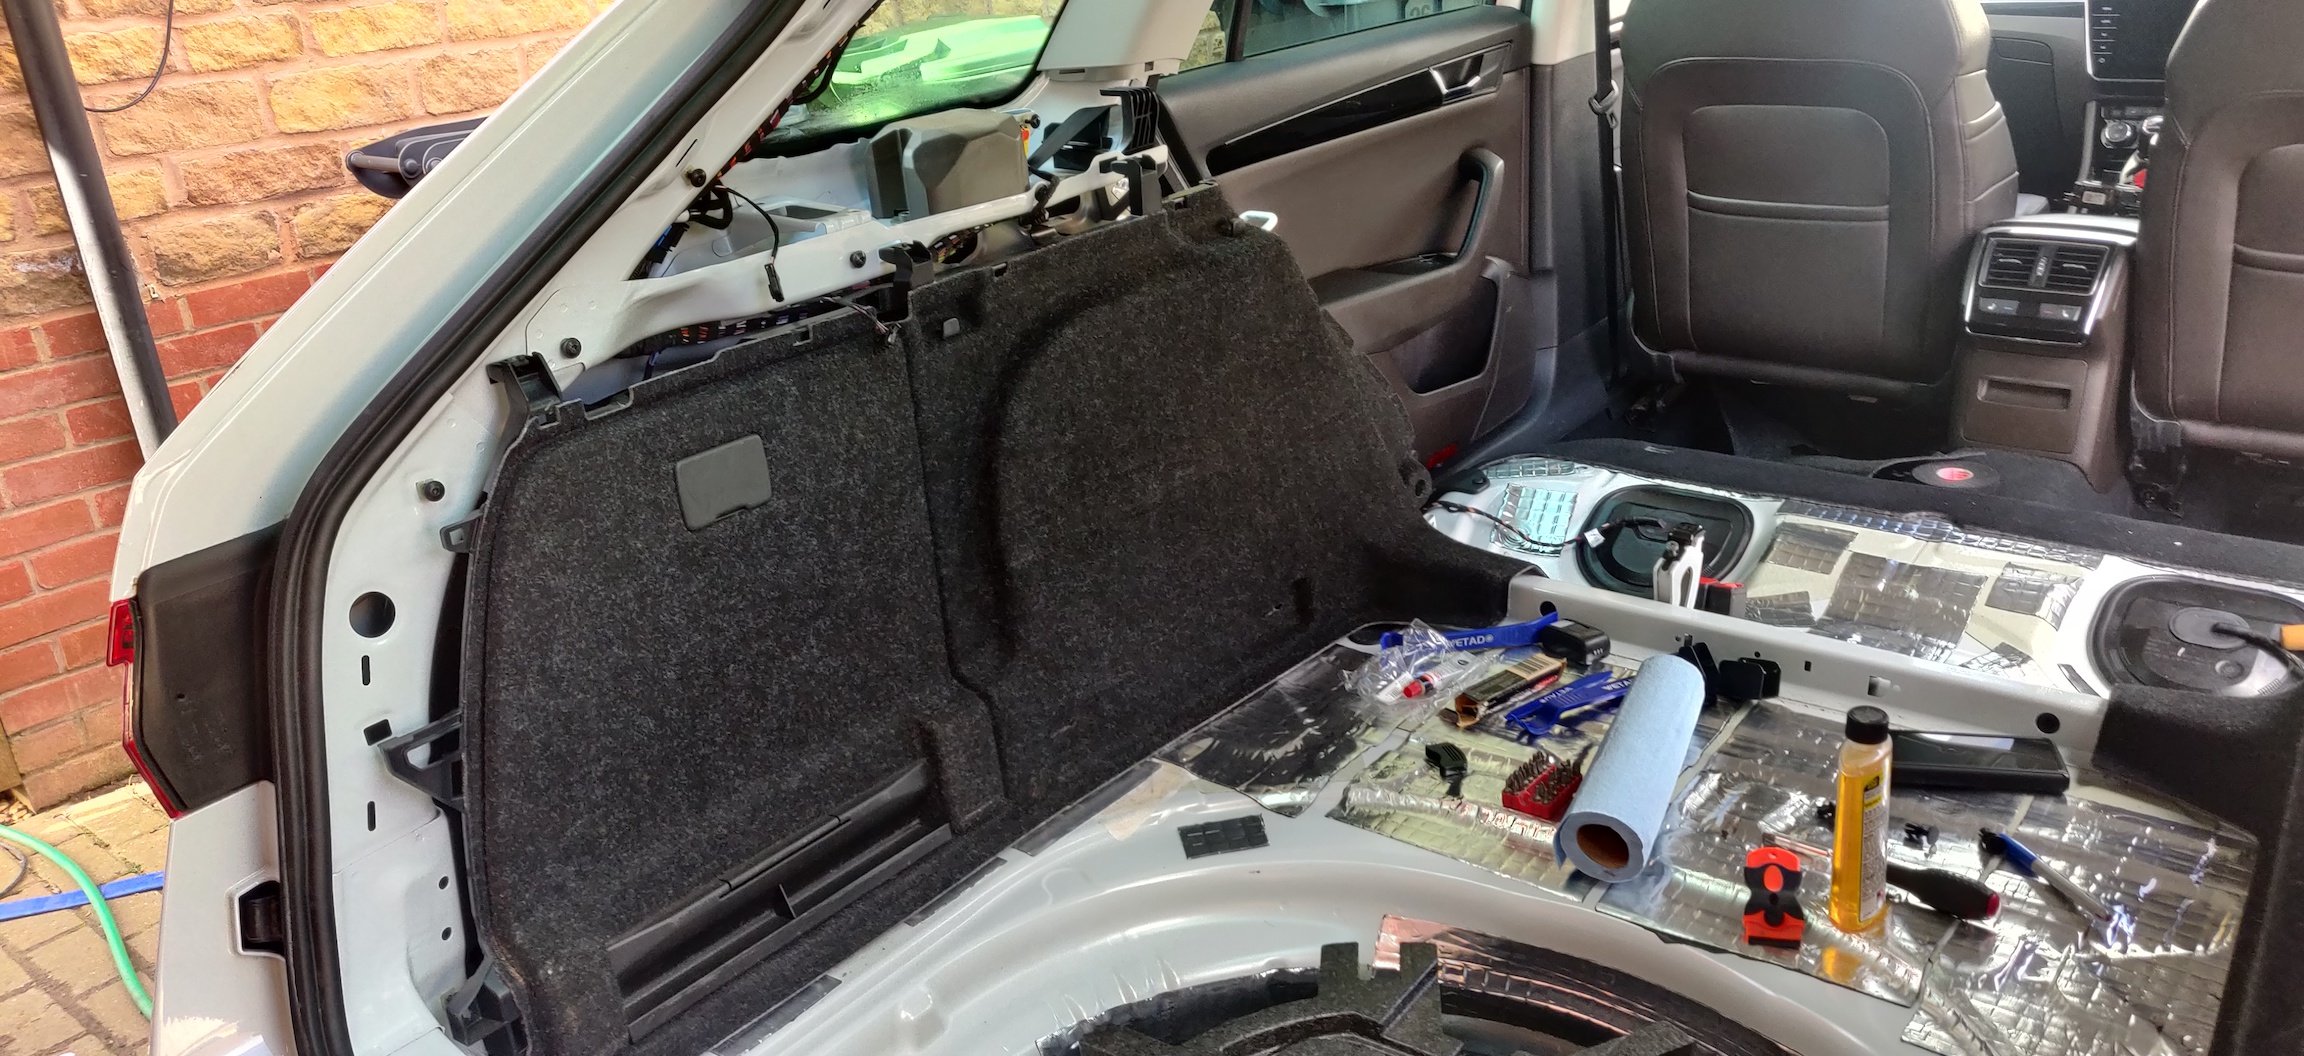
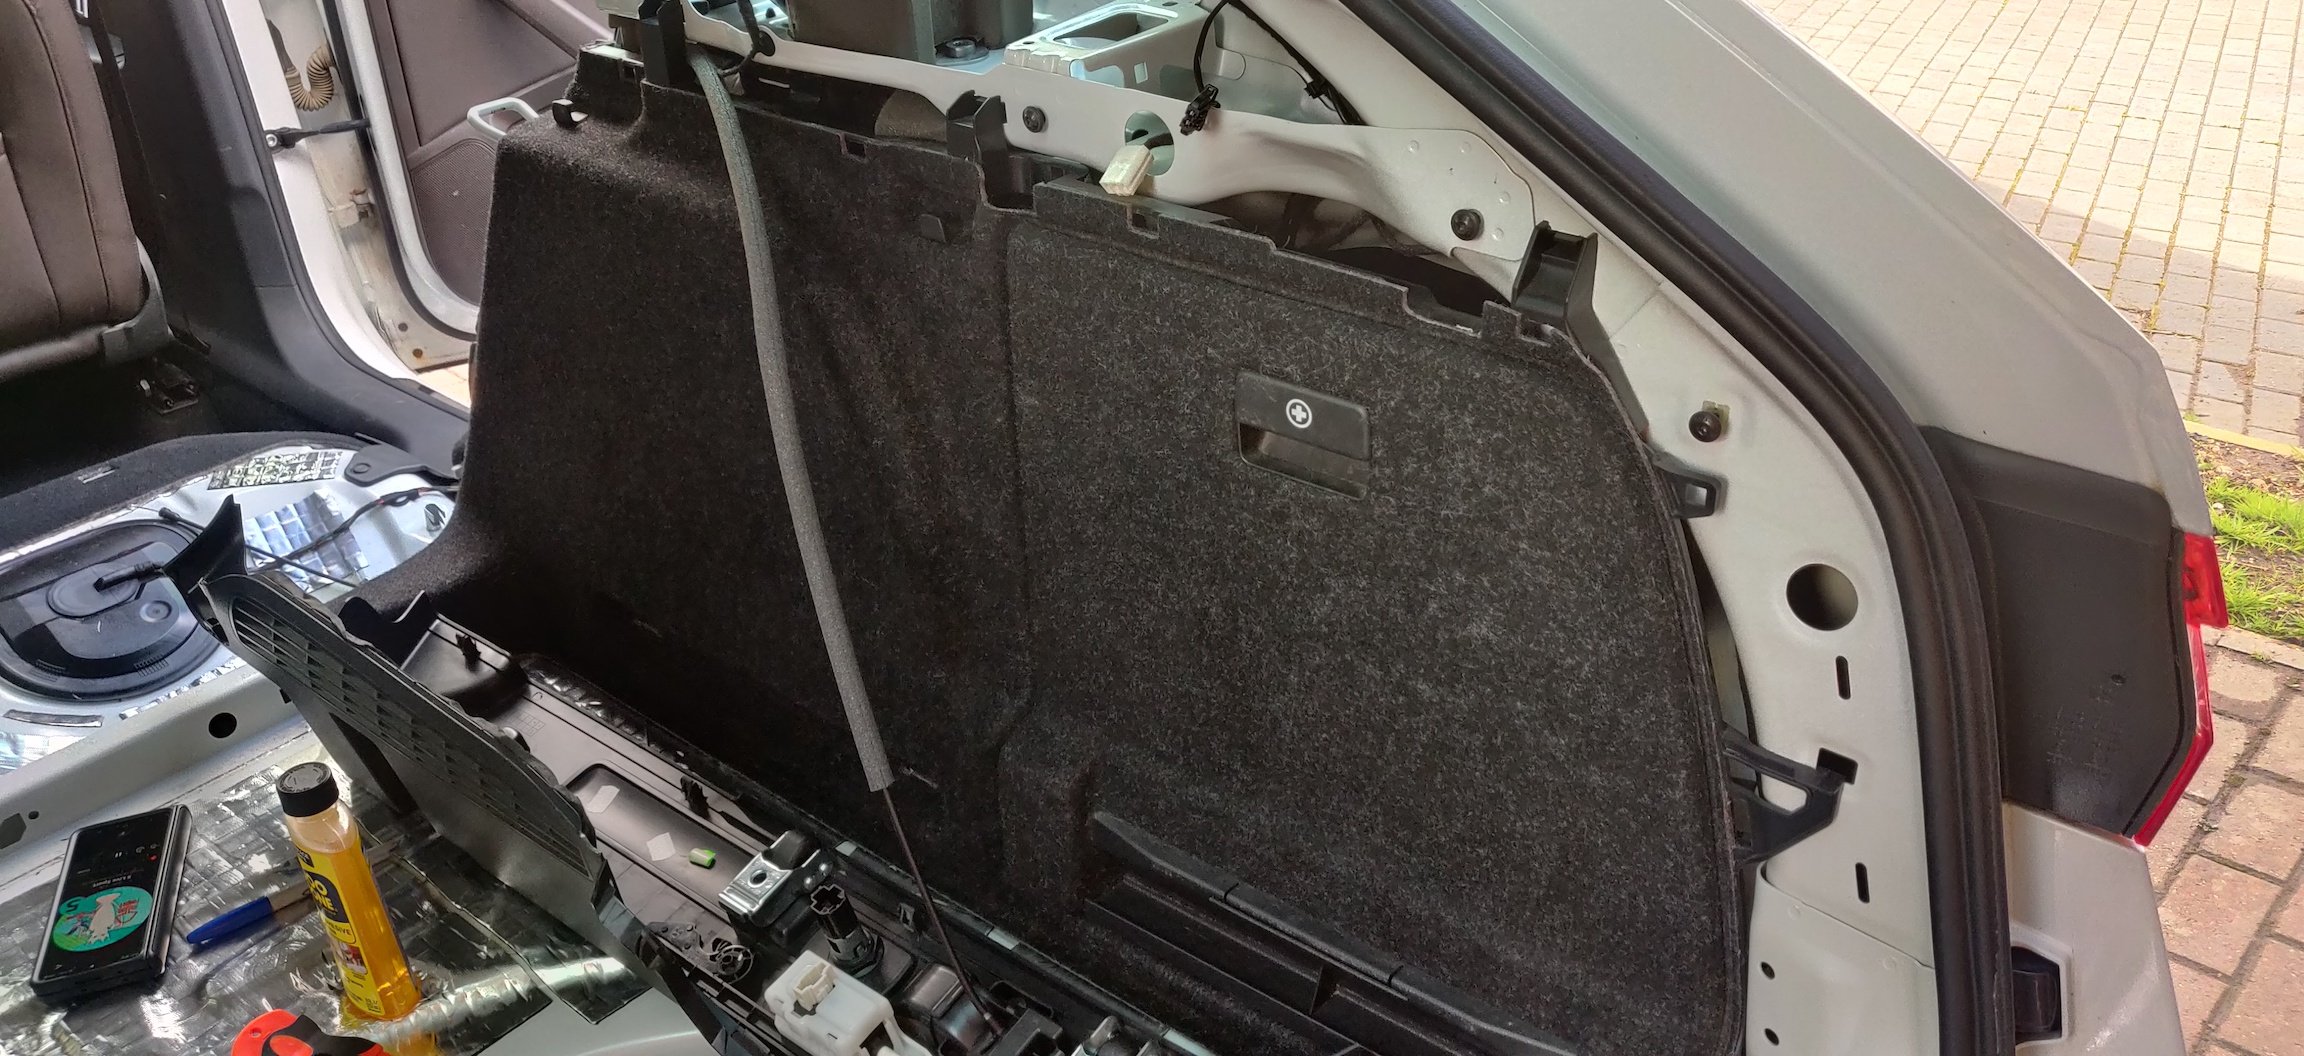
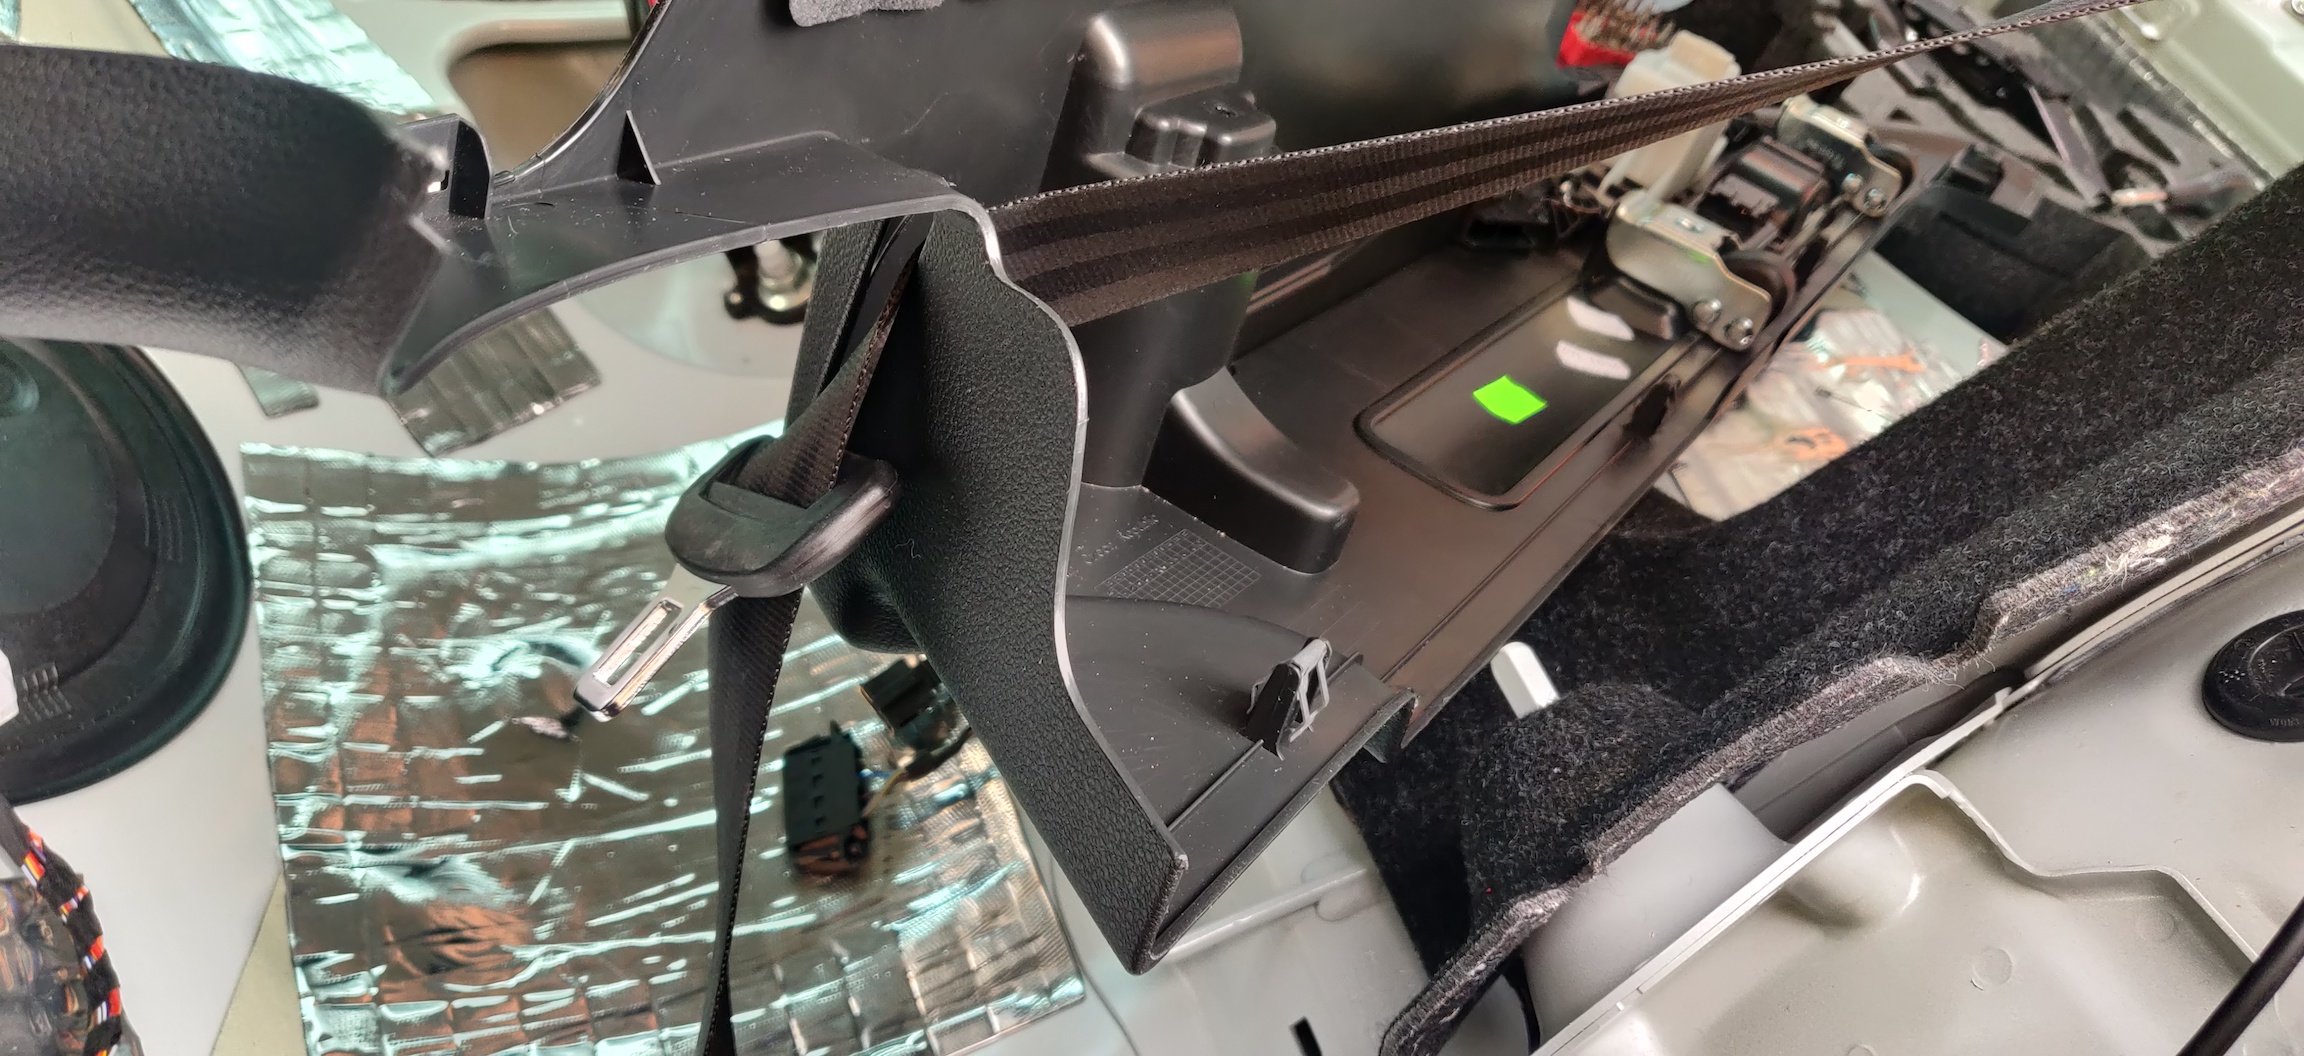
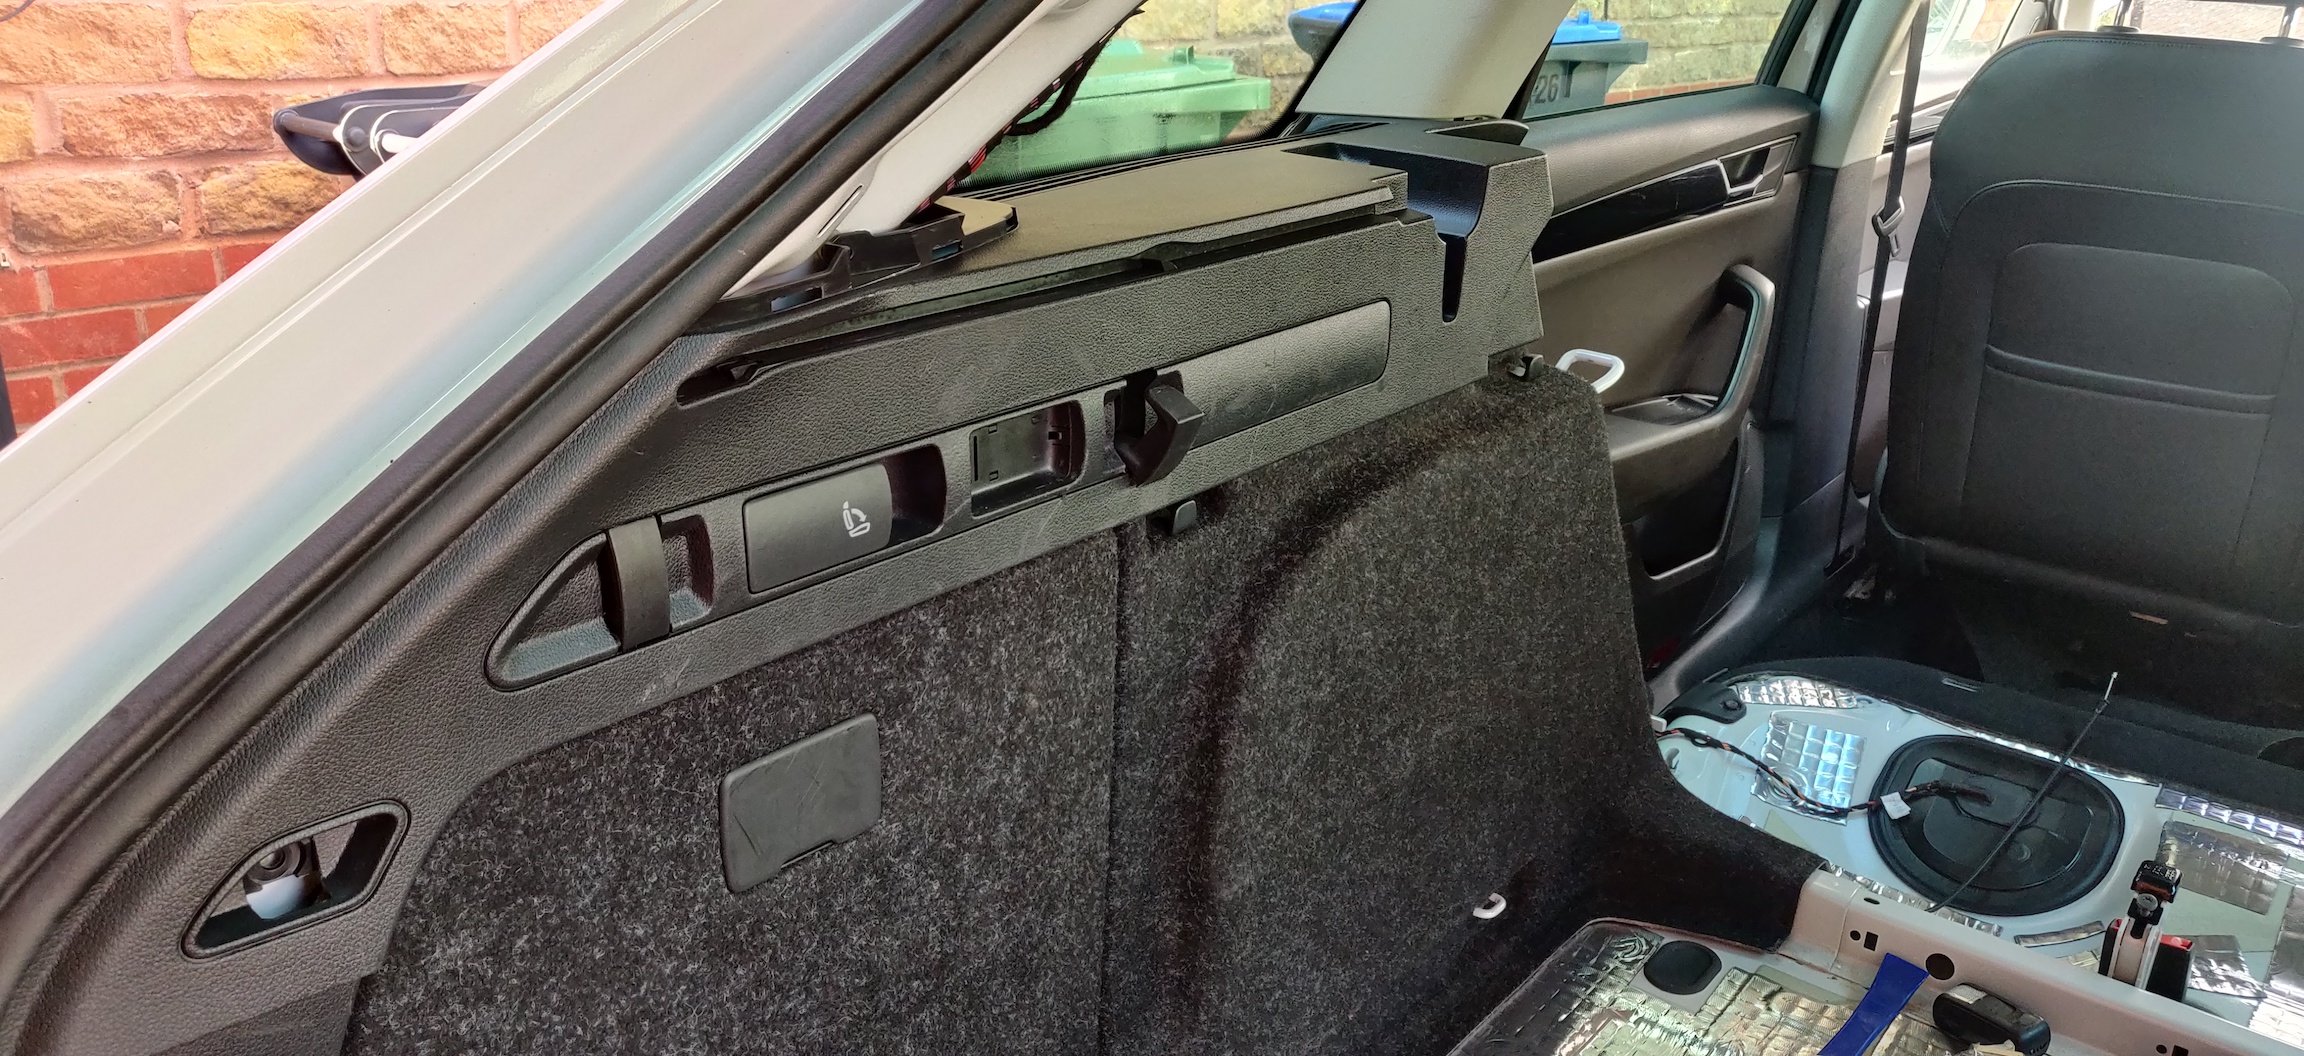
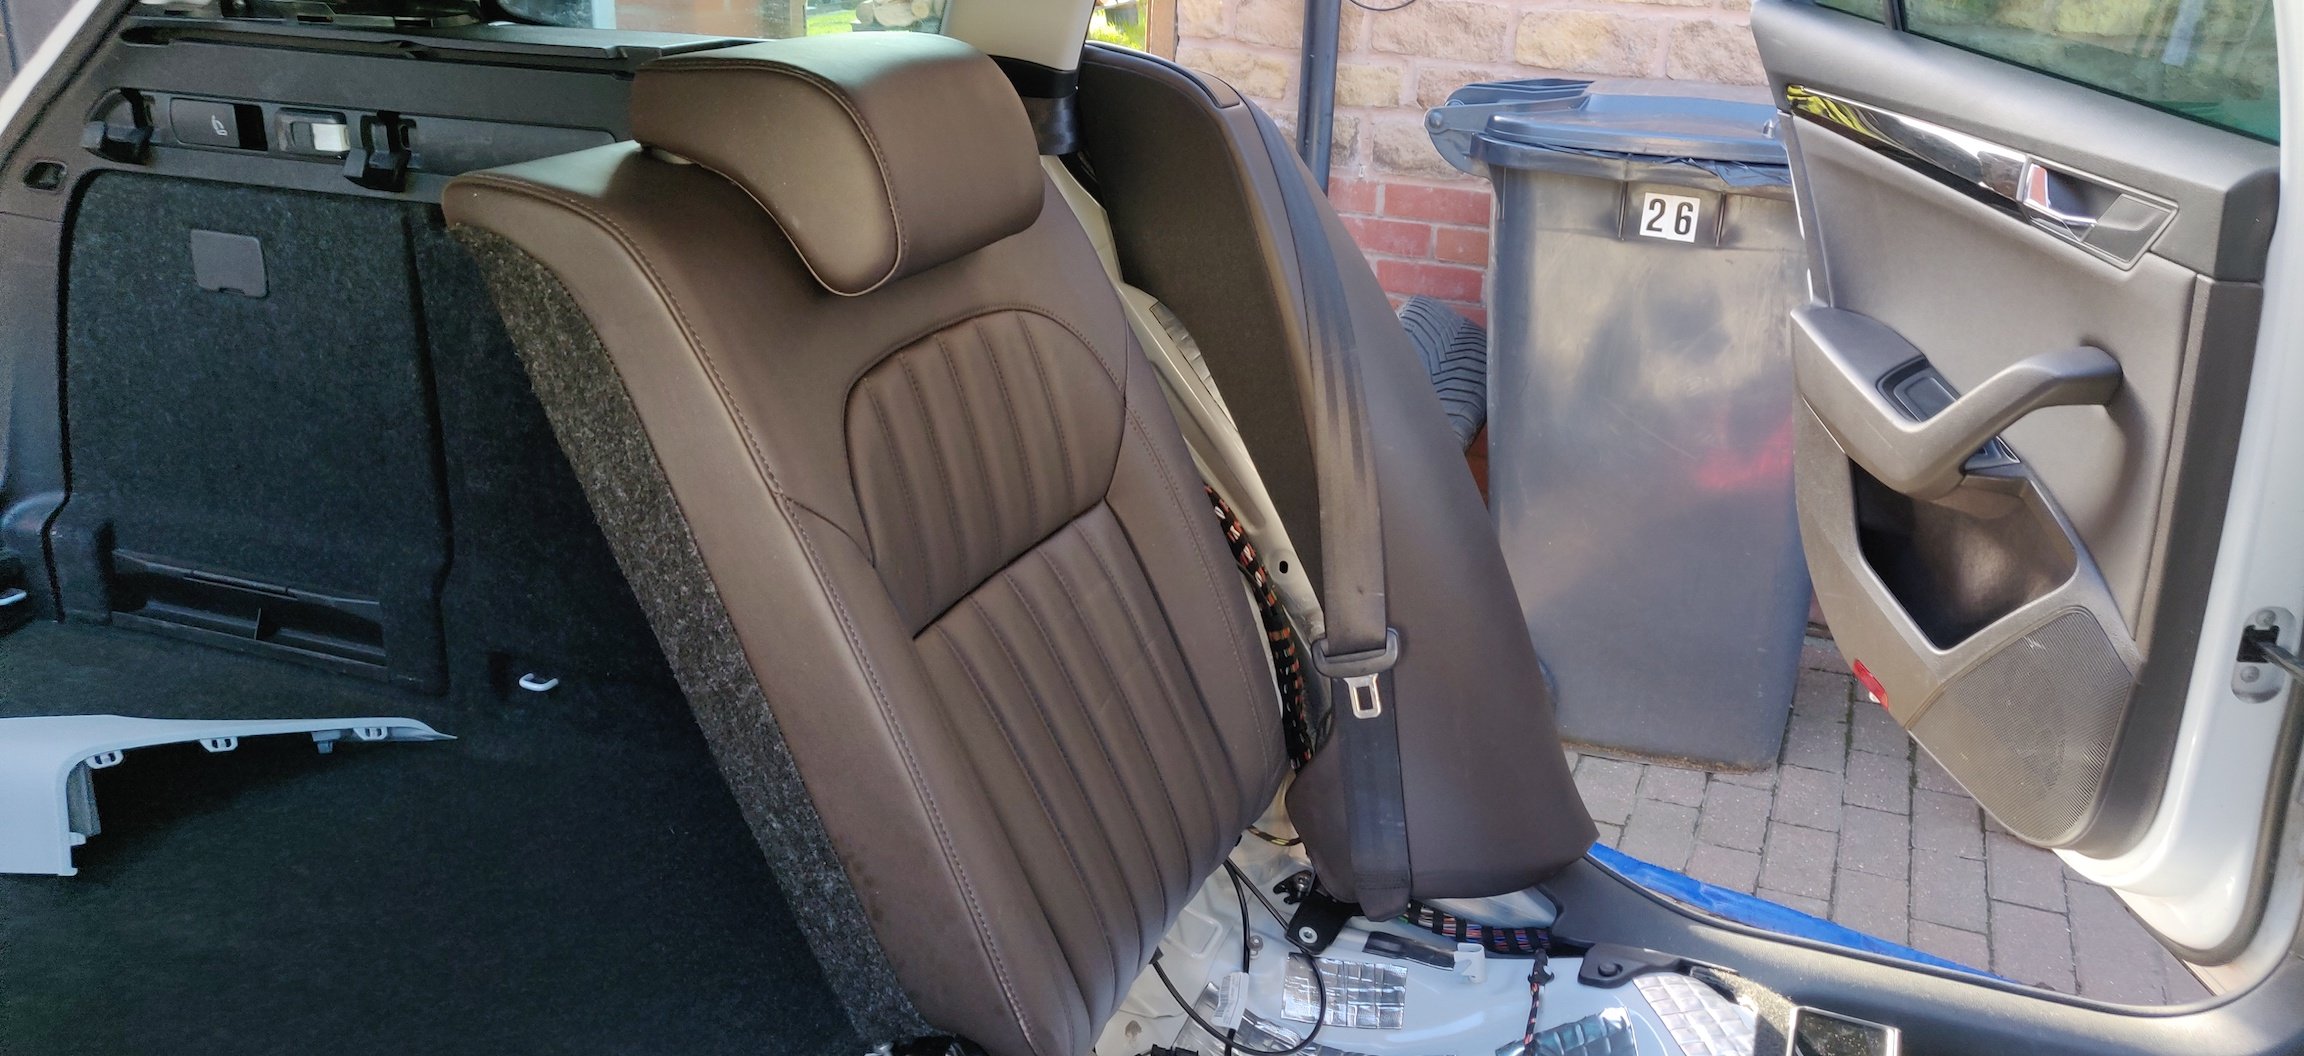
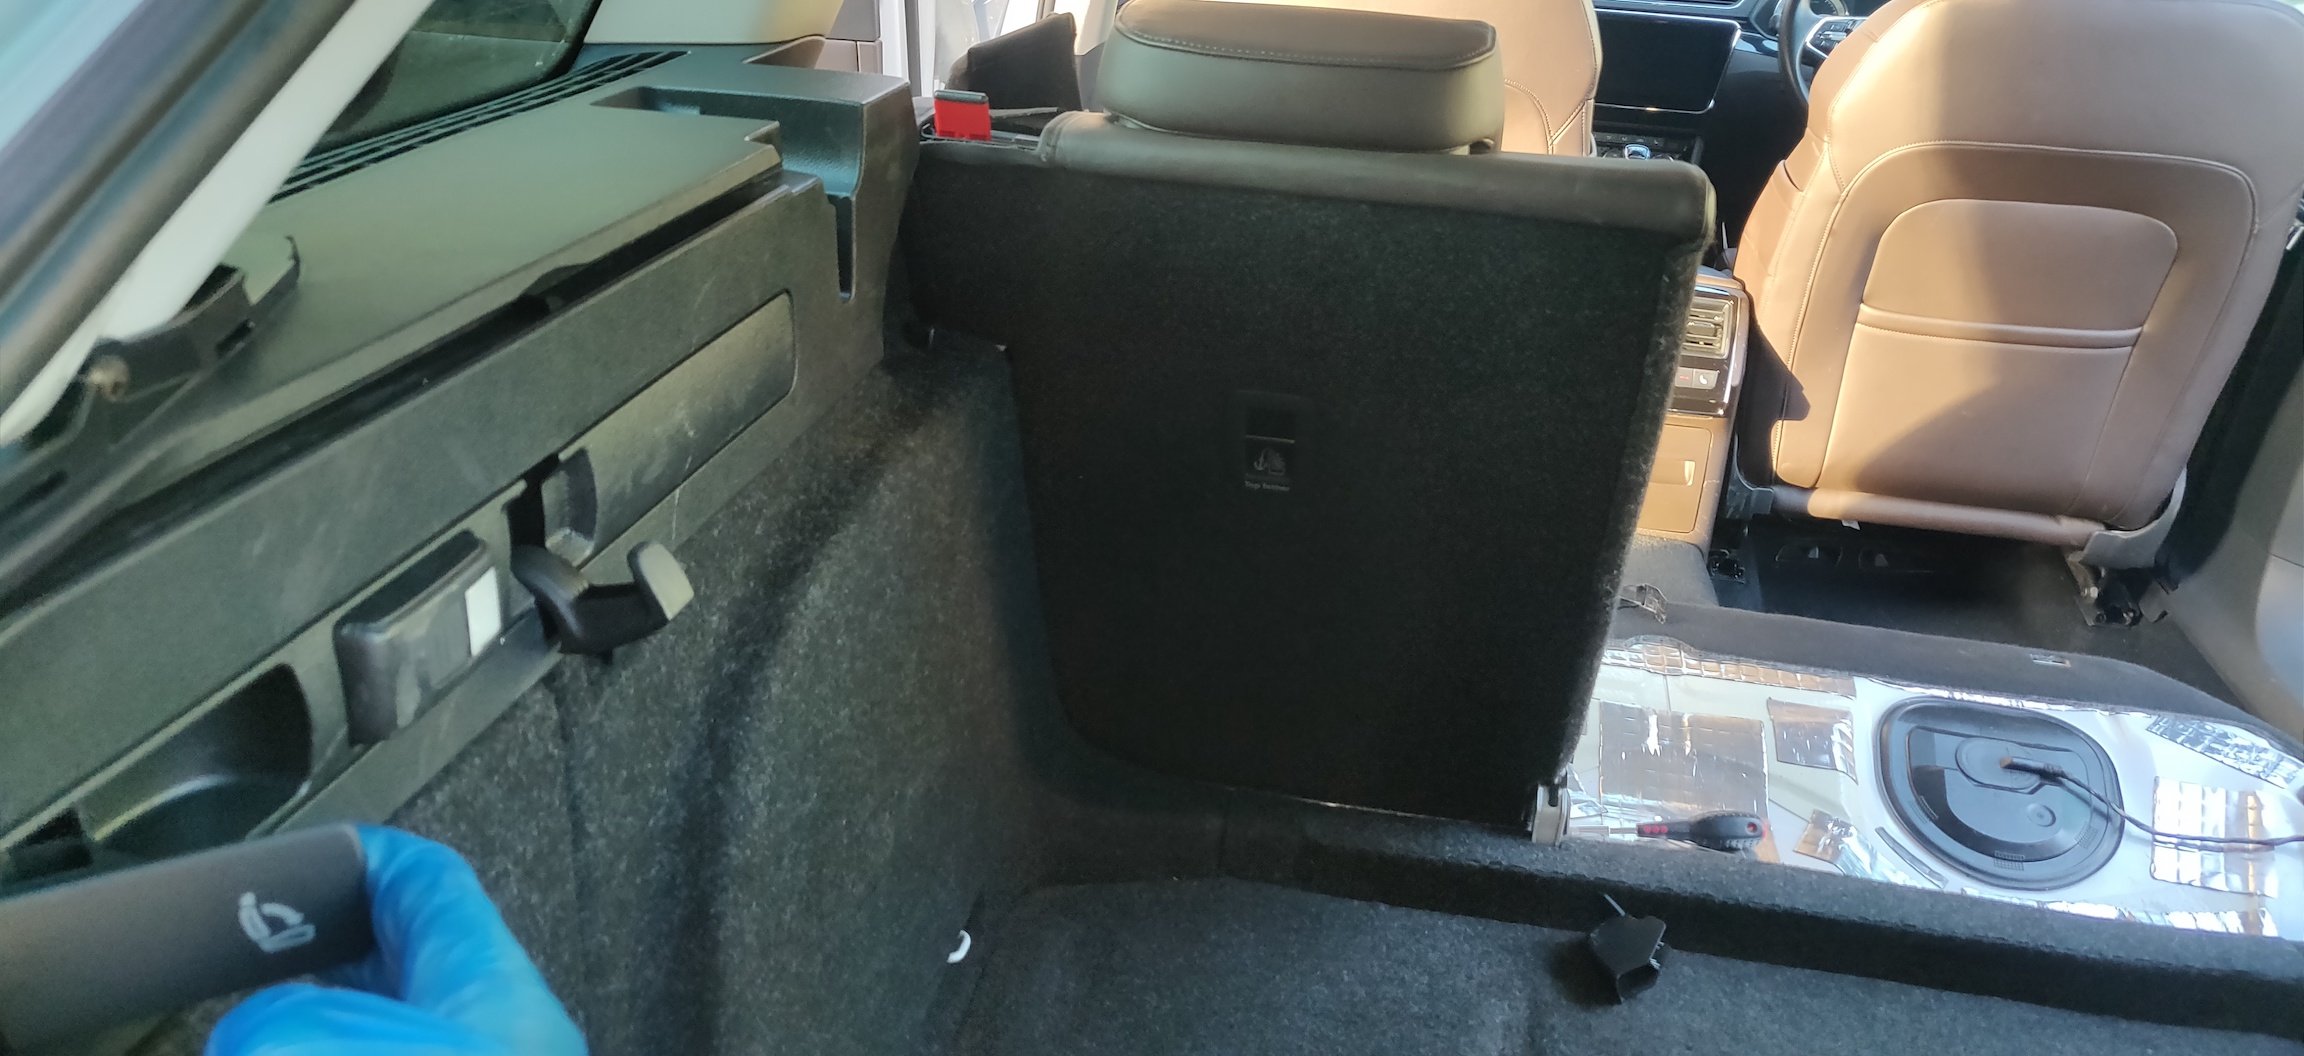
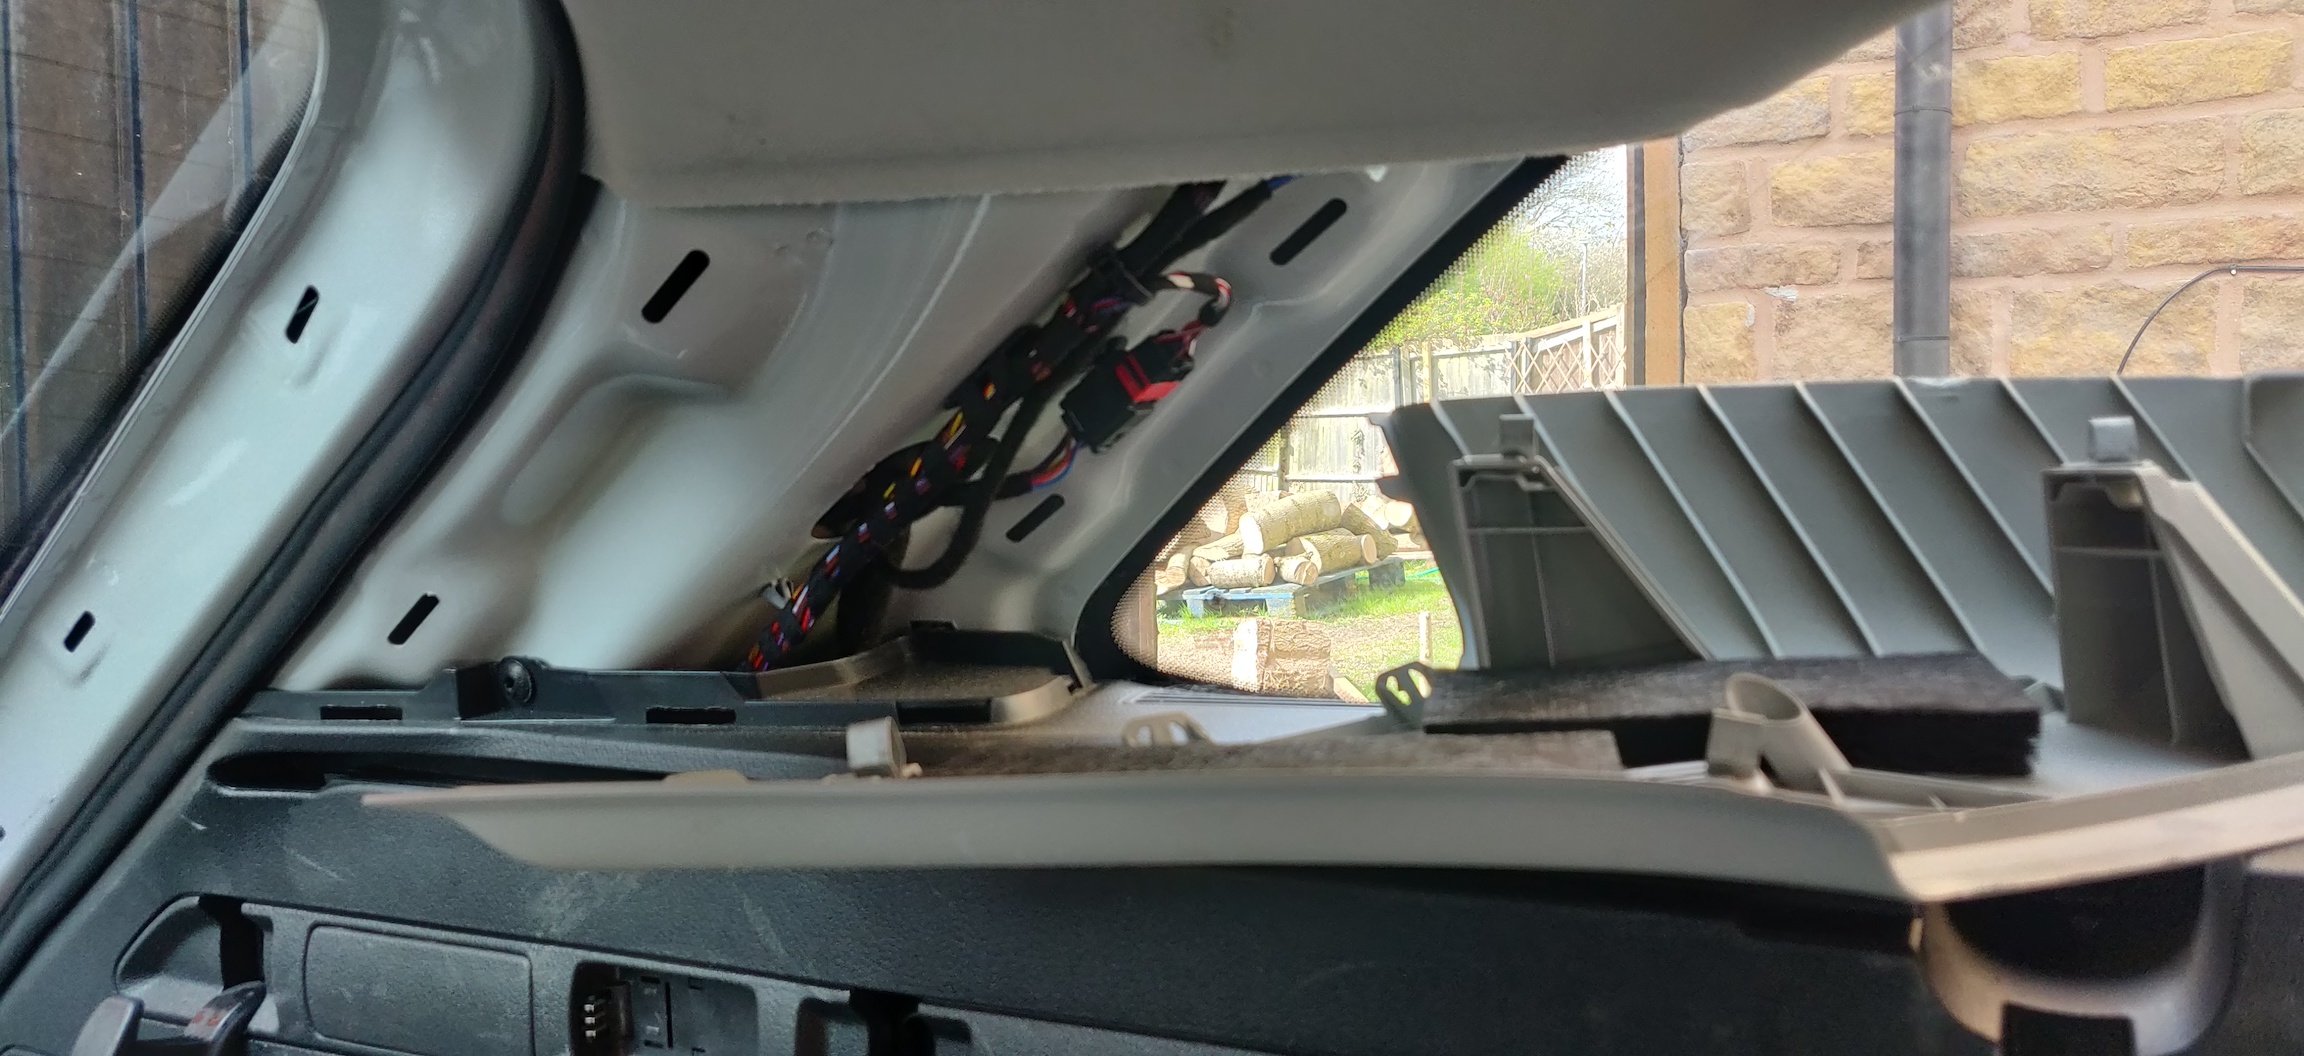
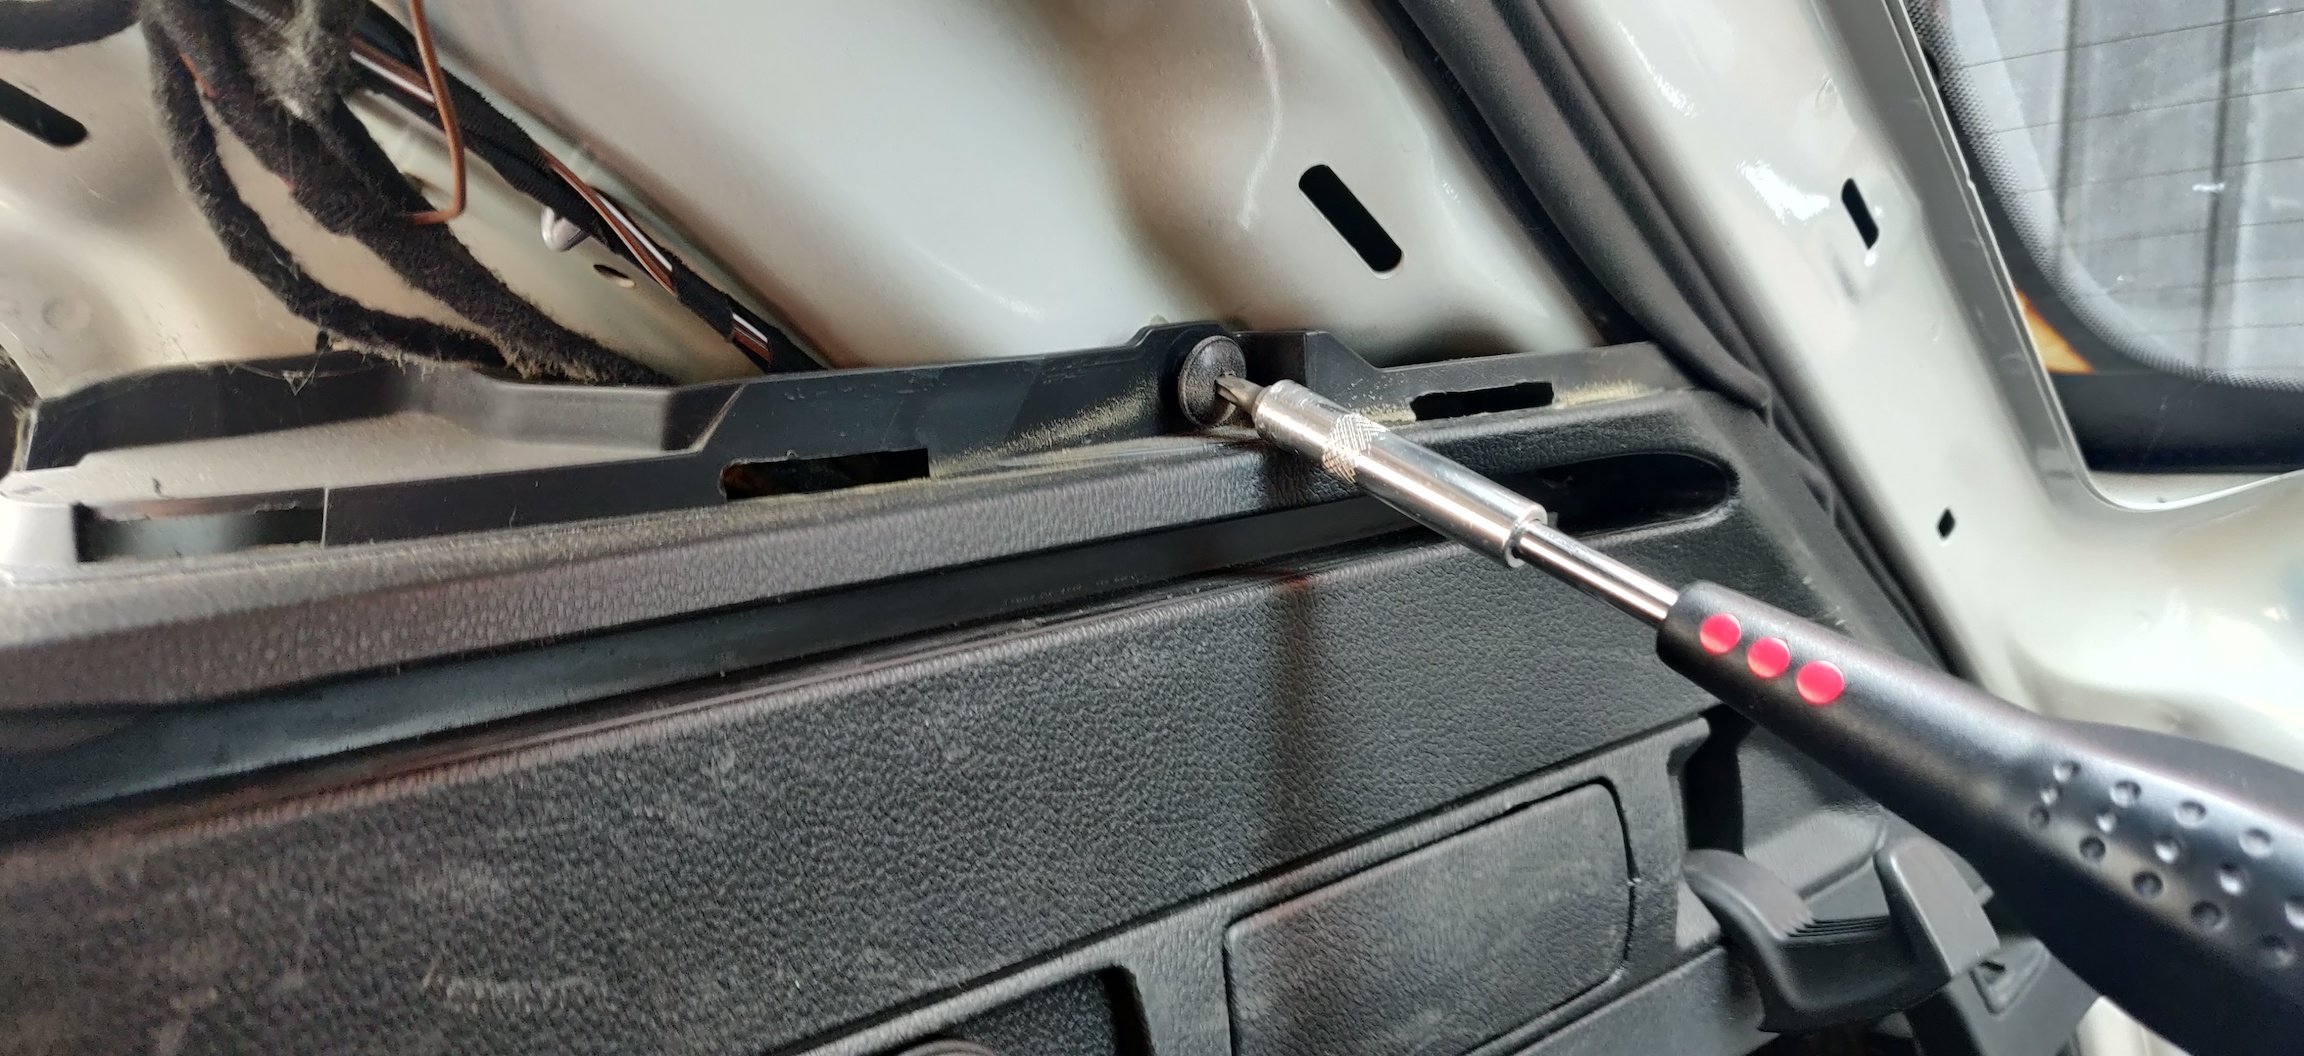
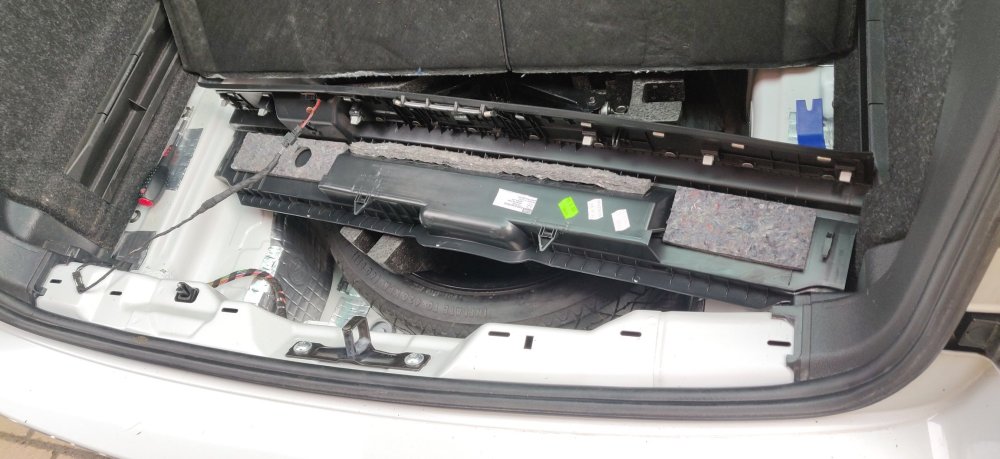
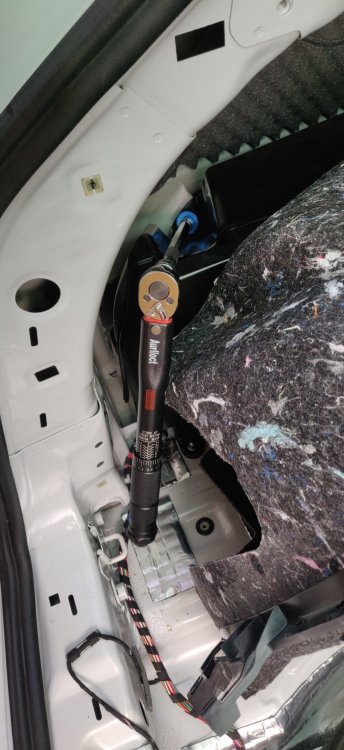
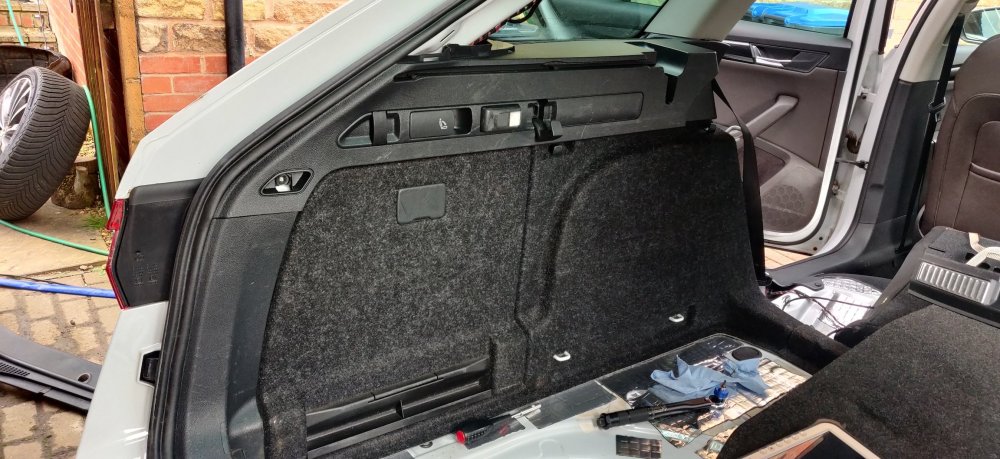
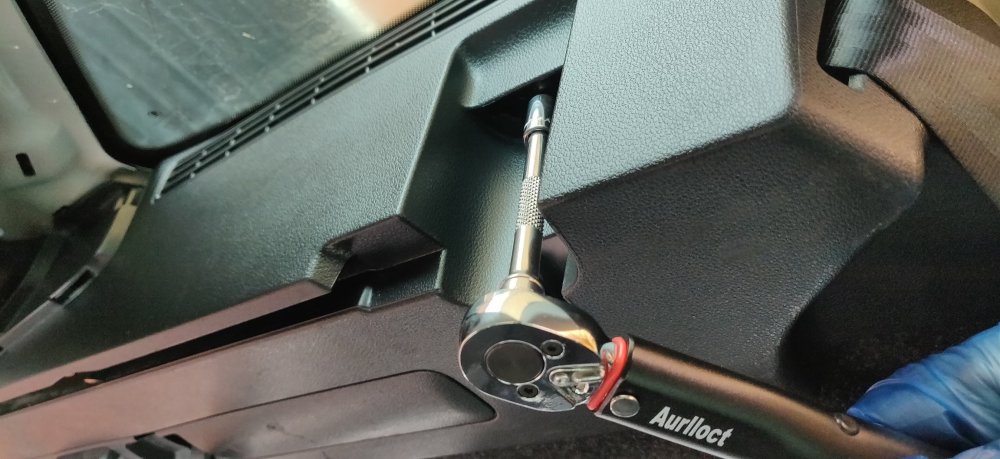
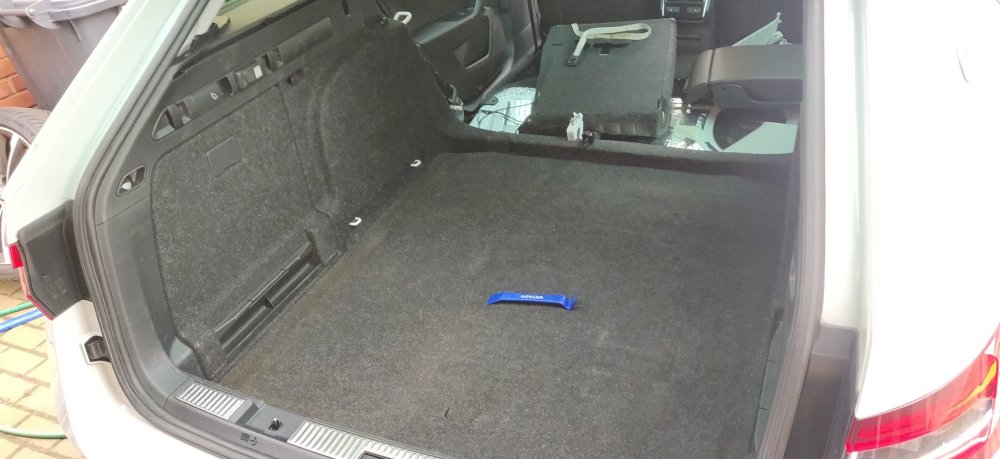
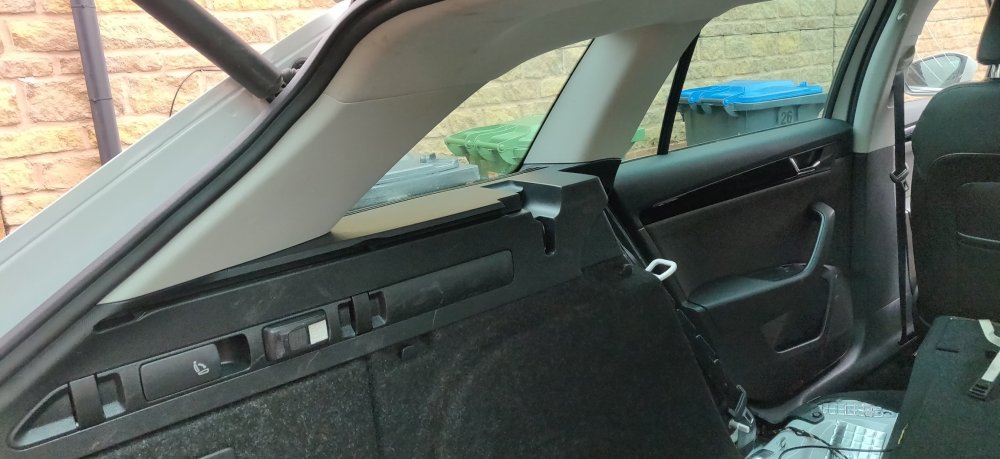
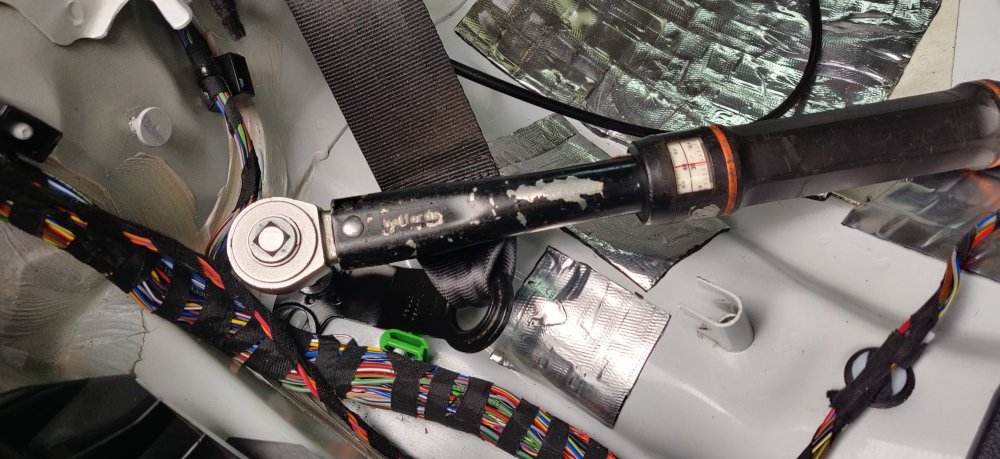
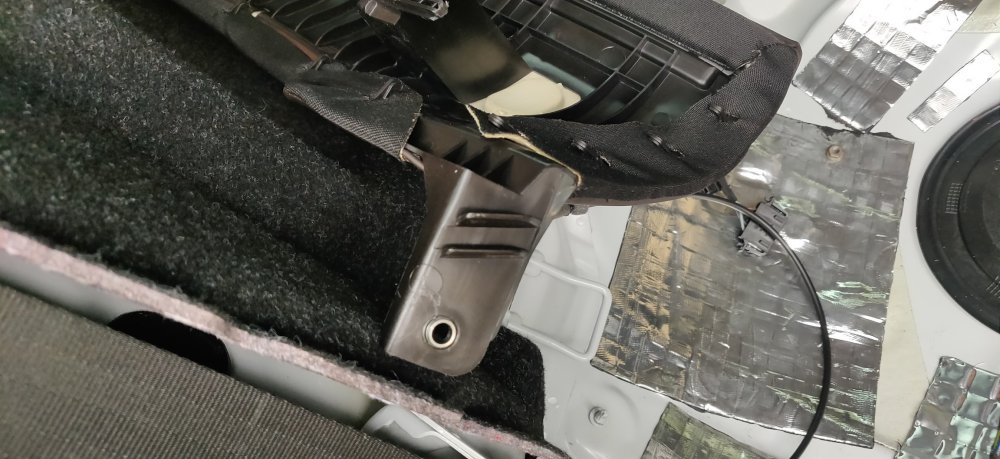
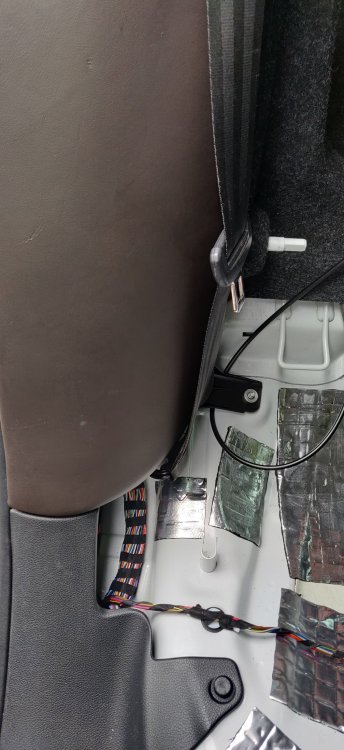
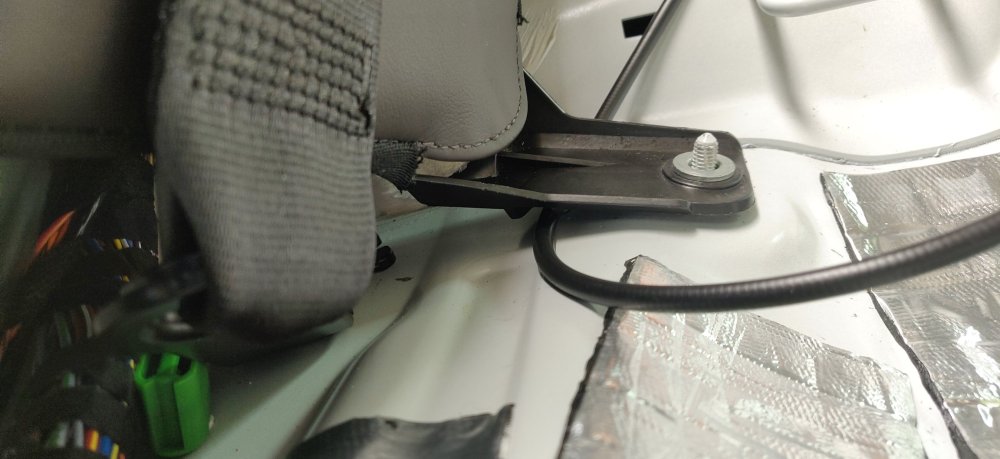
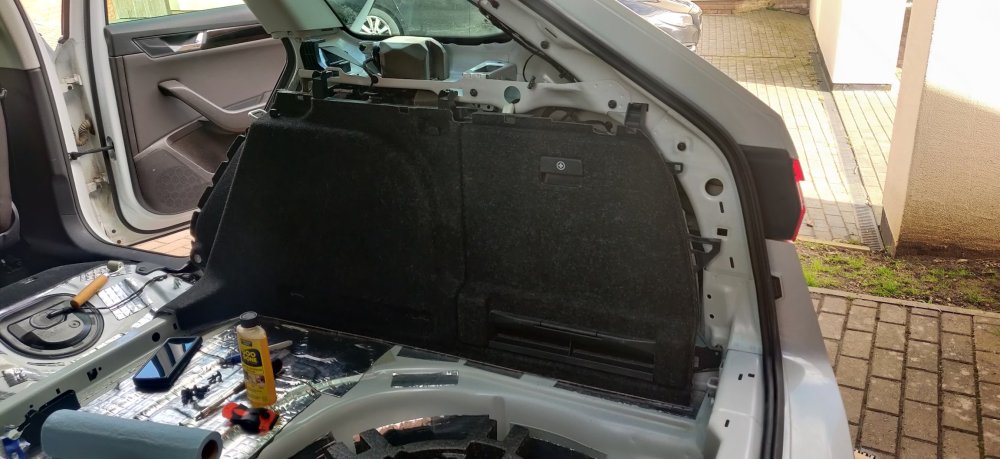
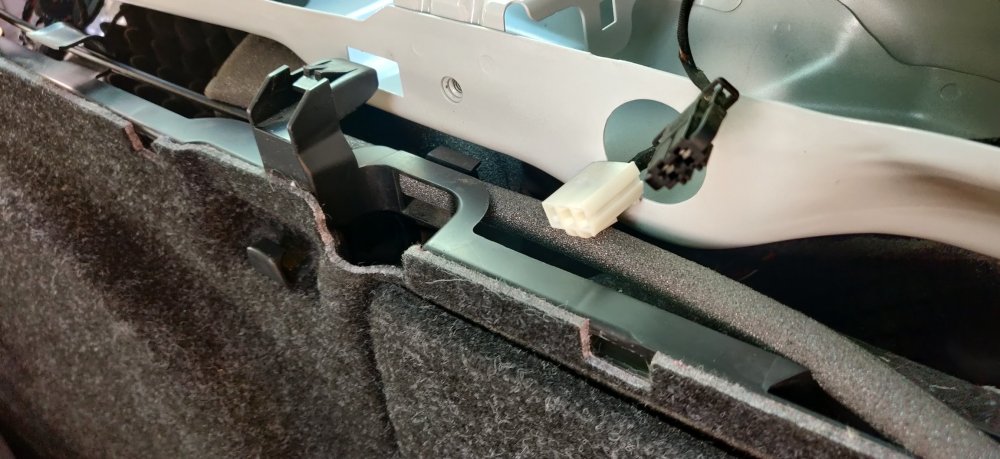
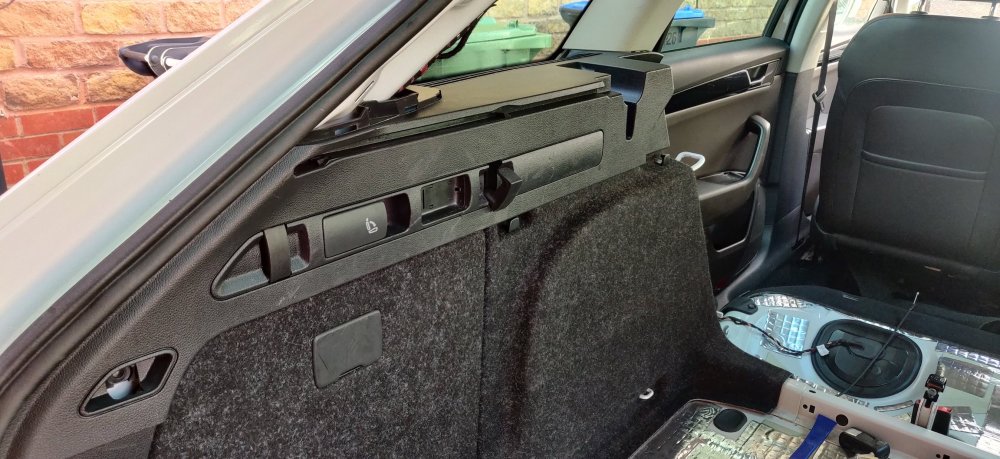
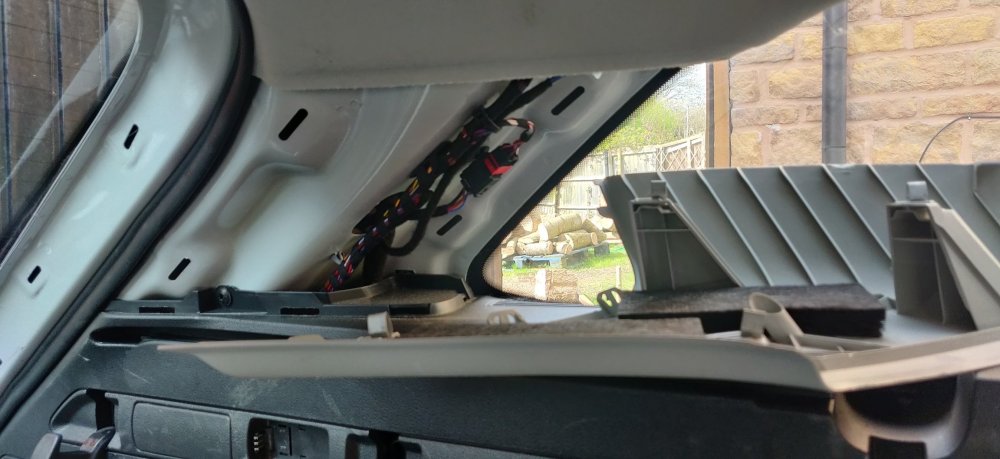
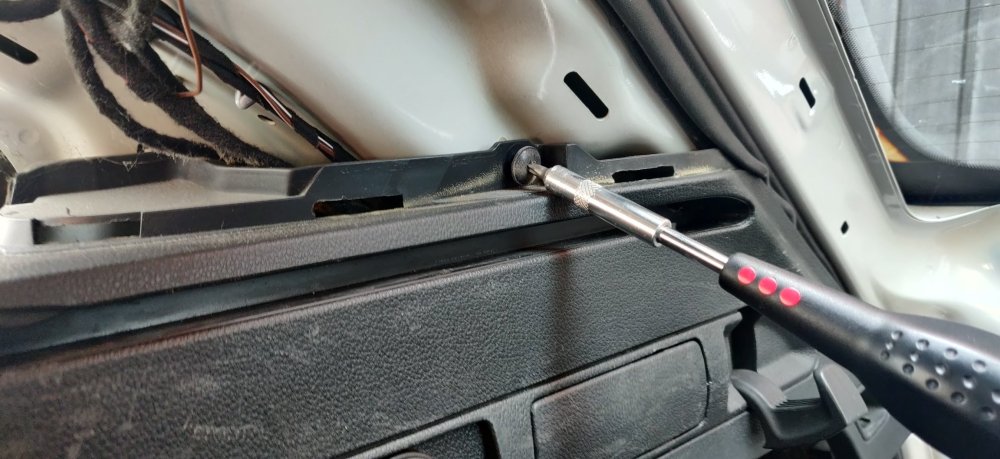
I'm no clearer on what's different for the rear seats. I've seen some parts that suggest possibly different hinge bushes and whatnot, so I may start taking random punts. Anyways, some deja vu early morning. Emptied out the boot again, and started to disassemble the left side to get to the subwoofer. So the boot lip trim is lifted up: Disconnect the cable, and then start taking apart the top left trim: This is pic from the front. Obviously this is after the two bolts and three screws are undone. Then once loosened, the D pillar lower trim can be wedged out. This leaves the one remaining screw used for the carpet trim. Once undone, the clips can be unlatched on said carpet trim and given a little pull: Just enough to see the two screws and the nut. The workshop states 3Nm, so pretty much finger tight would have done it. Decided to do it with the torque wrench given I've already made the effort to retread all this: The rear most screw needed some improvisation with the extensions I have available, so all sorts of adapters were involved, so looks a little overkill: Just needs a long extension really. Once tightened, the trim can all be reinstated: Decided to things correctly whilst I was here, so the T20 screws are done to 2.5Nm: The one furthest forward needing an extension to get to it. Then the T30 bolts are done to 7Nm. That should be it: So as above, just reassemble the rest of the boot trim and carpet. The D pillar trims can then be wiggled on: This actually took me a few tries, as I wasn't getting all the latches and tabs aligned along the bottom and front, but just a bit of a faff really, has 4 spring clips so no real pain to endure. Whilst I had torque wrenches around, sorted out the rear seat belt anchors: An M10 spline socket and done to 40Nm. There's a metal bump on the bodywork which locates into the anchor grooves, which makes the alignment of this fairly idiot proof from the looks of it. It won't really line up any other way. I then looked at the leather padding/side trim, and noticed at the bottom there's a couple of plastic guides: This reeks of being used for the Bowden cable, so a dry fit: Kind of suggests it does make sense: It looks to be just about the right size. I recall getting some stainless steel nuts for the modules under the seat: So perfect as replacements for attaching these side trims. They're hardly structural so might as well if they're lying around spare. Repeat the install for the other side: The nuts were done to 9Nm as per the workshop manual. So just the rear seats left and for all intents and purposes, the interior is sorted! It's just the question of how to get the seats to fold down automatically now. Maintenance: £1806.50 Upgrades: £1020.69 Miscellaneous: £631.67


-
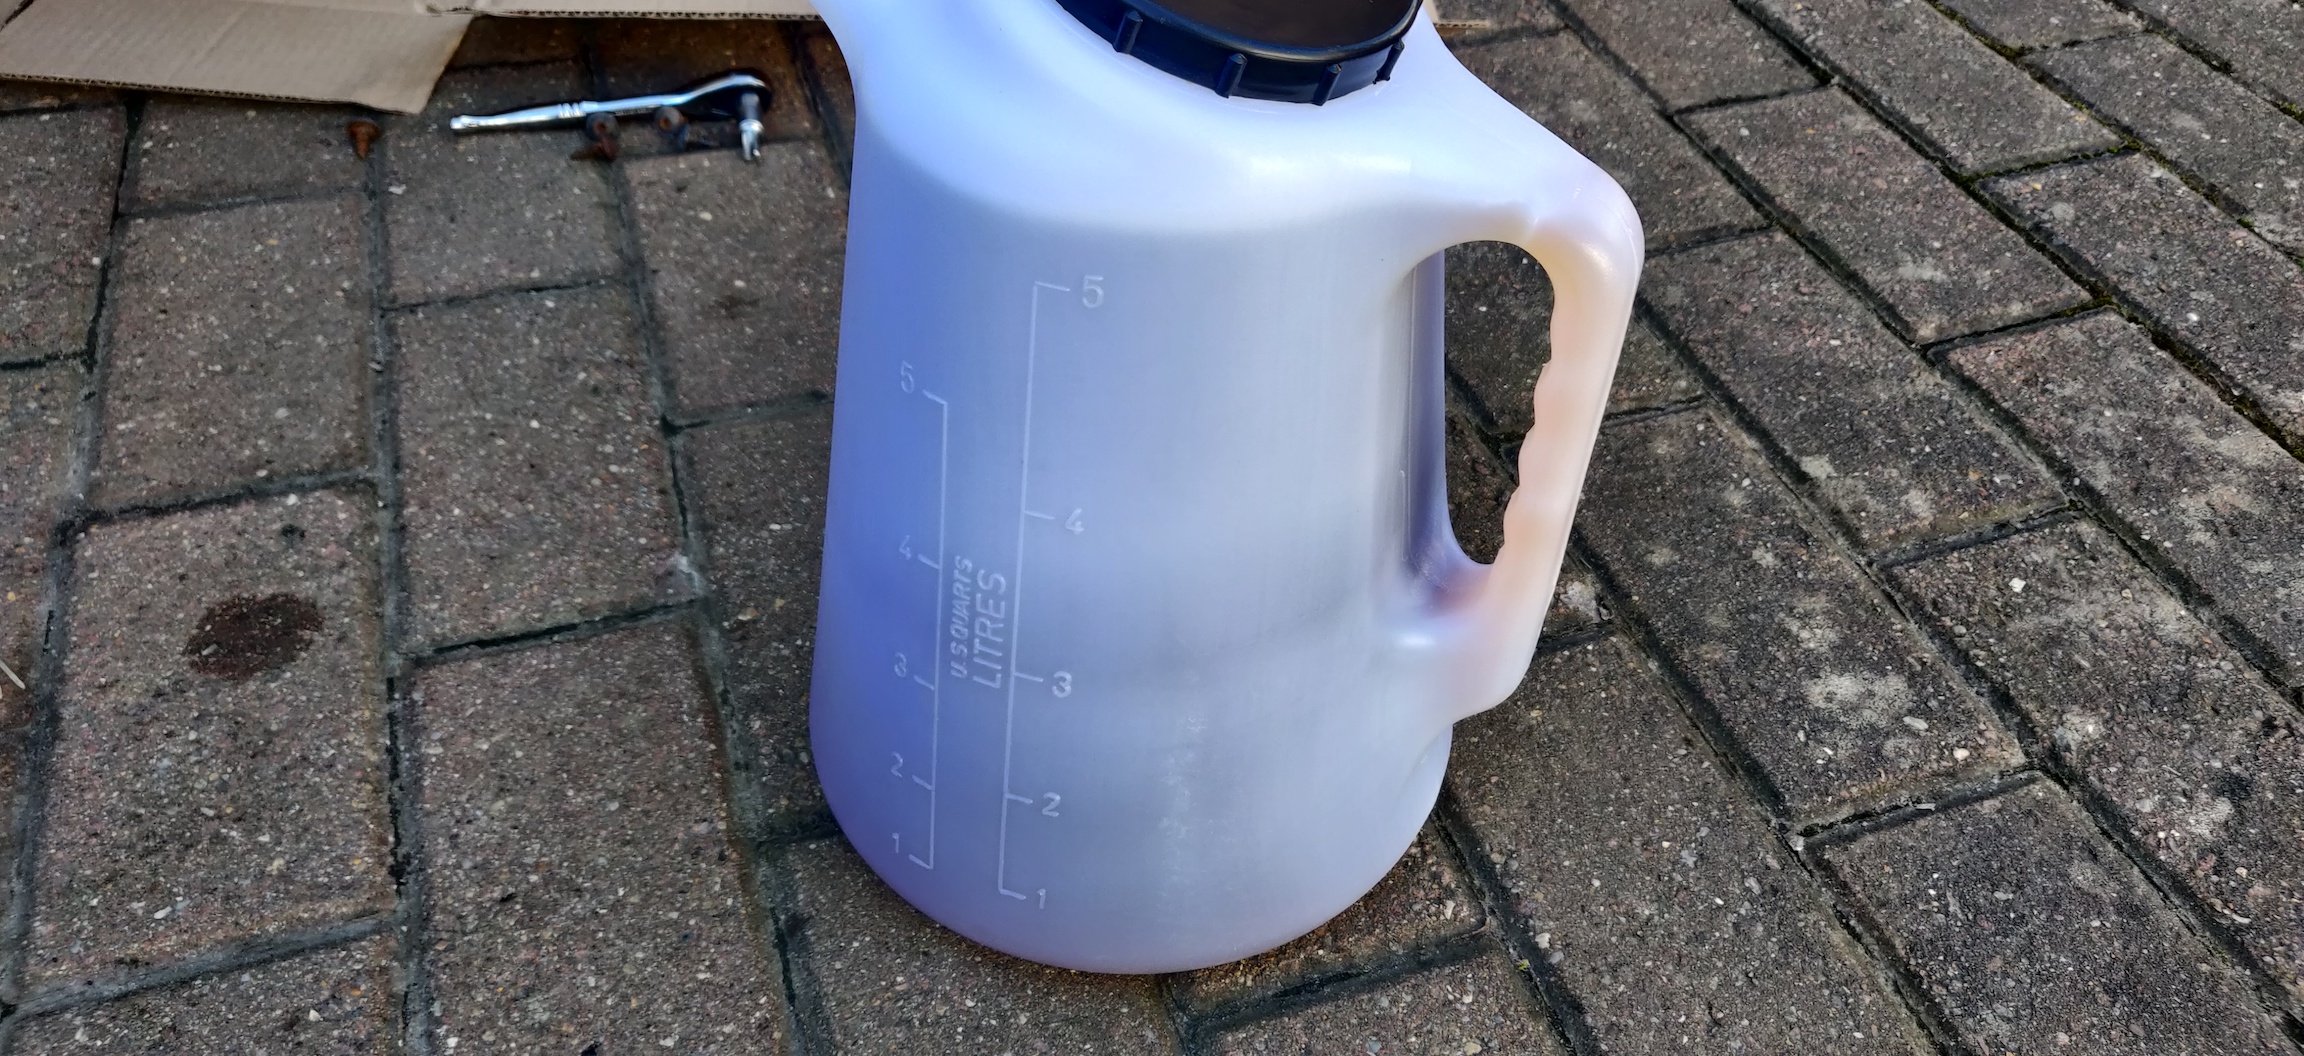
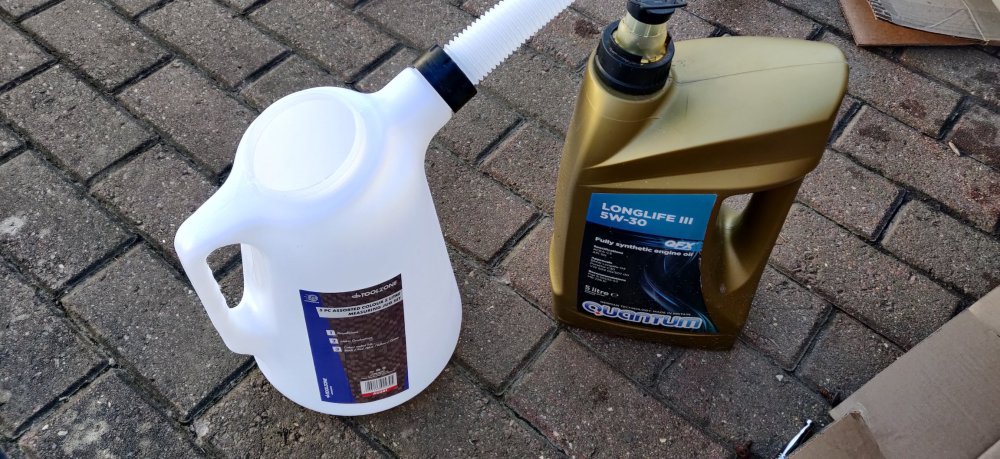
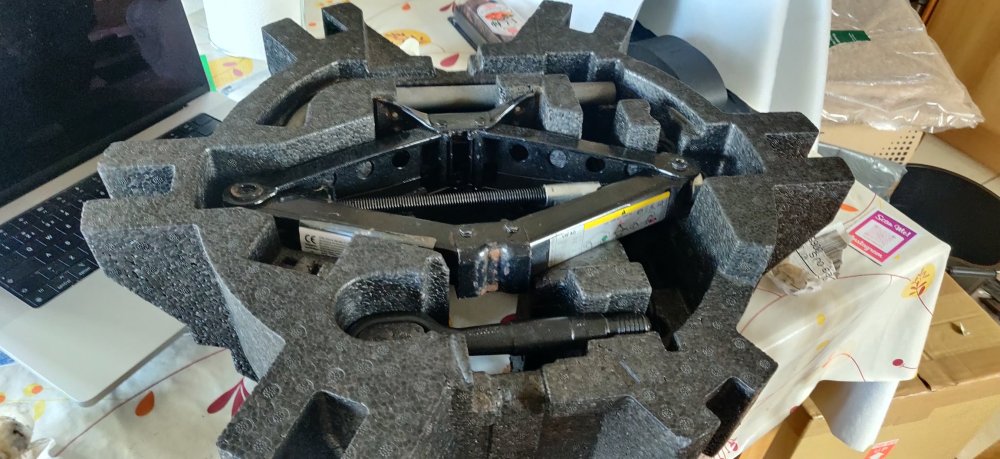
As part of preplanning for tomorrow, looks like a 24mm socket is used for the DSG oil filter housing, so scrambled in the garage to find one, and left it there ready: Installed the sump plug: So I've used one of the green viton o-rings to replace the black one there, and tightened the plug until it slotted into the notch as above. I suppose it prevents needing to check up on torque settings, but doesn't sit right with me. I'll probably get used to it after a few years. Whilst under there, removed the undertray at the front, 5 torx screws, with a central one tucked up a little: This should mean easy access to drain the coolant. One thing I bought recently was a set of 5l oil pourers: Most of the cars I have usually have a 4.5l refill capacity, and this is the first car I've owned which has more, so I'm hoping this pourer helps in terms of dishing out quantities, in addition to having a lovely long spout so I don't risk making a mess. I have some of this old Quantum stuff from a few years back when I did the wife's old Seat Ibiza. It is VW 504 and 507, which doesn't really mean much to me. I'll add fuel to the fire by topping up with some 5w40 rated VW 505. I'm not fussed, and I'll probably interchange between 5w30 and 5w40 depending on what oil I have in surplus. Decanting the entire contents has shown its a little over 5l, so probably may well be enough as is. This particular engine doesn't have a deep oil filling area, and has some bits which I presume is to reduce splashing when oil is poured in. This meant I couldn't really shove the spout in there and let it rip, so still had to pour it slowly, albeit with a little more accuracy with the spout. Left an oil drain pan under the sump and will leave overnight to assess if the o-ring has done enough of a job. So that's it for the day. I also went through all the suspension bolts and liberally sprayed some plus gas on them, in anticipation of stuff in the future. So the strut bolts and all the anti roll bar stuff essentially. I'll probably want to try and extract the rear anti roll bar tomorrow so I can ascertain a suitable replacement part. Oh, and I guess I need to remove parts of the left trim again to access the subwoofer so I tighten it down properly, and figure out the rear seat releases. If I'm lucky, may be able to drain some more stuff and maybe even refill it! Maintenance: £1806.50 Upgrades: £1020.69 Miscellaneous: £631.67


-
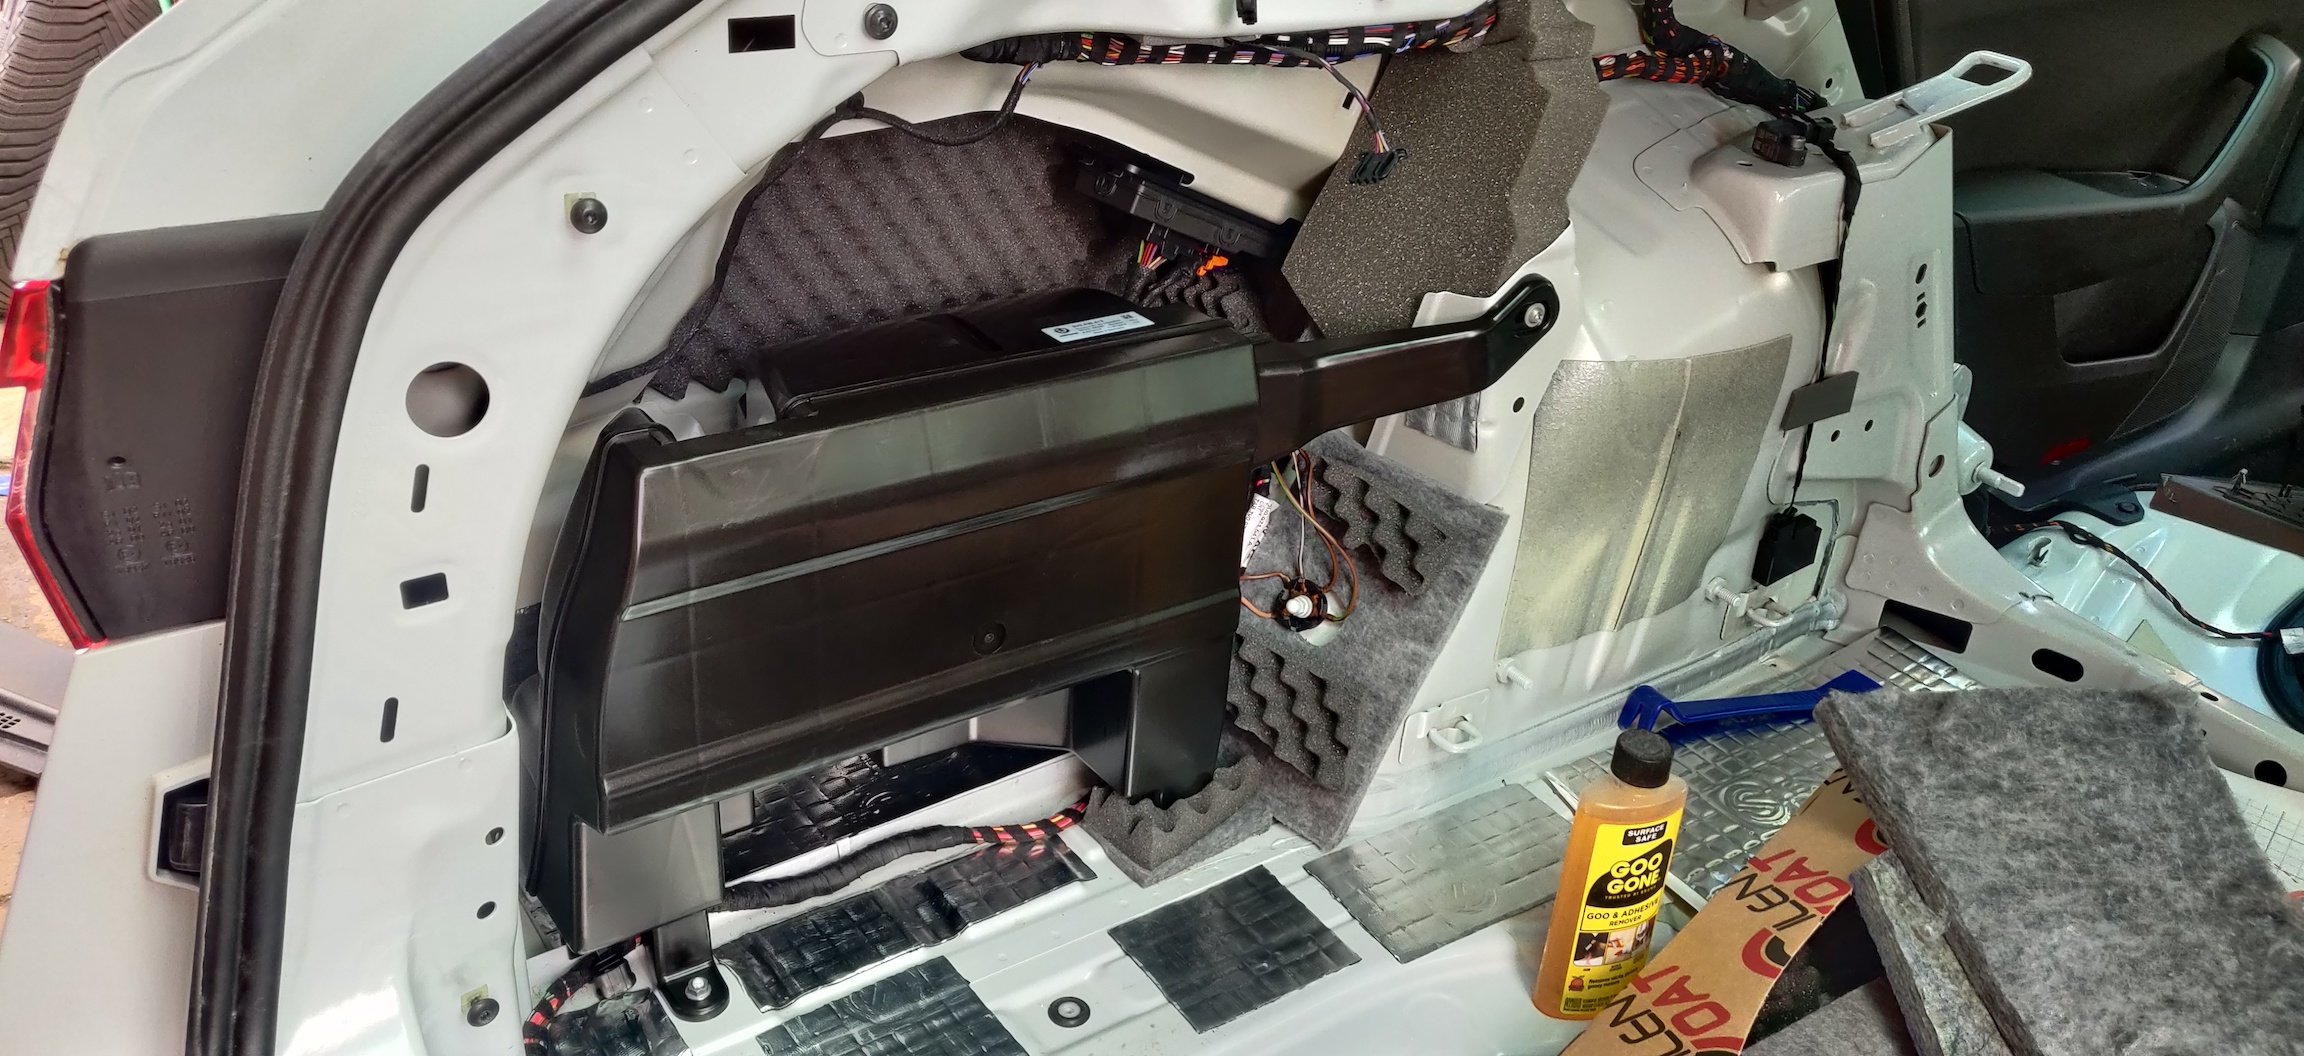
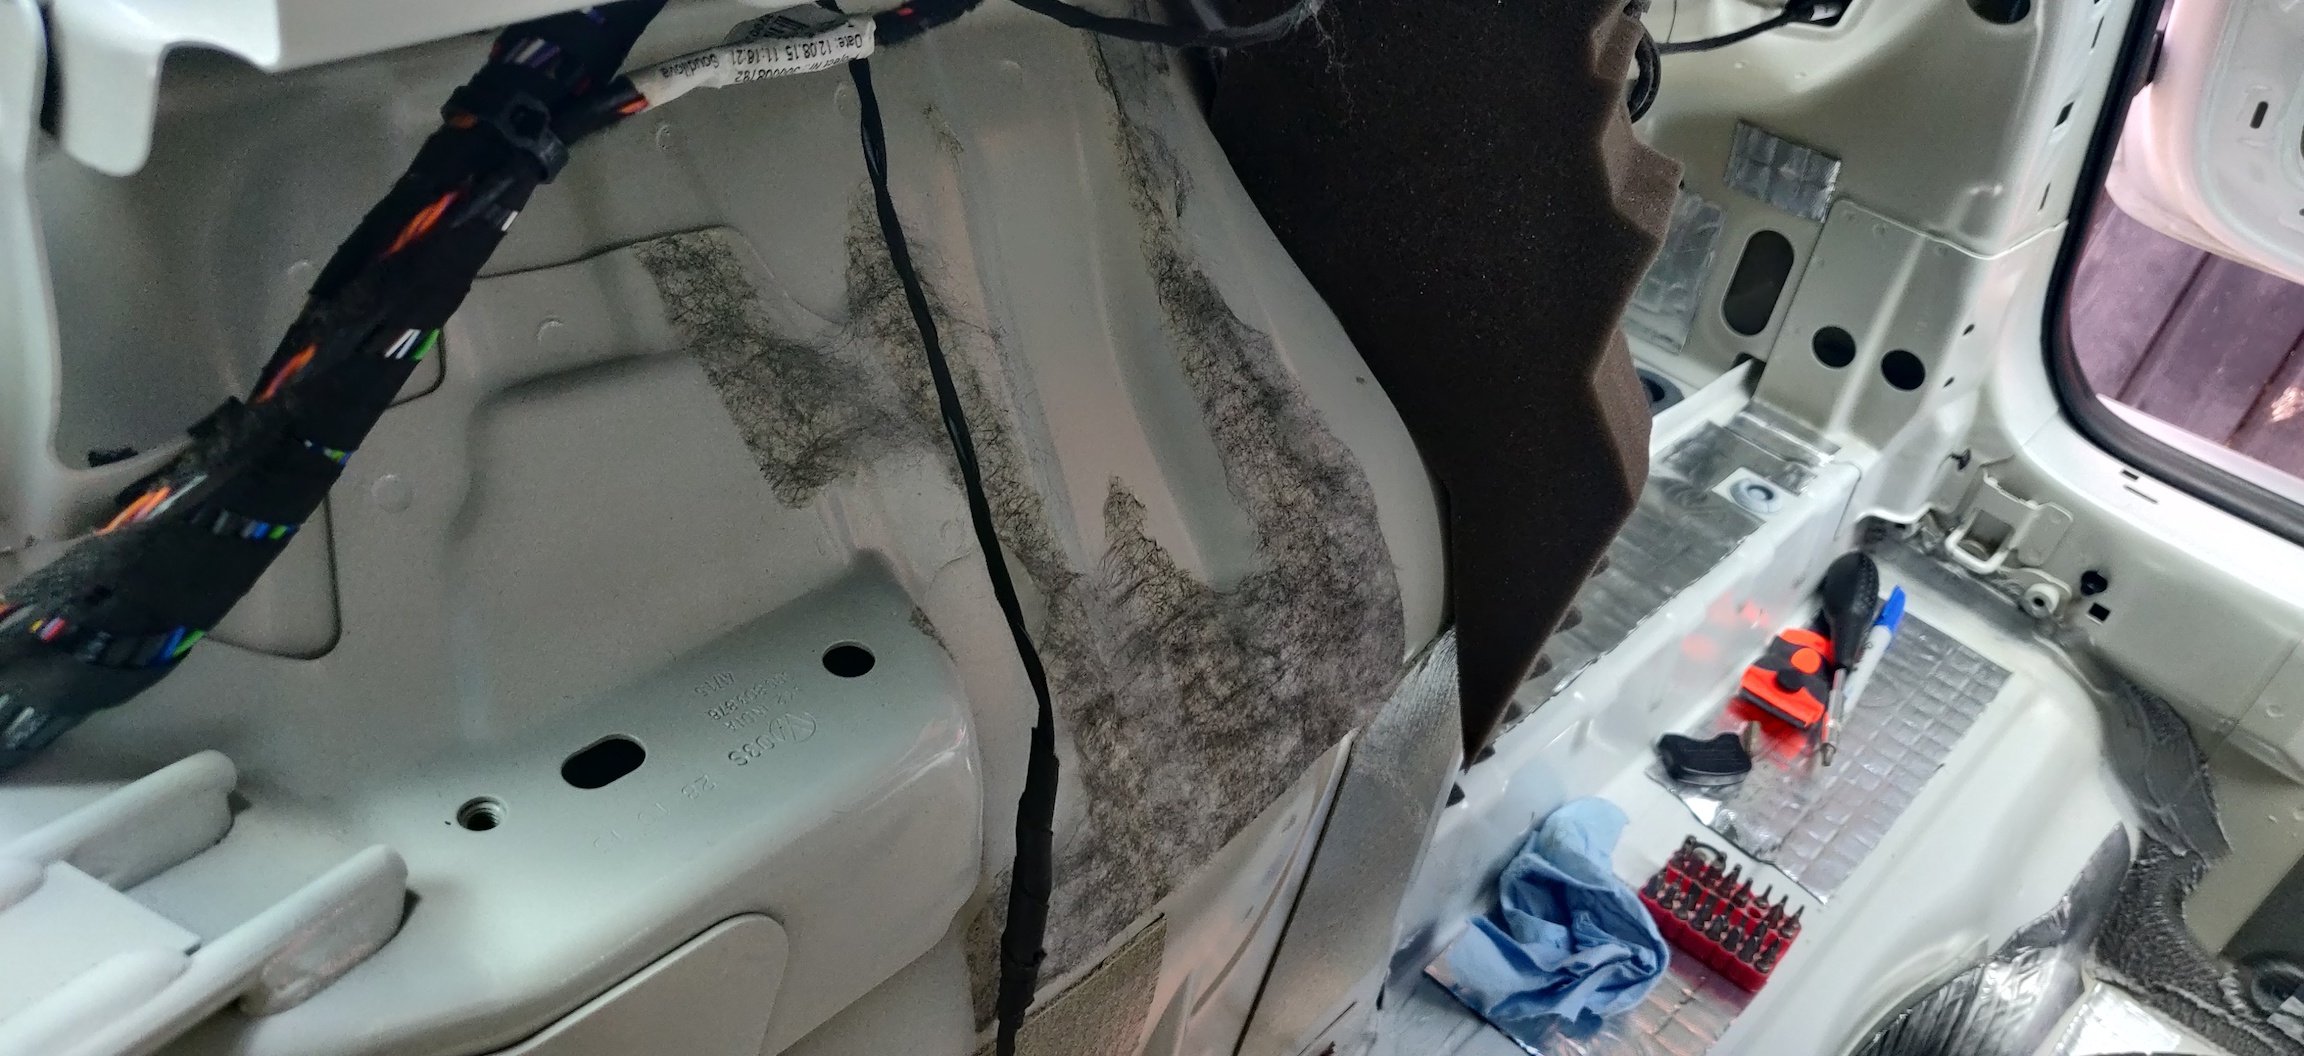
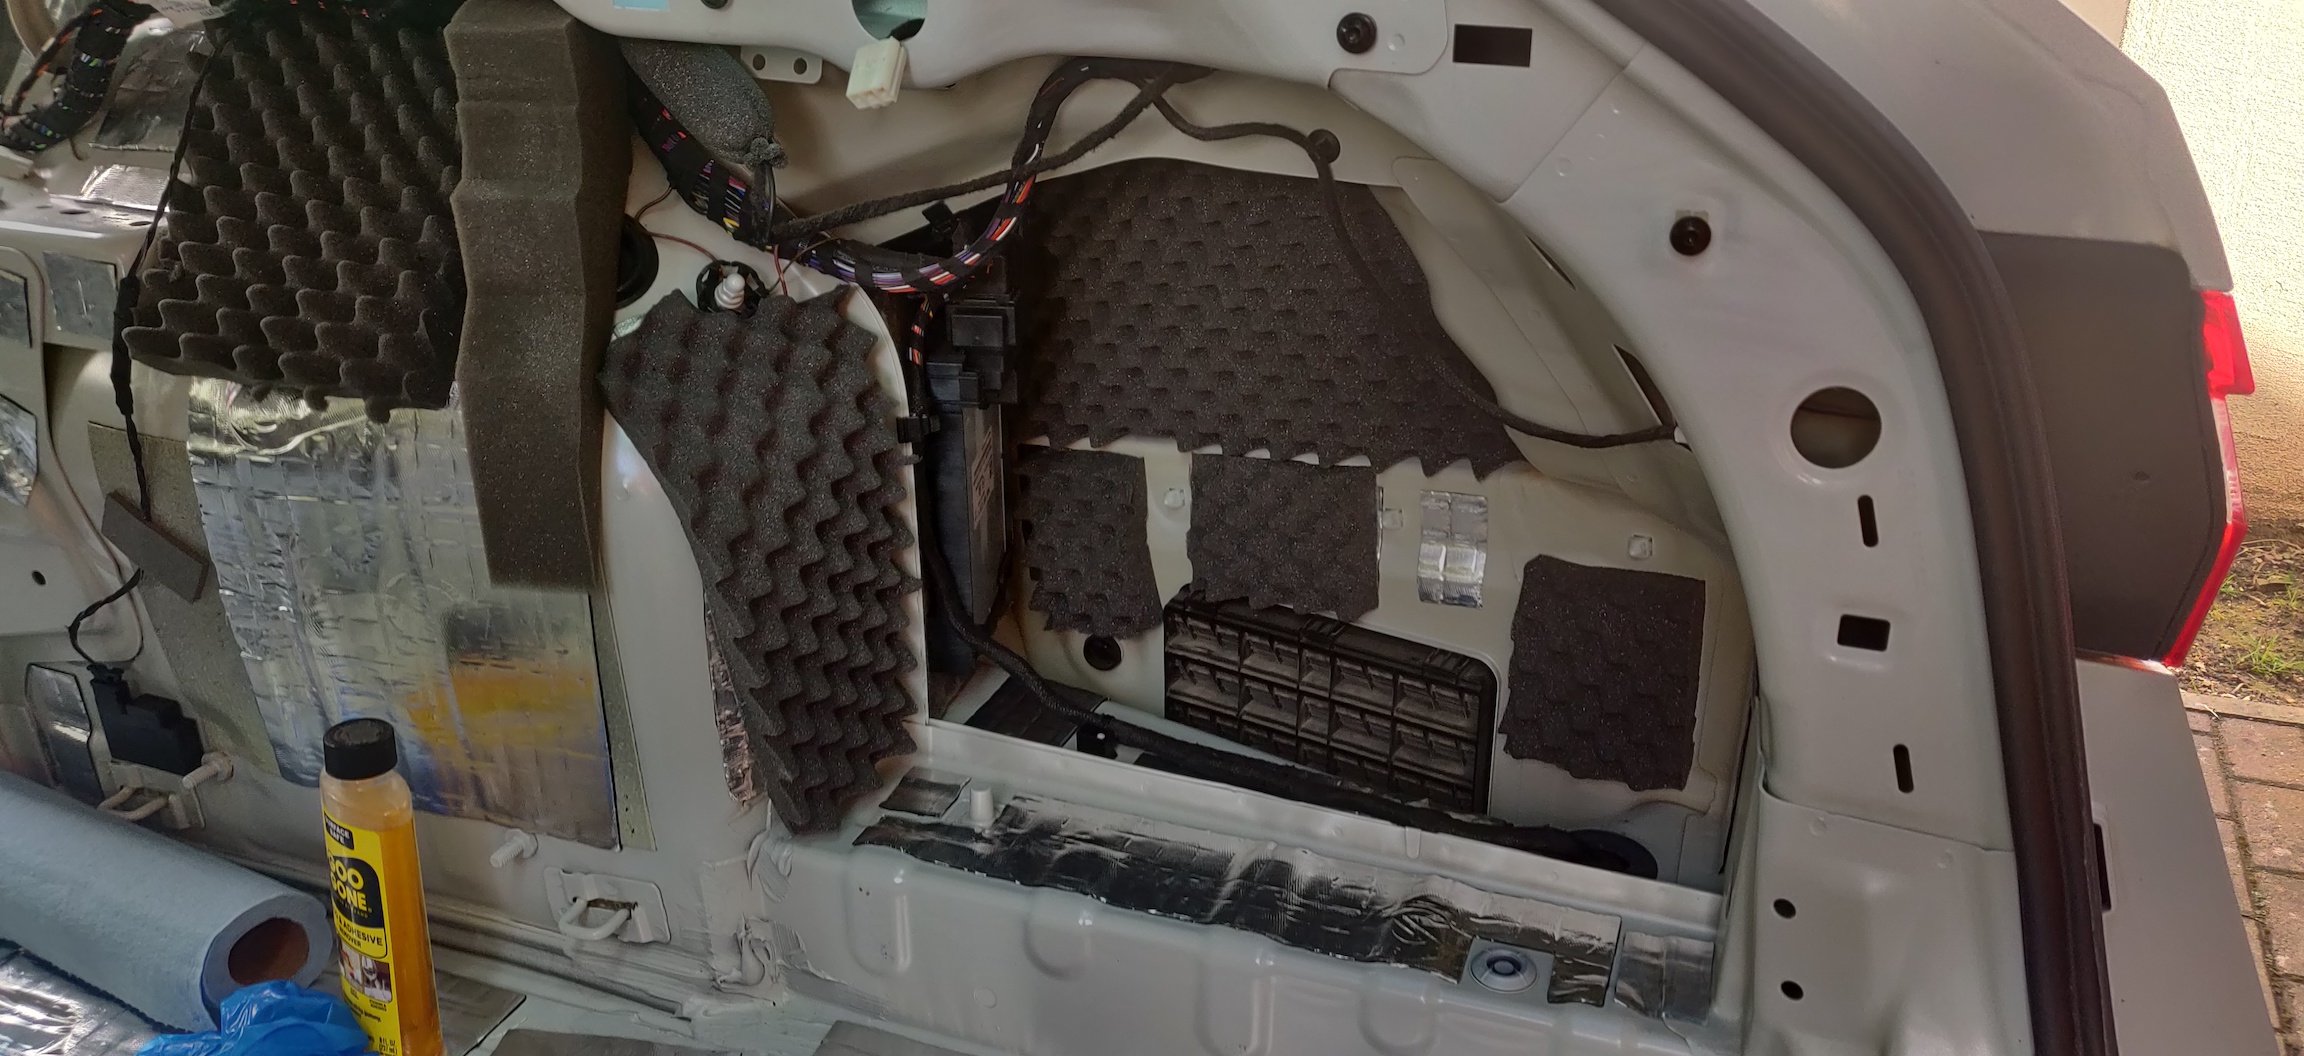
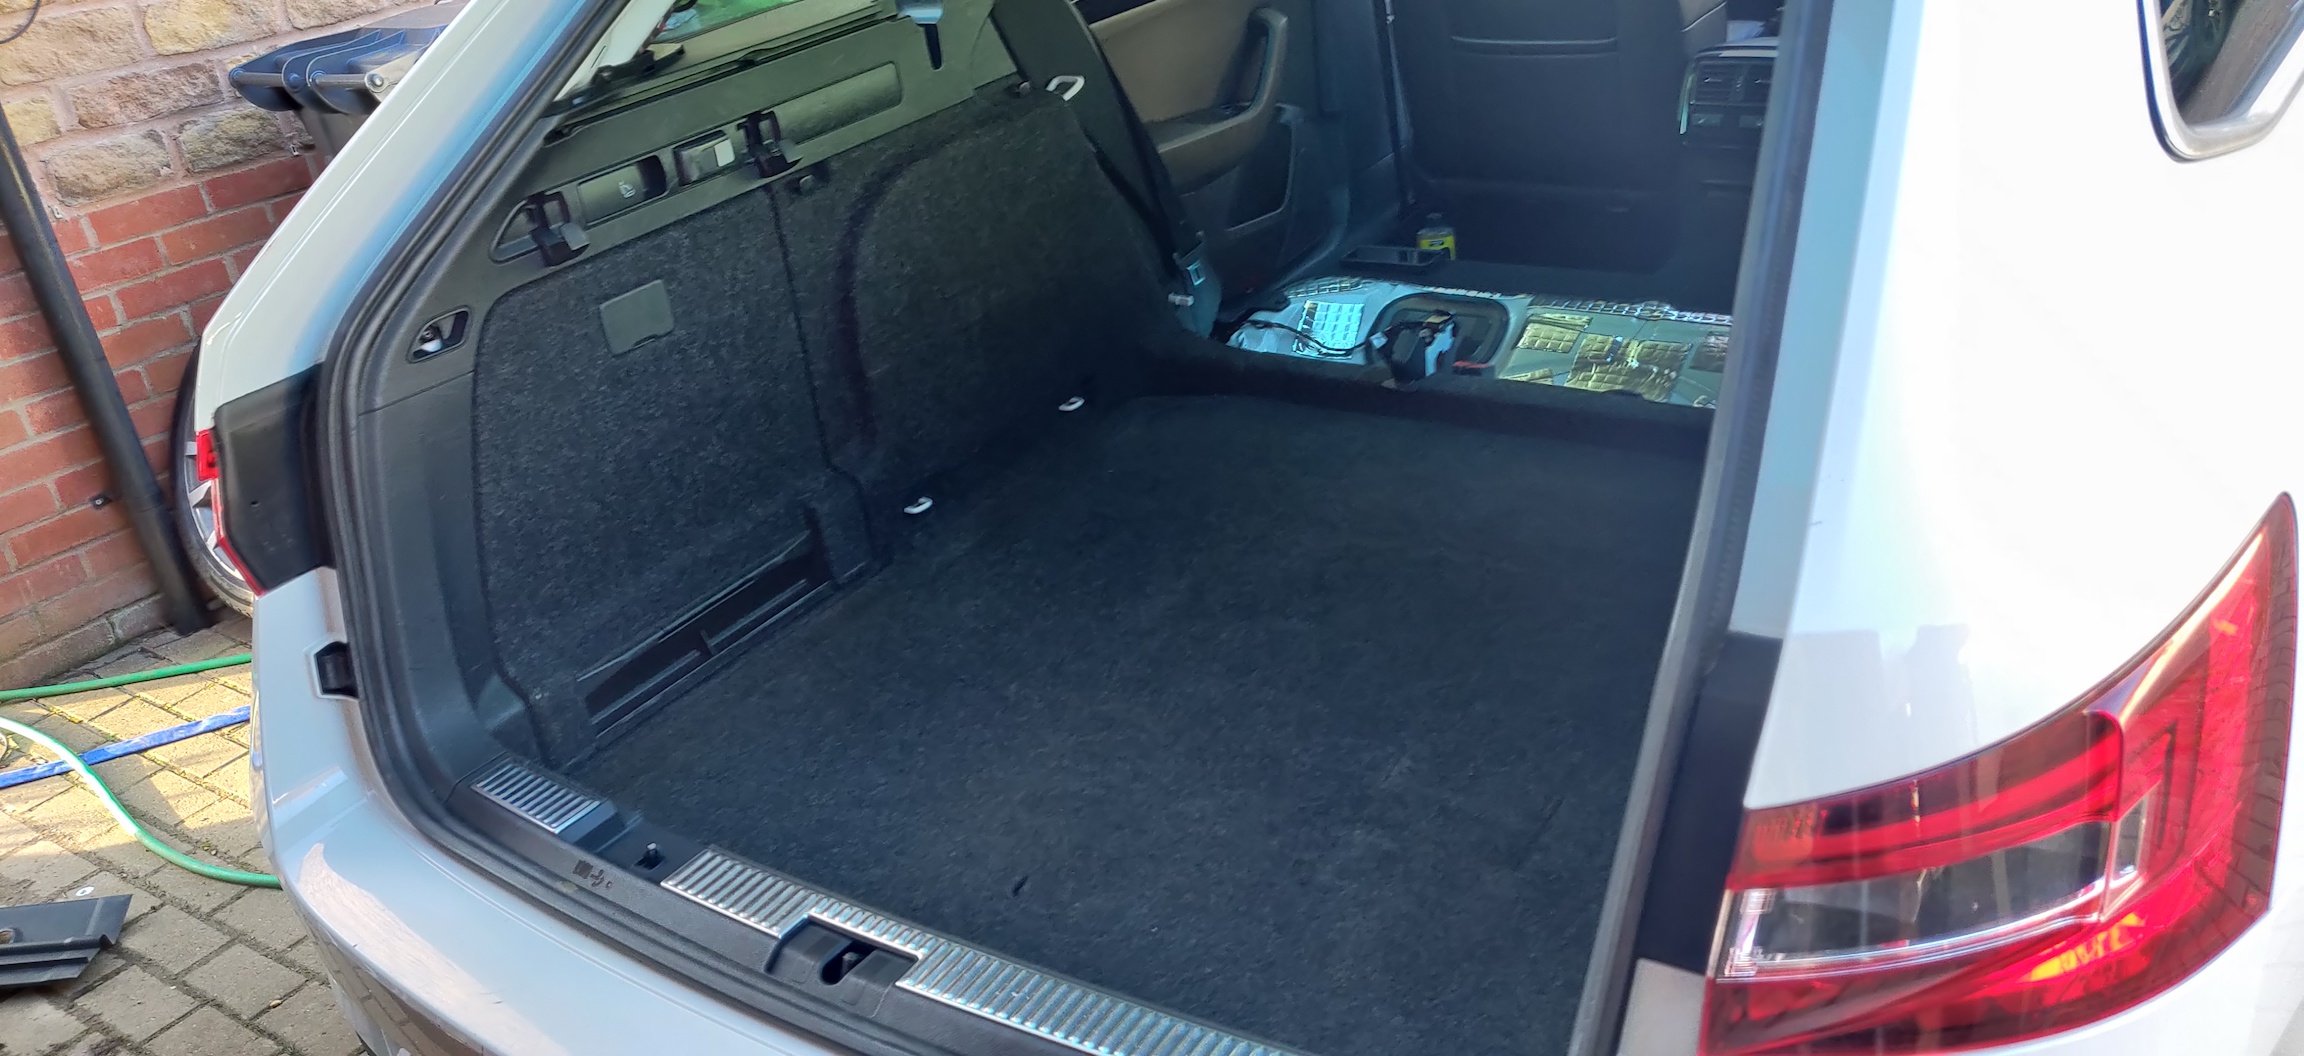
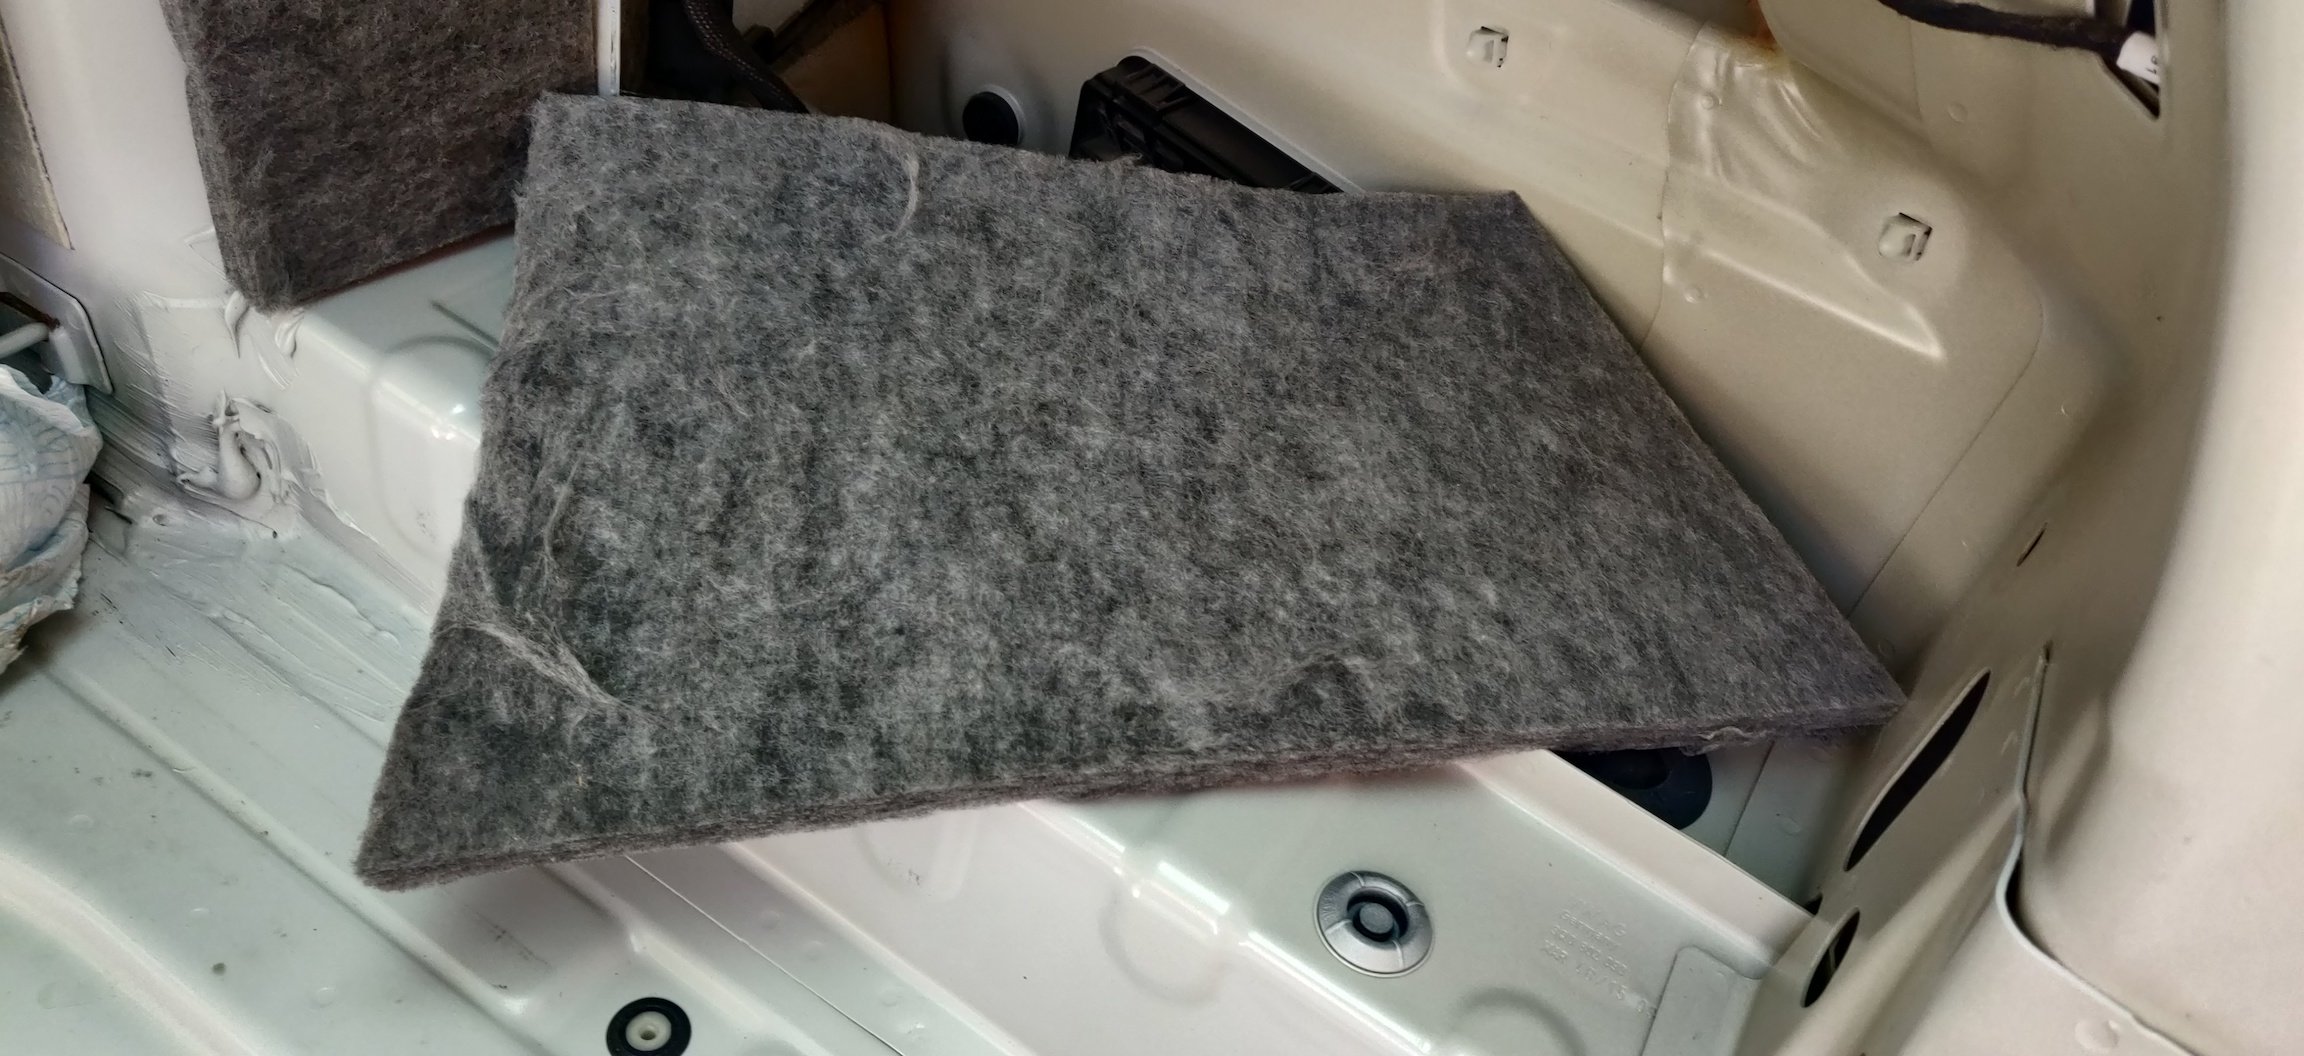
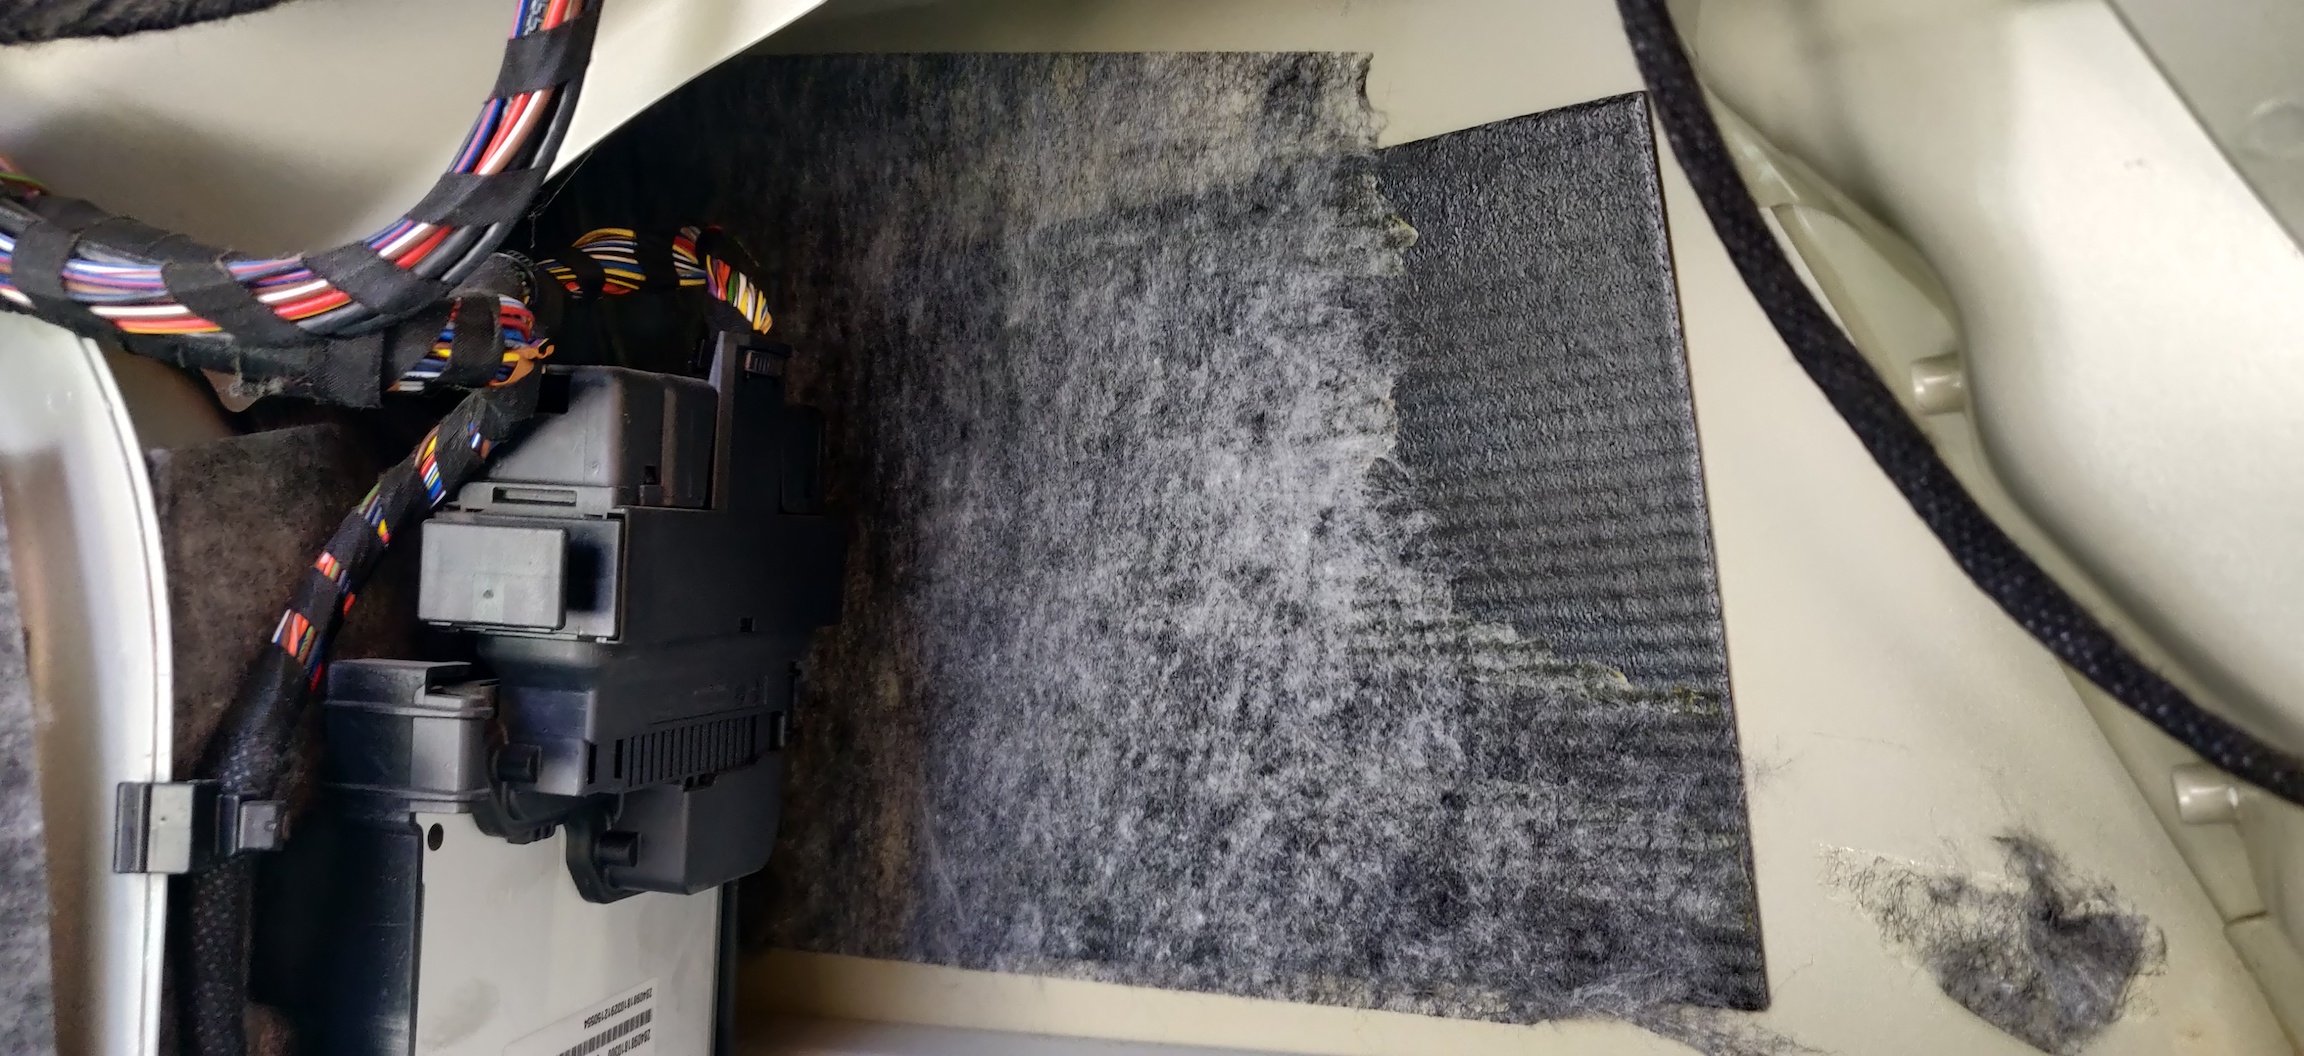
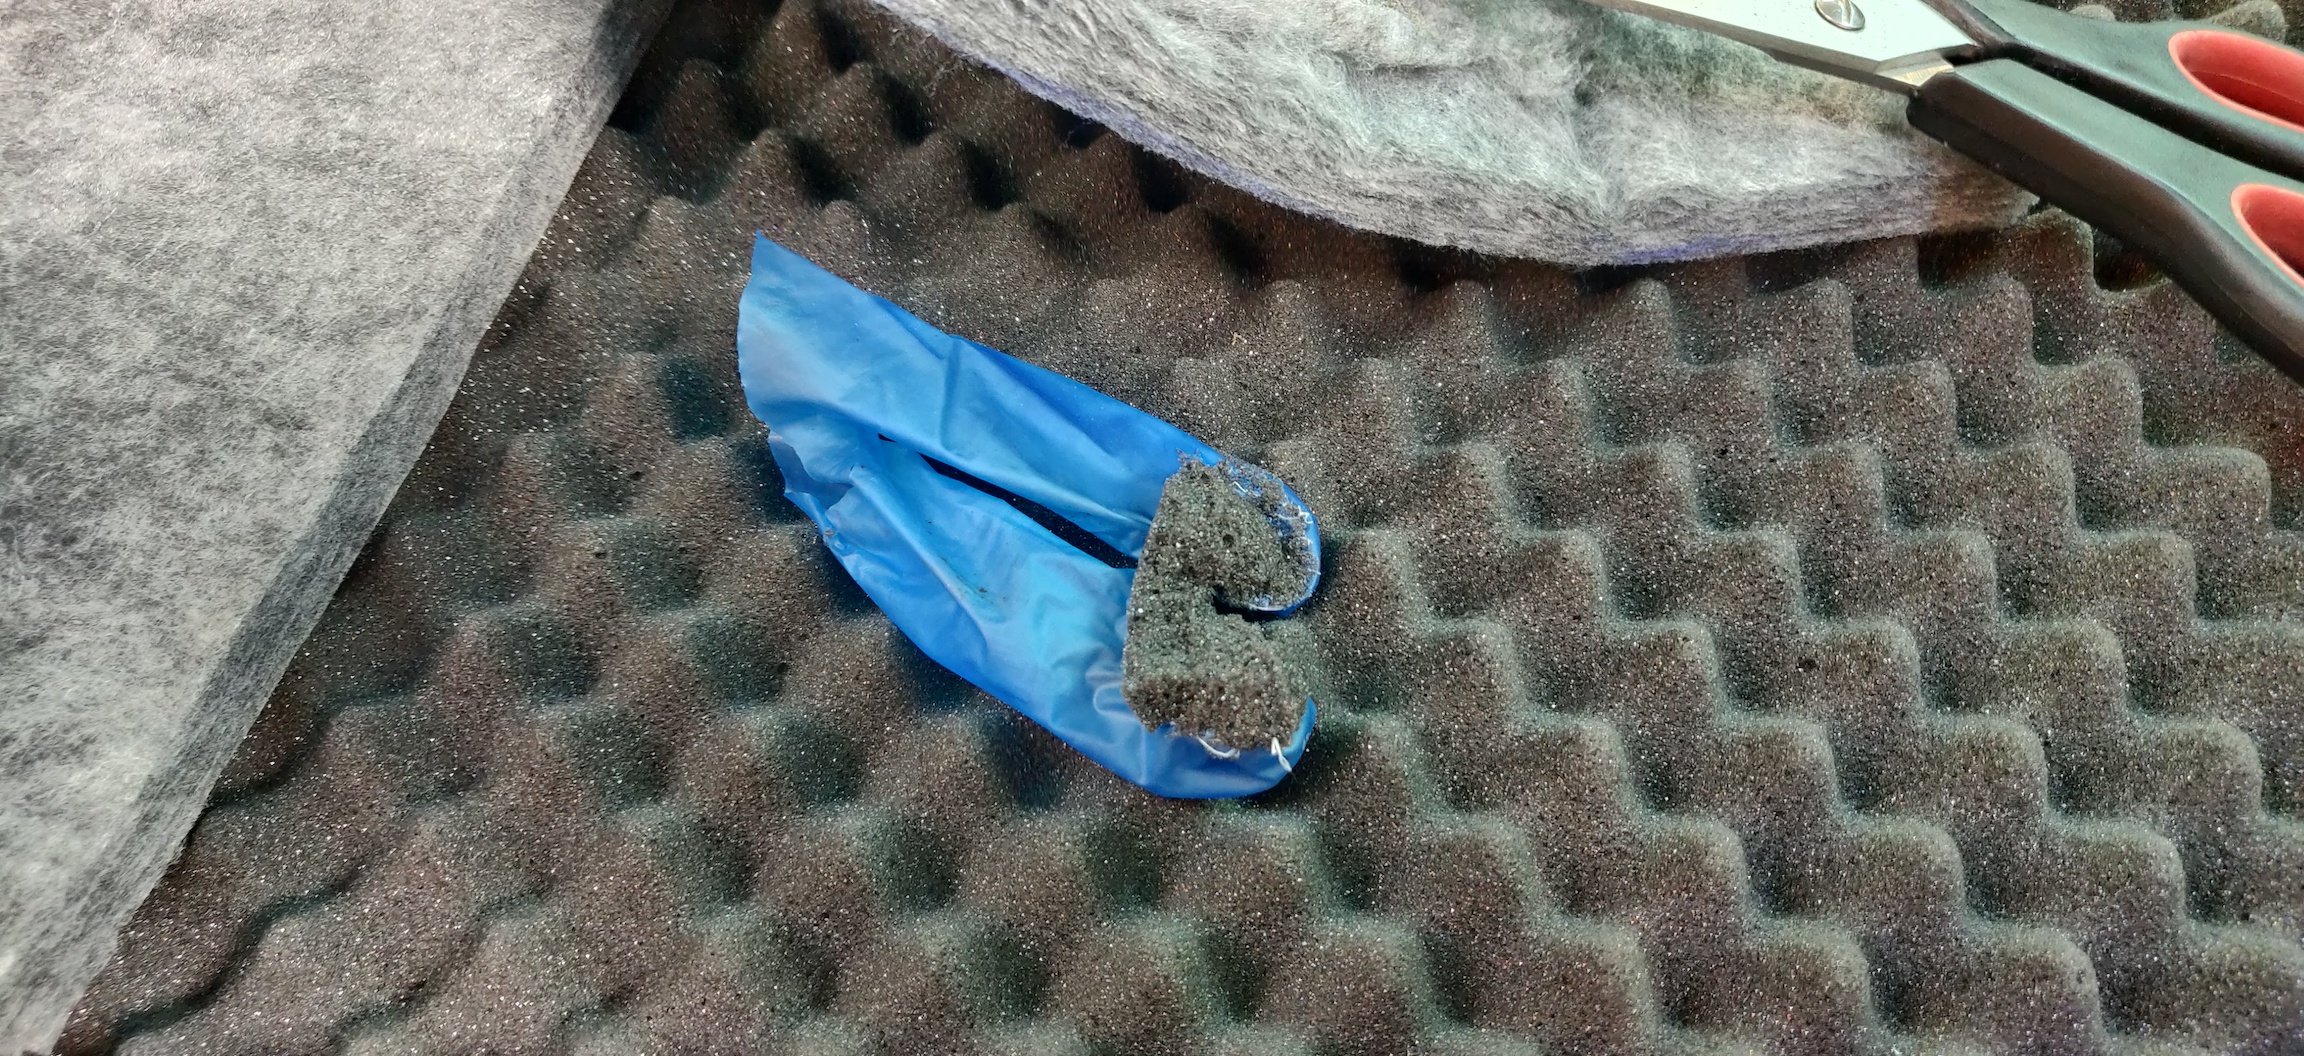
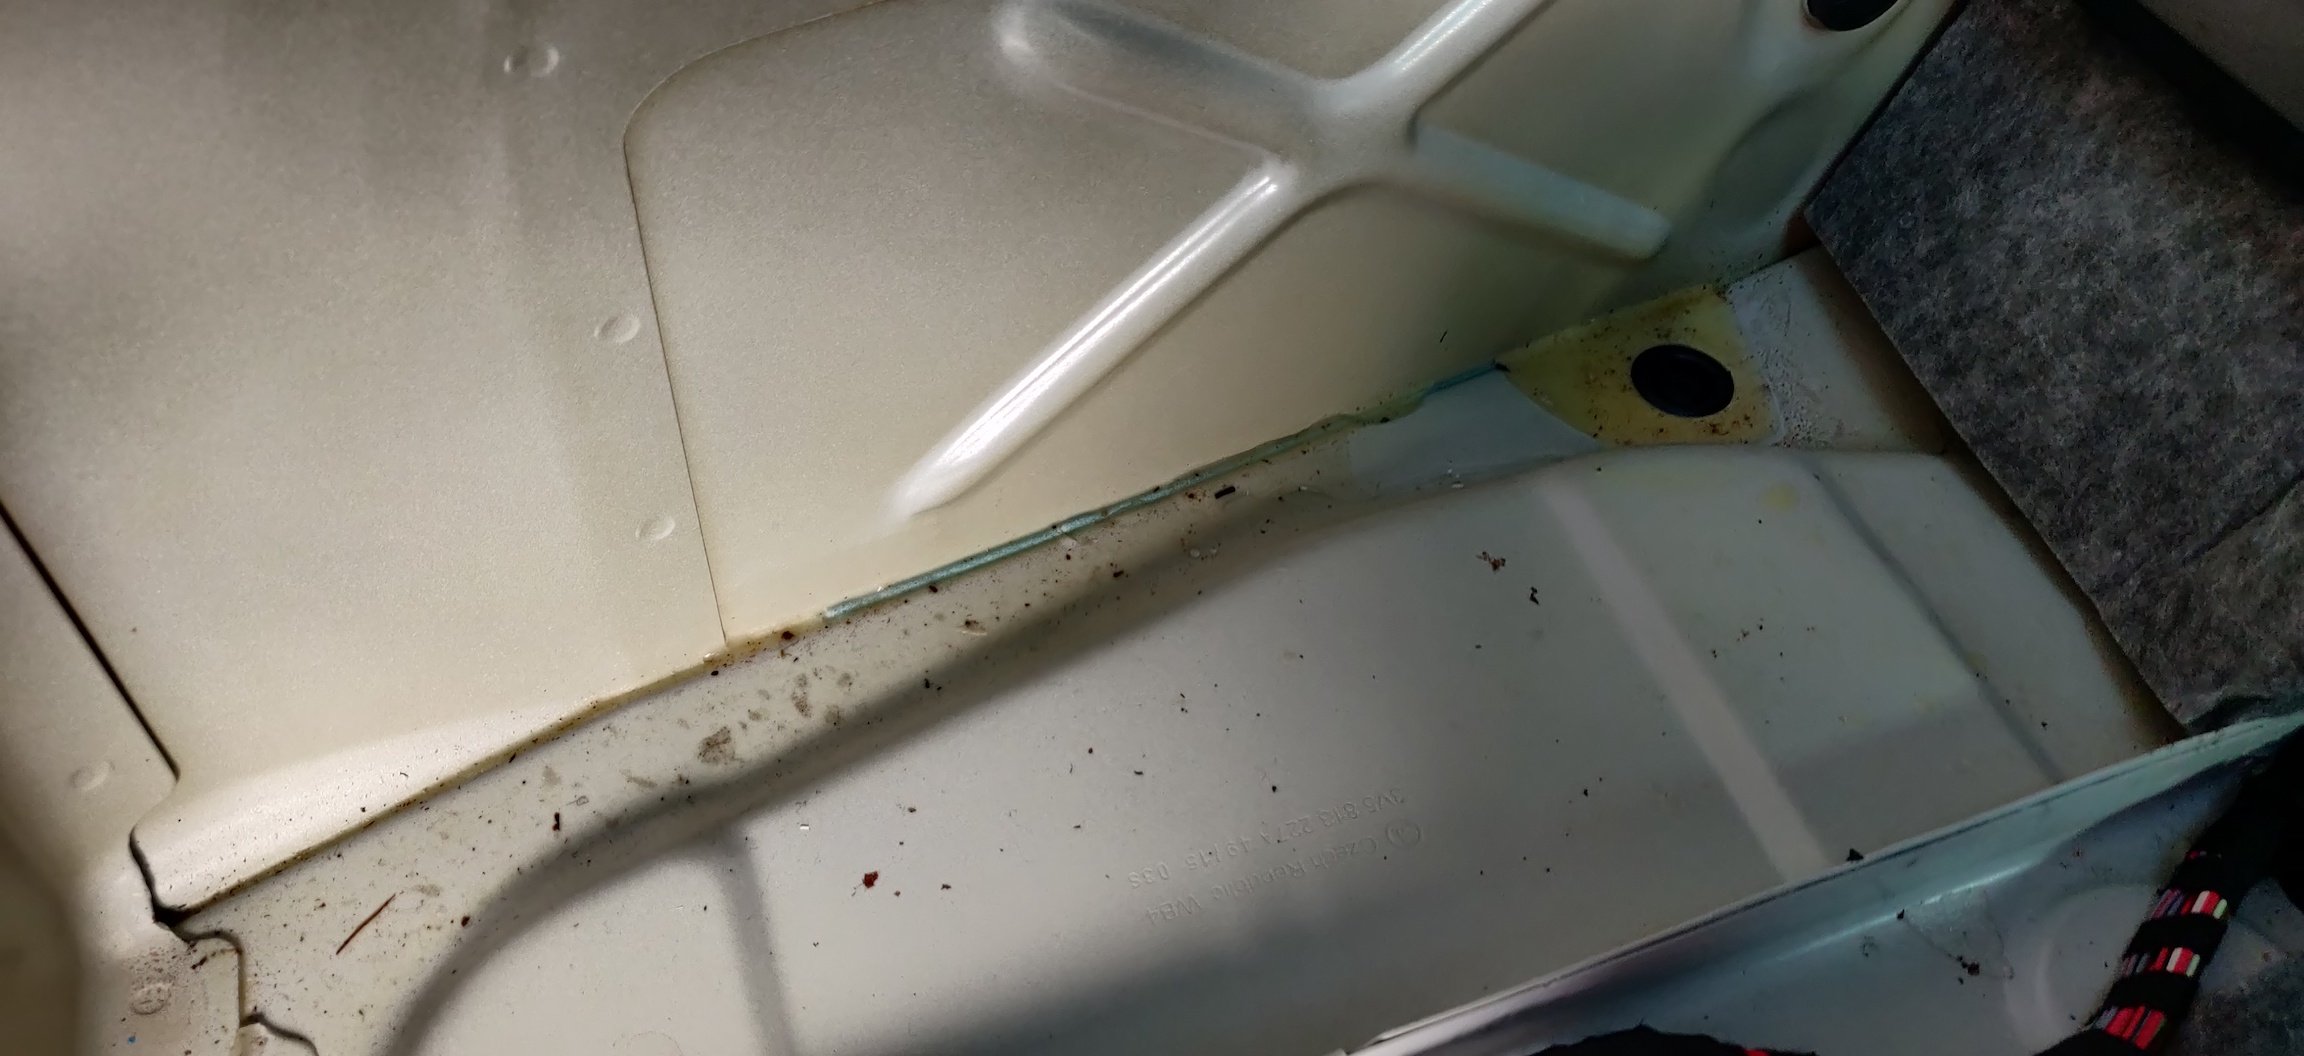
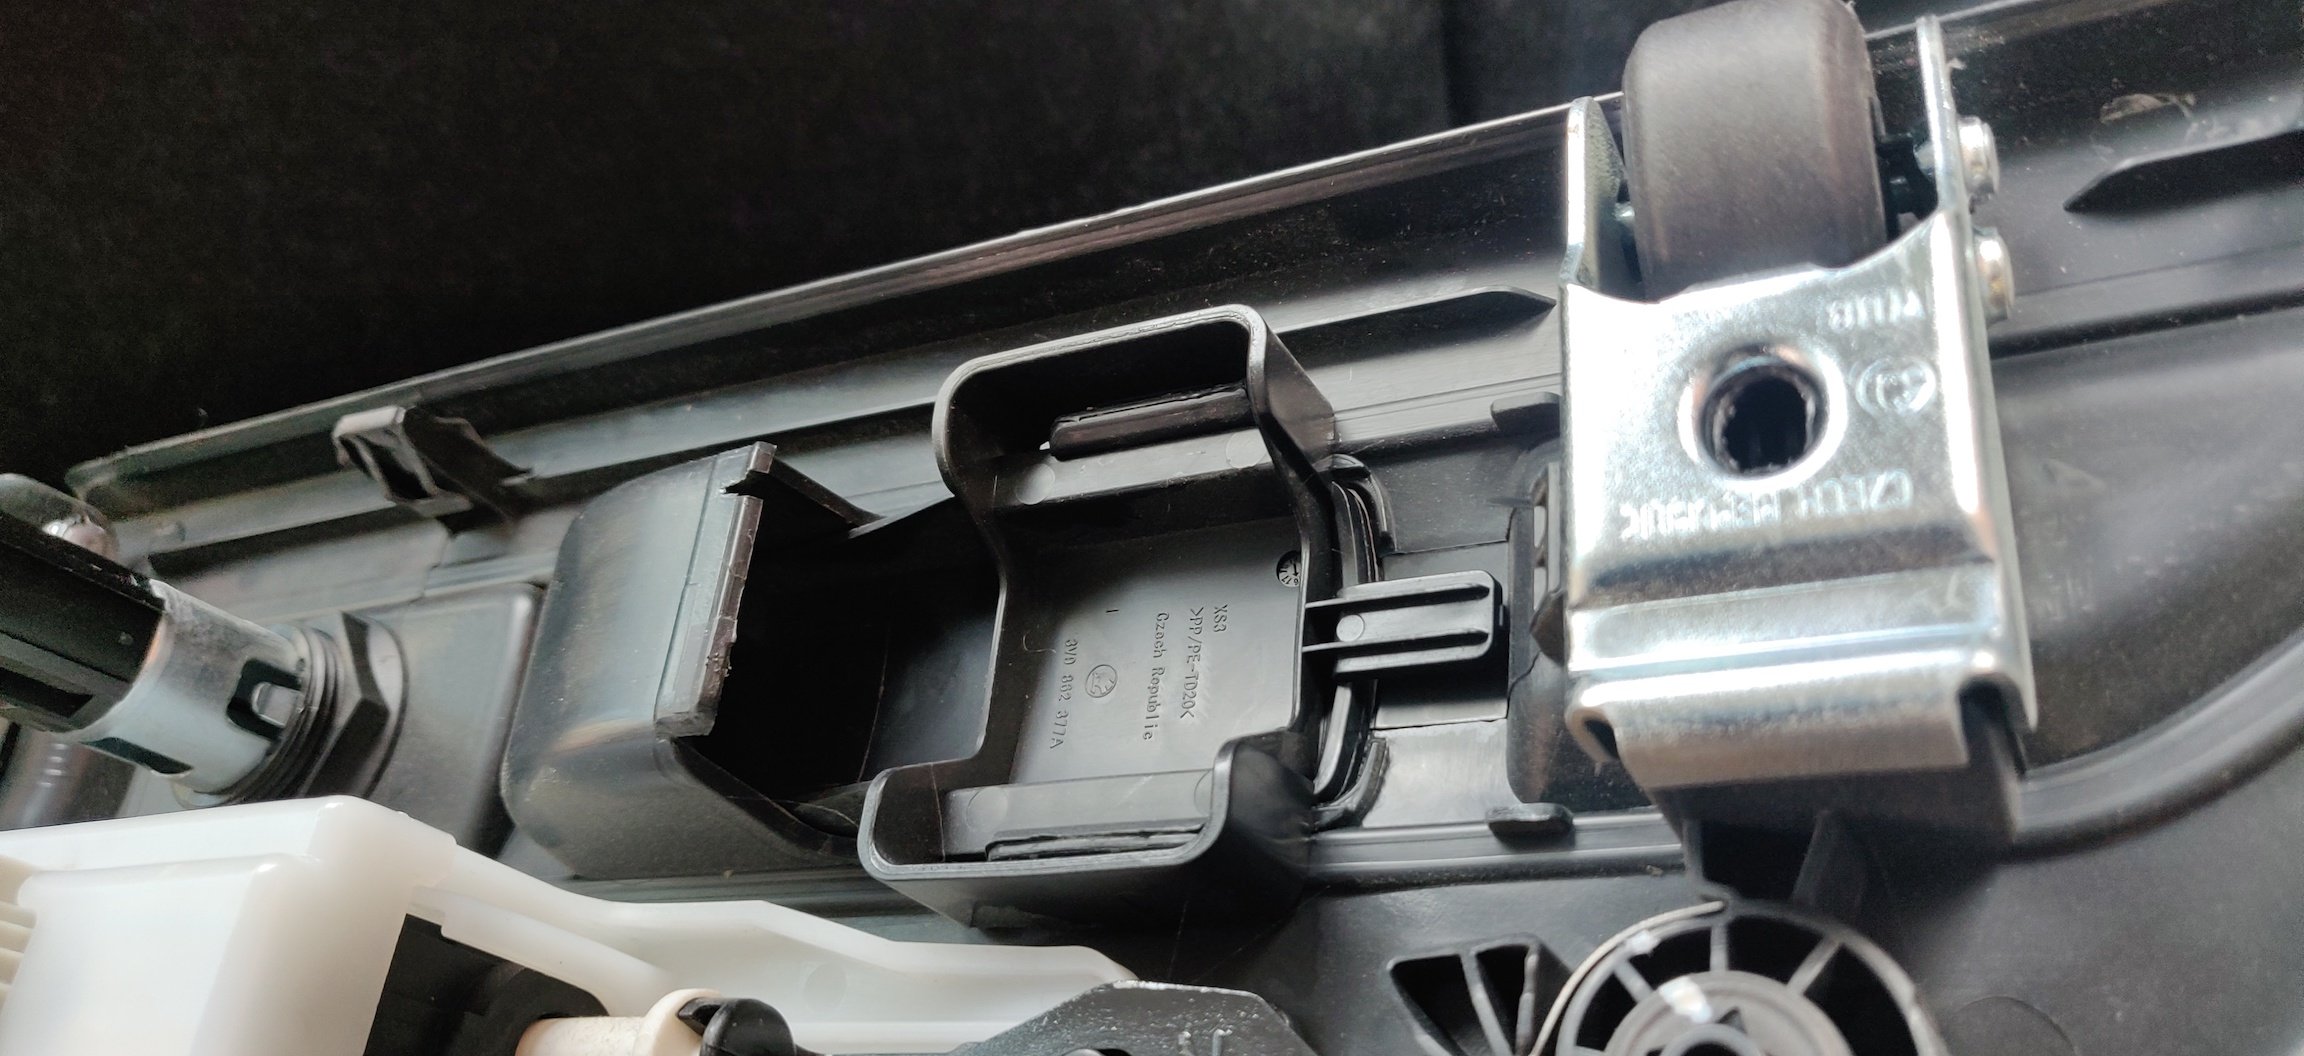
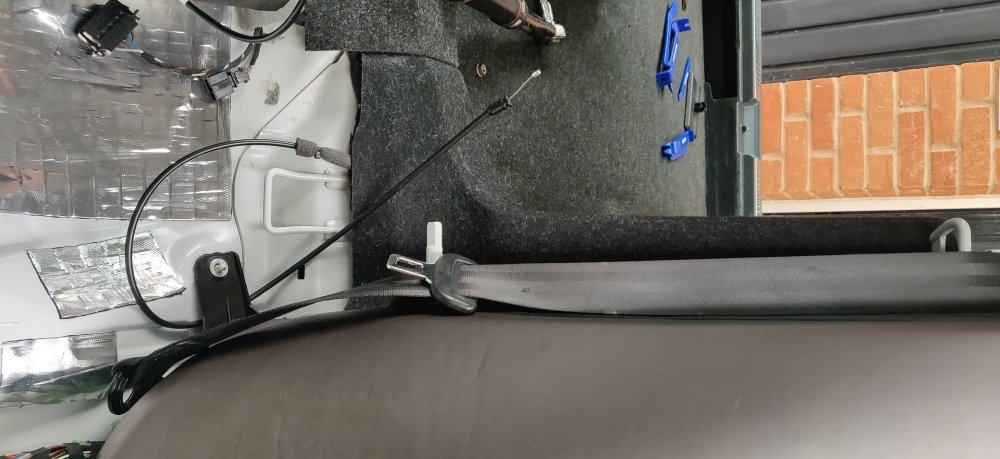
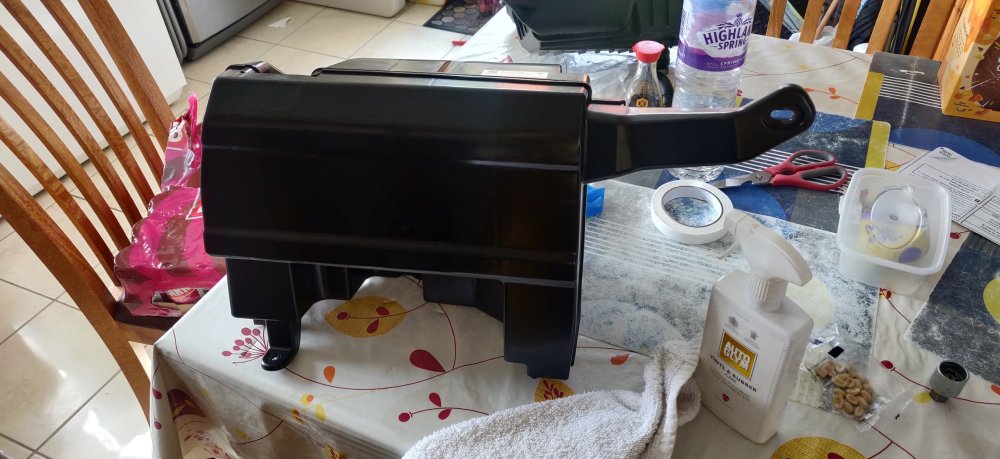
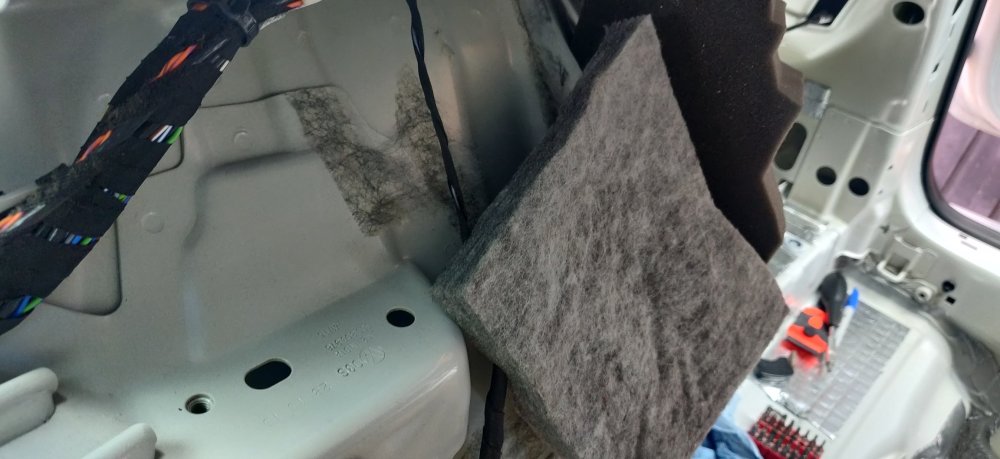
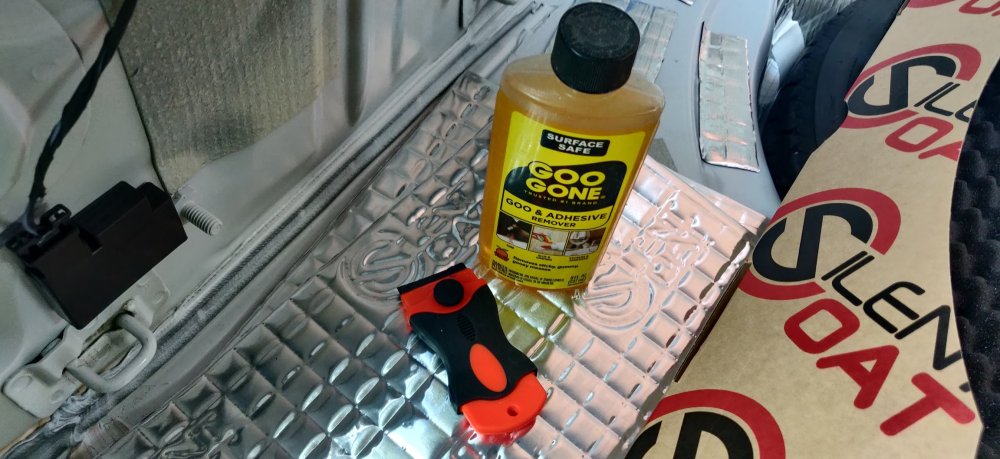
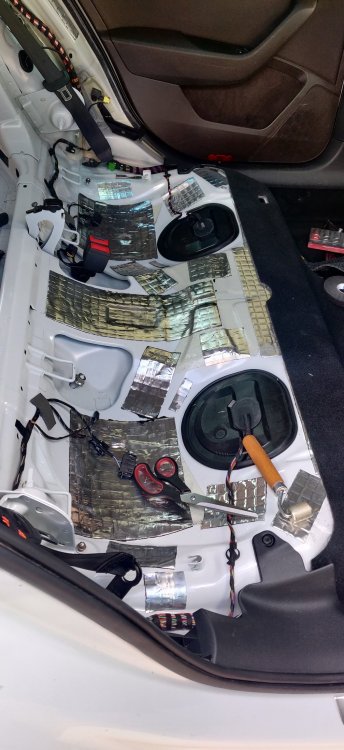
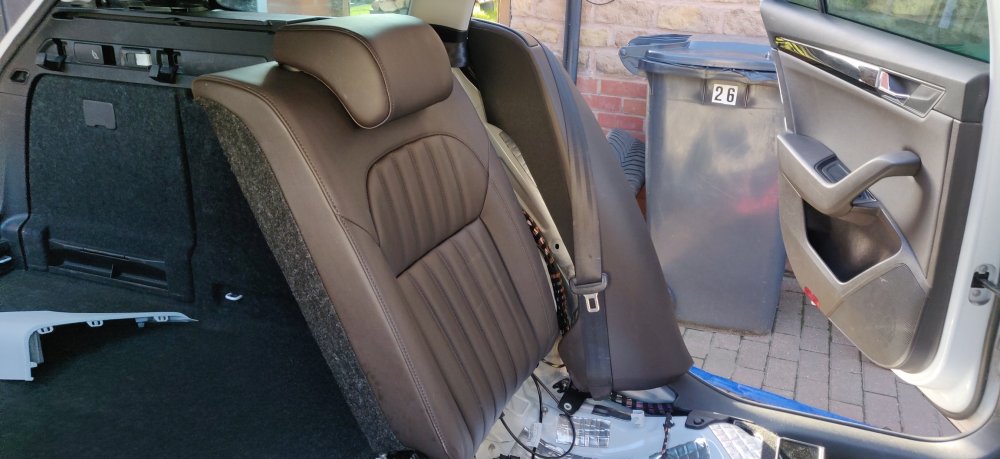
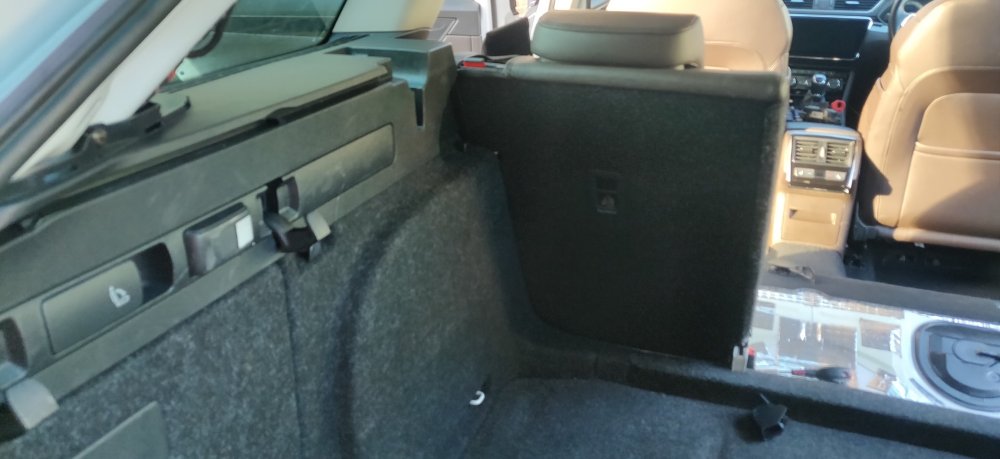
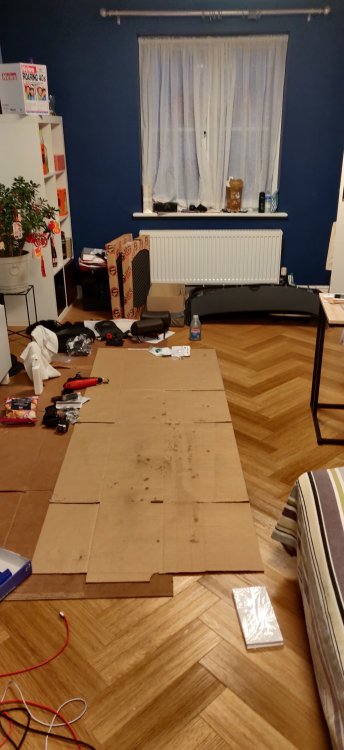
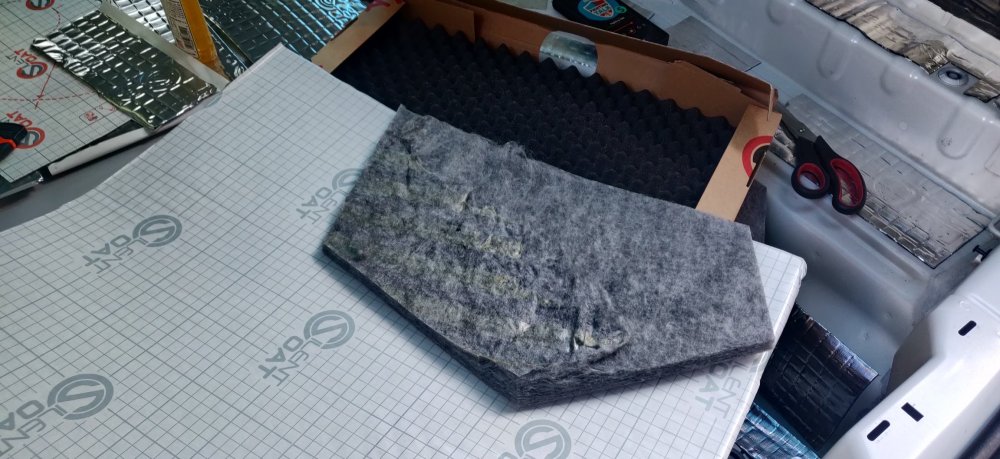
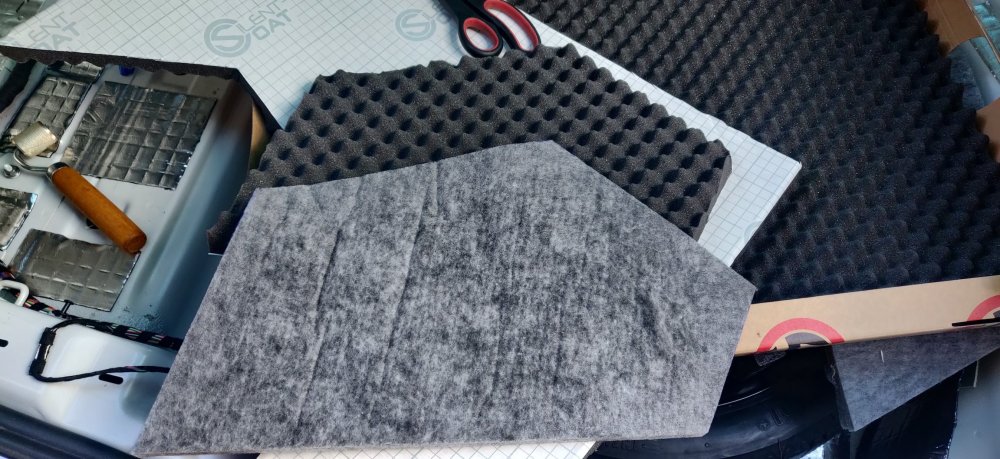
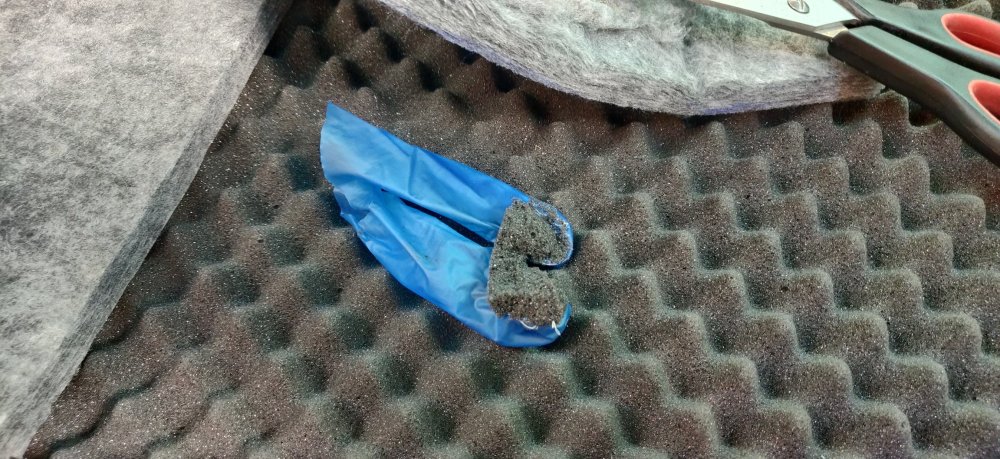
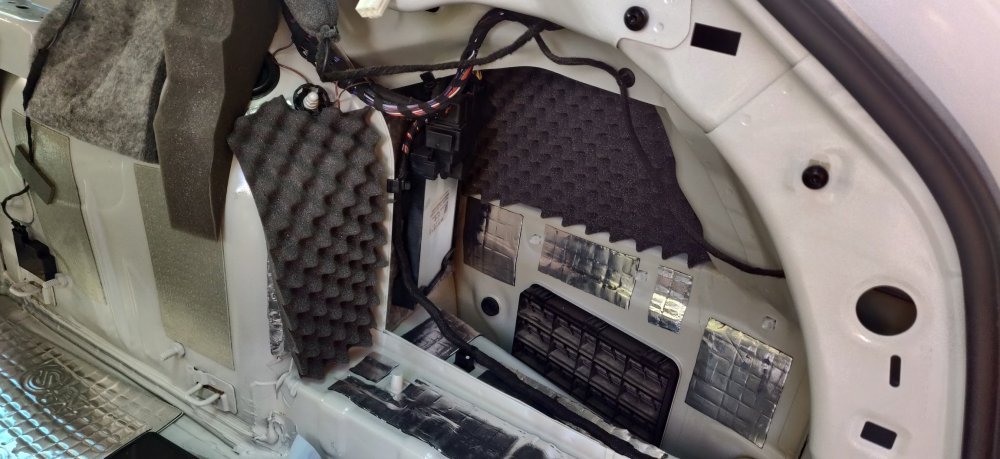
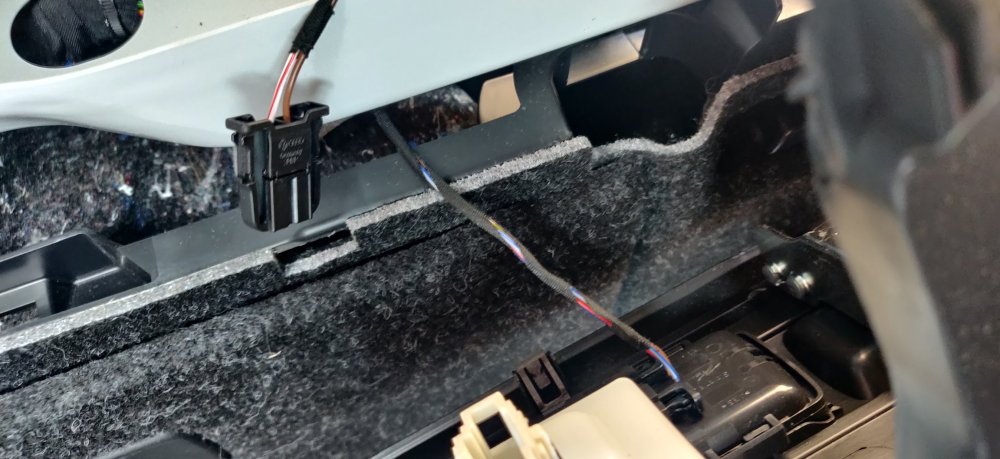
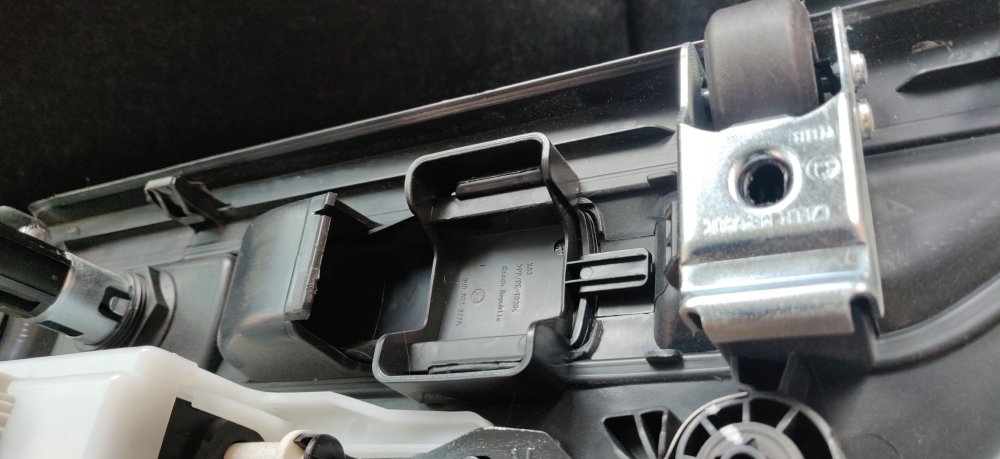
After lunch, gave the subwoofer a wipe down and once over with the Vinyl and Rubber Care: The subwoofer fitted; There is a 10mm nut at the base and two T30 torx screws at the top, one can be seen in the pic above, and one kinda behind in a recess. You can see the silent coat absorber all in place. There's probably a discussion to be had whether using silent coat to reduce rattling is ideal for a subwoofer, given reverb is kind of the point. Continued along the boot towards the rear seats, so here's some pics of removing the residue. So this is a piece of foam on the driver side removed: With the residue on the chassis: What I used was some stuff called "Goo Gone" and a plastic scraper: This Goo Gone has been used over many years to remove anything that leaves a sticky residue. I think its some sort of petroleum based solvent. It usually has an orange scent, but unfortunately, its been a number of years since I've used this stuff, and the orange smell is a bit off. It still worked though, just rubbed into the residue which will then start to gum up the residue: The plastic scraper (and fingers) then take this off. Hopefully making it nice and neat ready for the replacement foam: So continued applying silent coat and any foam as necessary: The area under the rear seat is next, which is a bit awkward, so applied in little bits: I still had some silent coat absorber from the first sheet, so cut it up into arbitrary sizes and applied to the right luggage area: So it was time finally to get some of the boot trim back into the car: Started to dry fit the left and right side: Same for the upper part for the right side, which has the Bowden cable already attached: So the next step was to try and determine a route for this Bowden cable. The carpet trim appears to have bits that look like candidate channels for the Bowden cable: So slotted the cable through one, and further down towards another part with a hook. Started to do the same for the left side, but with the subwoofer in place, some wiggling of the carpet is required: So just pull down the cover/lid and rejig the bottom carpet if it catches on anything: Whilst getting the carpet trims further in place, made sure the rear most plastic tab is hooked into the car, needs to be lifted up and it will plonk down: In addition to wiggling the Bowden cable into place, the rear seat belts also need to be weaved into the slot in the upper trims: Only then can the trims really start to look like they're ready to go: For now, I've improvised a route for the Bowden cable where it follows the wiring that is present, and I expect the cables will then loop back before going vertically up into the seats. With the carpet and upper trims fitted, installed the lower part of the rear most trim: Then clipped the trim for the lip, didn't take a pic of that. Started to seat the upper trims home properly now: With that, then took the boot carpet and refitted it: Starting to look like normal now. Got a bit excited, so took the left rear seat backrest, and dry fitted it: The latch appears to work, so hooked up the Bowden cable to the seat, then tried the seat: Gave the lever a pull: Then nothing. You can see the red tab goes up, so the latch is actually released, the seat then needs a push to actually fold down. So I have a horrid feeling something is missing, like a spring maybe that keeps the hinge under tension when fitted? Any ideas would be appreciated. Regardless, decided to start filling the boot with the other gubbins ready for finishing up later: Which leaves the living room in a better state: Mainly the tailgate trims to be honest. As I type this, I now realise I haven't actually tightened up the screws or the nut for the subwoofer! So I suspect I'll have to do a fair amount of trim removal again to get access to those to tighten up. Also, I'll need to swot up further on the rear seat release, because it feels like I'm missing something, which would be very annoying given the effort spent on it thus far. Any ideas would be most appreciated! Only other thing today was some engine oil filling, which I'll sort out in the next post. Maintenance: £1806.50 Upgrades: £1020.69 Miscellaneous: £631.67


-
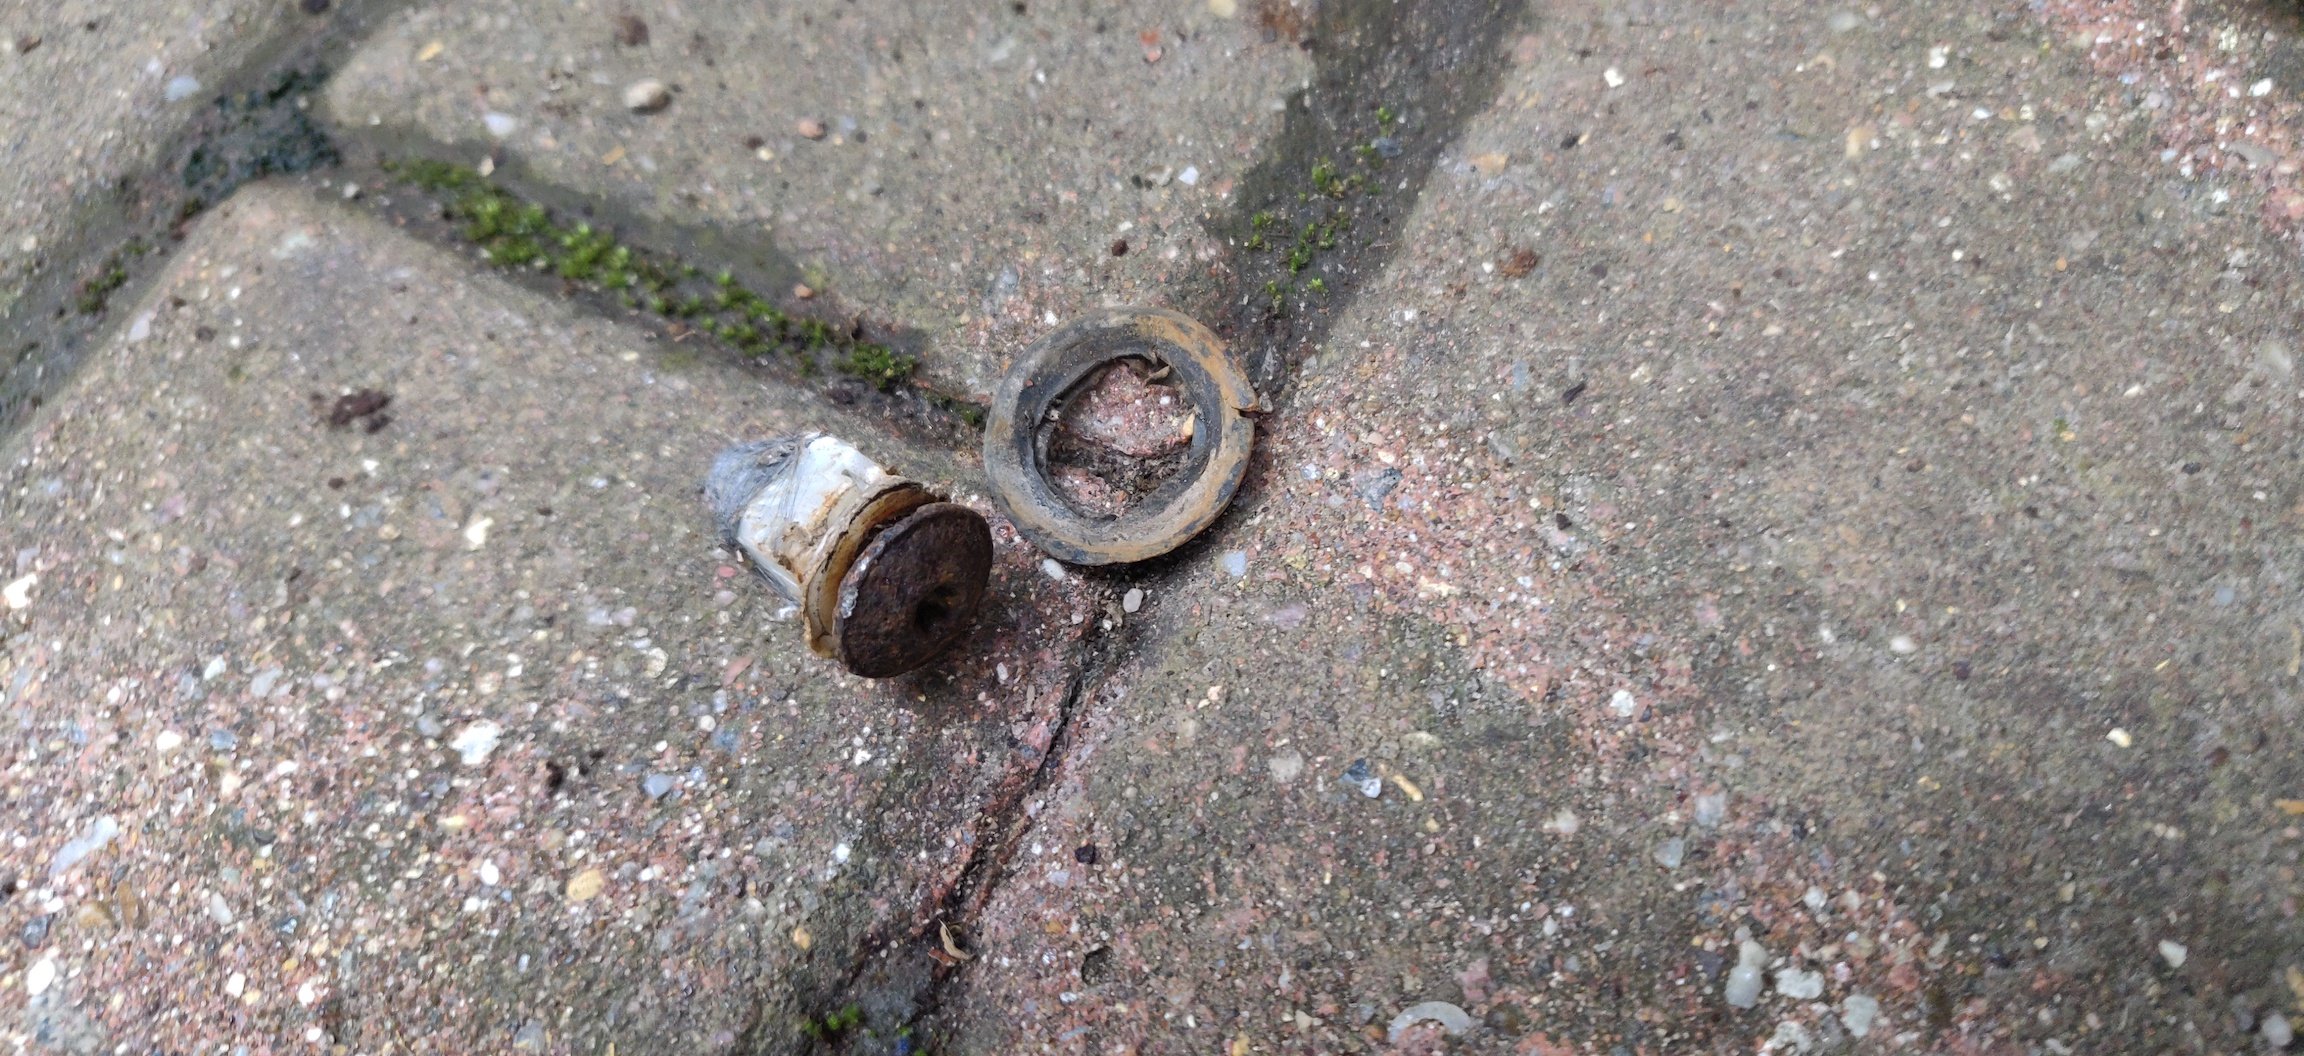
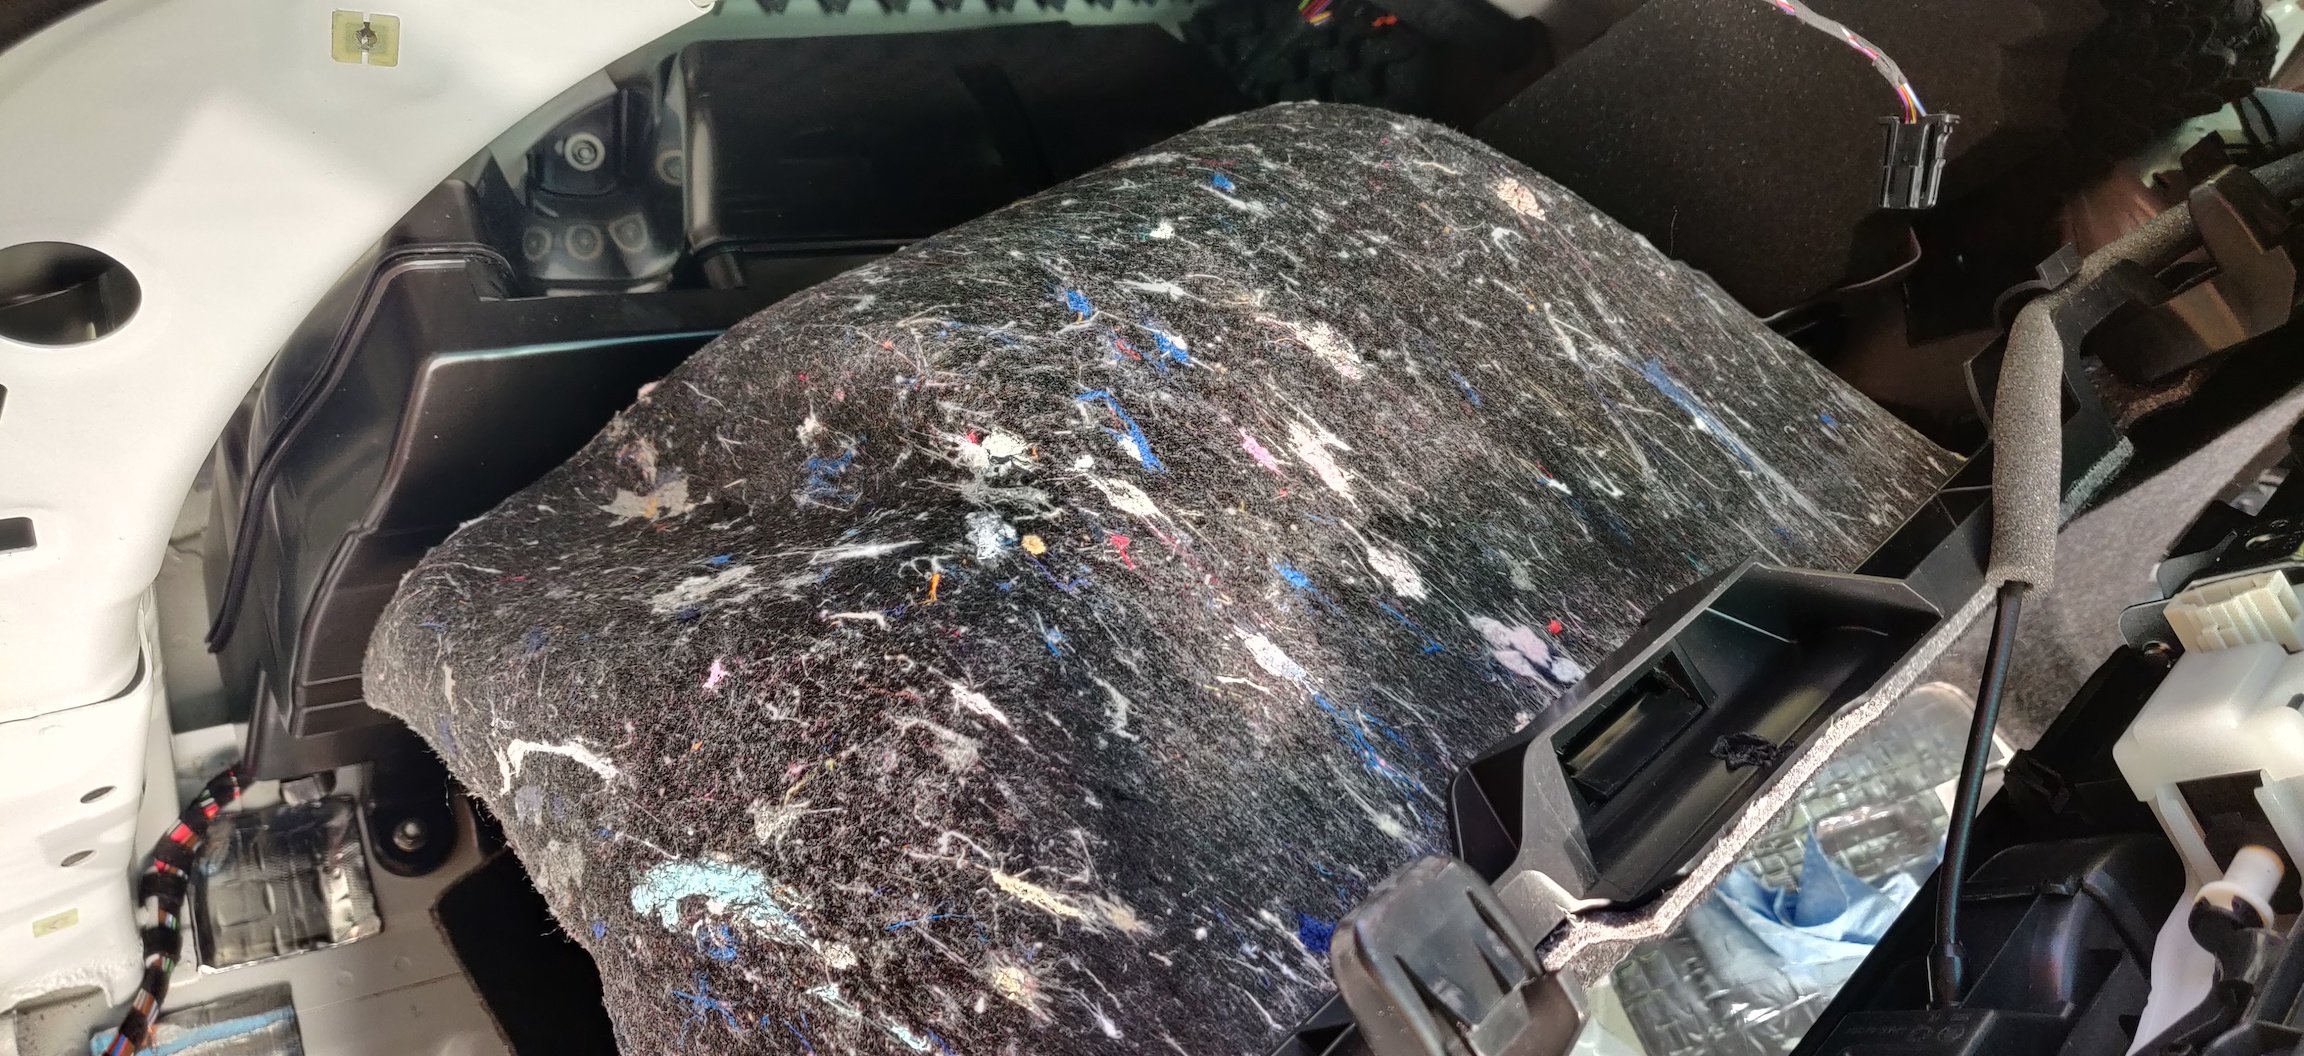
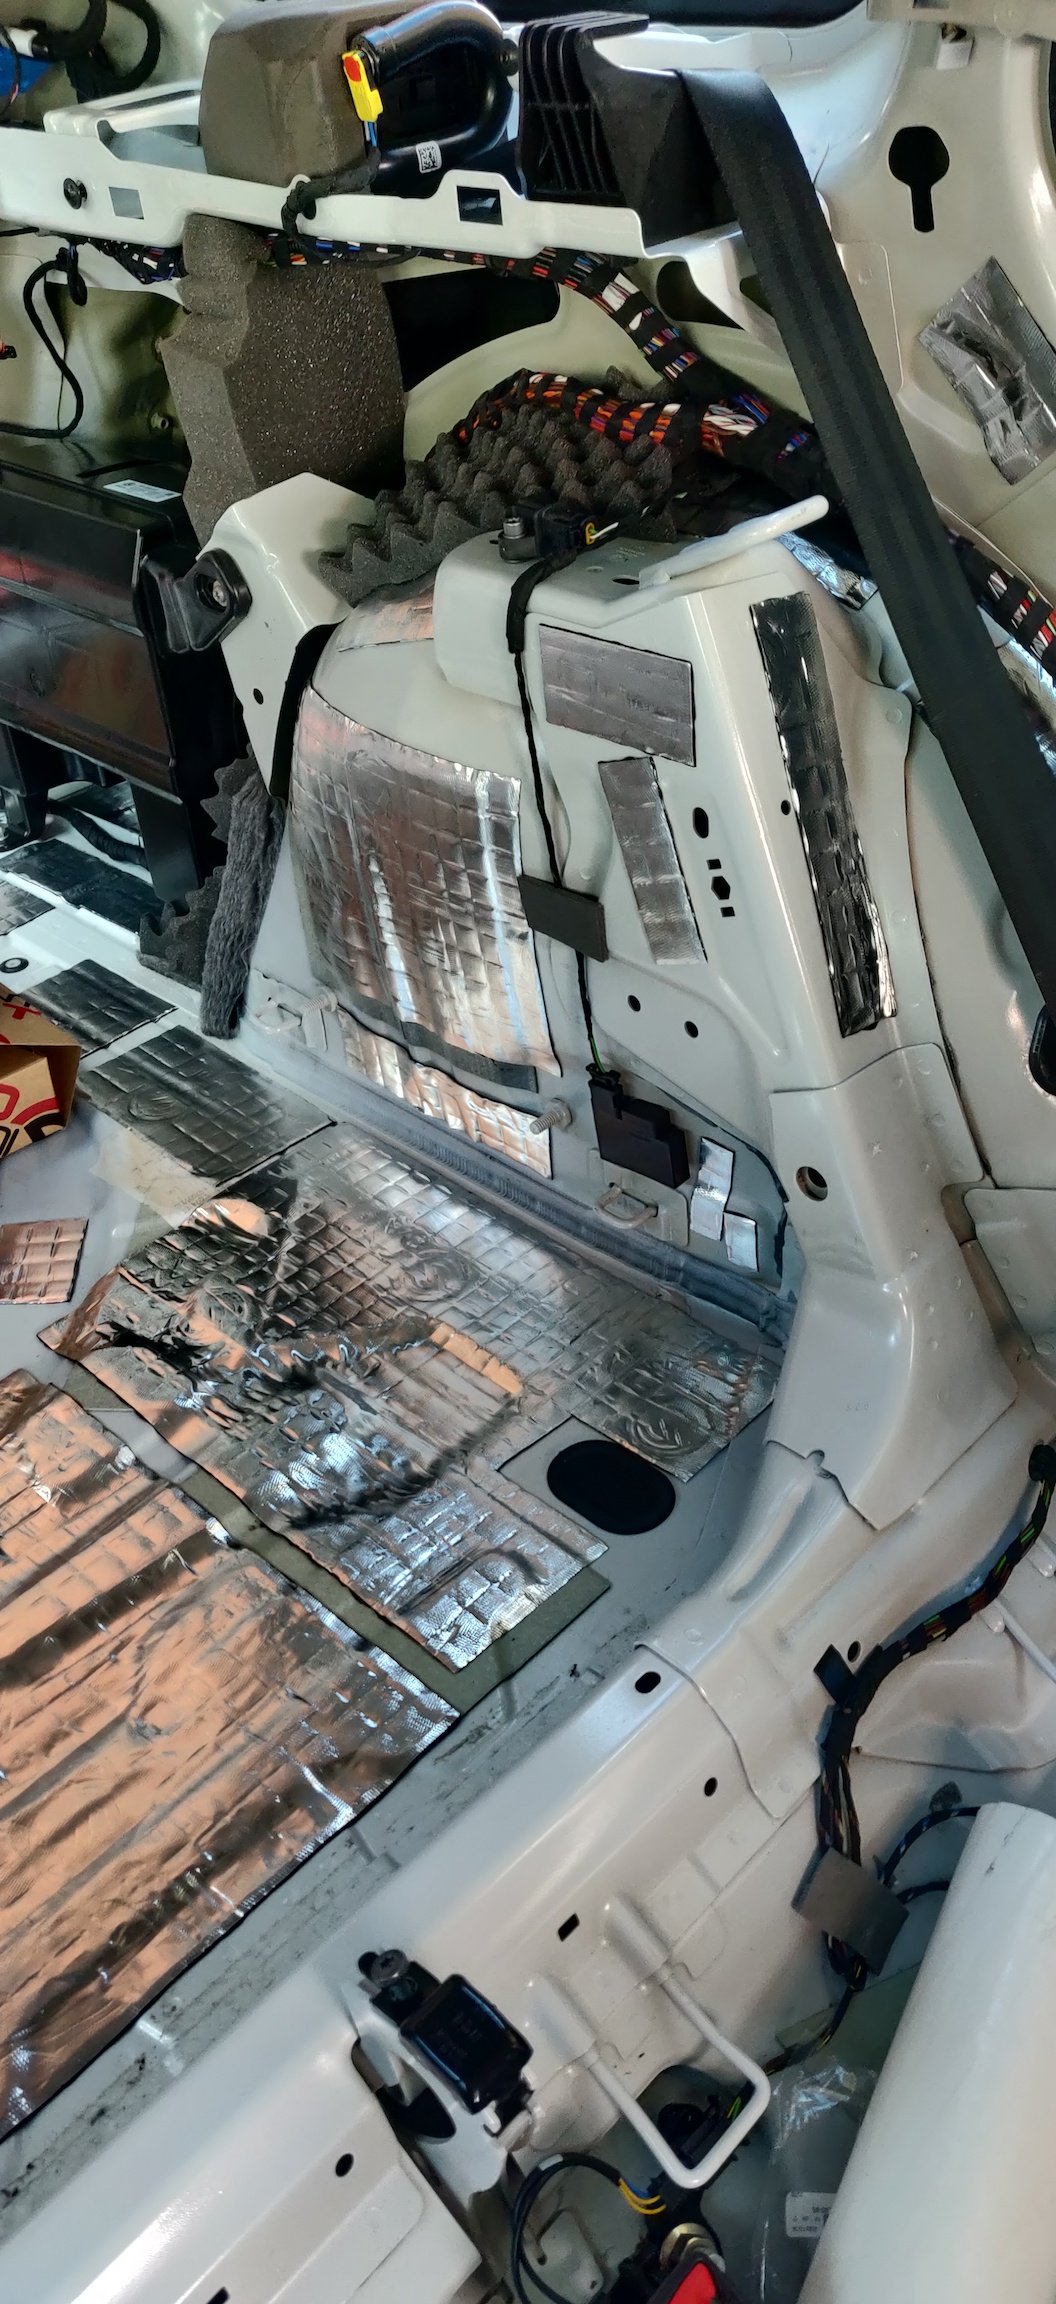
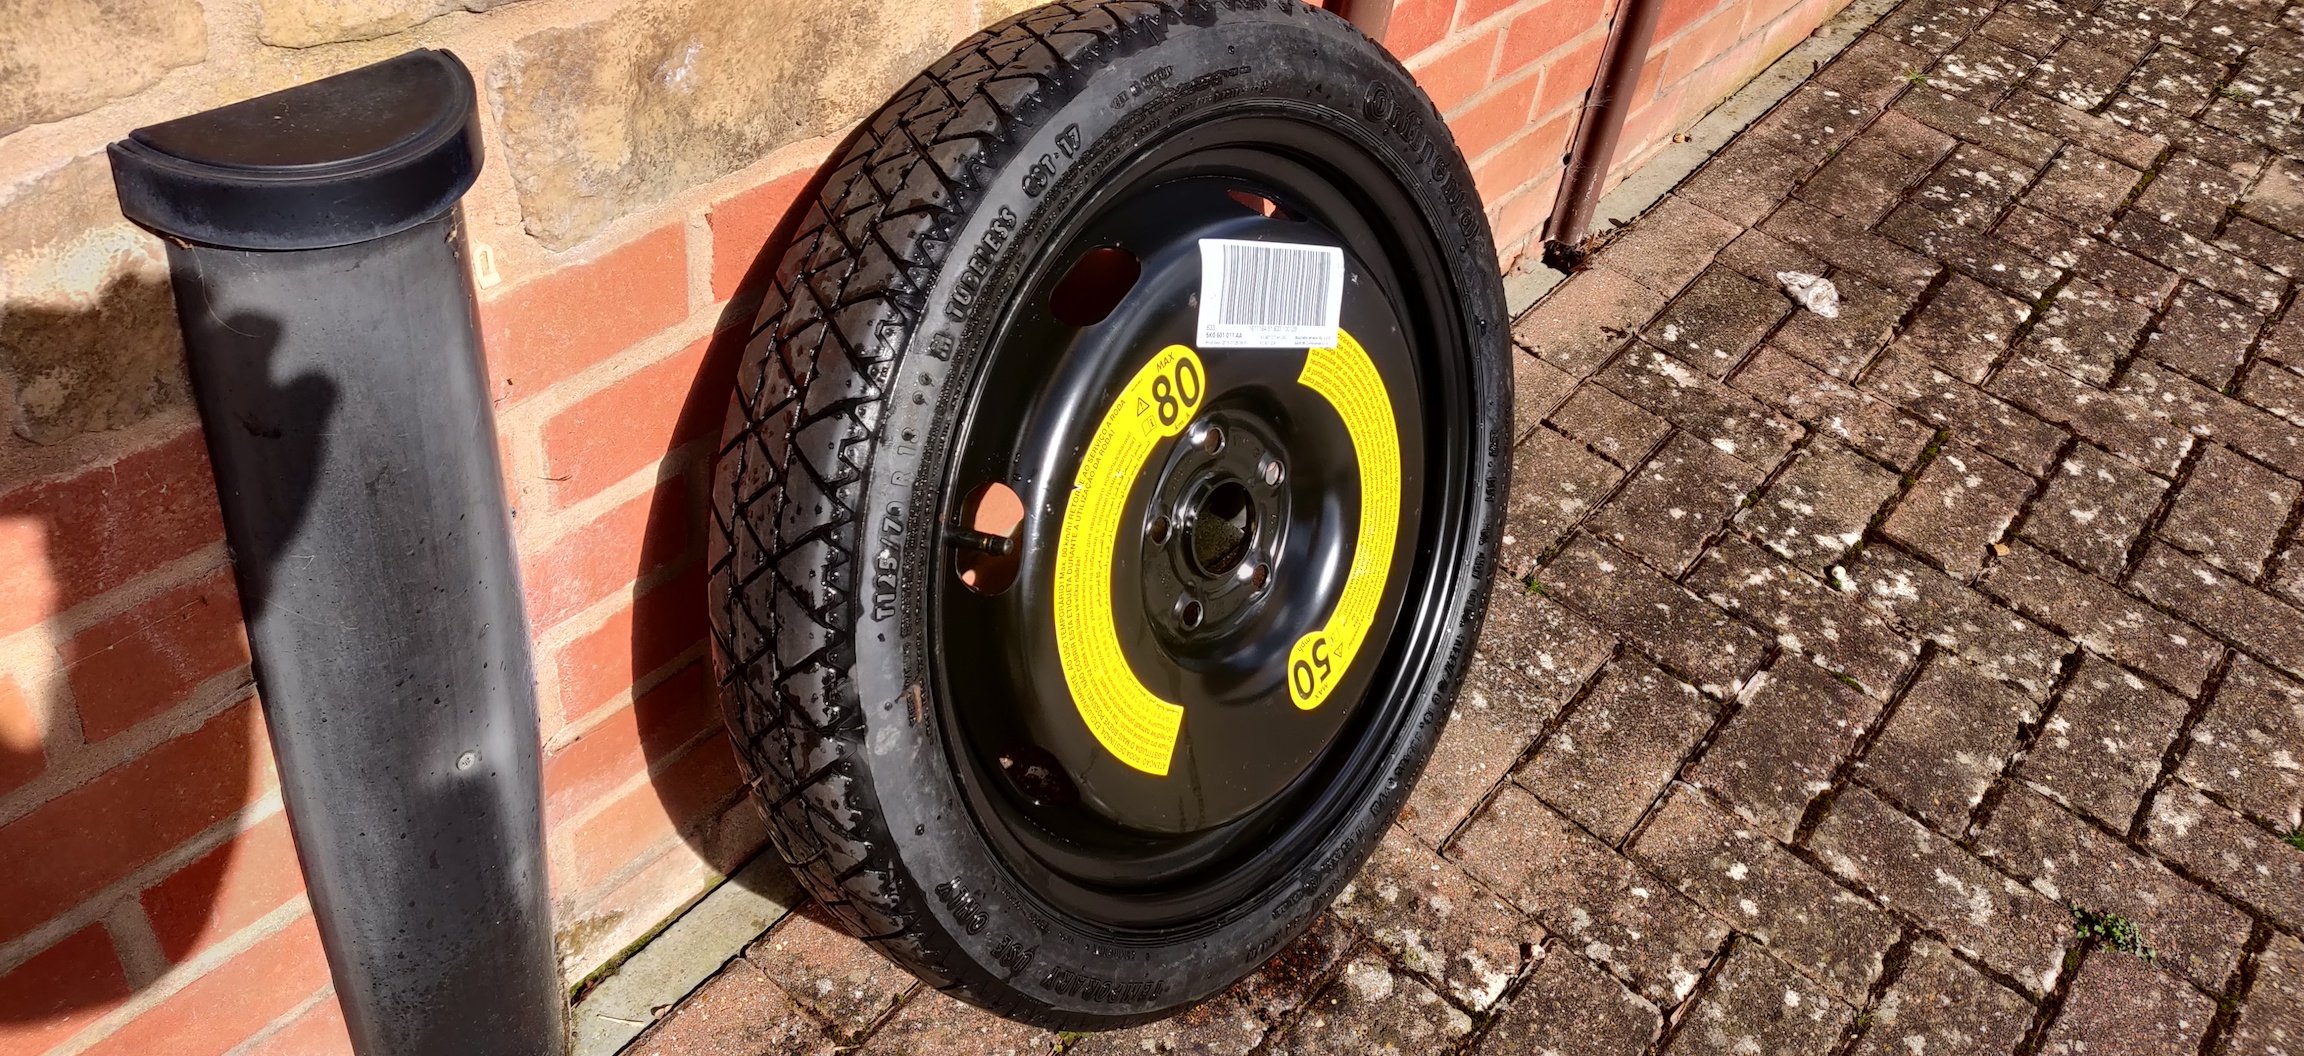
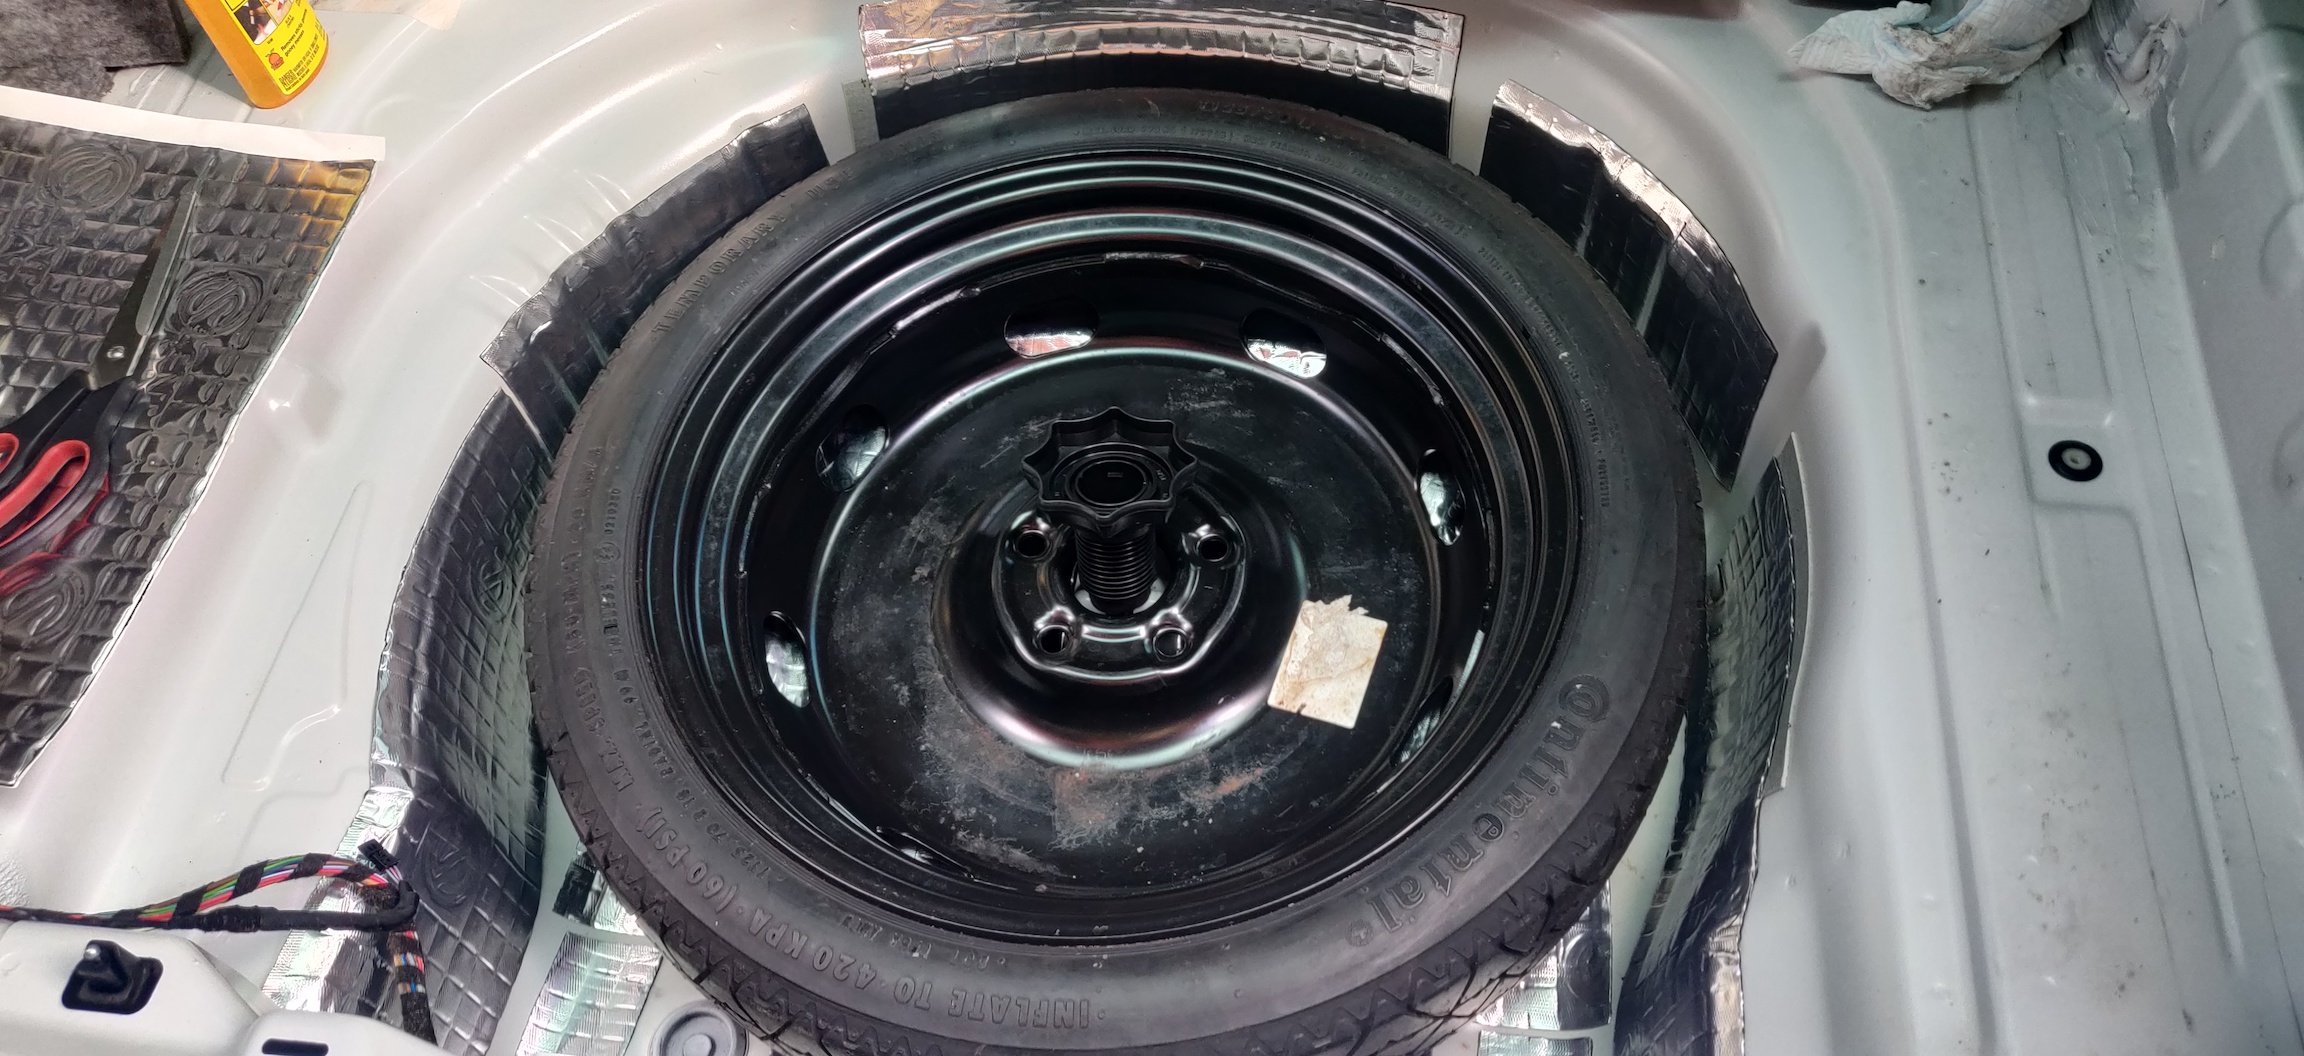
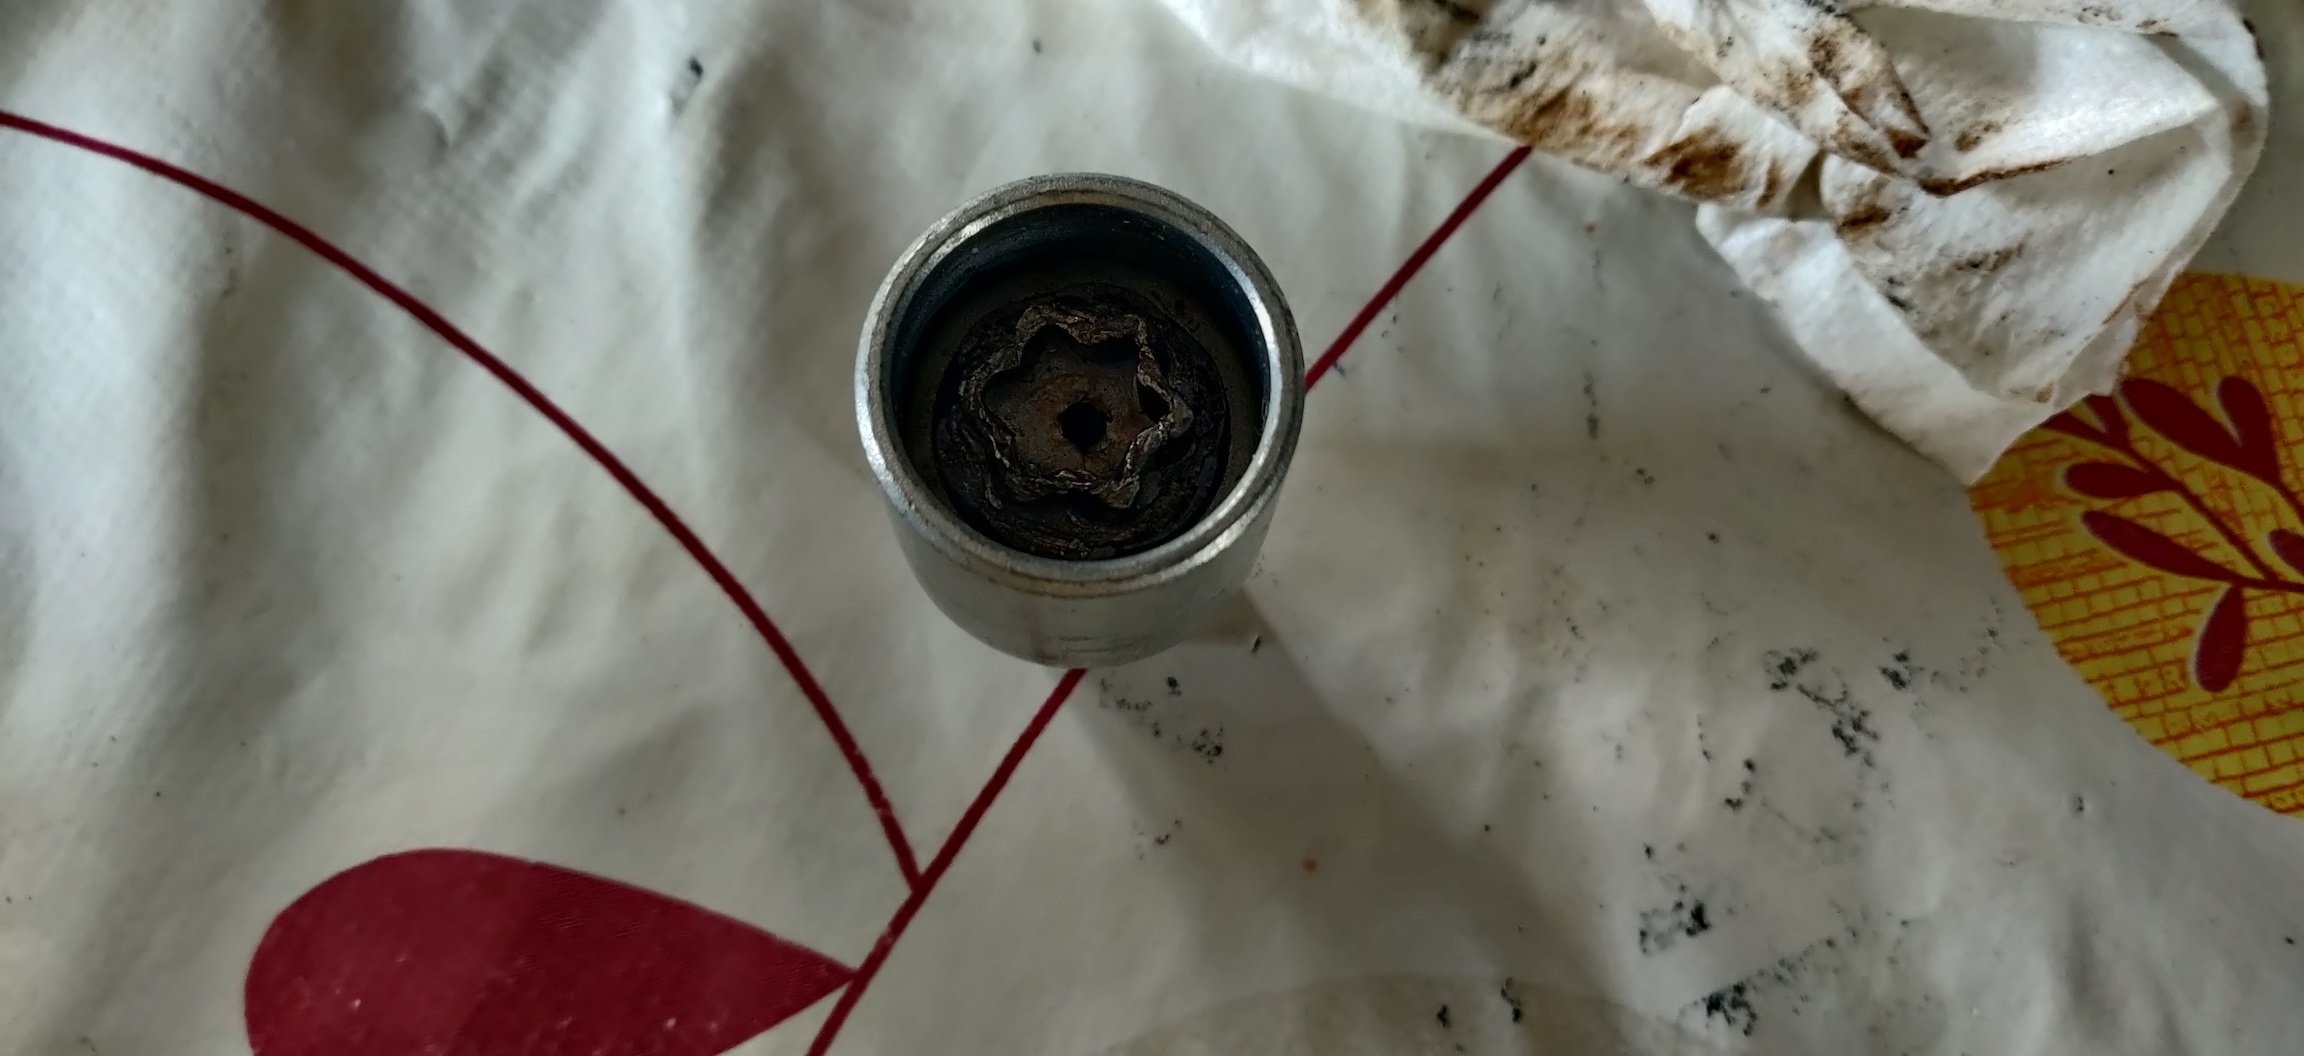
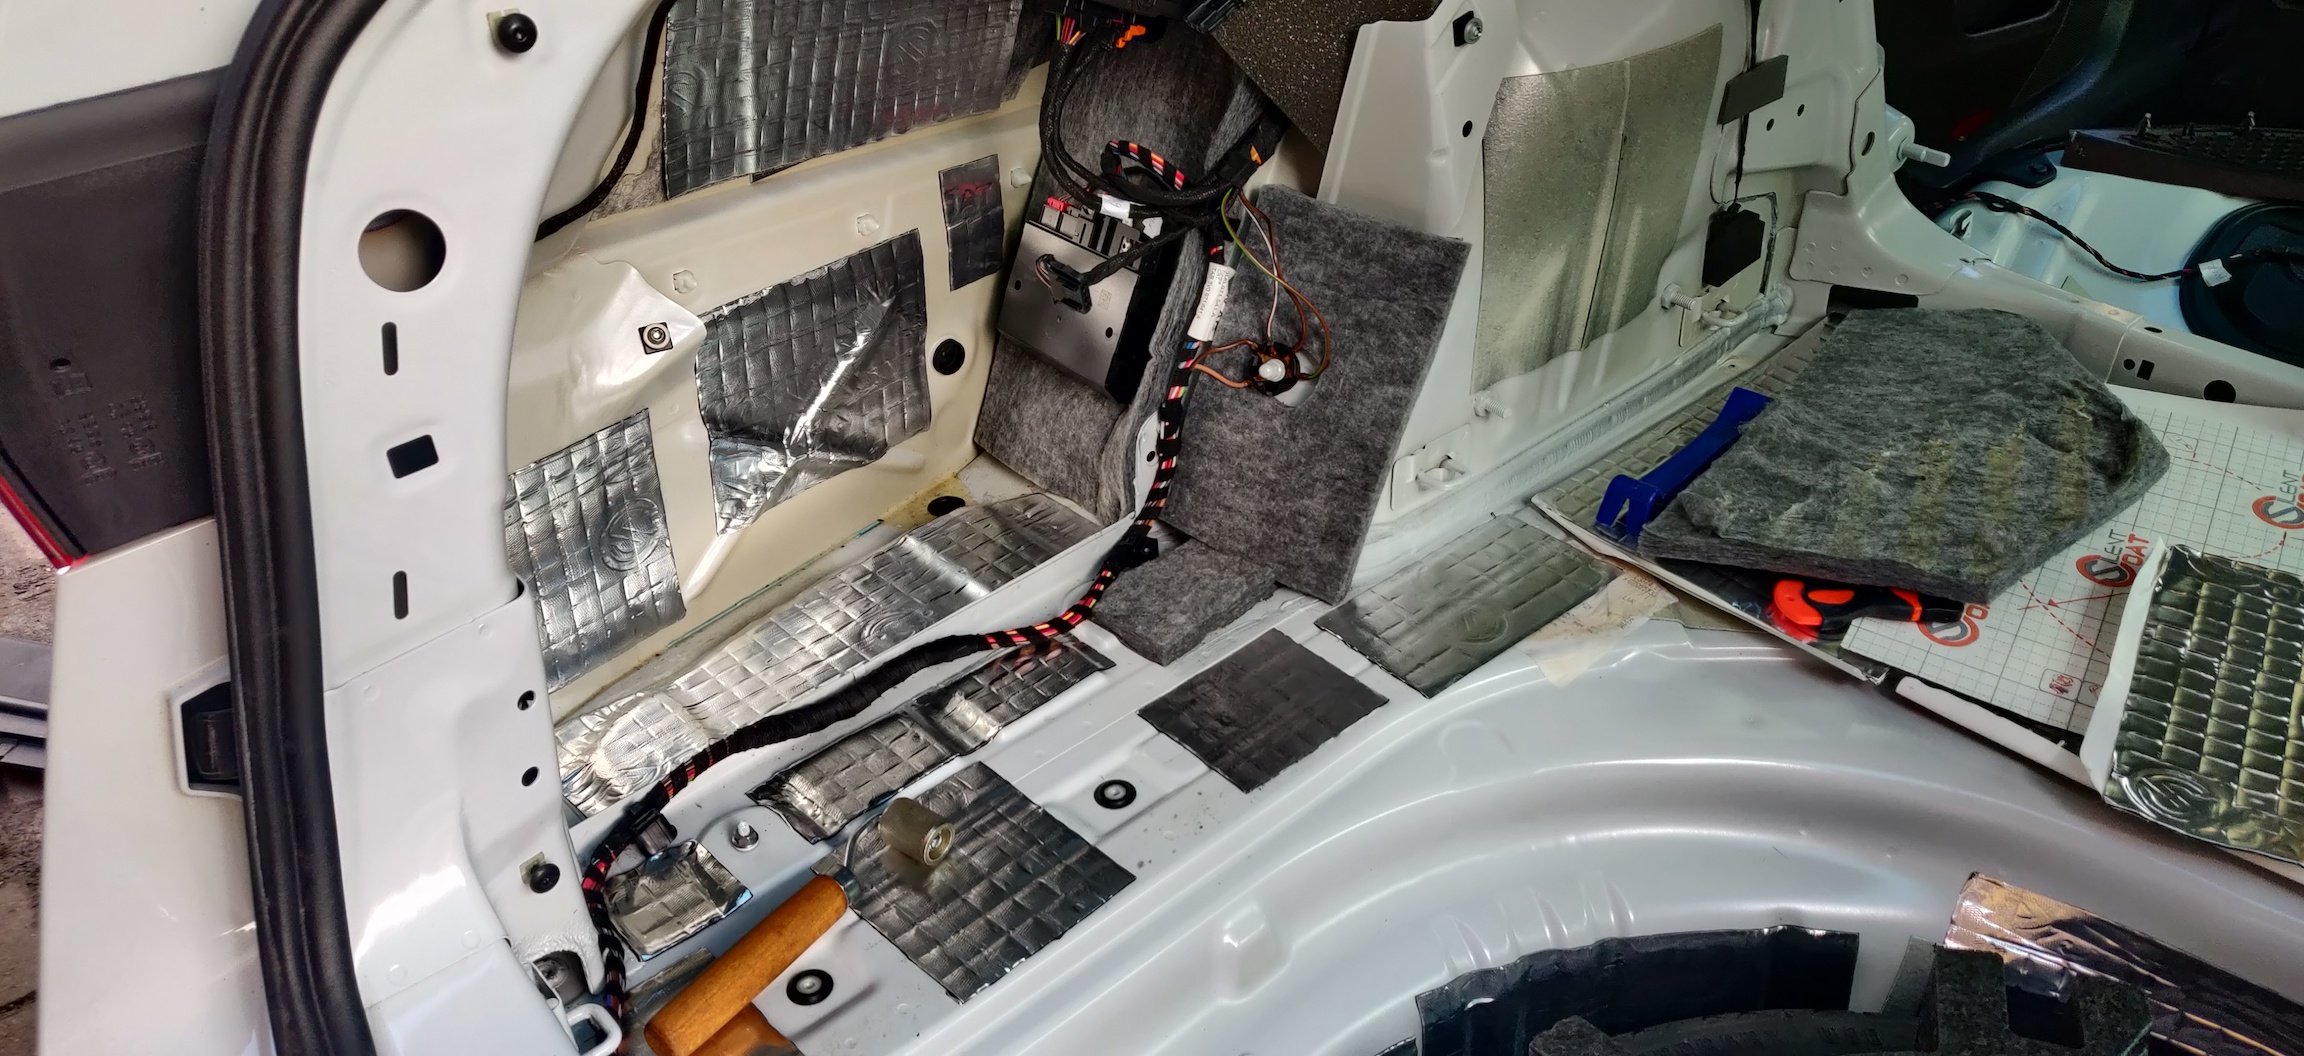
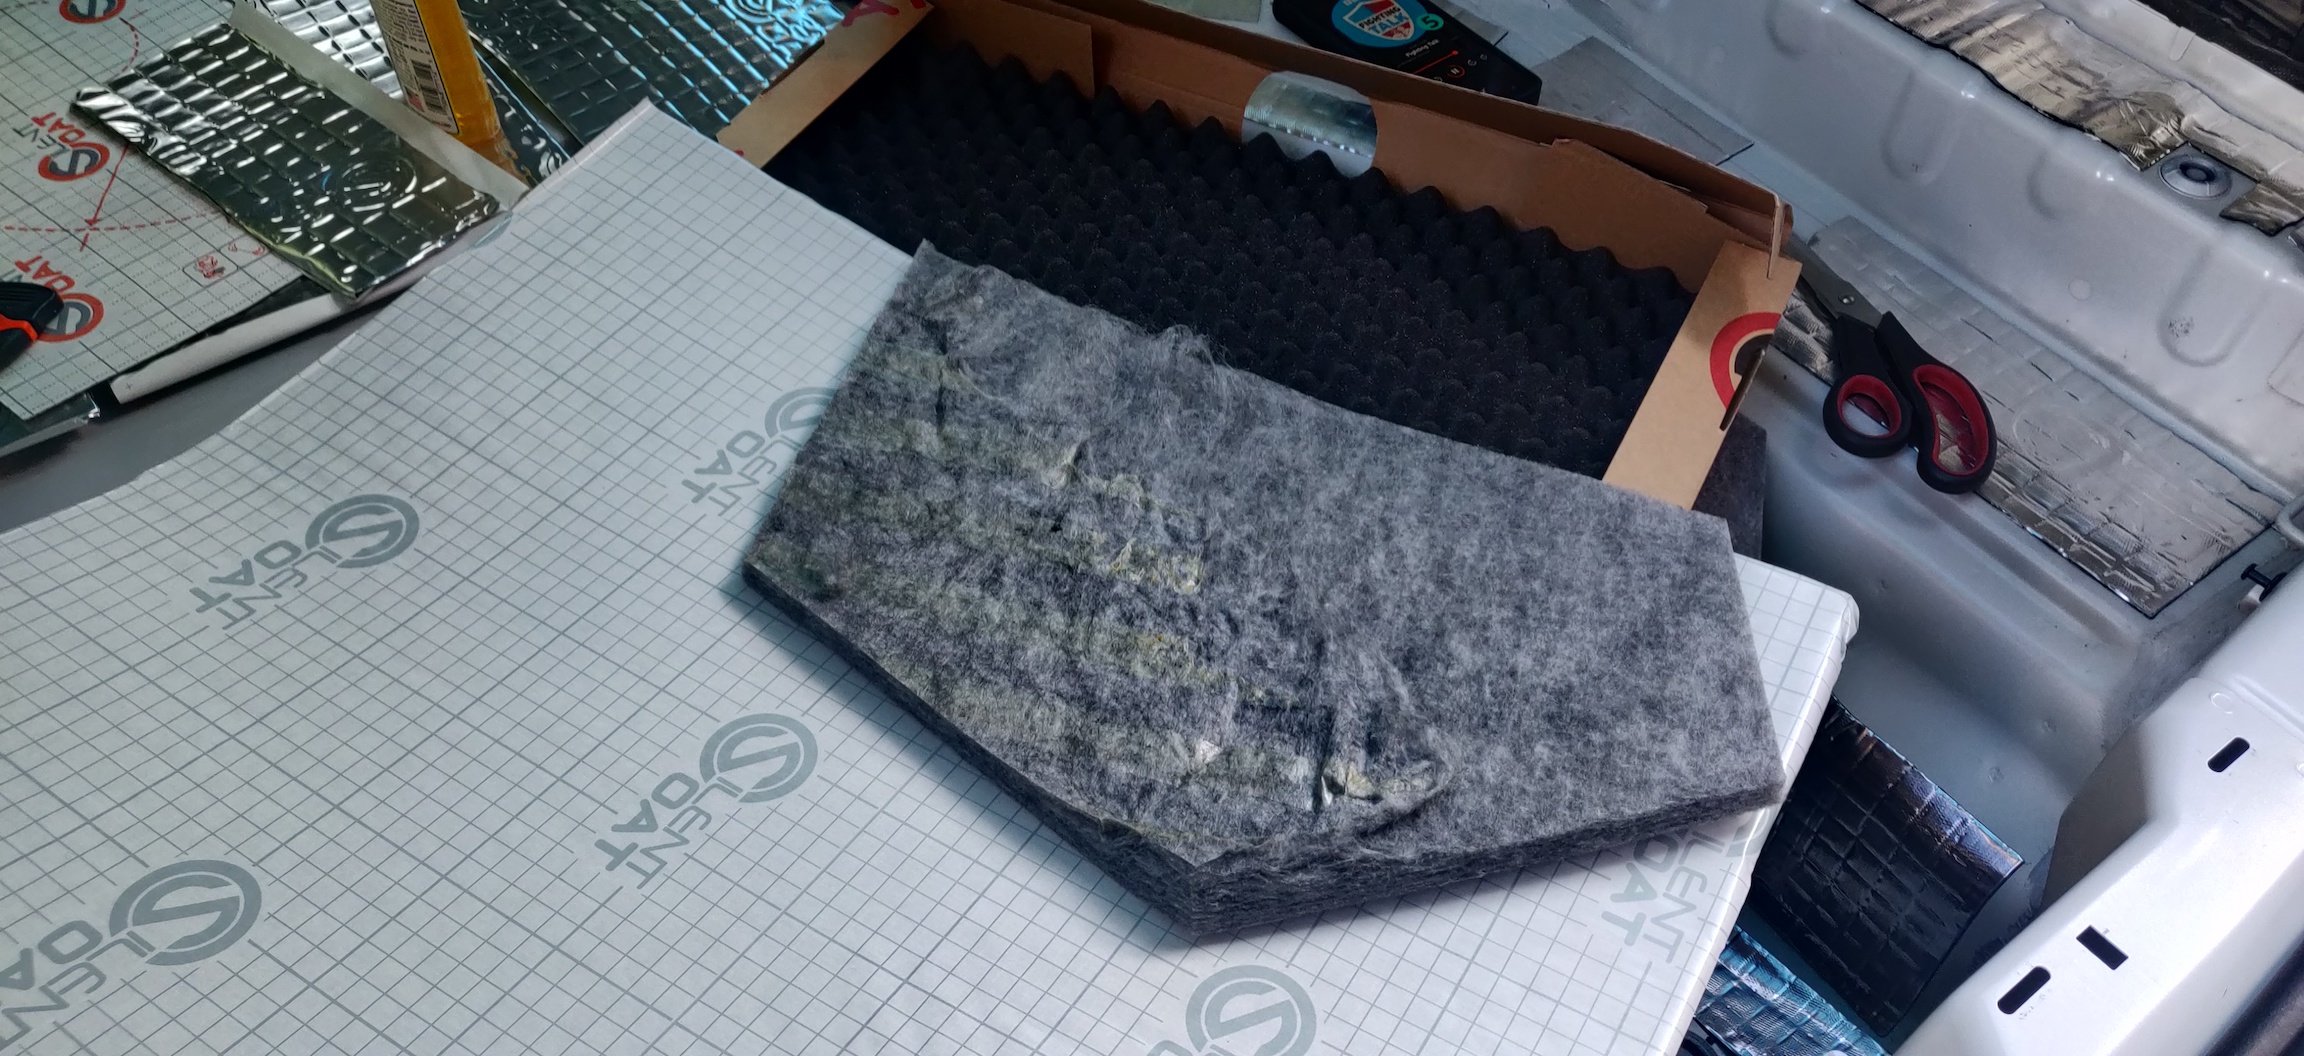
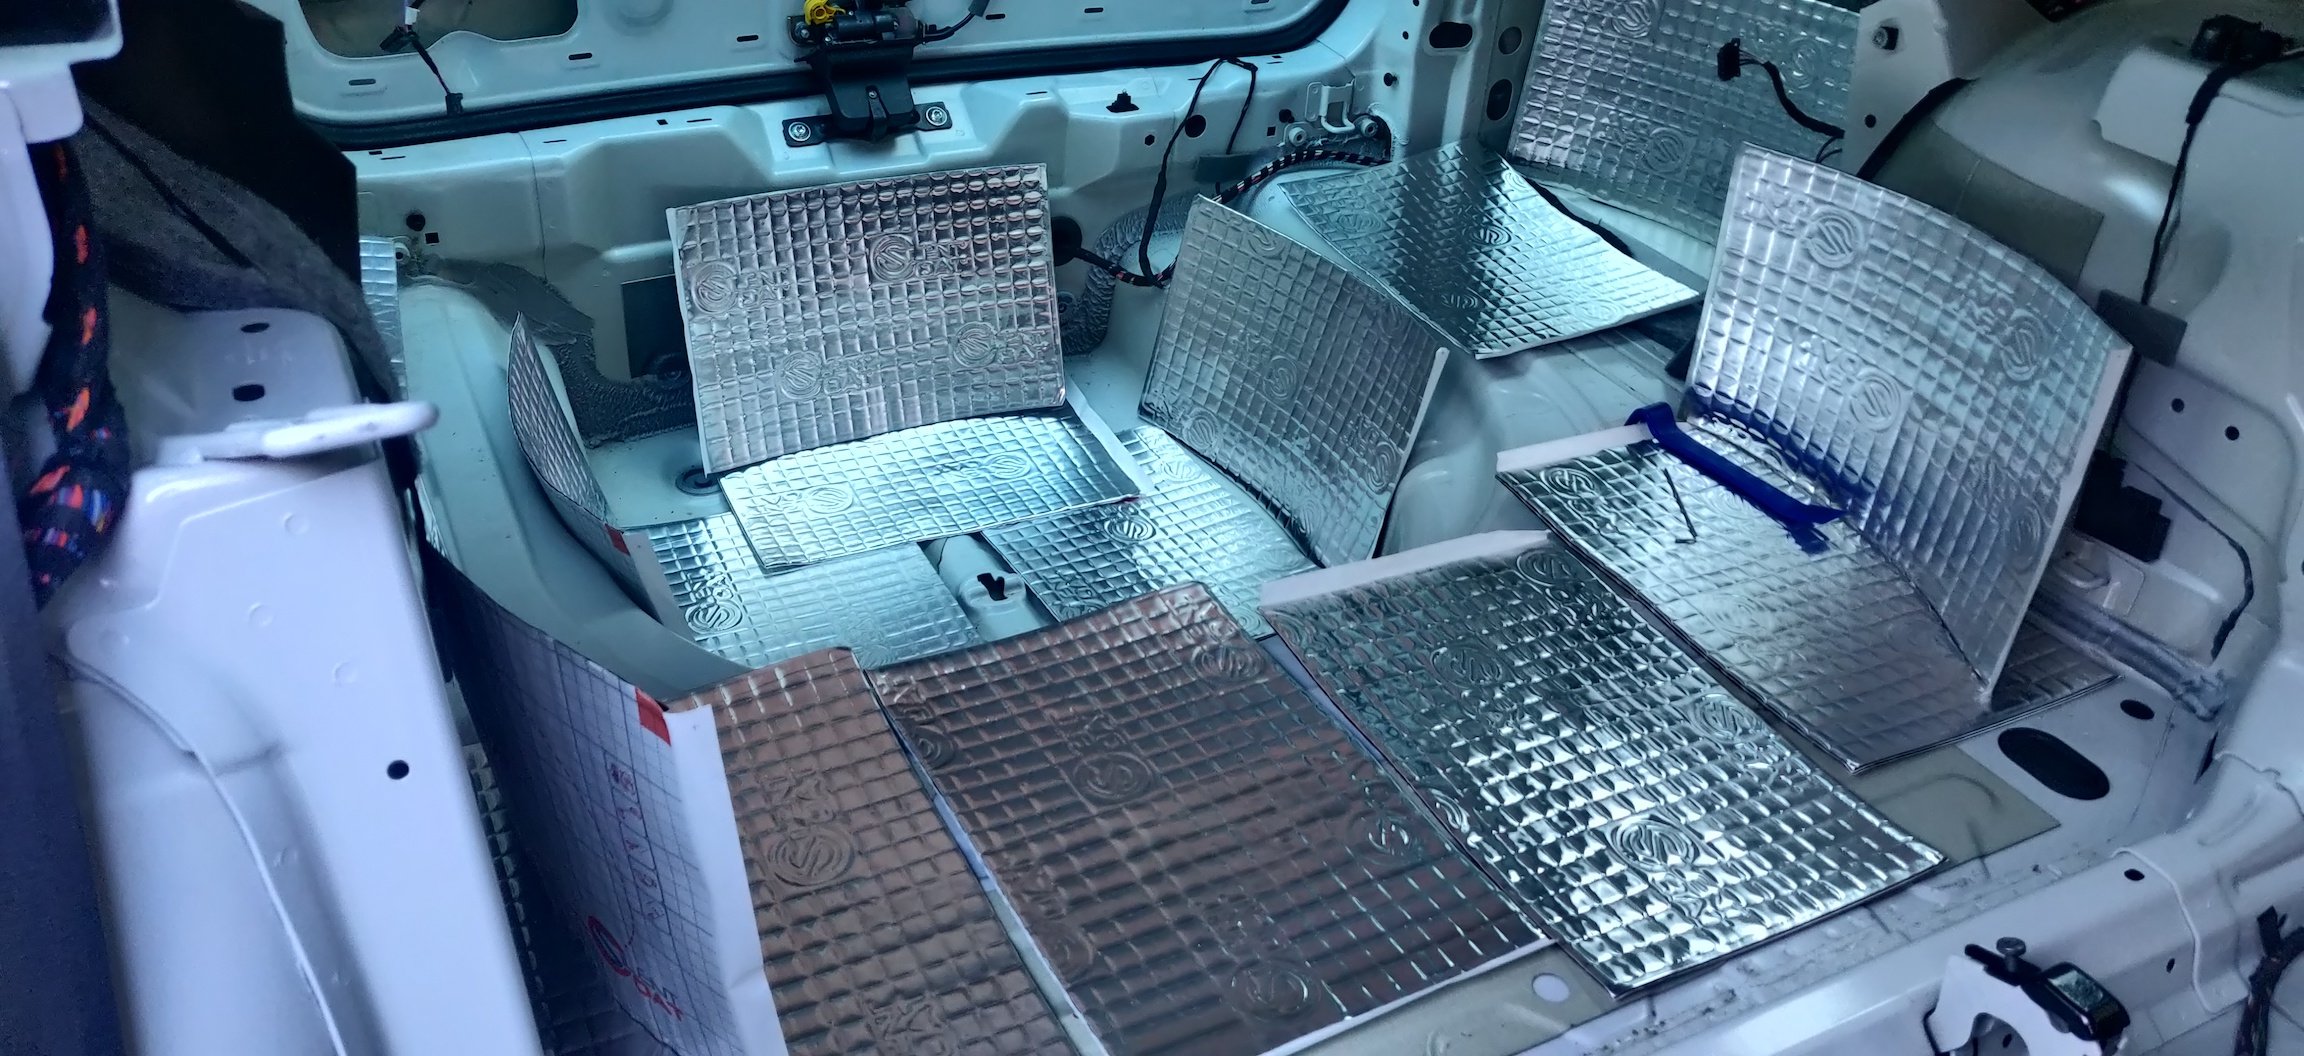
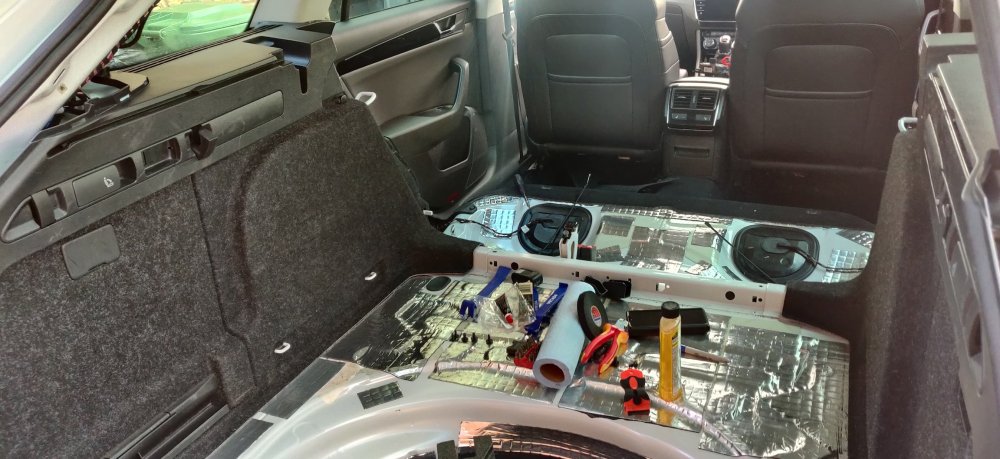
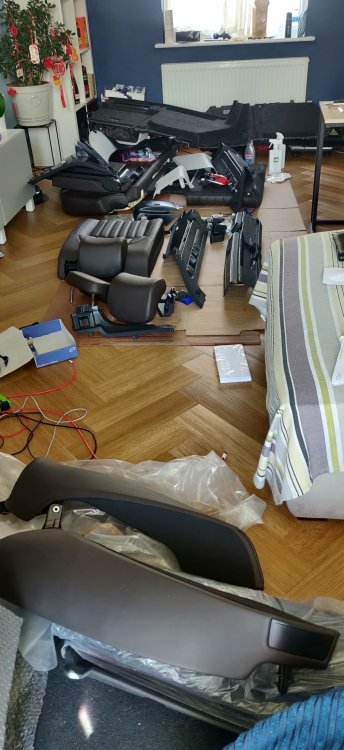
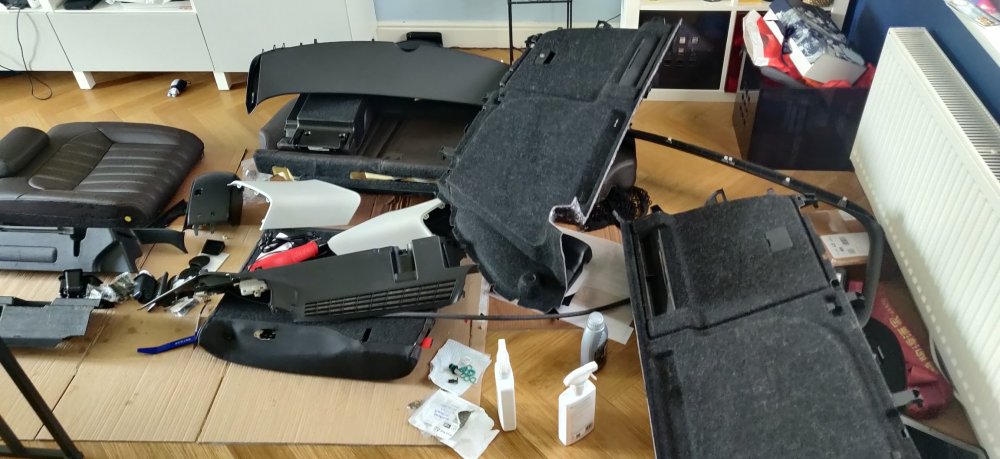
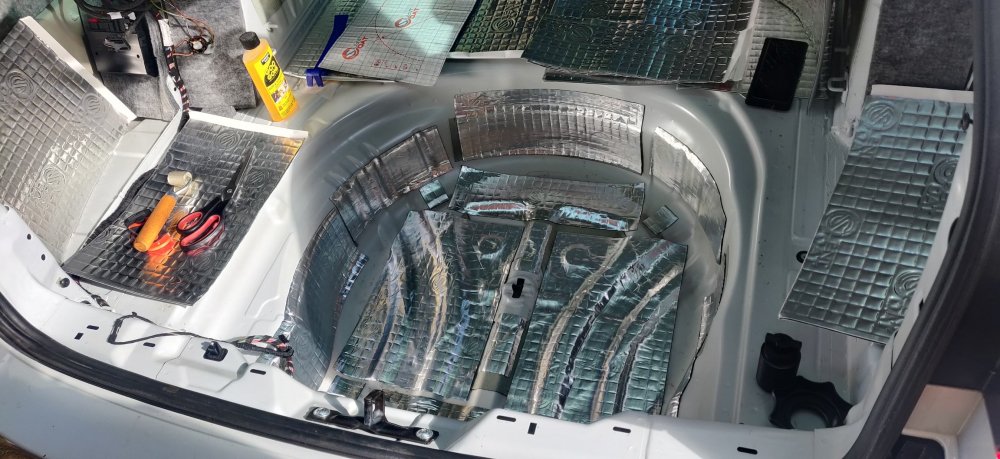
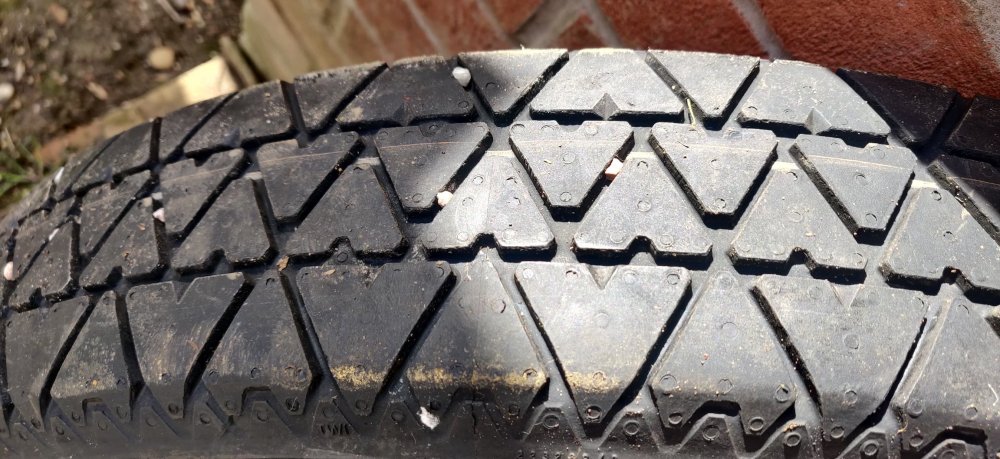
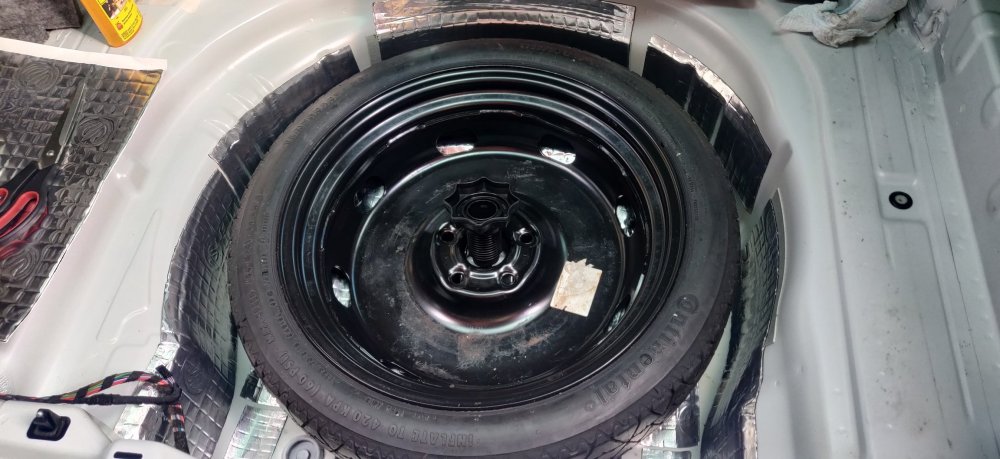
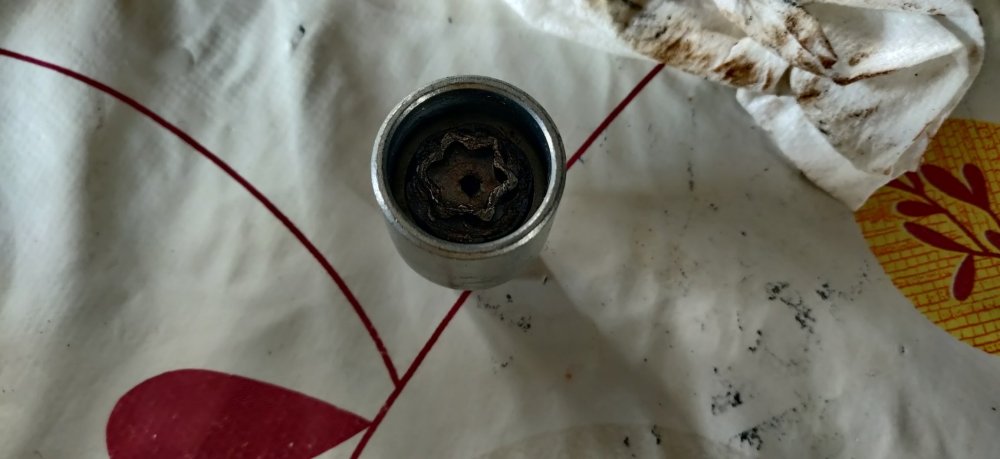
Busy day, lovely weather so tried to get the silent coat stuff sorted. The main reason is this: The living room isn't really habitable with the entire rear seat back all splayed in bits everywhere. The sooner the silent coat is applied, the sooner the rear luggage and maybe even the rear seats can be installed. So, decided to get cracking. The silent coat is 2mm thick, and so was pretty easy to cut and roll, so essentially just a bit of art and craft it feels: I tried to be reasonably comprehensive but not over the top. With the spare wheel done above, there was nothing really stopping the actual spare wheel from being reinstalled: So installed the thing to keep the wheel in place, just slotted in and rotated 90 degrees. So then got the spare wheel out, it was lying around in the garage for quite a while: \\ A closer look reveals what is probably grit and salt in the treads, so picked them all out (more salt around the car is probably not a good idea), then gave it a quick wash and wipe over: Whilst waiting for the wheel to dry, decided to find other things to wipe down: So went over the passenger side of the windscreen cowl and turret and sides: Noticed this: I've seen this along the door jambs as well. It looks to be tar spots? There must be something in the Aberdeen air, because I've never seen tar spots get into random enclosed areas such as this. Didn't think it was physically possible. Did the other side, and tar spots there as well: Whilst doing this, and before the wheel was dry, got an unexpected parcel: Some silent coat absorber, 35mm, two lots of two sheets. From eBay for £68.60. I was expecting this sometime after the Easter break, but what this means is that whatever foam I see in the boot area, I can now replace like for like with this stuff. So with that, installed the spare wheel: Then I cleaned up the accessories for the spare wheel, cobwebs and whatnot: The remains of a locking wheel nut, destined for the bin as not used anymore. Related to the awkward wheel nuts? Forgot to take pics of this put back into the spare wheel well, but no point in that really. So with the absorber stuff now available, started to take out the foam in the left and right sides: The residue is quite full on left behind: I've taken pics of another area of residue removed, so I'll describe the process for that later. Once sorted, the silent coat is applied: I used the old foams to act as a net for the new foam: The scissors used for cutting the silent coat also worked on this foam: Warning: the adhesive used on the backing of the foam is very strong, like a souped up duct tape. So it doesn't mix well with gloves: The stickiness also made it difficult to manoeuvre the foam into the recesses on the left and right. Just some persistence leads to: So with the recessed area in the left and right sorted, the side carpet trims can now be installed, but for the left side, the subwoofer needs installing first. At this stage, I broke for lunch. More posts to come. Maintenance: £1806.50 Upgrades: £1020.69 (+£68.60) Miscellaneous: £631.67


-
Current plan is to drain the DSG and fill with 5.2l of new stuff as per the workshop manual. Then once the engine is ready to be fired up, I'll try and improvise some means of levelling the car and then doing the procedure of letting it drip out oil once its at 35-45 degrees. I still have to tackle the rear anti roll bar, remove the old suspension, all sorts left to do really. The sooner the silent coat is sorted in the boot, then the sooner loads of stuff lying around the house can be put back in, so that's probably my focus for tomorrow.
-
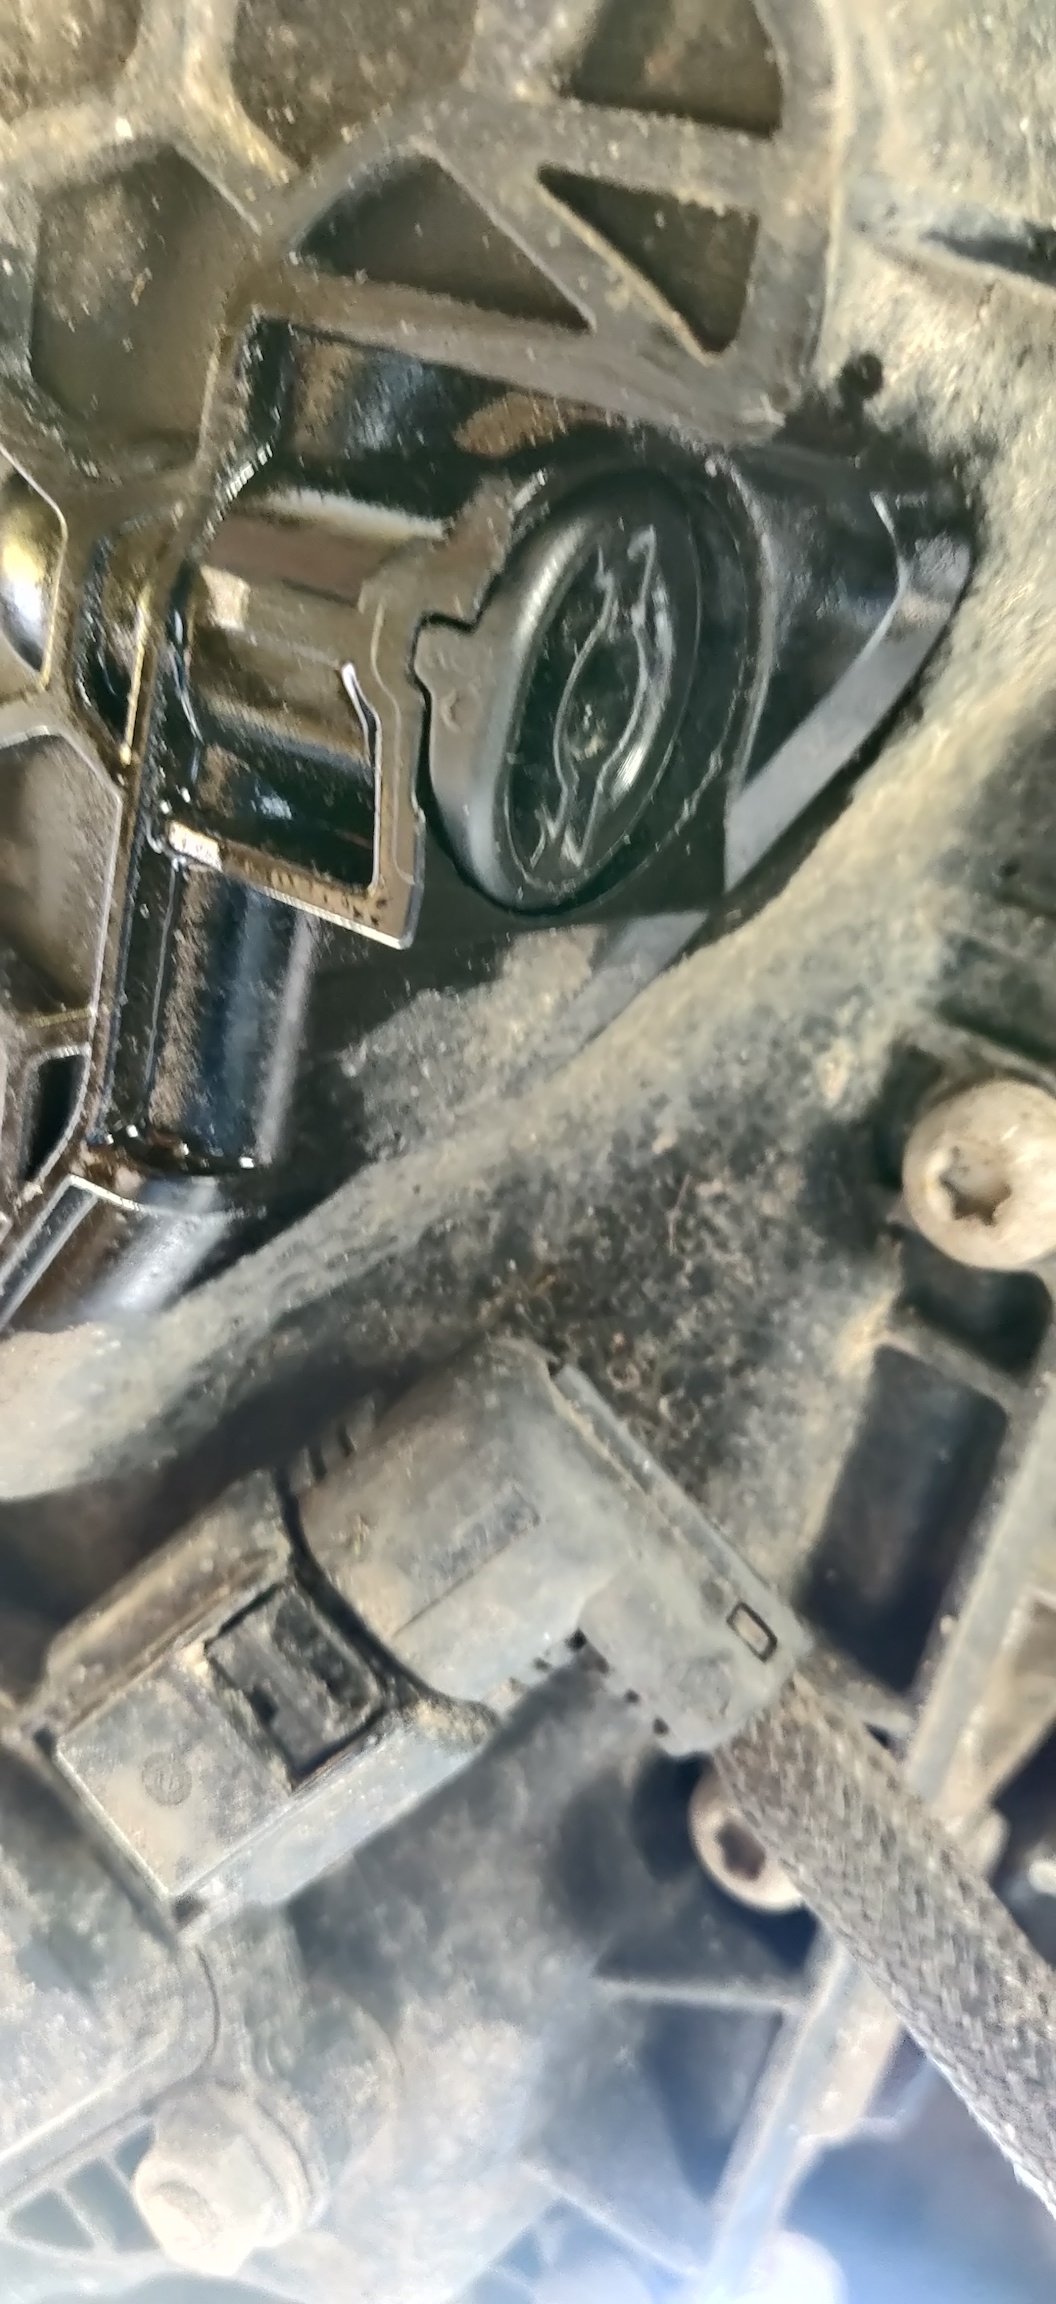
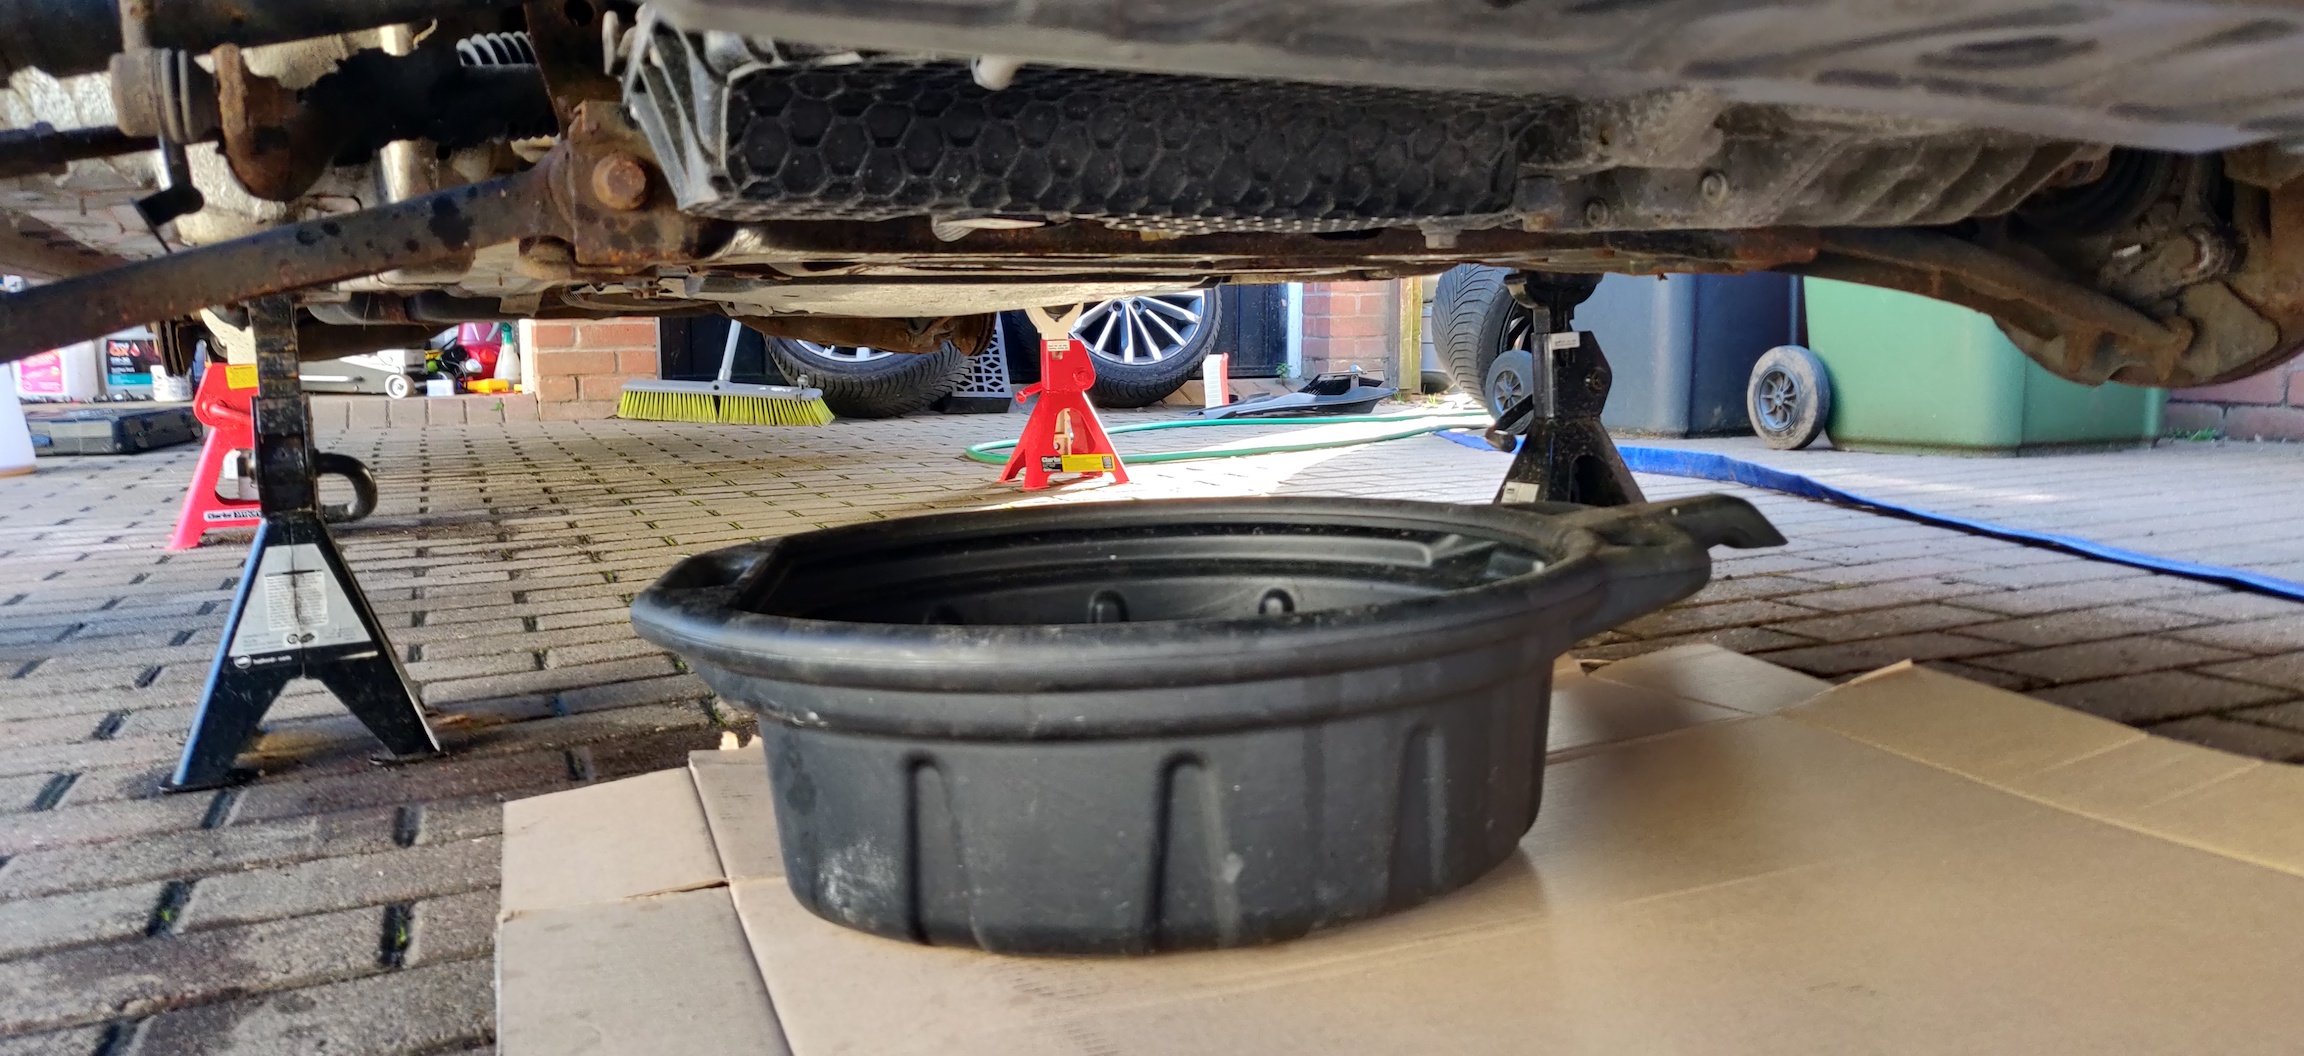
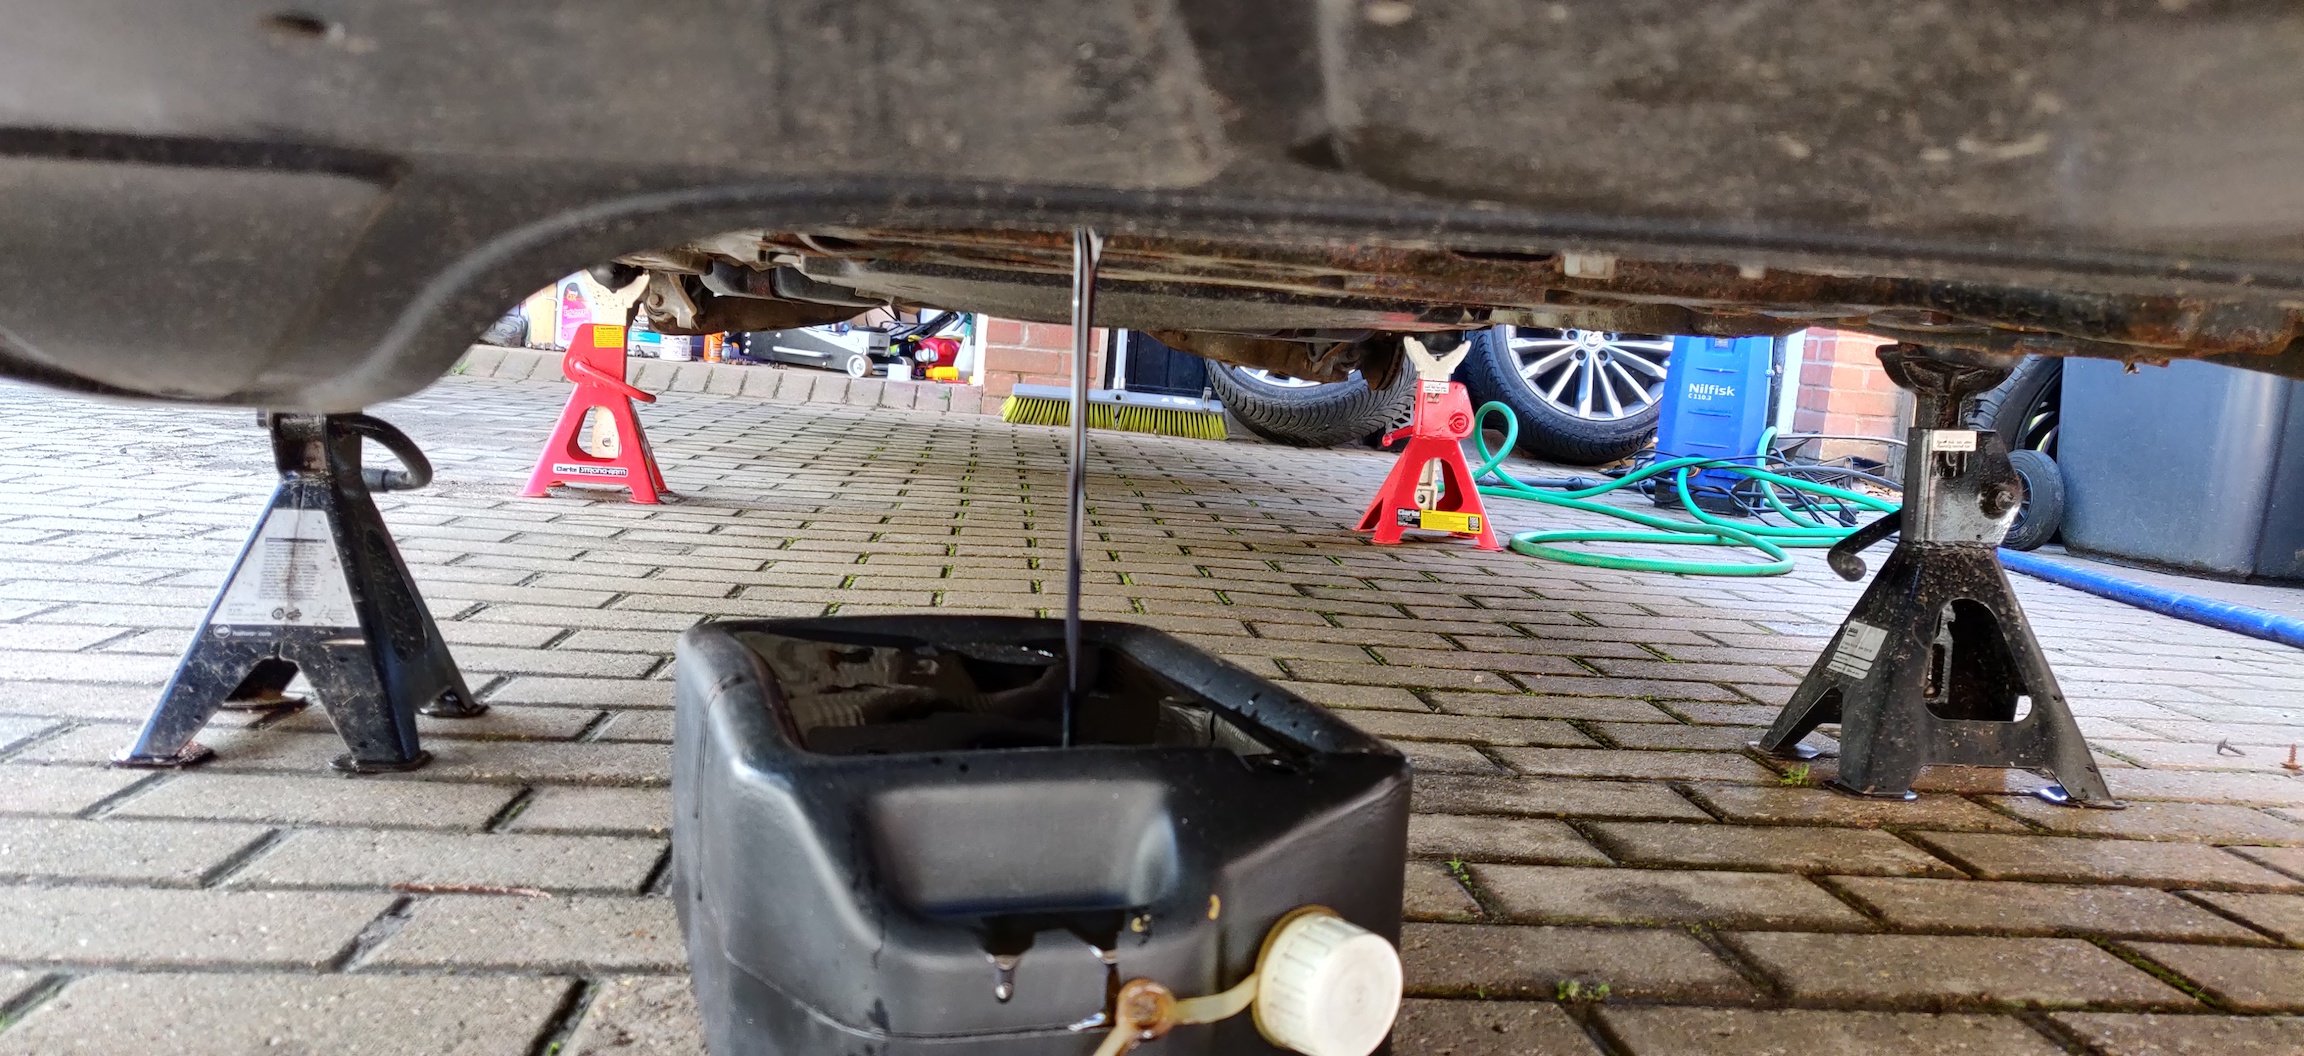
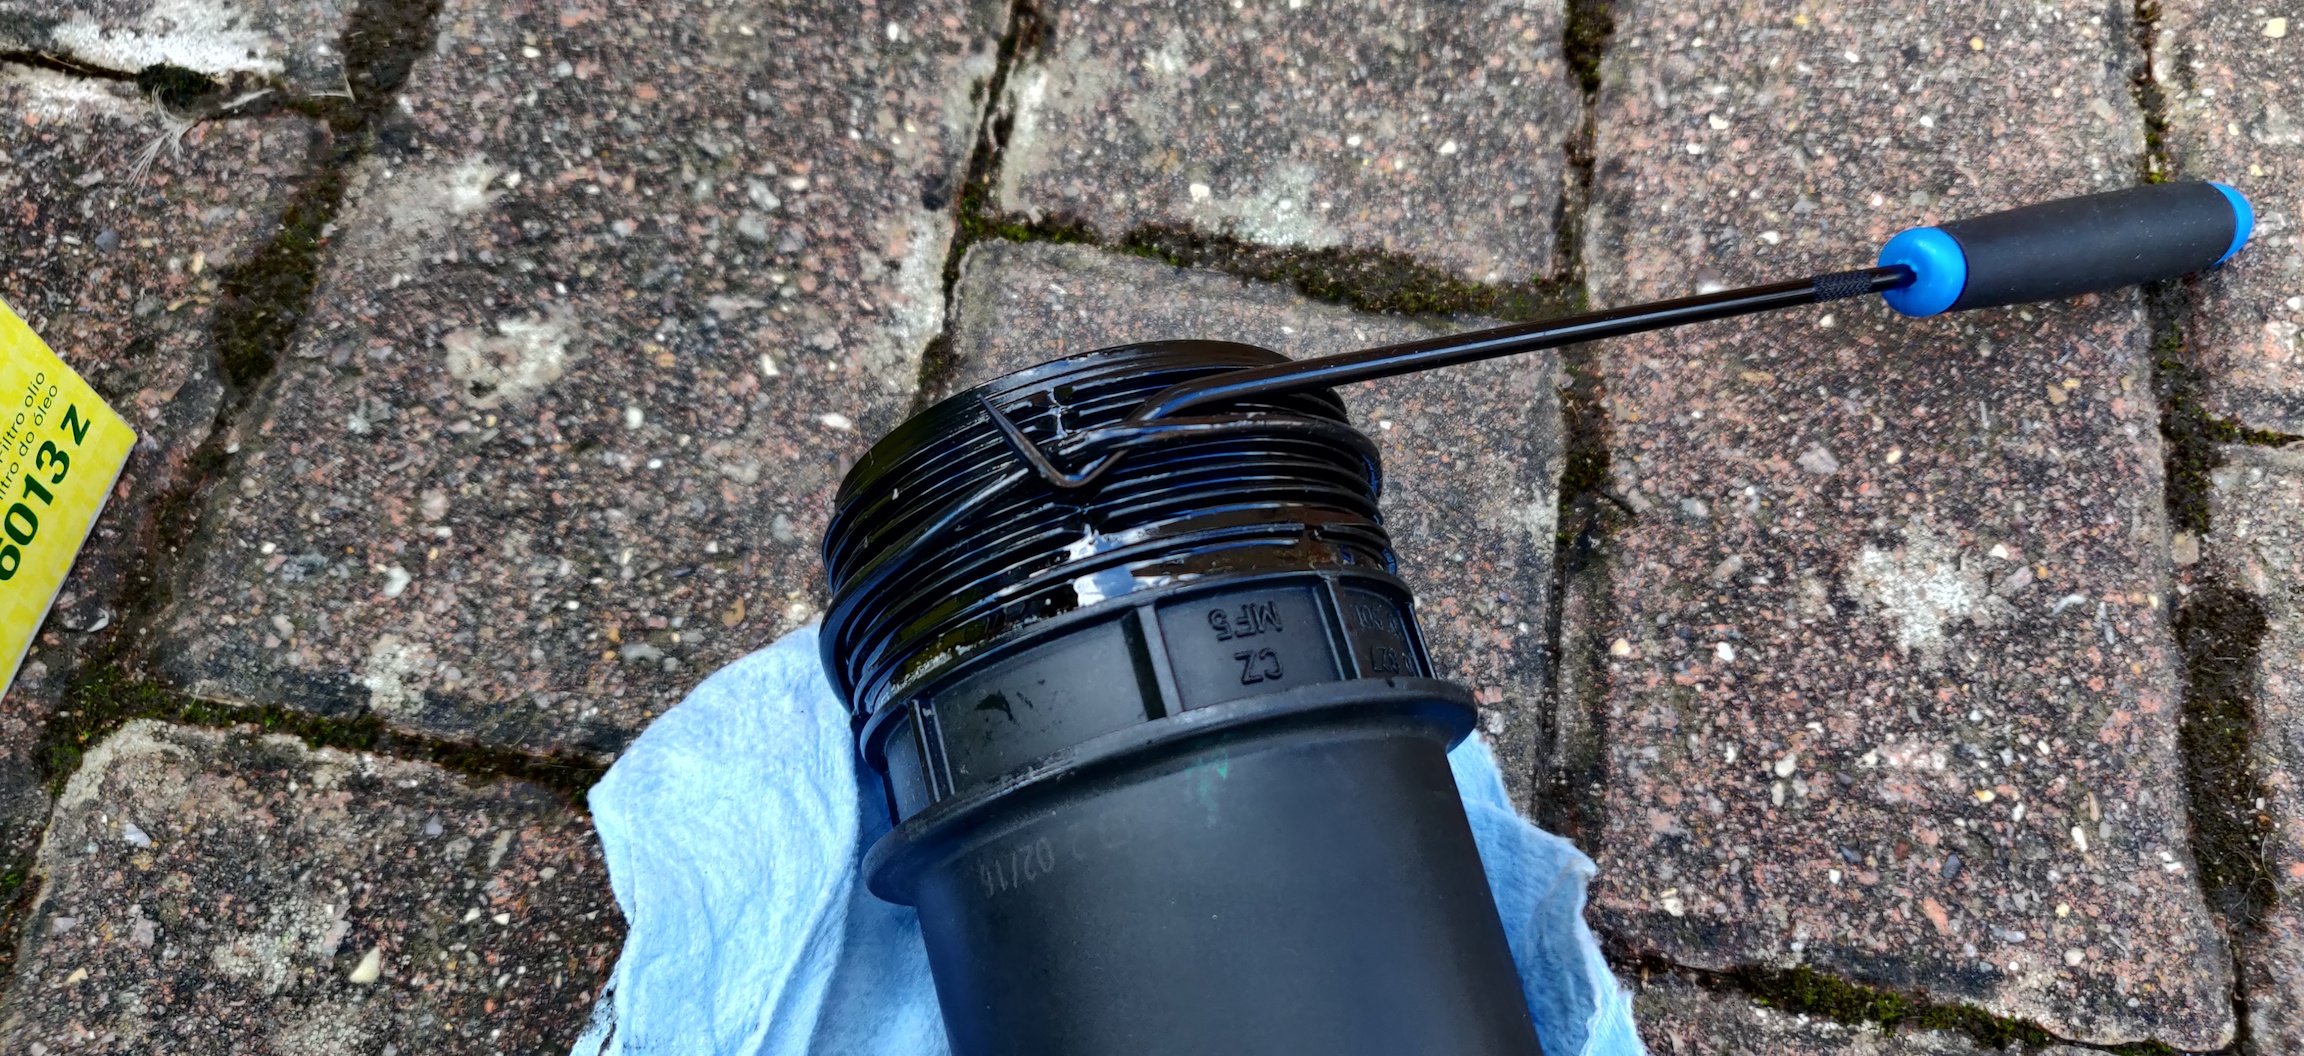
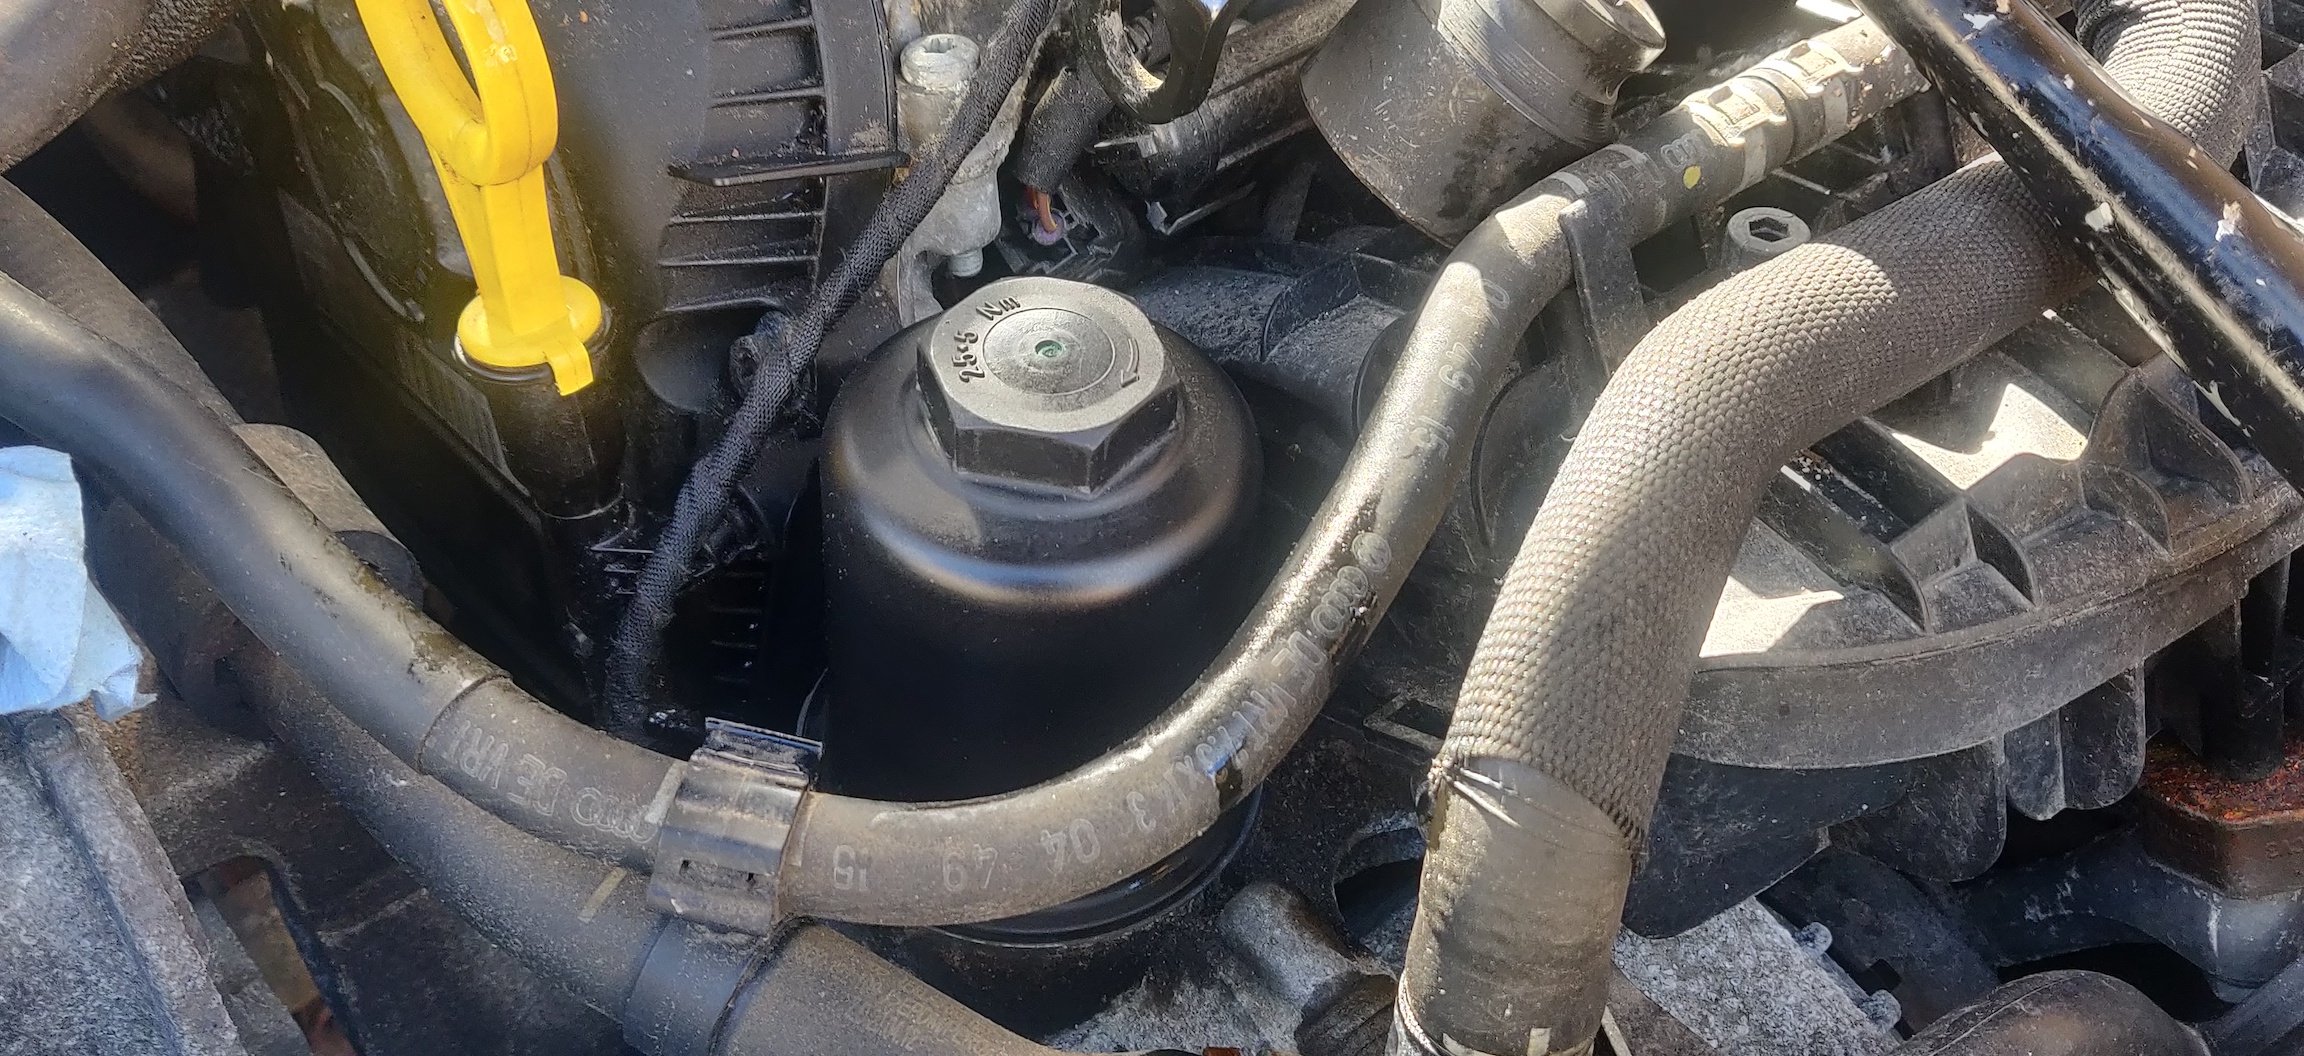
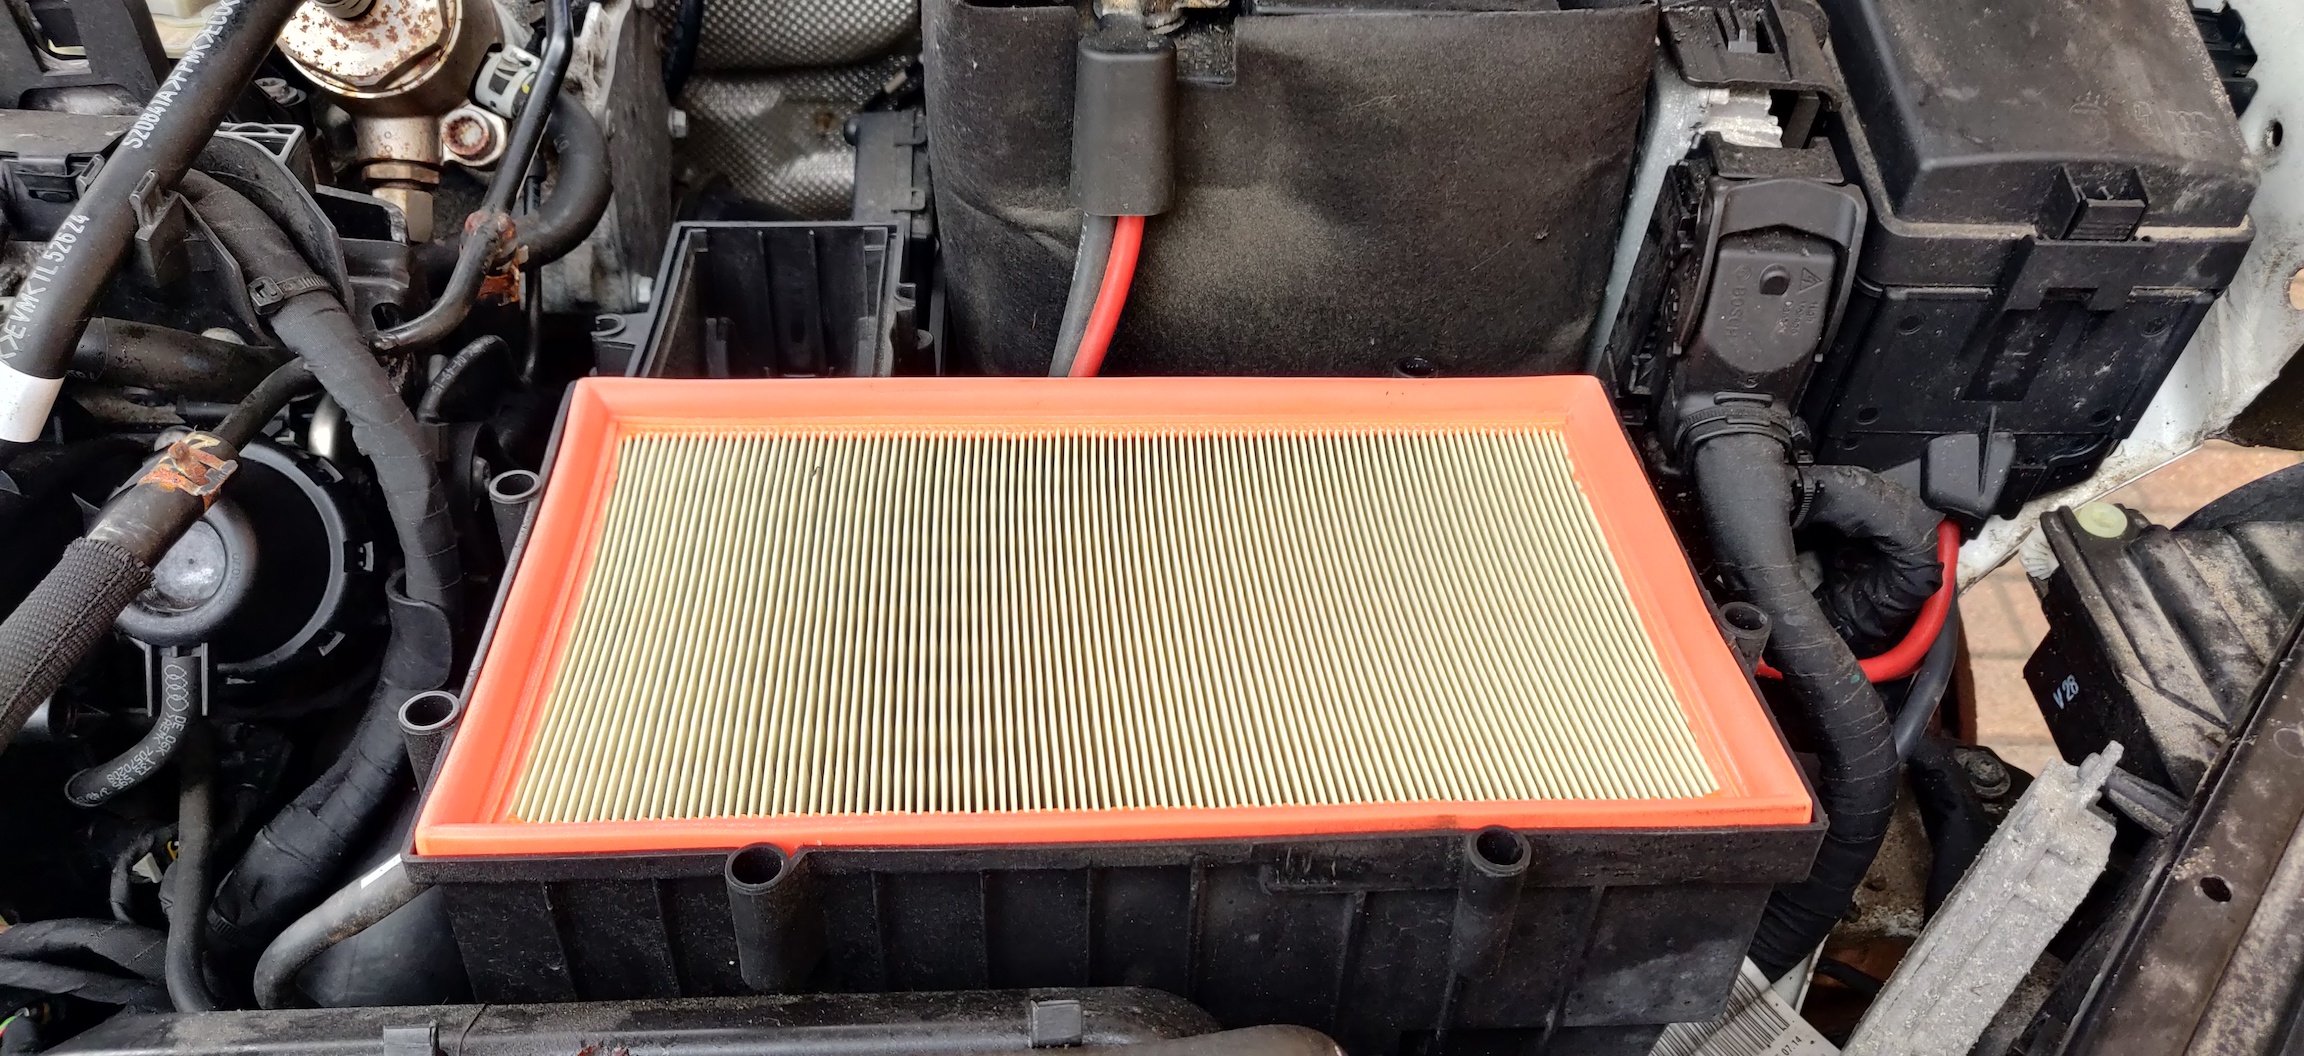
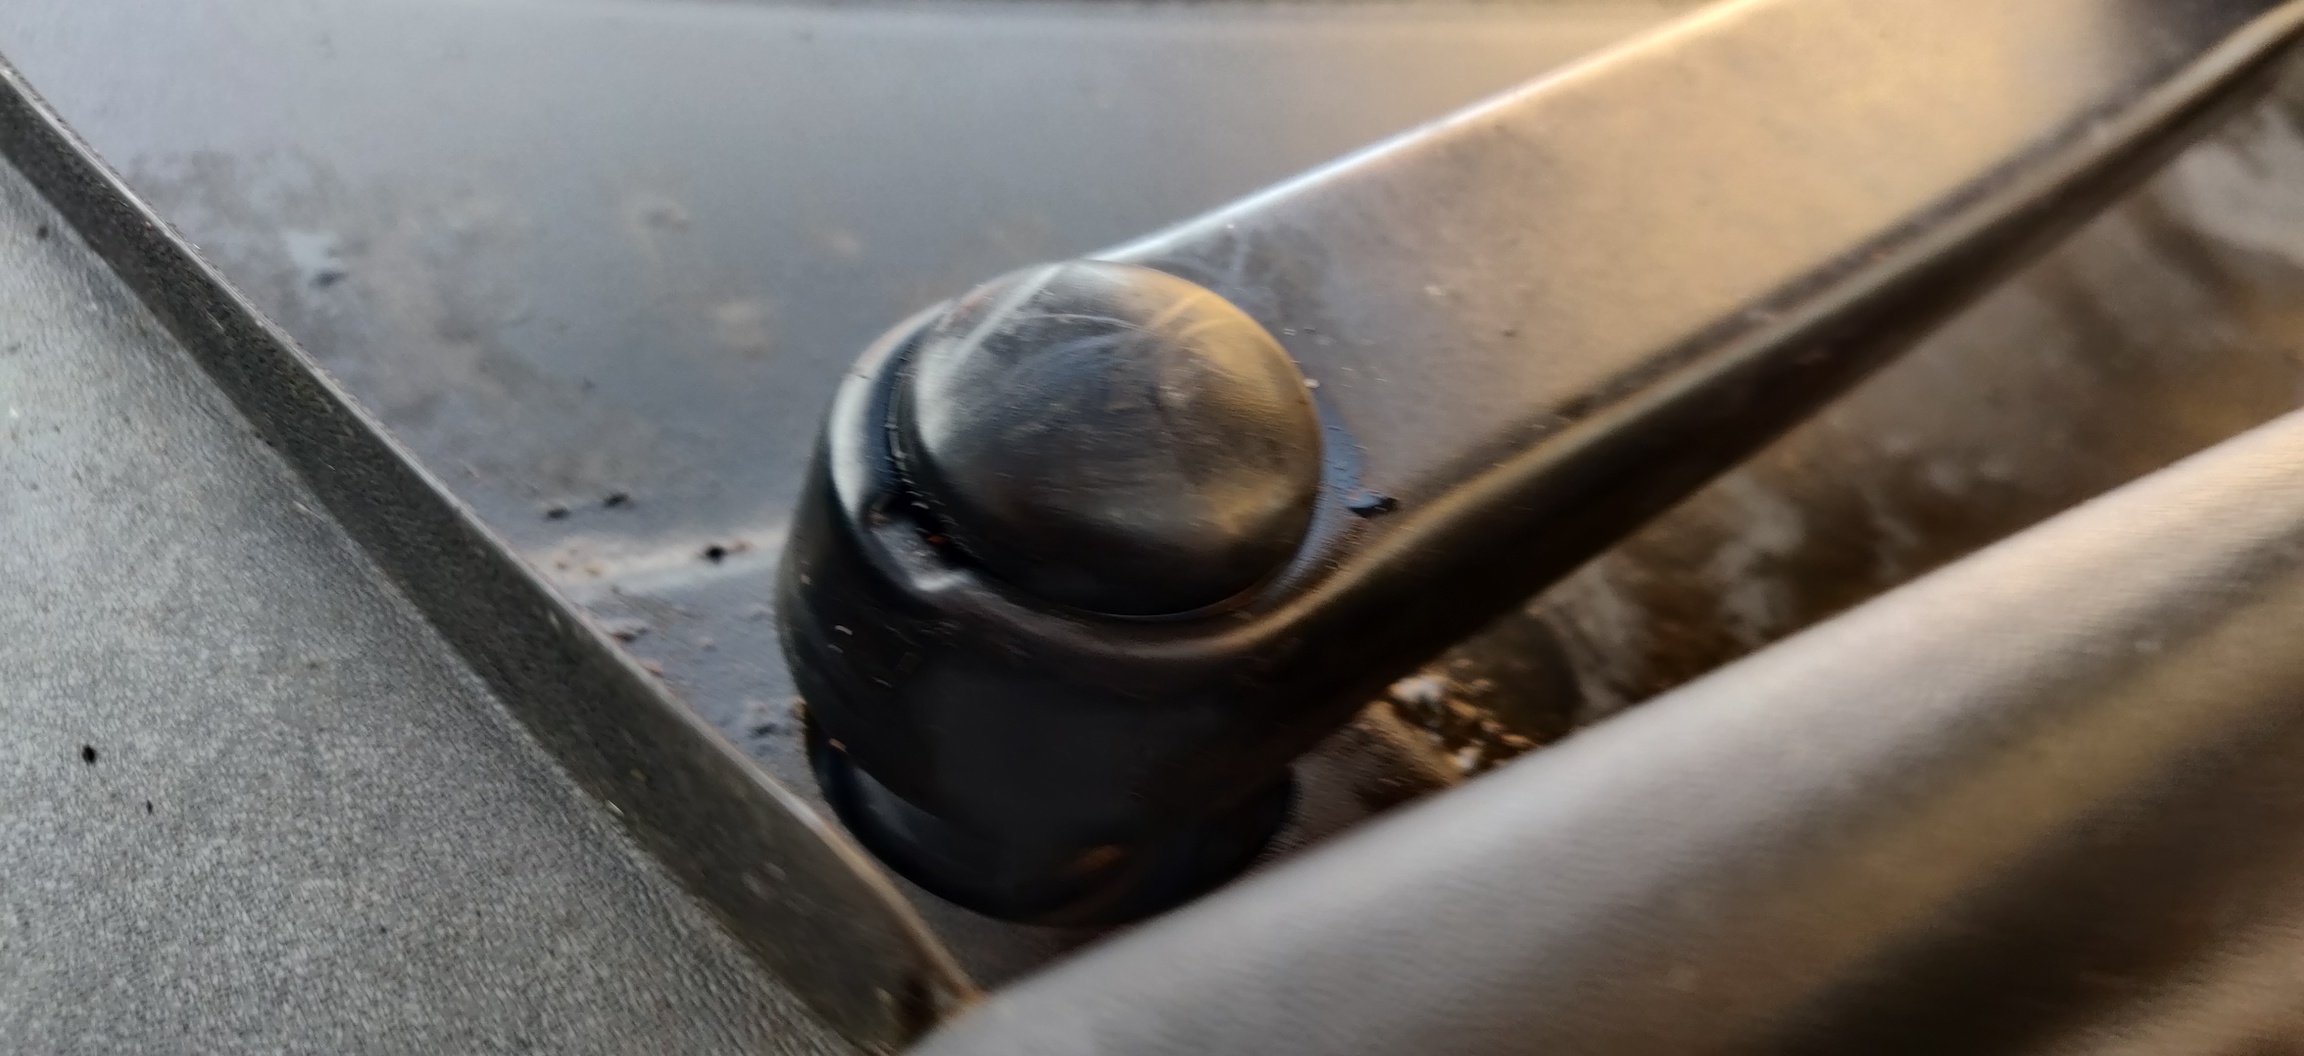
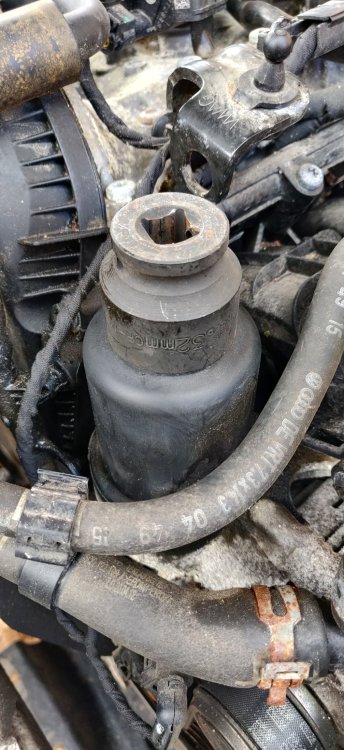
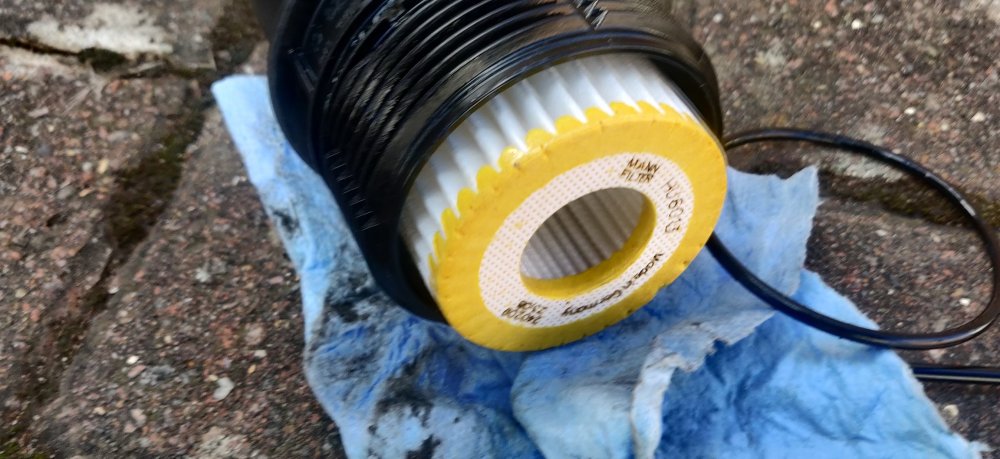
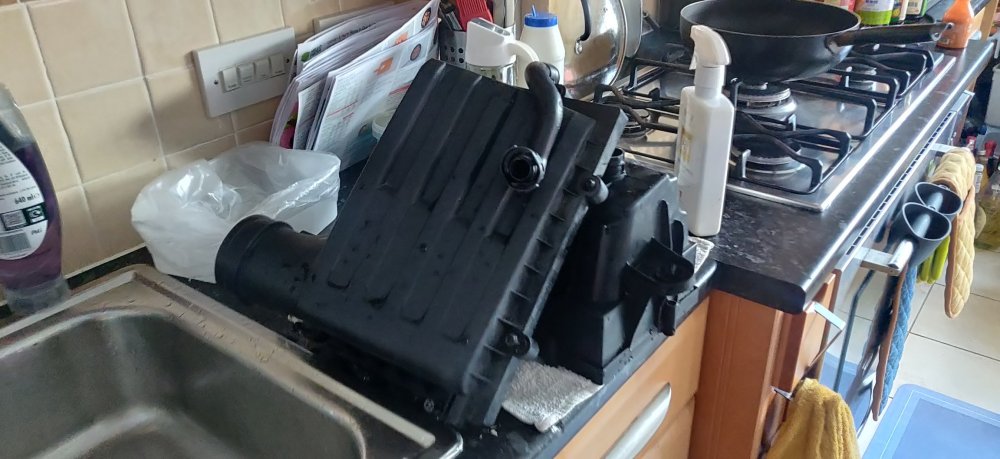
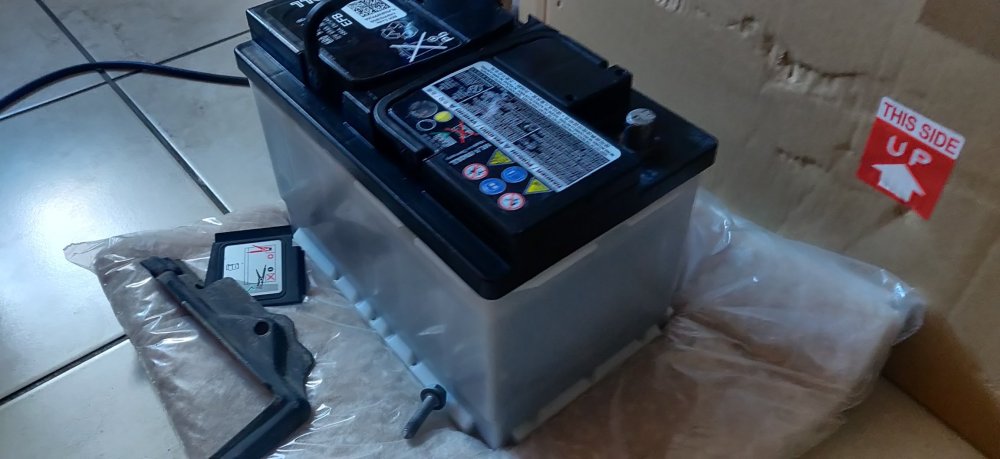
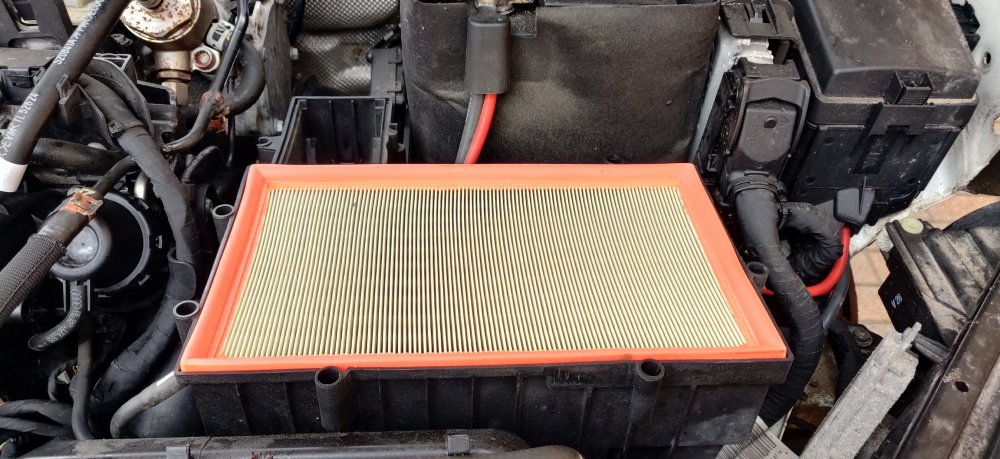
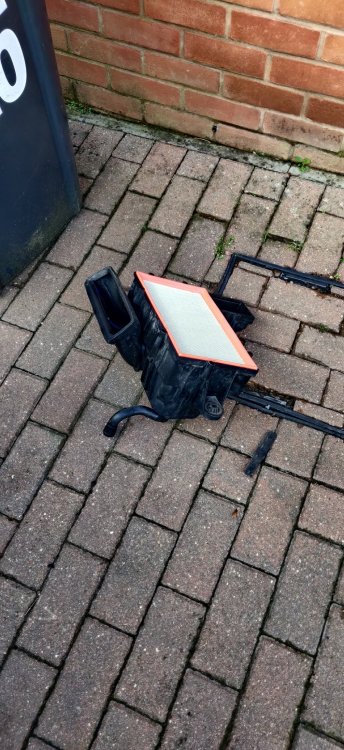
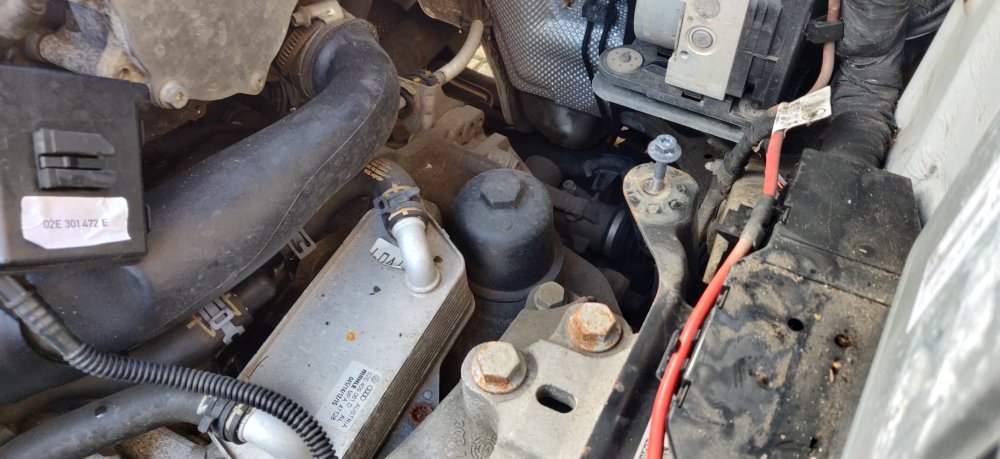
Suitably pumped from the spark plugs, decided to see if I can wiggle myself under the car enough to get at the sump: The answer is yes. I'm still surprised at seeing a sump made of plastic. The Honda Insight I have lightens things by having it made of magnesium, so I reckon less about weight and more about cost. Anyways, got a specific tool for this as per an earlier post. I panicked a bit as it looks like it didn't actually work, until it sank further in to the plug: Nice and solidly in there, so hopefully doesn't mangle the plug in the future. Out it goes: This is one of two drainage vessels I have. I have set aside the larger one for the DSG oil, but in all honesty, I've reached the point where this smaller one will be consigned to the bin: The afternoon had bouts of gusts. Not at the same intensity as the winds yesterday, but enough to start messing with the driveway, spraying the dripping oil everywhere. I'll have to get more cardboard. Anyways, decided to feign ignorance and deal with all this tomorrow, so turned to the oil filter: Luckily, I have a few large sockets for things like driveshaft nuts, so a 32mm socket is what is required for the oil filter housing. Seems to be a German thing having a housing for it rather than just chuck away the entire filter. The picks I bought in advance of this now in use: The old filter is pulled out, and the new one clicked into place: Not sure if there's an orientation, can always swap over if so. The replacement o-ring gets a slather of new engine oil, and is then inserted into the housing, and the whole thing screwed back into the engine: Gave the housing a wipe down and a coat of Autoglym Vinyl and Rubber Care. The housing itself states 25Nm, with a +5 as well, so I've tightened it to 25Nm for now. So that's nearly the engine oil change. Given the blustery wind blowing the dripping oil all over the place, I didn't rate my chances pouring fresh oil in, said blustery wind making it potentially go everywhere. I have sourced a specific pourer which might help I suppose, but I guess at this stage, I felt I've done a decent amount. So a few more random pics: Started to give the air filter housing a quick wash and scrub: Just gave it a quick over under the tap with a sponge and Fairy Liquid: Leaving these to dry and then give it a deeper clean probably on Monday, as the weather is forecast to be raining all day. Here's me being bored enough to wipe down the battery: That'll be the last time this battery gets any TLC I reckon as the next time it's out, it'll probably be replaced! Weather this weekend is supposed to be nice, and much less blustery, so I'll tackle the draining of the DSG oil, and maybe the Haldex as well. I'll probably need to remove some more under engine bay trim bits as well to reach the radiator hoses, as I'm presuming that'll need to be undone to drain the coolant. I should plan the brake fluid bleed as well, given there's actually no obstacles stopping that from happening. Maintenance: £1806.50 Upgrades: £952.09 Miscellaneous: £631.67


-
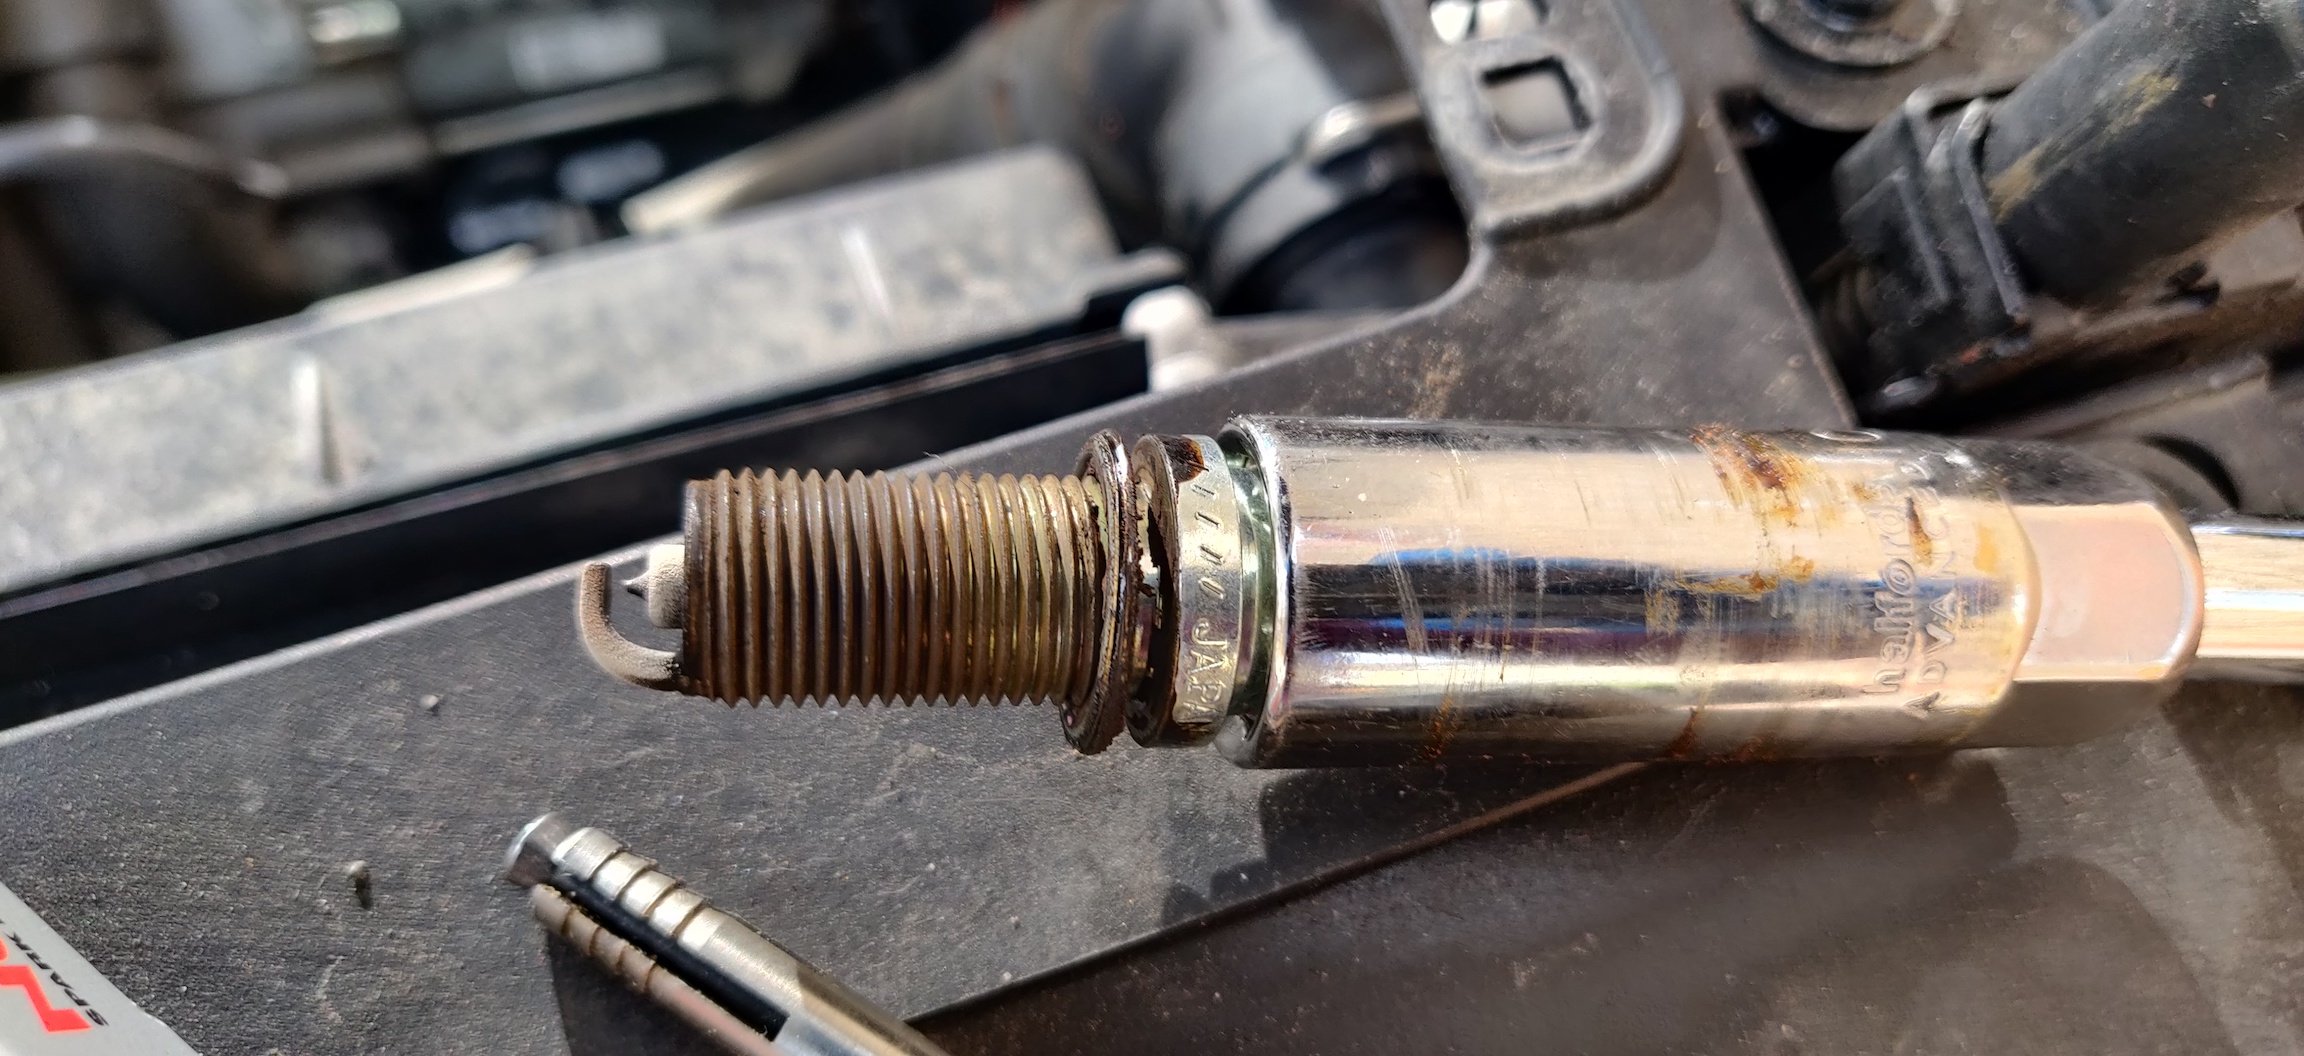
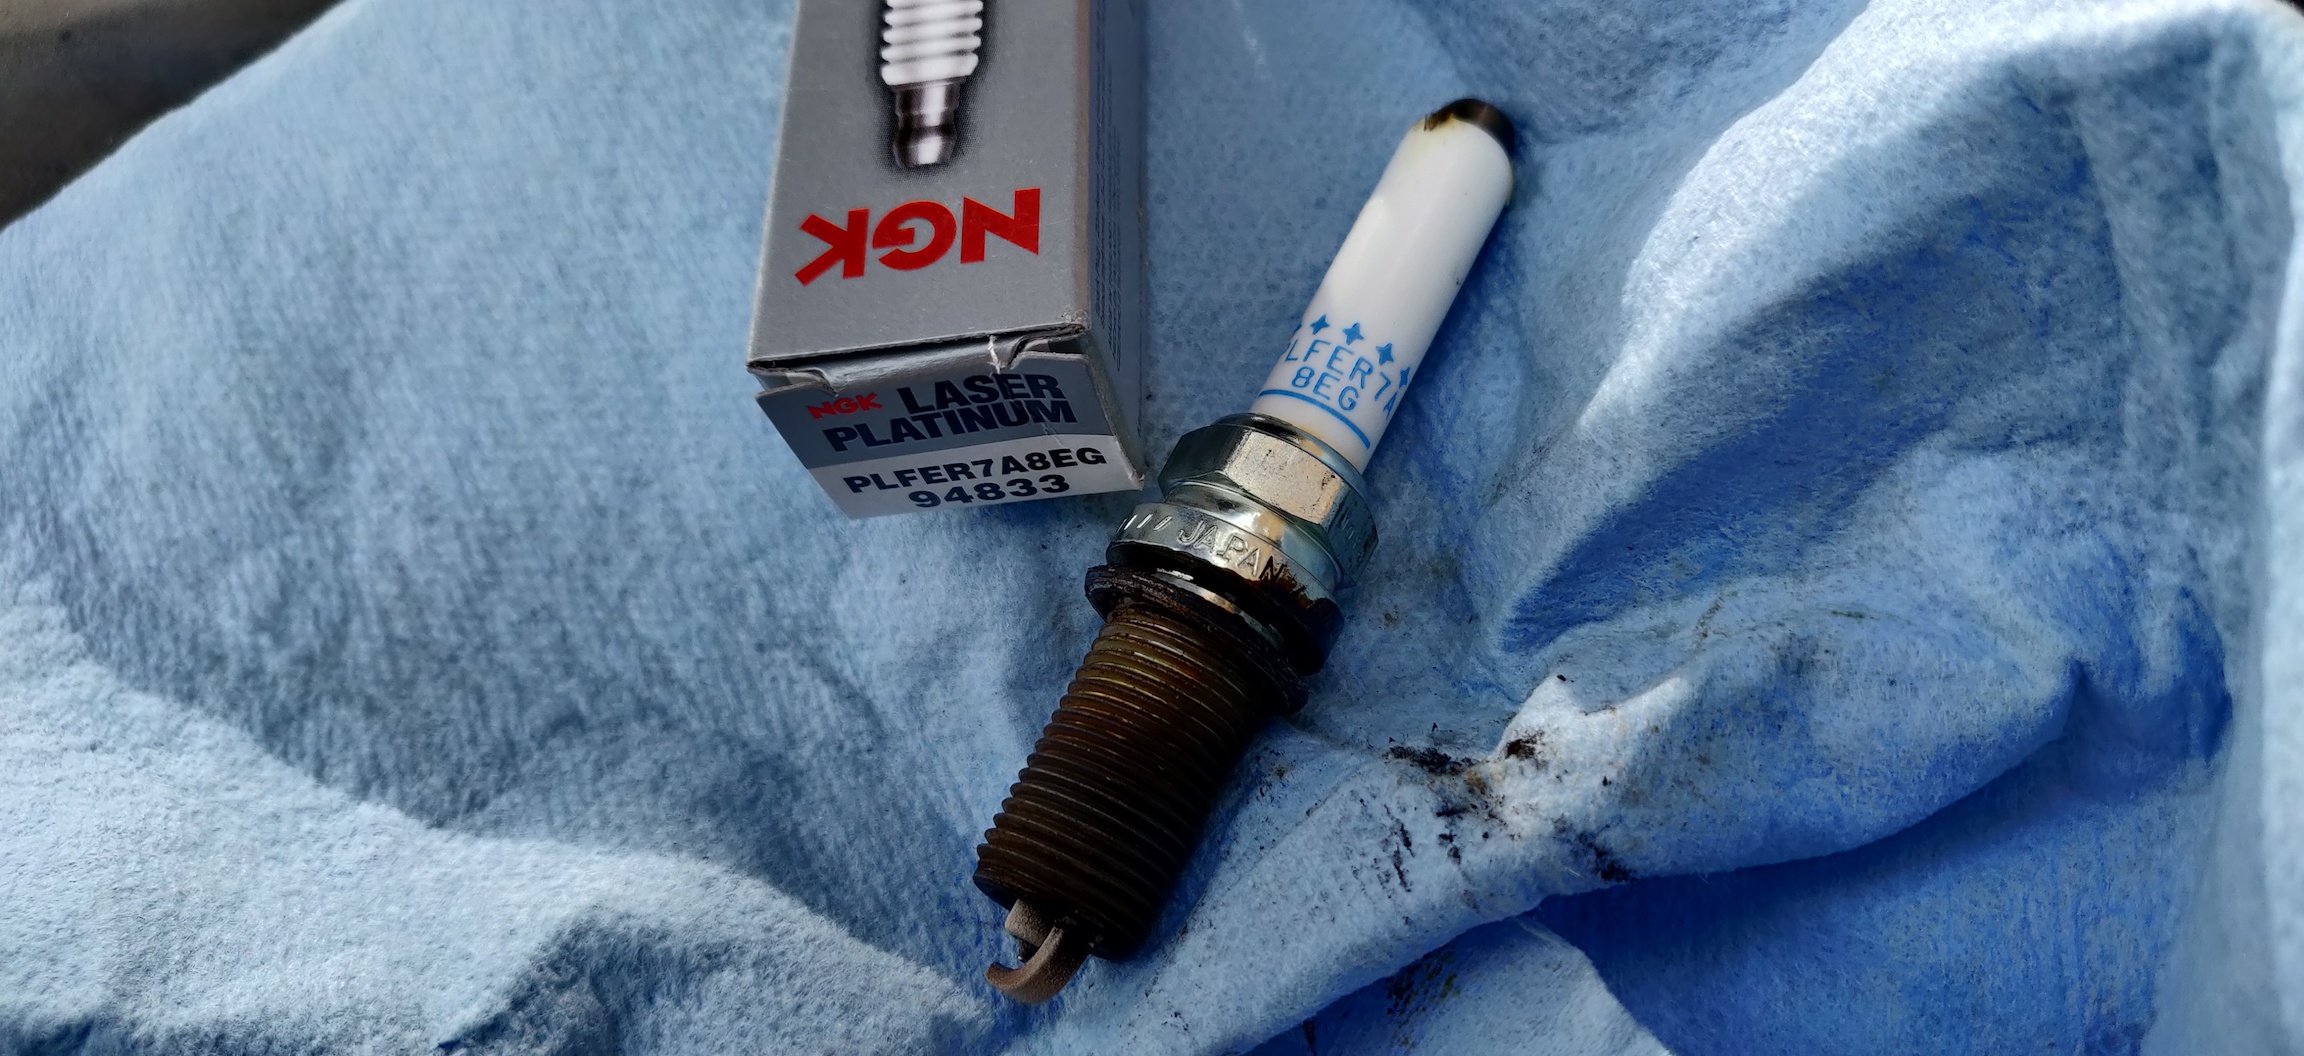
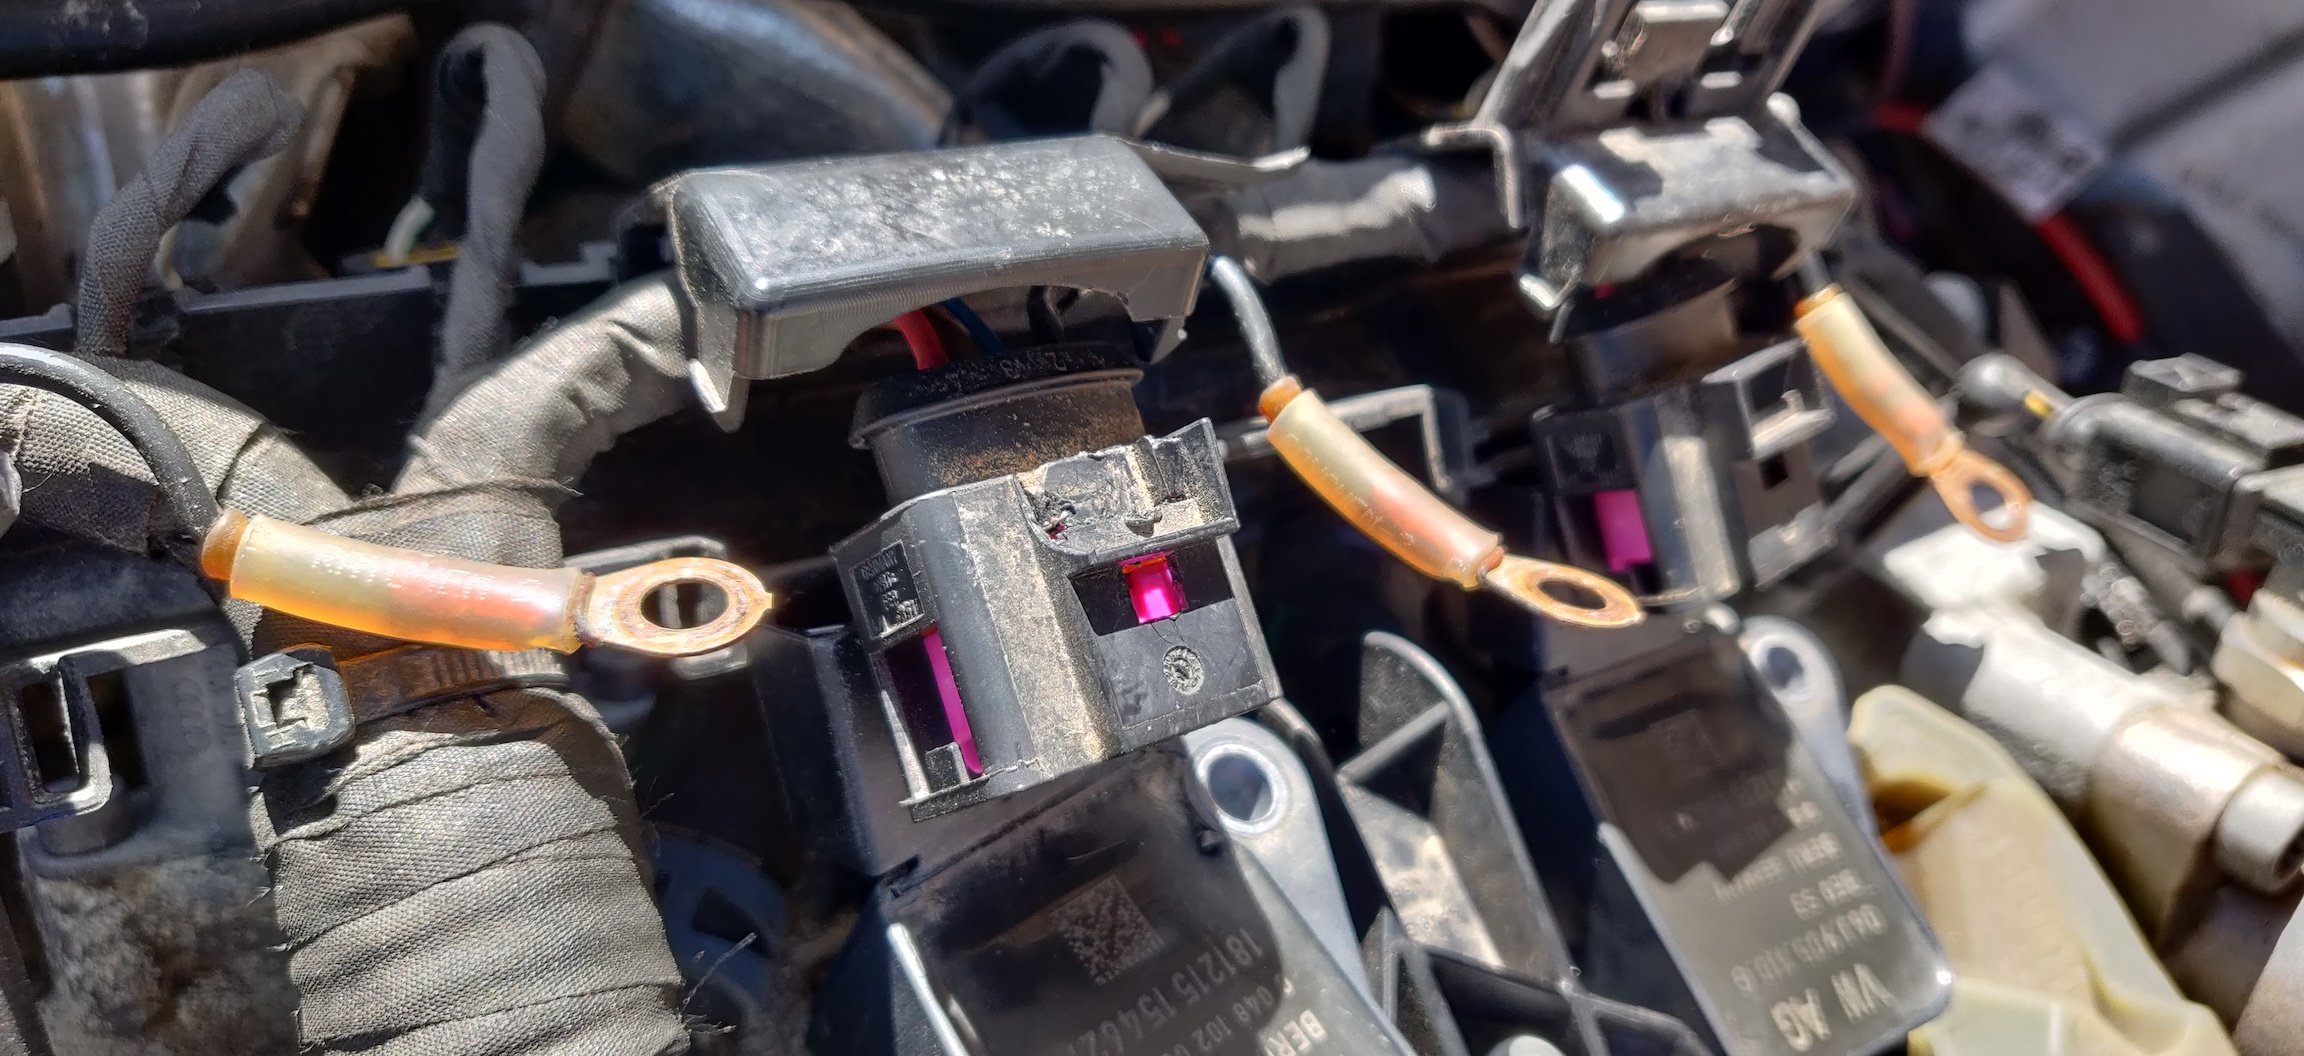
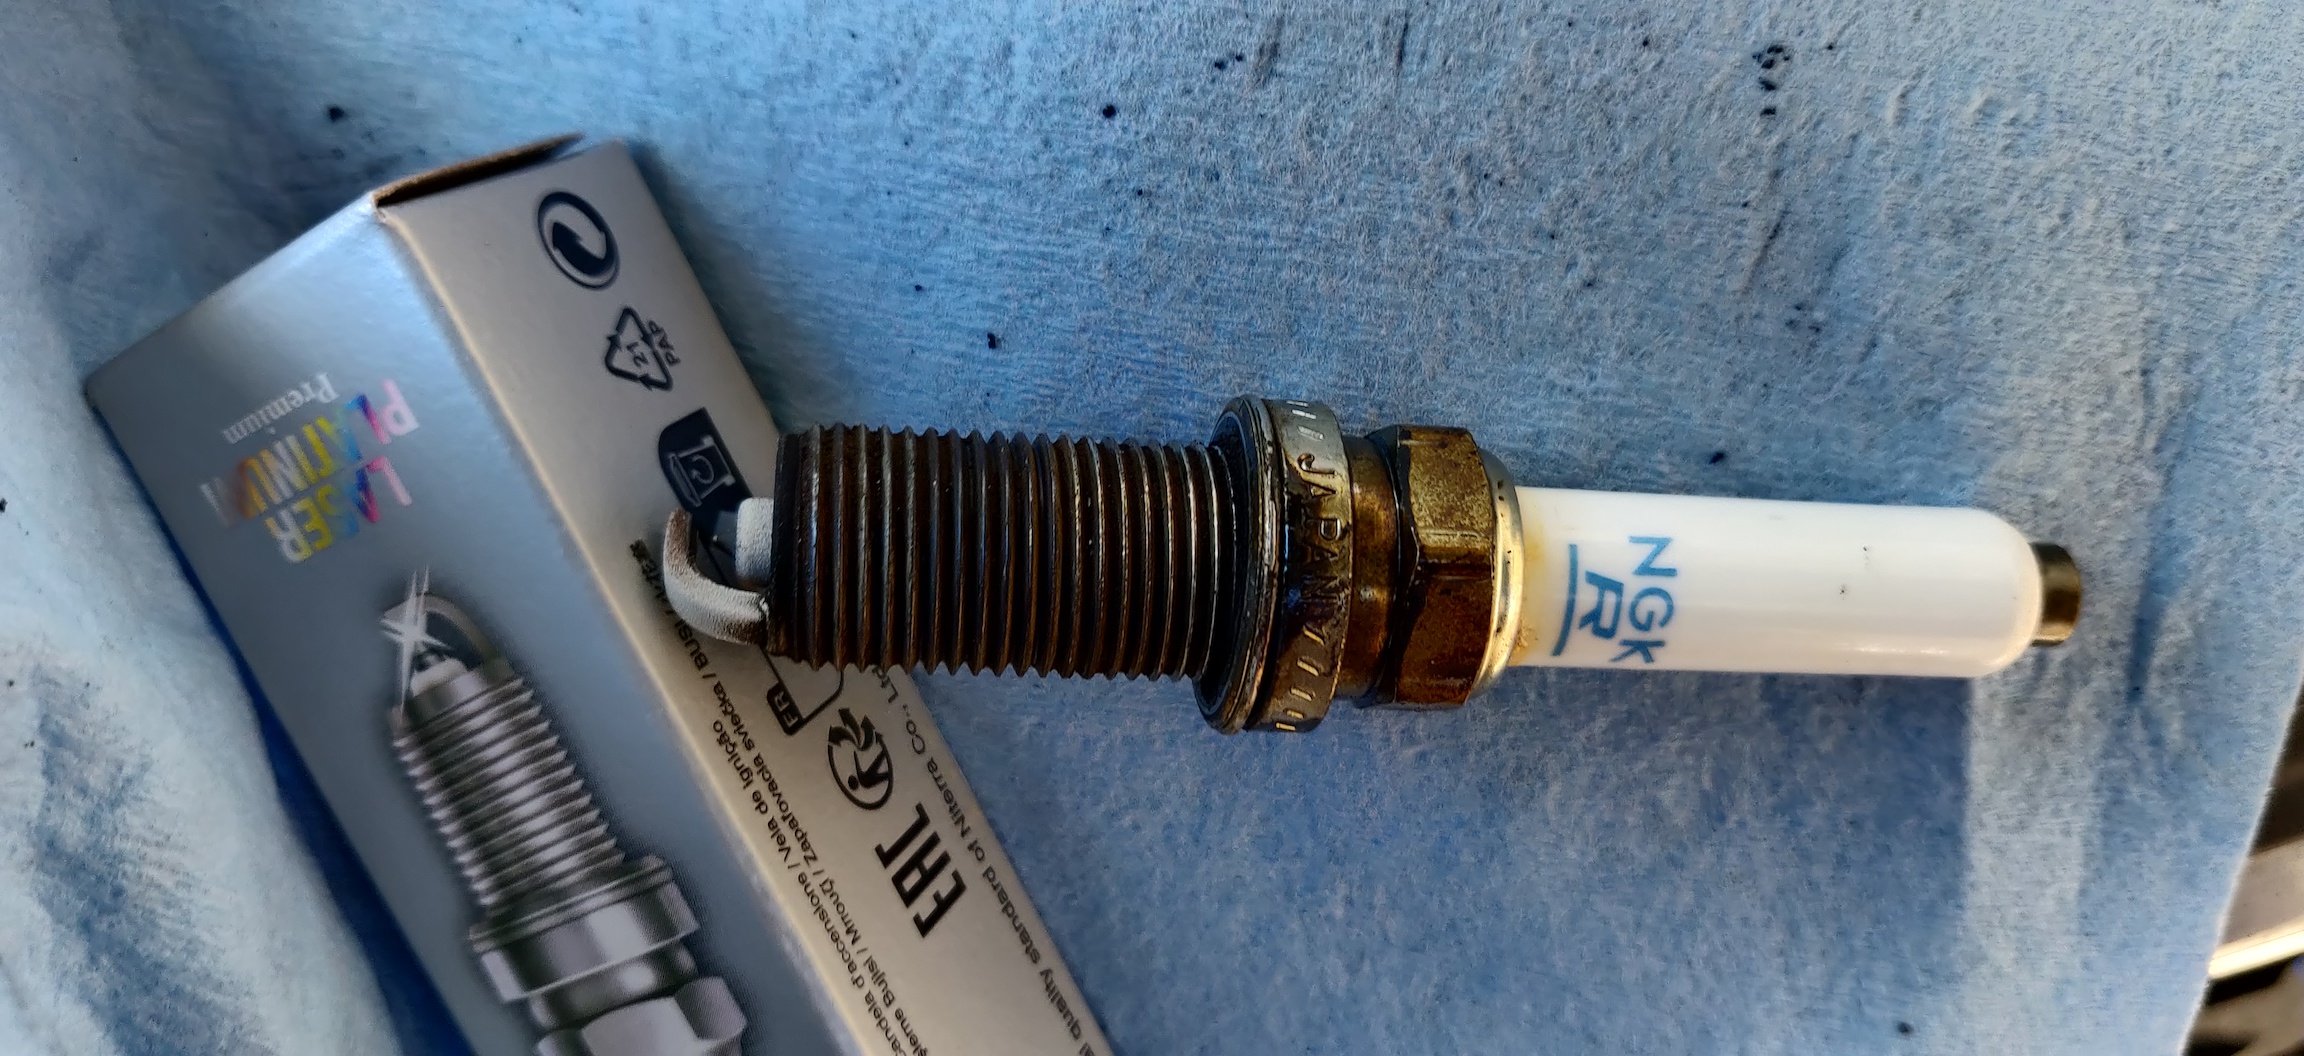
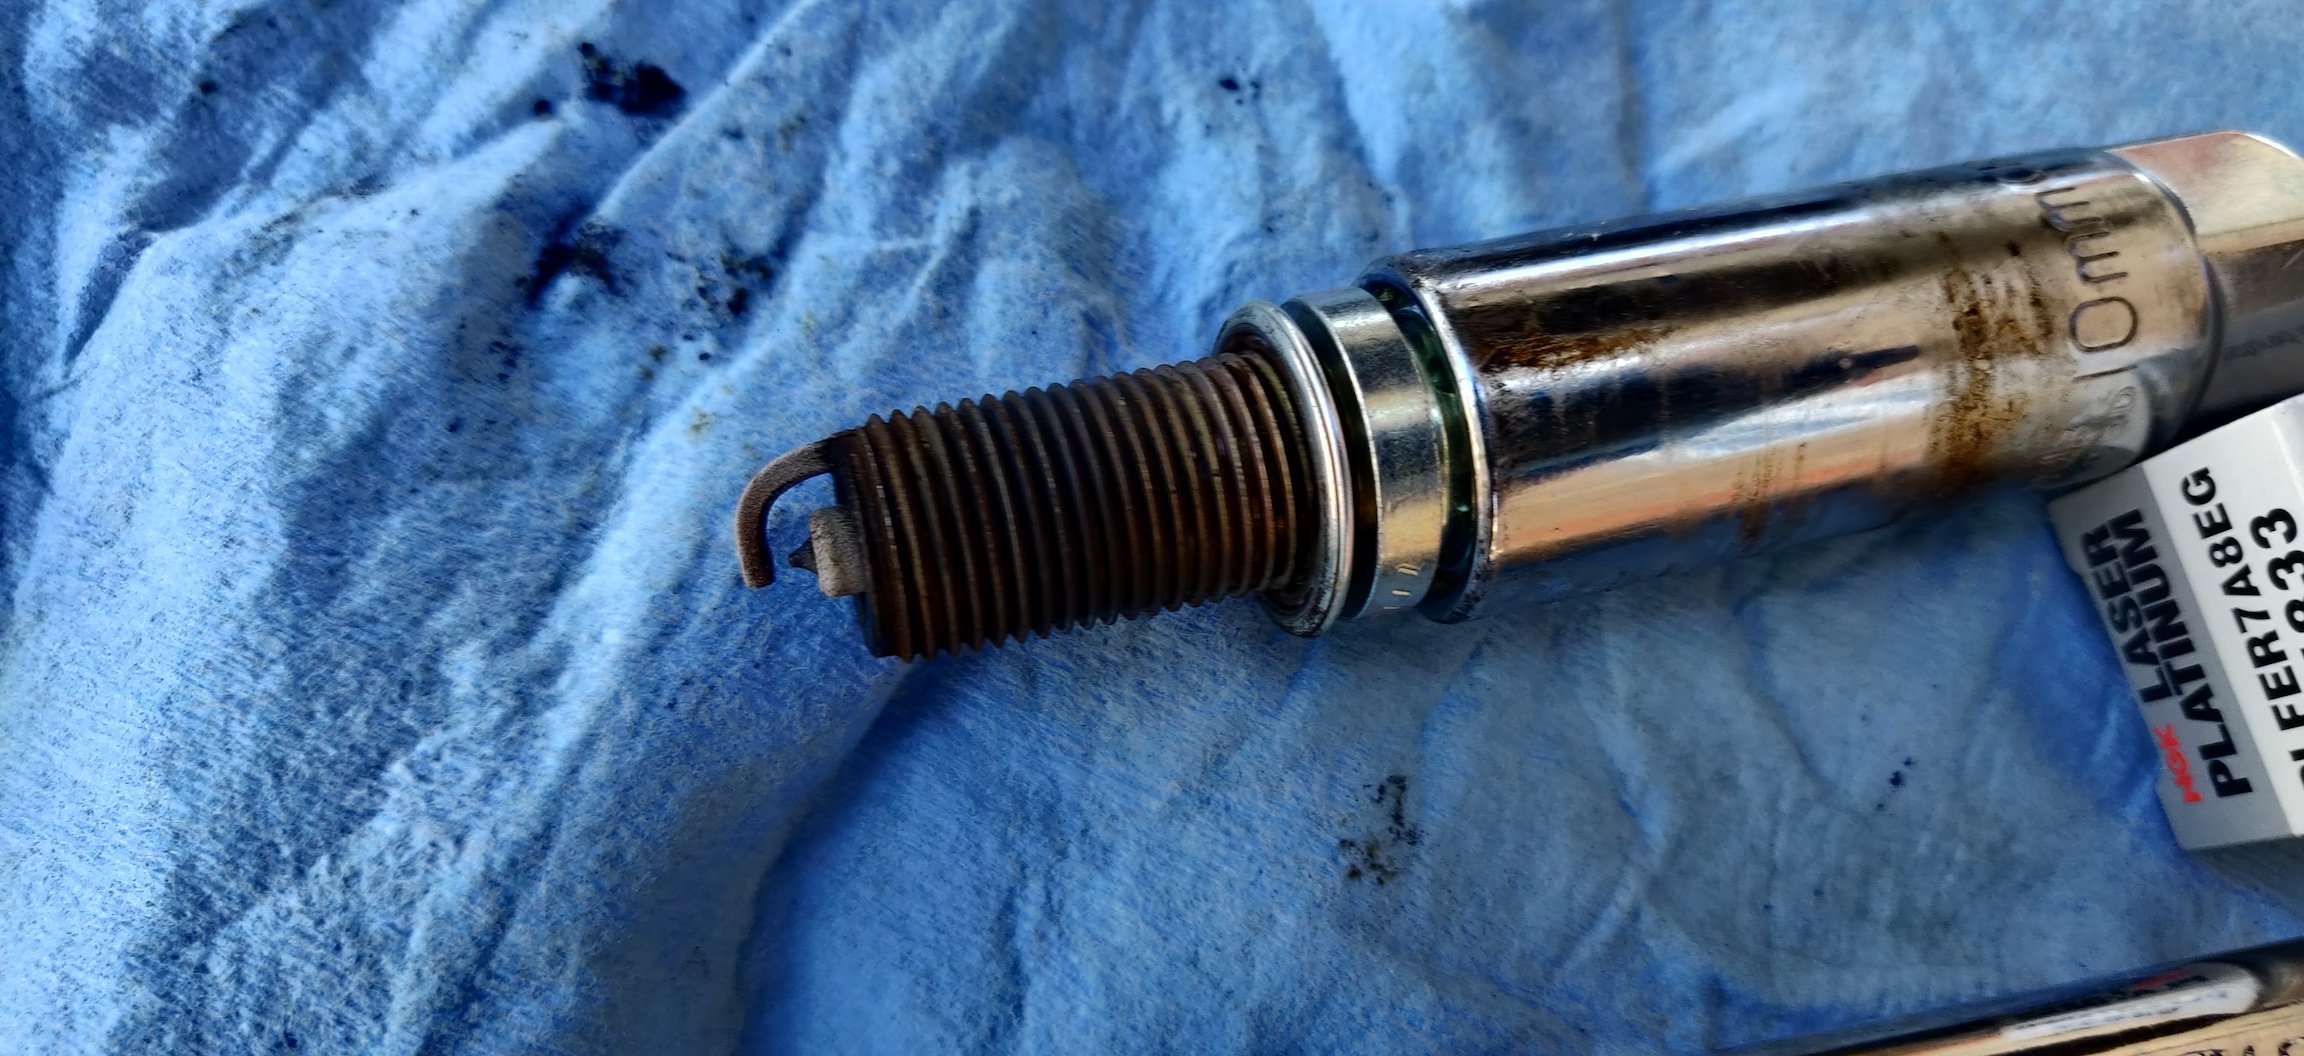
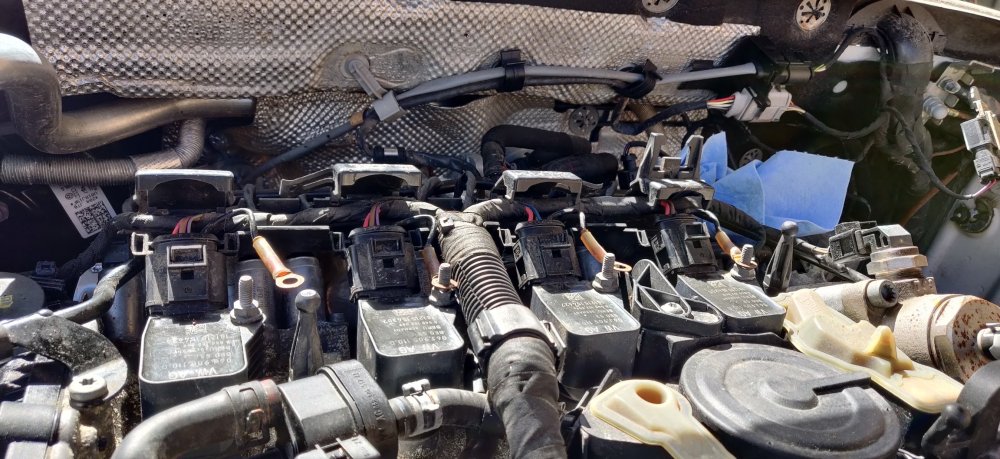
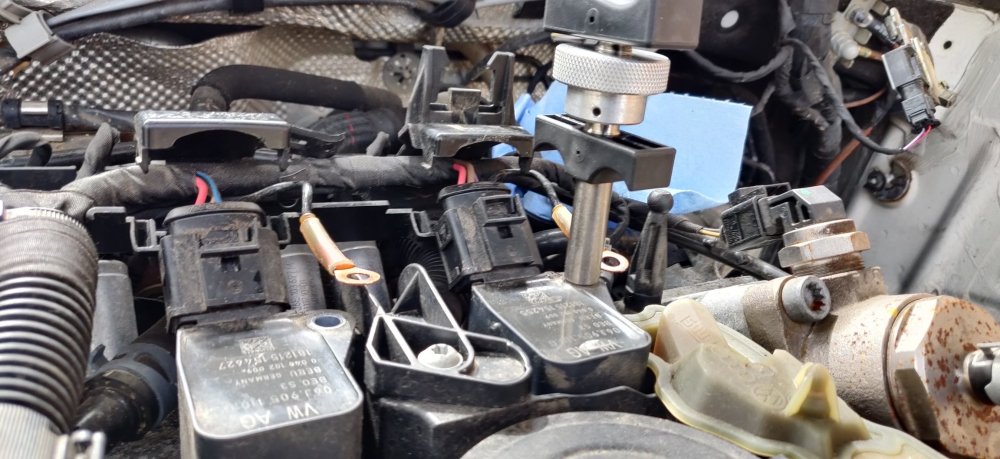
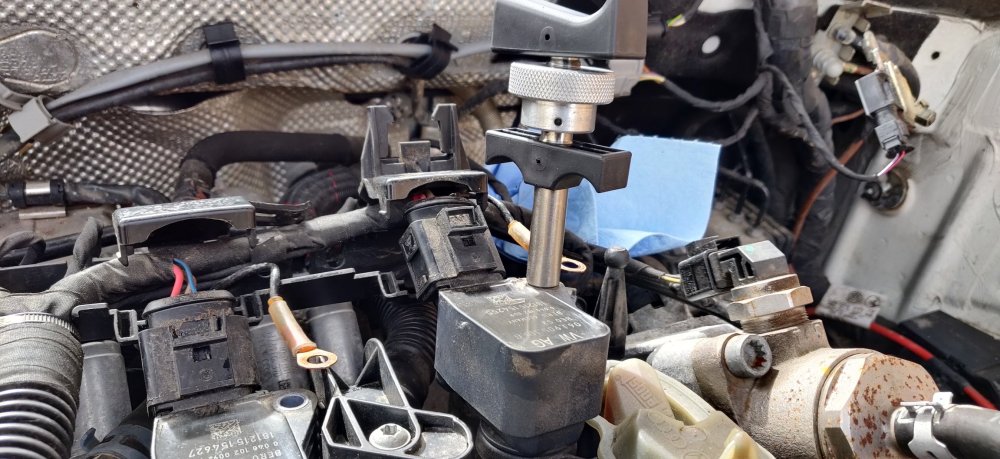
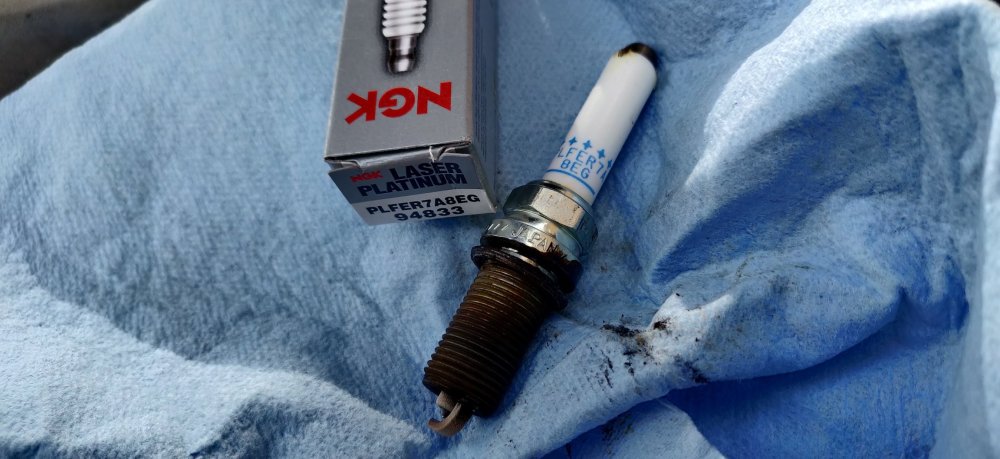
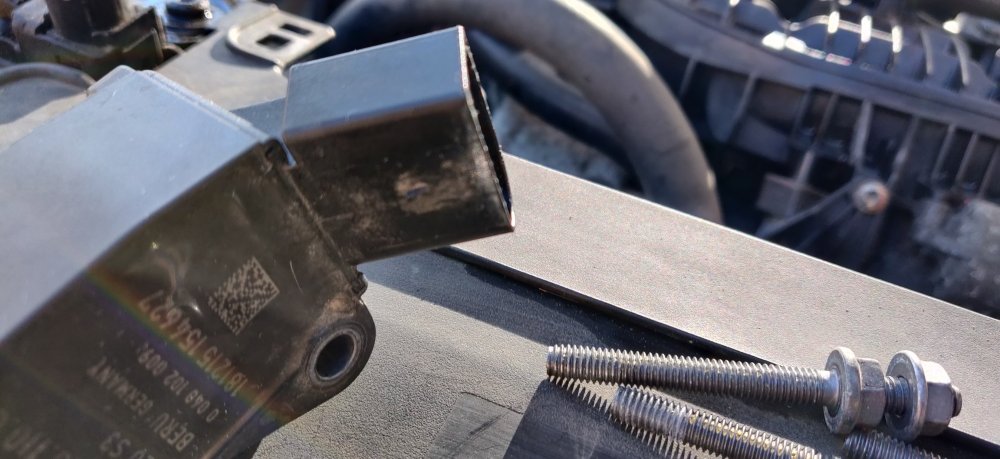
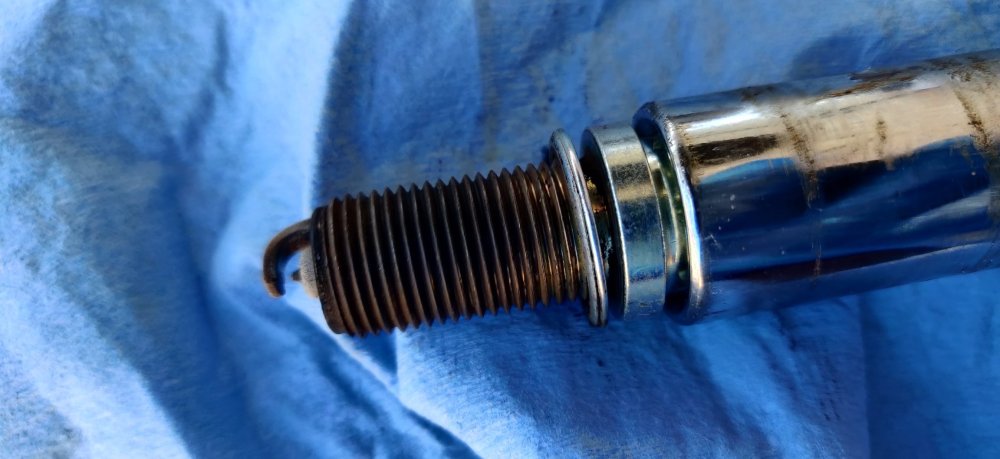
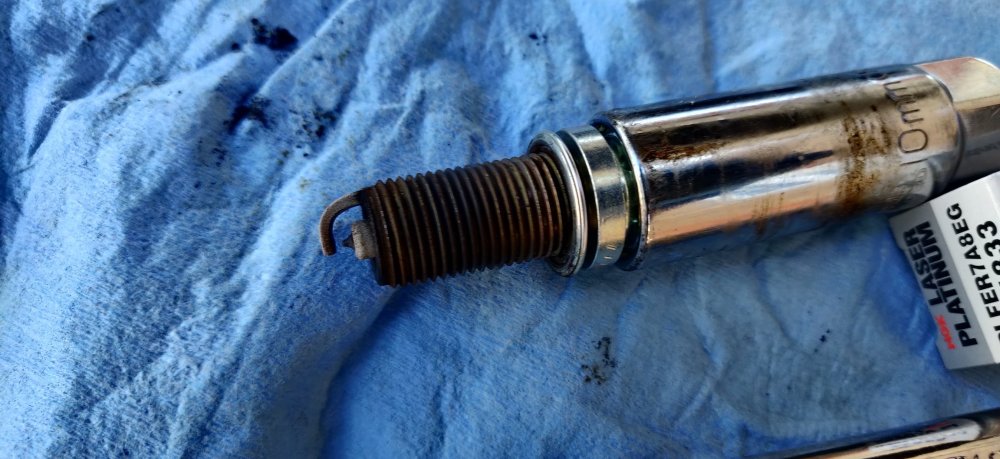
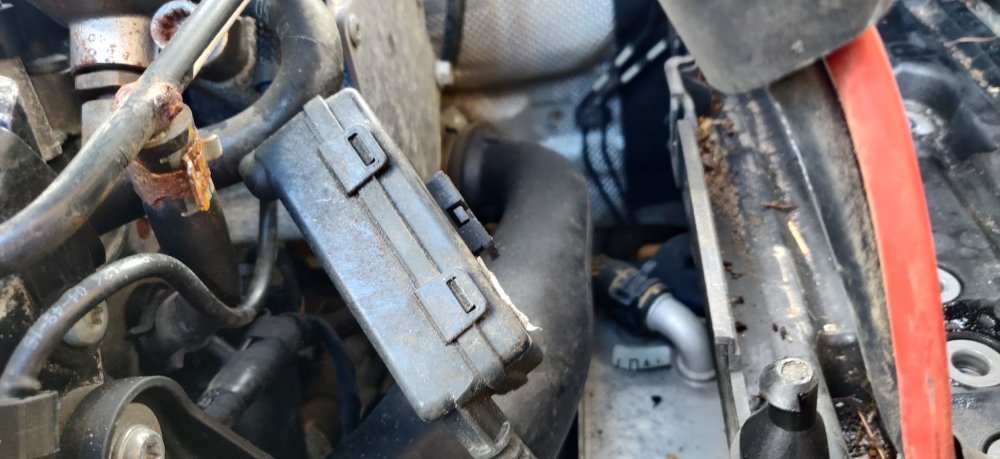
Eventually, I may need to lift the car higher in order to make things like the Haldex and DSG oil changes a little more easier. If I do that though, I'll definitely struggle to reach the top of the engine bay as I'm on the short side. That'll be my reasoning for tackling the spark plugs. I'm immediately stumbled by how contrived the wiring connectors are for this. The connectors are pretty much the same as what I've seen in the past (brother used to have A3 1.4 TFSI, so the same connectors). But this car also has a plastic frame or cradle or whatever which looks like it's to cover some of the exposed wiring, and maybe keep things together. So some fumbling, and the use of the thin screwdriver again, something pops up: I still couldn't really pull the connectors out for whatever reason, so decided maybe if the coil packs could be lifted out then maybe that'd give me a better angle at figuring things. I bought one of these: Another thing from eBay, £13.54. This is similar to what I see on the workshop manual, designed for pulling these things out. So once the nut for the copper rings are undone, and the longer bolt removed for the coil packs, you insert this tool into the recess, and screw the knurled knob until the tool feels tightened to the coil pack. You then grab it and give it a go: Then it pops out, feels like a couple of times actually. The connector stops the coil pack coming out freely, but now that its raised, it gave a bit more purchase. Using a thin screwdriver, I gently wedged the top part of the connector until I head a faint click. That was my cue to pull the connector with a bit of intent. This then disconnects the connector. Didn't take pics of this bit, as I was starting to get miffed with these connectors. For this first coil pack, it was removed, and a spark plug socket with an extension plonked down and essentially the first spark plug is lifted and removed: I'll have to swot up on the internet about spark plugs after some use, but this doesn't look like anything of concern. Checked the removed spark plug with the new ones: Exactly the same part number, PLFER7A8EG. So got the new one out, a bit of copper grease on the threads, and then use the spark plug socket to get the new one in. This is then tightened to 30Nm: Now, the second connector the coil pack: Had its latch part already broken. Such is life. Not sure how, but as per the pic above, it did disconnect, it could well be because it kind of doesn't lock into place: The latch on the coil pack itself is also missing. So I guess I'd need to source both a connector and coil pack if I really cared. I don't think I'm the only person in the world who's encountered this so I reckon replacement connectors are probably easy to find. Anyways, repeat for the other spark plugs: They all pretty much look the same in terms of them having a sooty finish on the threads. No idea if that's good, but the consistency amongst them is probably a good sign. I've torqued the long bolts for the coil pack to 10Nm, but I've left it there. I'll leave the final connecting up later, depending on whether replacement connectors are easy/cheap to source. Regardless, this is my first mechanical task complete! Maintenance: £1806.50 Upgrades: £952.09 Miscellaneous: £631.67 (+£13.54)


-
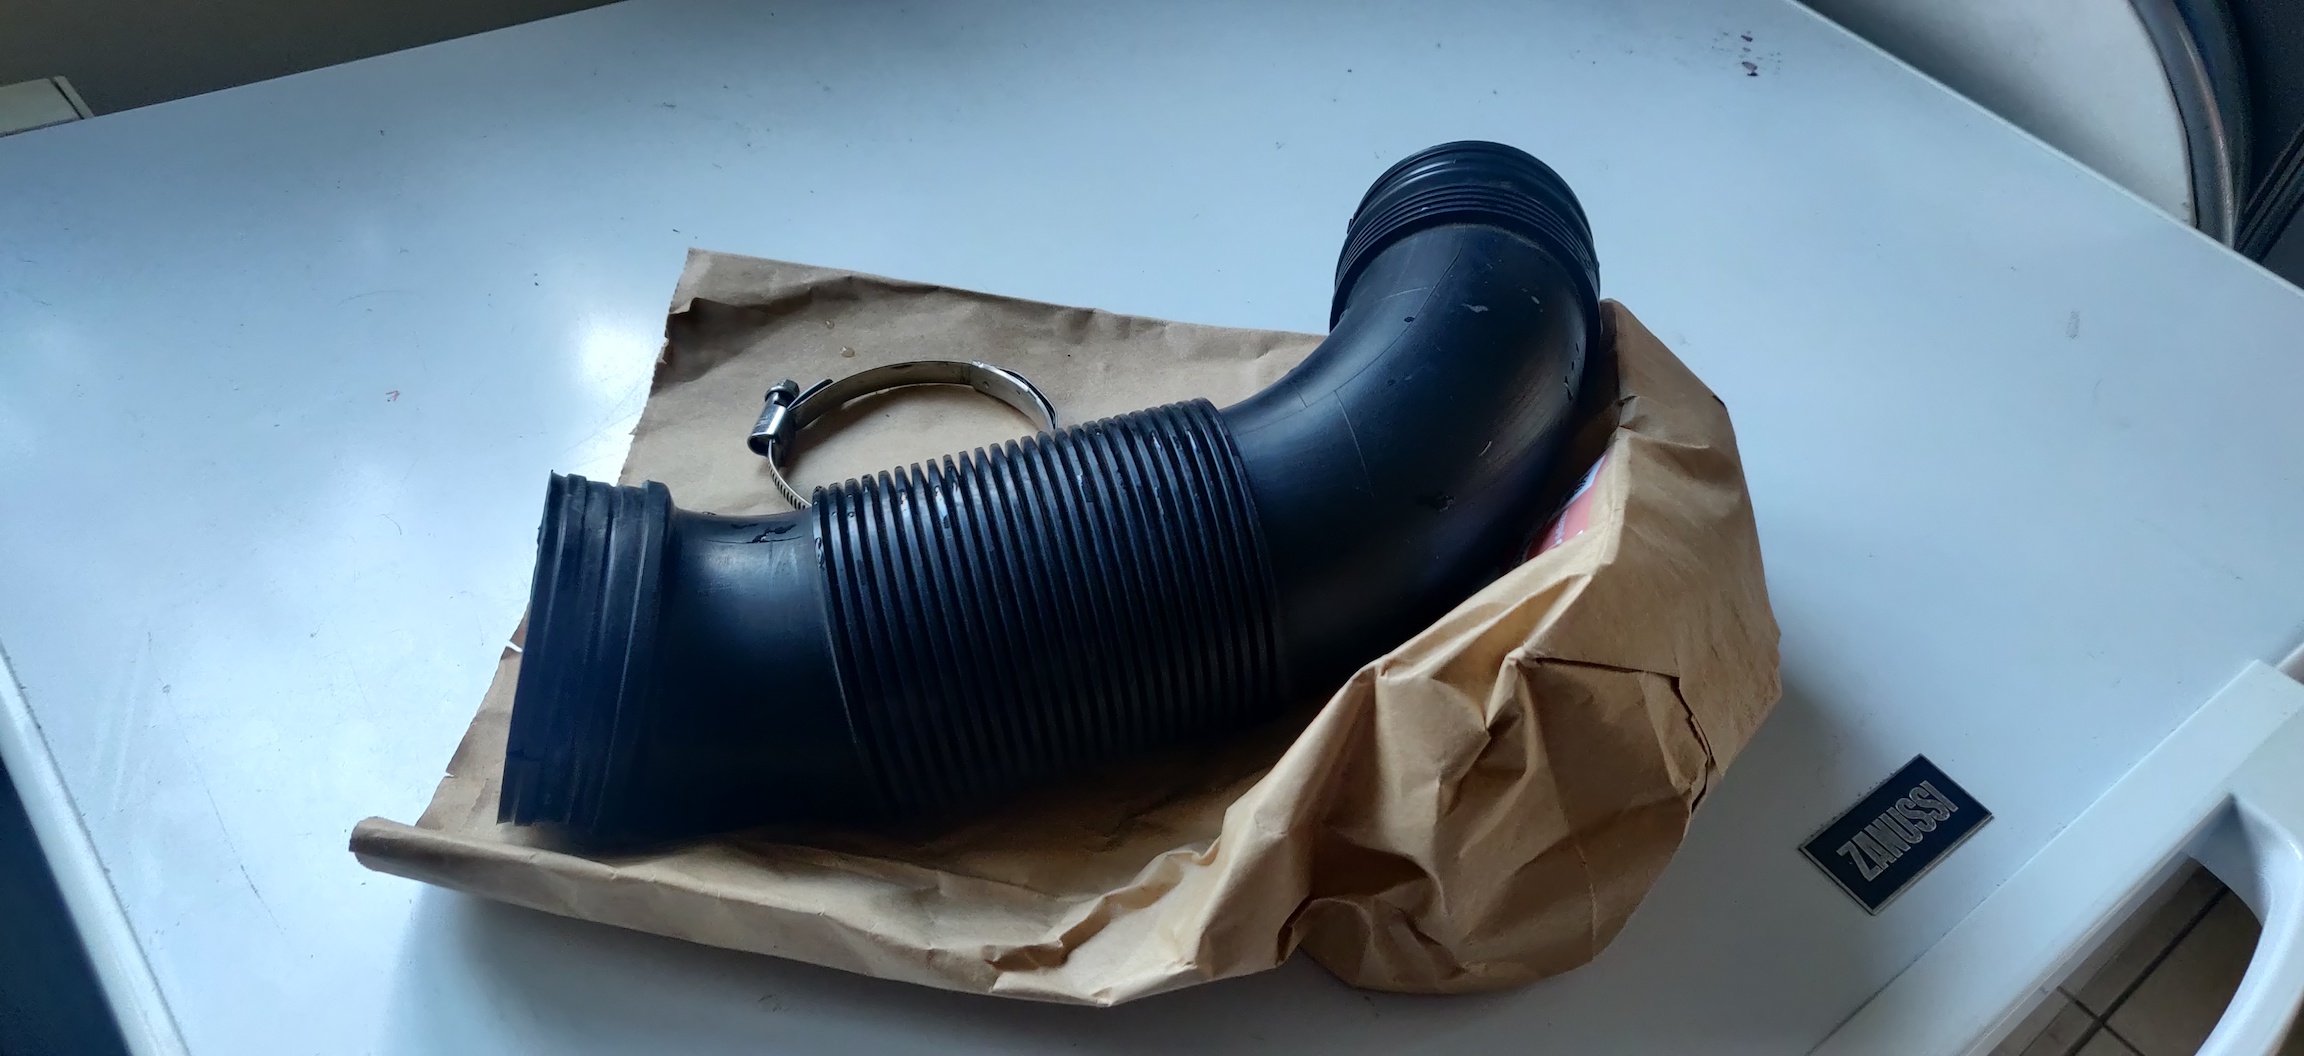
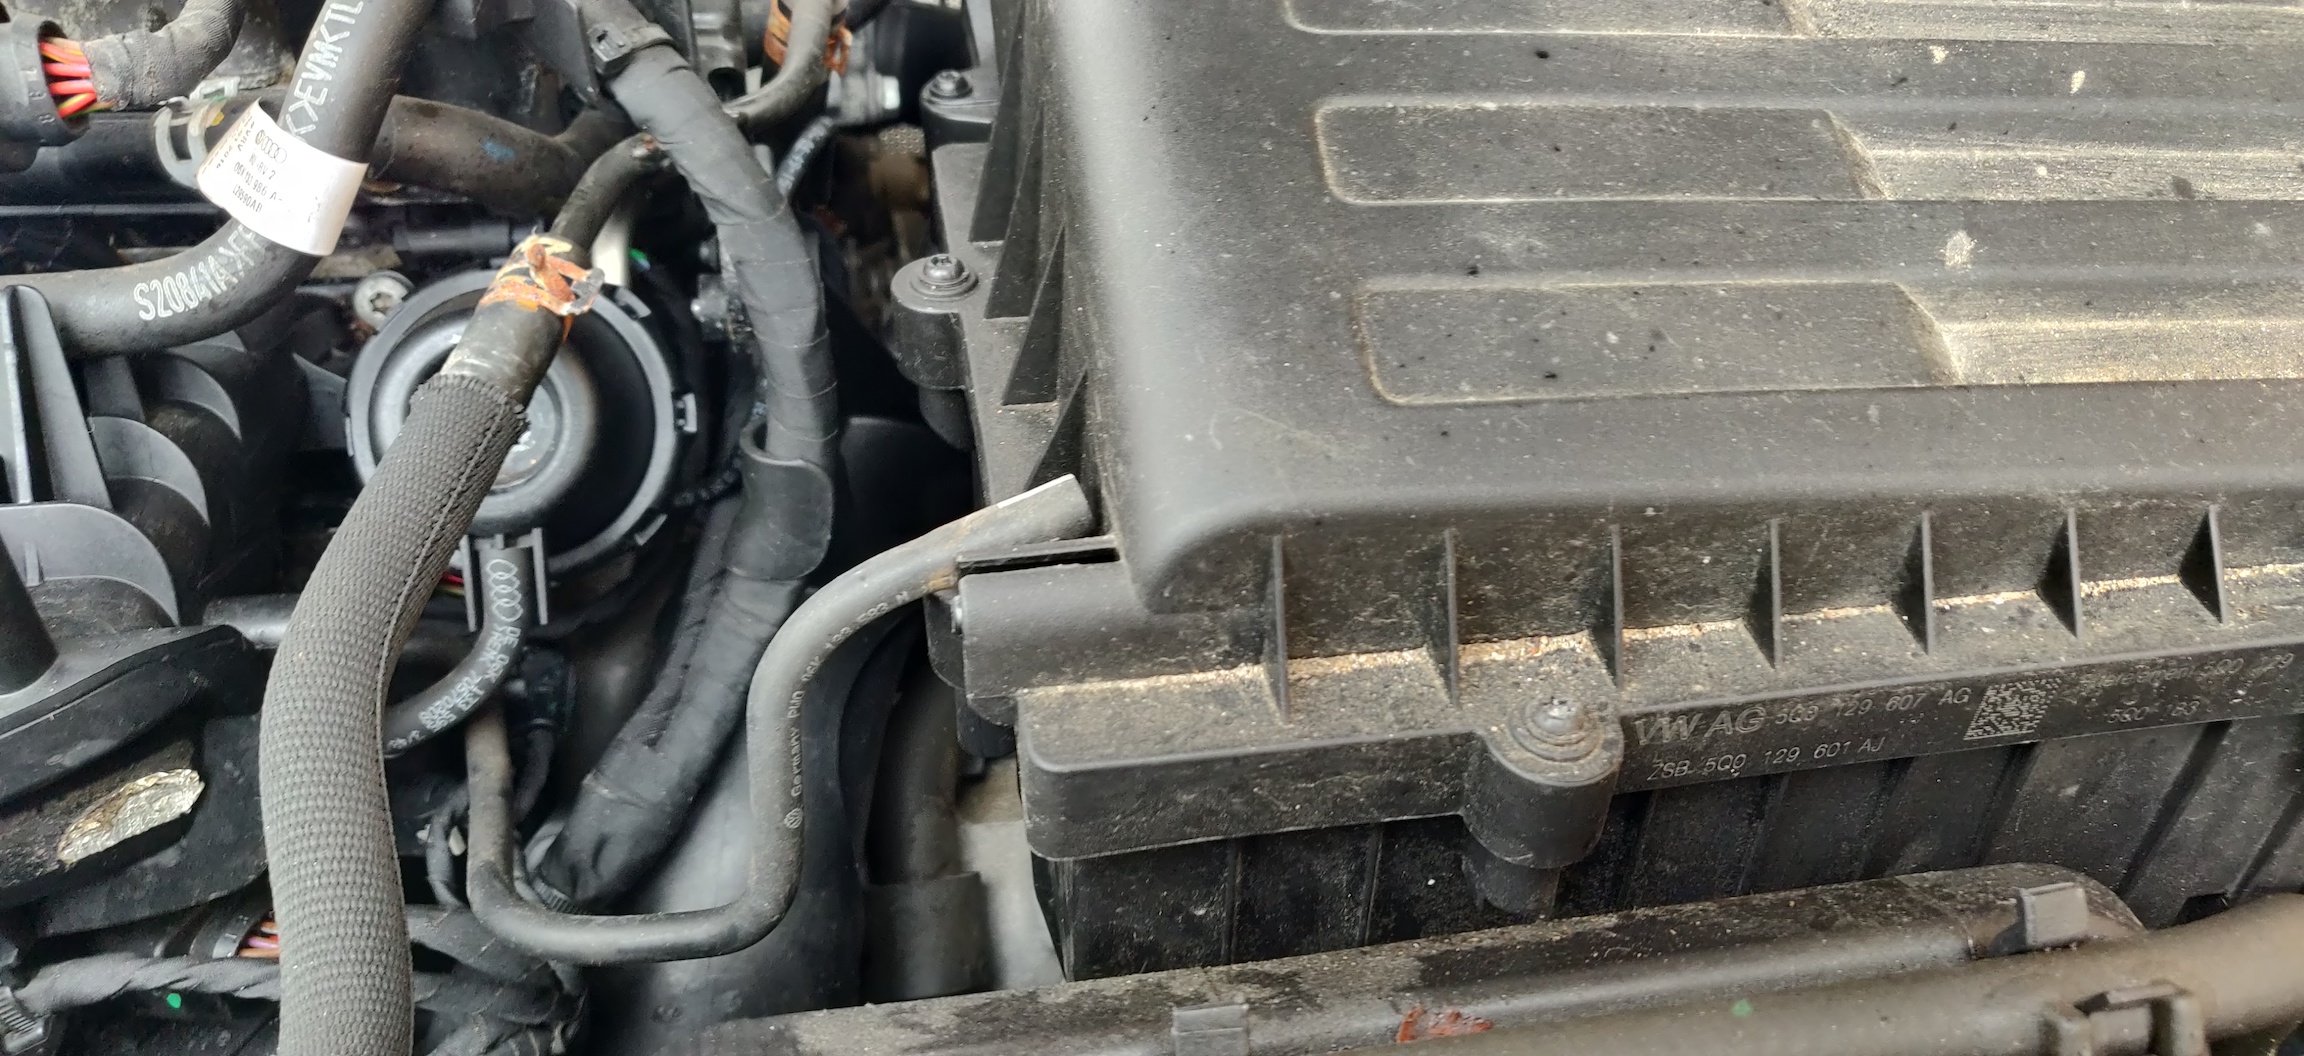
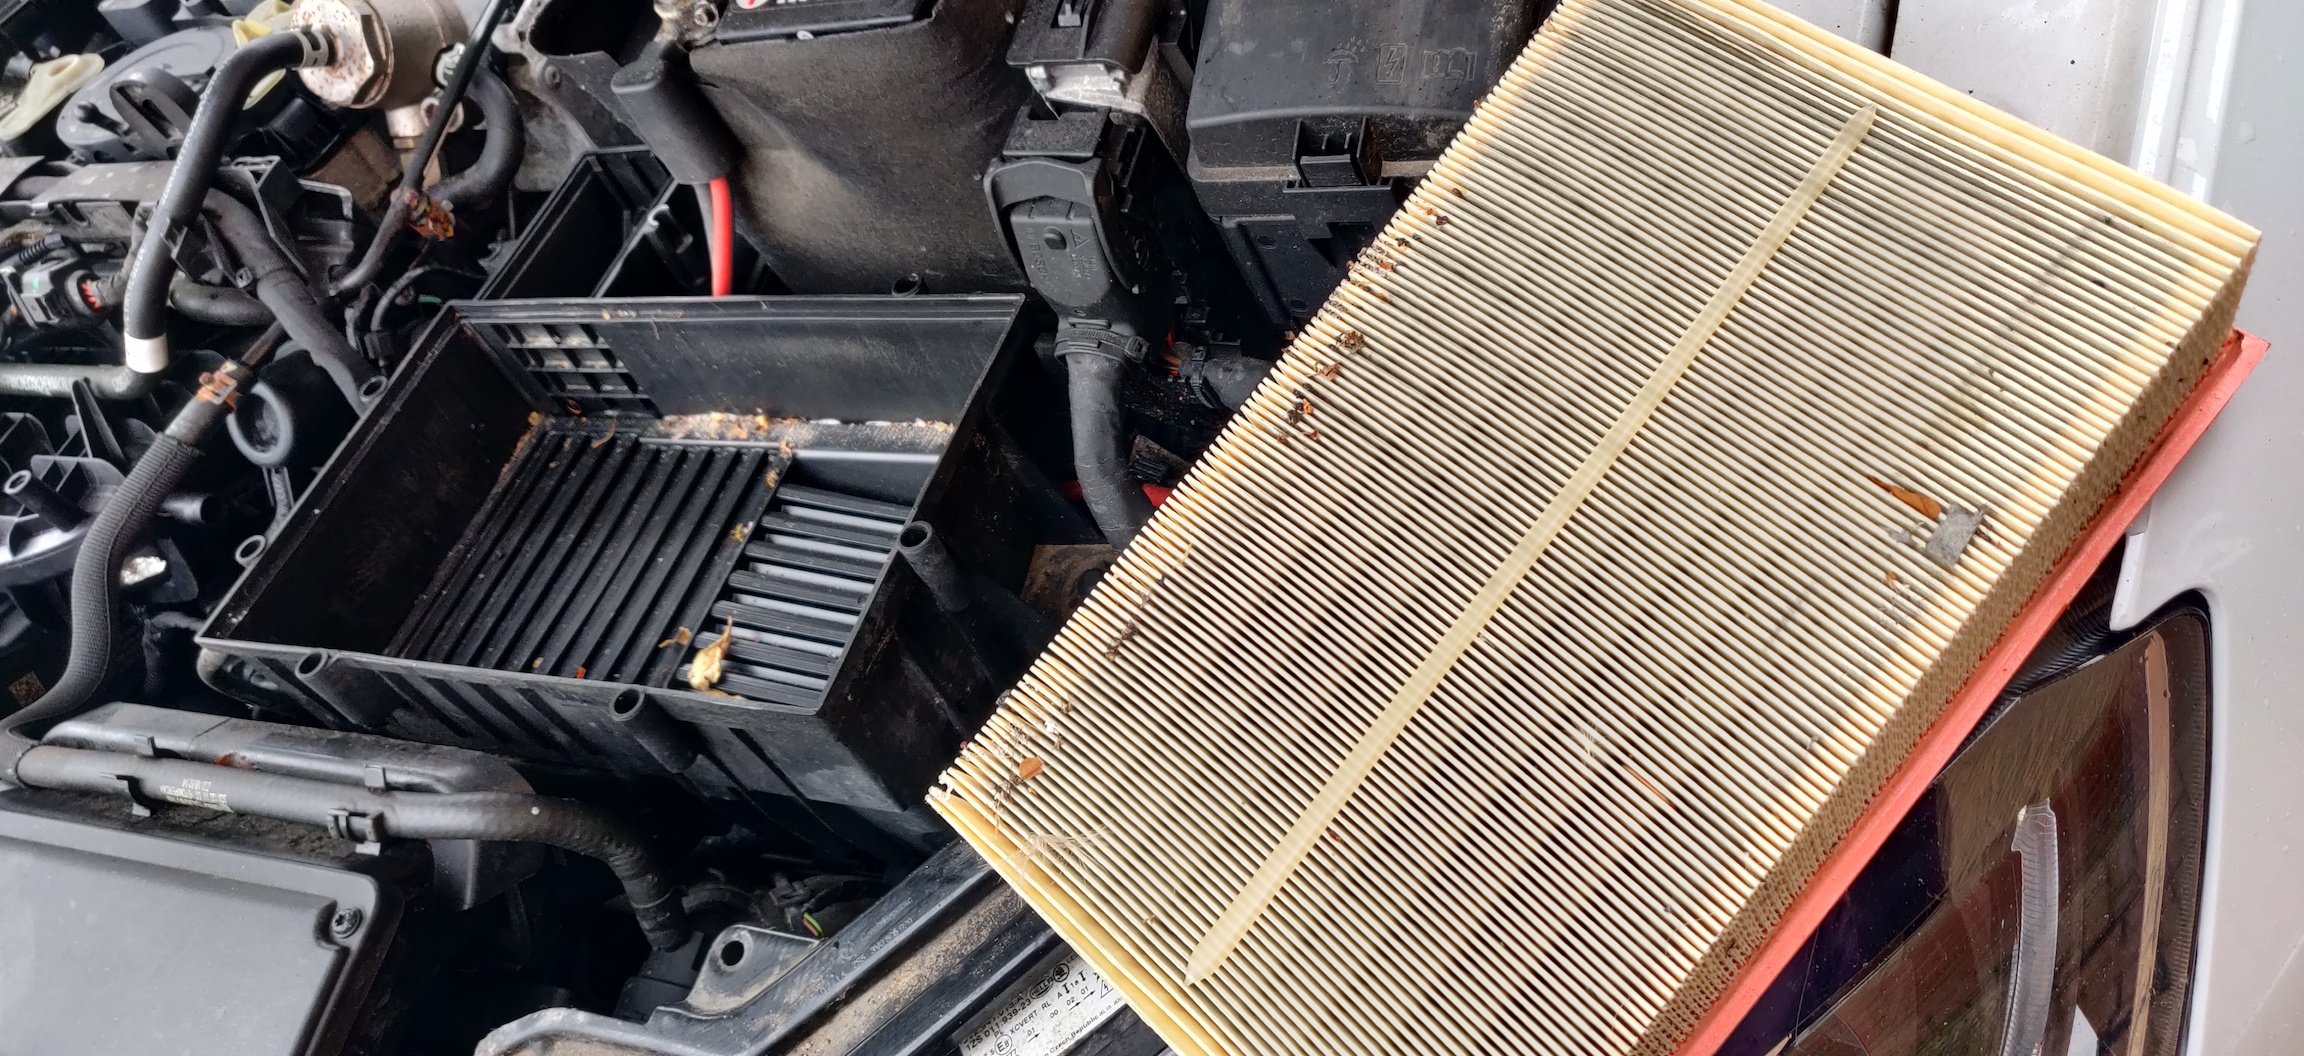
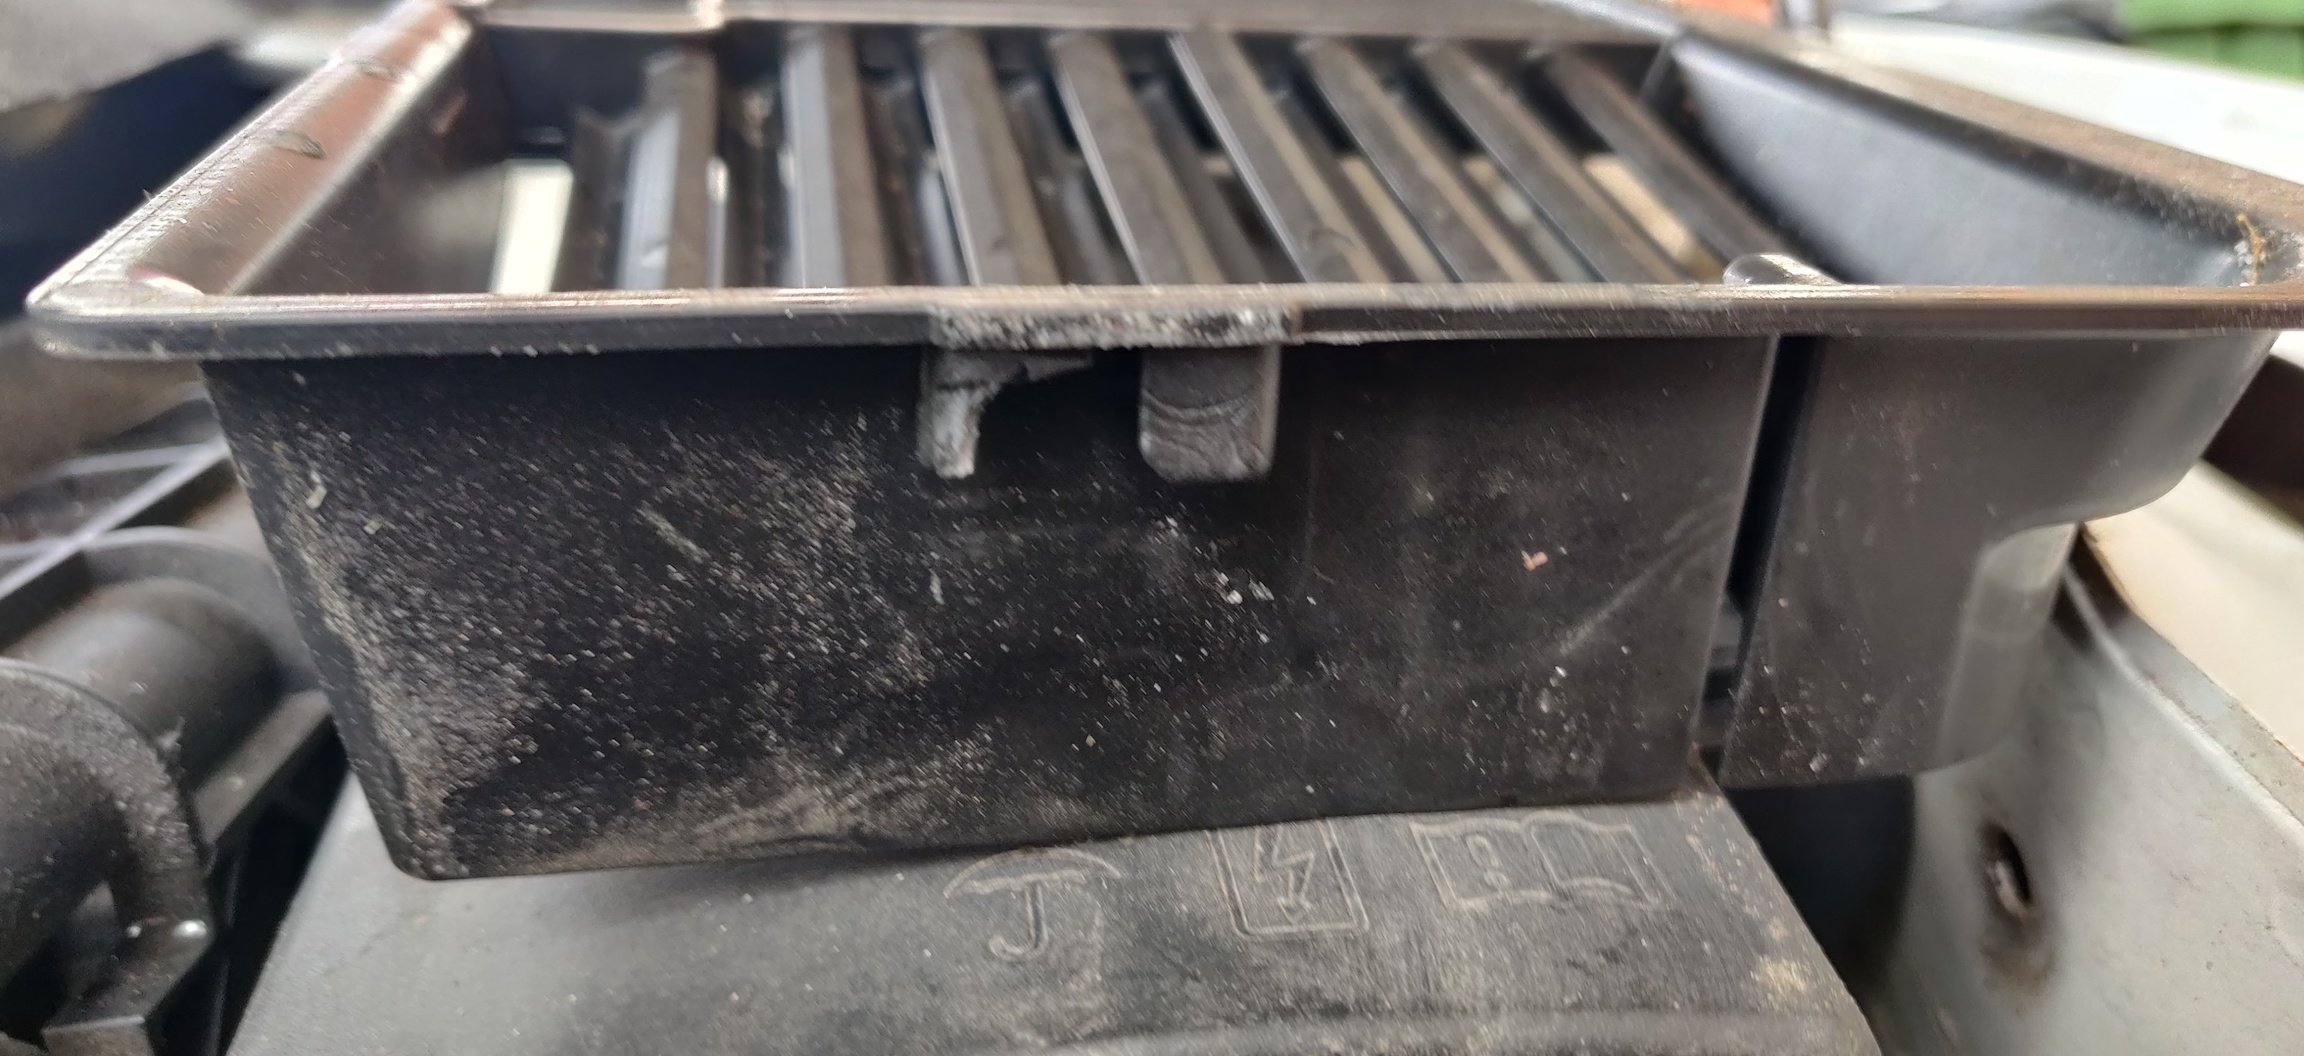
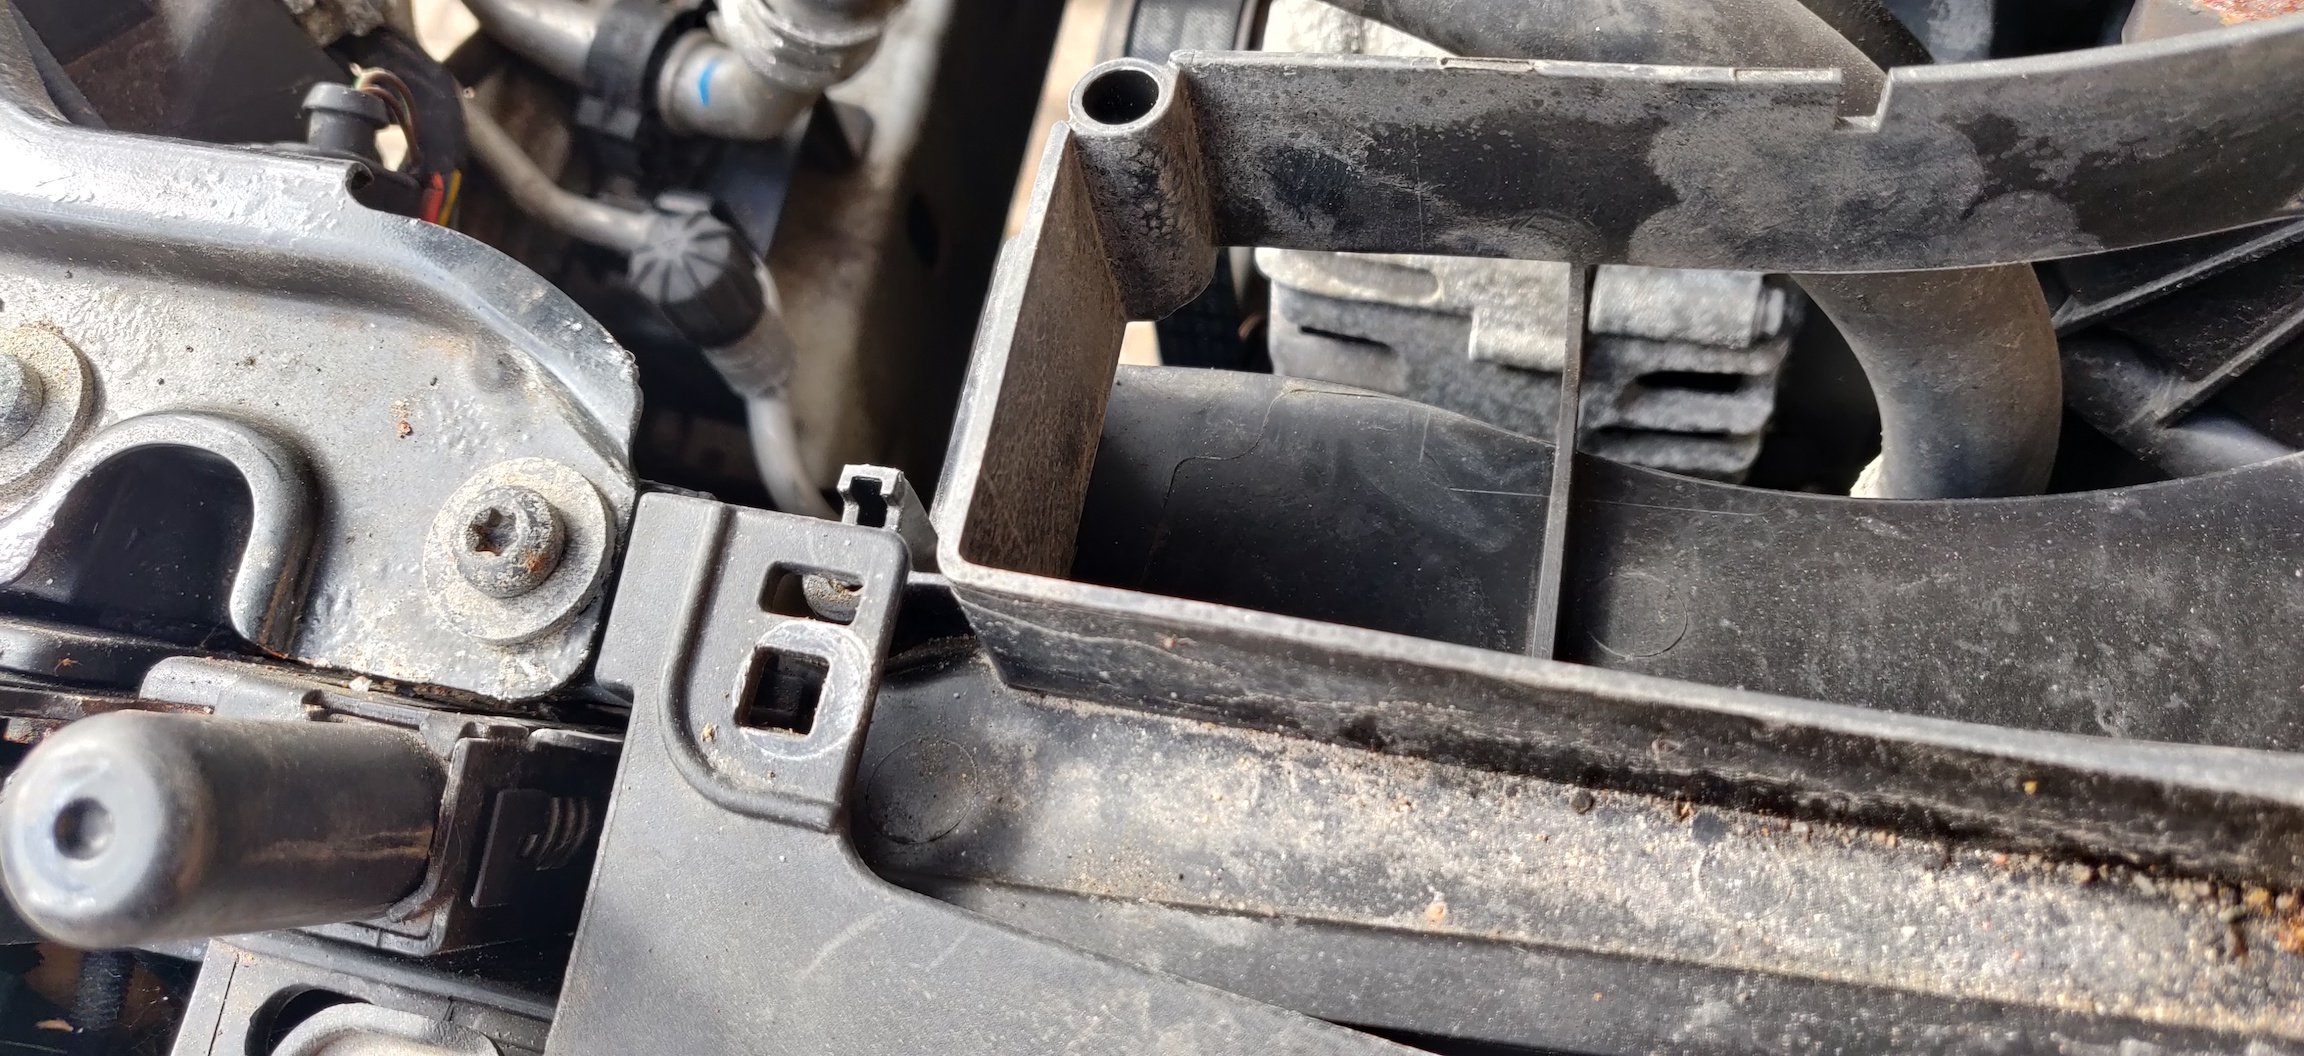
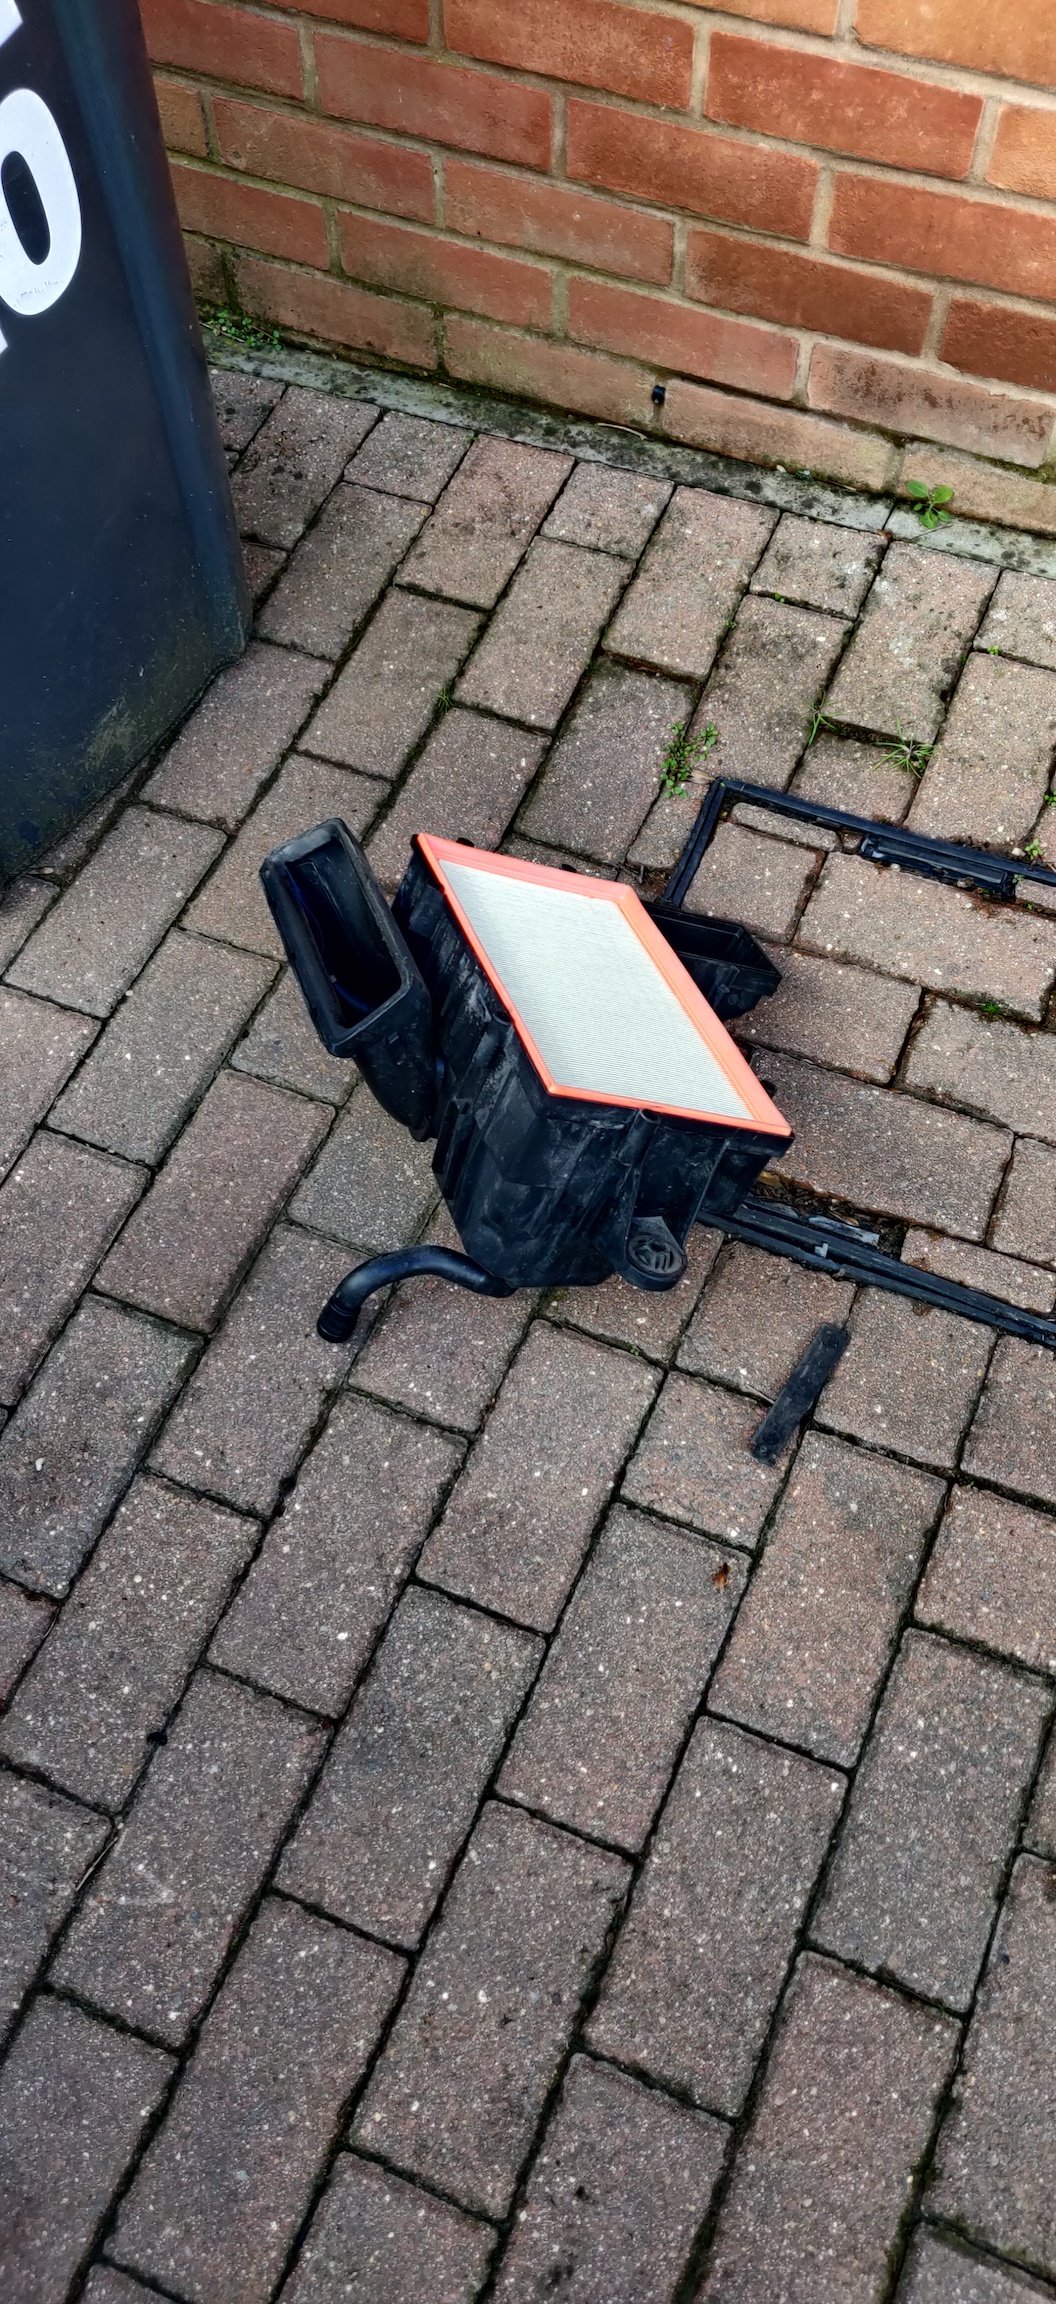
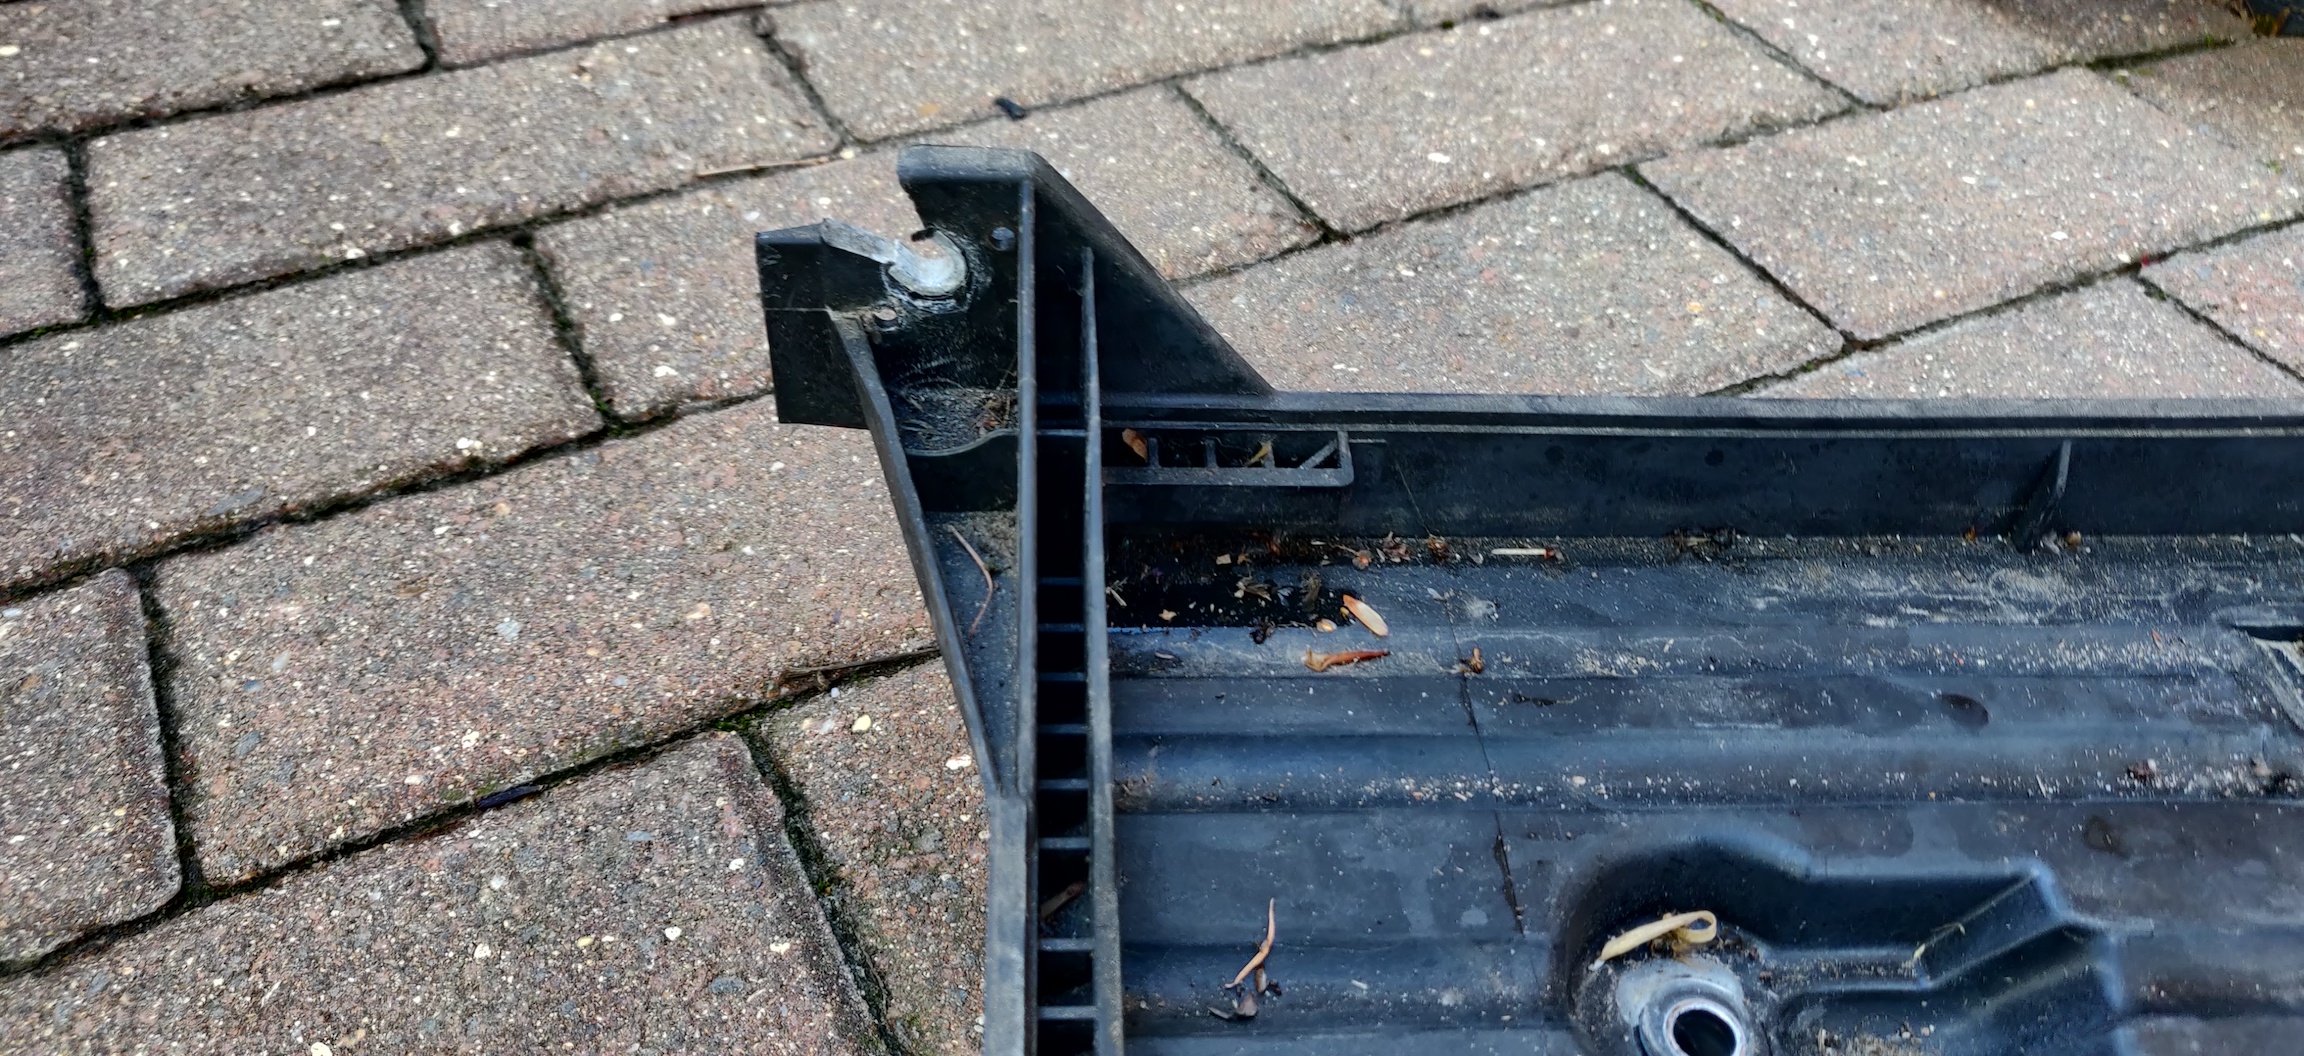
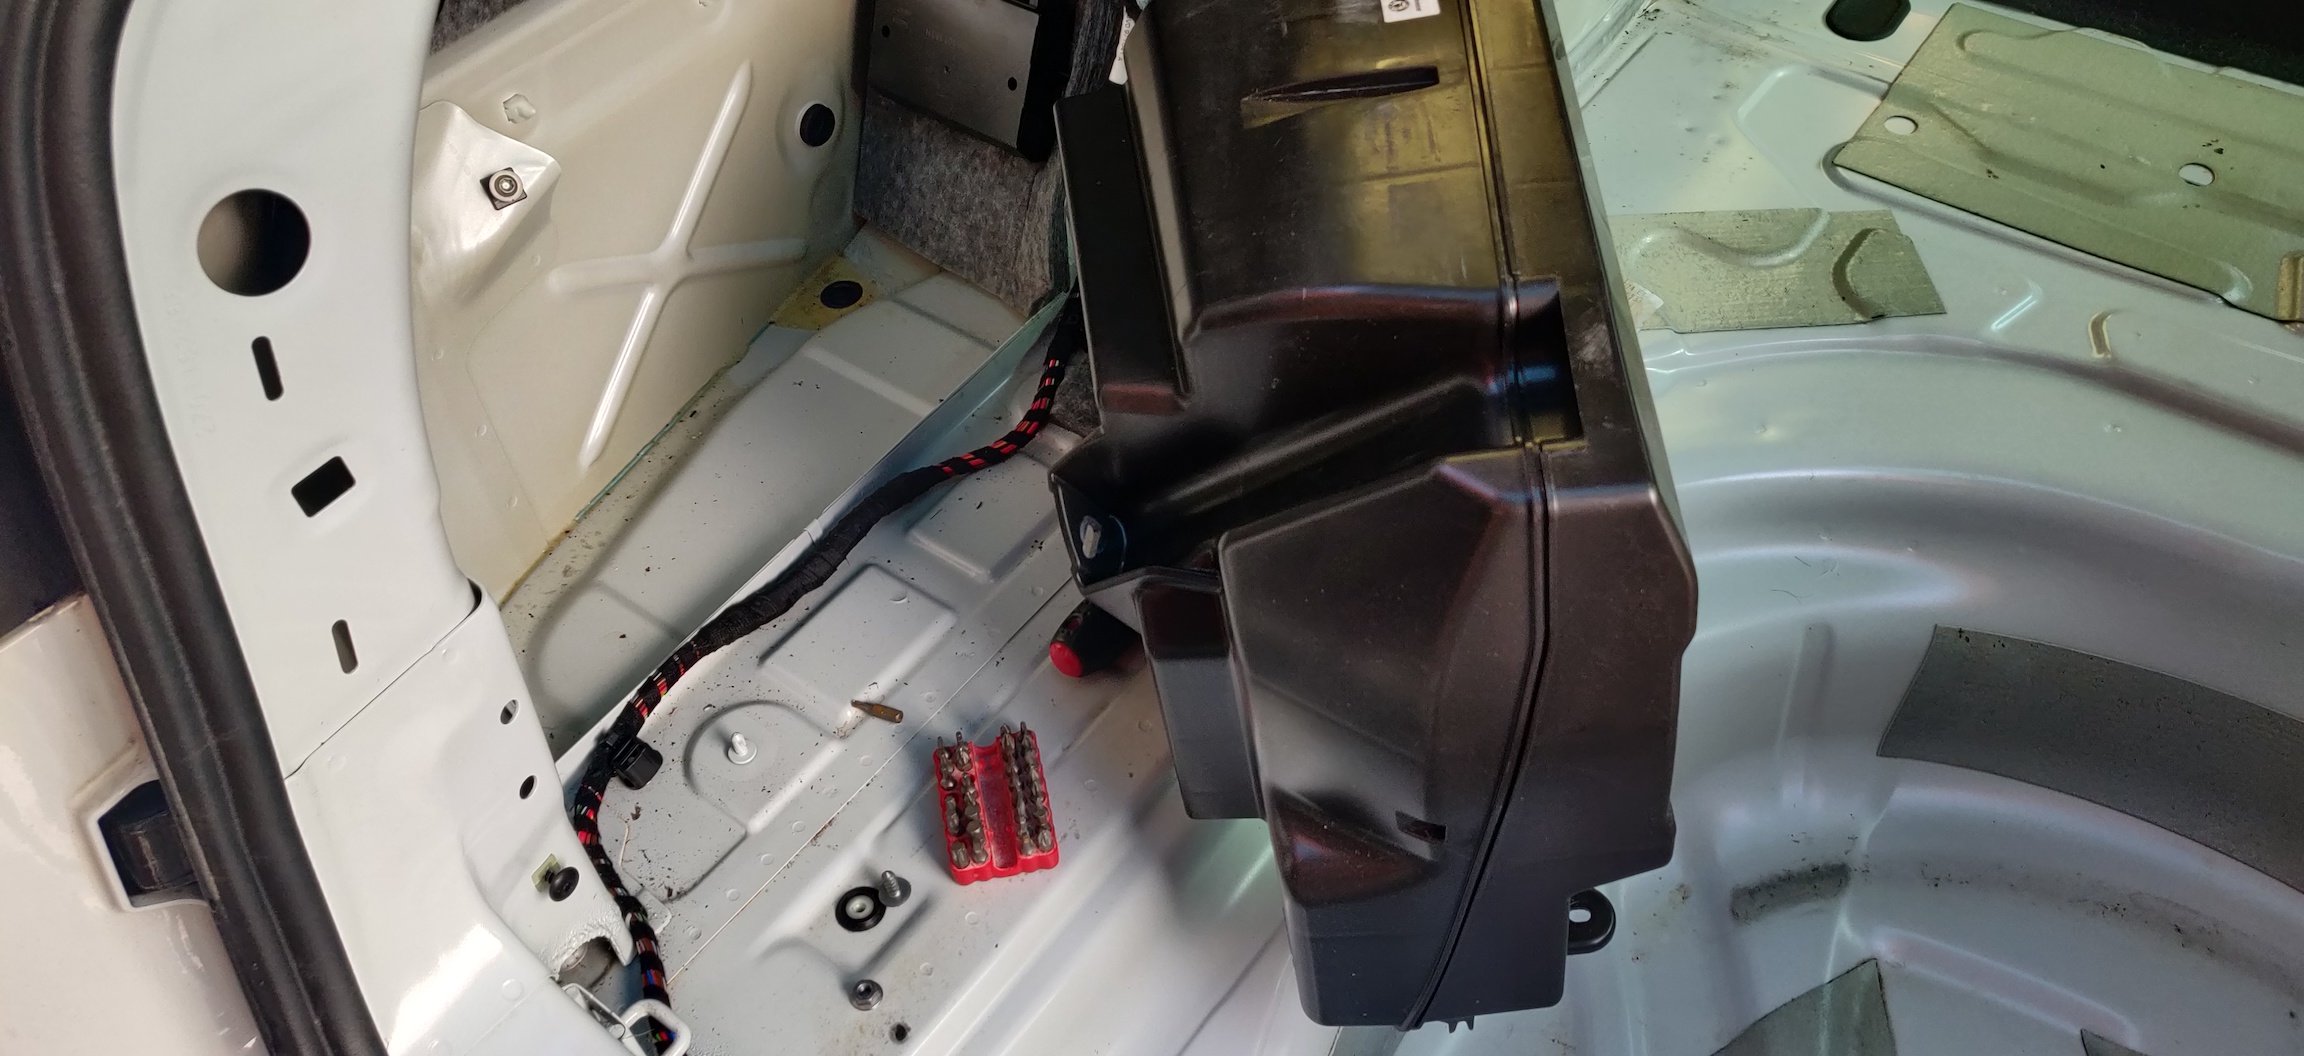
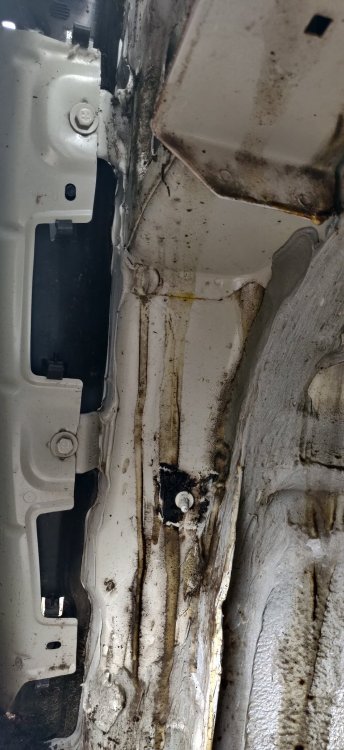
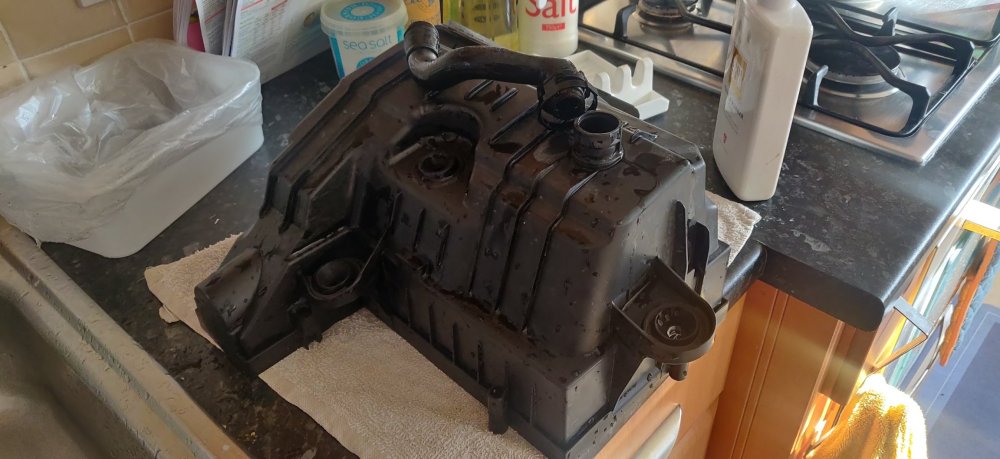
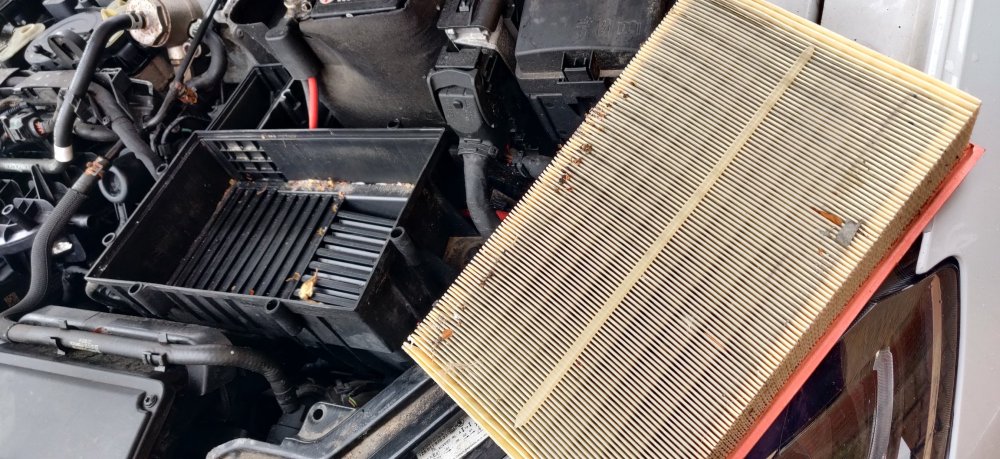
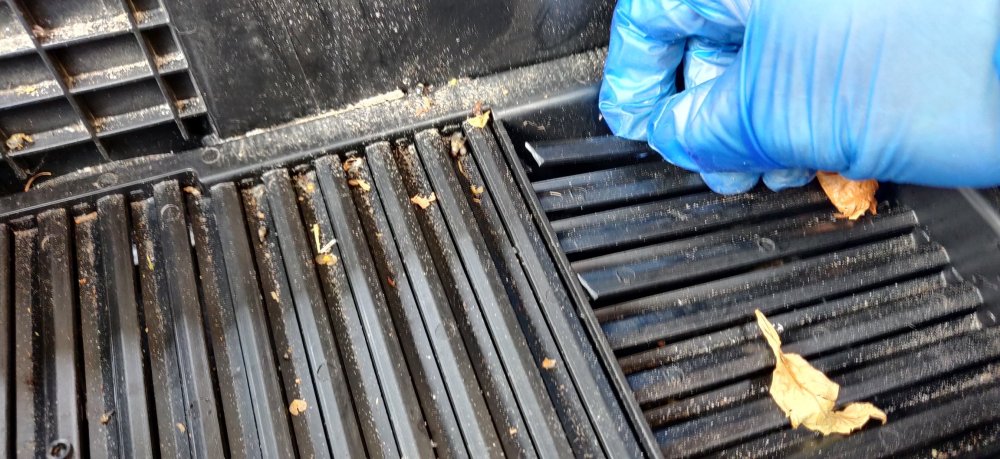
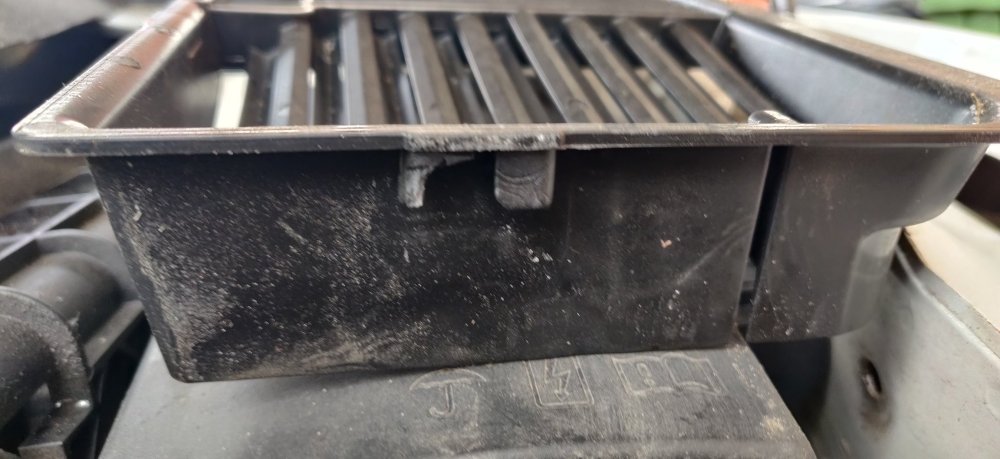
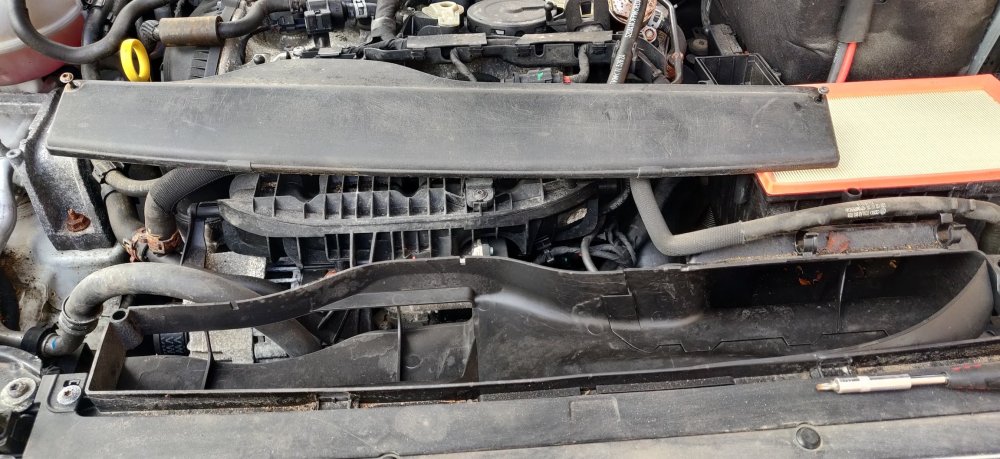
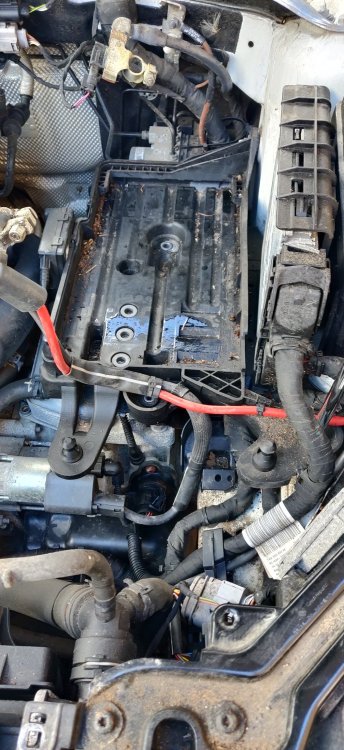
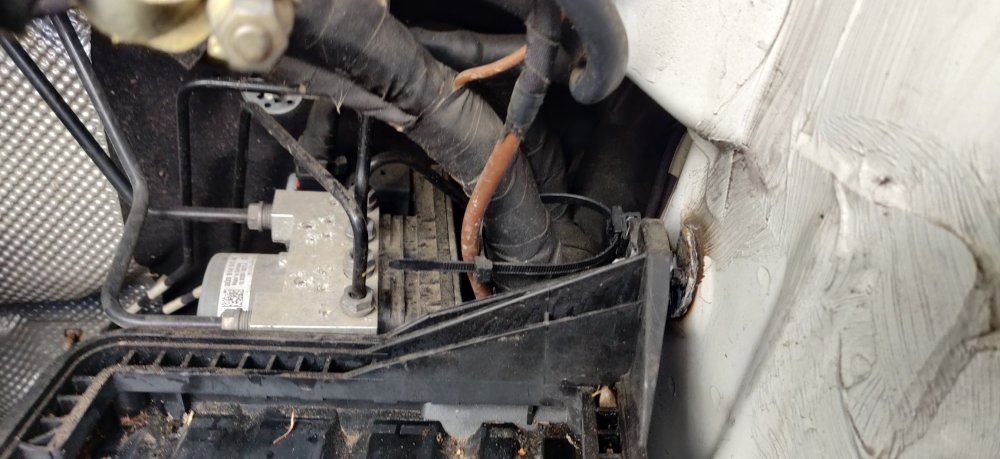
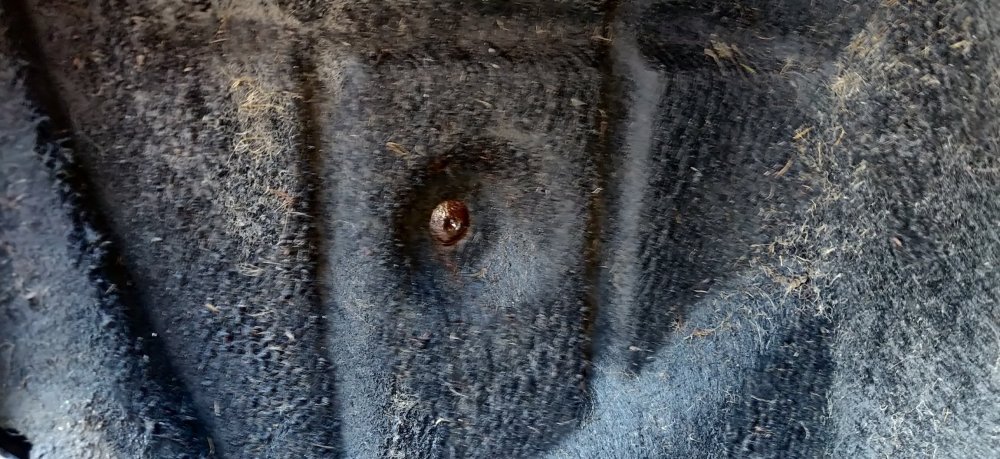
If that's genuine, then I'd suggest either applying Dinitrol or getting a rustproofing outfit to do so. It's a much simpler job when everything is new, clean and everything can be undone. It'd probably be over a thousand pound done professionally given the size of the car, but if its a new car, you most likely never have to worry about it again. It cost £1200 for my GR86 to be done, and the chap said a decent saving was had by not needing to scrape off any flaking rust, etc. Most of the horror has lied behind things though, so it's completely understandable as its out of sight and out of mind. I still don't understand how the sills have ended up as they have though, be it snow drifts, salt, or whatever. It won't be rotting from the inside out though, so I think it's still rectifiable. A few more posts from me before I call it a day. Next post will be about me removing the air filter and battery, which frankly I made more of a drama of than I probably should have. So firstly, decided to take out the hose connecting the air filter housing to whatever is next (maybe the throttle butterfly?). The nearest front clip was a spring one, so the Knipex pliers were involved and loosened and out of the way. The rear hose clip though: For whatever reason, was done pointing towards the engine, rather than say towards the battery where access would have been much easier. Managed to eventually manoeuvre a 7mm spanner in between wiring and bits to get a few turns onto the clip. This then loosened enough so I could rotate it: So I can actually get to it, even if its facing down. Simply flipping this around would have been a big help. So after a bit of wiggling, I plucked the hose out of the car and stuffed some shop towels down the hole: Now, my first thought was that the air filter housing was probably kept on with rubber studs so would entail pulling upwards to remove. So firstly, disconnected the vent hose: Needed to get the thin screwdriver to get some purchase, as rubber hoses tend to do. Once it starts to wiggle it comes off easily. However I couldn't get the housing to budge, so made a foolish guess that maybe something is at the bottom of the housing, so unscrewed the top off: A bunch of T20 torx screws. These luckily don't really fall out unless you make an effort to, so no flashbacks of fallen screws. Just the usual signs of use, normally needing a vacuuming out, but given I want to take the whole thing out, I started to see if I can remove the bit at the bottom. I think the workshop manual calls it a "snow strainer". However, don't do what I did and be completely cack handed with it: Snapped bits as I tried to lift the thing free. Got there eventually: With me snapping more bits though. I suppose I could source a replacement, but I can't be bothered. Spoiler alert: I may not use the OEM filter housing in the future! Still couldn't get the housing to budge and nothing was underneath the strainer, so tried removing the "air guide" as per the workshop manual, to see if that helps any: Two T20 screws and a latch on the back can then allow it to be lifted up at an angle with the front. There is then a middle part, which connects to the housing, which unclips: Then its a couple more T20 screws and some tabs for the bottom part: So the air guide was removed, but it still didn't look obvious regarding the air filter removal. I then got a bit miffed and then just pulled at the sod, and obviously it then pops up: So yeah. Not actually sure whether the air guide needing removing, but I certainly didn't need to disassemble or destroy the snow strainer. Oh well. So the battery is next. The negative is already disconnected, so repeat for the positive terminal, a 10mm spanner for it. I didn't take any pics, but the front of the battery has the clamp, much more visible with the air filter housing removed. A 13mm bolt, and once undone, the clamp can be lifted. This will then allow the battery to slide forward and then lifted straight up and out: The tray itself has two bolts, which I may have already taken out in the pic above. There is also a bolt hidden in the corner at the front of the car: Then a nut at the back: Which also seems to have a zip tie of some sort. I guess it was sorta put there but not tightened up. I cut this and will need to remind myself to attach a replacement. That should be the fasteners for the battery tray, but there's a few more things connected to the tray that'll stop it from coming free. One is this thing clipped into the side: Just came free with a bit of tugging at the latch. Not actually sure what it is. The positive cable for the battery also has a few clips, a couple of u-shaped ones and a standard pop clip type: That will then free the battery tray. I struggled on the rear part, and after some force, something popped and has disappeared into the ether: I've assumed I cocked this bit up, but after looking for a possible replacement battery tray, they all seem to have this notch missing in the corner, so I'm less sure now that I've broken it. I imagine the thing that had the zip tie was what popped free, so not sure how to sort that out for now. Might not be a big deal. But with the tray out, that leaves the filter housing for the DSG in view: Now, for whatever reason I left it there rather than actually replace the filter whilst I was there. Maybe I was getting tired. I'll probably spend some time in the future to give some of these nooks and crannies a quick wipe over. Maintenance: £1806.50 Upgrades: £952.09 Miscellaneous: £618.13


-
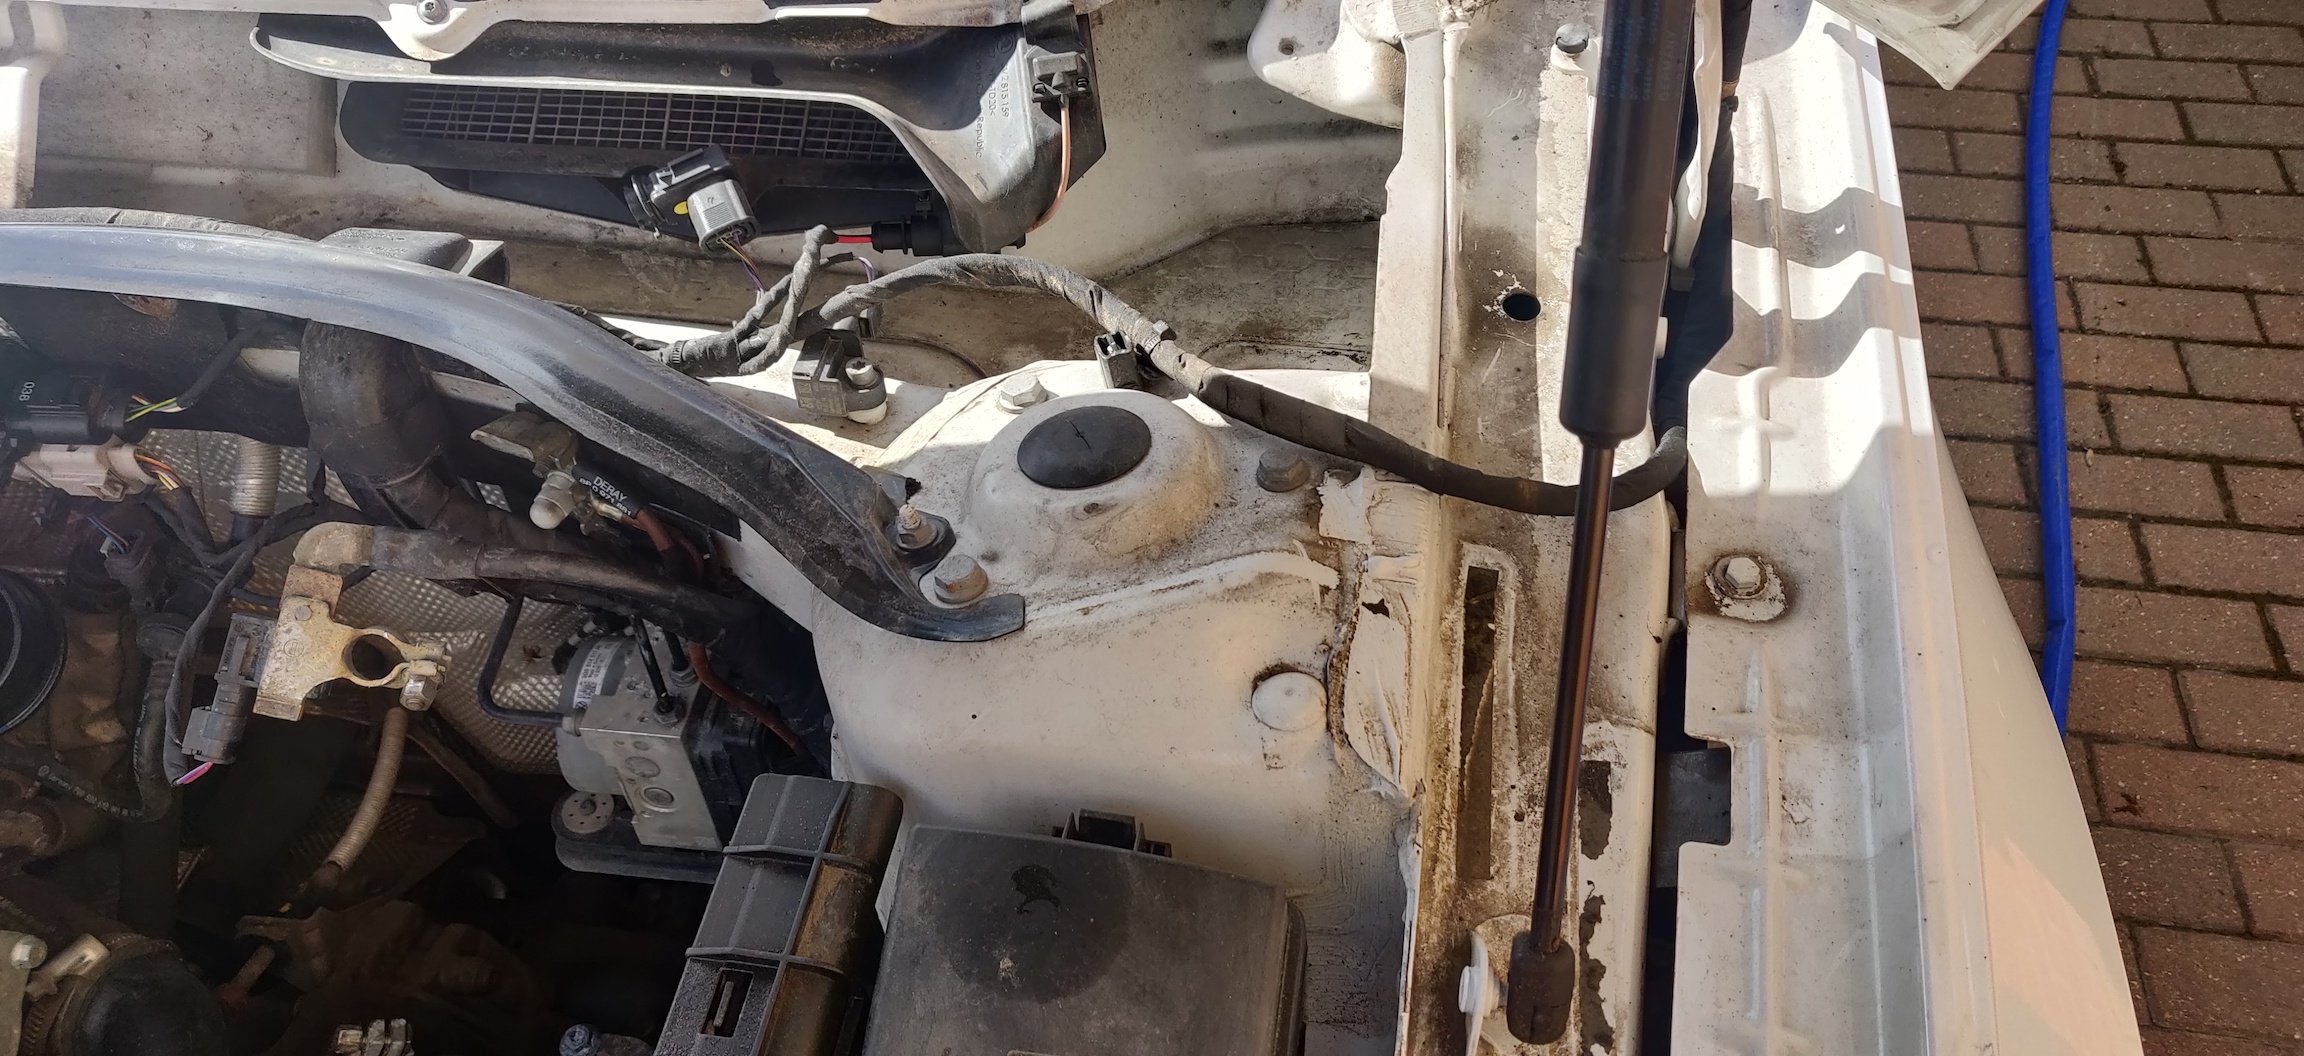
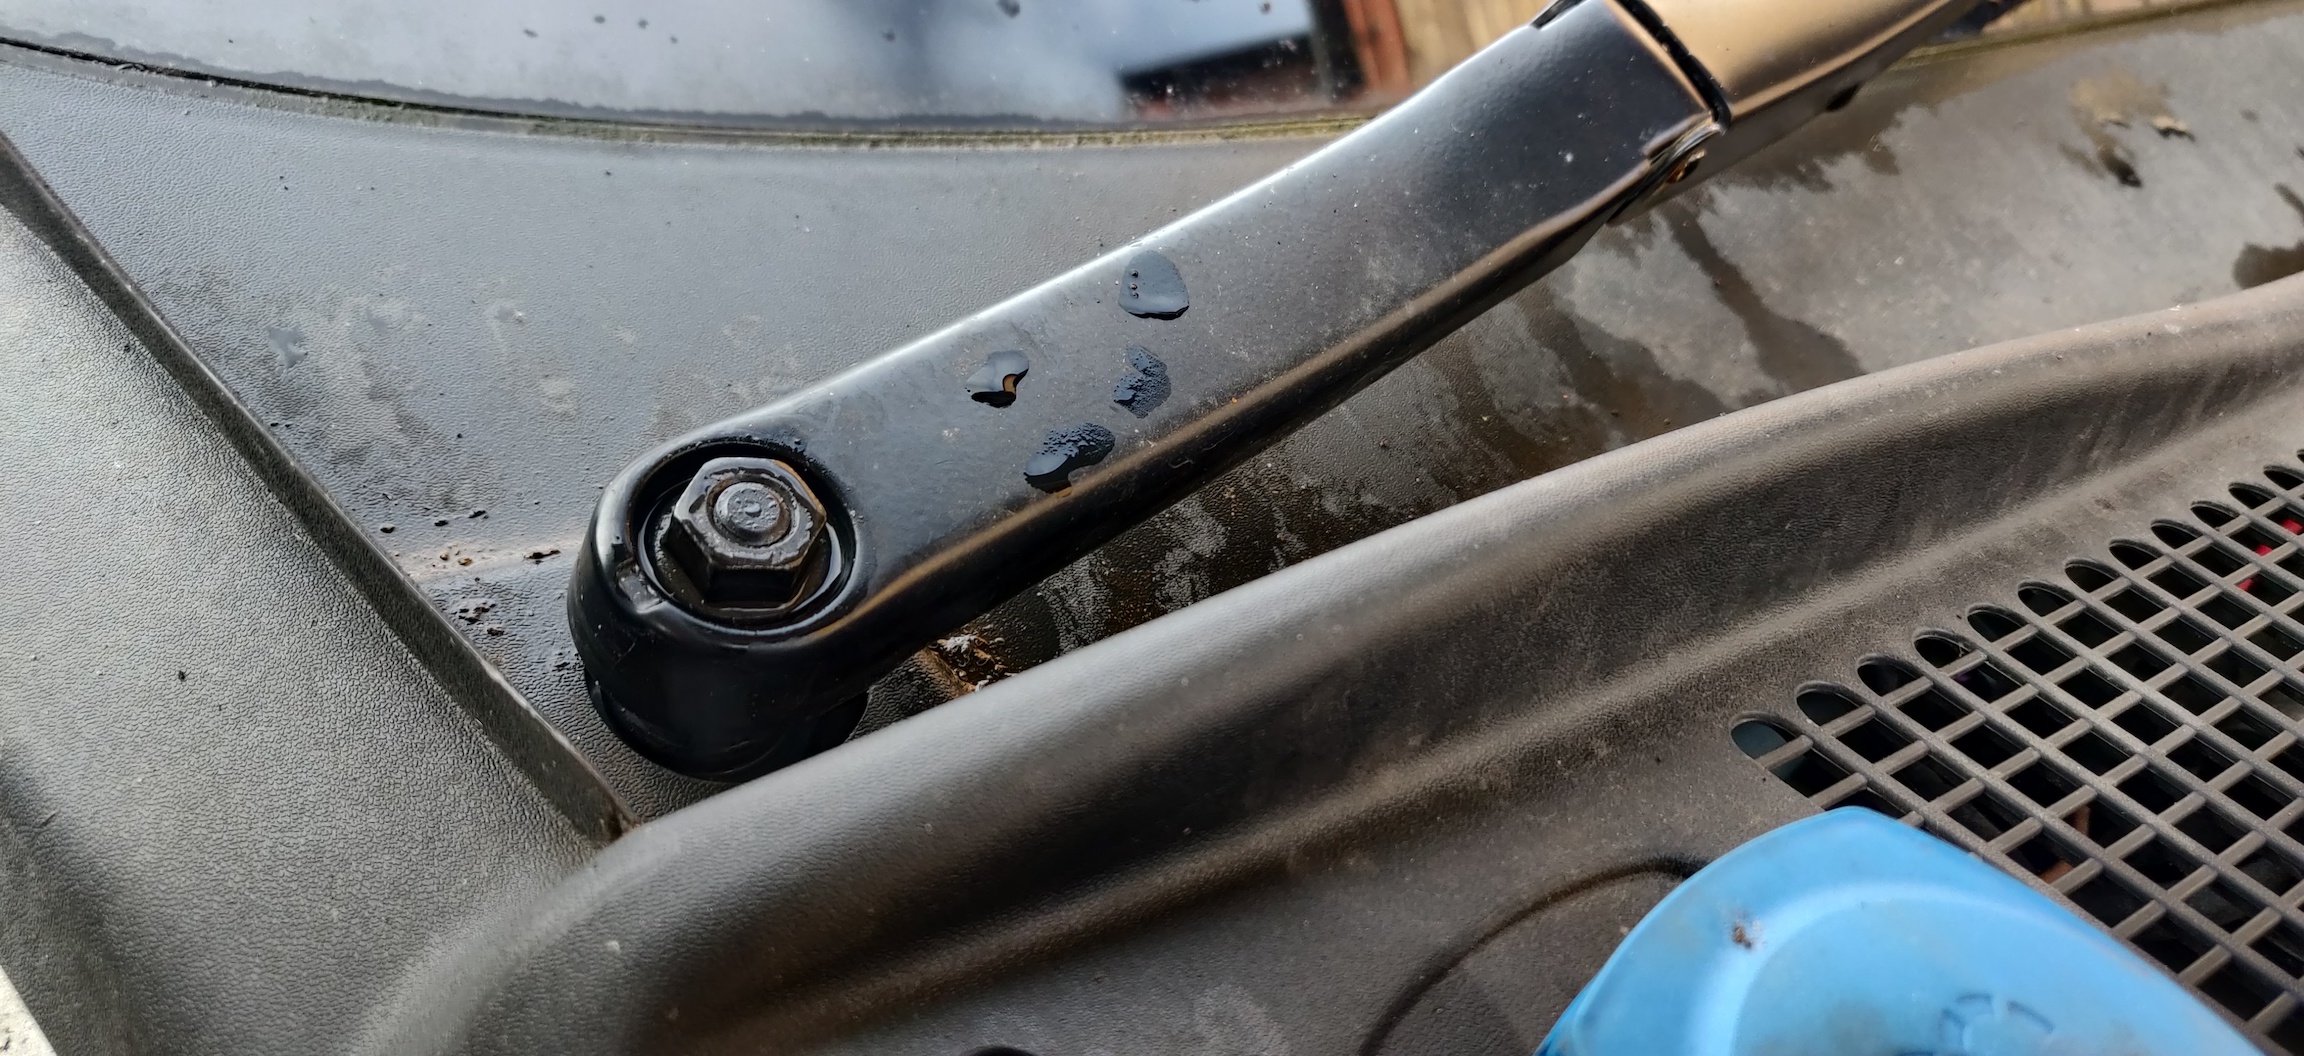
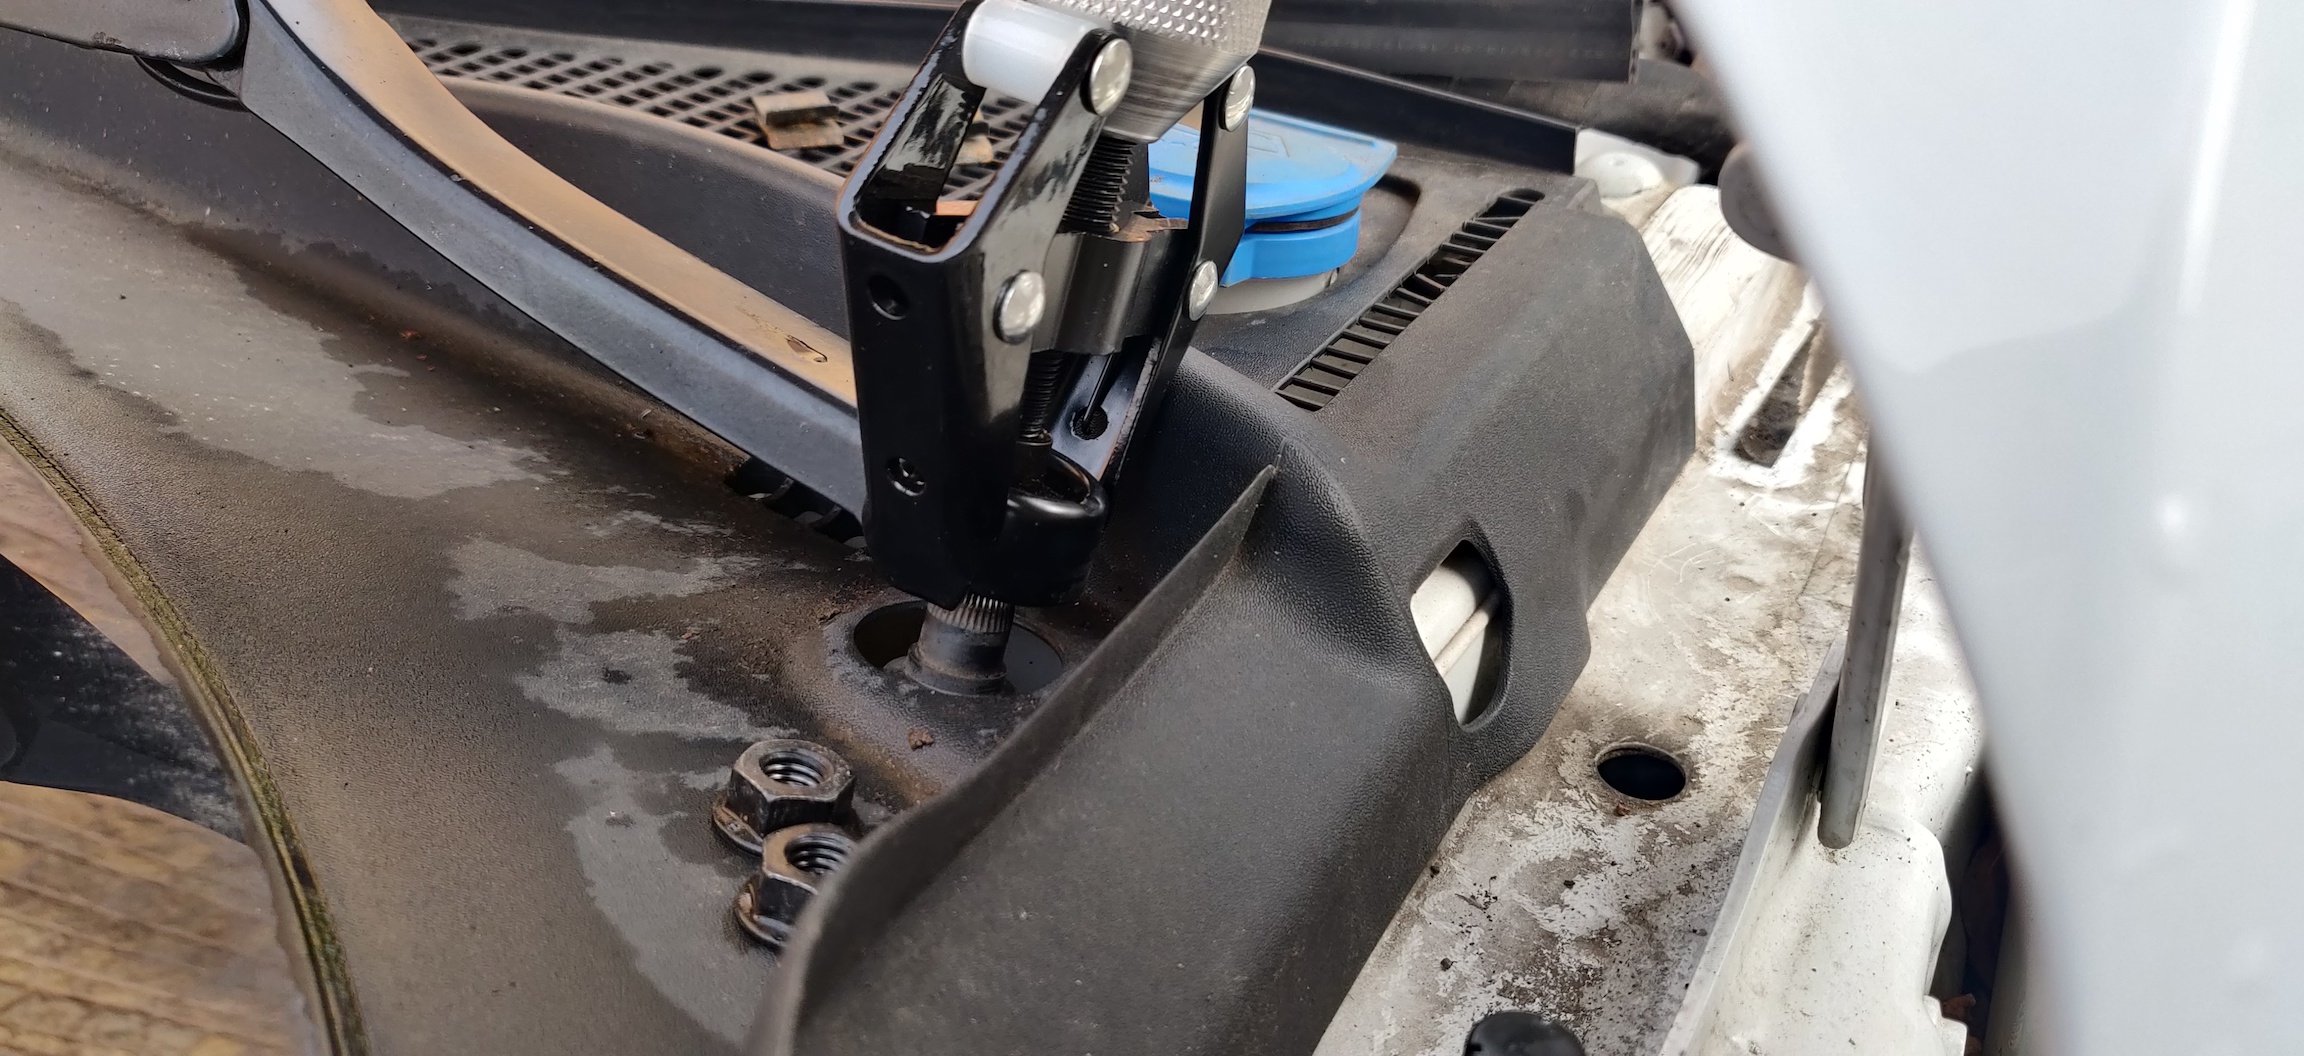
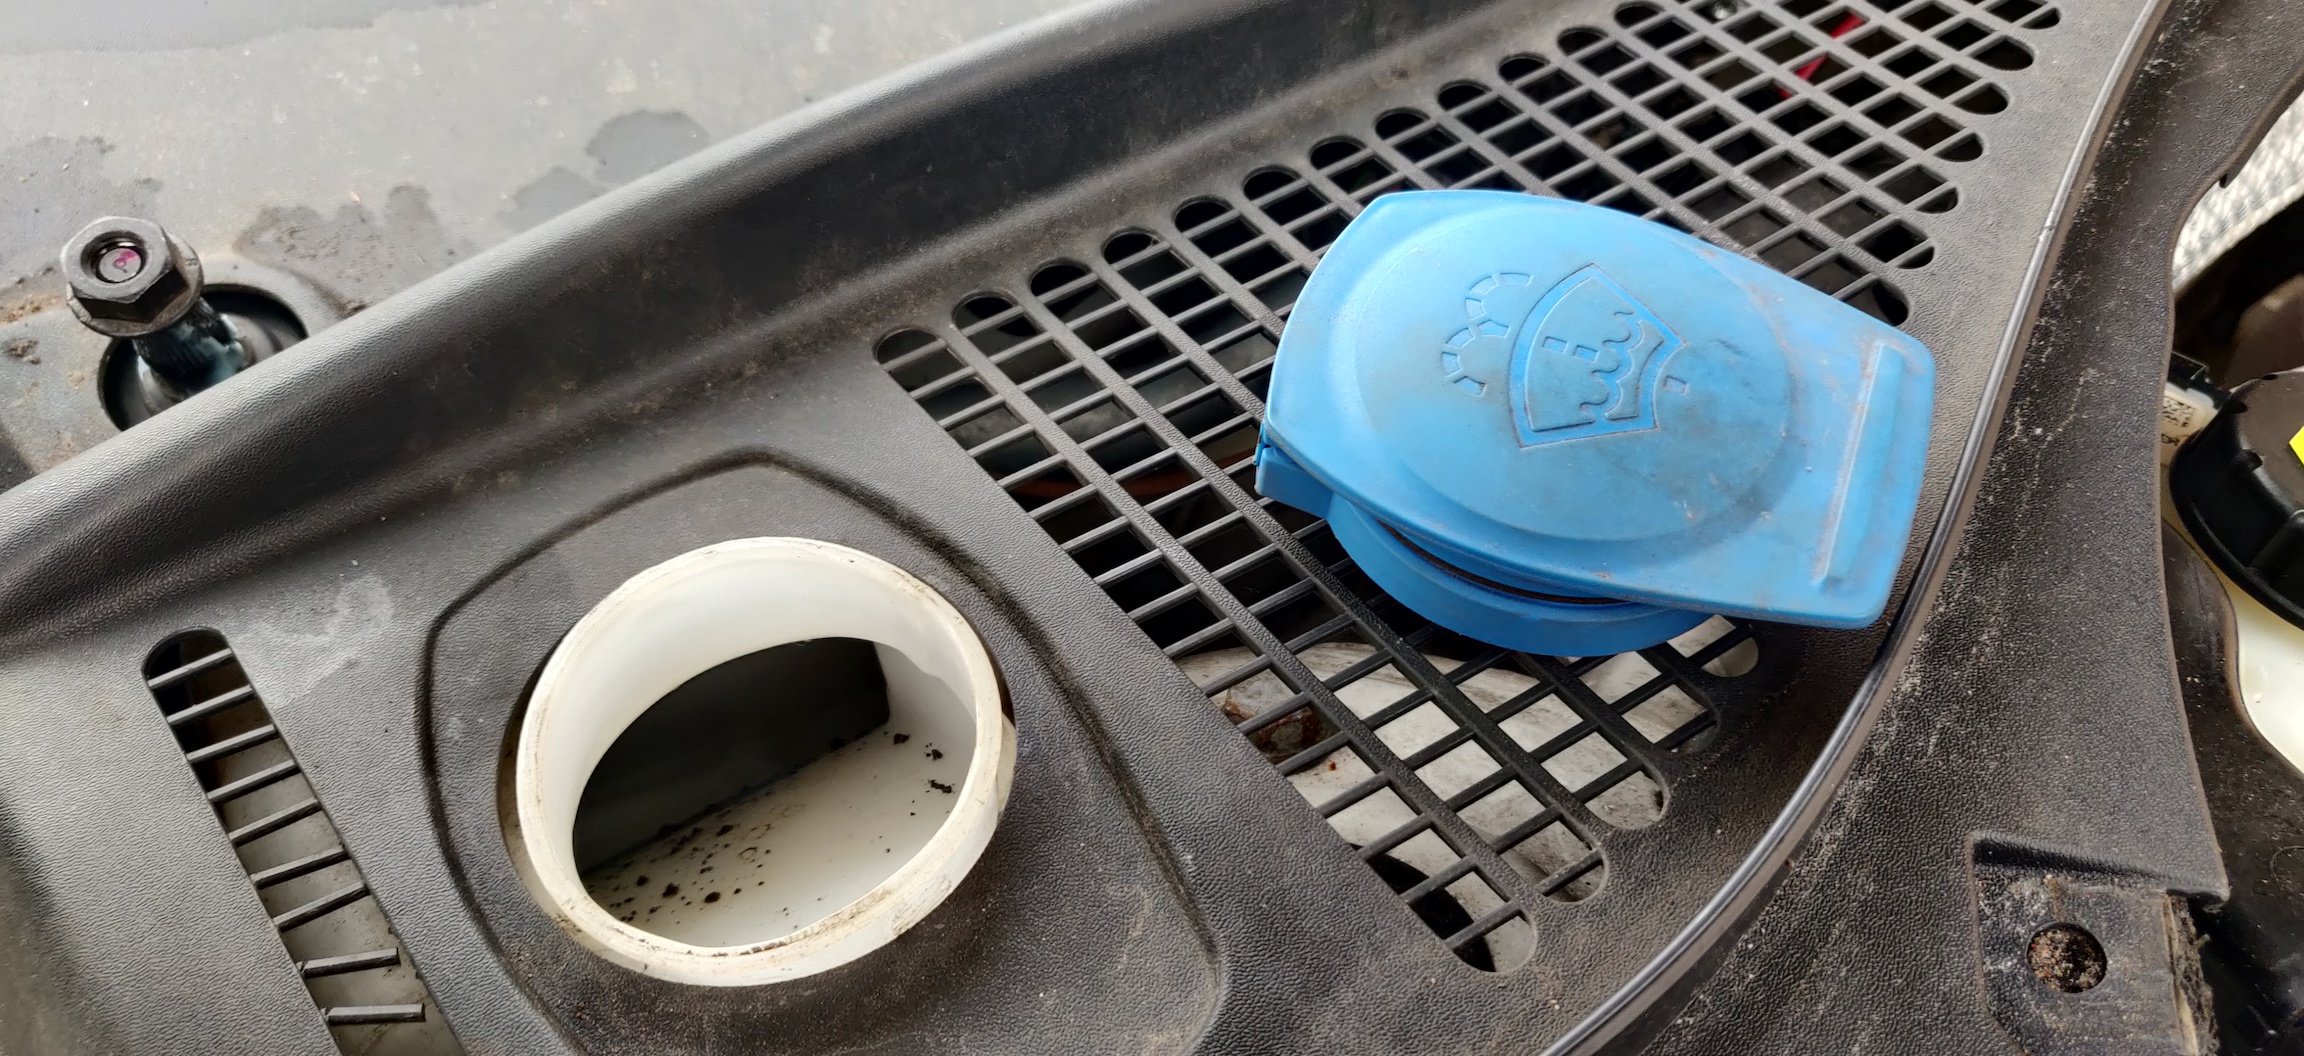
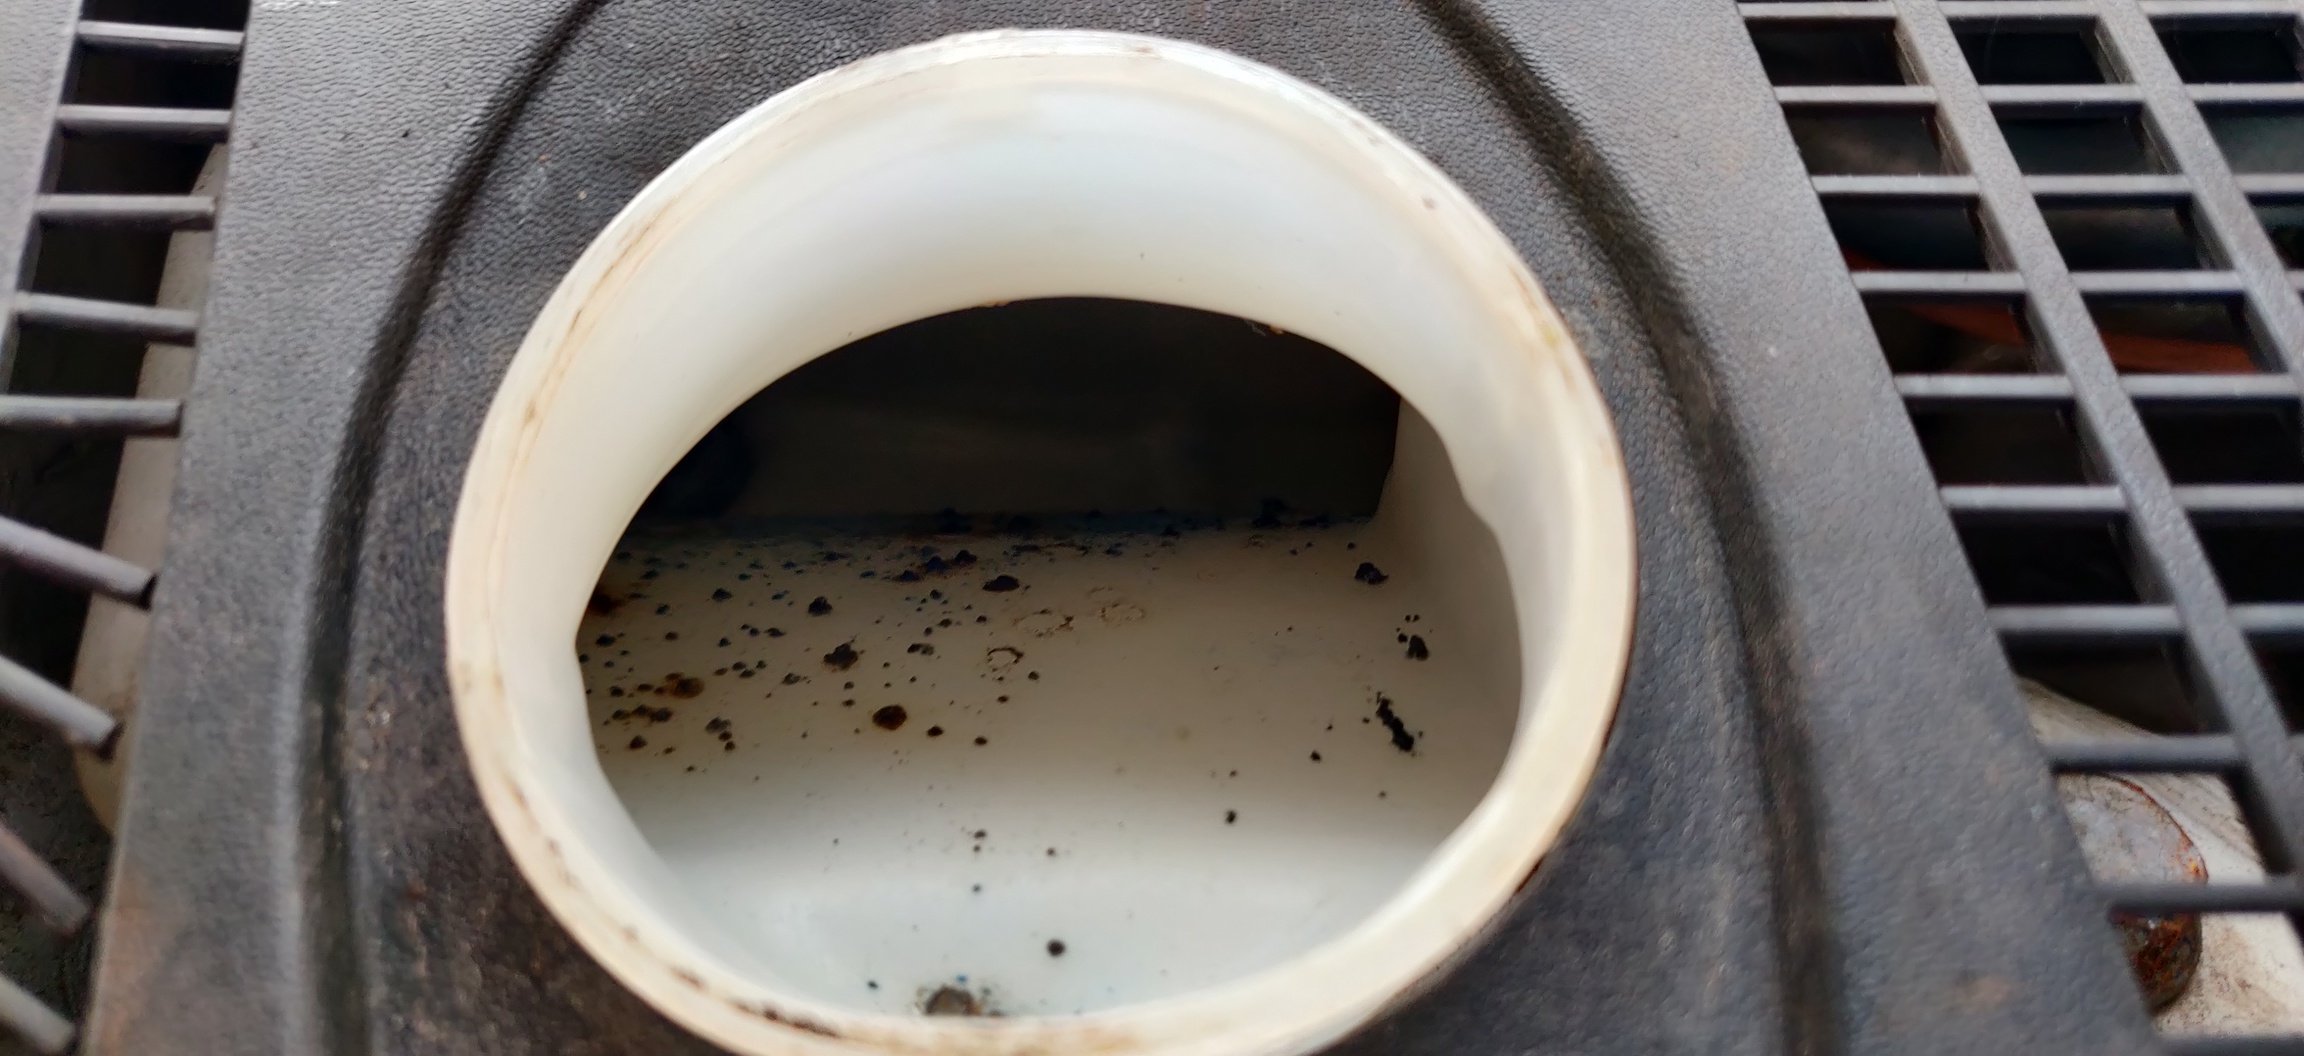
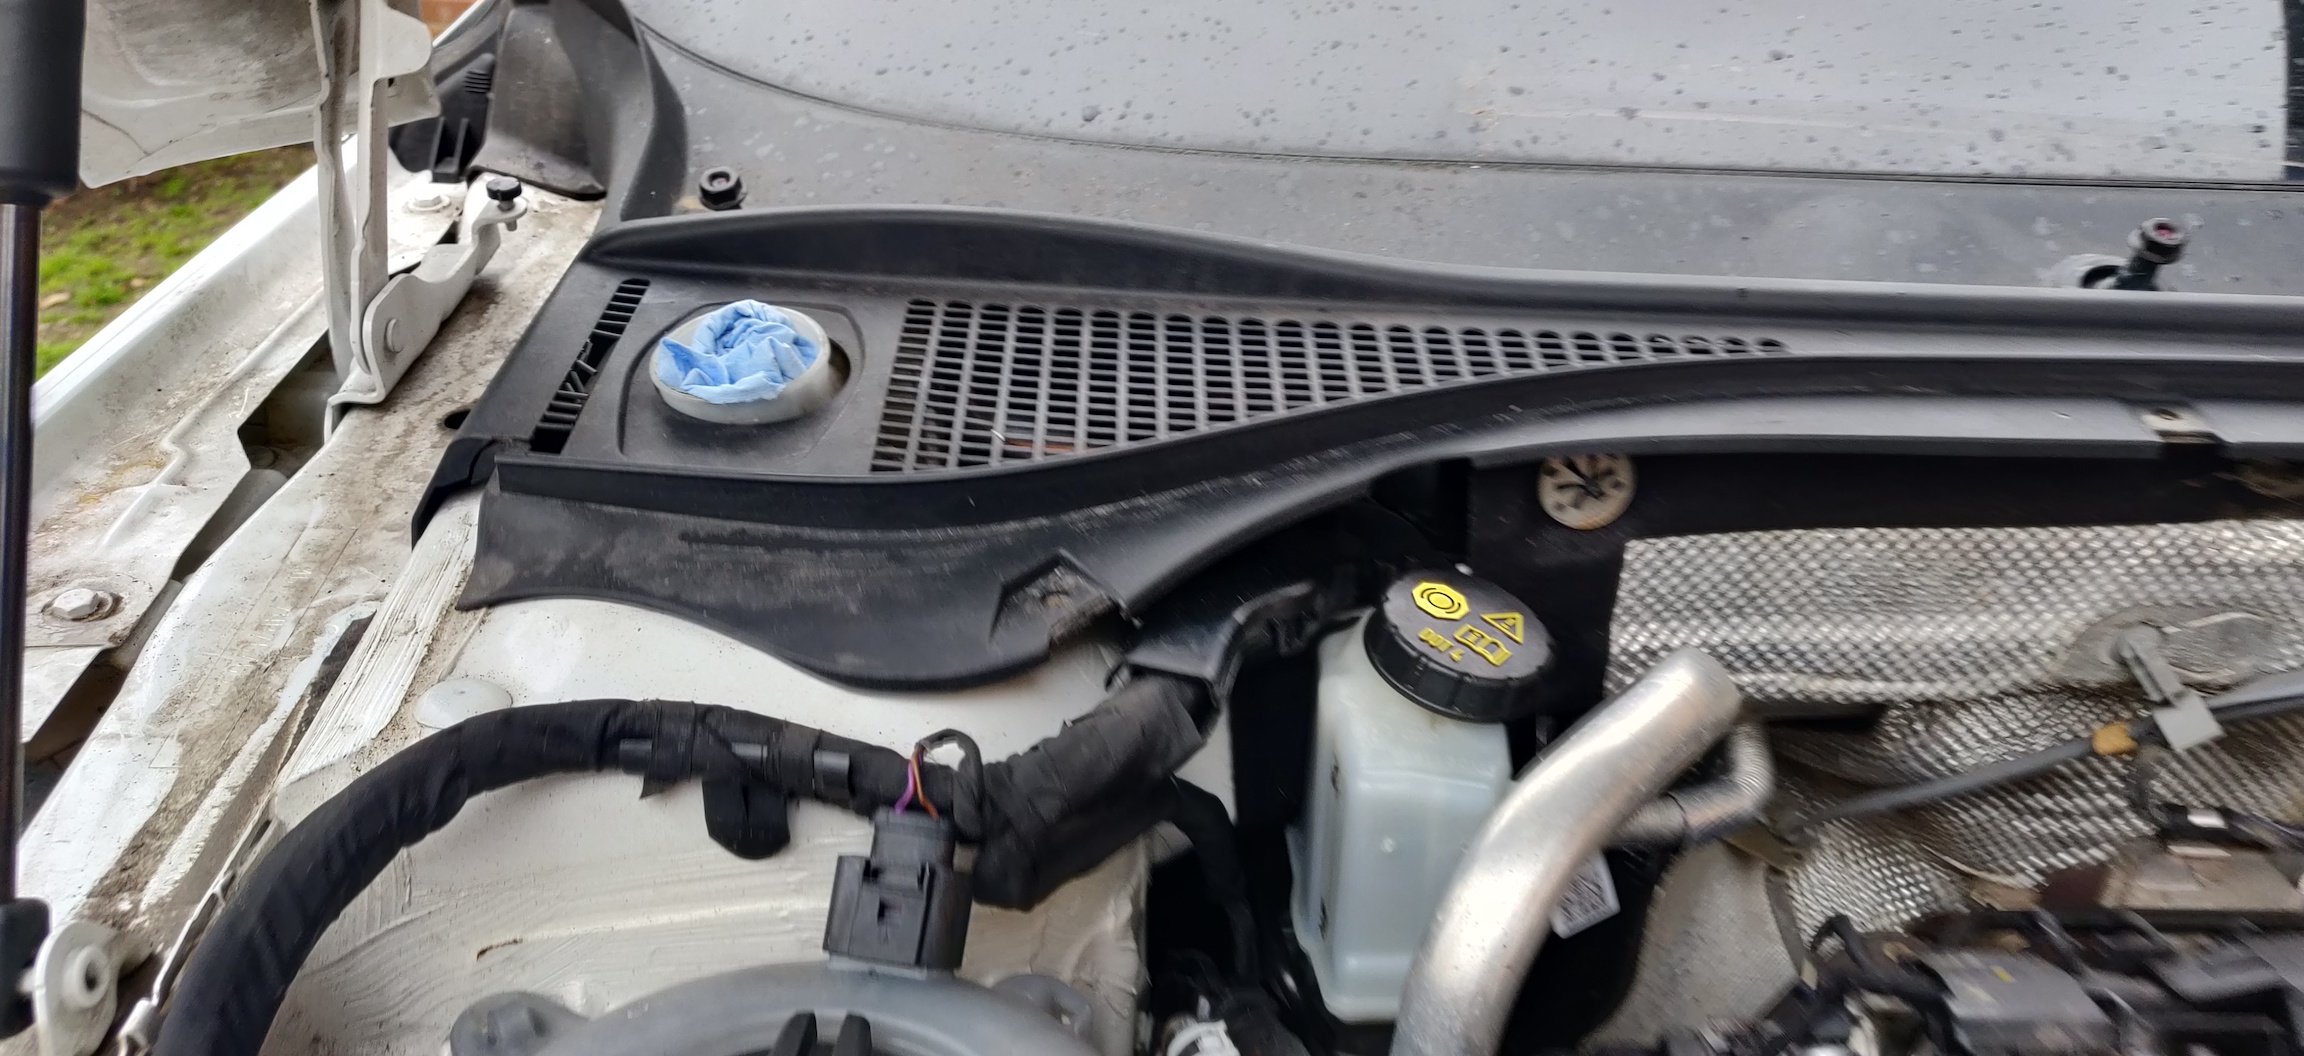
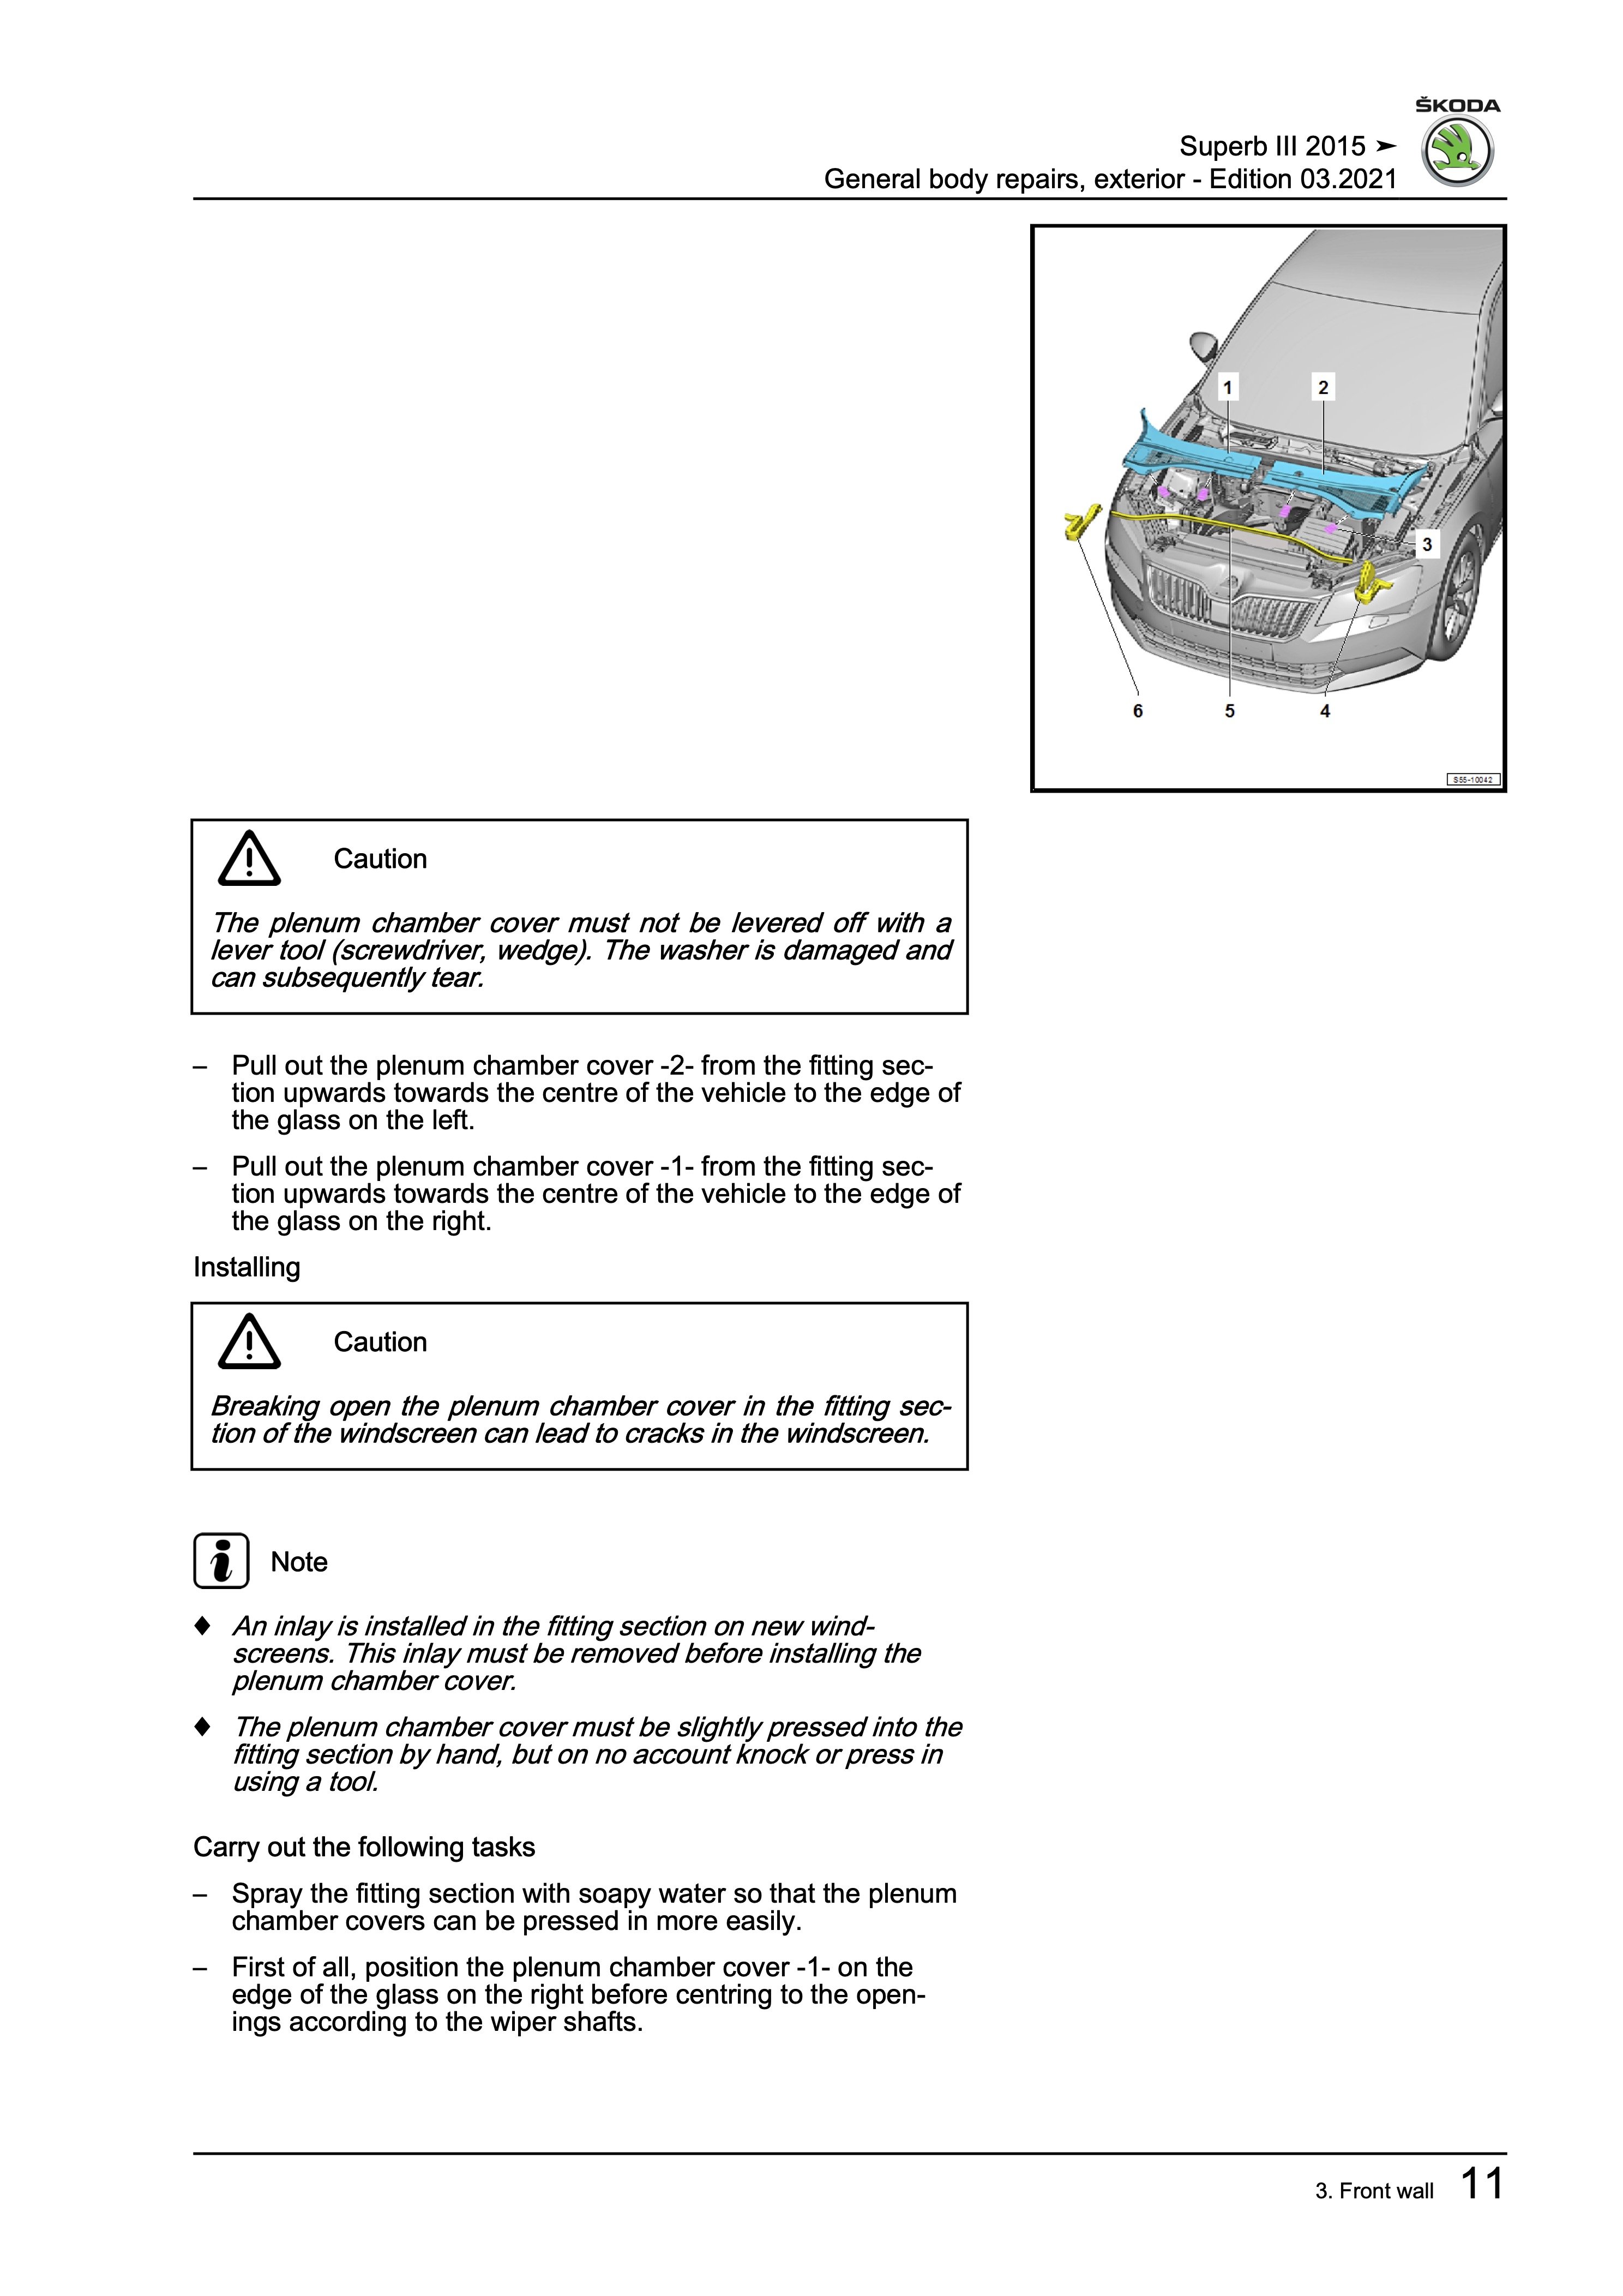
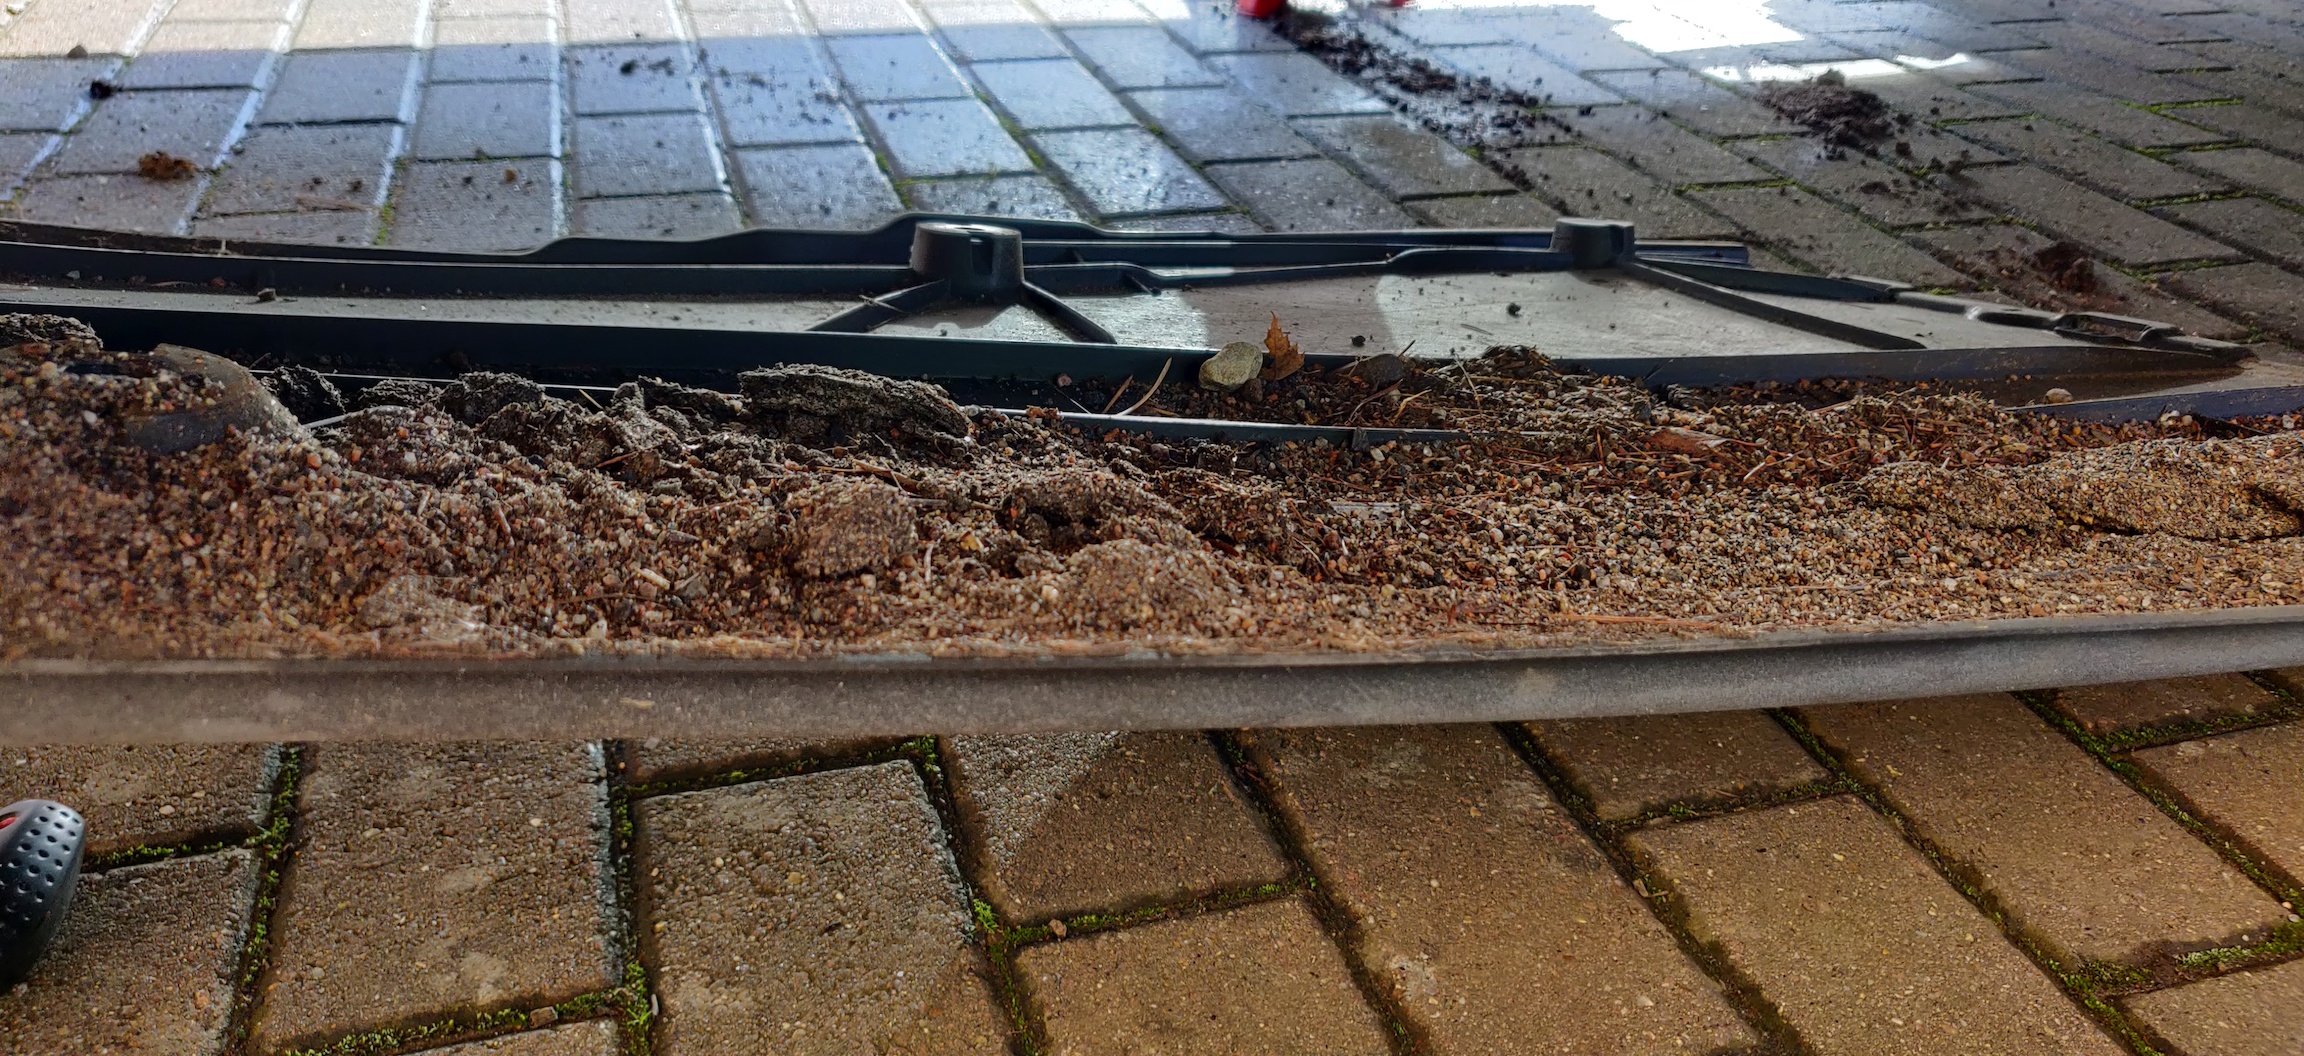
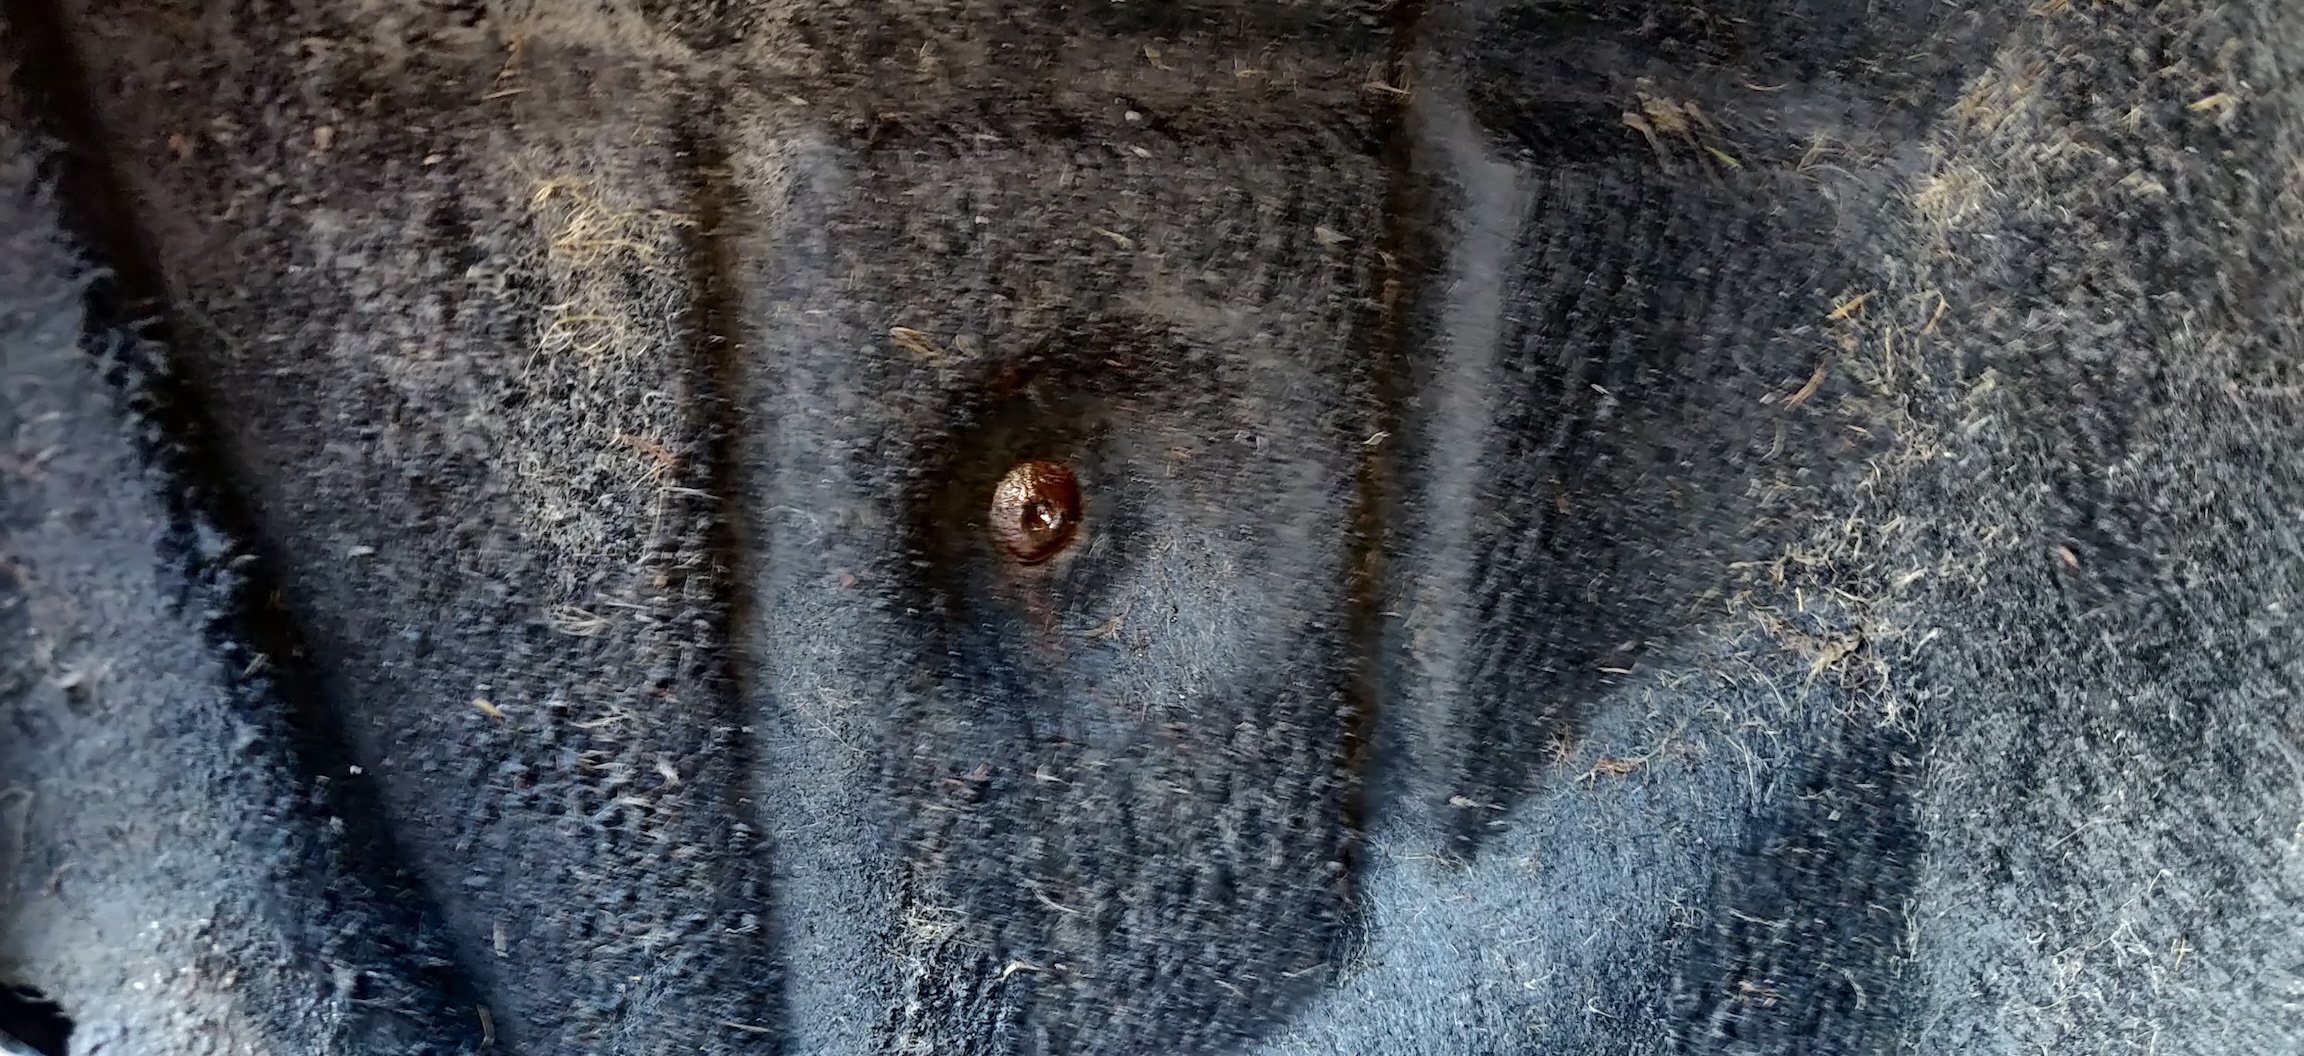
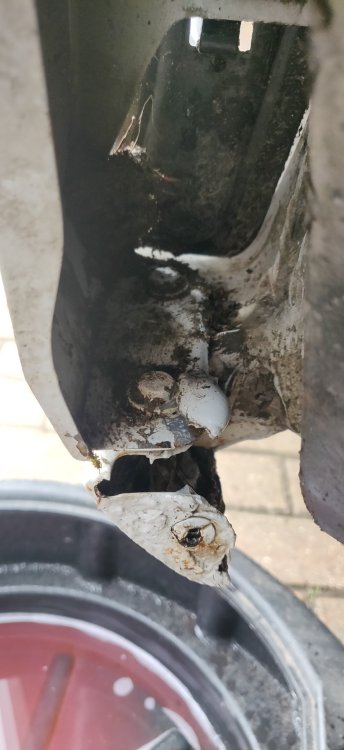
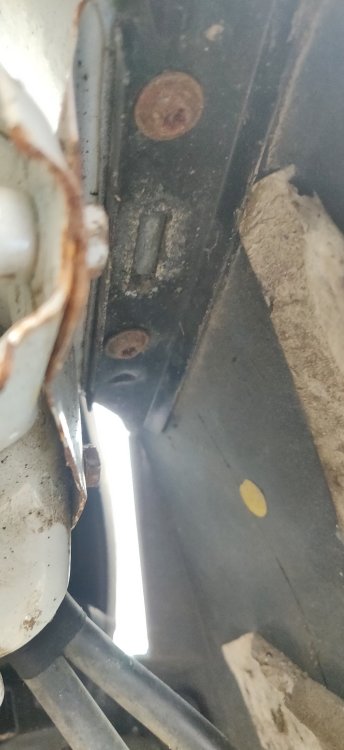
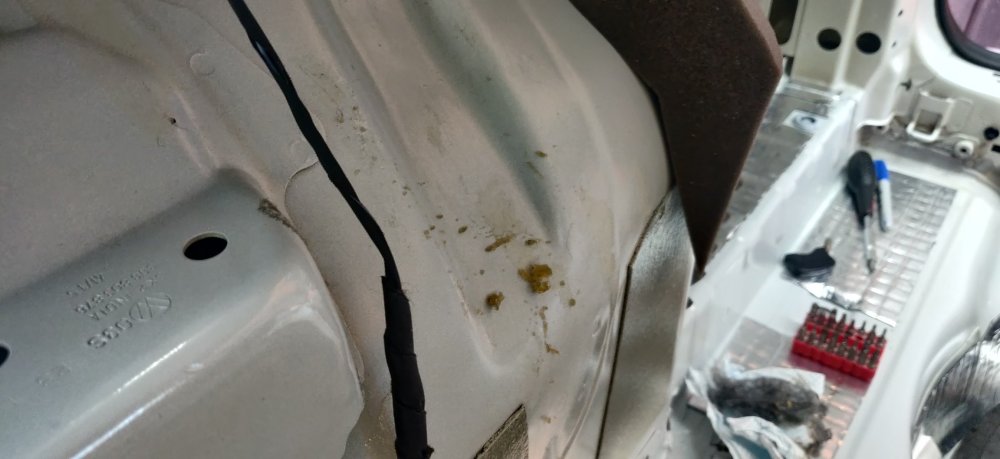
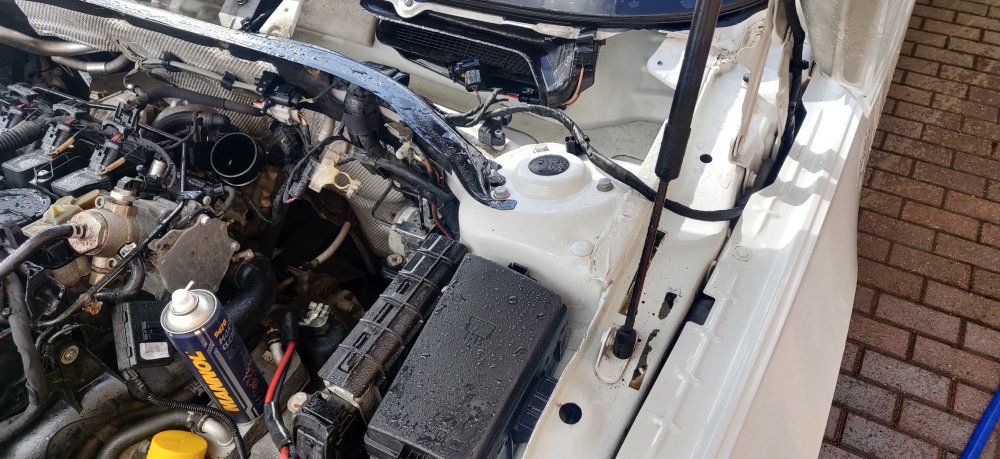
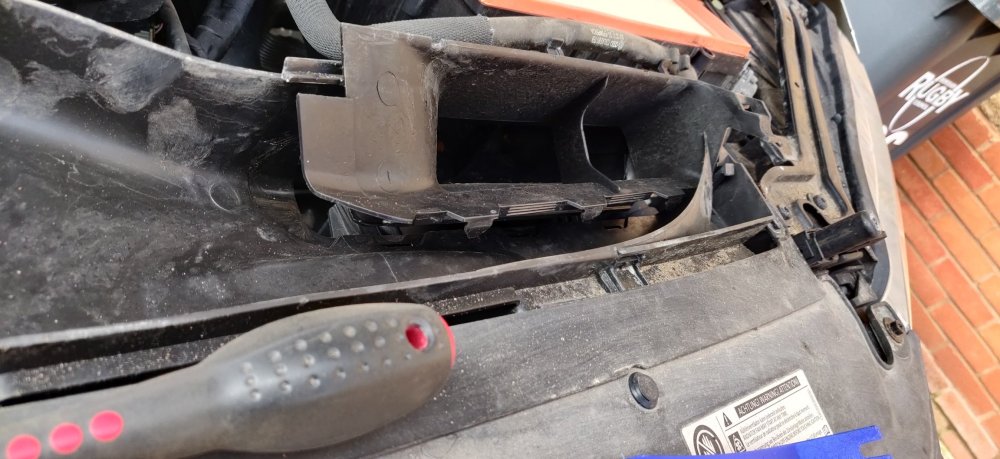
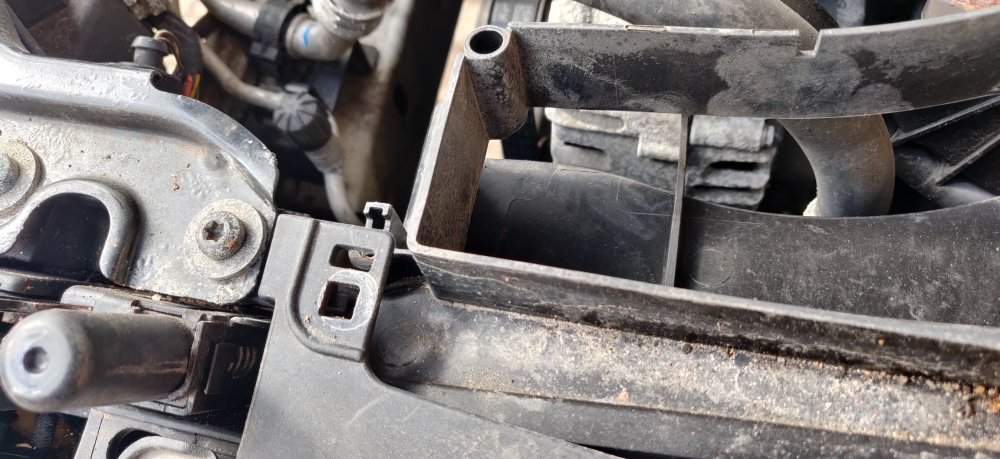
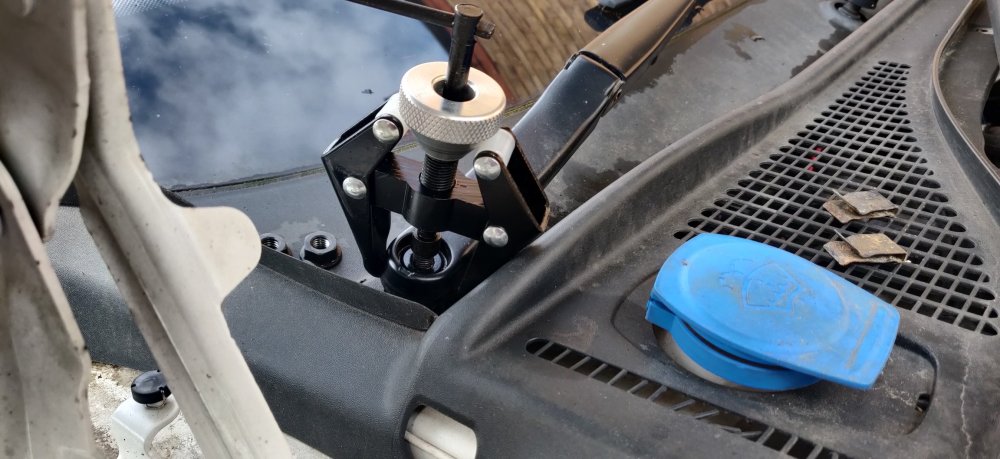
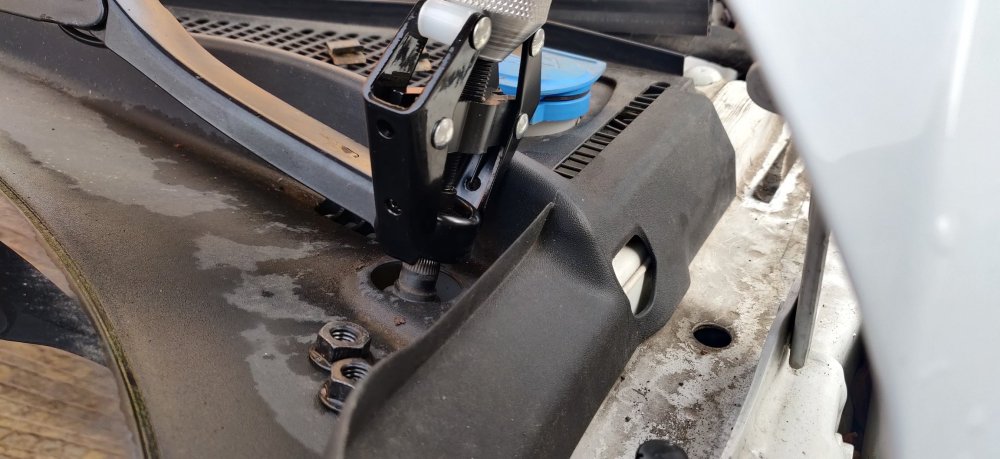
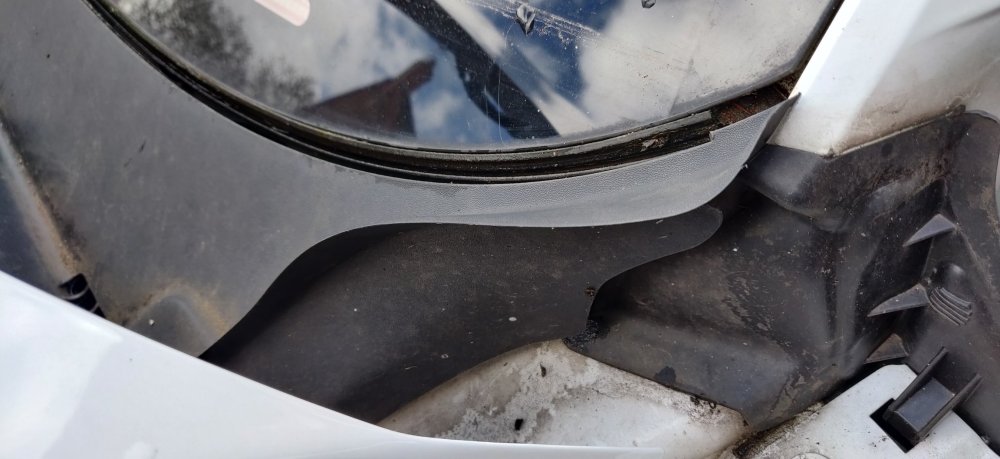
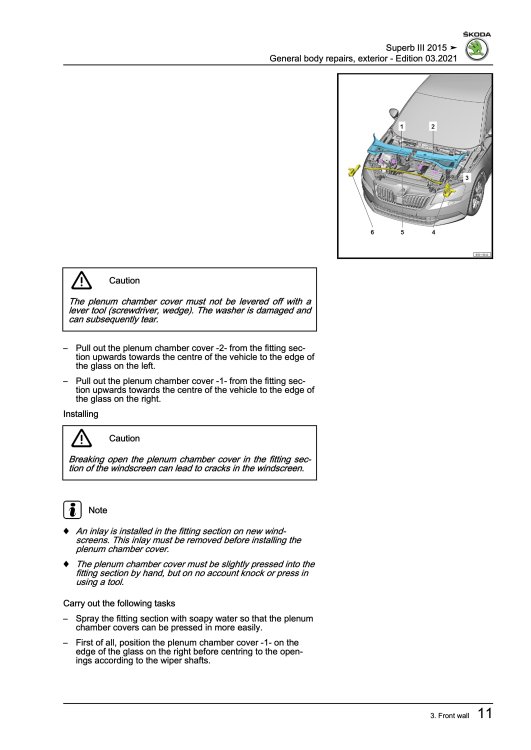
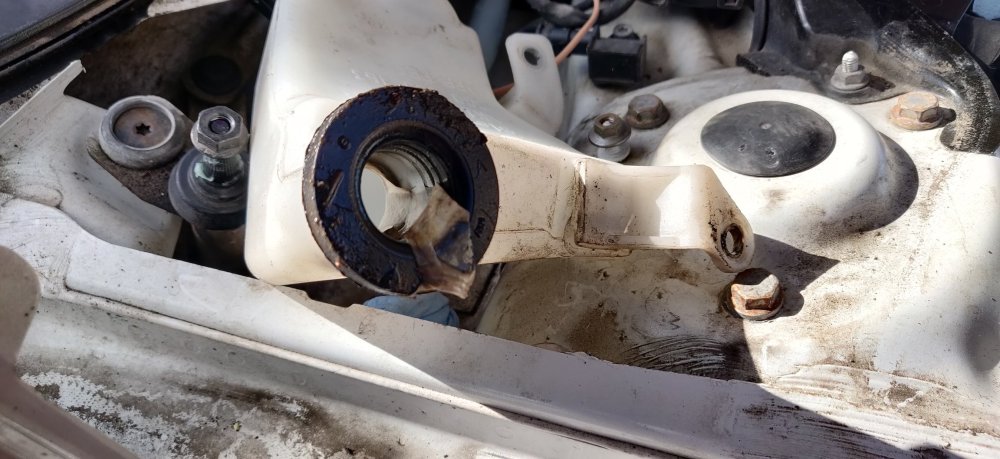
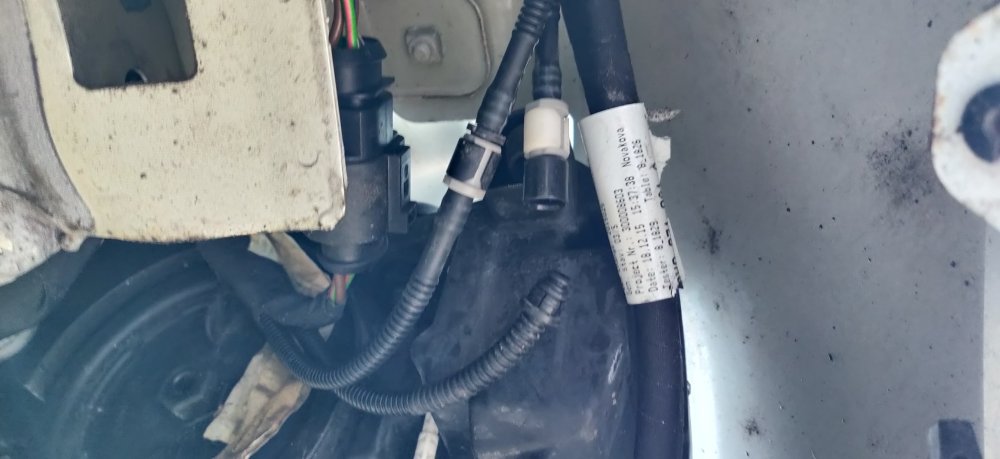
Several things involving the engine bay happened today. One thing was to take the windscreen cowl off, as I eventually want to get the washer bottles out of the car, but also to make the suspension top struts easier to sort out without the cowls in place. I think I've also mentioned the air quality sensor. So firstly, the windscreen wipers need removing: It's another one of those where the thin screwdriver is needed: Many wiper arms I've encountered have used 13mm nuts (apart from the Japanese, where its 12mm, as they're superstitious folks), and this was no different. It was at this point that I tried out my new wiper arm removal tool. I'll not tally this up in the costs as its a tool I'll probably use whenever needed, not just for this car: So it's a case of mounting the jaws to the underside of the arm, and then screwing the centre downwards to start pulling the arm. Irrespective of mileage or corrosion or condition, it always feels a bit squeaky bum, as what you're actually expecting is an almighty bang to indicate it was freed from the splines: Then its a case of just using the tool further to lift it up a bit more and then the arm can be wiggled free. The driver side was tougher than the passenger side but both got free without major drama. Rubbed some corrosion block grease onto the splines for the future. Next was to remove the washer bottle cap as it looks like the only thing on the driver side blocking the cowl: Just a case of wiggling and unclipping it. The neck didn't look great: This could go some way to explaining the blocked washer jet and the subsequent MoT failure. More reason to take the washer bottle out as who knows what else is in there. For now, just bunged it: So, here's an excerpt from the workshop manual I have read "Pull out the plenum chamber cover -2- from the fitting section upwards towards the centre of the vehicle to the edge of the glass on the left" so many times and I still don't get it. I heeded the warnings about cracking the windscreen to heart and just fumbled about in an oh so careful manner. After a few minutes, I managed to do this: The outer corner of the cowl lifted and popped out. Once done, the cowl is able to pivot, so essentially, the two sides of the cowl pivot around the centre of the car, and then also can be angled up at the base of the windscreen. So some wiggling and lifting and both sides came out without much drama: So that's them, leaving the cowl: Will need to give this a bit of a decent wipe down, but the pic shows the air quality sensor to the far end. There's now easy access to the top of the washer bottle, which is a separate piece from the main bottle. It was two nuts, and a large rubber bung which meant a deal of wiggling and lifting: I have no idea what this weird film is and don't really want to know. I then started to tackle the nuts on the washer bottle: I found two nuts and a T20 torx at the top on the washer bottle. I stopped at this stage, as I couldn't find anything else. Hopefully it doesn't mean the wing itself needs removing, although to be honest, there doesn't seem to be any significant obstacles stopping the wings from being taken out. Something I'll have to swot on the workshop manual for. Maintenance: £1806.50 Upgrades: £952.09 Miscellaneous: £618.13


-
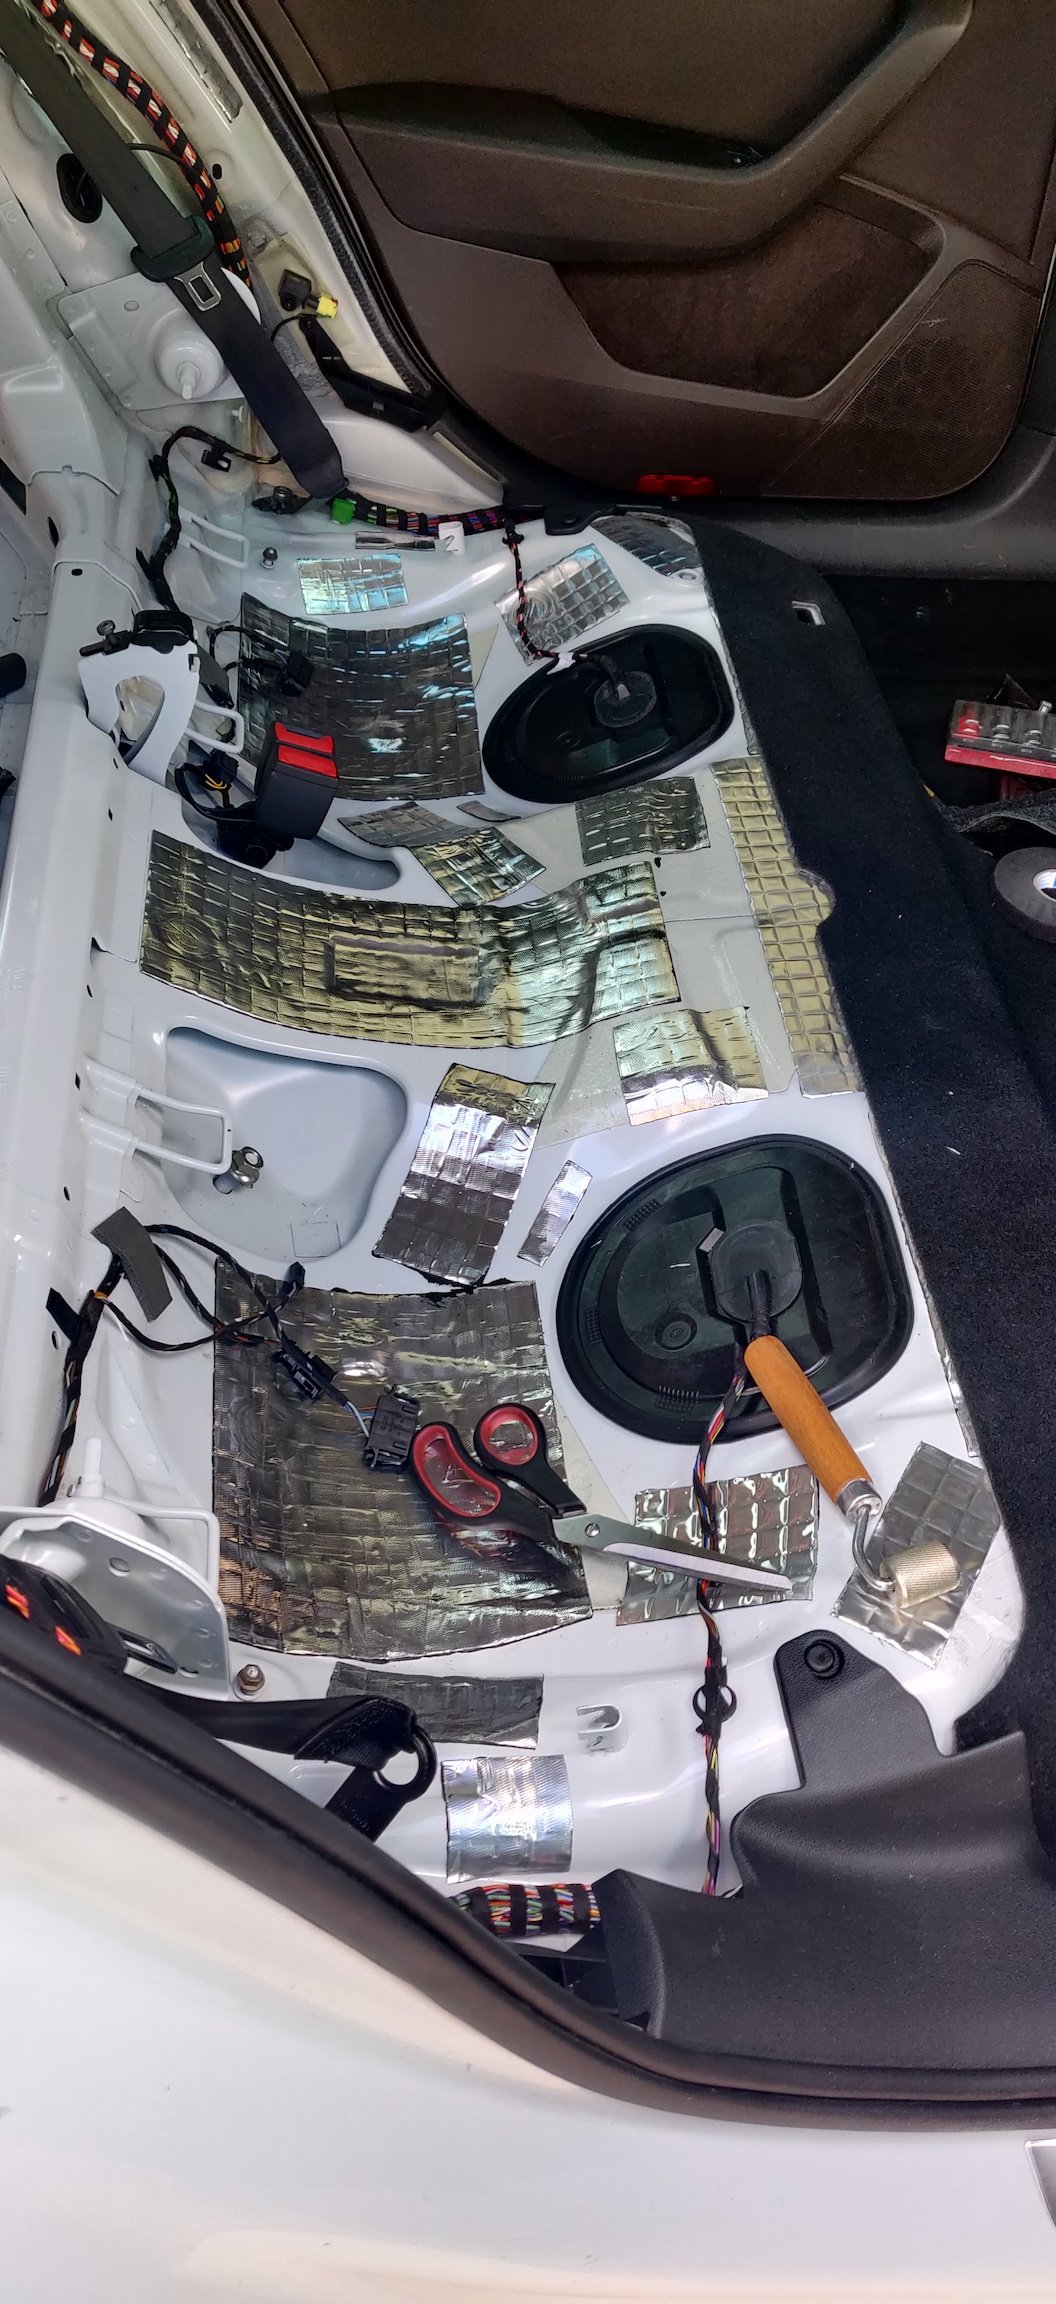
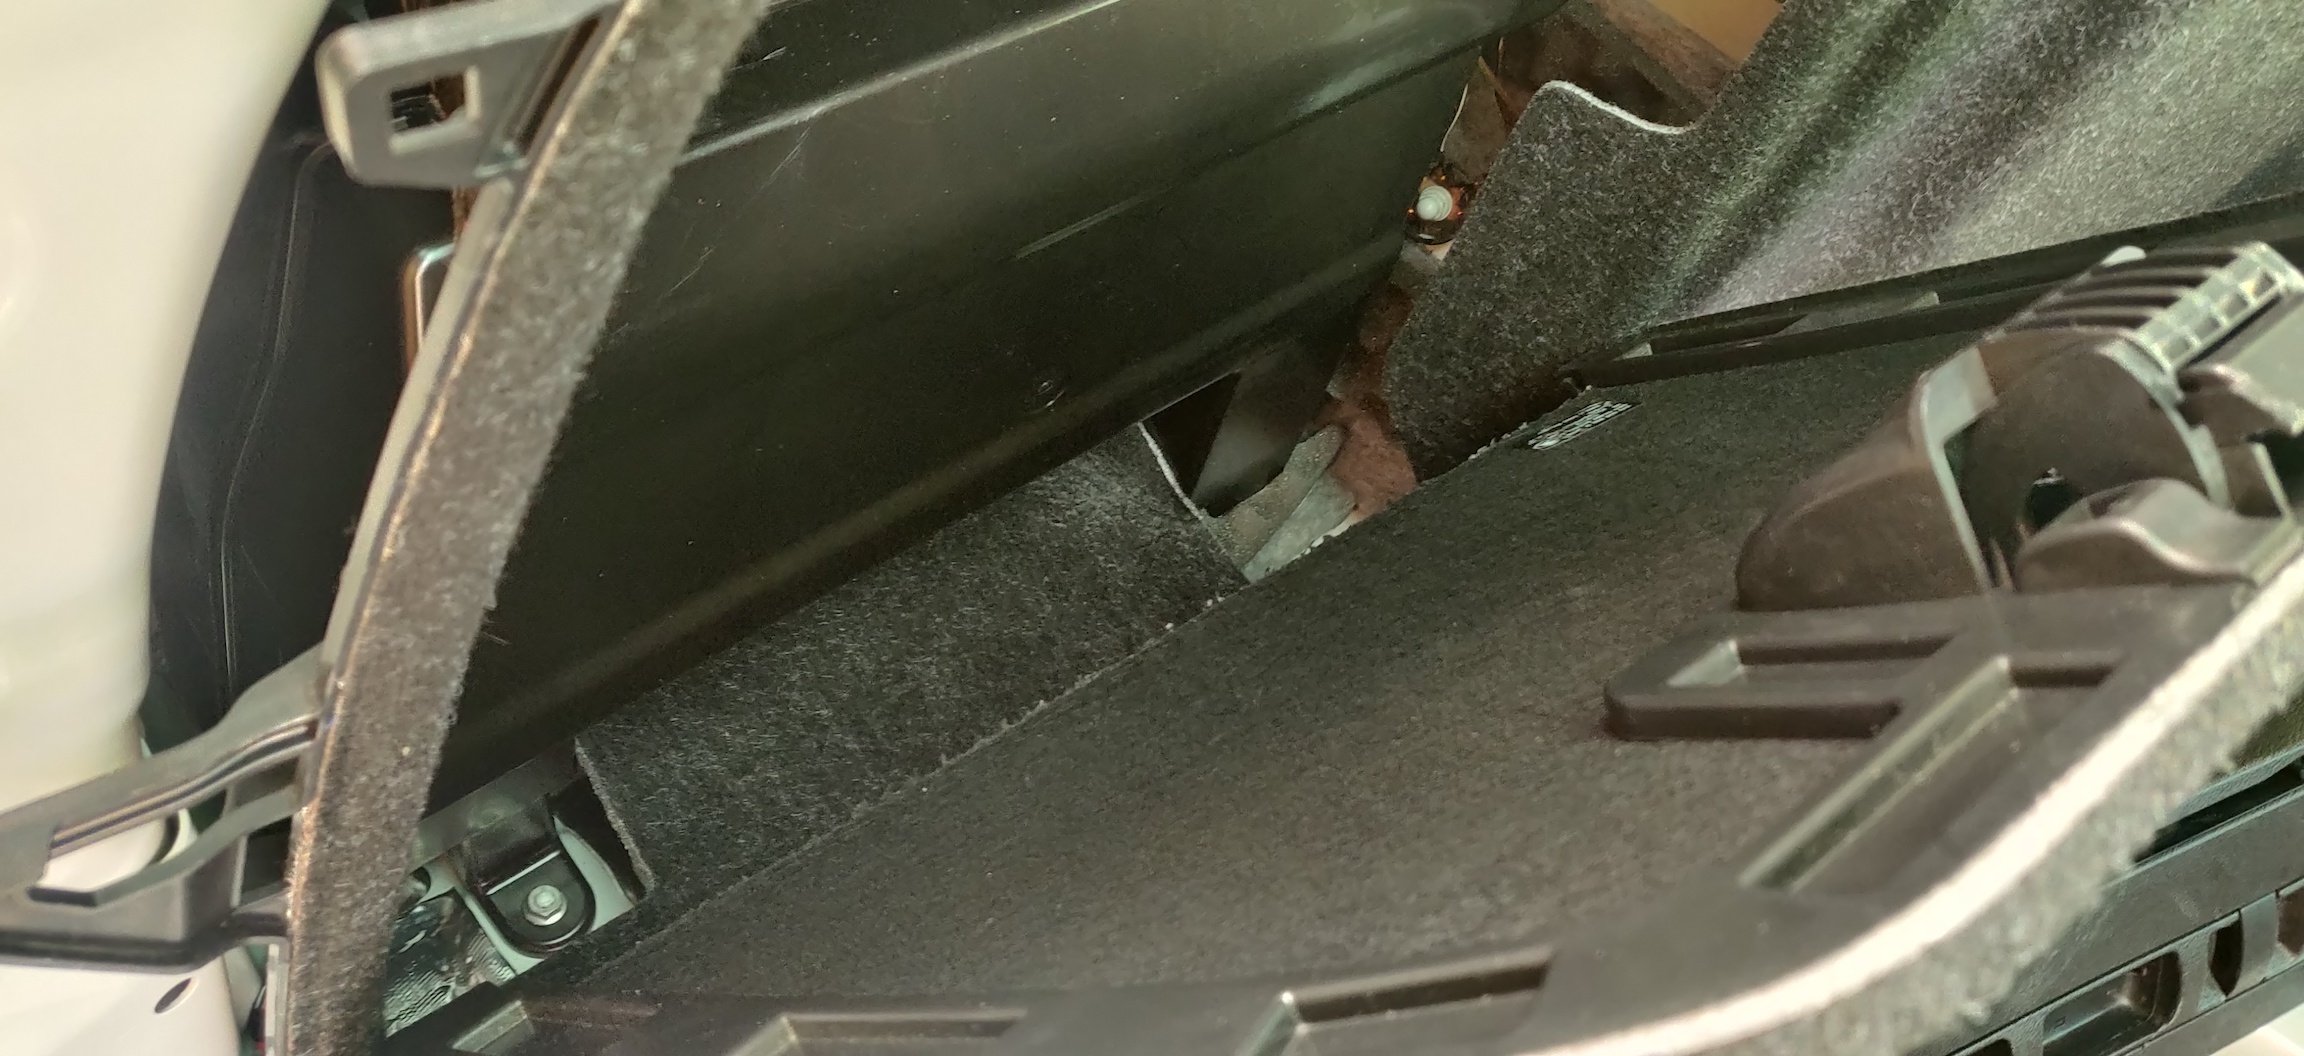
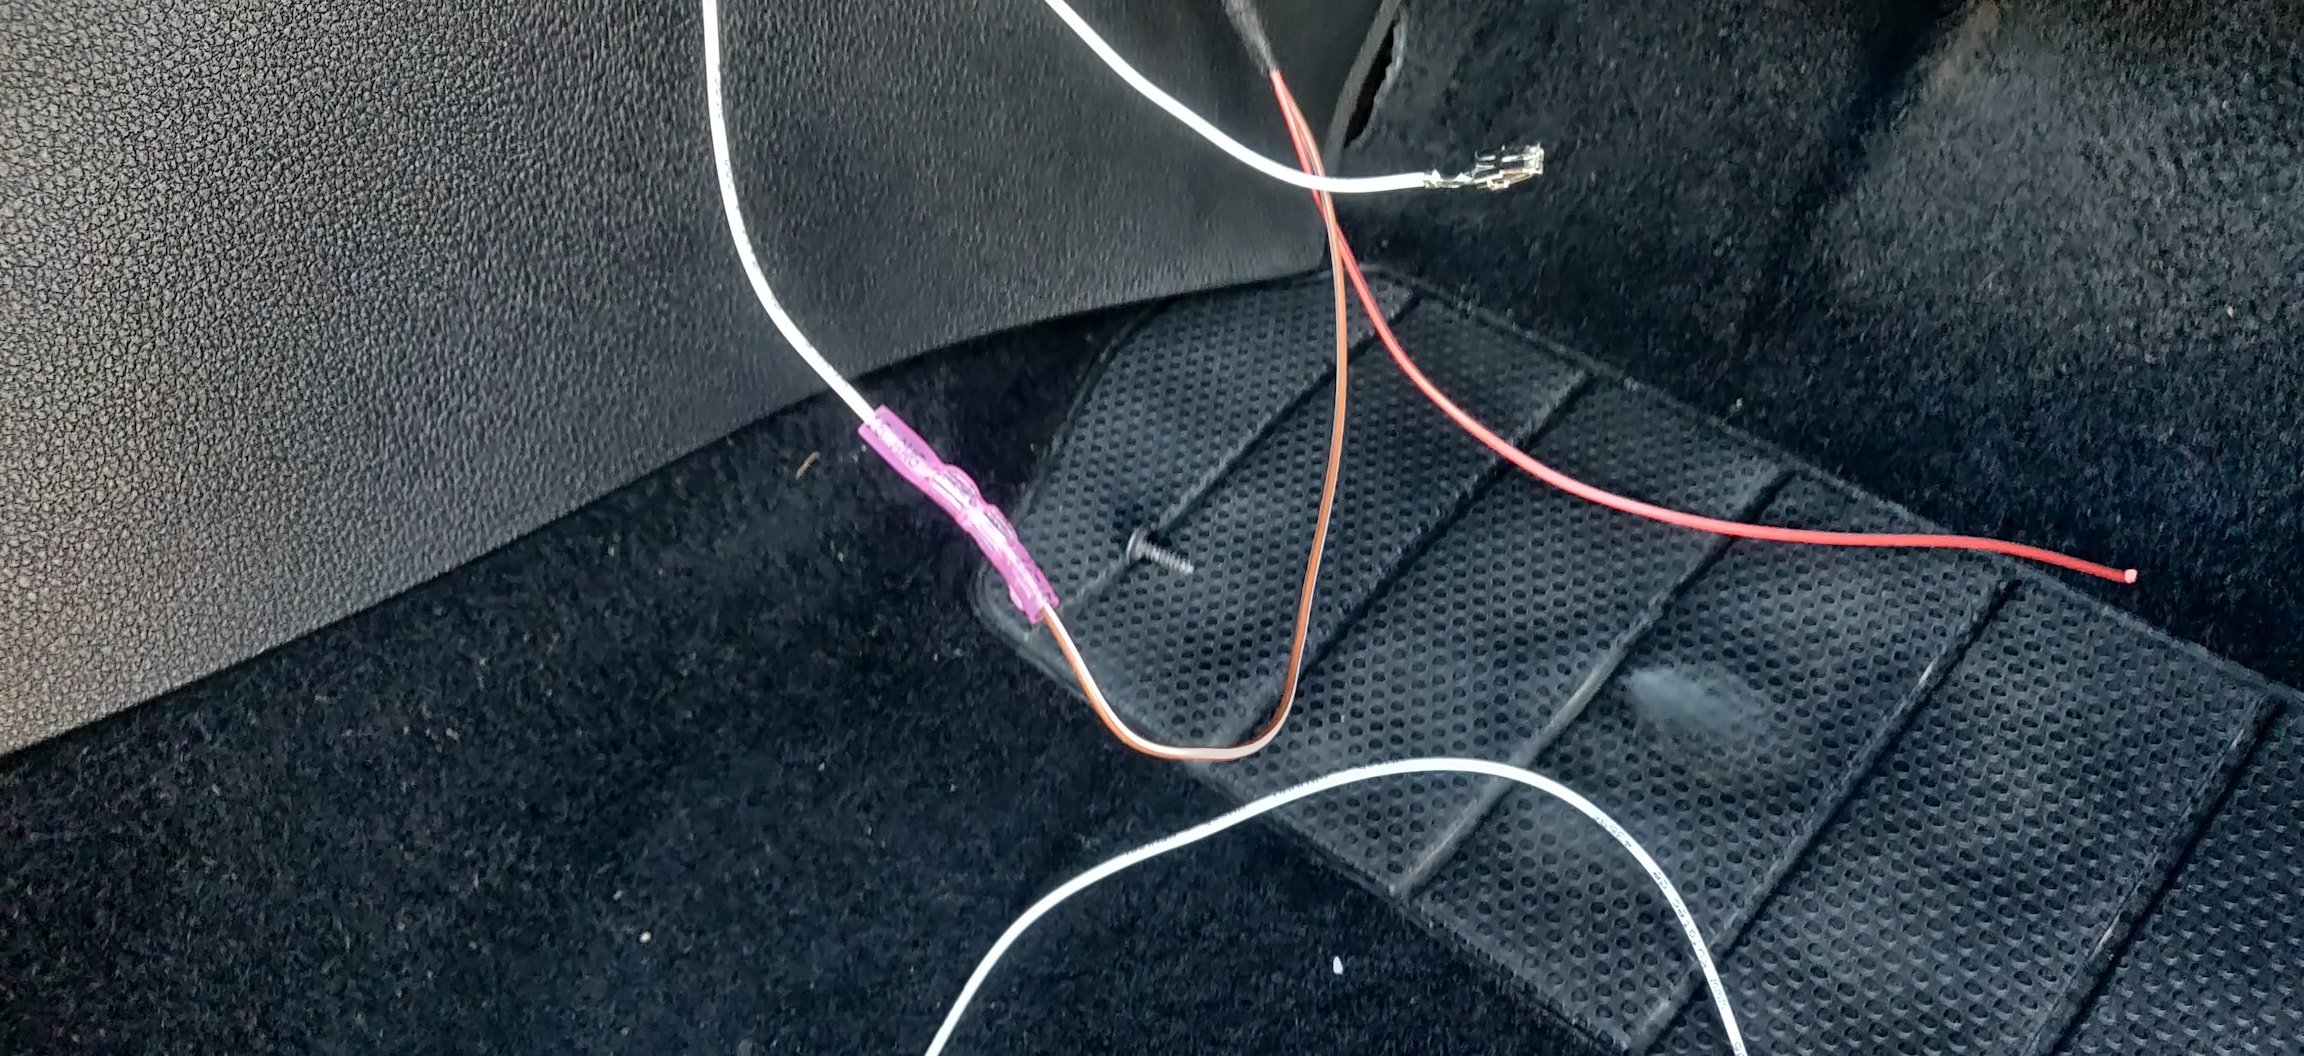
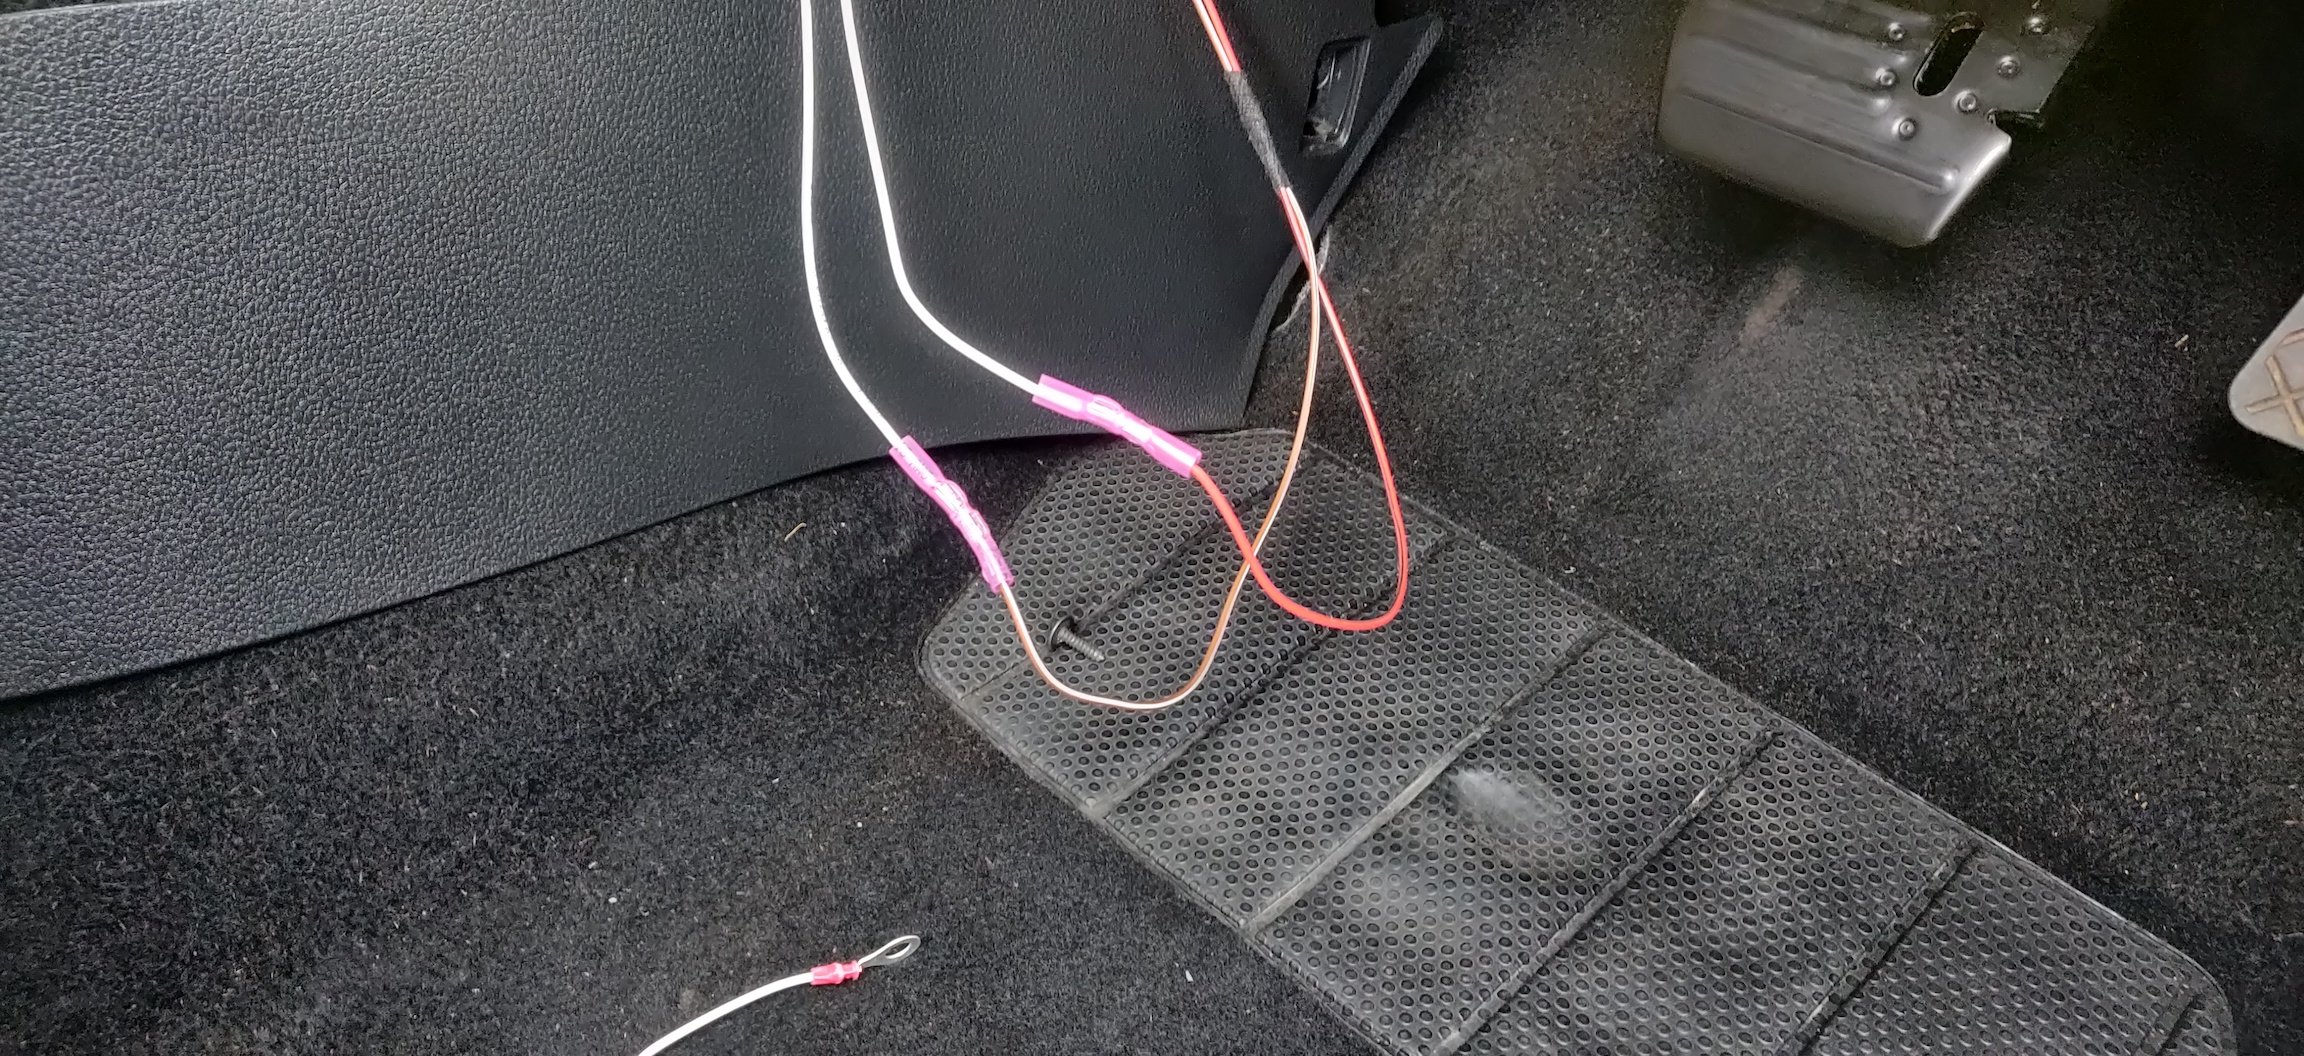
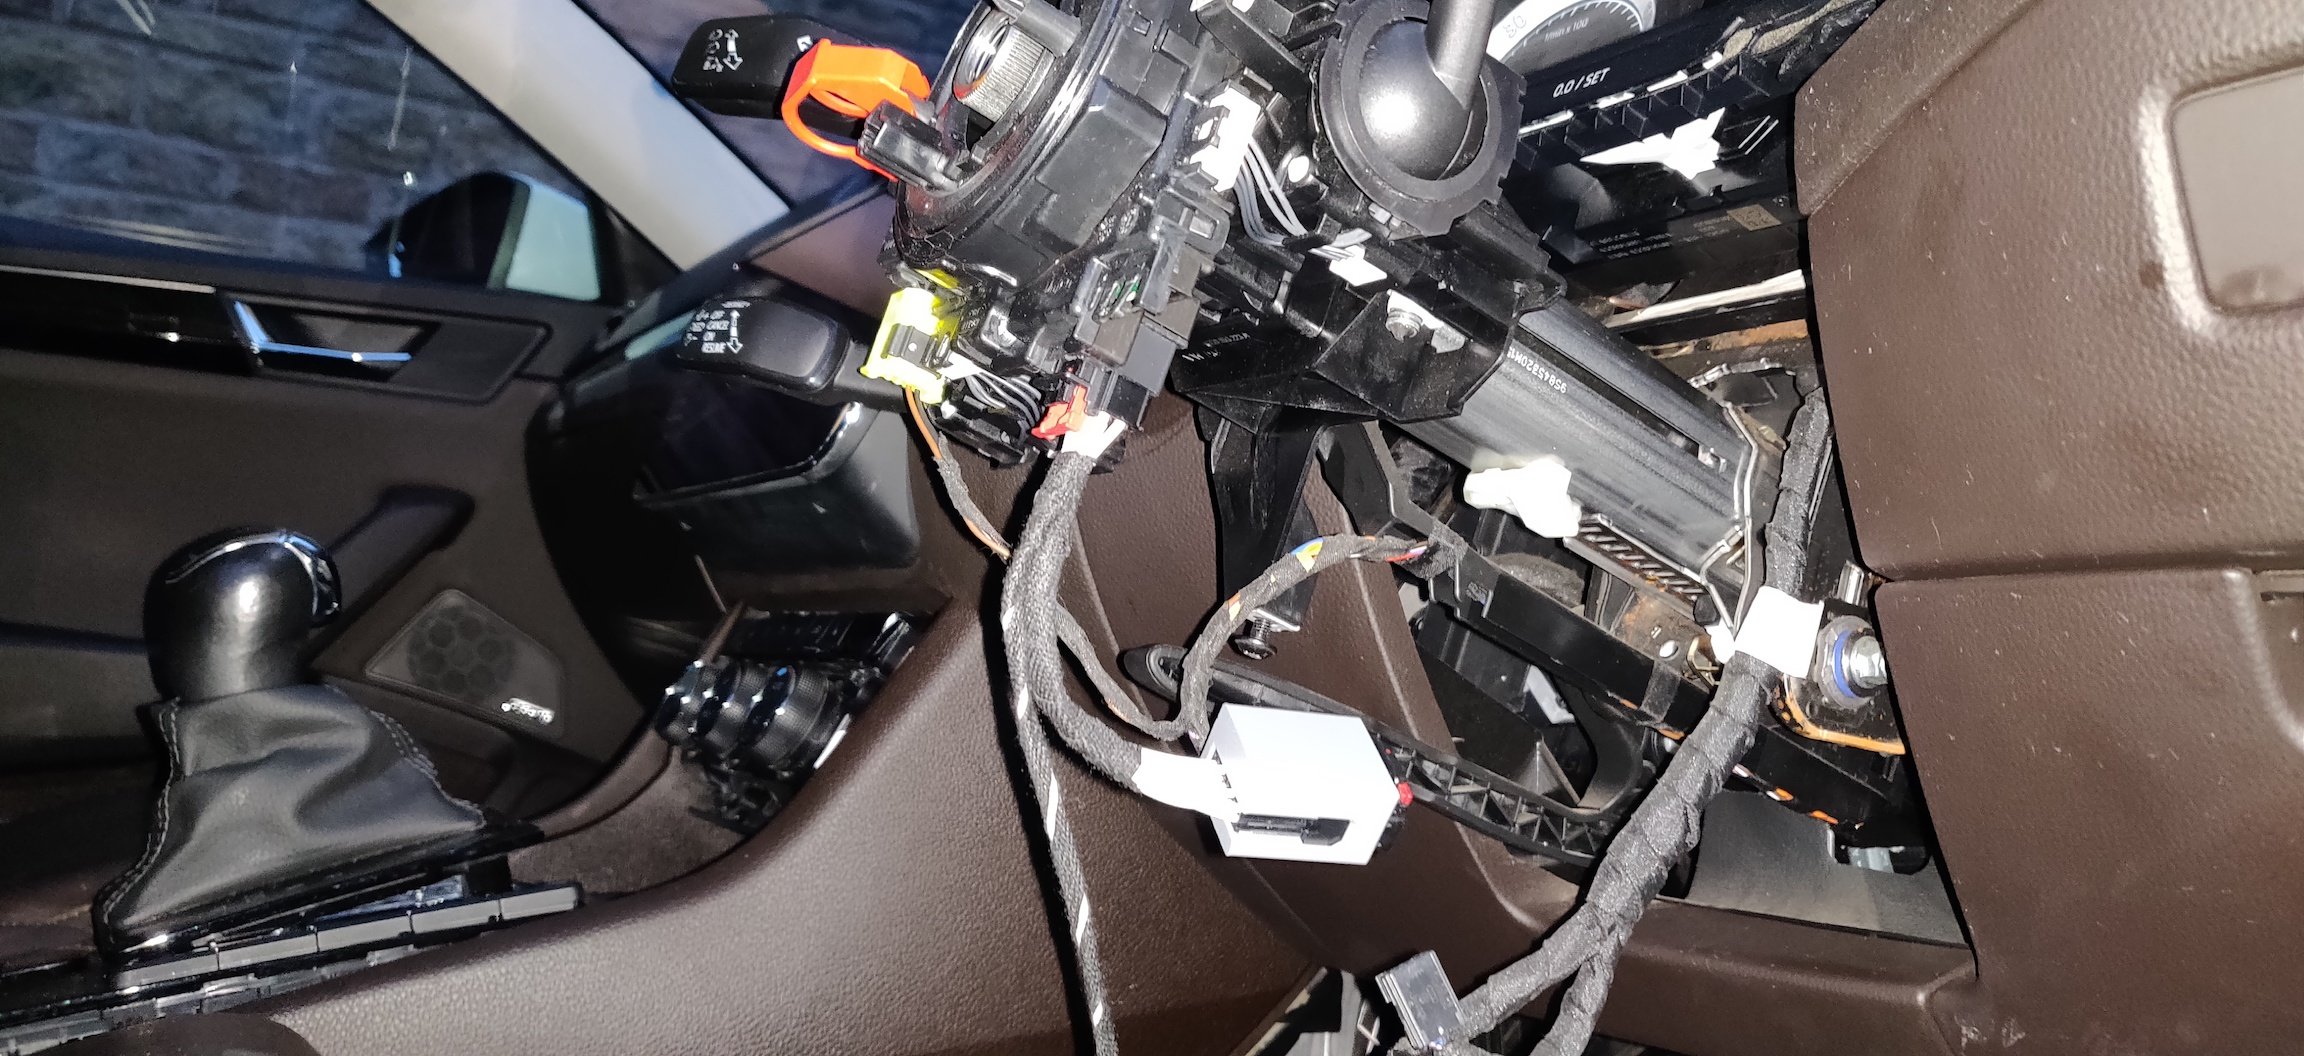
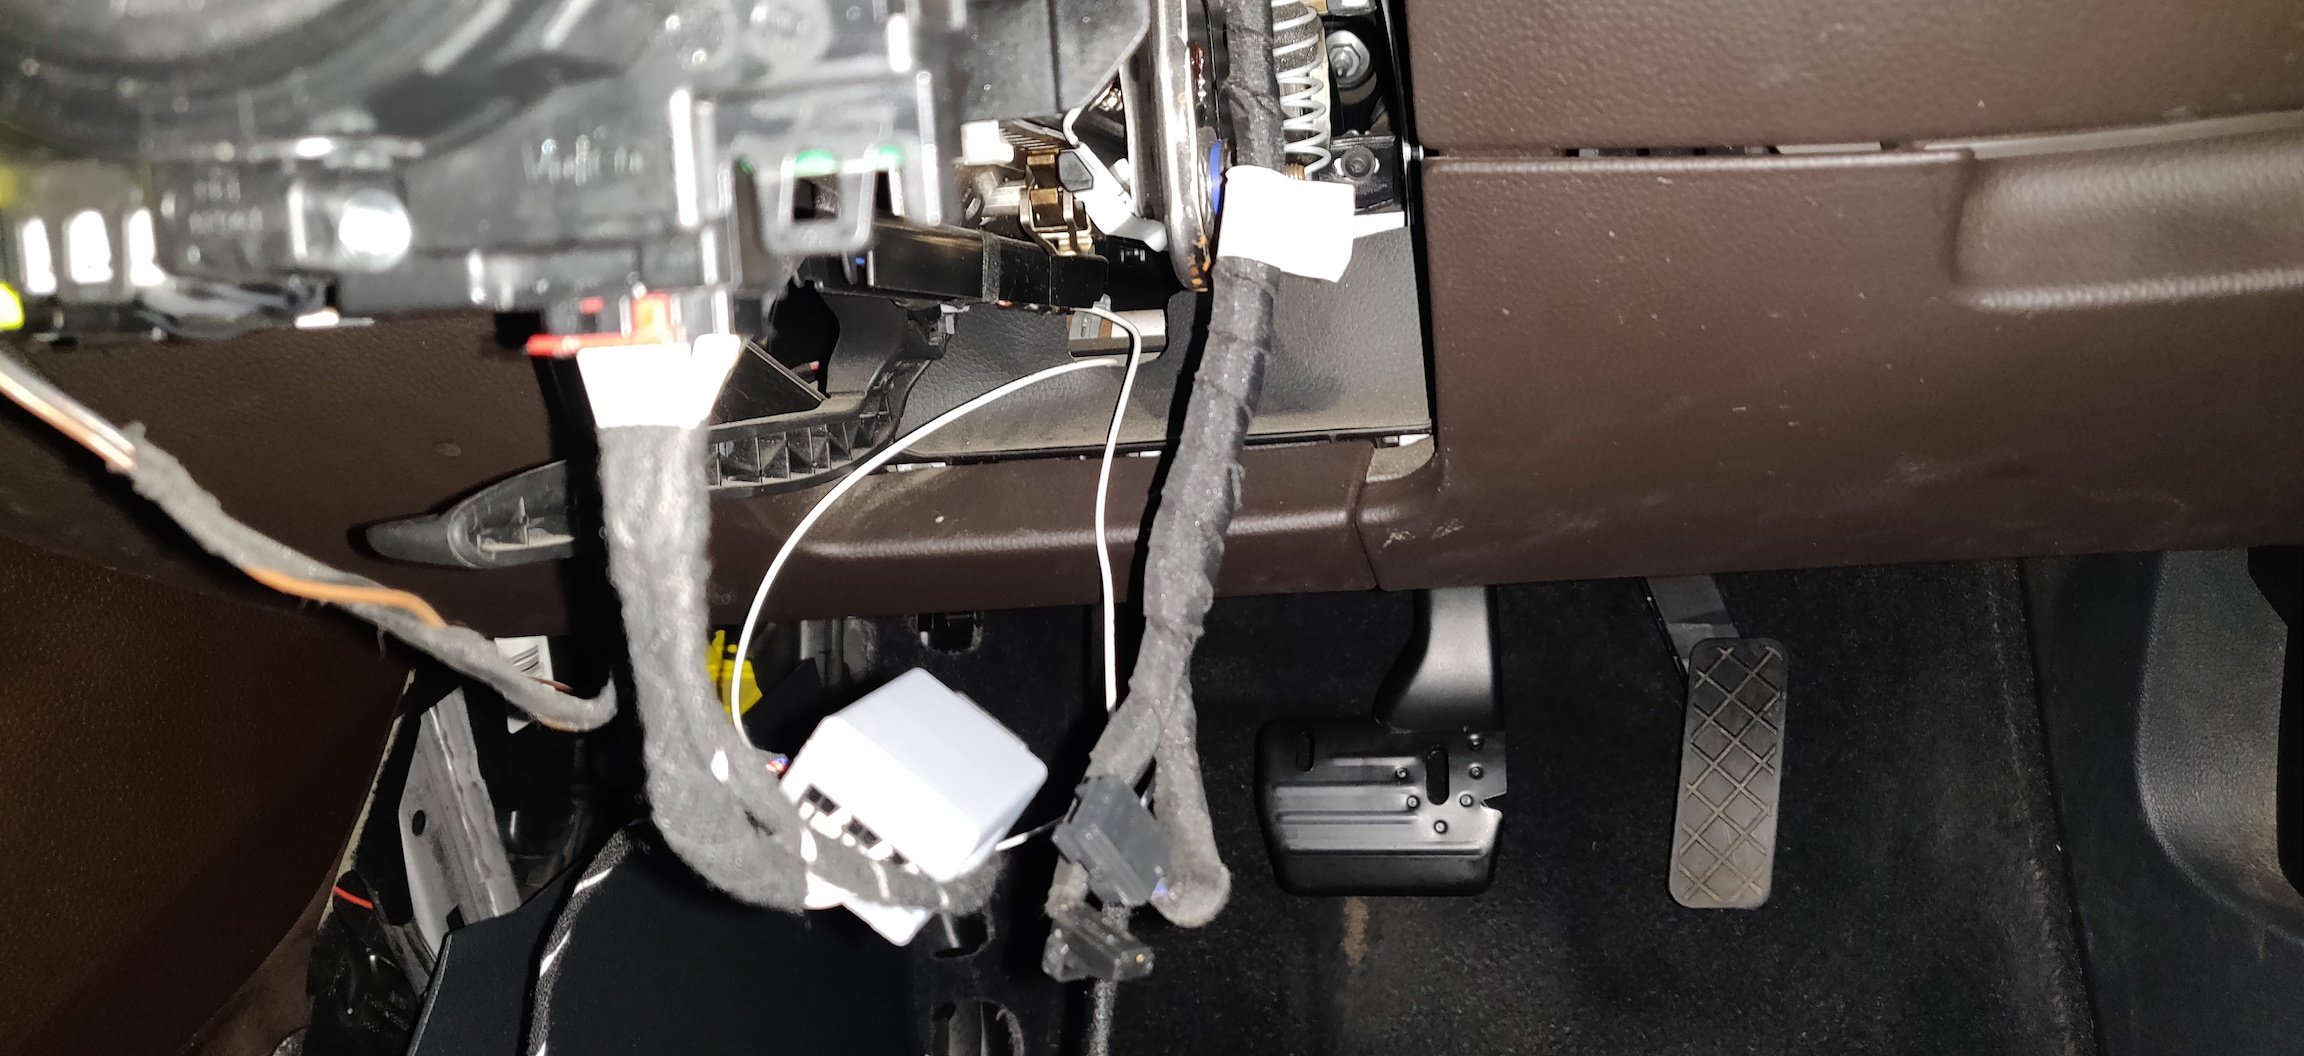
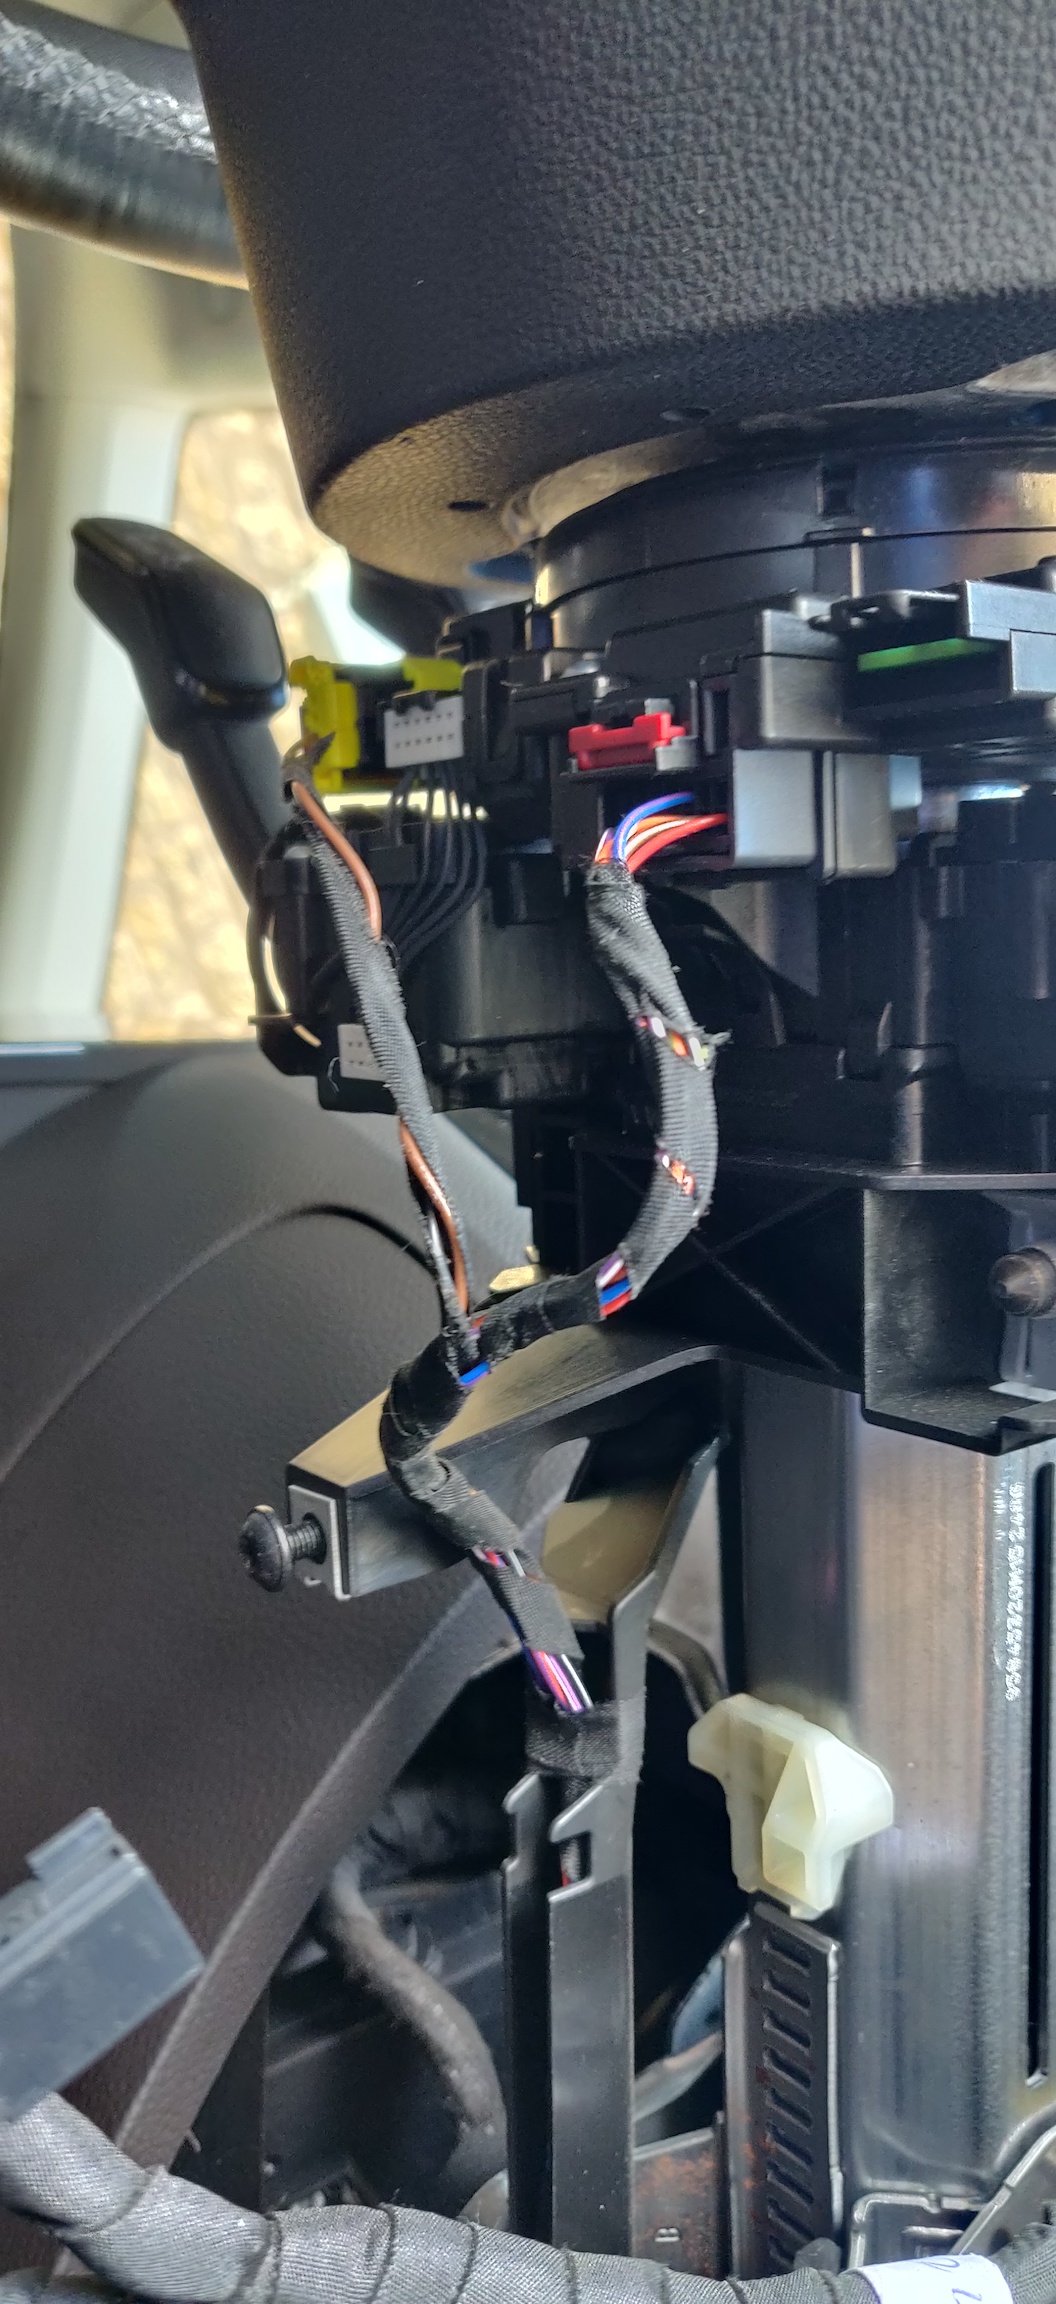
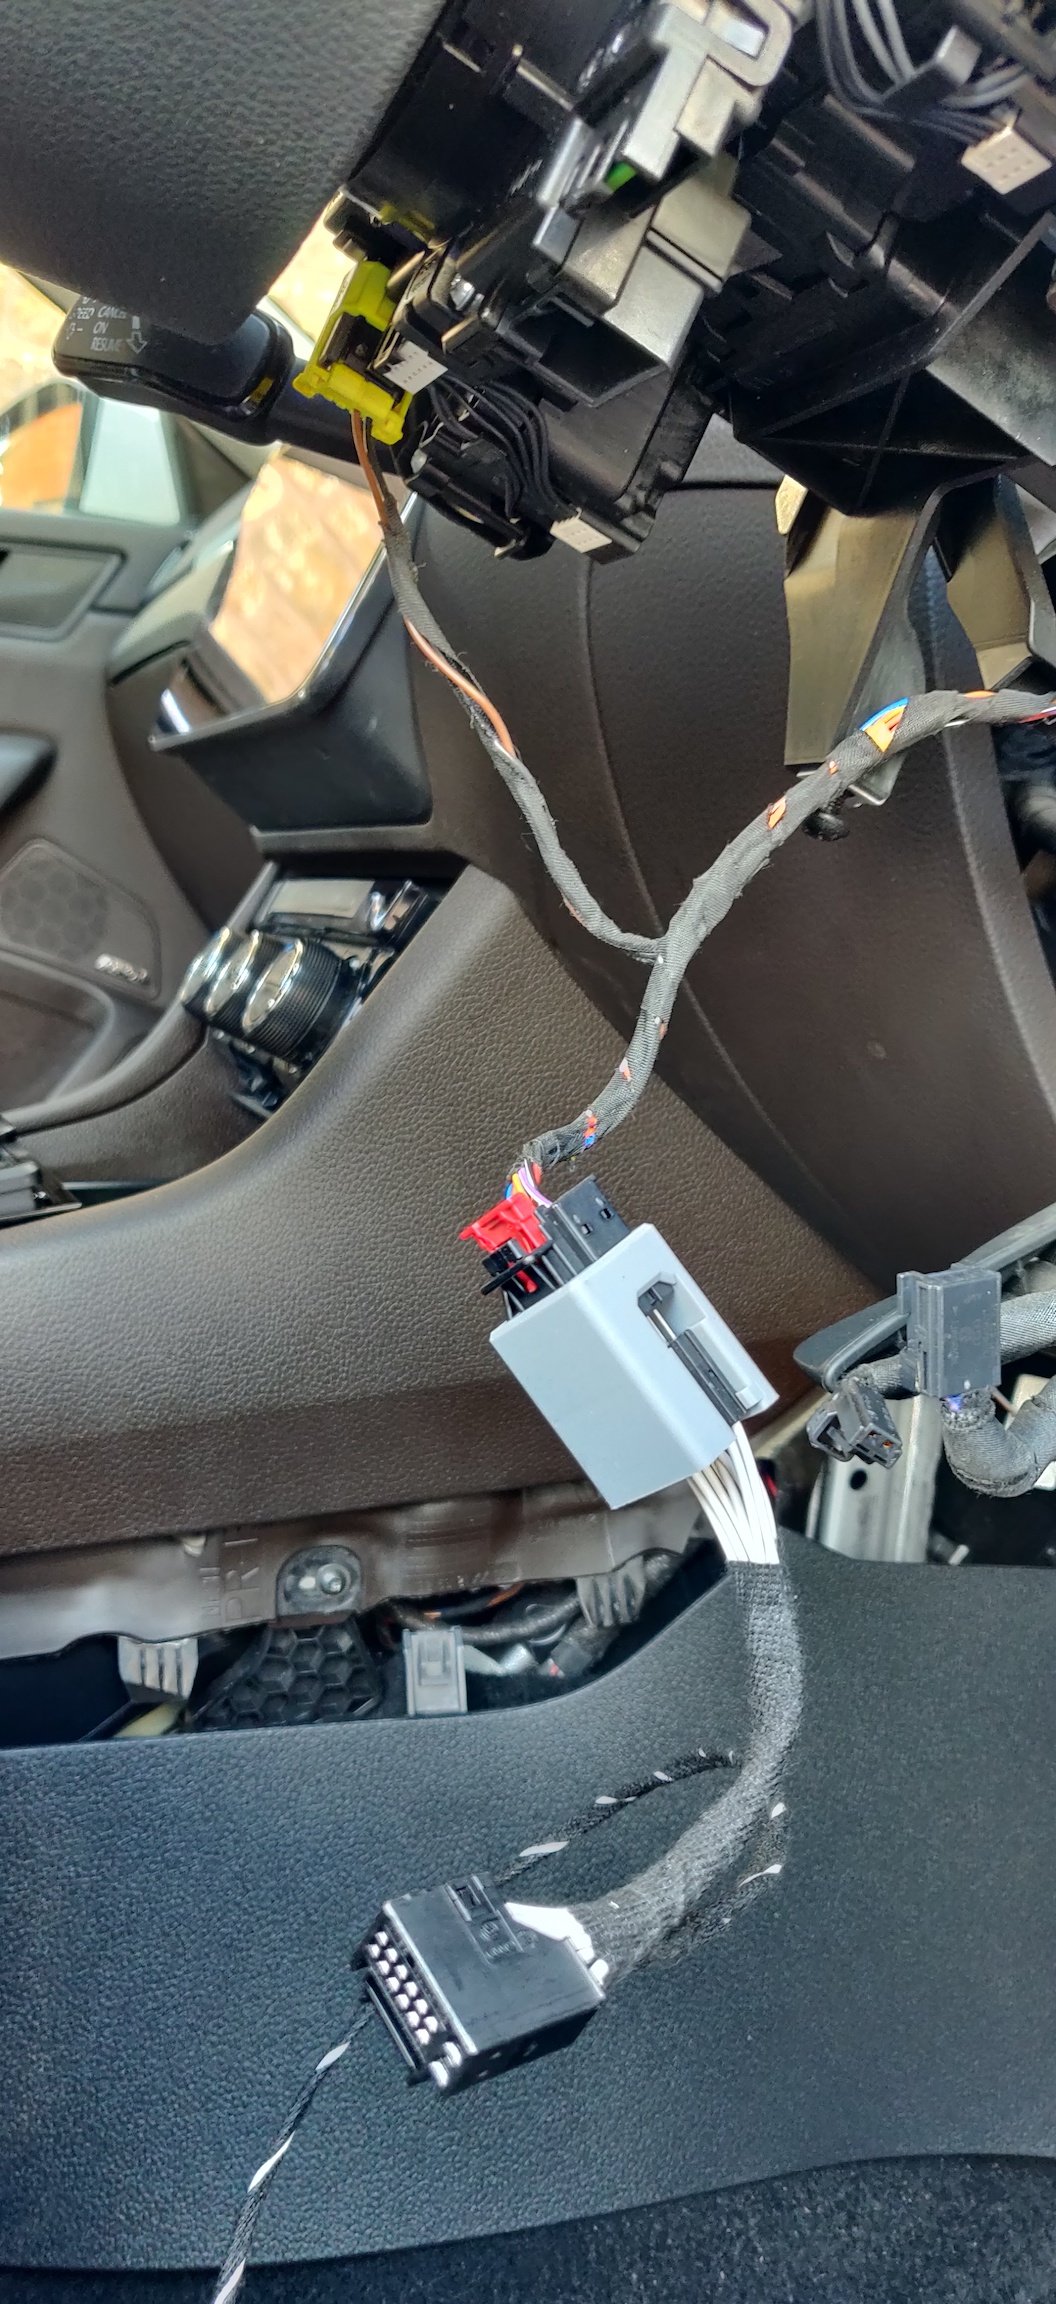
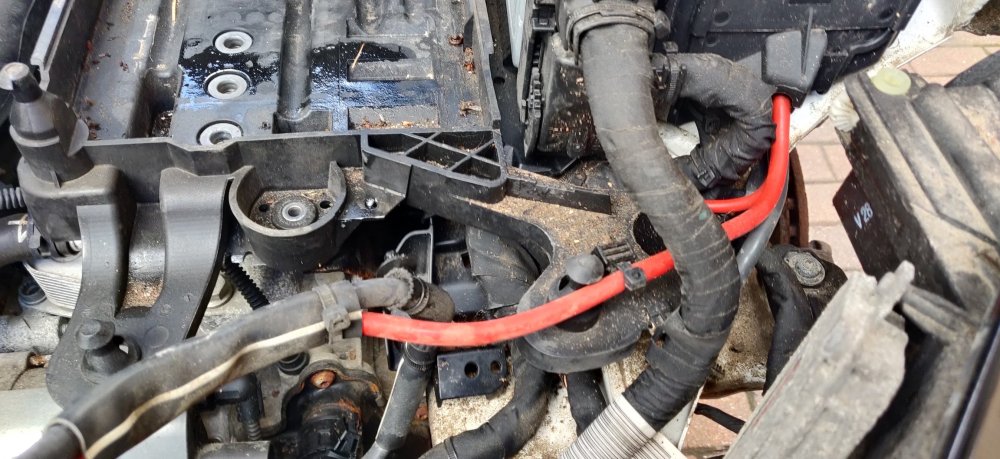
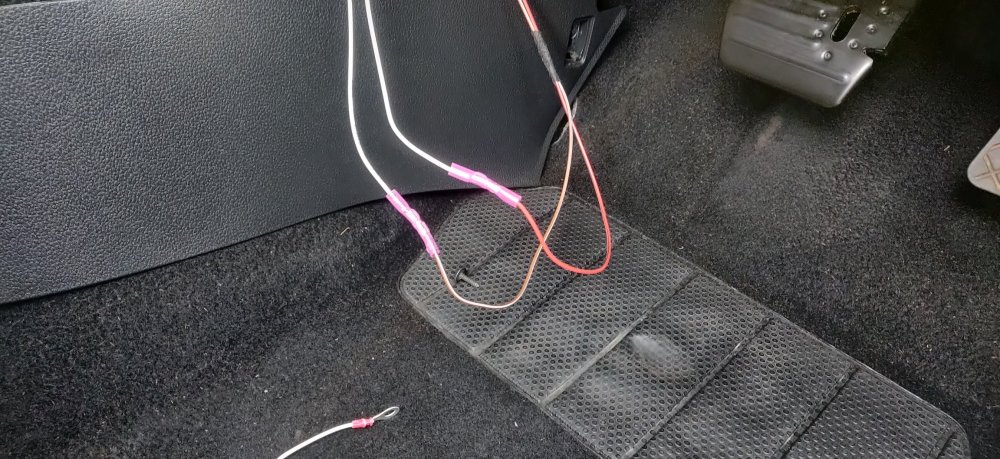
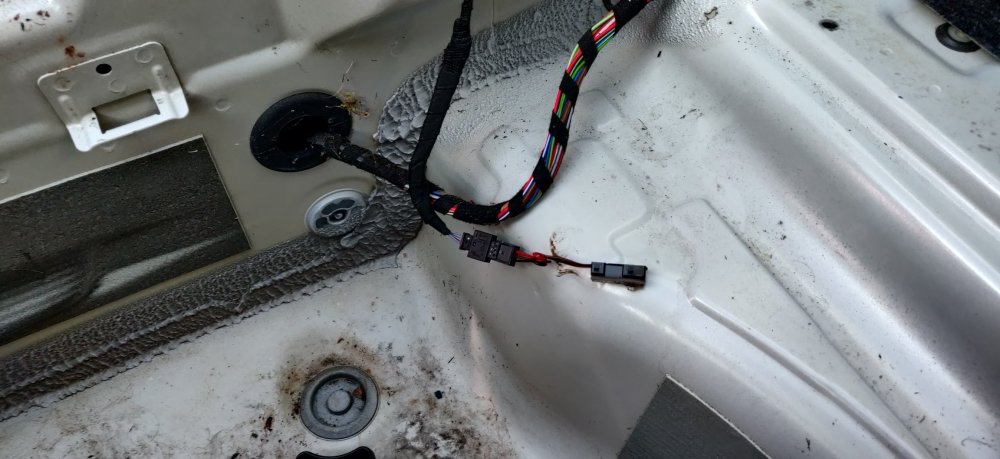
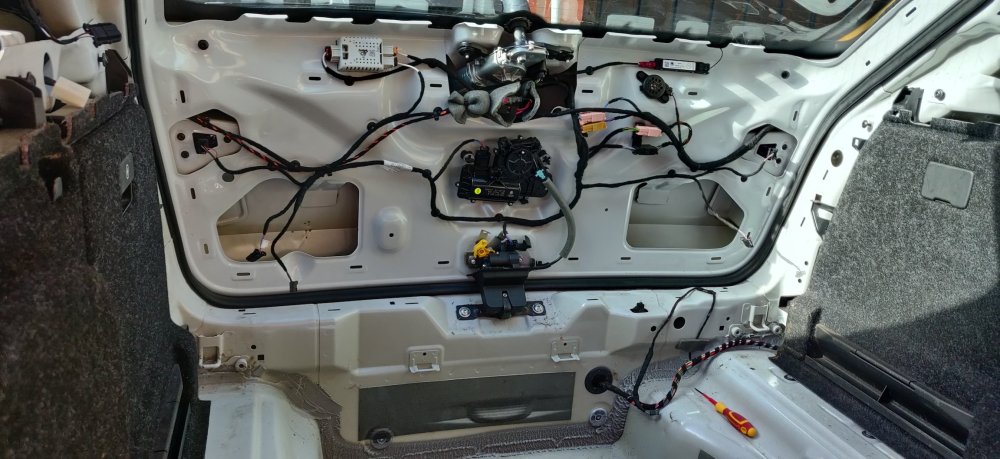
So after the huge downpour for 30 minutes, the sun came out again. This happened twice over the afternoon, so there were basically bits of working inside the car, then in the engine bay, then running back into the house, etc. So now that I know how to unlatch the tailgate, decided to lift it up further, and it looks like the struts keep it held at whatever position it is, so lifted it up further, and started to take out the subwoofer: It was a 10mm nut at the bottom, and two torx screws (T20 I think) and the subwoofer can then be lifted away. There is a single connector for it. Noticed the area behind it was a bit wet: I don't know if this is recent water ingress, given the downpour, so I'll need to check this tomorrow to see if more water appears, because that's another headache if so. Anyways, spoiler alert: I decided to buy some 2mm silent coat stuff. From eBay for £64.99, simply because given the amount of the boot trim has been removed, this is probably the best and easiest opportunity to install some. I also spent £9.99 on a roller for it. There are 40 sheets, and I suspect one day if I also do the remainder of the interior of the car, I'll probably end up using about 20 (maybe 40) more. For now, I won't be doing complete coverage, but probably 70-80% I think, and I'll most likely just wing it by tapping on metal to check for pings or thuds. I'll have to determine what to do with the foam bits attached to the chassis. I peeled a bit and it looks like a lot will remain, so I'll either just put silent coat over it, or get something to scrape away for a clean surface. It'll probably eat more time than I'd like. This will technically block the reinstallation of the boot trim so probably needs to take priority. Yet despite this, decided to find something else to do: I routed the Kufatec loom under the steering column and through to the side of the centre console to meet up with the wires I've already sorted into the fusebox and ground point. The pic above is the butt splice crimped for the ground, and the other for power: I'll need to heatshrink and clean this up as appropriate. As it is, it technically means that the heated steering wheel wiring is now complete. Maintenance: £1806.50 Upgrades: £952.09 (+£64.99) Miscellaneous: £618.13 (+£9.99)


-
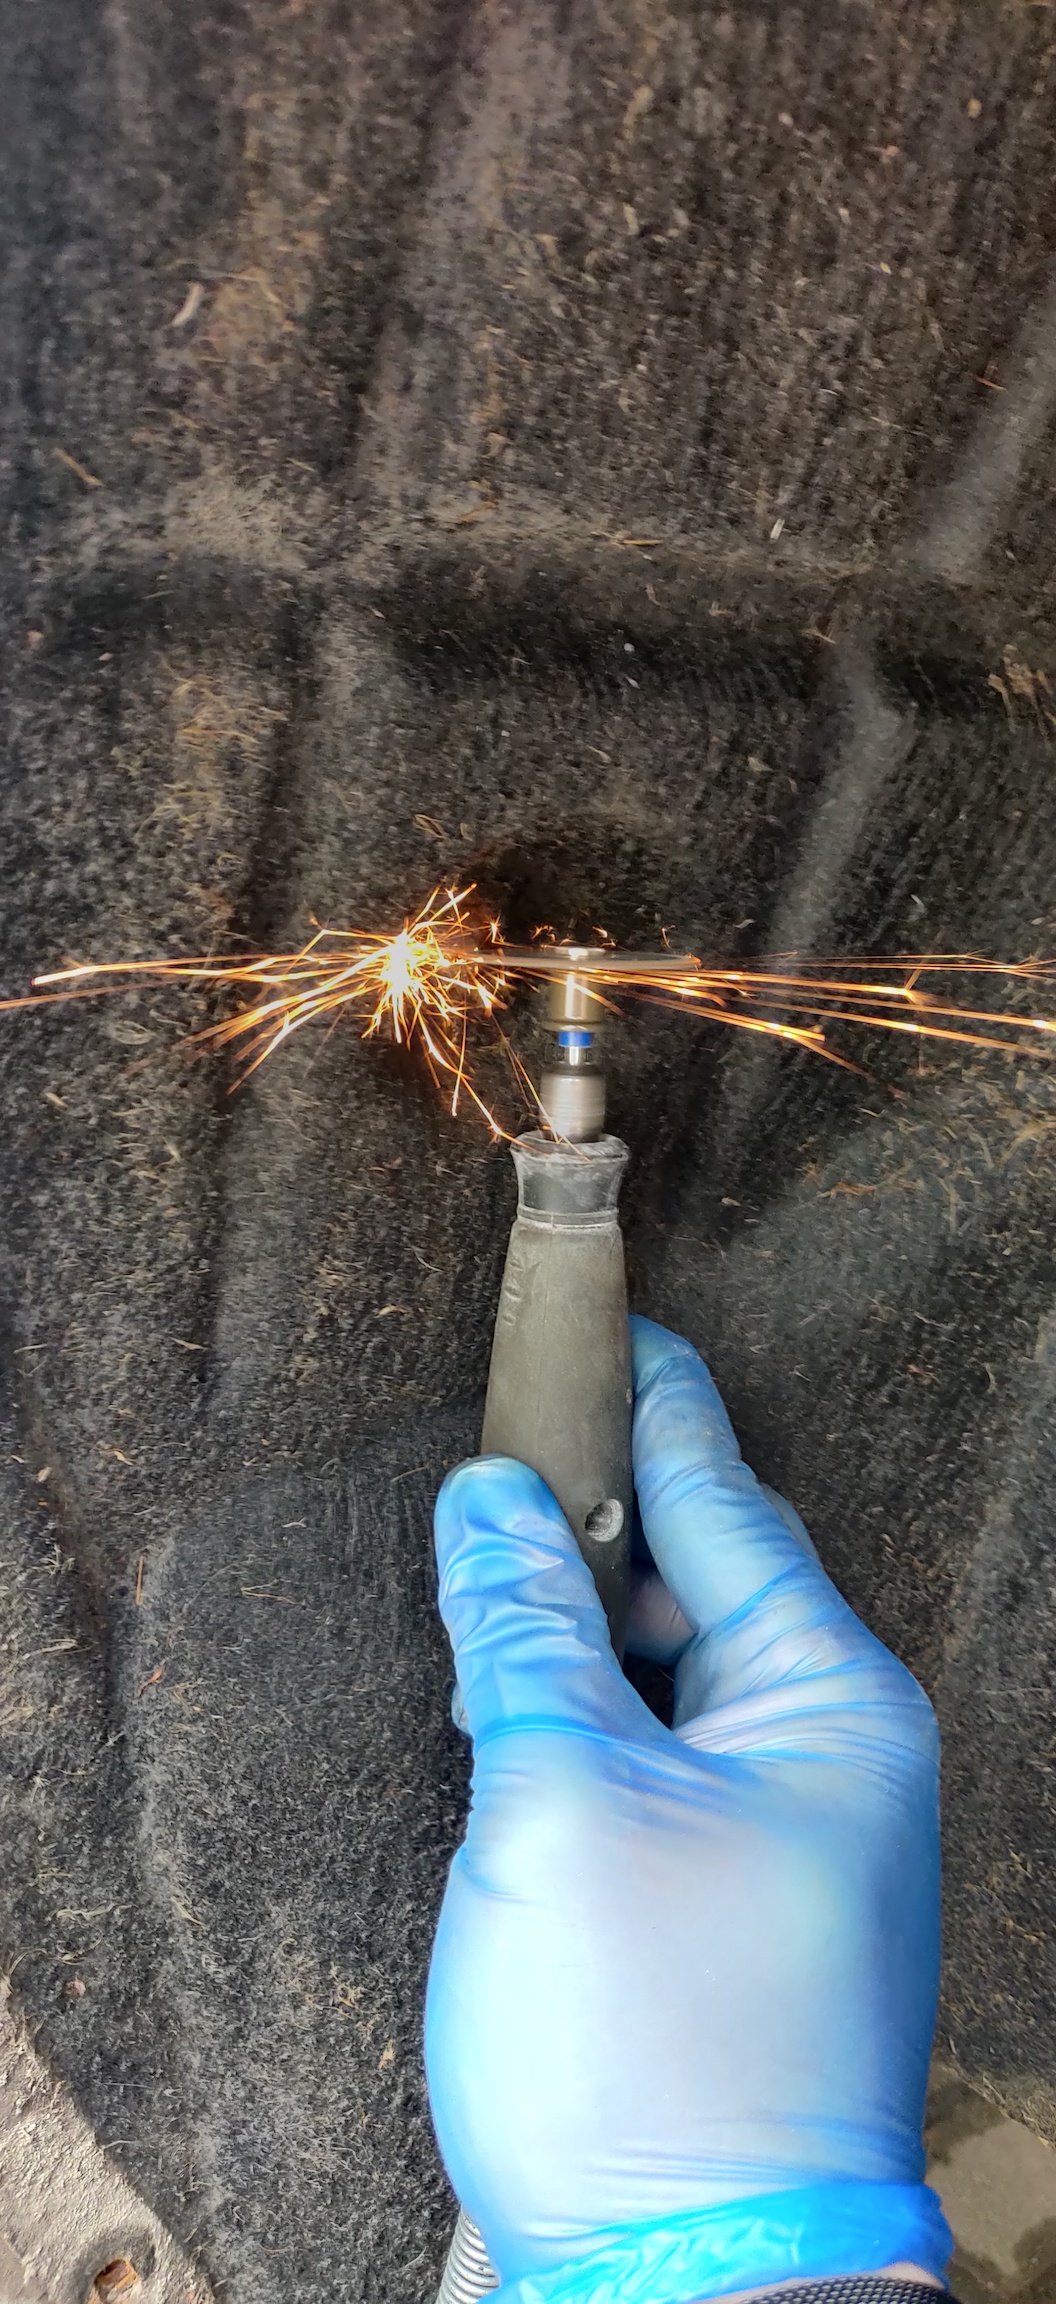
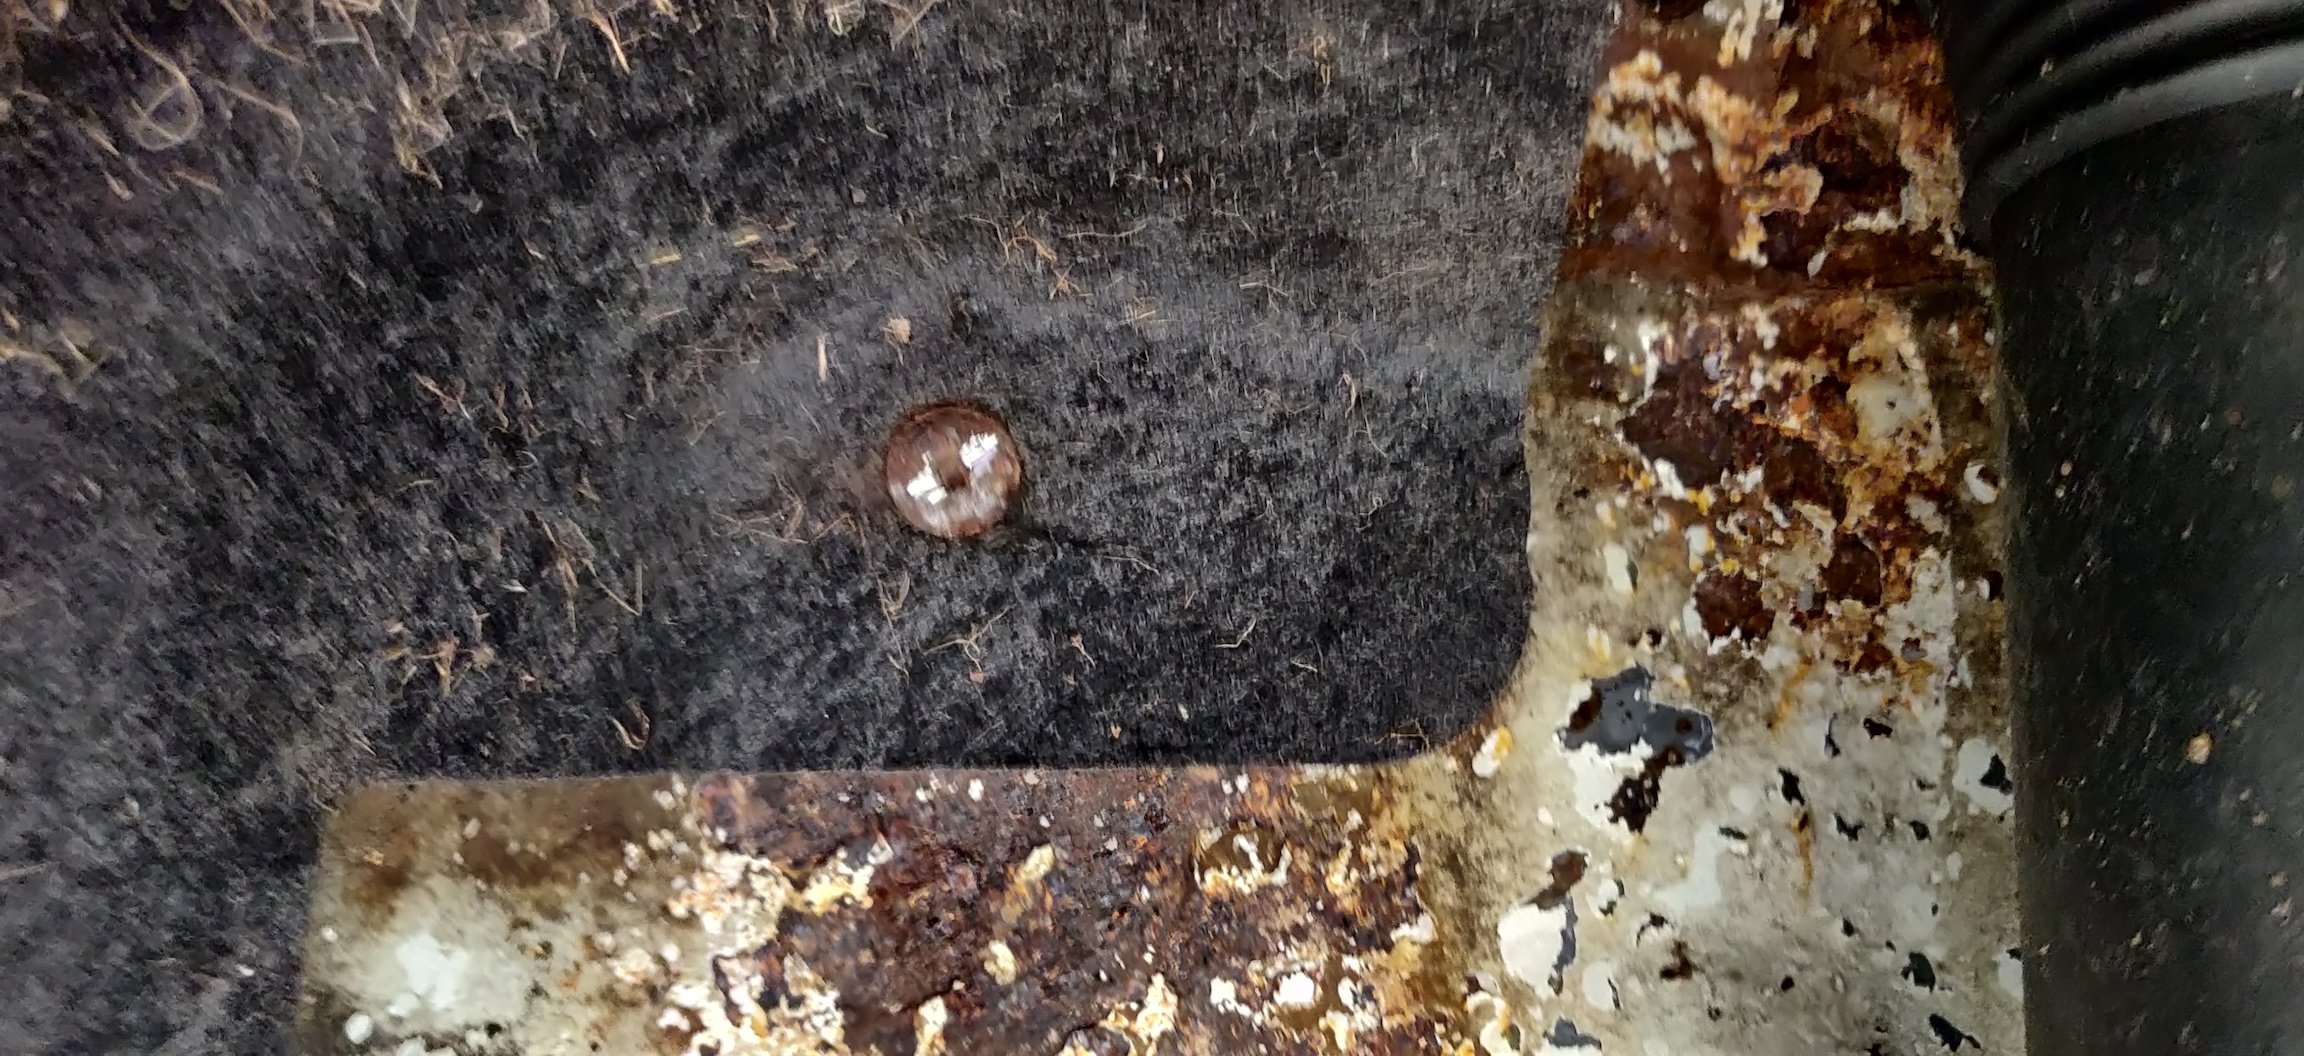
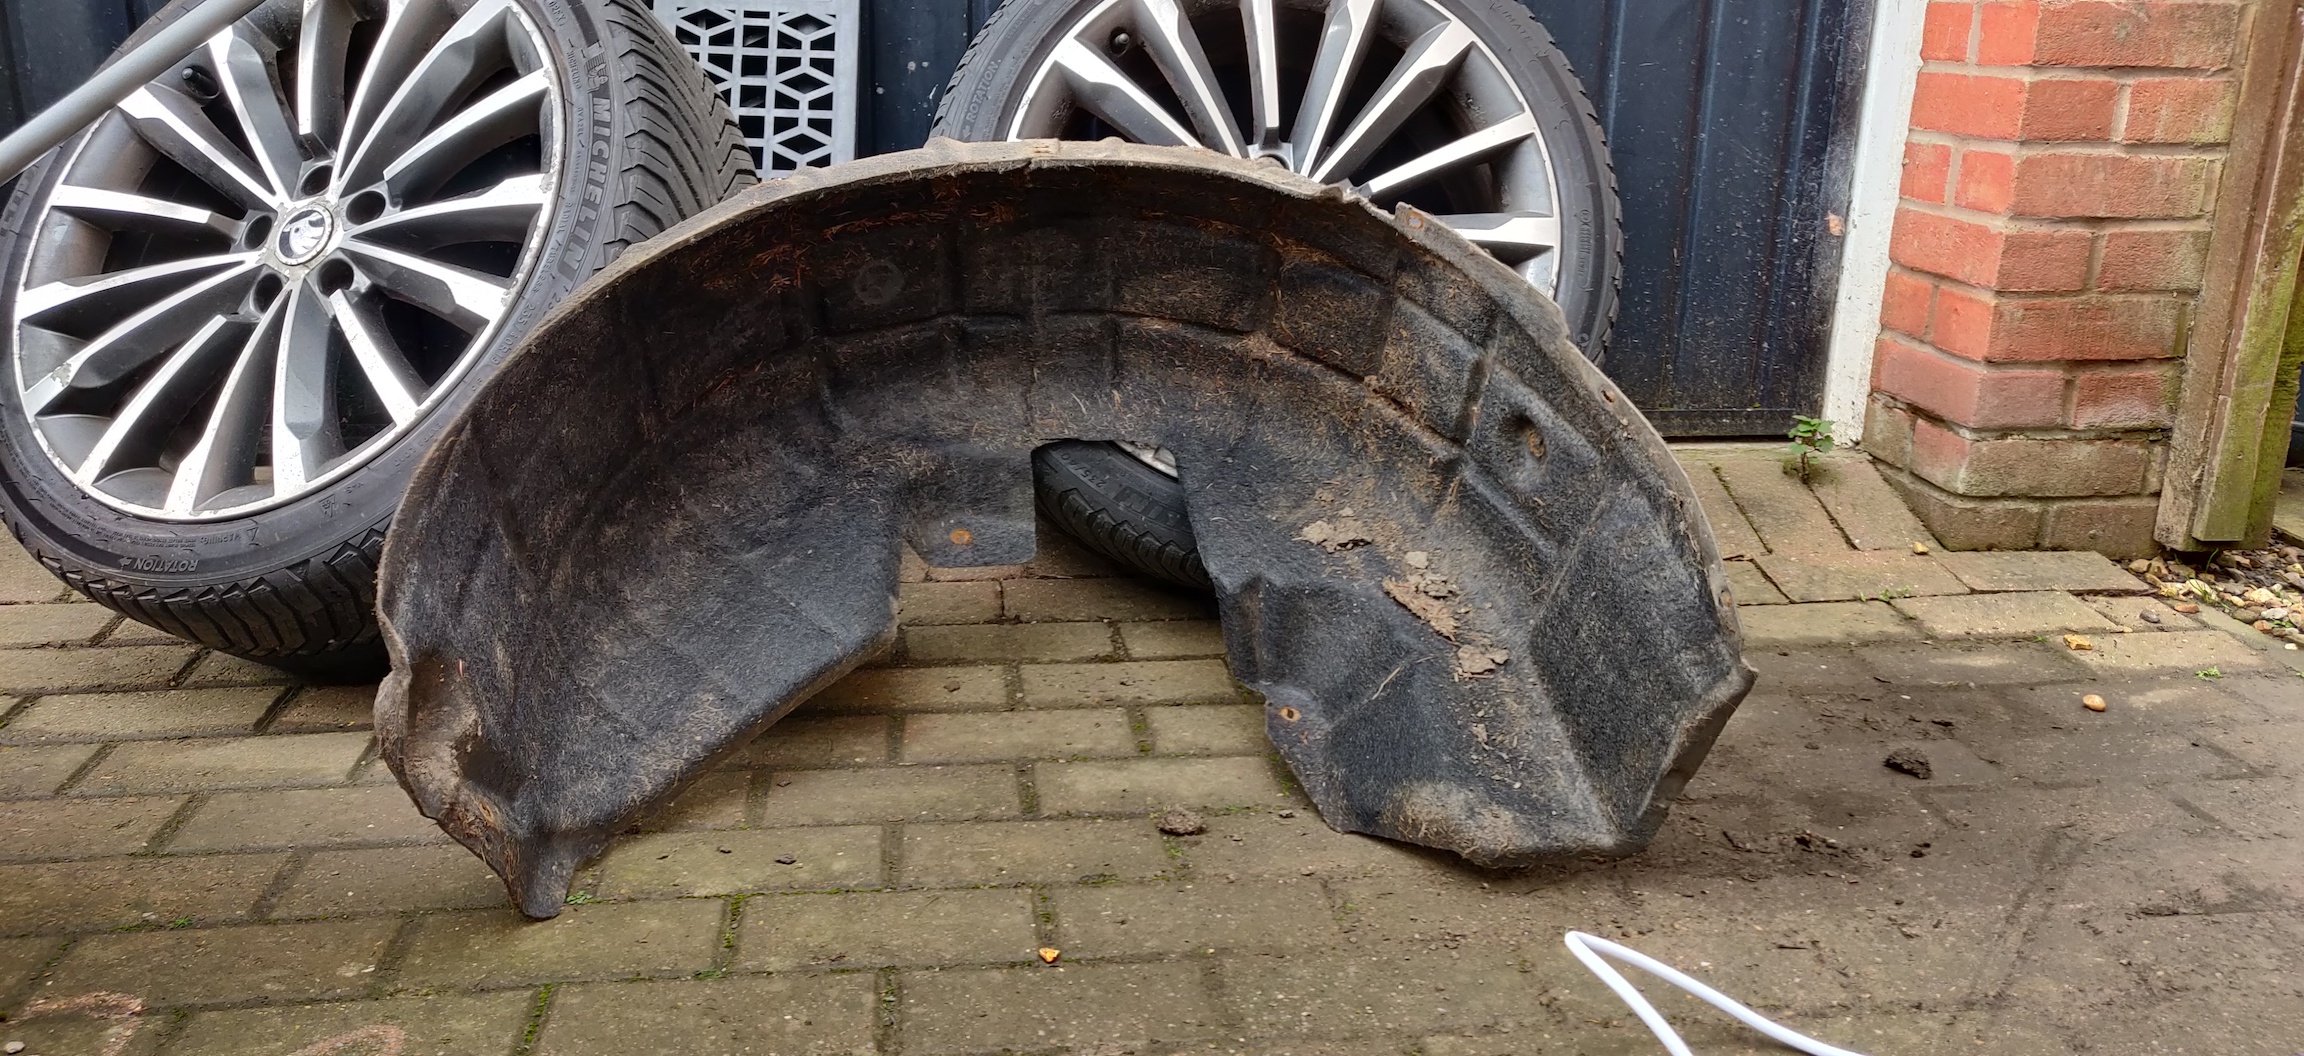
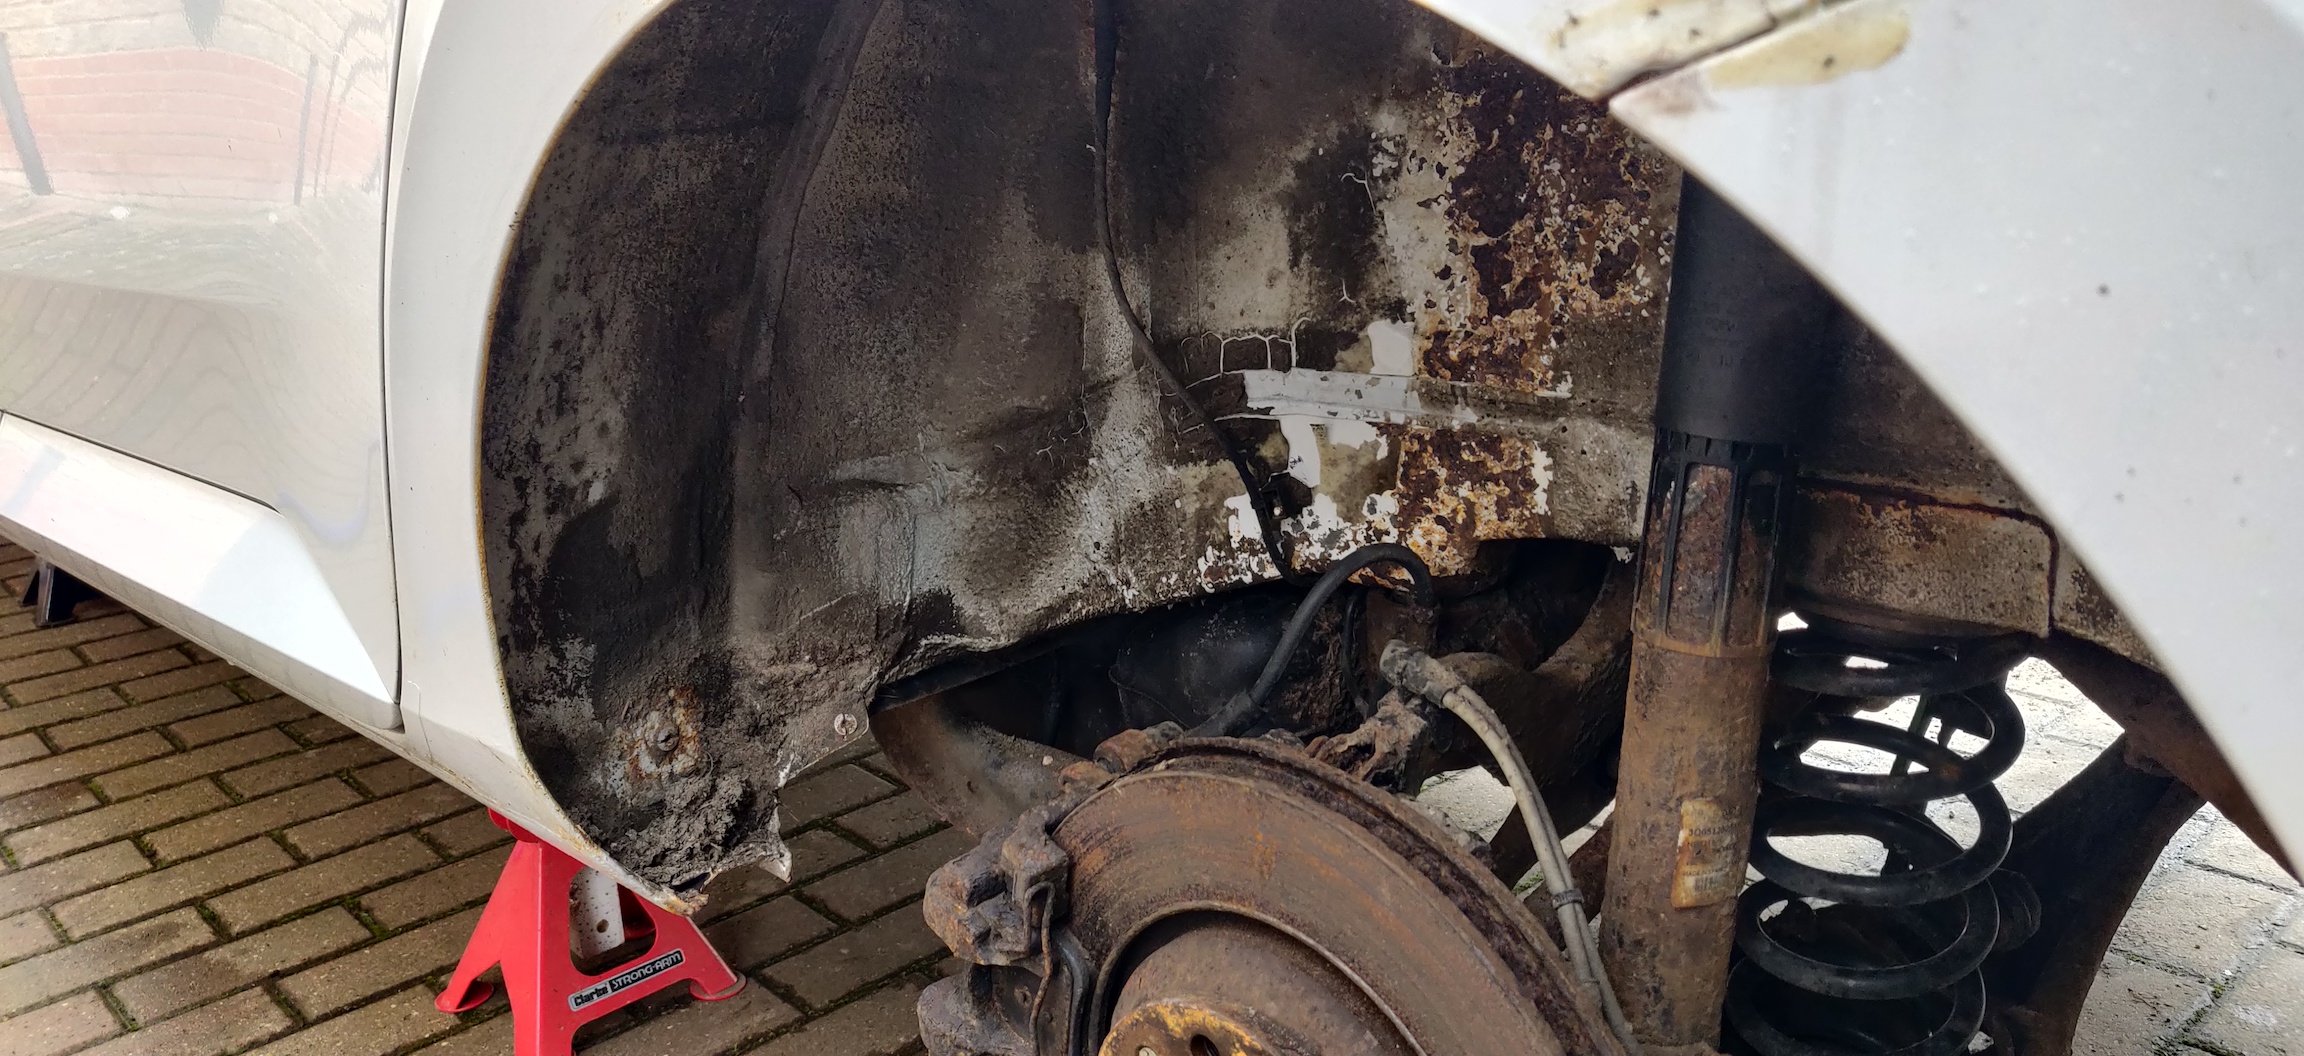
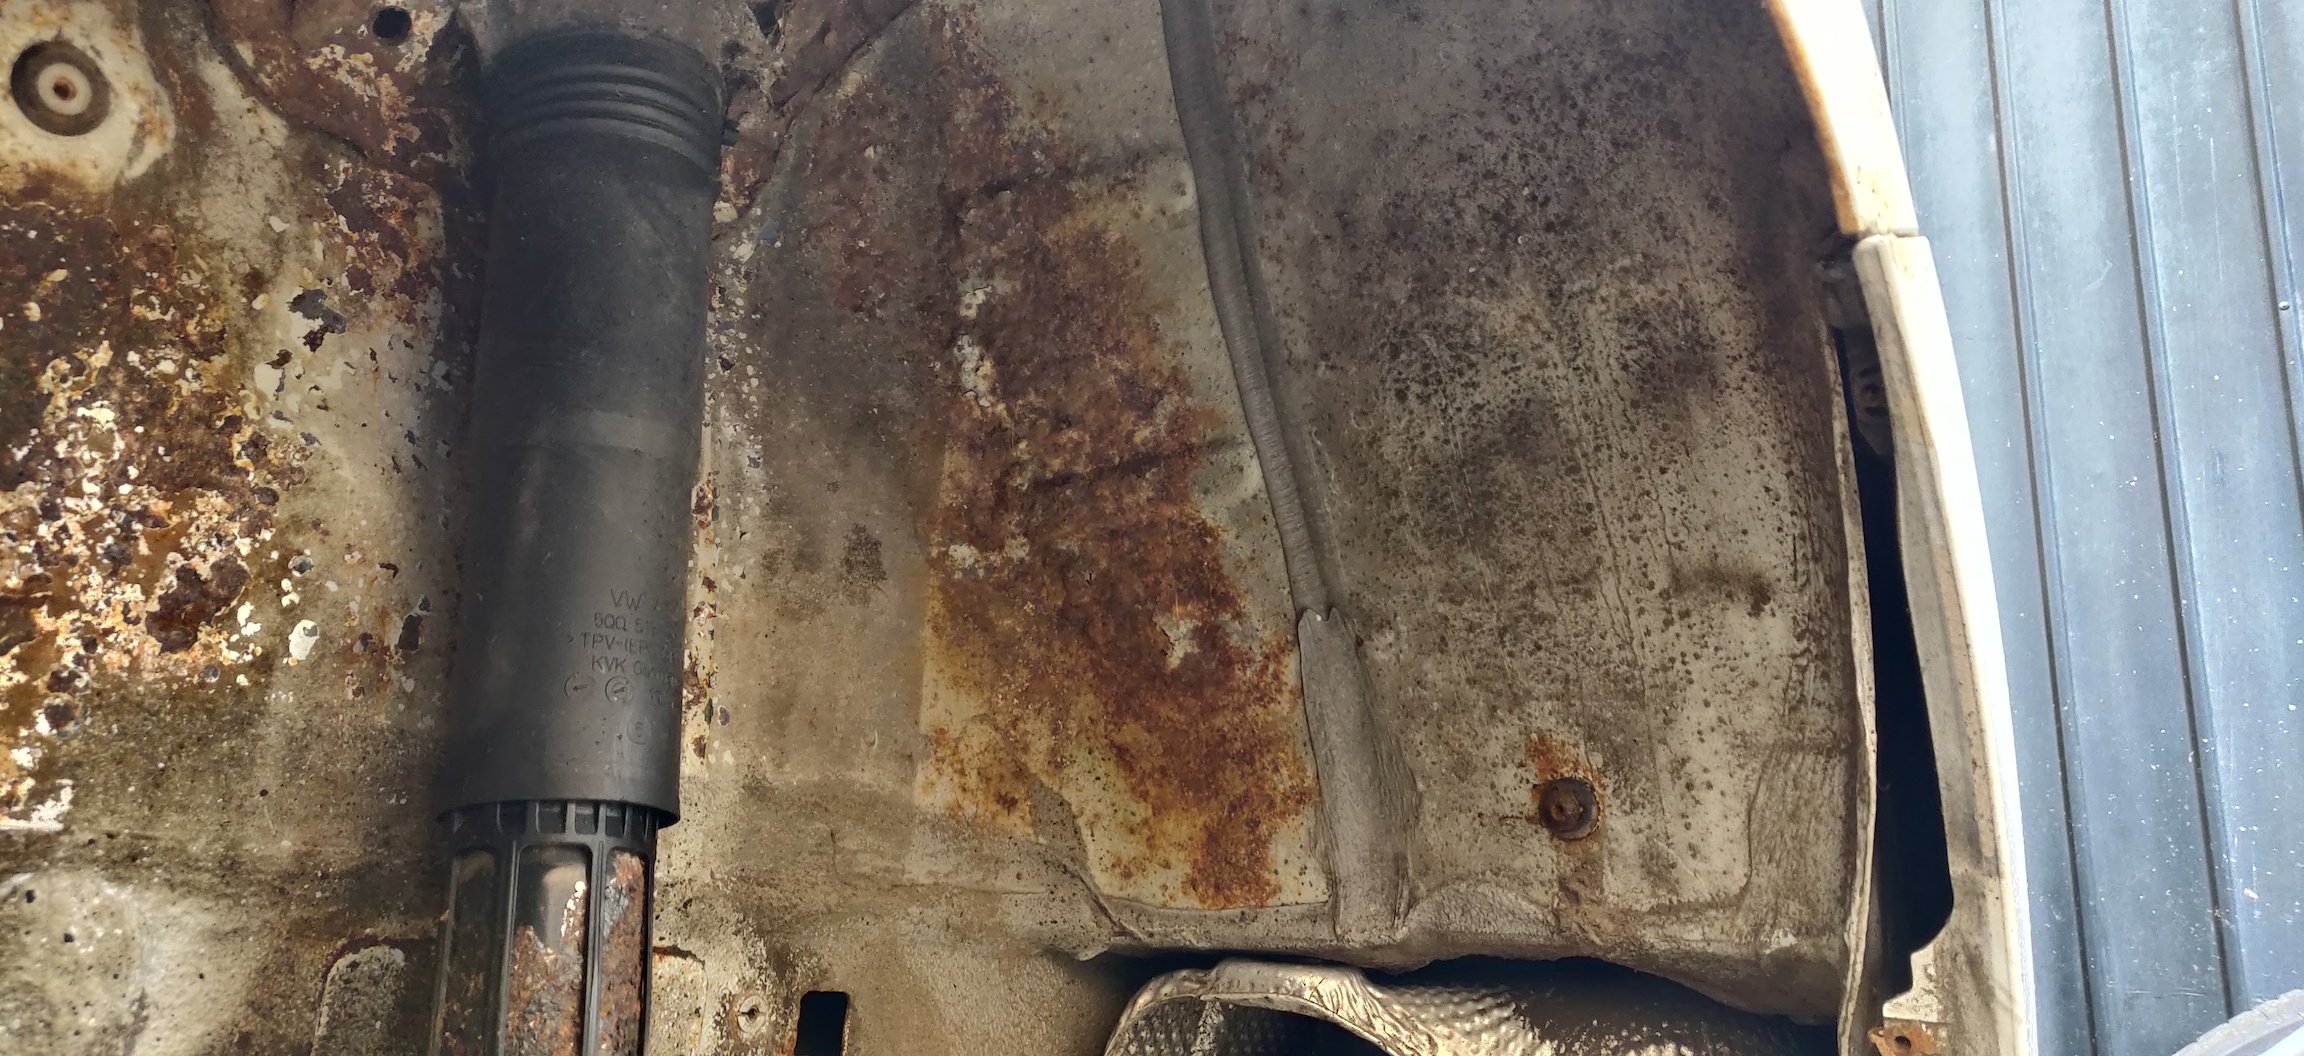
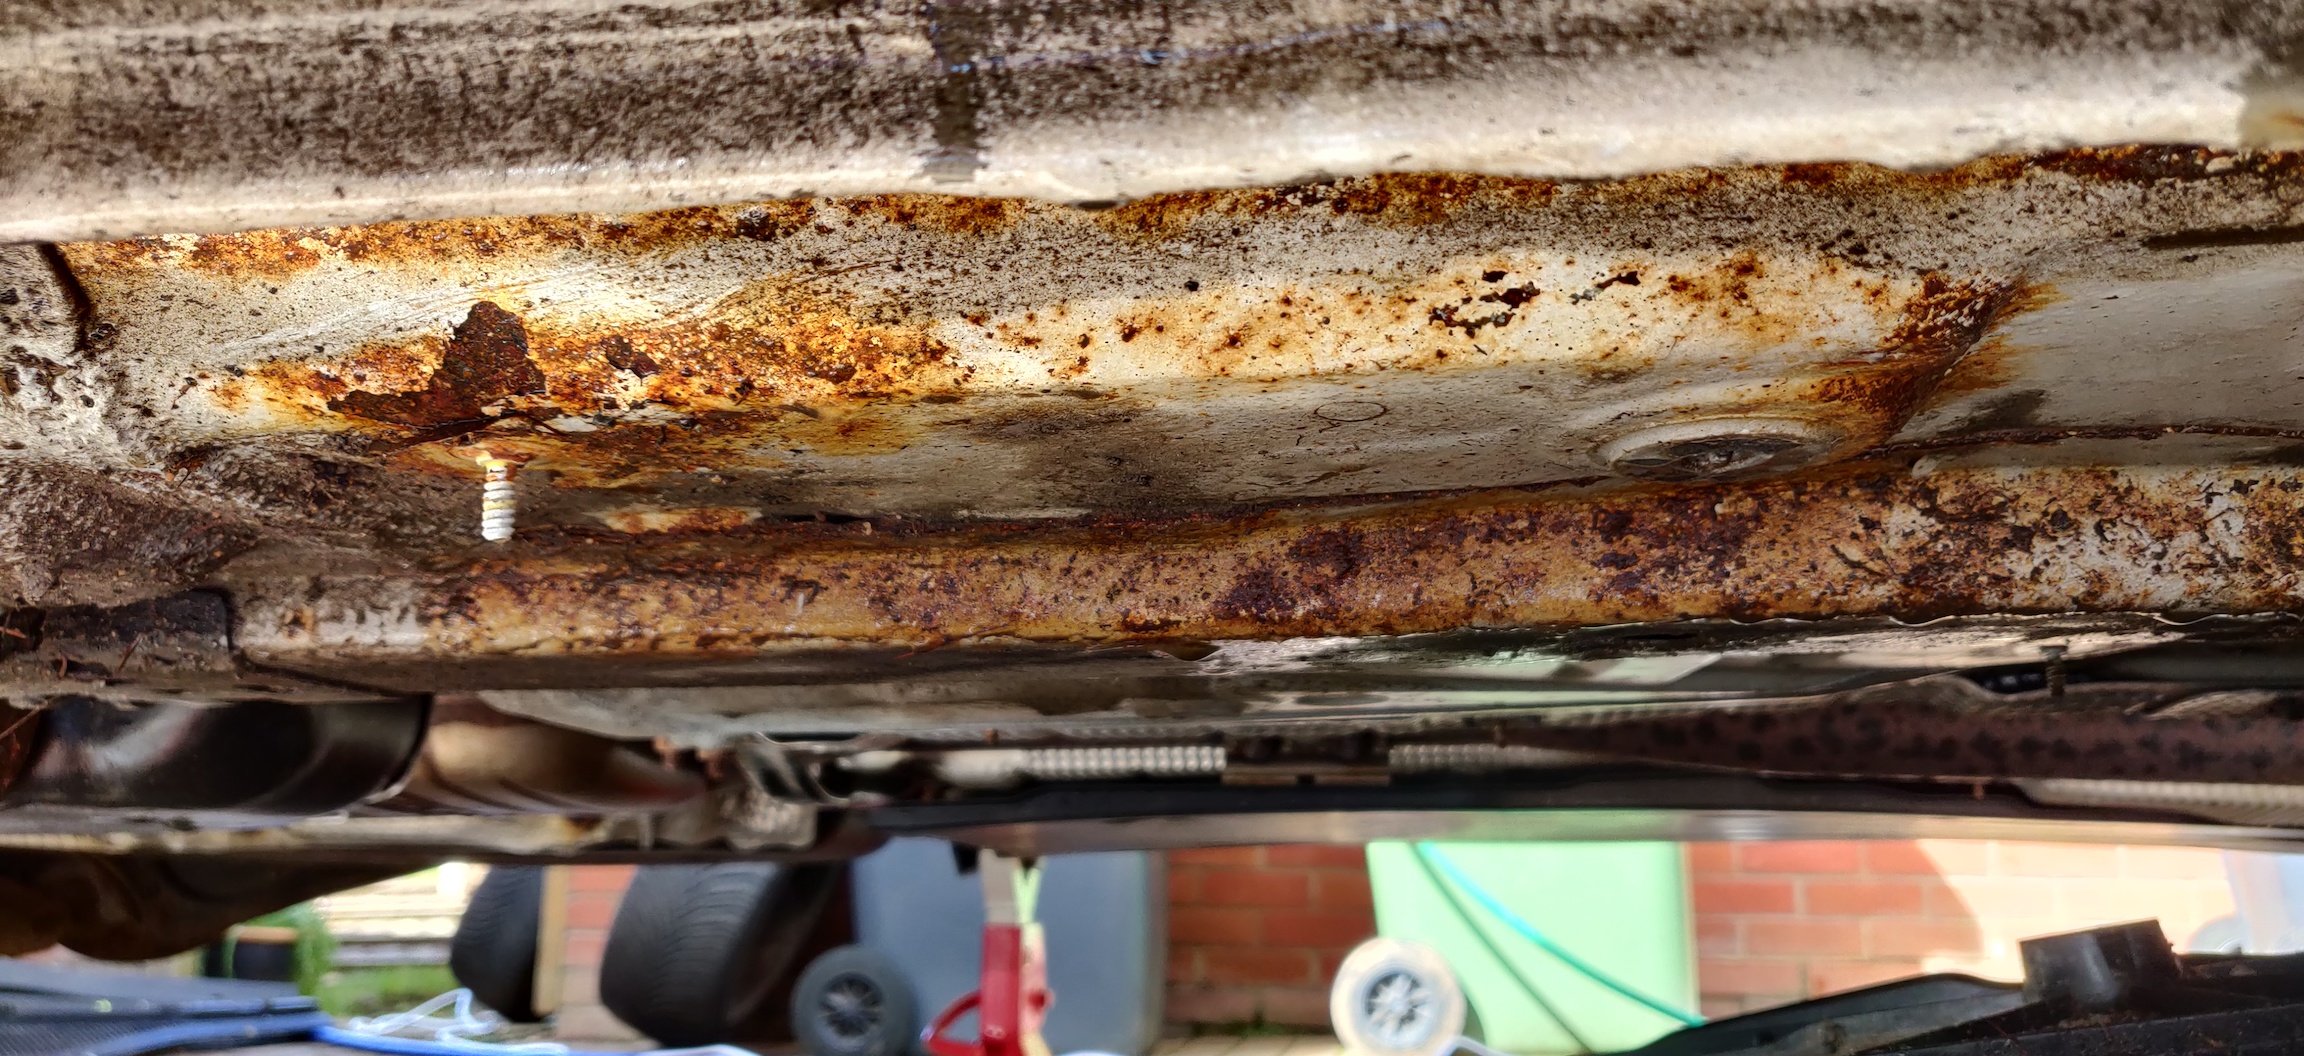
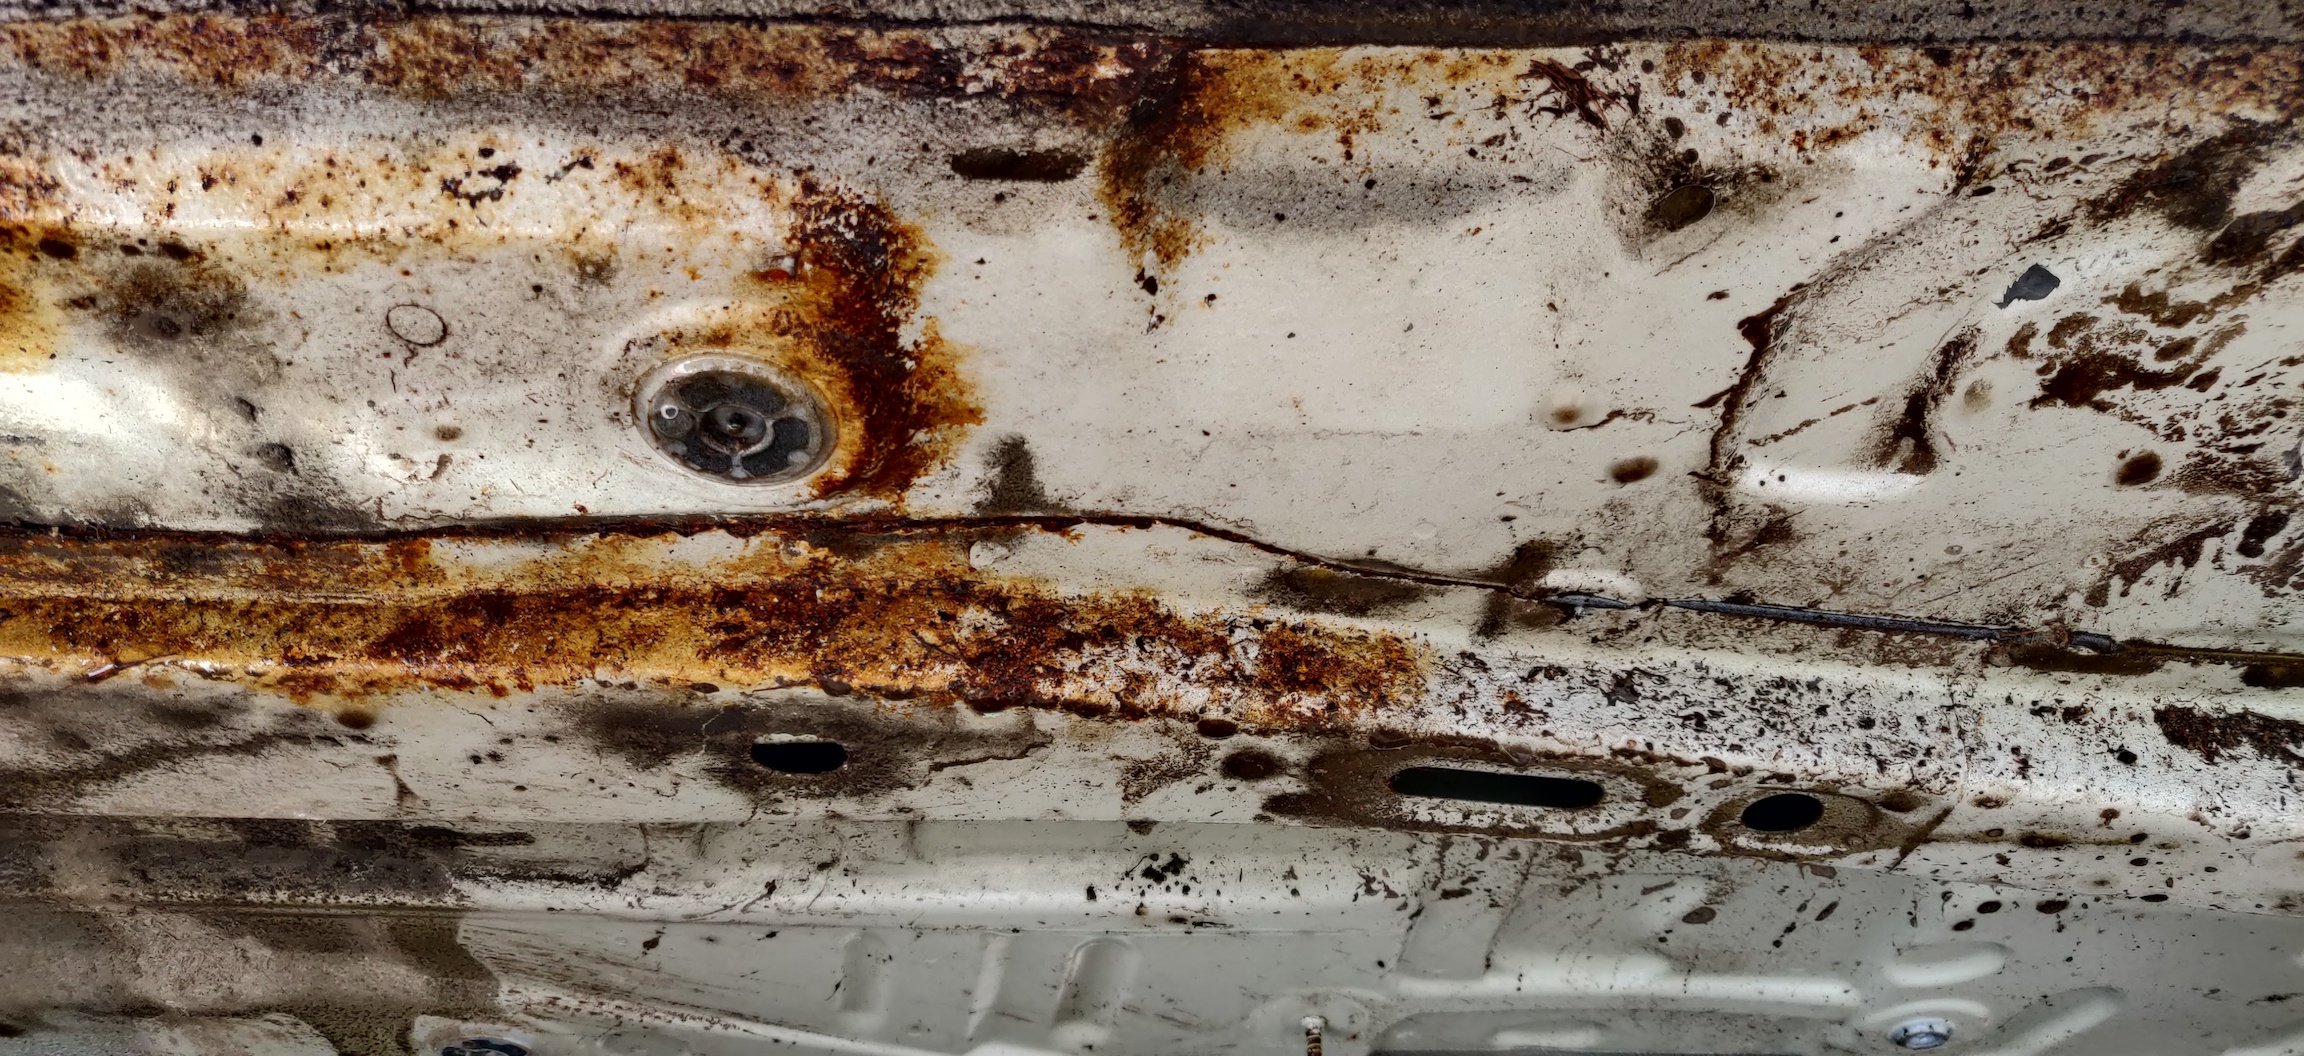
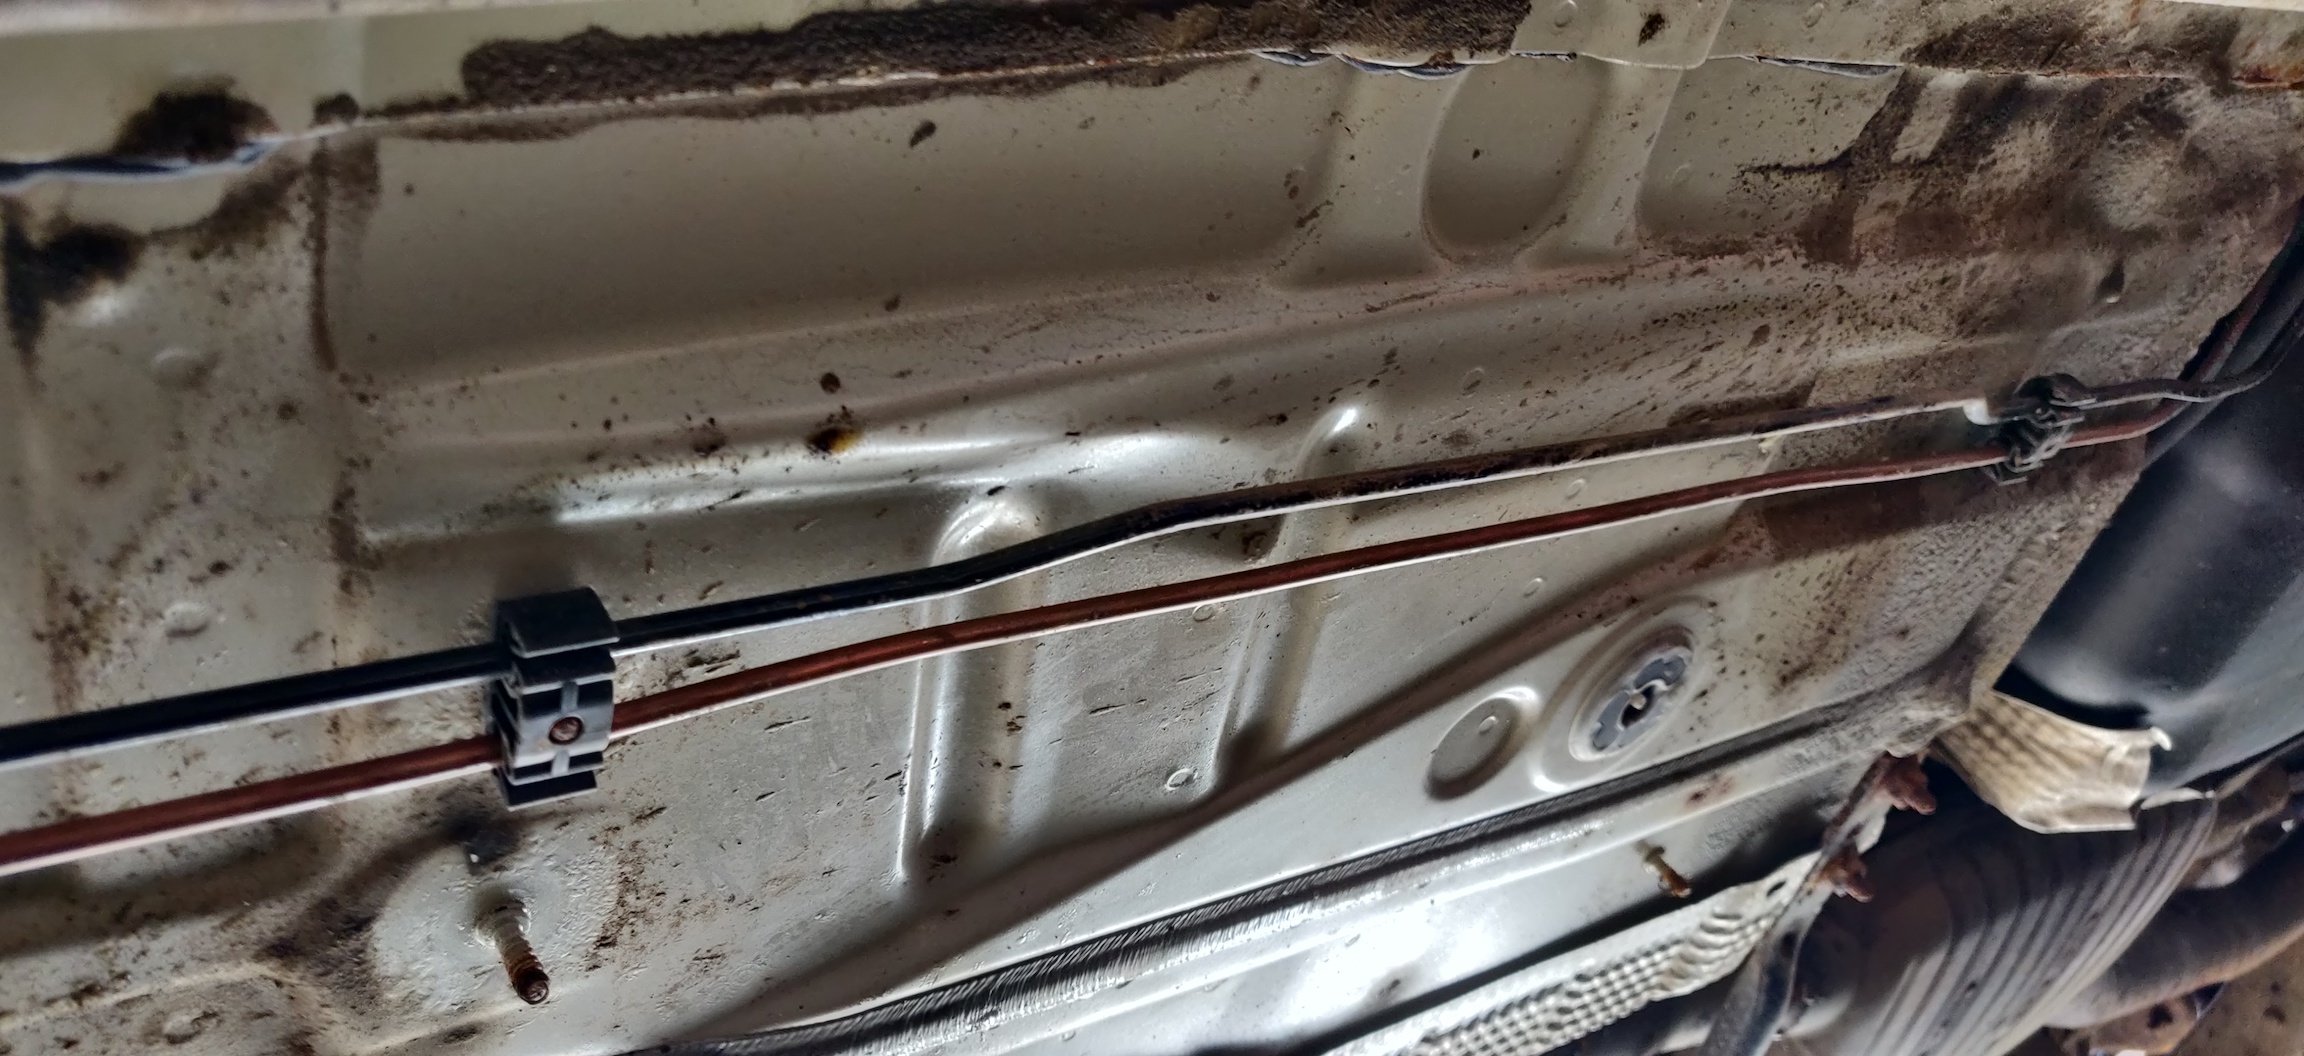
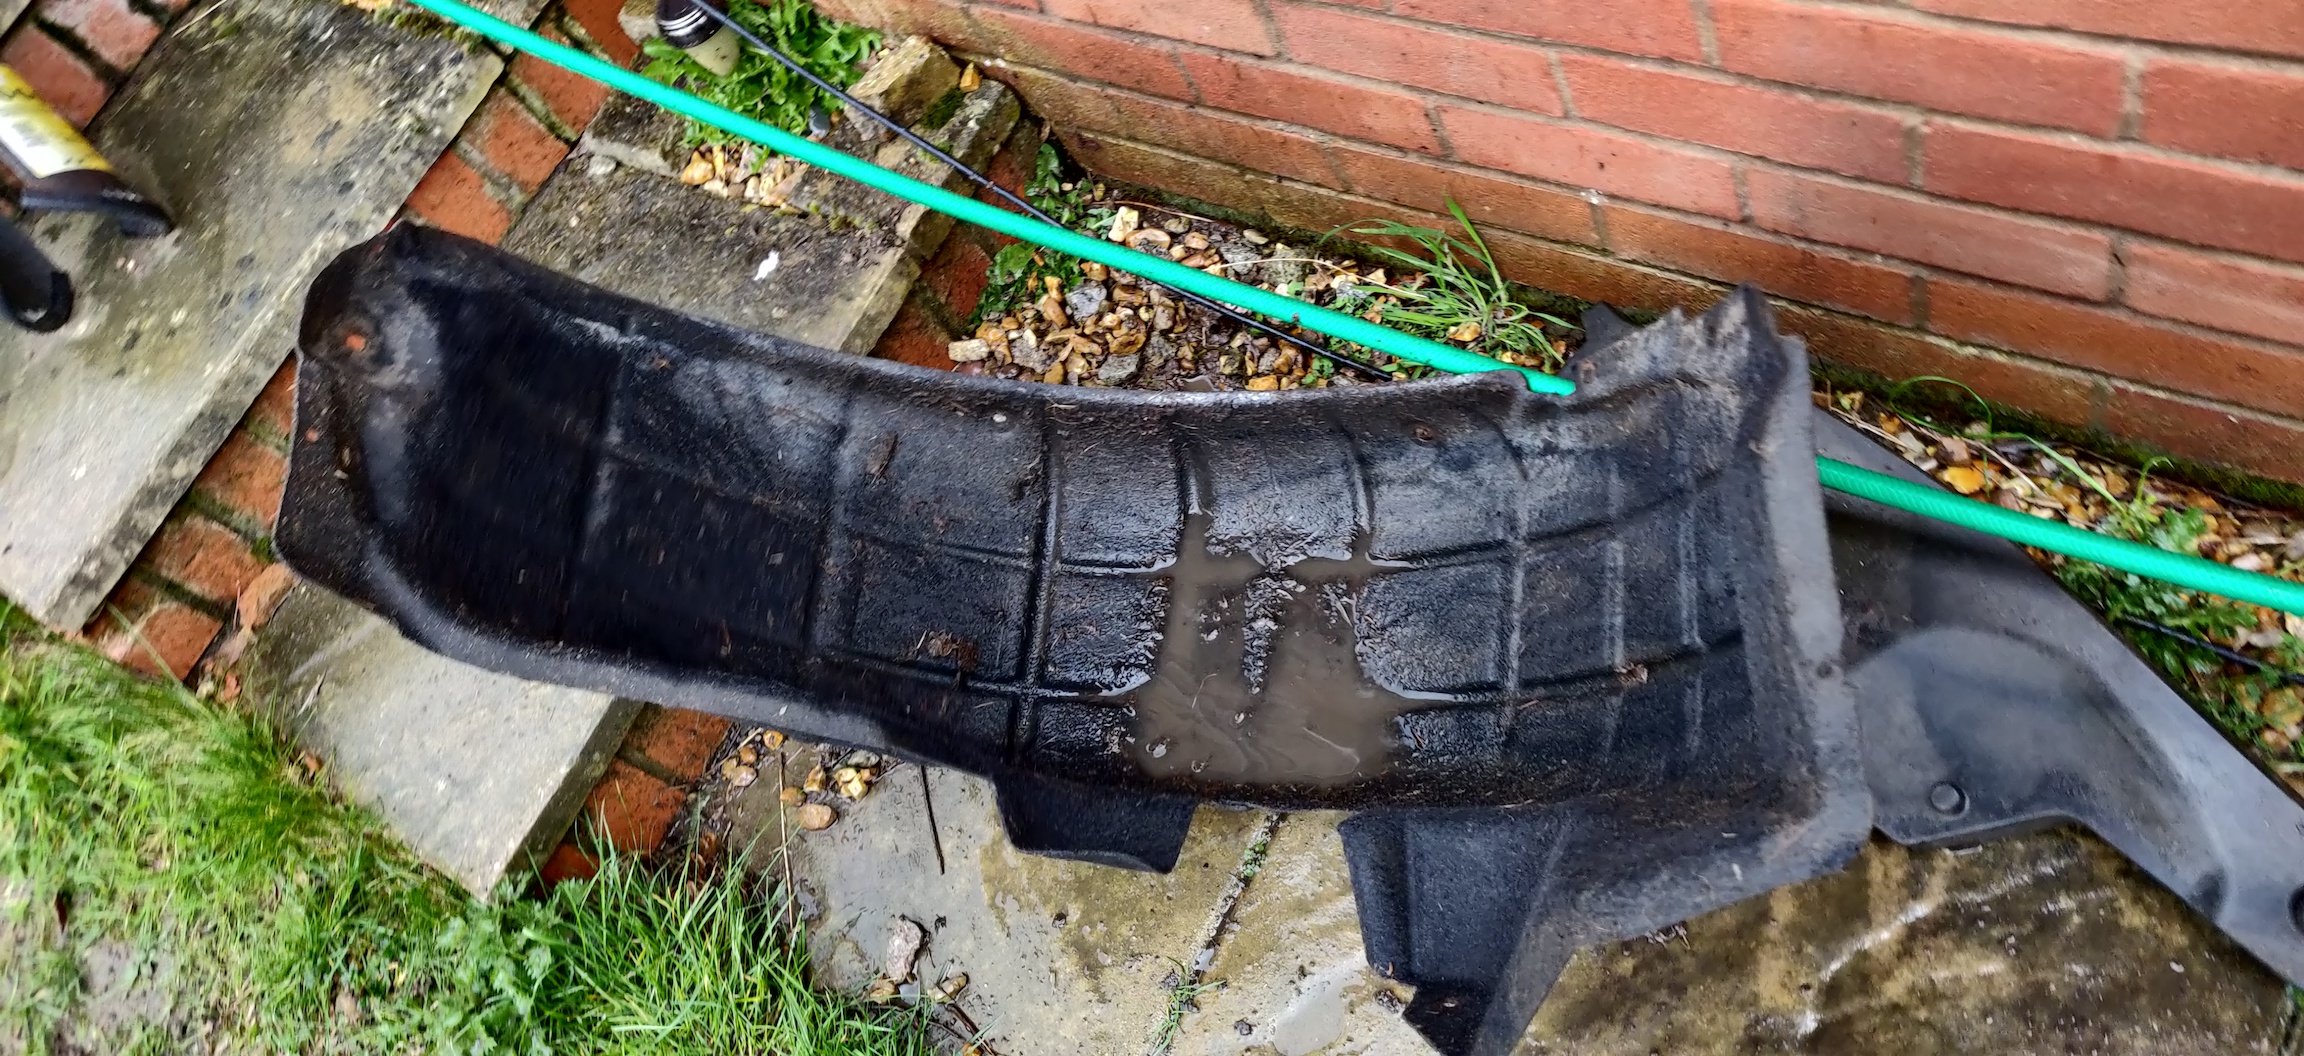
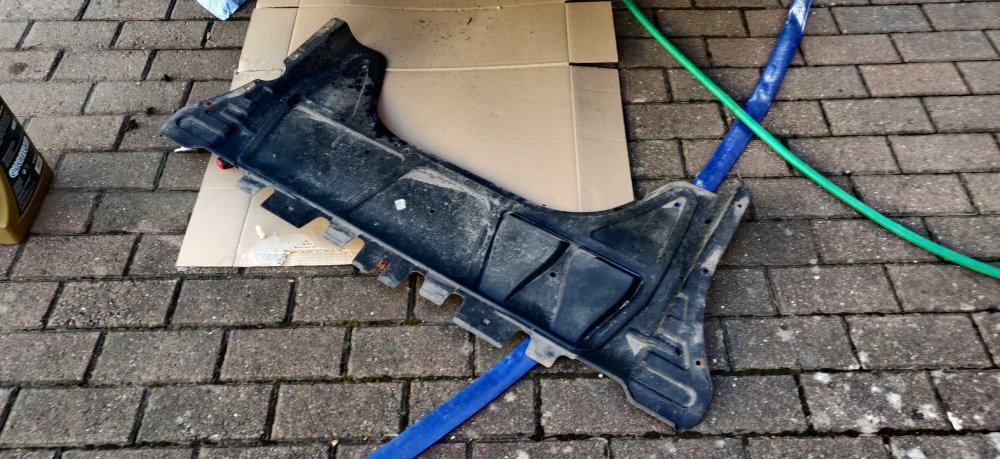
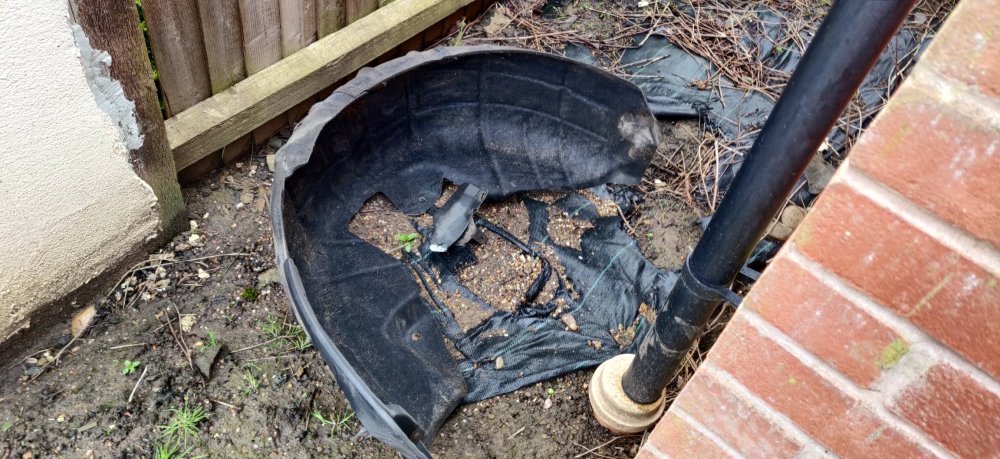
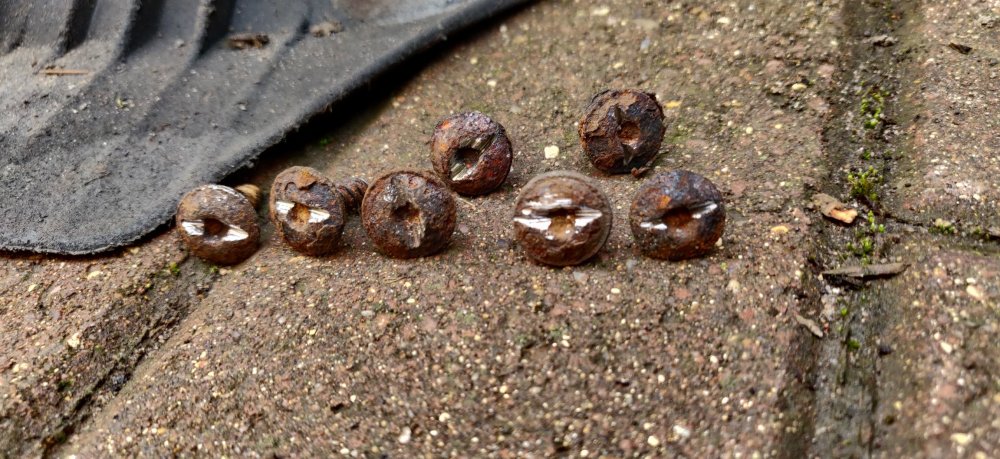
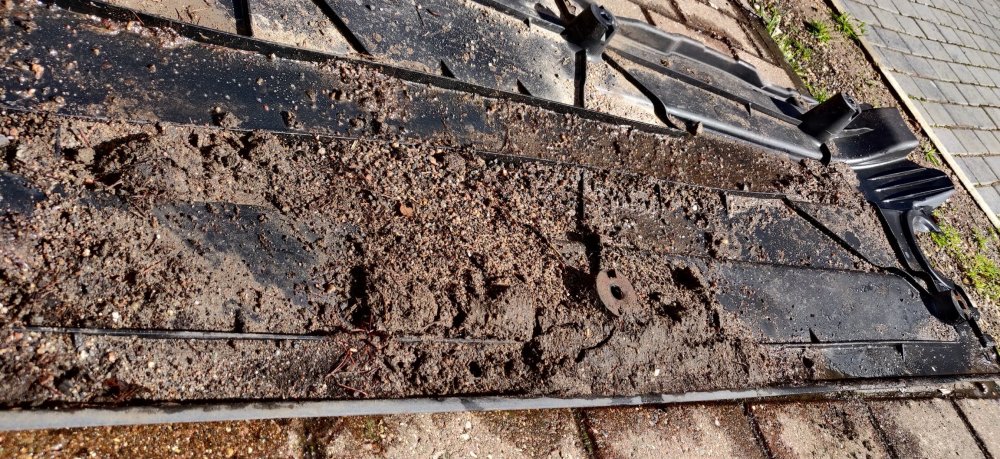
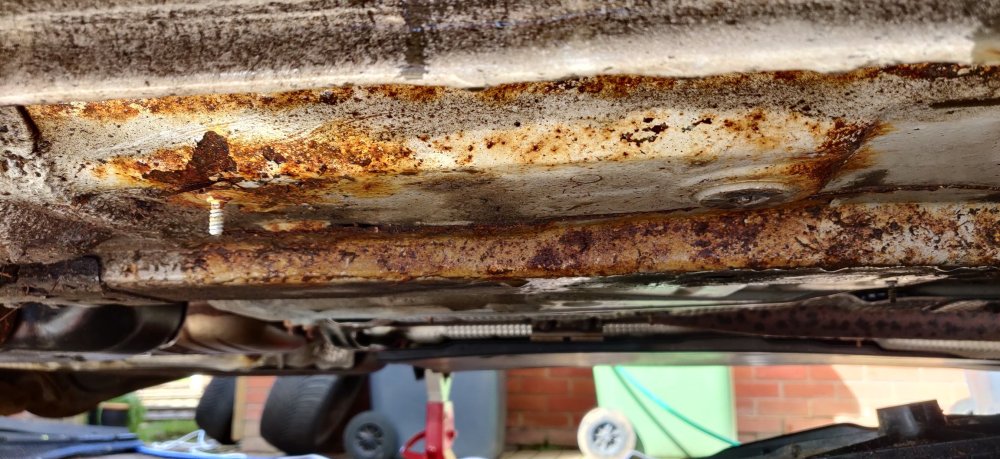
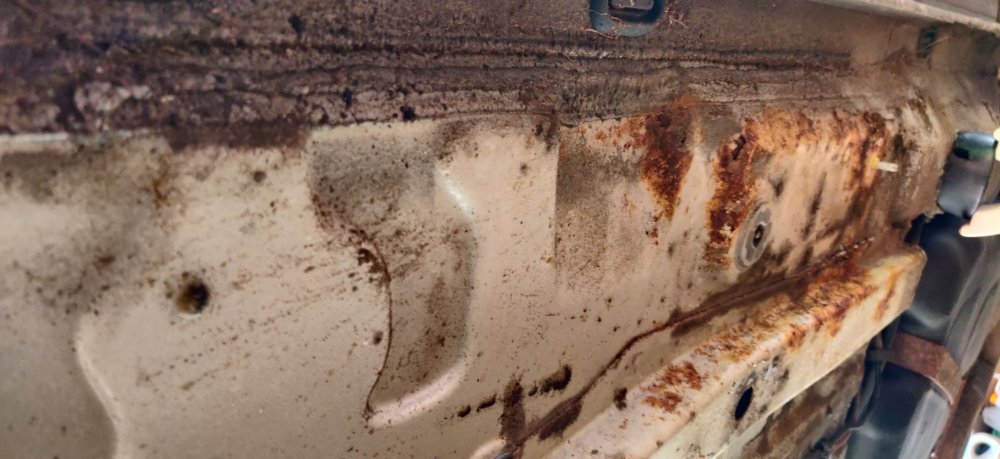
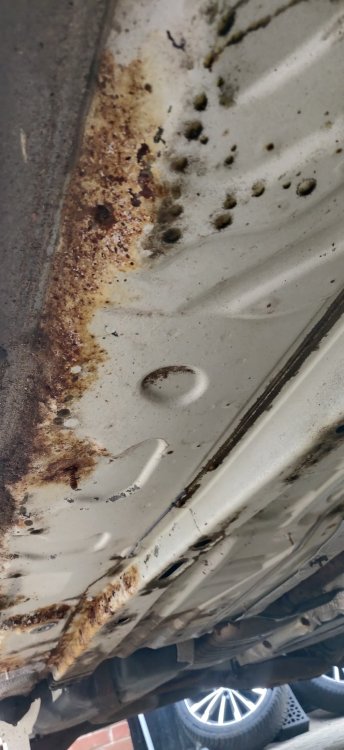
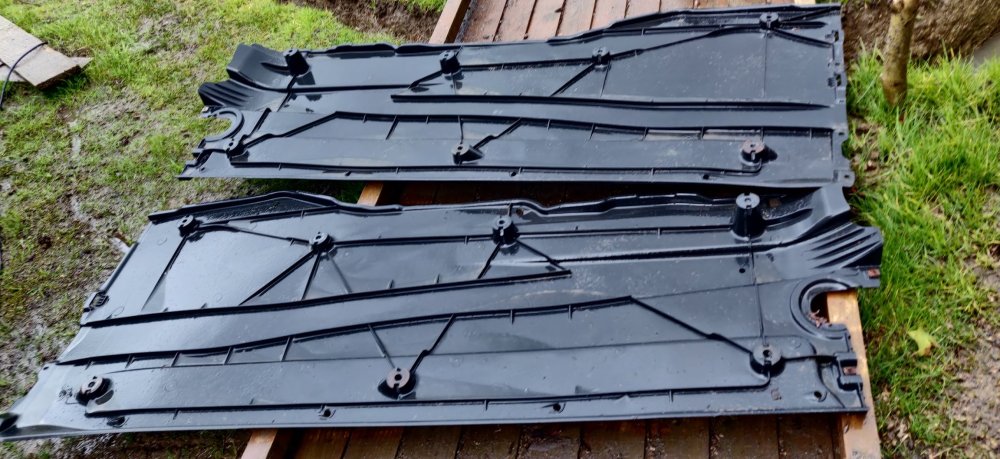
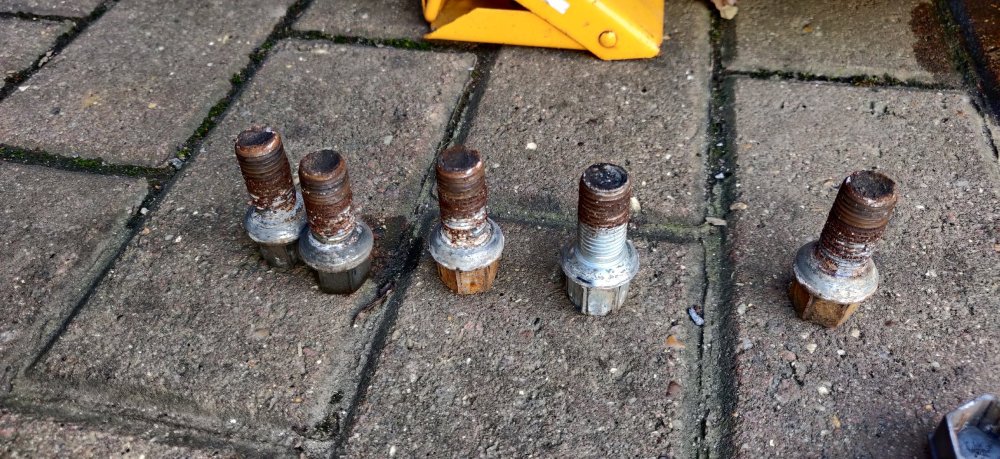
I put grease on wheel bolts irrespective of whether anyone suggests otherwise. Otherwise this sort of shenanigans can happen, especially as you say, with 100 miles of salty road driving with no cleanup afterwards. Steel, aluminium, salt and water is gonna do stuff. Anyways, things are about to be worse. It's a busy day this Good Friday, I'll be splitting up the day into several posts, in order to maintain a sense of flow, as I ended up doing bits in an adhoc order, but there's a sensible grouping of tasks which I'll try and sort out here. As suggested by @coppertop, I decided to dremel the remaining screws that were rounded off in the rear wheel arches: Please don't do this whilst taking a photo! But essentially, a cutting disc on the screws to get a groove into it, enough to get a flat head screwdriver in: Because these are screwed into a plastic housing, some of them did come free without much drama: Unfortunately, there were a couple of screws along the wheel arch lip that I missed (as they were under a decent chunk of mud), I didn't fancy lying down to cut those, and ended up just being impatient and ripped the wheel arch out: I'll probably either source another one, or just bodge it back into place somehow. So for the right side rear arch, three screws remain: This was one of them in addition to the two. Now this one has a notch Dremel'd in, but more importantly, had access to the back. The screw here was also turning the plastic retaining nut, so had to eventually resort to two Knipex pliers to undo this one. For the remaining two, I'll leave it for tomorrow or Sunday. The left rear arch was no where near as troublesome, I think about 4 of them needed the Dremel: \ Amusingly, the two wheel arch ones on this side was fine. So this is the resulting wheel arch on the front: With the same to the rear: As mentioned in an earlier post, exactly same effect as I saw on our Focus with the similar carpet-y wheel arch, so presumably a trap for moisture and dirt and salt. It is what it is. So the spoils of war: I'll be sourcing stainless steel equivalents to hopefully make future removals less painful. So decided to also remove the two plastic covers under the car body, running along the length of the car. I posted a pic of impending dread around this. The covers are attached with a bunch of plastic nuts, and can be undone with a 10mm spanner: The nuts appear to stay captive in the plastic cover. I haven't given it a closer inspection, because, well, look at them. I had to get the trolley jack back out to lift up the front as the front axle stands were pinching the covers, but once the plastic screws were undone sufficiently: So here's the underside: Not great. Carried on with the opposite side: So the other side is also less than perfect: A copper brake line, so at least one won't need to replaced in the future due to rust: It's sad to see what should be a galvanised chassis suffer this much in such a short time. The plan still remains though, only this time the Lanoguard looks to need applying almost everywhere. For now, just pressure washed the underside and wheel arches now that the chassis is more exposed: So the underside: Some bits look ok, so I guess its just sod's law. I took the plastic covers and gave them a quick one over with the pressure washer: Also went at the wheel arch, at which point the heavens opened: It was at this time that I took a break for lunch, although technically I also did other bits in between, but as mentioned, I'll group the posts into sections. Next is some stuff in the interior. Maintenance: £1806.50 Upgrades: £887.10 Miscellaneous: £608.14


-
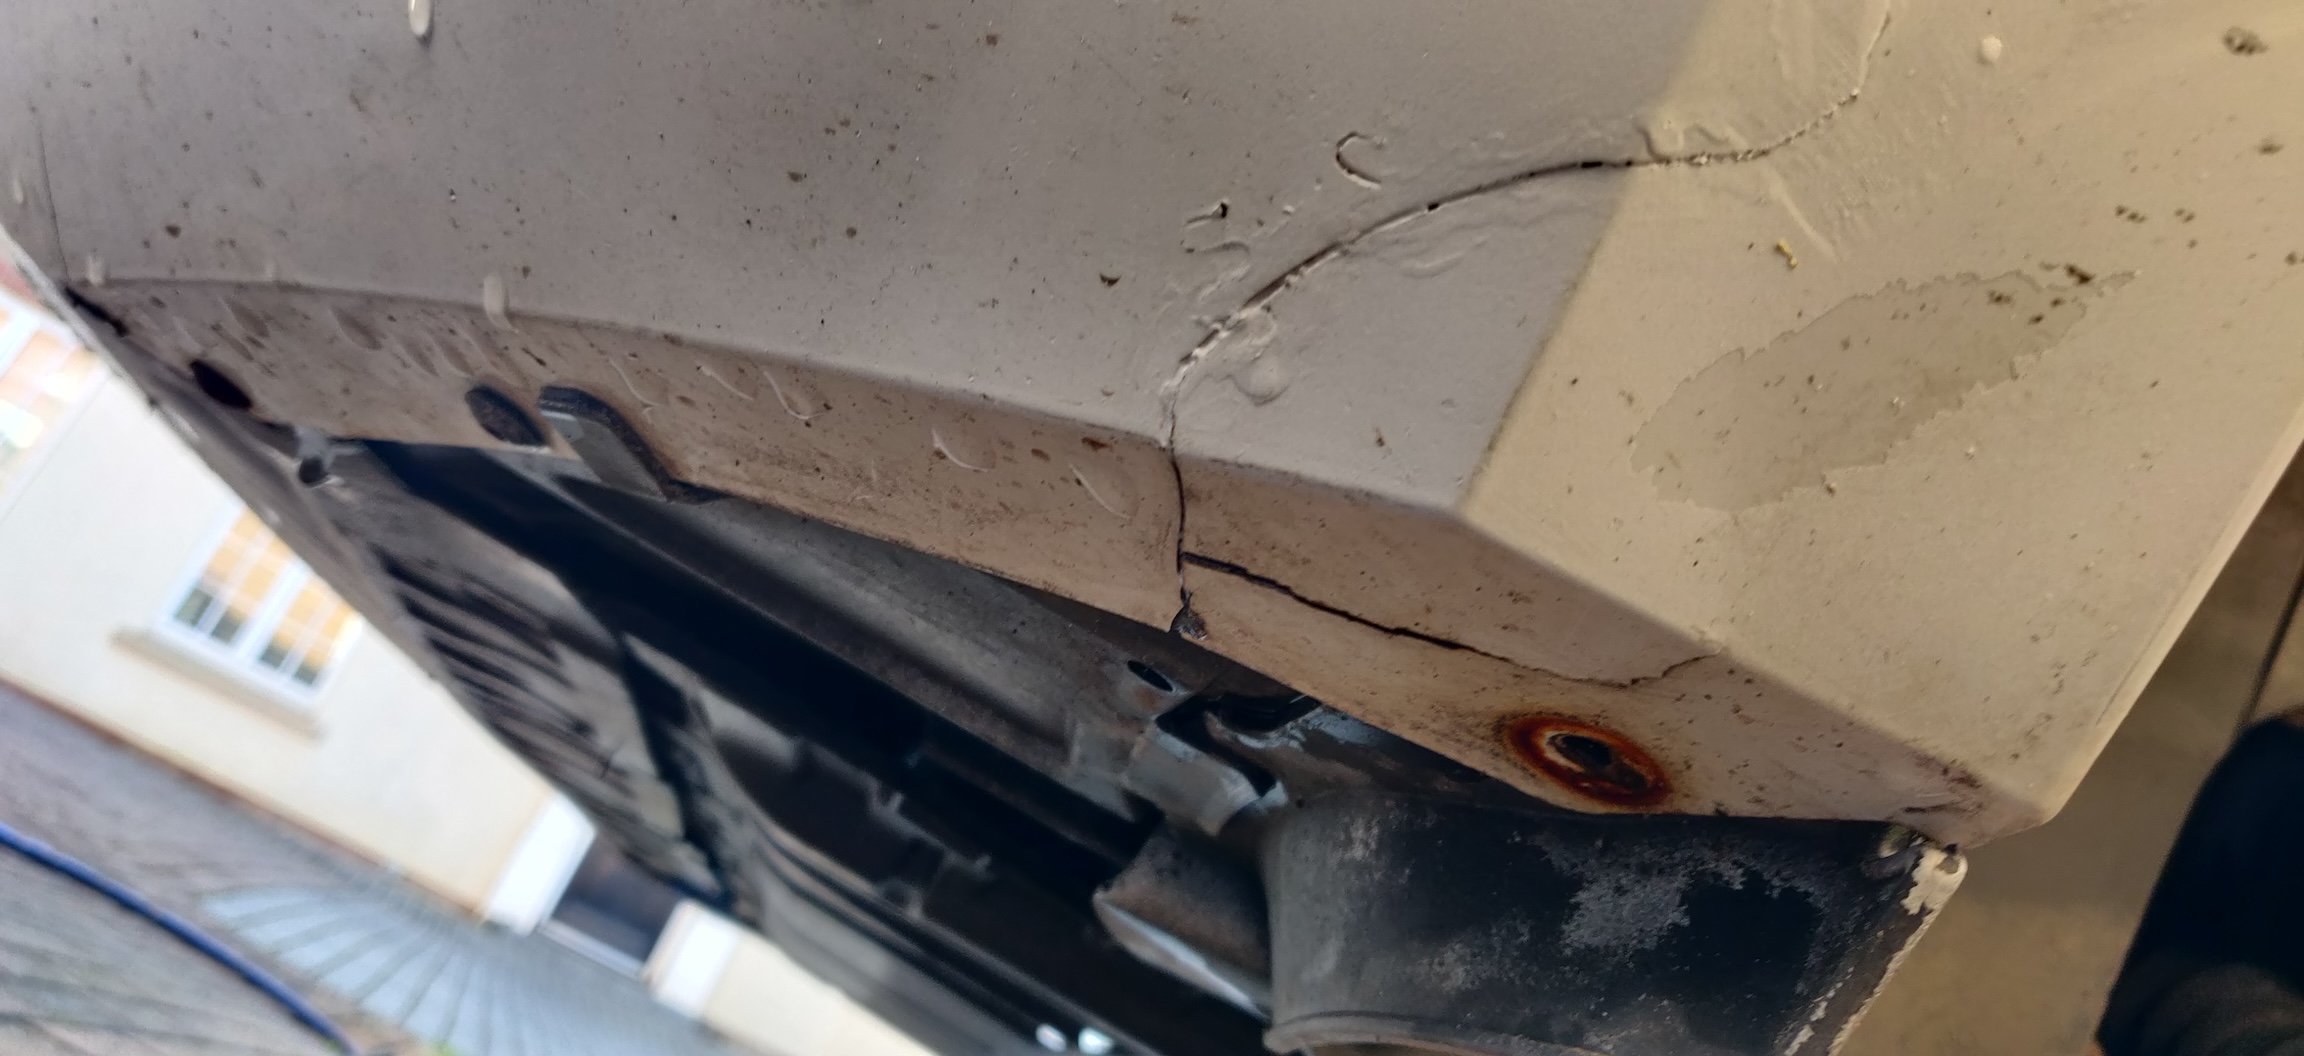
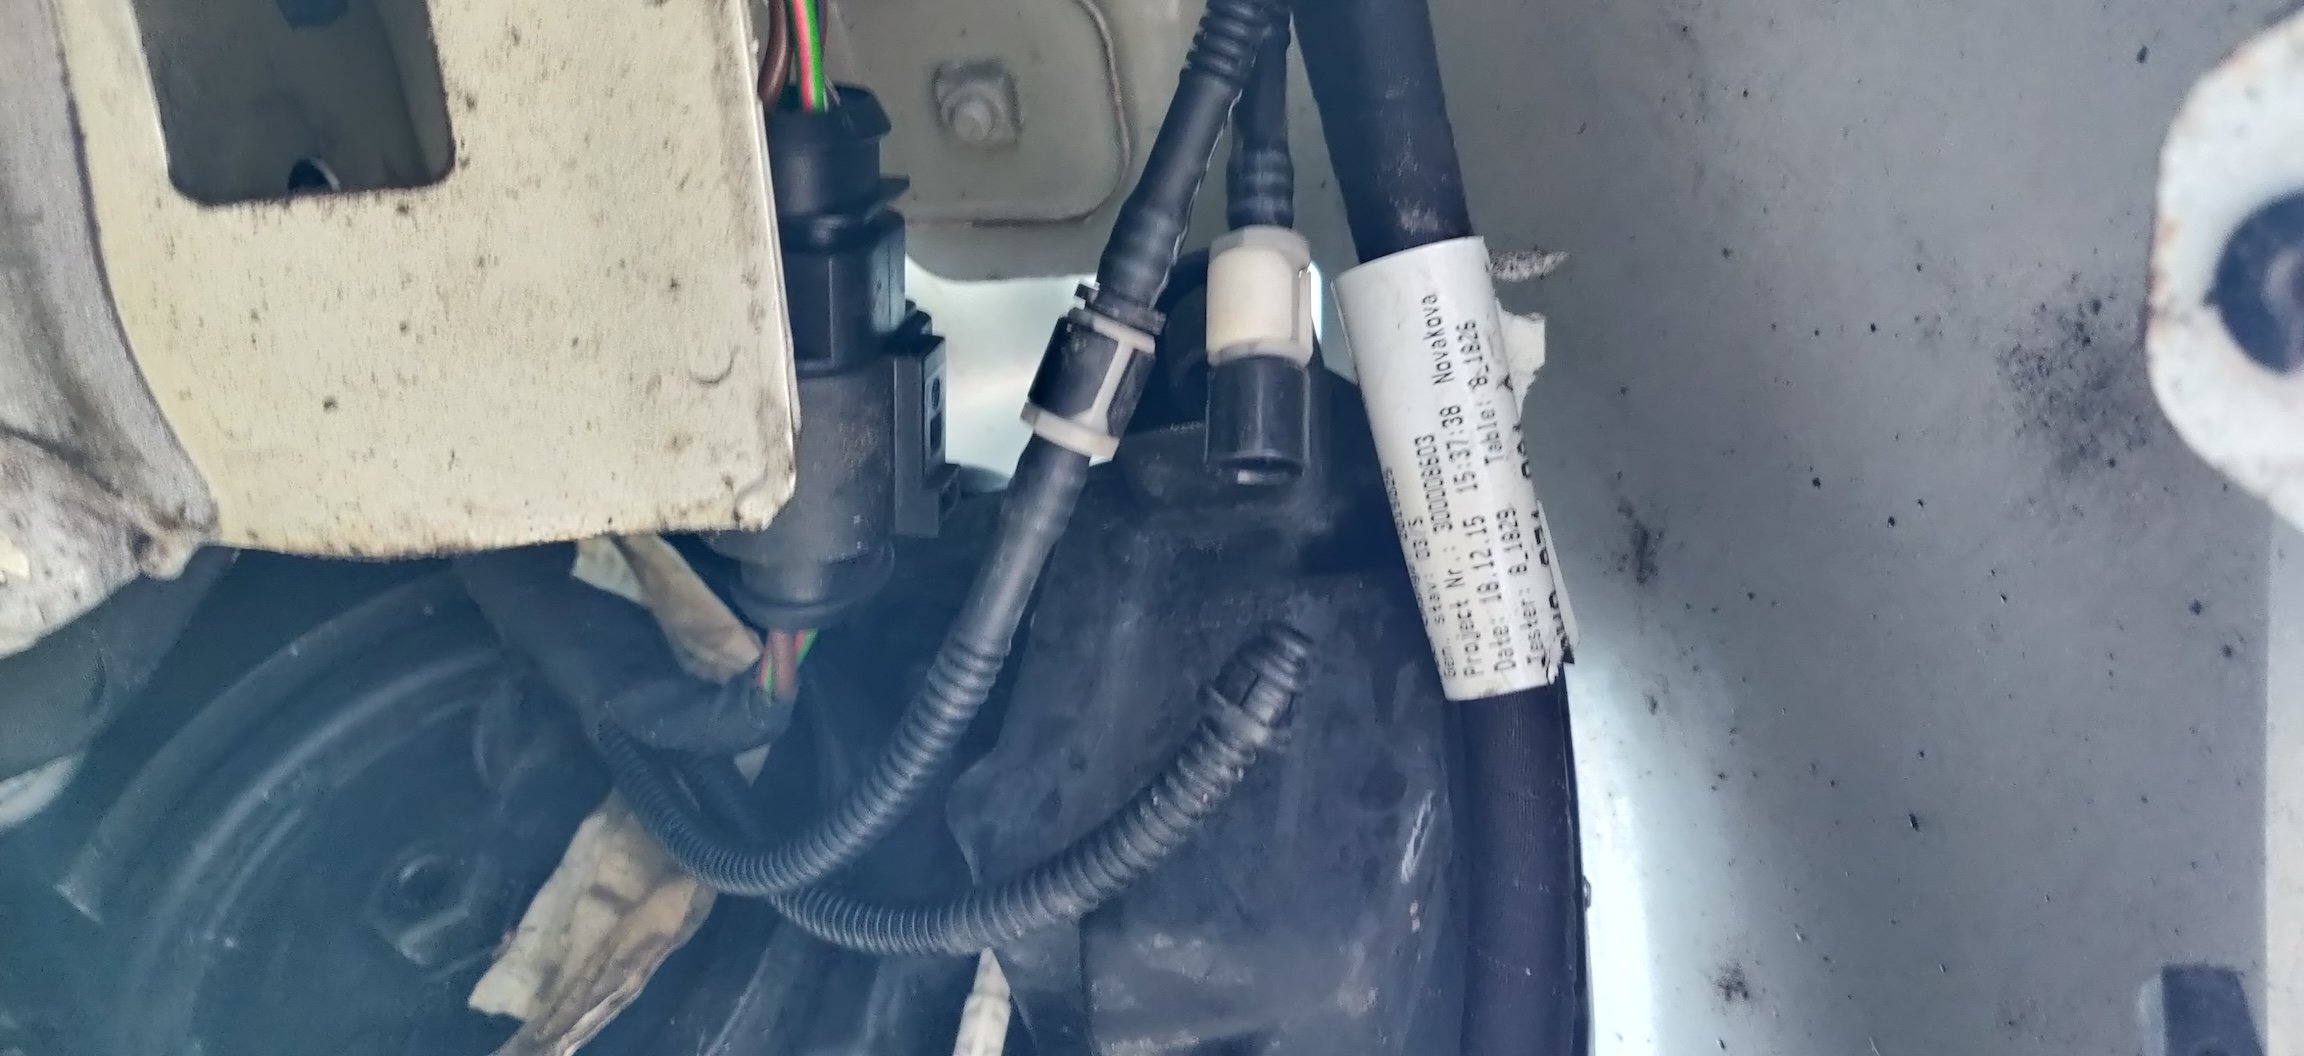
As seems typical of bank holiday weekends, there's no telling the weather. What was forecast as rain now appears to be overcast, and rain today has like yesterday actually meant sunshine in the morning. So spent the time before work getting the wheel arches off, or at least the fronts. First step was the broken mudflap, held on by 3 screws out of 4, with one being on the underside. It comes out without drama: All the screws encountered are T20 torx, and are pretty much the standard VW wheel arch screws. There were about 18 for each of the wheel arches: Including a few around the bottom, including 3 or 4 attaching to the front undertray. You can see the scrapes on the right underside of the bumper here. Not really fussed. Probably a bit more fussed with the left side: Maybe a curb or a verge that was too high? Seems solid enough and its just plastic at the end of the day. I suppose I could go to a scrap yard if I'm ever really bothered. Once the mountain of screws are undone, it's just some wiggling to get the arch liners free: The remainder of the wheel arches themselves aren't as bad as the exposed bit. I'll probably jet wash those around lunch time if the weather remains fair. Quite easy to spot the washer hose: So that's the mystery solved. I'll assume it just needs clipping back into place but I'll double check the workshop manual. I started to attempt the rears, but the right side decided to be a hassle: A couple of the screws on the right arch immediately rounded off upon looking at them. I'll have to hope some Knipex pliers can get enough purchase on them, otherwise worse case is to be brutal and destroy the plastic retaining bit these screws go into and replace. Back to work! Maintenance: £1806.50 Upgrades: £887.10 Miscellaneous: £608.14

-
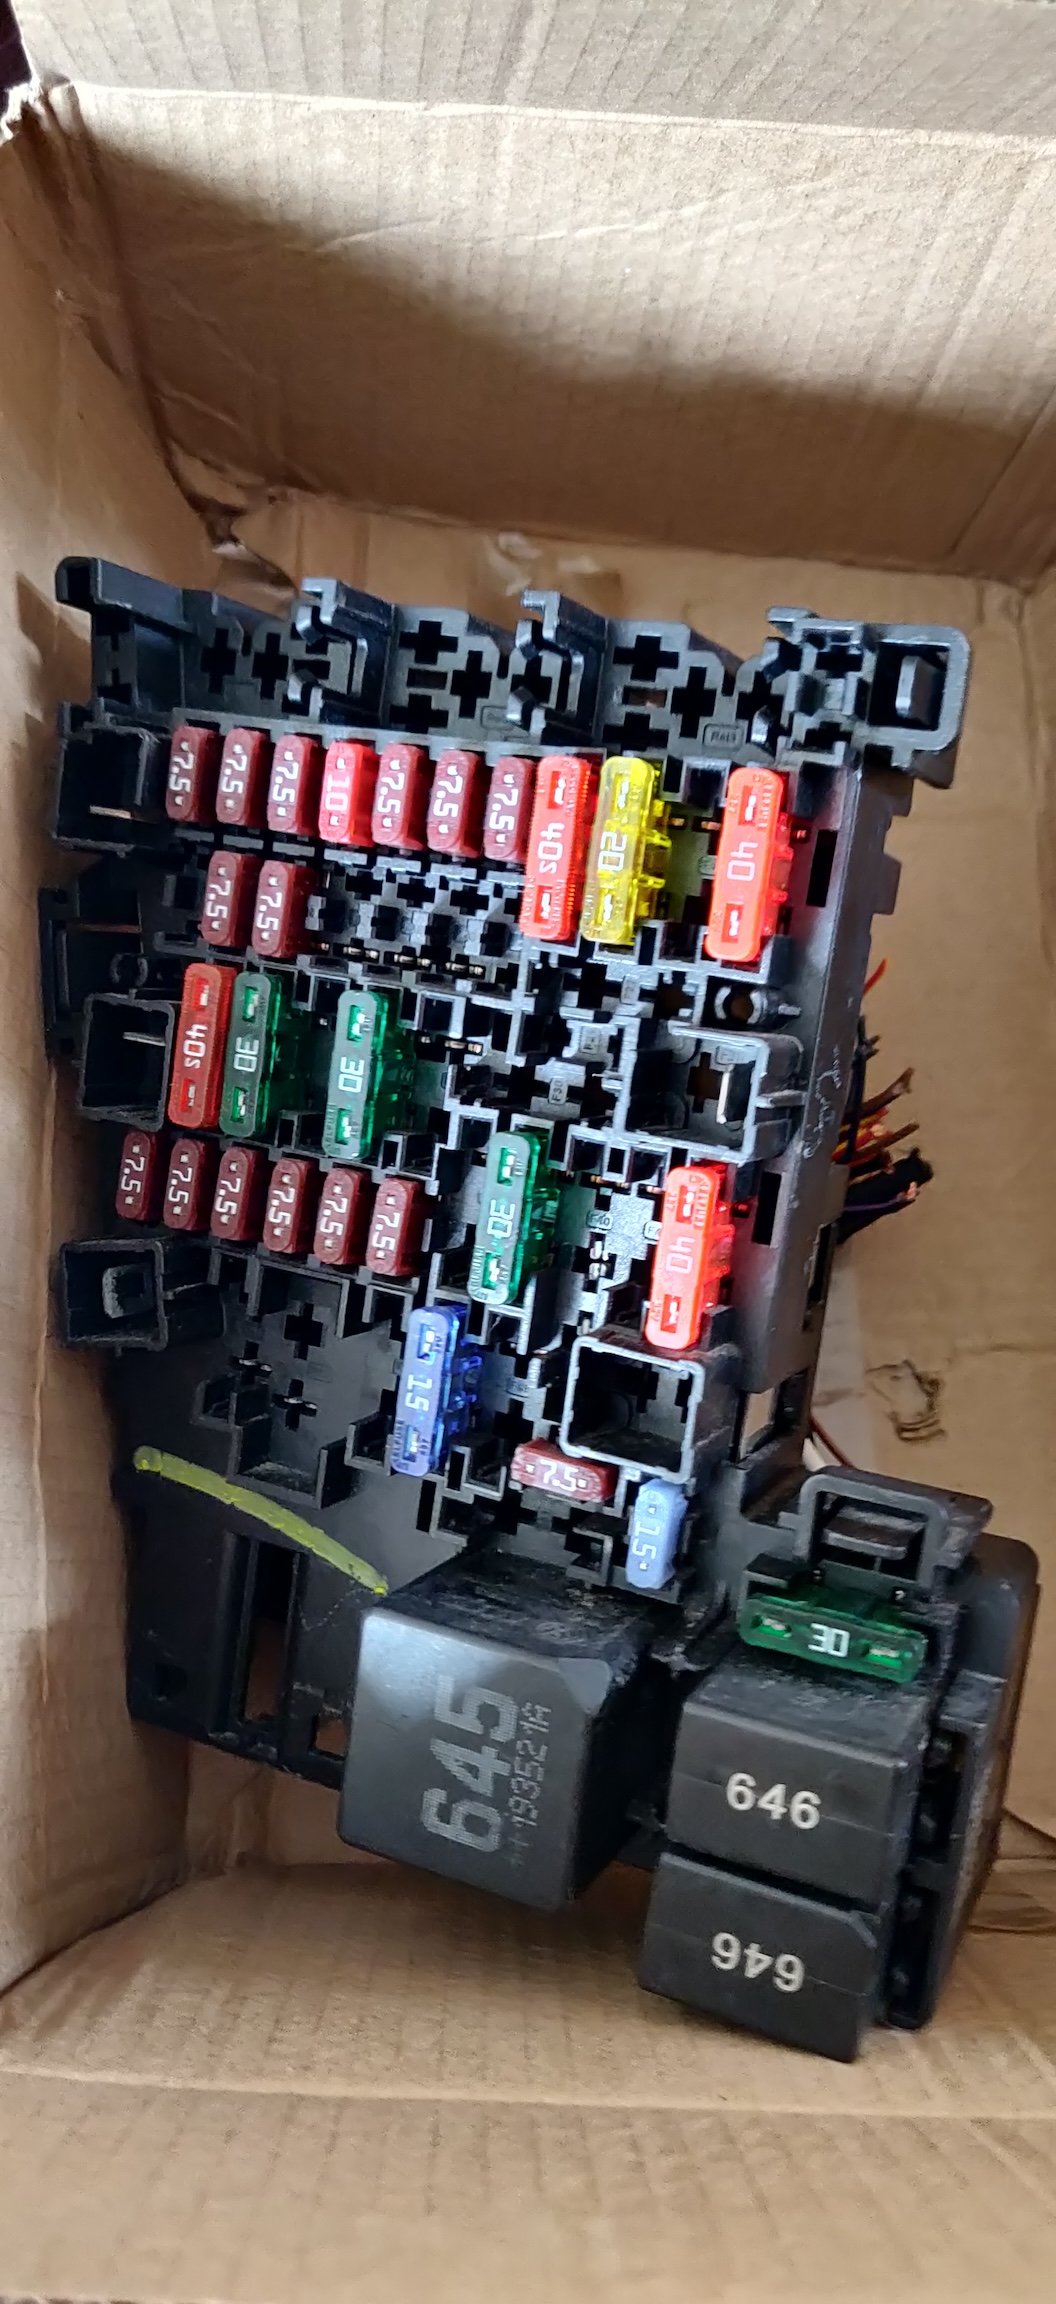
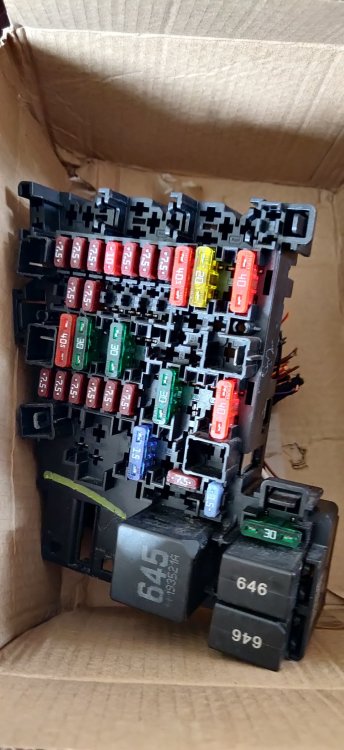
Random thing through the post: I had no luck trying to find out anything about those purple locking tabs, so decided the quickest (and probably cheapest) is just to get a fusebox from a scrapped car on eBay. This was £12.33 part number 5Q0 937 615 C with the ad describing it as VW Golf/Seat Leon. It looks similar enough. I'll essentially extract the purple locking tab from this, and I guess, throw the rest away I suppose... The pain point is the fact that I've already reinstalled the glovebox, and head unit and all that, so if anything, I'll end up leaving this on the back burner for a long time. I guess once I get to the stage of installing the Virtual Cockpit, that'll be the time to sort this out (as I'll have to get behind the head unit to attach the cable from there to the Virtual Cockpit... Maintenance: £1806.50 (+£12.33) Upgrades: £887.10 Miscellaneous: £608.14
-
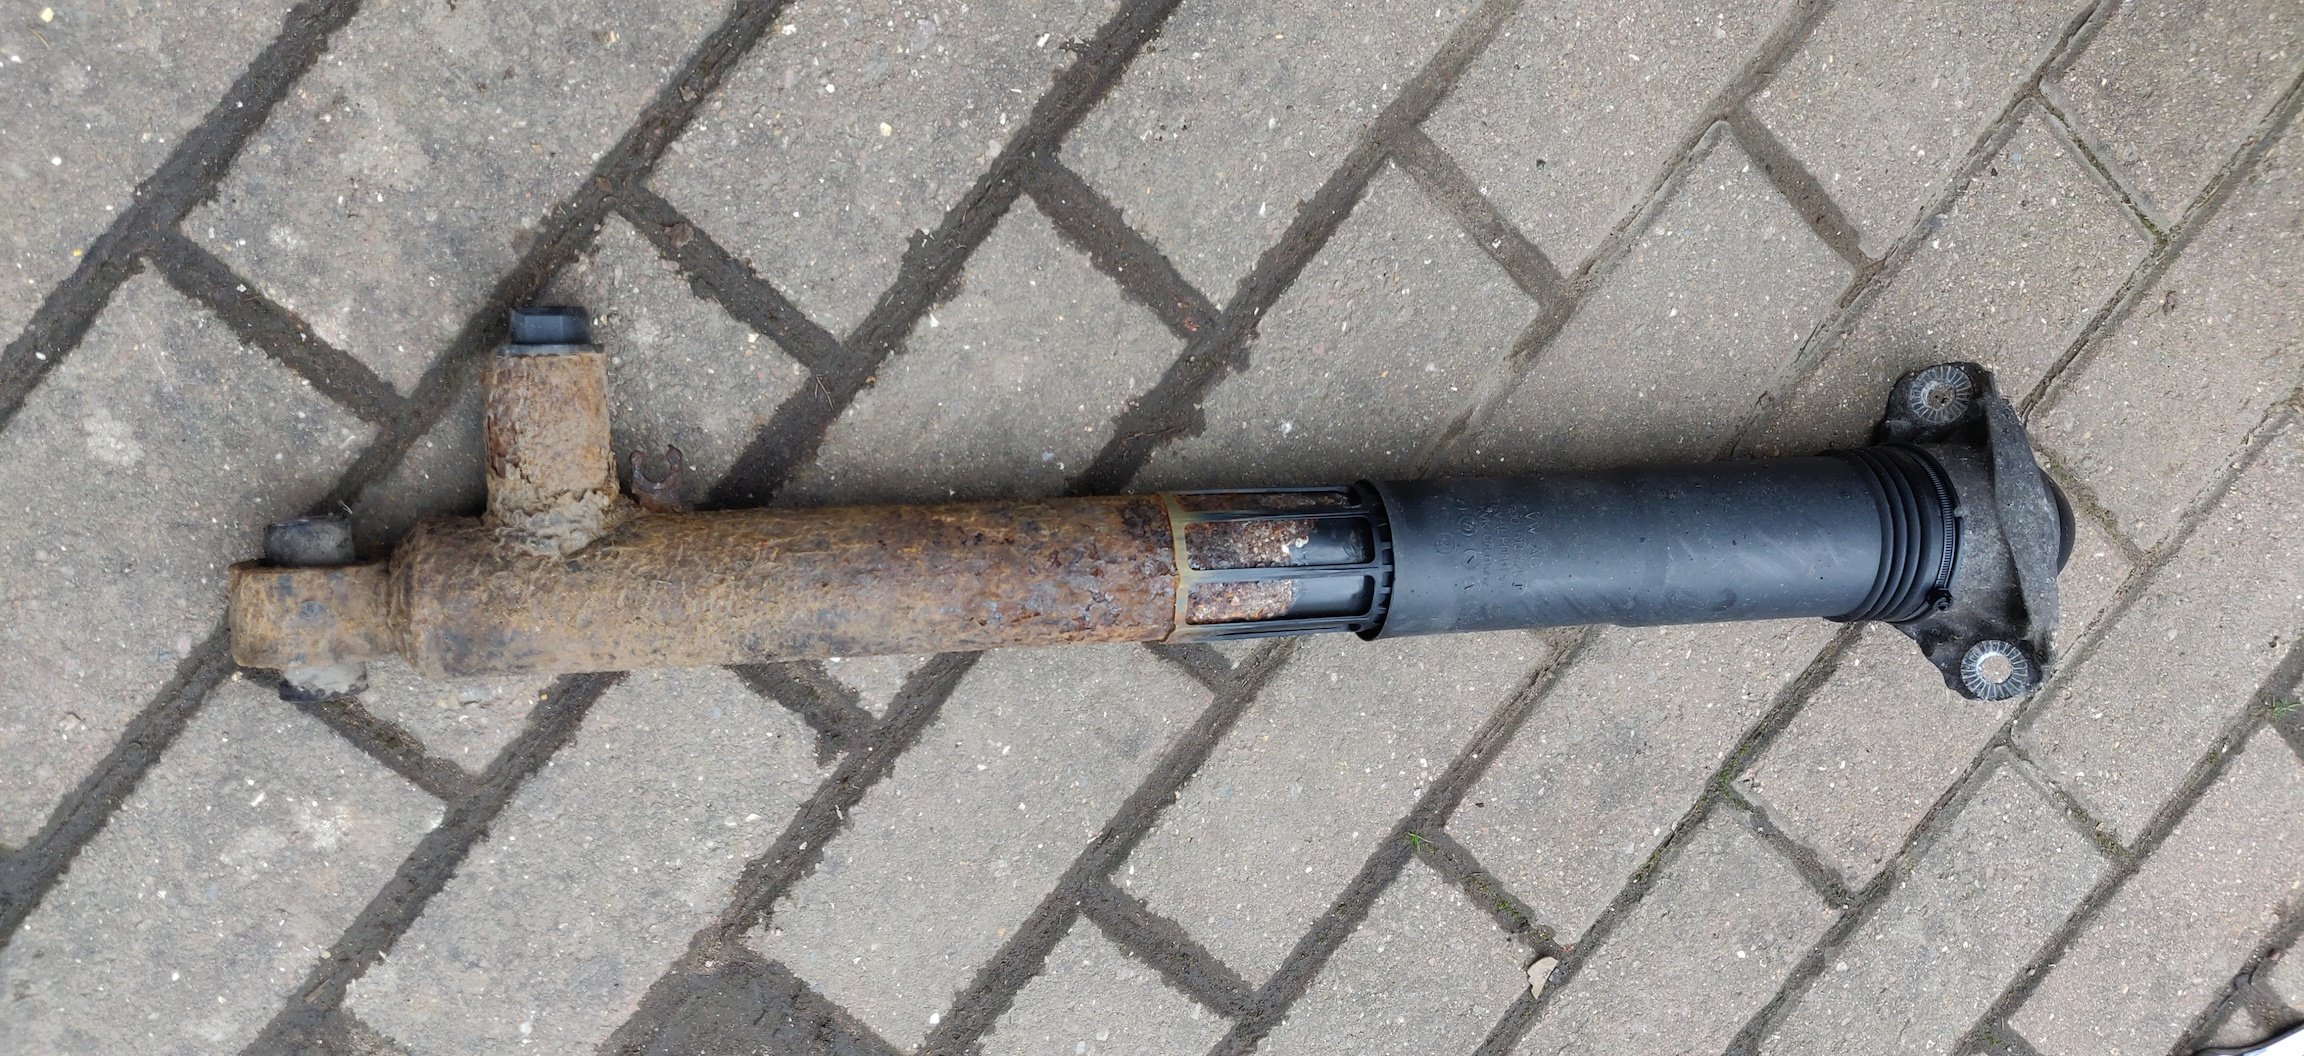
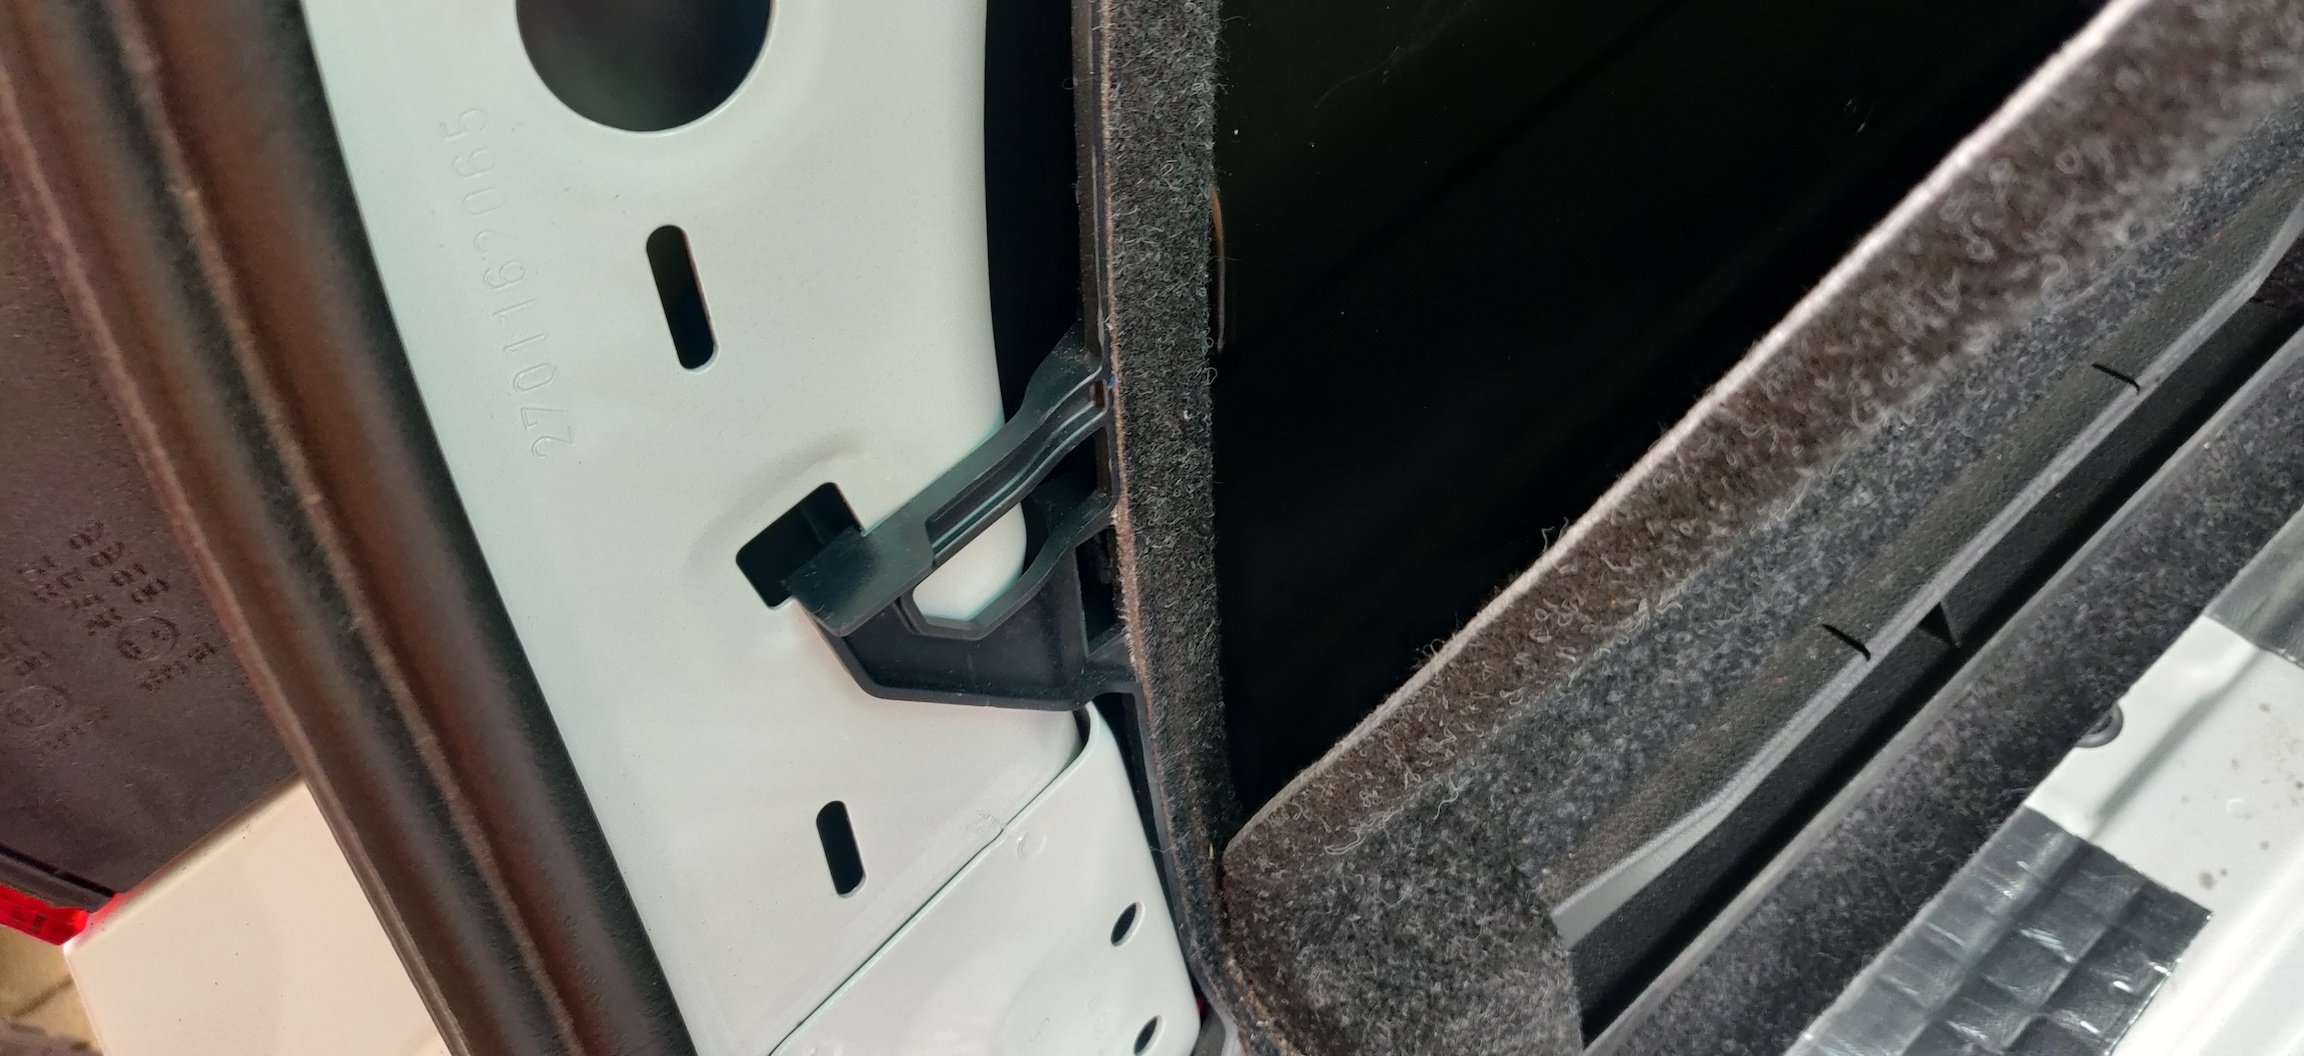
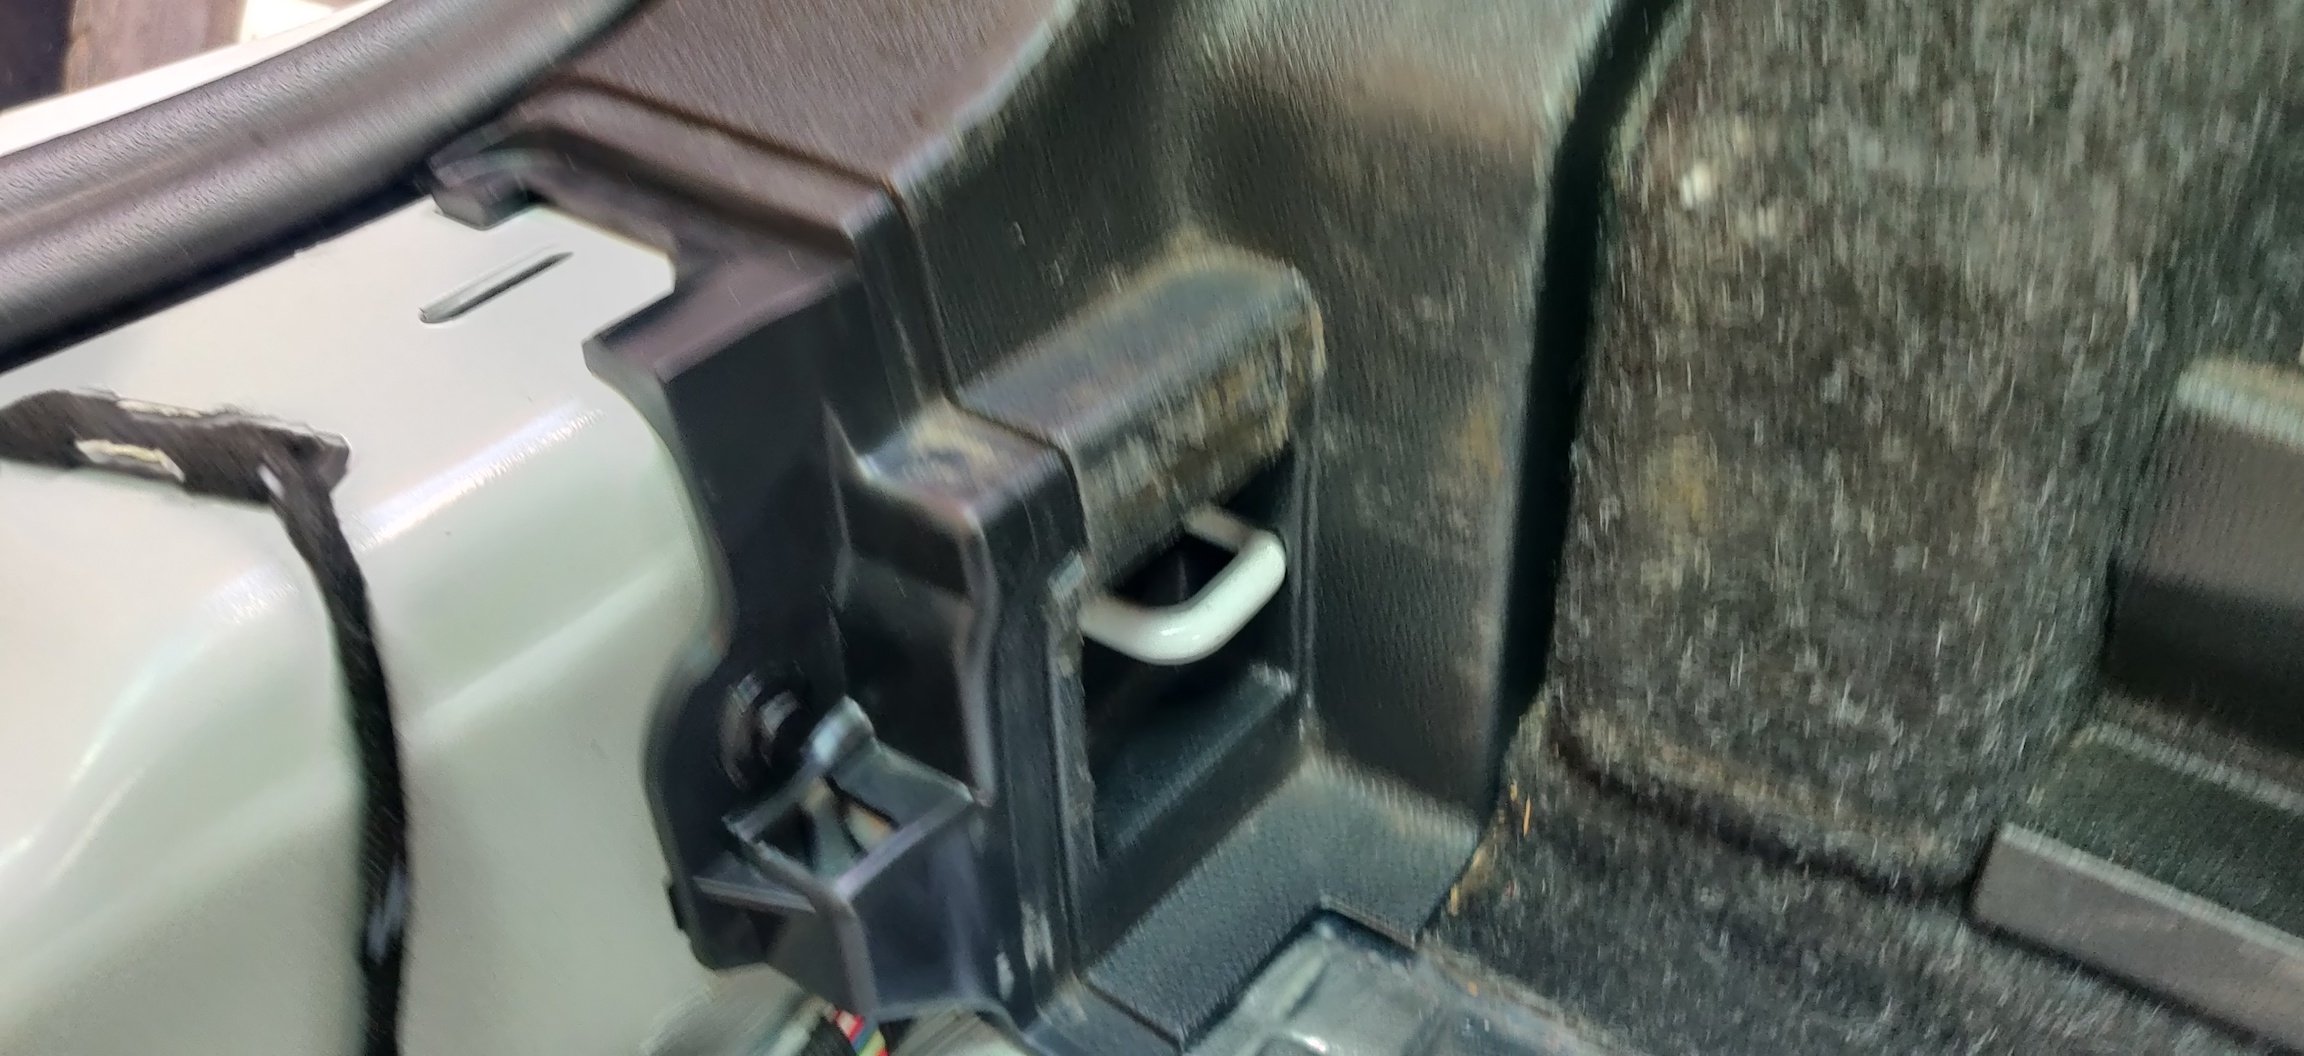
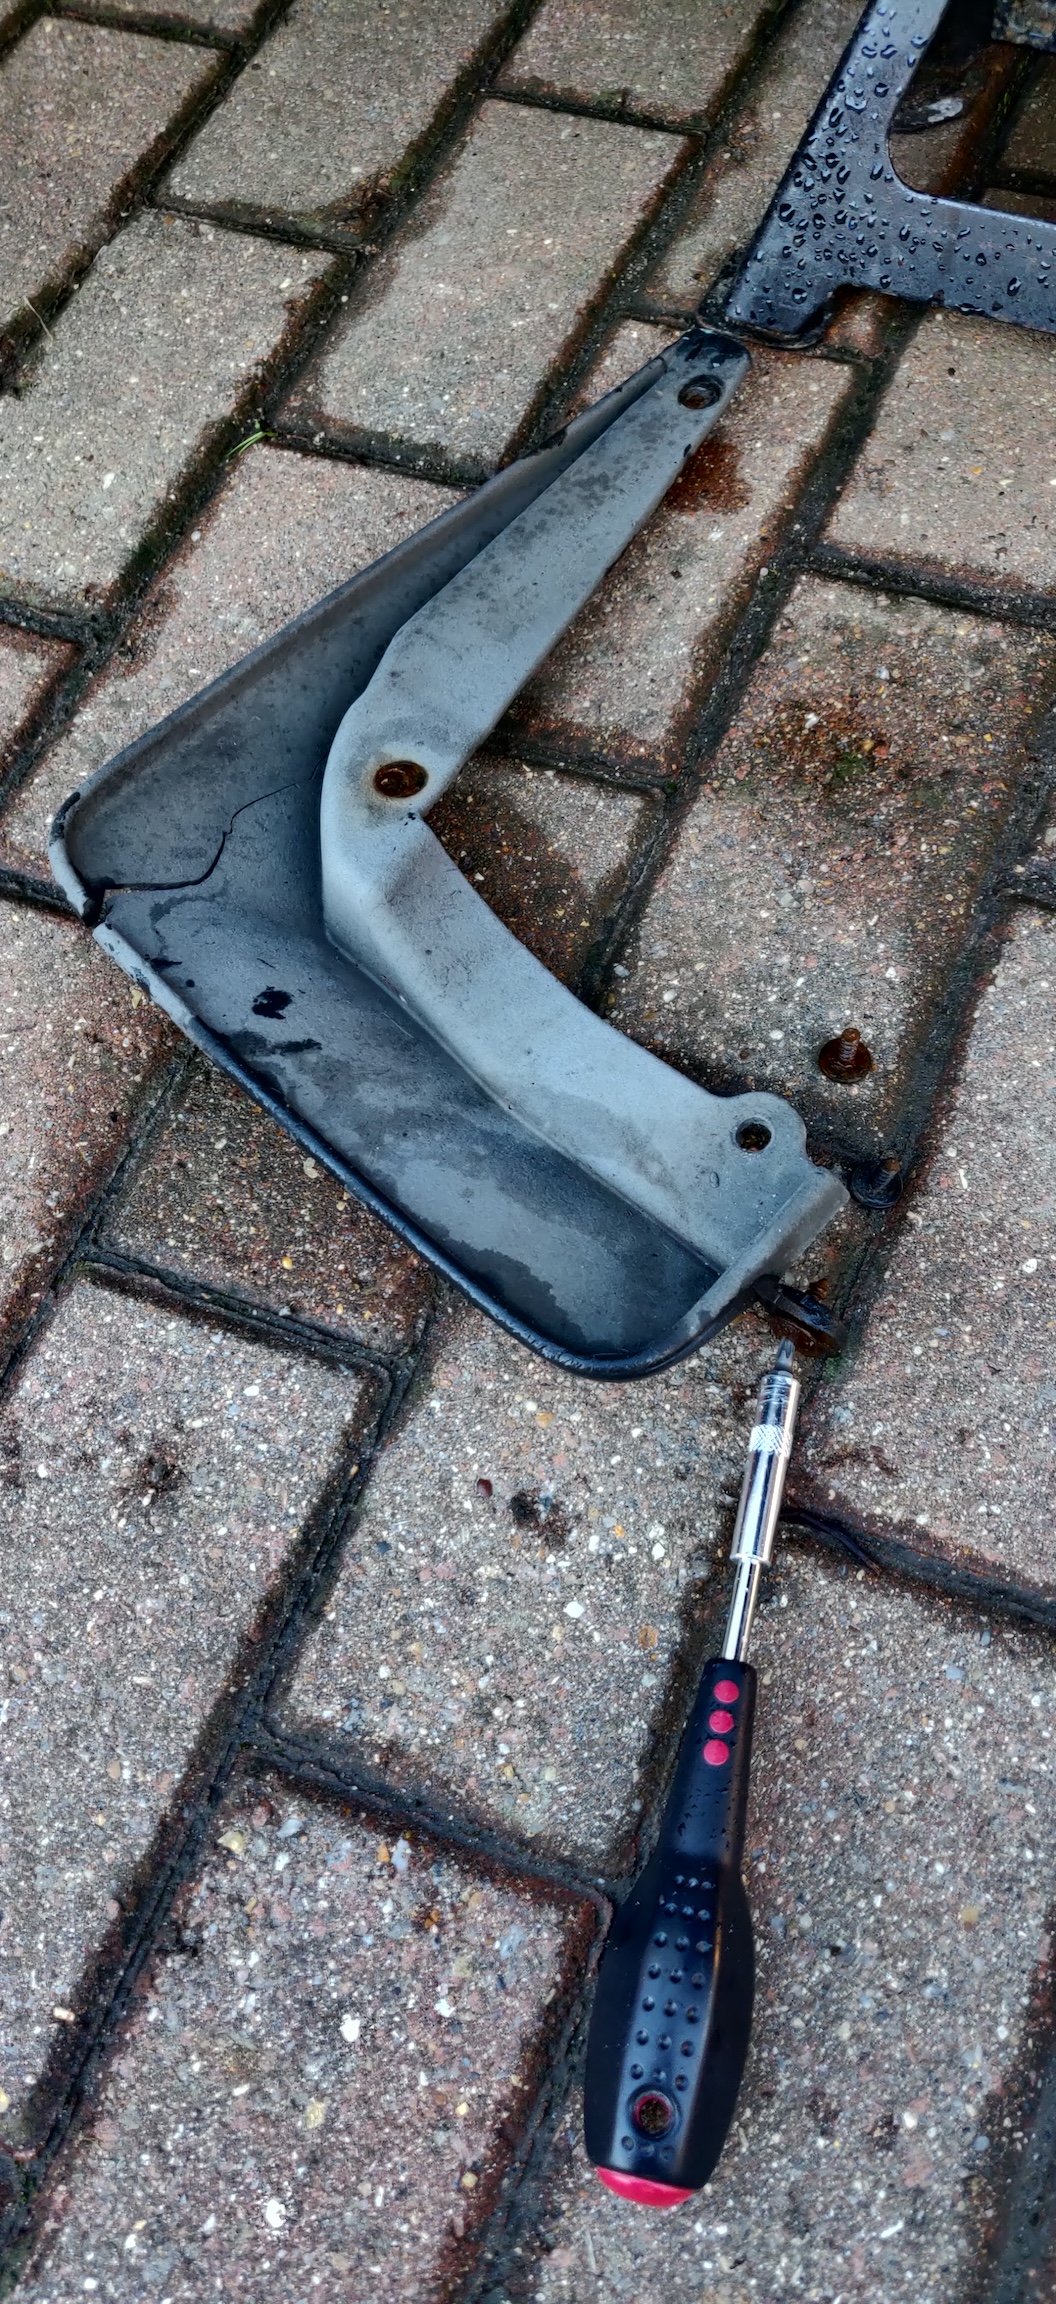
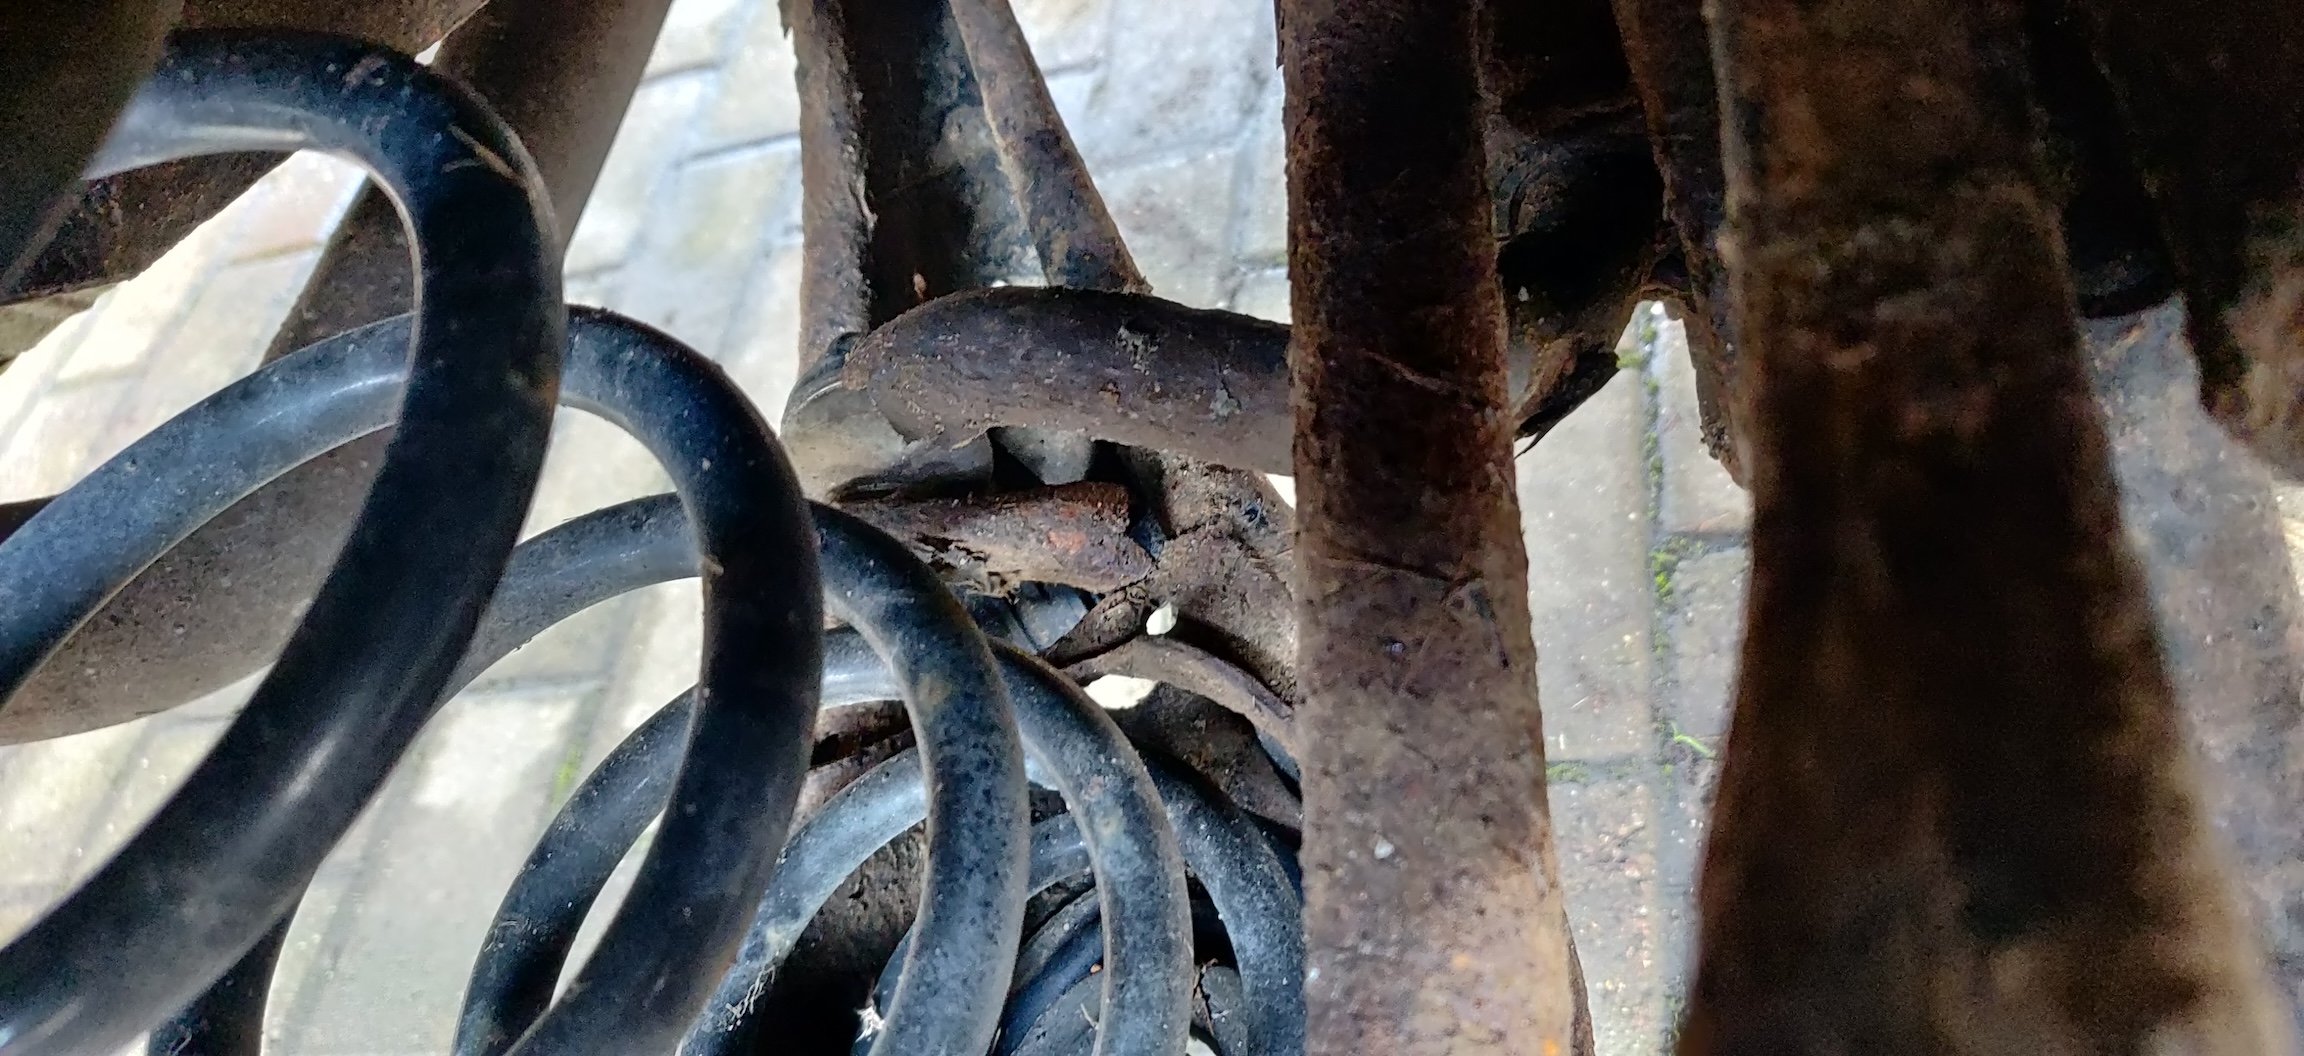
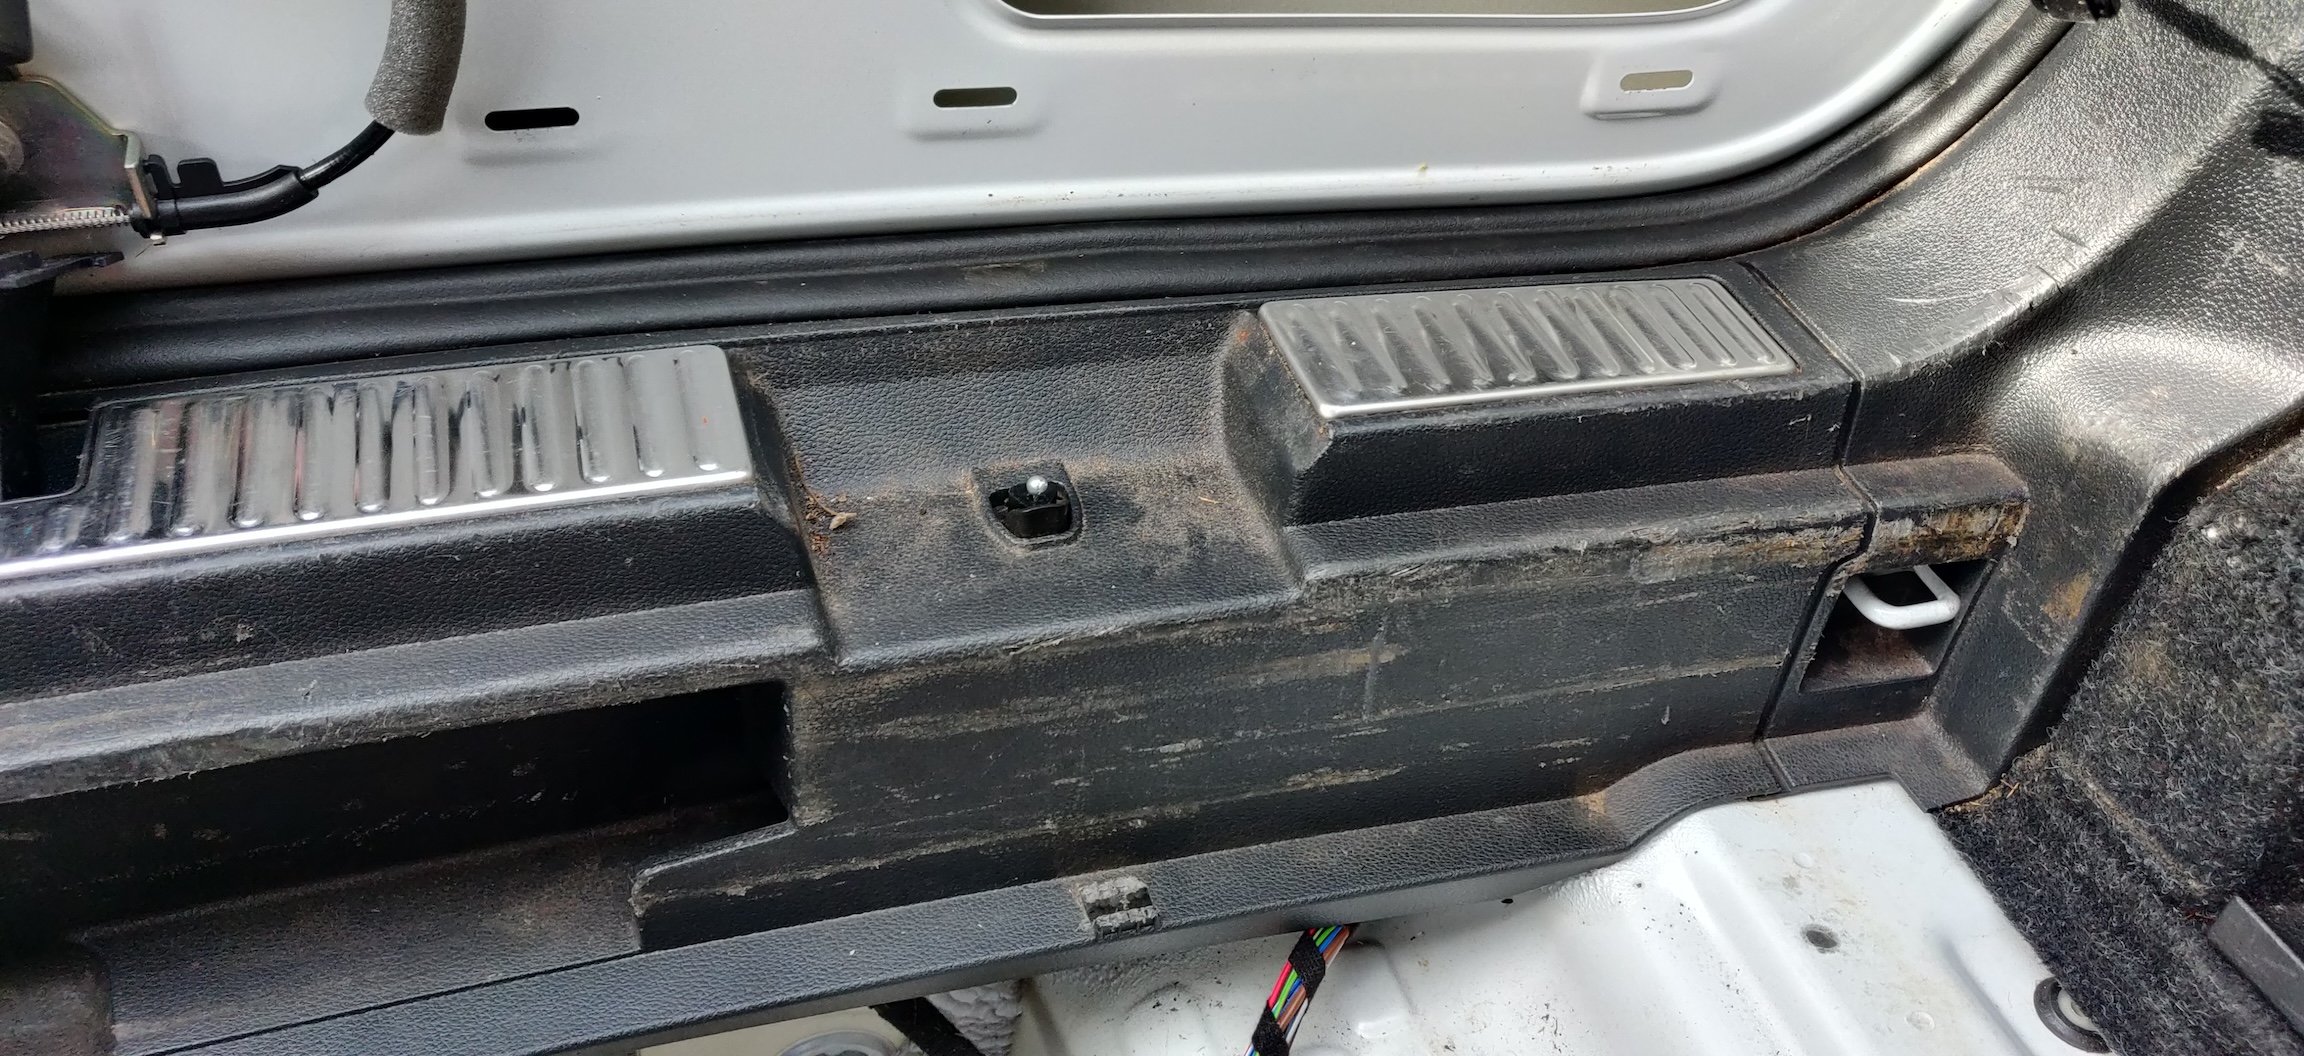
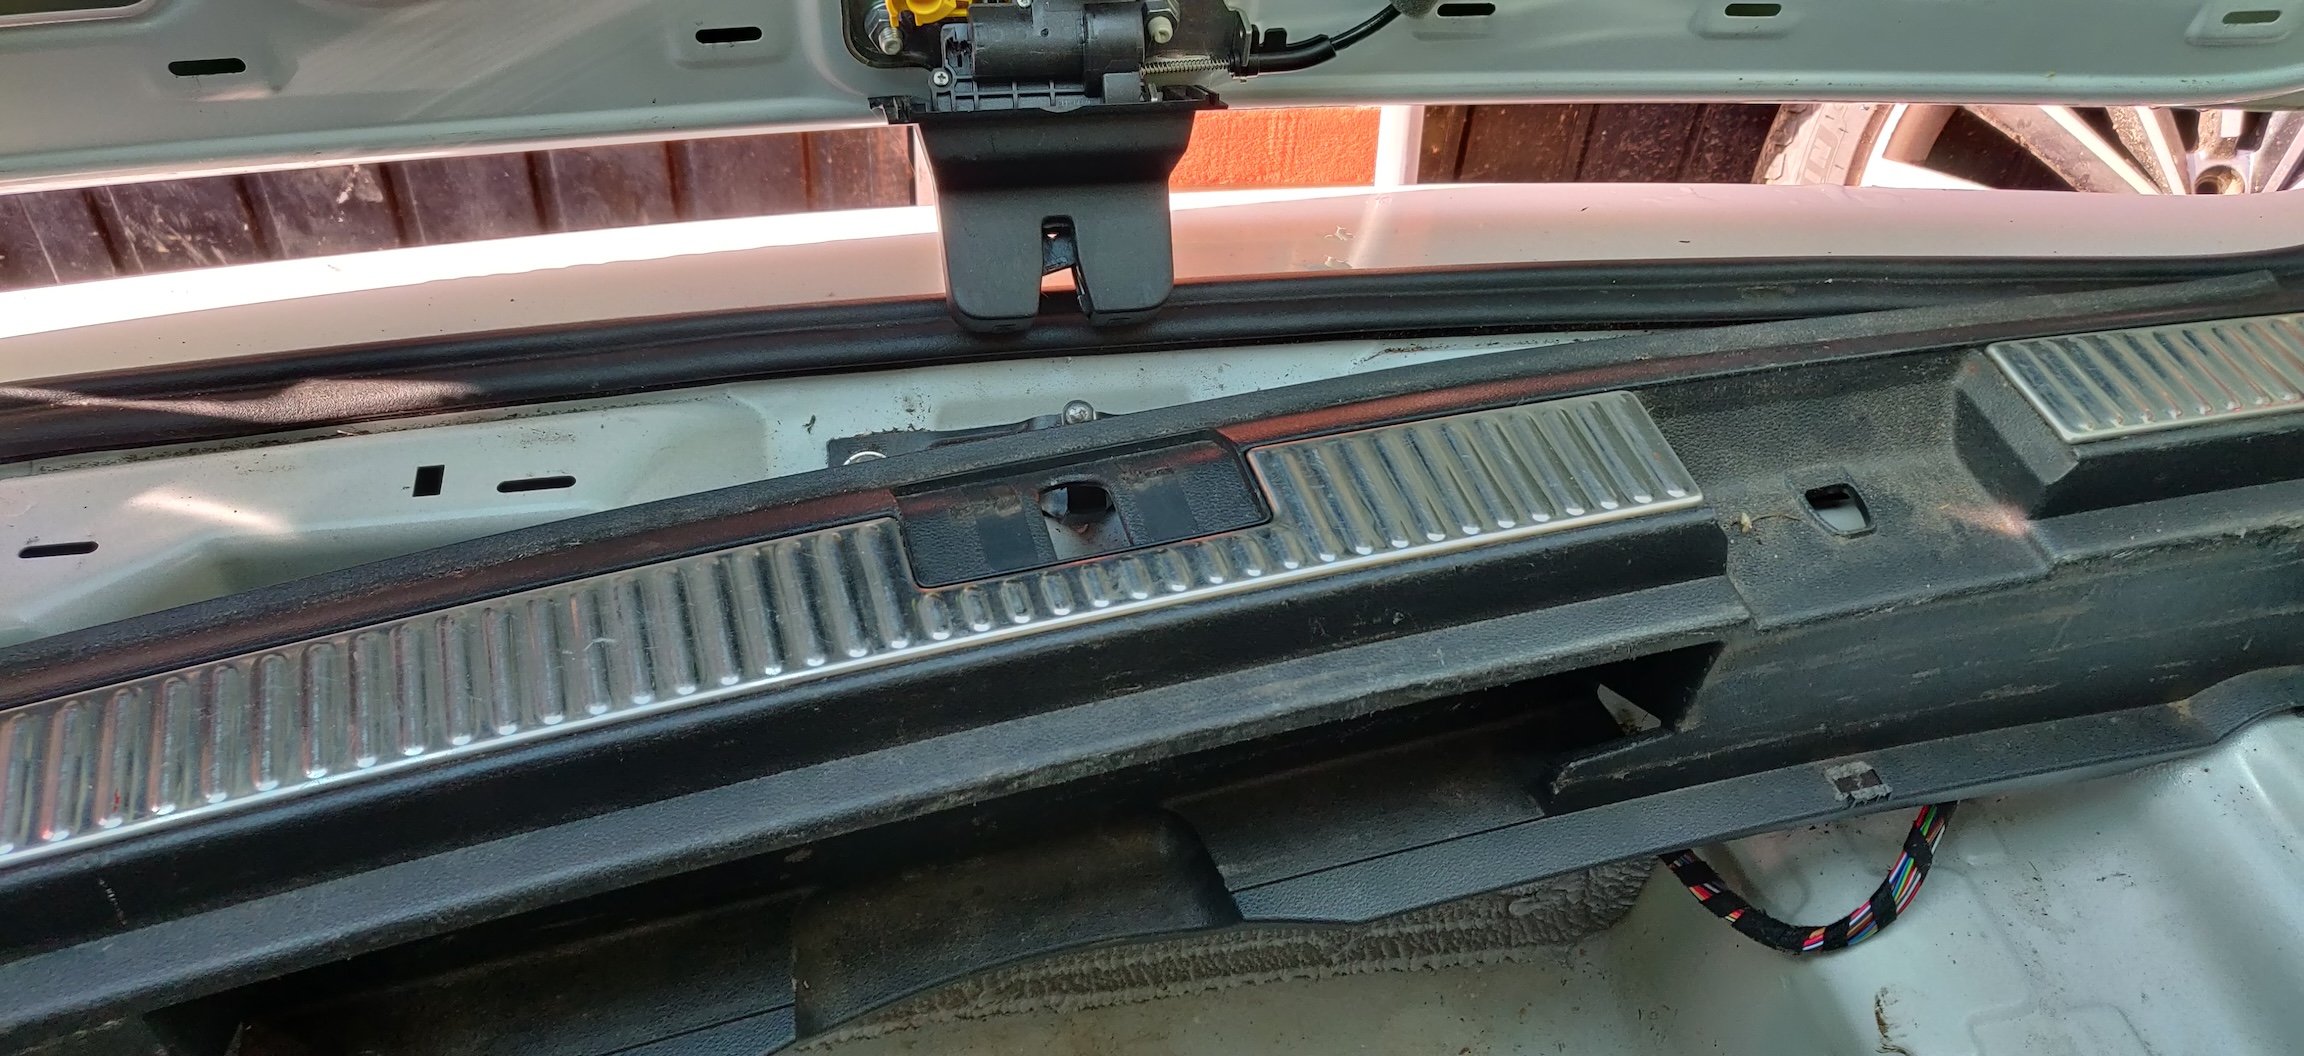
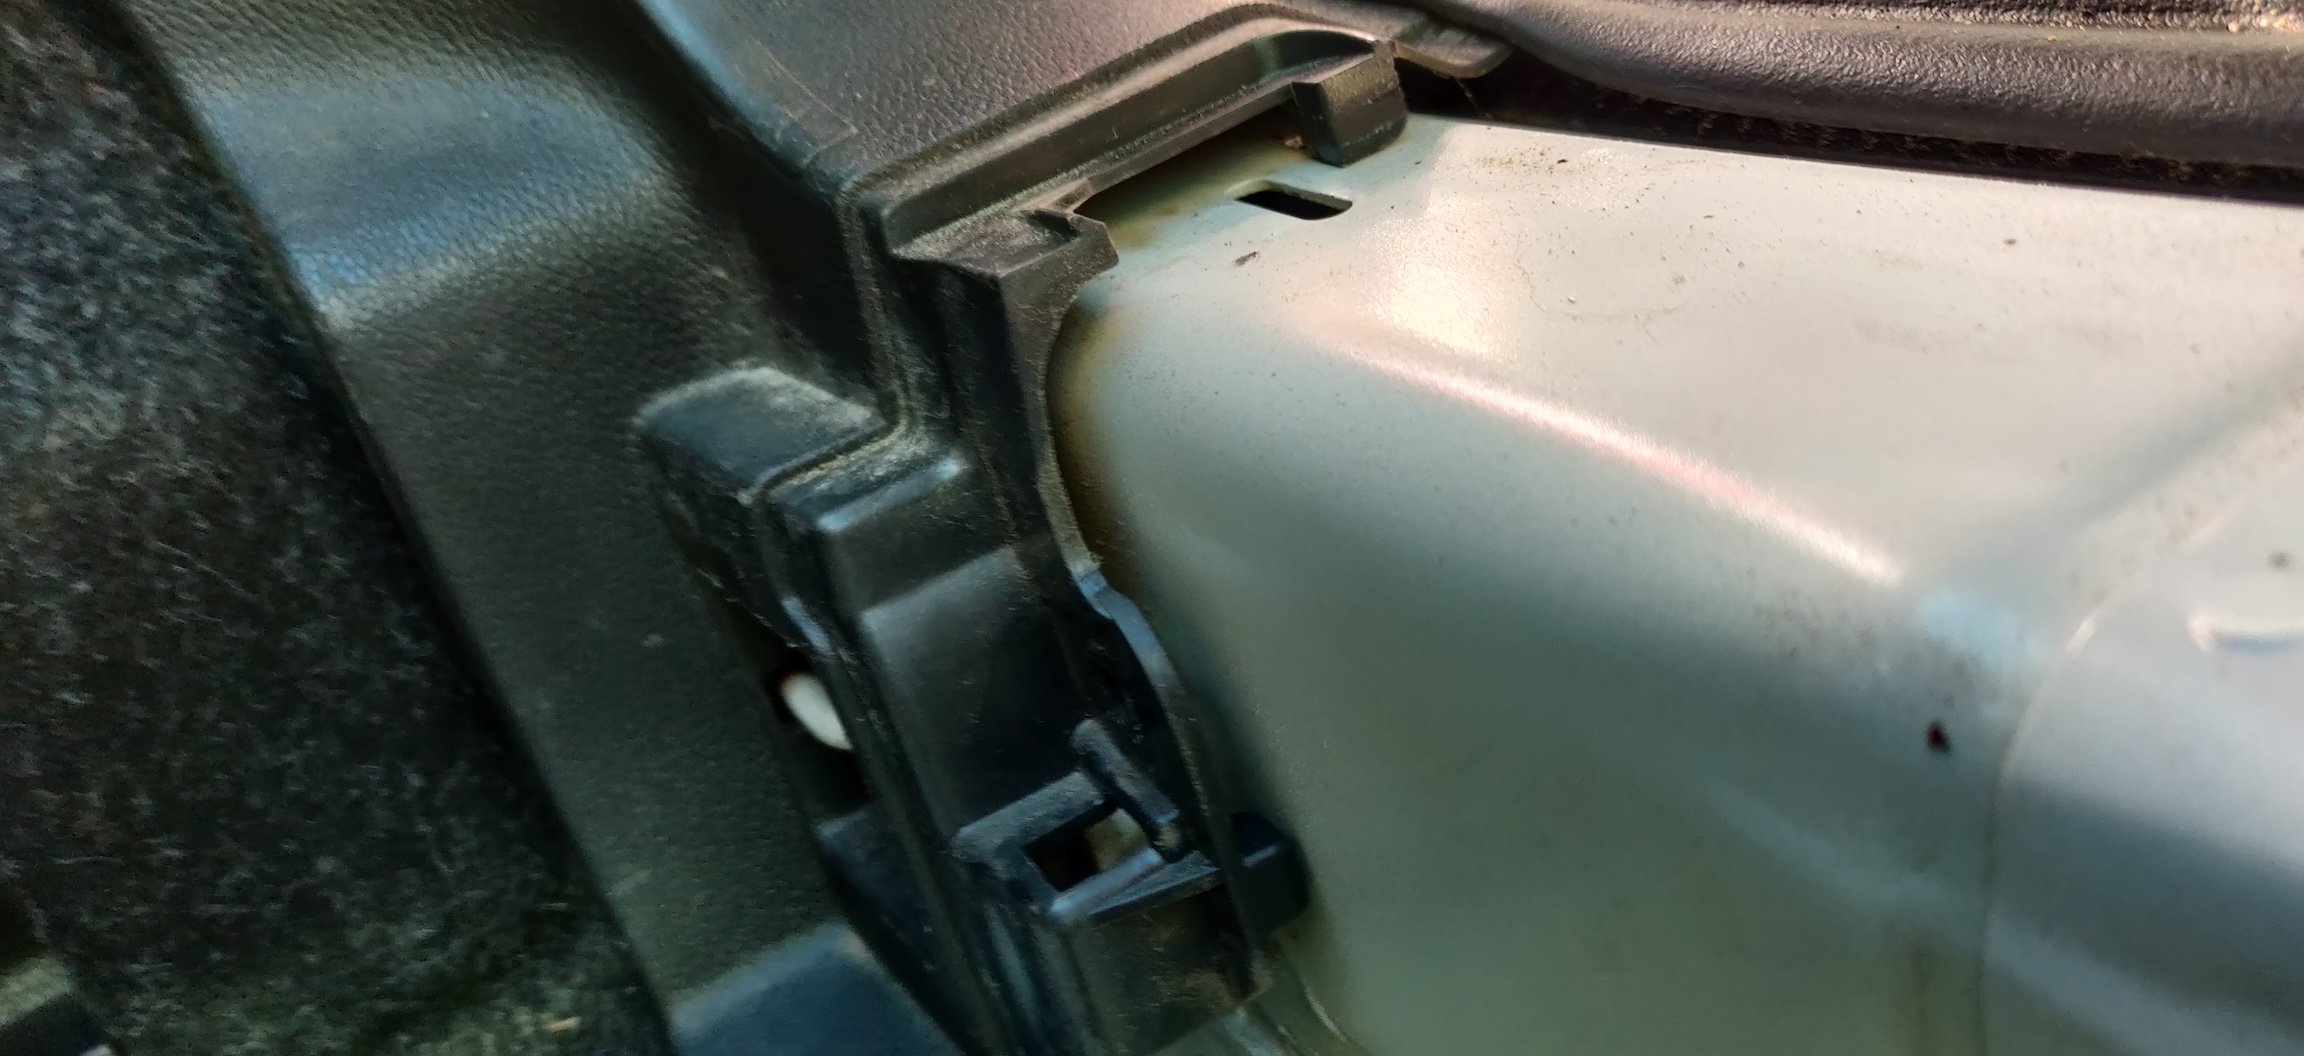
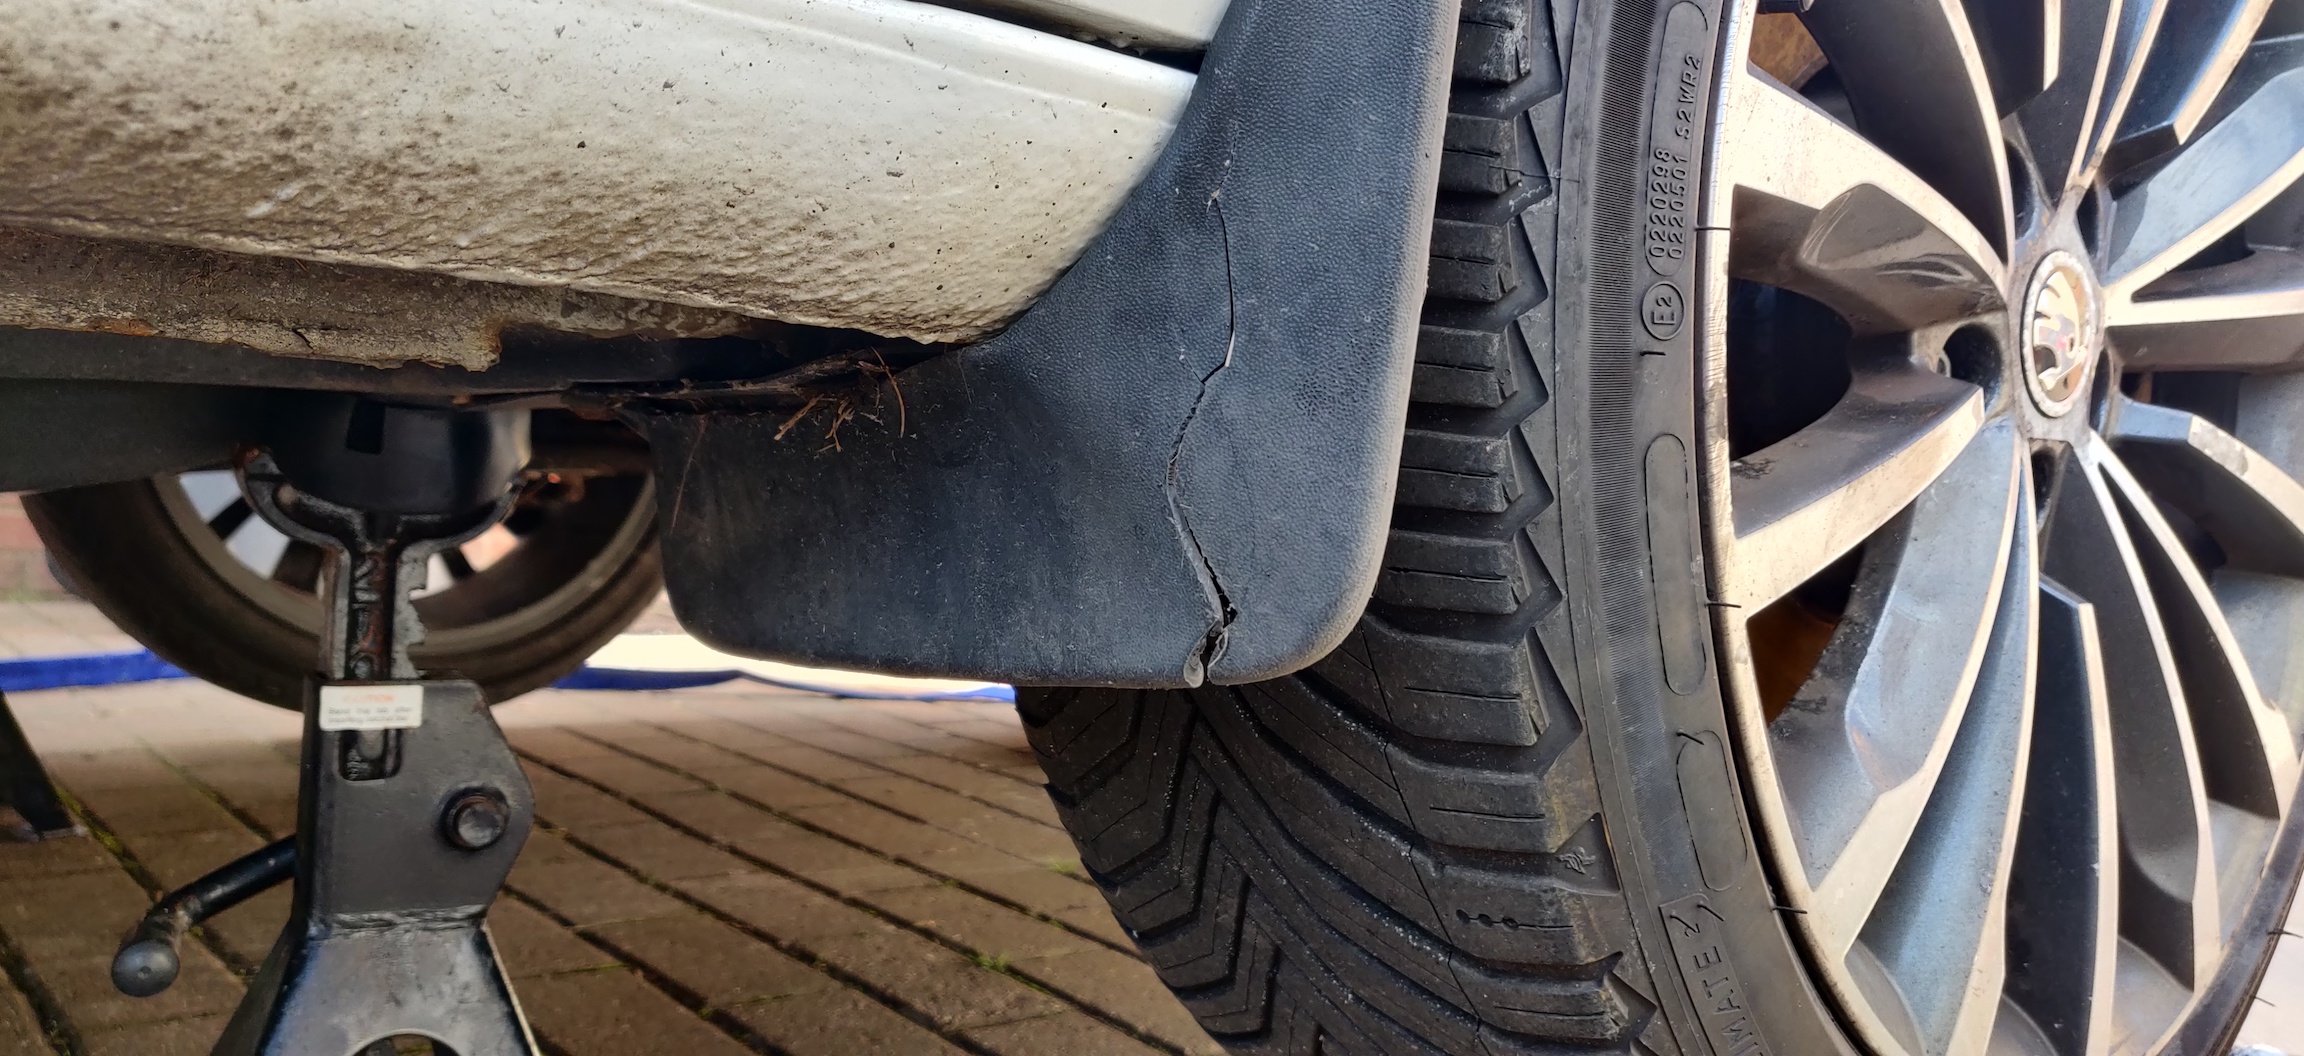
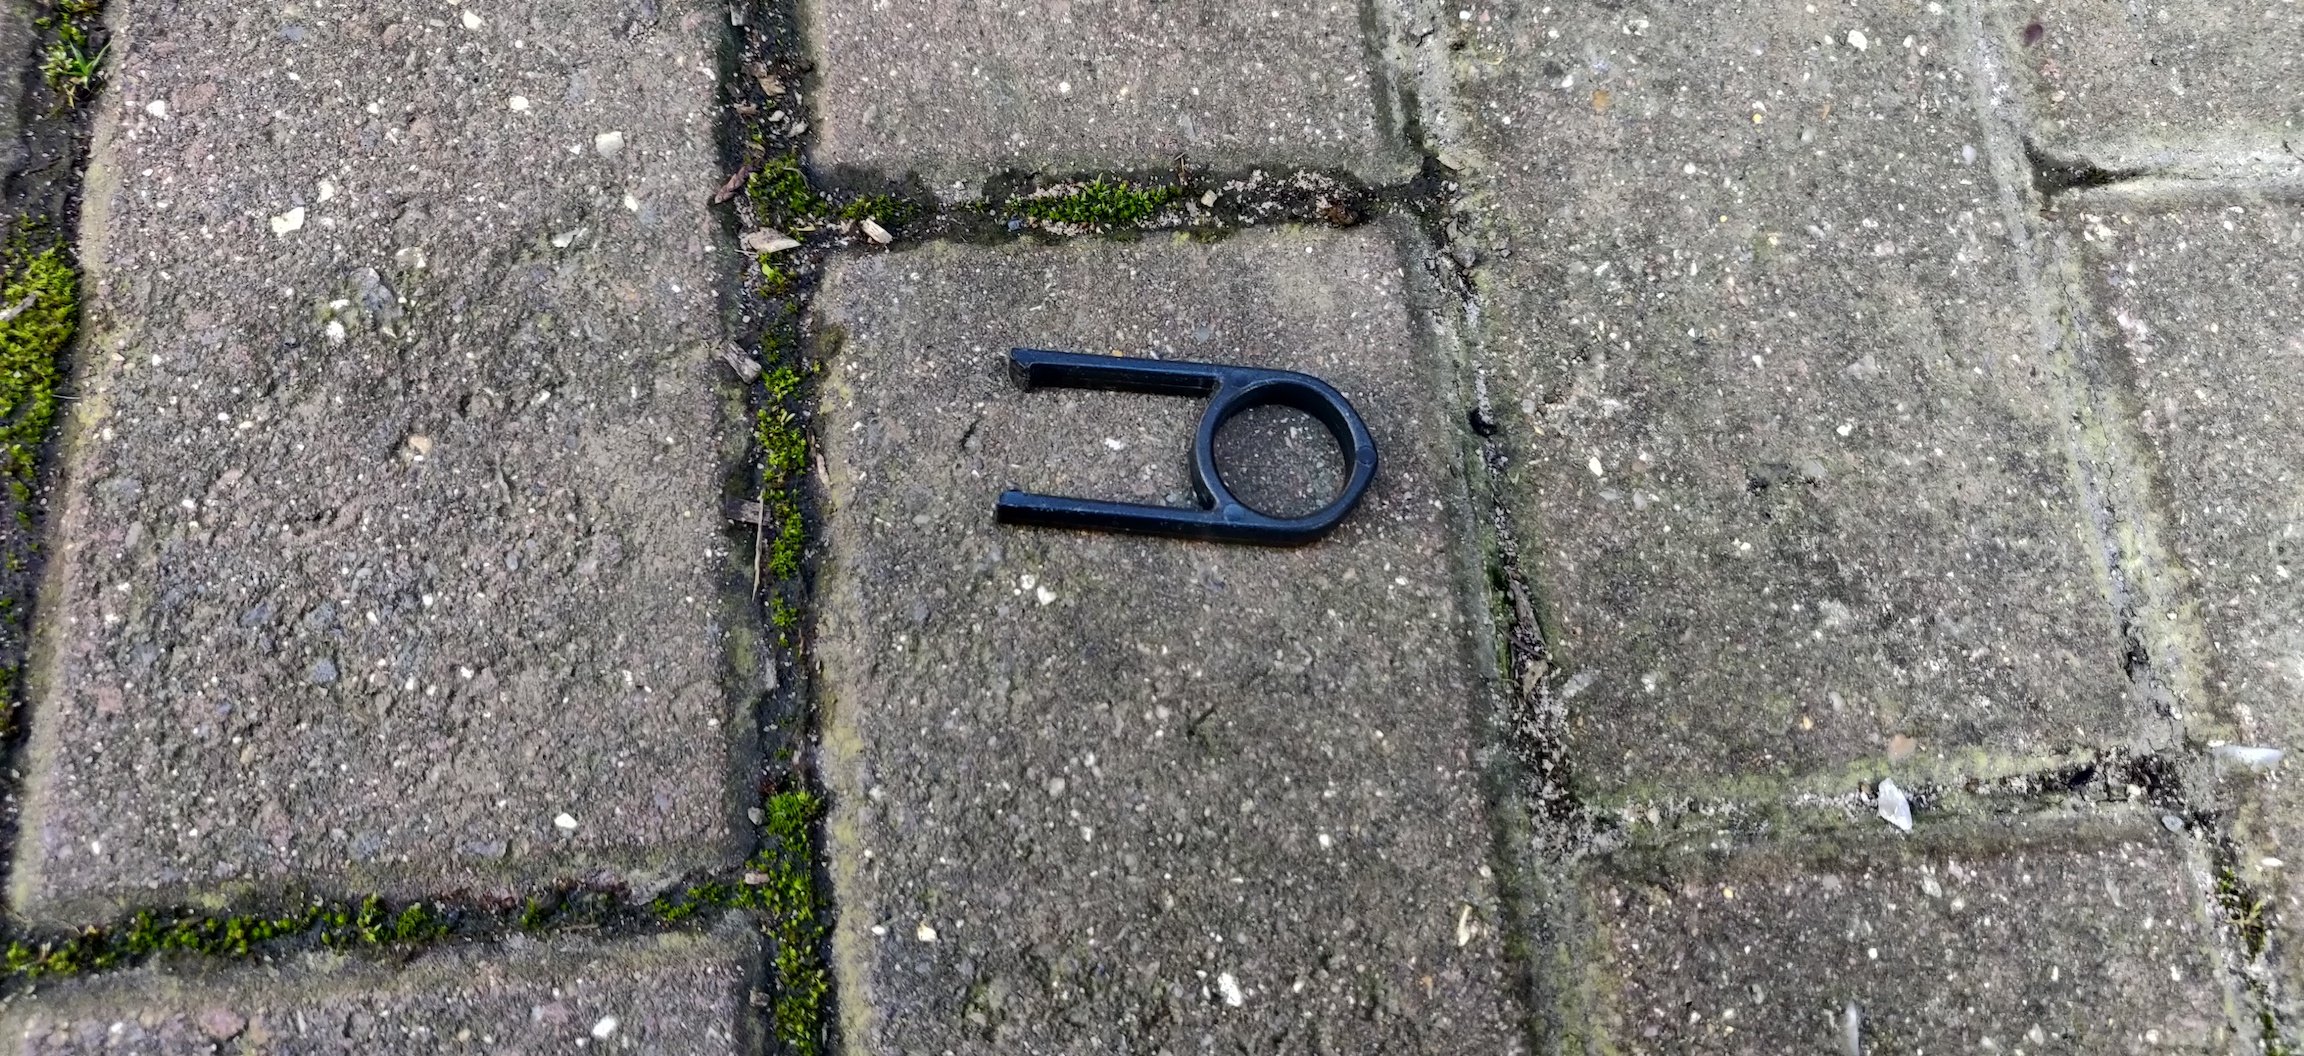
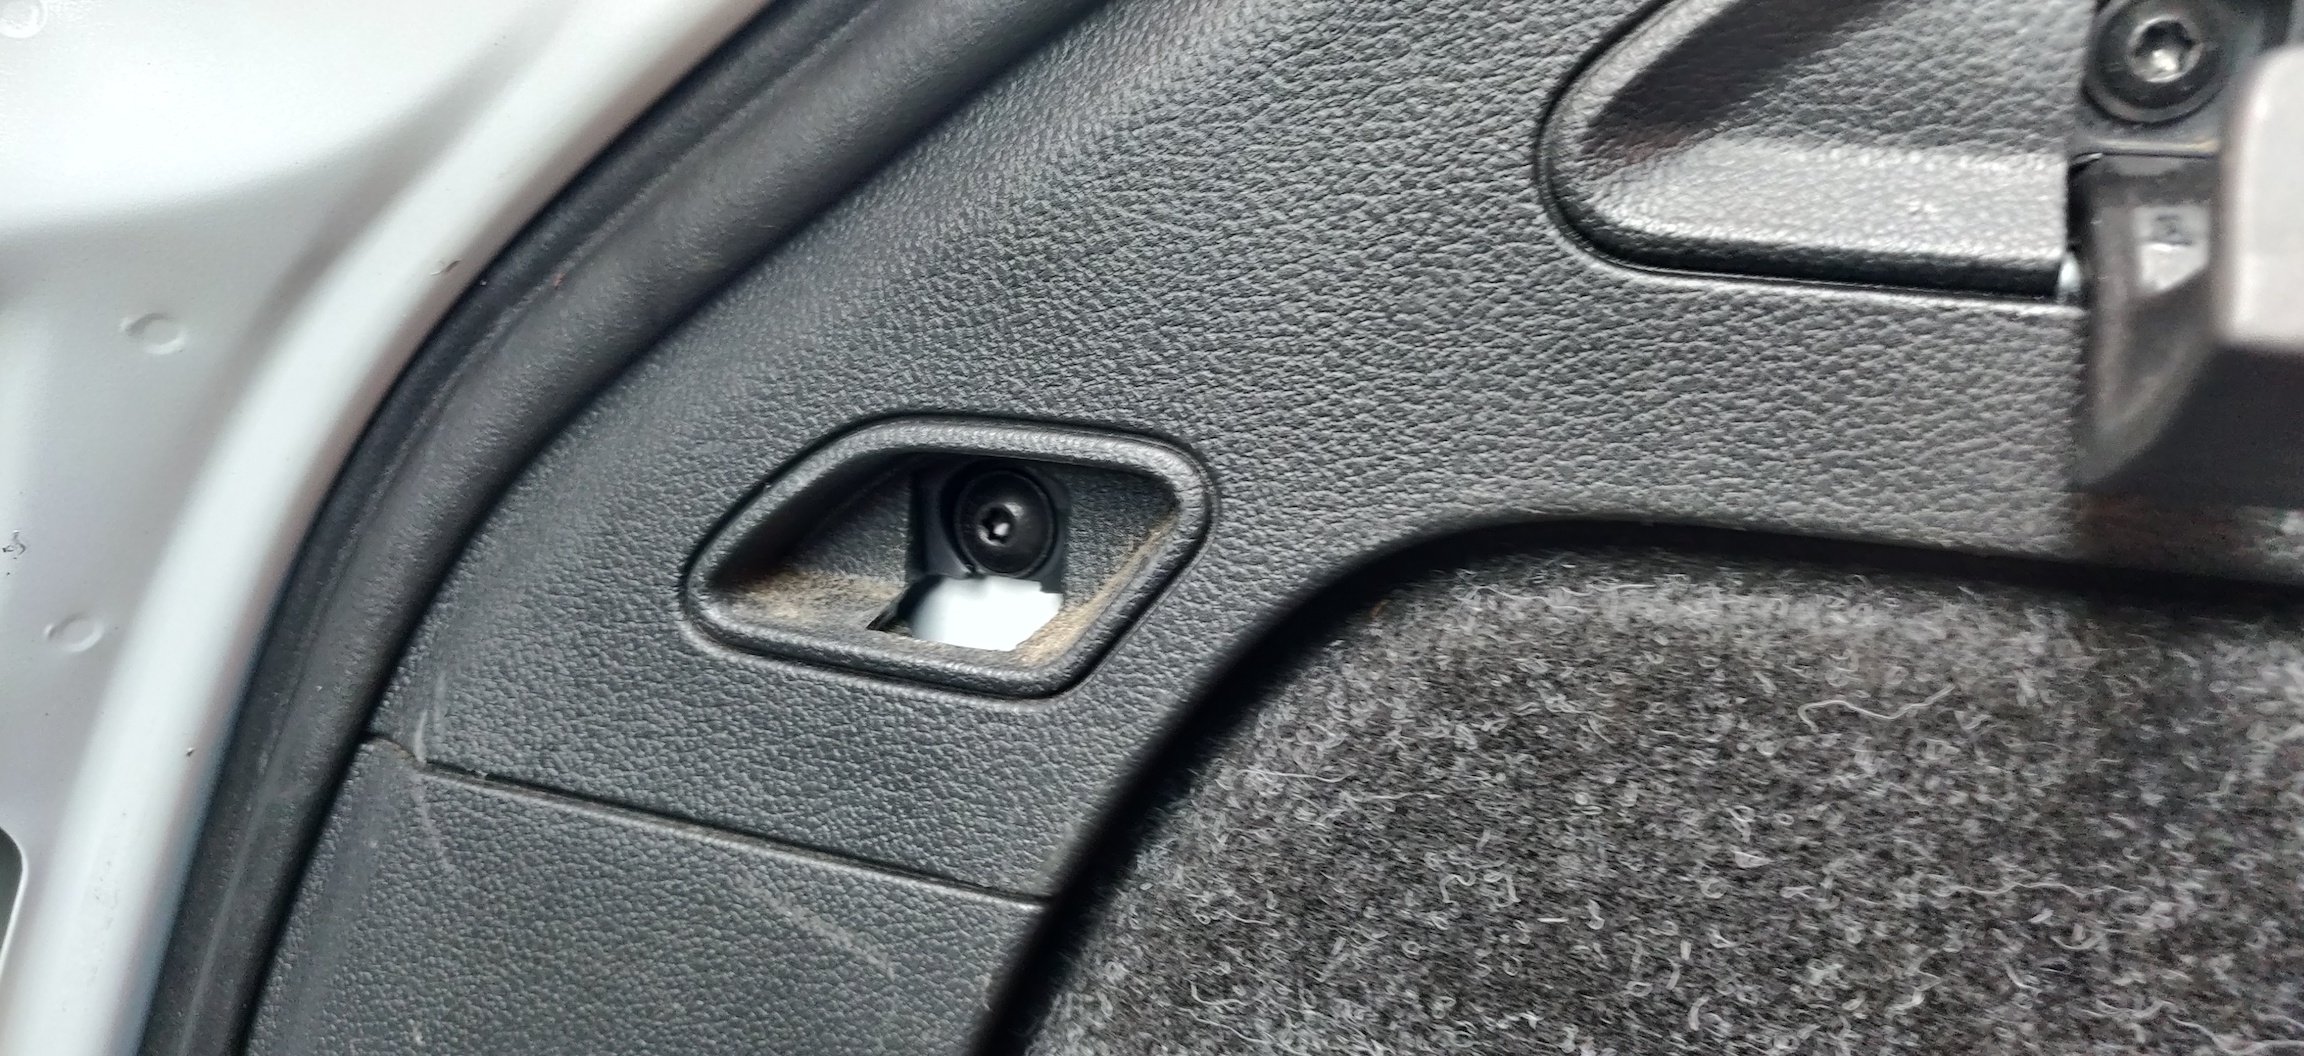
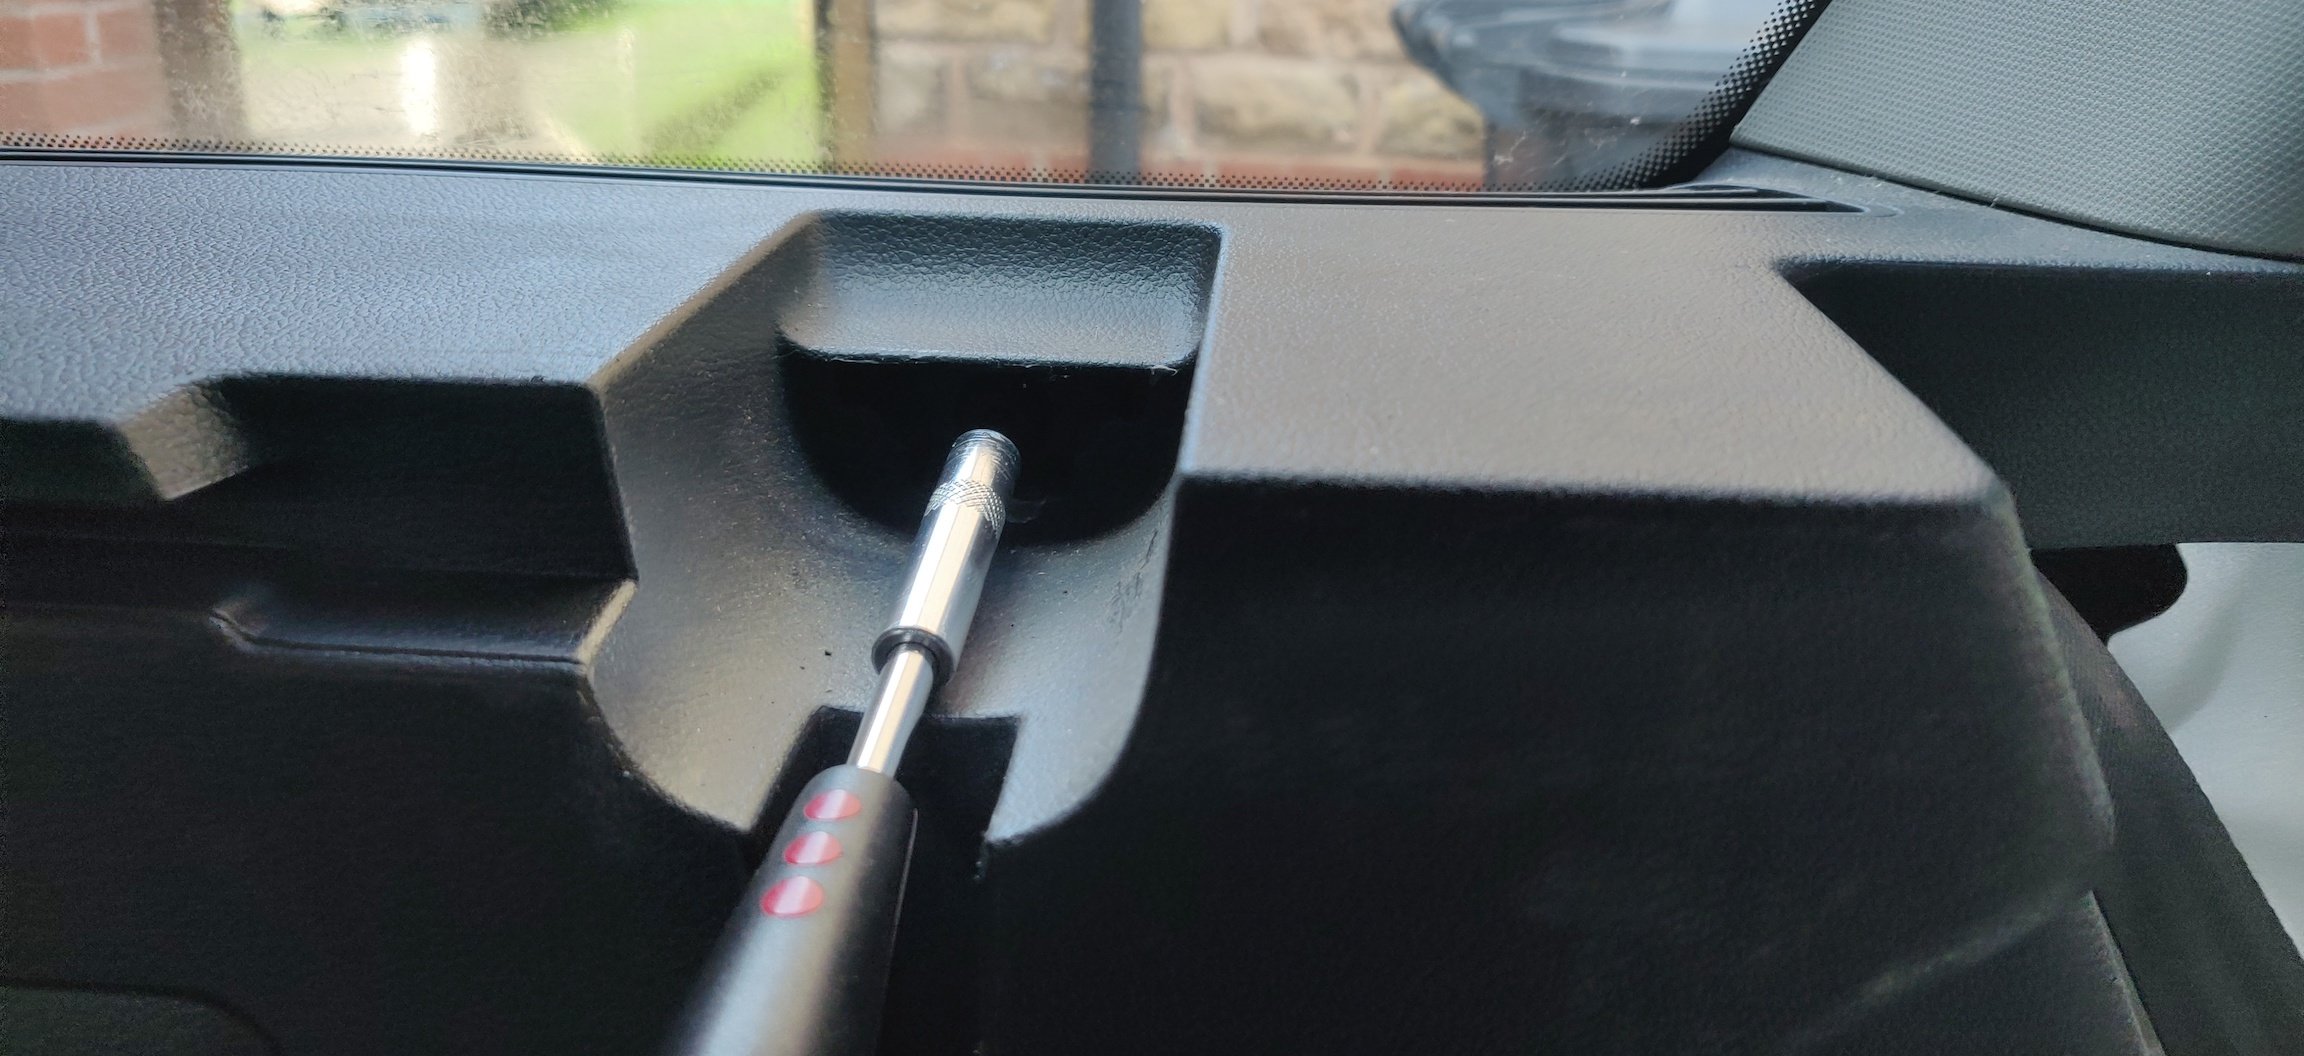
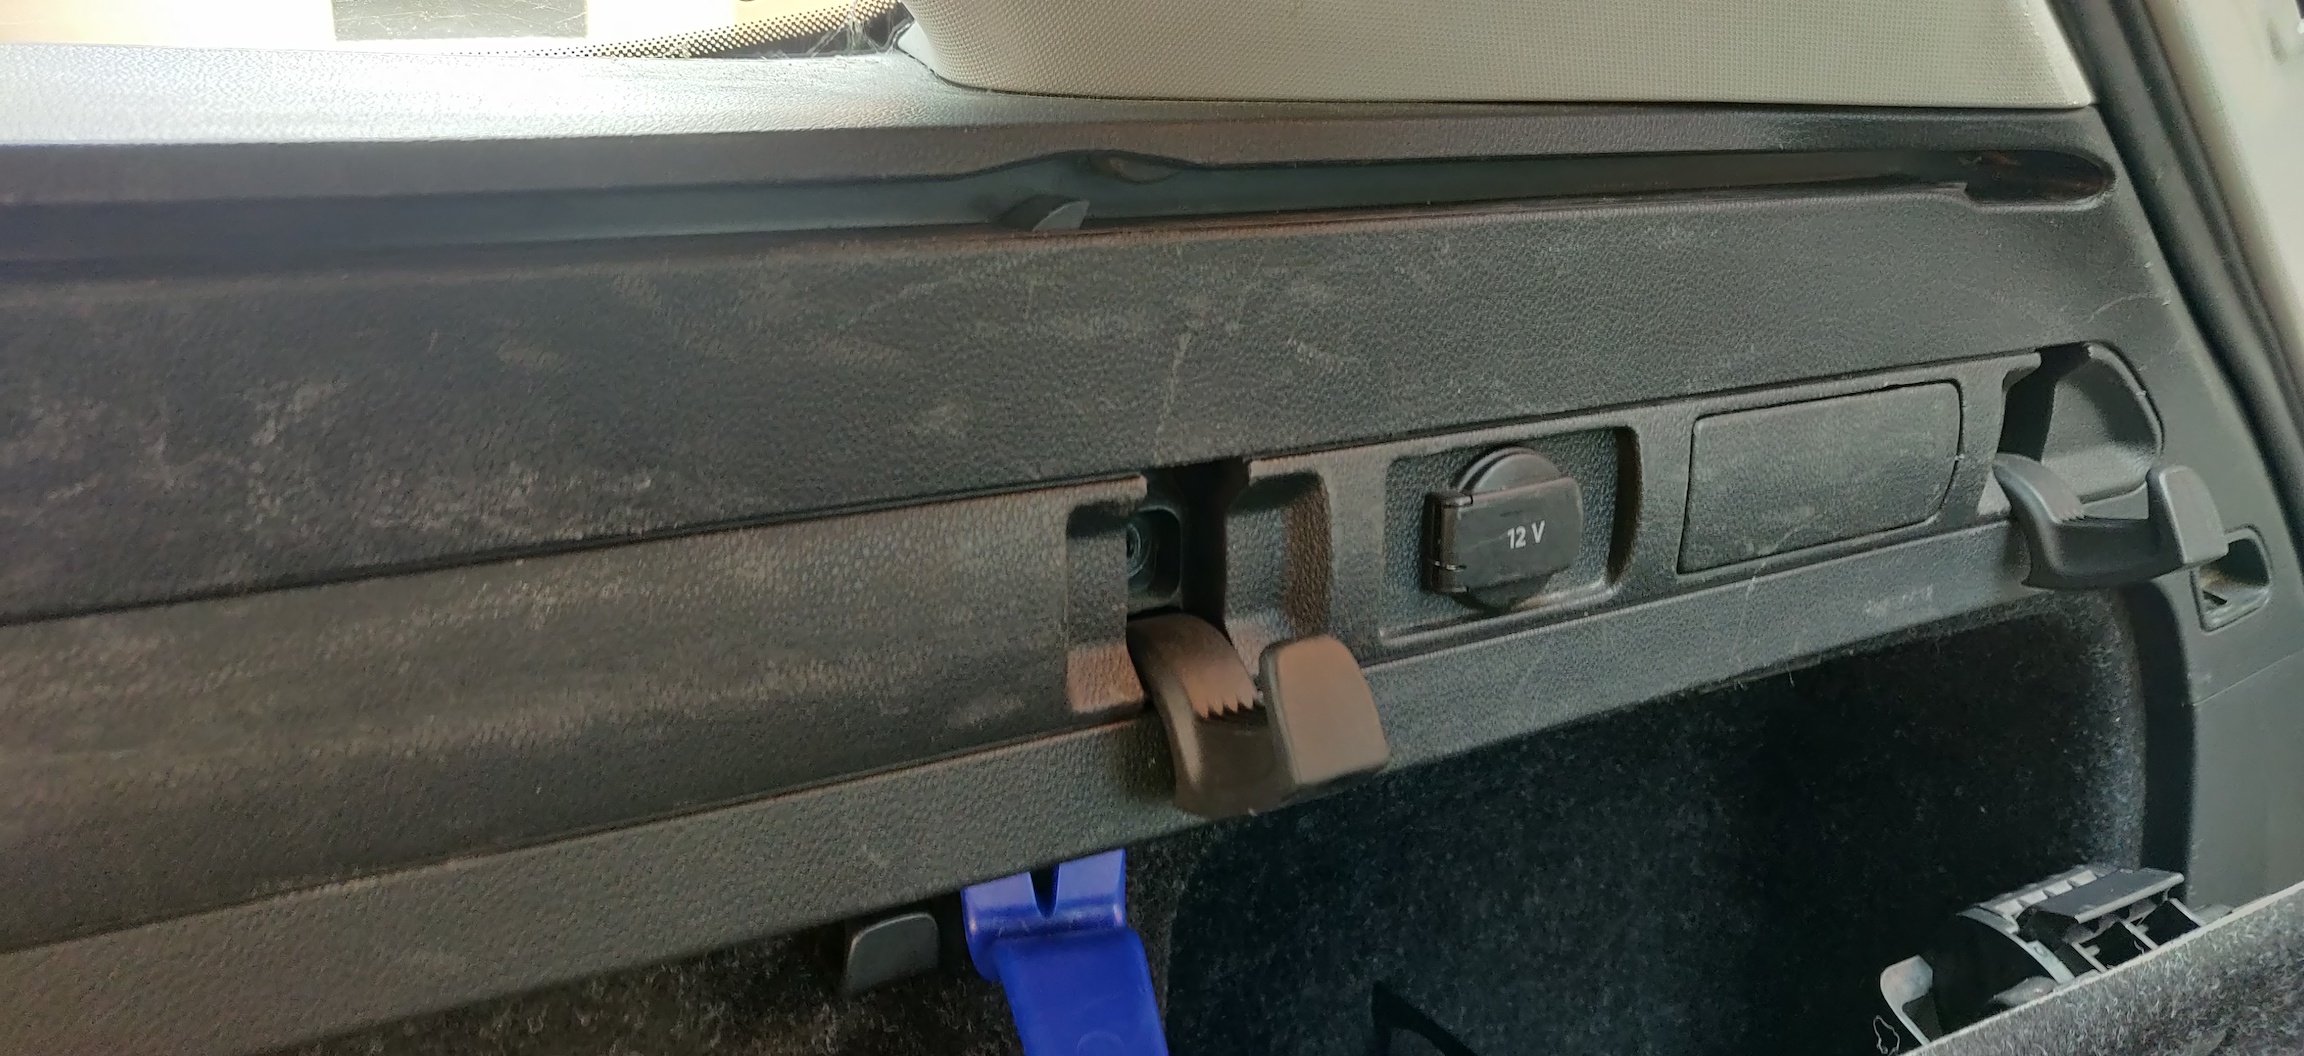
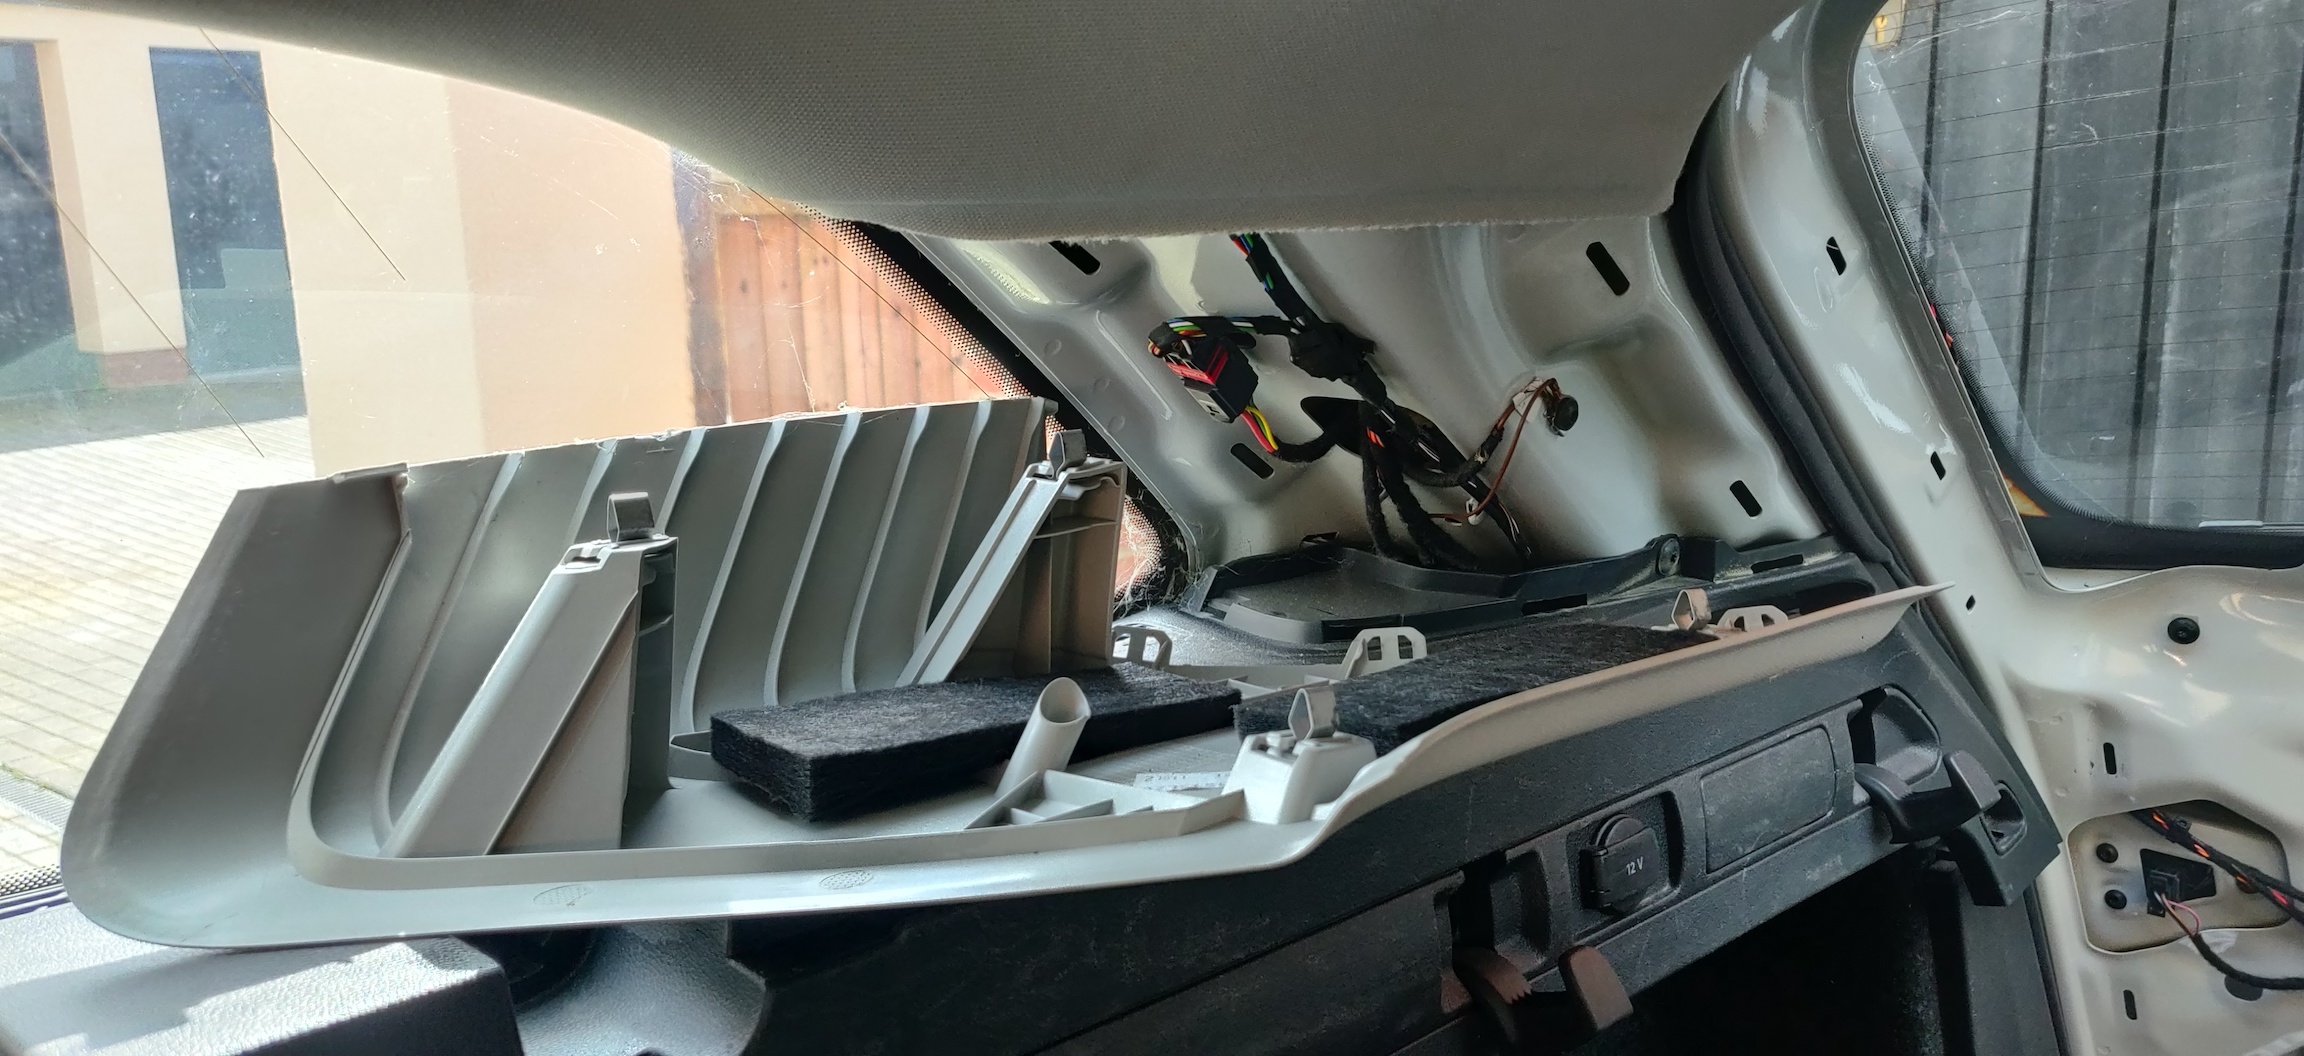
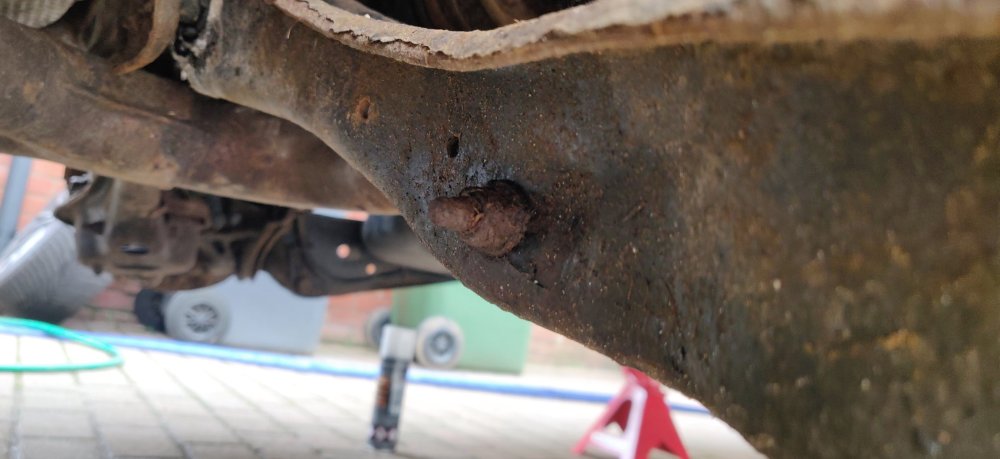
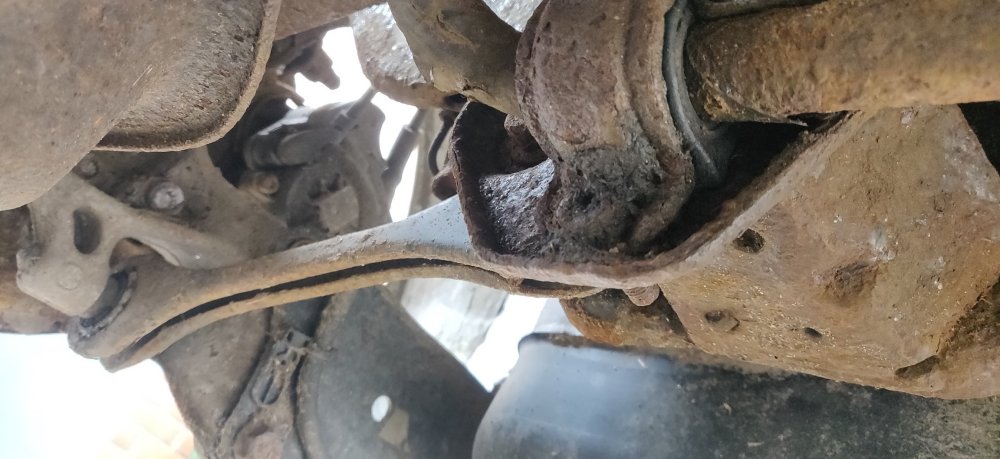
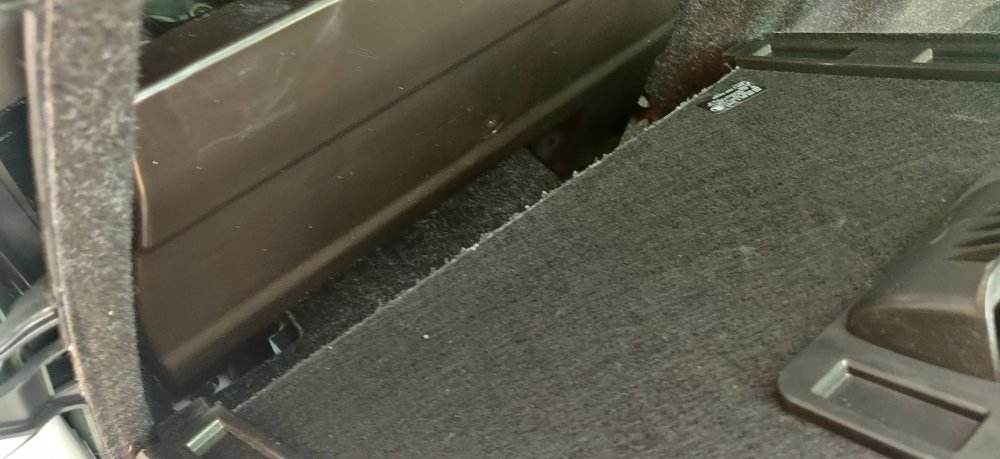
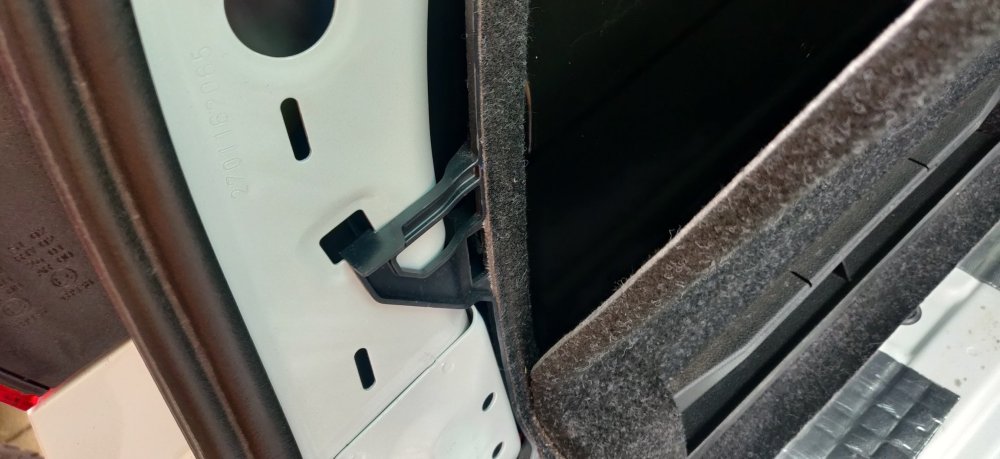
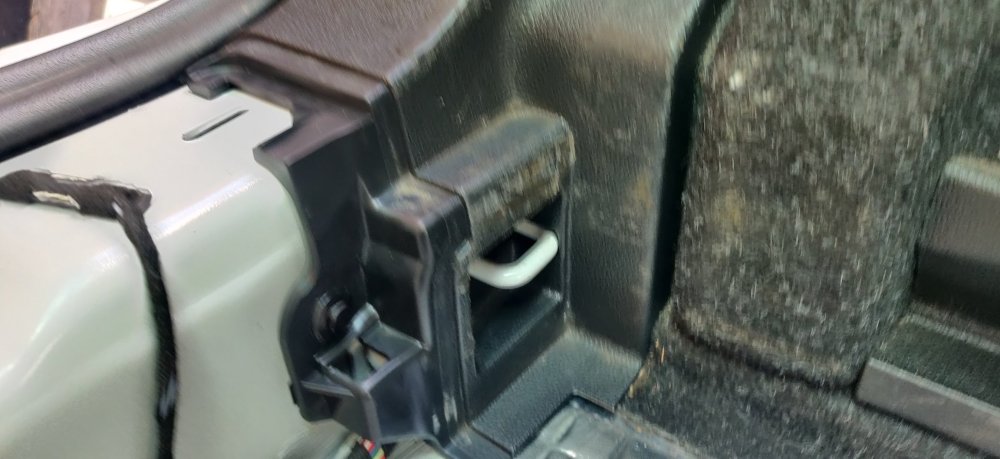
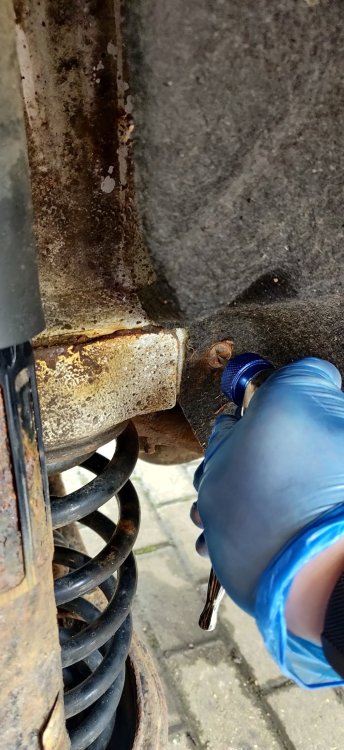
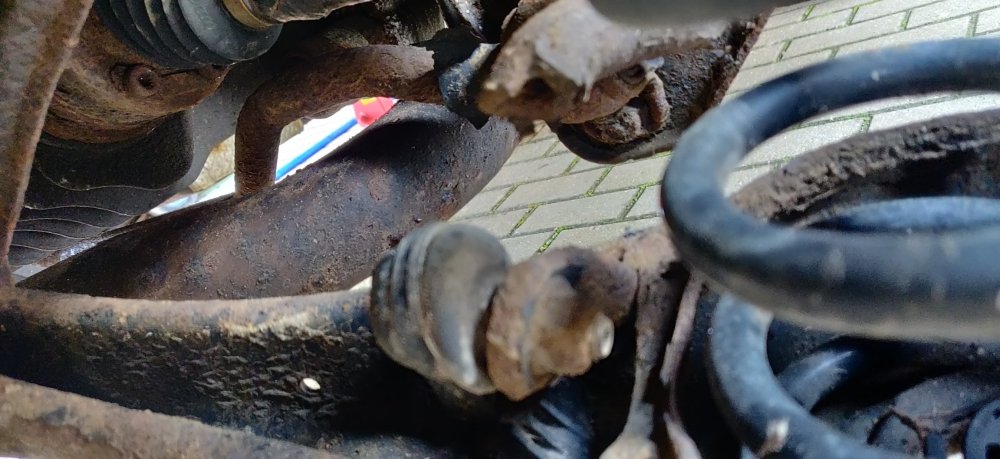
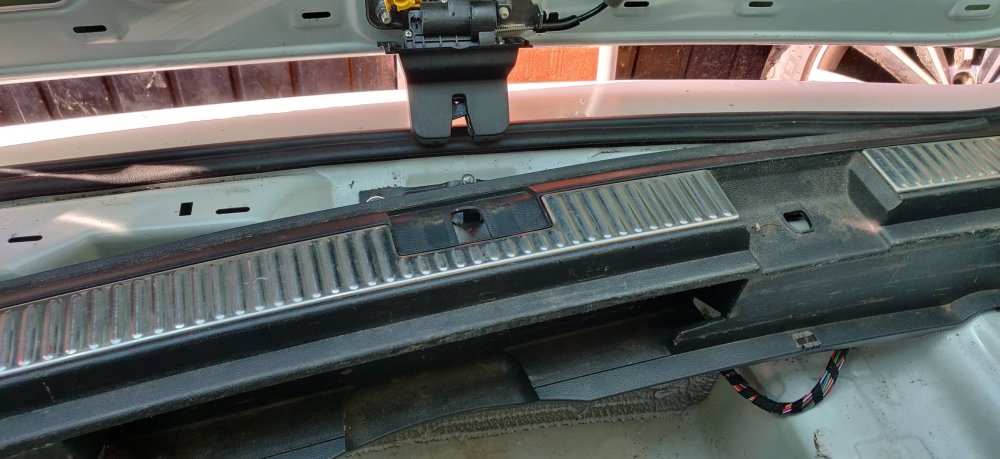
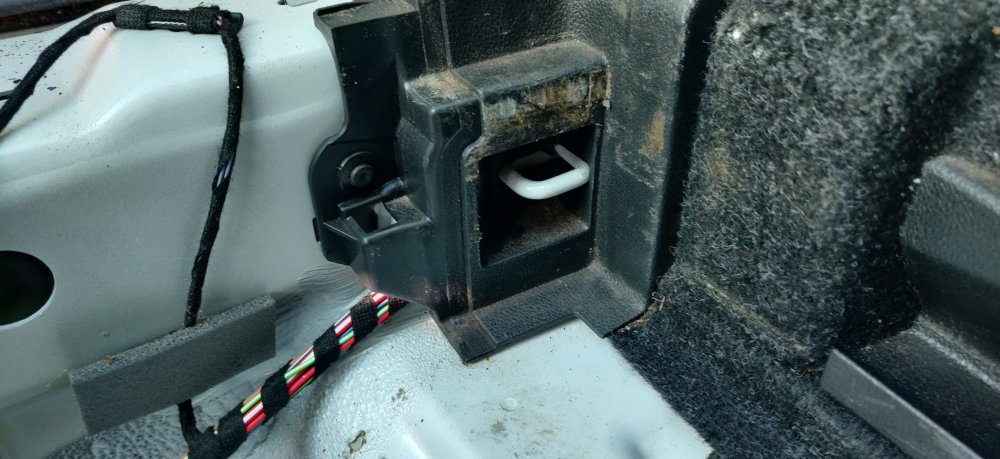
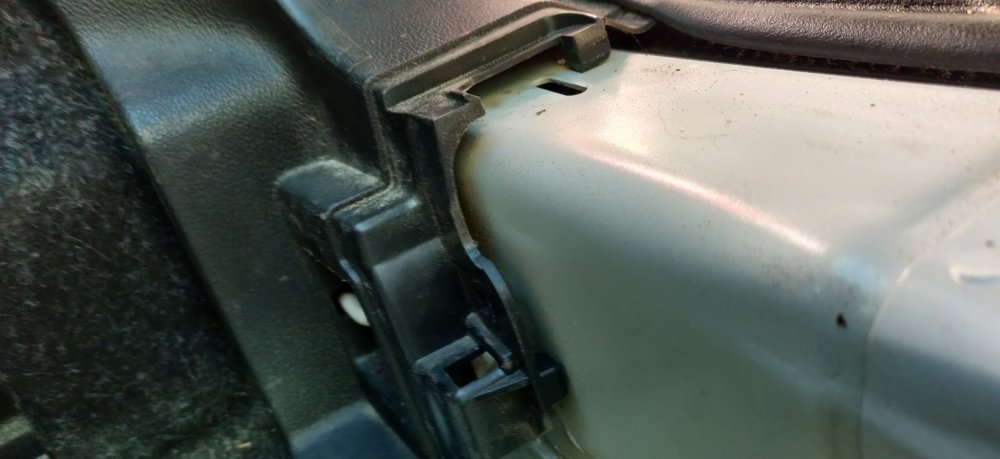
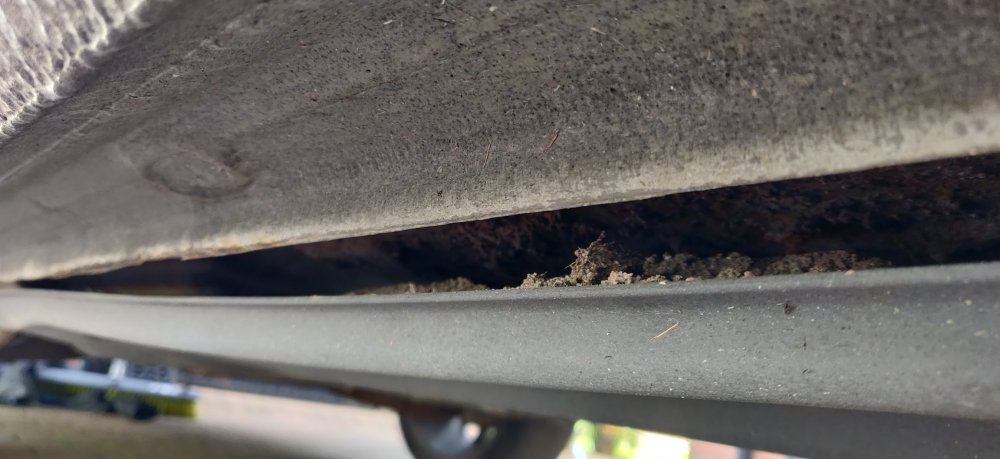
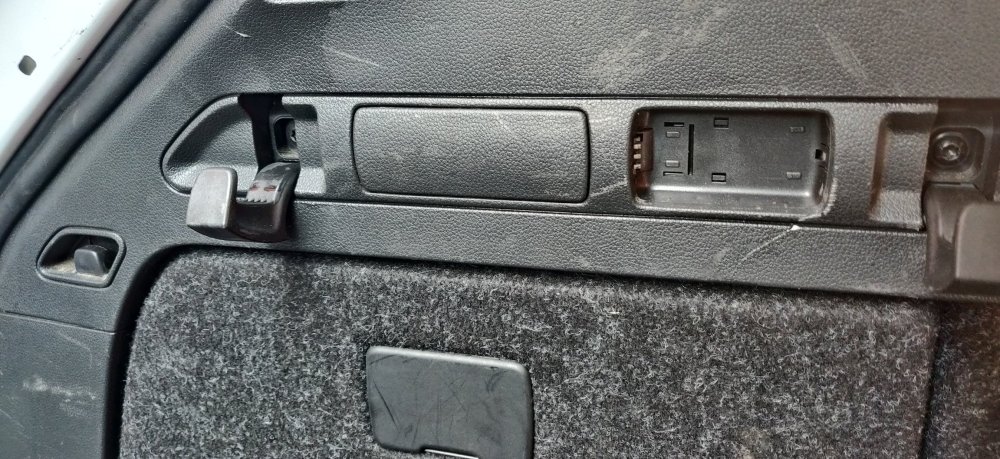
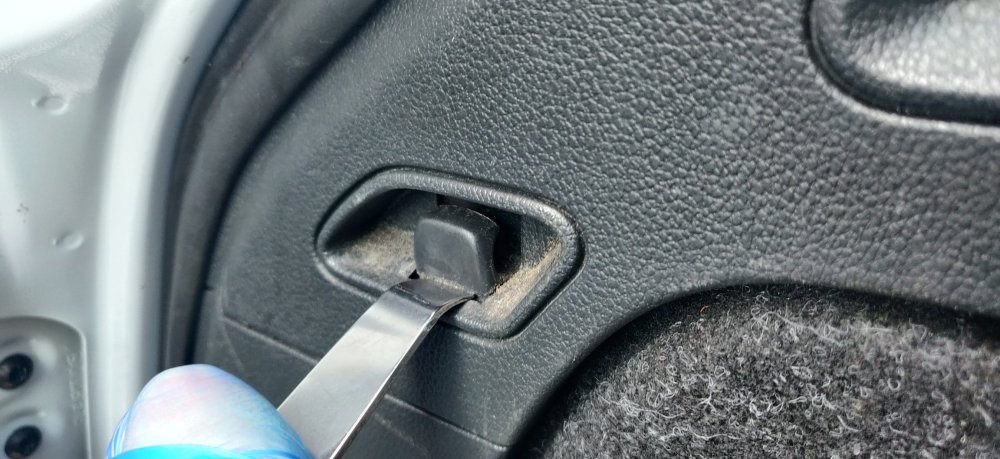
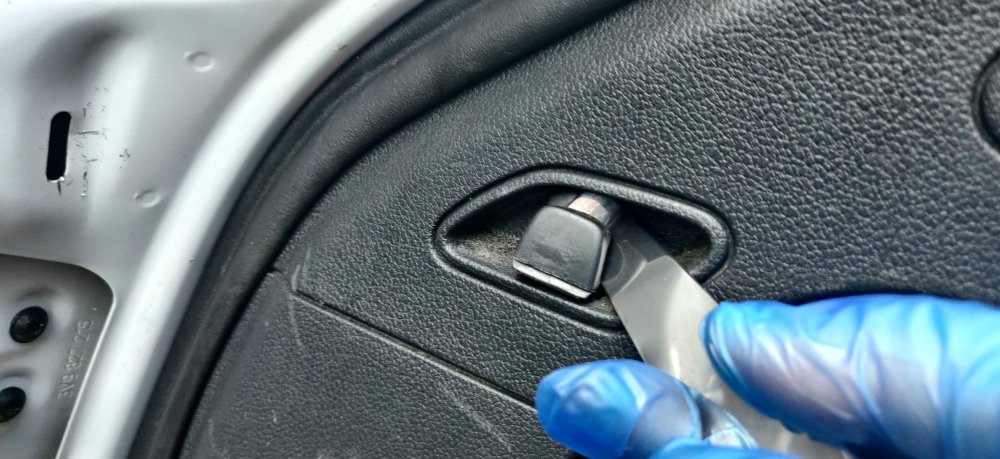
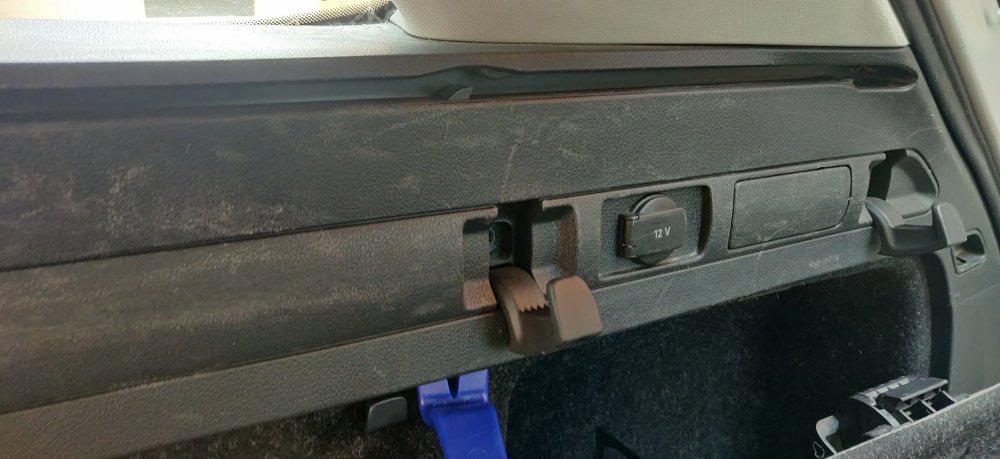
Weather is supposed to be rain all day, but this morning had a bit of sun, so took a quick half hour to do some car stuff before work. I stared wistfully at the rear wheel arches. I think the plan for now is to get some Lanoguard and give it the once over, then reassess next year. I'll eventually want to play with something like Epoxy Mastic, but I'll need to mentally prepare for that, as doing that properly entails removing entire swathes of the car underside... I sadly noticed this: With a reverse angle: Basically, the right side of the rear anti roll bar has snapped. Interesting that the MoT didn't flag this up at all (either hidden well enough behind the wheels, or it has snapped on the way back down from Scotland). I think for now it might be easier to source a second hand replacement. If I was super desperate (i.e. the MoT test was within the next few days), I'd probably resort to removing the entire rear anti roll bar. I believe it can't be failed if its not there. So diverted my attention back to the boot. I was conscious of the car being on axle stands that I didn't do something silly like bounce around on the boot, but it looked like it was stable enough. First port of call was the lever used for the retractable tow bar. It's a case of lifting up the lever, putting something small into the hole on one side near the lever and pushing down, whilst lifting a plastic tab on the other side straight up and into the handle. It'll then reveal the ball on the other side of the lever cable and it comes free: Not very practical to take photos of this as it kind of requires 3 hands to do really. The workshop manual states to clamp the lever so it doesn't retract back in, so I was a bit panicky about whether the whole thing will slide back into itself, but it kinda stops where you see on the pic above. Probably will need strong pliers to get it back out enough to reattach though. Don't do what I did and try and lift the plastic tab without doing the bit on the other side: A portion of the plastic tab snapped off. I don't think it'll make a difference once reinstalled I think, but one of those that'll probably annoy me enough to eventually do something about it. This allows this part of the trim on the boot lip to be almost removable. So a trim tool to get some purchase: To start loosening the 4 clips that keep this trim on. It won't lift free straight away, as the tailgate itself is preventing access. I started to get annoyed, but decided to see if the yellow latch that's visible with the tailgate trim removed can be used. It tilts upwards, and doing so, the tailgate releases! I lifted it just enough to allow the trim to be removed, as I didn't want to potentially do anything damaging to the tailgate struts/motors: The trim then lifts upwards and away. There's a connector that fell away from the trim: Looks like the light for the towbar lever bit, and what appears to be double sided foam tape to keep it in place. I guess some rubbing alcohol on the trim might help make it adhere better. The side bottom trims are next and the only thing I believe stopping the side carpet bits being removable: There's a pop rivet on each side, either a thin screwdriver or trim tool to loosen and remove. The trim is at right angles, so requires a bit of grunt with the trim removal tools. What I found was the two tabs which the boot lip trim covered: Allowed the rest of the trim to come out a bit more easier. There's a few more tabs at the top, but eventually it comes away. So that's the rear of the car: It looks like a T20 screw at the rear is what is holding the side carpets on, so hopefully that's it. Back to work though. Maintenance: £1794.17 Upgrades: £887.10 Miscellaneous: £608.14

-
This maybe? https://www.lllparts.co.uk/product/1M6867574A/holder-for-holding-strap
-
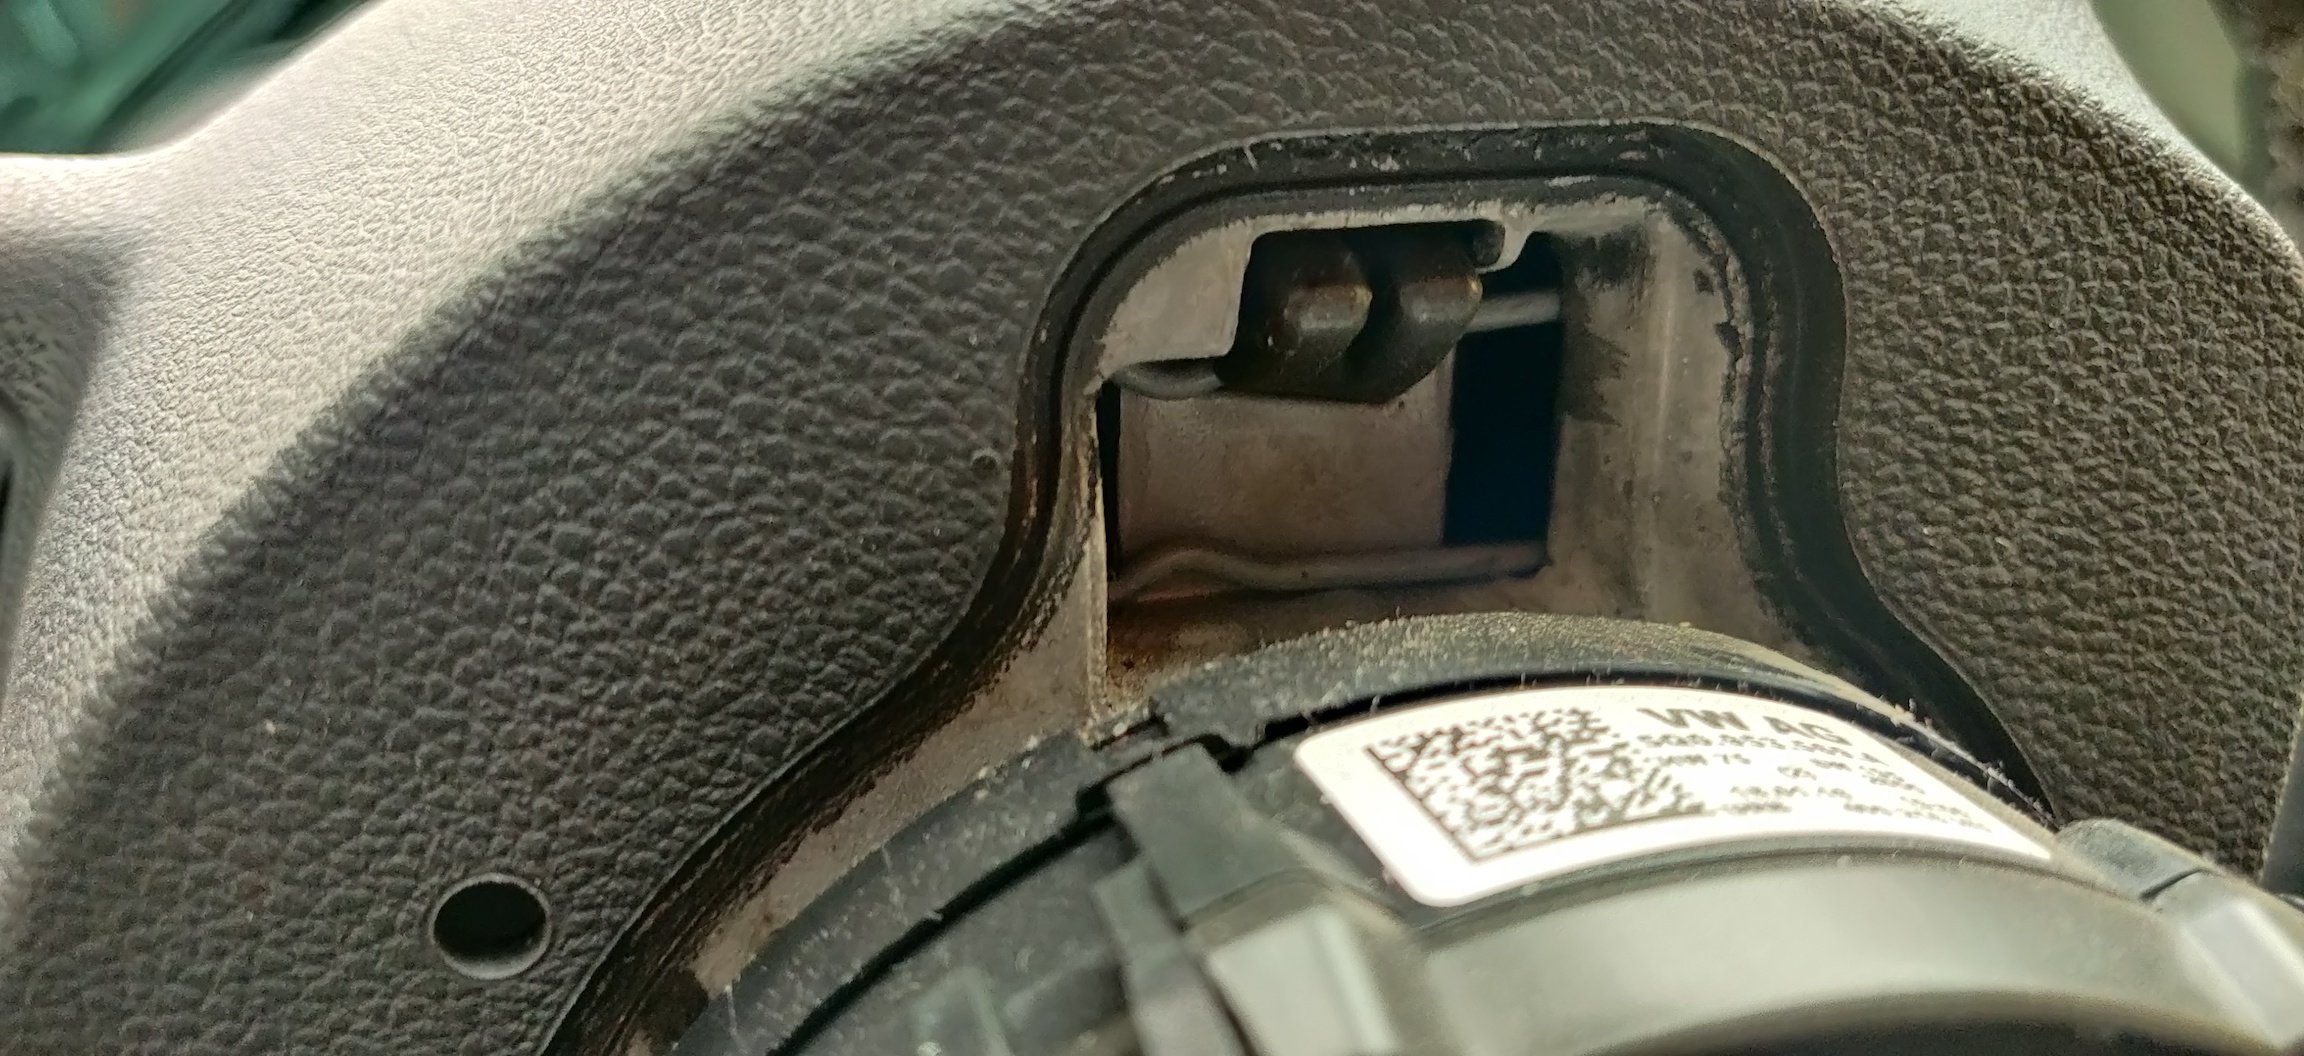
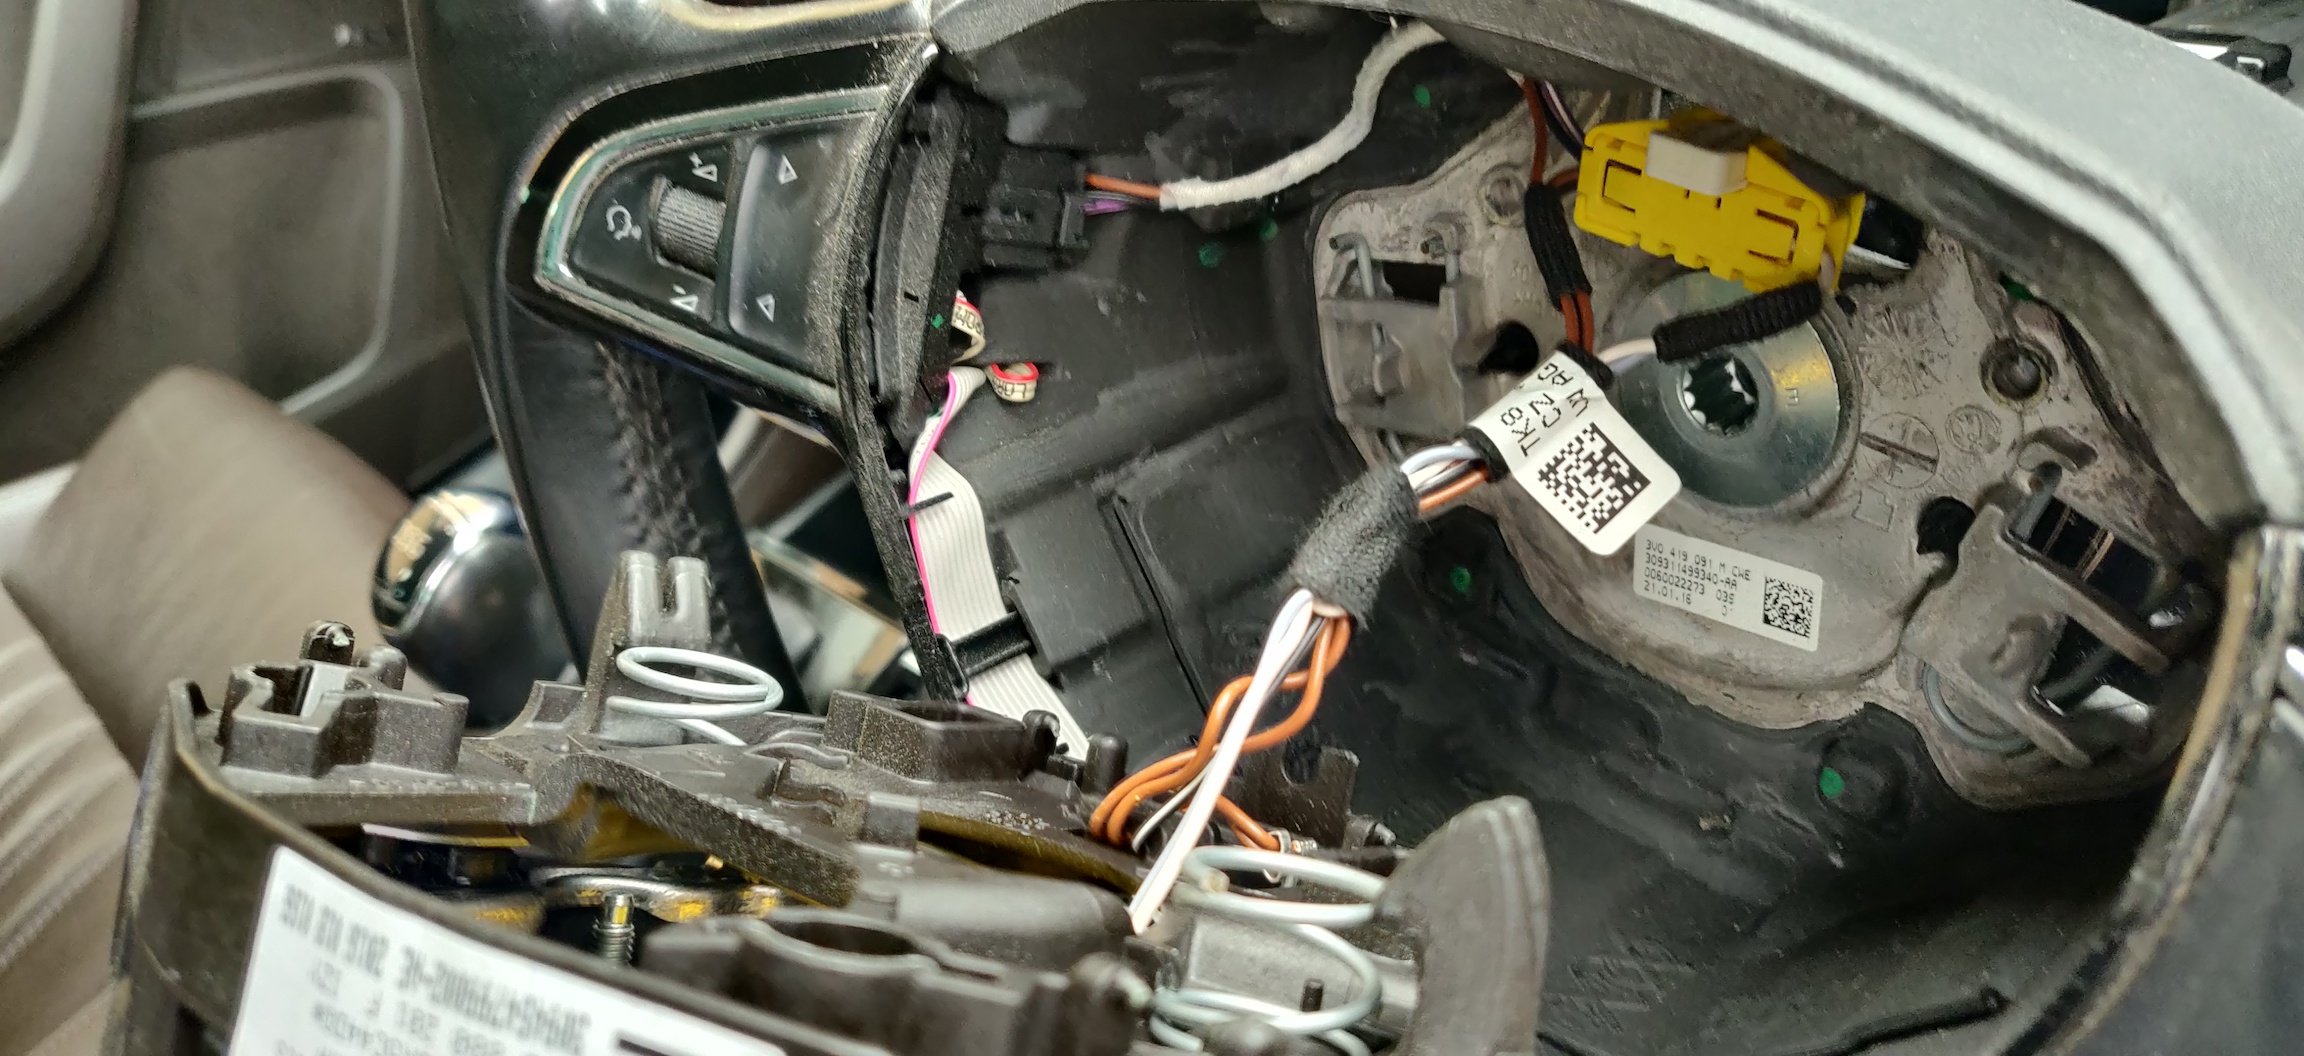
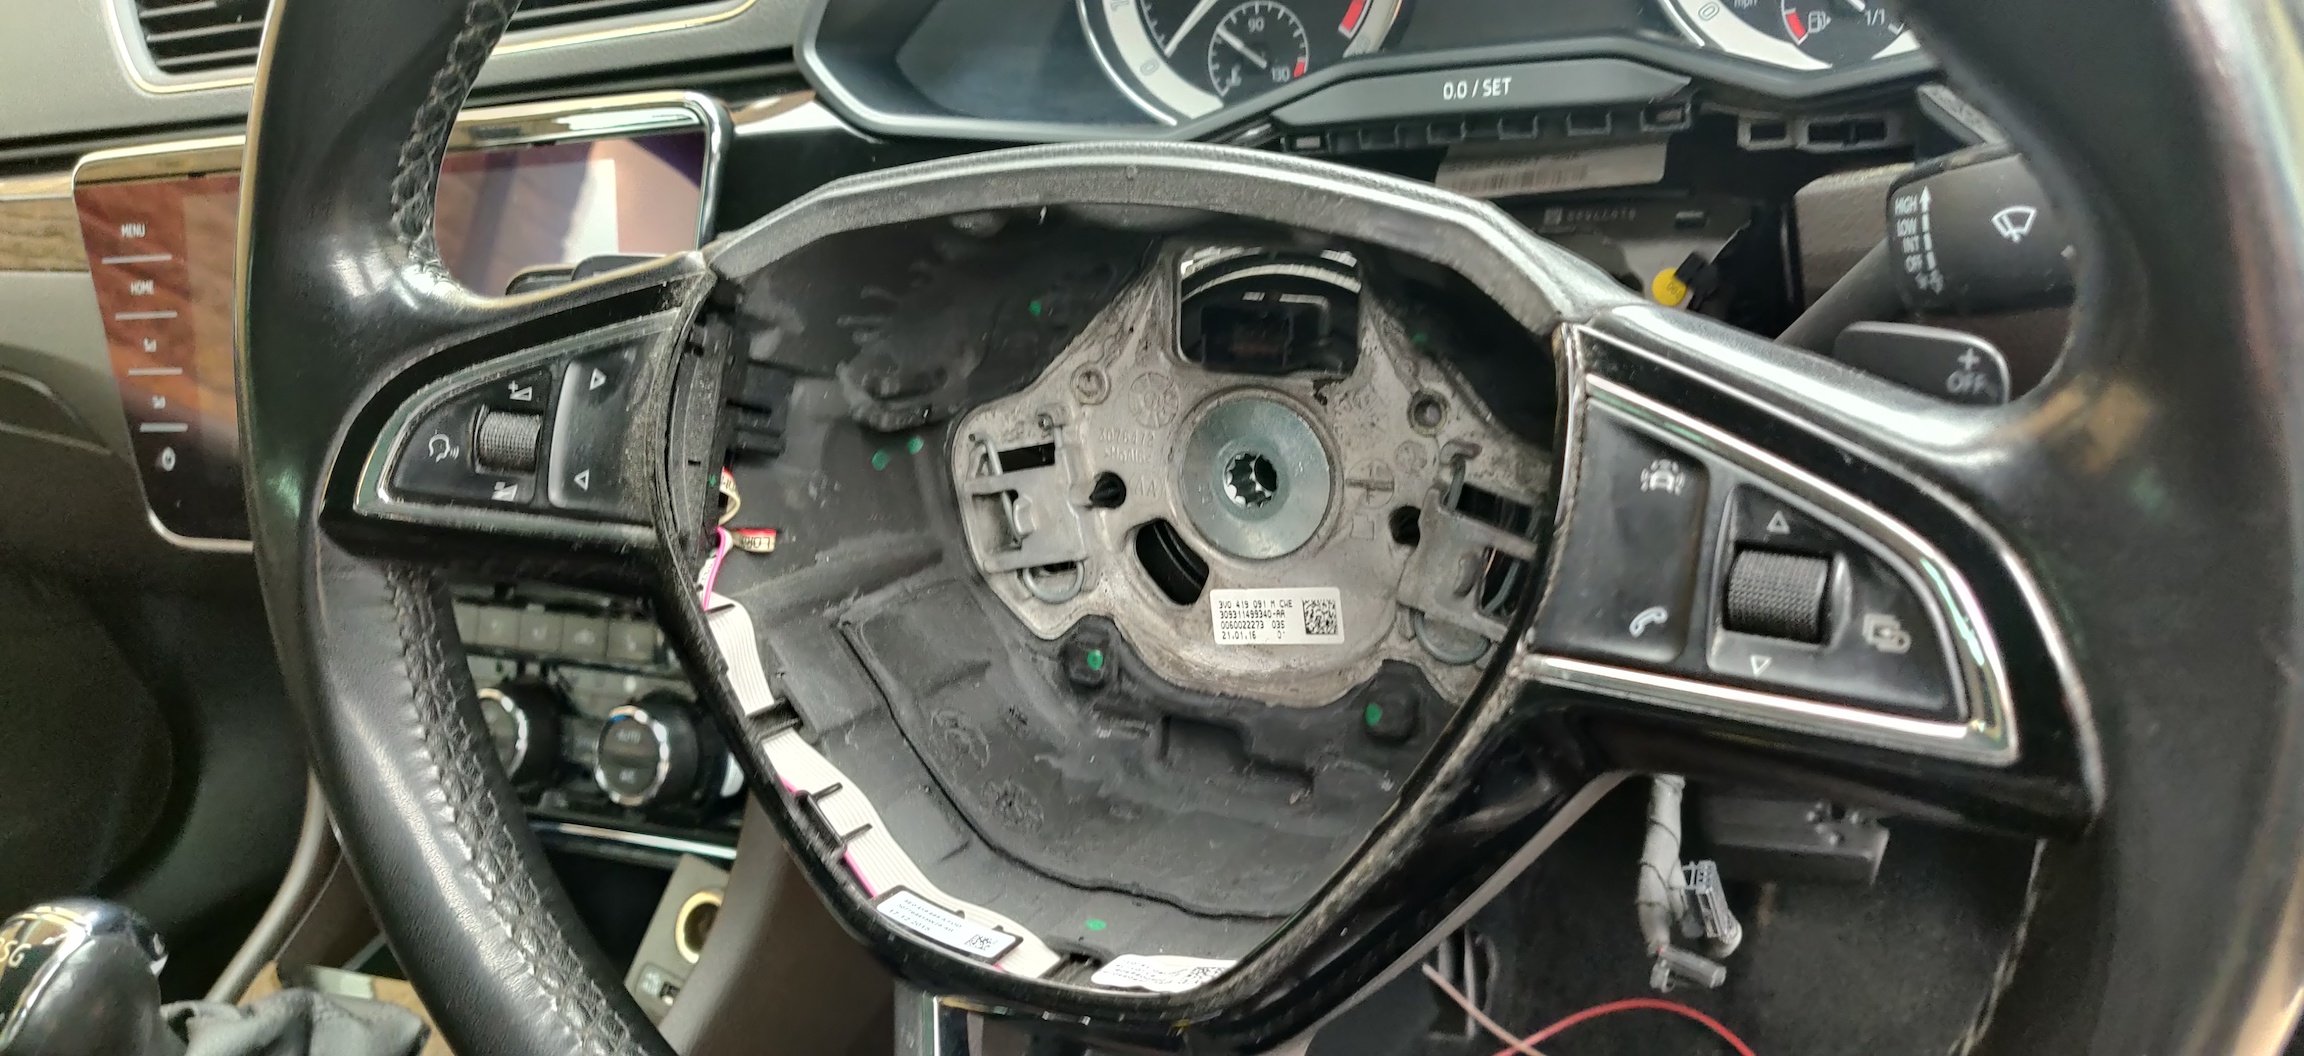
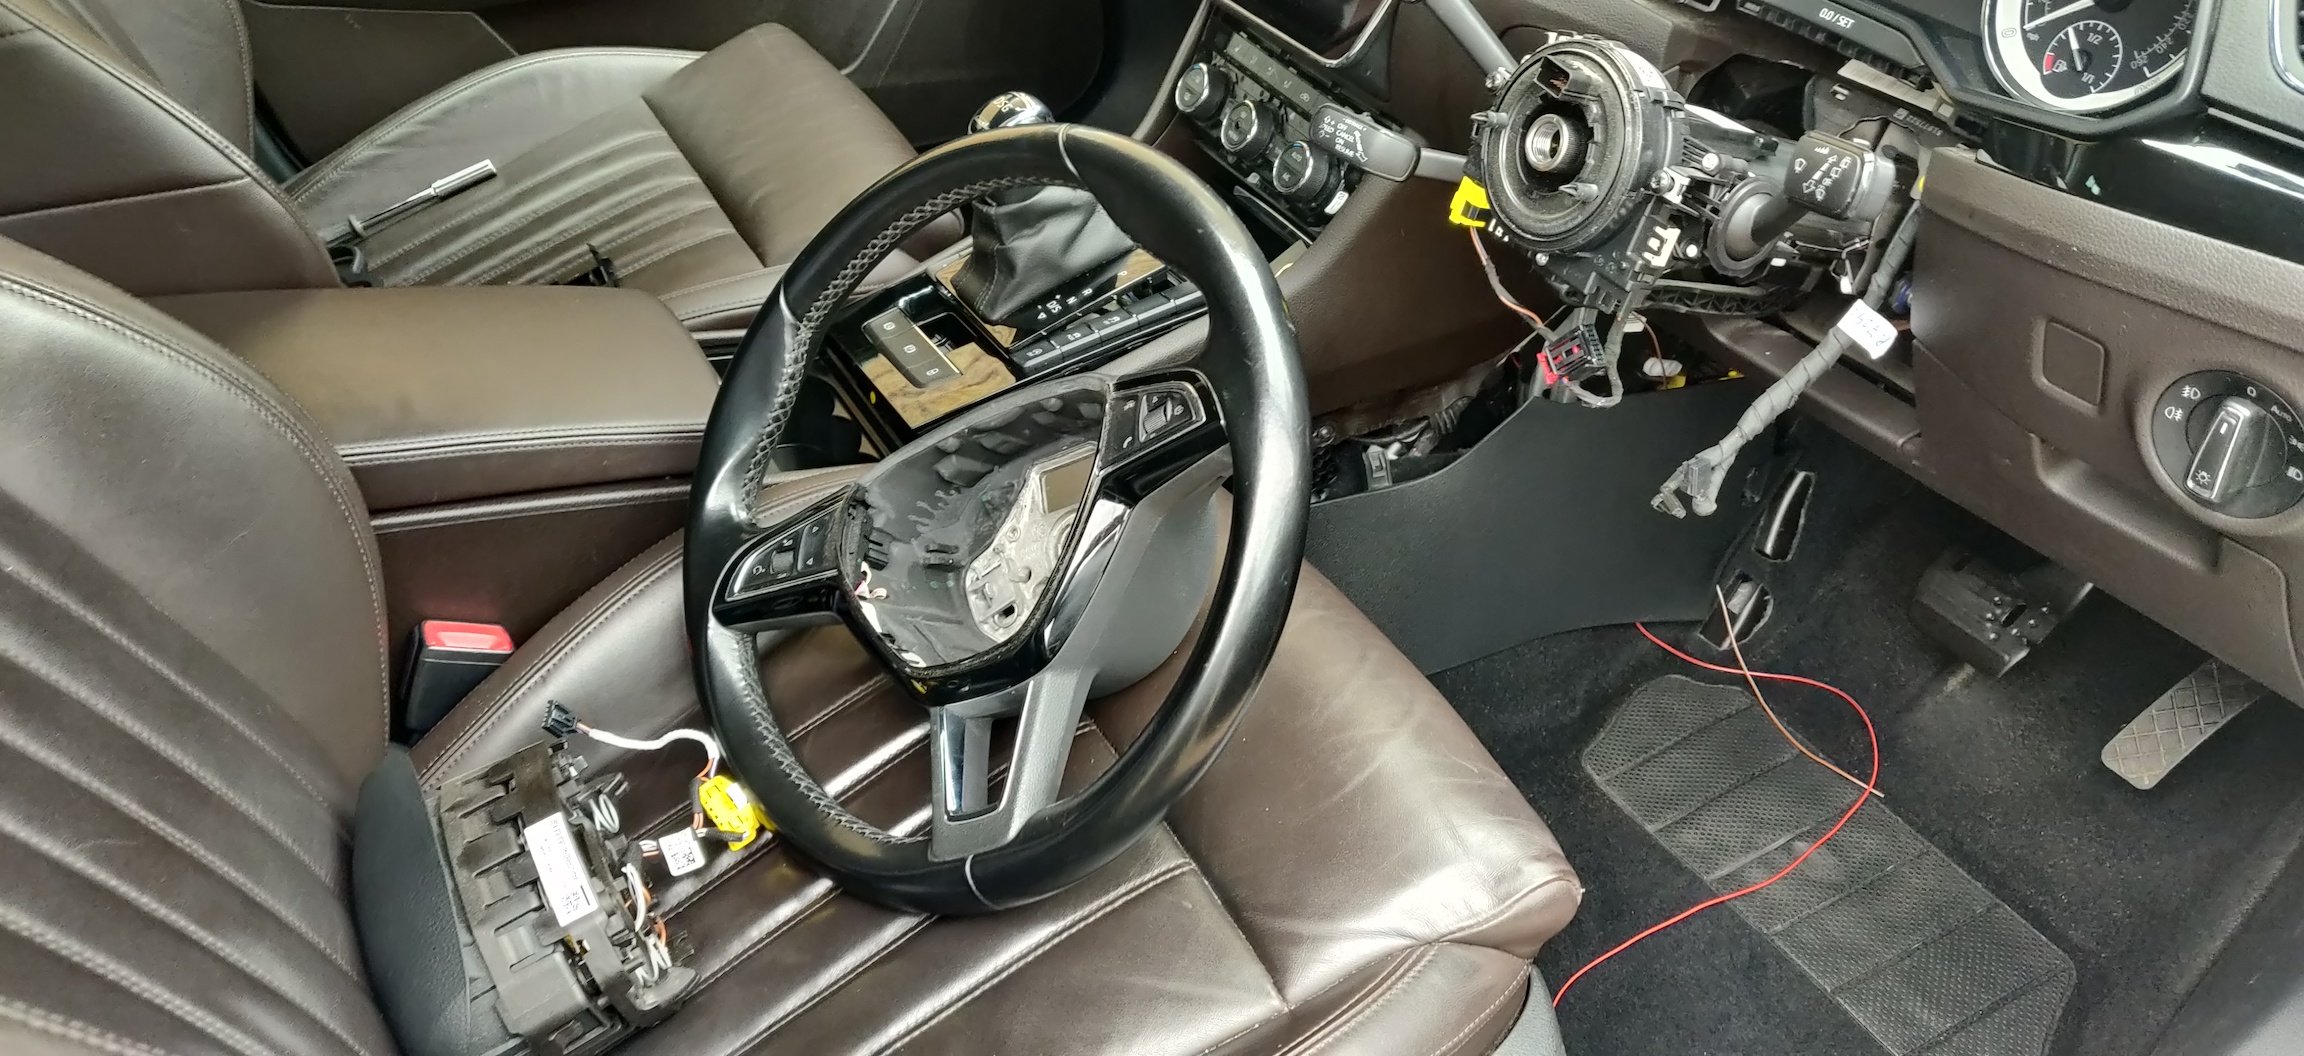
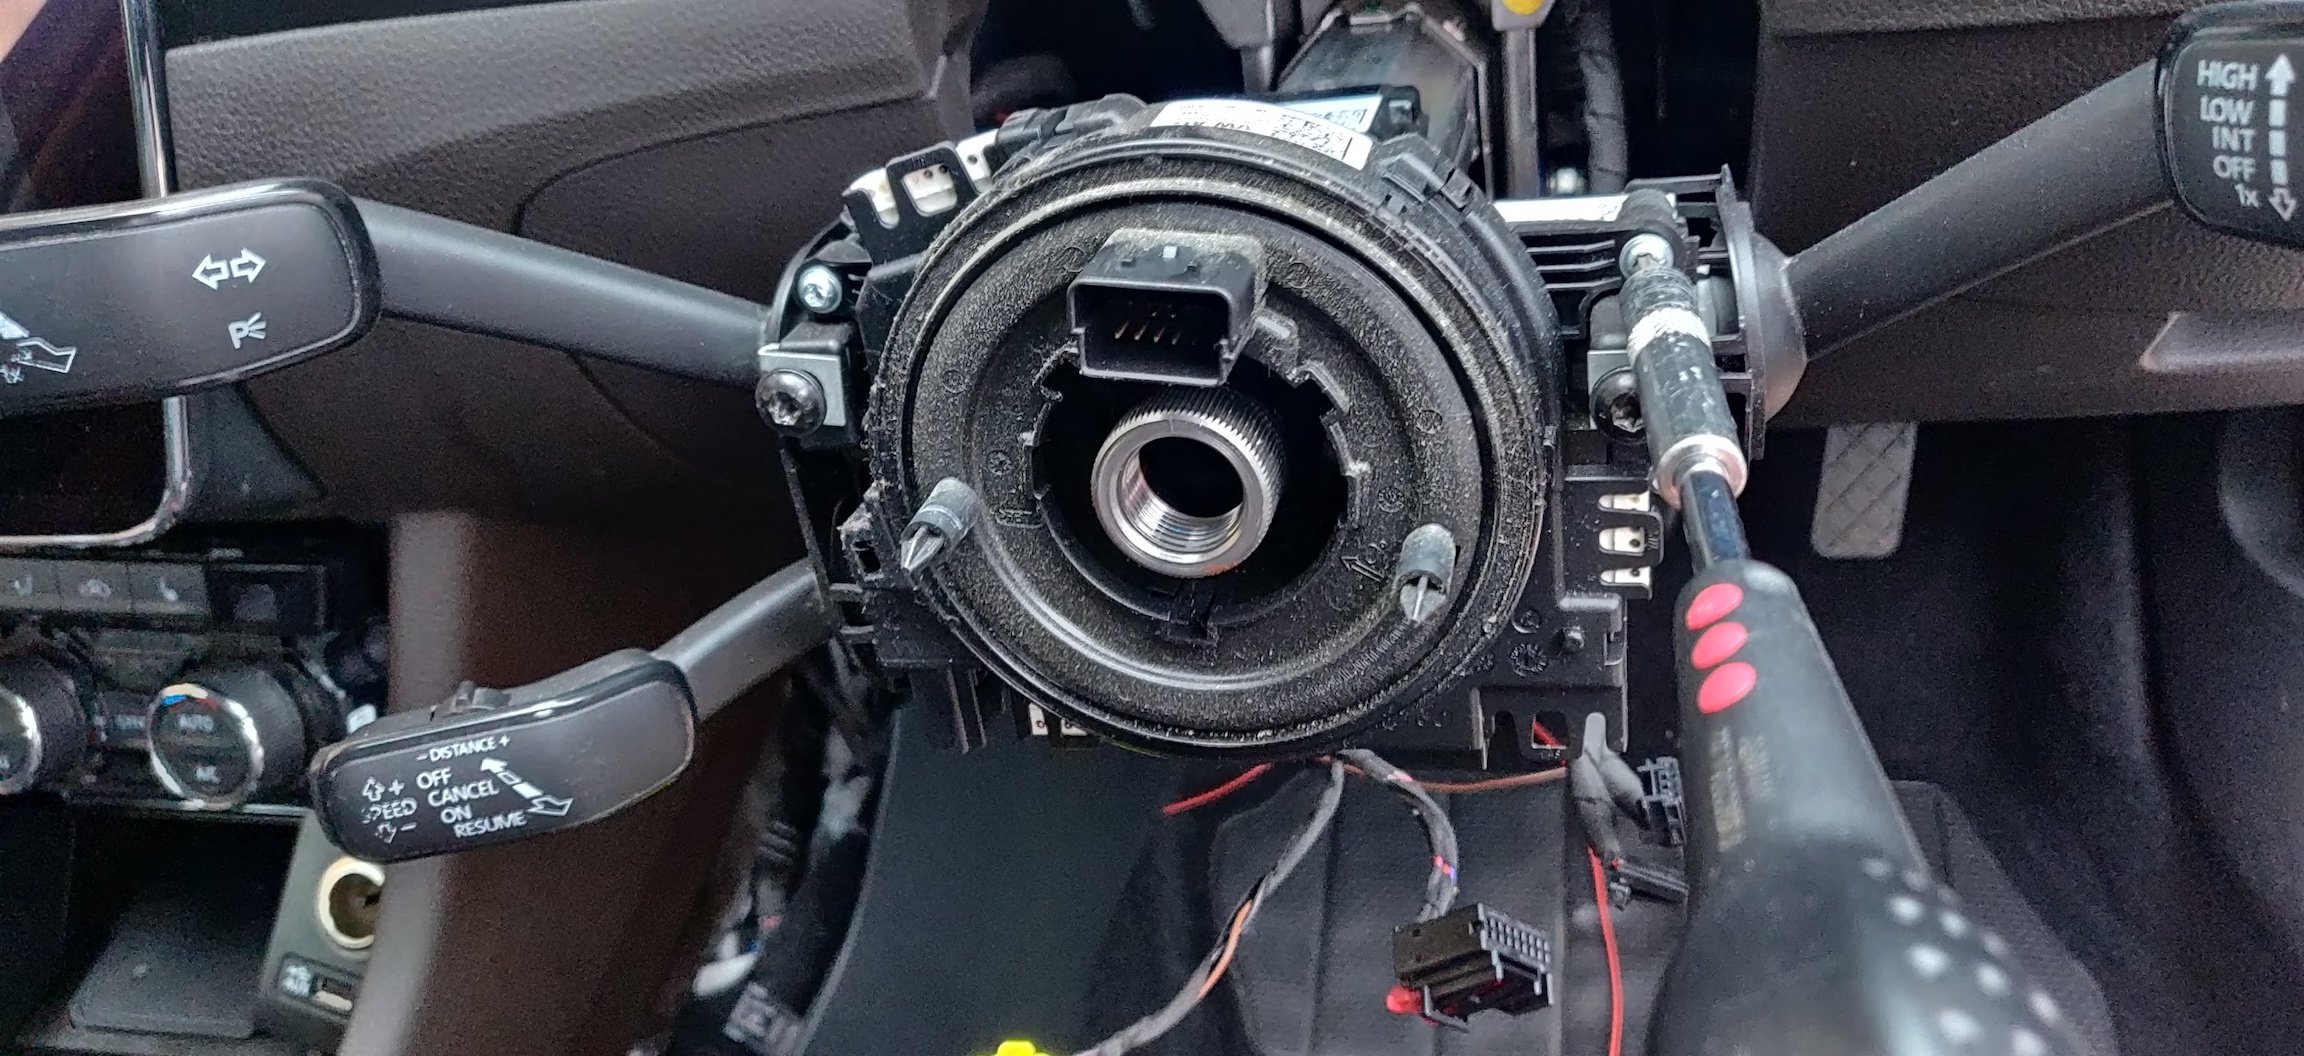
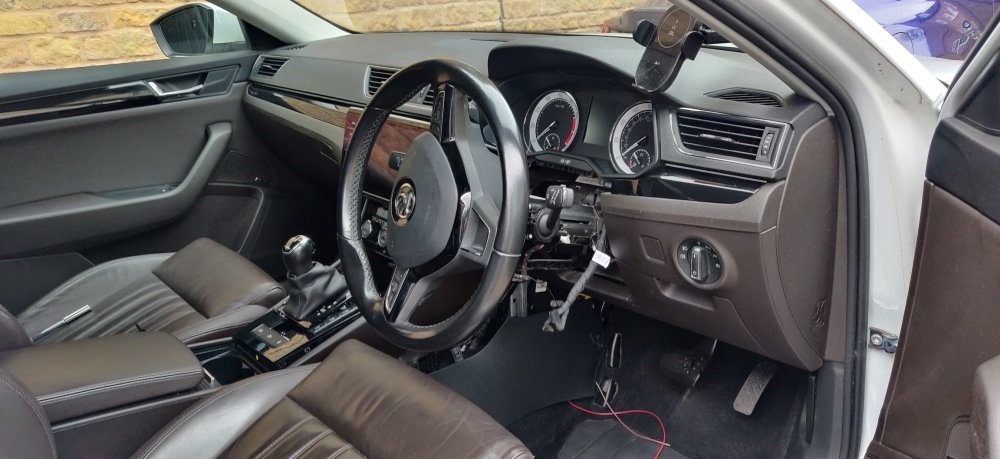
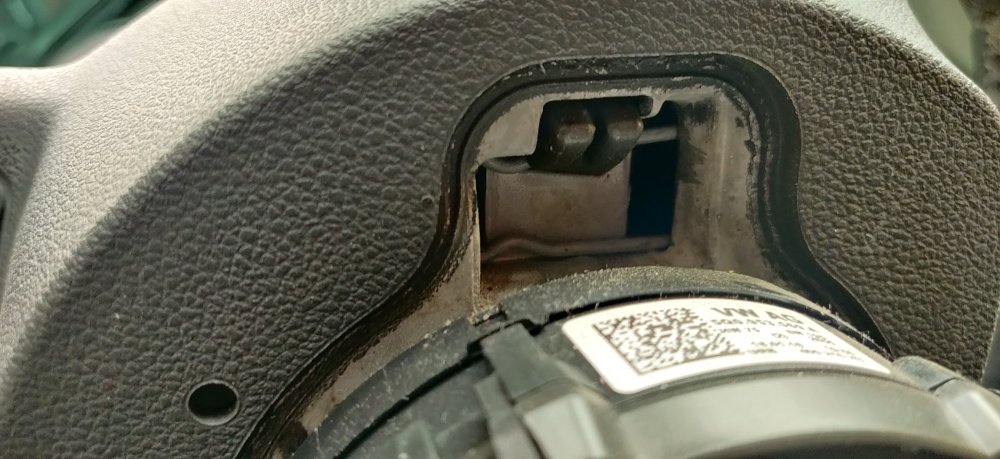
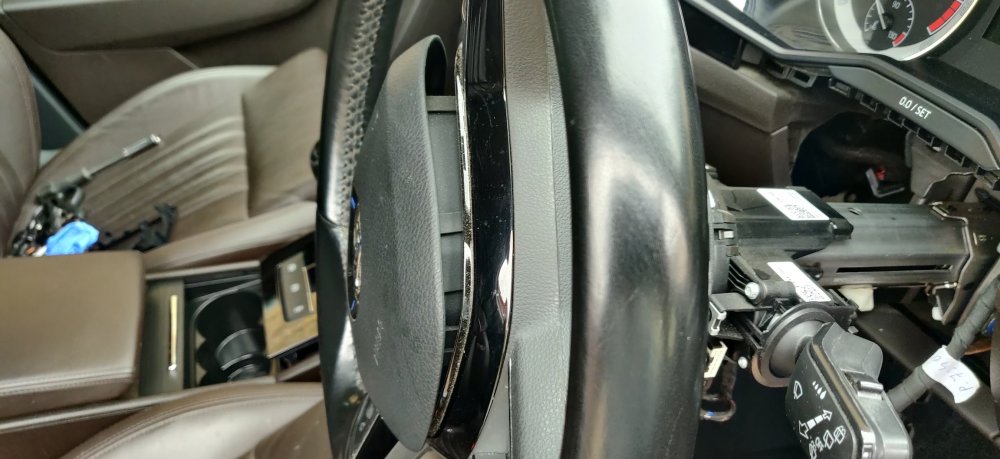
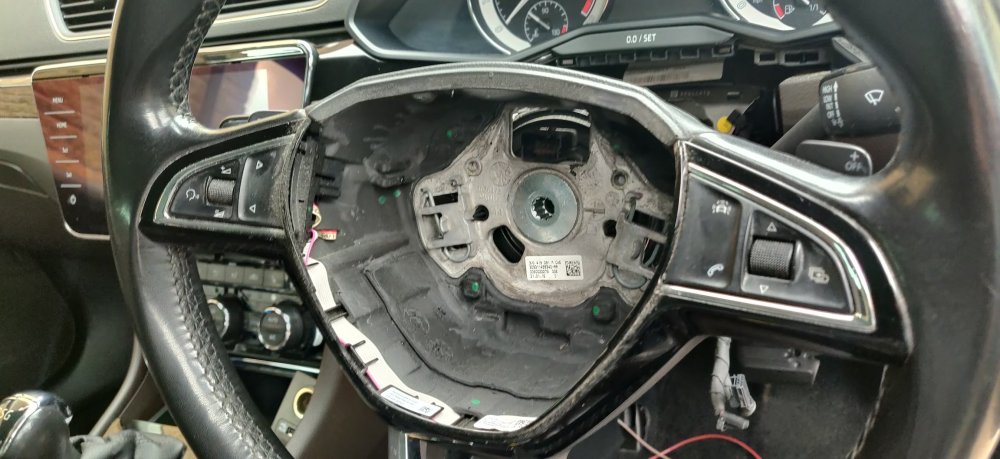
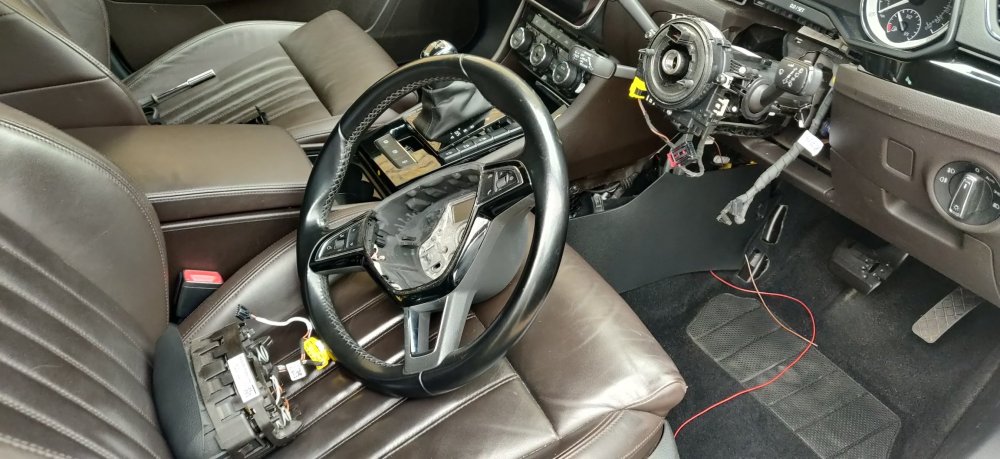
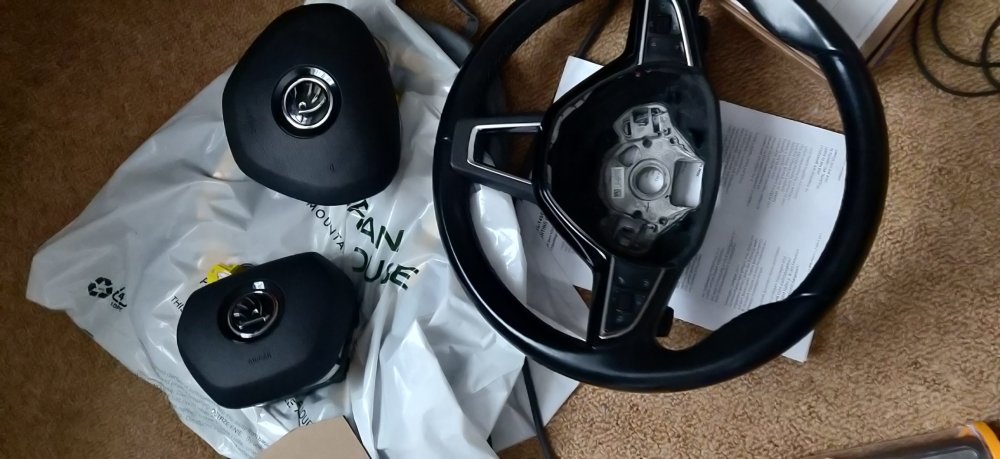
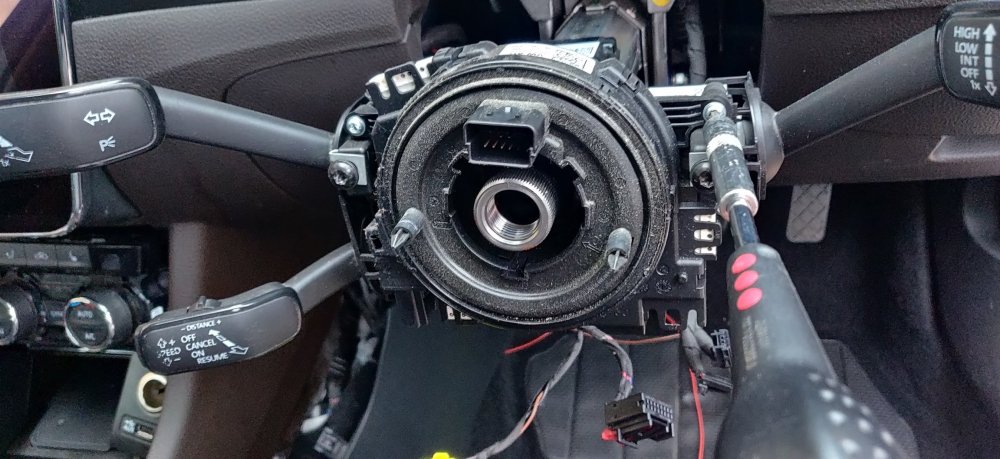
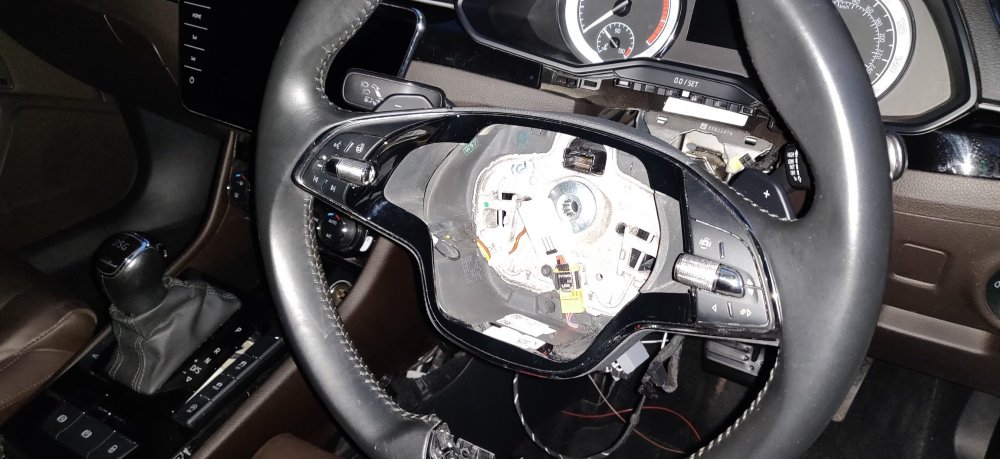
So now that the battery was disconnected with the ignition on, and the wheels are off the ground, I figured this is the best time to have a look at the steering wheel and removing it: So an earlier post had me doing this with a steering column off the car, and the steps are the same. So turning the wheel to the left and looking at the back: Reveals the hook for the airbag and the metal retaining clip thing. My stubby screwdriver was back to wedge itself around in the top right of the gap, and then wiggled to try and lever the metal clip to get it free of the airbag, and once done, it'll pop out: So turn the wheel to the opposing side and do the same thing, so the airbag pops out pretty much entirely: Then its the white tab on the yellow connector, pulling that out to allow the yellow connector to be disconnected, and the one on the left to the buttons. It's a tiny bit of a faff as it's pretty tight against the steering wheel, compared to the facelift wheels where this connector is at the bottom of the wheel. Once those connectors are sorted: It'll be the M12 spline bit to undo. Used my impact wrench whilst holding the wheel just in case it decided to spin freely: The wheel comes out without much drama. Compared to something like the Lotus Elise, where a puller is required, it's nice that it simply slides out. Brought the old wheel and airbag back into the house: Newer design is just a smidge smaller. So it's time to get the new clock spring that's been sitting there to be installed. The old one is removed first, three T15 torx screws: Then the three white connectors need disconnecting, just some wiggling with the black retaining tabs and so on: Which should allow the clock spring to slide out. With the new one in place, I connected up the yellow connector in addition to dry fitting the Kufatec loom: I'll need to do some rejigging of the loom to put that large white connector block somewhere without fouling anything. I took the main power and ground from the loom and followed it: Down along the other wiring into the abyss it seems. Hopefully I can remove the trim below to gain access, primarily to get the newer wiring into there and spliced into the loom. So that's really it, put the new steering wheel on, making sure the centre line notches on the column and wheel are aligned, and started dry fitting the bolt and connectors: It was getting dark, hence the camera flash over exposing the wheel and the connectors. You can just about see the adapter I bought from https://skoda-acc.com/Skoda-steering-wheel-buttons-adapter-Full-S0001F. I actually don't remember if I've tallied this into the cost. This was ordered on 1 March, and arrived on the 16 March. The order came to €268.37, primarily due to also order a set of all weather mats, and shipping of €27.42. It came to £239.44 according to the credit card statement. It's an expensive adapter, really hope it works. So once the Kufatec loom is spliced into the two wires I bodged in on the weekend, there isn't much stopping the power from being disconnected. We'll see how the week and Easter break goes! Maintenance: £1794.17 Upgrades: £1126.54 (+£239.44) Miscellaneous: £608.14


-
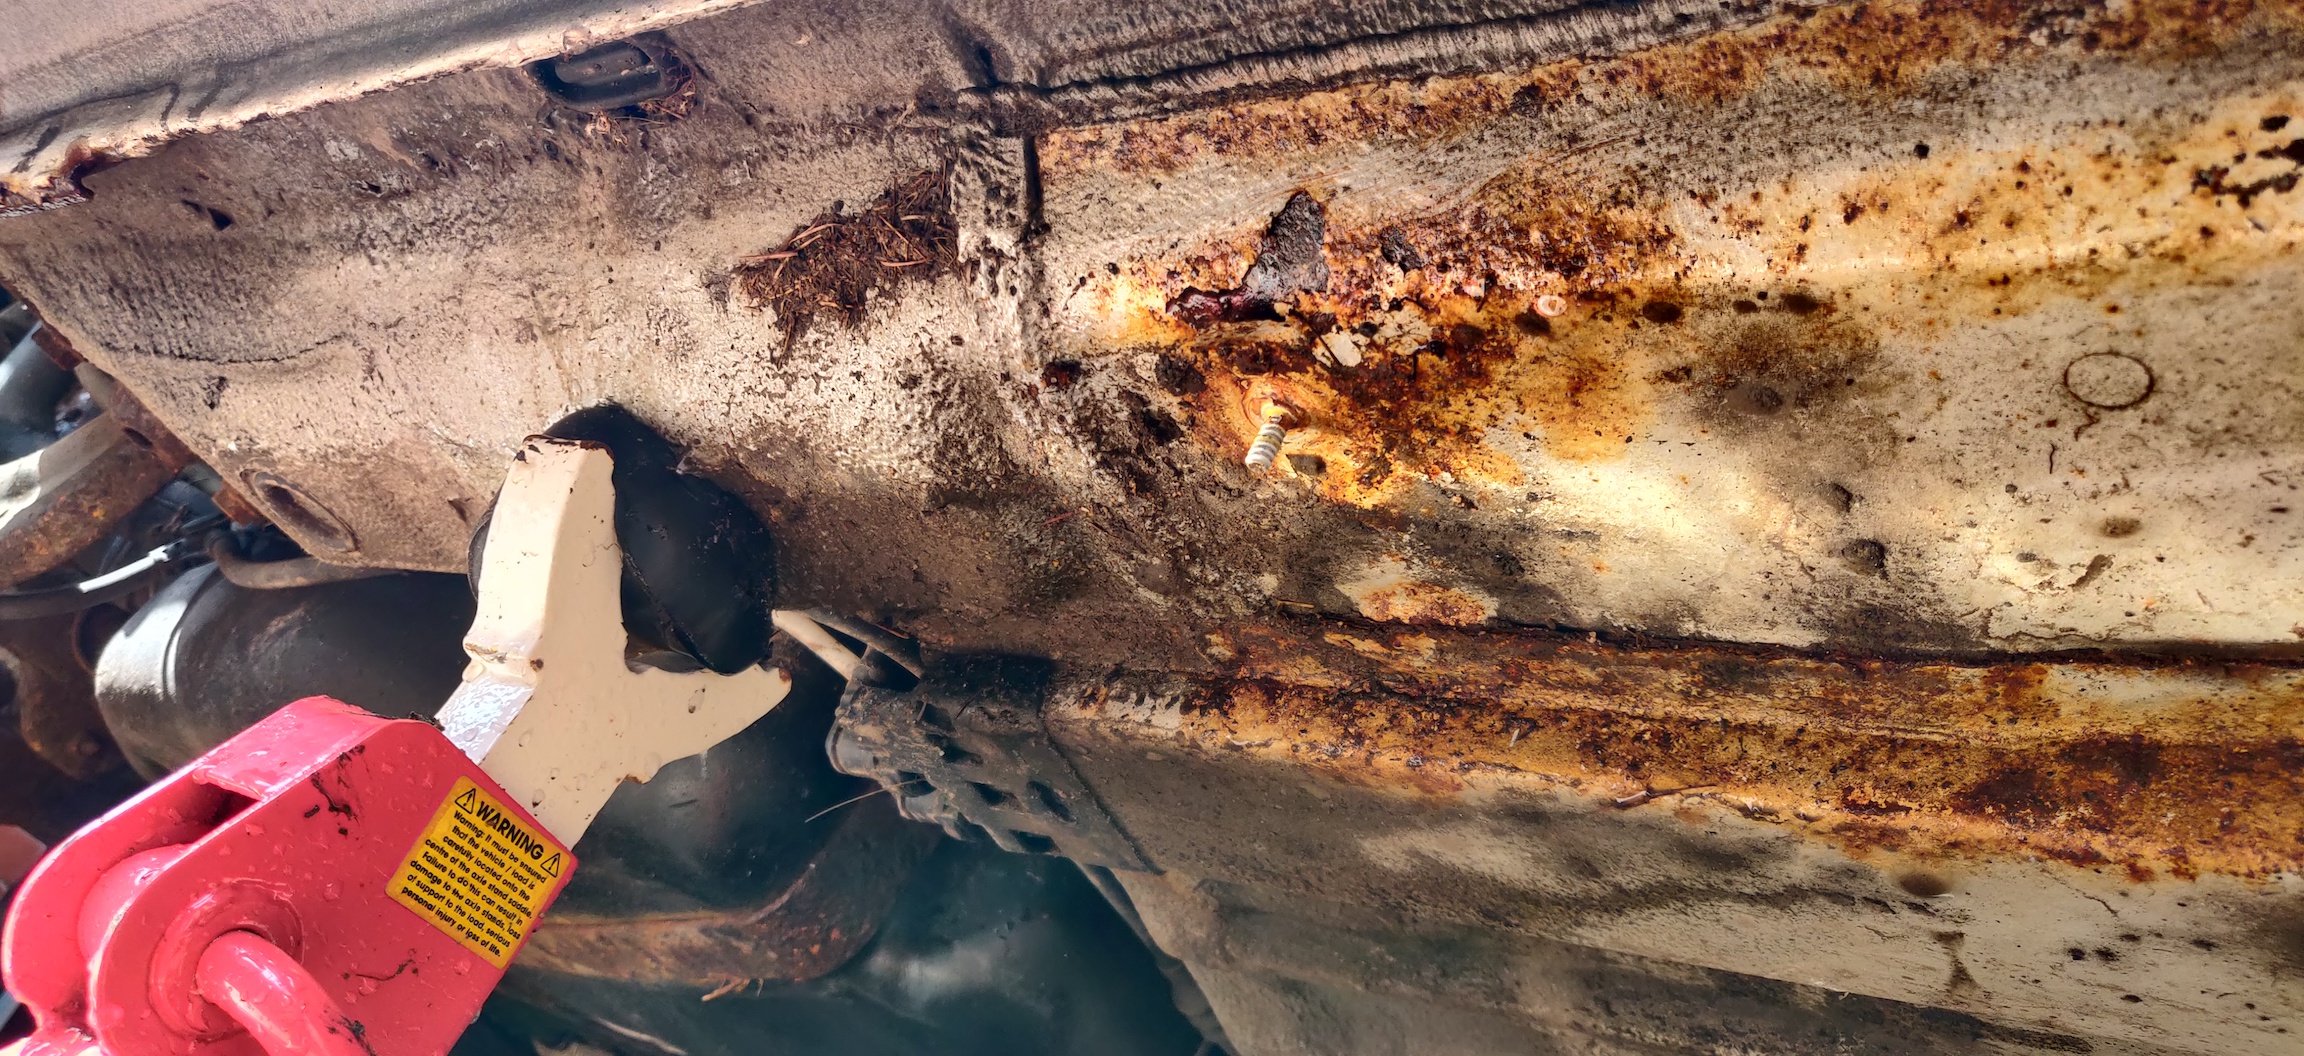
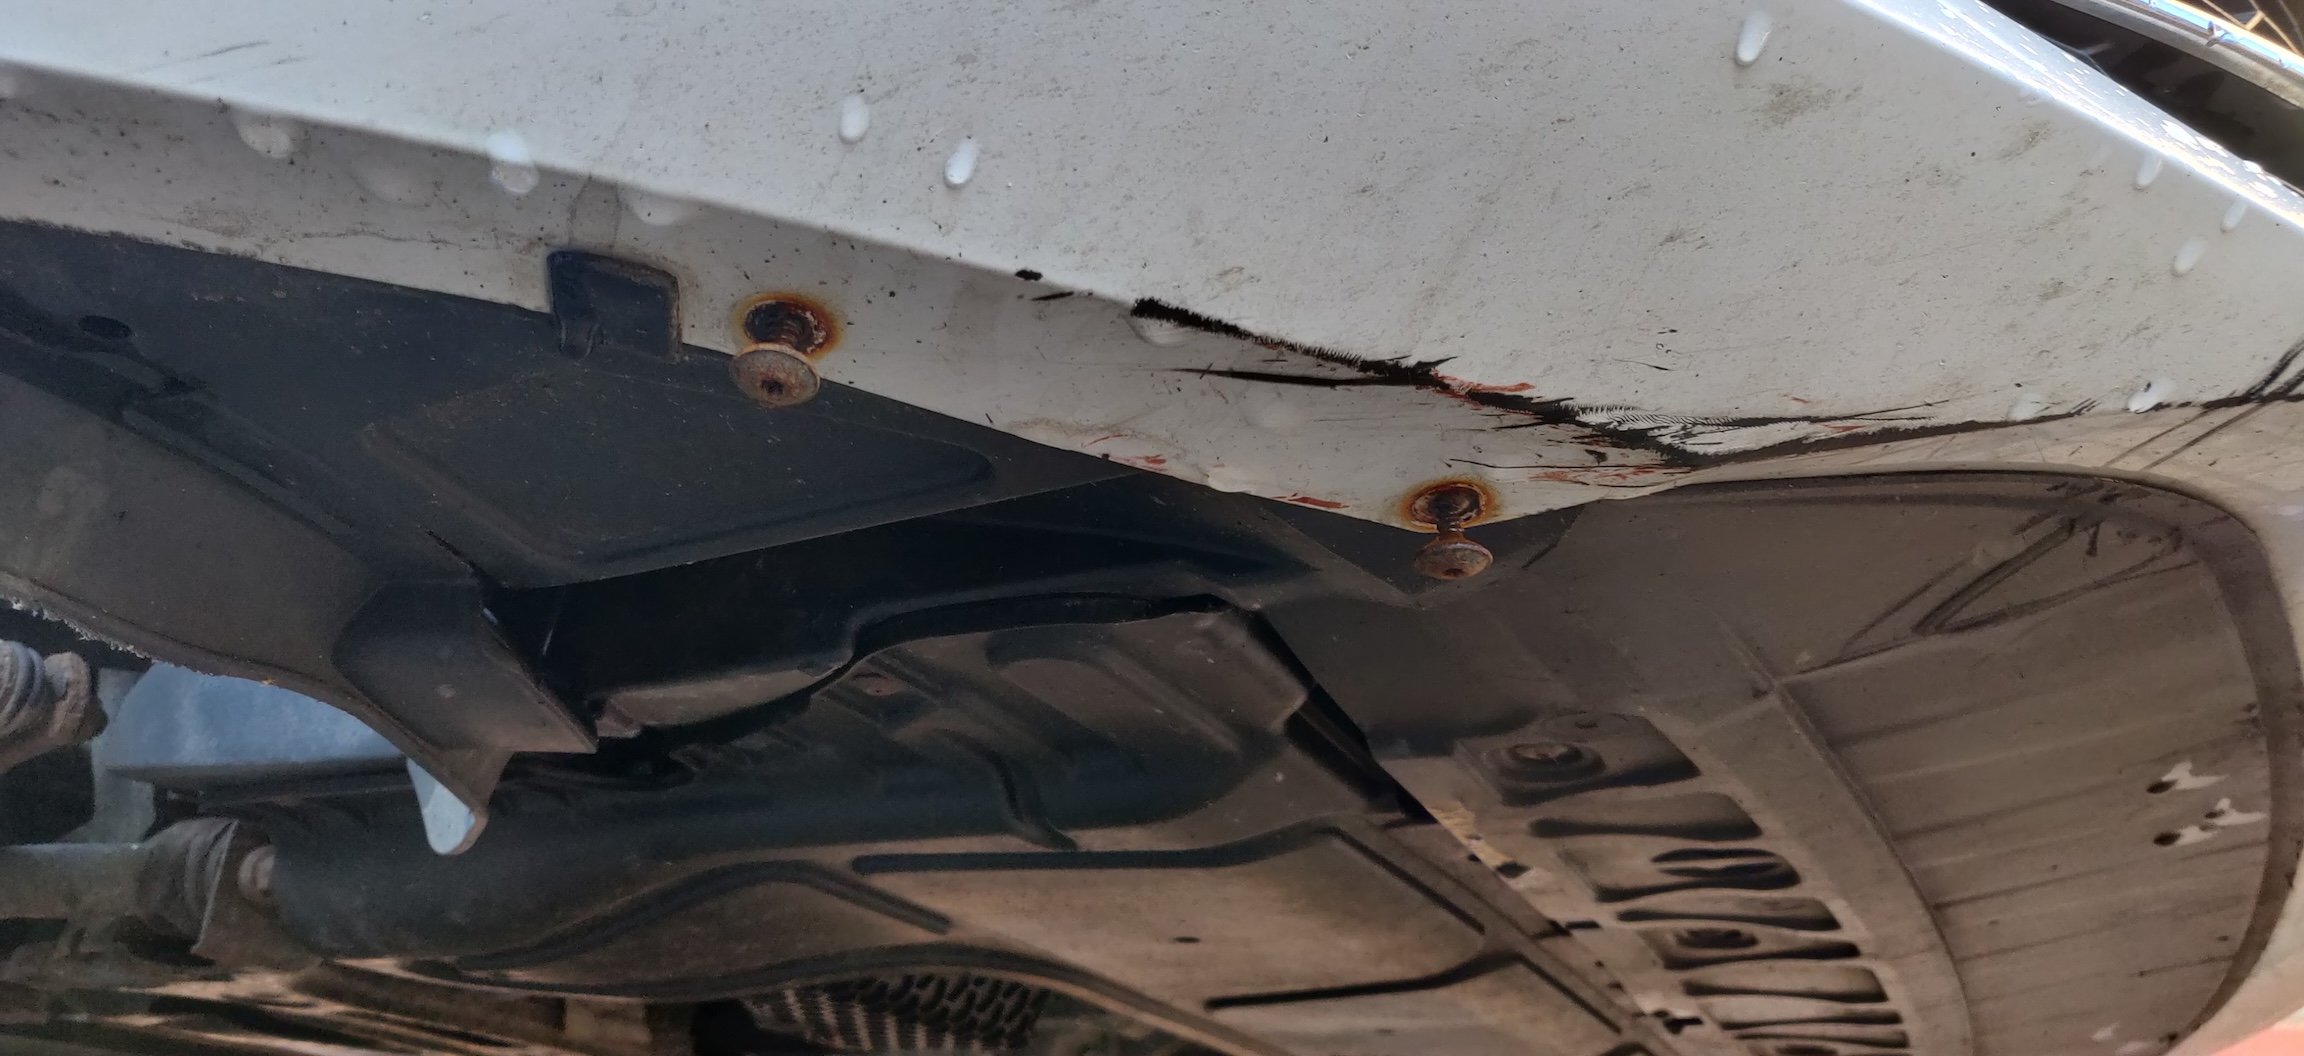
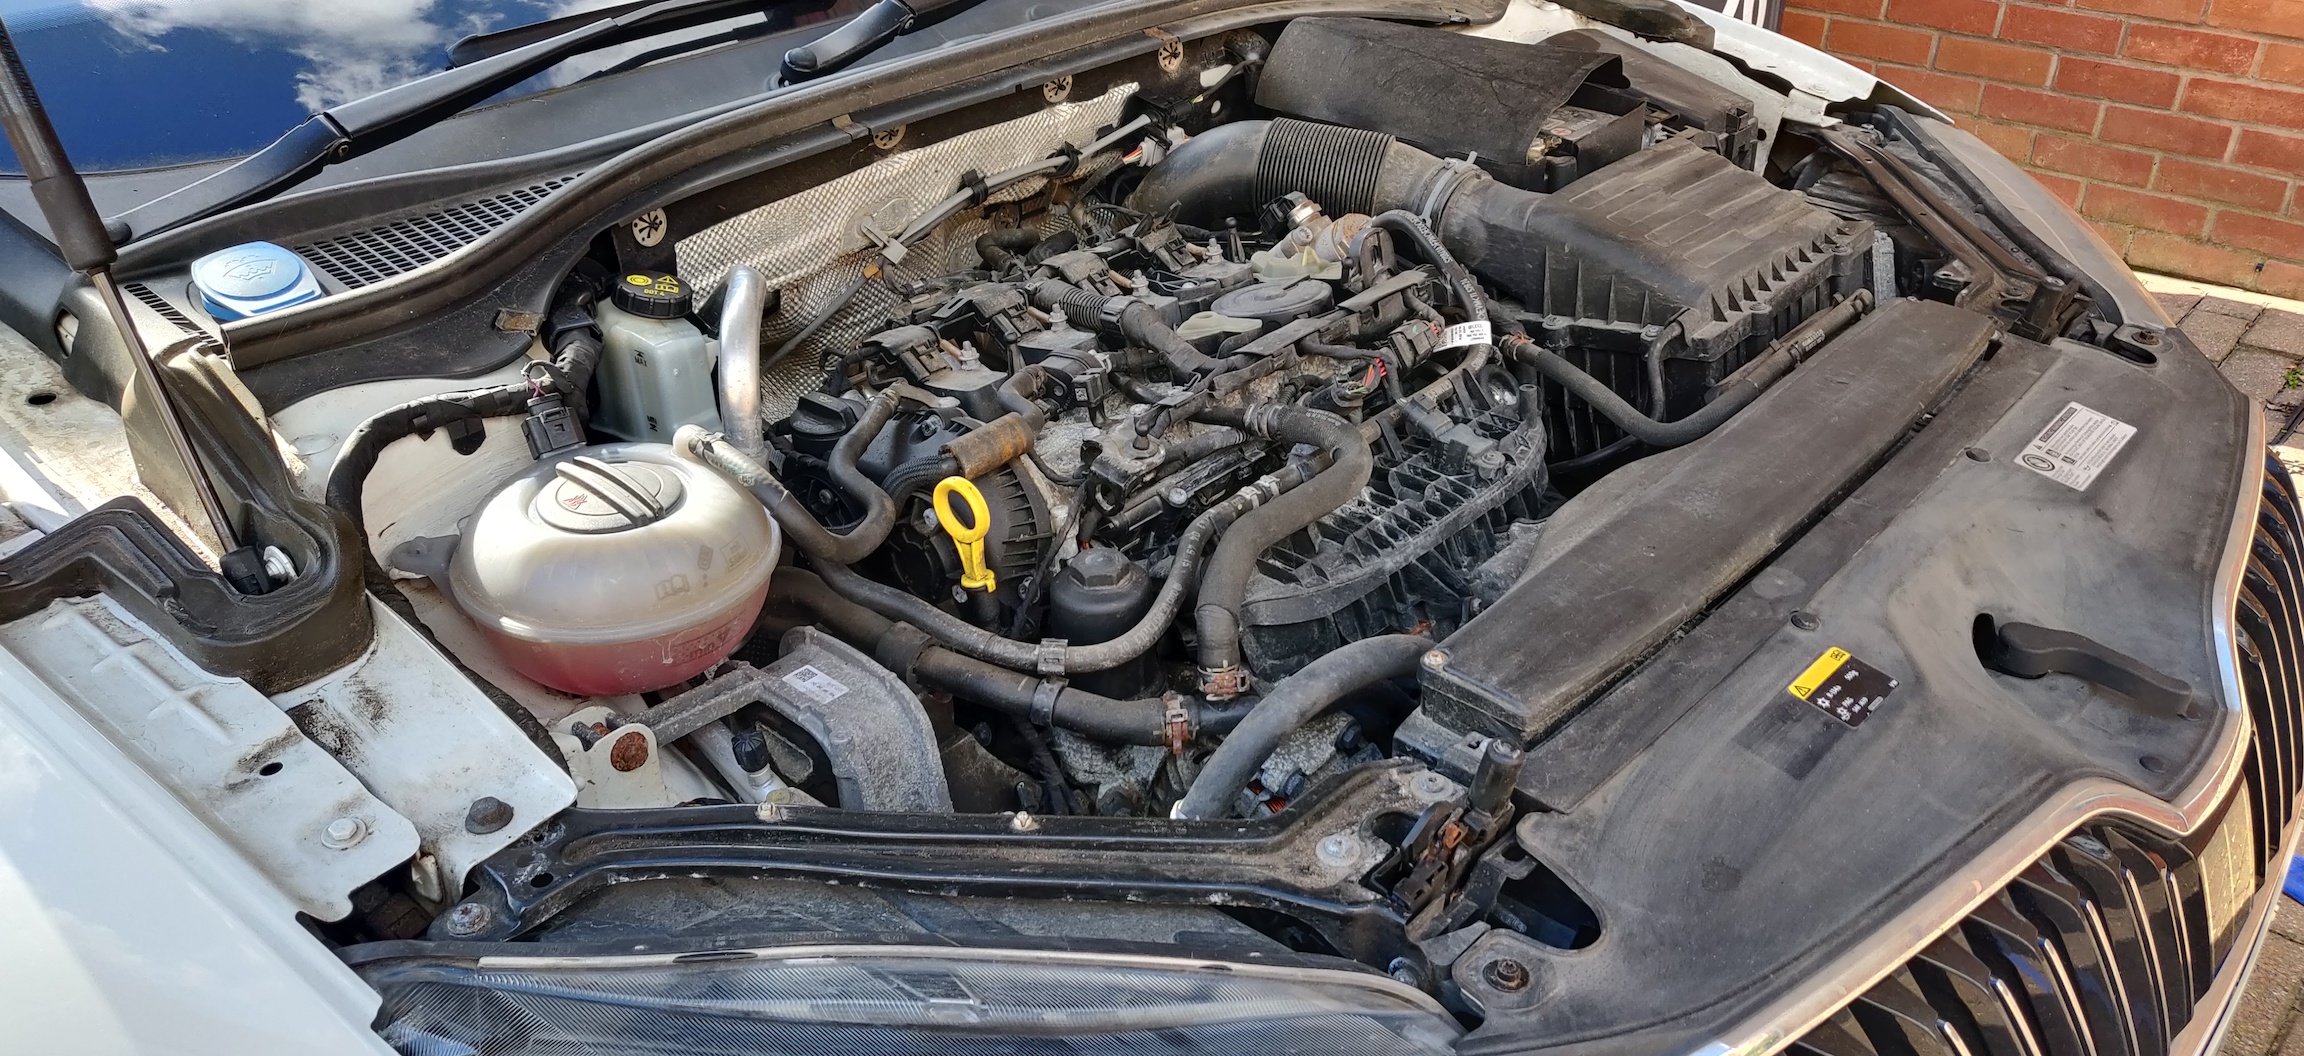
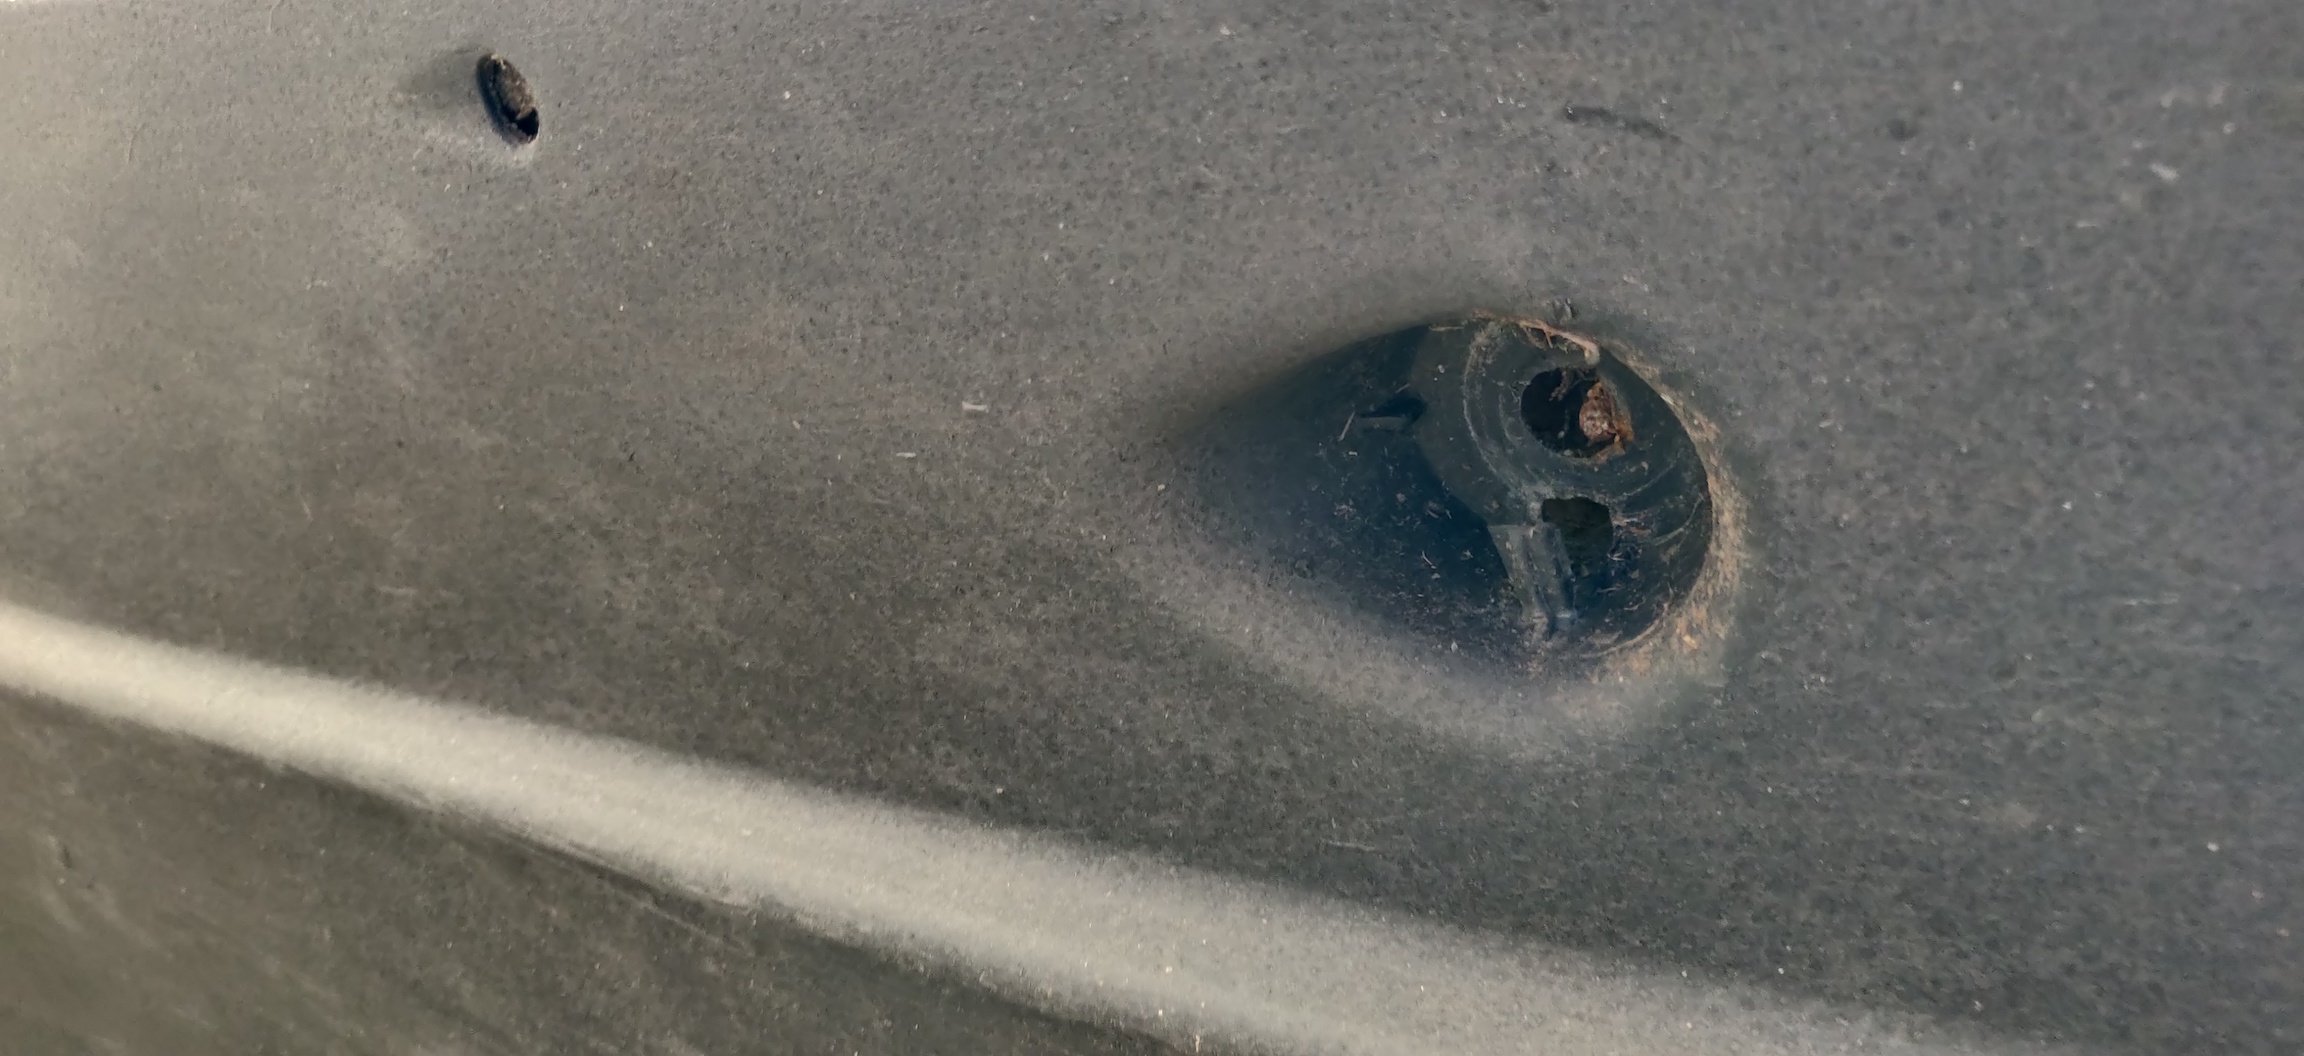
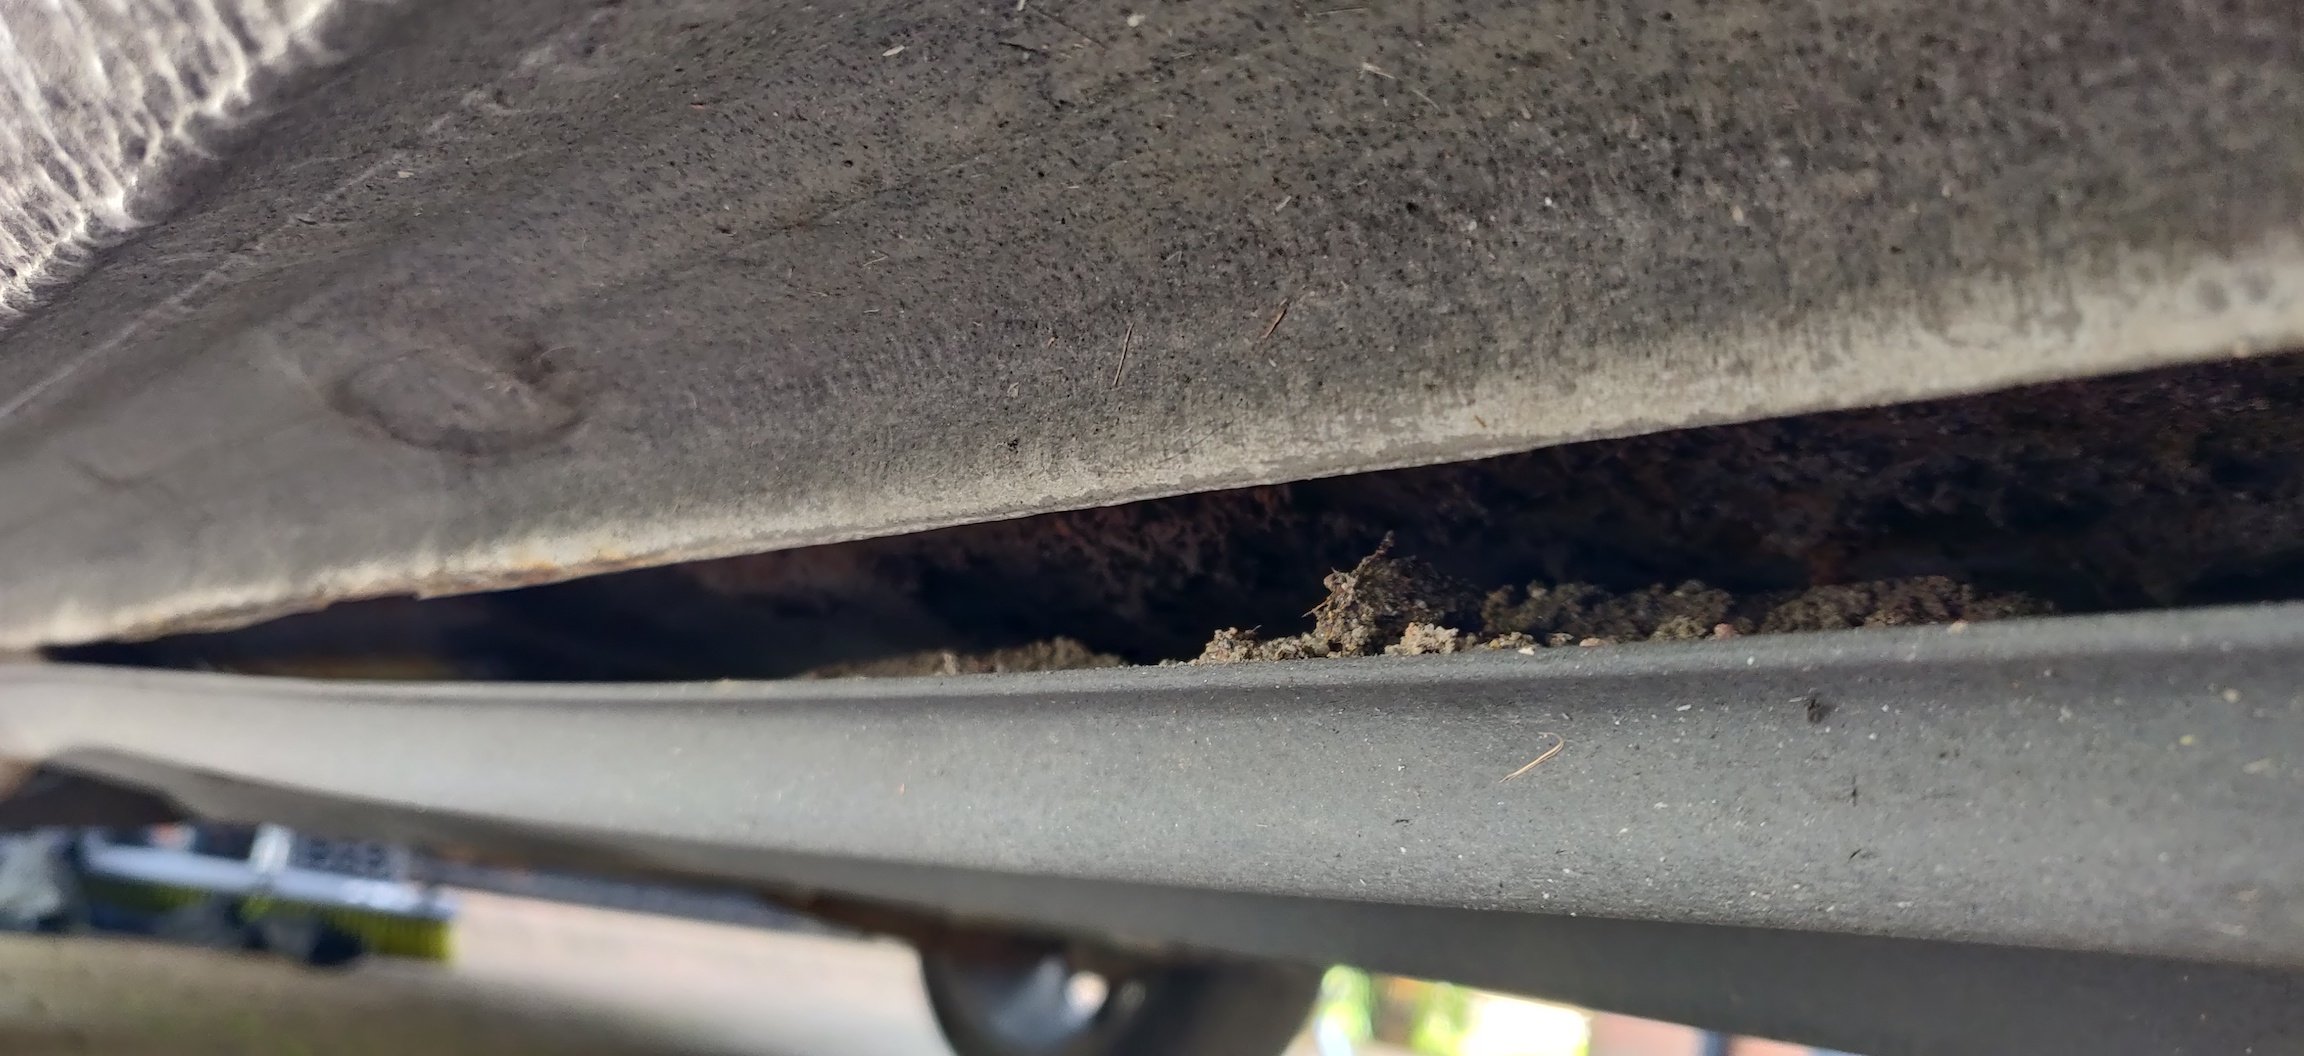
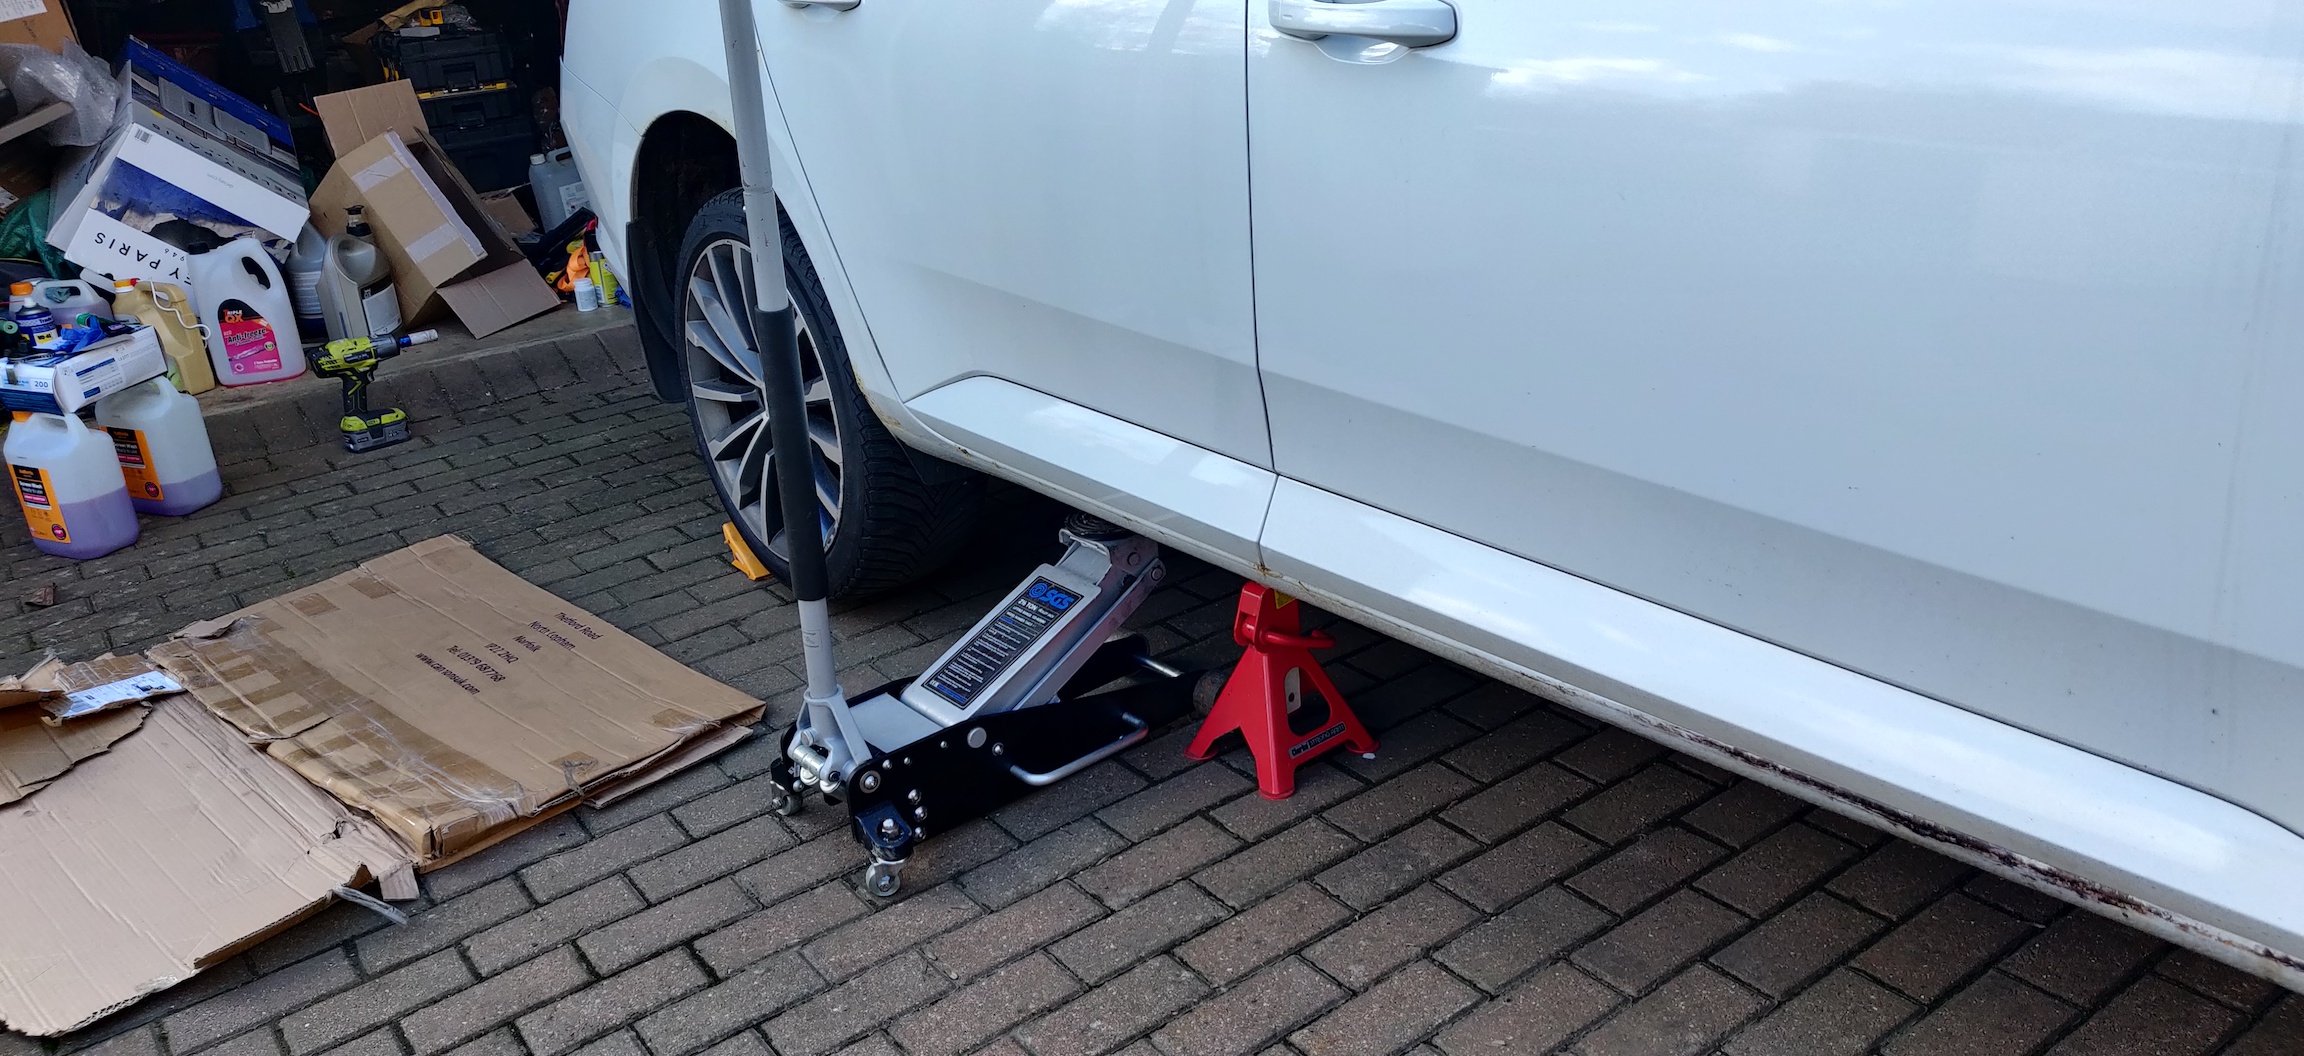
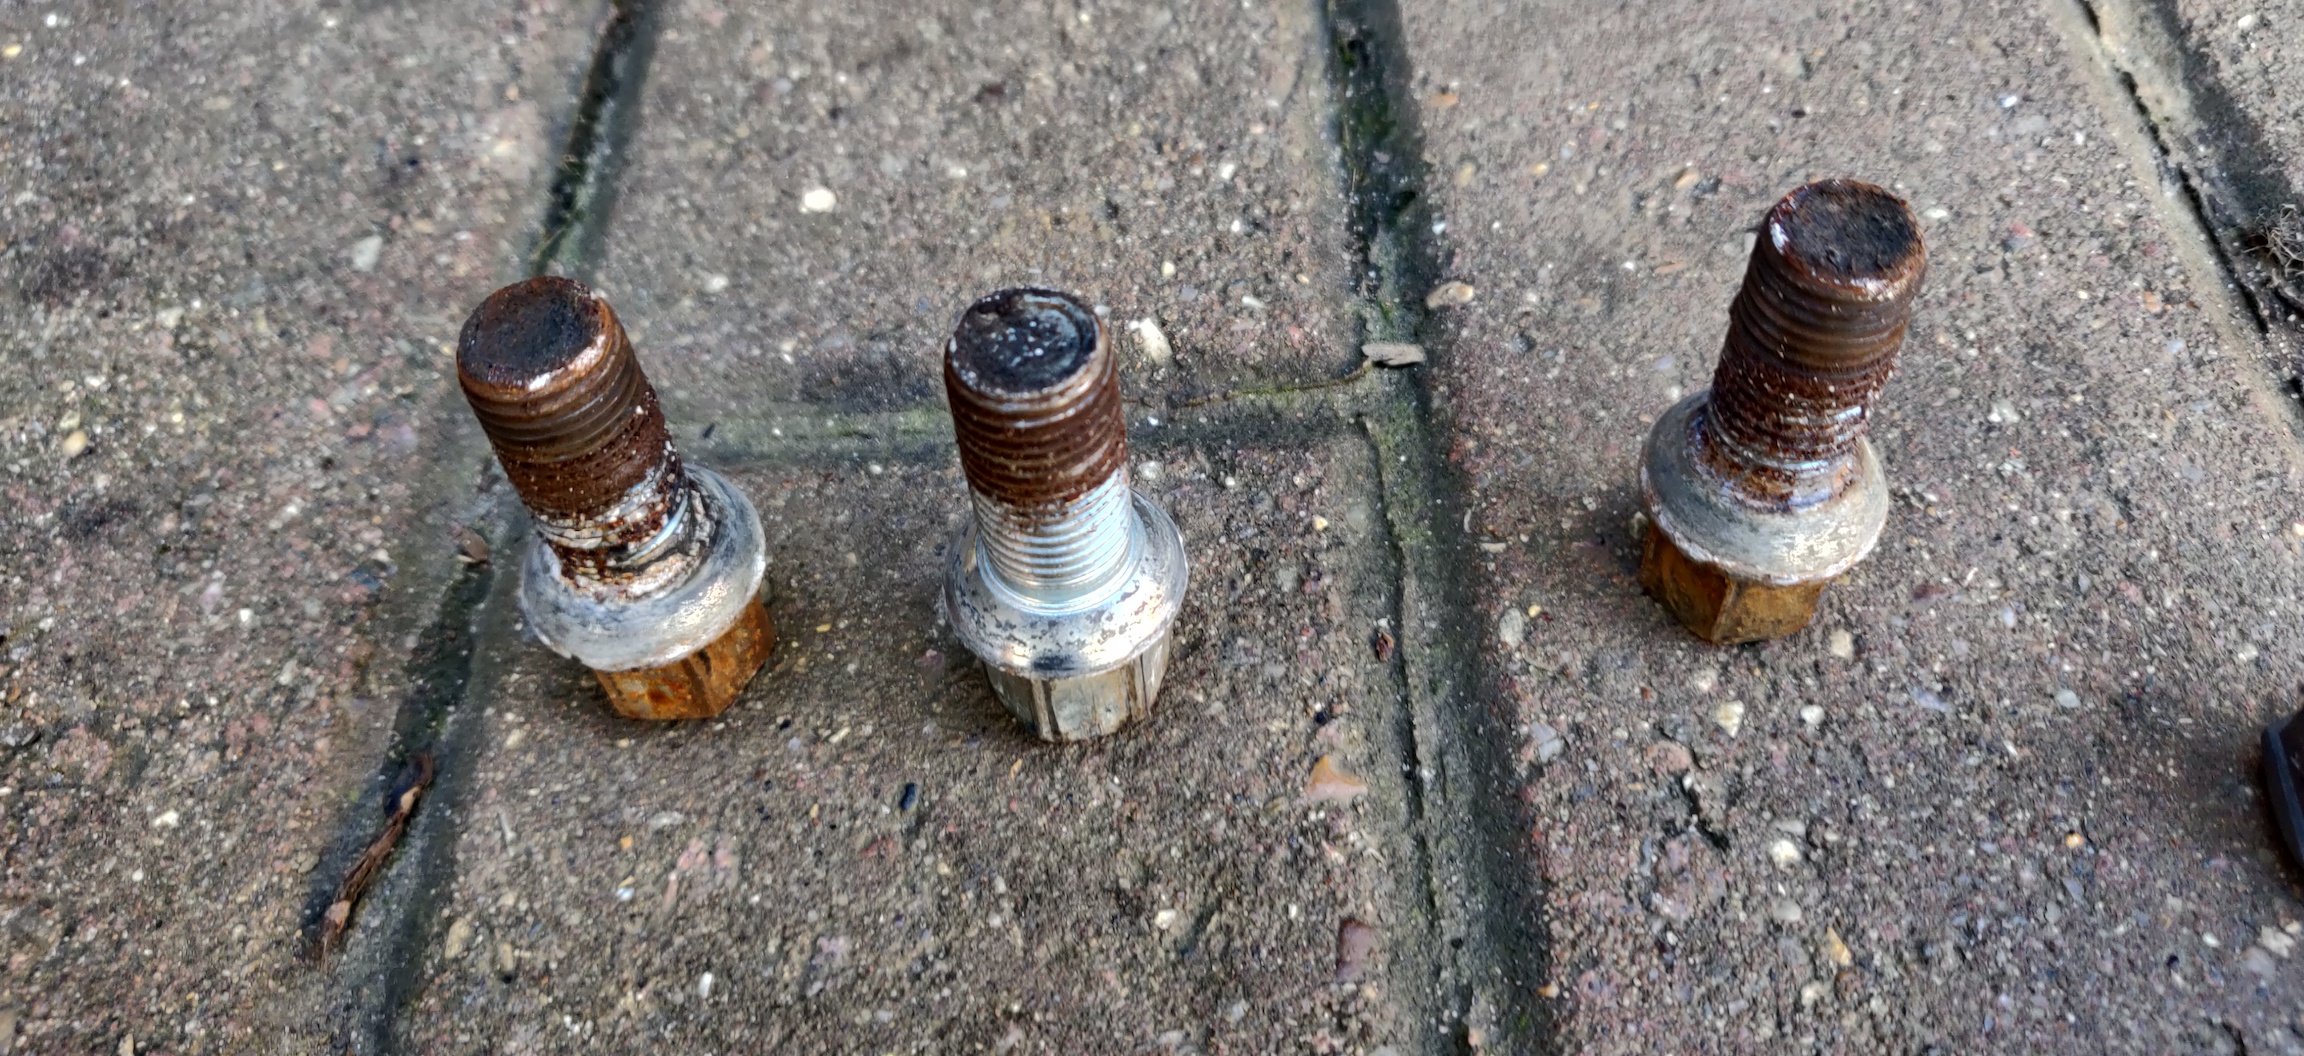
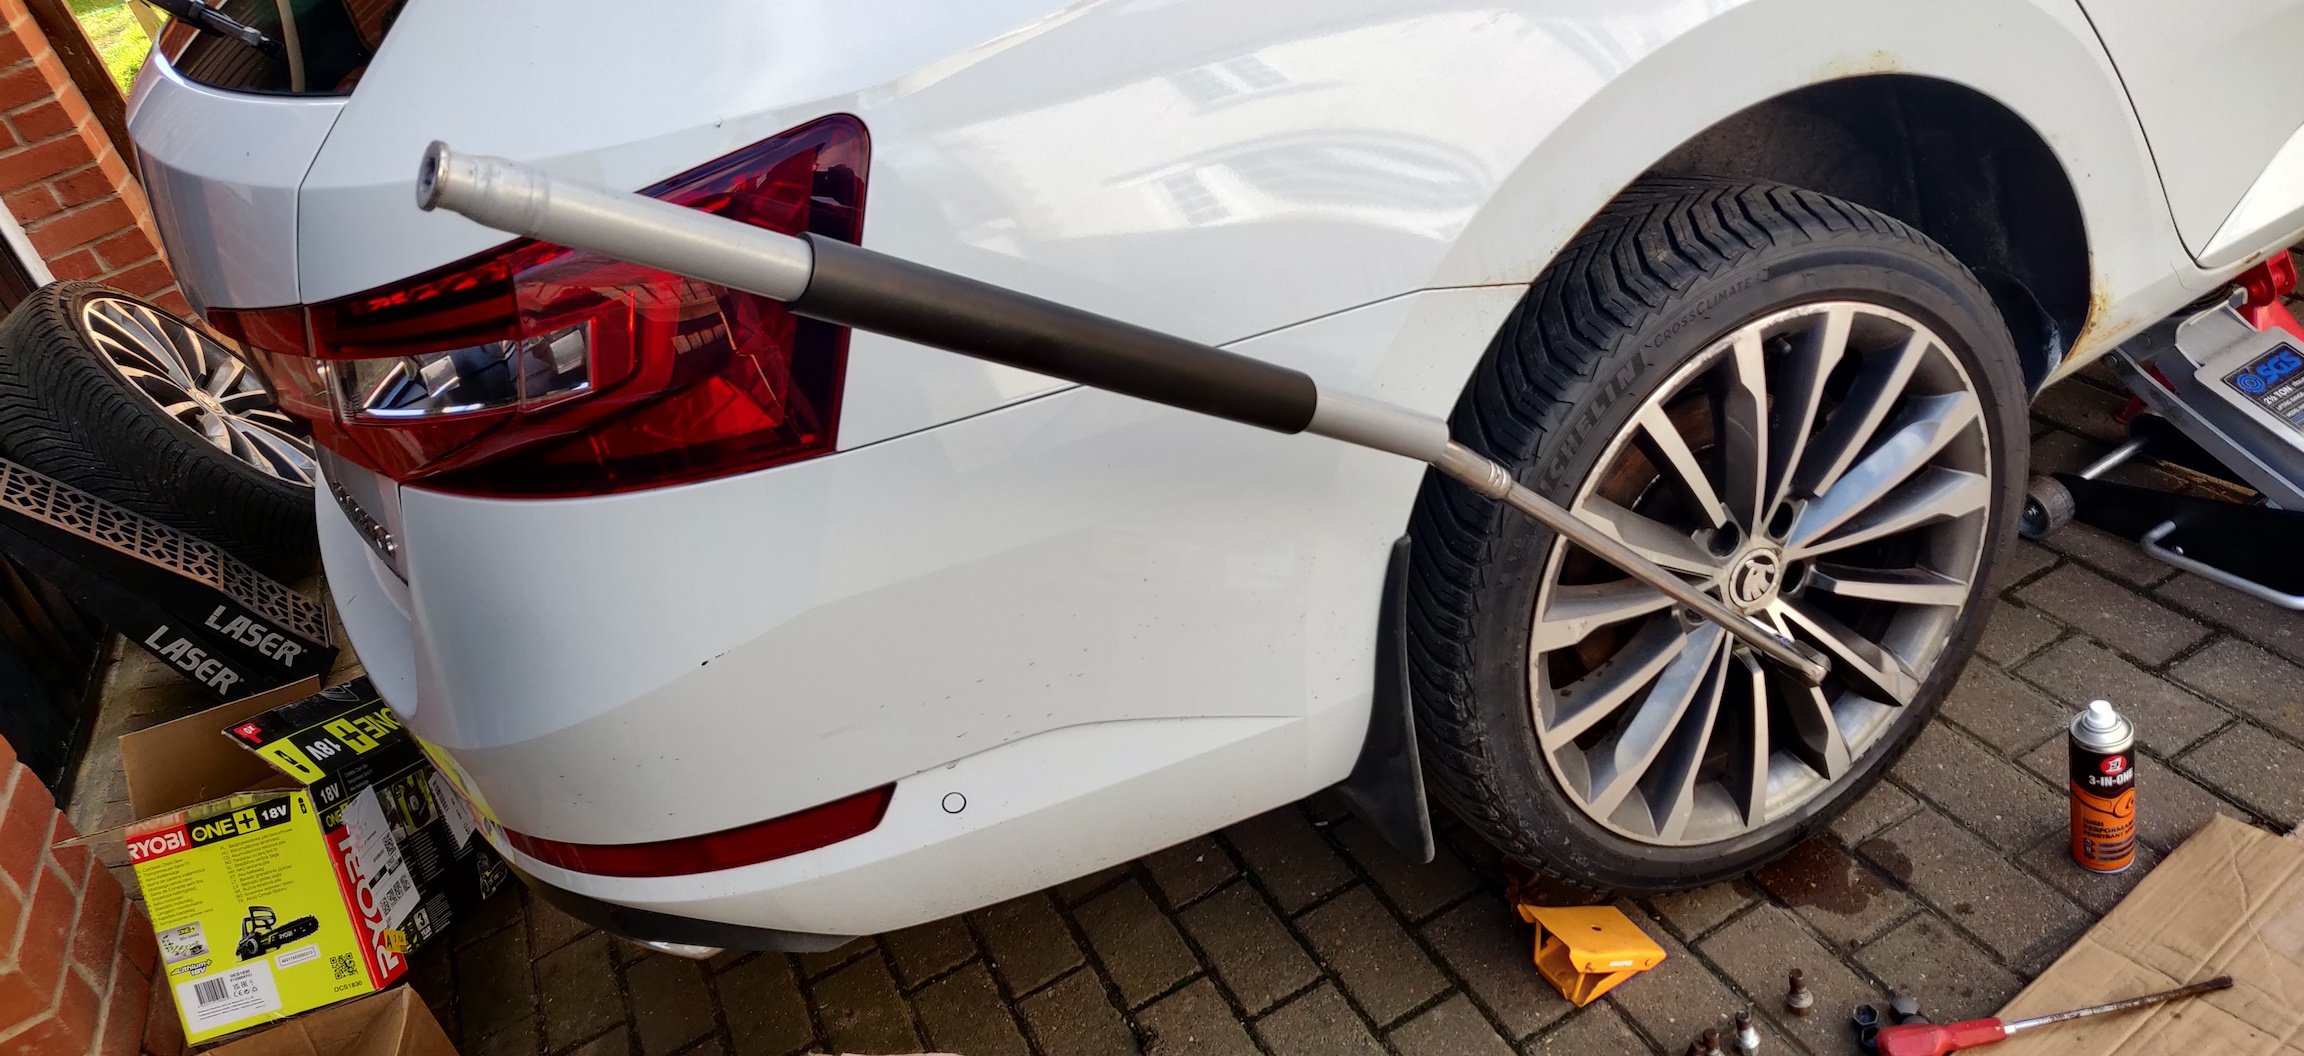
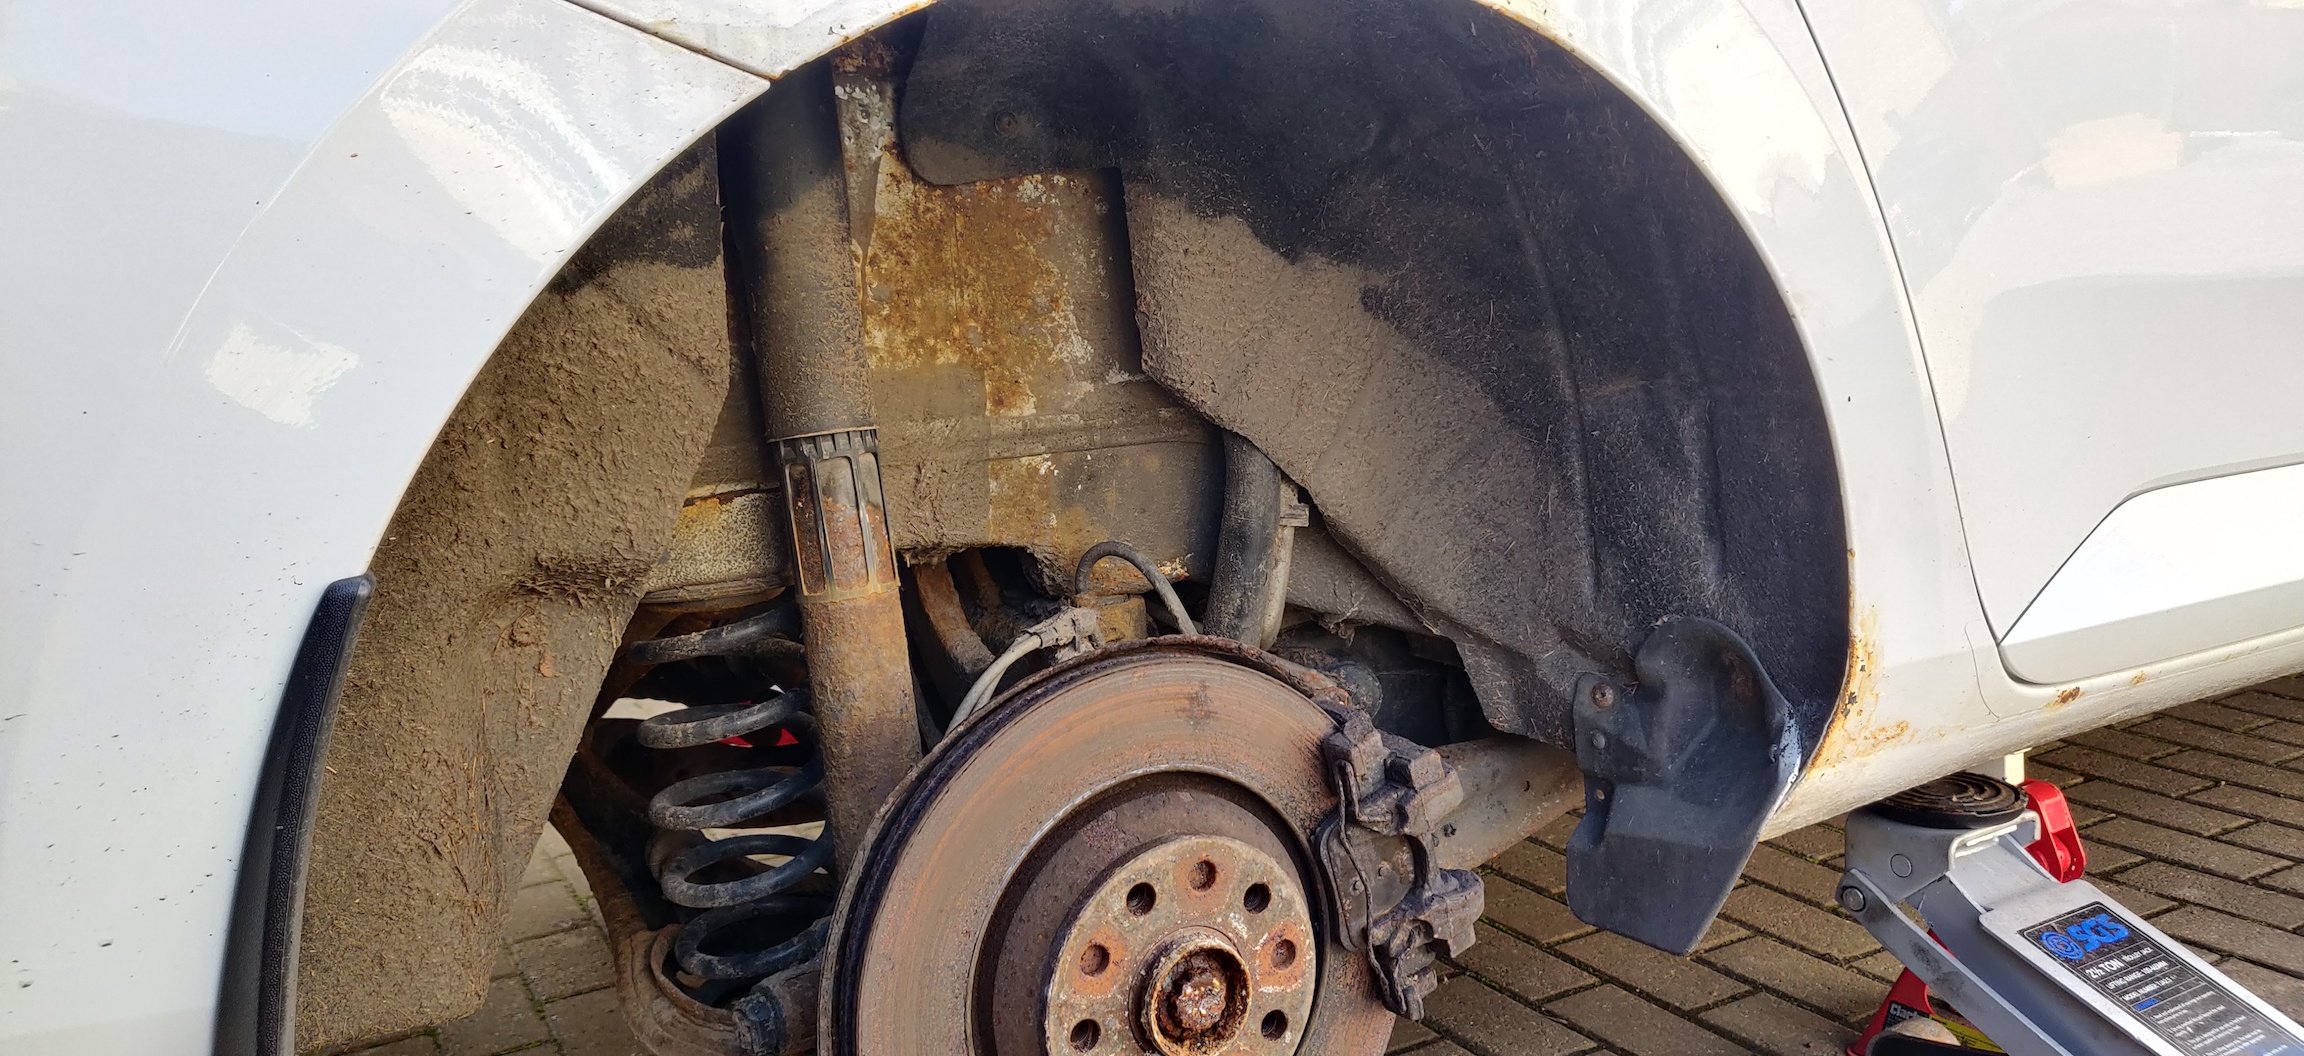
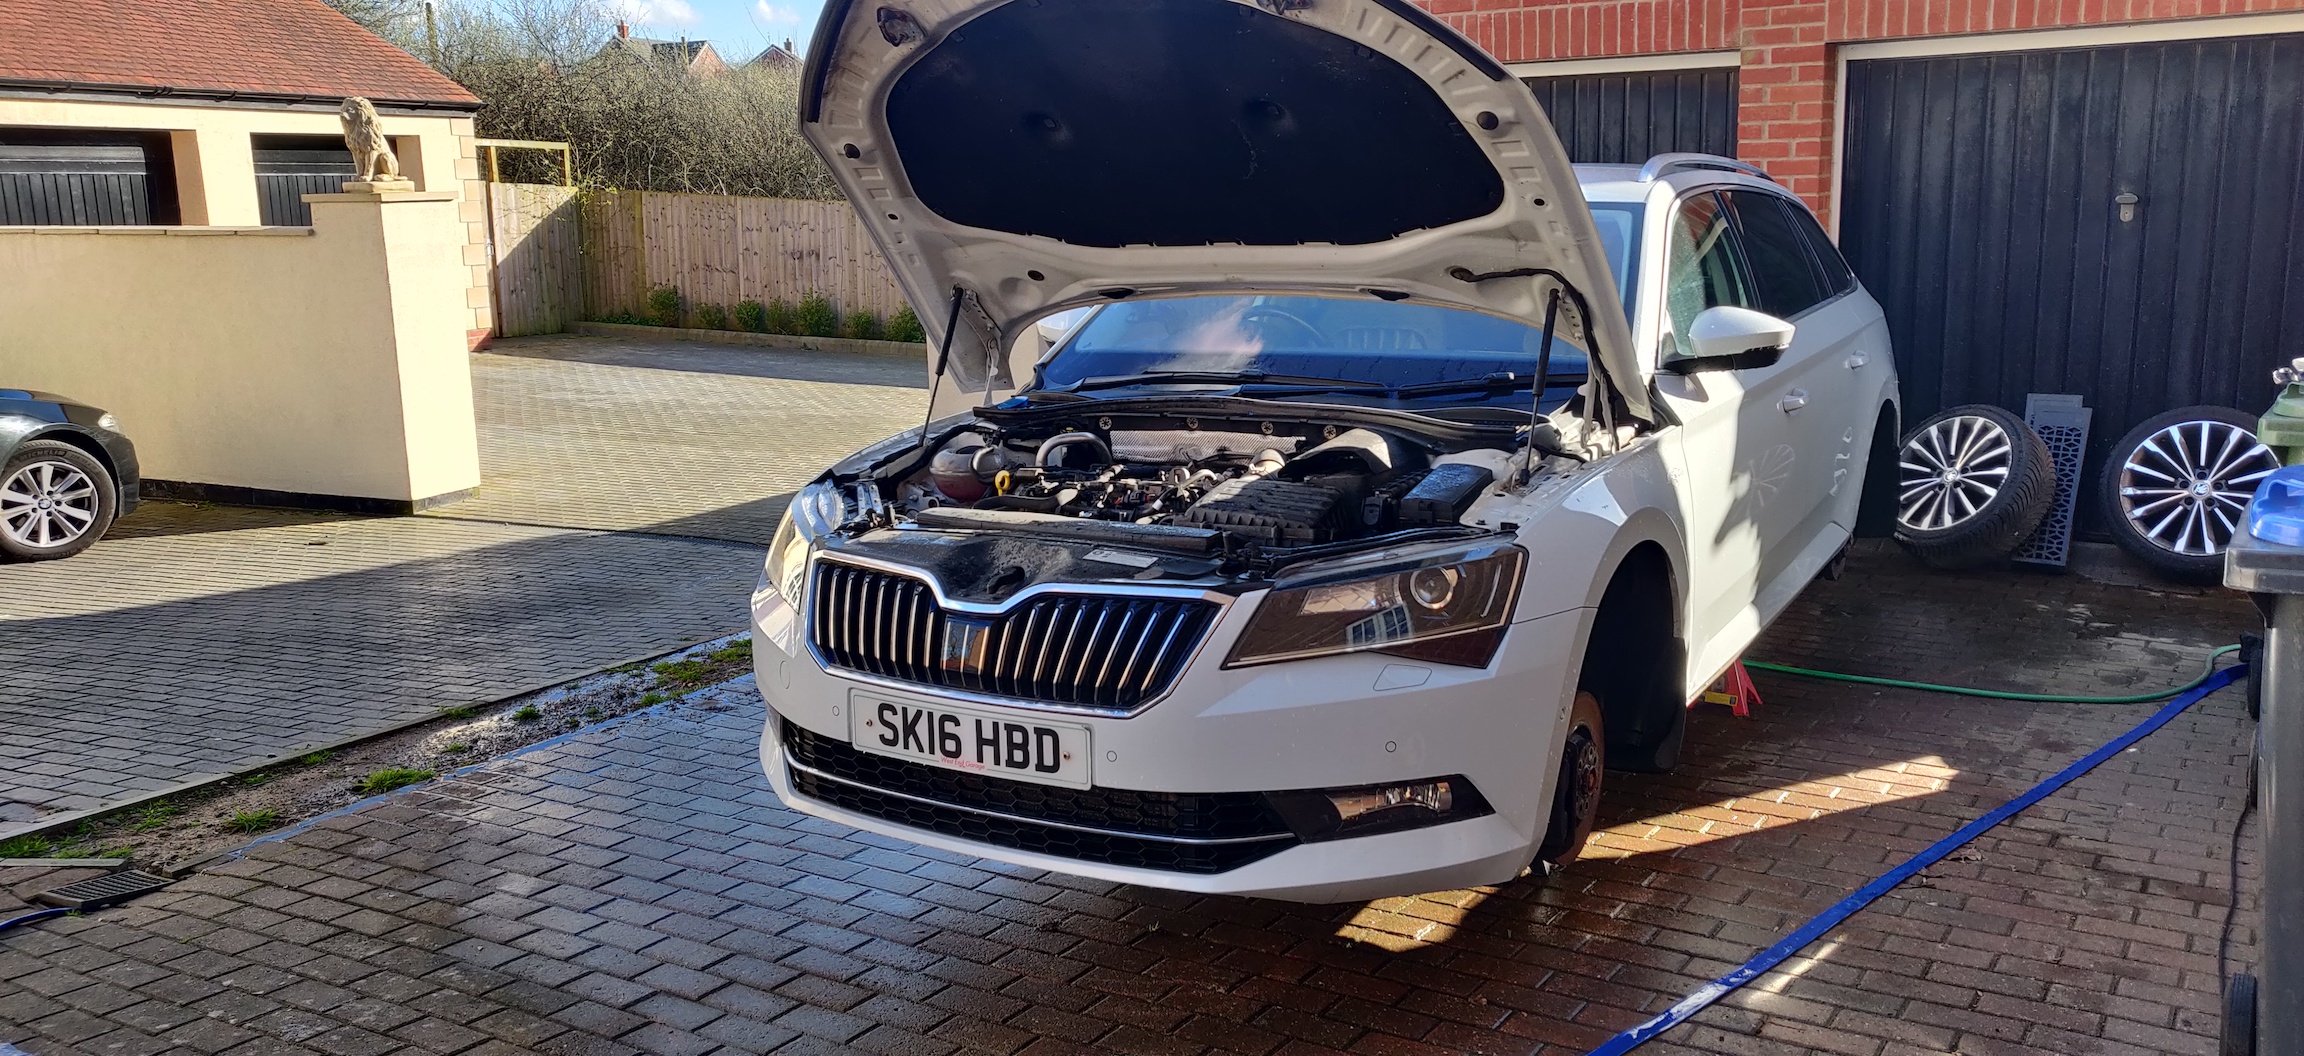
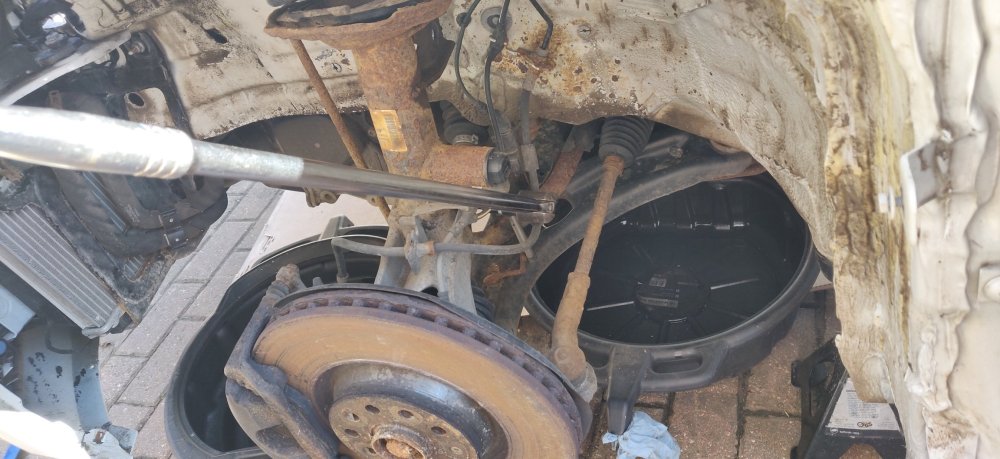
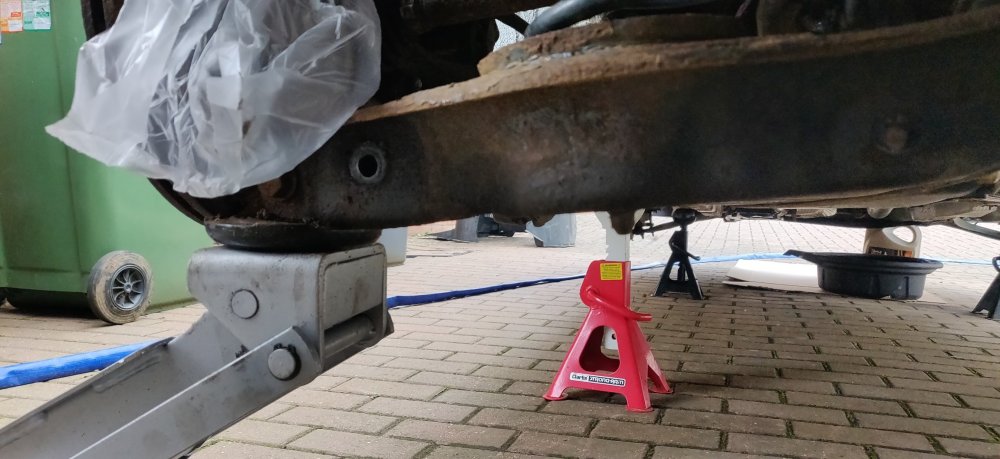
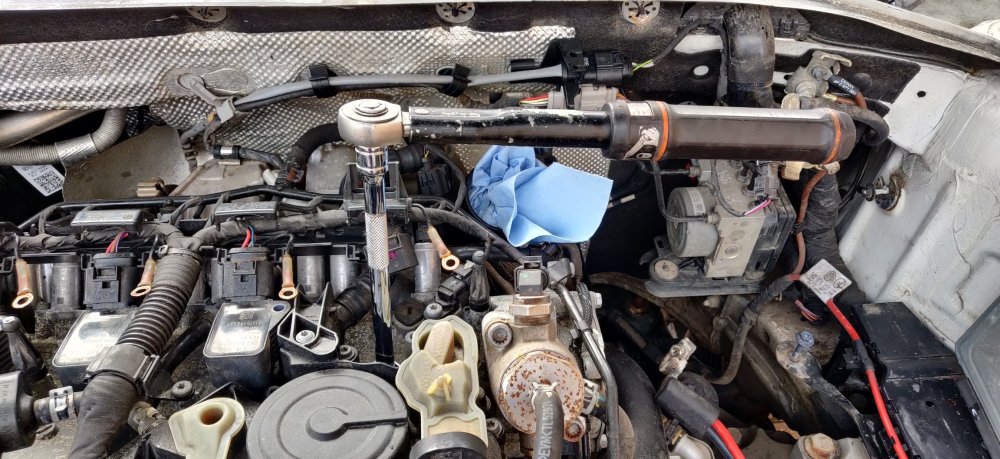
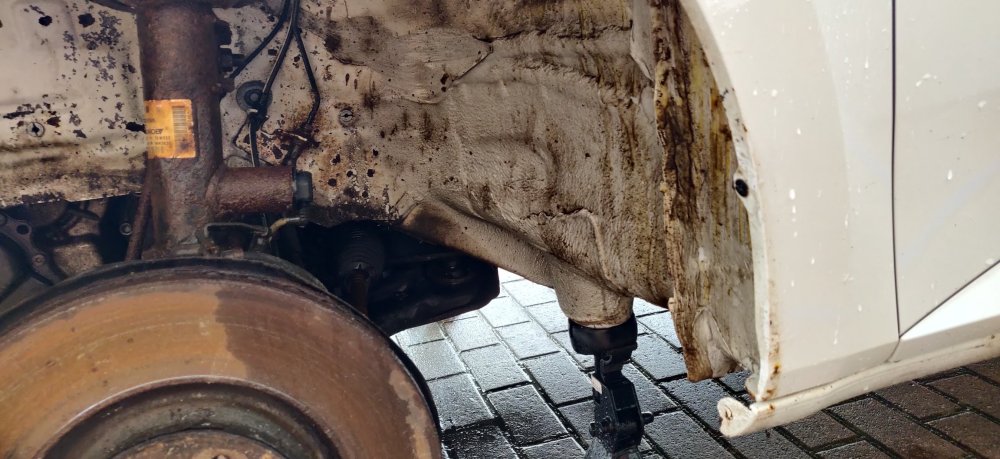
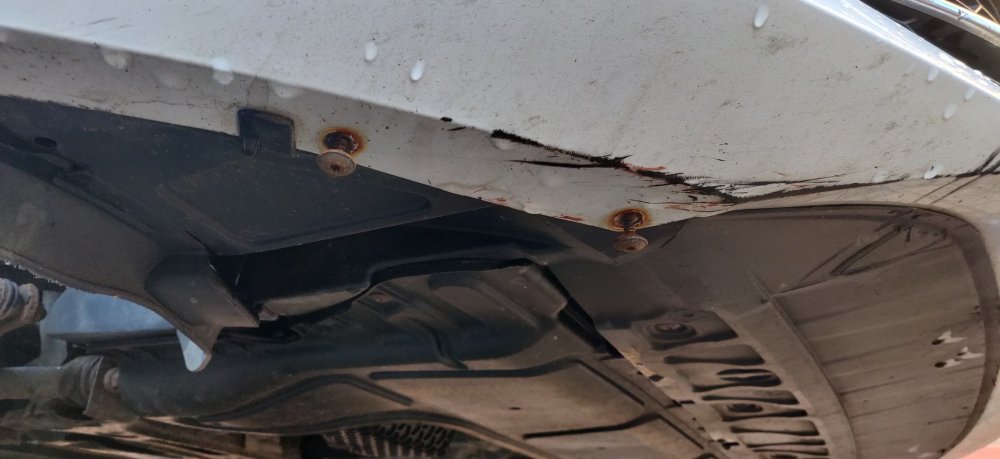
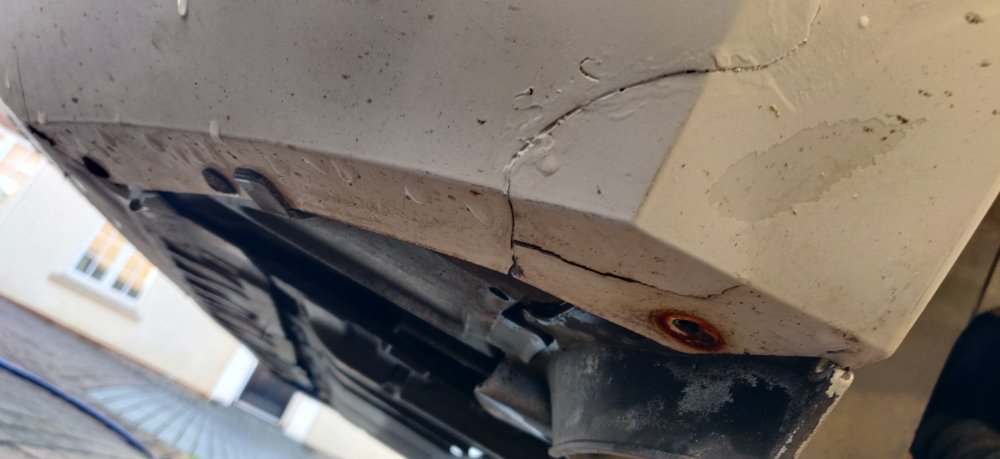
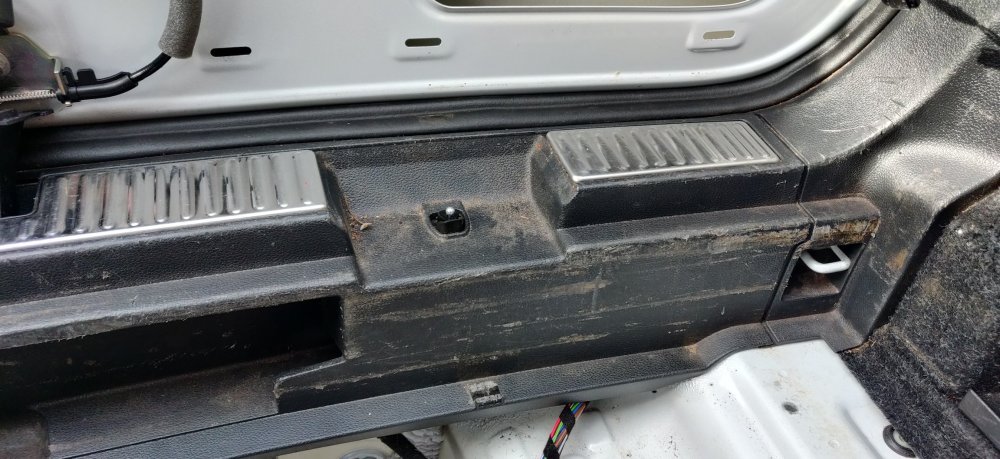
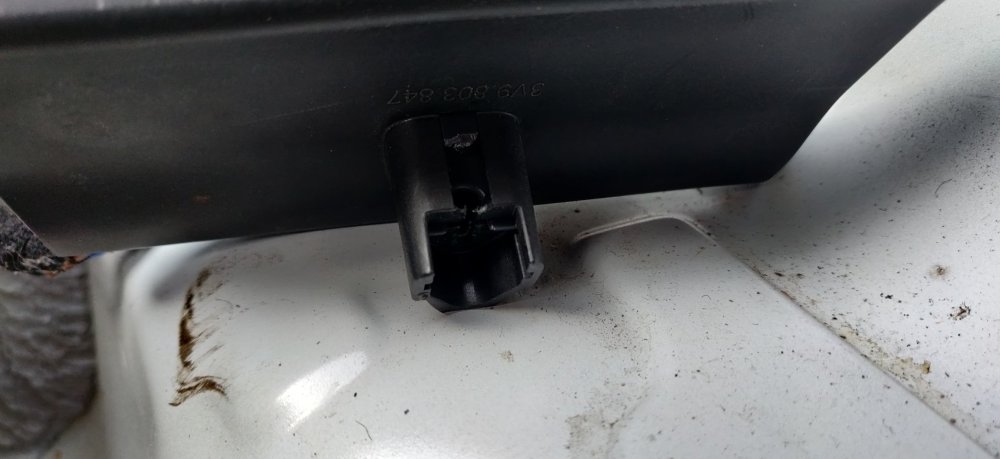
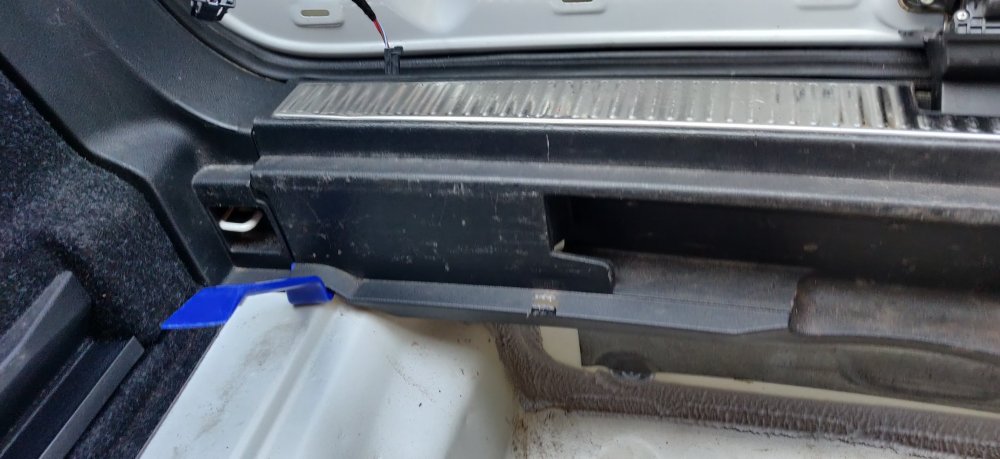
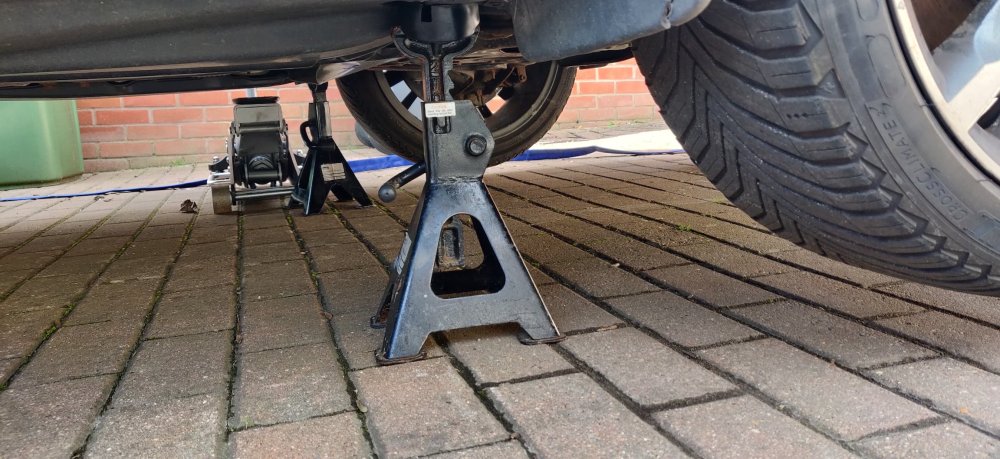
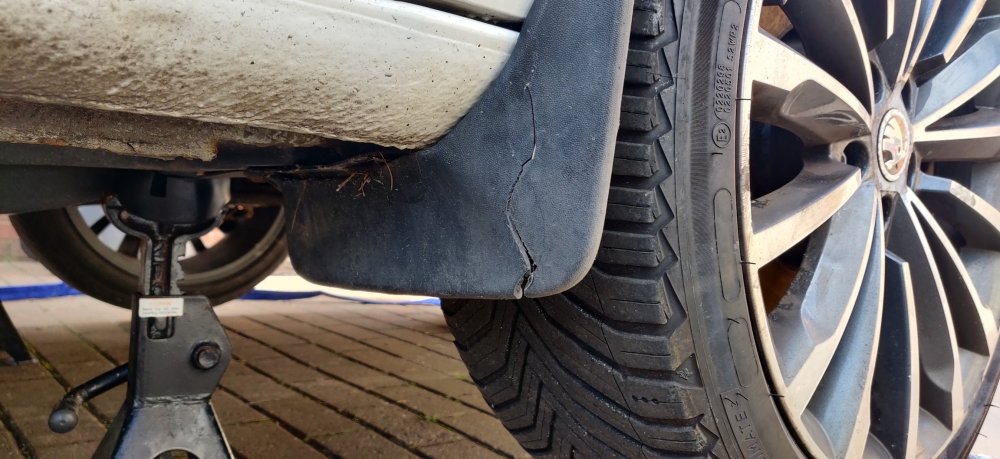
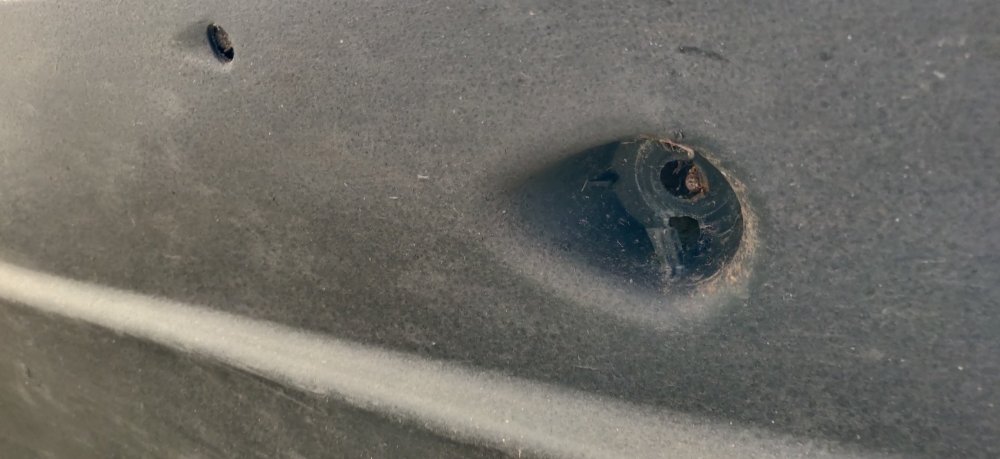
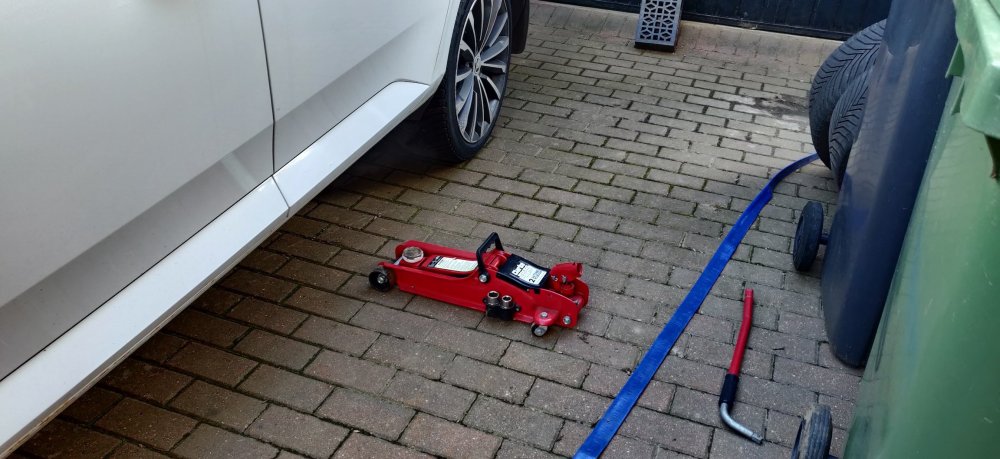
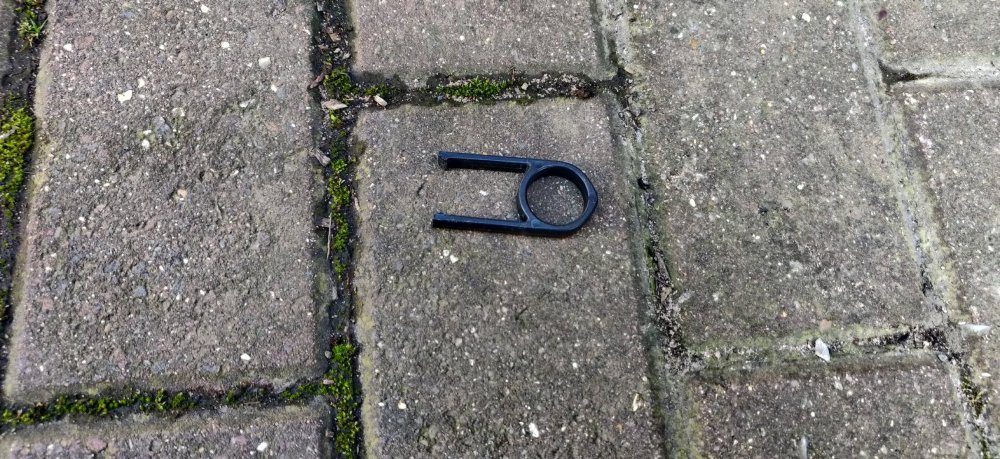
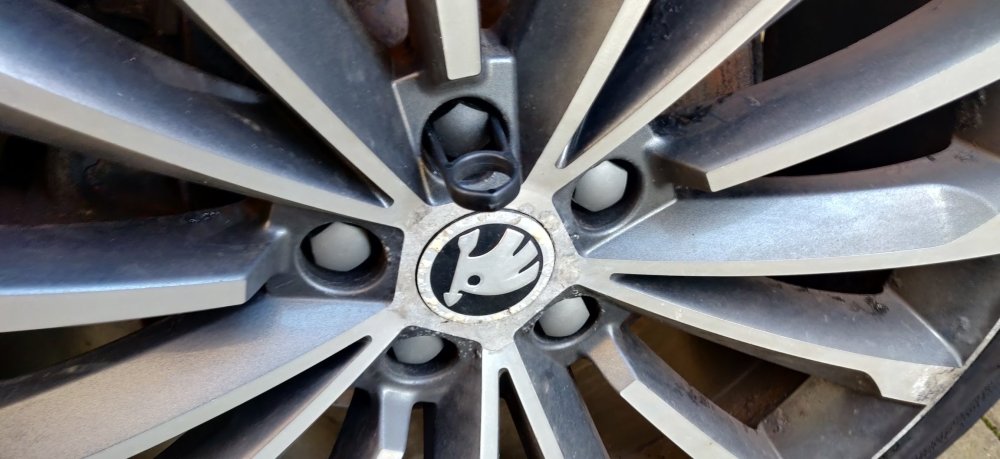
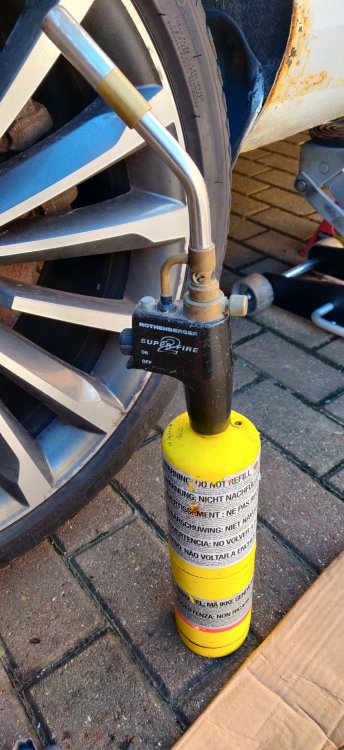
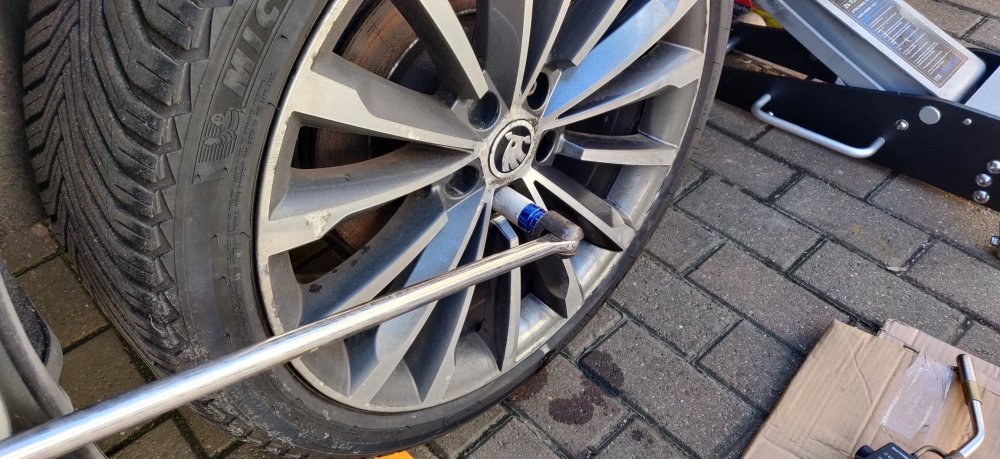
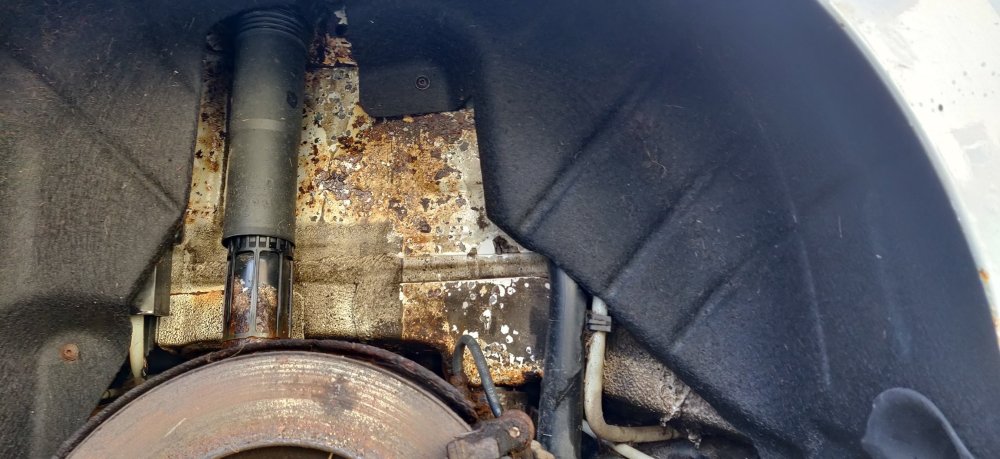
With the afternoon looking bright, I decided to finally do something not with the interior: First pic of the engine bay I guess? I've taken the engine cover off a while ago, giving it a clean. On my wife's old 1.2 Seat Ibiza, the cover also housed the filter, which is neat, but as far as I can tell, as per far too many modern (usually German) engines, its just a lump of pointless plastic. But anyways. I probably should have structured the day a bit better. I decided to randomly try and remove the windscreen cowl/plenum cover: So removed the two metal clips with some gentle persuasion with some Knipex pliers, which is definitely overkill. The seal is then next. It then occurred to me that I would need to remove the windscreen wipers. So decided I'll leave that for another day for now. I've ordered replacement windscreen cowls ages ago now, and you can't see on the pic above the damage to the left of the trim. Want to remove them primarily to gain access to the three bolts each side for the suspension, but also to inevitably give that whole area a clean. But yeah, decided at this point to jack up the front. Got a trolley jack onto the sill, and then axle stands roughly under the rubber bit slightly inwards. Well, the right side had a rubber cover, and the left had nothing: I noticed the jack was awful close to the stand, meaning I couldn't get the axle stand dead centre. Hopefully it's good enough. I'll probably need to source some jack adapters to aid locating them (and to fill that missing one on the front left. Wasn't jacked up super high, but potentially enough to get working on it. Ideally I want the car to be as level as possible ready for the Haldex and DSG oil fills, but that'll be something I'll sort out a little later. So noticed this: In addition to: So the mudflap needs replacing, and there's a missing retaining bit on the right side underside plastic panel. I lifted the panel down slightly: So that's an ominous amount of mud. I'll need to remove these bits and have a big clean out. At this stage, I remember I actually have two jacks, which would have made the process of jacking the front up a bit easier, so did the same process for the rears: Now, from other posts in the forum, there's apparently a plastic trim piece at the rear, but on this car, it wasn't present, so just went and slotted the axle stand in place: Whether I source replacement plastic panels or not, will depend if I can find the part numbers I suppose. So time to remove the wheels. The bolts on this car had those plastic covers on. Luckily I recall spotting this in the garage during my rummaging for other bits in the recent past: Basically then slots in and pulls out the cover: Amusingly, the grey ones on the wheel in the pic above came out without drama, but the black one was on tight. I had to resort to that thin screwdriver again, to wedge the edge of the cover, and once it decided to budge a millimetre, was loosened enough for the tool. The wheel bolts for the left rear came off without any drama, and the wheel came free with a slight pull: The wheel arch itself has probably what could be assumed to be 8 years of wear and rust: The wheel arch on the rear is the same sort of fabric like wheel arch cover that I saw on our old (now dead) Ford Focus, a moisture and dirt trap perfect for this sort of rusting. Don't really know how best to approach this. I'll probably just spray the wheel arches with something to buy a year or two before I think about something more (hopefully) permanent. The bolt for the brake disc on this side looks newer (cross head screw is a usual giveaway), but evidence of grease on bolts and the wheel face is good to see. I've had nightmares of cars simply not having any and being a pain. On that note: I struggled on these two wheel bolts. I've not had any wheel bolts where my Impact wrench has struggled with before, so this is quite novel. The ones that came free: Look like a sign of what happened, caked in rust and no grease! A breaker bar didn't help: Even with me actually standing on the damn thing! So I got a little desperate: I've never had to resort to a blowtorch on wheel bolts before: But this, with some penetrating spray on it, still didn't budge. I had to keep the heat on it a few times, and then resorted to further dramatics: I needed something to extend the breaker bar, and the trolley jack handle fitted the bill. One bolt gave a hell of a crack, and the other eventually loosened with some forceful belly flopping of the super long bar: Absolute ball ache. Amusingly, the wheel itself just came free with a pull akin to the other side, so either no grease, or someone just deciding to go as RFT as possible, or both. The arch is the same as the other side: I suspect I'll need to remove the wheel arch to gauge properly the state of the arch, but what is seen here is probably the same for the whole arch, just a bit tatty really. The fronts were nowhere near as bad as this. The bolts came free and the wheel fell off of the hub, so plenty of appropriate use of grease there. I was left a little miffed with that rear right wheel, so left it at that. I'll need to remove the front wheel arches anyway as part of addressing the rear washer jet pipe issue. So in advance of this, I pressure washed the arches: The rear arches will need to be taken out to truly get them sorted as they kept coming out dirty constantly, probably the years of dirt buildup. The front wasn't as bad: For the front right arch, the pressure washer stripped off a tiny bit more of the paint near the mudflap. Another thing for the poor body shop to sort out once I get to that stage. Slapped a bit of corrosion block grease on it for now. So here she is waiting to dry out a bit before I close the bonnet and the day: I feel like the rear axle stands are a little more to the front than I'd like, but I assume most of the weight of the car is at the front, so unless the engine is removed or something, I'm hoping its stable enough. There's technically nothing to stop the car being serviced now. Again, I probably should plan this, but I'll probably end up just doing things in an adhoc manner. Hopefully, I'm still able to reach the engine bay ok with the car raised, as I've said in previous post, I'm on the short side, so I'll probably have to rely on stools and what not for when the battery needs removing for the DSG bit. Once I've calmed down a bit, I'll probably clean up the trim I bought in the house, and that's that for the day. Maintenance: £1794.17 Upgrades: £887.10 Miscellaneous: £608.14


-
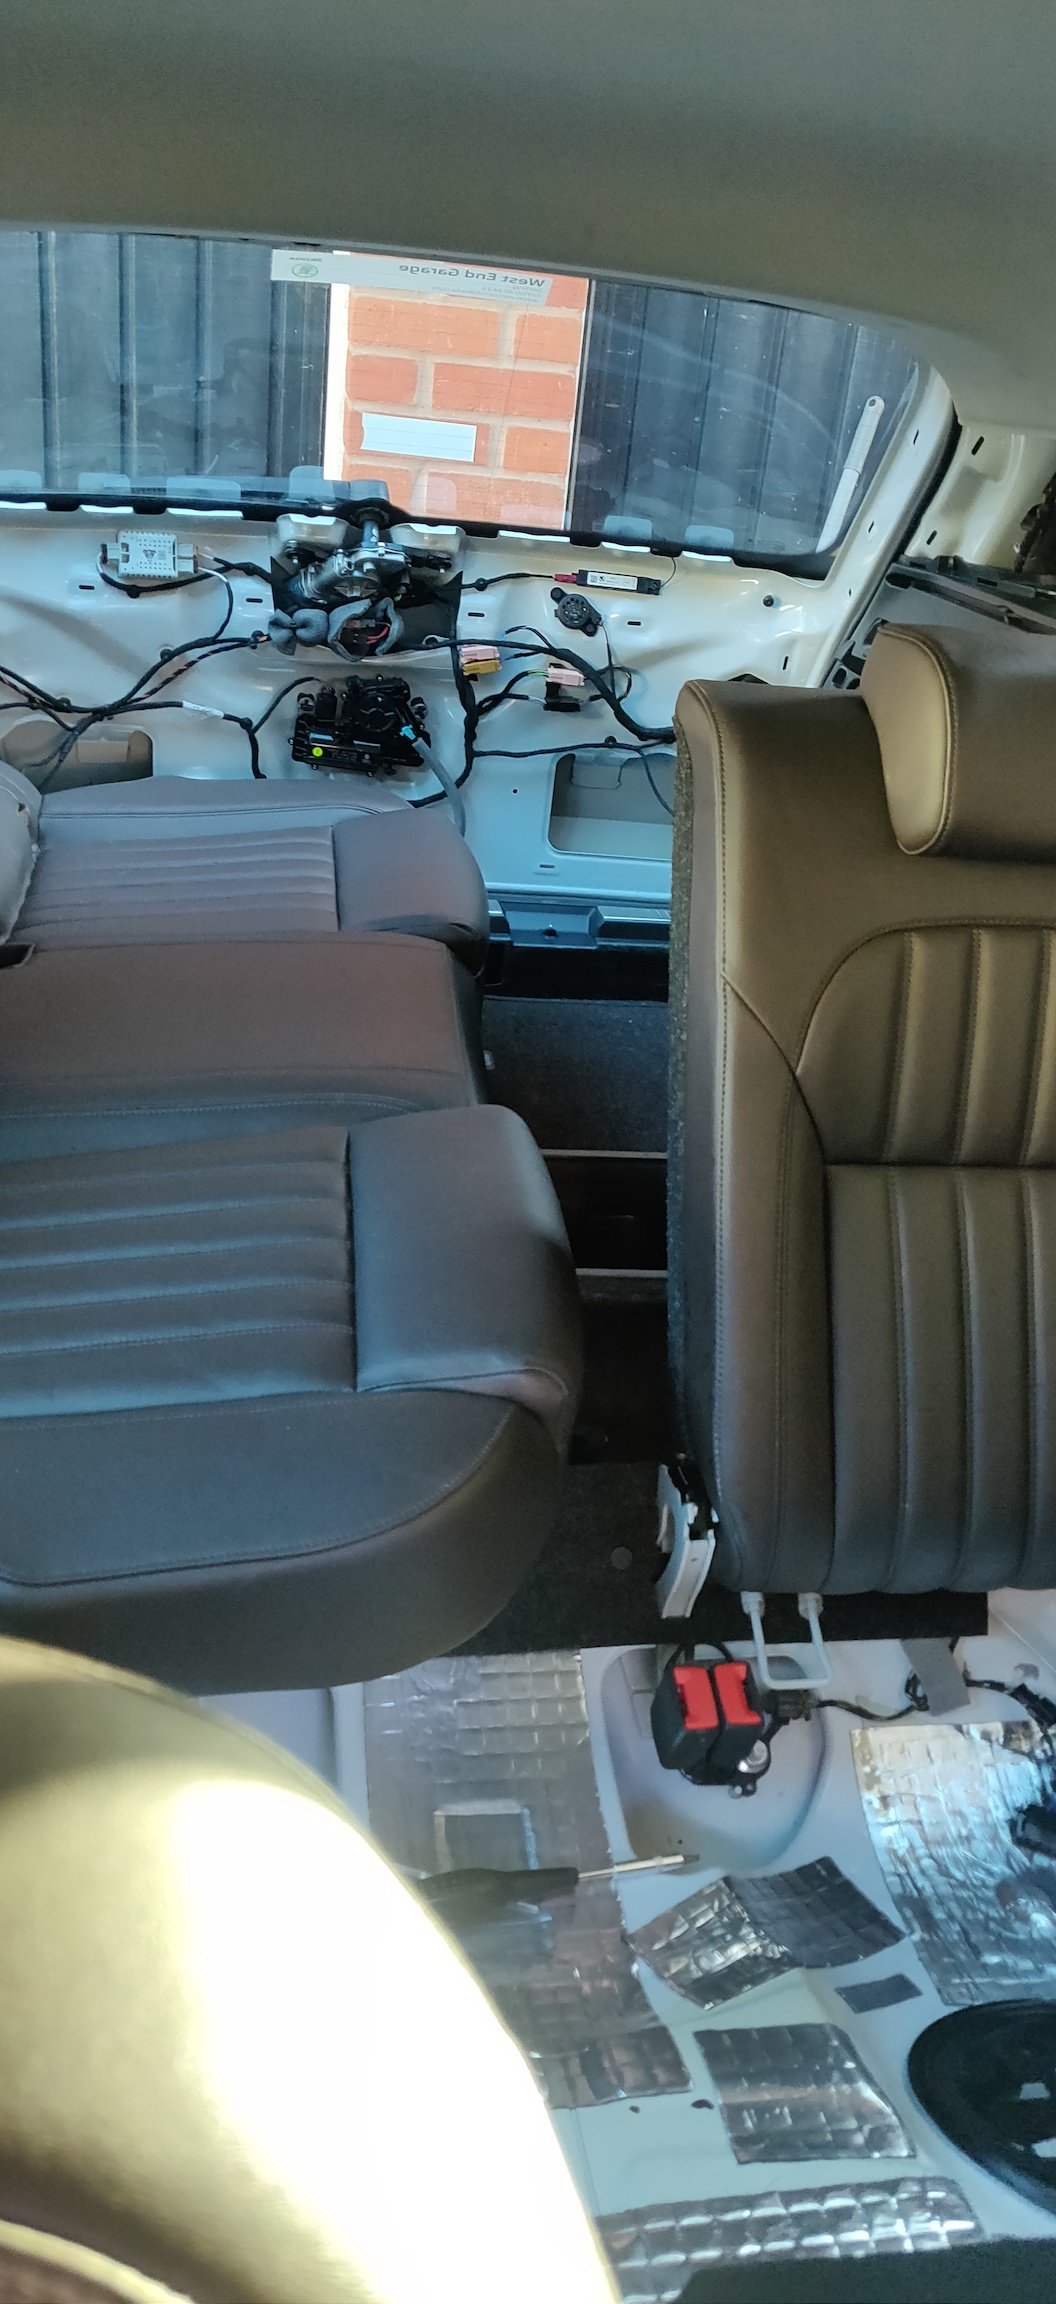
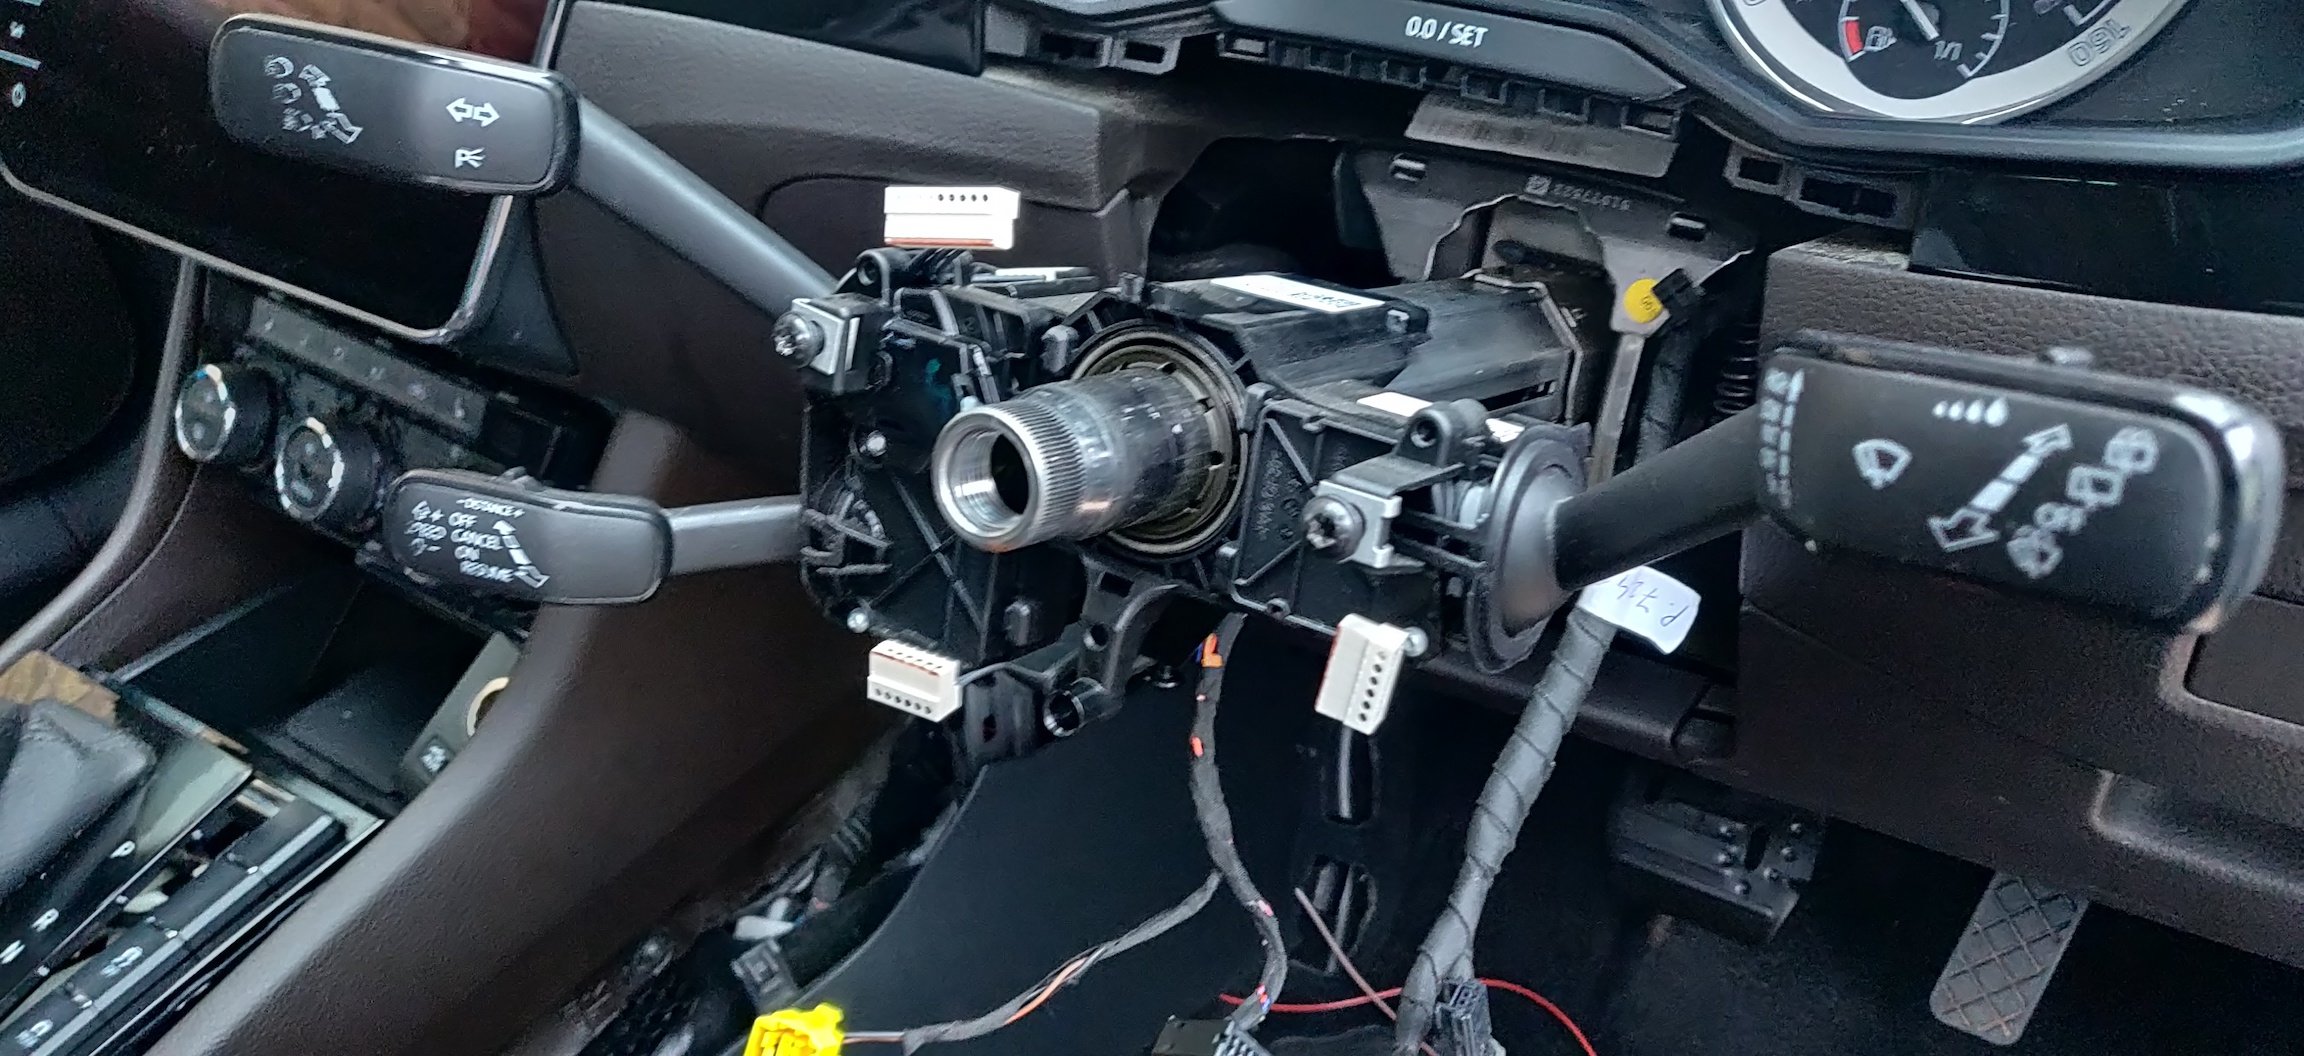
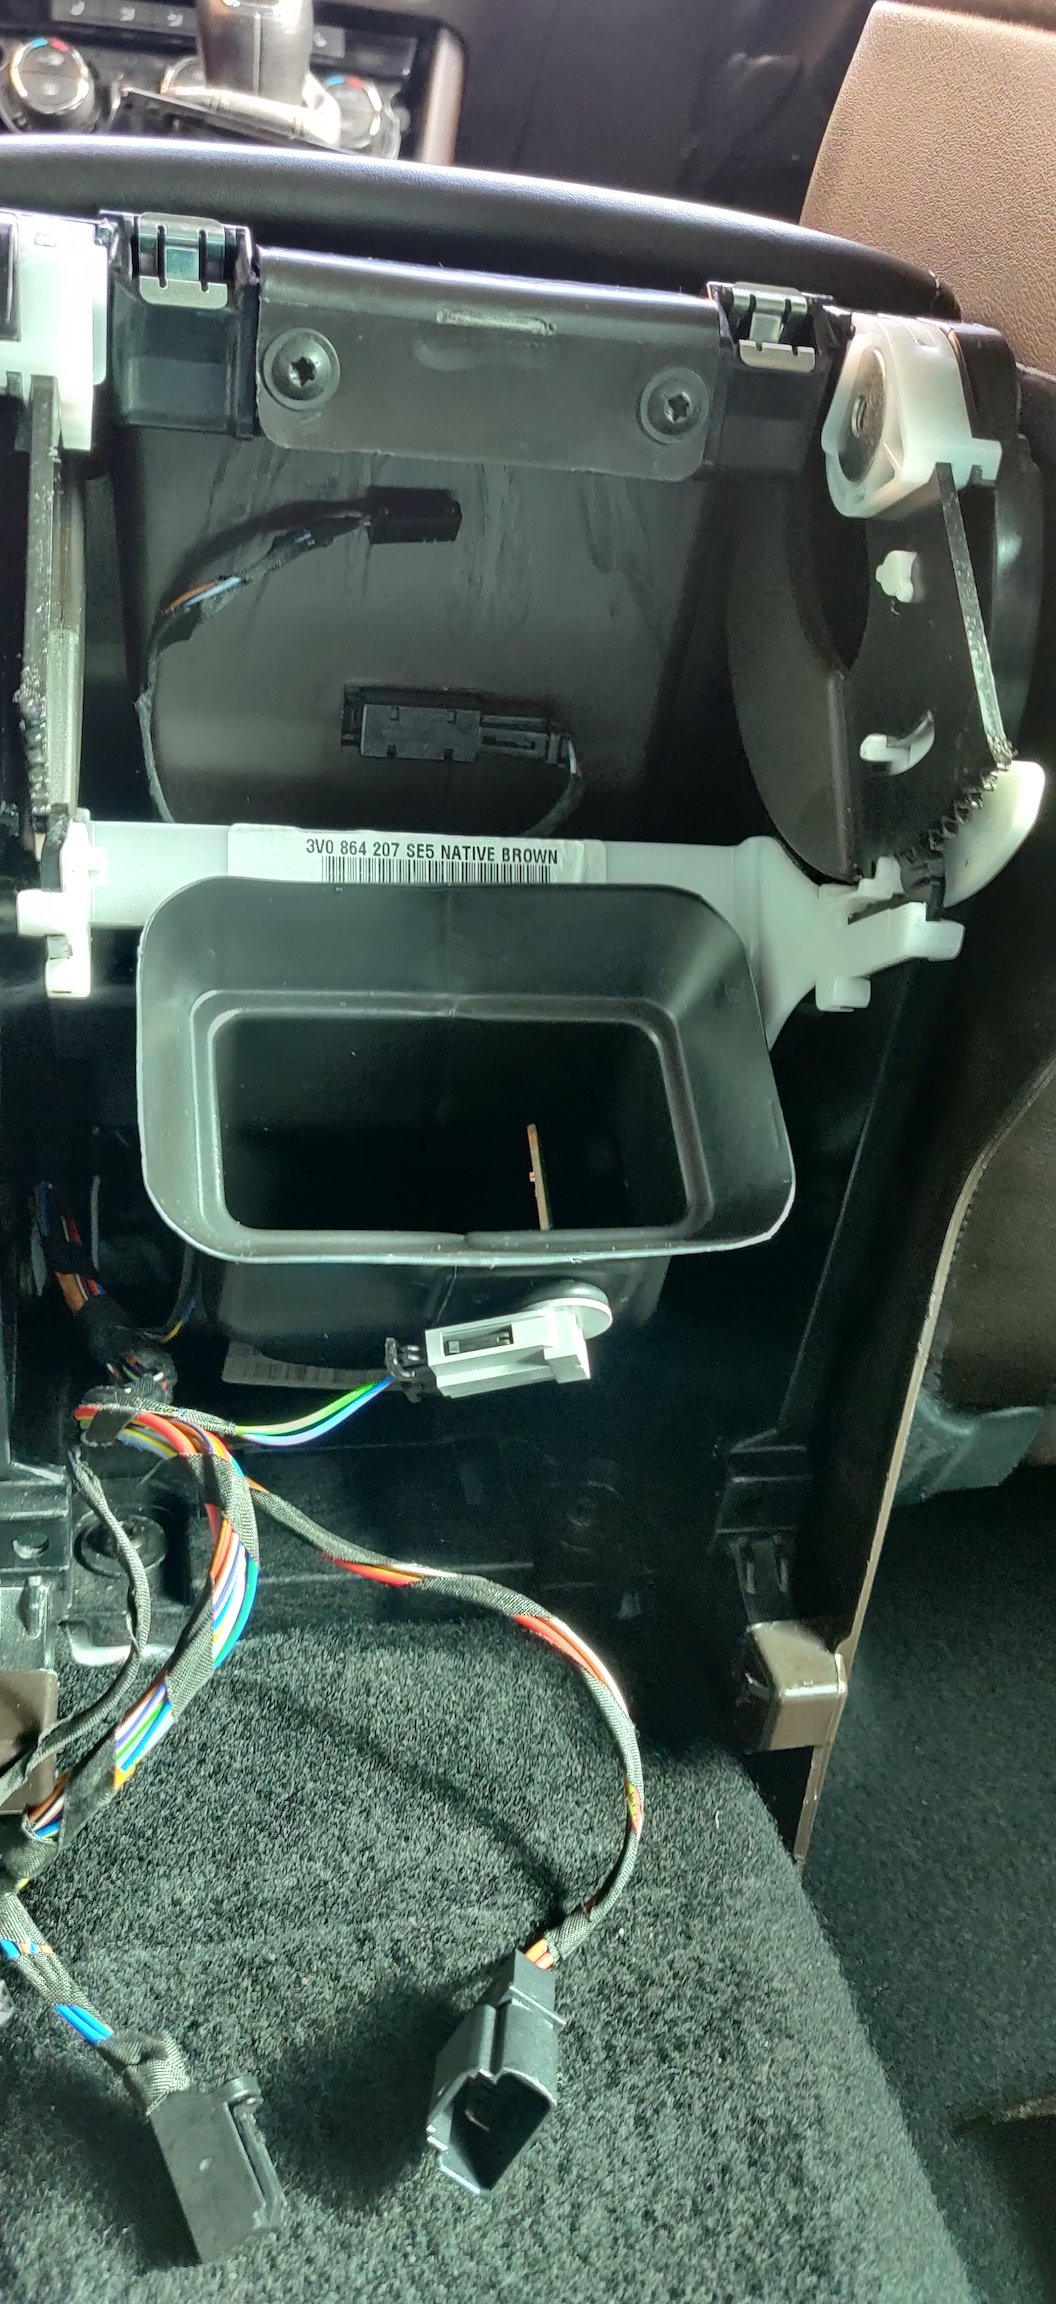
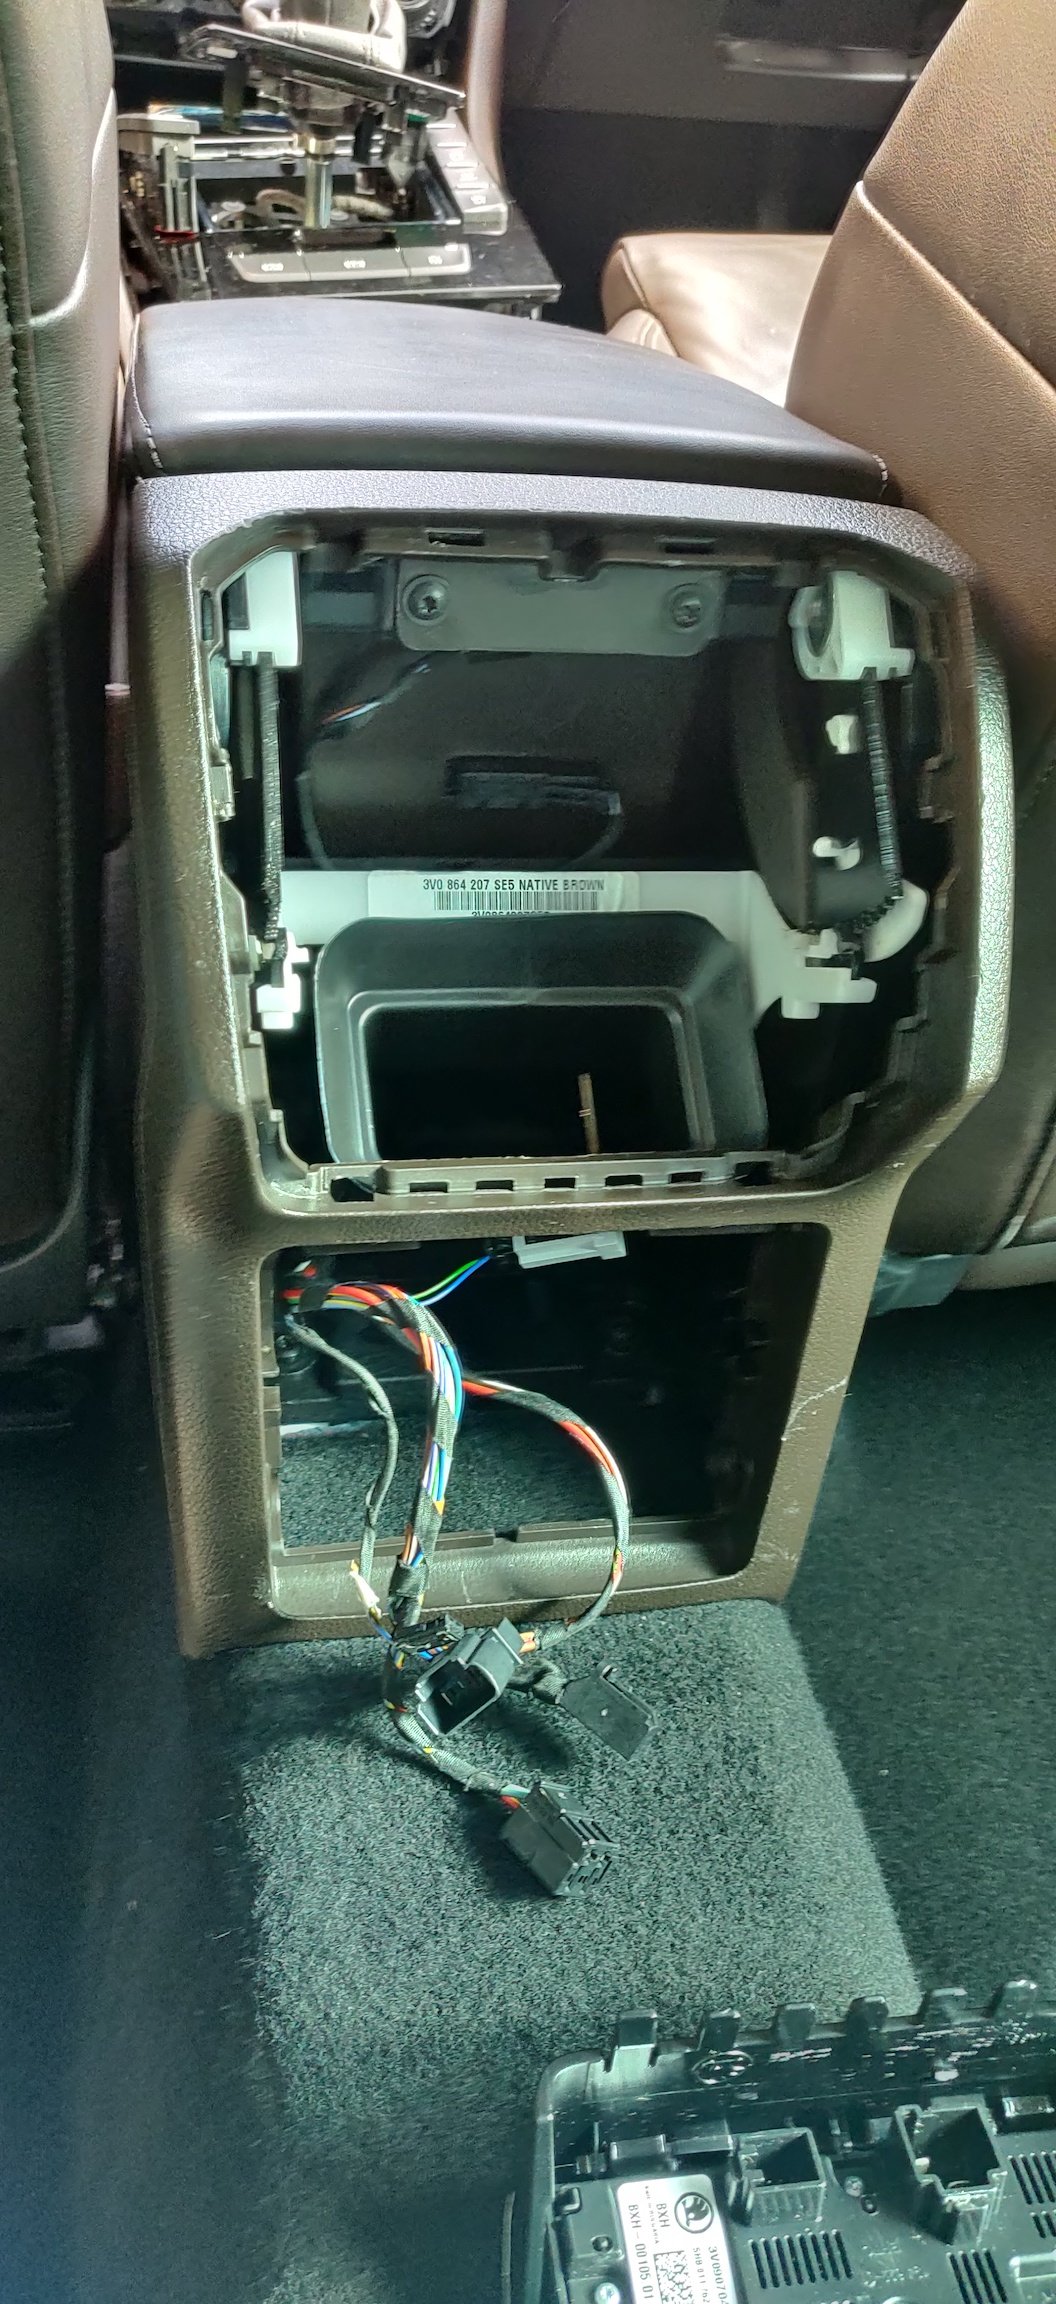
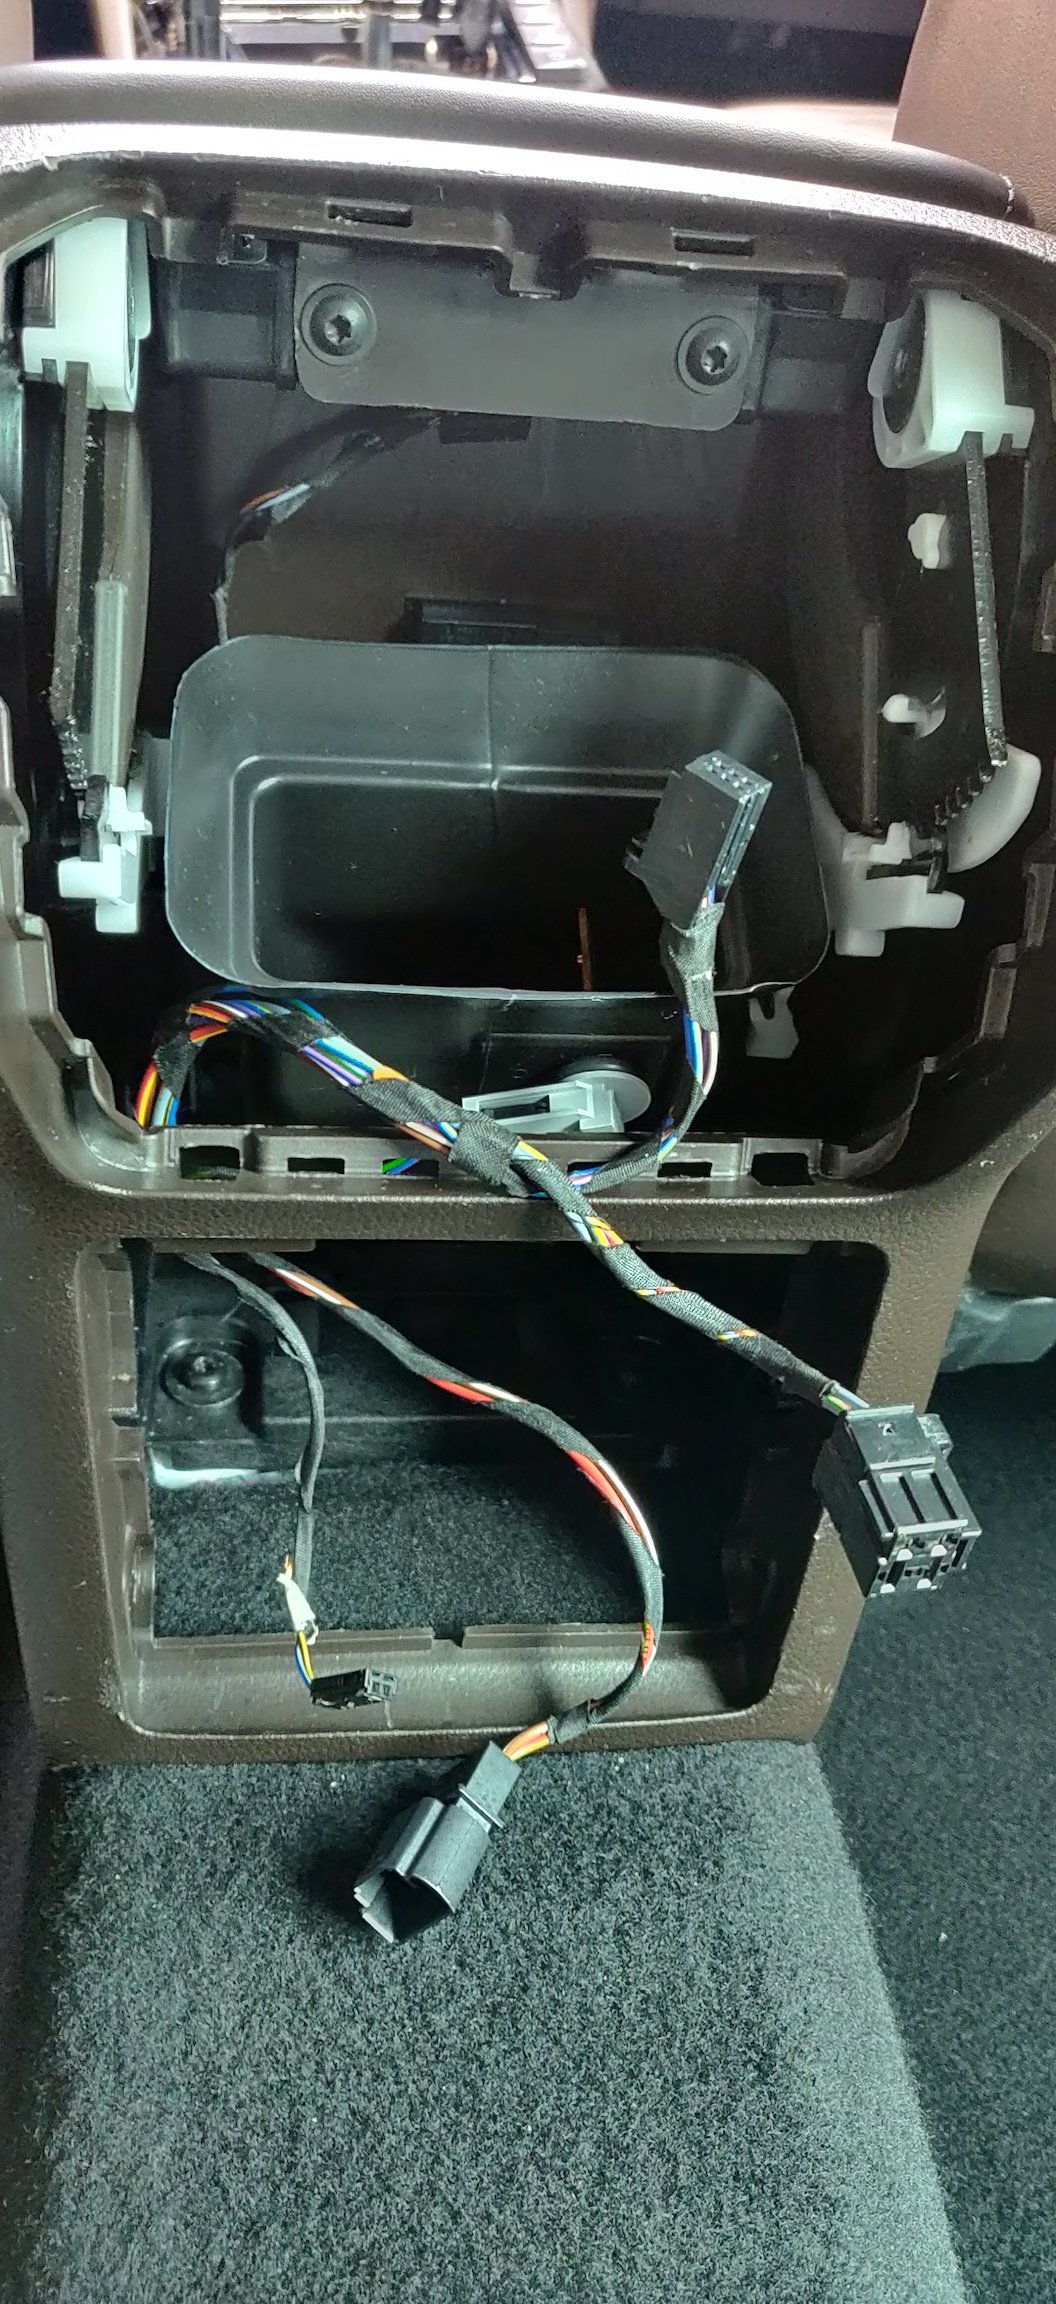
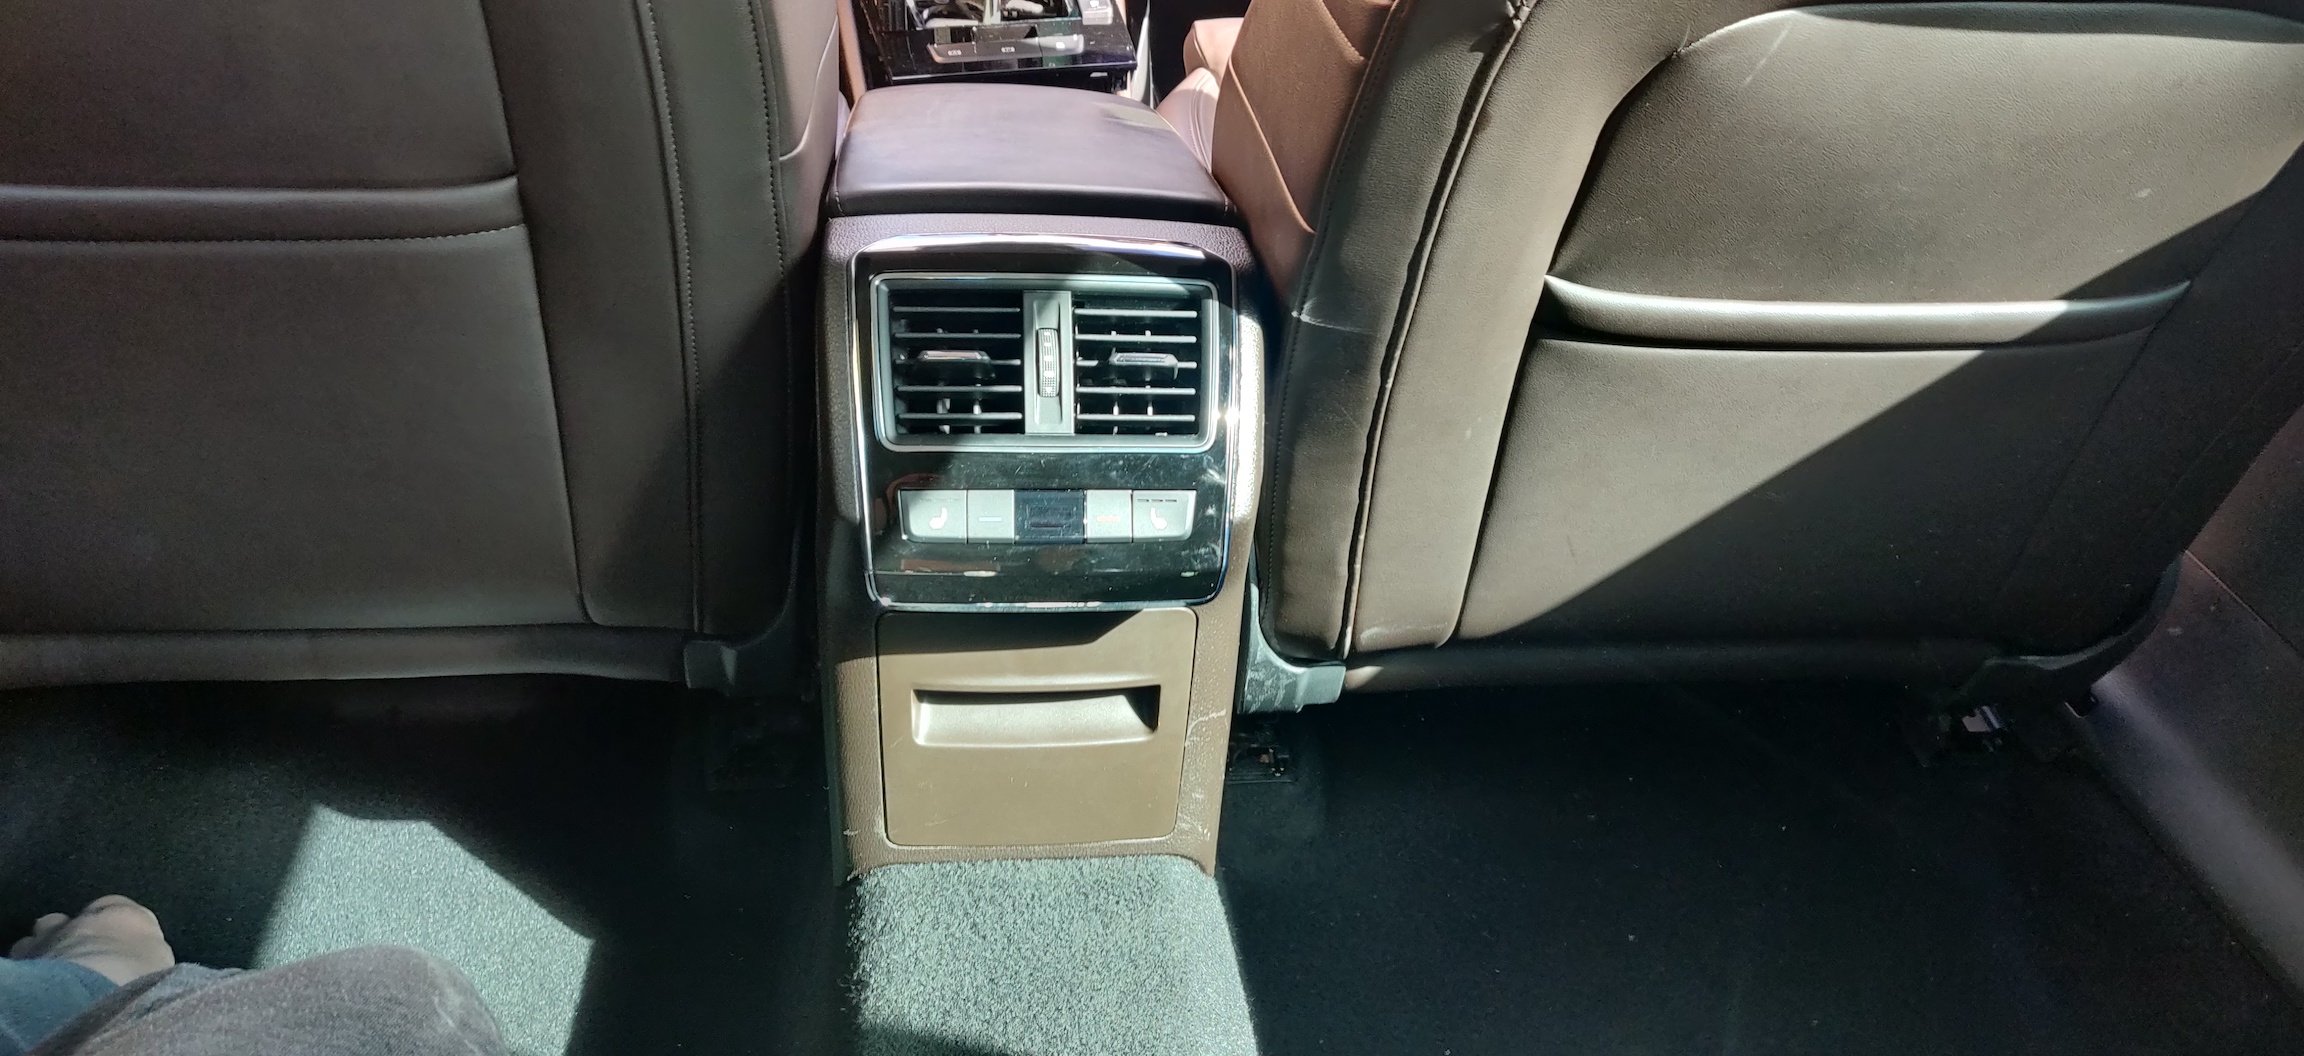
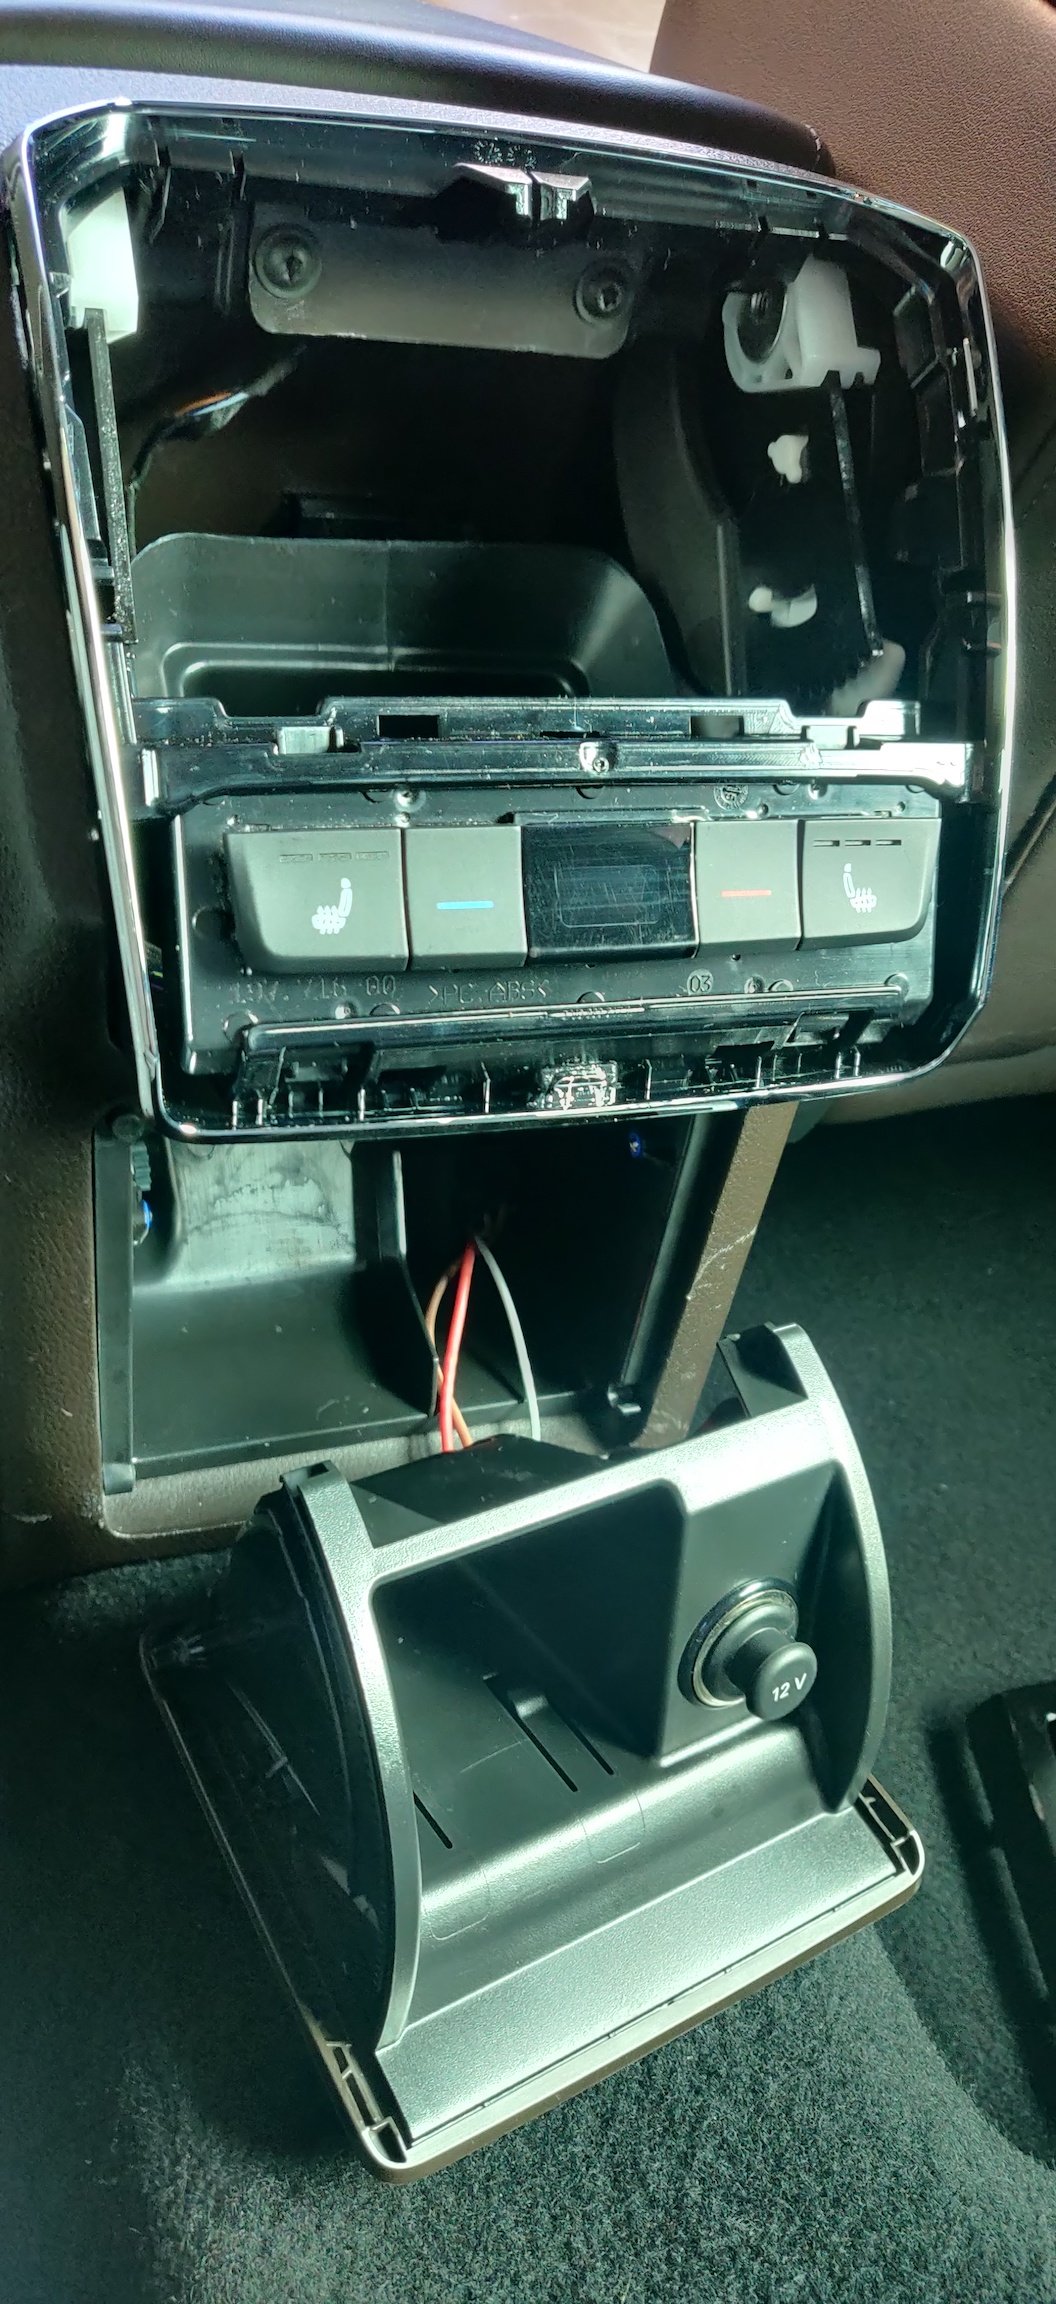
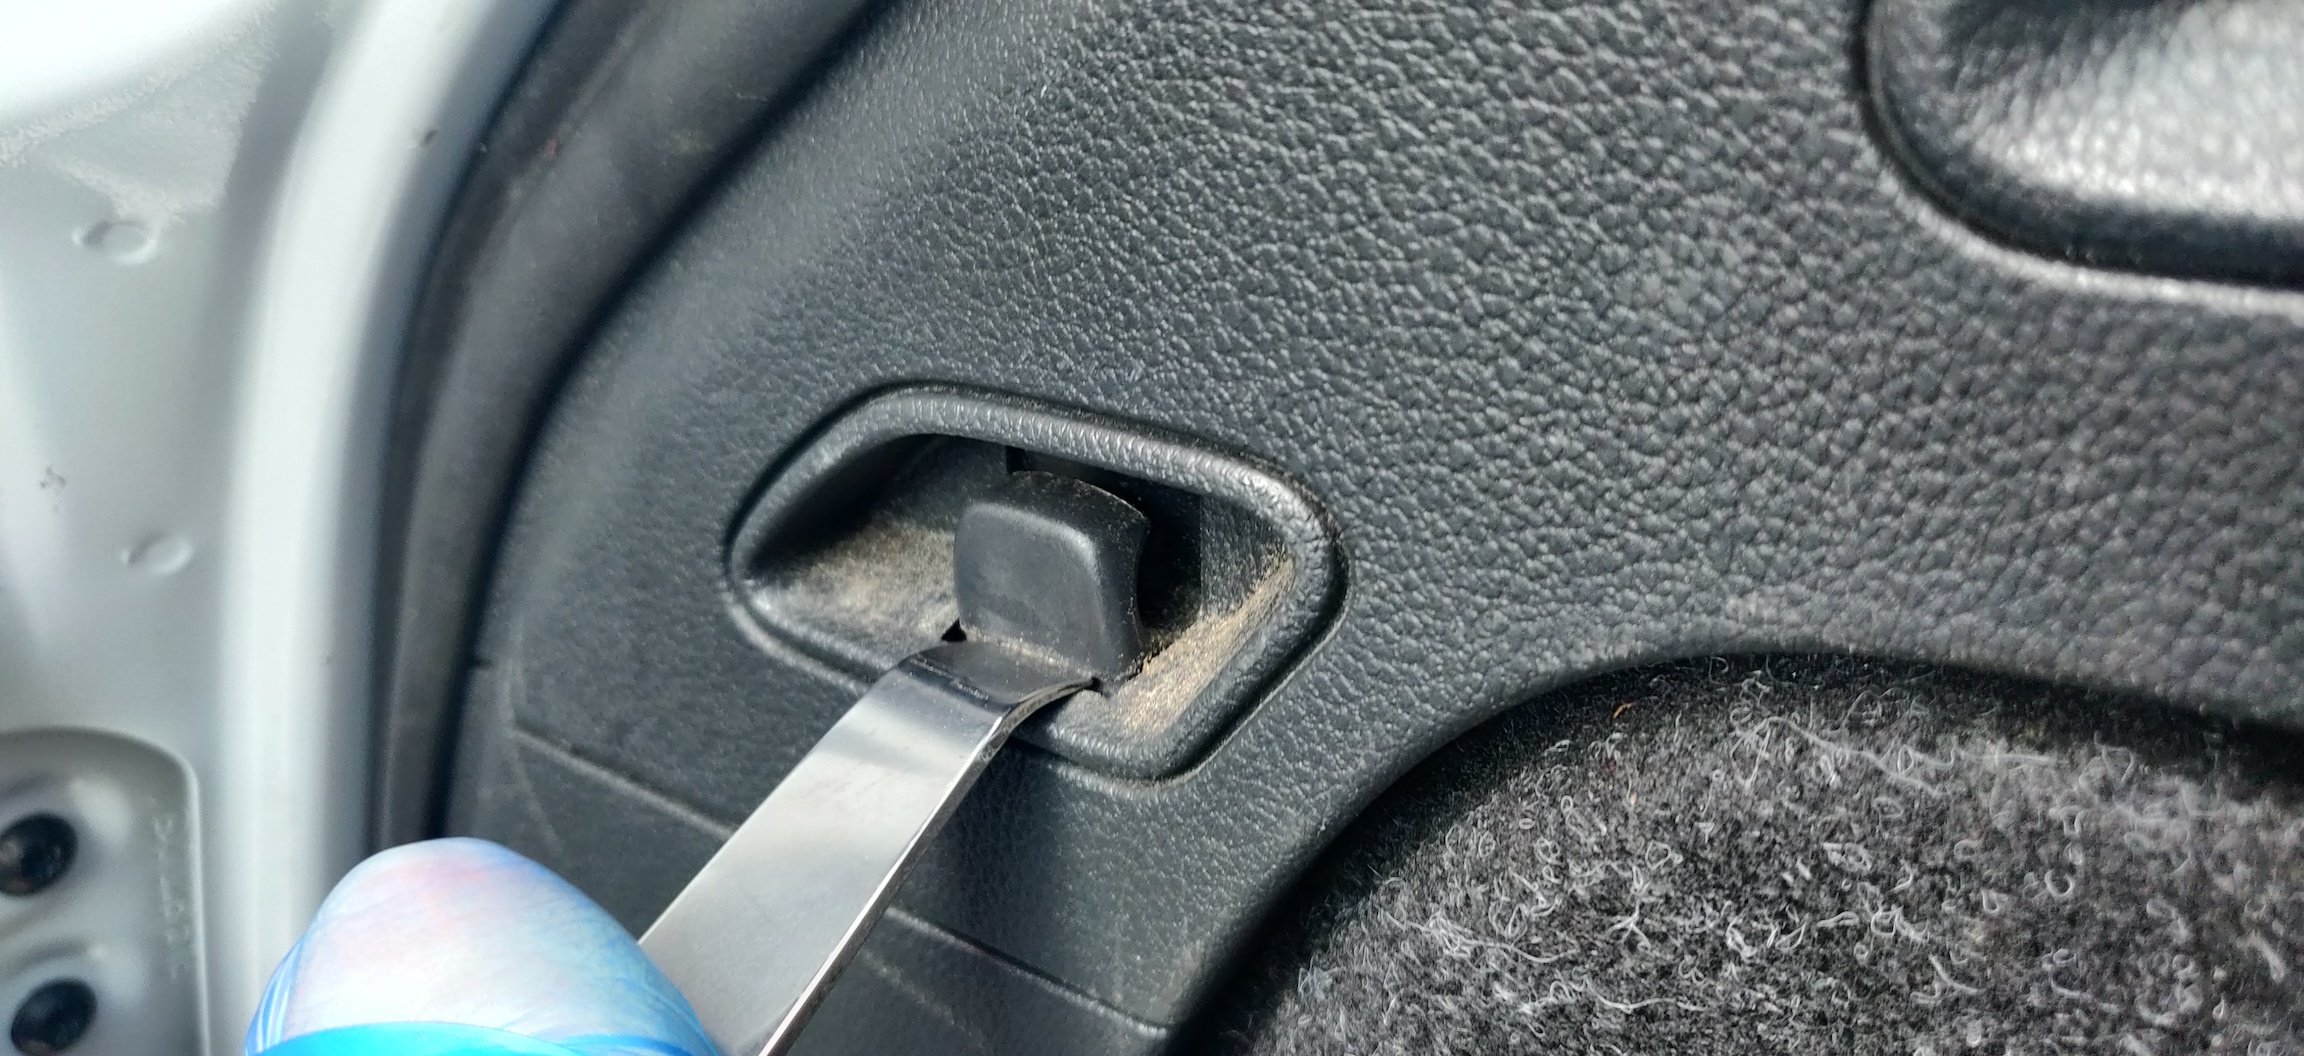
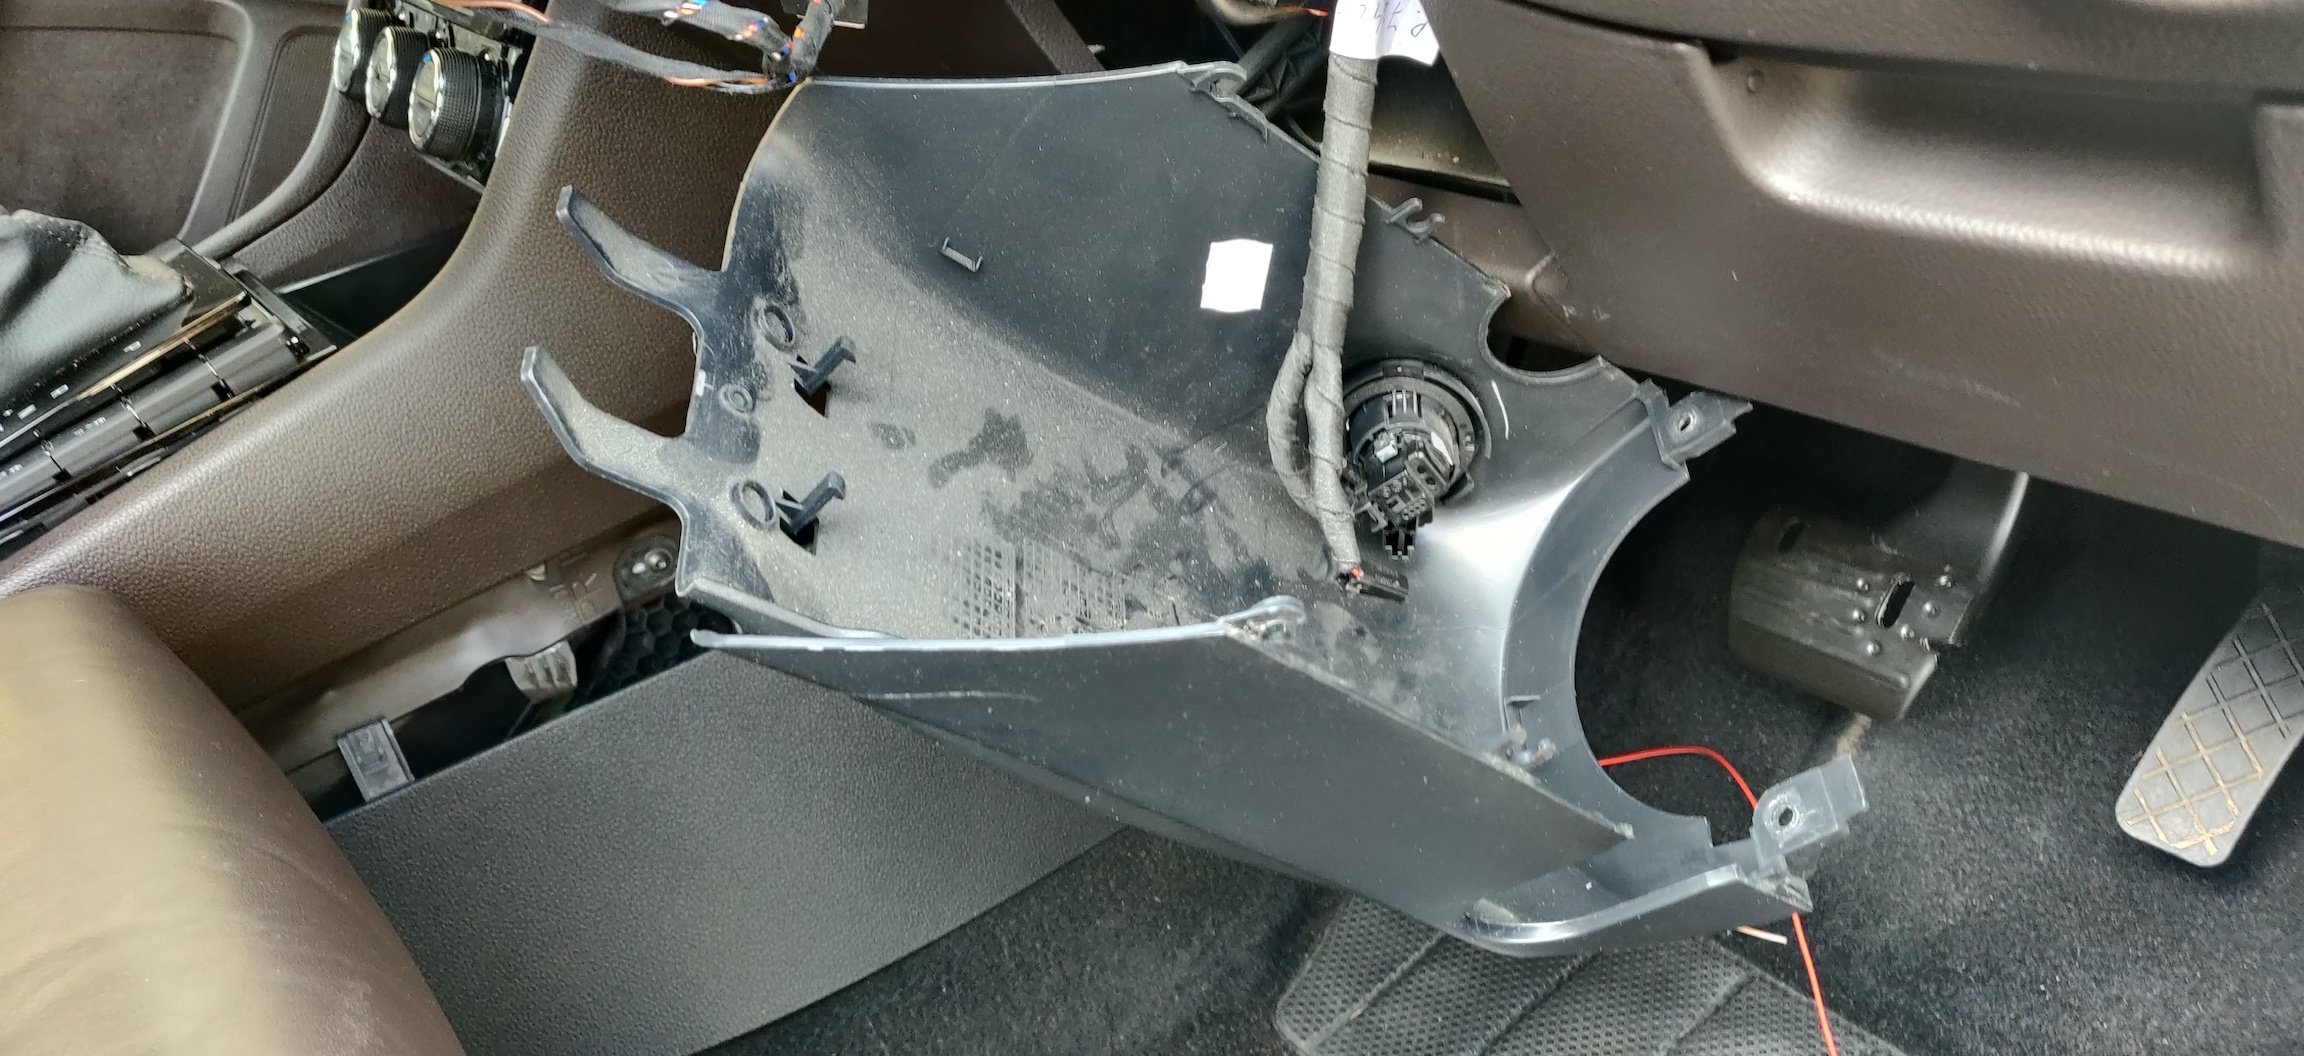
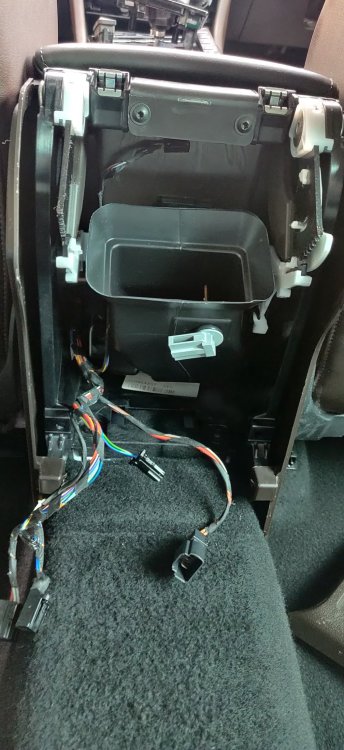
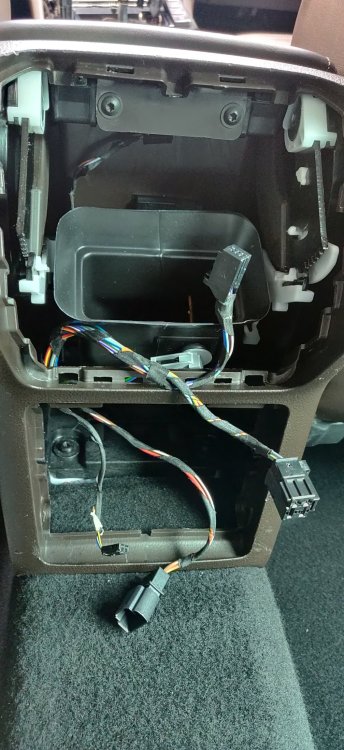
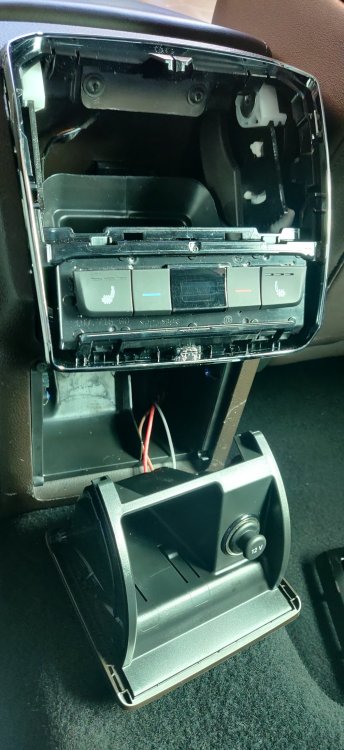
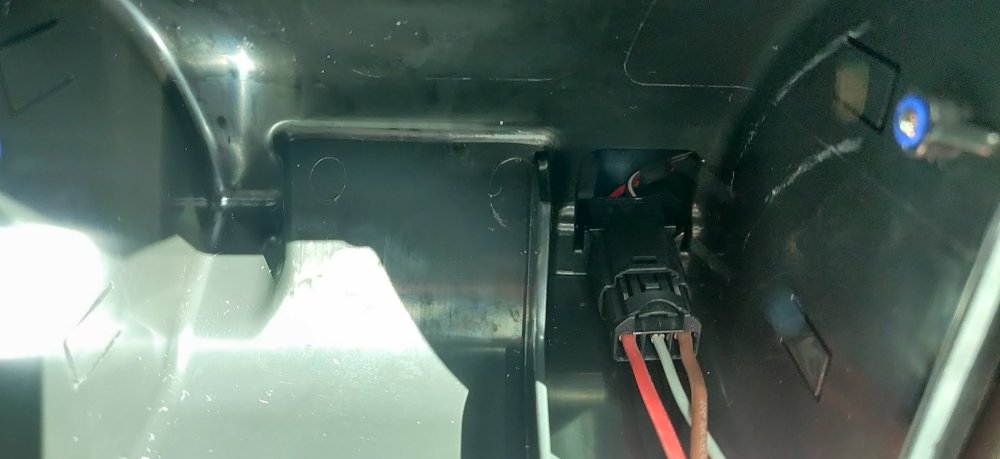
Another long day, easier because the sun was out especially in the afternoon. Was a bit windier in the morning, so spent that within the car. Started to reassemble the rear of the centre console. Don't make the same mistake I did and forget to put the air vent back in: I then realised an additional mistake: Luckily I got the rear vent and tried to roughly guess where it would end up, and the air vents were nowhere near one another. So I removed the rear trim (again) and rejigged the air vent: It finished up much higher, and more importantly, more in line with the rear vent where the foam was now seated as expected. Did some rejigging to make sure the wiring is in the correct place, two connectors for the rear climate controls, and the light and 12v socket connector at the bottom: The ashtray/storage/12v socket bits comprises of 3 bits; the outer trim, which clips into the tray, which together clip into an inner part. The inner part was a push fit into place: The pic also shows roughly locating the top part with the rear climiate controls already inserted into the replacement trim purchased a few days back. The pic also shows the actual tray connected up. Forgot to clip the connector into place: There's a couple of tabs that keep the connector in place, which I didn't sort out the first time, which led to what I assume is the tray fouling the wiring and not closing fully. Once that was sorted, the rear vent light connector was plugged in, and it attached to the piano black trim, and that all clipped into place: The rear is pretty much done, feels like a good milestone! With the back of the car actually pretty clear and empty, and me being rather short, I decided to crawl into the boot and start having a go at the trim, which I'll need to eventually remove in order to install the remaining Bowden cables that connect to the rear seats. So firstly, some of the easy bits: The rear hooks that fold down expose some Torx bolts (as opposed to screws). These are T30 in size, chunkier than others such as those in the centre console, but that's presumably due to them being part of the hook assembly. The blank where the rear seat lever goes is slap bang in the middle, which we'll get to later. The rear most hook needs a bit of contortion, where it needs to be pushed in a bit, then lifted up slightly: This will either then pop out and fly across the boot, or be in a position to be coaxed out: Revealing a T20 screw: In addition to the this one, and the two T30 bolts, there is also another T20 screw at the front most of the trim: At this point, I started to loosen the trim: It pops out from the bottom along a few places, and the front also clips out near the window. It didn't come free though, so started pulling additional trim, specifically, the D pillar trim: Did this on the other side as well, as it came out relatively straightforwardly: Eagle eyed readers may notice the remaining the T20 screw on the trim: So once removed, you can then pull the trim free, and separate the electrical connectors. For the right side, one for the 12v socket, and one for something I'm not actually sure about: The other side also has this unknown connector, in addition to the charger for the removable torch thingy: I didn't take anymore pics around this point. To free the trim completely, you also need to undo the M10 spline bit bolts attaching the rear seat belt anchor point to the chassis. This is then weaved through the trim opening. I bolted the anchors back in just in case. I didn't take pics primarily because of this: The blanks that need to be removed in order to install the seat release levers: These were a PAIN to remove. They are kept in place by essentially two tabs on the trim, but they were an absolute nightmare to get free. Some force with the trim removal tools and some perseverence seemed to be the only way to remove them. Anyways, with that done, I took the trims back into the house to give them a clean up. They're a little scratched up, the life of a fully utilised Estate I suppose. I took to then distracting myself by taking apart the lower steering column trim. Three T20 screws a la lots of the interior screws: A couple of electrical connectors, with the engine start button connector being a little more awkward (thin screwdriver as per usual). This leaves the clock springs as seen from below: I started to connect up the Kufatec loom: Before I realised it wasn't actually going to fit into the clock spring because it's the non heated steering wheel. I took that as a cue to take a break, coinciding with lunch. Maintenance: £1794.17 Upgrades: £887.10 Miscellaneous: £608.14


-
Happy to be the guinea pig regarding the o-rings. I'll probably source a few drain plugs, or entertain more drastic options if I find it all too much of a faff (read: replace sump).