Leaderboard
-
silver1011
Resident Member18Points23,782Posts -
Skoda_newby
Members14Points510Posts -
shyVRS245
Locked13Points0Posts -
trundlenut
Resident Member11Points10,659Posts


Popular Content
Showing content with the highest reputation on 02/04/19 in Posts
-
2 pointsI've just fitted a RS Reflector Bar to my L&K, which I think improves the rear end appearance. There are 3 parts involved, total cost from my local dealer inc vat - £91.63: Protective bar - 565807423A9B9 - £58.34 ex VAT Reflector - 565945103 - £9.01 ex VAT Reflector - 565945104 - £9.01 ex VAT Fitting does not require the rear bumper to be removed. There is some minor modification involved in the fitting as the reflector studs protrude through the rear of the bar, that is not beyond the means of an average d-i-yer with a 13mm drill and a dremel taking around 1/2 hour, simply because the RS bumper is not quite the same as other Kodiaq rear bumpers. (Yes, it's due a first wash!)
 2 points
 -
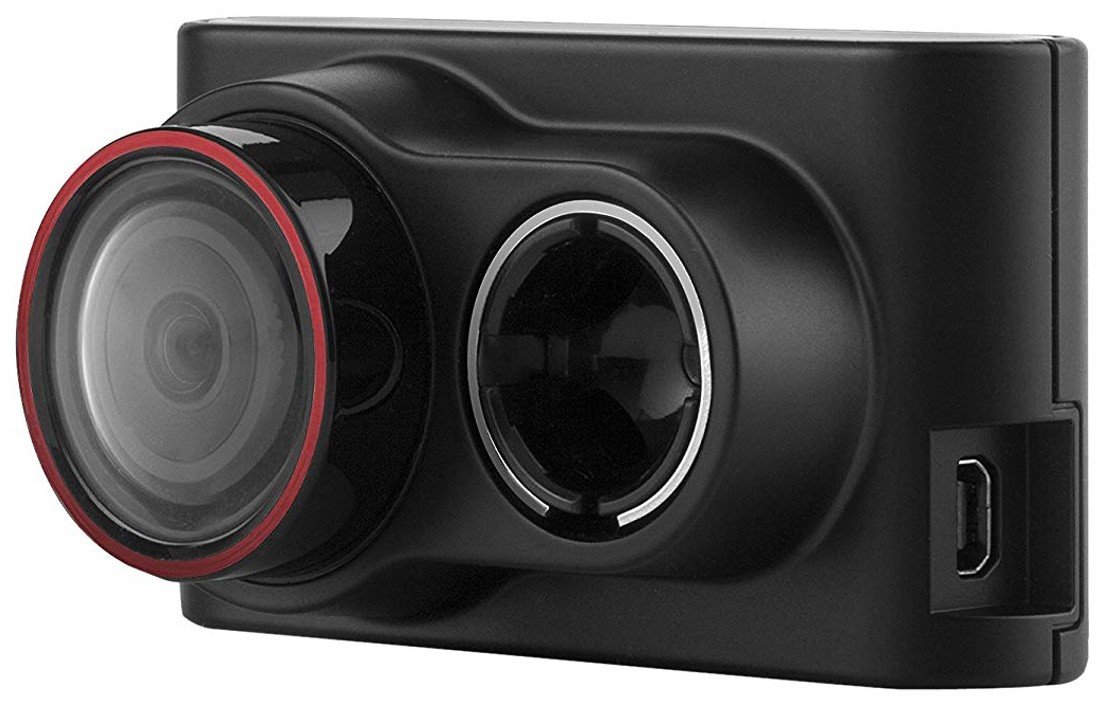
Sharing my experiences after fitting a Garmin Dash Cam 30 to my 2018 Skoda Kodiaq Scout... About £80 off Amazon including a 64Gb micro-SD card.


 1 point
 -
Wanted to add my building/retrofit/cool-stuff experiences. Always hard to find detail and pictures in the wild so hoping this helps others. Badge and Emblem Replacement - Major Reason - I think the Black looks much better on the Steel Grey body paint than the factory chrome. Tips/Tricks/How-To 1) Give yourself plenty of time and make sure its not going to rain......the warmer the better as it makes removal easier. 2) Hair dryer on a low-setting will help to "loosen" the glue. Well its not glue its more like double-sided sticky-pad material. My car is only a month old so it may be harder on older cars as the adhesive will have set and the padding may come off in little pieces instead. 3) I used dental floss to "saw" through the glue holding the badges and emblems in place. You can use minty-fresh or plain dental floss :-) The front and rear badge have A LOT of the sticky-padding so keep working away at it. I found using an old ATM Card allows you to pry it off and doesn't scratch the paint. There are also 3 protruding plastic notches on the rear of the badge so it won't come off as easy as the emblems. Be warned it is near impossible to get the badges off without snapping them. The joy of the black protruding notches is that it will only line up and fit one way......and that's perfectly straight. 4) I used blue masking tape (painters-tape) to line up the original emblems as once you remove the sticky-pad and the residual adhesive you WON'T see the outline of the old emblems. After the work and cost you don't want to screw it up and have the emblem not straight........it'll **** you off every time you admire your work!! 5) Cleaning off the residual adhesive I used rubbing-alcohol and a CLEAN buffing cloth. Its easier if you can grab a little piece of the pad and SLOWLY pull it off as it comes off in one nice movement without the need to scrape off the adhesive with a fingernail. 6) Shine a light and look for any imperfections, you want the surface to be spotless, clean and dry before fitting the replacements. The joy of rubbing-alcohol is that it dries quick and leaves no residue. They're pretty much the factory-part so remove the rear protective strip and then line it up and press hard on the individual letters. I also used a paint-roller to roll over the emblem before removing the protective clear plastic just to be sure it was stuck on nice and flat. 7) Link for the badges and emblems. You can buy individual or a "pack". I opted for the body-paint coloured front and rear badges and the 3-pack for the emblems. http://www.superskoda.com/Skoda/OCTAVIA-III/Octavia-III-original-Skoda-emblem-INT-version http://www.superskoda.com/Skoda/OCTAVIA-III/Octavia-III-original-Skoda-MONTE-CARLO-black-emblem-set-´SKODA´--´OCTAVIA´--´RS-245´
BeforeRear.thumb.jpg.8dc7b4eb185ffd9d07c3bbc858281d93.jpg)
AfterRear.thumb.jpg.e6896e18b469ff44d06d3d6563de3c20.jpg)
BeforeFront.thumb.jpg.7d194cc3458f686e4c0ce4430fa52c8f.jpg)
AfterFront.thumb.jpg.636dd8f093c1f4db383ec6bd1b06c2e1.jpg)
AfterFront.thumb.jpg.76b1cc454027e62f01cc462ab67bd3a4.jpg)
AfterFront.thumb.jpg.e1fef308d729b183d3d9acbae7e2a350.jpg)
RearOne.thumb.jpg.b534ecfcde62d9f0b7c7357241cccf68.jpg)
RearTwo.thumb.jpg.ab583828a796cecd3118808de7530259.jpg)
RearThree.thumb.jpg.677ed648f6d613c1b81908ece23514db.jpg)
RearFour.thumb.jpg.7eedbfb30133a4158d3754f5c30eef94.jpg)
RearFive.thumb.jpg.990f19e83c602c92a7458830c8aa7687.jpg)
RearSix.thumb.jpg.d0135dac7f67f776ce256e1849e90b97.jpg)
RearSeven.thumb.jpg.a93eab220a111867e0f25a72ddc25d80.jpg)
RearEight.thumb.jpg.b8d3f5da135306718195bda430a0fd8d.jpg)
Tools.thumb.jpg.59635d29f8588d33b2fbc0a056da9927.jpg)
RefResize.thumb.jpg.ca174e7a690e6135c83fa88a3802df47.jpg) 1 point
1 point -
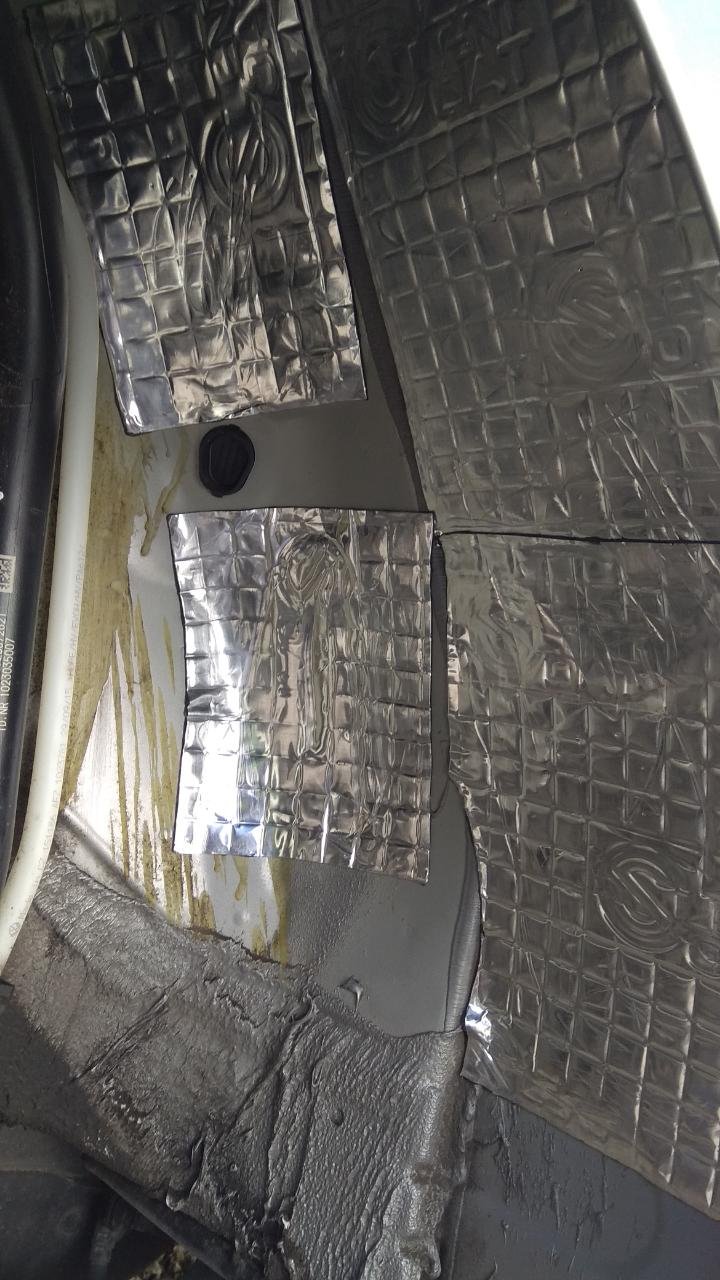
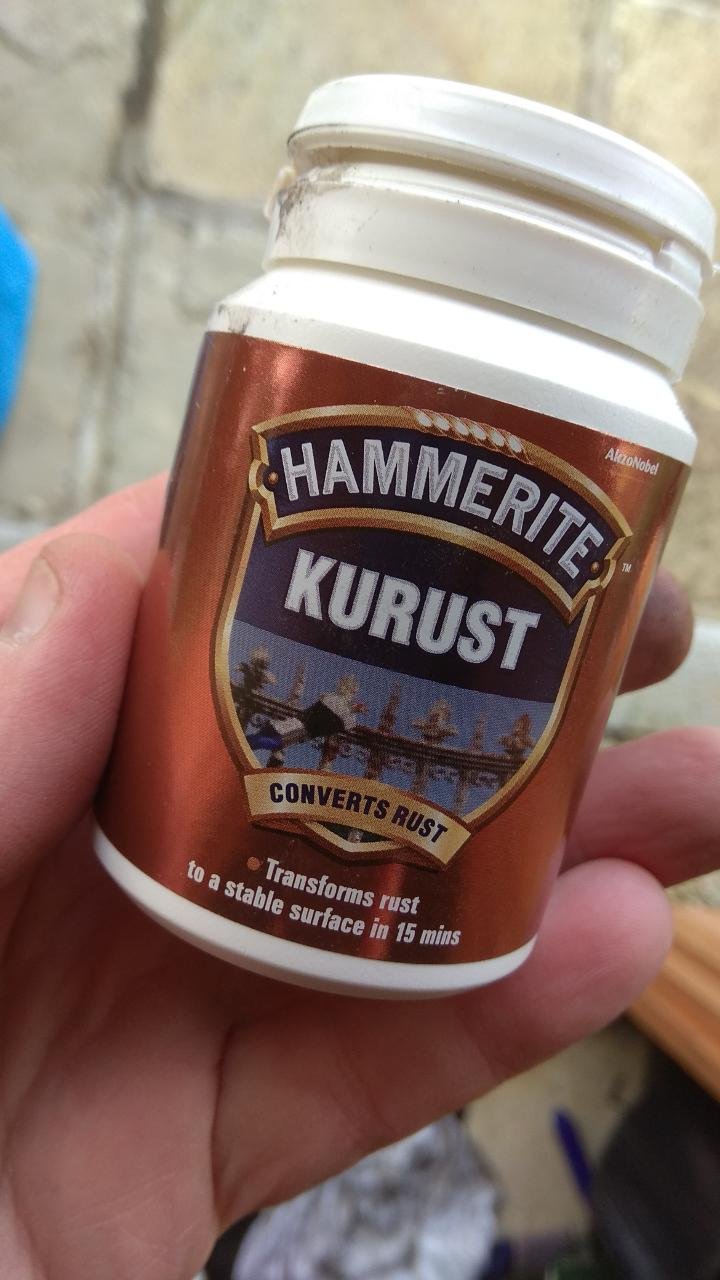
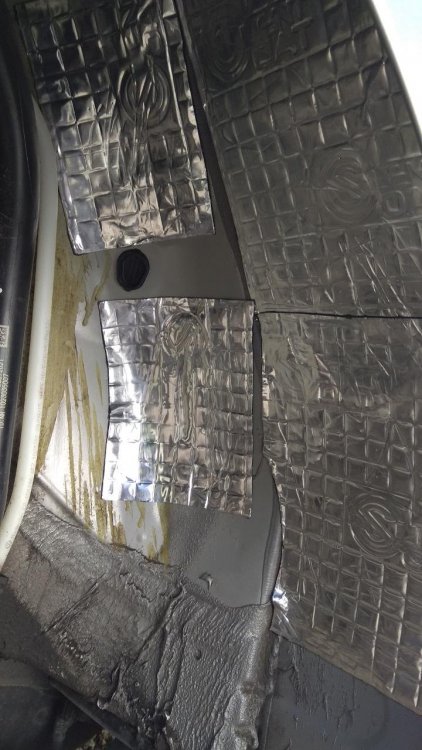
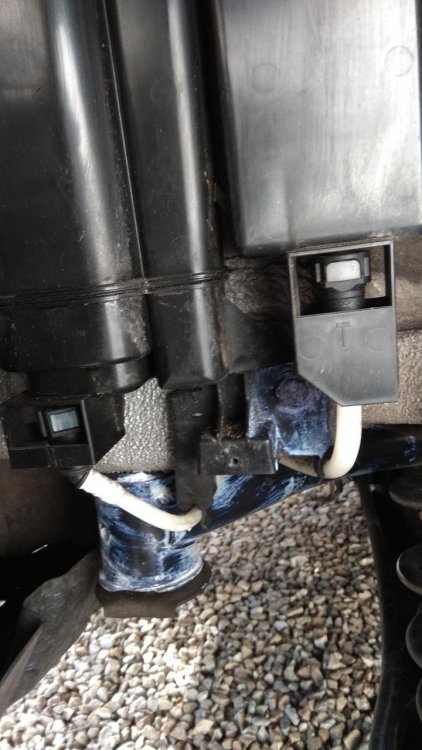
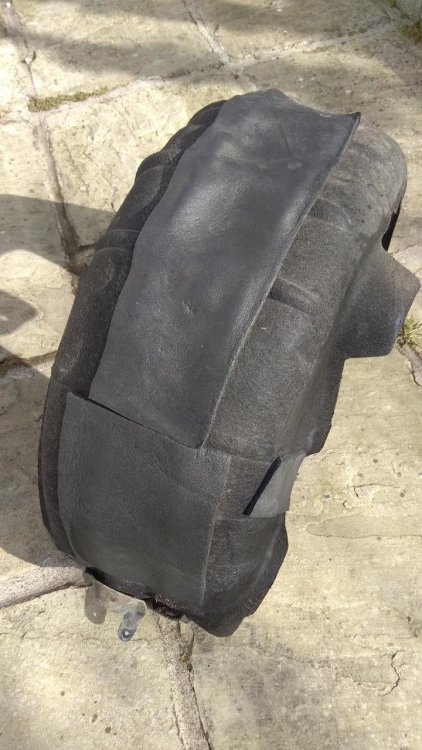
1 pointMy car is very quiet, but it can always be quieter! So just finished one of the rear wheel arches with one layer of silent coat, then another layer of 5mm closed cell foam. This is an easy job really: Wheel off Remove various torx bolts, some are a bit more awkward than others but they all come out easily. Clean with alcohol then set about the insulation. I stayed away from the dirty area of bodywork around the shock that the liner leaves exposed as I didn't want crud building up on the insulation. Also added some to the liner itself. While it was all exposed I applied some rust treatment (blue coating in pic) to the dust shield and various corroding bolts. Liner on and job done. About 1.5 hours not rushing things. Will do the other side when time permits.
 1 point
 -
Just read an interesting article on Fleet News listing all the known emission zone activity for mainland UK. It seems to be up to date to January this year and also includes good details of what the various emission zones mean. I've summarised the listed locales, their actions and action dates below and a link to the full article is here. Low Emissions Zones action dates.xls1 point
-
1 pointLee Boyce (?) has written an article about keyless car theft in yesterday’s Mail. His story is based around his newly delivered Karoq and what a great motor it is.....However, he goes on to moan about the fact that no one at the dealership warned him about the risks or indeed how to mitigate the risks of keyless systems. Not a single mention in the article or the many comments that follow about the option to disable the Kesey with a simple touch of the handle. Quite a few comments about the Skoda being safe from theft simply because it’s a Skoda.......if only those folk knew what a (generally) excellent vehicle the Karoq is.......1 point


BeforeRear.jpg.13bc54a5d94737a79da3b121ea0a5fac.jpg)
AfterRear.jpg.cca60ea68d94e79e4e95cfeda47bdde5.jpg)
BeforeFront.jpg.c95ce30a9156c62fc86a418d6e0a87a1.jpg)
AfterFront.jpg.a8a2b839b91046852811bedca06f8a26.jpg)
AfterFront.jpg.feace5c1630796c5ae1e81b0d2dfe3be.jpg)
AfterFront.jpg.810164502eaf716105bd0f61d3e272a7.jpg)
RearOne.jpg.fe7d87705a62a04394307fa183e88f66.jpg)
RearTwo.jpg.1c44334cdc6882eaebb1f47242c3d9ca.jpg)
RearThree.jpg.9f6d5b44dc527b53b91255175adb5e86.jpg)
RearFour.jpg.6341231d7e7943a3531562745ac0aa8f.jpg)
RearFive.jpg.7e4c580af1f9d74fc75014f3bc8c9796.jpg)
RearSix.jpg.26c75825c2315f869dccd76e11748792.jpg)
RearSeven.jpg.37806af489bb547d8d9616391c91351f.jpg)
RearEight.jpg.41200687f36f49a0f46b18569e4525a5.jpg)
Tools.jpg.0d2c218b14f9d17d0ac58b813b2d7d46.jpg)
RefResize.jpg.48304c36386319f1afe5eef204789dcc.jpg)