StoreyR
Finding my way
-
Joined
-
Last visited
Everything posted by StoreyR
-
You know what.. I actually done proper motorway driving today and coincidentally they didn't knock when I reversed back on the drive now. You might be right, they just need more bed in.
-
They're not squeaking what so ever. Which I'm glad for. I thought I nailed it for the first couple hundred miles they seemed fine! Then all of a sudden I'm hearing a small knocking sound when I reverse manuover.
-
I've fitted Apec front discs and pads to my motor about 8 weeks ago and I've started hearing a small knocking noise only upon reversing.. the pads were well greased on each side too. They were TRW before and didn't make any noise. Calipers also TRW.
-
Yeah it seems like a lot of effort to access it, usually the case with body work though... They don't like people doing work on their own vehicle. I've just been trying to upload compressed PDF screenshots of the bumper removal from the Skoda manuals found on er.win - but file size needs to be 60.34 kB for my account, it's ridiculous to adjust.. Even so... it doesn't instruct how to precisely remove the VRs badge on either RS or Face lift models.. If you do find that you need to get behind the grill though.. to remove any clipped in components, the Skoda er.win manual does quote... "To remove clipped-in components, the bumper must be removed and the latching lugs unlocked from the inside." This is the link i used to fix my bumper and do front discs and pads change... https://erwin.skoda-auto.cz/erwin/showHome.do
-
I failed to mention... Before all this... Front of the vehicle jacked up - placed onto front axel stands.. Wheels removed. Ben.
-
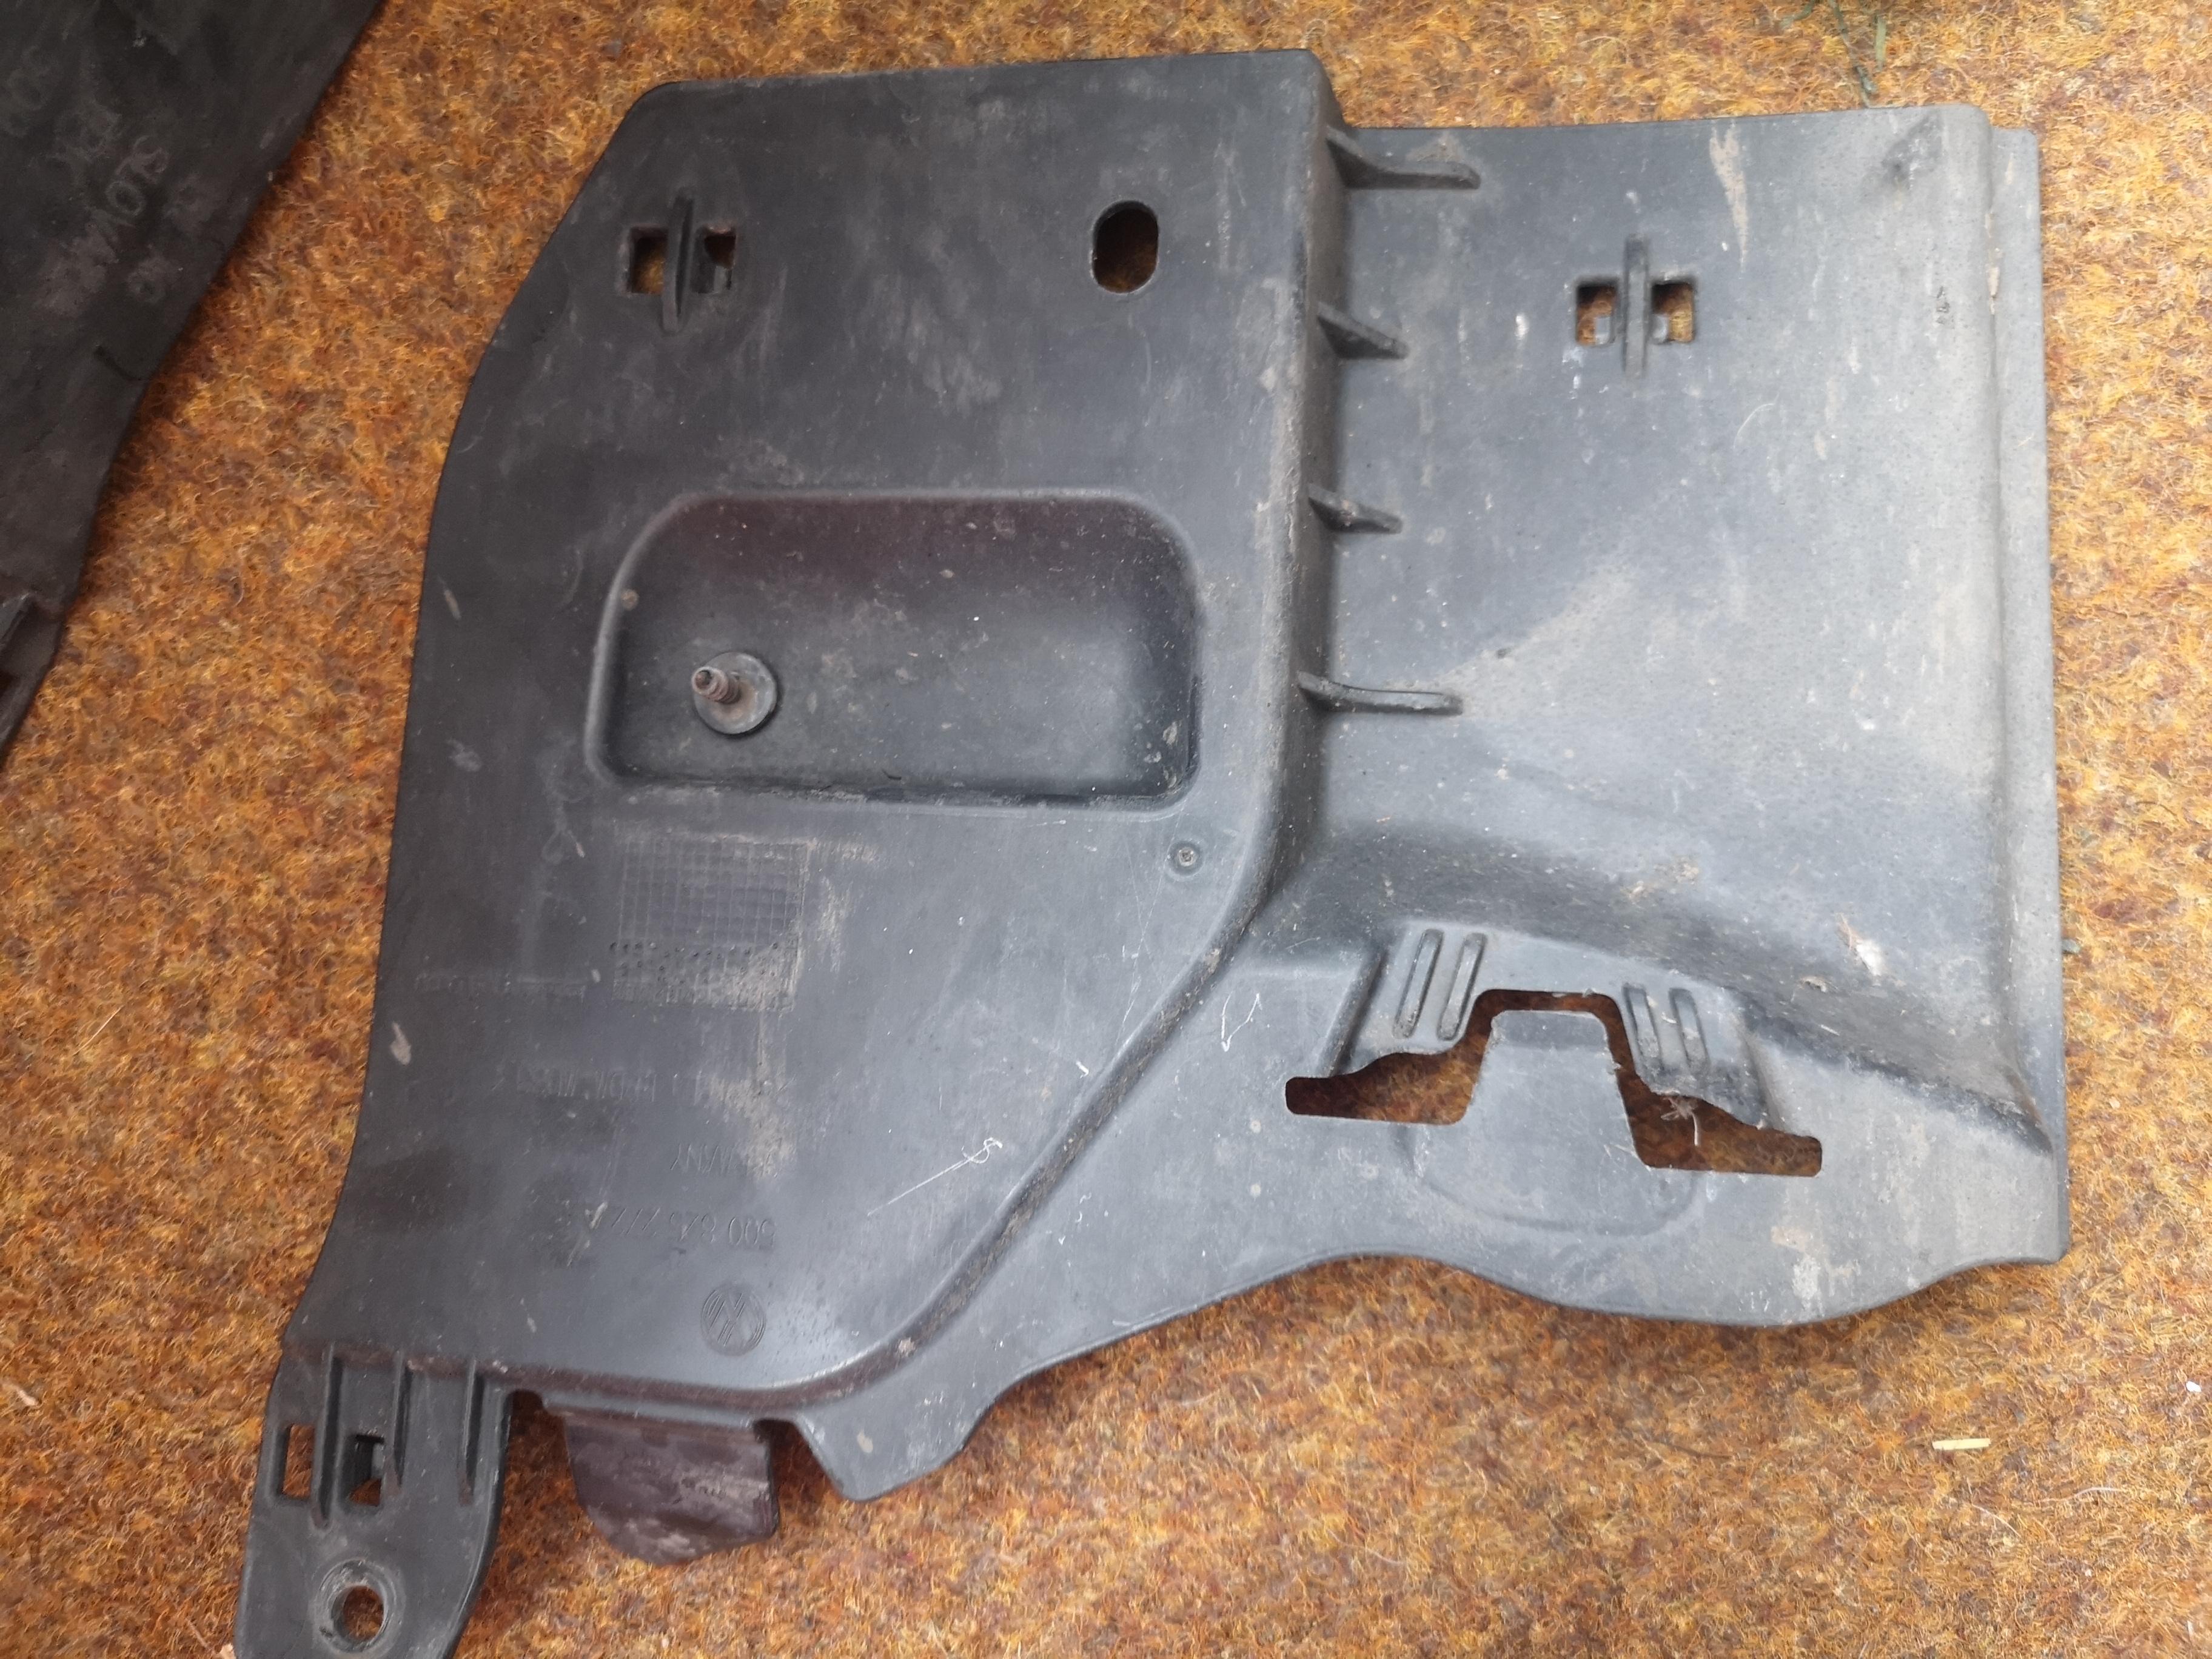
It's quite tricky to remove without the guide, I will dig through and post a picture later for you to see.. I taken my bumper off for refill and respray repair about 6 weeks ago. Quite a lot of screws to remove. Wheel trims- First you need to remove about 16 screws on each wheel trim connecting them to the outer body and the bumper (wheel trims on these models run all around the arch and also a further section going underneath the vehicle connecting to the front bumper section). You unfortunately have to remove these trims. And I'd advise counting the screws. Underneath the lip of the bonnet- there's 4 screws at the front , and 2 screws on each side next to the headlamps (you can see which ones as they're held in place underneath by counter bolts, now visible with access after removing the wheel trims. Also very tricky to remove these ones - I used lose nose pliers and maybe a small open ended wrench). Final 4 screws easily removed underneath the bonnet connecting the bonnet to the plastic under trim. You'll need to disconnect the headlamp electrics(the headlamps will remove with the bumper) and if it has headlamp washers, you'd need to disconnect the hoses for these too. Importantly - there's also 2 sections of the bumper needing released from the body with a flat head screwdriver, located in the top bumper section where the 4 screws were removed. Also difficult to locate but evenly spaced. Should have an audible/physical feel of being released. Will probably read this back and think it's a big job to get to the VRS badge. I think they probably need heat guns and patience to remove and refit those ones. I seen a YouTube video, one guy uses a heat gun for the skoda logo badge, then floss like material to get behind and pry it out... Ben.
-
Has anyone rounded off the locking nut socket before? I just did. Just enough to break it. Hate these things now. More money to pay for vag parts
-
It feels like you'd be contorting the bolt and ruining the bars setting it as tight as an extra 180°
-
Okay. I'm just going to say when I removed the 200Nm set bolts on my brakes carrier to the hub.. It did not feel all that tightly on in terms of the extra 180° It was tight enough to put my whole body into the breaker bar to remove but didn't feel ridiculous.
-
Yes mate, apologies I was just scouring a lot of threads for the information on applying these bolts back in general. What exactly does it mean to tighten by a certain degrees ( °)? ... Just recently I've set the bolts connecting the brakes carrier caliper to the the hub at about 200Nm + some. And the replacing screws connecting the brake caliper to the brakes carrier caliper at 35Nm as per erwin.
-
Thanks for the response. I'll give them a good look over. It doesn't seem to depress at all, do you need to open master cylinder cap to allow pressure release? Doesn't actually say in the manual either but does state to check depressions slightly. Brakes I assume are tight enough..? Ben.
-
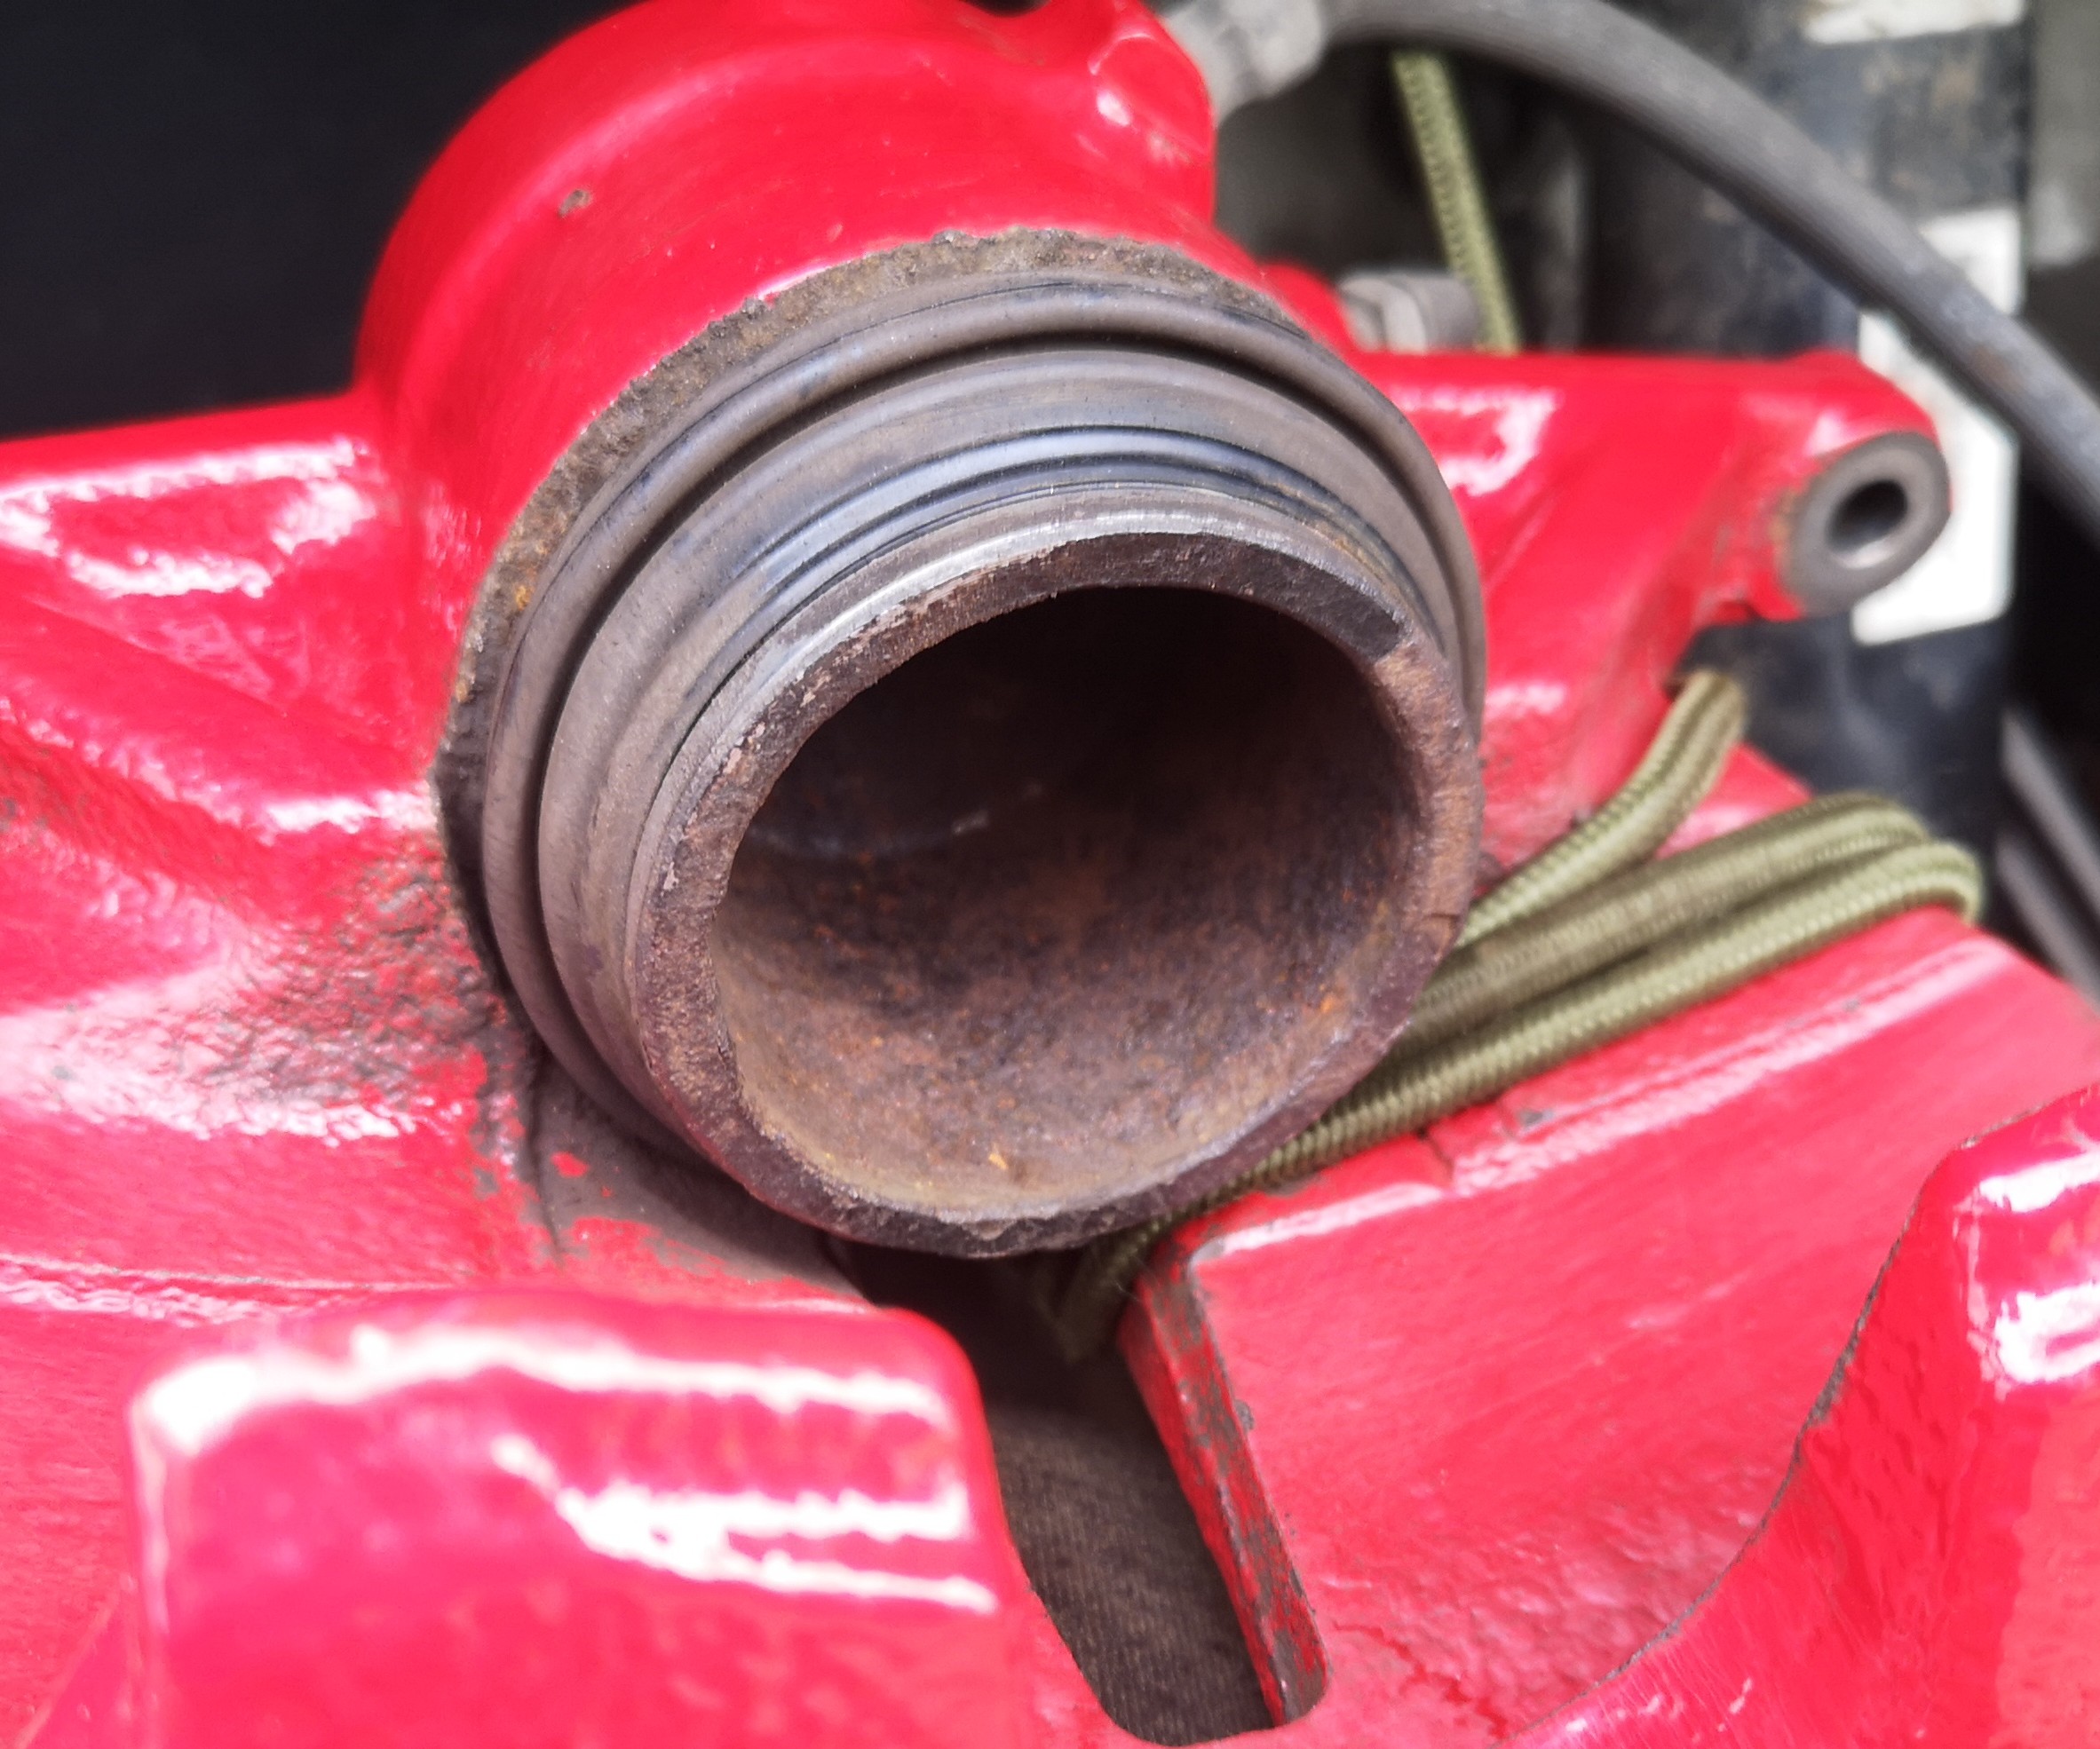
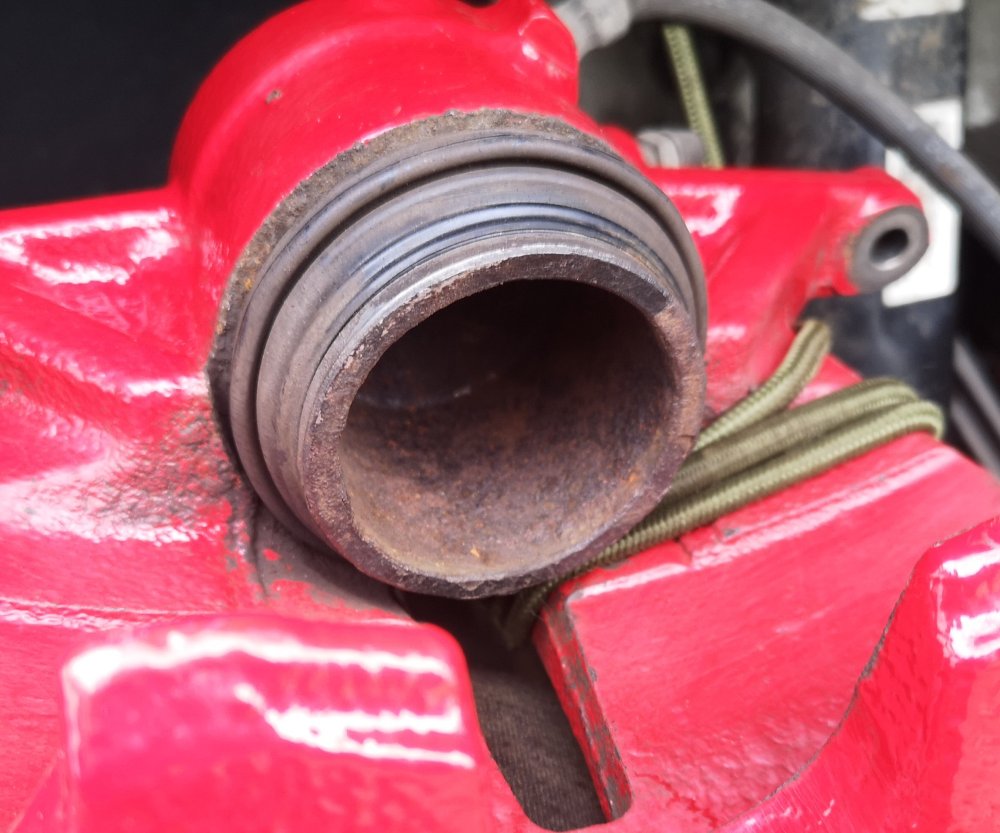
These look really good. With buying wrong sized discs. I've waited longer to get calipers off. And upon removal.. Seen the condition of mine.. 😕 Can anyone say that this looks like a healthy piston. To me it looks shot.
-
Have you ever done brakes change on fronts with axle stands on? Does the extra 180° have to be done on the stands. 200Nm + 180° is just brutal.
-
Is it just the two brake carrier screws with blue threadlock that are needed to be replaced? Those are said to be replaced once removed In the manual. It doesn't say to replace the 2 bigger regular head bolts holding the caliper to the hub. Those set at 200Nm. I think I know what you mean about the head? One guy said a tool maybe a 6 piece star number 15 (YouTube video) but it was incorrect for mine unless it was a different model. The problem is it needs to be 35 Nm reset back in. And I needed to find 2 different adapters to fit a small piece to a larger torque wrench.
-
You've probably gone and had a go by now. But.. I'm pretty sure you need to take the bumper off to do properly. Only way to get behind the grill. I've just taken mine off to repair damage to the front, had a look around the small VRS badge and it's well secured into the grill. It removes probably with careful screwdriver prying, or having to break off from behind to glue back in. Looks tricky.
-
Yeah I skipped on crafting a piece to fit on the lip. Probably worth it if I was doing this again more often. I did try a quick fix using a sawn off piece of wood probably just from bed frame to raise the lifting point on the trolley, started cracking the wood slowly and thus backed off. Lol.
-
-
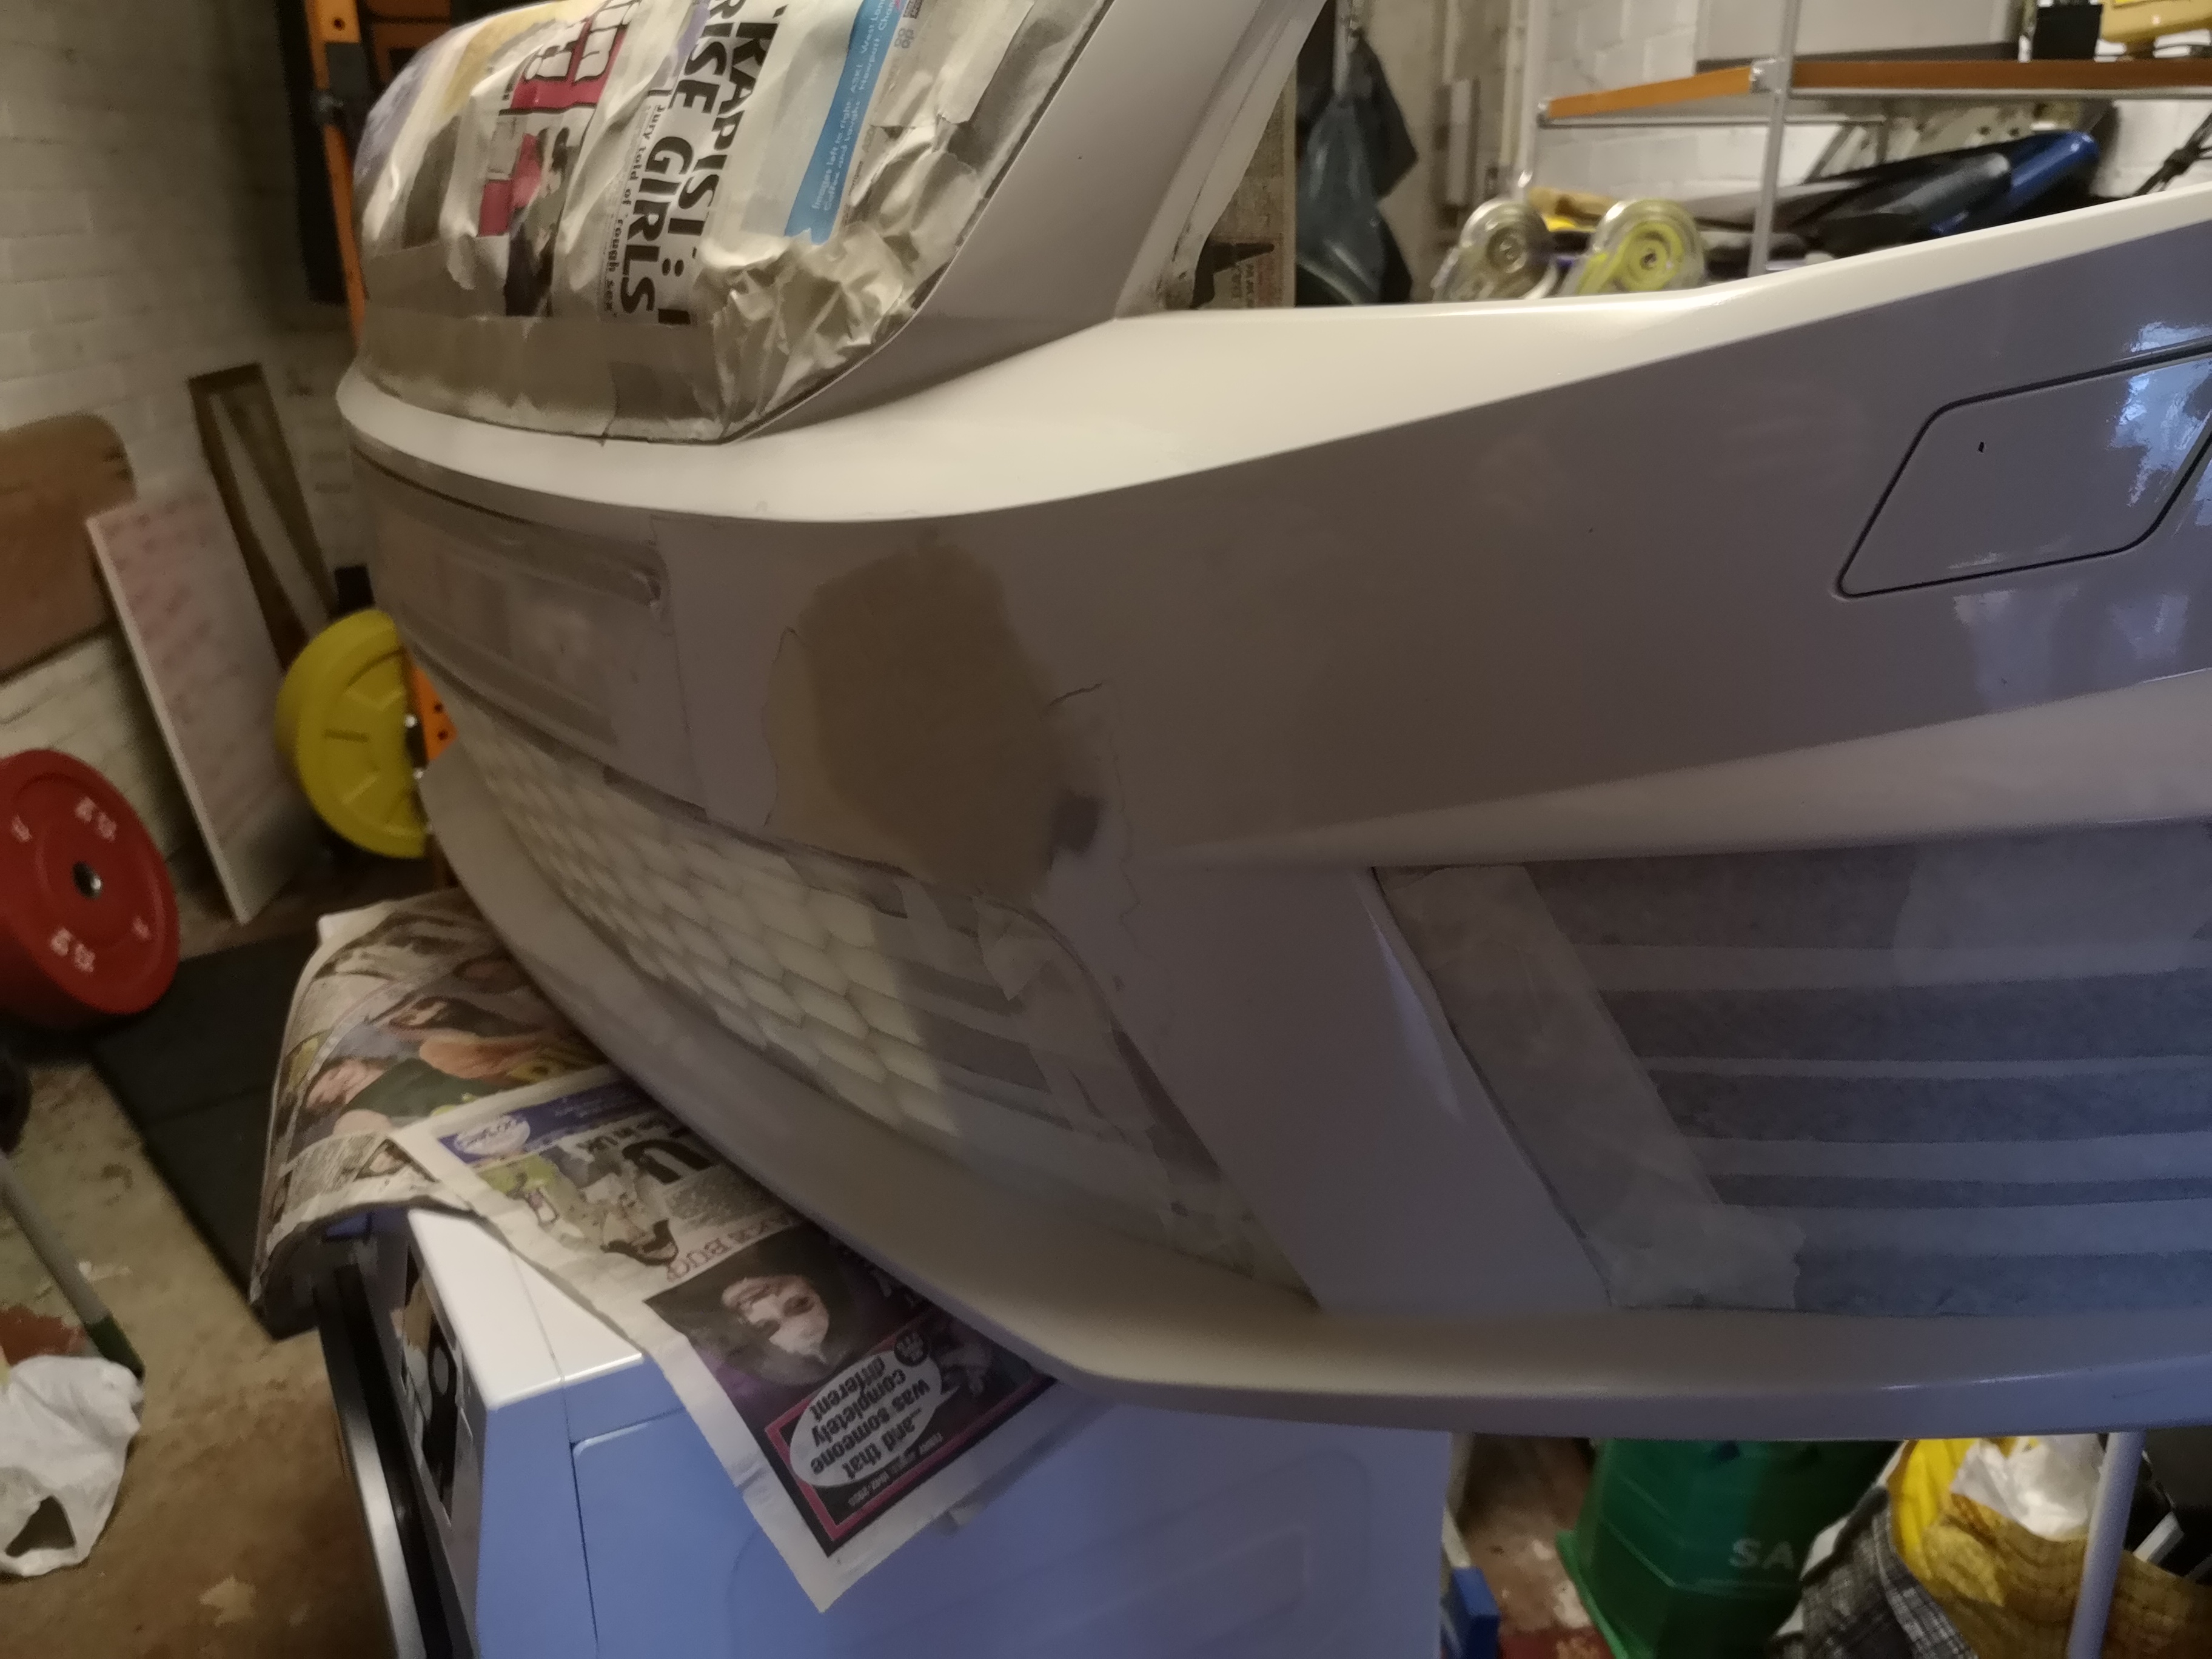
Ah mate, why didn't you say so.. I was literally at this for 3 days trying to smooth out as much as possible. I have ground it with sandpaper on bare metal in some sections because the paint was so damaged. The Etch Primer I bought is 'E-Tech Technik Self Etch bare metal alloy Primer (grey)'. Got VHT rally silver paint and VHT clear coat gloss. I've seen one American guy in a video recommend a 2k Primer for the bonding. He used colour tin per alloy and 2 tins of gloss. Maybe its the American ego - going for bigger is better? I can see your point that prep is more important. And fair play if you done this for a job. It is pure graft.. One question I've got for you.. The highest grade paper I've gone round these is only so far 240! As it wasn't even scratching the surface. And was having to use between 80 and 180. Is it worth going round again before Primer with a 600 or just smooth with a 600 after the Primer?
-
-
-
-
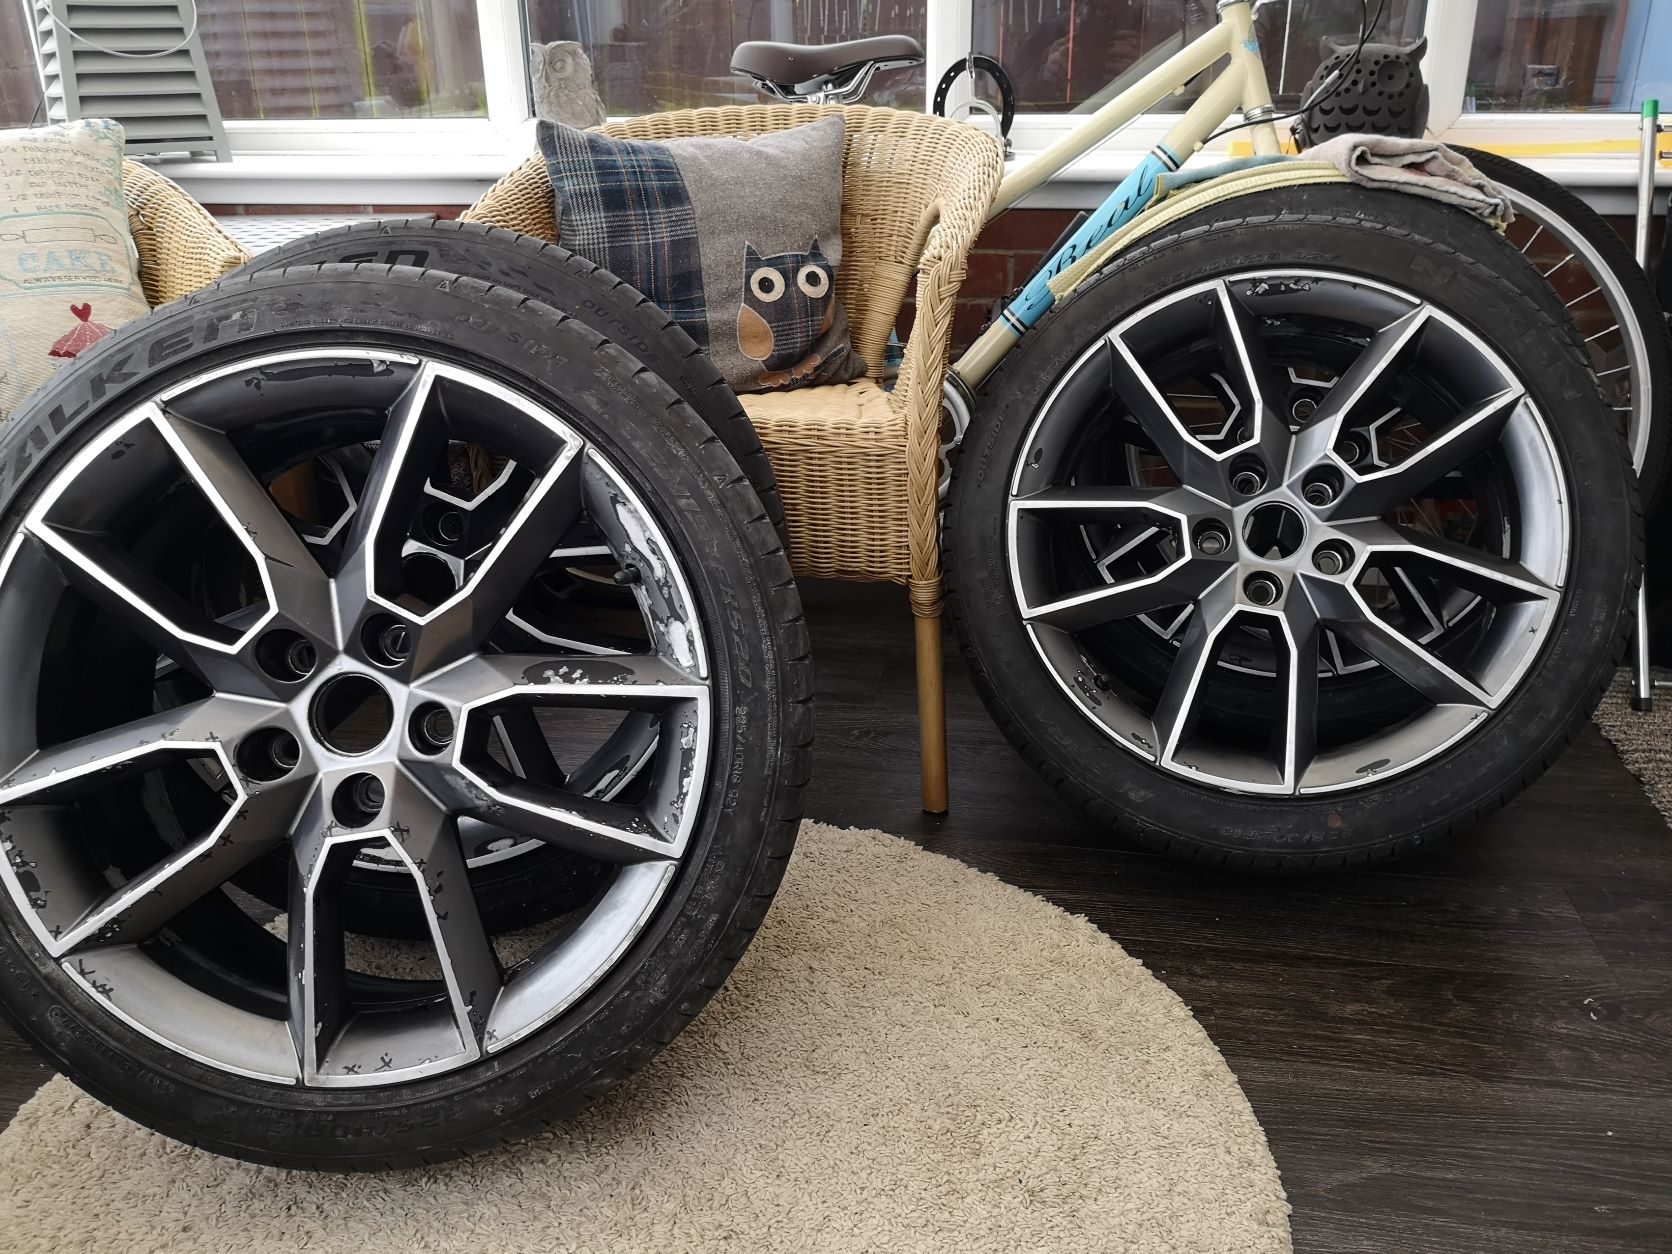
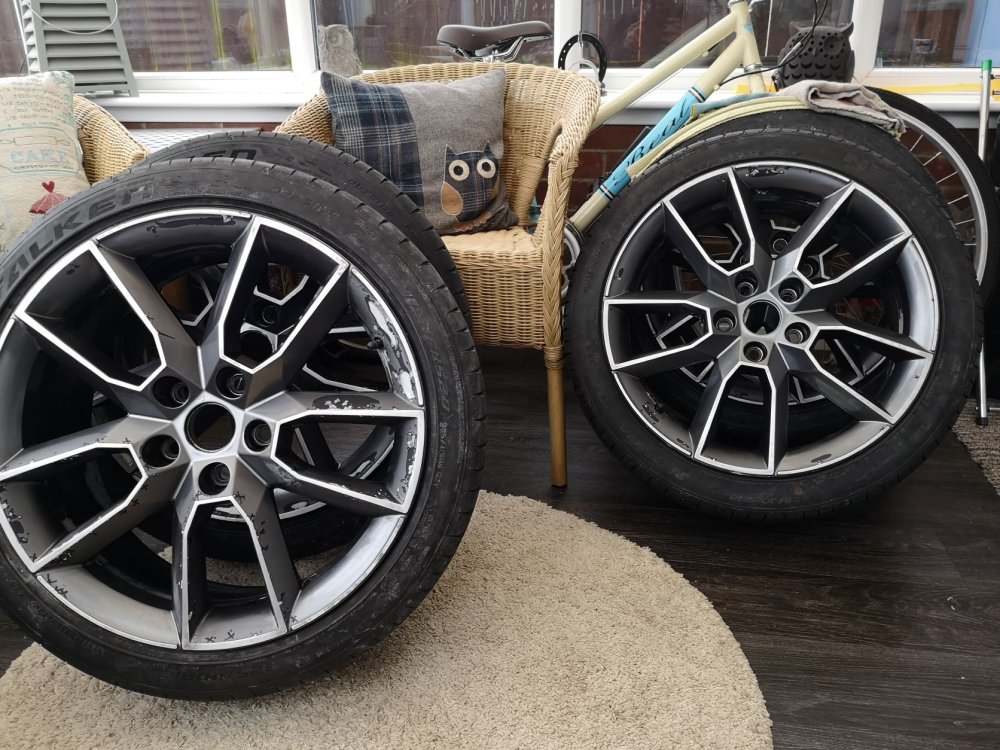
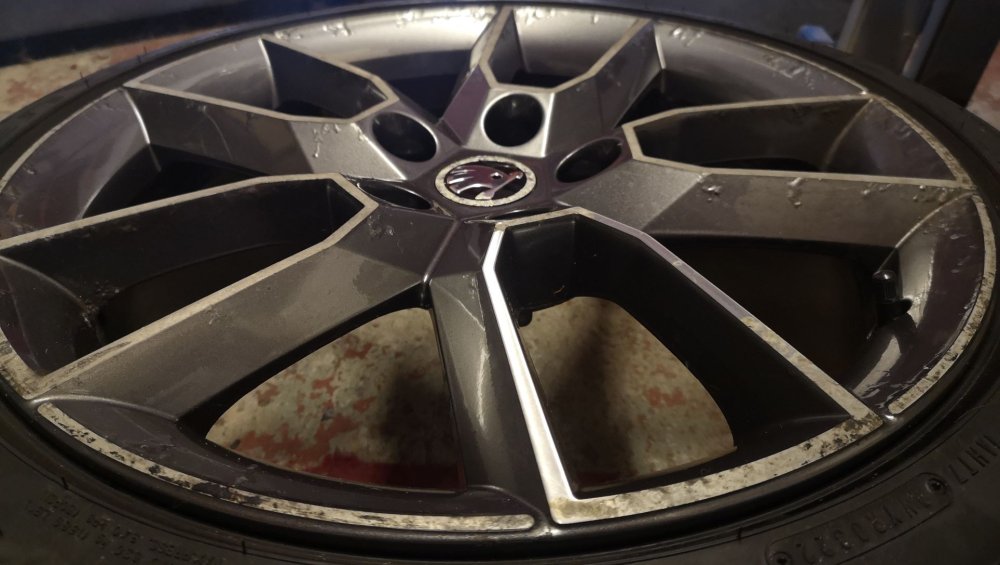
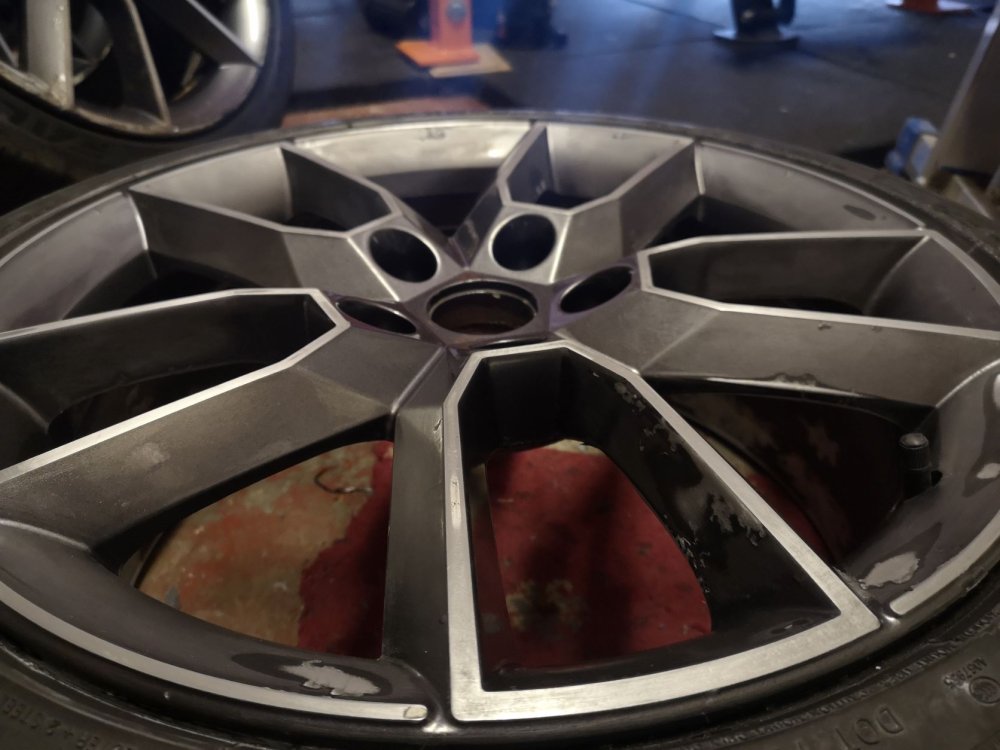
Alloys look amazing in their first few years. I've actually spent 3 full days refurbishing these with mainly sandpaper, some power tools. The amount of labor and time to put into making each section look good, you really need to be committed. And once you've started, you've then set yourself up to have to finish it. This is a front wheel alloy before.. This is actually a different rear wheel alloy after completing the bulk of sanding.. Anybody who has the same or similar problems and wondering why? I realized its very likely the heat from the brake discs, the front discs are fairly bigger on the VRS models anyway.. not entirely sure about other models. Both front alloys were in a lot worse condition than the rear. Not only this I've seen water does get underneath the film and start to eat away. So regardless. Your alloys are screwed! I don't want to say that Skoda can't paint their alloys properly, I've read it happens to a lot of these type of wheels. I'm going to repaint them Racing silver with VHT brand, very high temperature alloy wheel paints, and VHT gloss clear coat. Supposed with withstand approx 120 degrees centigrade. Using a strong primer to start. Will see what happens.. All pretty much complete ready to respray.. Front wheels on the left are clearly worse.
-
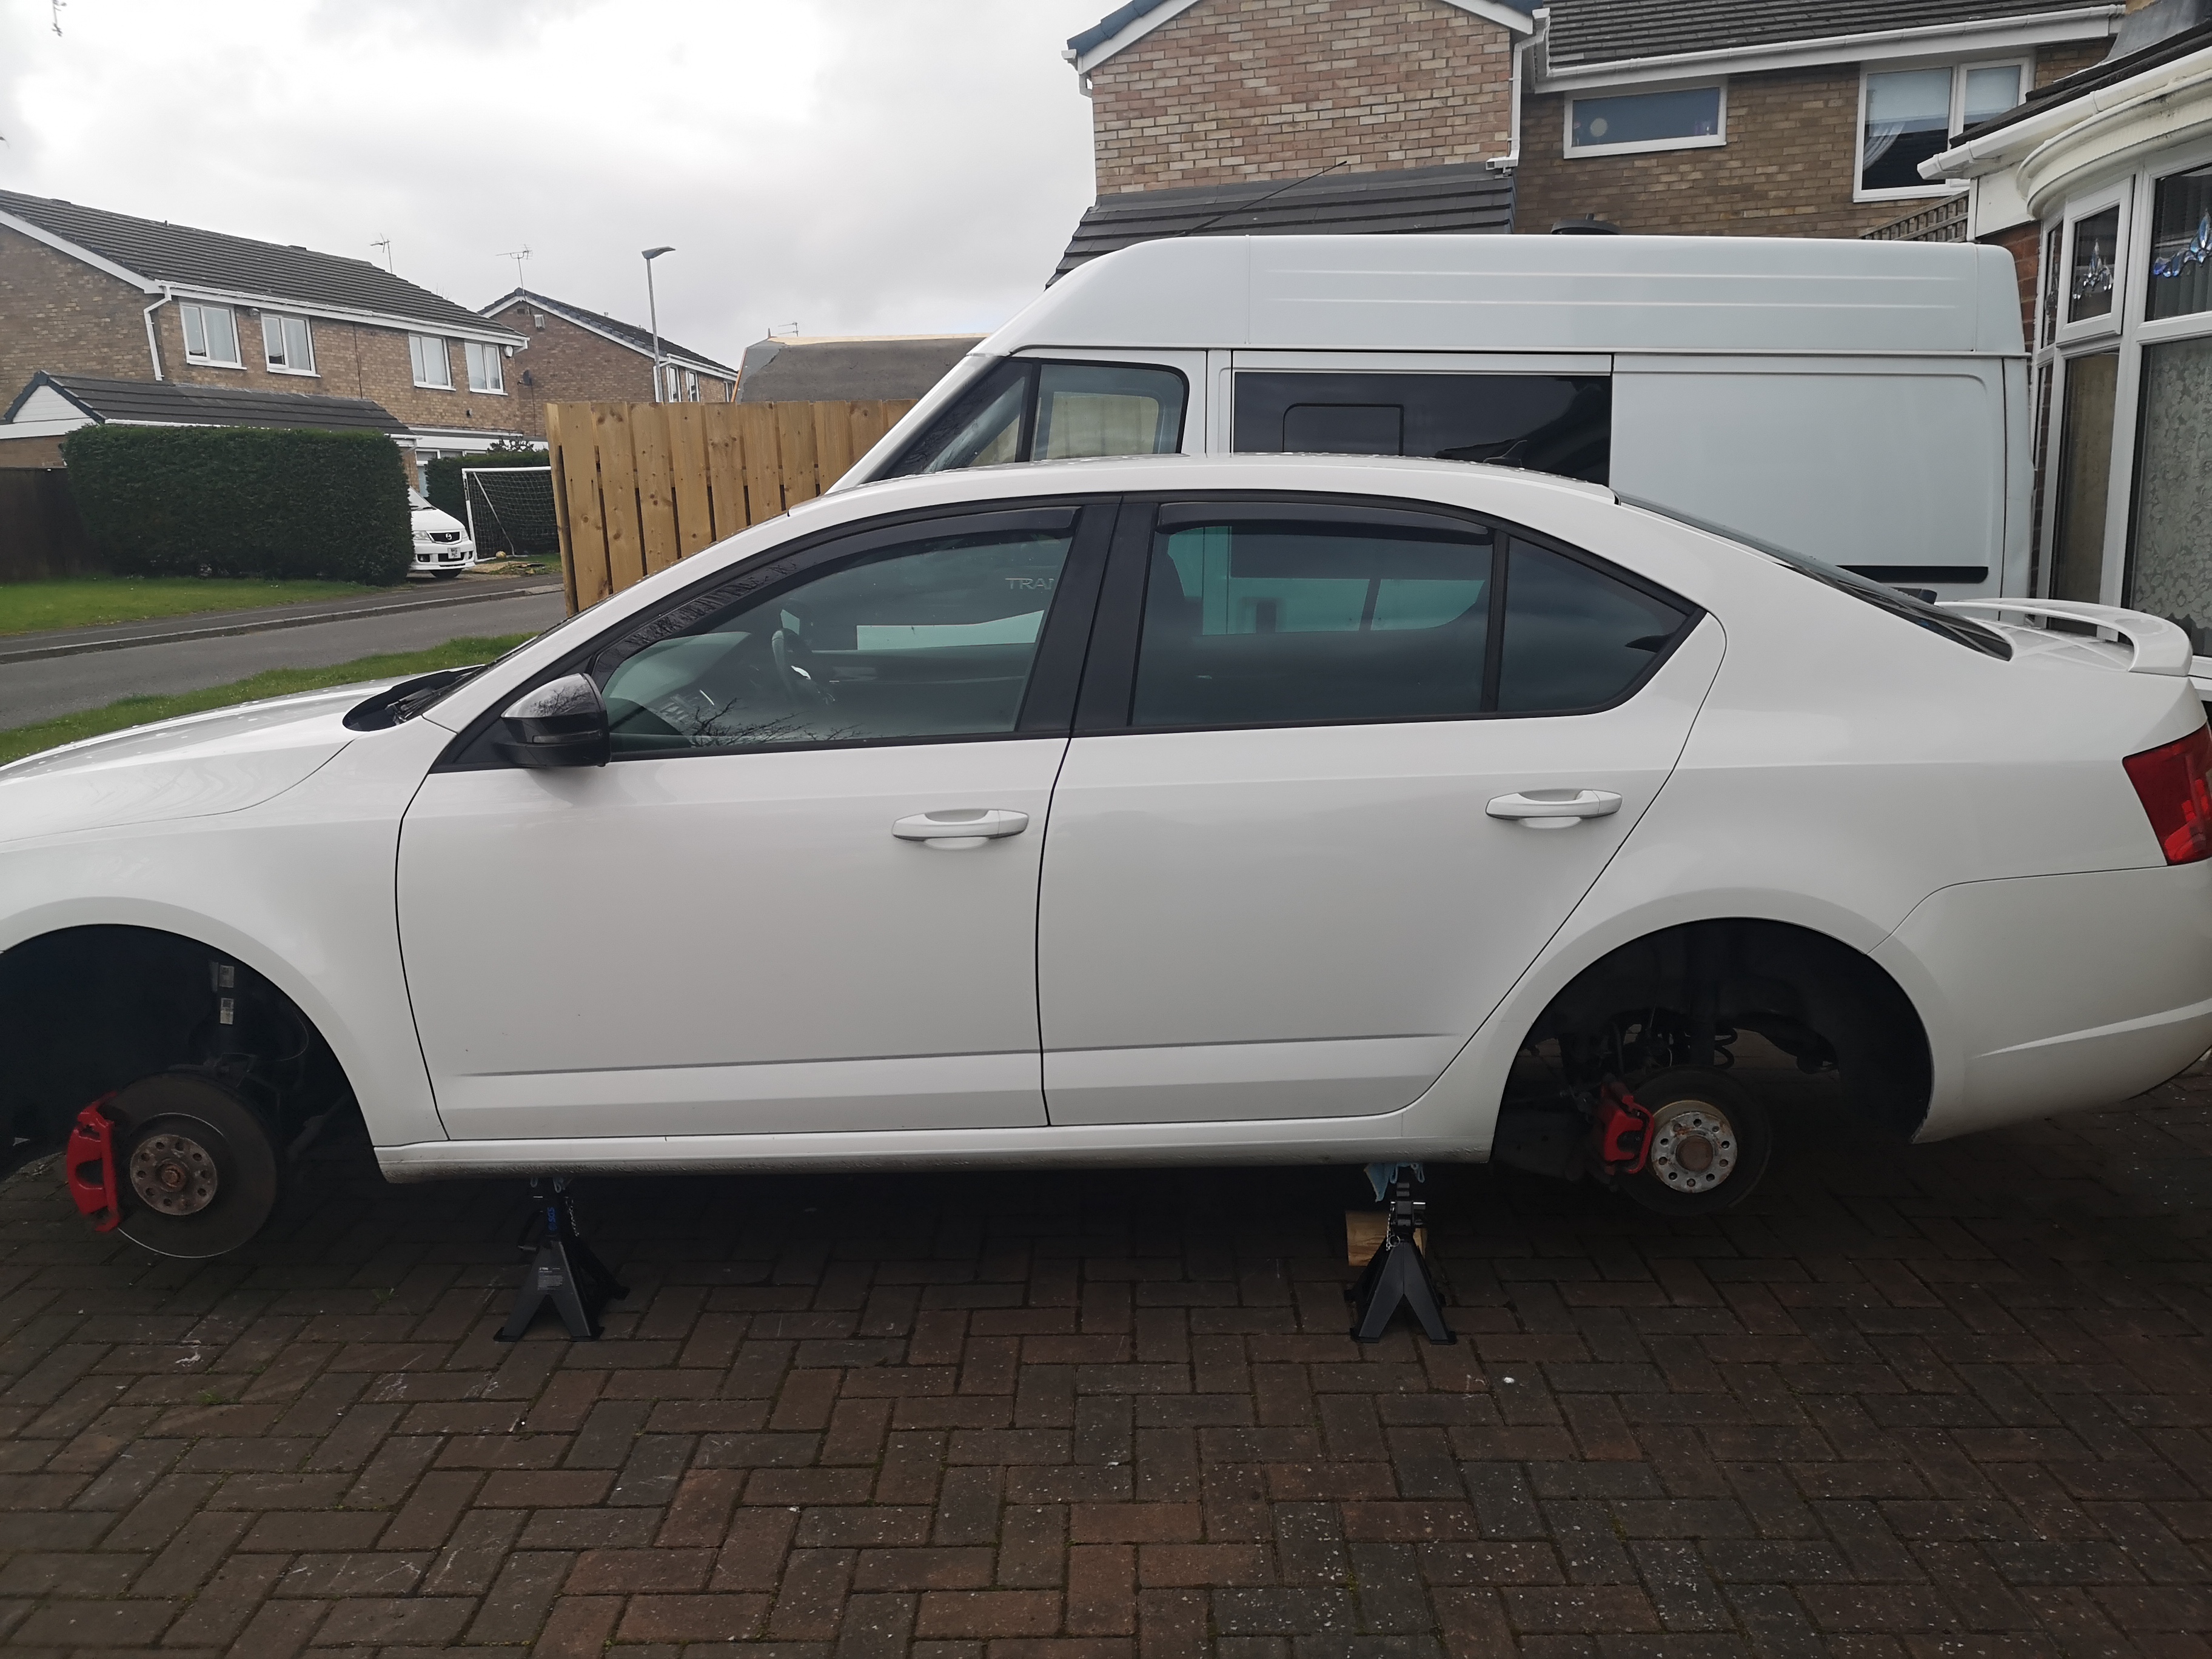
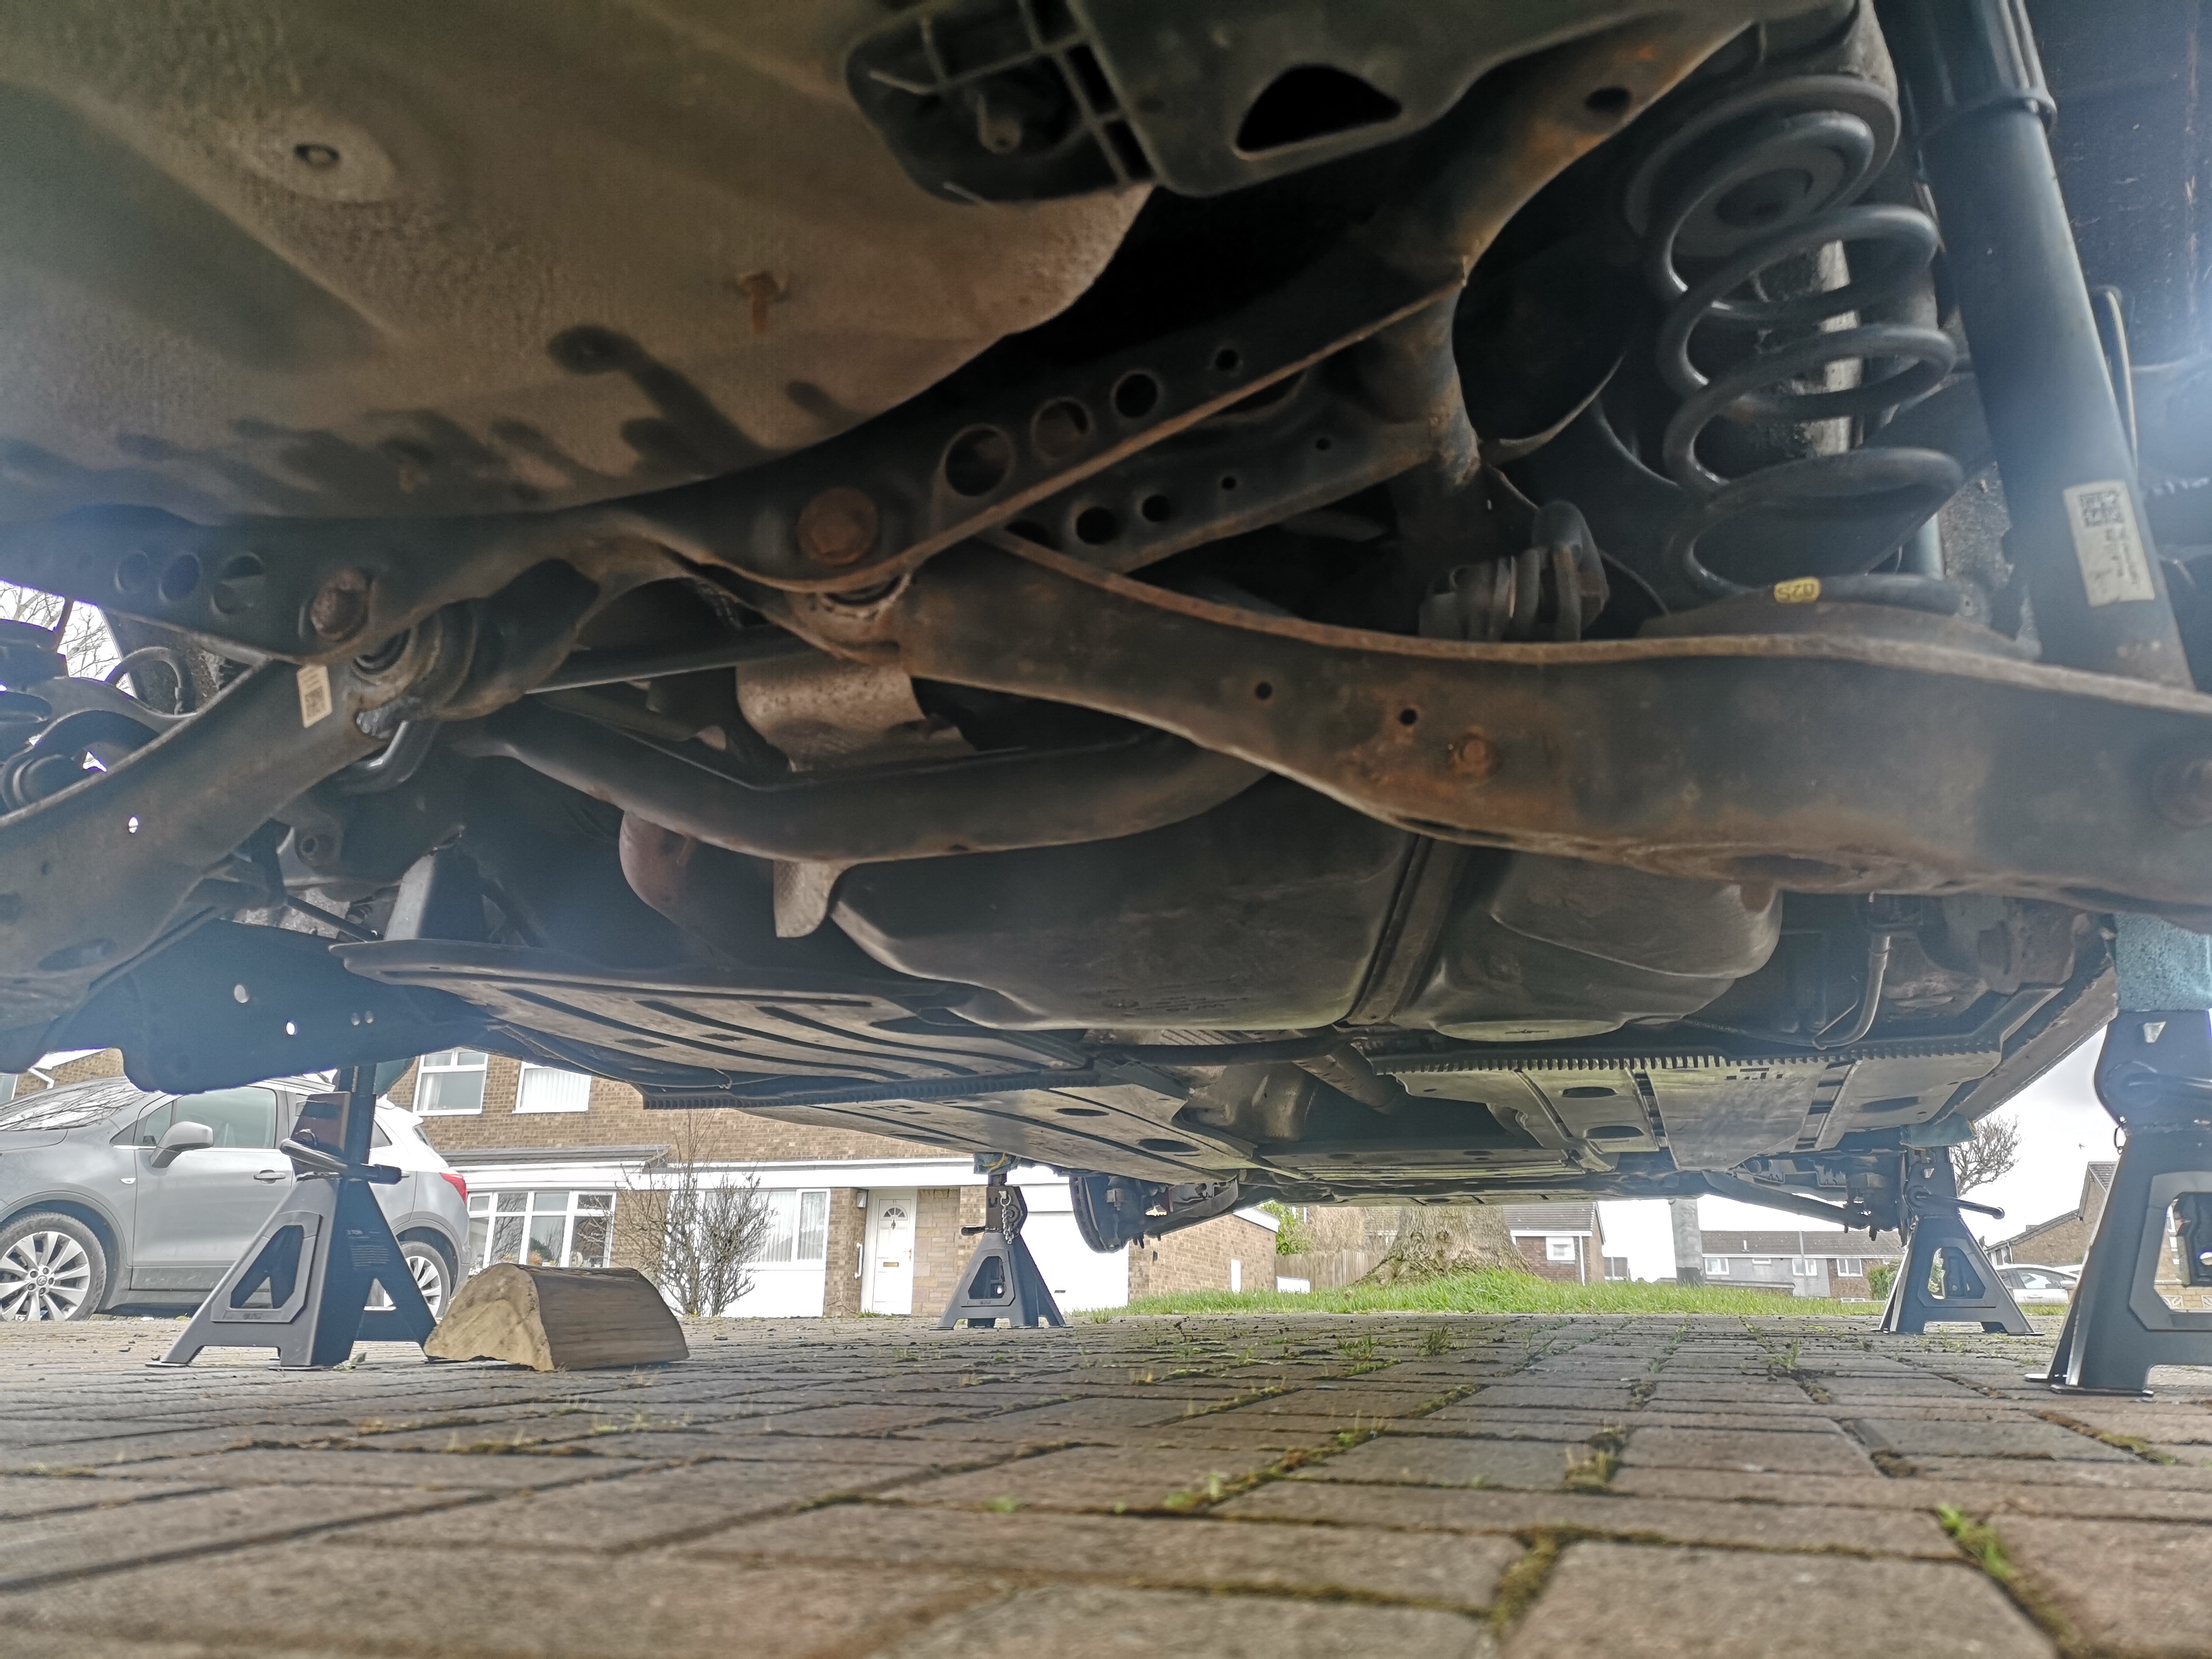
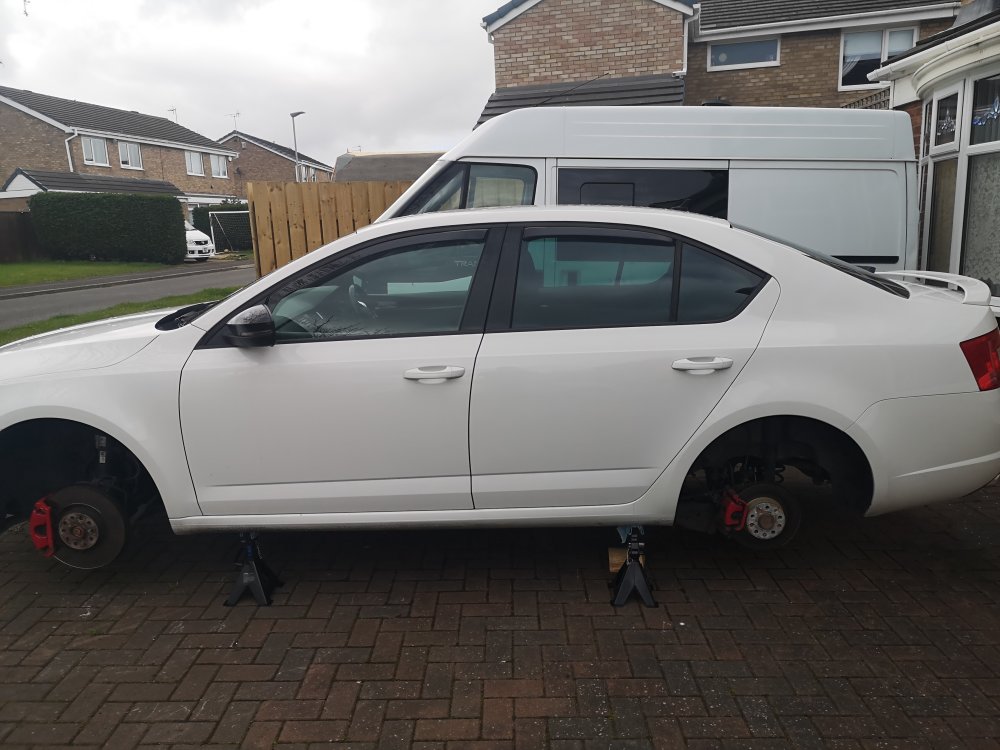
So getting this off the ground was very tricky with a smaller trolley jack and four entry level 2 tonne axle stands. I had to remove a small section of the plastic underneath behind both front wheels. one small 5 star piece screw and clipped in.. needs to slide out. One on both sides. Placed the trolley jack in the cut out section to raise and then lower carefully onto one axle stand on the secure point behind the N/S/F. Wanted to lift it from the centre to drop onto two stands simultaneous but it is near impossible to be safe and being too low and is far back for smaller trolley jacks. Raised the O/S/F the same way. Got the rear jacked up easier, lifted from under the O/S/R suspension coil spring. This brought the vehicle up on the opposing side so could lower the rear equally. Much better than getting the front up. Probably an easier way to lift the front up, maybe get onto two axle stands together. If anyone has done before? Some points to note - Ensure handbrake is on, in neutral, use rear wheel chocks, observe the axle stands carefully when lowering and raising, don't forget to crack the wheel bolts when the vehicle is still on the ground.


-
They apparently do upto 15% restocking fees. So they'd pocket 60 pounds off me just for ordering the wrong ones. A bit of a punishment that is.
-
I read a lot about green stuff just being better similar to OEM. Is the blue or yellow stuff not any good then?