Agent327
Members
-
Joined
-
Last visited
Everything posted by Agent327
-
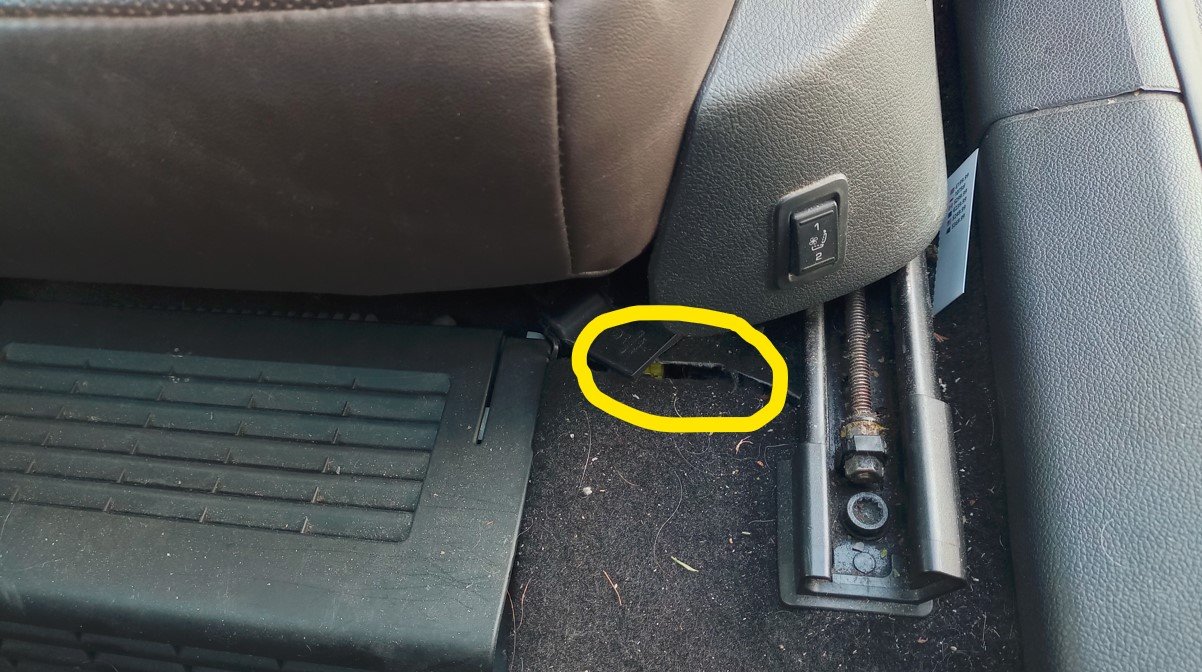
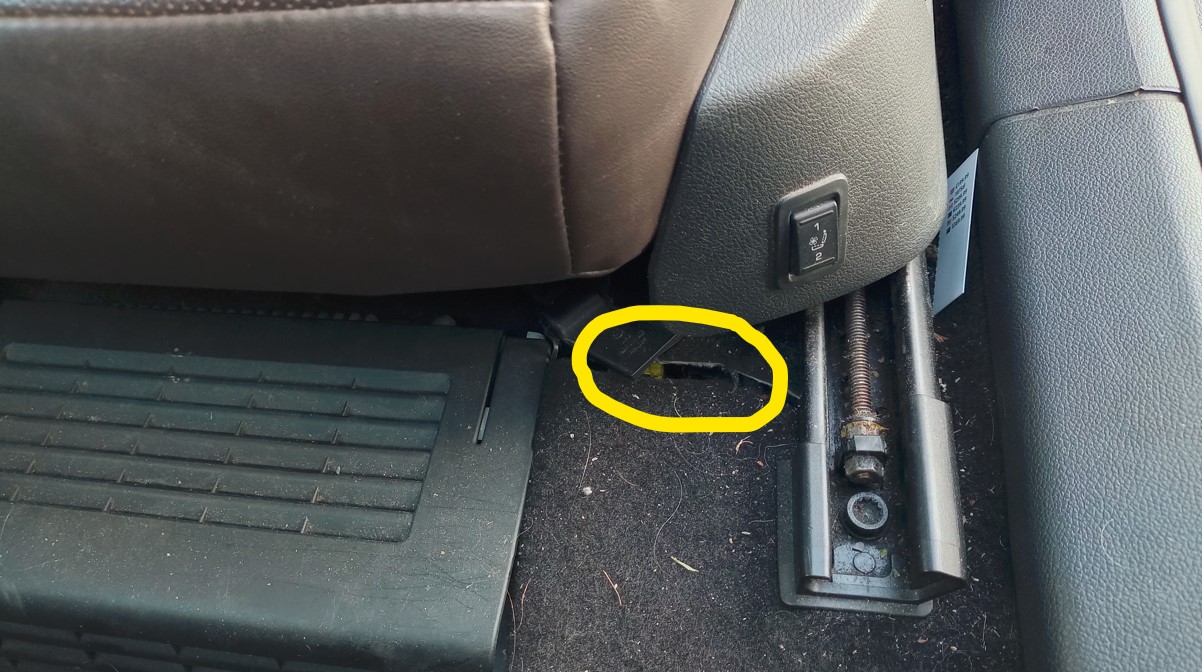
It is located where the wire loom of the seat vanishes under the carpet. just move the seat to the end rear position and dig it out 😉 FYI, my car is LHD

-
Affirmative, I had mine replaced because it was fried after water had come in some years ago. I paid about € 20 for it back in 2017 (a Chinese one still functioning today) See here
-
Hi, as Andrej suggested to pull the fuses out one by one to locate a faulty module, I would also recommend you this method, This video give you a full understanding on the parasitic current draw chapter The advantage here is lies in the fact one does not have to pull out fuses ans it will leave the electrical system undisturbed whilst testing. In the attachment you'll find the related VW technical bulletin concerning this issue. vw.current.draw.tb_compressed.pdf
-
Here are my 5 cents: when you turn each wheel, can you see they are running perfectly round? have rims been cleansed properly before new tires were fitted? are A-brand tyres fitted? tyre pressure according to spec? are the rims perfectly round? are you shocks in good condition? Some years ago I had new tyres fitted and had the same symptoms as you are describing. I then noticed that there was a noticeable run-out on the wheels when I spun them while the car was jacked up. I went back to the tyre supplier and they eventually removed the tyres from the rims, cleaned the rims and refitted the tyres. This solved the problem.
-
Well done, I did clean mine one year ago as I had to change throttle body. Unfortunately I did not take any pictures by yours are a very good representation of all the work that needs to be done. You did glows plugs as well, what is the mileage of your car? I am considering too to change them as I have done 160K miles on my car
-
Last week I did change the heather matrix in my 2012 2.0 TDI. Prior to the repair I watched several HOWTO youtube video's. A big help in removing the matrix is cutting both piper 1 1/2" away from the connection with the pipe that come from the bulkhead. This makes it easy to remove both matrix and removing the pipe bits from its connection with the bulkhead pipes. The advantage: no damage on the bulkhead pipes. In case you have knee airbags fitted, take your time to remove it because the device is a pain to remove. As the electrical connector is an awkward one, take a picture of it and ask google how to disconnect it. Concerning the required quantity of cooling liquid, the instruction manual prescribes 8.4 liters. Drain the coolant by removing both hoses of the auxiliary water pump. Finally, if you are in the possession of an air compressor, you can empty the matrix from all left over coolant by blowing air through the pipes in the bulkhead, doing it this way one keeps the foot well fro from coolant. At Amazon I bought a vacuum device (with help of the compressor) for refilling the system with new coolant. This works perfect.
-
'Normally', when the heather matrix is blocked, first this will be noticed by (LHD passengers side) not heating up. However, before changing the matrix, one needs to read the system with OBDII tools to see if any of the flap actuators are faulty. Also a reset of the HVAC system is recommended (https://youtu.be/r38l1lCoTF4?si=n8v0atwOdrI_GRNi). Even a thermistor could be faulty. Did the garage perform all these actions first? In your case I´d assume the thermistor or the flap actuator appears to be malfunctioning.
-
For me the issue resolved today, as a matter of fact is was a very simple one, to be honest, it never came up in my mind to think into this direction. Anyway, I removed to module, sprayed the contact pins and sockets with ACF-50 spray (Ebay), waited a bit, put the whole thing back together and now it is working again. The stuff was recommended by a friend to protect the trailer electrics (socket and plug) from corrosion. This treatment triggered me to give it a try with the seat control module and voila, issue resolved
-
Hi, please see this video: https://youtu.be/lRcj1fQcWwU?si=gxHq6XfSBAepTPpw I think it's the best one available on the net. All additional relevant information can be found in the description. It worked for me some years ago. If you still cannot find the culprit, you may need an infrared camera to find heath sources in the car that produce heath even when the car is not been used for some hours. Once found the module that is producing the heath it may well be replaced by a new one. Btw, my current draw issue was caused by the boot light with the torch and itś charging device.
-
Changing shocks at the same time with the springs is imo a no-brainer.😉
-
There you go: https://youtu.be/R7RNs8b6lfw?si=LM_ipn0JnCeR83cE
-
I bought a set of Monroe shocks some months ago and they are doing fine. Original I had Sachs fitted bit these were not available at that time.
-
Does this help?
-
Like J. R. I am in France too and live in a rural area. It is absolutely necessary to develop advanced mechanics skills as the garages here are not very reliable in terms of calling one back, 'forgetting' to send out repair quotes or simply overcharging you( € 150 they ask for a diagnose on their OBDII diagnostic computers) Therefore is is paying off to investing in tools as OBDeleven or VCDS and car specific tools. this works for me already more than 40 years. I wish we had YouTube tutorials in my early days.... but Haynes manuals also helped a lot. The thing of keeping the Superb running lies in the fact that almost everybody loves their cars and want to keep them running as long as possible I am 70 years old now and I concur with this statement 😏:
-
Sure, the EGR broke down due to mechanical failure.The valve was no longer functioning. I still need to examine the device though. The good thing is, the EGR was not clogged up with soot, this justifies the use of injector/EGR cleaner. I hope this helps
-
My 2012 Superb L&K with 248k km, had a broken down EGR valve last week and had to be replaced, I do recommend however to replace it when it breaks down and not perform preventive maintenance on it. For preventing issues with it I add every 10k KM a flacon of injector/EGR cleaner, this is very helpful. In October I had my rear shock absorbers, rear brakes an battery replaced. 2 years ago I had injectors, throttle body, aircon pump and cooling fans replaced. For filters, engine oil, DSG oil, brake fluid I stick to the prescribed maintenance schedule
-
Hello, I have been suffering from parasitic current draw on my 2012 Superb 2.0 TDI. Unfortunately, intermittently, the issue sticks up its head every once in a while. First of all I want to say say that pulling fuses is not the way forward diagnosing the issue. As soon as one pulls a fuse while measuring amps, the system that has been brought to sleep will be reactivated when pushing back the fuse in its slot. On YouTube I have watched the video published by the Humble Mechanic on this subject which sounds to me a healthy approach. To identify a current in the first place I´d suggest to watch this video I have done this a couple of times now without success. I also have tested non-fused devices such as alternator and starter motor. With OBDeleven I was made aware of 2 faults generated by the driver seat control module, when I bought the car 8 years ago I already saw the seat sliding forward and back with some hickups and the memory of the seat position also shows strange behaviour, espacially when the second key (used by my wife) Anyone here familiar with this issue and able to give me push into the right direction?
-
Recently I submitted my opinion about Autodoc on trustpilot and I got a reply from them. Here it is translated from French: I'm quite happy with autodoc. I think the service could be improved by showing a reduction in the range when searching by VIN number. A little too often I get the following message: this part is suitable for your car when different versions of the same item are on display. The range of brake discs in different diameters is a good example.¨ Their reply: Hello, Thank you very much for your positive feedback. Don't forget that you can always check the compatibility of spare parts with the chassis number (VIN) of the car, to do this you can write to us at: [email protected] . Best regards, The AUTODOC team¨. This solution looks like a workaround to me but if you want to be sure of ordering the right parts it could help to avoid issues.
-
Here you can find a new one. If you can fit it yourself, the only thing the garage need to do is the calibration
-
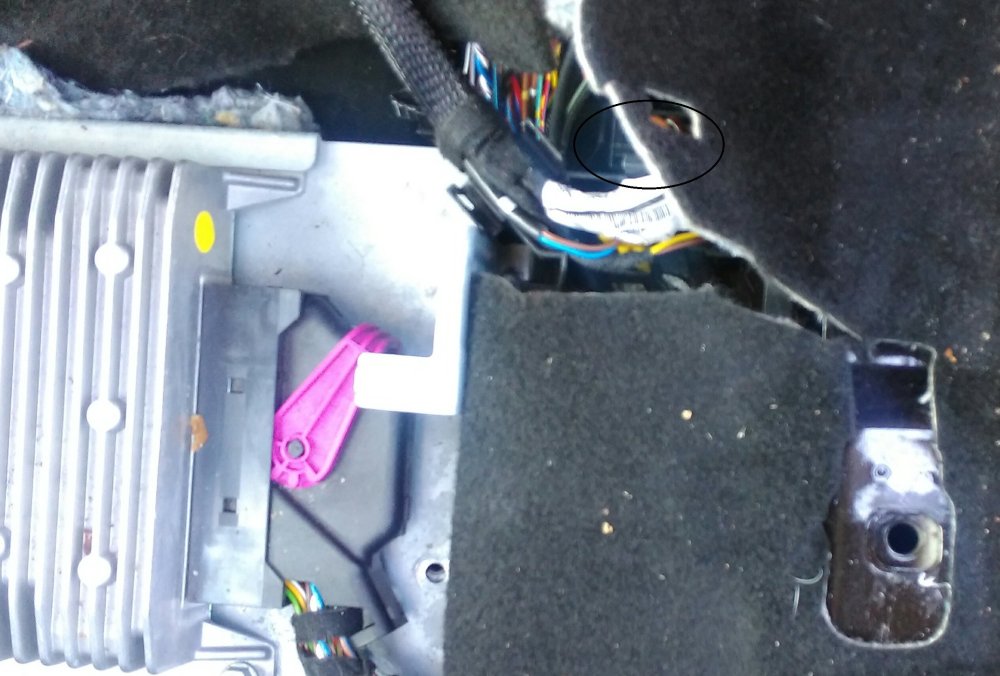
the relay is almost located on the bottom, mine was fried due to water/condens causing shortcircuit. So dig a little deeper. 😉
-
Just resolved the issue, changed my injectors, with OBDeleven I adapted the injectors and primed the fuel pump twice with the Transfer Fuel Pump (FP) test
-
Would be nice if you could post your findings/resolution here.
-
There you are

-
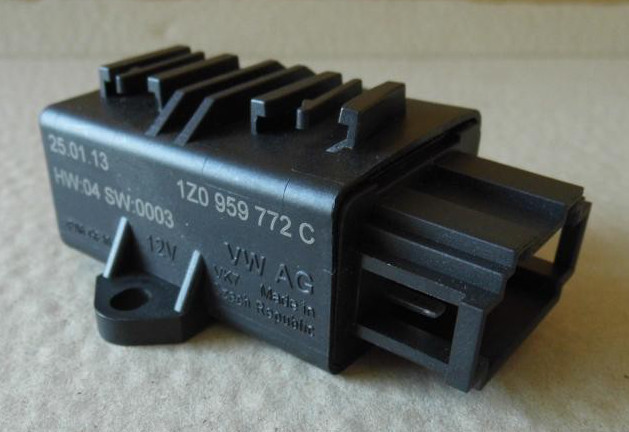
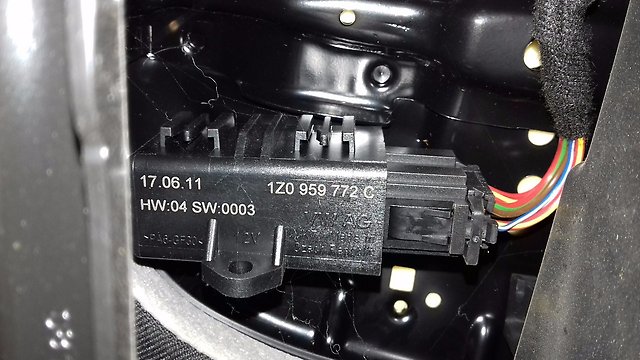
Please check the module that is located underneath the driver seat in the front. it is well hidden behind the wire loom almost at the bottom. Mine was was fried due to water in the module. You van find the at eBay. Just search on this number: 1Z0 959 772C Have fun.

-
Hello, I'd like to understand why this topic ends without having a solution published. Are the issues resolved by all of you and if so, what was the solution? Since a while now I experience the same issue as described here. Two reliable sources of mine confirmed independently, the rattling noise is likely to be cause by clogged up dirt on the injectors. So first step they advised is adding a double amount of injector cleaner in the diesel tank, run it (almost) empty and repeat this for a second time if necessary. In case this. Second step: remove injectors (remember their location) and have them ultrasonically cleaned. Refit them with new seals, 'fire plates' and stretch bolts. Not sure what to do when second step is giving the desired result, possibly need to find a diesel specialist.