


EnterName
Resident Member
-
Joined
-
Last visited
Everything posted by EnterName
-
Hello and welcome! 🙂
-
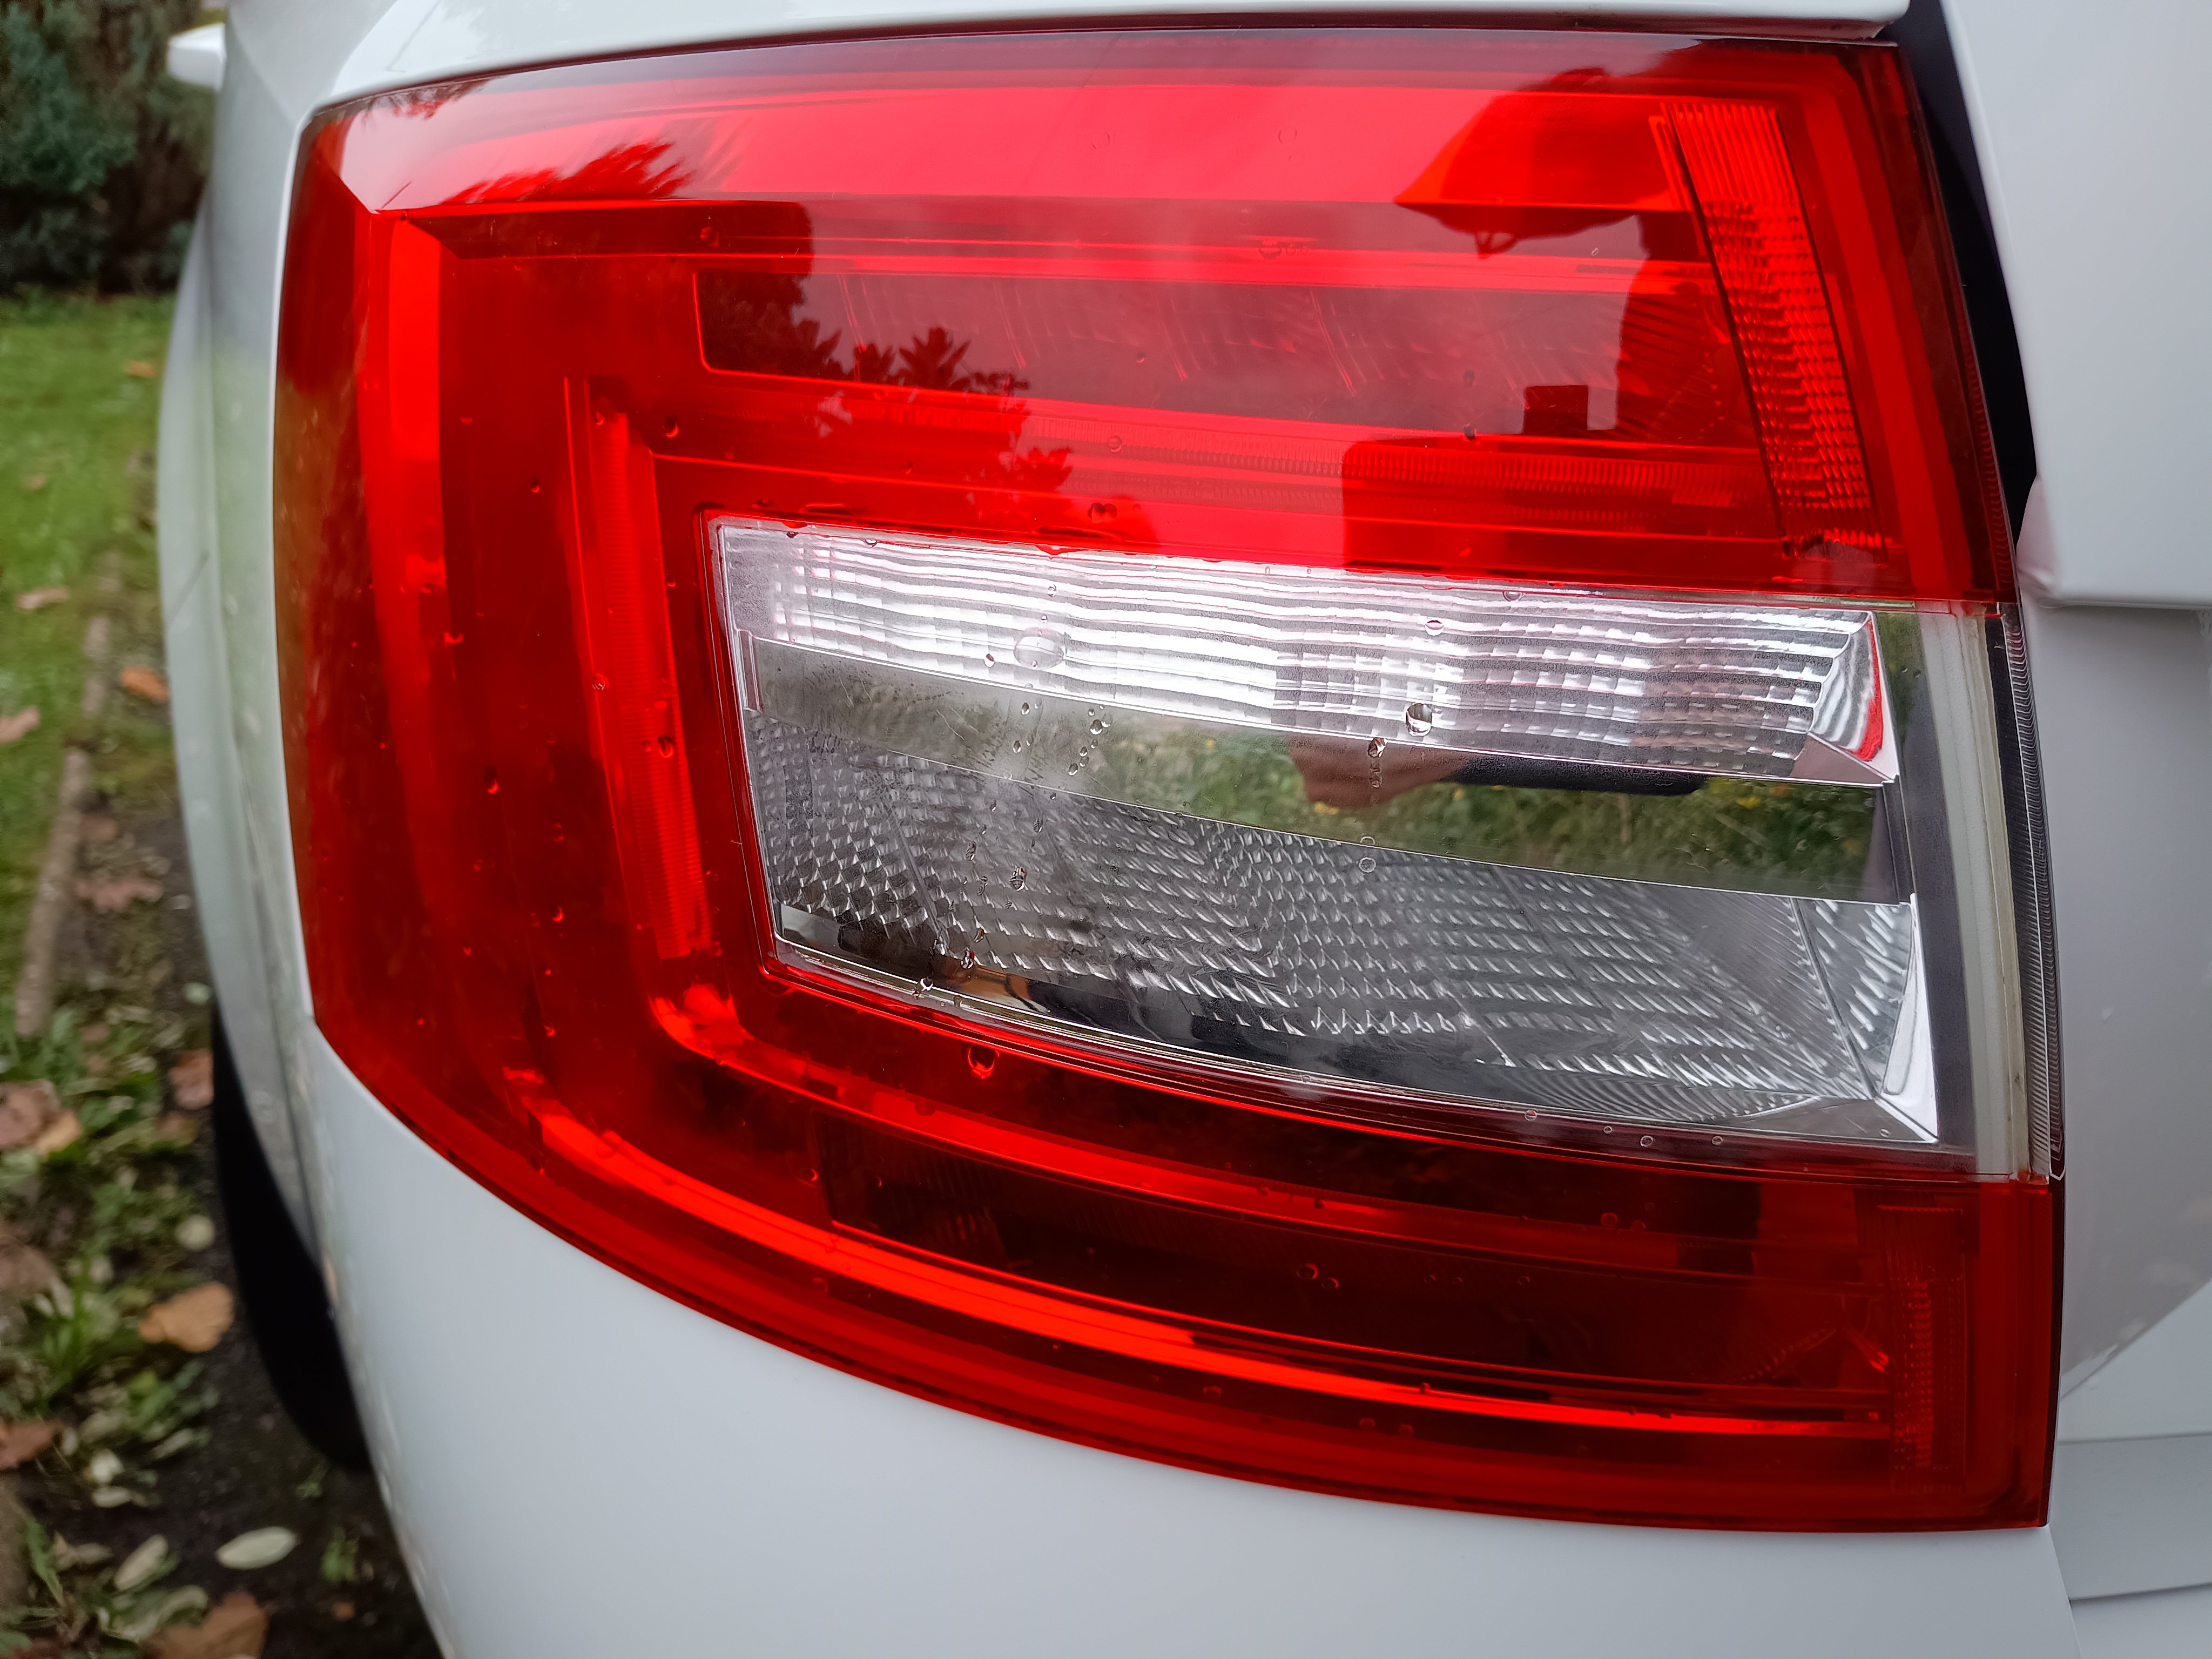
There's bound to be another OCD Octavia owner worrying about whether their vehicle has a crack in the paintwork at that point. I'm certainly going to check the other side on my car over the weekend. 😄
-
All done now, with a couple of hiccups along the way. First hiccup was forgetting to reconnect the internal connector, so the indicator/hazzard lamp worked but the others didn't. Some minor head-scratching and cursing took place until I worked out the problem. Second hiccup was discovering a little split in my paintwork. (below) I cleaned that and applied a little touch-up paint to cover the hole. EDIT: I also gave the rubber mounts on the car that the light locates into a little squirt of silicone lubricant to make sure the light comes out without too much drama when the bulbs do go. Beyond that, it's all back in place and looks more or less as it should. 👍

-
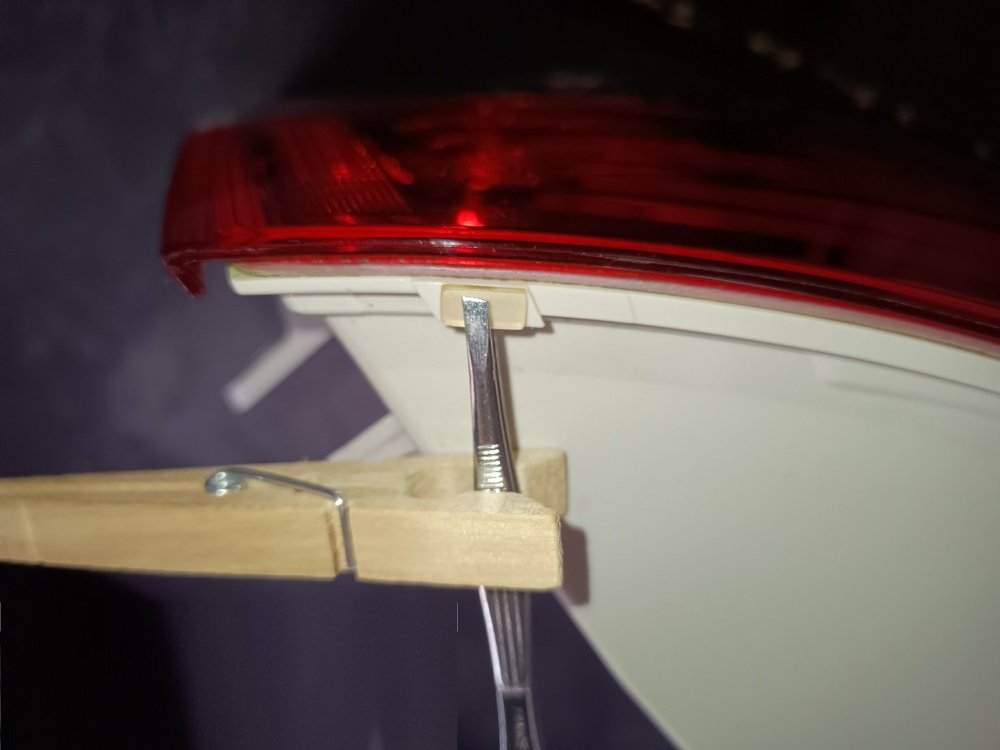
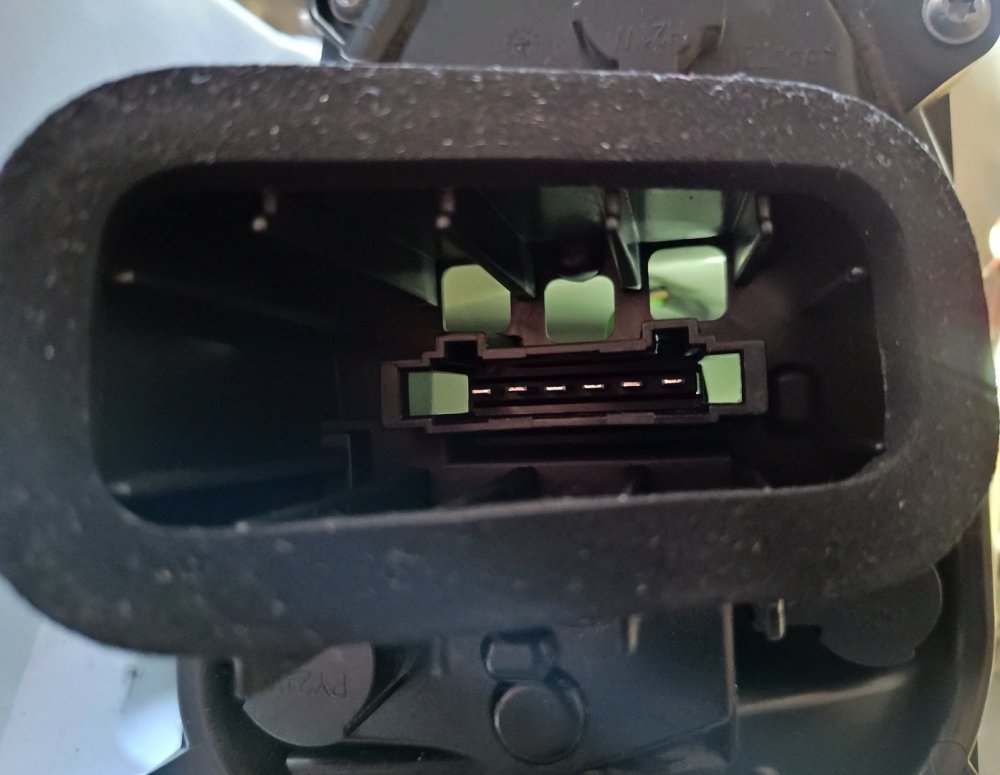
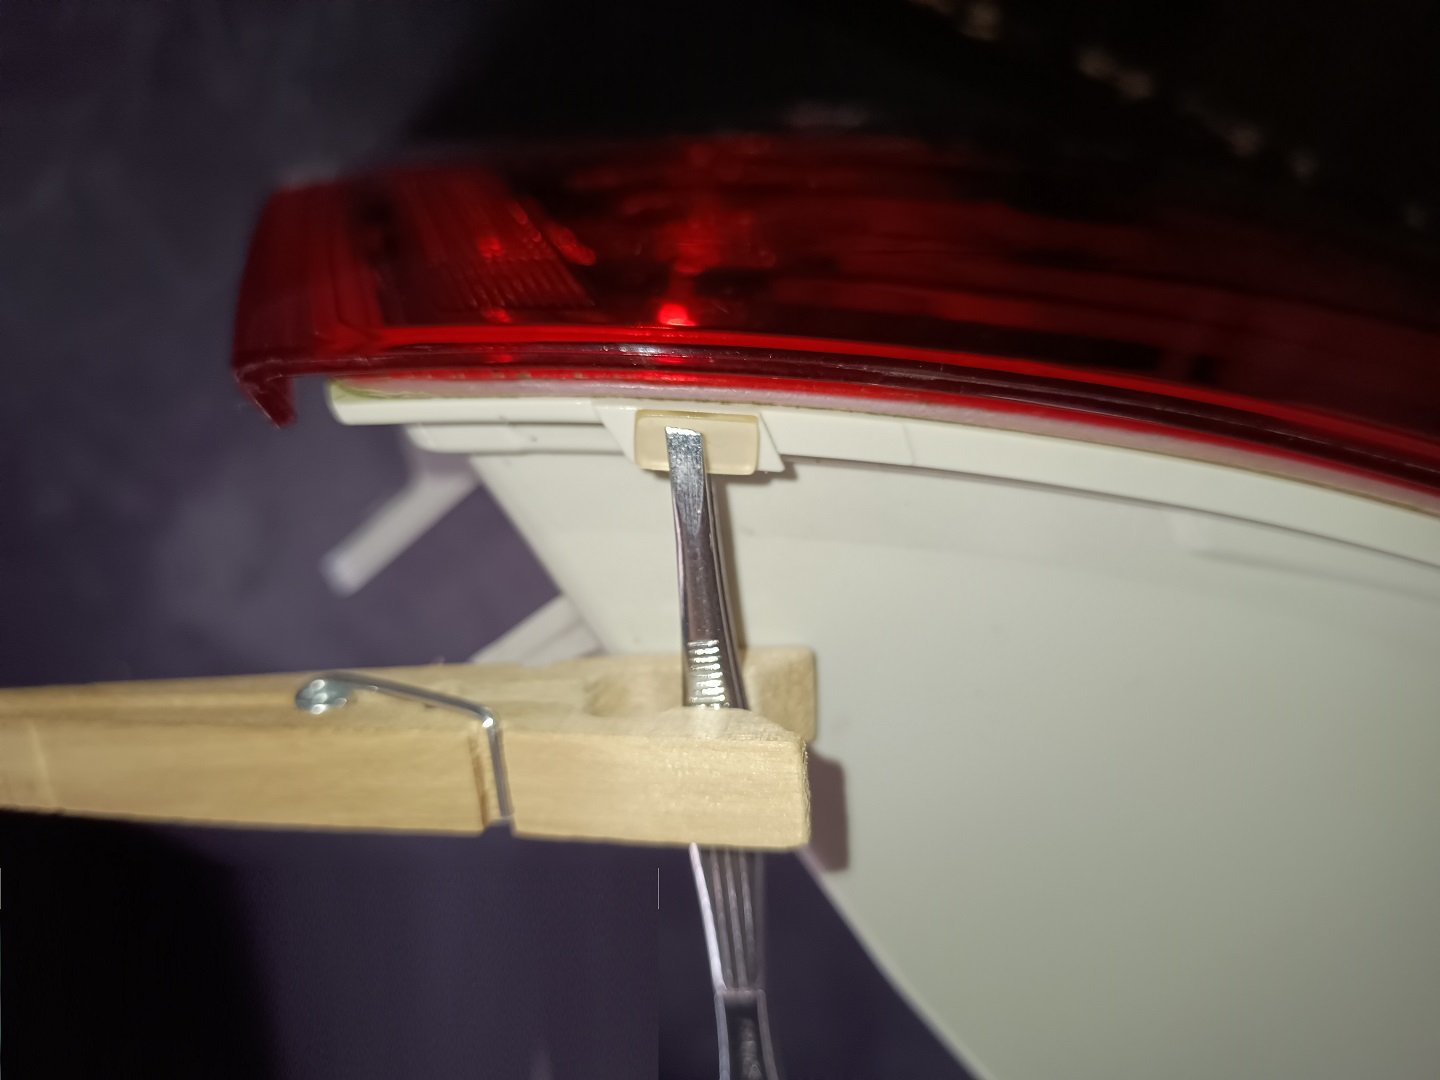
Cleaning the light prior to sealing it and I find one of the plastic spacer/shim tabs has become displaced and needs removing and gluing back in place. I uhm'd and ah'd about what to use and then opted for some superglue gel. Cleaned off the previous failed glue, which looks like some sort of double-sided sticky tape, and then applied a few tiny drops of superglue and pressed the pad into place. Held it down with a contrived tweezers & peg clamp, as it's a tricky little situation to allow clamping and the tweezers and peg allow a precise and simple "fit and forget" clamp which worked perfectly. While I'm here, I'll mention that the lamp isn't a sealed unit when fully assembled. There are vent holes in the rear of bulb mount by the connector plug, but hopefully water will not get in through there.
-
-
So you said earlier. nonetheless, have you run a vehicle check to see if it has had accident damage recorded? A check like this. https://www.carcheck.co.uk/CarCheckExample.pdf
-
That's good to hear. No vehicle check to see if it's had a major shunt?
-
That is an excellent point, Gaz. I will take your advice and use a permanent sealant. 🤝
-
No the light is beautifully dry and ready to be sealed against water ingress. I have ordered the silicone sealant, but I have a thought that some silicone grease might be better, as it's a more fixable solution after completion. I can easily wipe it off and re-apply, whereas the silicone sealant is not easy to sort out if it fails or turns black with water mould. But potentially it's a less permanent solution. I suppose I could put an initial layer of sealant on the joint around the lamp unit, then if it fails, apply a top coat of the silicone grease. There's one awkward crevice that will be difficult to seal neatly and completely.
-
I've had my car for 4 years and the only thing that's gone wrong with it is water ingress to the rear lamp cluster, which I'm sorting out for the cost of a hairdryer and some silicone sealant. It's the most trouble-free car I've ever had, but mine's only 5 years old and under 23K miles. VAG cars are not like 2012 Hondas. They need meticulous maintenance as well as planned preventative maintenance, if you want trouble free motoring, IMO. It might be you have bought a troublesome car. Have you performed a vehicle checks on the car, to see if it's been in a big crash? Has it sailed through most of its MOTs without issue, or has it had a shopping-list of advisories every year for the last few MOTs? What's the service history of the car like? Complete and meticulous, or every 2 years/20K miles? When was the coolant last changed, before it spilled out onto the road?
-
Thanks to all who've contributed to this thread. I'll post more pics of how the light fits into the bodywork tomorrow, as you'll need to know how to remove the light unit if you ever have to change a bulb in the rear lamp cluster.
-
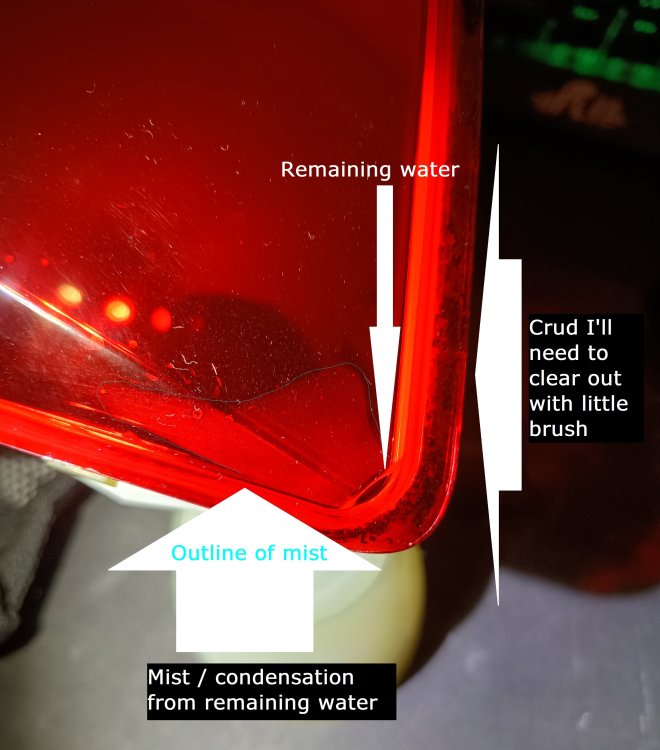
Right, an update. Tonight I removed the light, covered the hole in the bodywork with a plastic bag taped in place with detailing tape, to keep the worst of the weather out. I then set about drying the rear lamp indoors. I started with a (newly bought) hairdryer set on max fan and mid heat, with a large desiccant bag nearby. I'm not sure how much the desiccant bag helped, but the hairdryer worked very well, and I was content letting it run until I realised that a 2kW hairdryer might be quite an expensive way of drying the light. By the time that thought occurred to me, the light was already pretty dry. I had a careful look around with the aid of a torch for any tiny drops of water that I'd end up sealing in if I didn't shift them at this stage. There were a couple left, so I figured I'd need a cheaper but still effective solution to shift them. Enter the hot water bottle. I have rested the light on a cushion with the desiccant bag under the bulb holes, and rested the rubbery hot water bottle over the top of the remaining water hole and left it to evaporate the water. The cushion allows me to position the light perfectly for the hot water bottle to sit neatly over the drop of water and associated condensation, and I'll check on it and replenish the hot water bottle as required. I have a little tube of clear silicone sealant on the way for tomorrow, and will use some very cheap and nasty interdental brushes to clear the accumulated crud out of the channel where I intend to run the silicone sealant. I intend to err on the side of caution, and use as little silicone as possible. I'll squidge the sealant into the gap between outer lens and main lamp body with a toothpick, and hopefully that will be that.
-
That thought did cross my mind, but I don't want to be drilling holes in the rear light in what is still a fairly young car, if I can effect an alternative solution.
-
Yeah, that's my plan for when I do the job properly. 👍
-
I gave them a try, but I think I was just trying the handle on the door to a world of trouble and I bottled it and went fishing for water instead. It's not perfect, but it's plenty good enough for now. Thanks for your replies, @Gaz & @Sweden24! 🤝
-
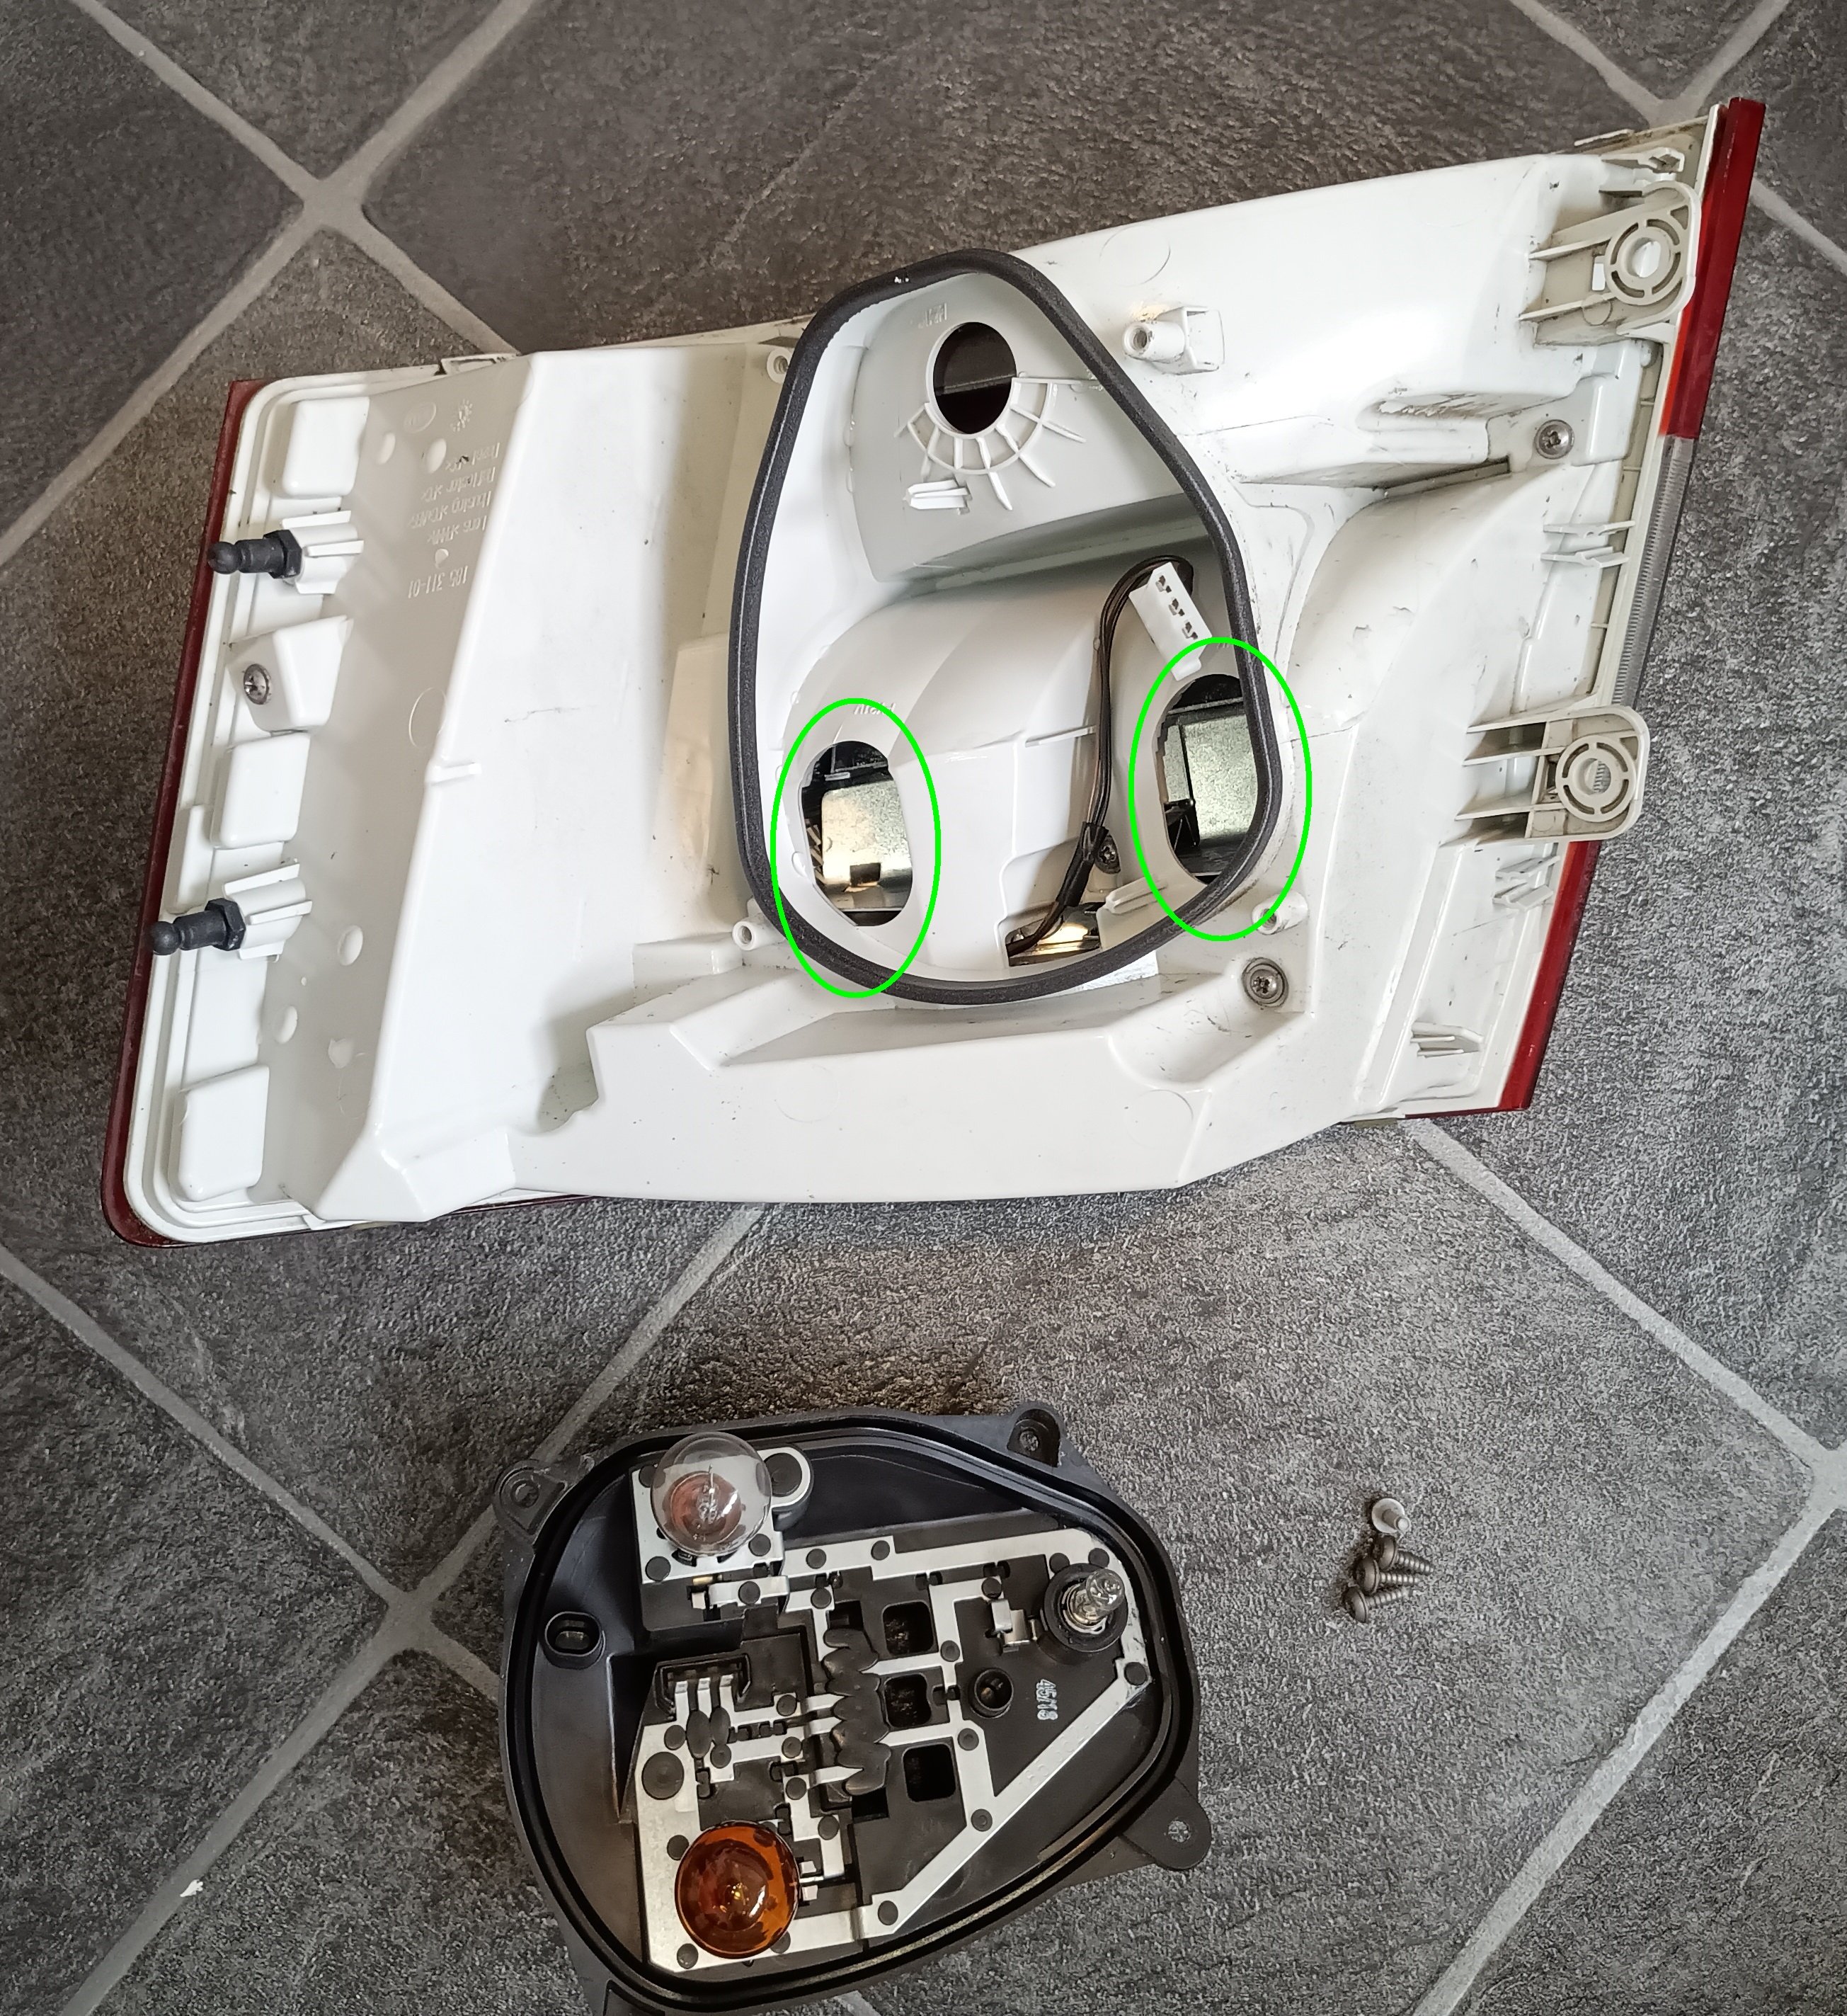
Well I've done a very rough and ready job of it, but it's getting dark and I need the car tomorrow. It's fairly easy to do, once you know what you're doing. This video gets the light out, more or less. There are a couple of flies in the ointment, however. There are two pop-in plastic lugs that fit into the bodywork. You can see them on the left below. I needed to pry the light backwards with the thin pry tool to pop them out, as there's not much purchase on the lamp itself to pull it out. Beyond that, I tried unscrewing the five Philips screws, but they were "giving" in an odd way, and I had visions of undoing something that might subsequently move and be impossible to re-assemble, so I bottled it and took the 4 torx screws out and removed the bulb cluster out. So now I know how to change my rear bulbs at least, which is nice. The rubber seal you can see actually slots into the bulb holder, it just happened to adhered to the main lamp body when I split the two. To remove (most of the water) I started with a turkey baster, then when I'd got the worst of it out, I used a tea-towel, extra-long cotton buds and a useless pipe-cleaner. (Which reminds me, I need a better pipe-cleaner.) It's still pretty horrible, but it'll do for now and I know what to do to do a better job when I have more time to do it.


-
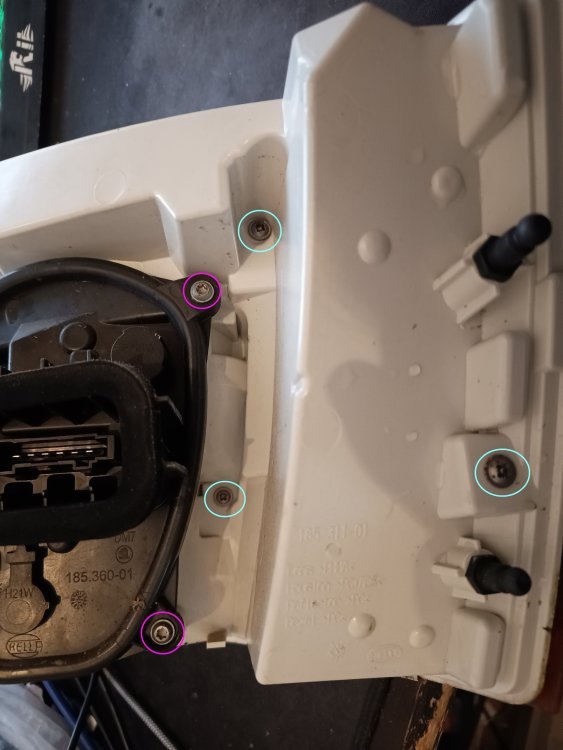
Does the lamp actually split into more than one piece? There seem to be two sets of torx bolts. Set one - Five bolts circled Blue (Philips head) Set 2 - Four bolts circled Pink. (Torx T20) The pink bolts look like they can be removed fairly easily, but the blue ones look a bit like they might cause problems. Or is it straightforward?

-
Yeah, I think removing the rear light and drying it out is certainly the next step.
-
I think it's failed here, @Gaz. Thinking about it, it's been one of those "Huh! I don't like the look of that, but it's not causing any problems." things that I've put to the back of my mind. I assume it's not related to that hole a bit above the tip of the pink arrow.

-
I have been guilty of using a pressure washer on the light previously, so if Skoda is right, I may inadvertently have caused the issue. 🤔
-
Thank you for adding information. Hopefully others will be able to add info on a repair to stop the problem, but if it needs a new lamp cluster, then so be it. I'm well out of warranty now, unfortunately.
-
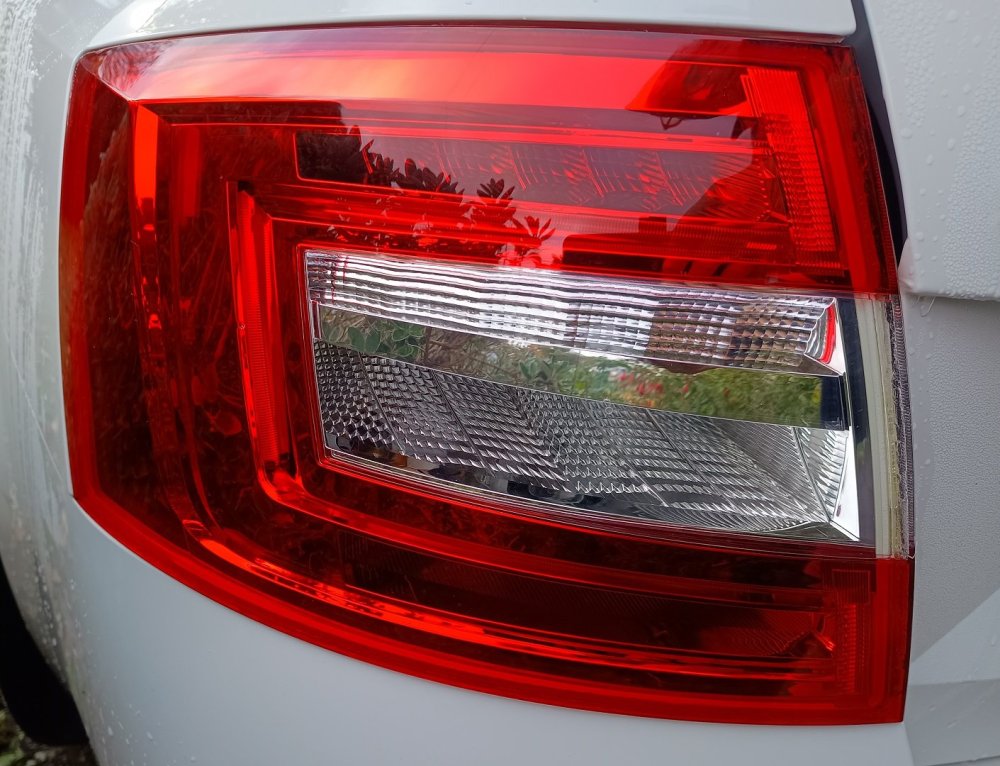
I seem to have a problem. I noticed it last week and figured it was a bit of condensation, but it has now become a problem IMO. Has anyone got any ideas as to how to solve this problem of water ingress into a real lamp cluster? AFAIK, the rear lamp has not been damaged by impact.
.thumb.jpg.1f364f63a8bf1024378c42c49ec6b8f4.jpg)
.thumb.jpg.2e1148776757bdafb0856b92183c3238.jpg)
.thumb.jpg.a0a49120296bca5f8c2a6bd57c3b006c.jpg)
-
Touching up is always going to be tough on a dark metallic. Whatever you do, don't use the wallpaper paste brush in the touch-up bottle. Get a decent very small brush and do it in thin coats along the scratch. If you're doing it outside, it might be worth putting a good layer of a hard wax like Turtlewax on it and leaving it a few months until it's warmer and dryer. If you want the best result you can get, pay a professional to do it. Also note that you can do the job and get it perfect one way or another, and still end up with one of your simian neighbours repeating the damage. So it might be worth setting up some sort of protection/security to try and stop the problem being repeated, or at least allow you to identify the culprit.
-
If the cops catch you driving without vehicle tax paid, they may not let you continue your journey. If you're lucky, they may let you tax it there and then. If you're unlucky, they may seize your car.
-
One of my online vices is watching those police chase videos from around the world. The UK police will stop someone, ask them for evidence of their tax/insurance/licence whatever, they then make off, get chased by the cops for ages, chase someone for ages, and after they finally bring them to a halt, arrest them and you get the post-mortem, you find they got a paltry fine and a ban on a licence they don't have. I like the Arkansas State Police. They don't put up with any nonsense and if you make off from them, you're likely to end up upside-down in a tangled wreck, with an angry cop bellowing at you with his gun drawn and pointing at you. The Brazilian cops are pretty spicy too. You stand a good chance of ending up dead if you make off from them. 😄 My point (FINALLY) is, there seems to be next to no deterrent for scumbags to drive around unlicensed/uninsured/untaxed/un-MOT'd in the UK, as the police really don't seem to think it's a big deal if they didn't catch them in the act.


.jpg.62c1f7cf15ed8bfb1a449edadc807914.jpg)
.jpg.7a280055fcc96a2f7f8e3e93894234b9.jpg)
.jpg.3c7c83234eafde59648b744171d9c85d.jpg)
