.jpg.add35da7a0ad7993ecbcafdfb20a6d19.jpg)
DieselMonte
FREEDOM
-
Joined
-
Last visited
Everything posted by DieselMonte
-
Could always join the darkside and put a cheap pair of led spots in for high beams
-
I've driven a few caddys and golfs that had the blue gauge lights VW used to use. Headache inducing. Green or orange are the best for gauges/ stuff in the car.
-
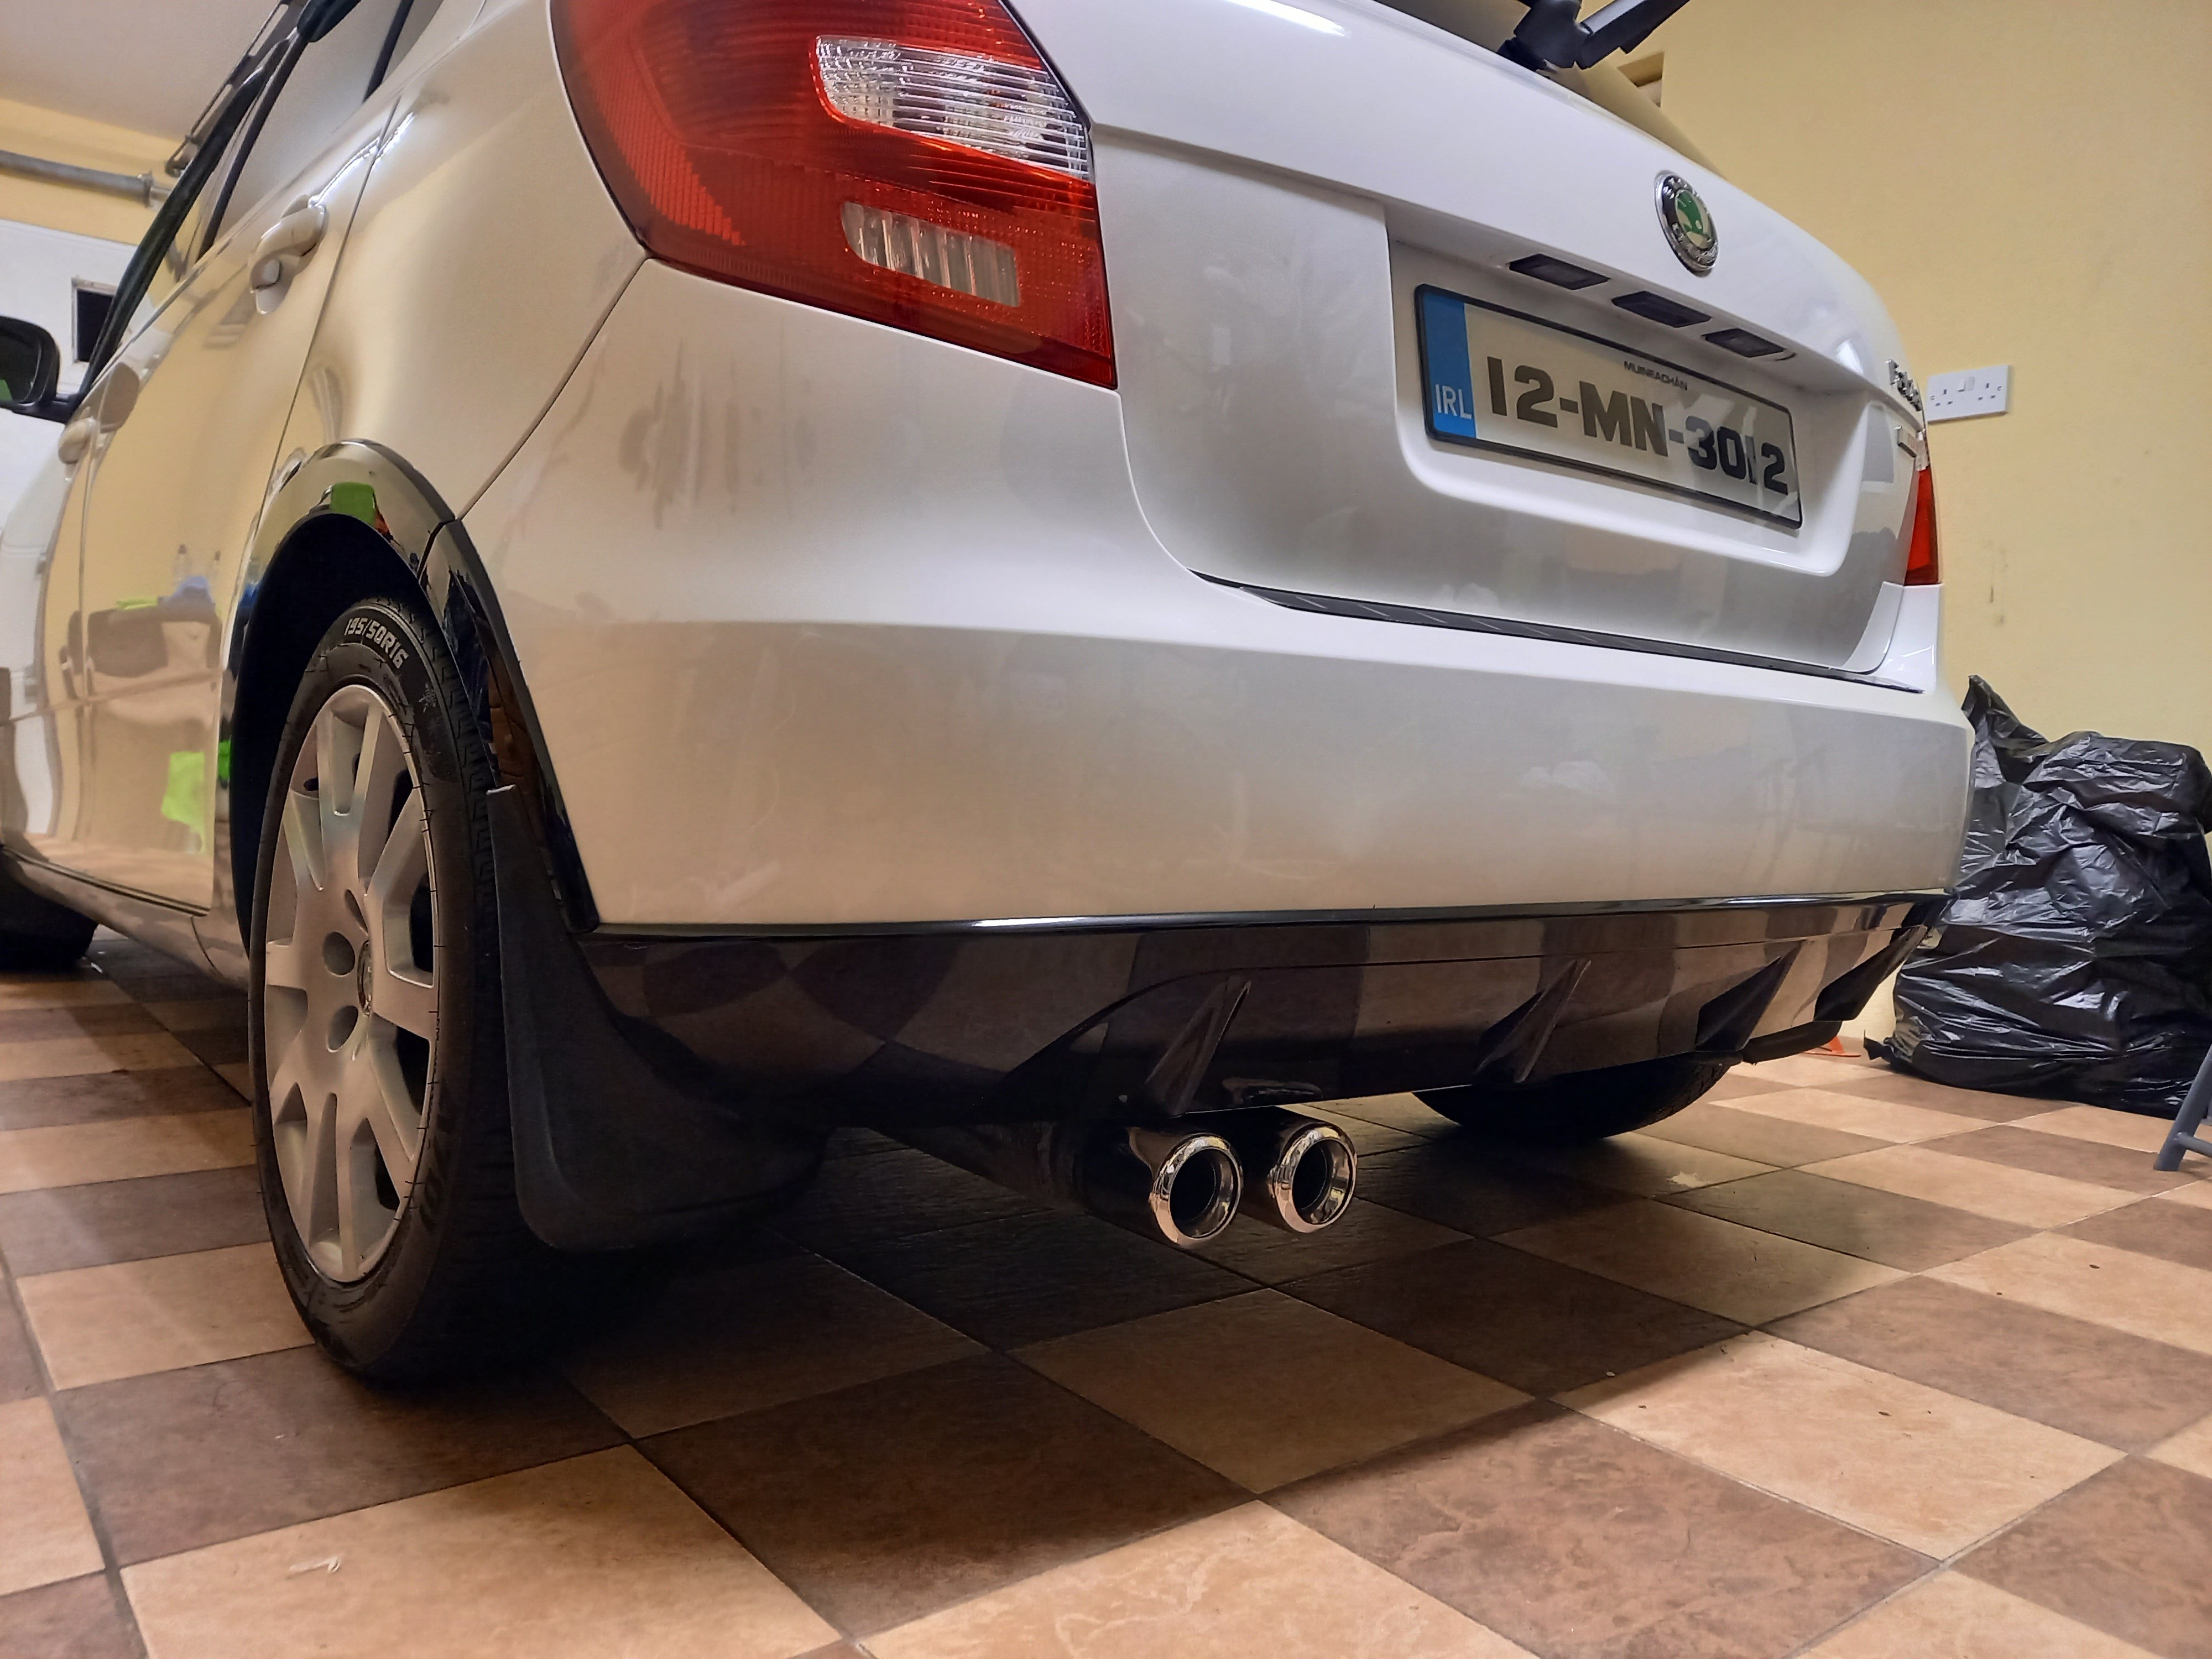
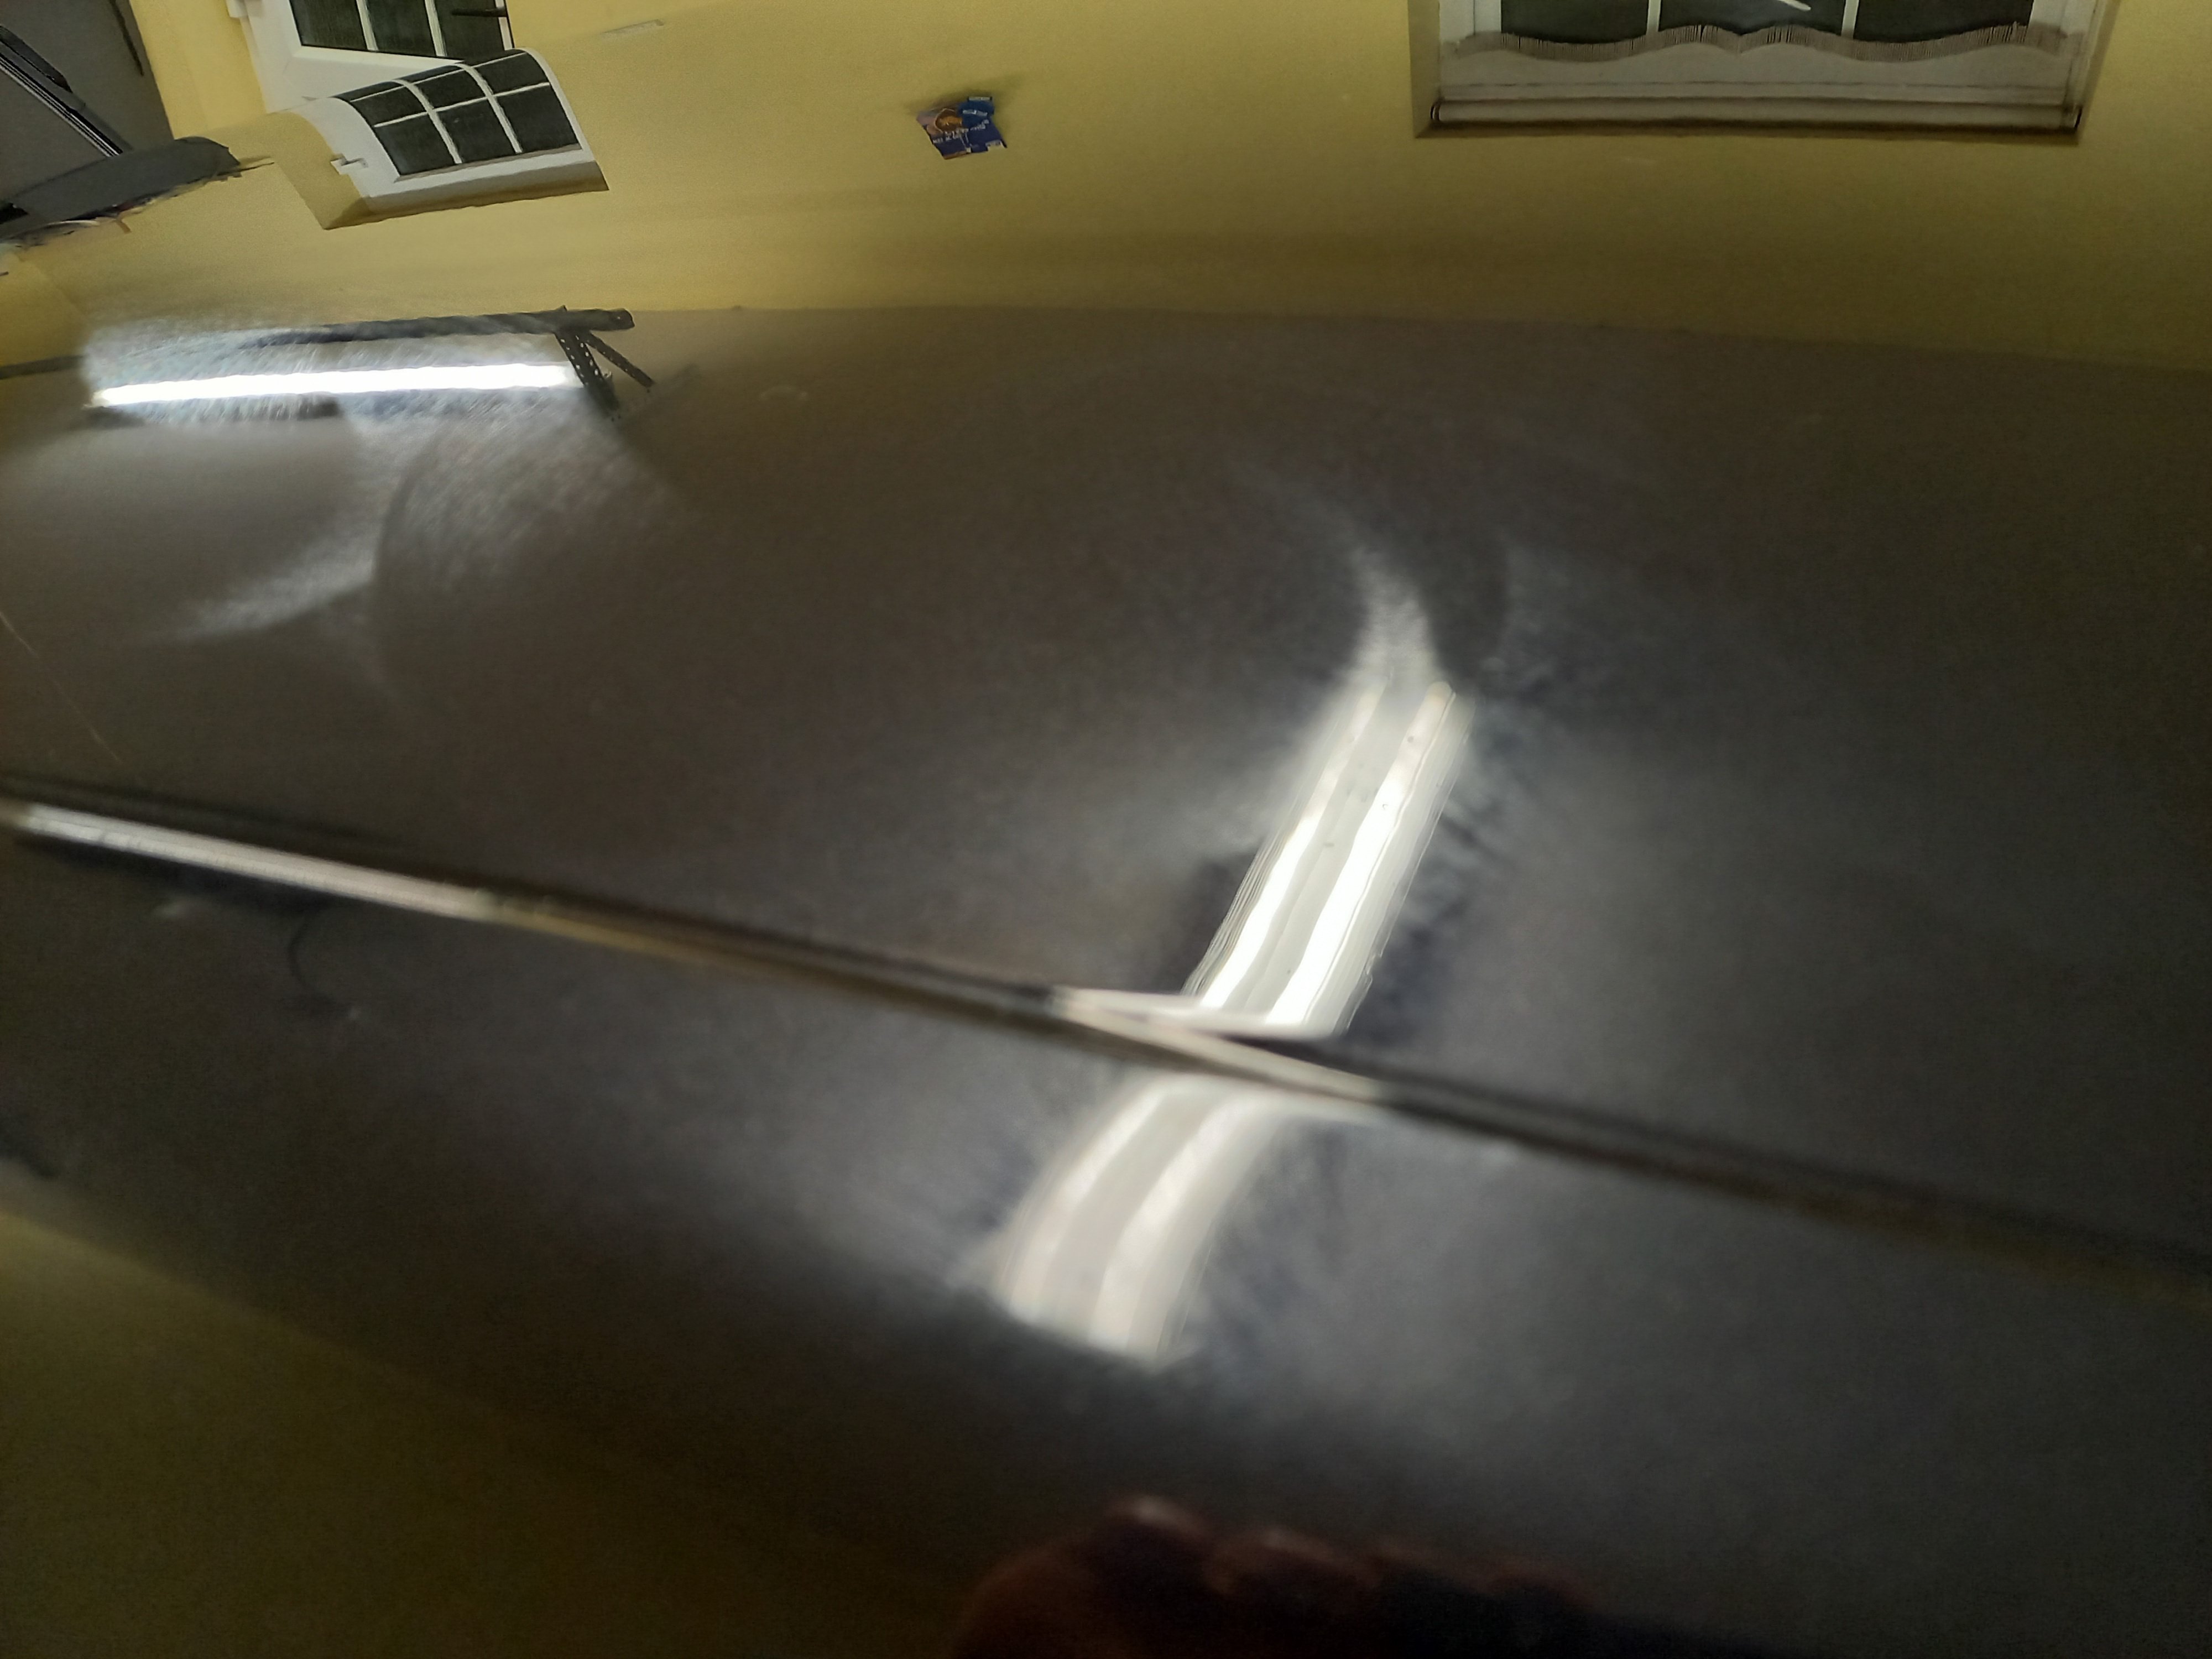
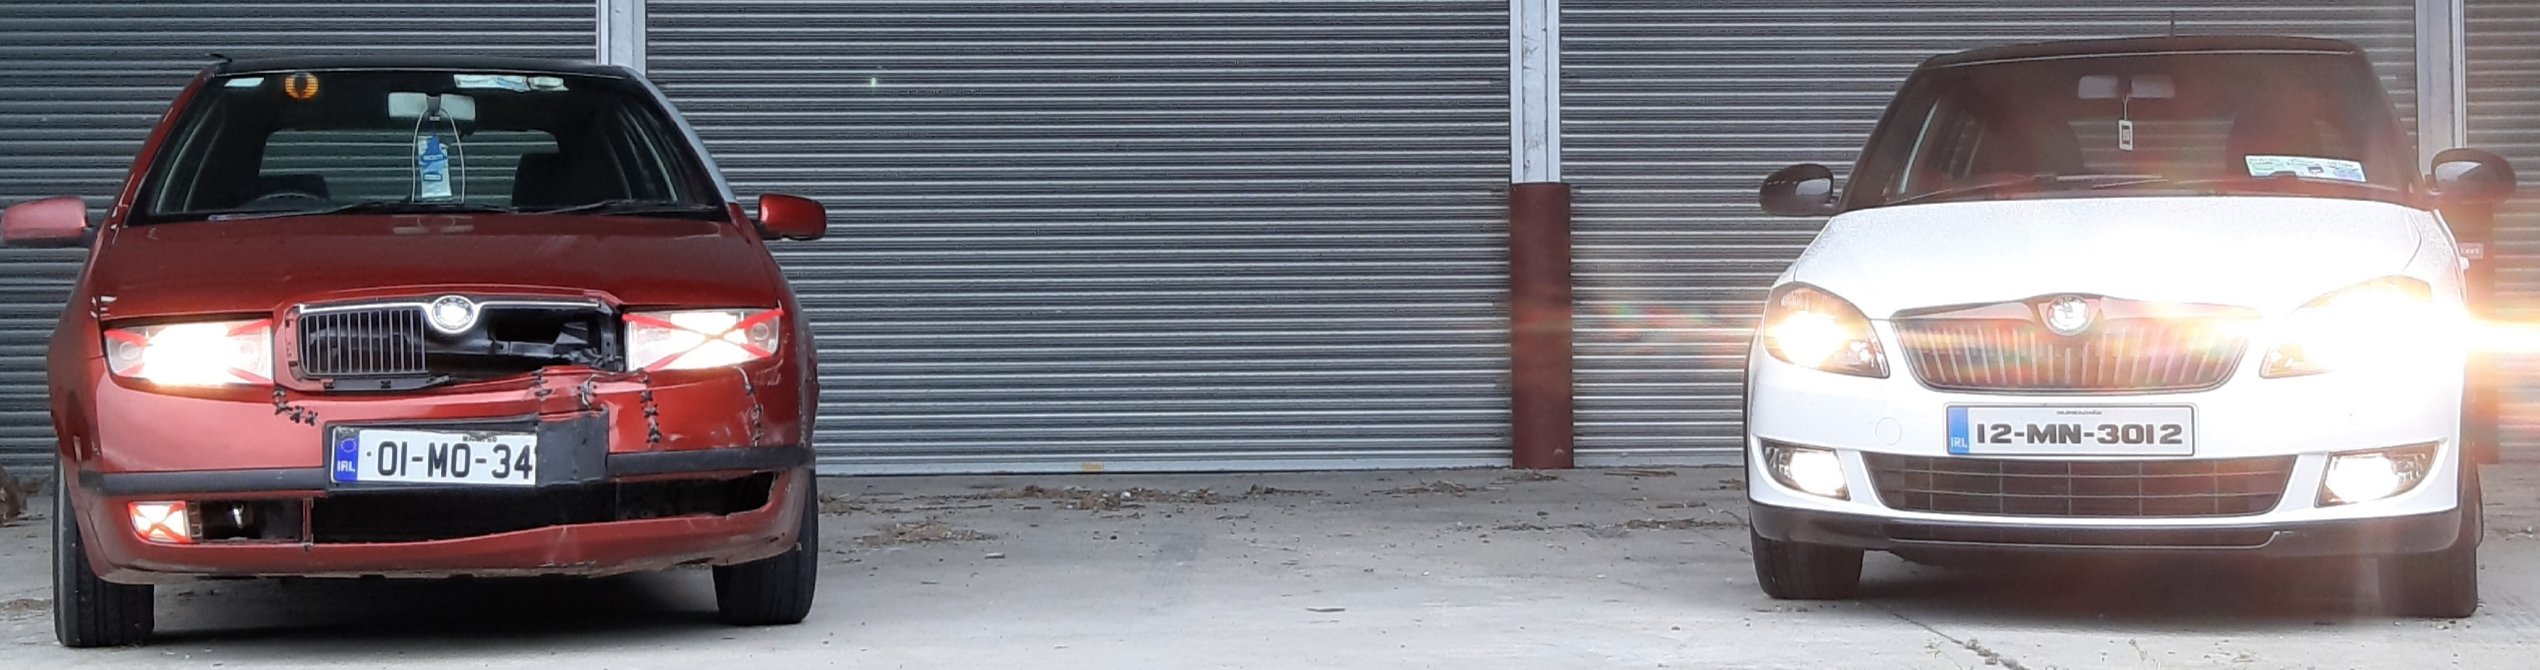
Found this yesterday Its not "too" bad but obviously needs fixed. Seems the darkside emblems helping the crack hold together. Taking this on a rather long trip next week and I don't know if I can get it fixed it time so it'll have to hold on for a while longer.

-
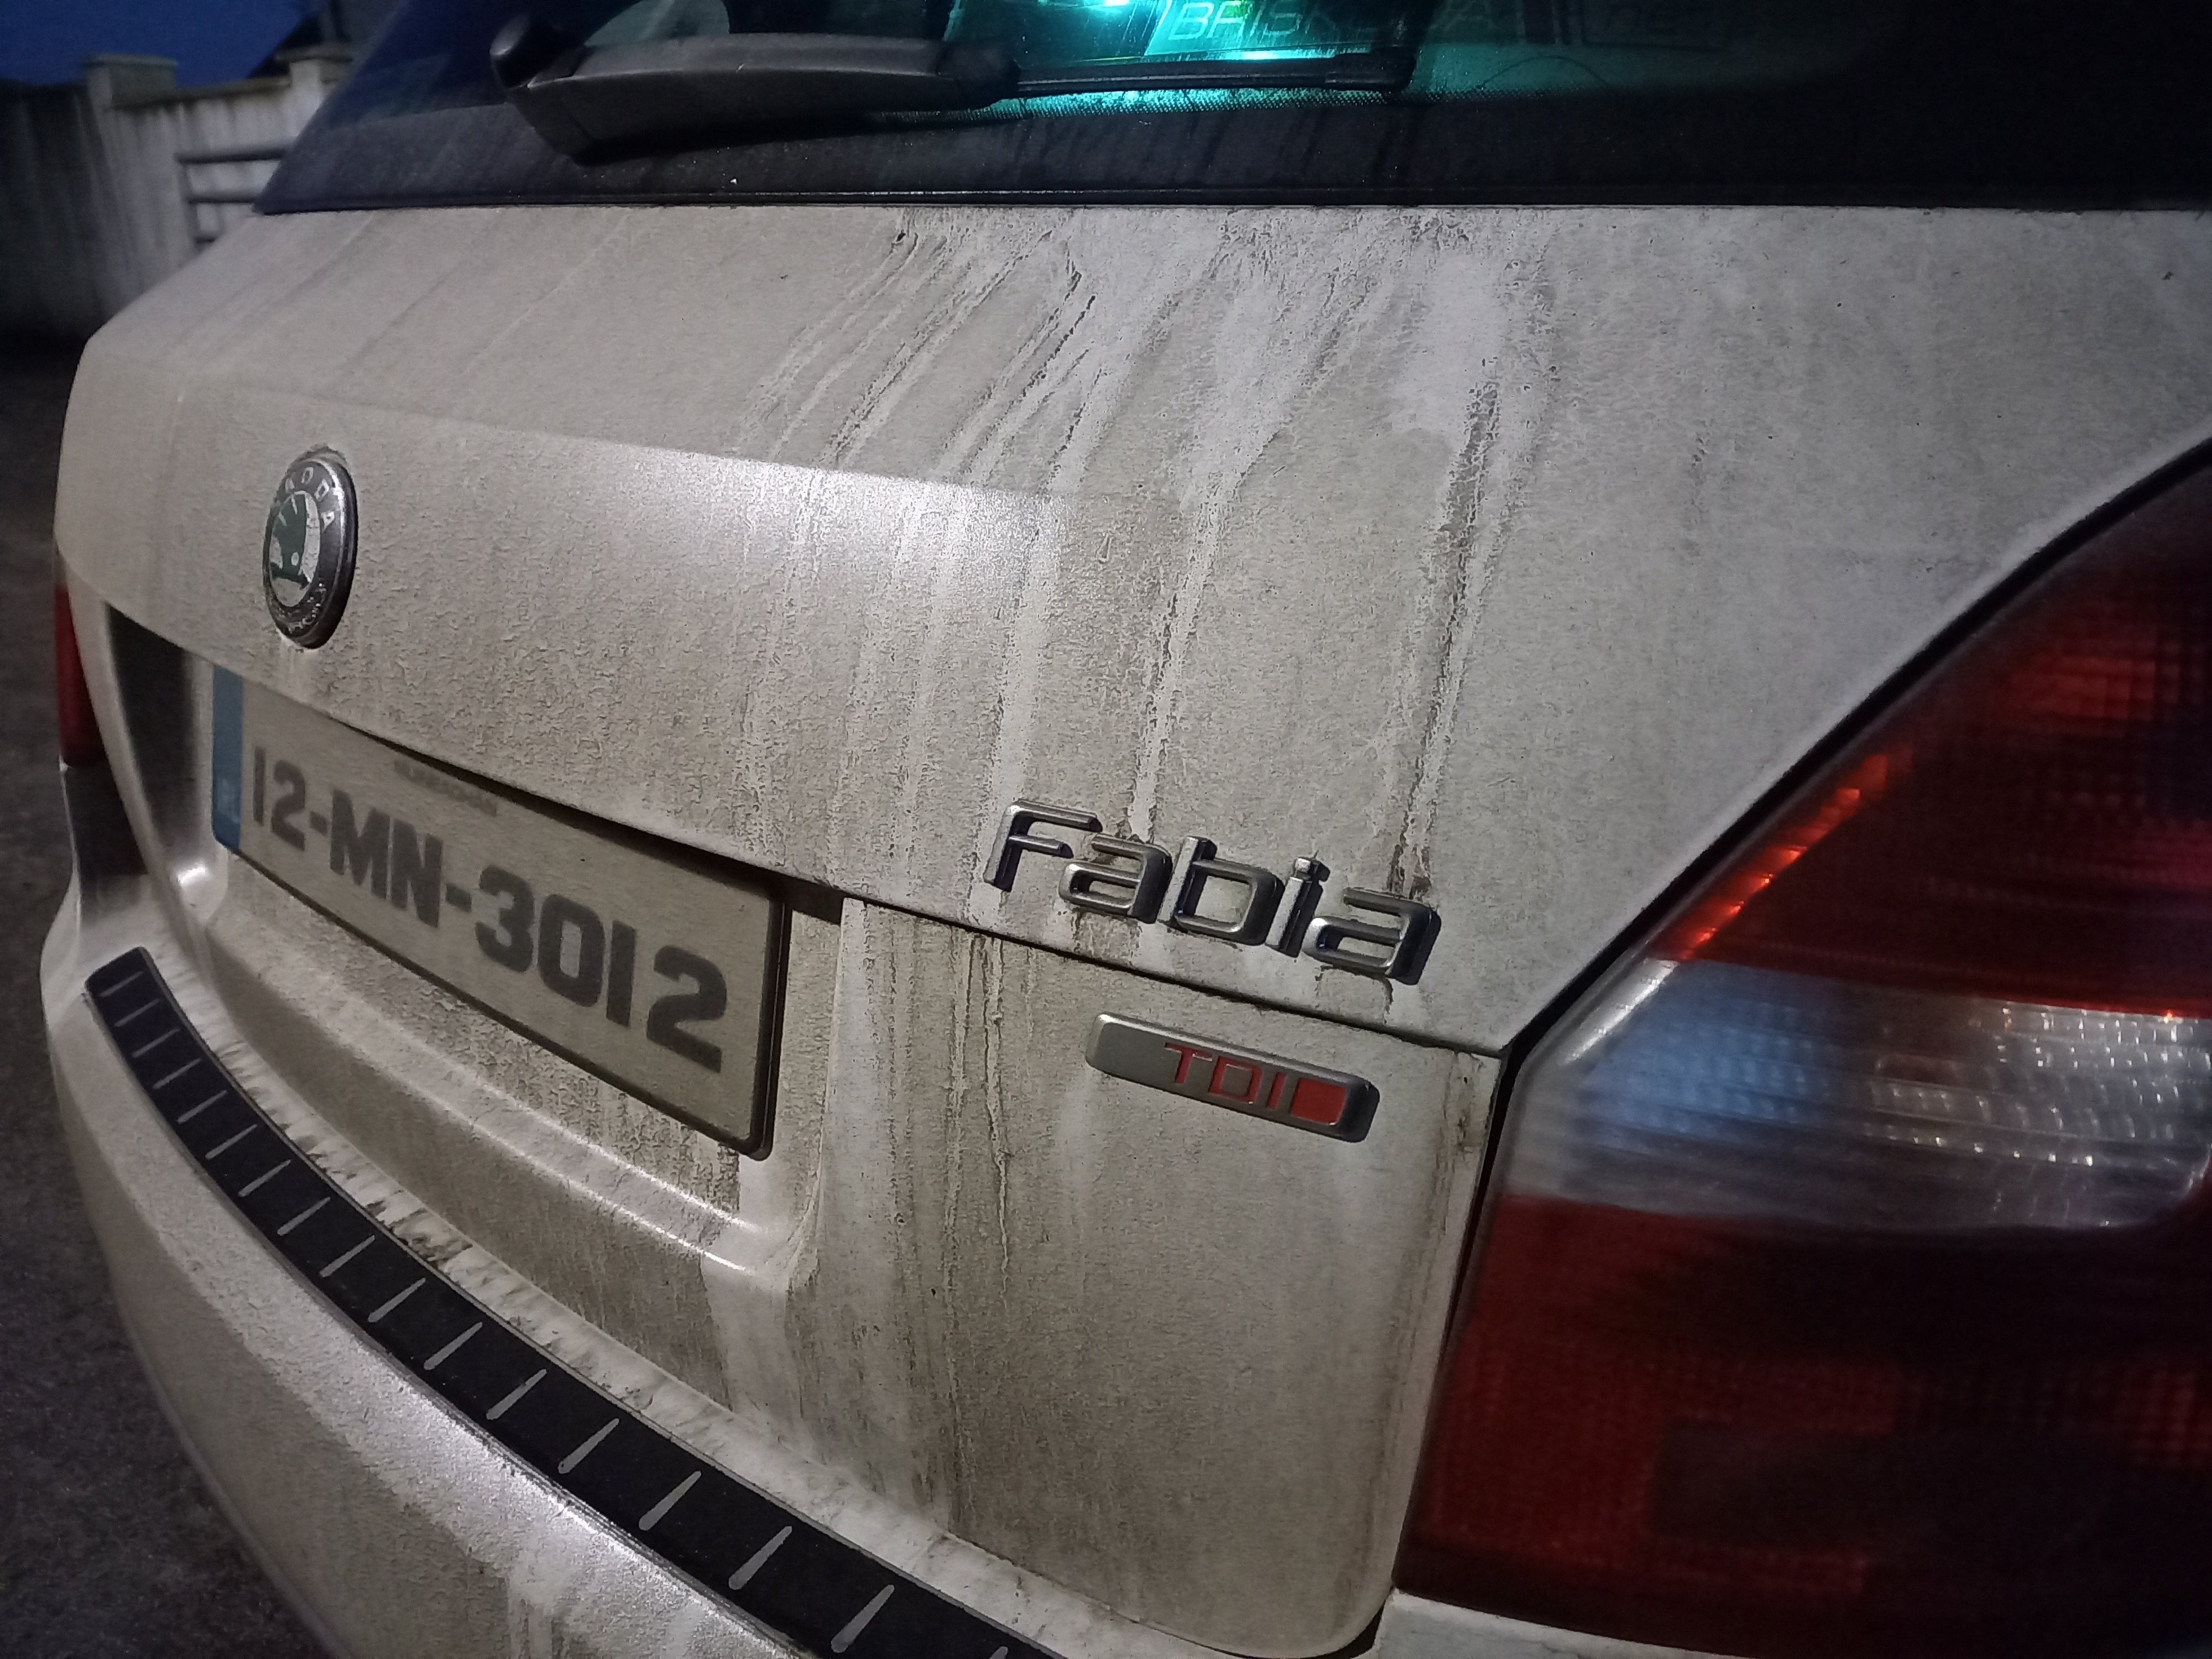
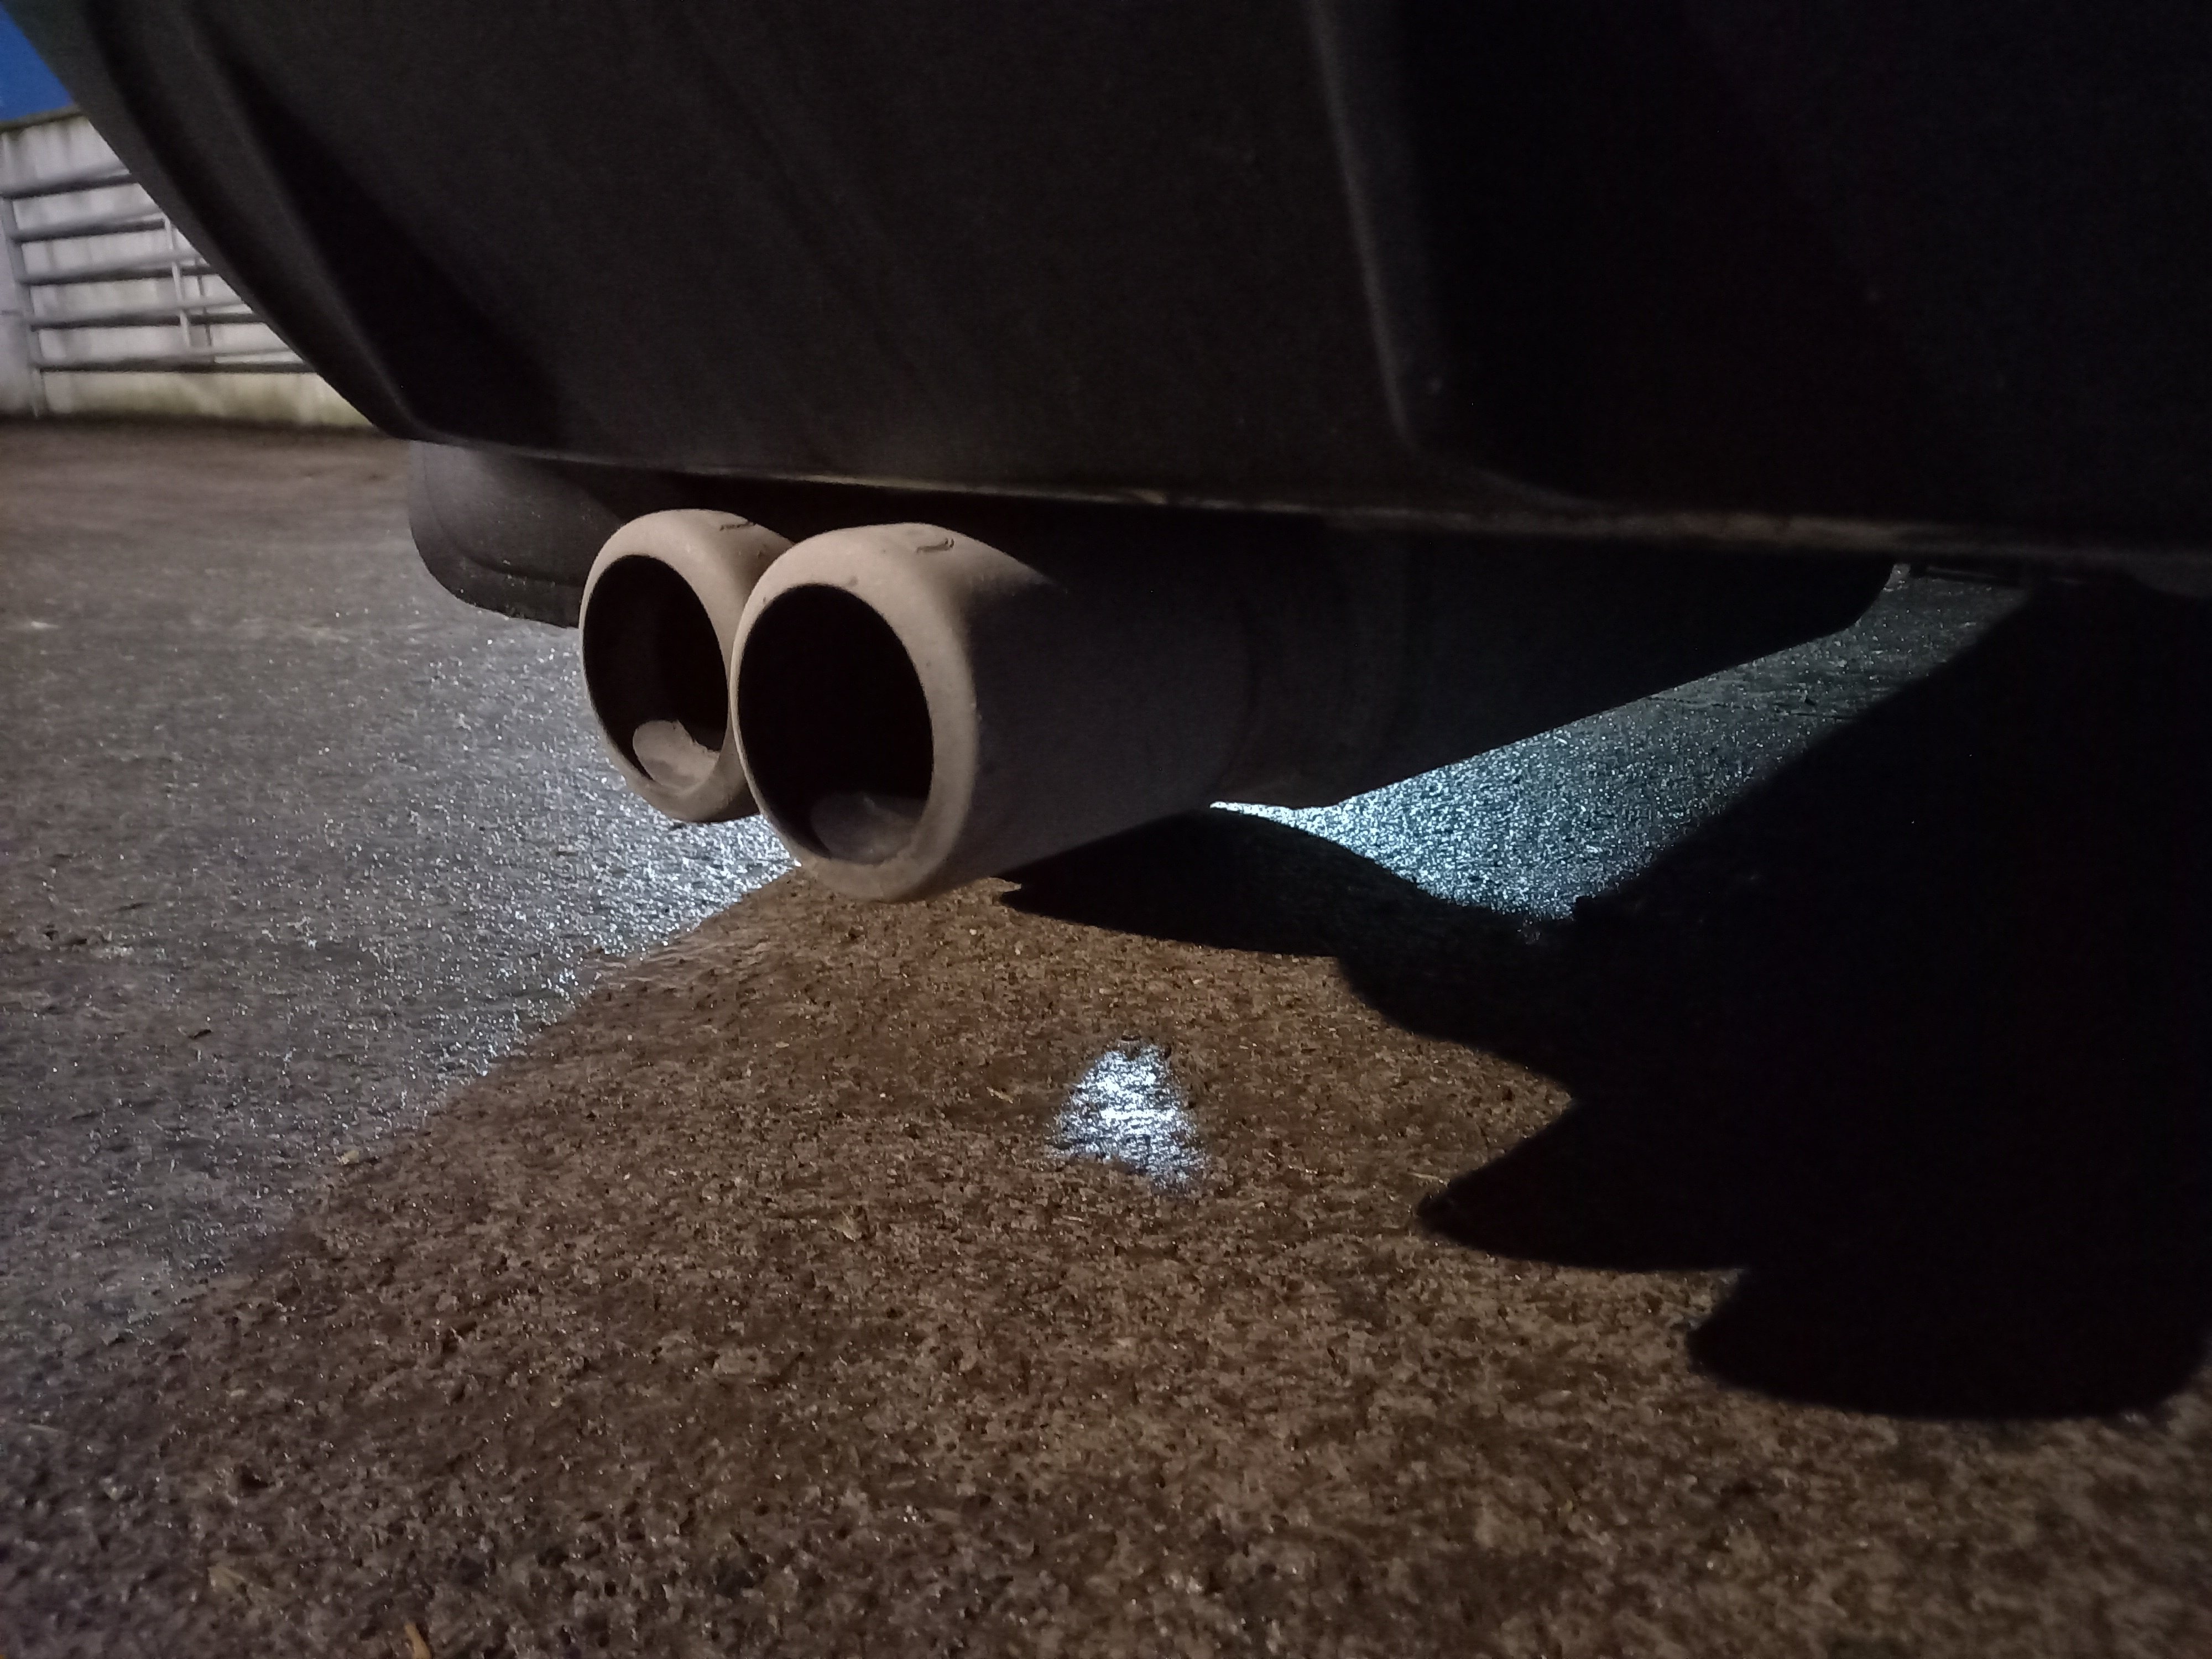
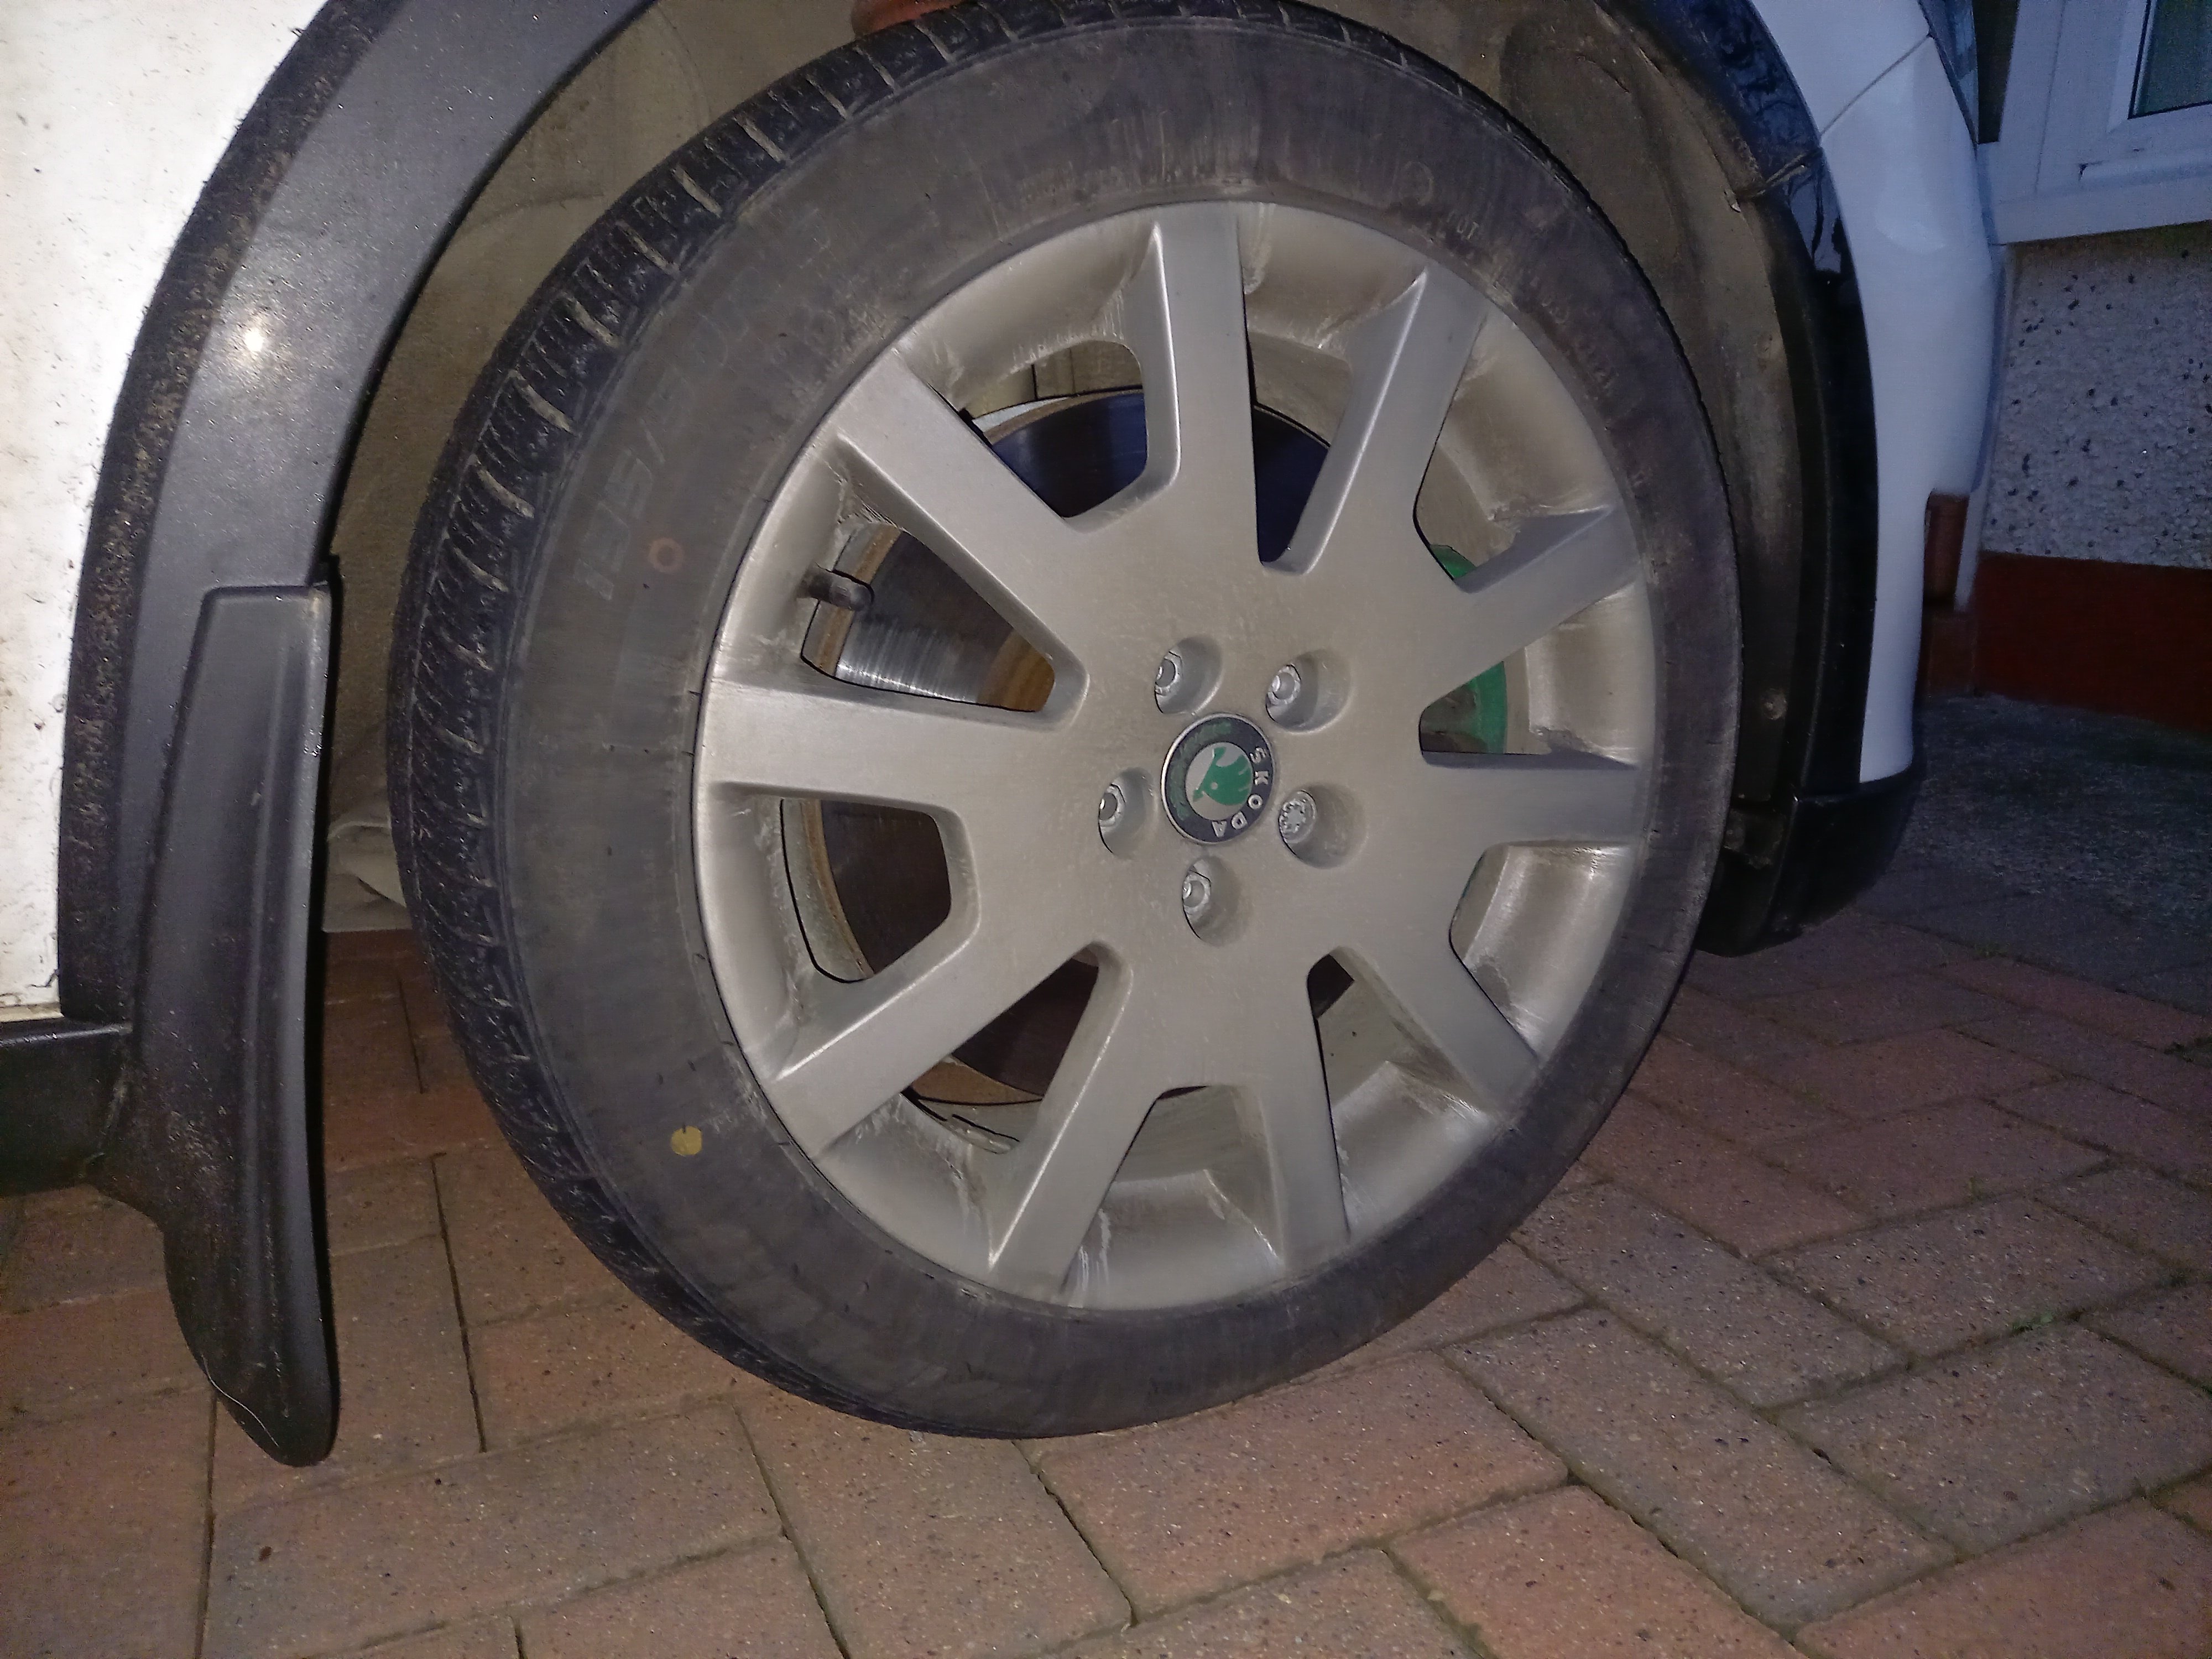
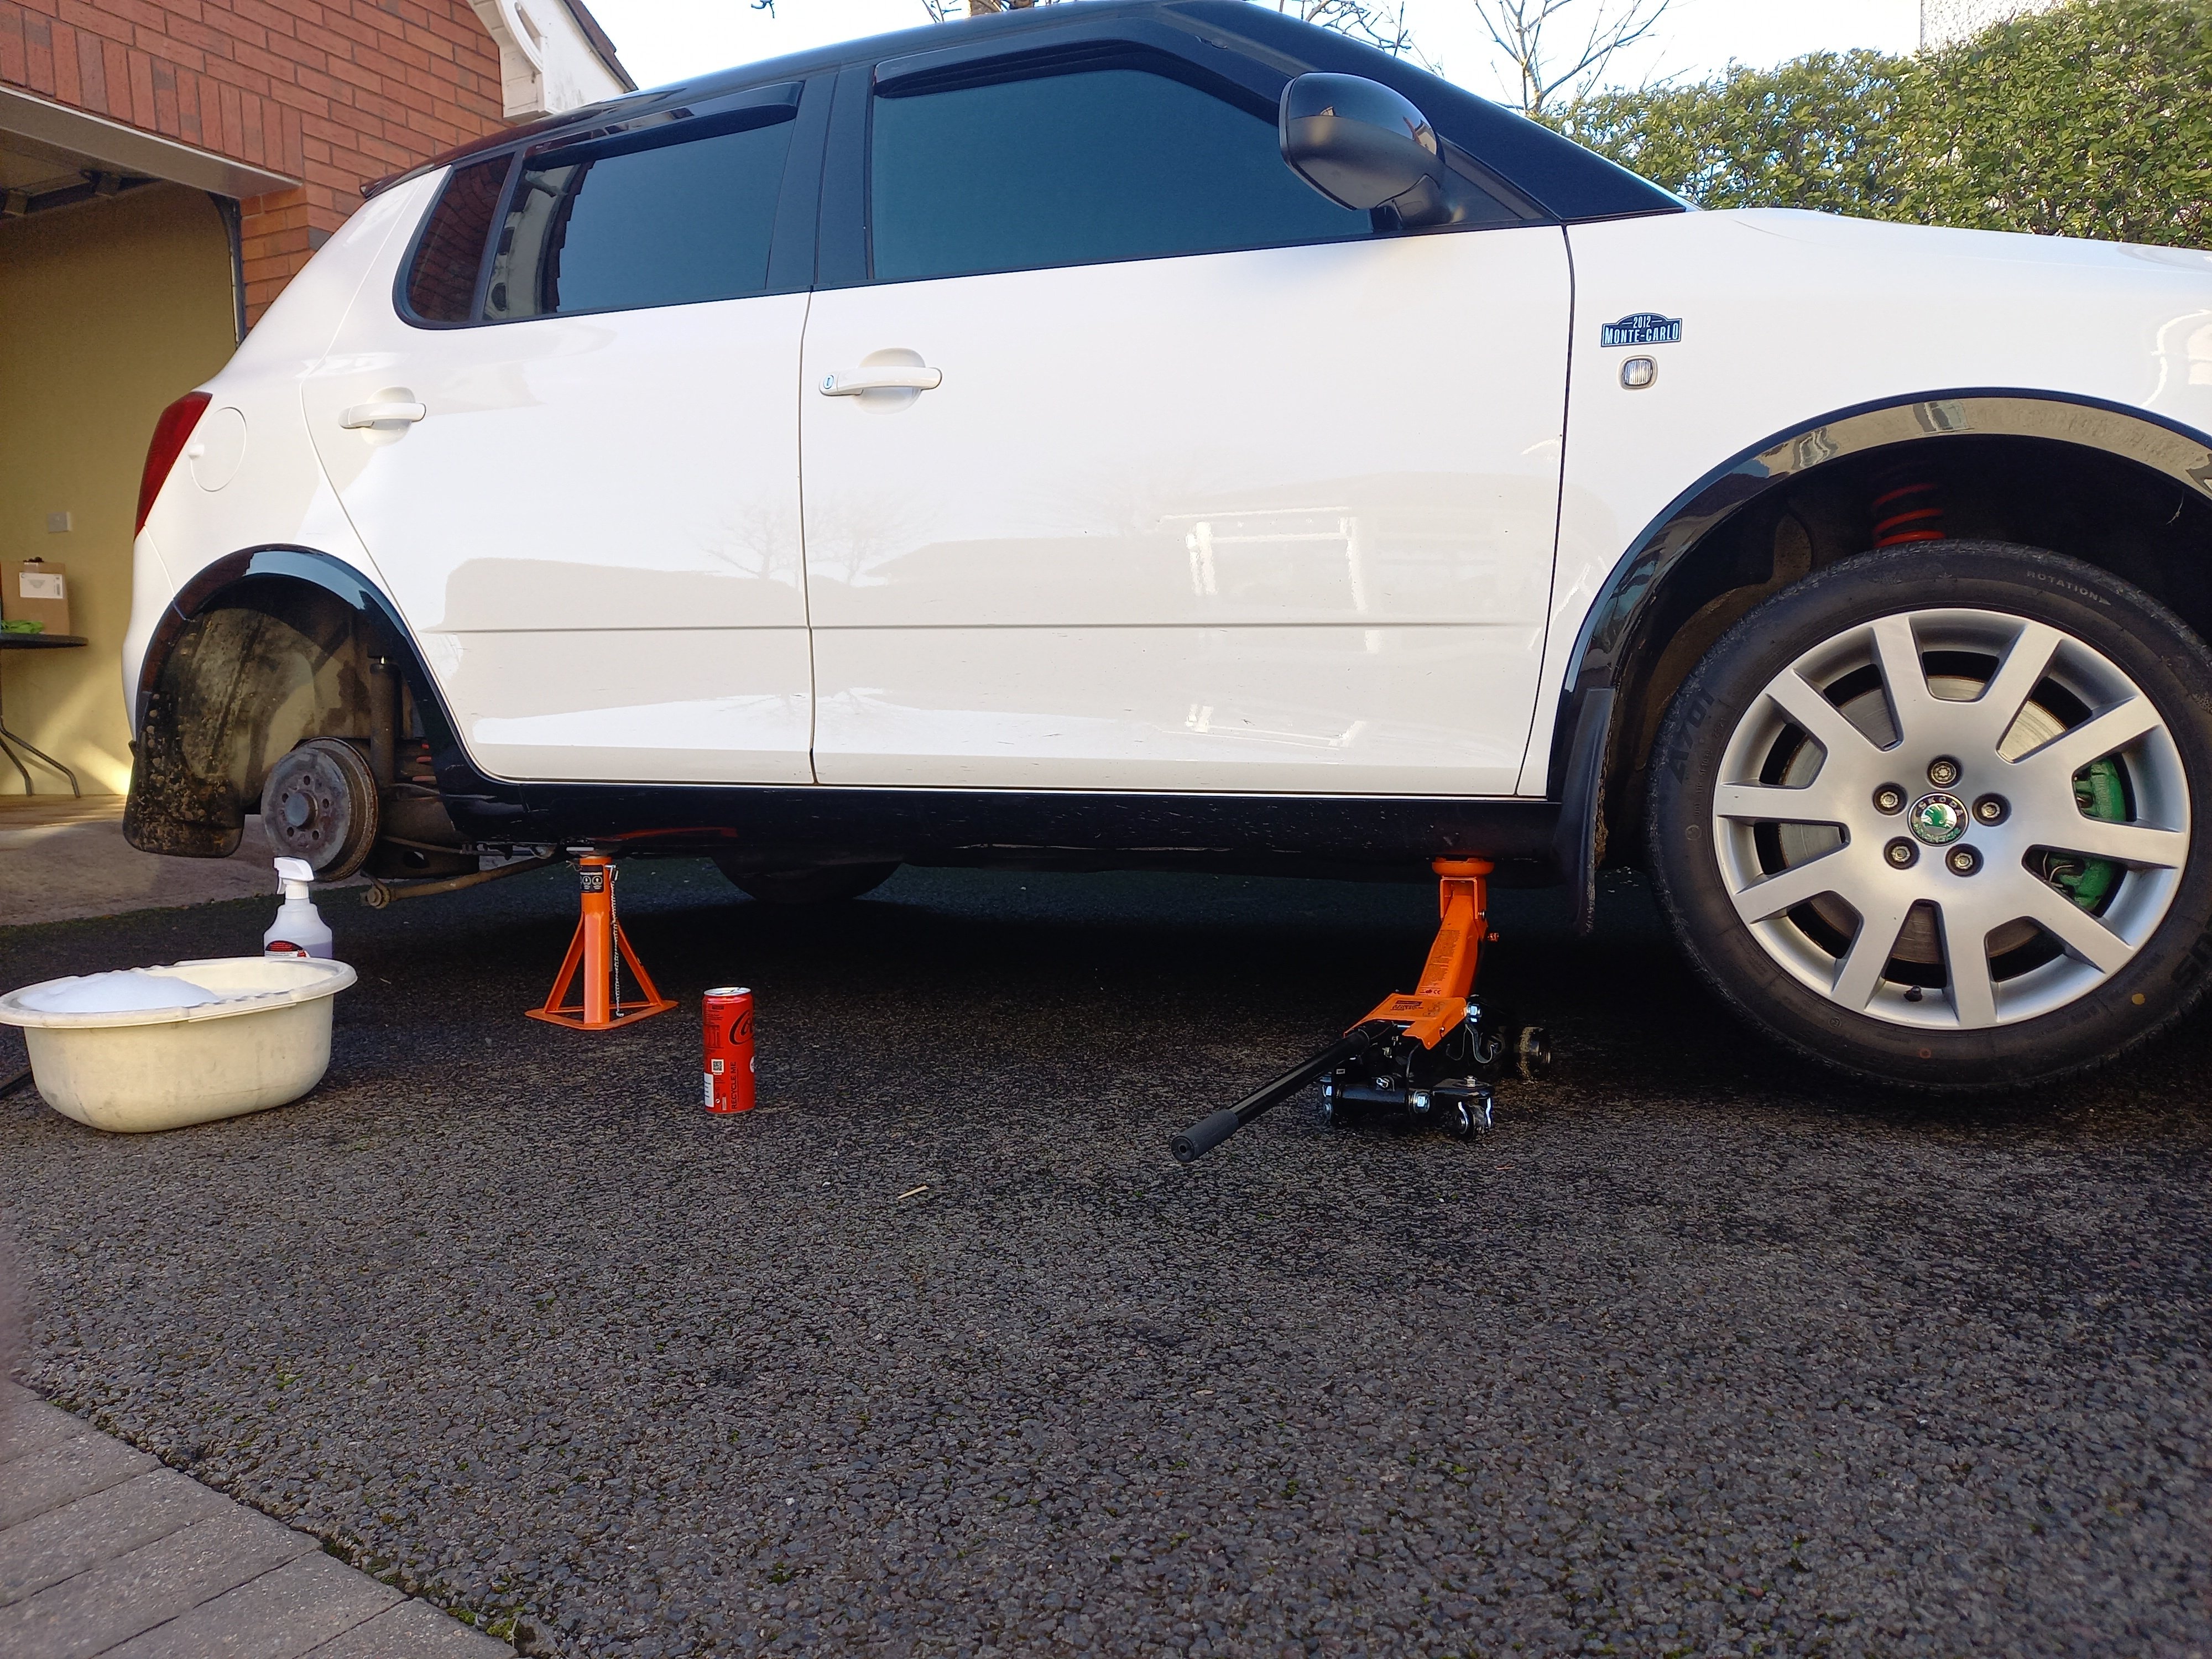
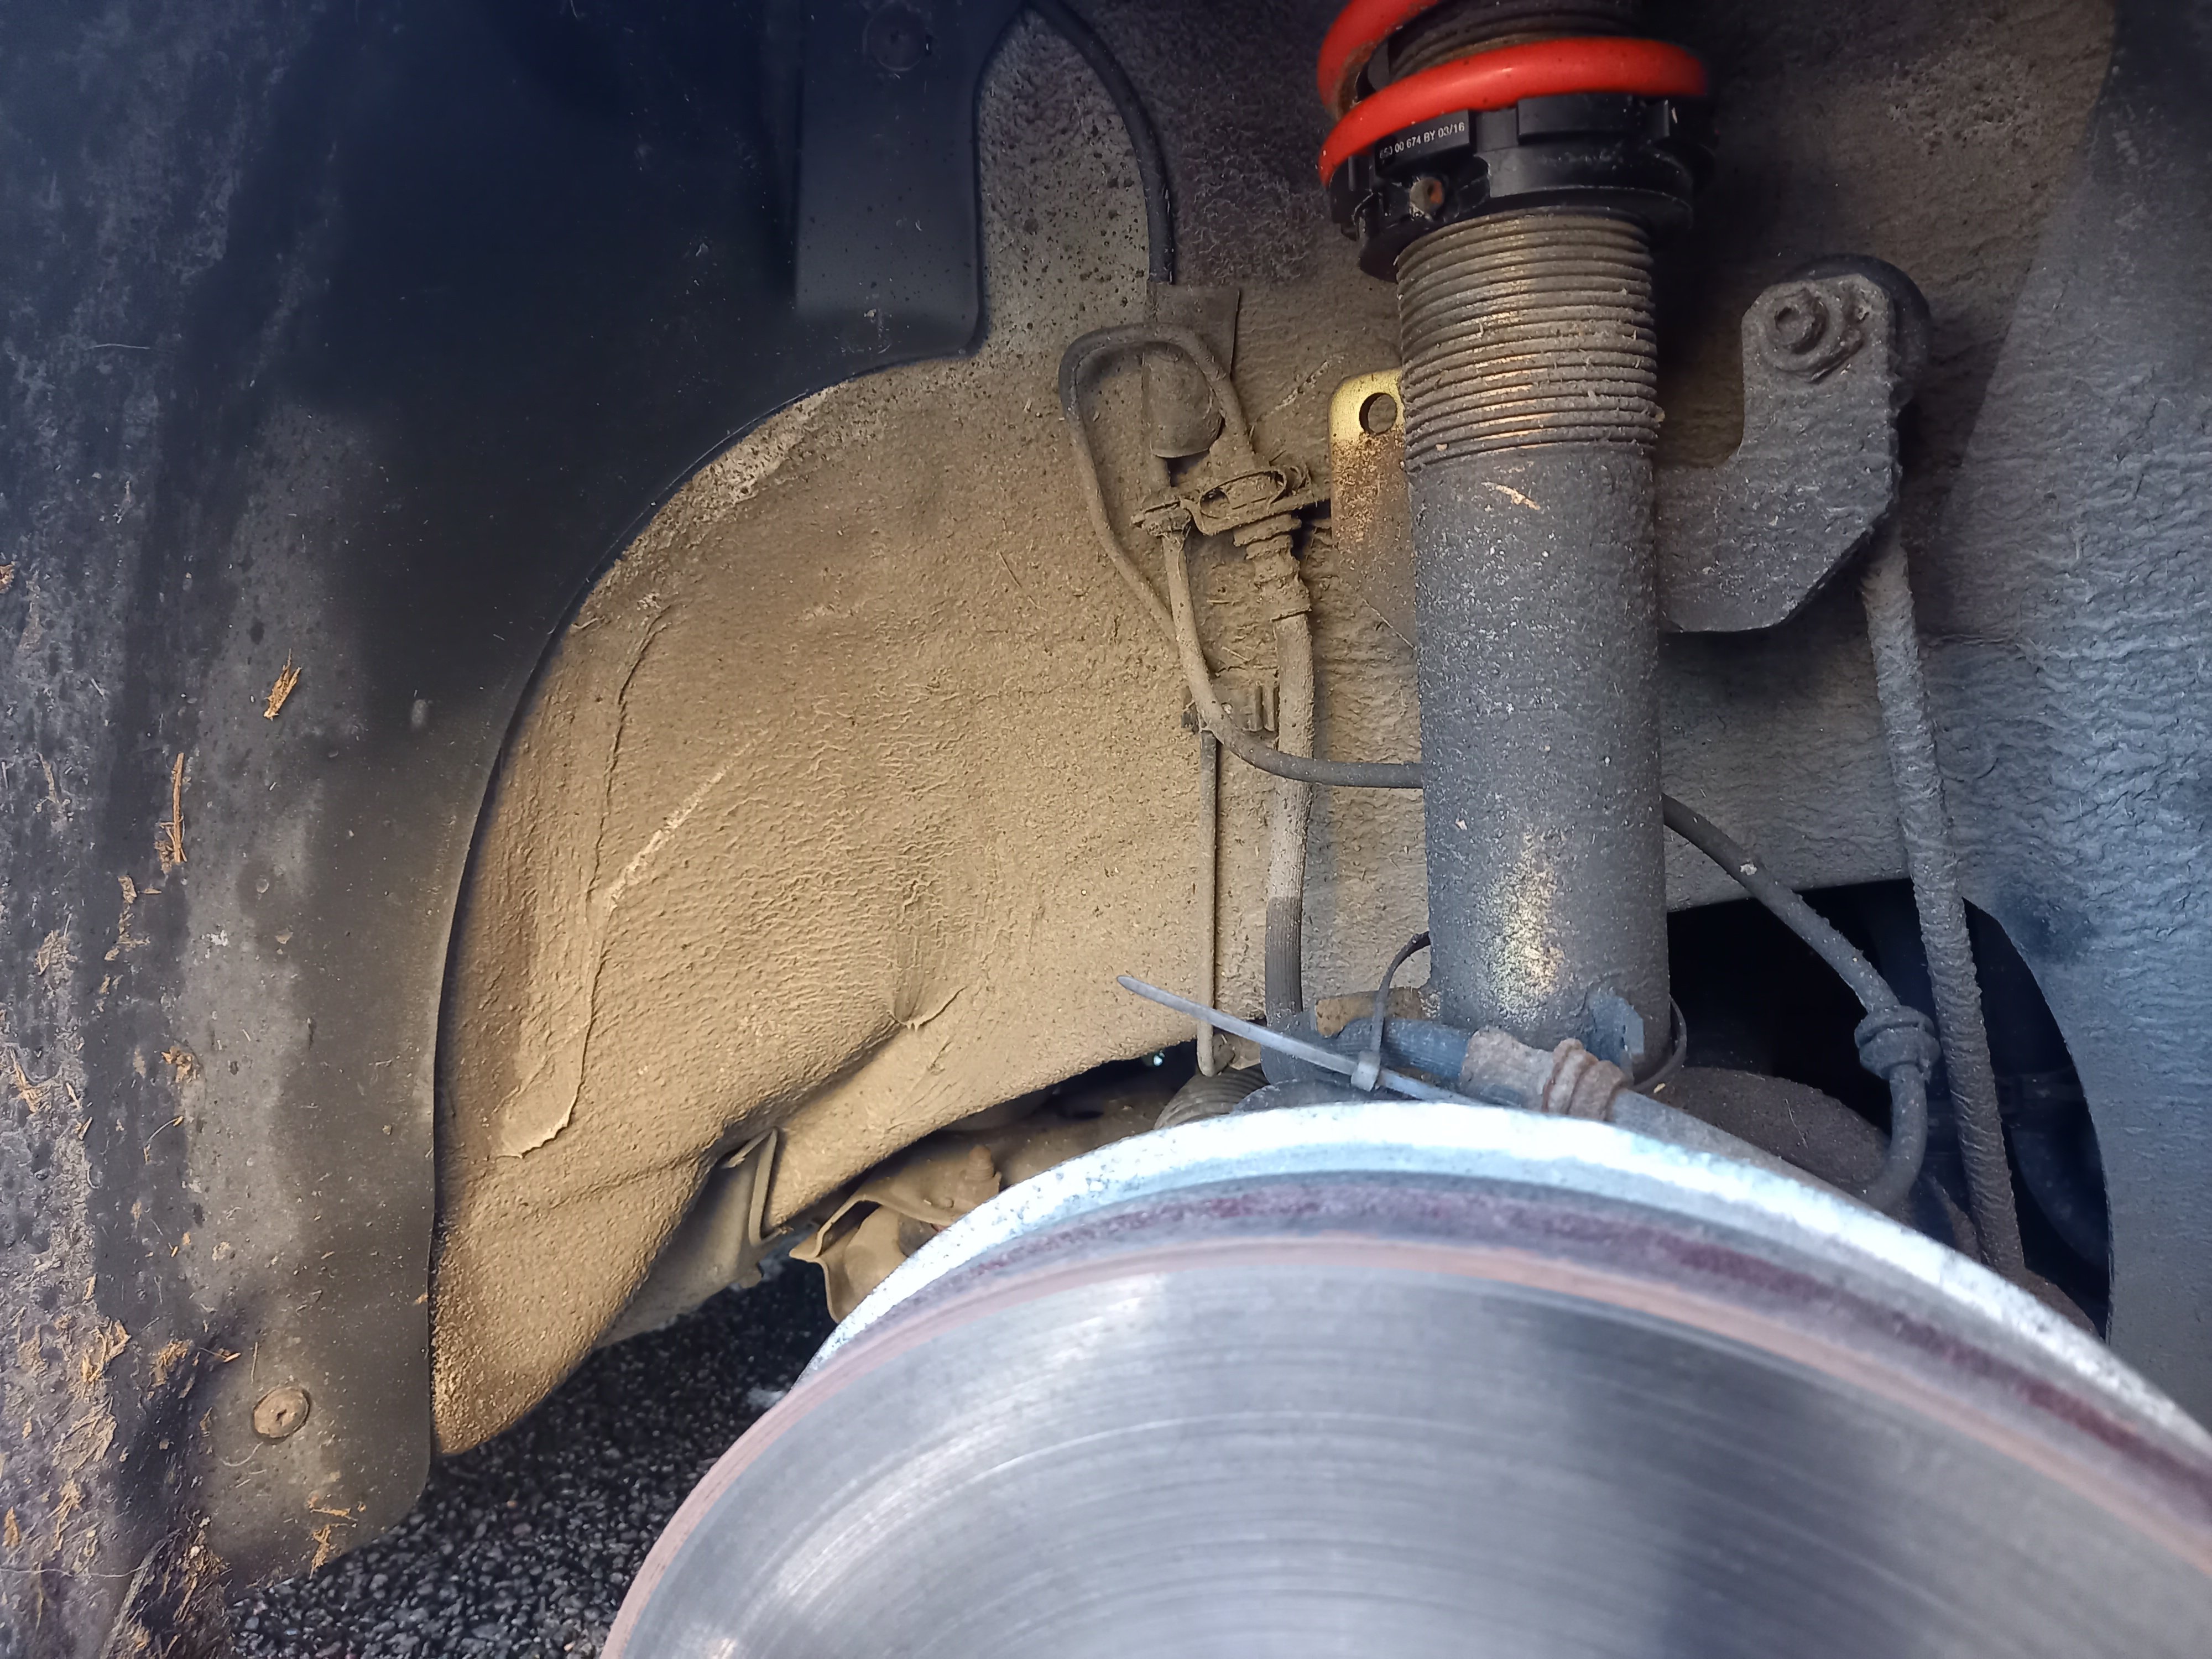
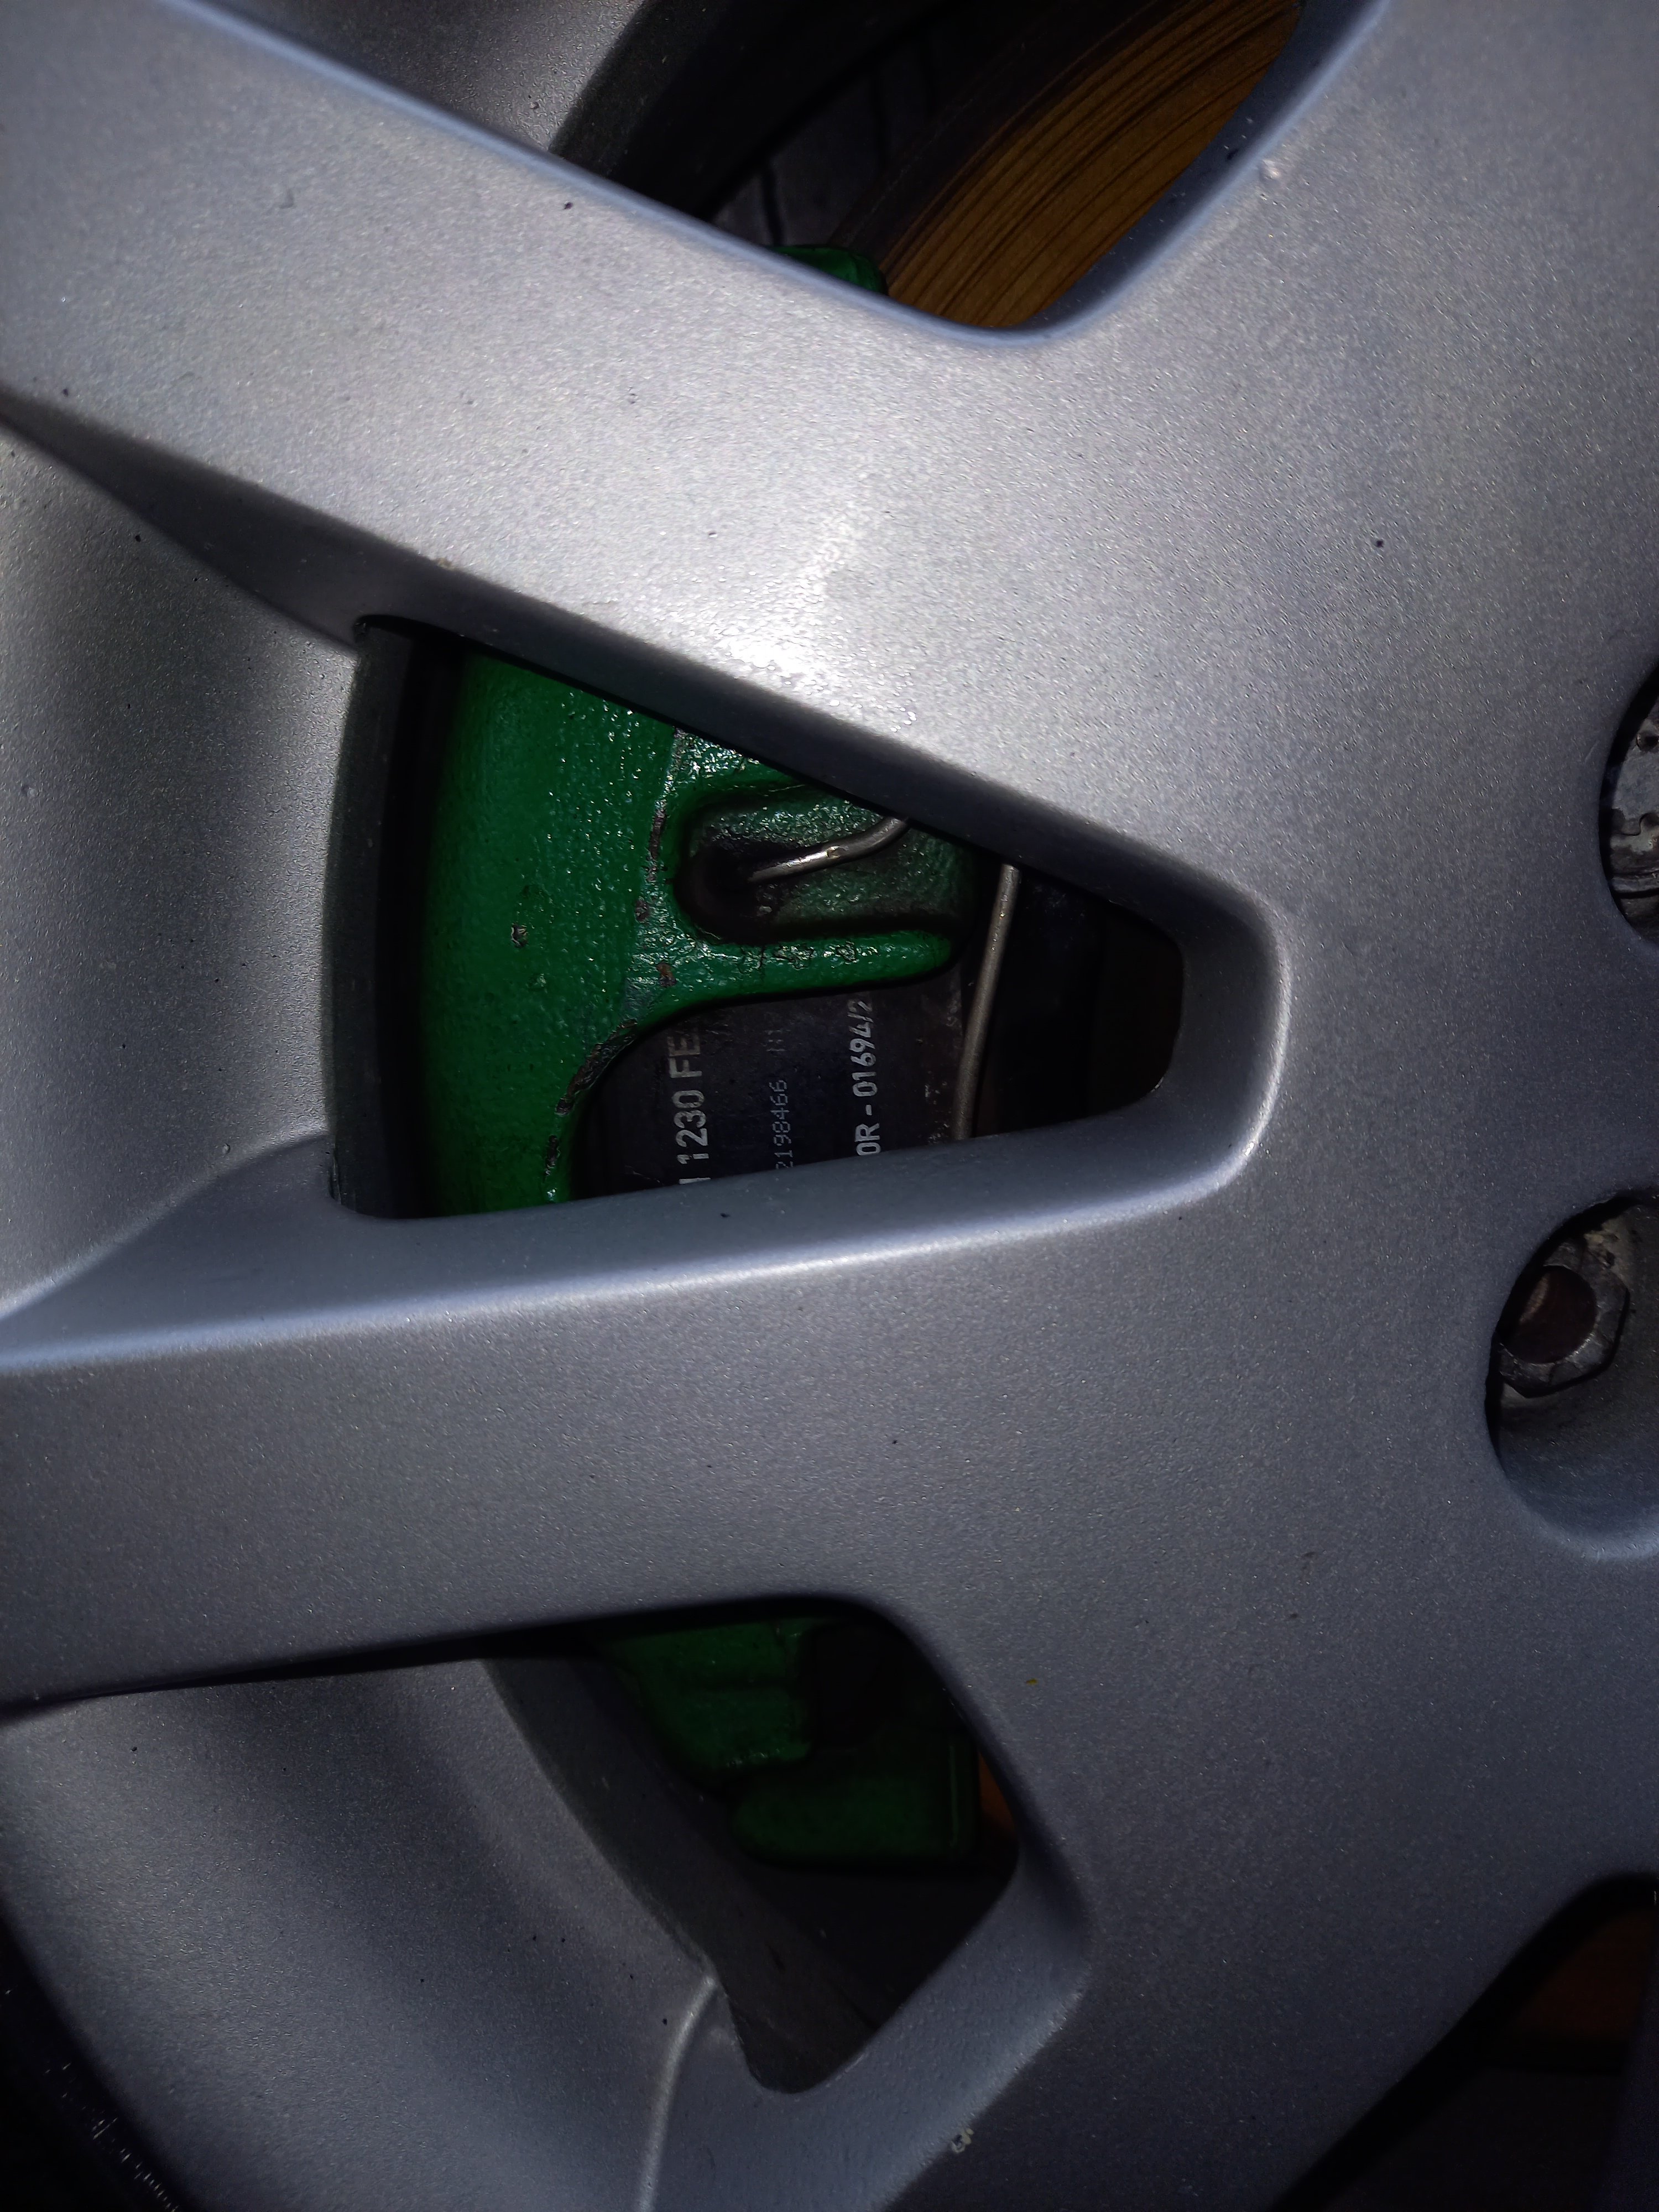
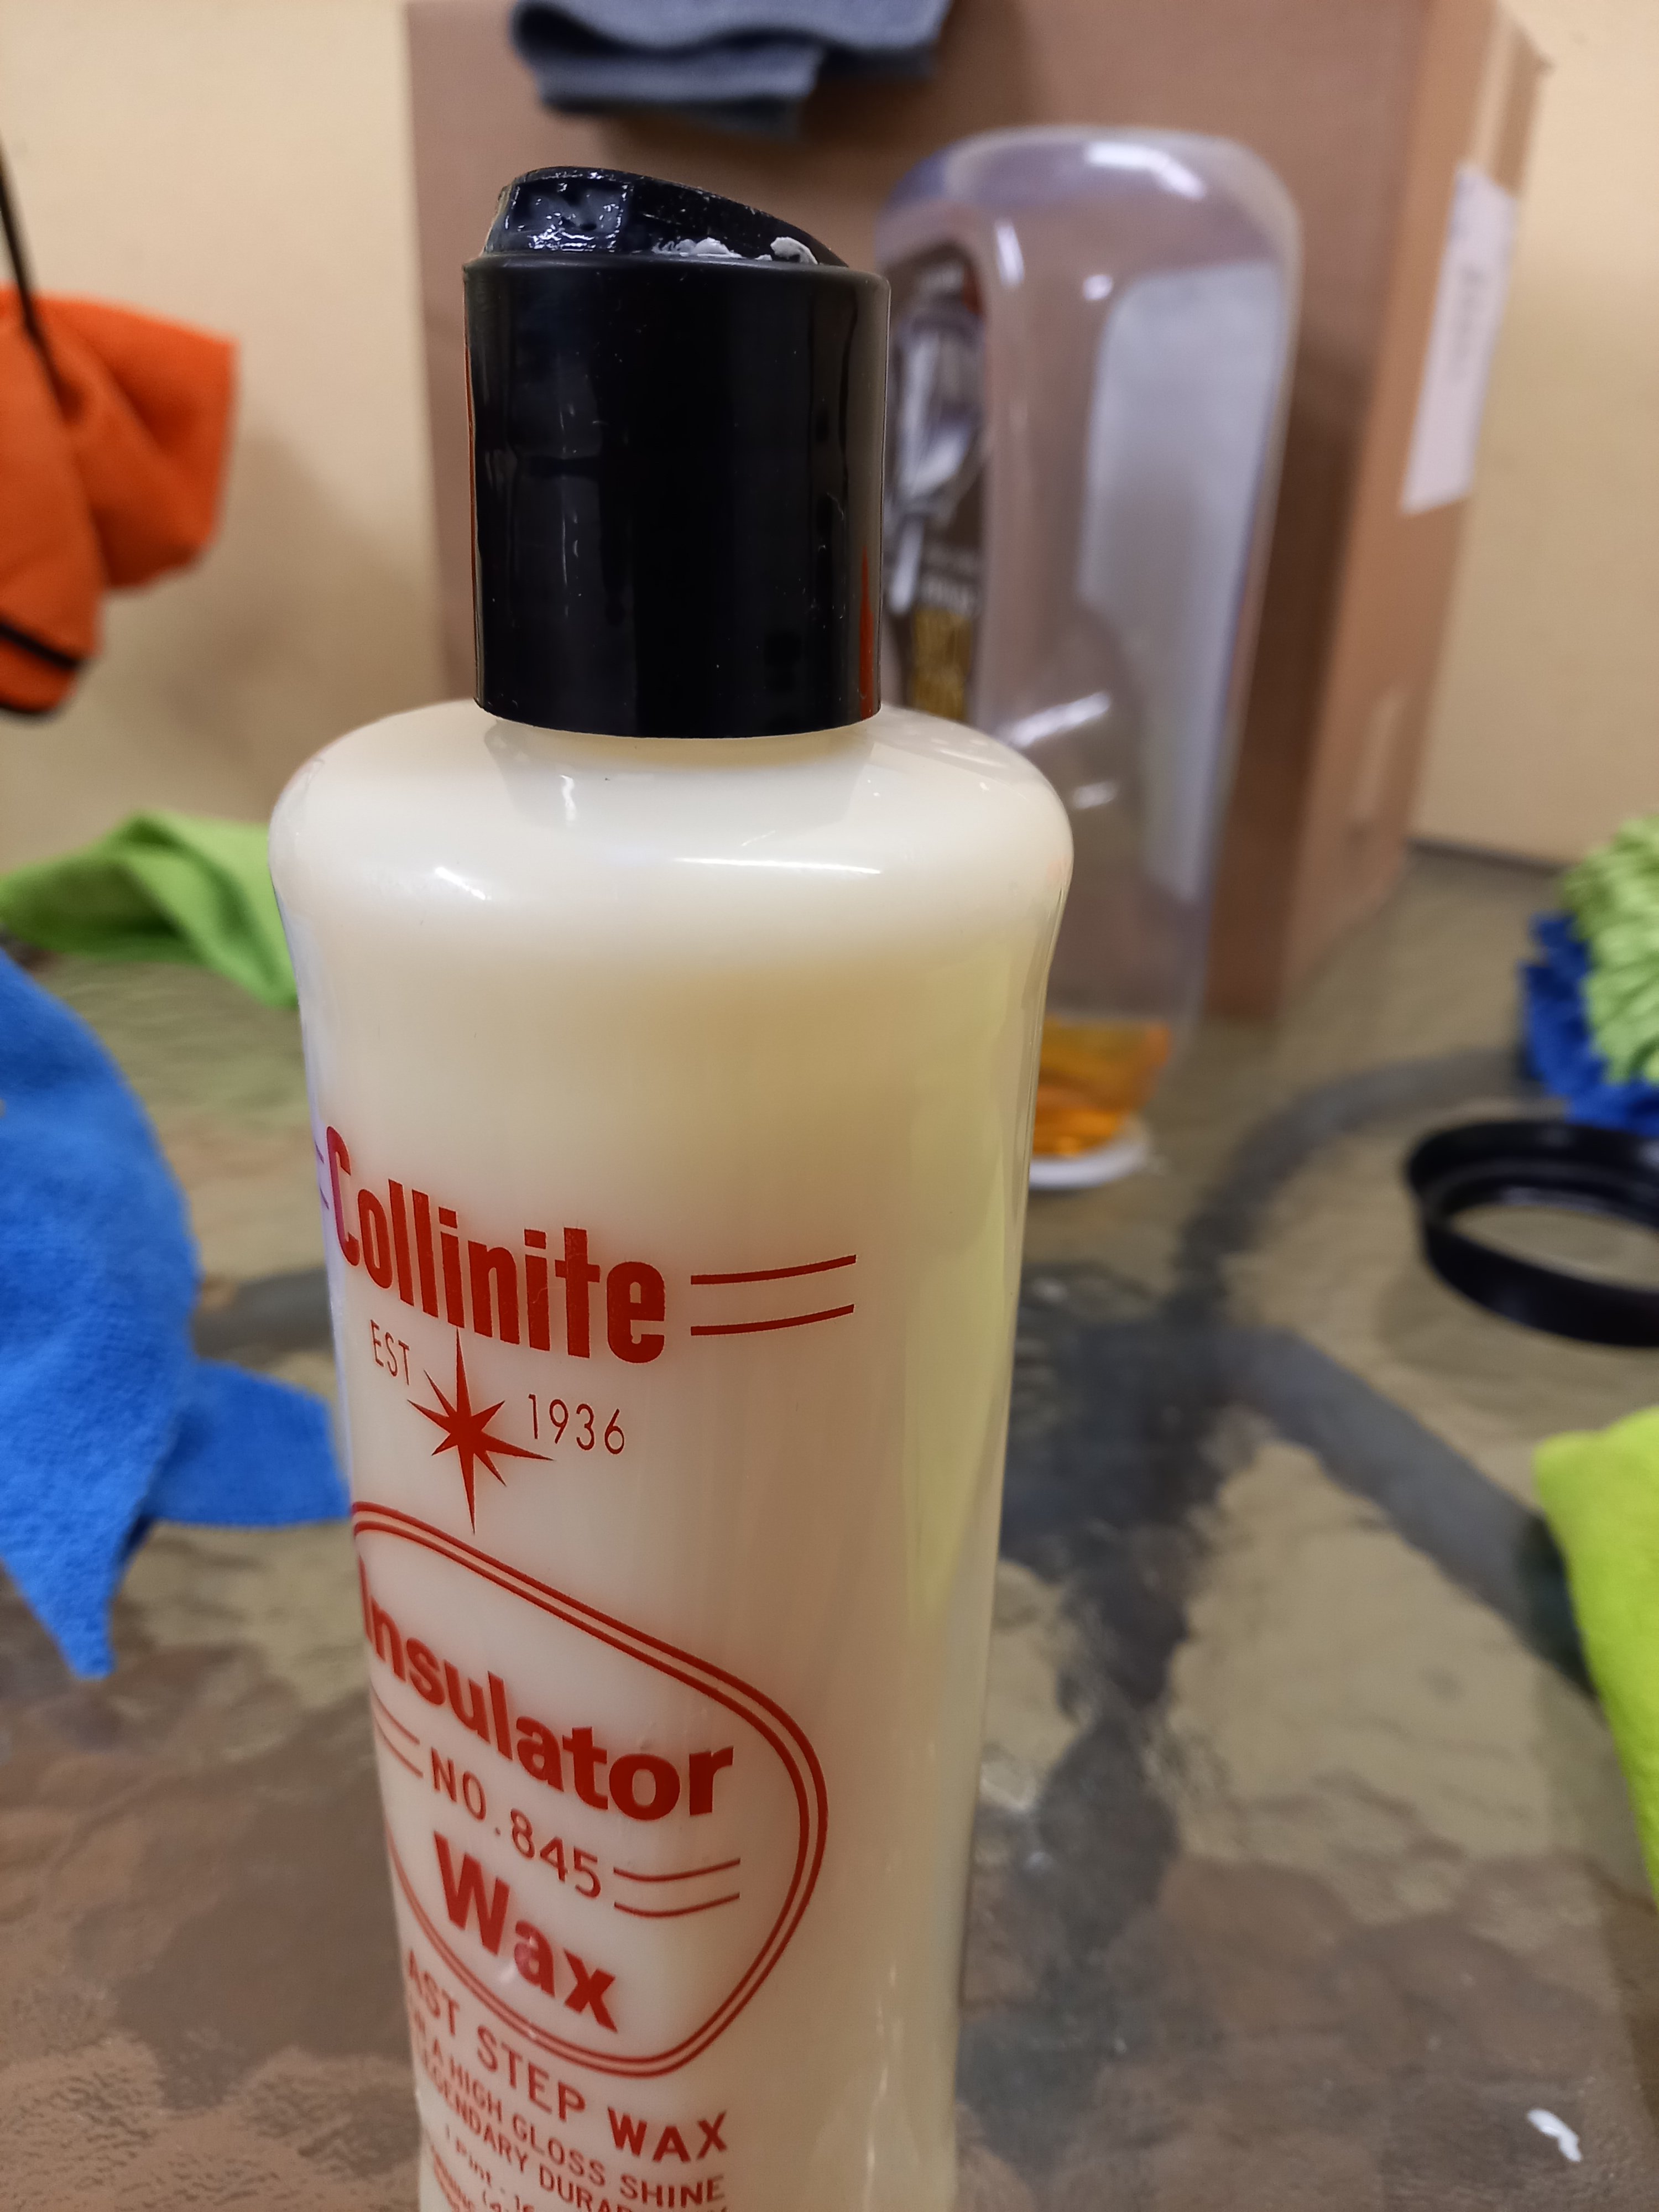
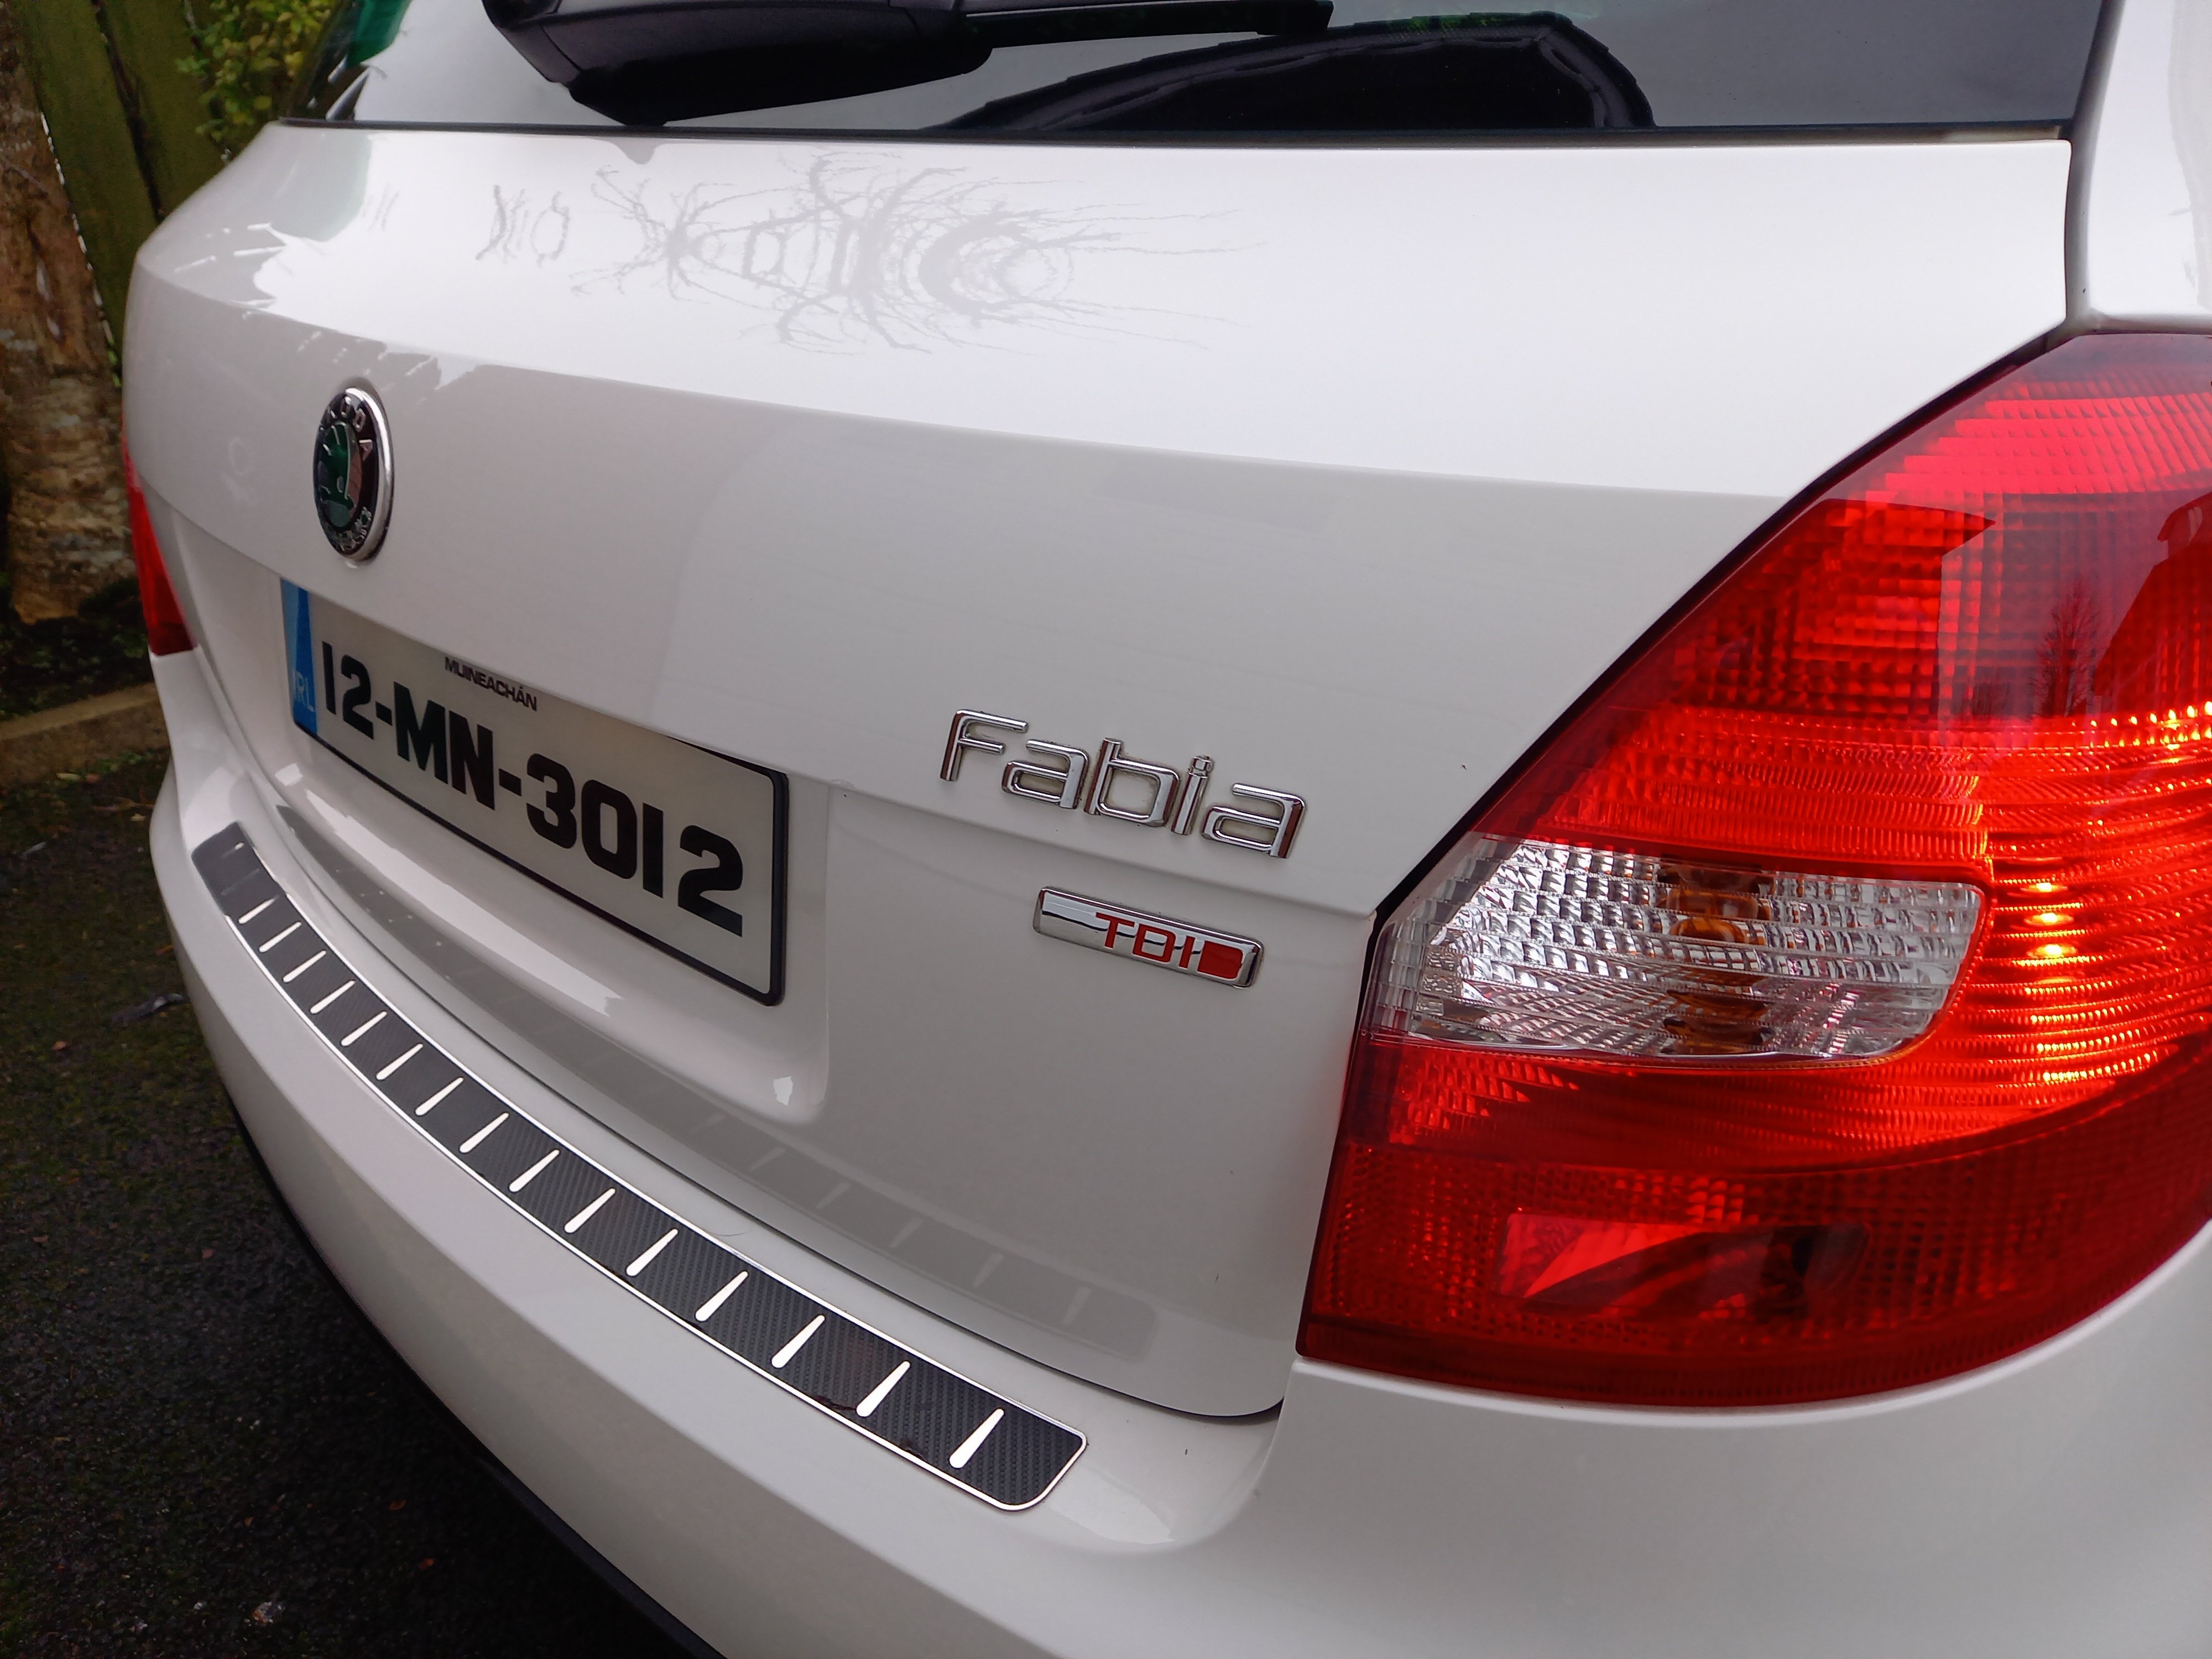
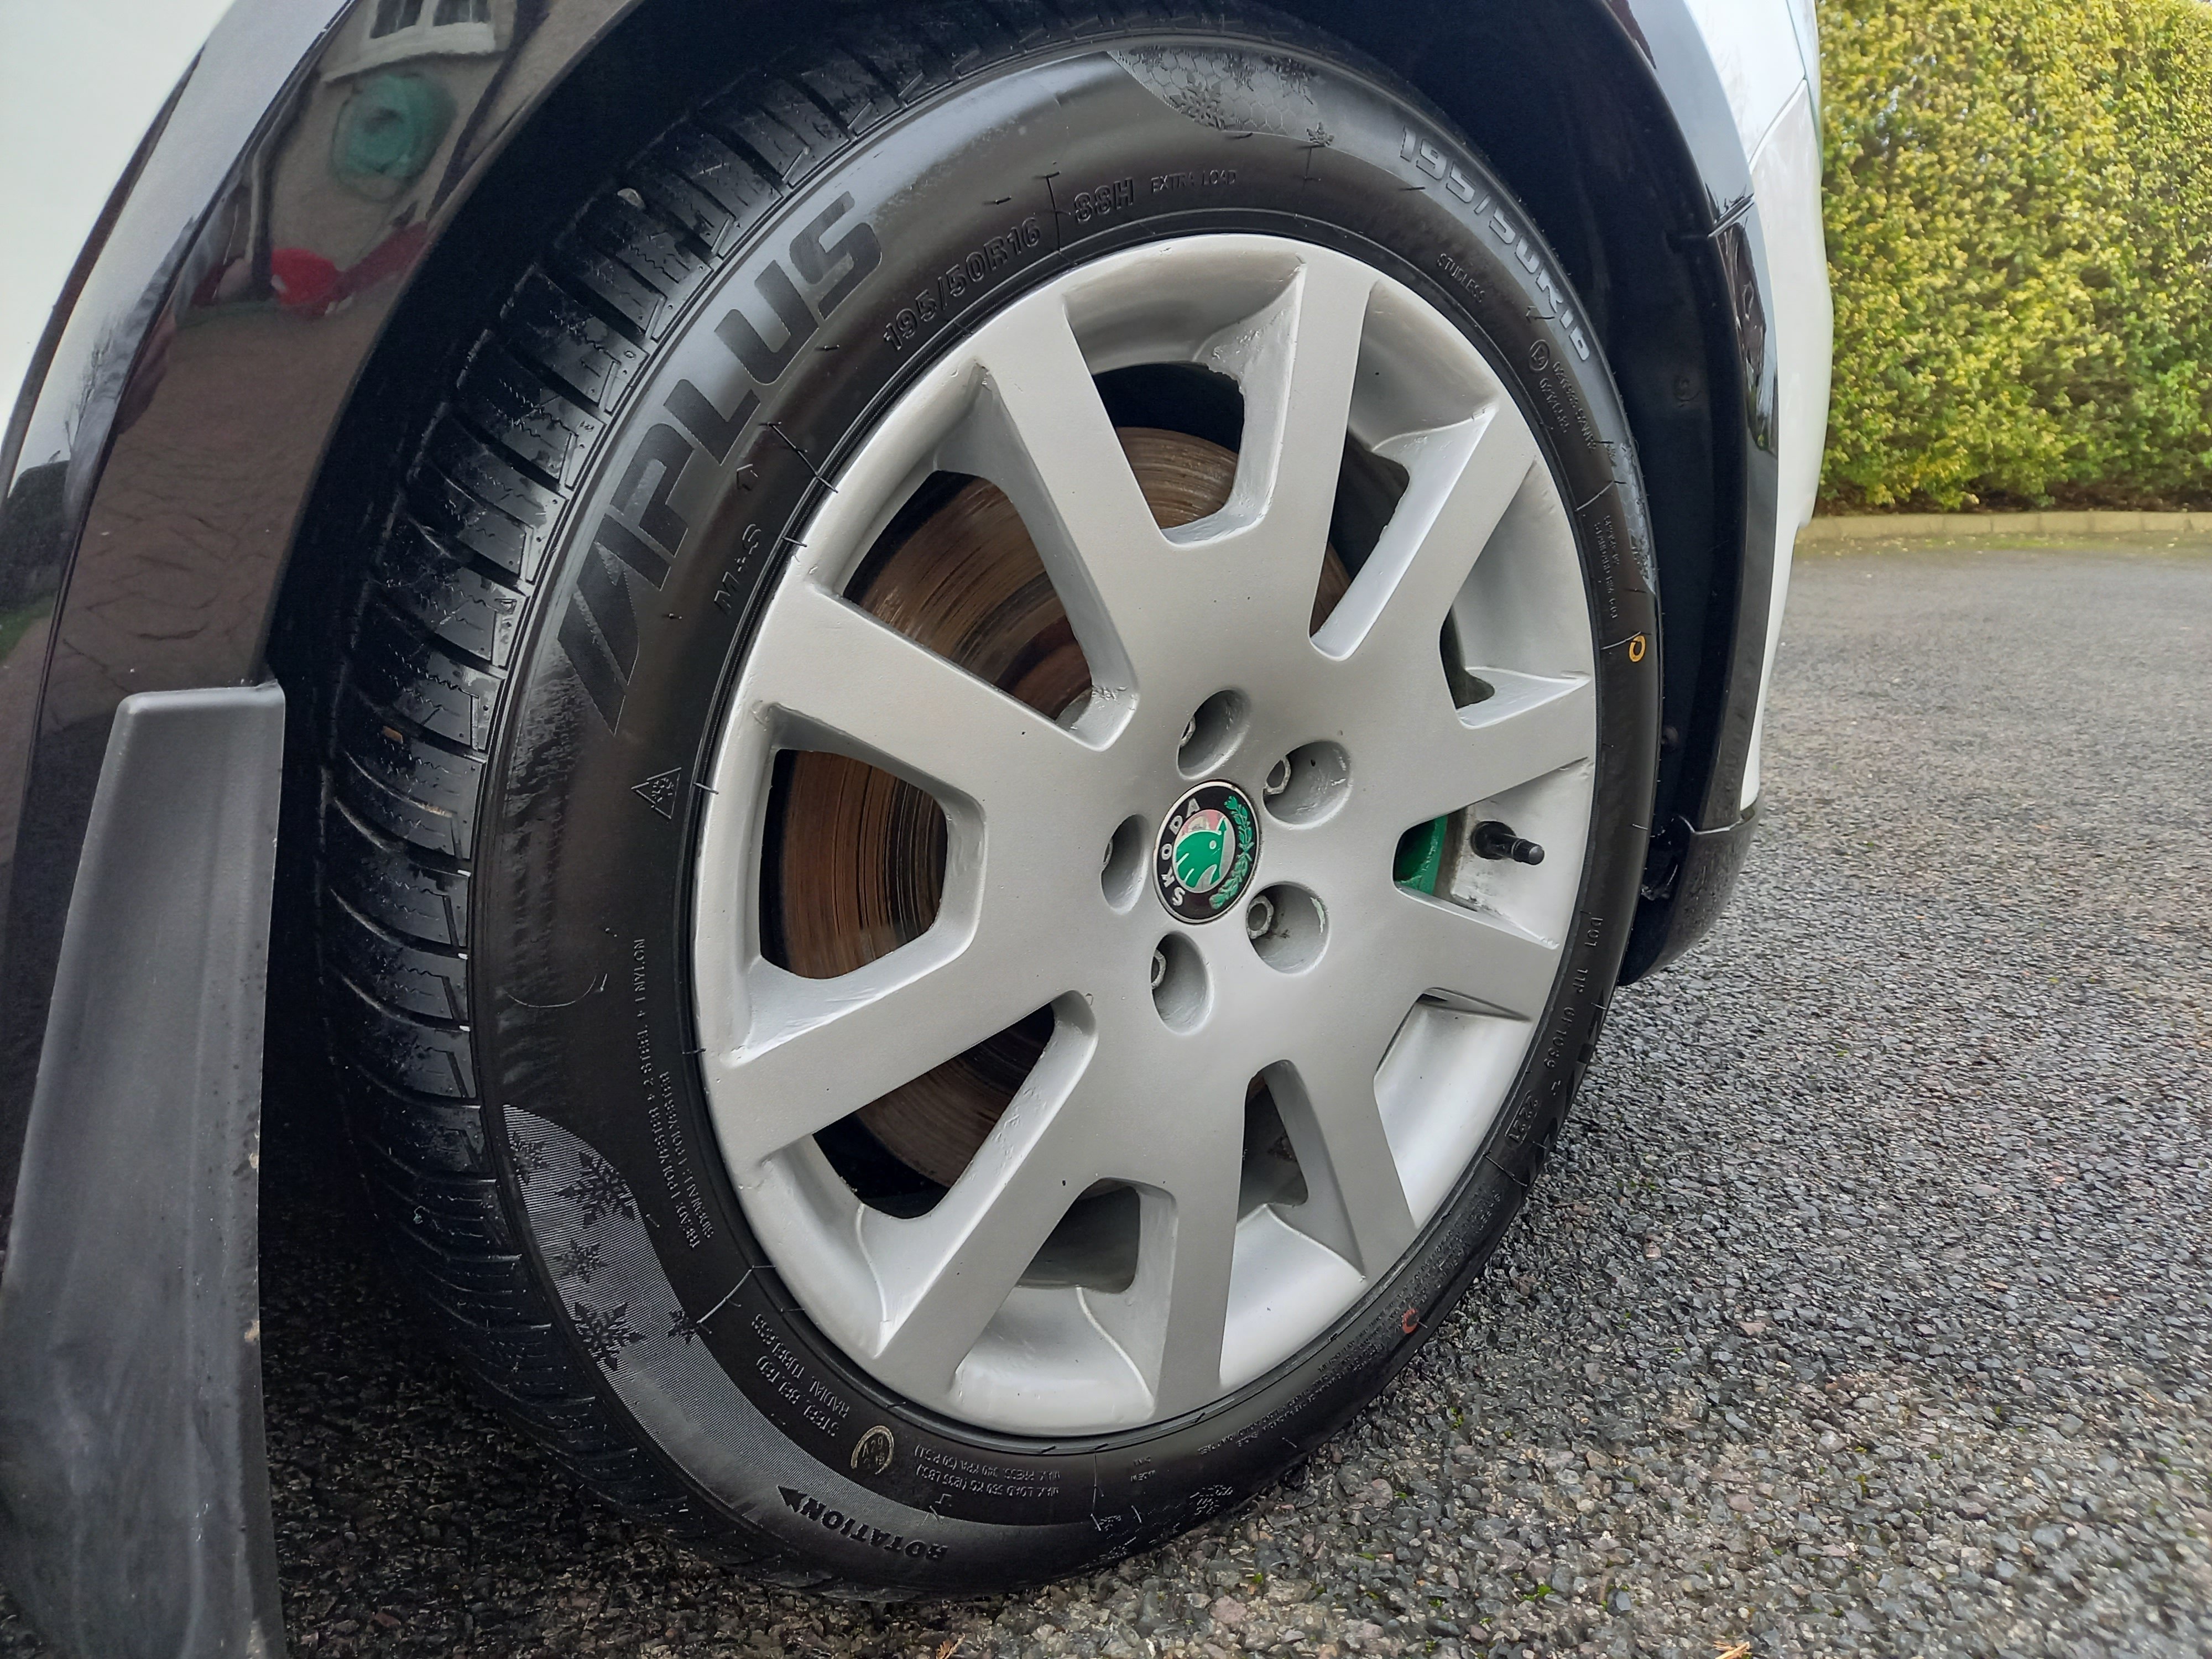
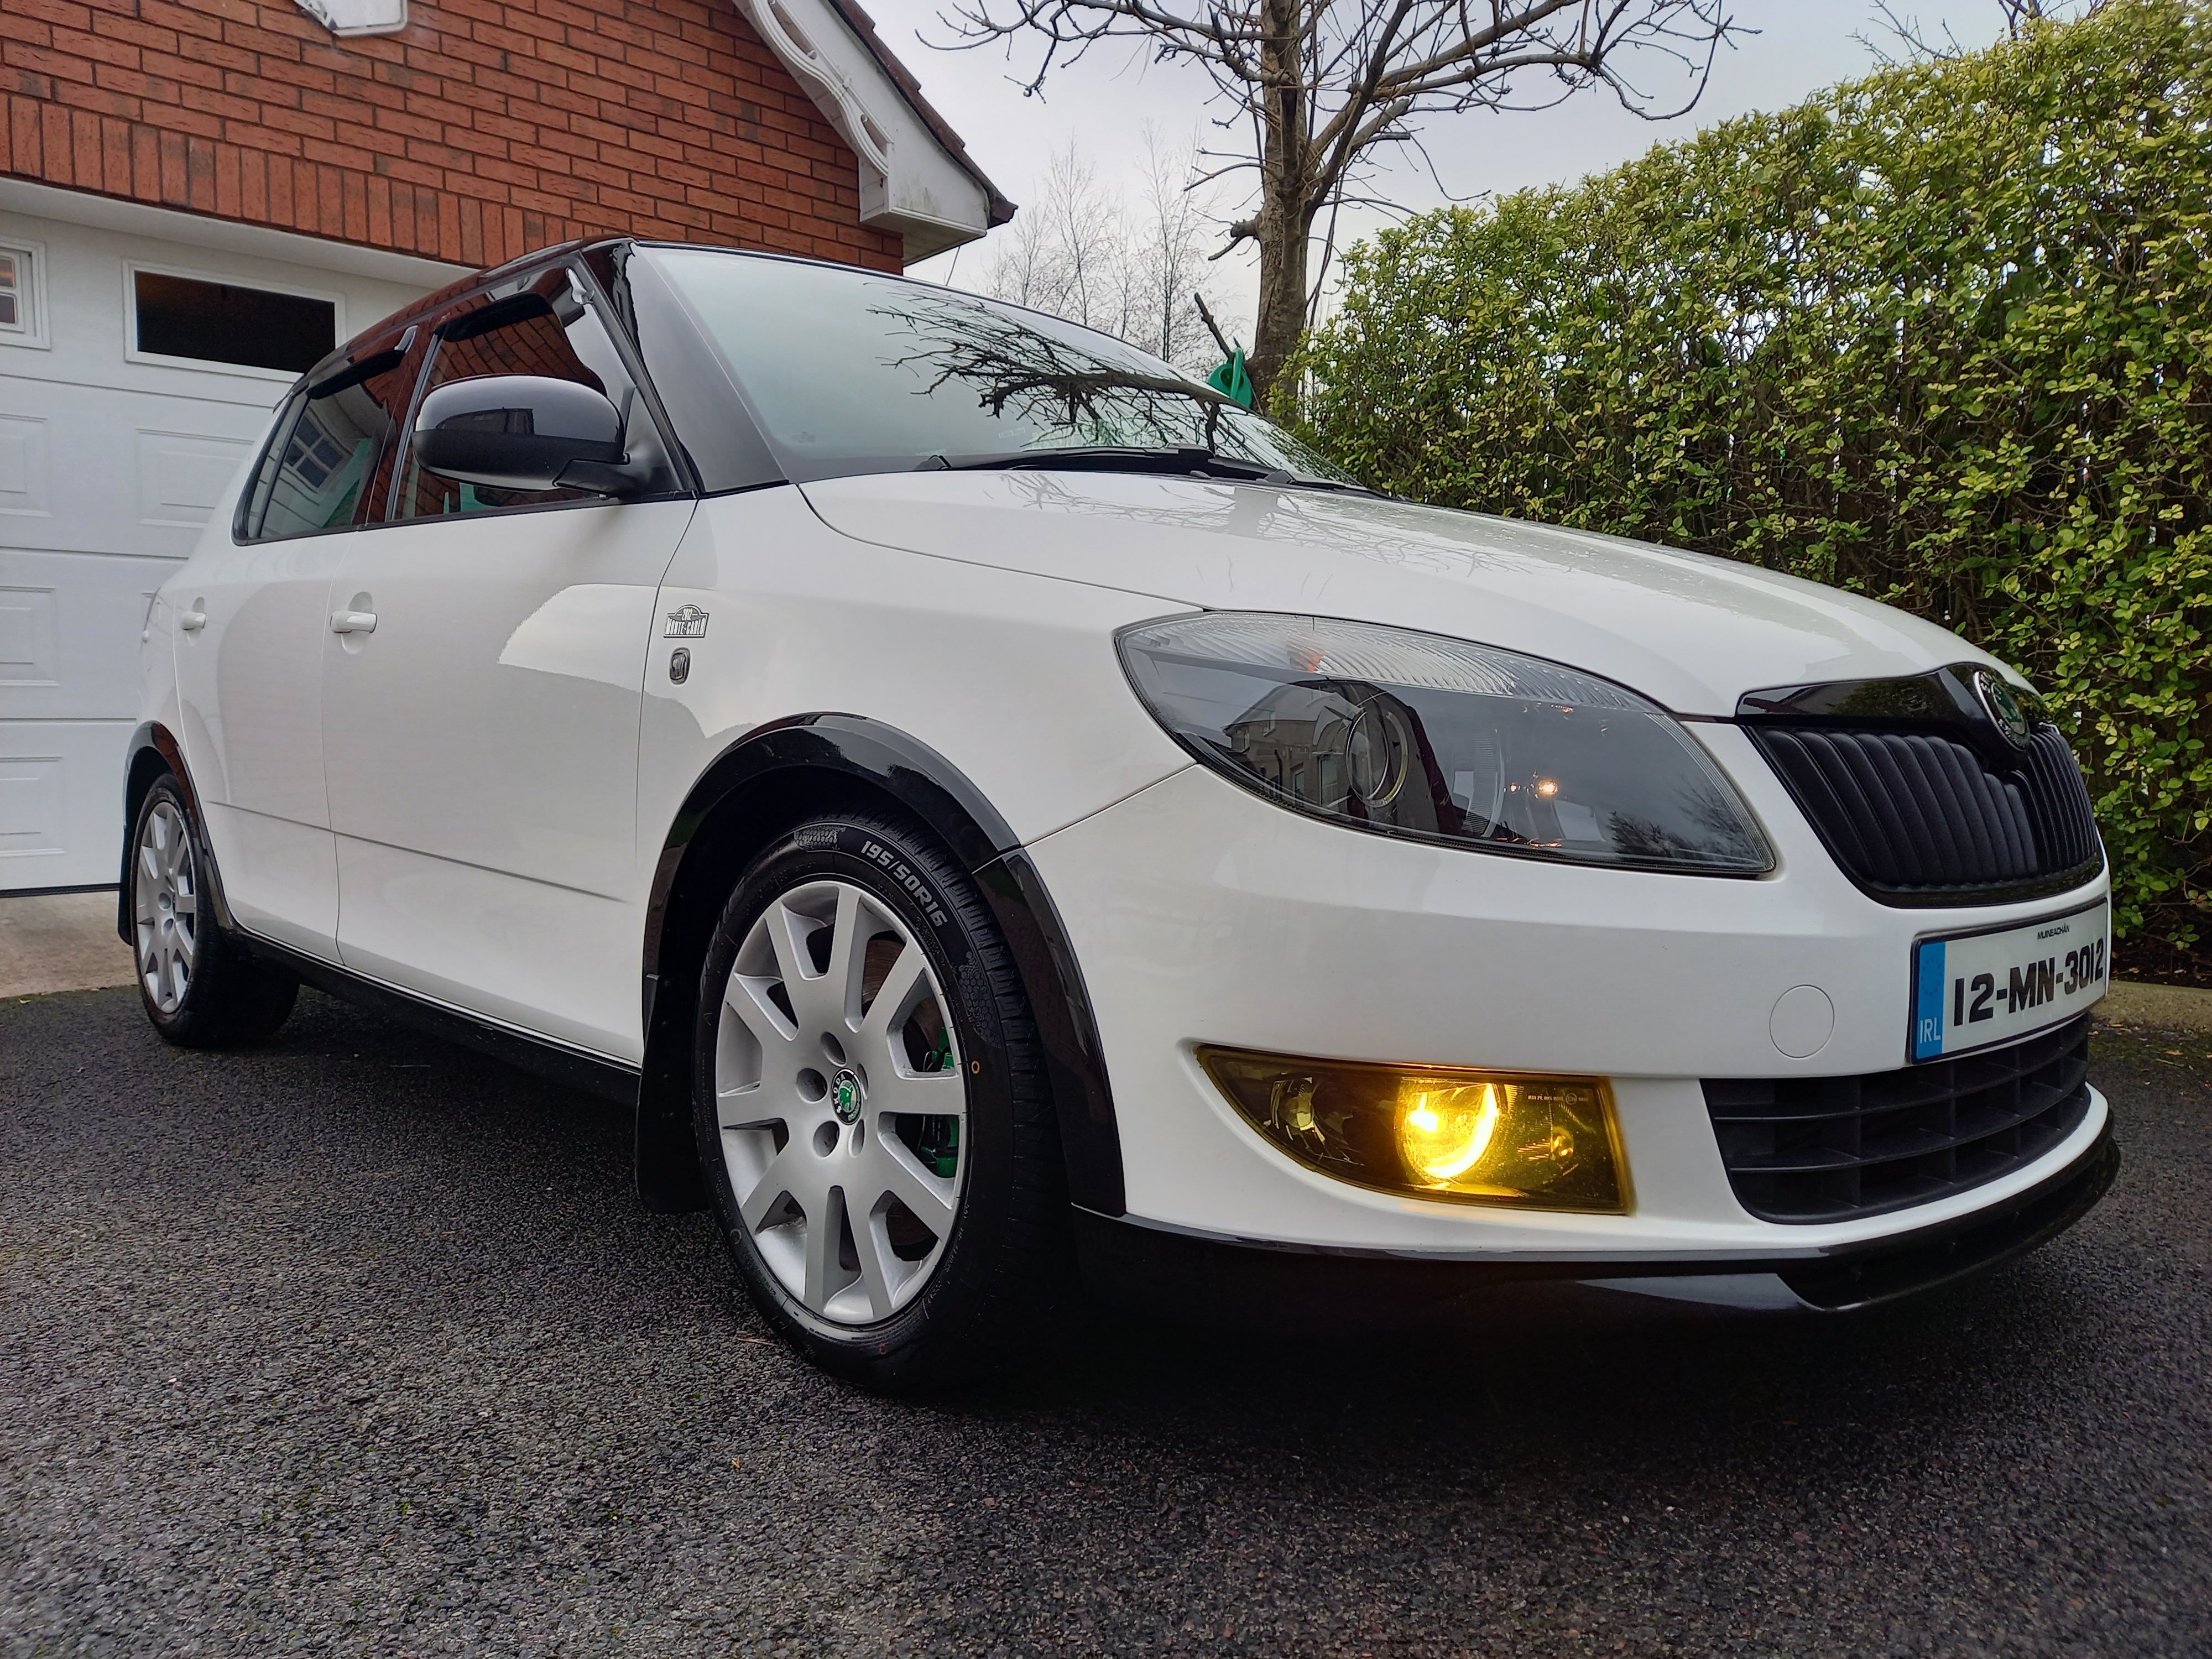
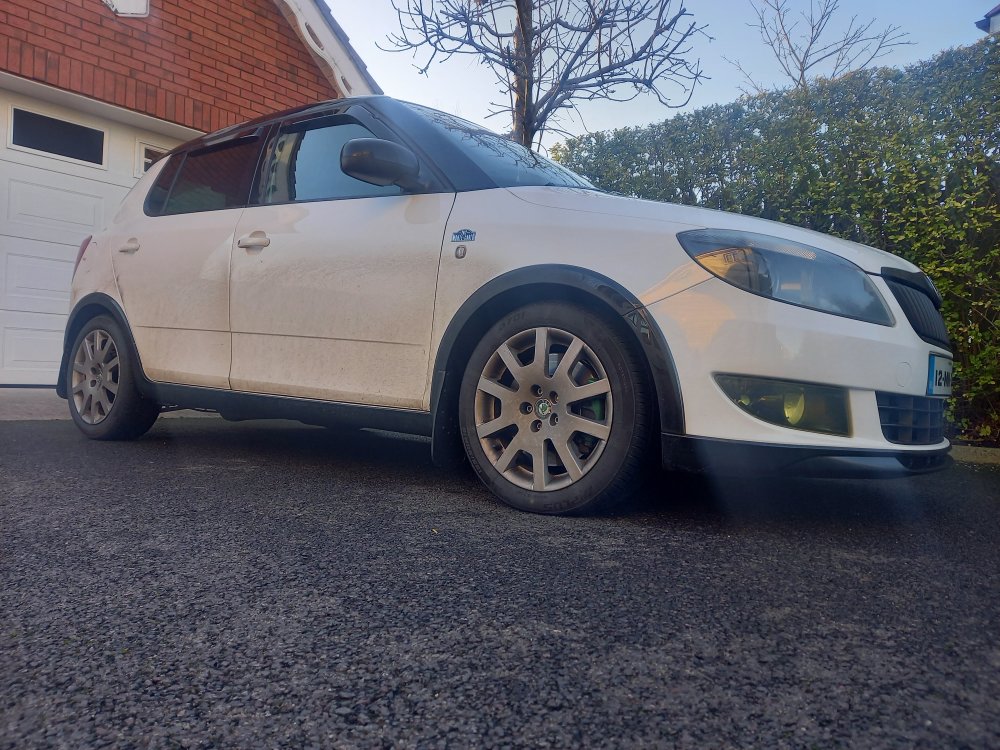
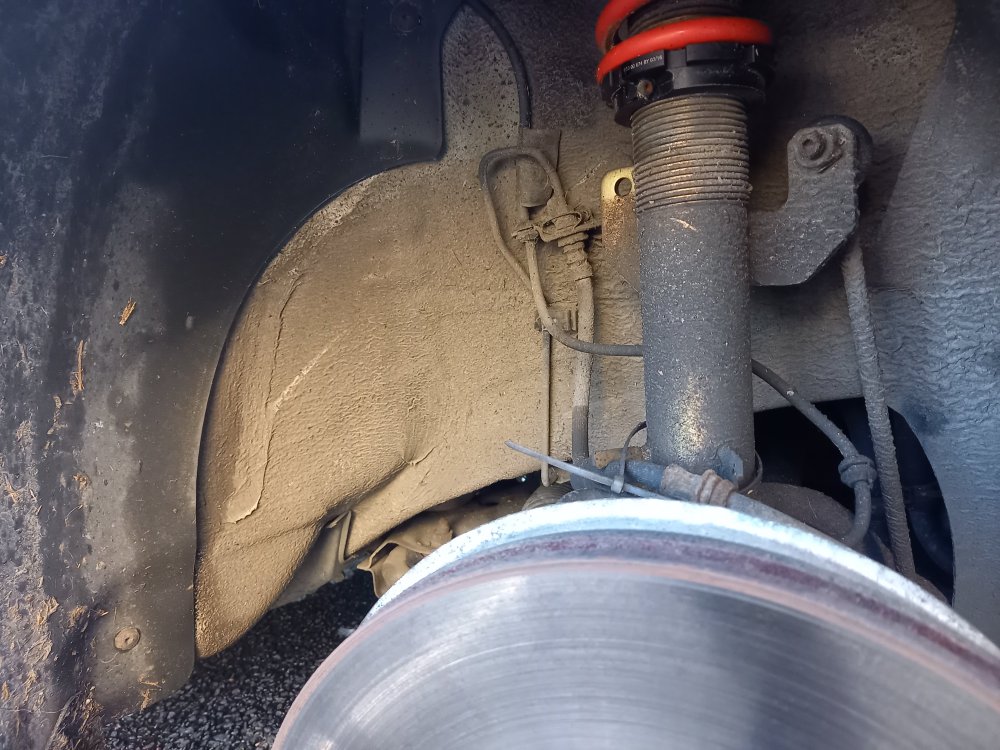
Very happy with the mounts. So much nicer changing gears and a lot less drama putting my foot down. Slightly more vibrations but not crazy especially this being a diesel. Wanted to give the car a proper clean and polish as I might be taking it on a long trip in a few weeks so want it looking smart for it. White hides the dirt pretty well, but in person it was rotten. Took it out to use the pressure washer as it has a strong mix of TFR in it. Exhausts looking grimy Took it home and left it for the night. Jacked up the car one side at a time to wash the arches out, and give the drums a coat of paint. Drums looked rough, just gave them another coat of metallic grey after I was done with the arches and let them dry. Arches cleaned up nicely. Didn't need to be perfect I was more worried about getting some mud off of everything. That arch cover cracked on the bottom some time last year, think it happened over a bad speed bump near my house. Weirdly this was when it was on standard suspension so not low by any stretch. No proper after pics but the fronts cleaned up well too. Brakes got a bit of love too. Not much of an after pic lol. Hindsight tells me I should have gave them a coat of paint to freshen them up, still came up well however. Bucket was brown by the time I was done. Swapped wheels front to back as I didn't want the fronts running any lower. Gave them a deep clean while they were off too. Rears are like new, You'd hope they would be considering they're only on the car from the start of November. Wheels on I backed it into the garage and got to work. At this point I just wanted to get the car done so theres not many photos here. What I did was: -Polish the exhaust before touching the paint. -Wipe down the car again to get any dust off it. -Detar the paintwork (Including the door jambs) -Went around the car with Meguiars ultimate compound. -Wiped the car down to remove any extra compound I had a hard time buffing off. -Moved onto polishing the whole car with Meguiars ultimate polish. -Again wiped the car down to remove any excess polish. Always have a hard time with buffing the megs ultimate stuff, but its what i'm used to. -Went around and gave it a coat of Poorboys world White diamond and Black hole glaze where appropriate. -Finished the car off with Collinite 845, never tried it so wanted to see if it lived up to the hype. Was told that it only takes a tiny amount of it to do a whole car so I changed the cap to one off of an empty bottle of meguiars ultimate liquid wax. Helped me limit how much I put on. It is astonishing how little of this stuff you need. Put it on thin and its a breeze to buff off too. Car came out great. Some before and afters: Rear: Wheel: (Since I swapped them front to back the drivers front now has the roughest wheel out of the ones I painted.) So far I've been very impressed with the Collinite, It takes very little to do a car so it'll last forever, its much cheaper than my previous favourite Meguiars Ultimate liquid wax. It went on and buffed off much easier than the Turtlewax hardshell paste wax which is what I most recently used. It beads better than anything else I've used and apparantly it'll last for a long time too. Supposedly combining collinite with menzerna powerlock is meant to make it last even longer and give it even more gloss. Nonetheless just the collinite has done a superb job.


-
In my case resetting the linkages seemed to help my car that did the same. Could be coincidence, but considering its free and pretty easy to do I think thats the very first thing Ryan should do. Possibly with his being a 1.2 you could get access to the linkages even easier than on both my fabias. Well worth spending an hour or so sorting it even in the cold.
-
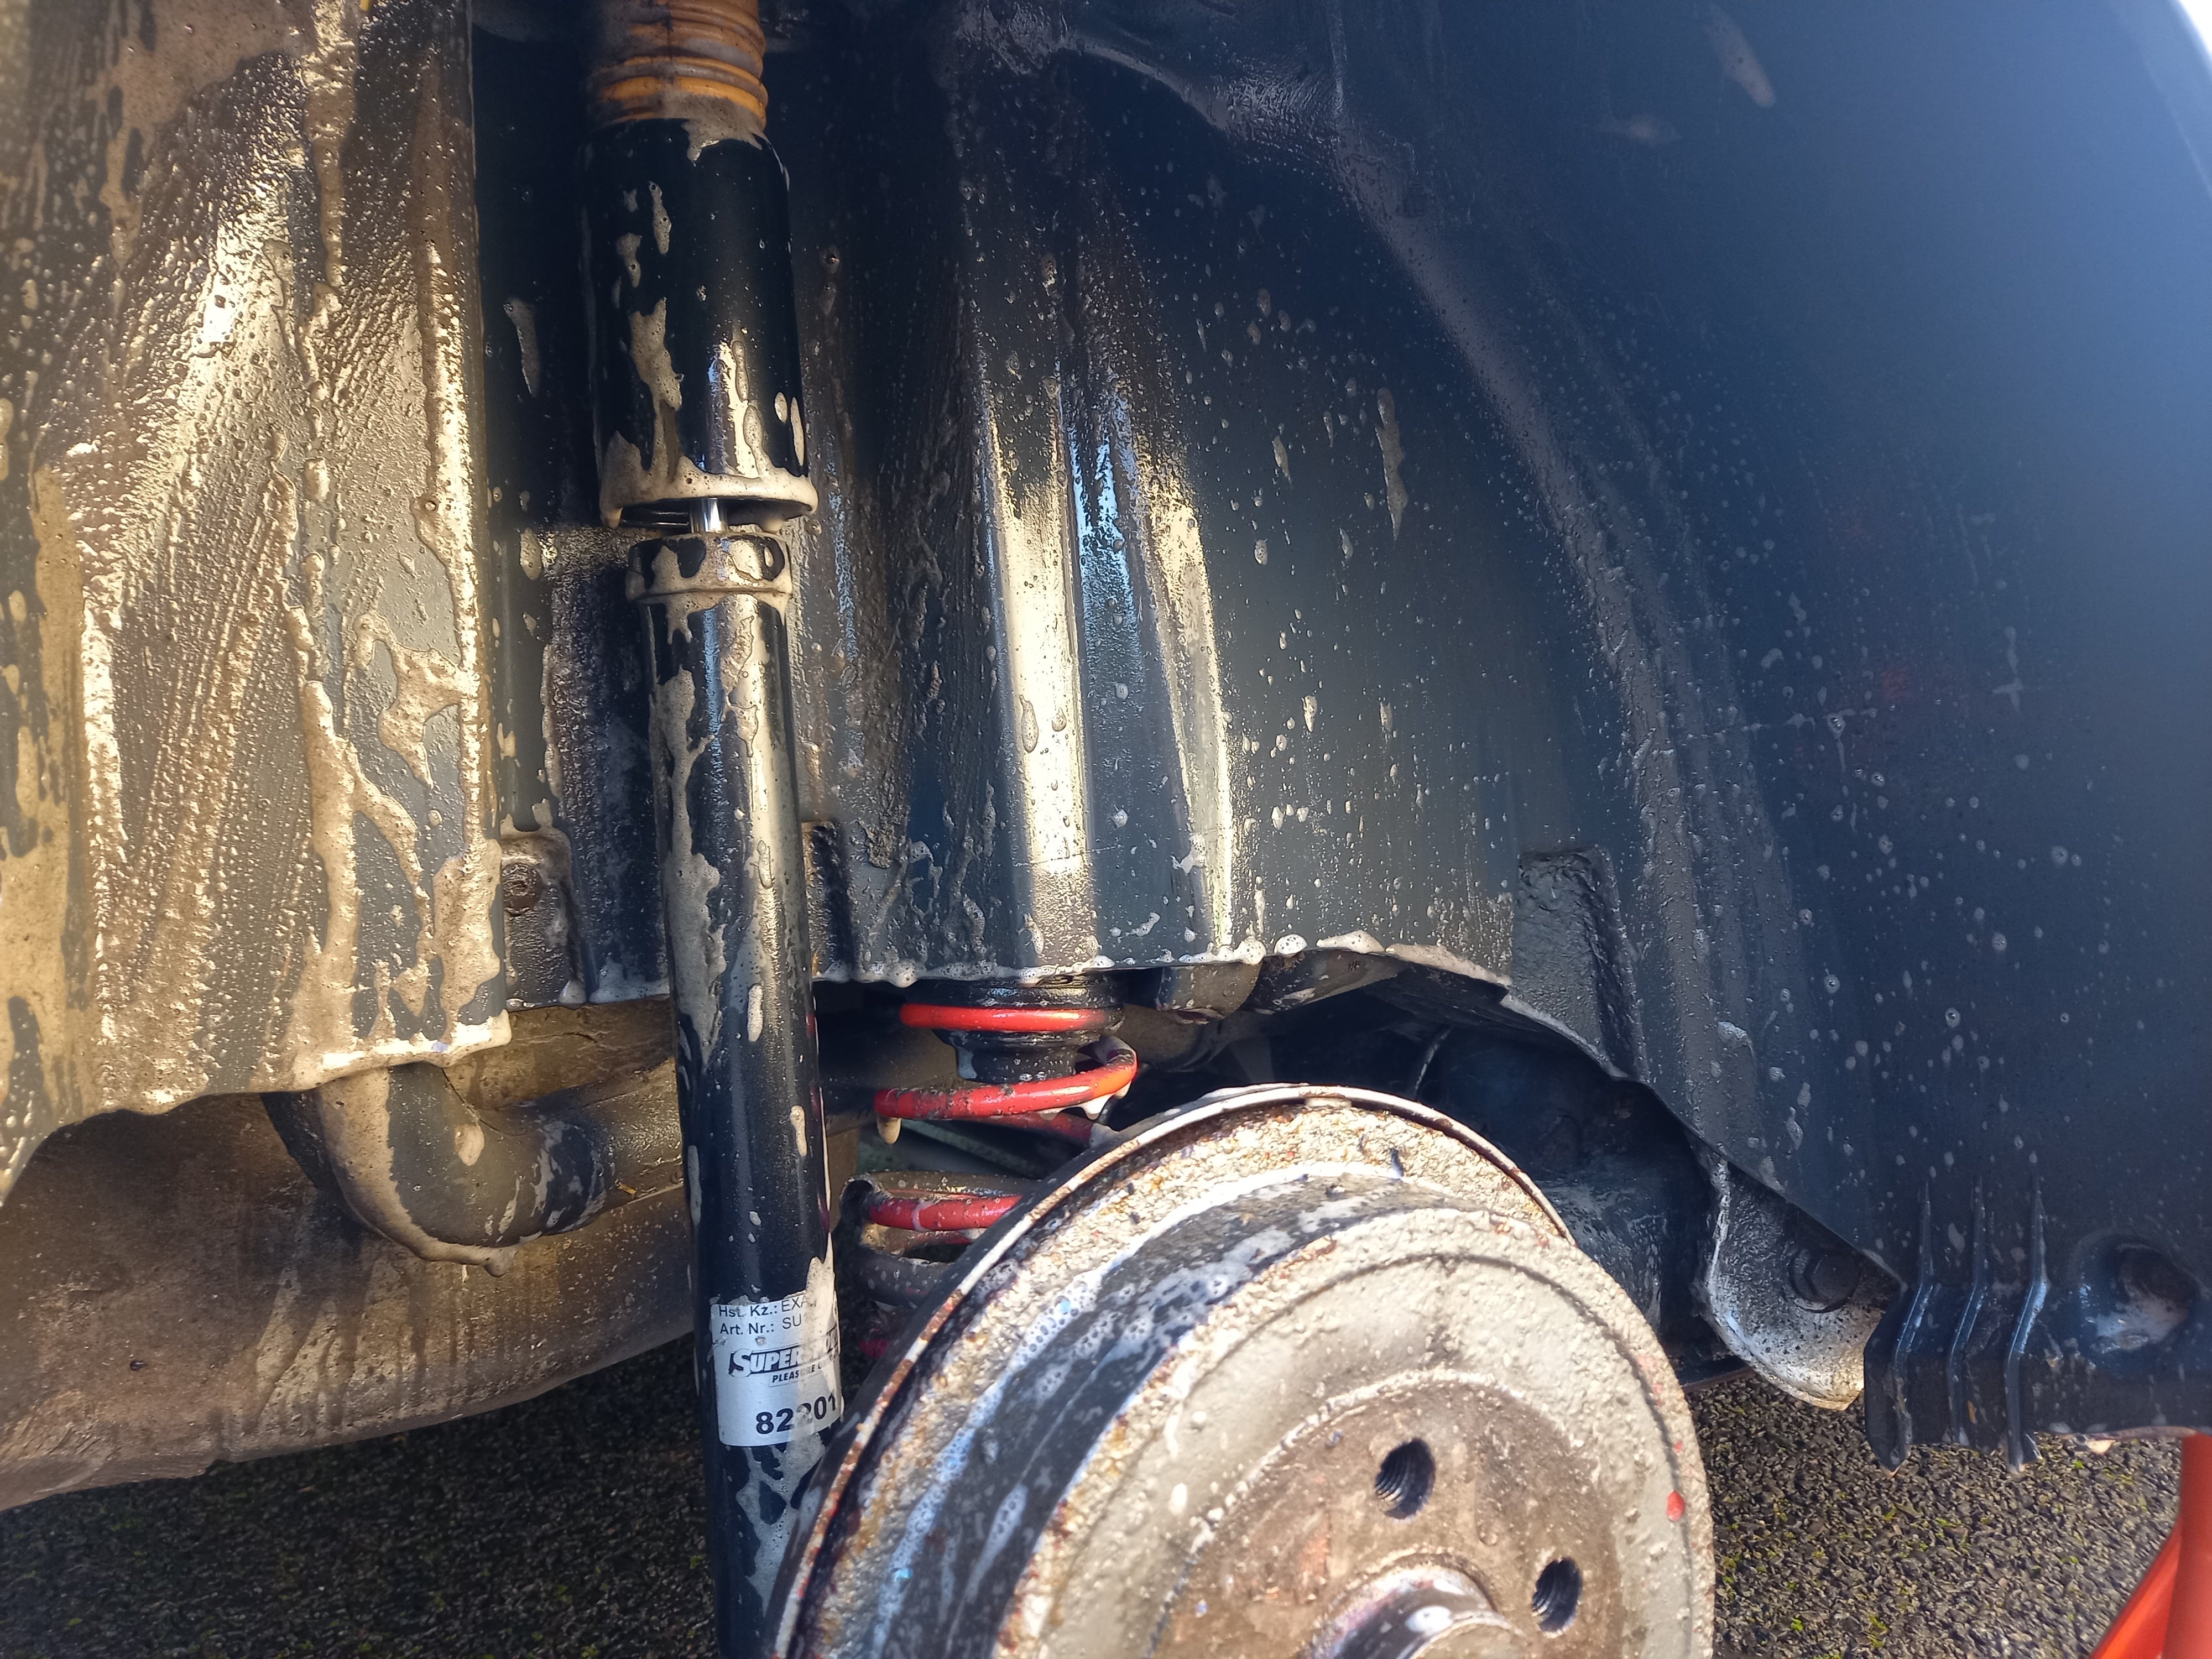
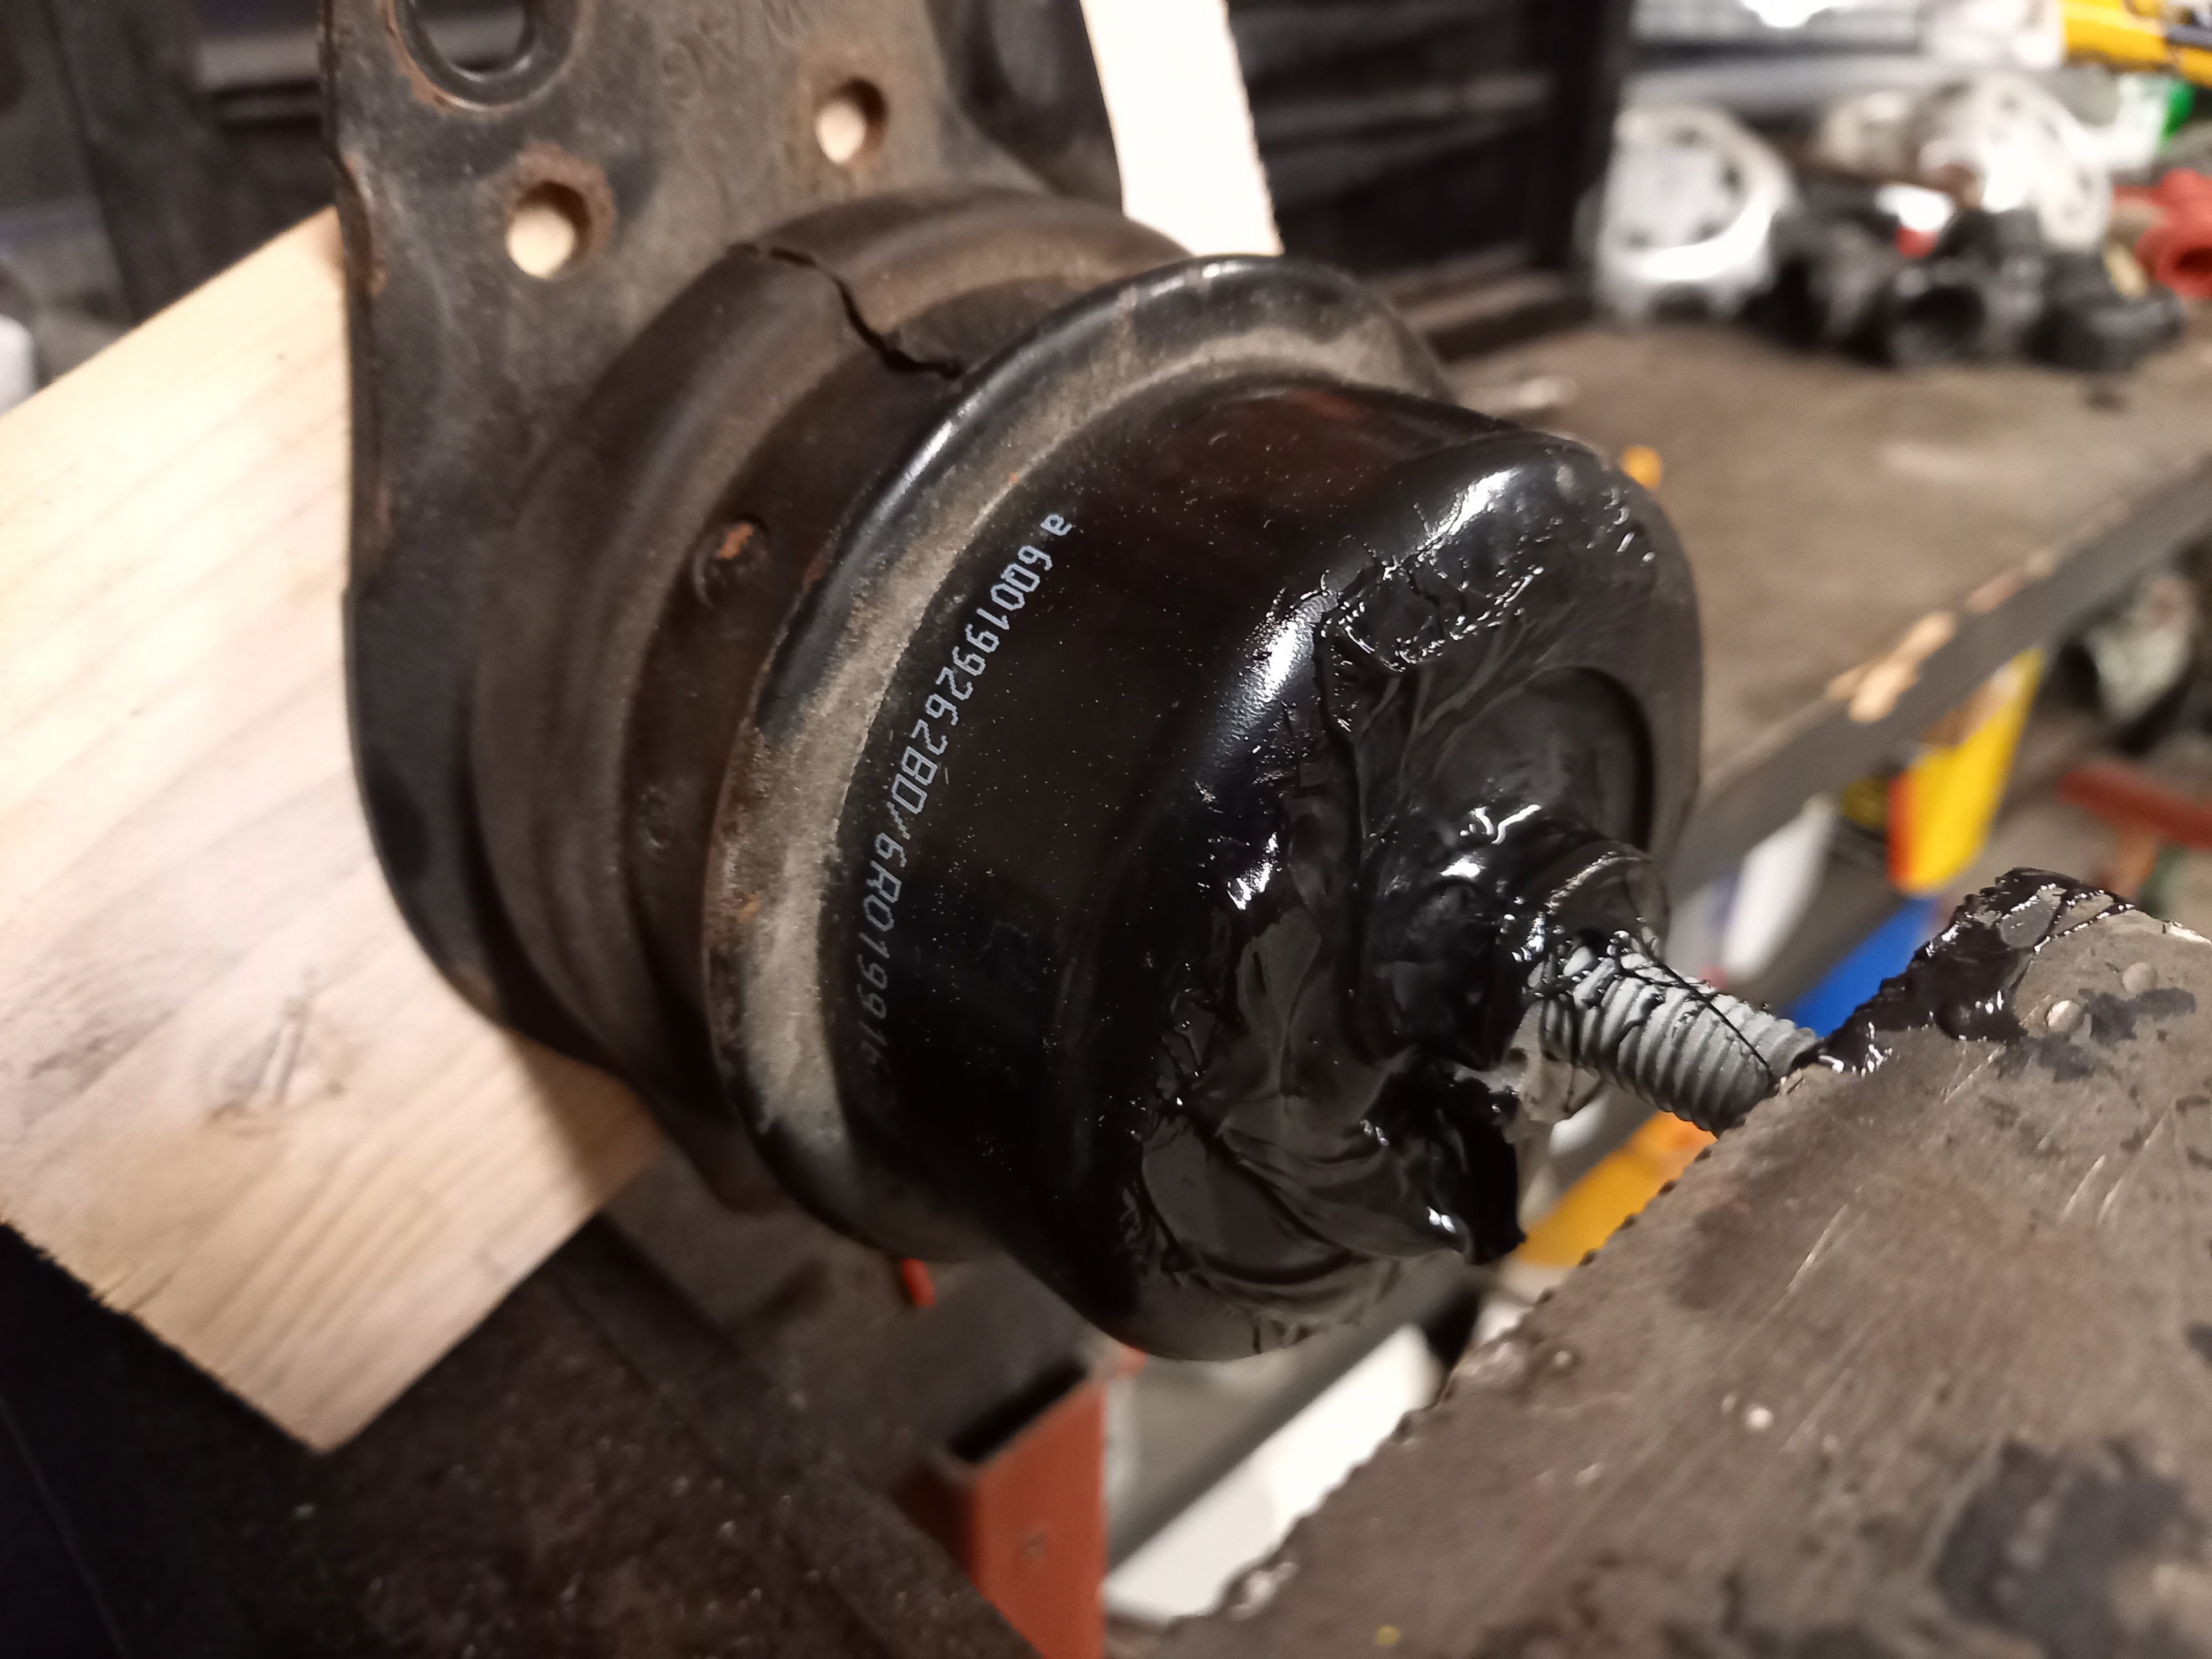
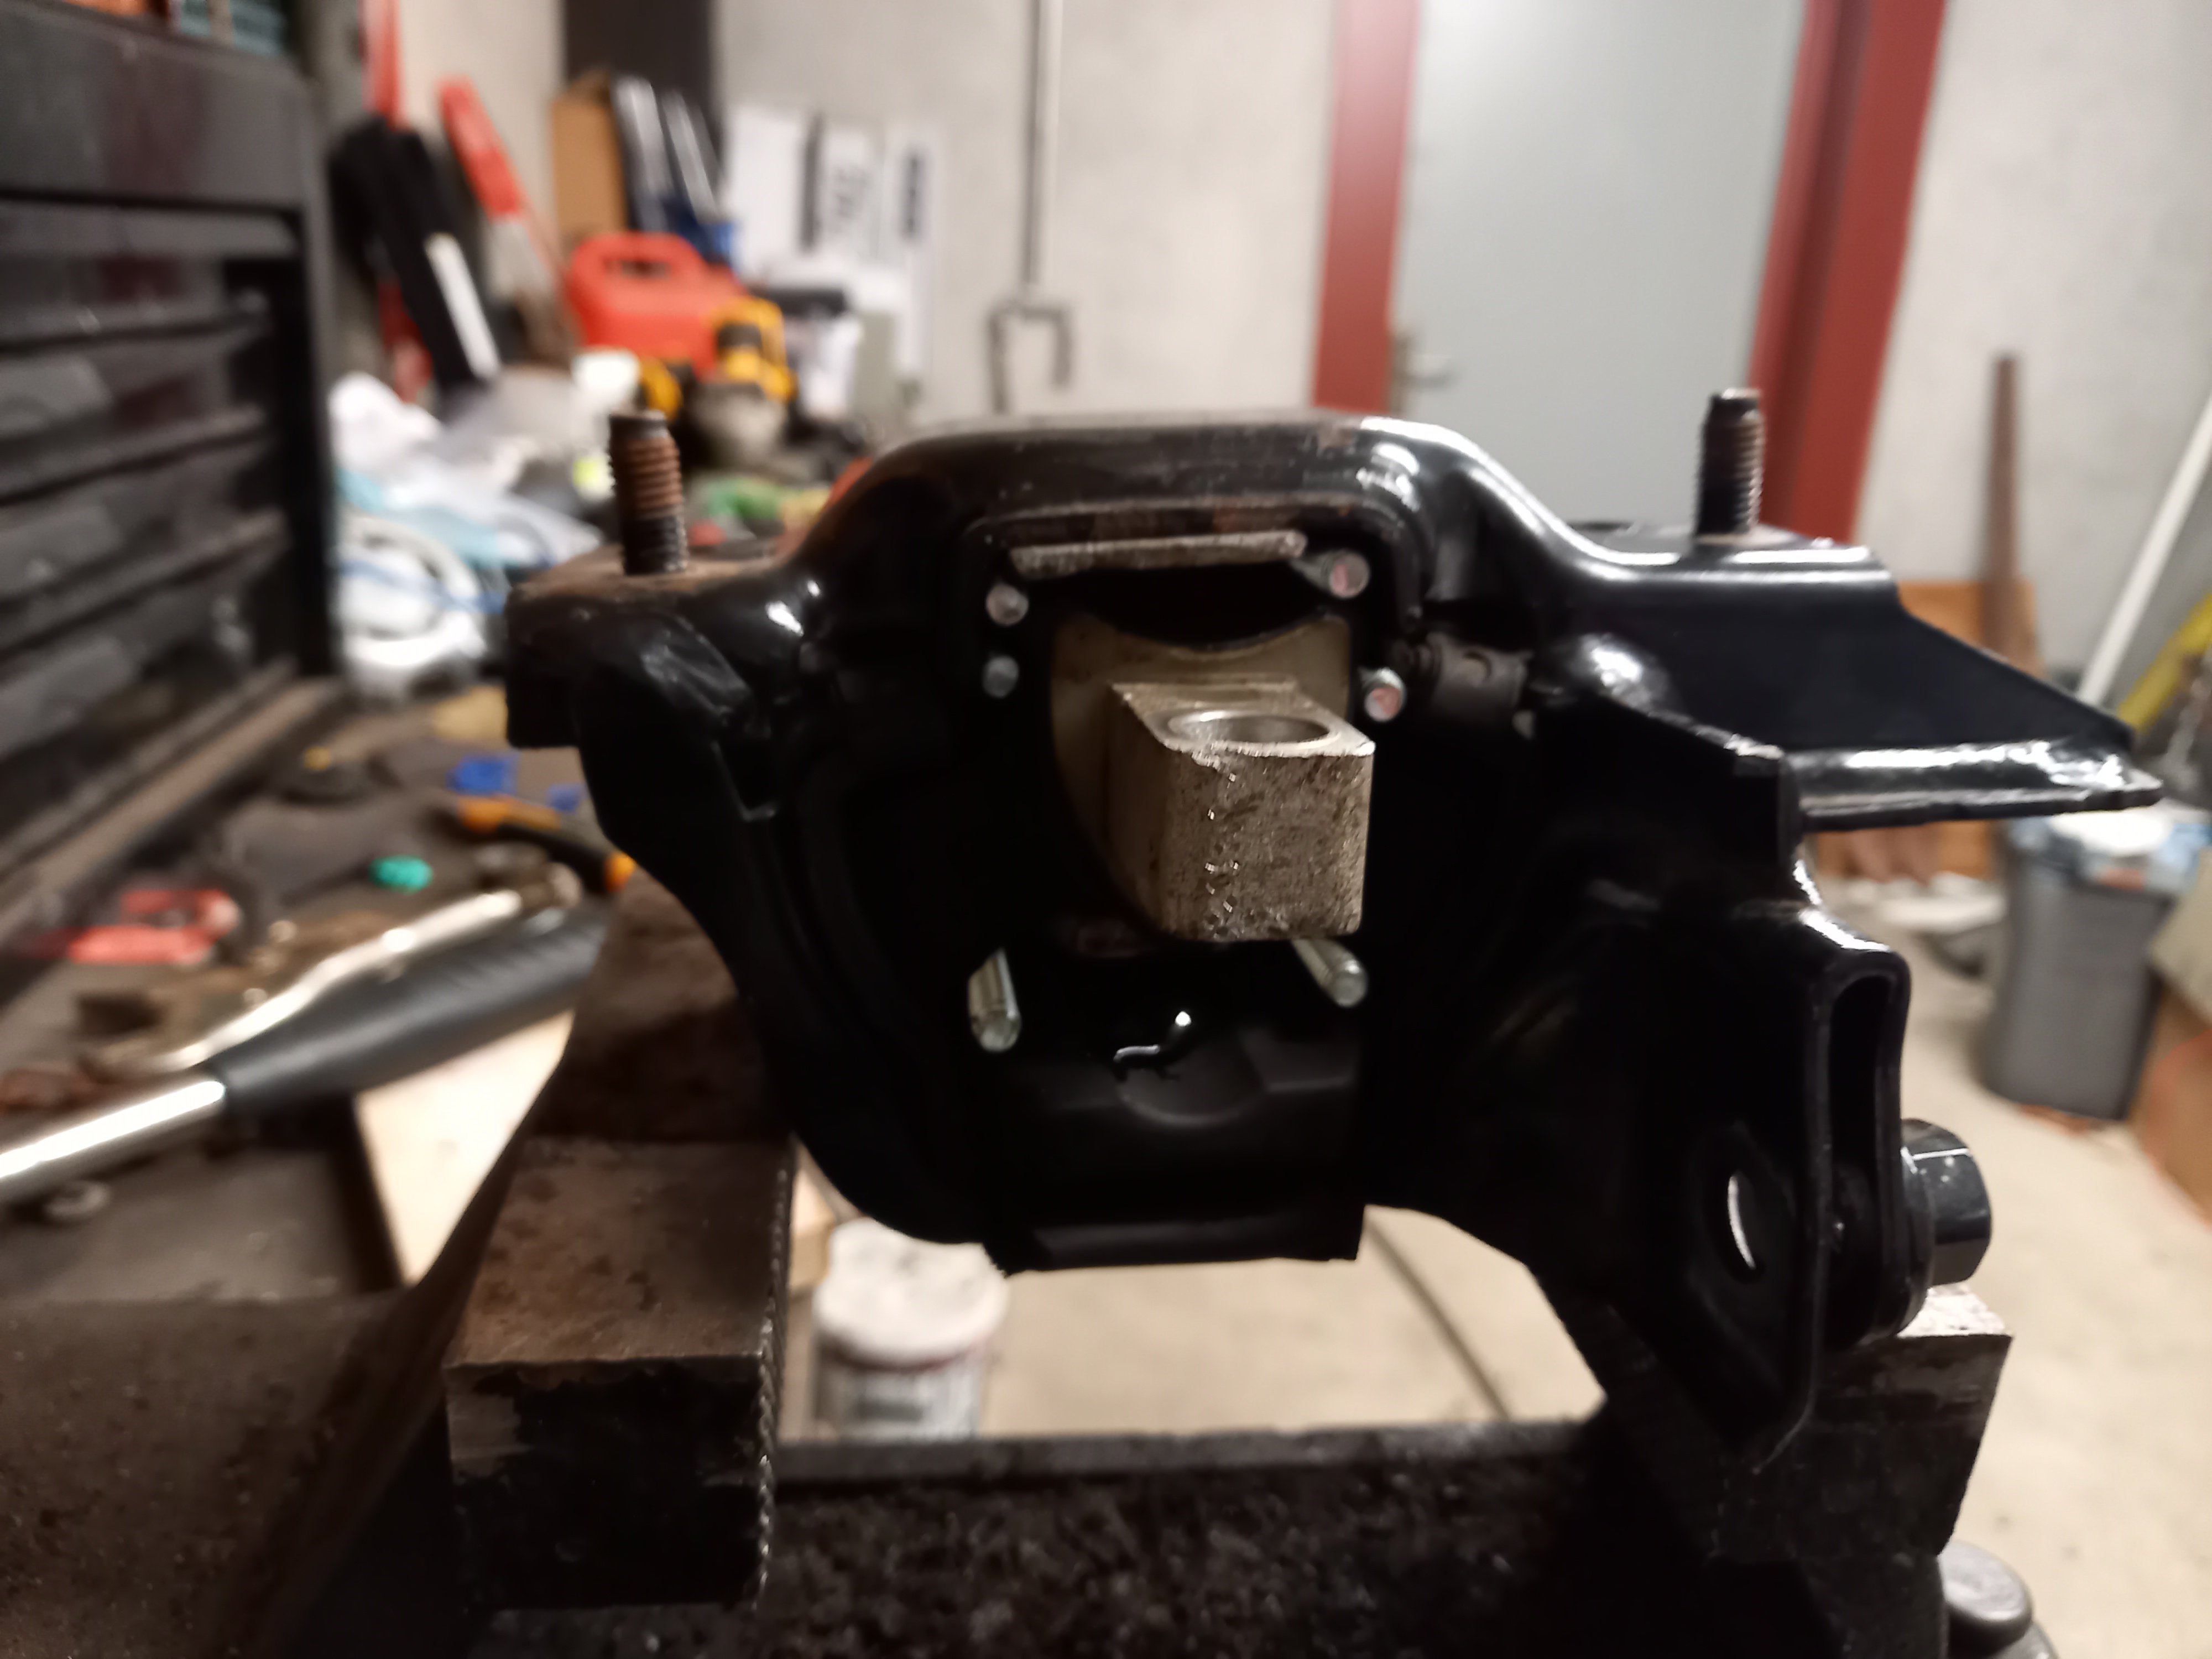
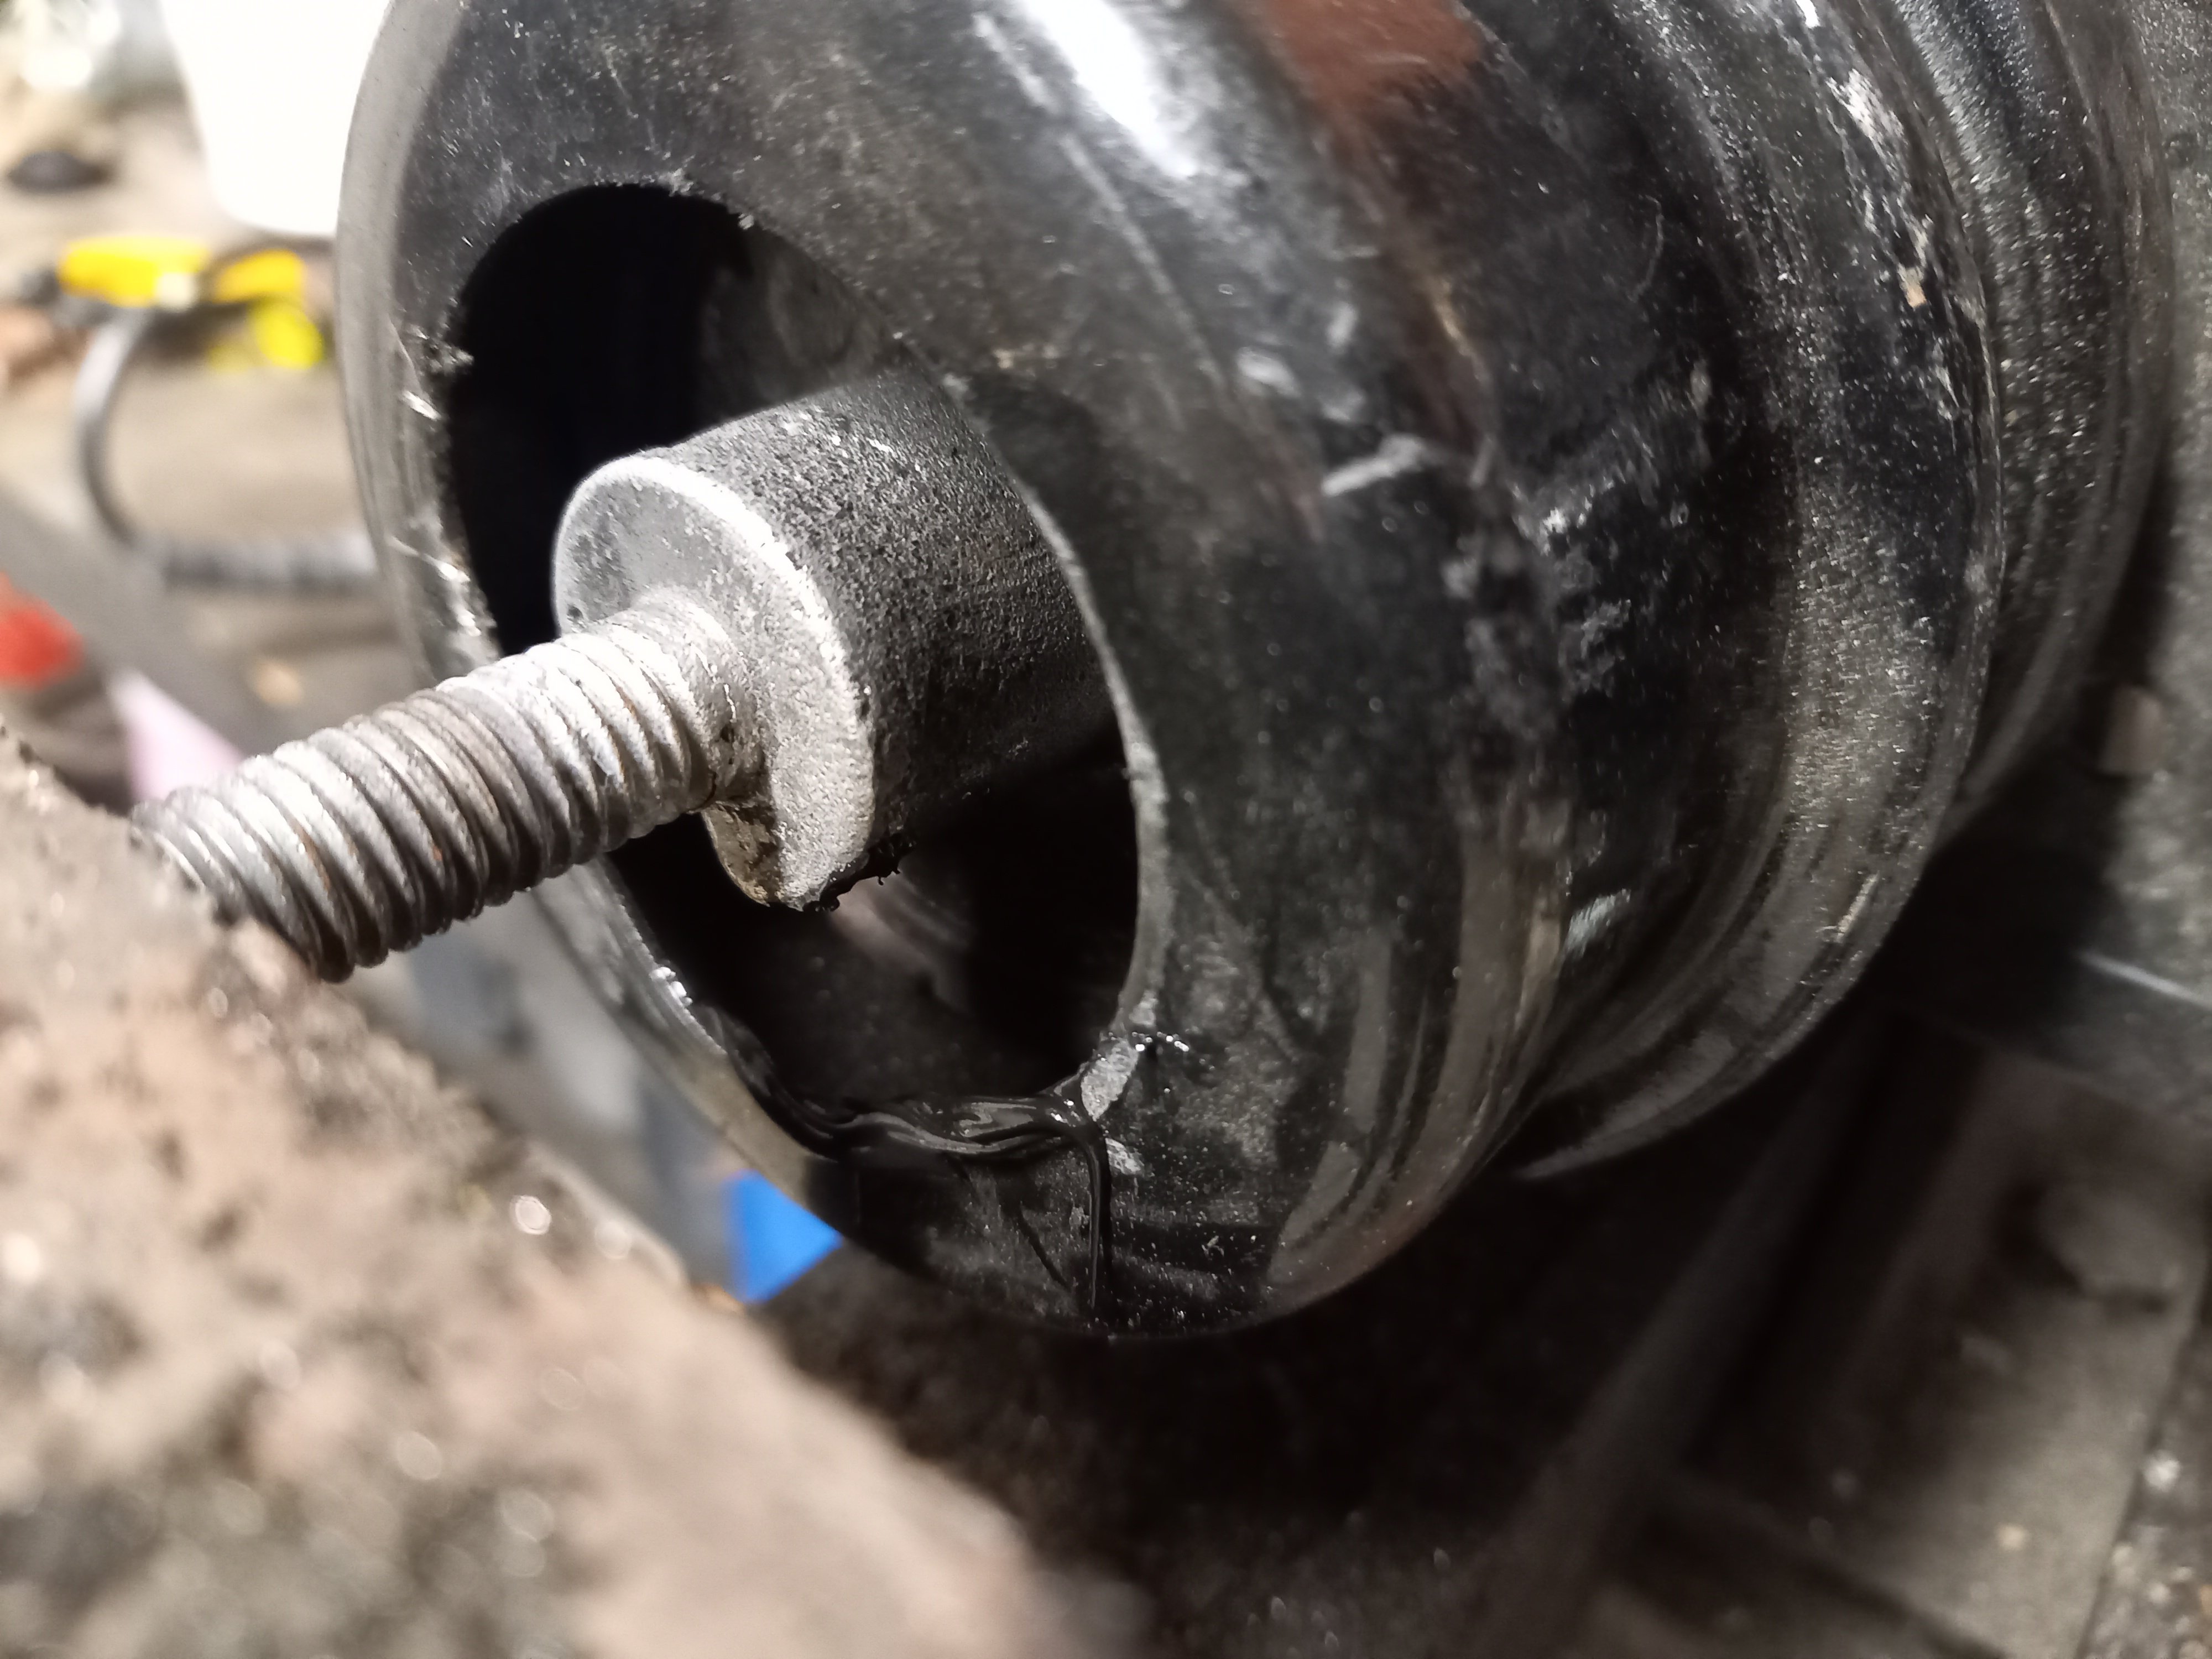
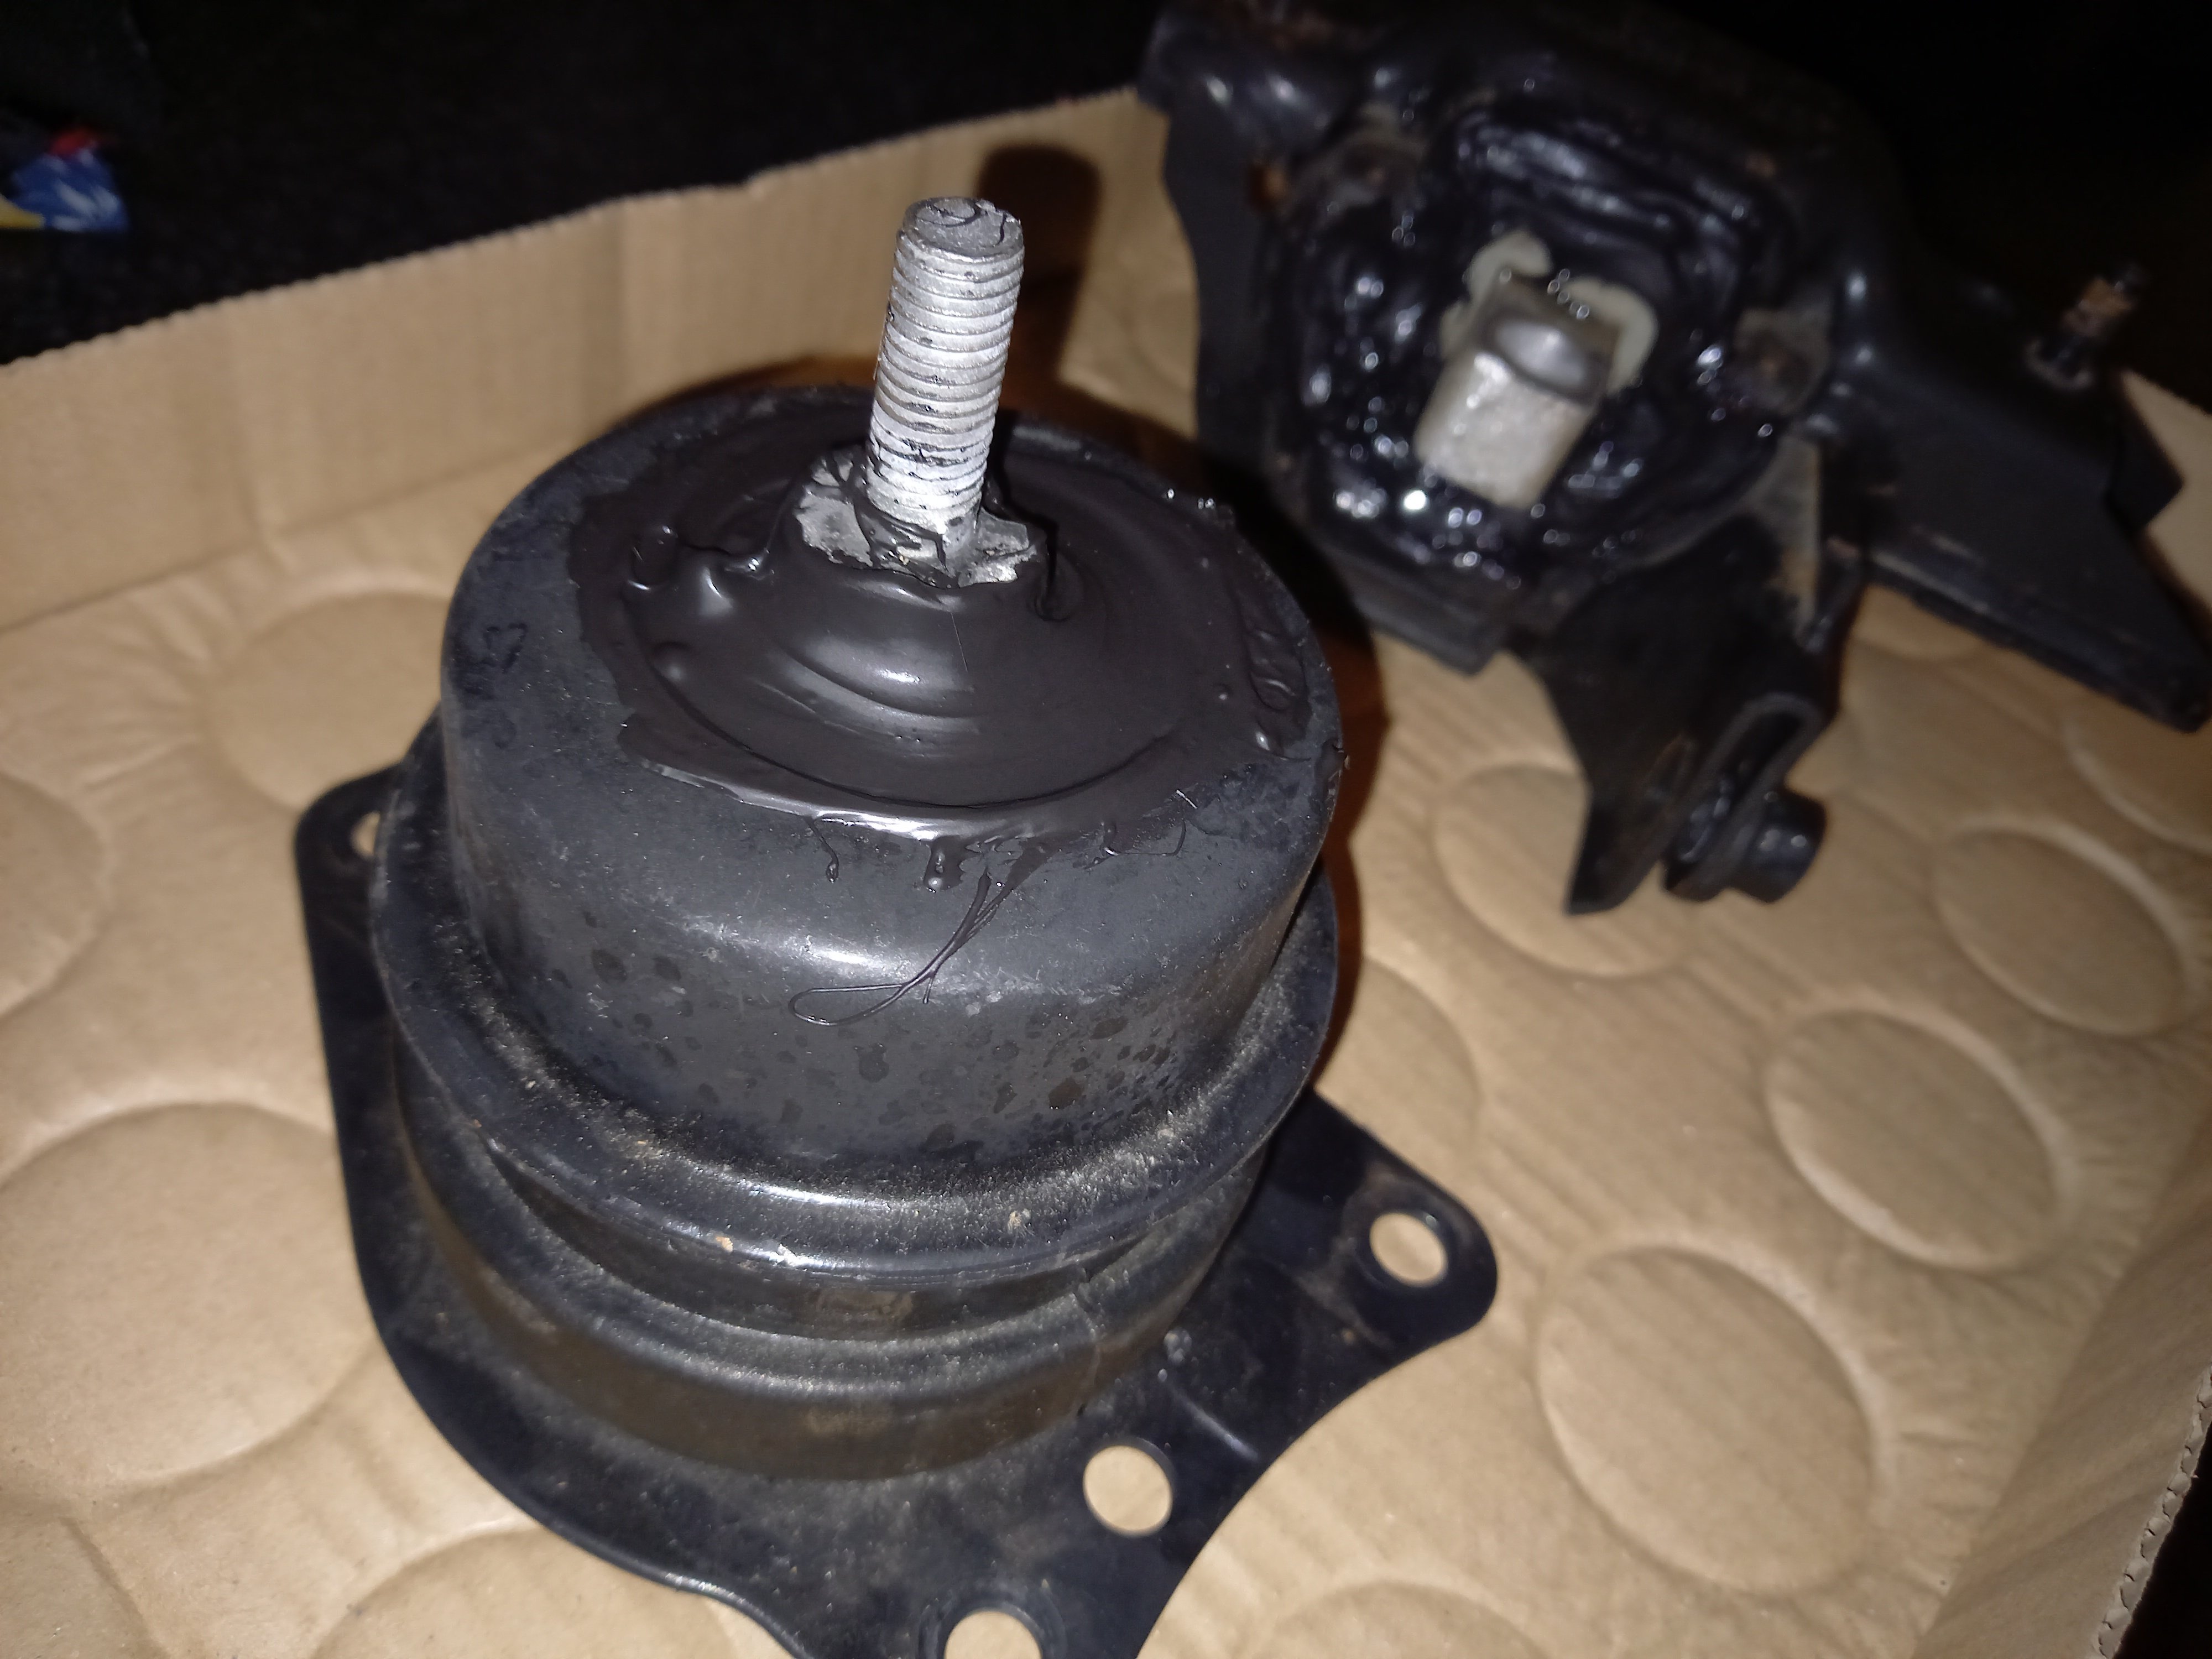
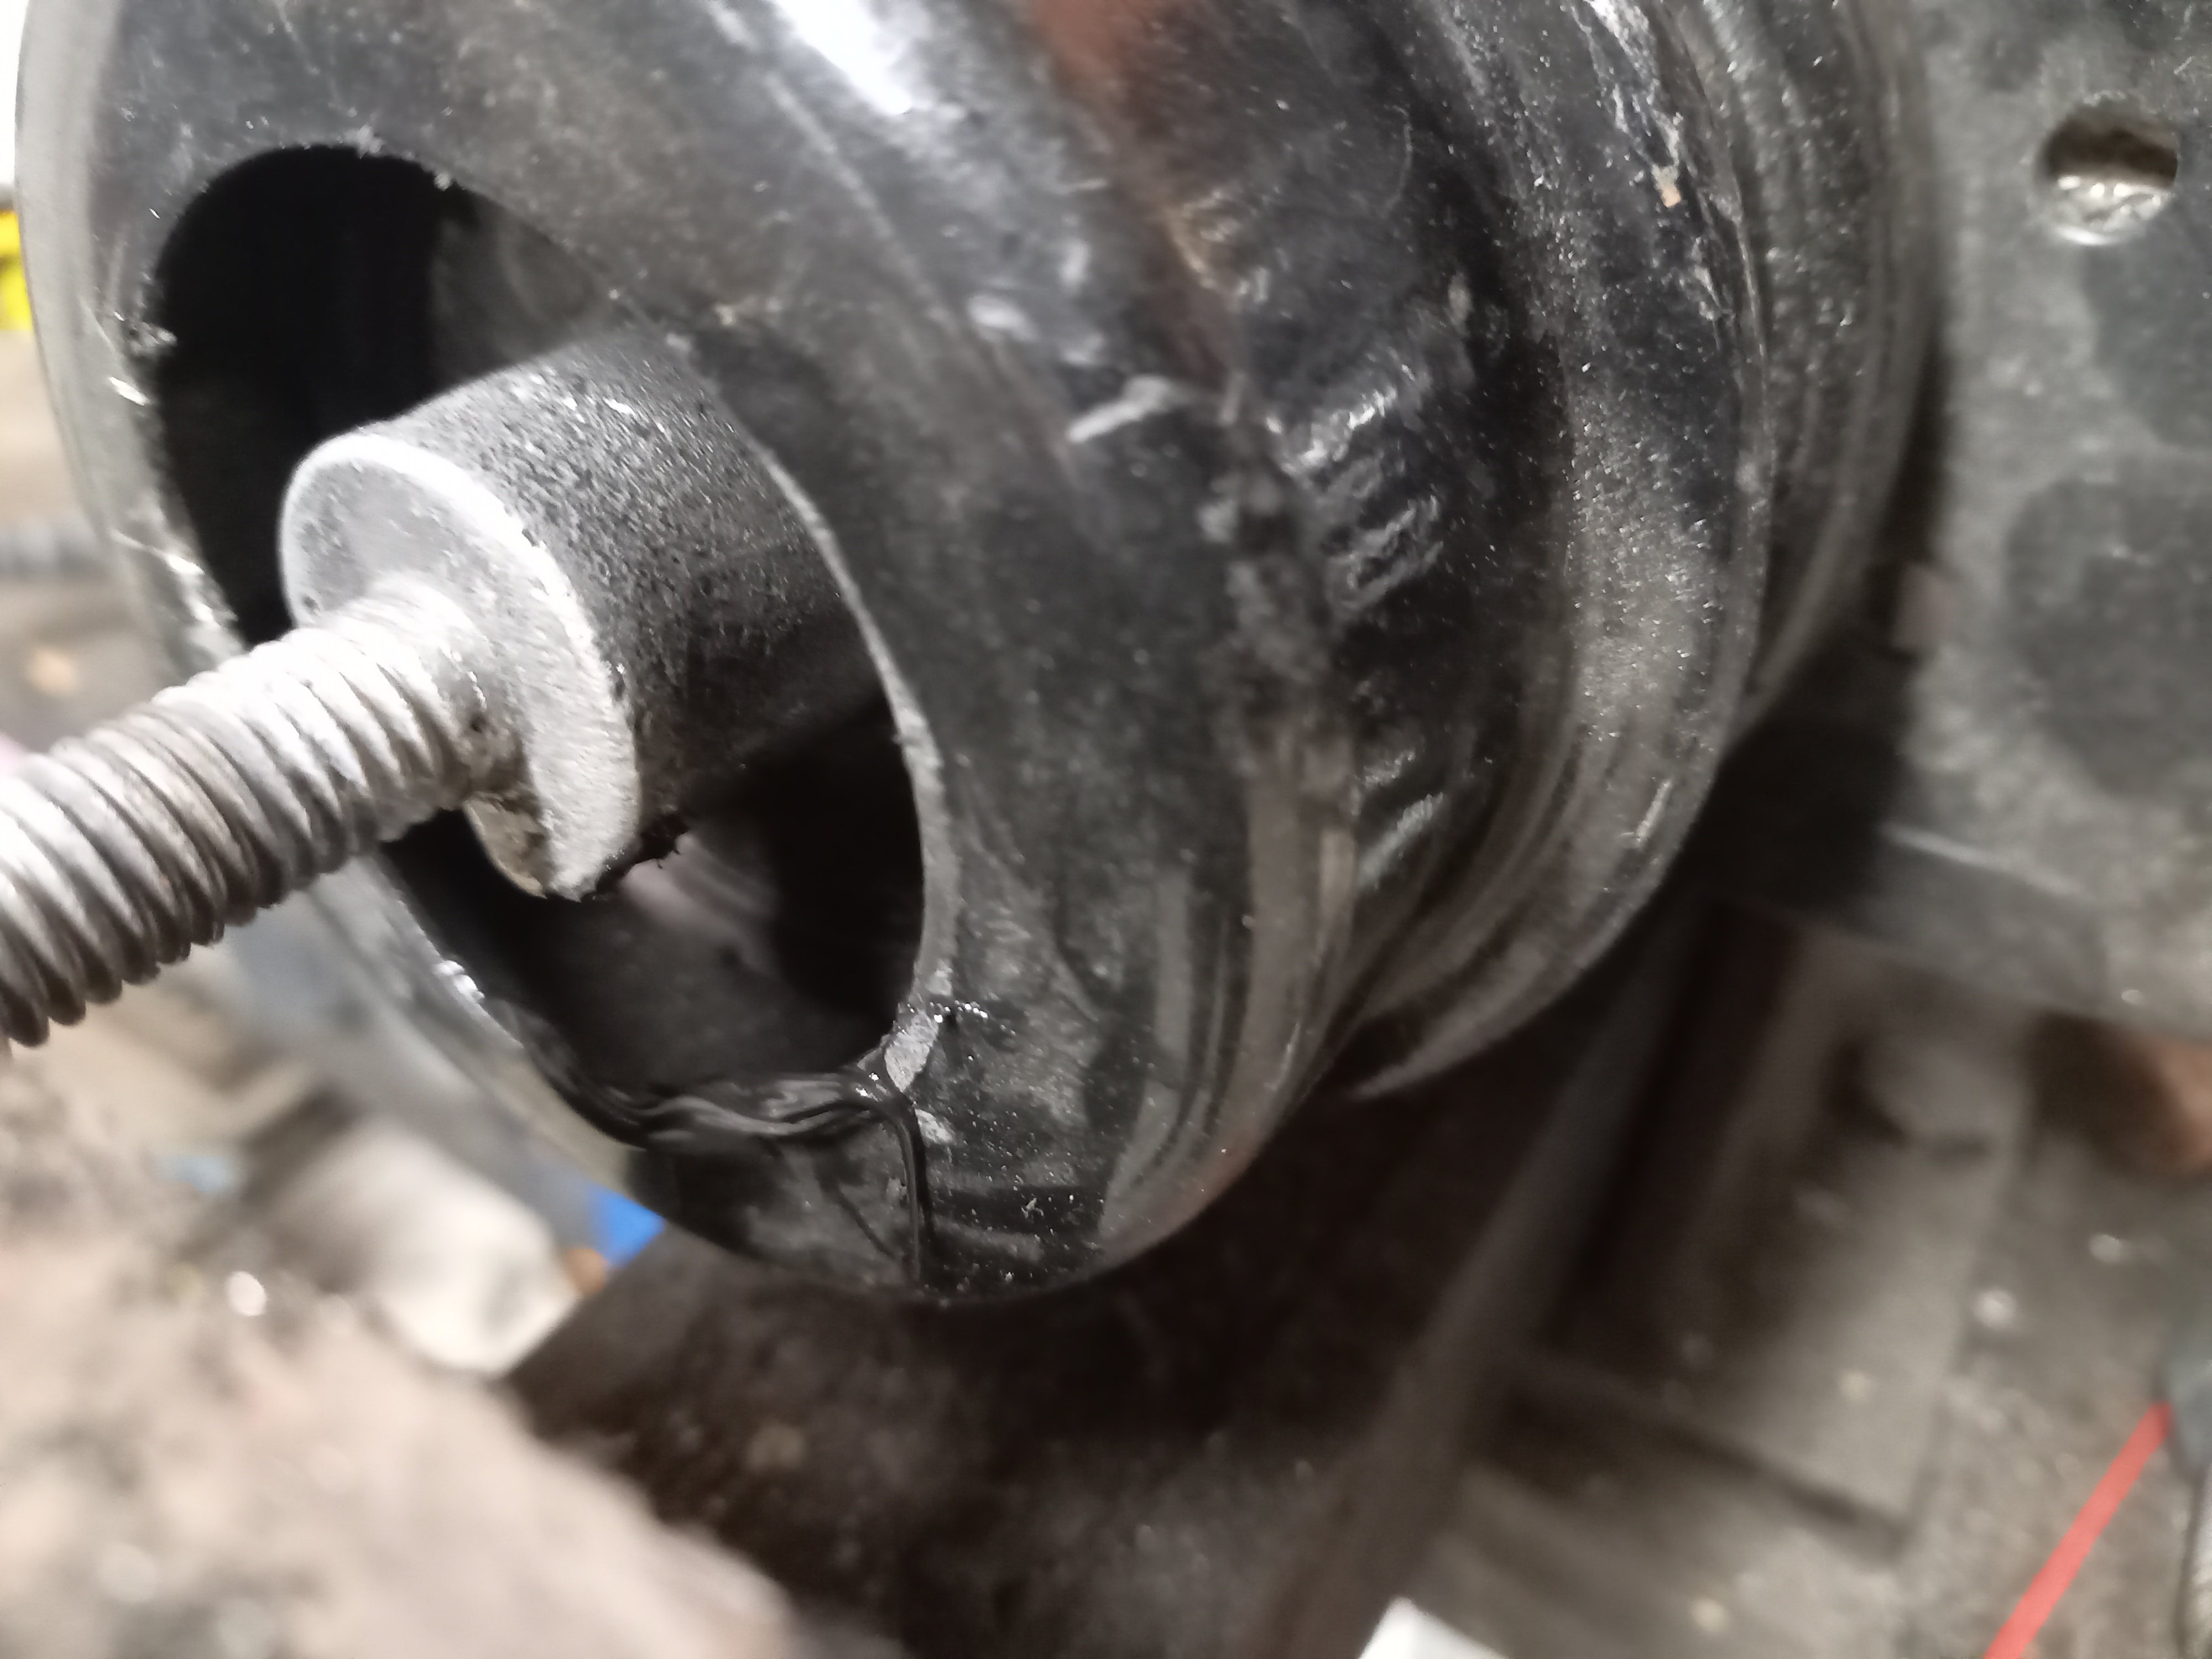
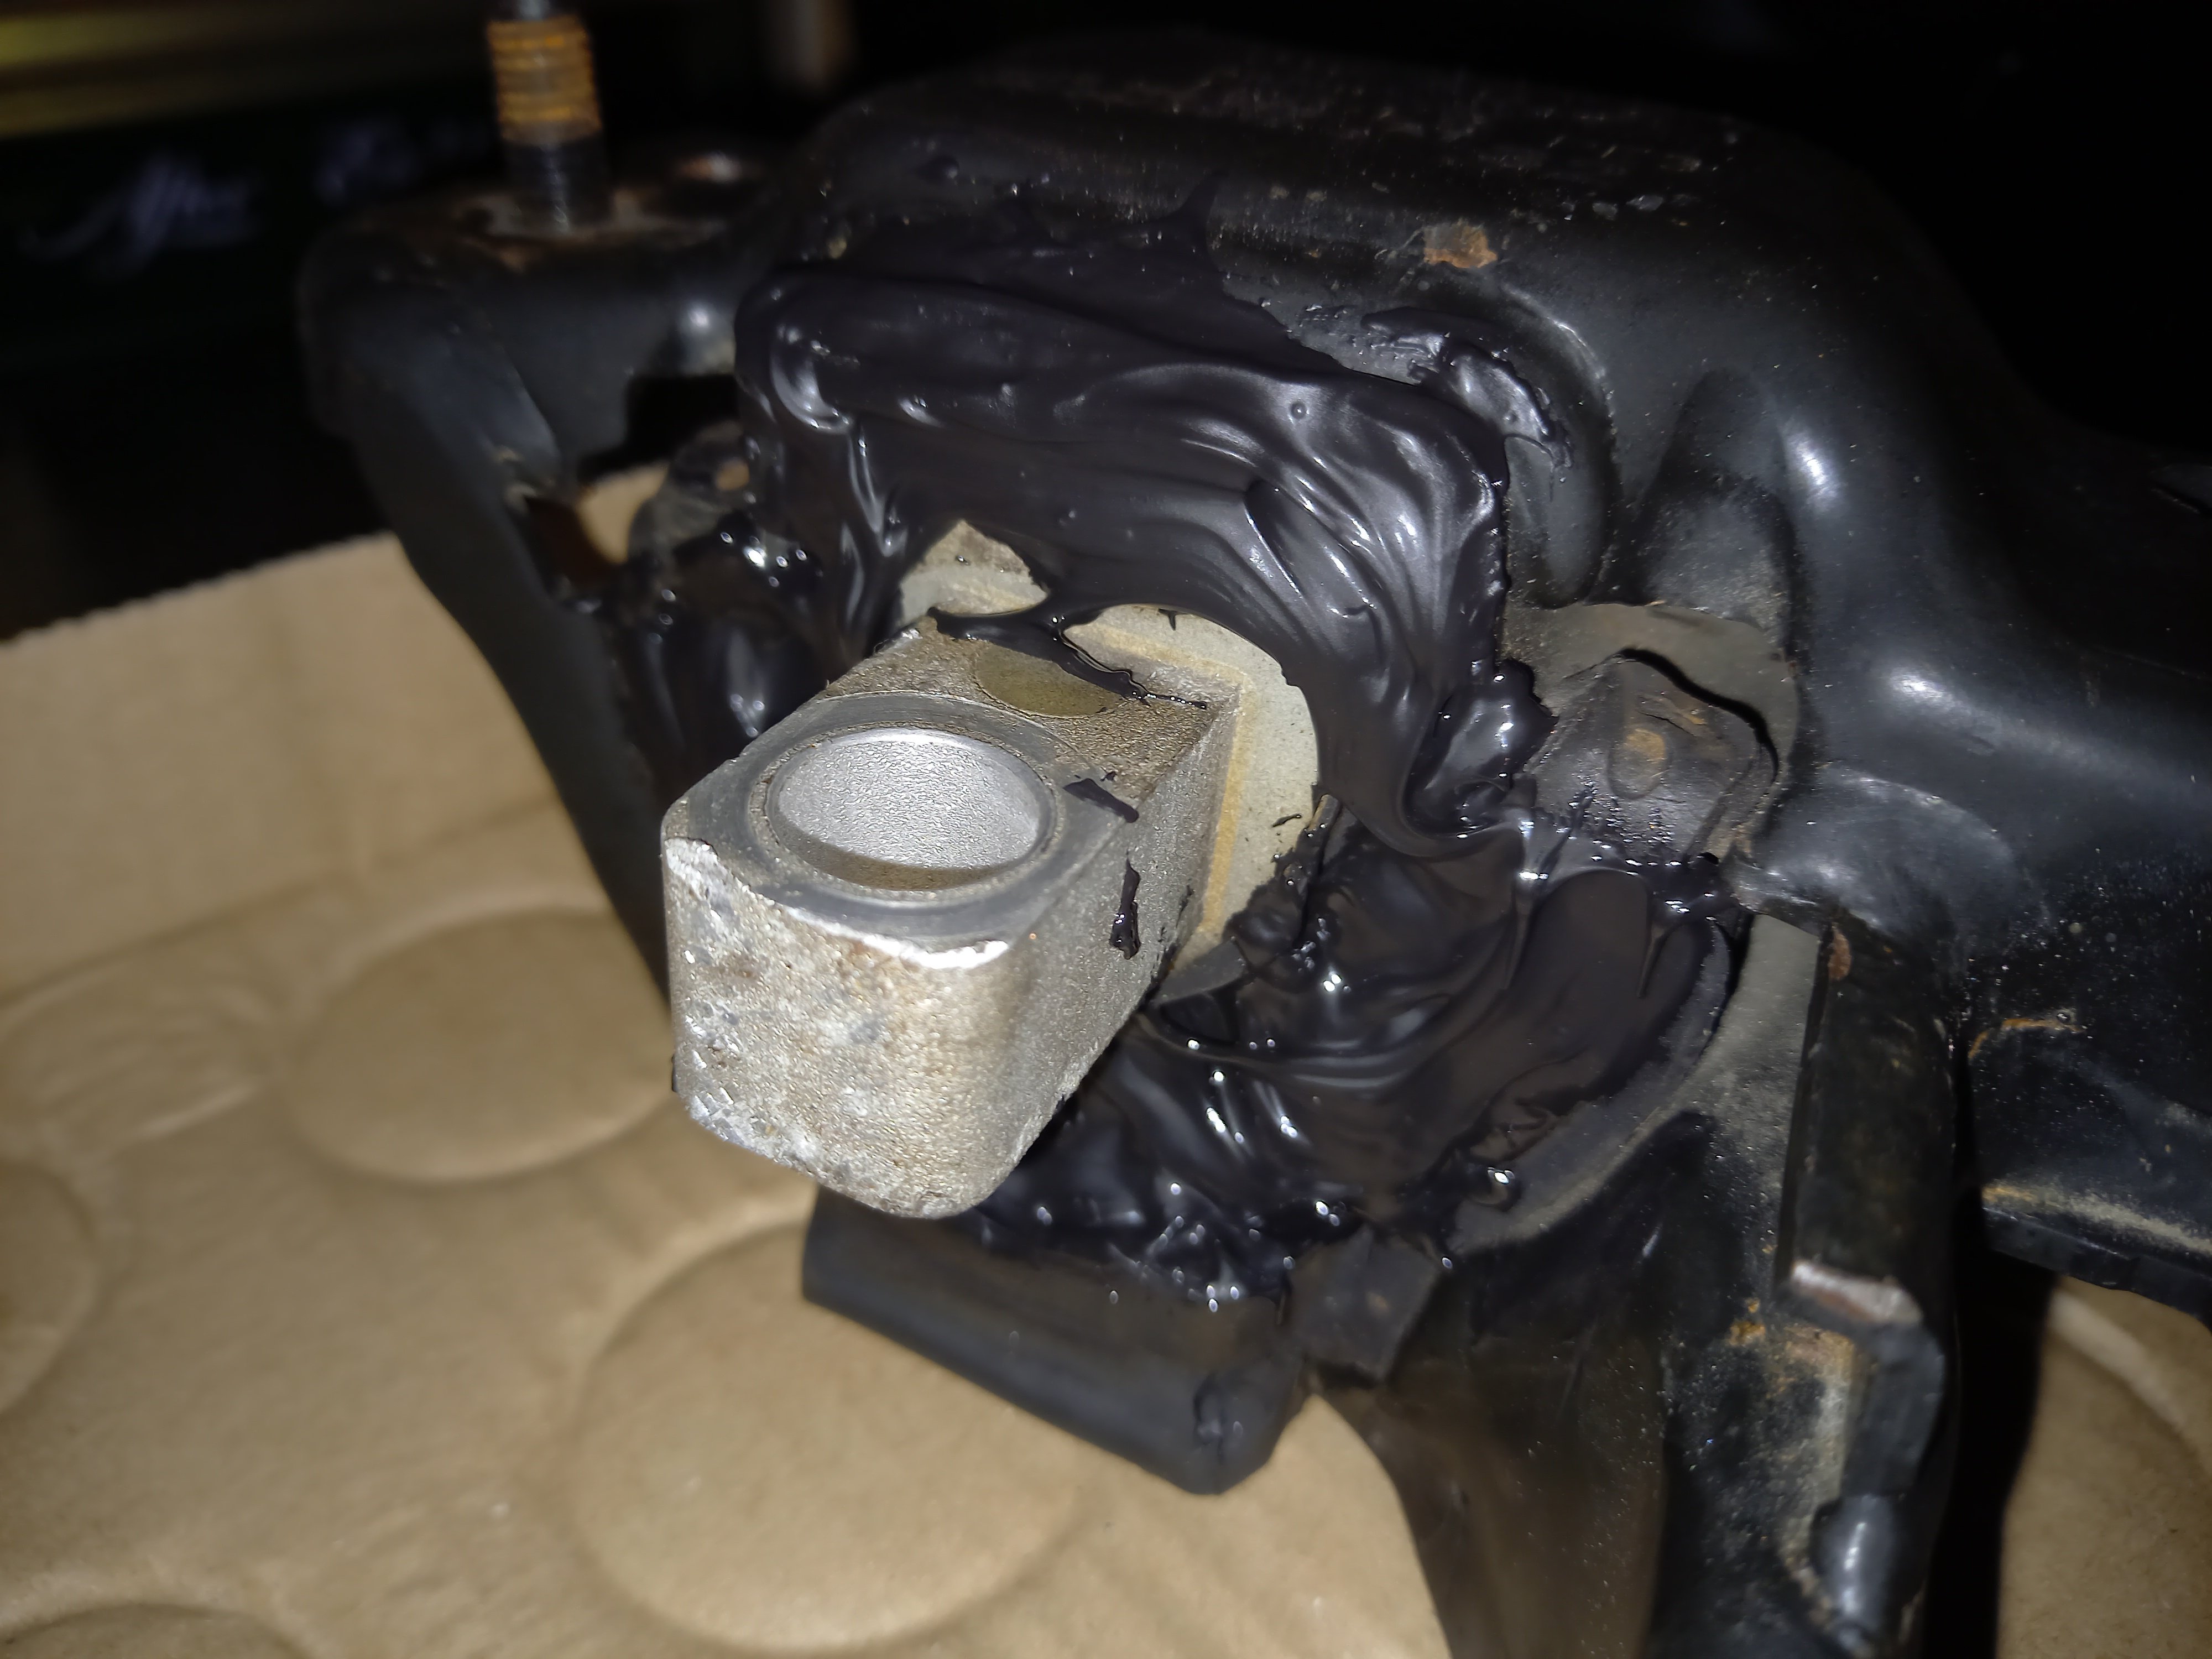
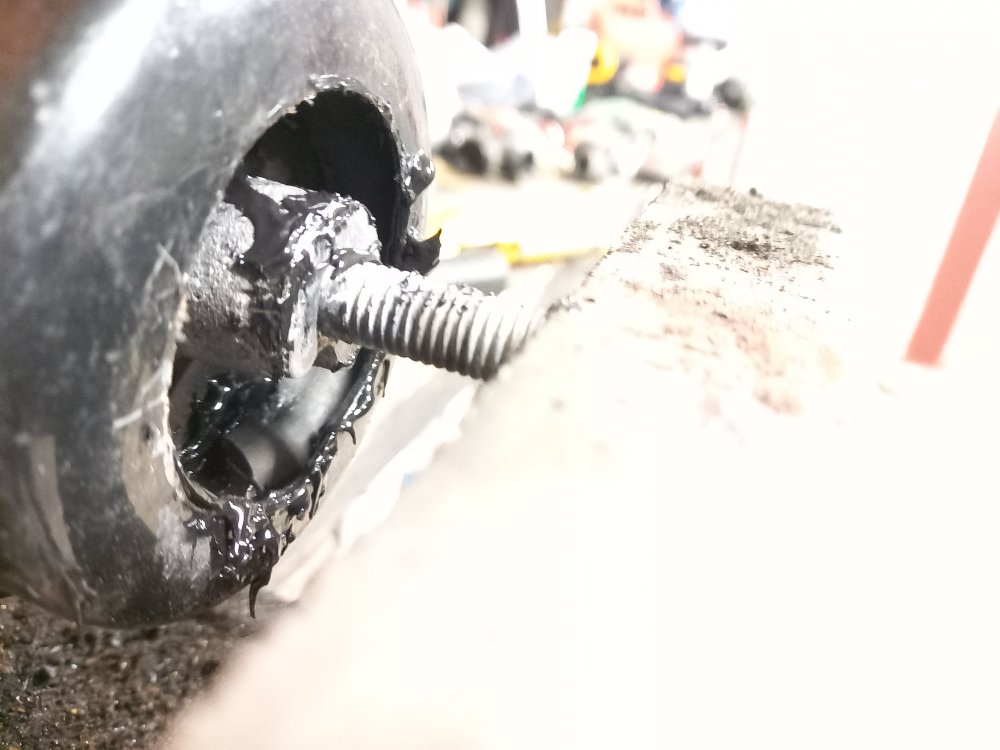
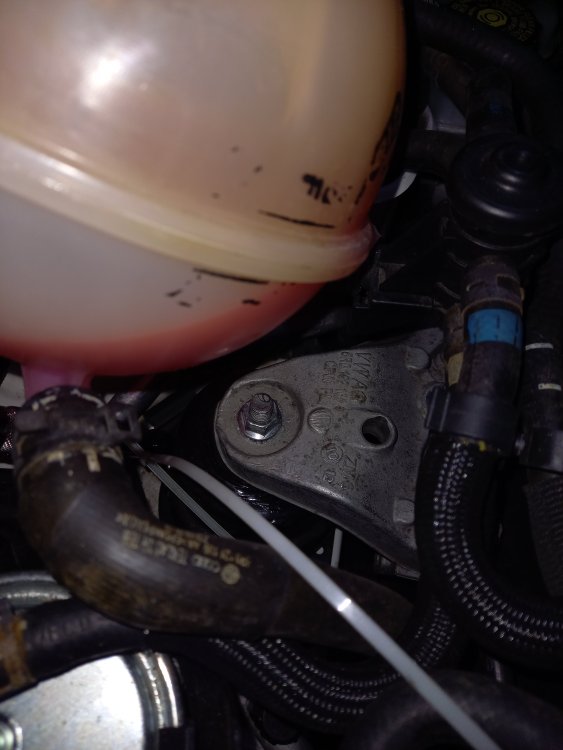
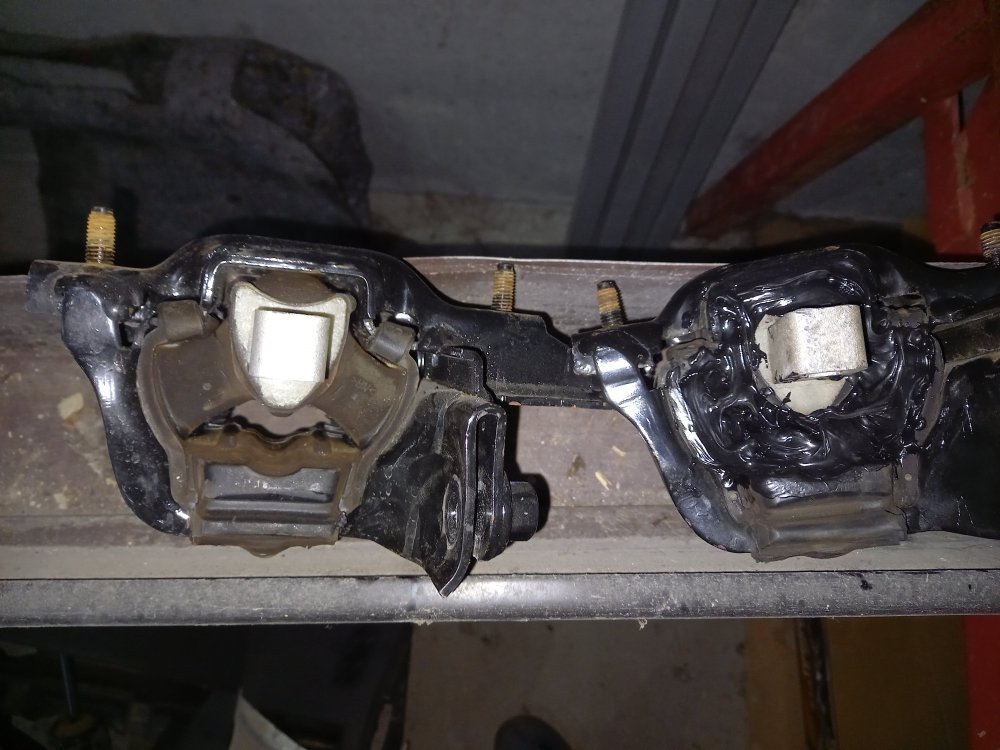
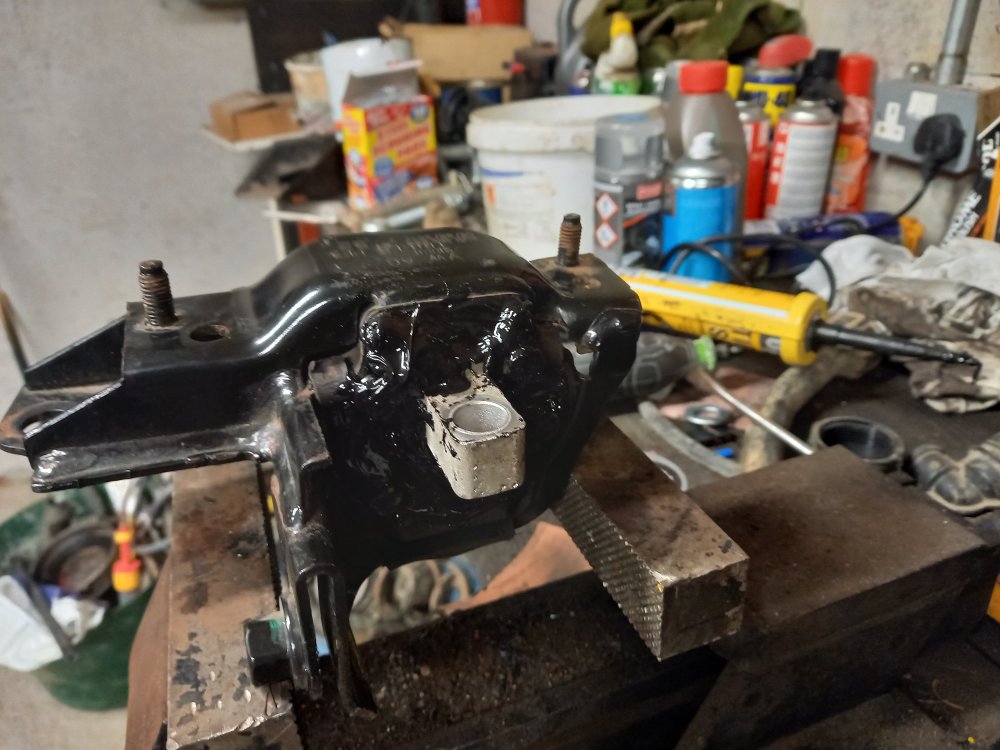
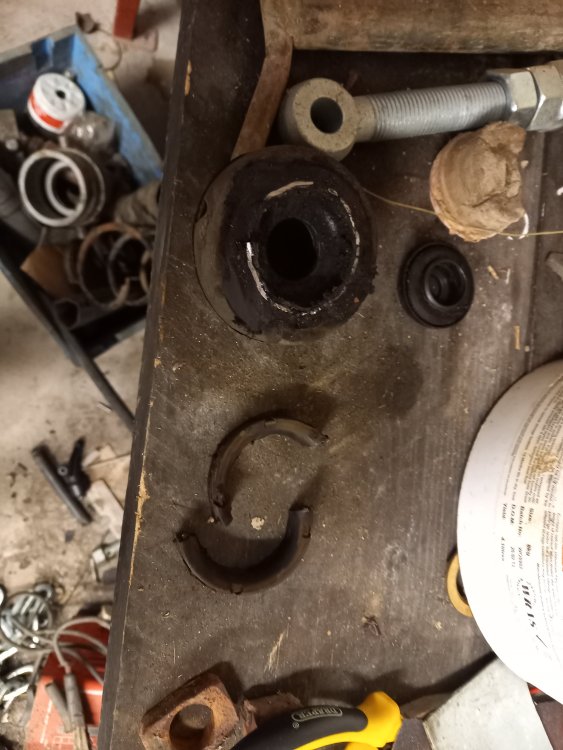
The mounts on my fabia didn't seem to be stiff enough for my needs. Everytime you set of from a set of lights I could feel the car "kick" even with new engine mounts and a powerflex dogbone bush. Shifting wasn't quite as nice as I'd like even though the linkages were reset and everything was working as it should. Just before christmas I started to hear a clunk when I was accelerating and I found the source of it to be the engine side mount, even though its only on the car a few months. Knowing I wouldn't be able to get a mount with christmas a few days away, and not wanting to drive around with a dodgy mount I did something I've wanted to do for a while now and filled the original engine mount with tigerseal. All I did was squeeze the original mount down in a vice, clean out where I intended to put the tigerseal and pumped as much of the stuff in as I physically could. Then I let it set for about a week in the vice before installing it. This mount worked well,stopped the clunk I experienced and stiffened things up a little bit. However, I thought I could do better so I set about making some improved mounts out of more spare mounts I had. But why? I wanted stiffer mounts as I figured they would make the engine feel more responsive, as well as make changing gears smoother as the engine and gearbox couldn't move around as much. Why tigerseal? Tigerseal is a polyurethane sealant that sets hard and sticks to just about anything. I got a tube of it in halfords for just under 15 euro and so far its done 2 engine mounts and a gearbox mount and theres still some left in the tube. I had considered using a proper polyurethane resin but that is slightly more expensive (still only around 30 euros) and would be a lot more finicky to pour into the mounts. Tigerseal needing to be dispensed from a caulk gun, and having a much thicker consistency is a lot easier to work with. Of course there is the option of vibratechnic engine mounts, but given the cost of them they weren't an option for me. How I did my new mounts: First make sure they're as clean as possible, free of grease and other dirt that could interfere in the tigerseal sticking. Also, wear gloves. I didnt and it took an age to get the tigerseal off my hands. Tigerseal even comes with a pair of gloves on the bottom of the tube so don't be like me and use them. Gearbox mount: I decided this time to find stuff to fill in the larger gaps of the mounts before putting the tigerseal in. For the gearbox mount I found a strip of metal to cut and wedge into the top of the mount, then I inserted a nylon nut into the lower portion of the mount. For the smaller gaps around the sides I used some bolts I had lying around to push through the gaps and firm up the mount (not pictured) More than anything, I did this to lessen the amount of tigerseal in the mount as this stuff takes a long time to dry and if put on thick enough might not dry completely on the inside. When you're putting the tigerseal in make sure to push the tigerseal into the mount, otherwise you'll leave voids inside the mount and it wont be as stiff. Doesn't need to be pretty, if you wanted to you could use your finger or something else to smooth the tigerseal. It won't change how the mount performs and purely makes the mount look nicer. Pic of the tigerseal mount next to the gearbox mount that was on the car. The tigerseal mount is the original one off the car and ironically its replacing a mount that is only on the car a few months. Looks to be cracking up around the edges already and felt very easy to move around by hand. Engine Mount: Similar to the other engine mount I squished it down in the vice to allow me to put more tigerseal into the gap on top. Like the gearbox mount, I filled the gap that was made with stuff. In this case, I used the lower portion of one of the original strut top mounts cut up to fit into the gap. I also found a perfectly sized brass nut with a washer to go over the middle portion of the mount and fill it up before putting in the tigerseal. I put in some tigerseal at this point to fill the mount slightly before pushing in the chunks of the old top mount. The beauty of me putting something solid into the mount is that it allowed me to remove the mount from the vice afterwards, otherwise the tigerseal would push itself out if it wasnt left in the vice to set. The finished product, at this point the shed got very cold so I ended up taking the mounts home to cure. I also ended up putting them in the oven for a while on a low enough heat to help them cure faster. Leave them for atleast a few days to cure but the longer you can leave them the better. A downside to tigerseal is that its air cured so it takes a long time to cure. Nothing special about how they go on, same as any other mount. The result: There is more vibration throughout the car, I noticed the difference most from the gearbox mount, likely because that was the only completely standard mount on the car. Worth noting that it has settled somewhat after a few miles. Just to visualise the vibrations I put a cup of water on the dash. You can see the water ripples a bit. For me, I don't mind it and its only really noticeable at idle (~800rpm). When its cold out and the car idles a bit higher (~1000rpm) I couldn't tell any difference from before. While there certainly is more vibrations its not nearly as teeth rattling, boneshakingly bad as I was led to believe. However, I have noticed its a lot more responsive as the engine isnt twisting and pulling against the mounts as much. There is definately less drama when you put your foot down it just goes. Changing gear it is significantly better too, much easier to change gear and it feels much more positive doing so. Overall I think this is a nice compromise between the standard mounts which weren't doing the job for me, and some expensive ultra stiff mounts such as those offered by vibra-technics. Considering I've done 3 mounts now with the one tube of tiger seal its certainly a cost effective solution. Its something I'll be doing again for my mk1 fabia


-
And what if the numberplate lights don't come on? Would it be a fuse that needs changing?
-
Jesus you don't mess about do you?
-
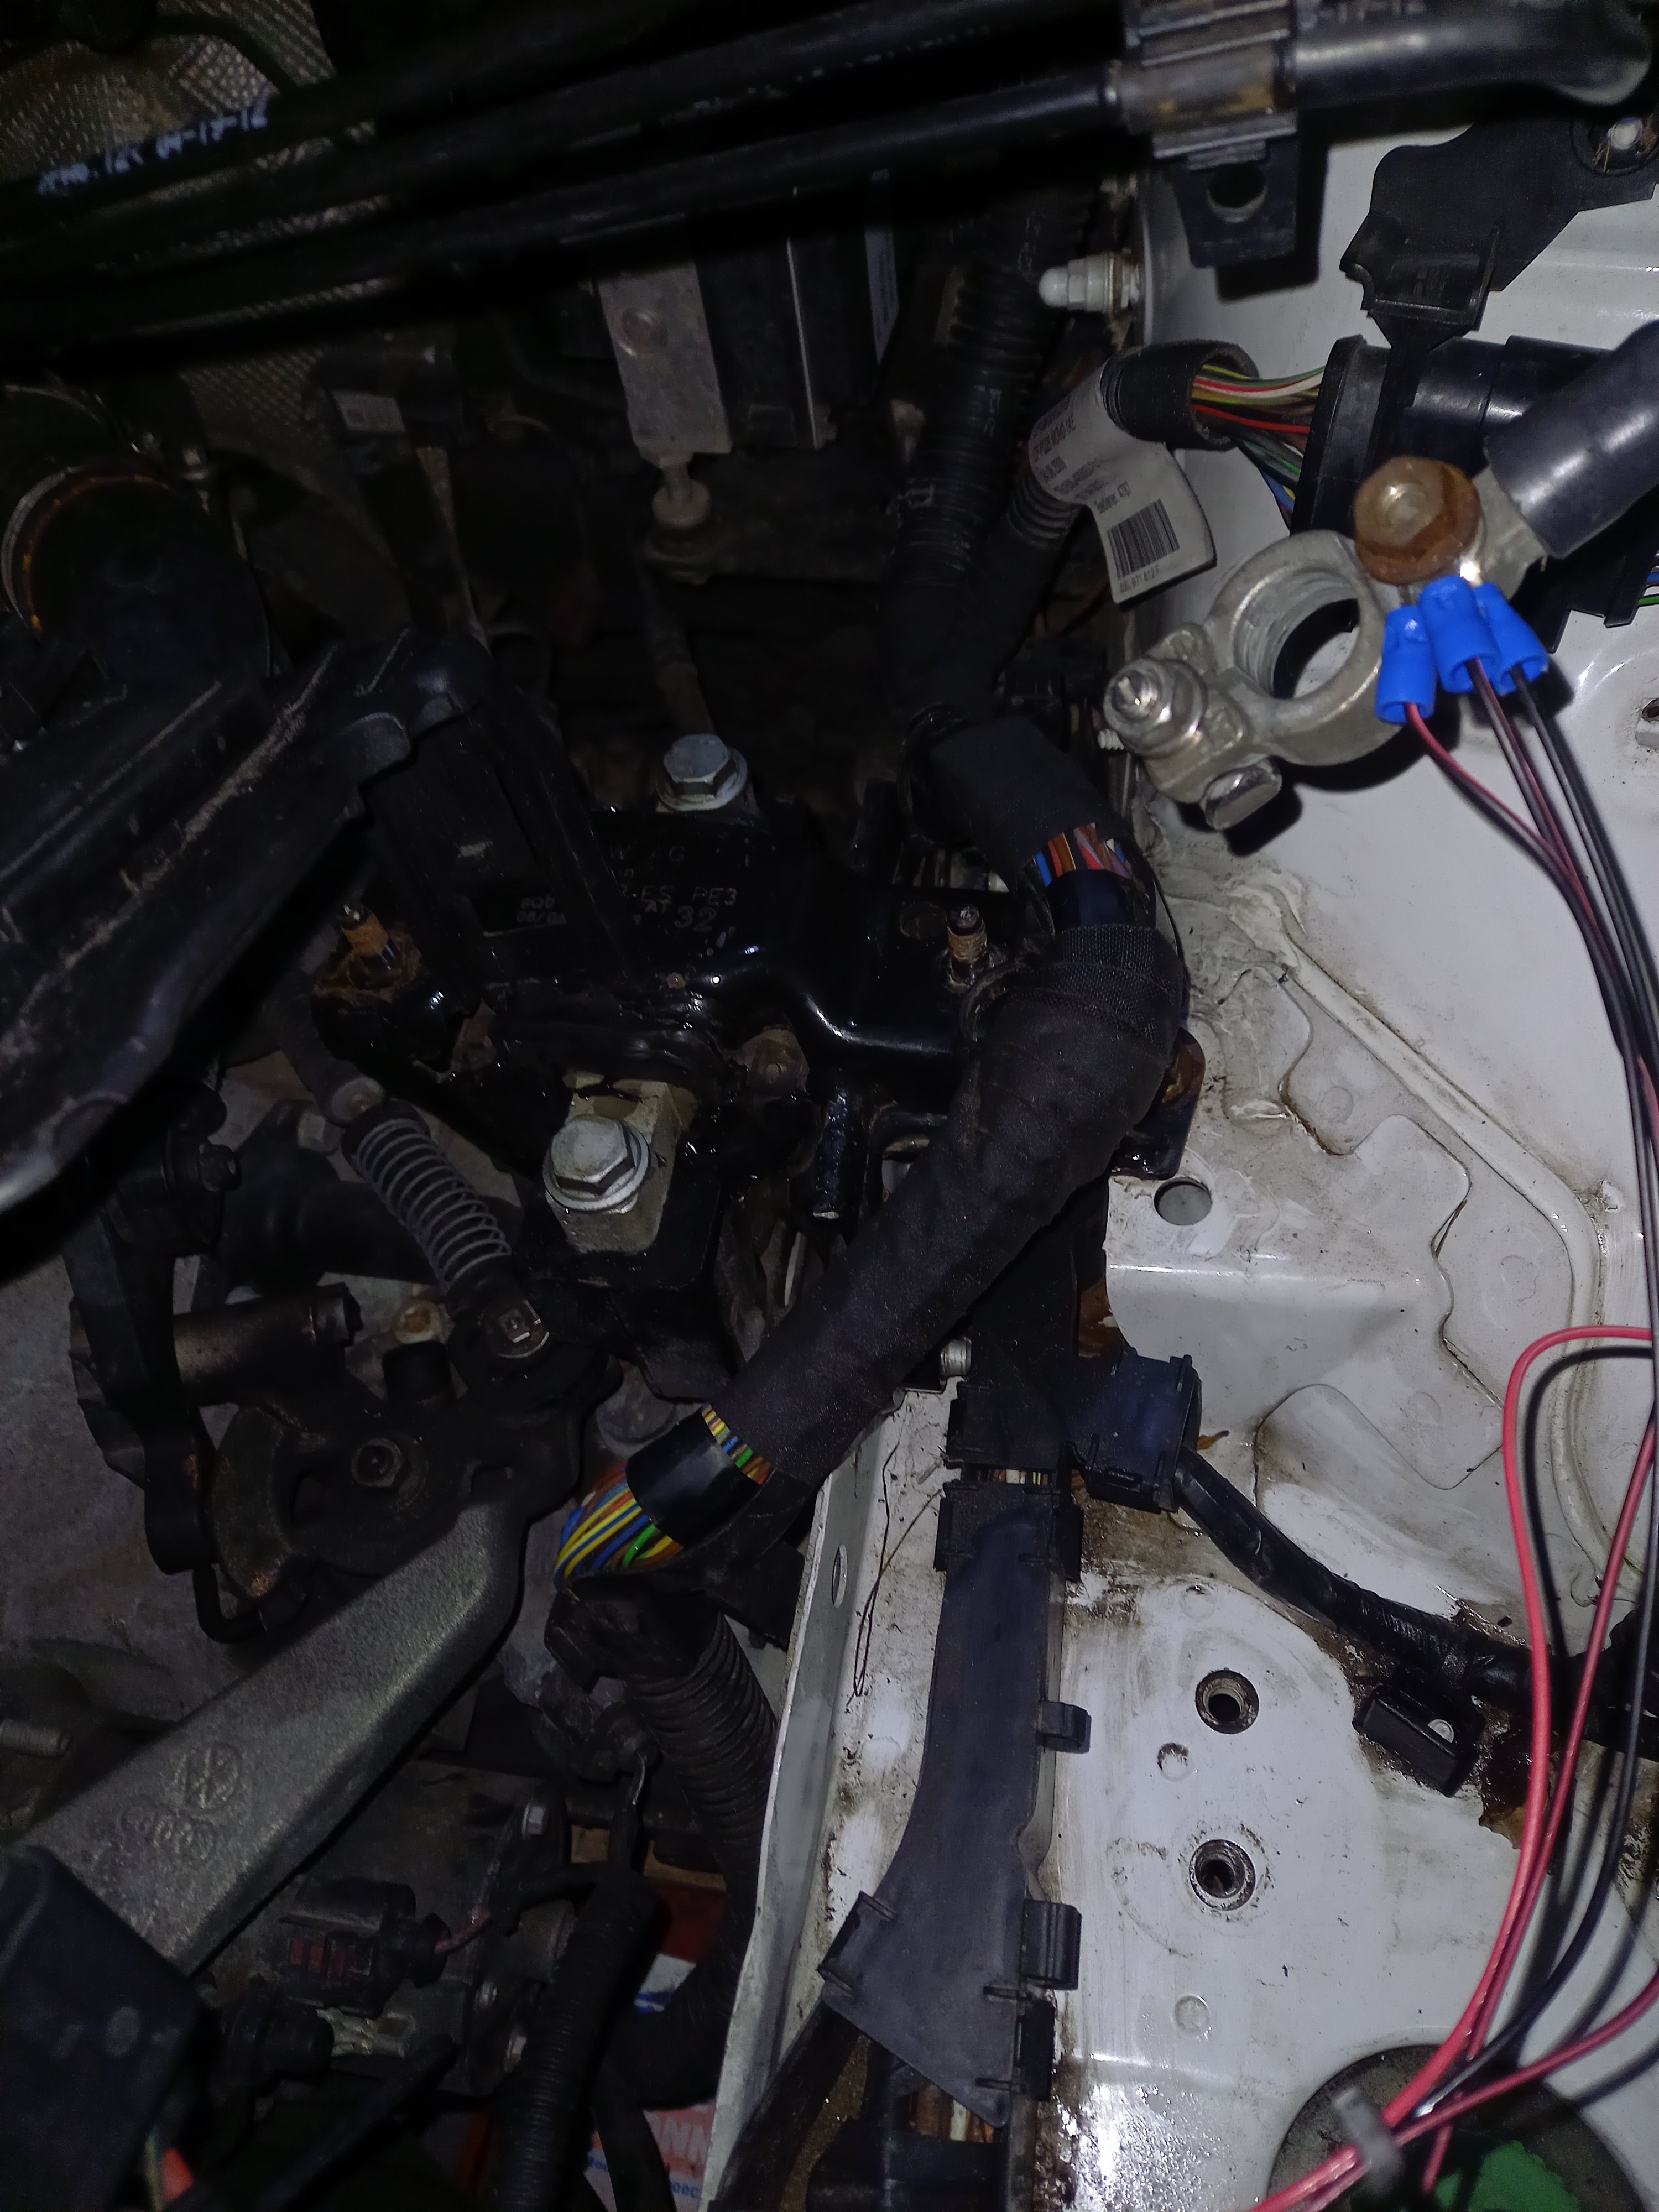
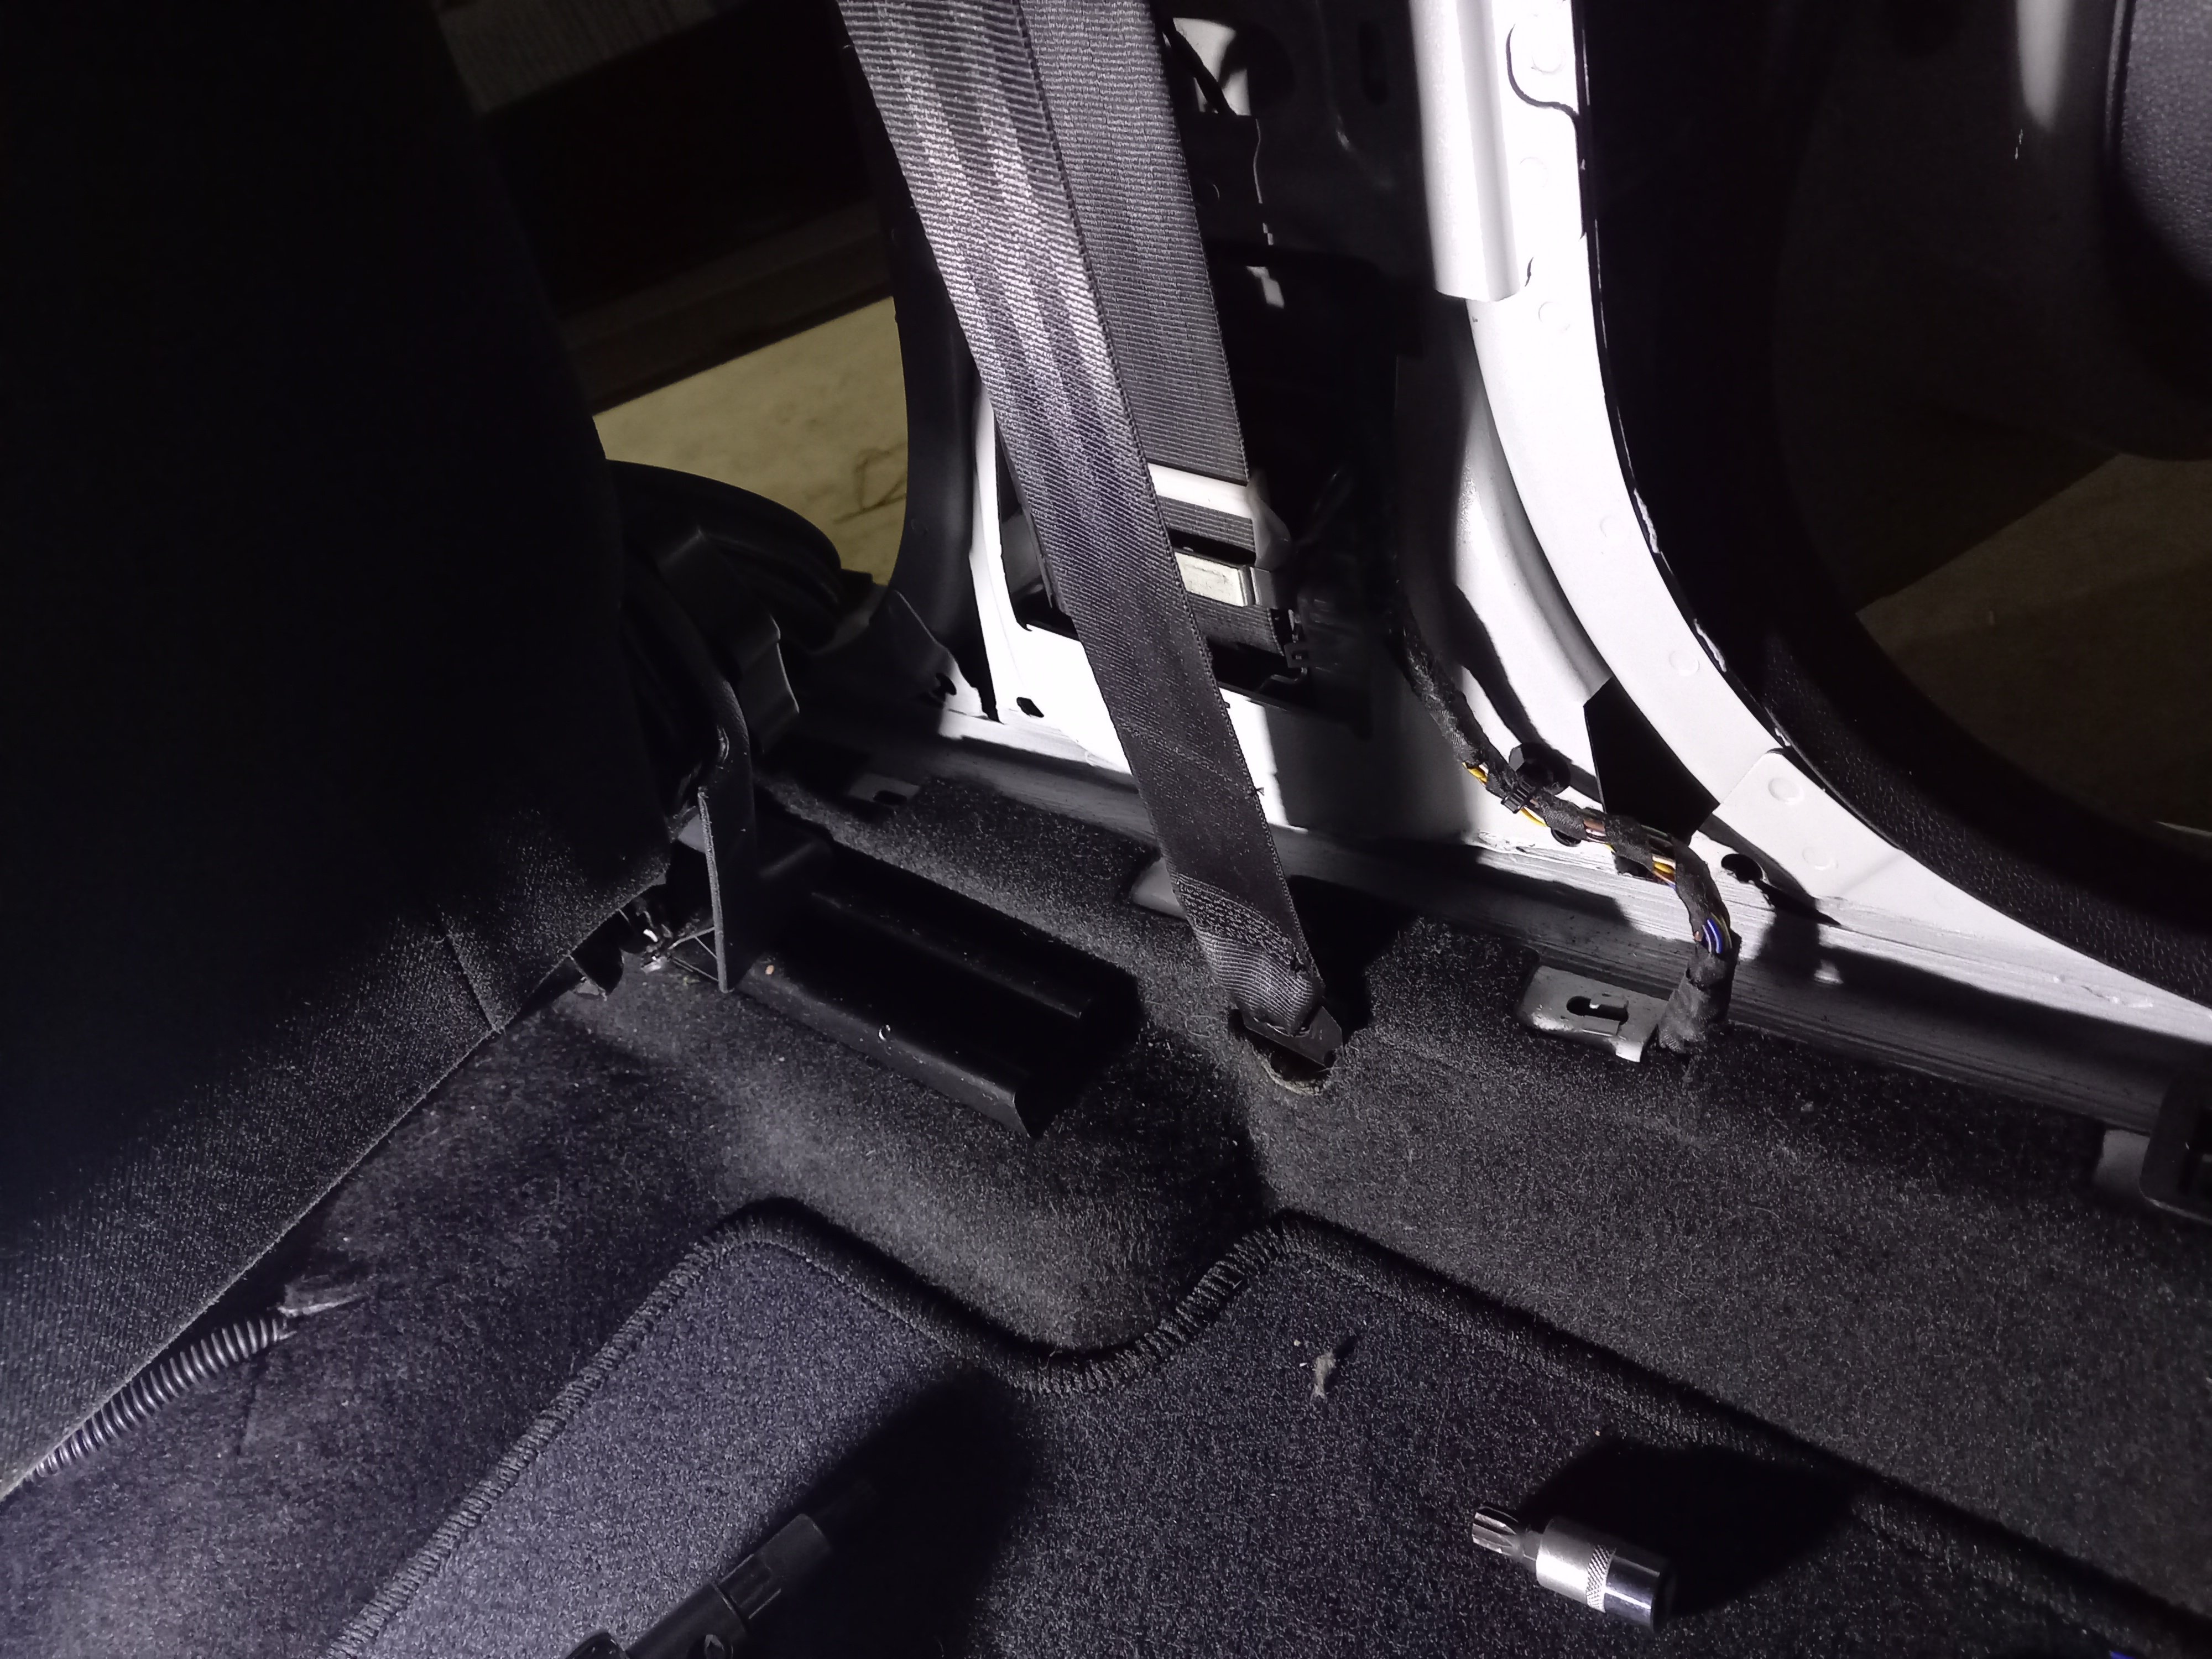
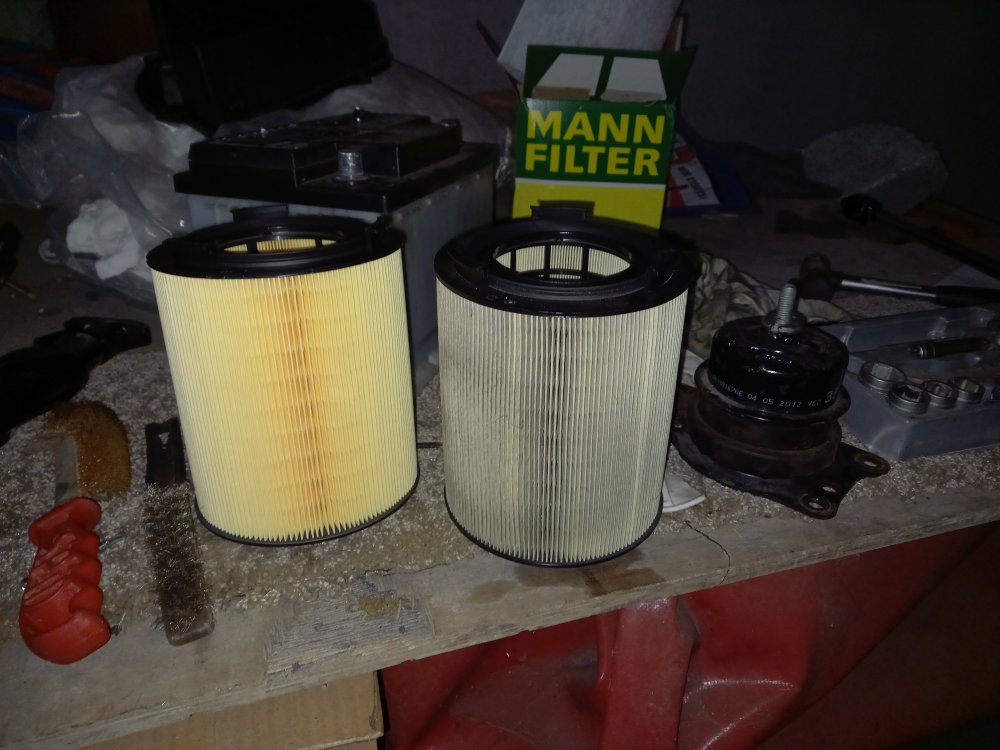
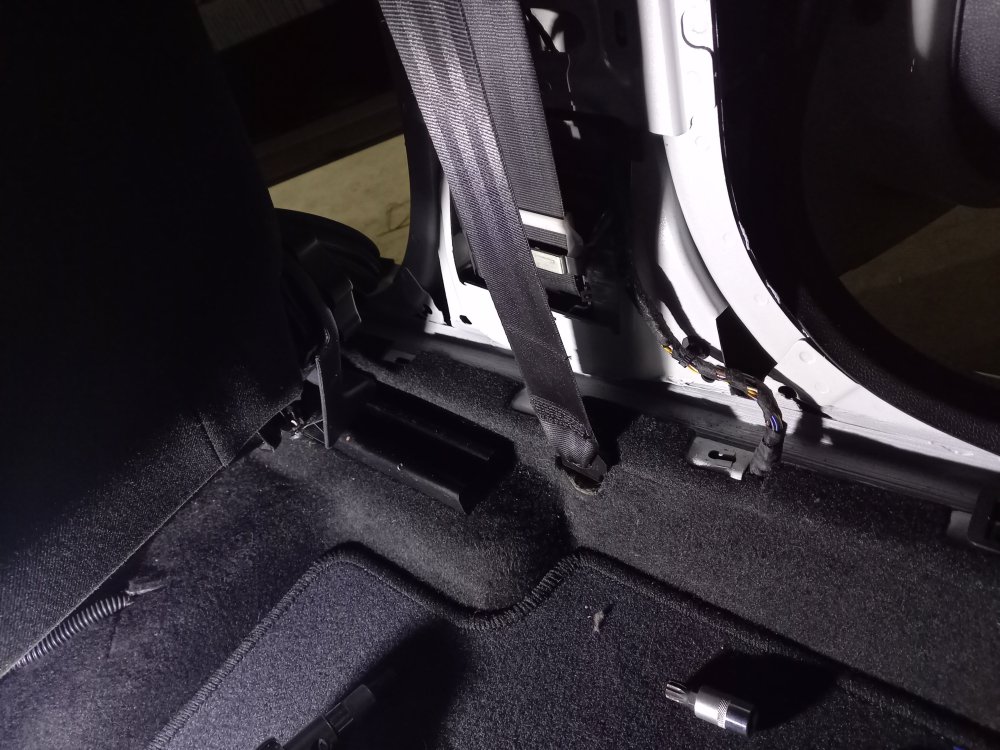
Lot of work done today, decided to put my diy mounts into this car in the end. Since I had to disconnect the battery to do that I took the time to finally fix the drivers side seatbelt. Foam that lays under the seatbelt reel had gone rotten and disintegrated so I took it out. Oddly you can see into the sill on this car from the seatbelt reel area, cant do that in the mk1 atleast not mine. Nice to know the cavity wax thats in the sills is still there. Back together, was easy enough to do. Then I moved onto the mounts. Drivers side went on straight away, Didnt notice much more vibration to the other mount I had on it. Gearbox mount got done also, looks like the one I put on not too long ago was cracking up already. Went straight on, also adjusted the shifter linkages again and regreased everything associated with that. Noticed the difference straight away with this mount, more vibrations but not quite as boneshaking as I was led to believe it would be. And it should lessen after a few miles. Only really notice it on idle. Havent driven it much so i'll edit the comment to say how much of a difference there is. Lastly, since the airbox was out and apart I replaced the airfilter again. Only been a few months since I changed it, changed again anyways.


-
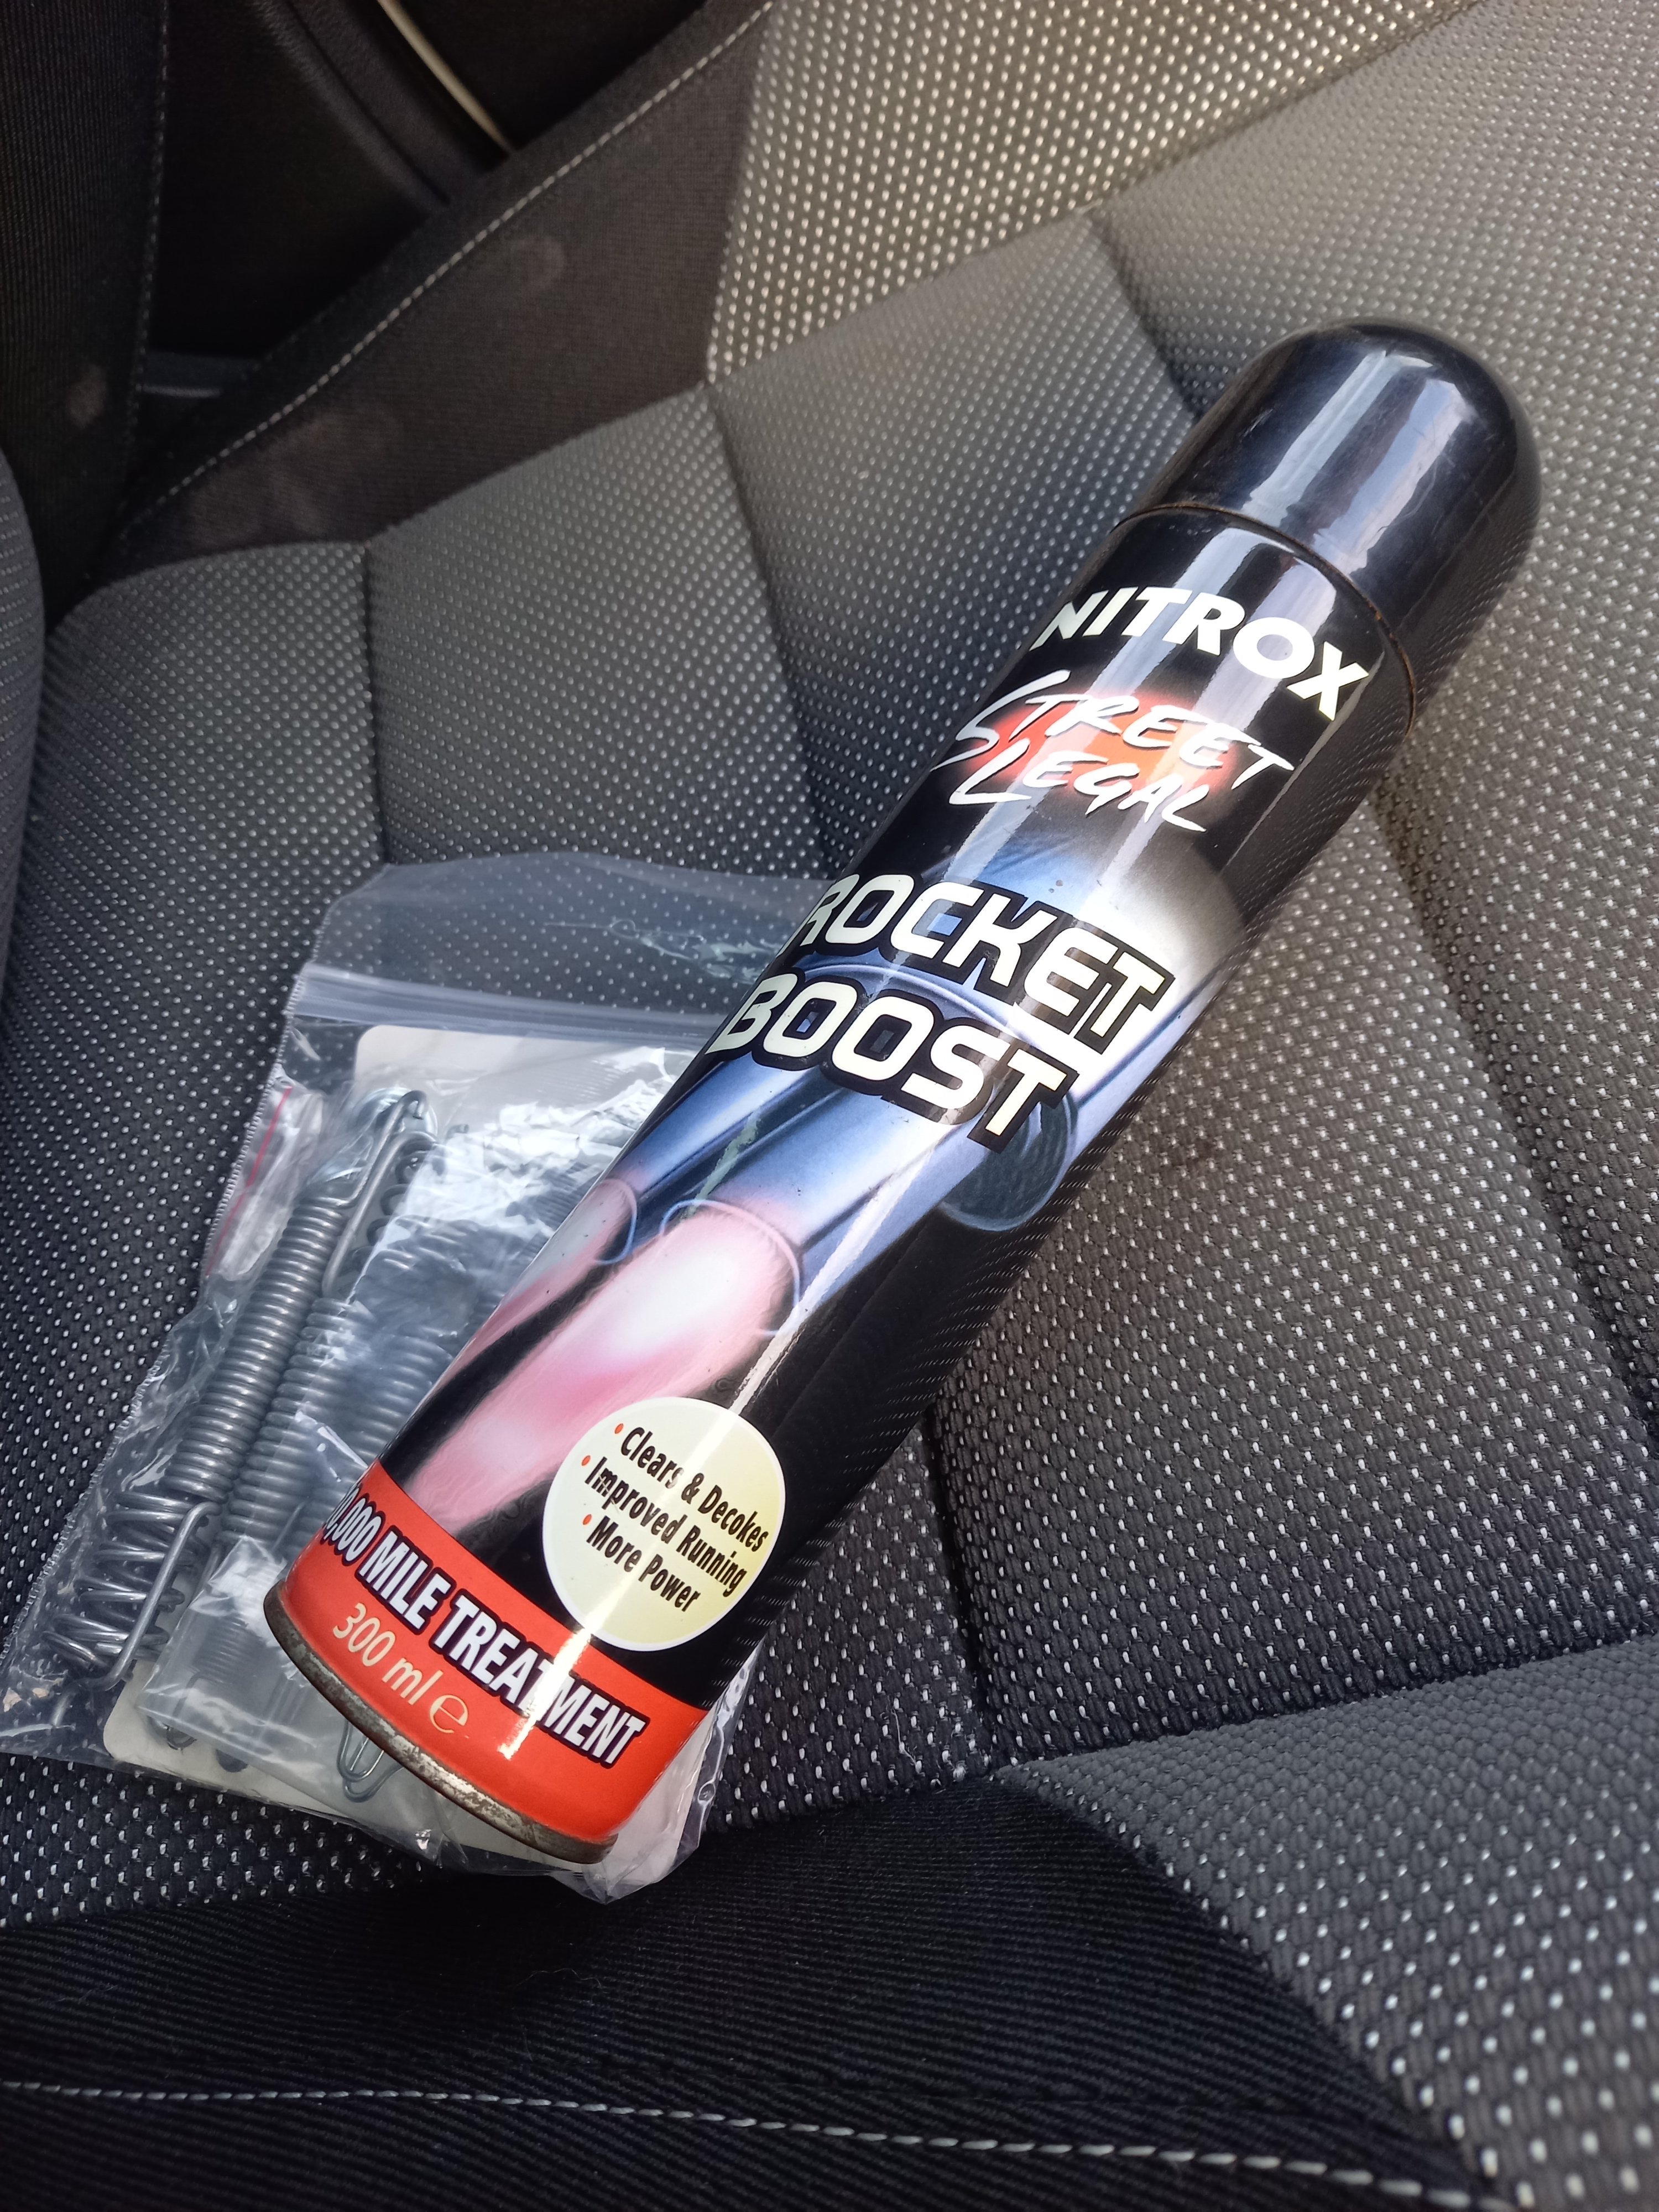
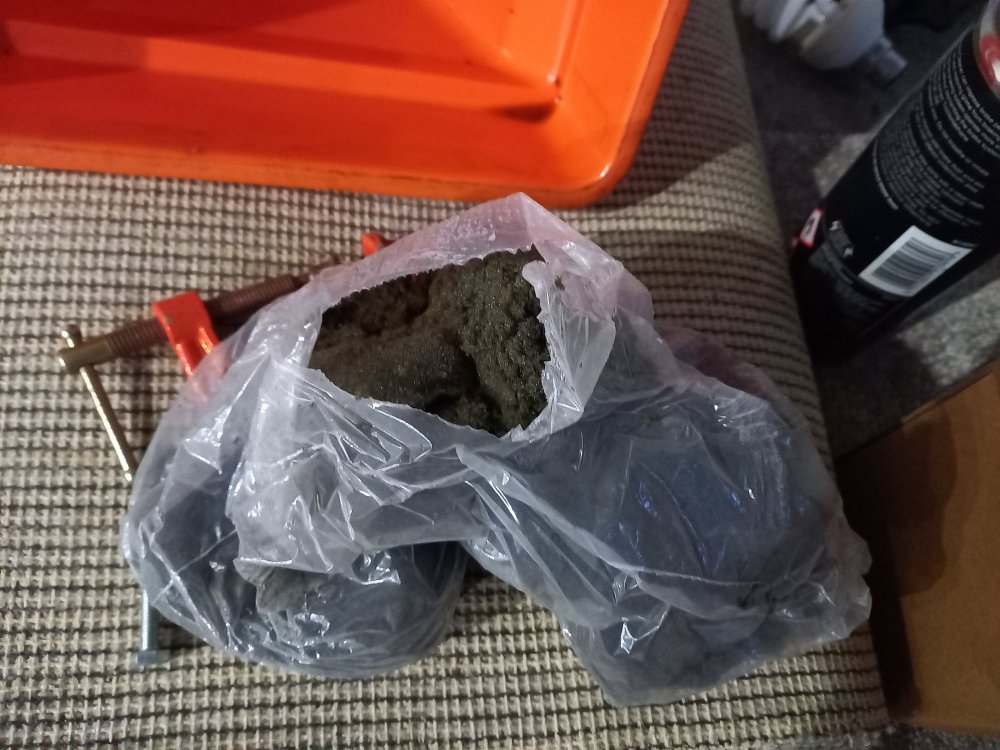
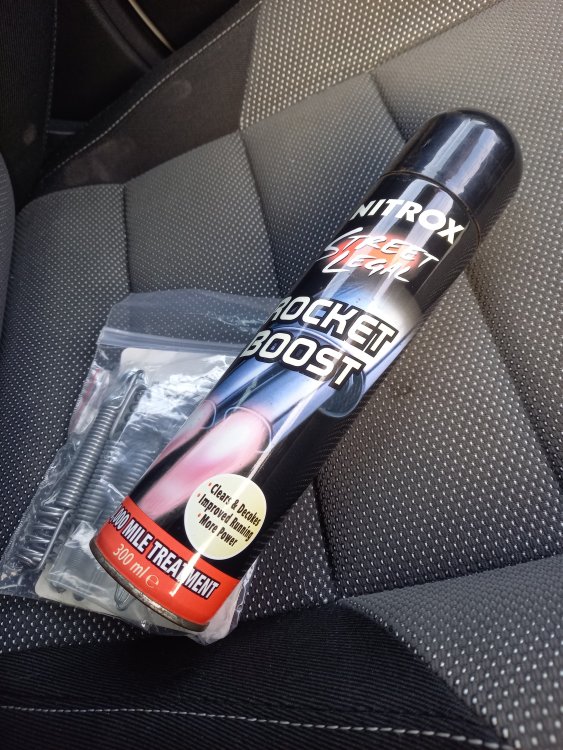
When I was in getting bits for the mk1 I saw this can of "stuff" and thought i'd pick it up for a laugh, was only a fiver. Obviously been sitting on the shelves for a while though. Directions say to spray it into the intake while the cars running, after the maf so as to not dirty it. I chose to spray it through the pipe that connects the ccv to the intake. Wasnt hard to use, spray half the can, let it run through as the car runs for a few minutes then spray the rest in. You're meant to have the car running at 2000-2500 rpm as you spray it in, didnt have anyone to help so I sprayed it then and then held the engine around that rpm. Plenty of smoke coming out once I ran this stuff through, kept the revs up until the smoke started to tail off then just let it idle for a while. Gave it a good hard run after. Unbelievably this can of ****e has made a difference. I've noticed the car feels a bit quicker than before, seems fuel economys up a bit too. If the engine doesnt fall out in the next while I think I can call this one a success.
-
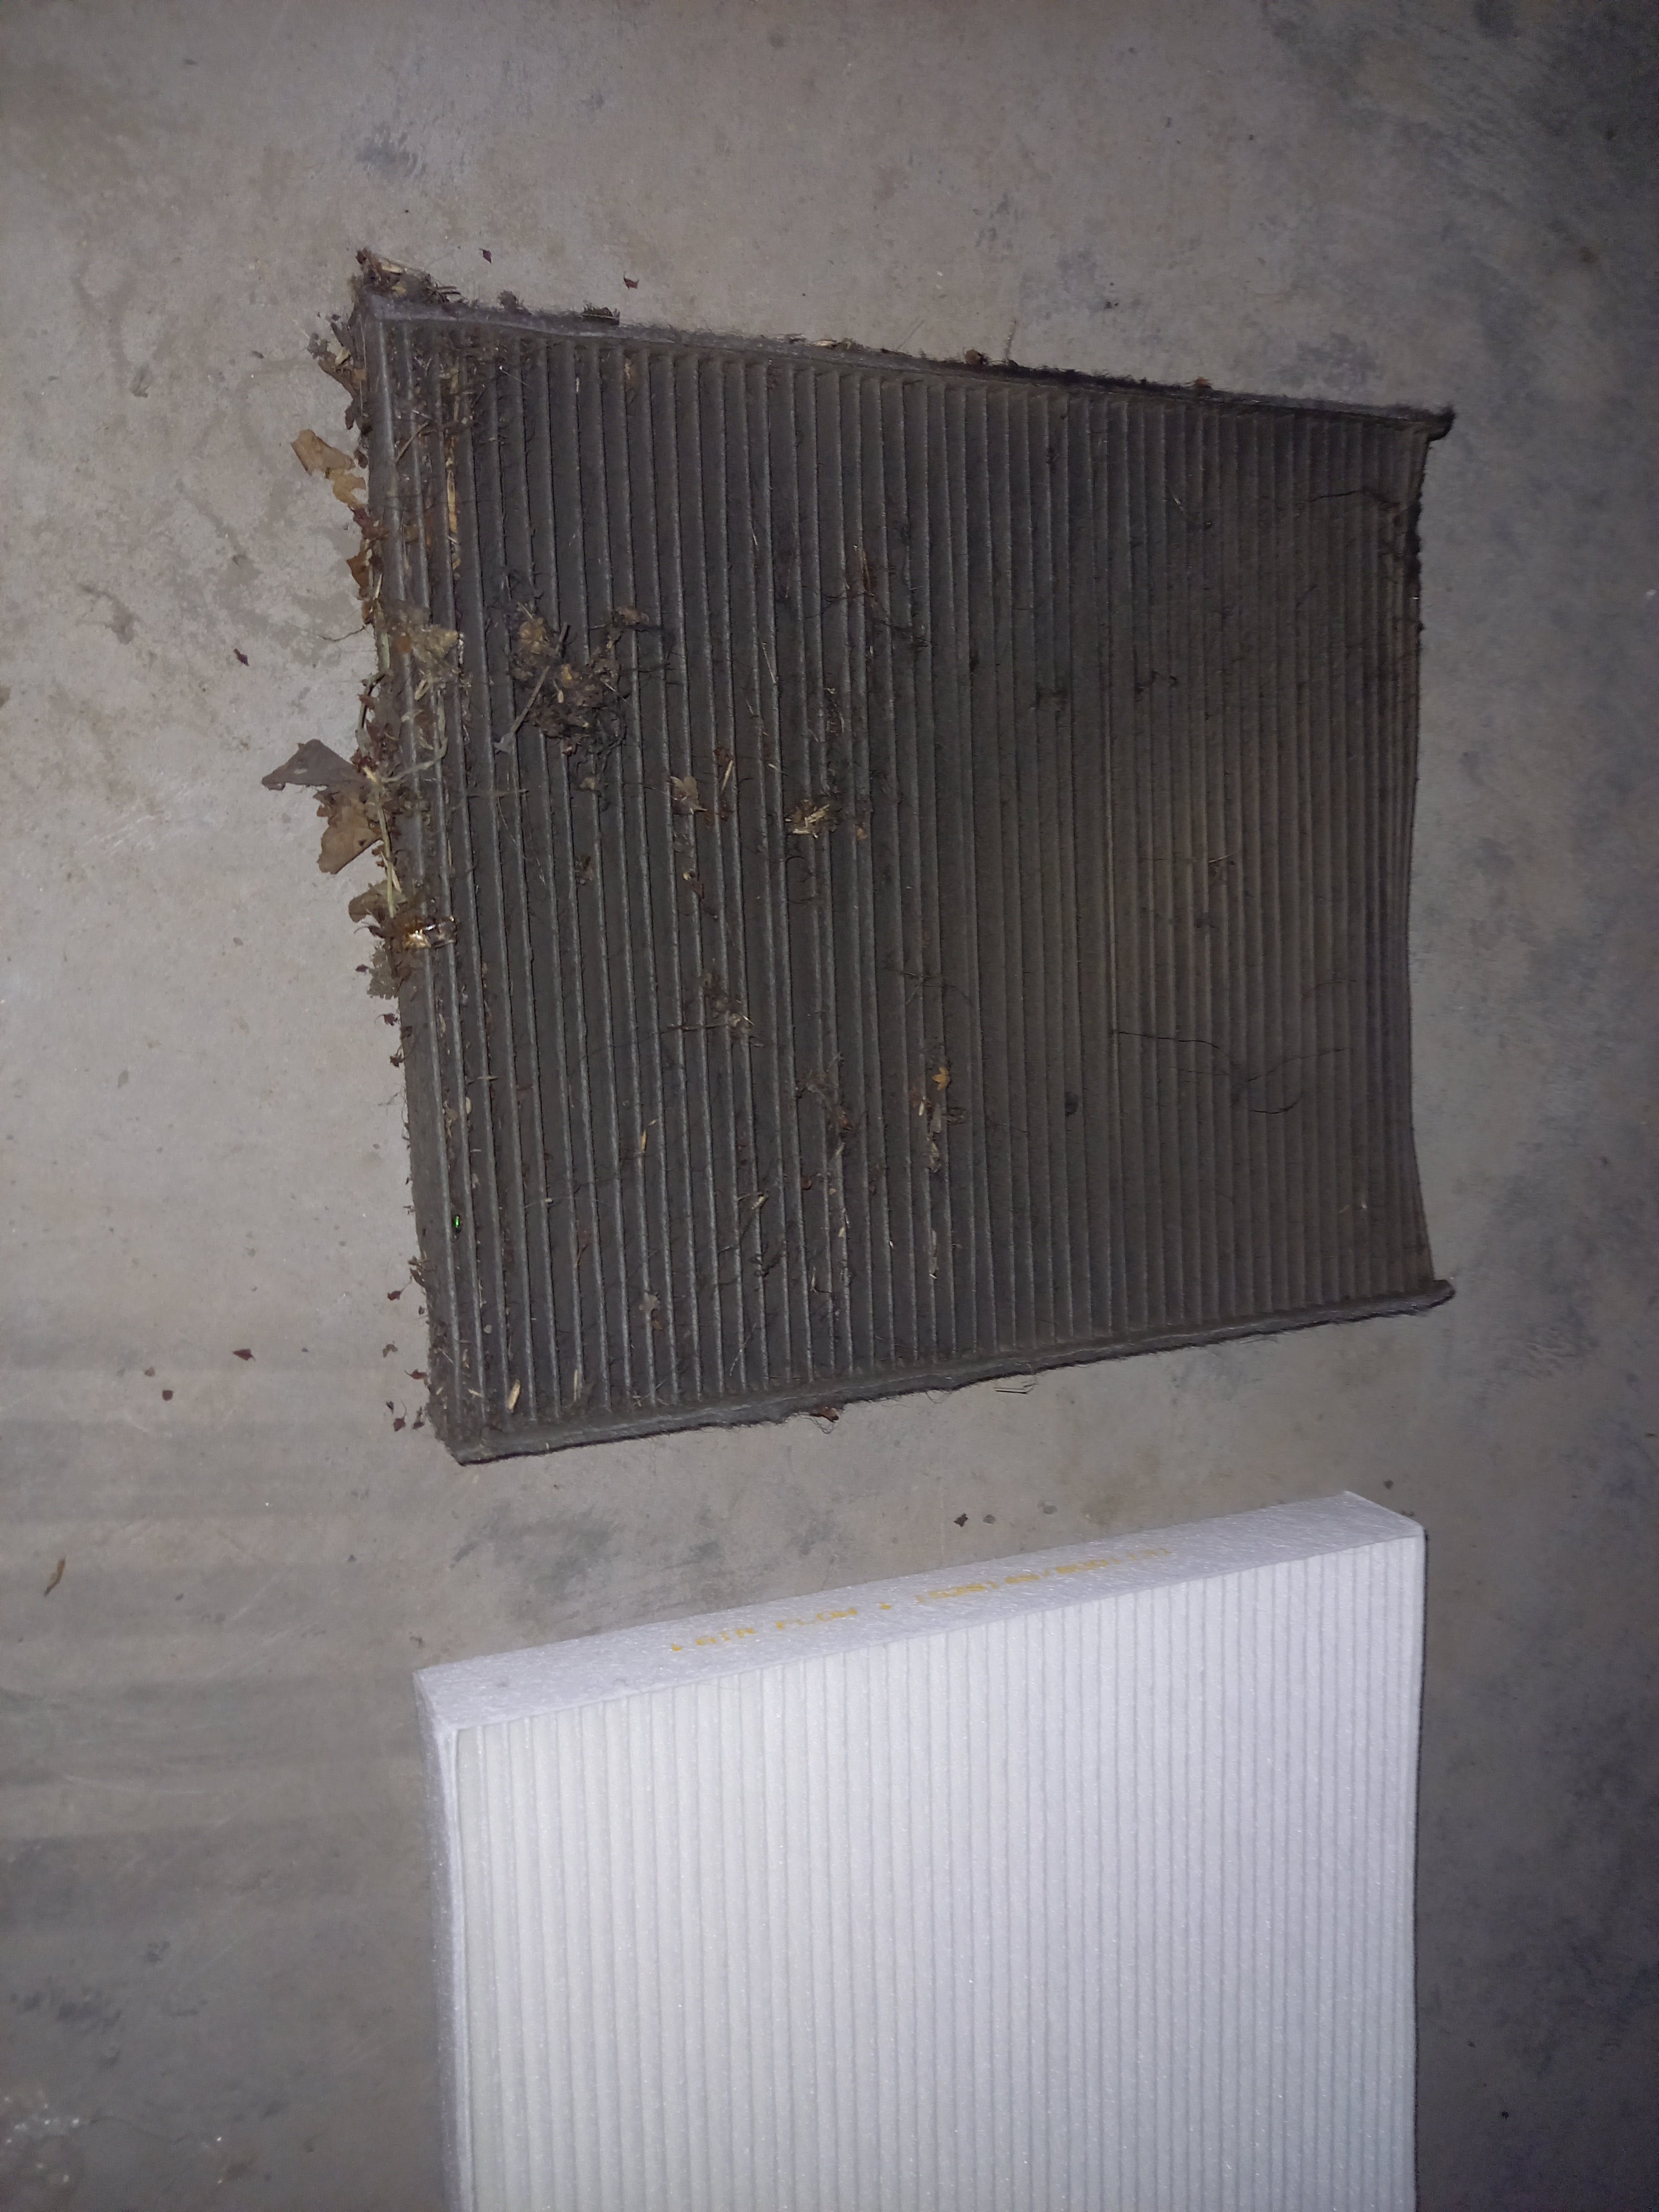
Pull the passengers seat fully back and get your head under the foot well, awkward but doable. I sprayed the new cabin air filter with odorX to make it smell nice.
-
Its a 2 minute job max on these. Recently changed mine and it was minging. Only cost a few euro for a new one, so worth changing regardless.

-
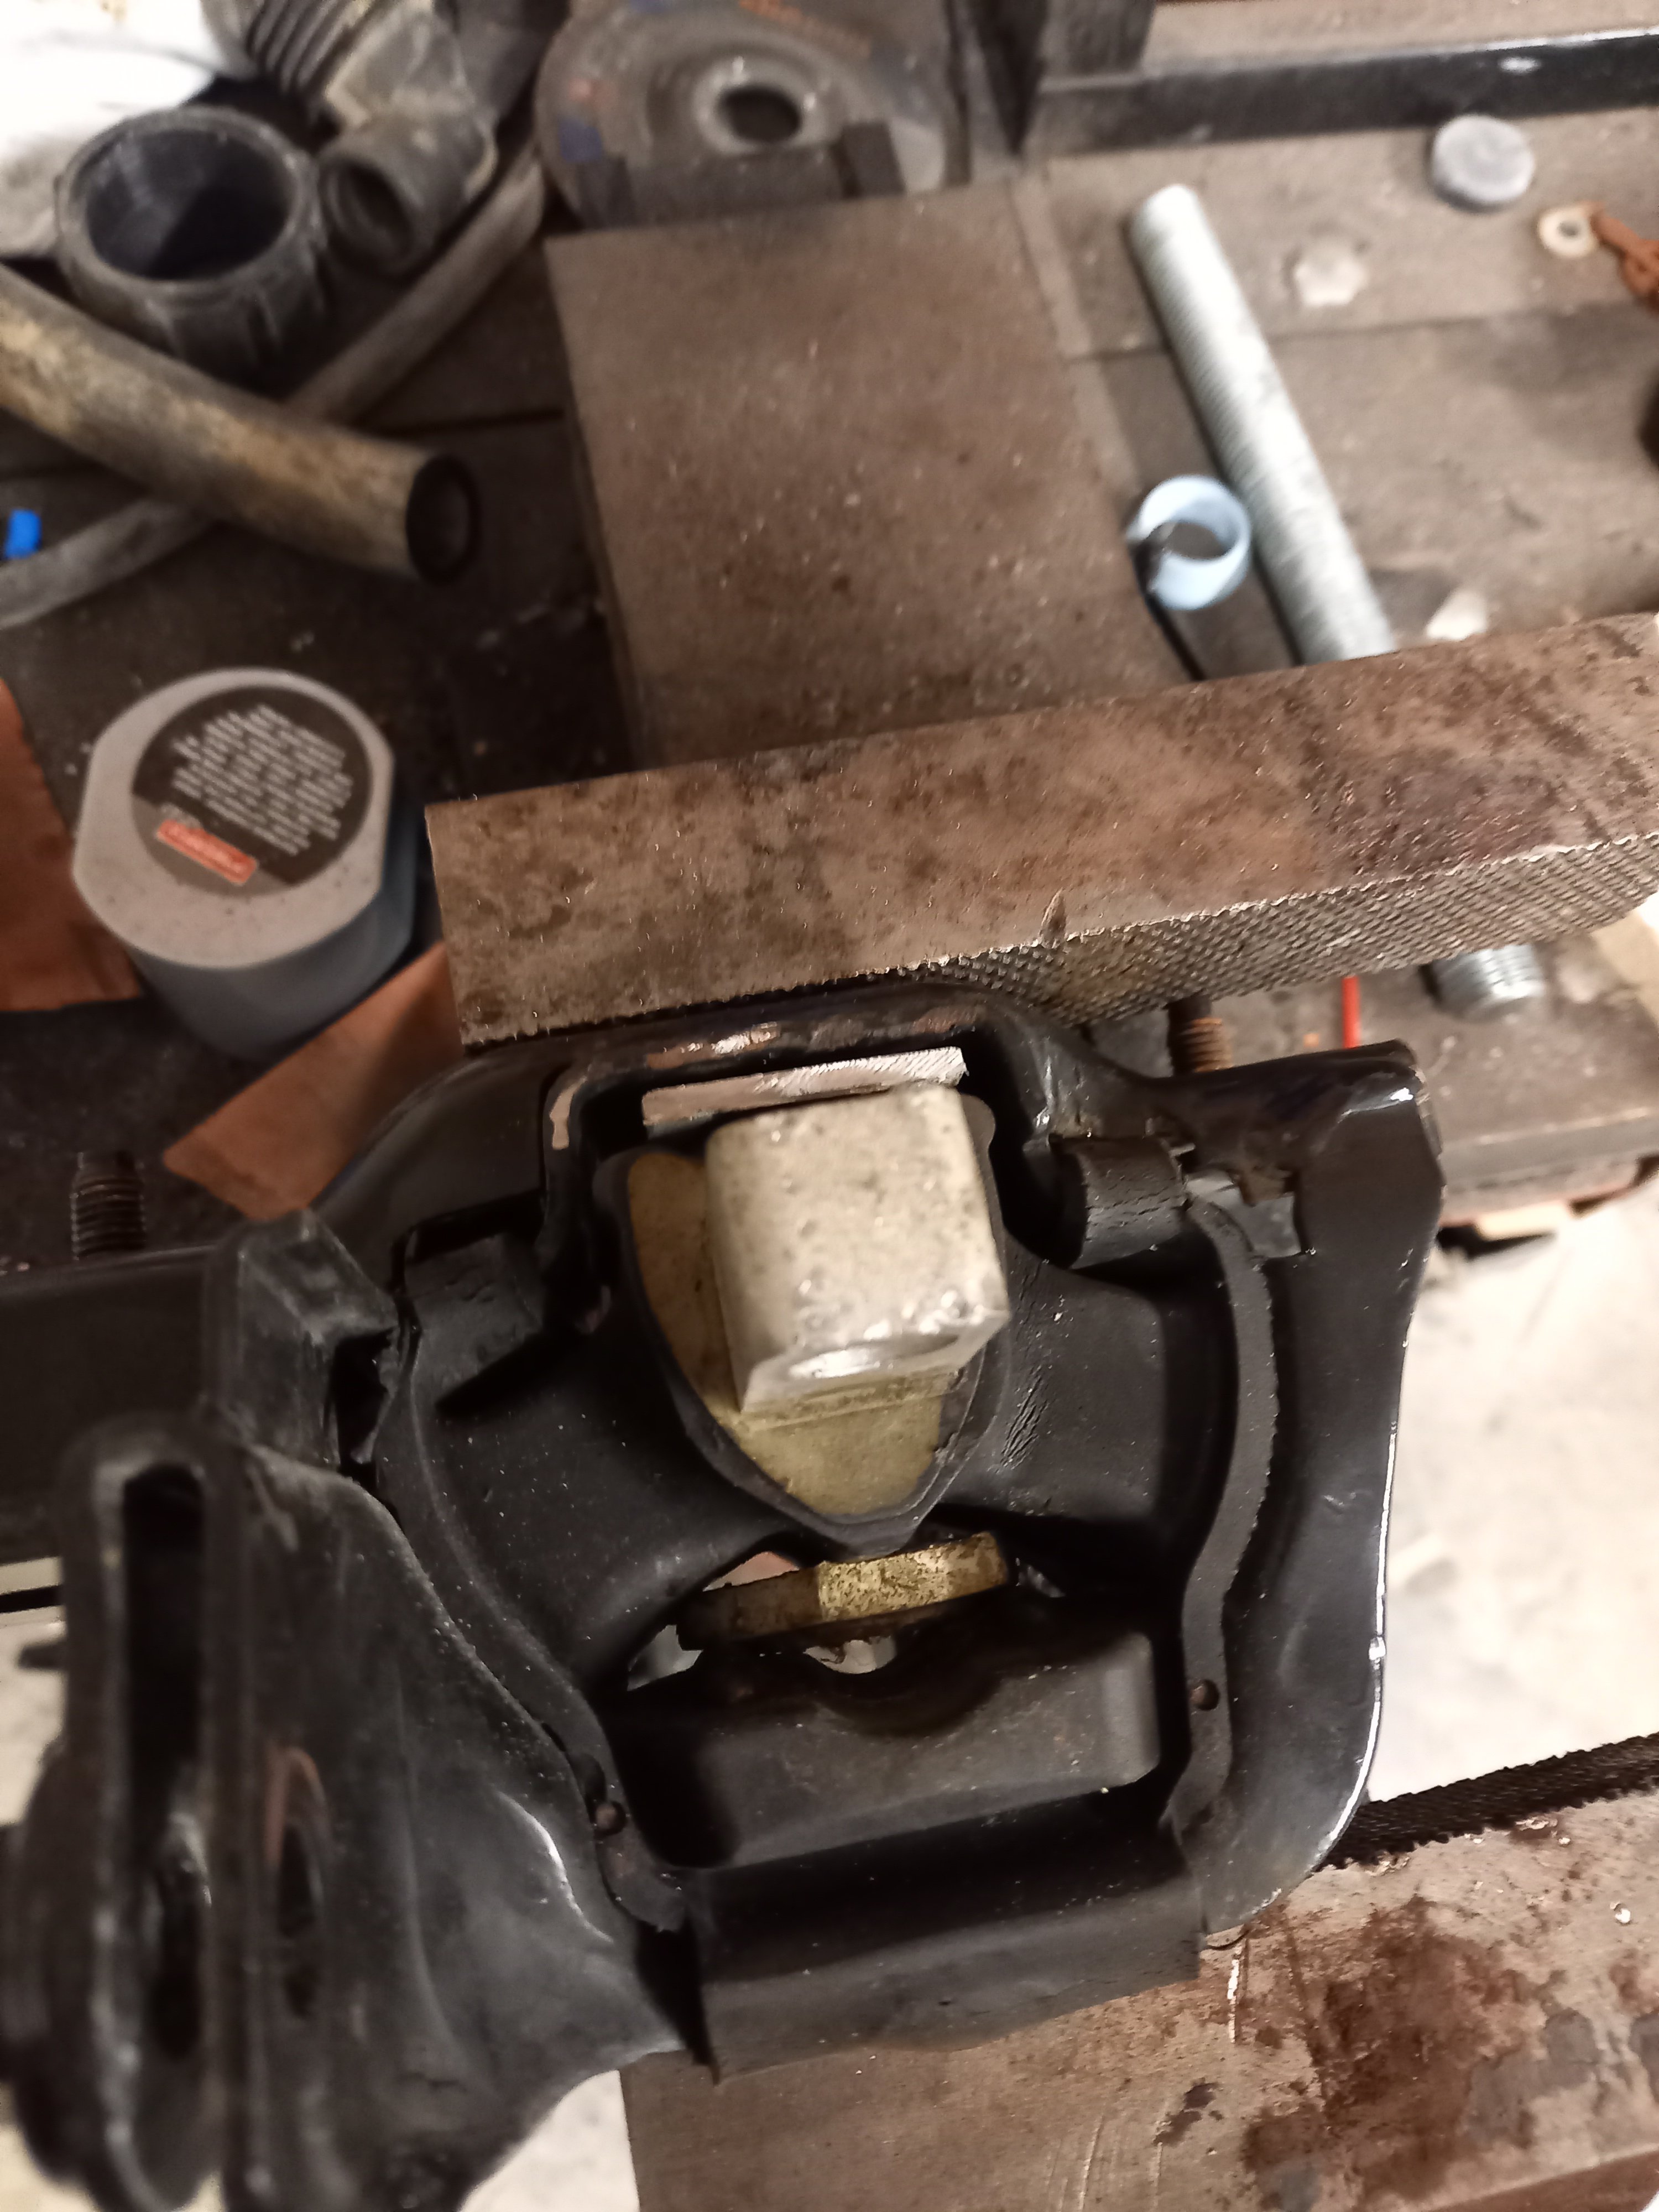
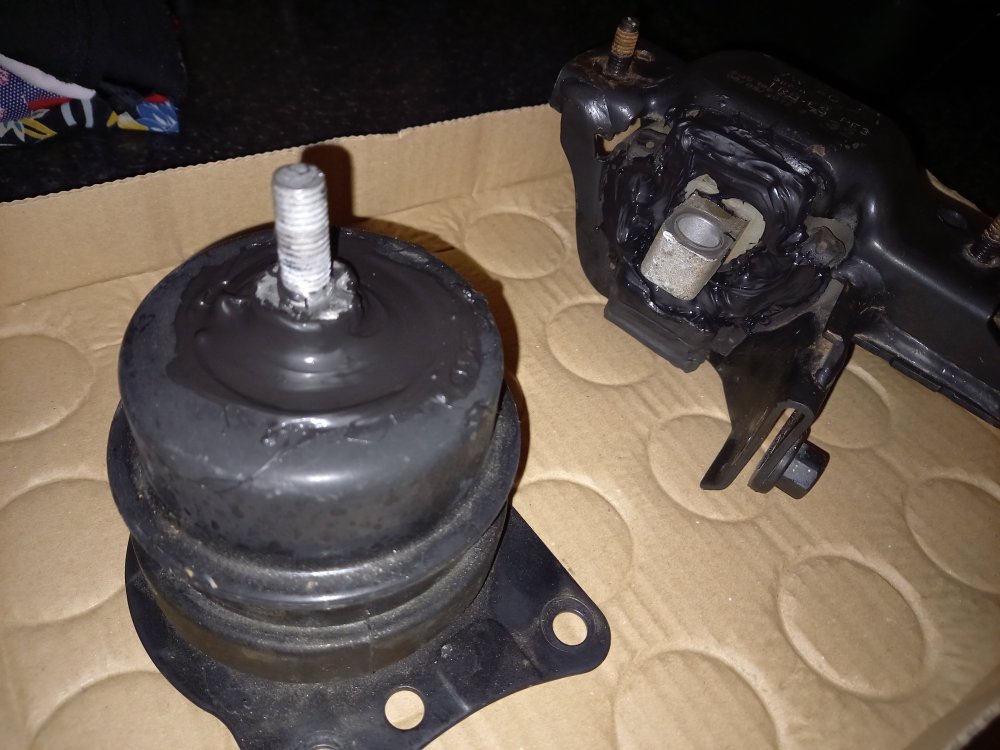
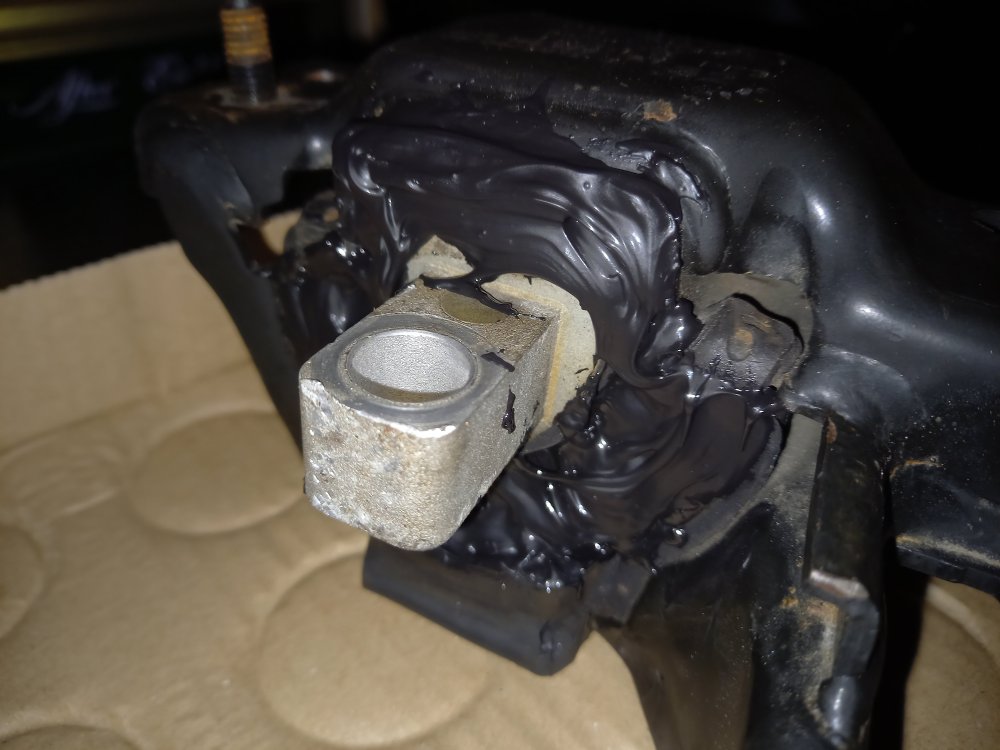
Had a go at reinforcing some more engine mounts, this time I did a spare engine and gearbox mount. I decided this time to reinforce the mounts before sealing them up. Used whatever I could find that I thought would work so for the gearbox mount I used a flat piece of metal on the top of the mount and a nylon bolt wedged into the bottom to fill some of the bigger gaps. Then I used some bolts of all things to fill up some of the smaller gaps on the sides. Filled the rest up with tigerseal, shoved as much as I could into every crevice I could. Then I moved onto the engine mount, for this I cut up one of the old top mounts off the mk2 and used it as a spacer of sorts for this mount. Put the engine mount in the vice like the other mount. Filled up the edges with some sealant first before putting in my mock up spacers. Also ended up putting a large brass nut with a washer over the middle part of the mount to fill up the space further. Shed was very cold when I was doing this, about 2° so I took them home where its warm. Might give them a bake in the oven to help them cure quicker. For the cost of a tube of tiger seal, and some odd scrap lying around I think this will be a worthwhile mod. Not sure whether these will go on the mk1 or the mk2, either way the mk1 will get a pair of tigersealed mounts, eventually. Might make a guide on how to tigerseal mounts for the fun of it.


-
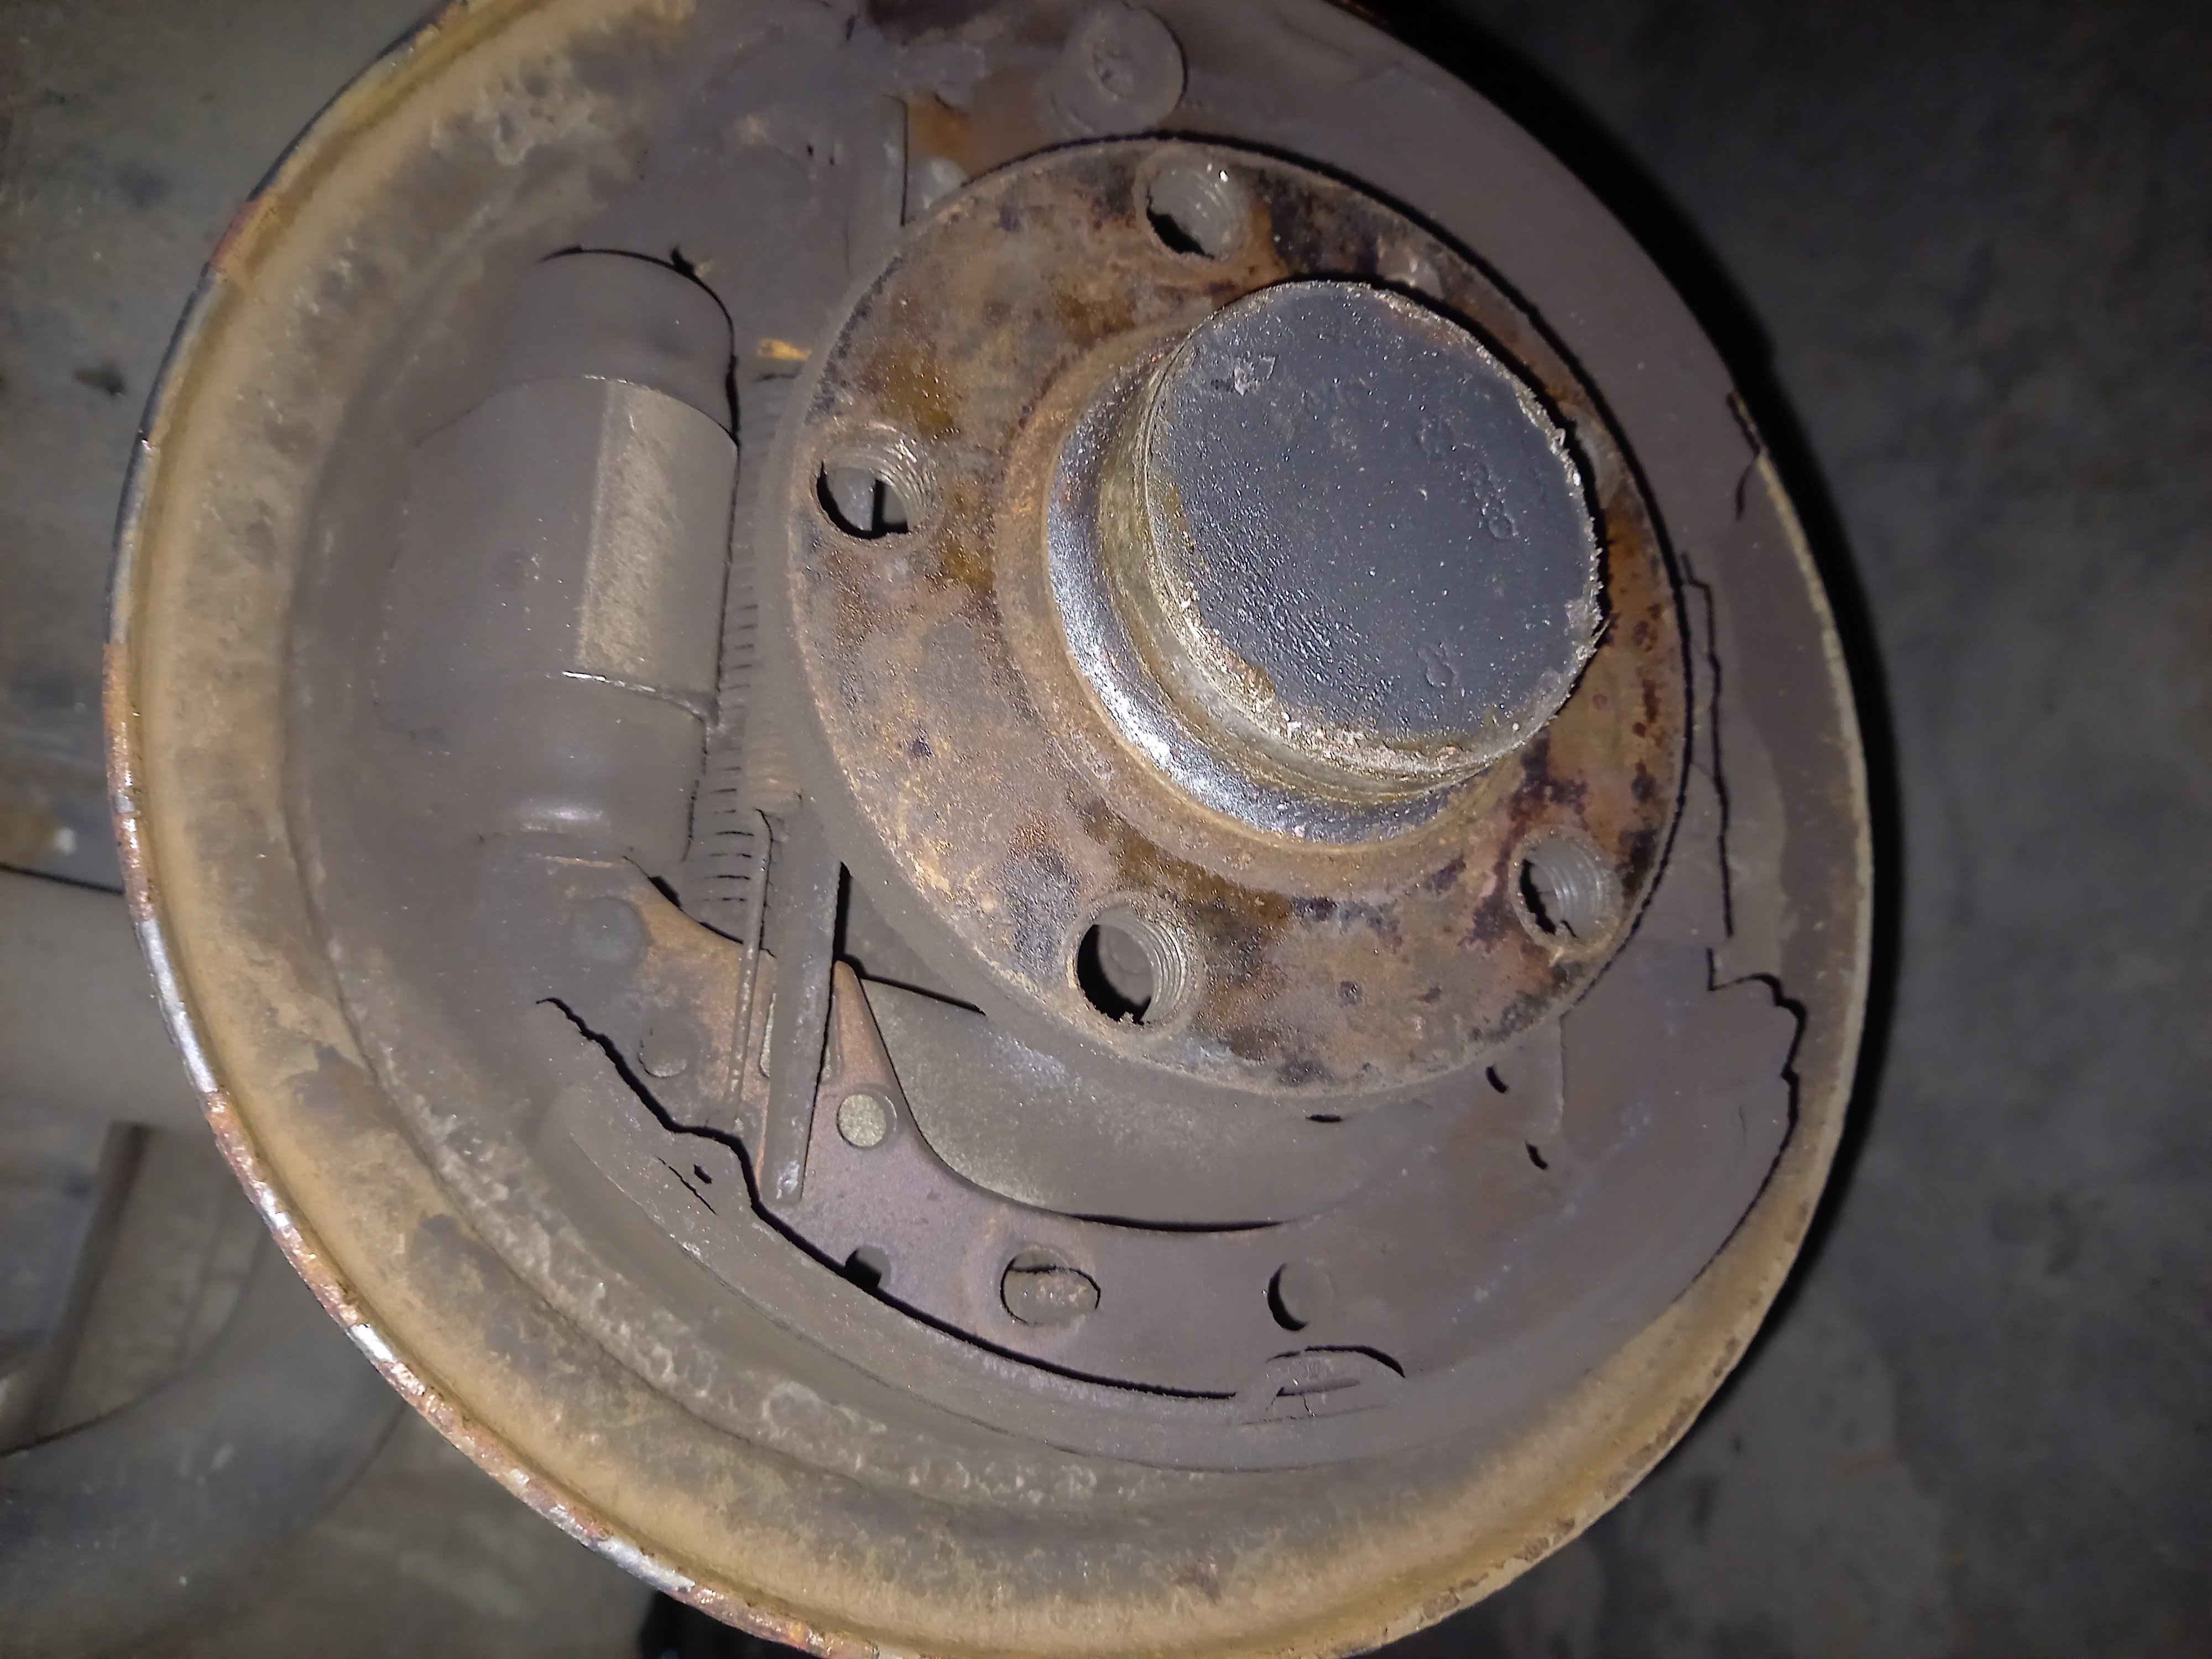
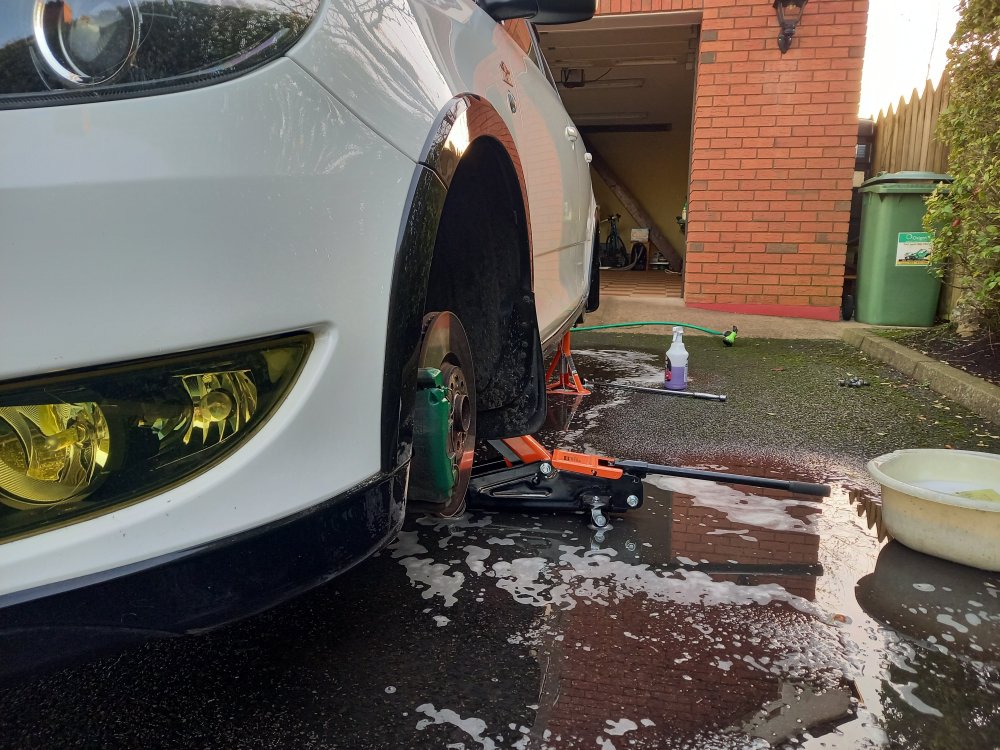
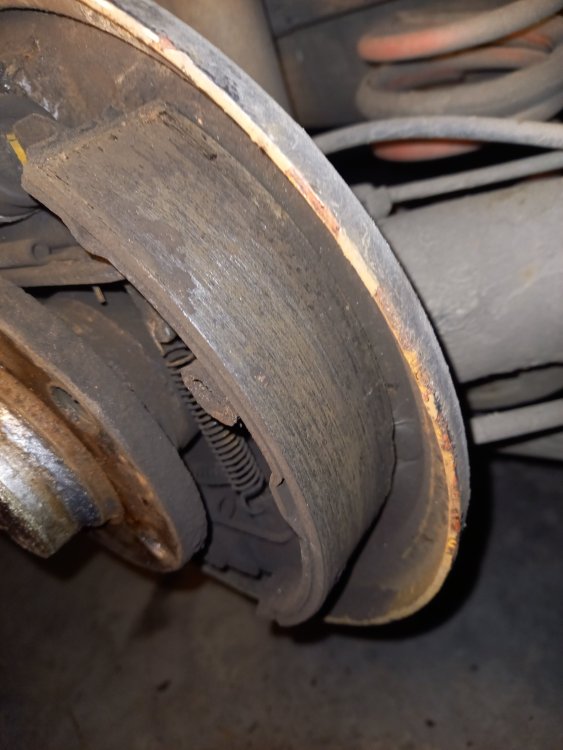
Had to get new a new spring kit to finish the drums properly, about 12 euro for the whole kit so hardly the end of the world. Brakes were almost done and I broke a bleed nipple clean off the drivers side caliper. Some reason its not leaking out so I put some stuff over it to seal it off. I'll have to get another caliper, atleast fsiii calipers are easy found and cheap. I'll drive on this caliper for now, obviously nowhere near a road. Cars very close to being back on all four again, just have to refit a spring I took off of the other drum for the mk2.


-
The oil message kharl would be about engine oil, atleast thats what it meant on my car (sdi) . I did not mean gearbox oil. I know these cars chew gearboxes and although I can't be sure, it would be safe to assume mine is on a second gearbox being so old and having the miles it does.
-
-
Sdi only has 125nm of torque, not that much more than the 1.2l petrols. Probably explains why the parts are the same. Service oil message would just be a coincidence, iirc it comes on after a certain amount of time or mileage and I believe there is some way to see the service interval on the gauges, reset them also.
-
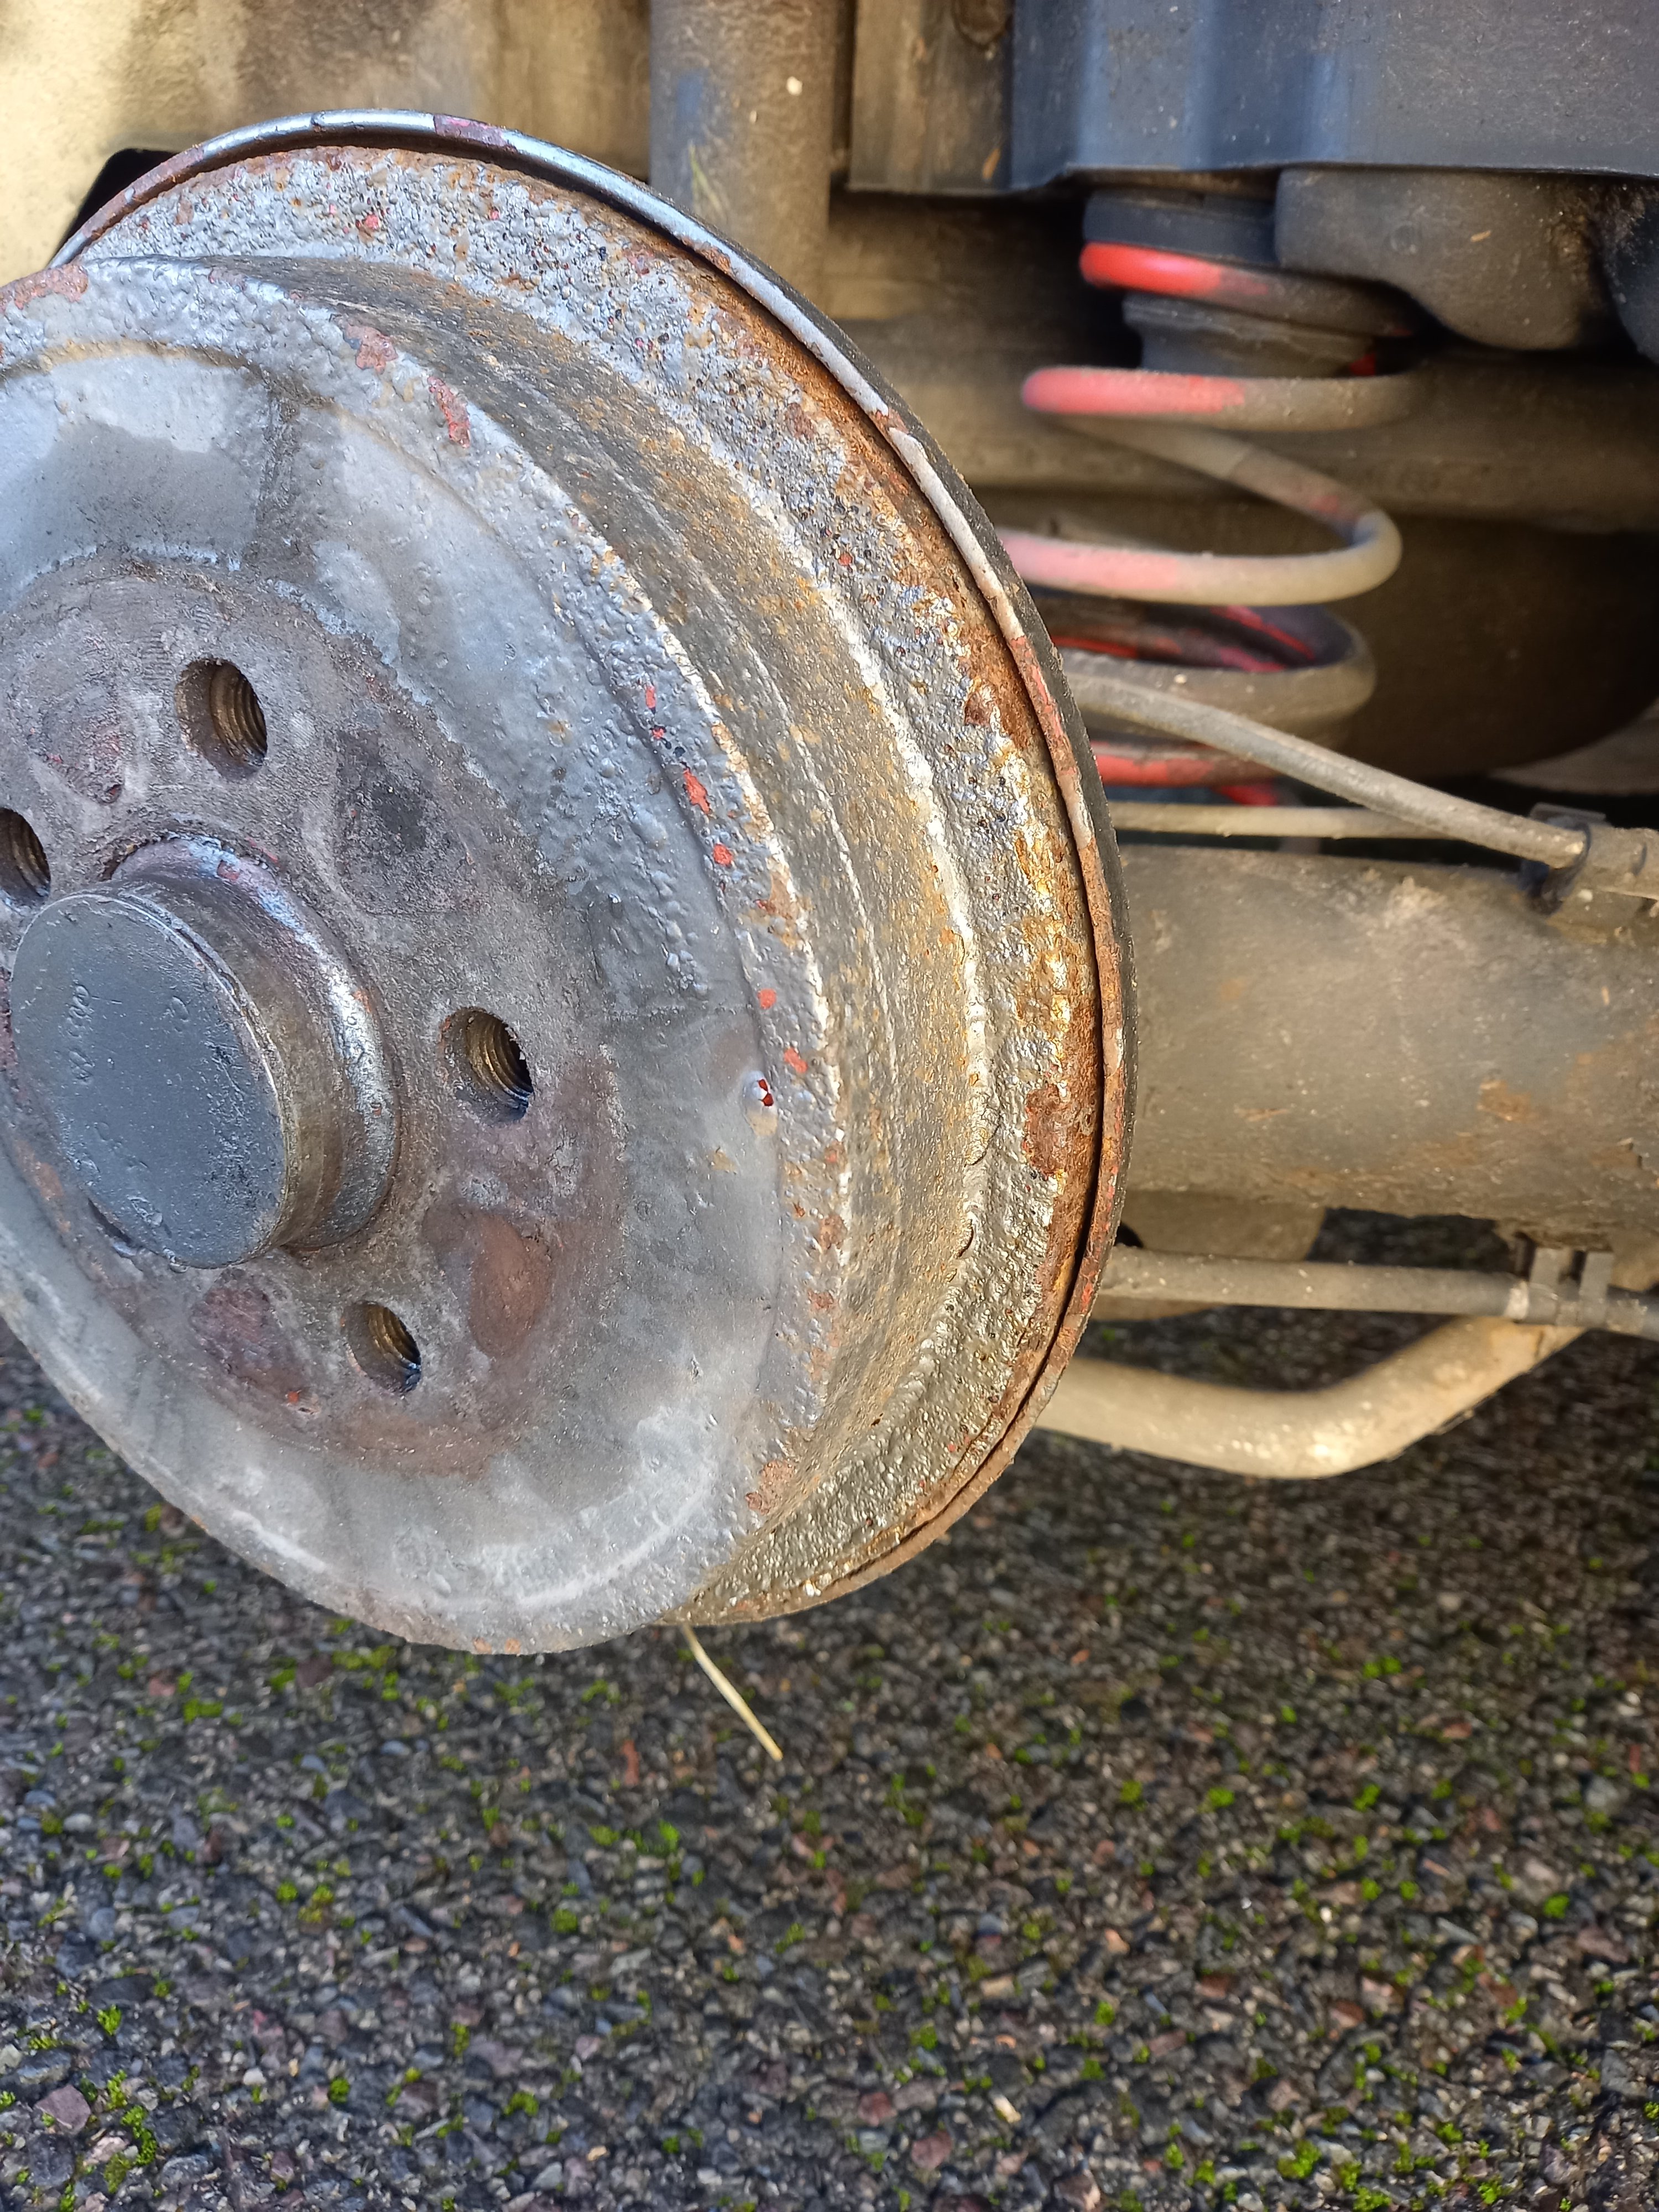
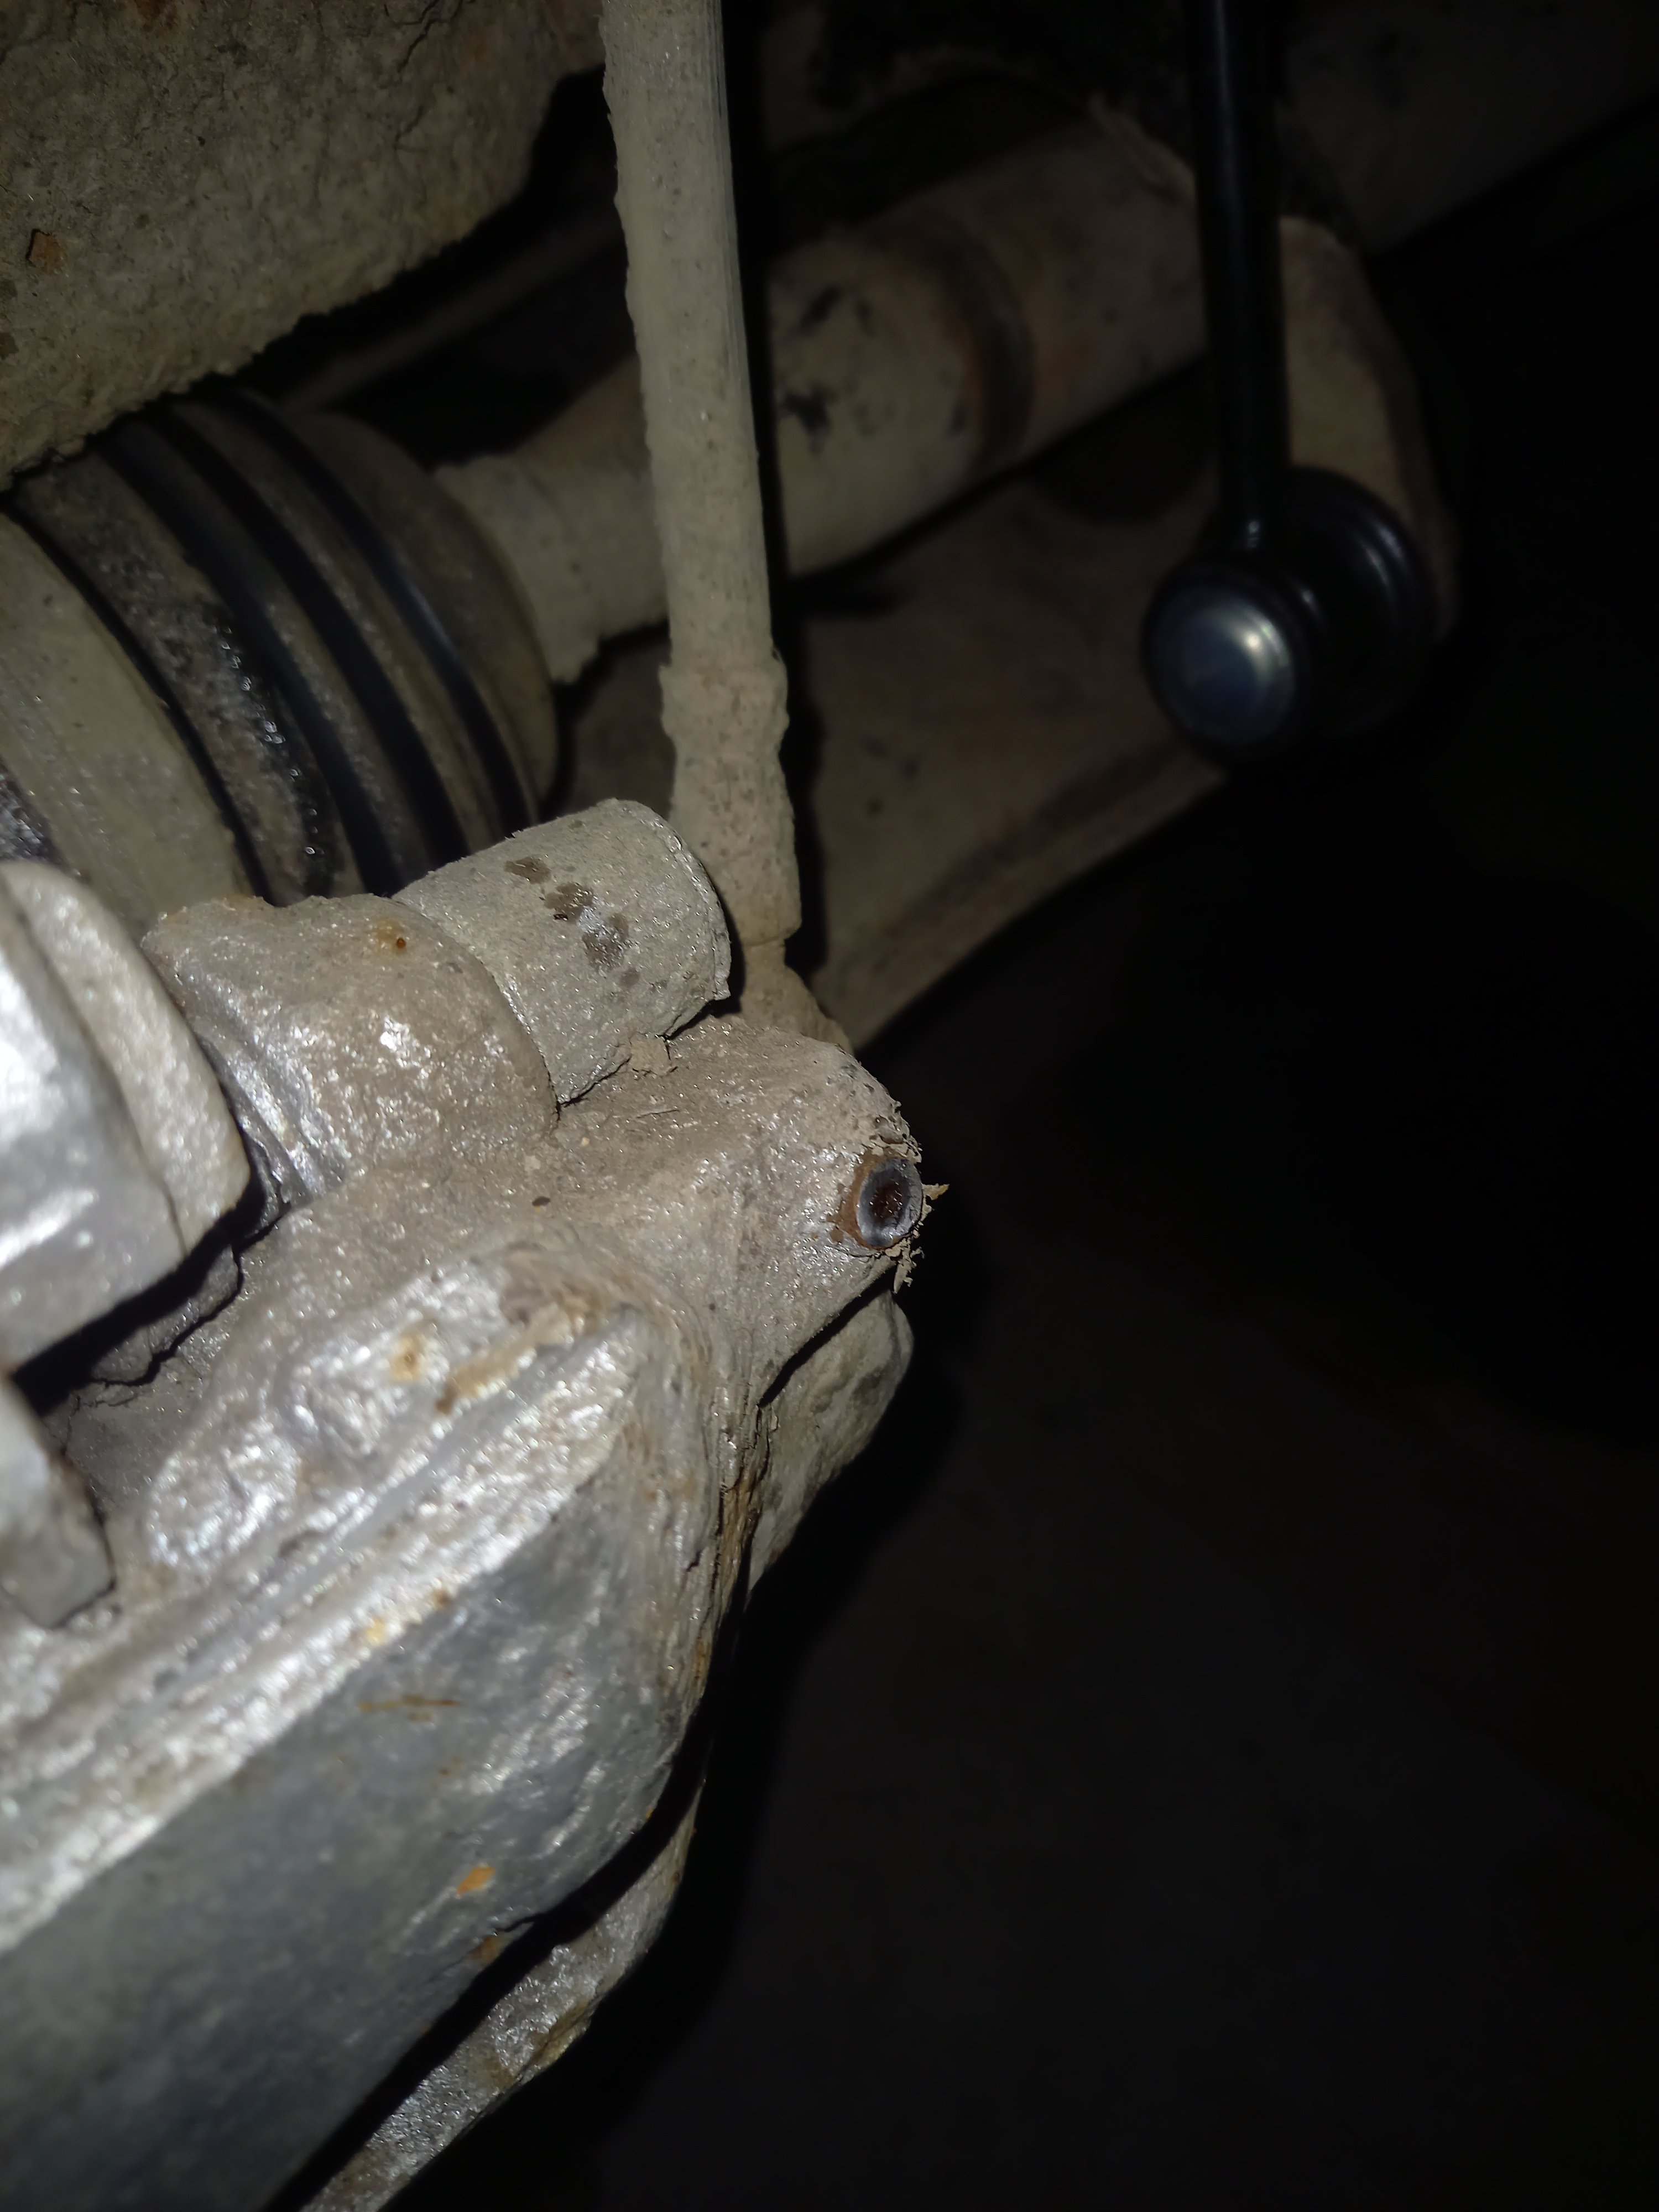
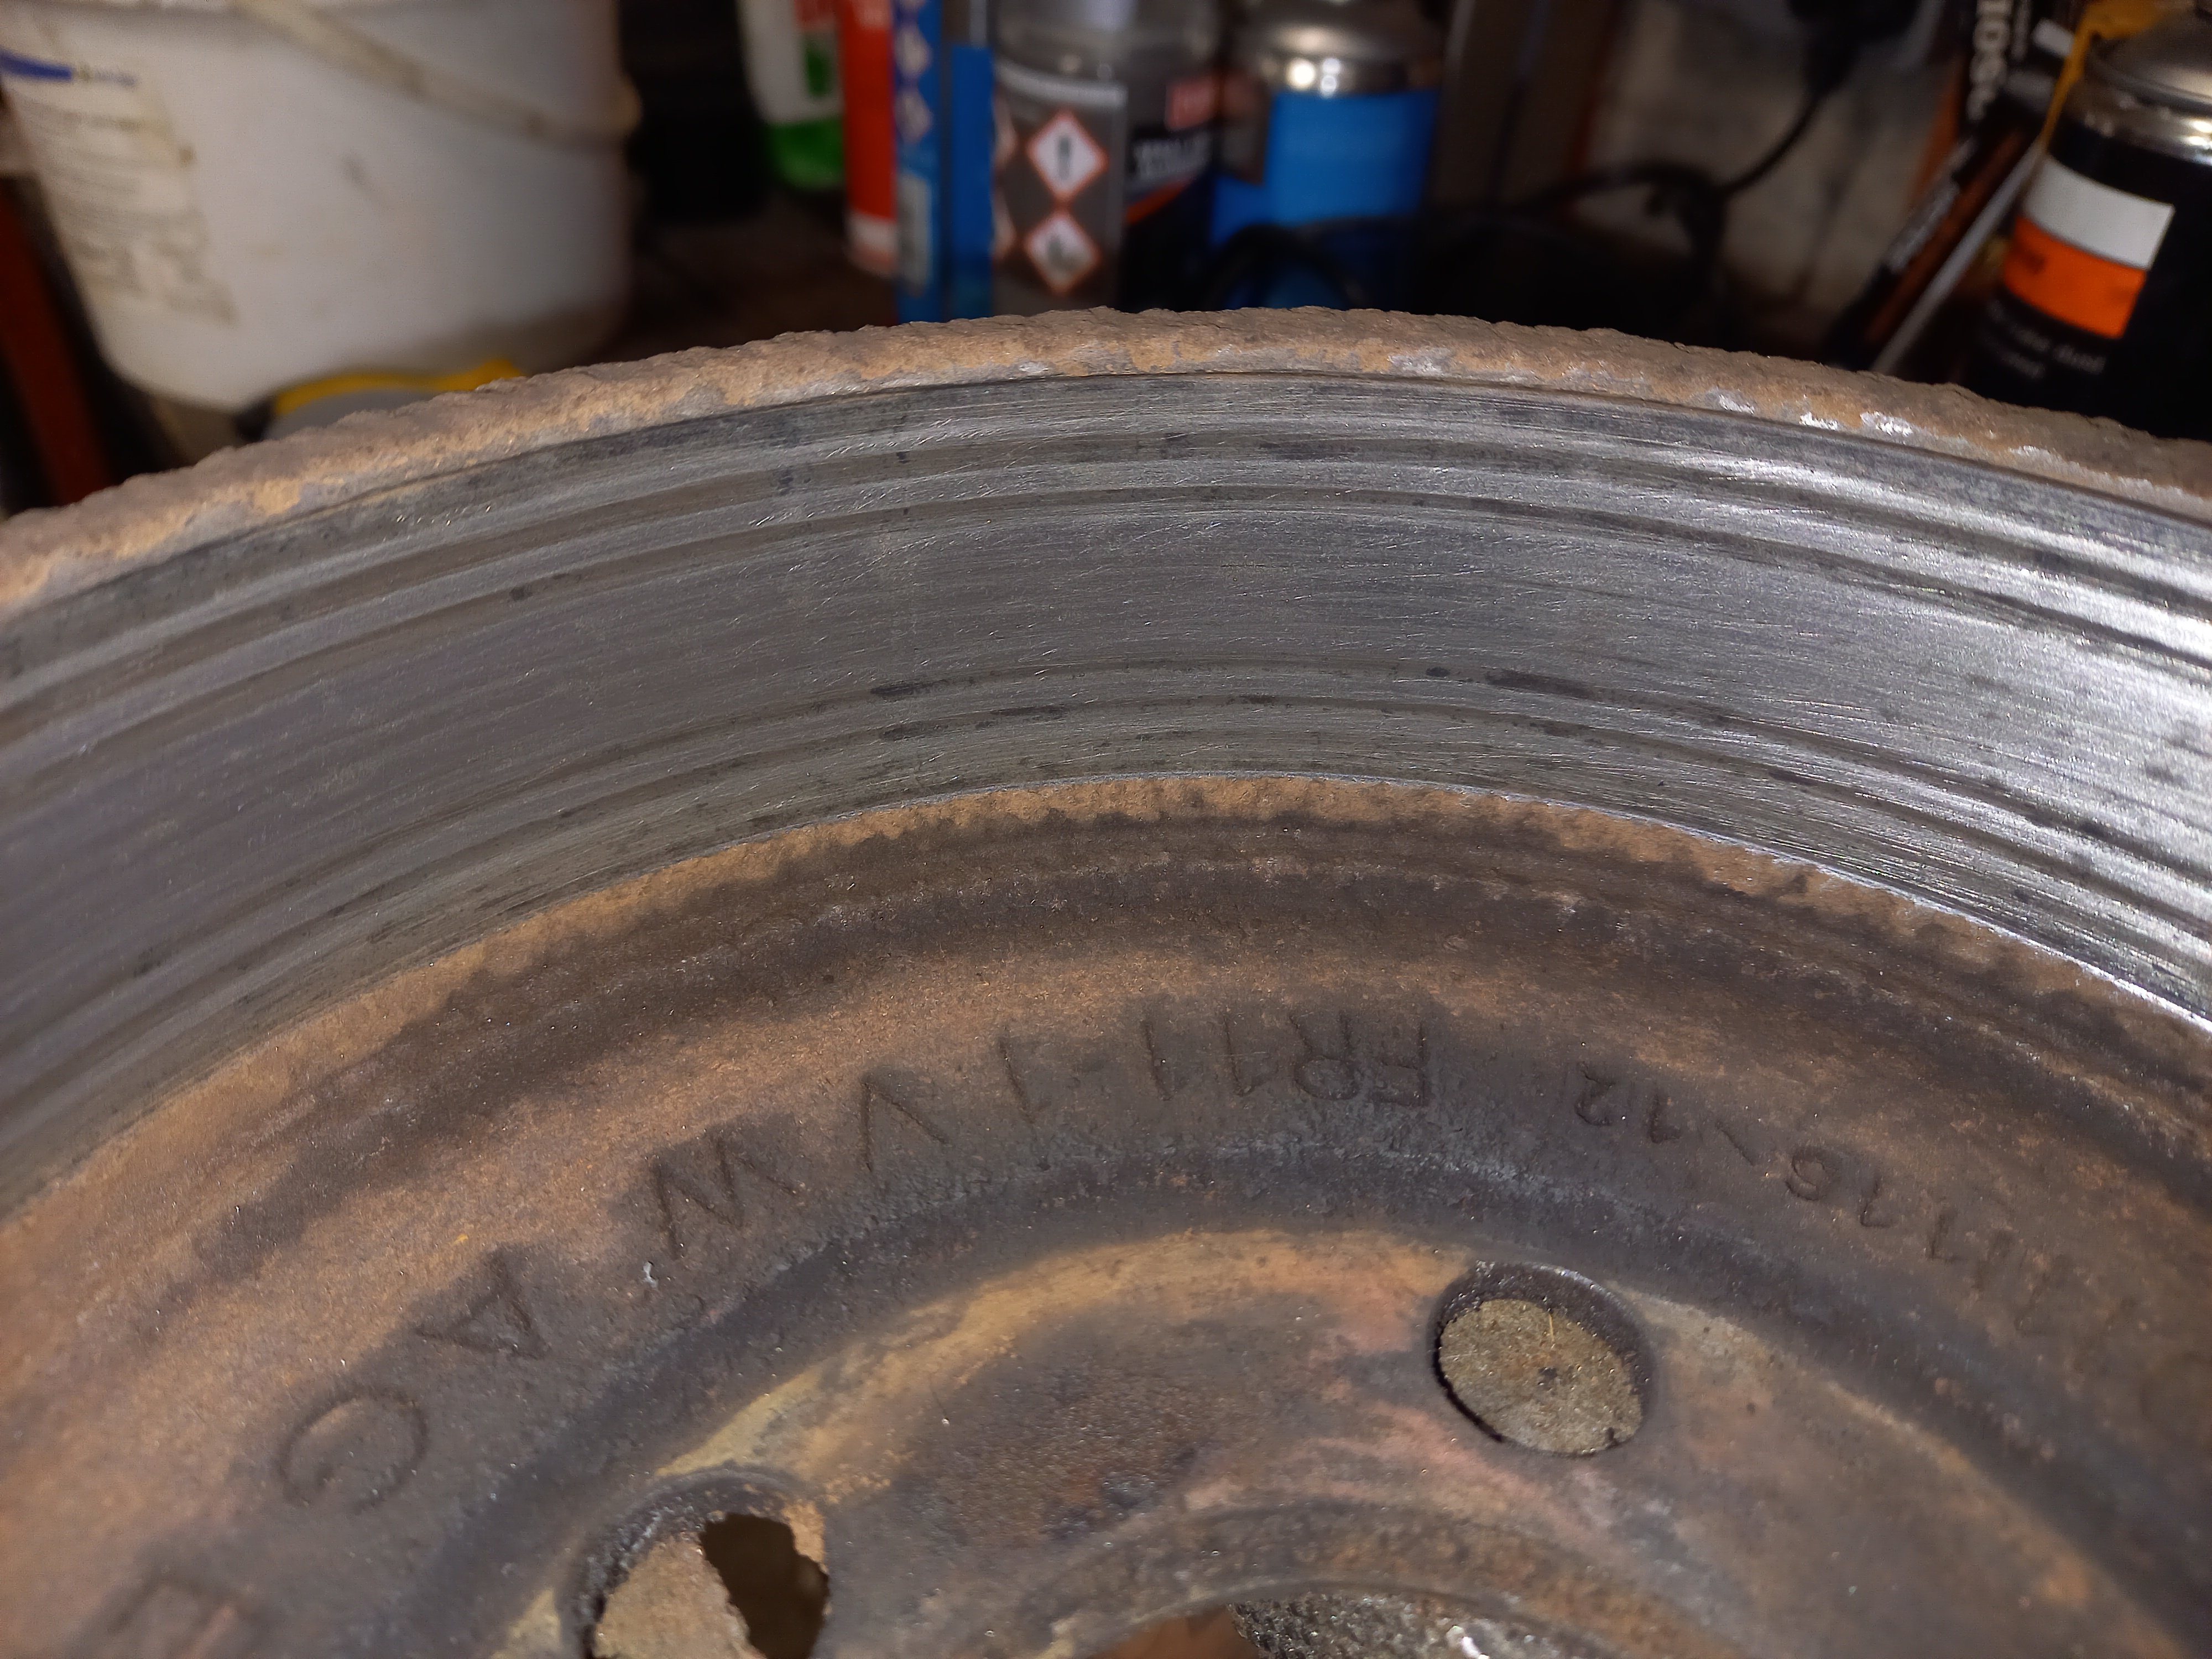
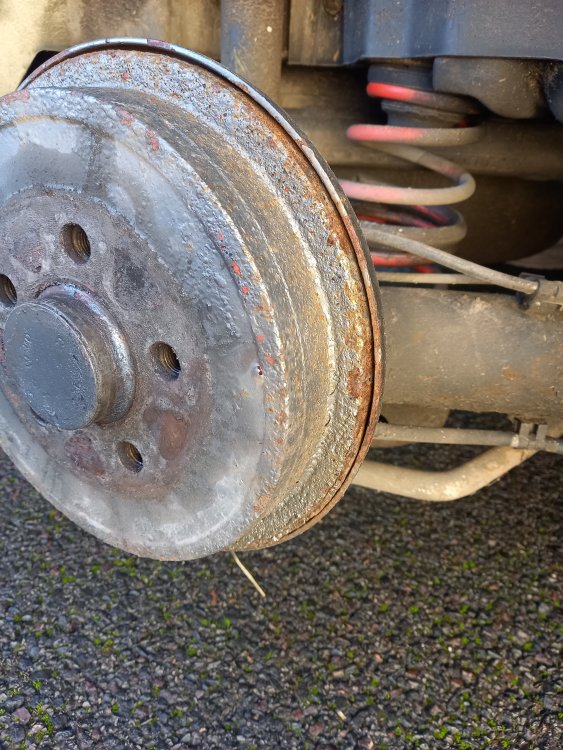
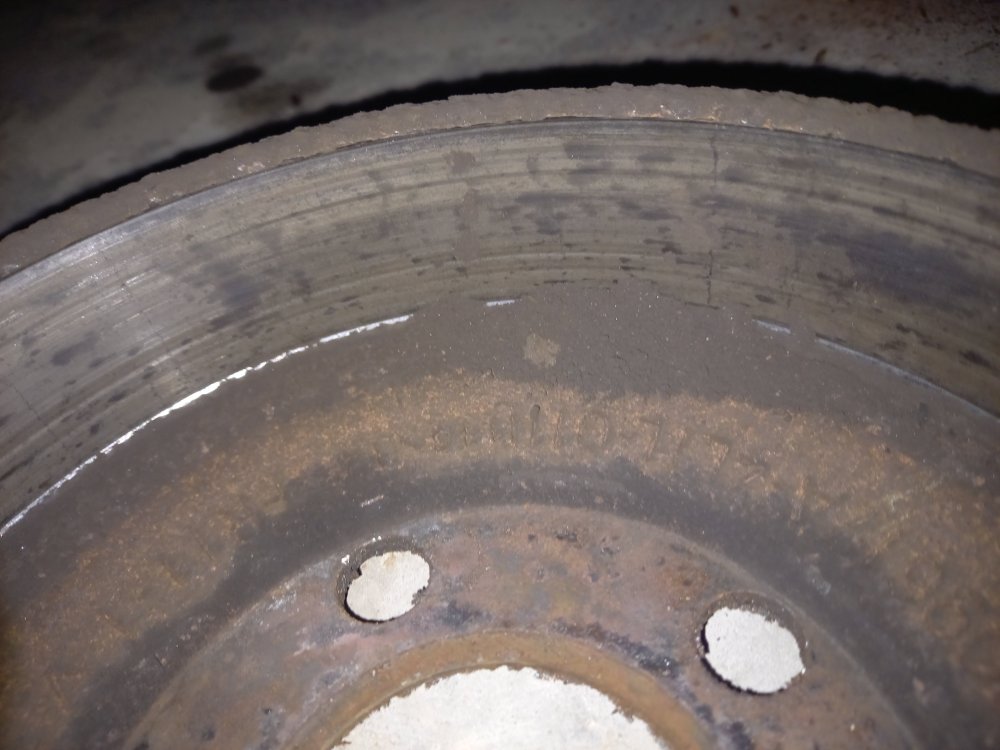
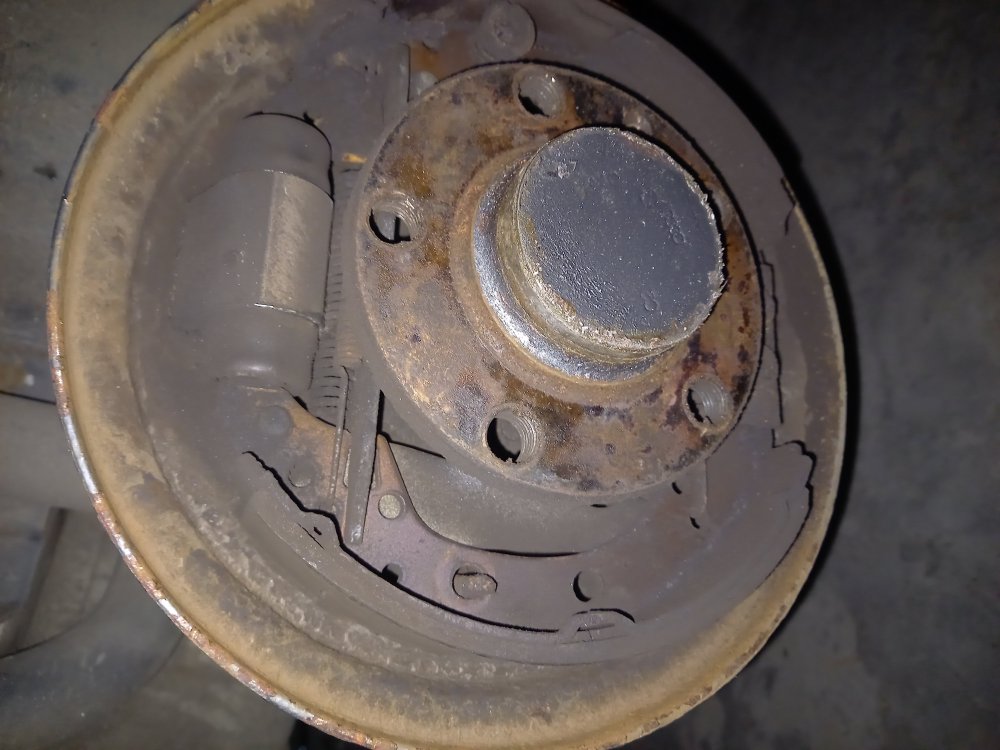
Had to do a bit of work on the rear drums on this yesterday, felt the back brakes werent working as they should, as if one of them was working harder than the other. Took off both drums and had a look, Nothing looked obviously broken except for the spring that holds the shoes on being missing on one side. I think I broke that taking the drum off, replaced it with one from the mk1. Drums look pretty chewed up, I cleaned them up a little, scuffed up the drums and the shoes to try get some more life out of them. Pretty deep grooves in them and I dont think thats how they should be. Fair lip on the outside of the drum too, not great. Backed off the little adjuster wedge on both sides and checked to make sure the handbrake lever was moving freely before putting back on the drums. Put all back on and let the drums adjust themselves back up. Seems to be braking a bit better. Edit: Brakes feel much better than before, pedal feel too. Handbrake is also much much better at holding the car. Guess these drums arent great at self adjusting so I'll need to keep an eye on them.

-
After having to fettle with the drums on both my fabias i'd probably leave them to a professional. The wheel cylinder itself is easy to remove but if its contaminated the shoes you'd have to replace them and its a pita. Technically you're meant to remove the wheel bearing but it can be done leaving the wheel bearing on, more hassle though.
-
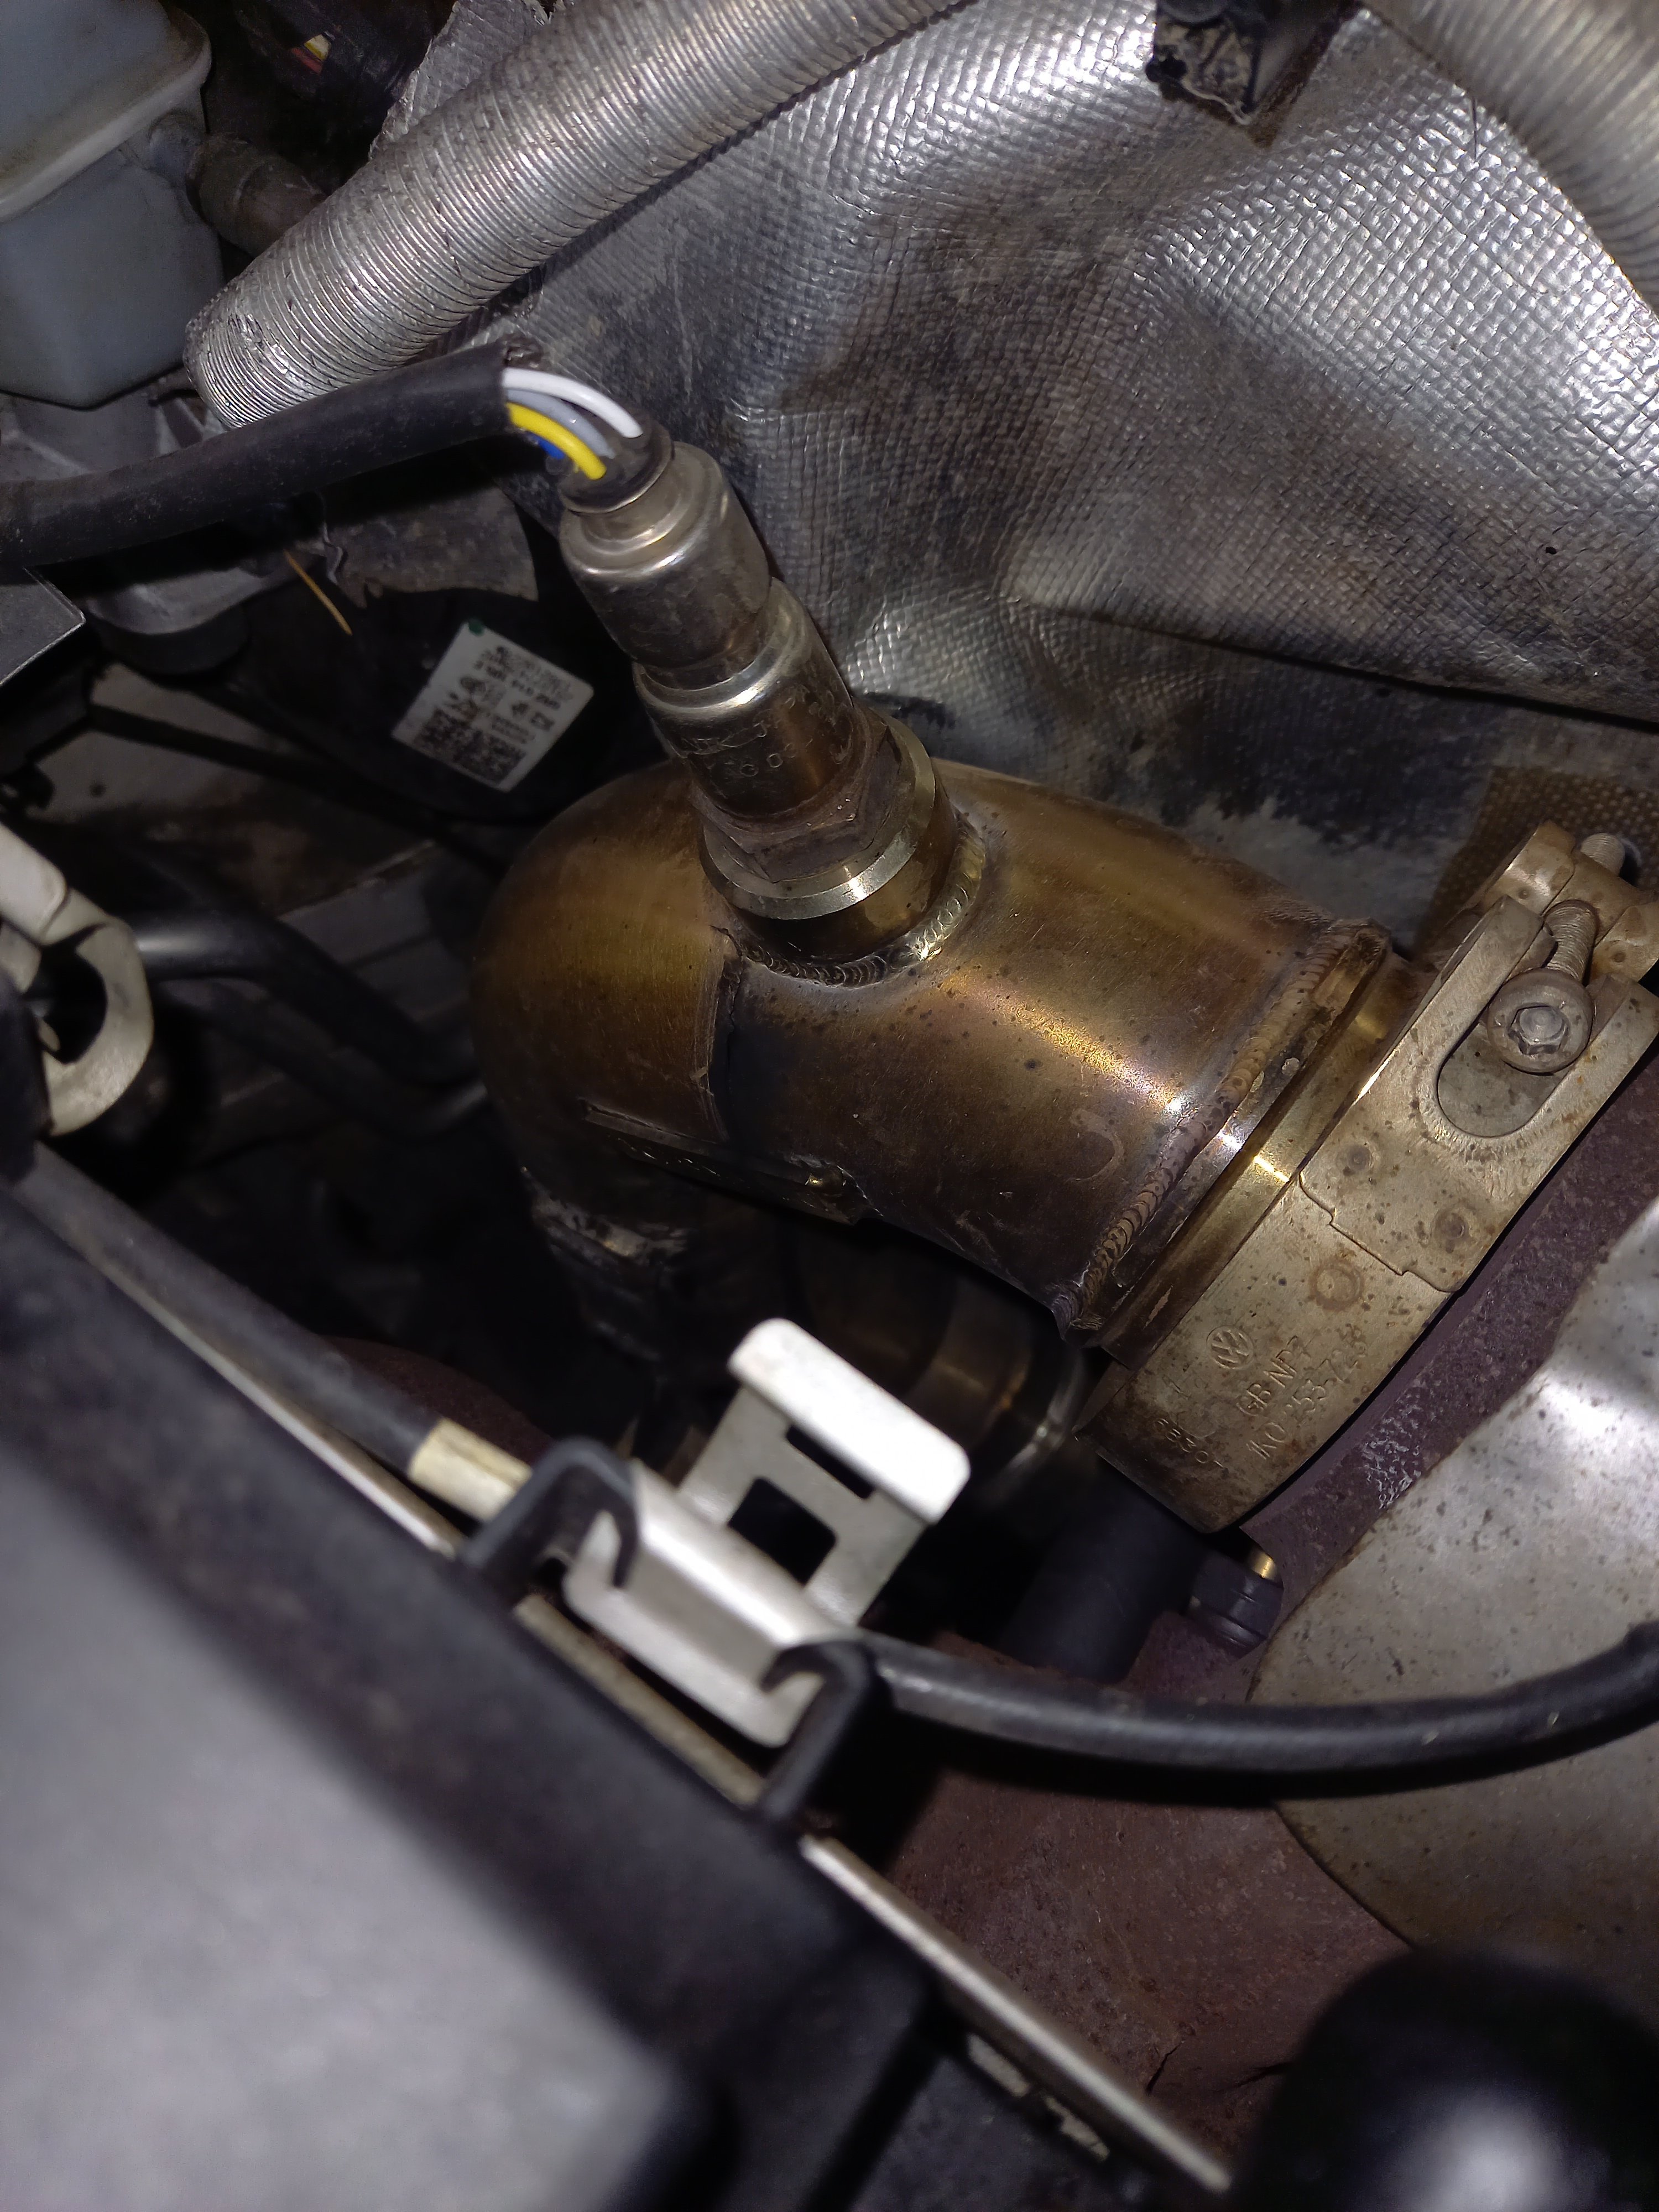
Again I've still got an egr on mine so I dont have any experience with either of them. Darksides always got high quality stuff but I'm sure the ebay one I shared 110% fine for it. Pretty hard to mess up a piece of bent tubing and some plates.
-
https://www.ebay.ie/itm/1-6-2-0-TDI-CR-COMMON-RAIL-EGR-BLANK-BLANKING-PLATE-KIT-EGR-COOLER-DEL-ETE-PIPE-/224691010195?mkcid=16&mkevt=1&_trksid=p2349624.m46890.l6249&mkrid=710-127635-2958-0 https://www.darksidedevelopments.co.uk/products/darkside-1-6-2-0-common-rail-egr-blanking-kit-and-egr-cooler-delete.html
-
Bumper clips are different too Prefacelift only does prefacelift bumpers Facelift and vRS are the same clips.
-
Worth keeping in mind AnnoyingPentiums car is 15-16 years old and only has 50-60k miles on it. It wouldnt be too hard of a stretch to guess its got the original oil in it. Plenty of time for that oil to degrade, or maybe get low what have you. If you're going to the hassle of topping it off its not much more to just empty the thing and refill from scratch.
-
Once its mapped out, technically I dont think you have to remove all of it. Egr cooler is on the back of the engine and meant to be a massive pita to remove itself. I mentioned before about restrictor plates, if you got the egr mapped out you could just put a blank plate in that spot and leave the stuff on the back of the engine where it is. I do think darkside stock a delete pipe for the stuff on the back of the engine, but just blanking it here should suffice.
-
Reverse usually isnt synchronised anyways so if it crunches sometimes going into reverse, but still goes in I wouldnt be too concerned either.
.thumb.jpg.06721e8c8b33ed0eea16572ff131b291.jpg)