Jorgeminator
Members
-
Joined
-
Last visited
Everything posted by Jorgeminator
-
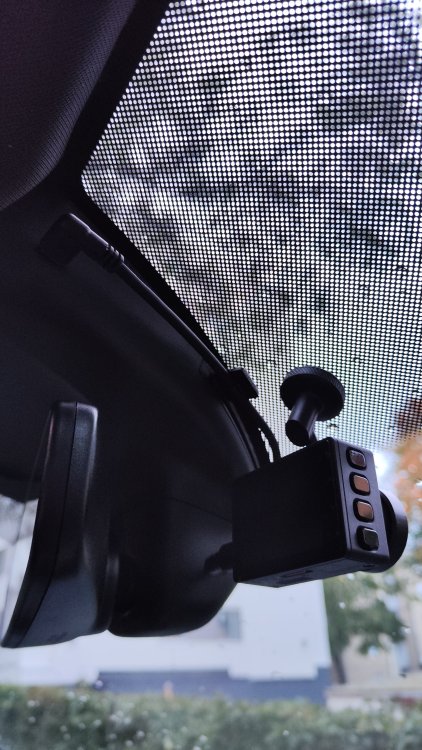
Here's my own setup. Garmin Dash Cam 57, polarising filter and USB-C to MicroUSB cable. The camera is completely hidden behind the rear view mirror from the driver's point of view.
-
There's no such thing as USB delivering 'too much power'. The consuming device only draws what's necessary to operate. You will not fry a 5 watt device by plugging it into a 120 watt phone charger for example. Sounds like you either had a bad cable or there was some other problem. Glad you got it working, though 🙂
-
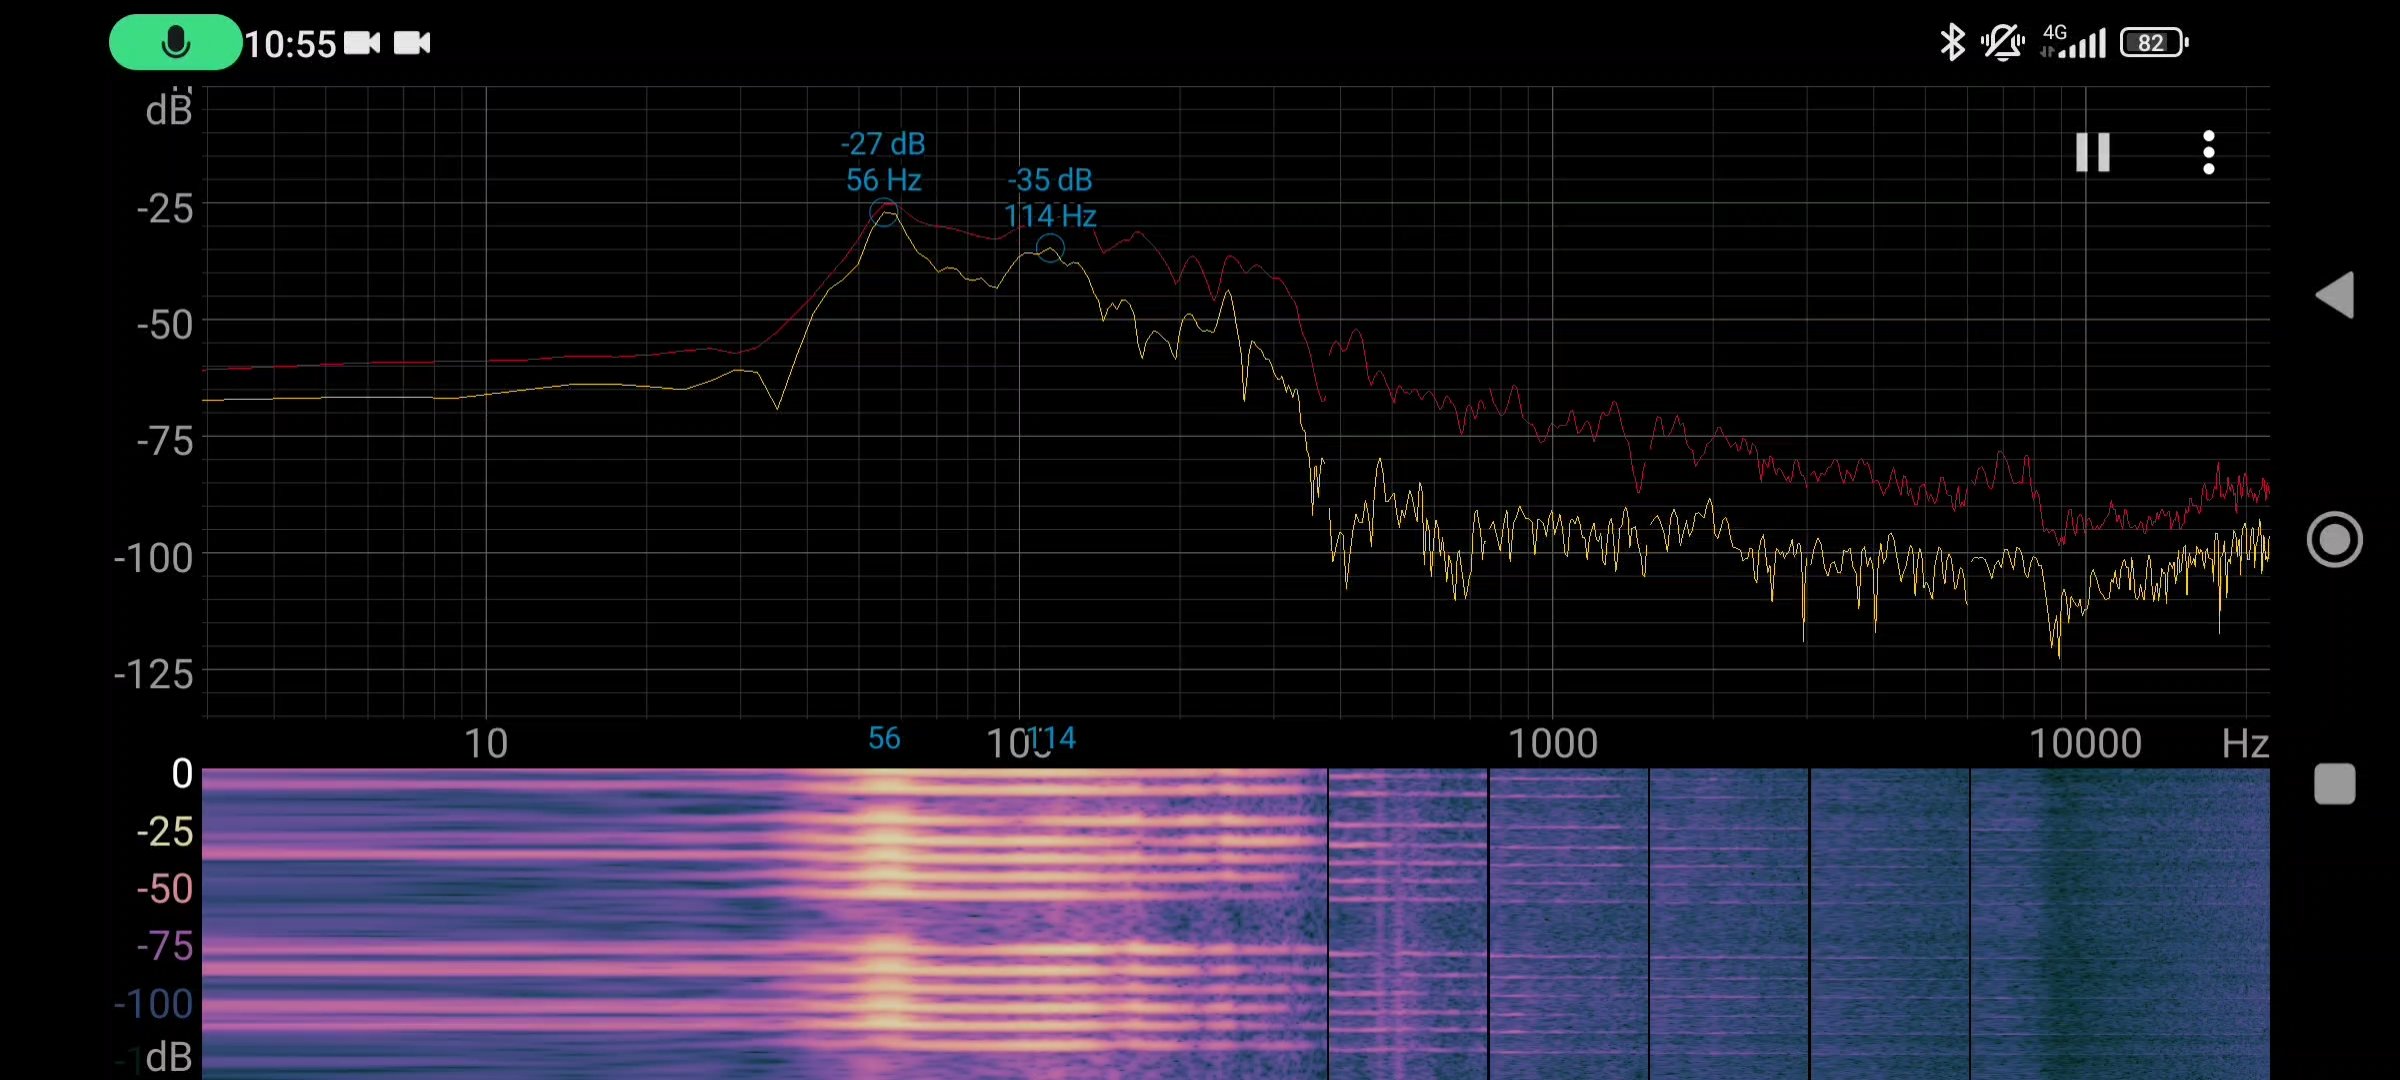
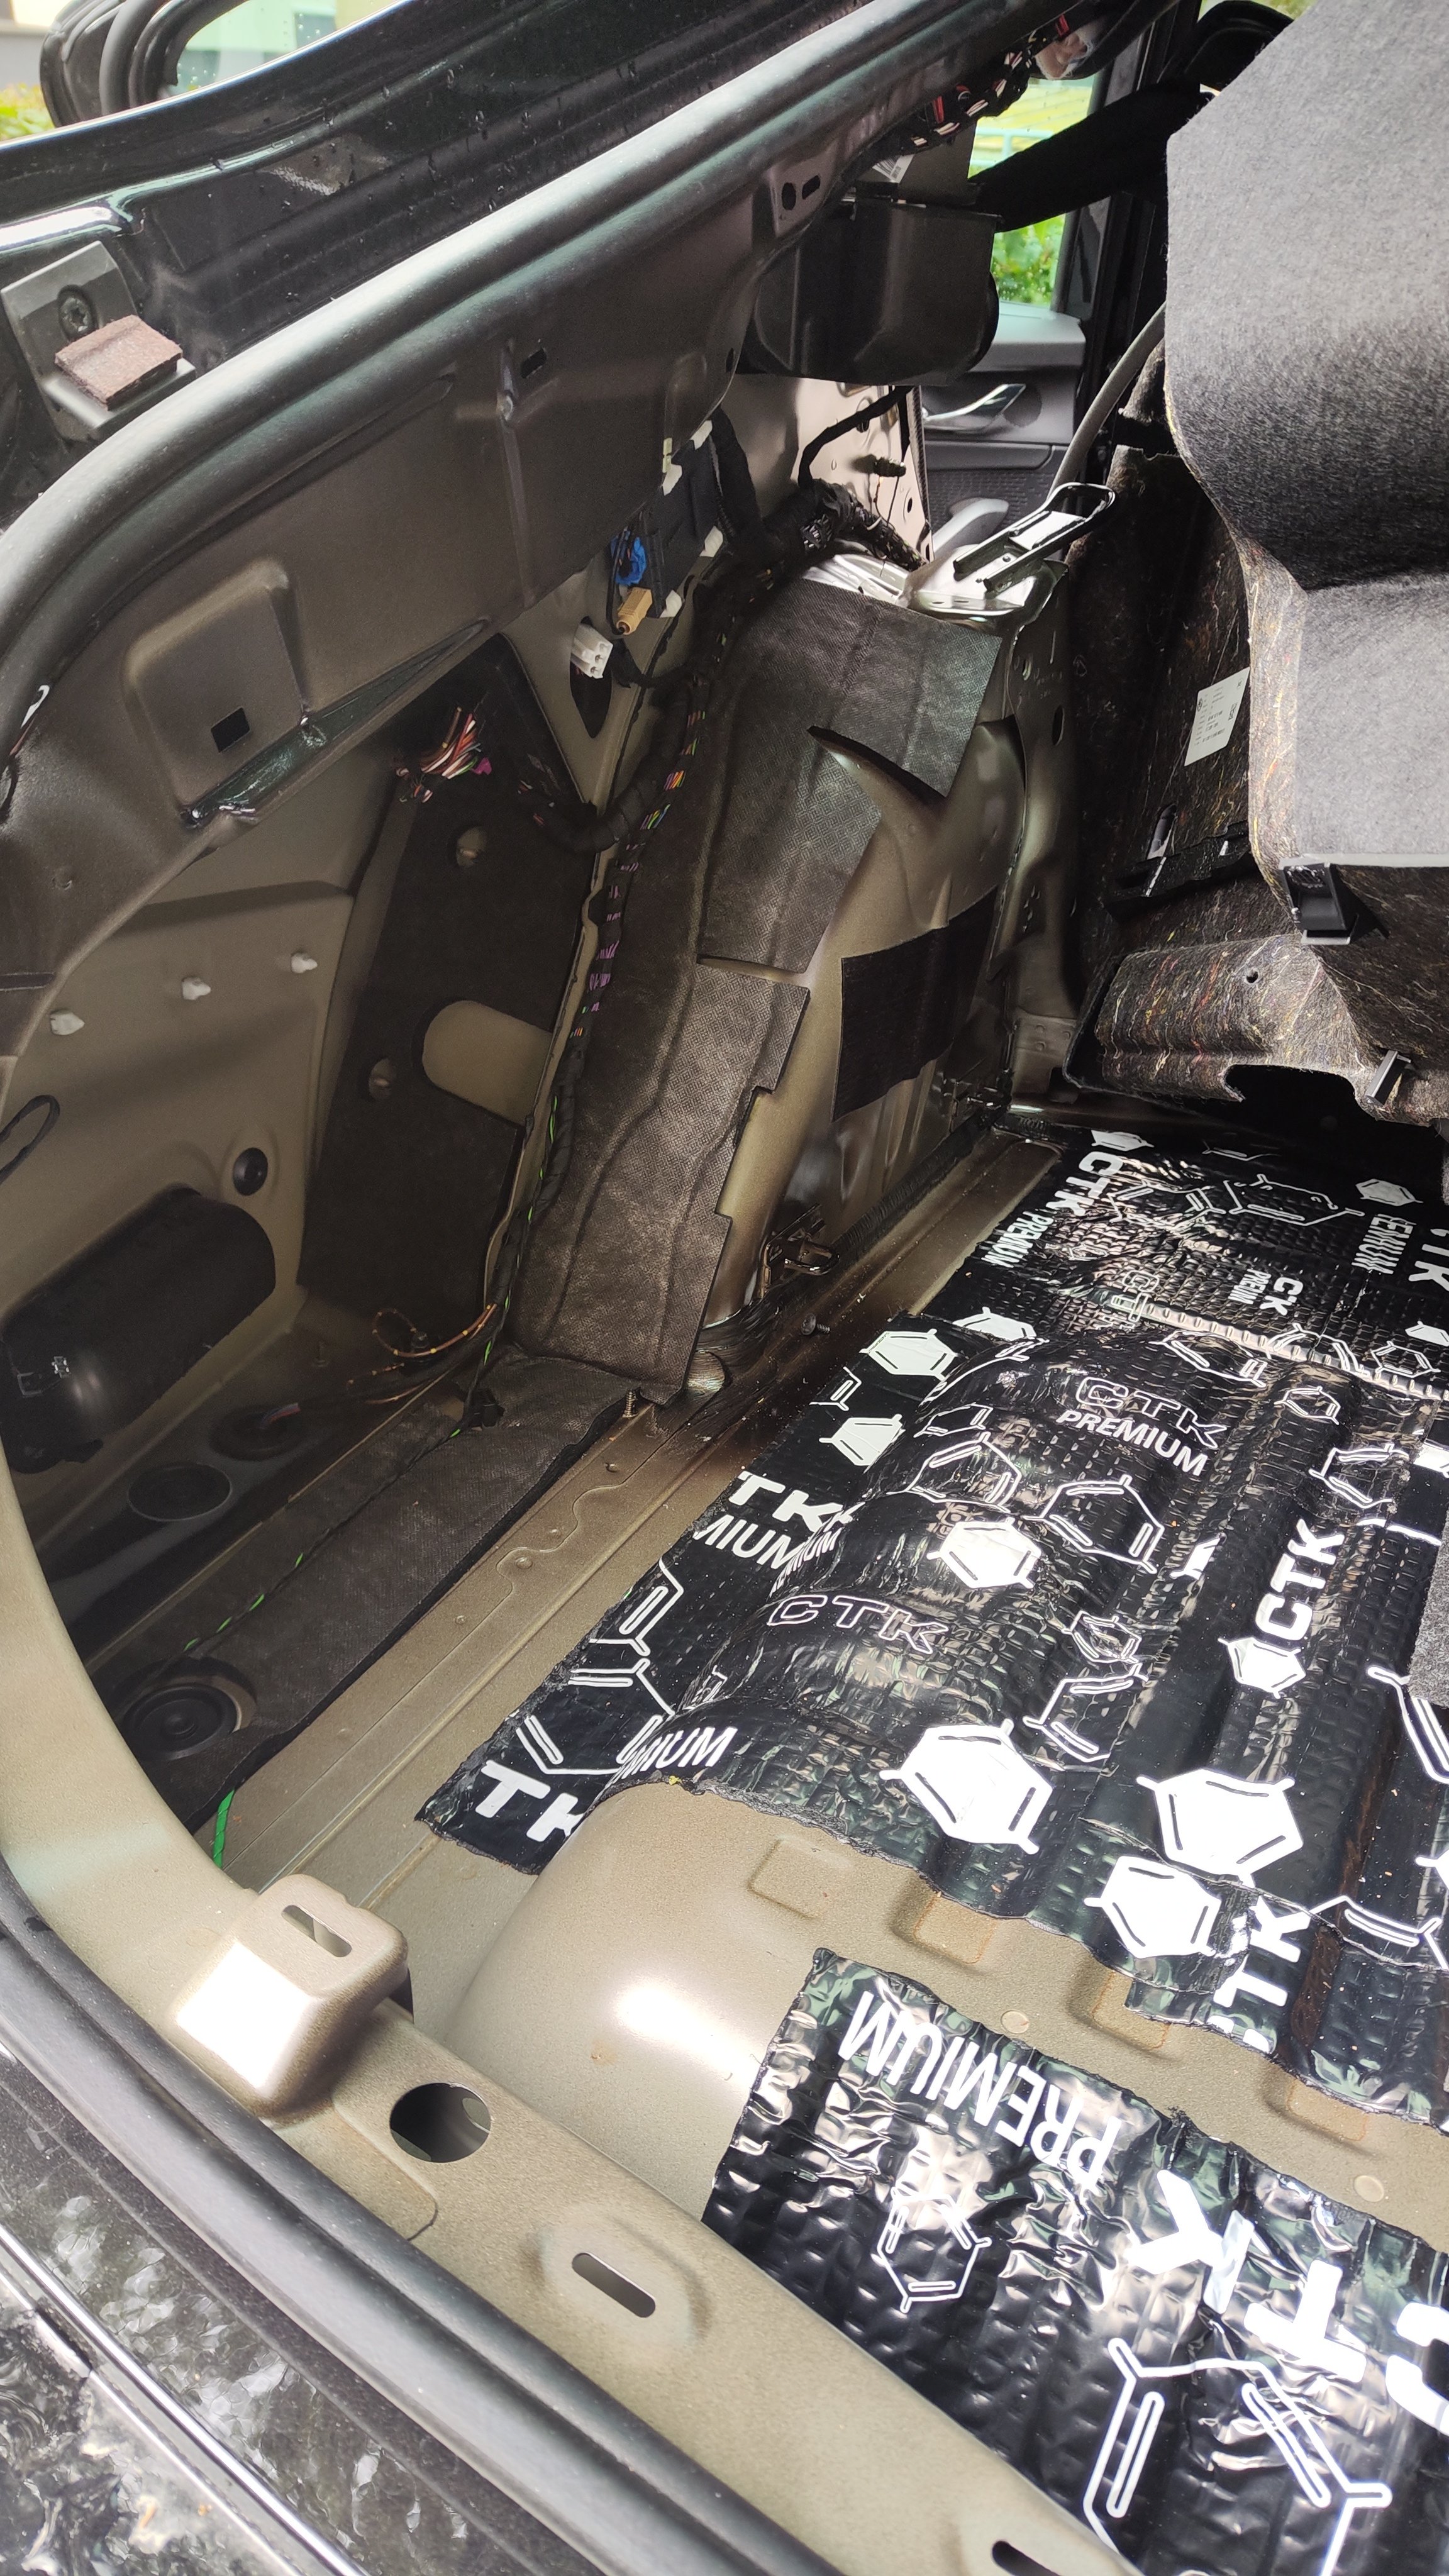
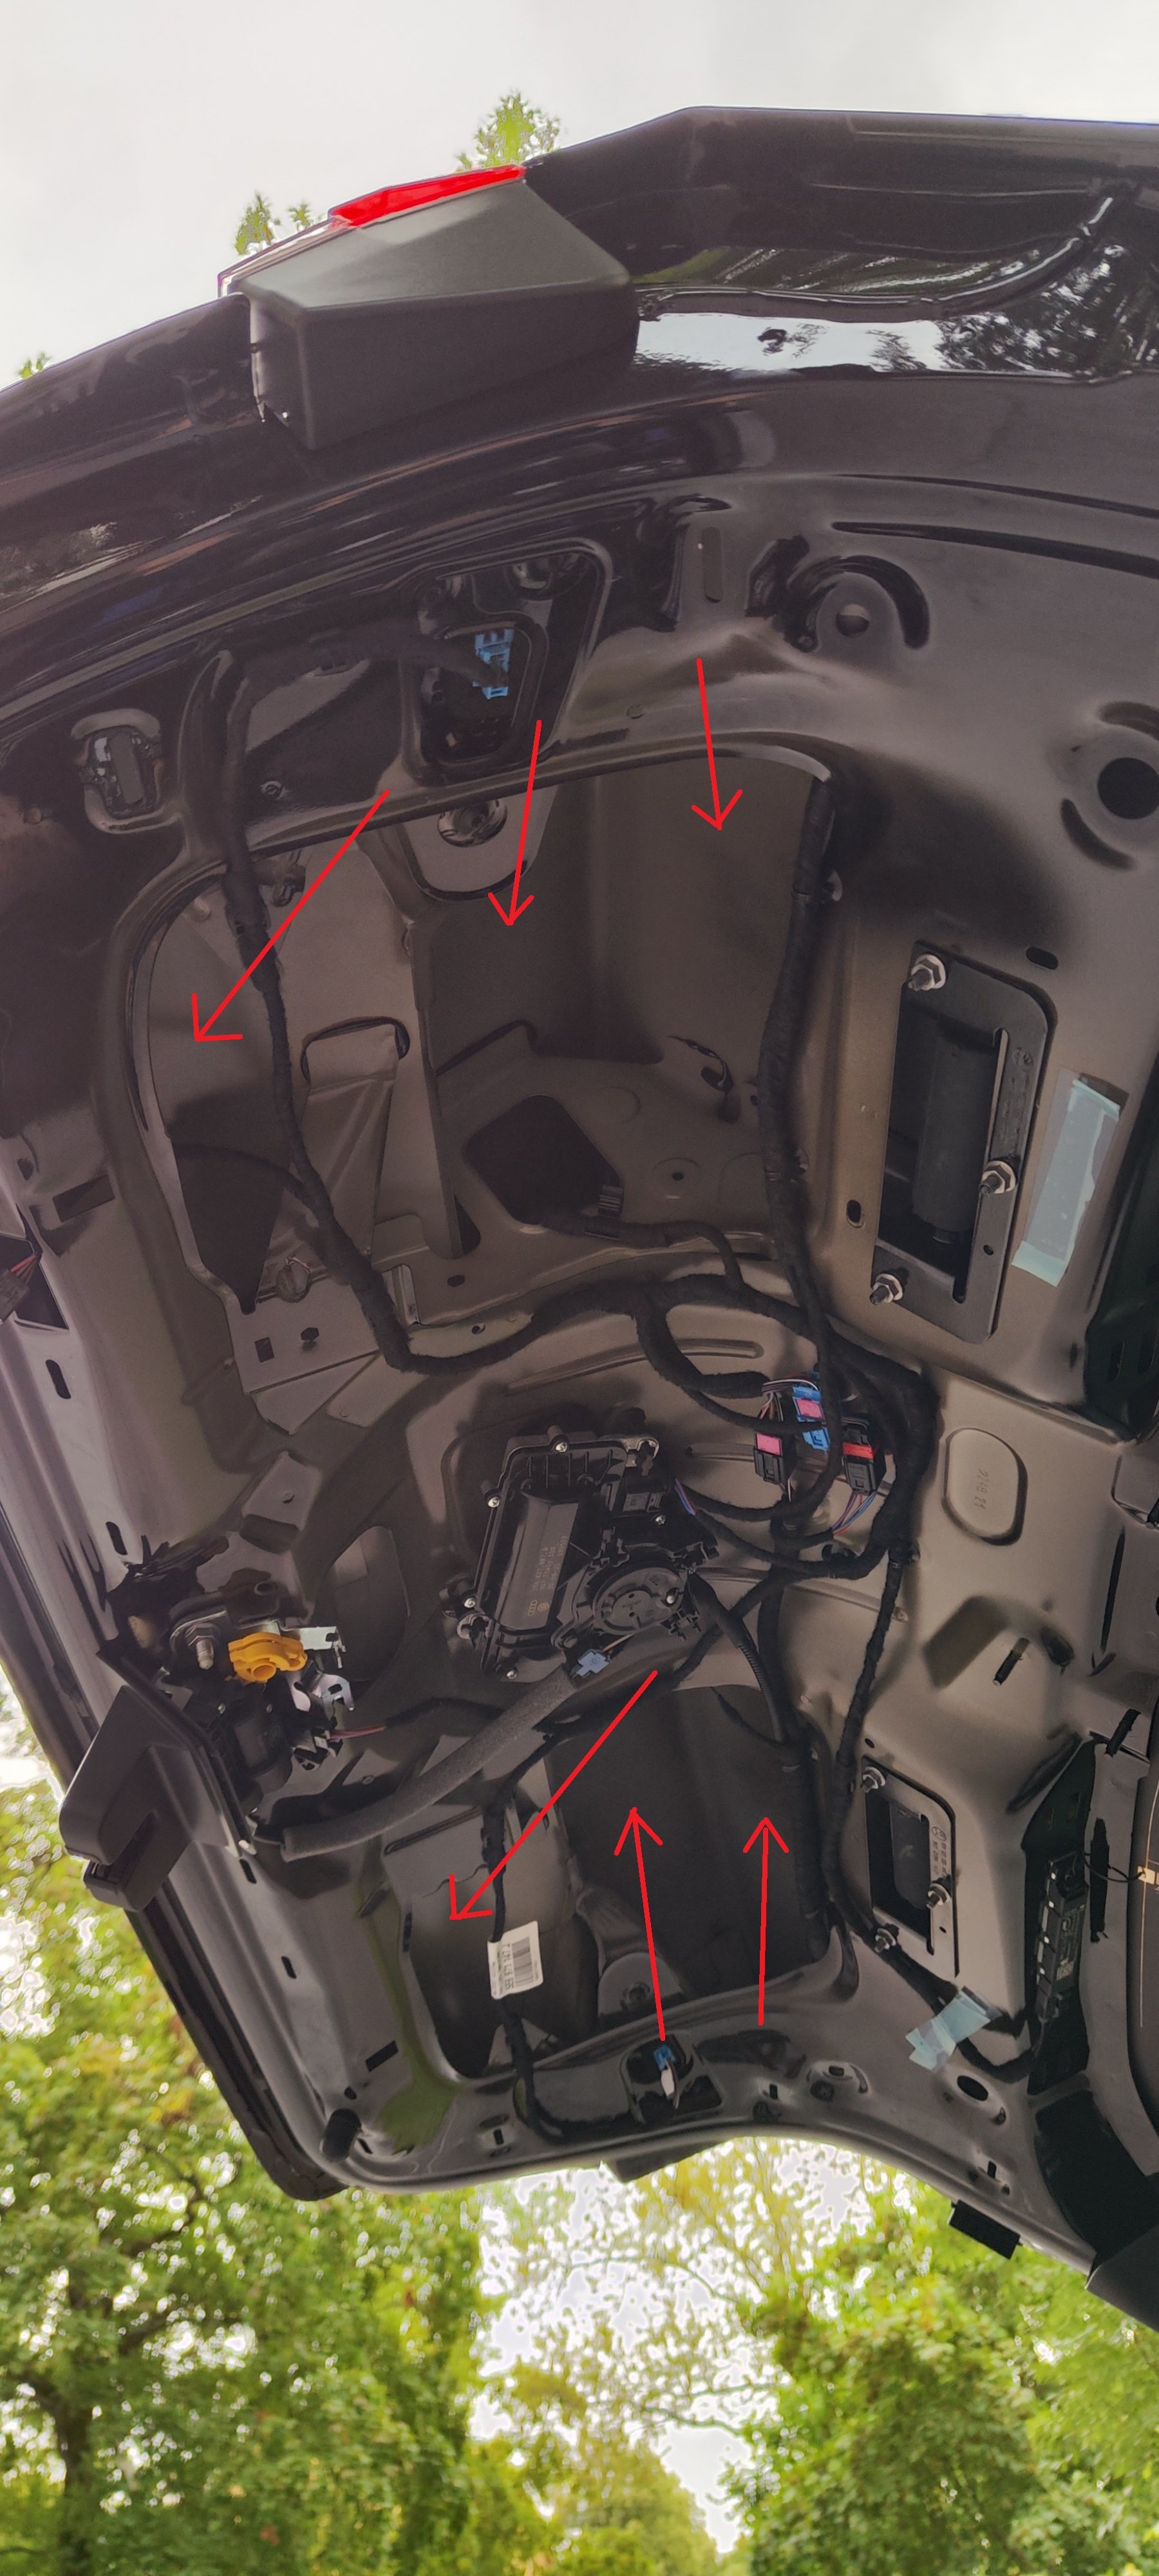
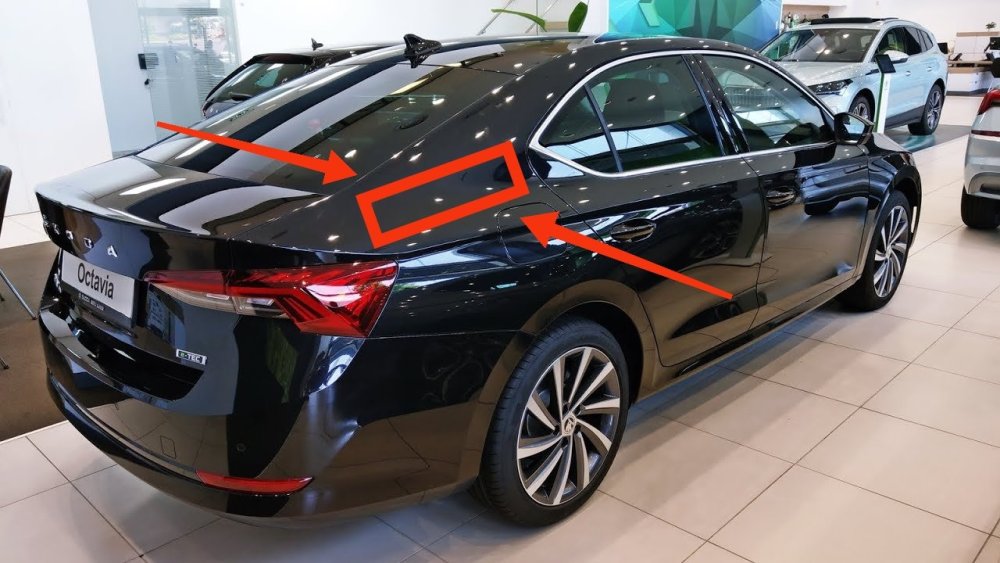
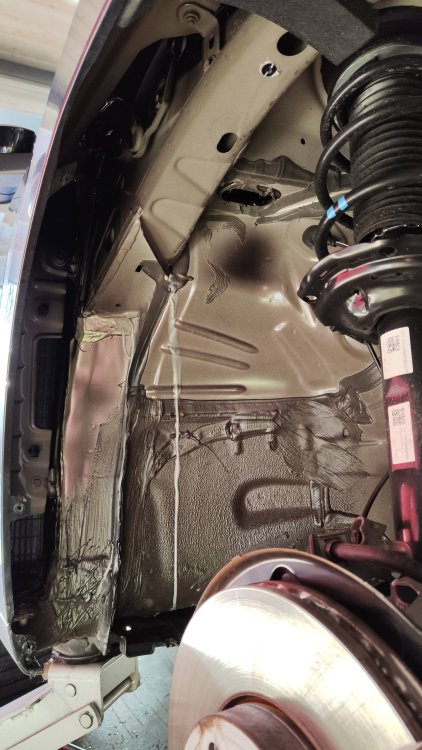
Rear wheel arch on the left is done. While in there, I discovered that the side panel acts like a huge subwoofer. Anyone with the limousine, put your head inside the boot and tap the outside panel in the area pictured below. I can't believe how noisy that panel is. Second picture is the sound spectrum it makes. It produces a 55-60 Hz tone. The second harmonic at 110-120 Hz can also clearly be seen.

-
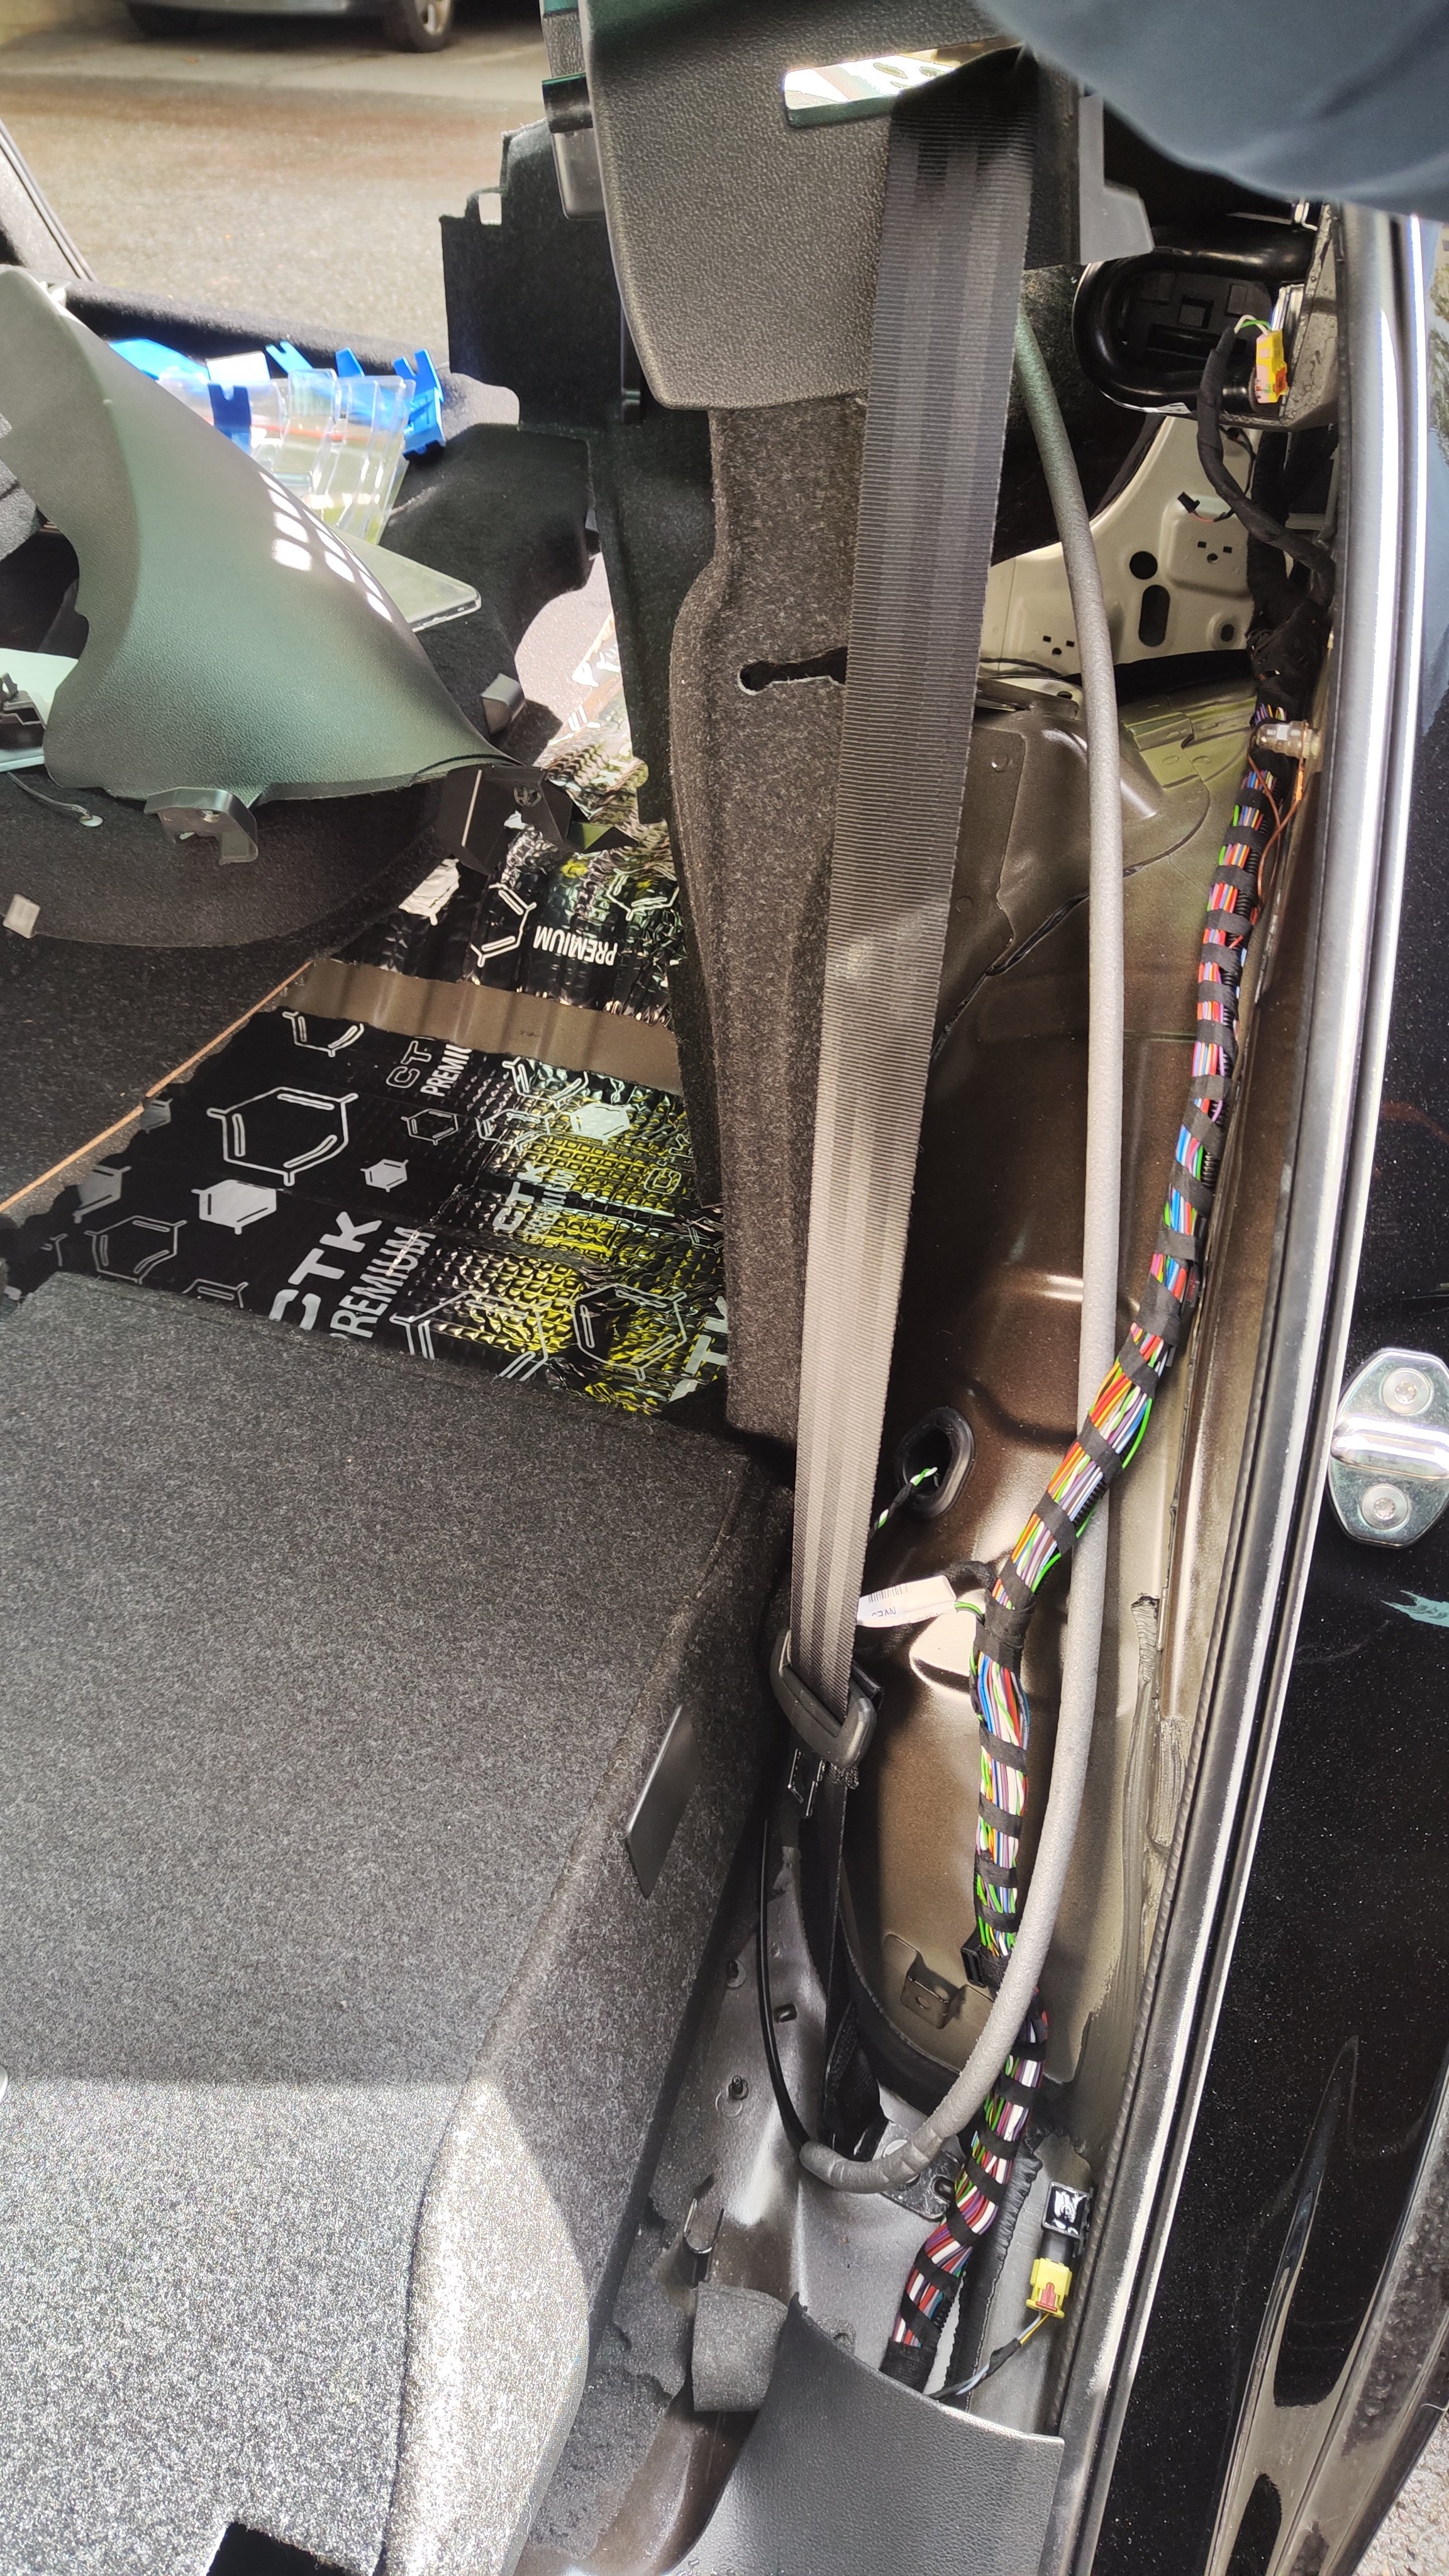
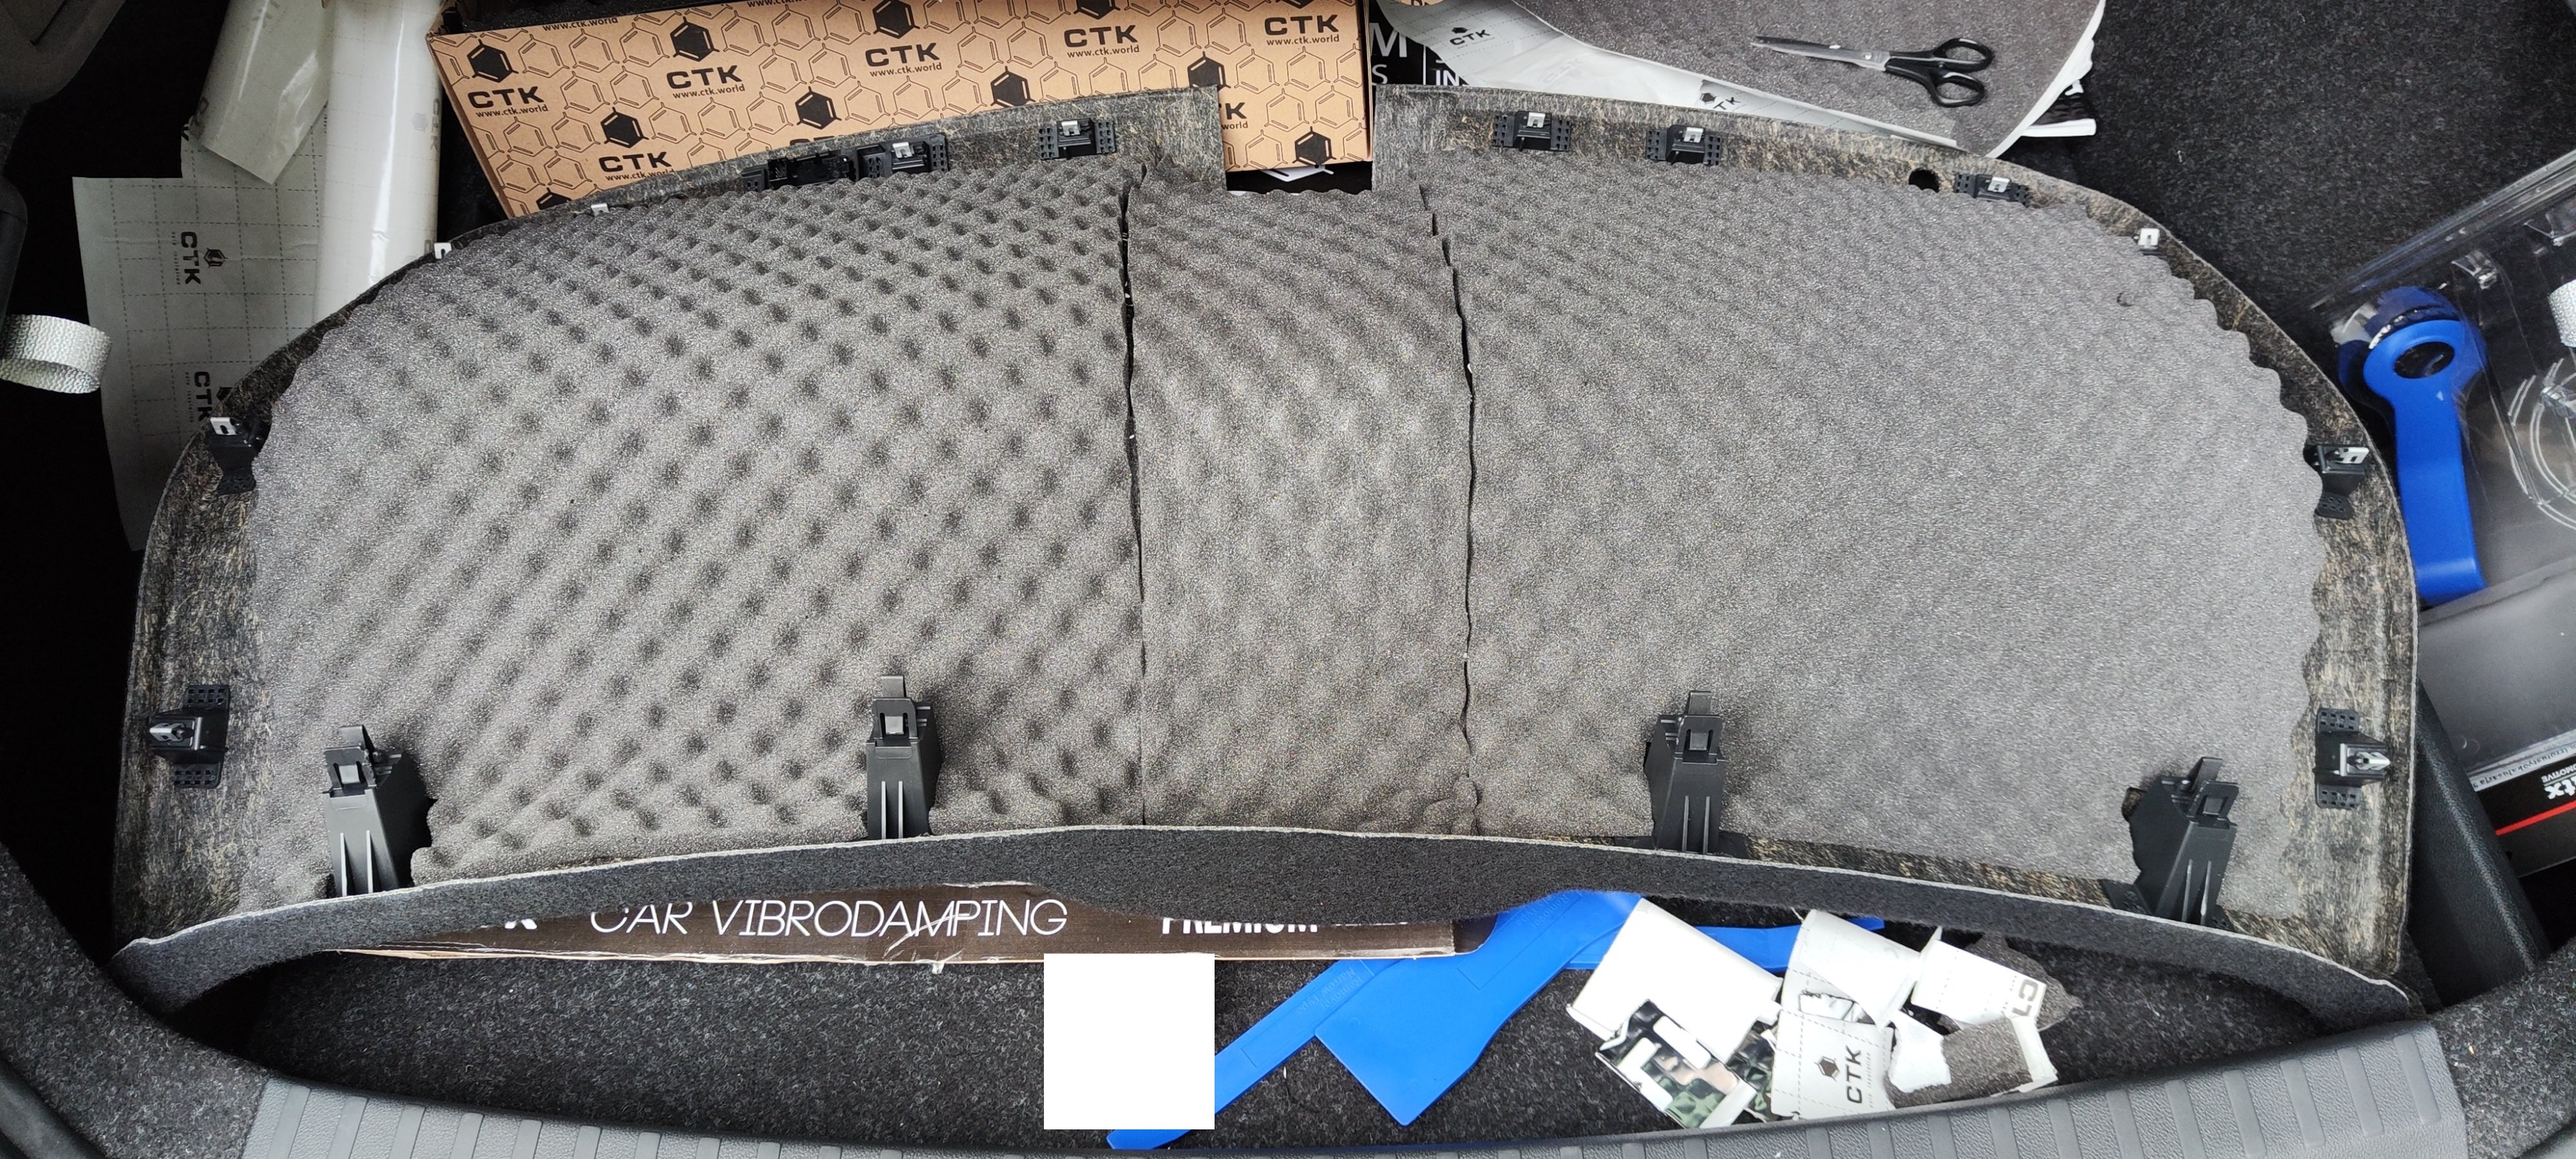
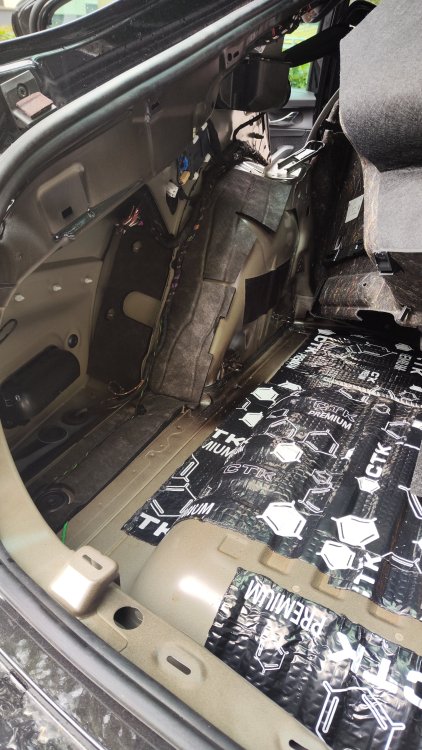
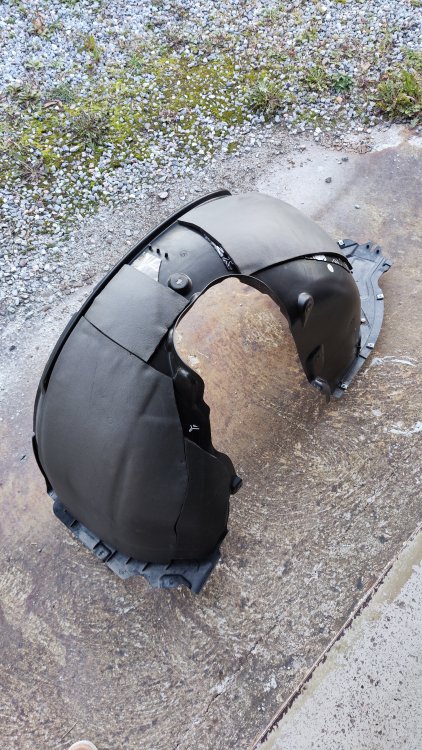
Progress. I will remove the factory insulation while applying mats and foam. The factory pieces come off in one piece if careful, so they can be reapplied on top of my own material if they still fit.
-
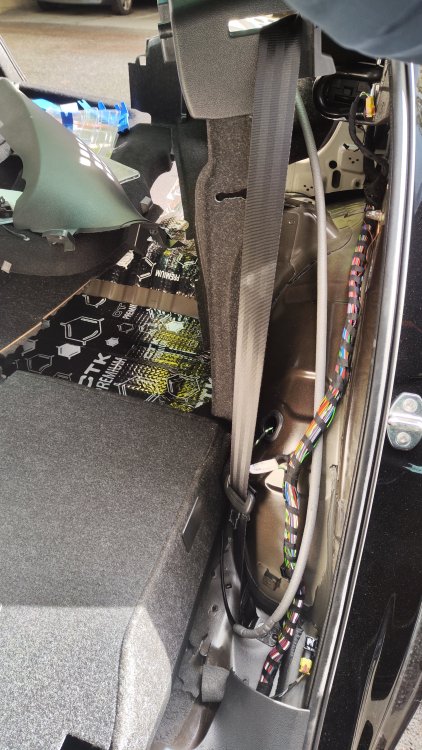
Up next: Rear wheel arches from the inside and quite possibly the front floor area (+ arches from inside). I've been studying the repair manuals to figure out how the side trim in the boot comes off. Shouldn't be too difficult considering I don't have the rear side airbags. The front floor trim should be easy now that I know how the lower trim part on the center console comes off. These are probably the last areas I'll insulate, leaving only the roof and rear floor (the foot area for the rear occupants) uncovered. I'd be interested to hear opinions on the roof. Has anyone done it on other cars? How much did it improve noise levels?
-
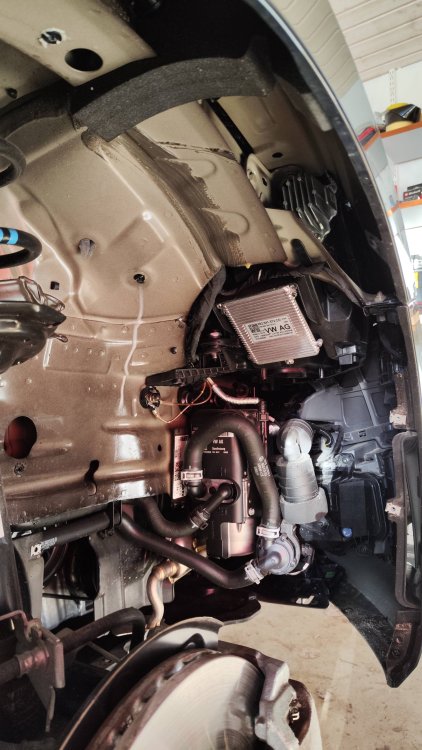
Thanks to everyone for your encouragement and support 🙂 The front exterior arches are now finished. I didn't bother insulating the front facing part of the liner on the passenger side since it faces the engine compartment, the auxiliary heater being closest to the liner. Pictures below. Unfortunately, I forgot to record a video prior to starting the project. Would indeed have been nice to compare the results. I listened to some of my dashcam footage after insulating the car, but the sound does not really represent what you hear as a driver/passenger. I might record a video with my phone if I find a way of fastening it in the cabin. Around 16 kg of material has been added in total.


-
I know very well 😄 It's a combination of the tarmac used and people using studded tires. Studs will wear the surface so they put a coarser tarmac compound to reduce the wear.
-
I have only done the driver's side so far, but to be fair, I didn't notice much of a difference. Will have to do the passenger side still, since I've heard that's where the majority of the noise comes from. I will update you when it's done. Although, I must say I didn't have much tyre noise to begin with, running on Goodyear EfficientGrip Performance 205x55 R17 tires. Really quiet ones in my opinion. The trim parts could be placebo, but it felt like the droning on rough surfaces decreased after I did them 🤔 EDIT: A good indicator of something done right, I can now clearly hear the turbo spooling, and the turbo on the 1.5 TSI is not exactly loud. I never heard that before doing the soundproofing.
-
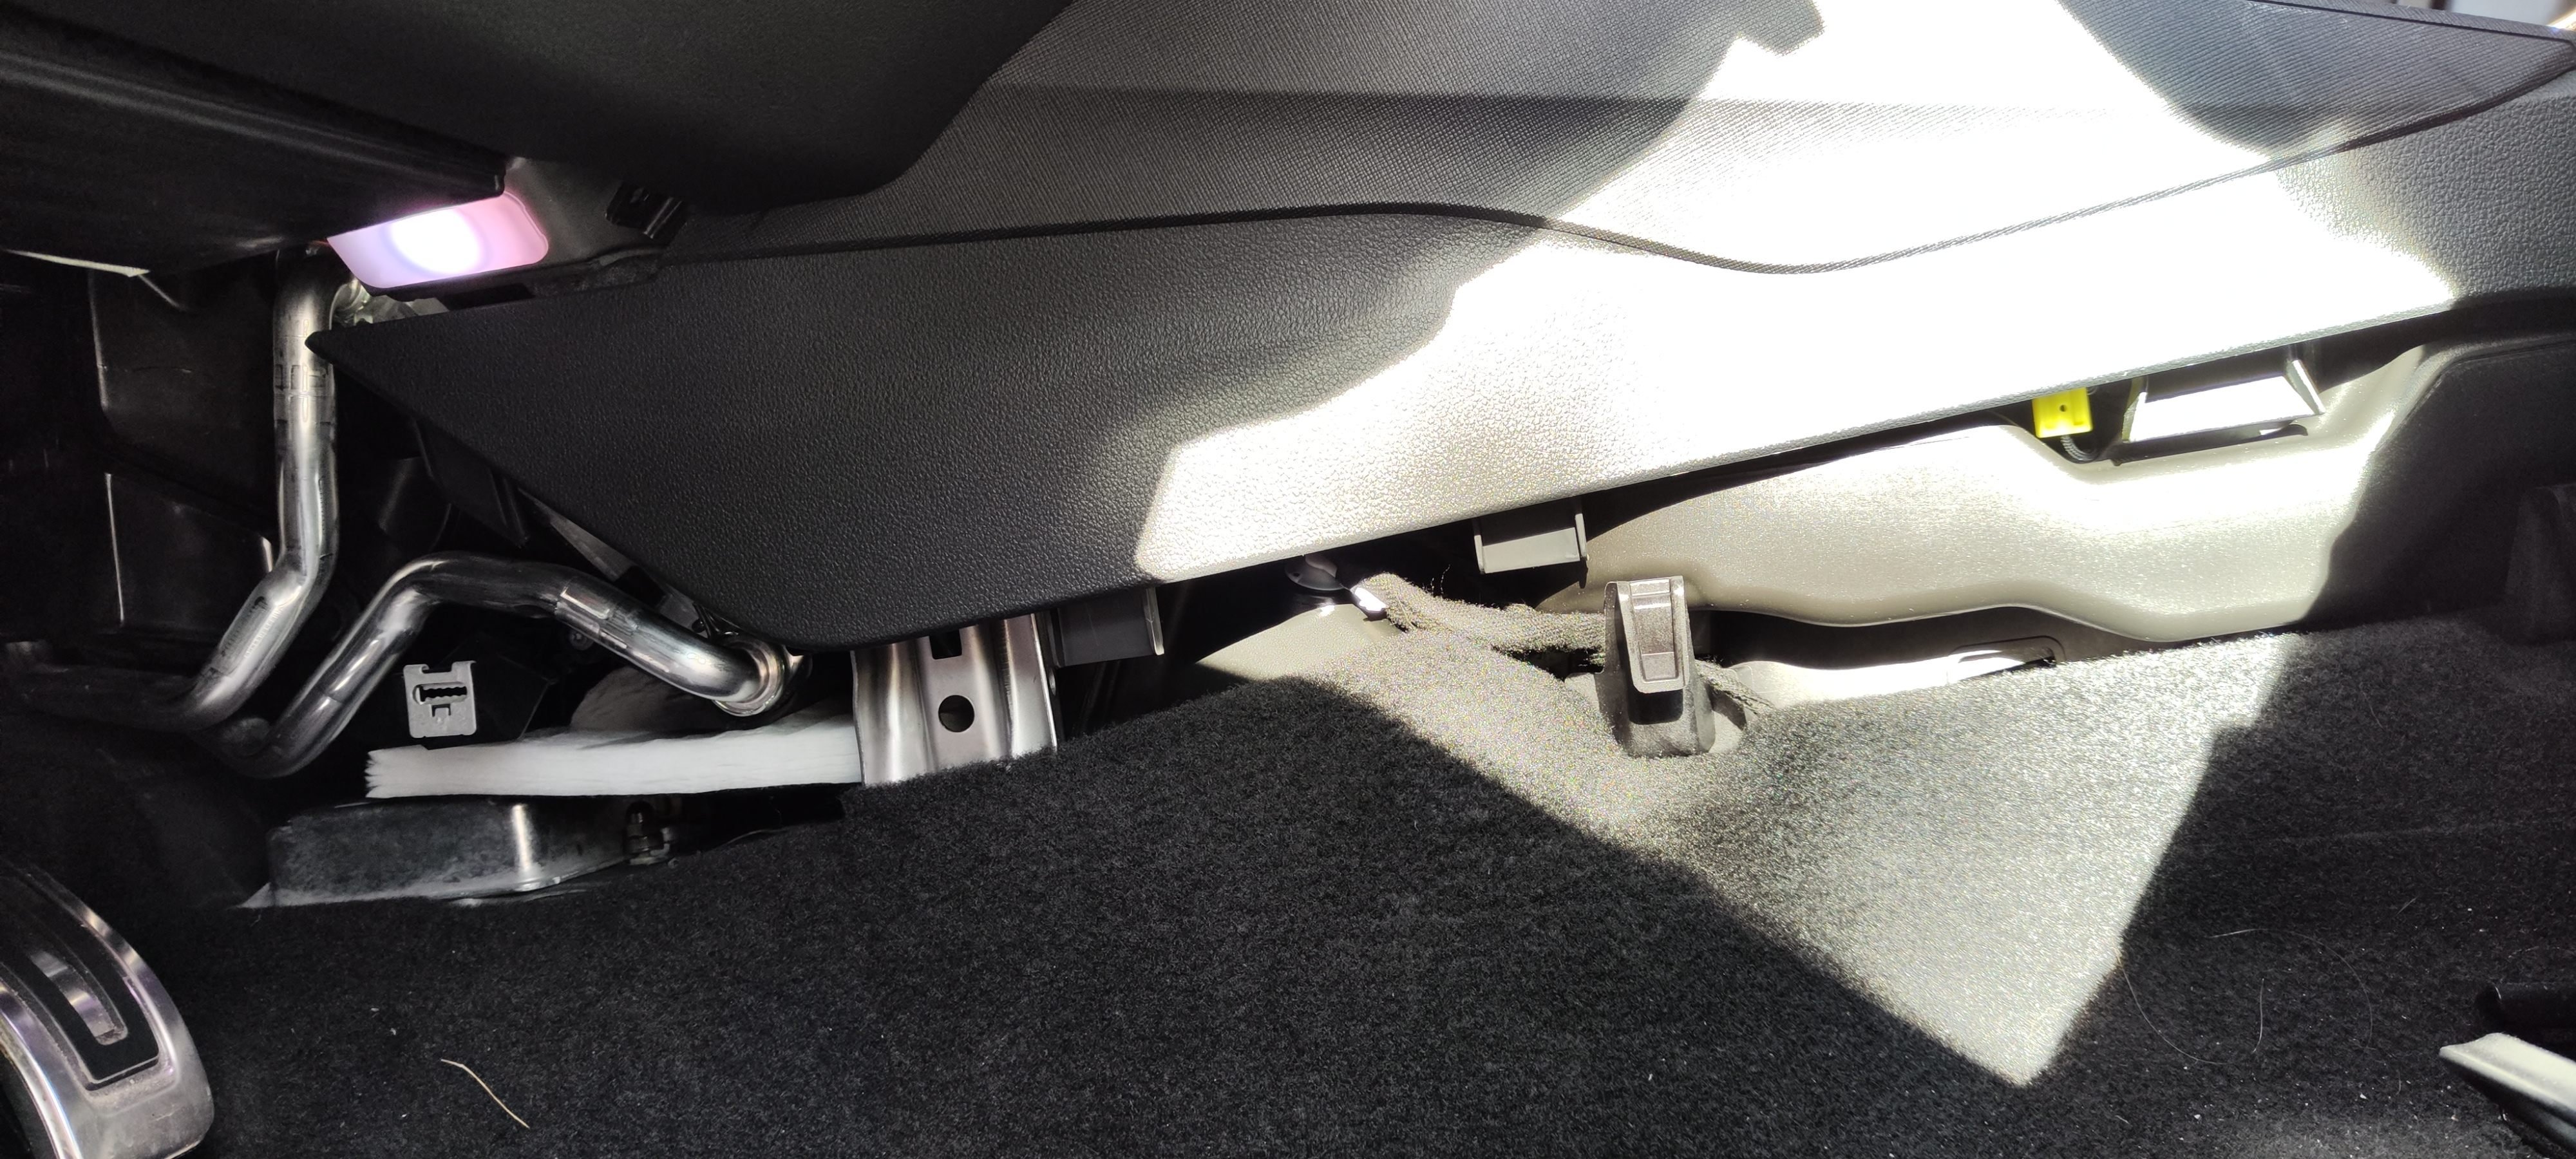
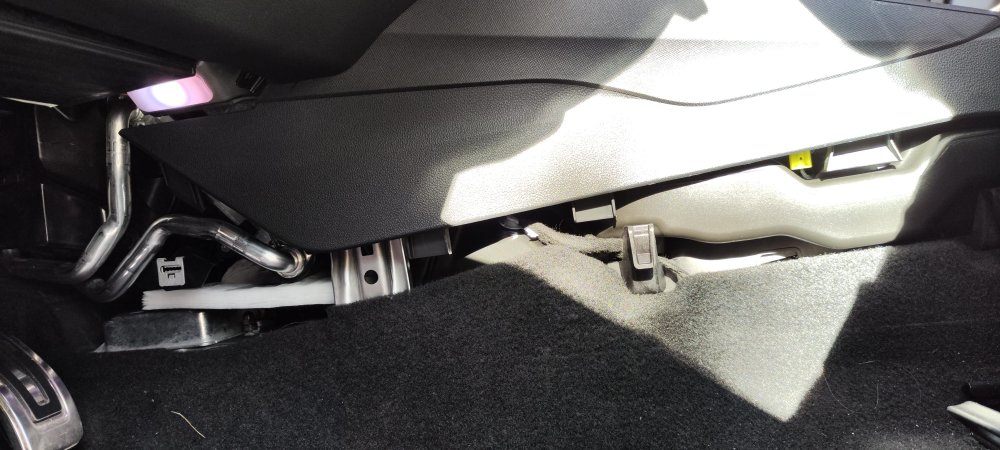
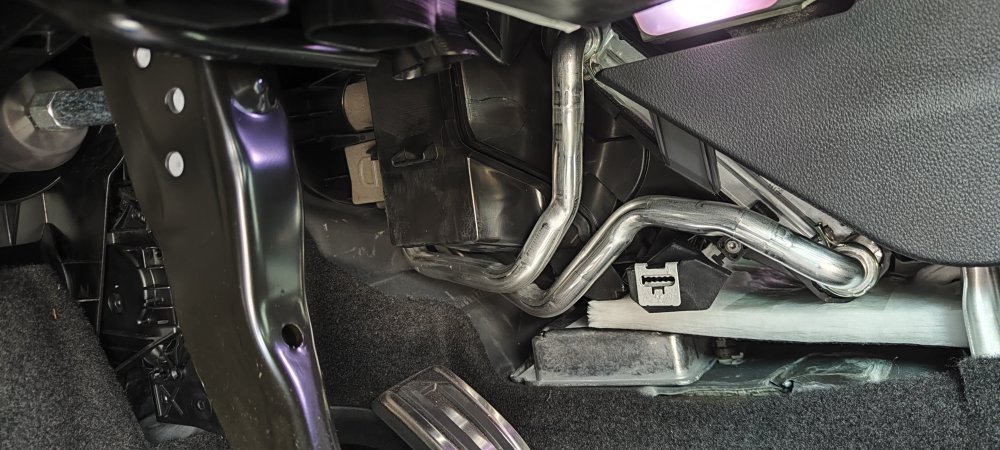
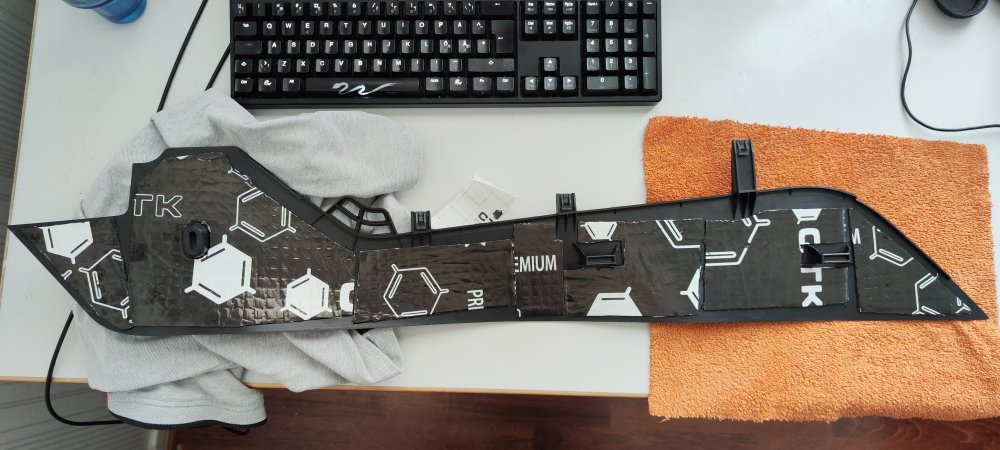
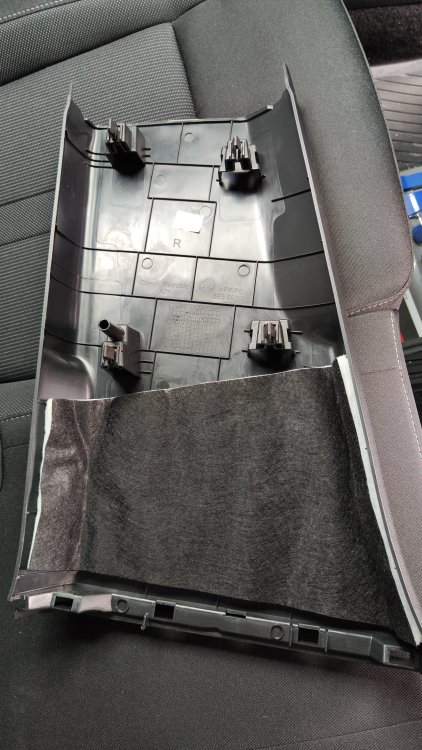
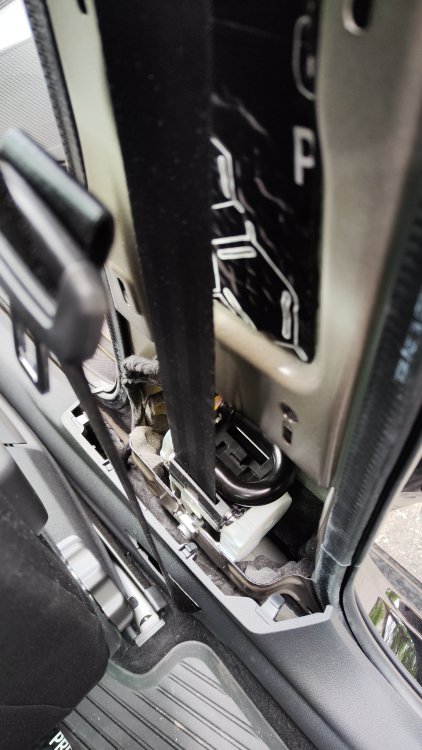
Thanks, much appreciated! I was running out of ideas what to do next, except the passenger side wheel arch, so I tapped my way around the cabin. Noticed that the plastic trim around the tunnel in front sounded thin. The lower trim piece comes off super easily, only one torx screw close to the throttle pedal and the whole piece pulls straight down. I deadened the piece I pulled off and added some insulation inside the upper trim where I could reach by hand.
-
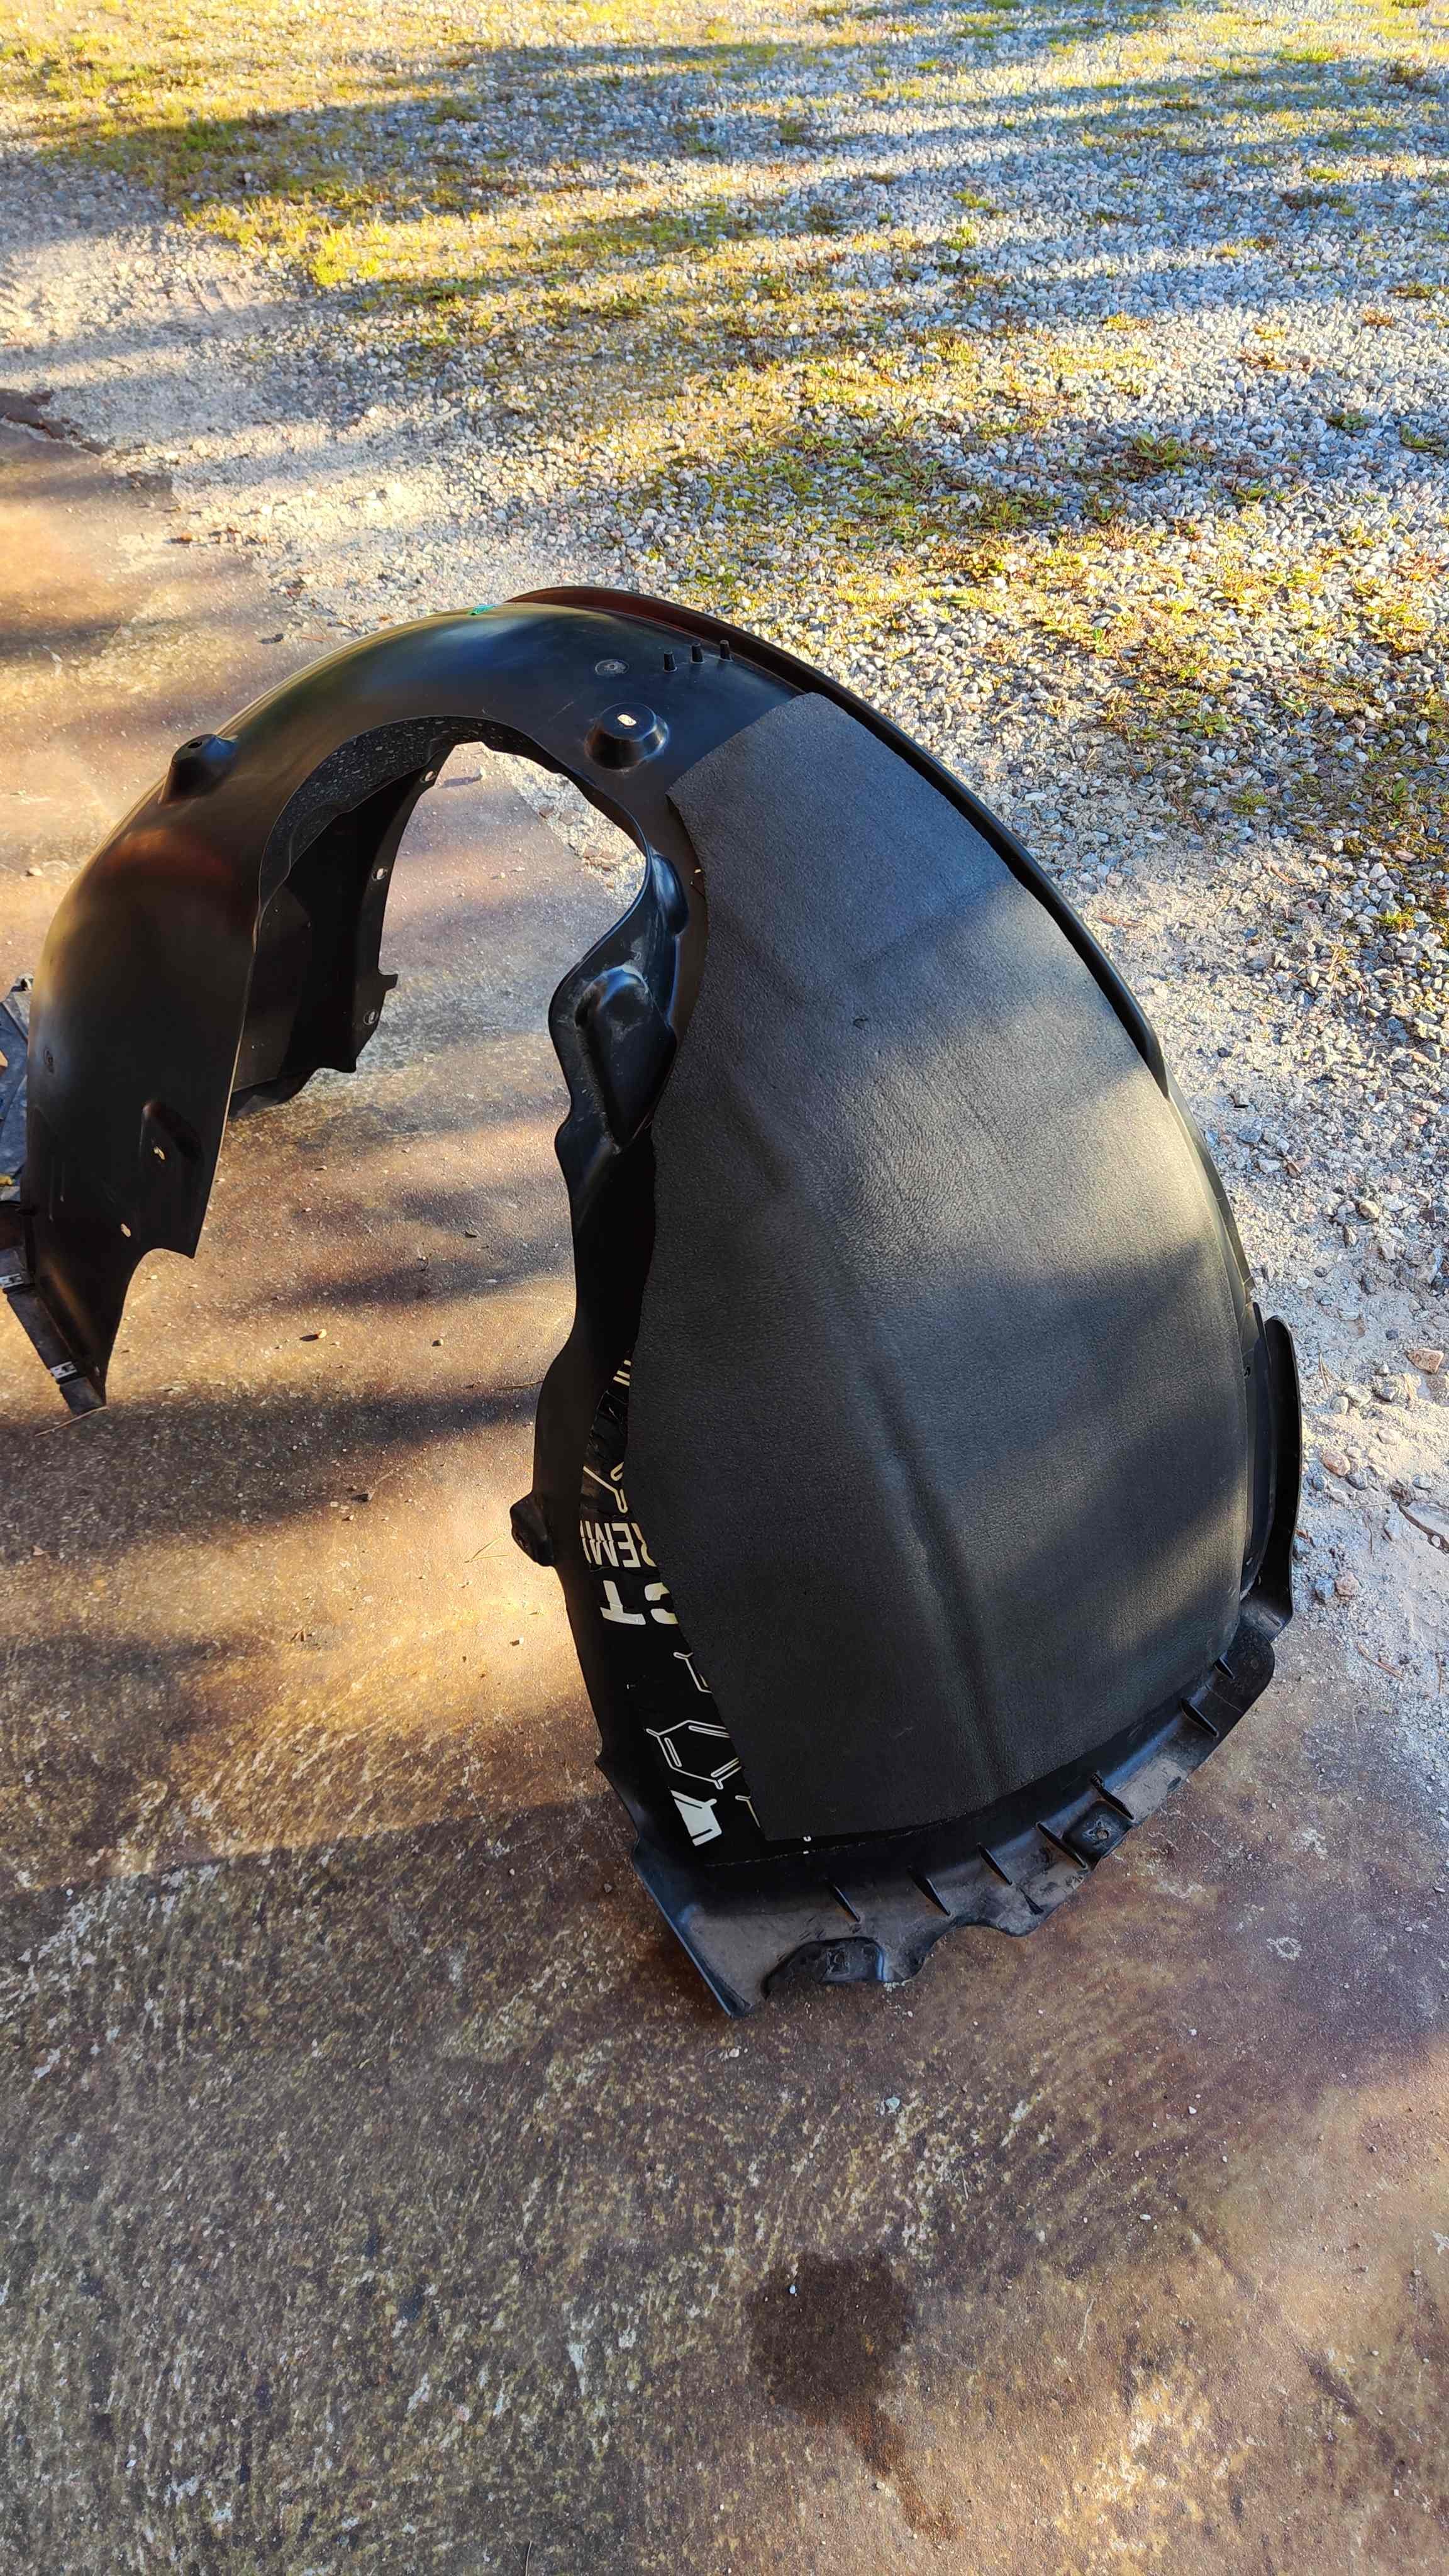
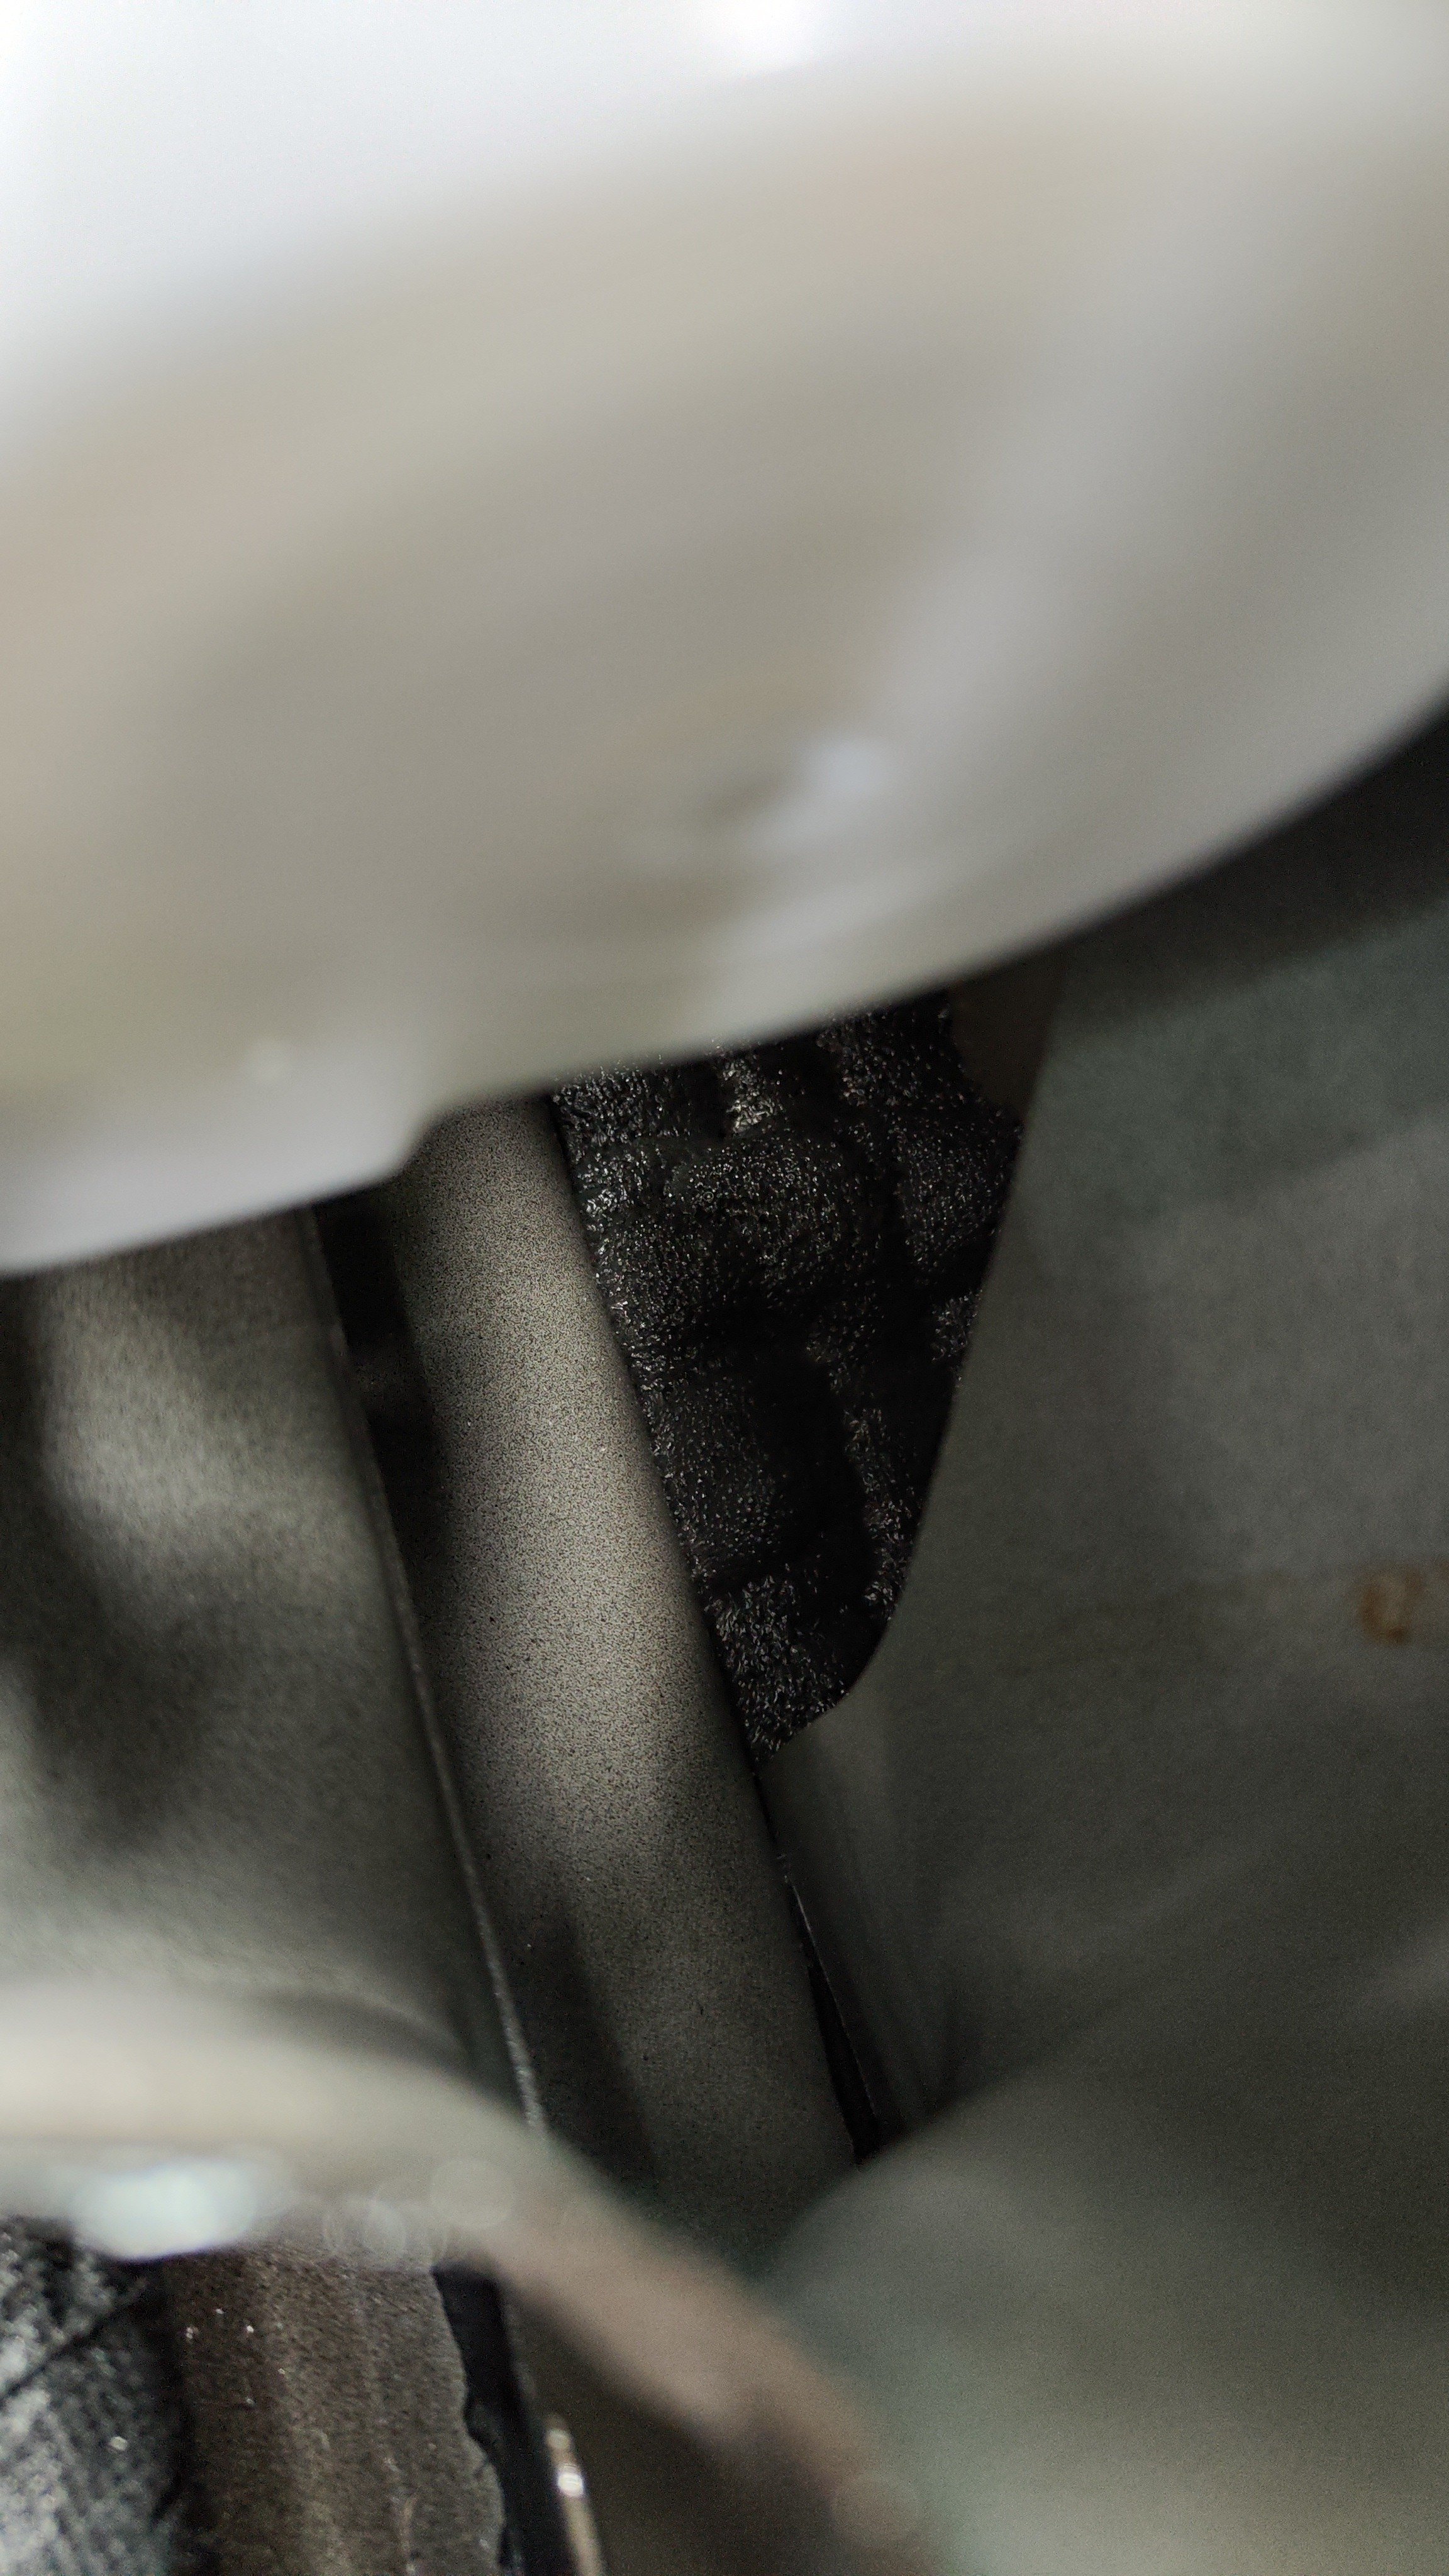
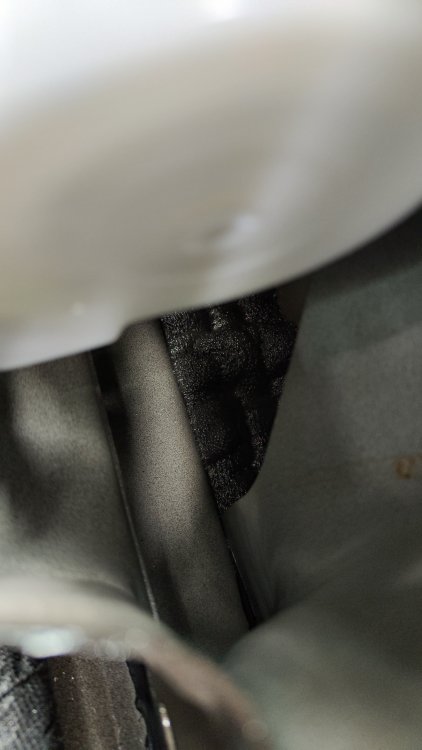
Front wheel arch liner, driver's side: A piece of butyl on the inside of the hollow sounding fender:
-
Same thing. I though I'd wait it out in the car 😃 Well, I waited for 15 minutes and no confirmation that it completed ever came. Went back to the car later, and the confirmation popped up as soon as I turned on the ignition... Perhaps it required a cycle to finish?
-
Closed cell foam on the arch liner plus mats on the exterior wheel arch should probably work. Tyres have to come off, so I might do it while changing to winter tyres later this year.
-
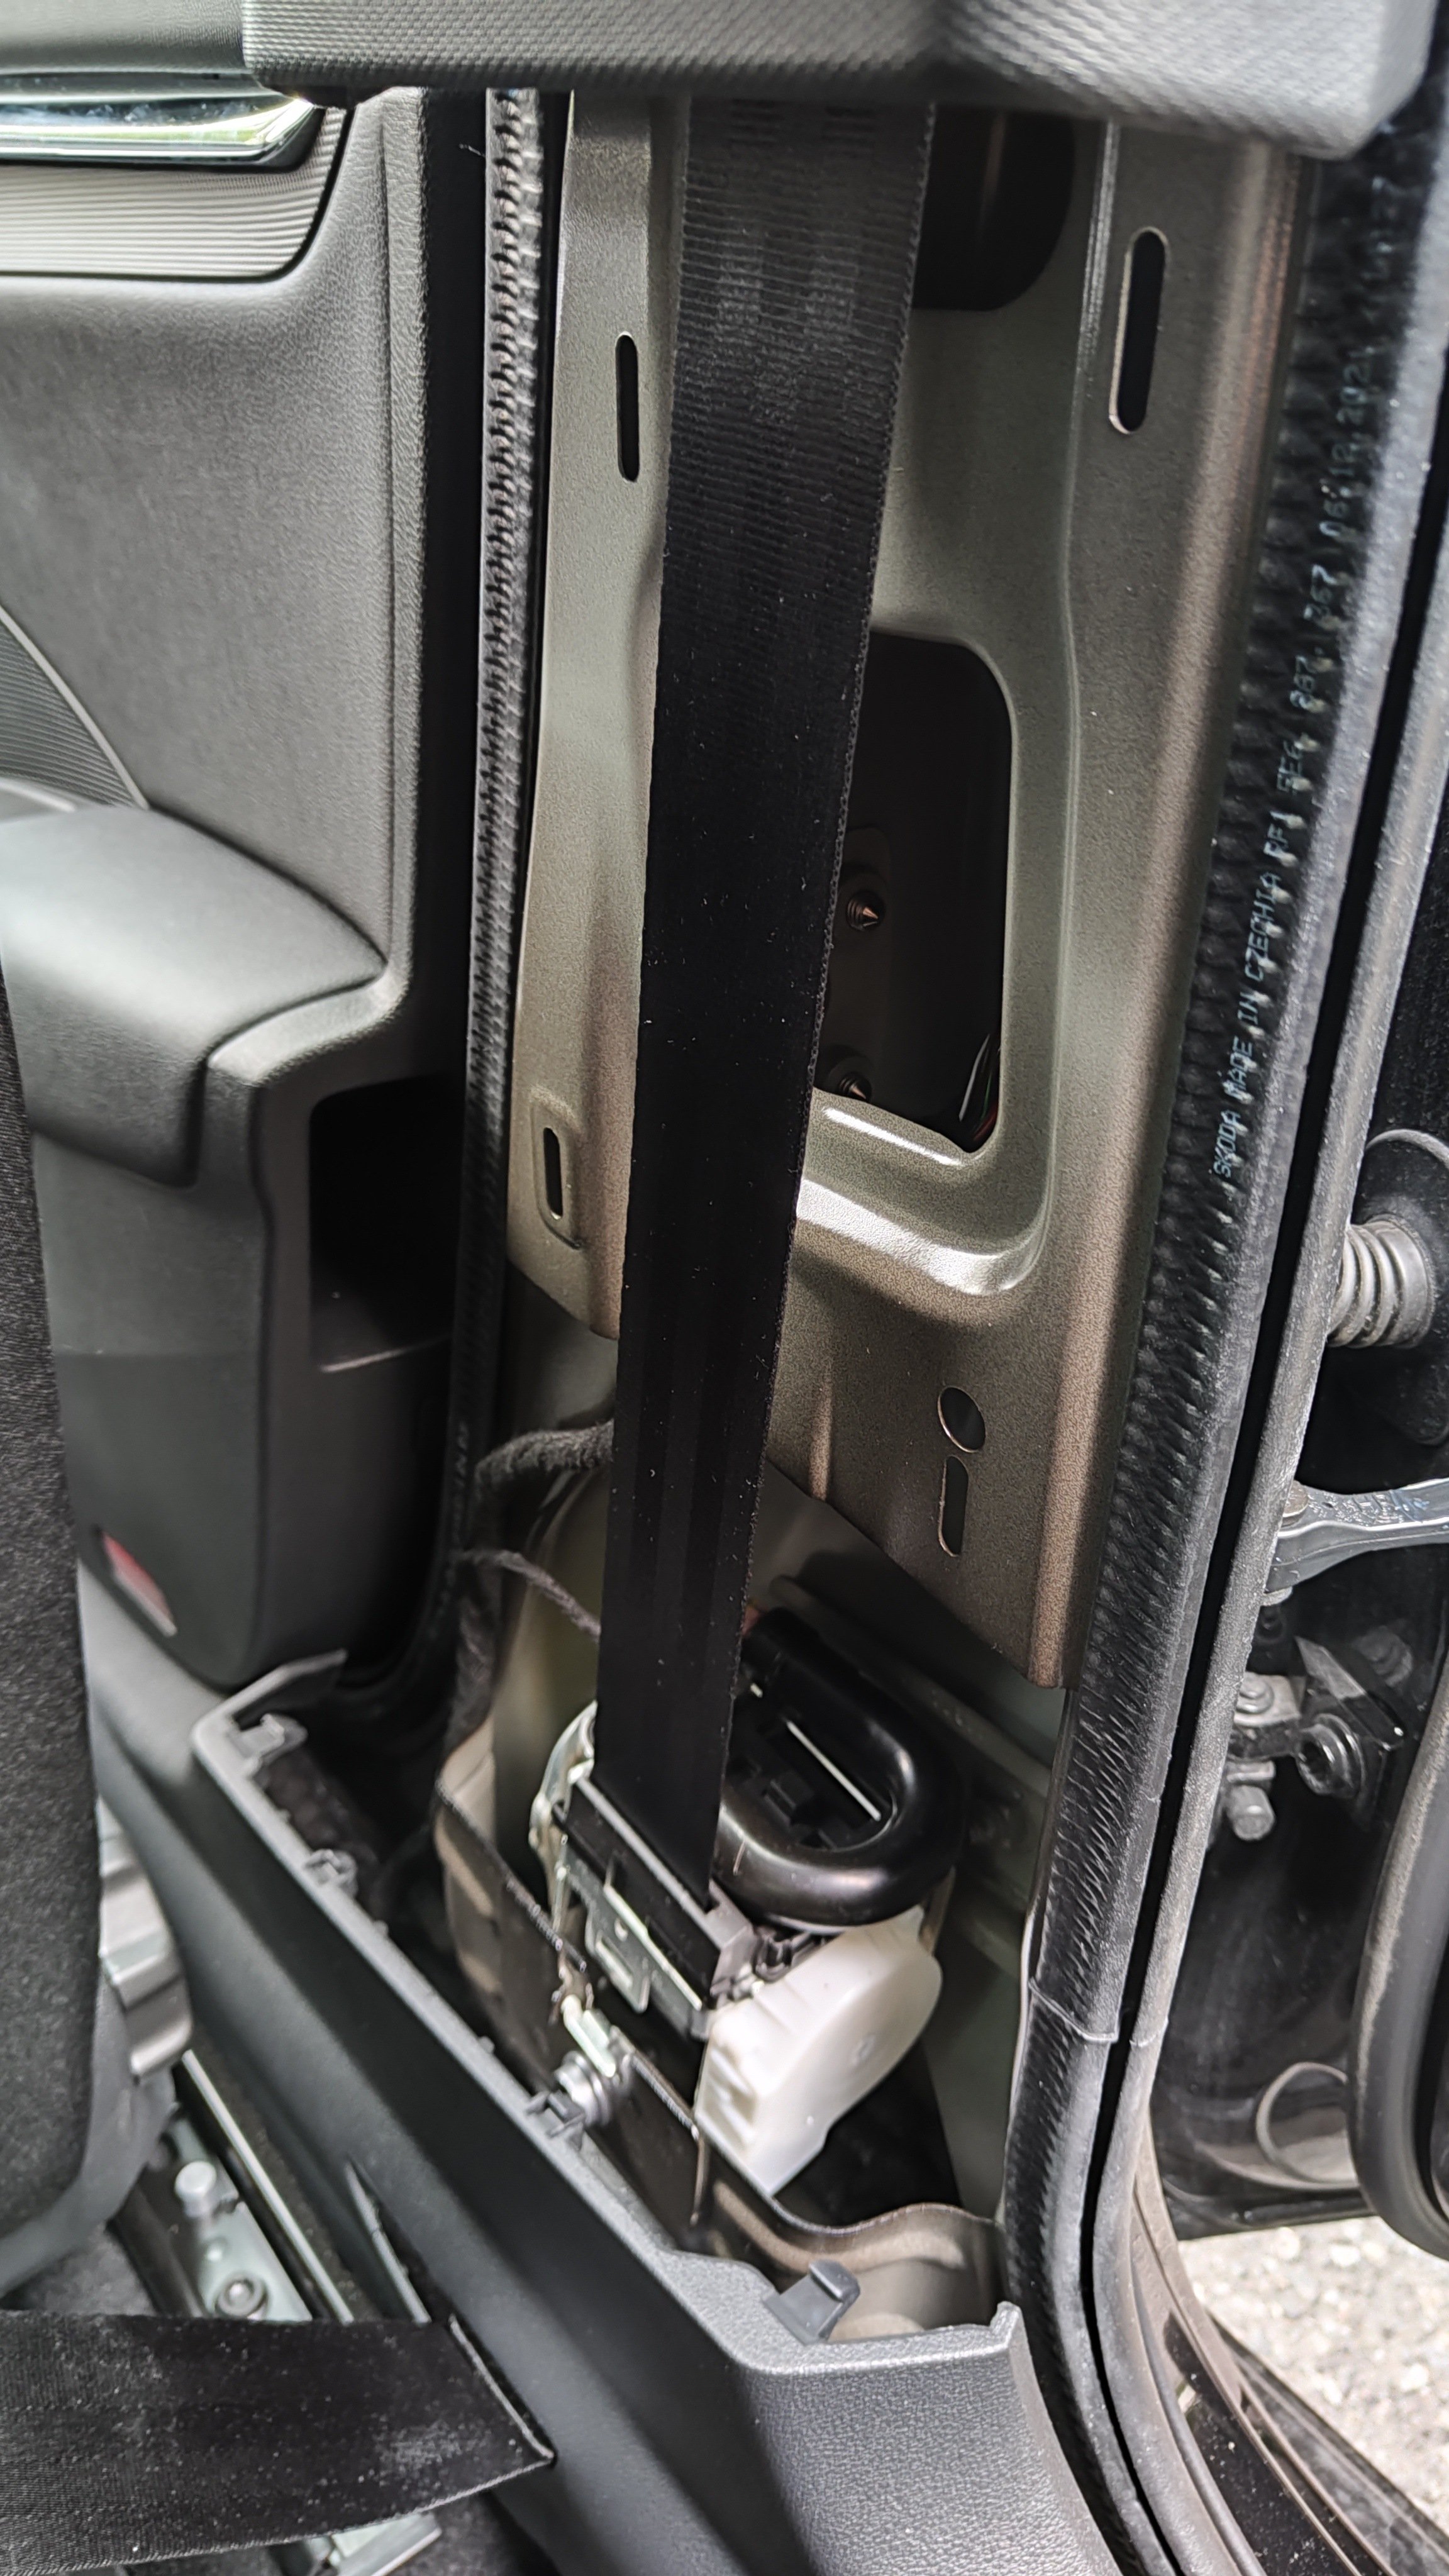
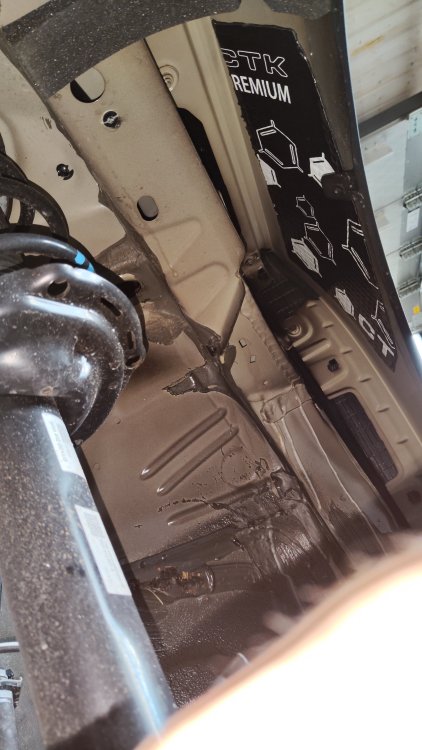
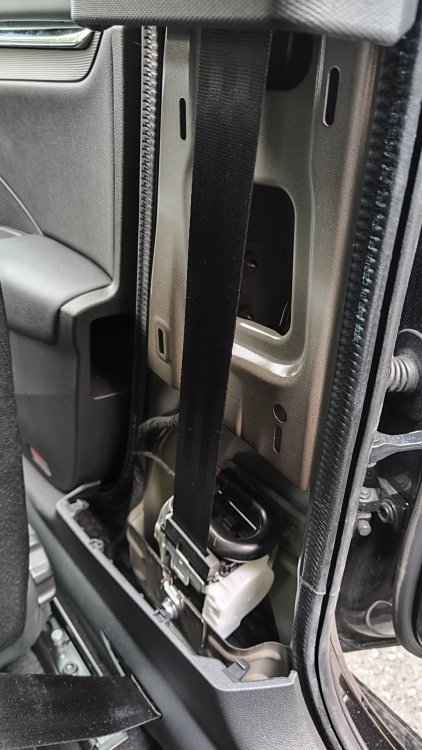
B-pillars done. There was some factory foam in the sill already and some sort of padding inside the lower trim panel. I put butyl mats over the large holes in the frame to stop sound from escaping through them. Also added some acoustic foam in the cavity at the bottom and insulated the trim with closed cell foam. First impression is less wind noise from the side at speeds above 100 km/h.

-
Had a quick look at the passenger footwell. There is already 10mm dense foam covering the wheel arch and firewall from the inside. The horizontal part of the floor in front of the seat felt empty when reaching under the carpet, so that's probably one area to focus on.
-
I've considered doing the front wheel arches from the inside, potentially adding some mass to the footwell floor as well. I'd like to do two layers with butyl mats under and for example 6mm closed cell foam on top, but I don't know if the carpet has enough play for the foam to fit. Not sure how the footwell trim comes off yet, I'll have to read the manual and have a look.
-
Nothing in the rear door cards. Judging from and comparing with the front doors, retrofitting would be difficult if not impossible. There are just too many permanently fixed points that have to come apart for that, unfortunately.
-
I removed the factory insulation pad only temporarily while installing the deadening mats. The CTK mats are specified for temperatures up to 150°C. It will never get remotely that hot behind the cover.
-
Around 300€. The difference is easily noticeable, especially at highway speeds. All the annoying rattles are gone as well. Doors have a better thud to them when closing them from the inside. I still had 10 sheets of butyl mats left over, so I did the underside of the bonnet today. Can't say it made a huge difference to the cabin noise, but opening and closing of the bonnet sounds a lot firmer now, not as tinny as before. Oh, and I added some felt pads to the boot lid stoppers. These stoppers are the newer, supposedly fixed ones, but the lid was still clunking slightly when driving over bumps. The felt pads made it quiet.
-
You completely misunderstood him. He is trying to connect to OBD11, and he has 2-factor authentication set up on his OBD11 account. This has nothing to do with the car... Get your old phone and log in using a code from your 2FA app. When logged in, add your new phone to the app's 2FA.
-
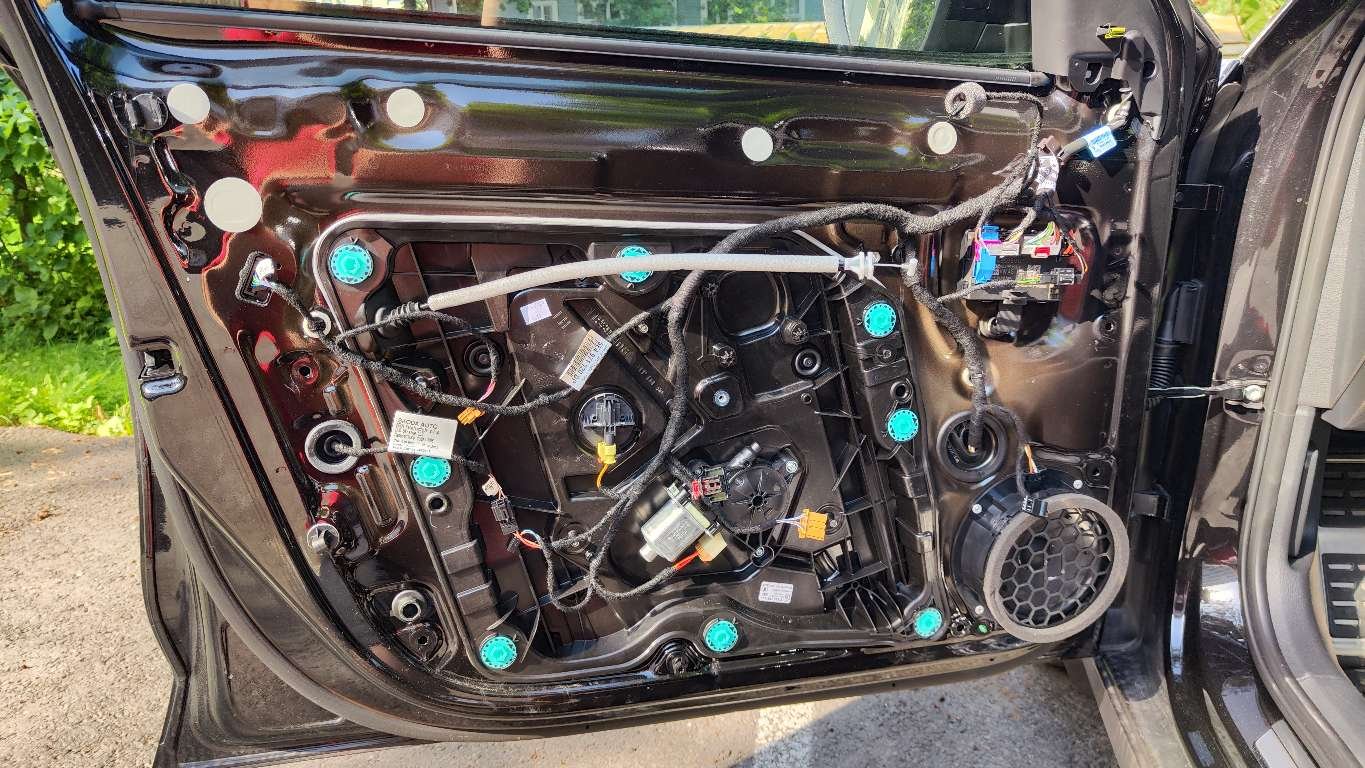
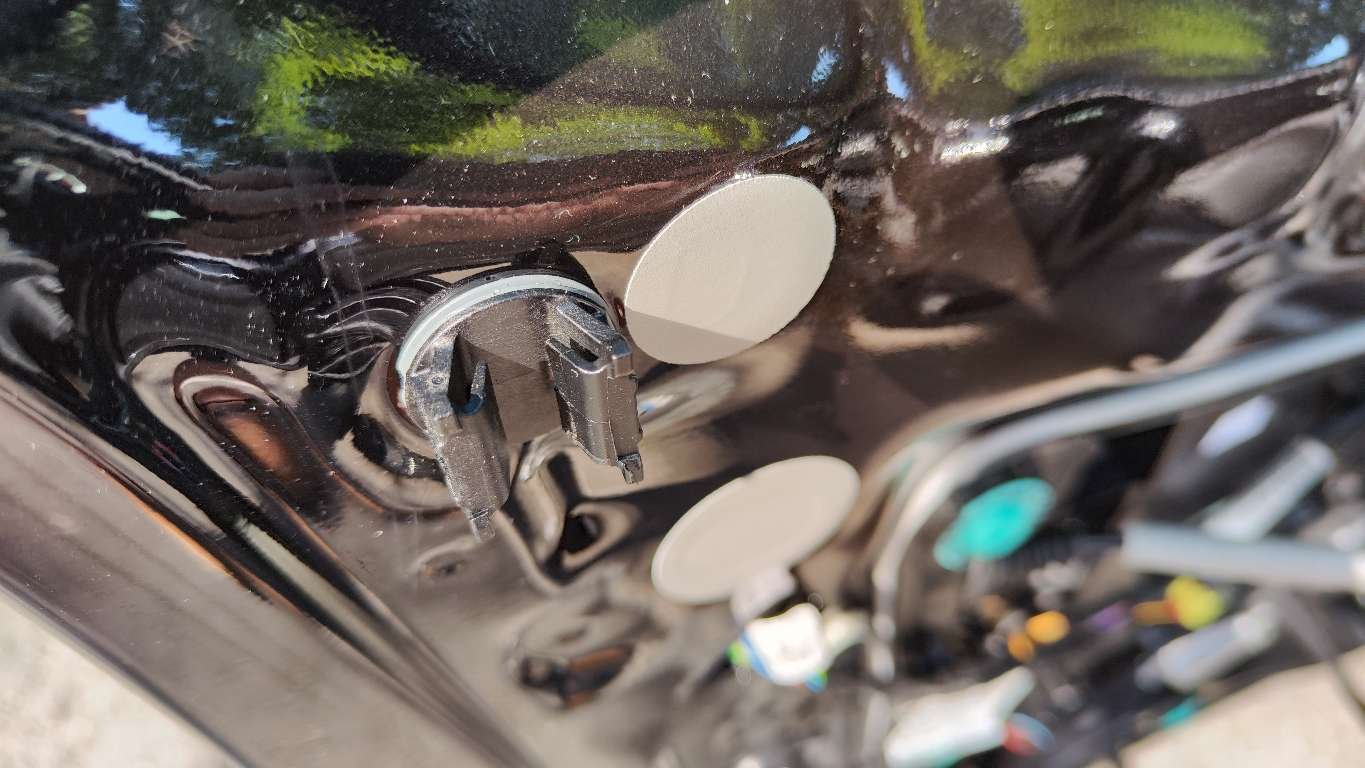
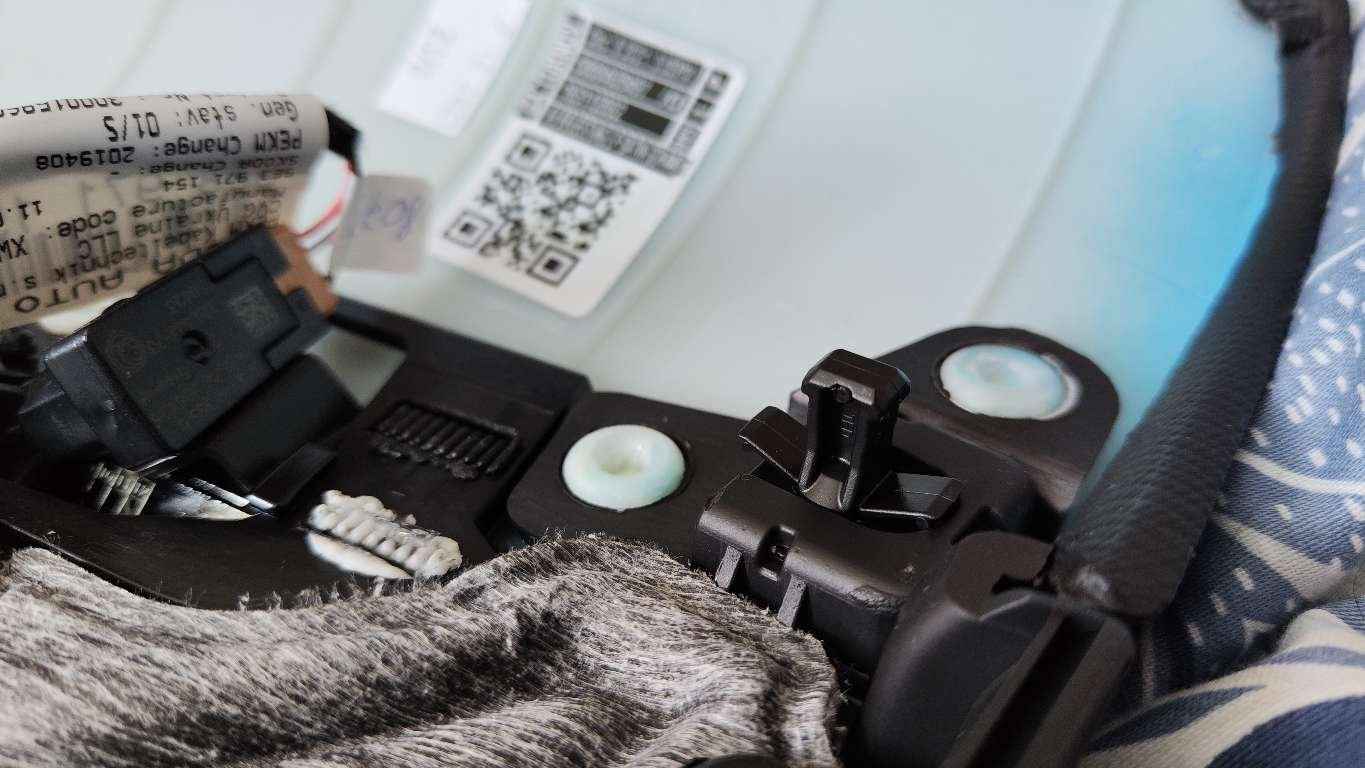
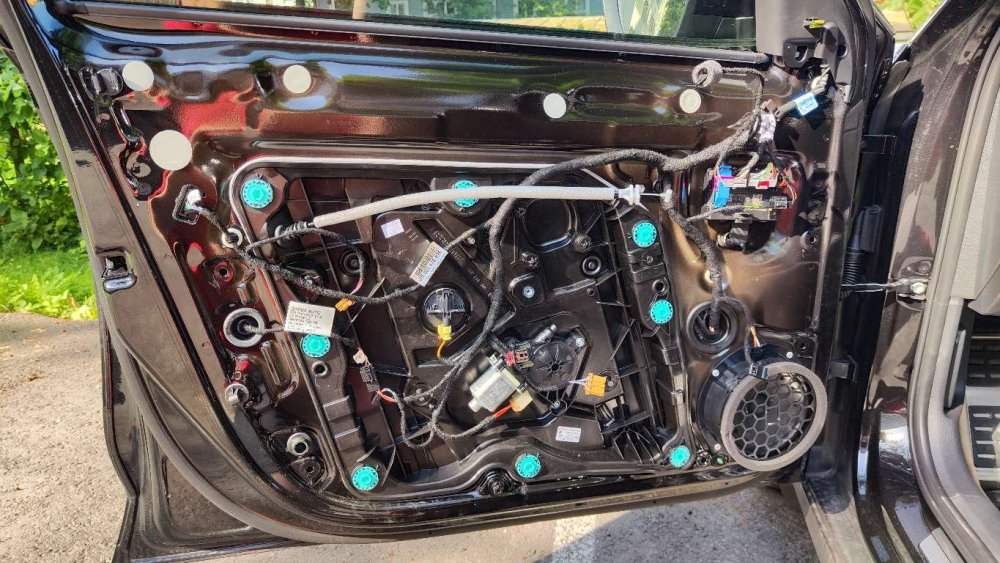
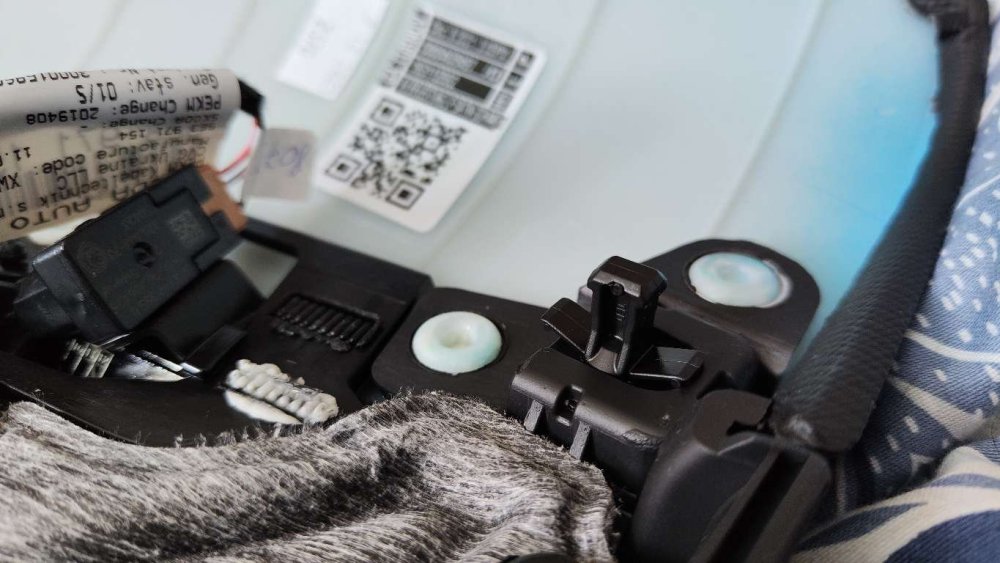
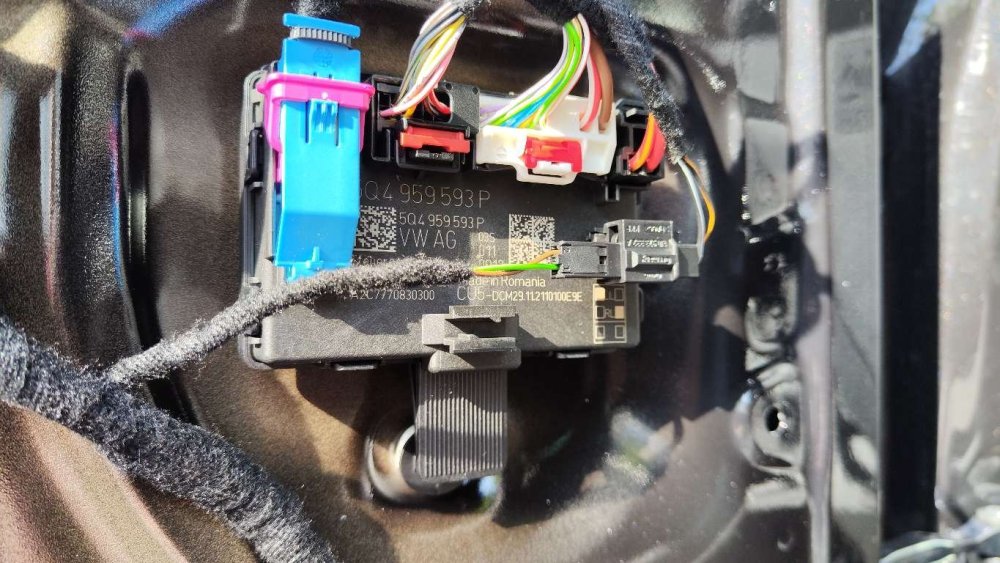
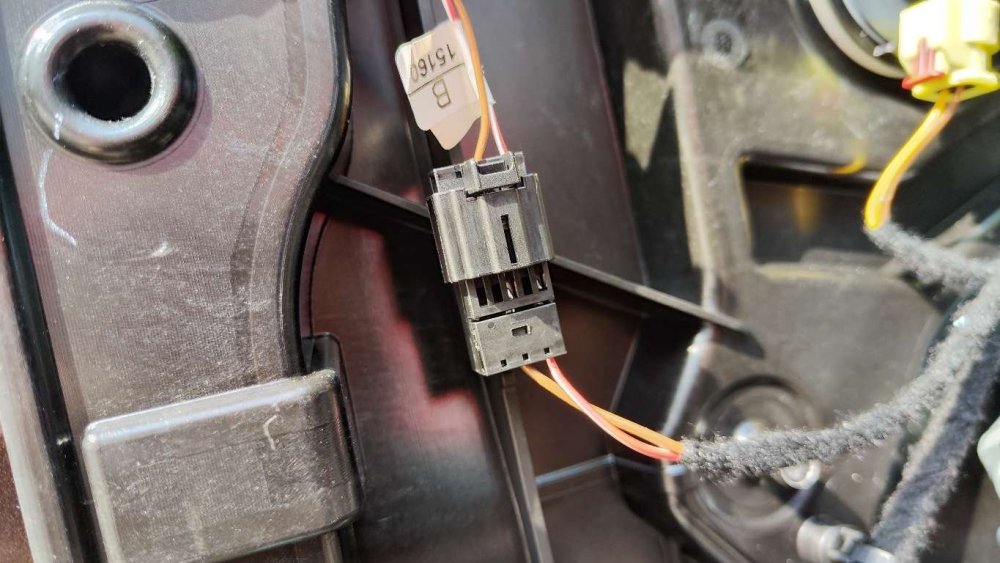
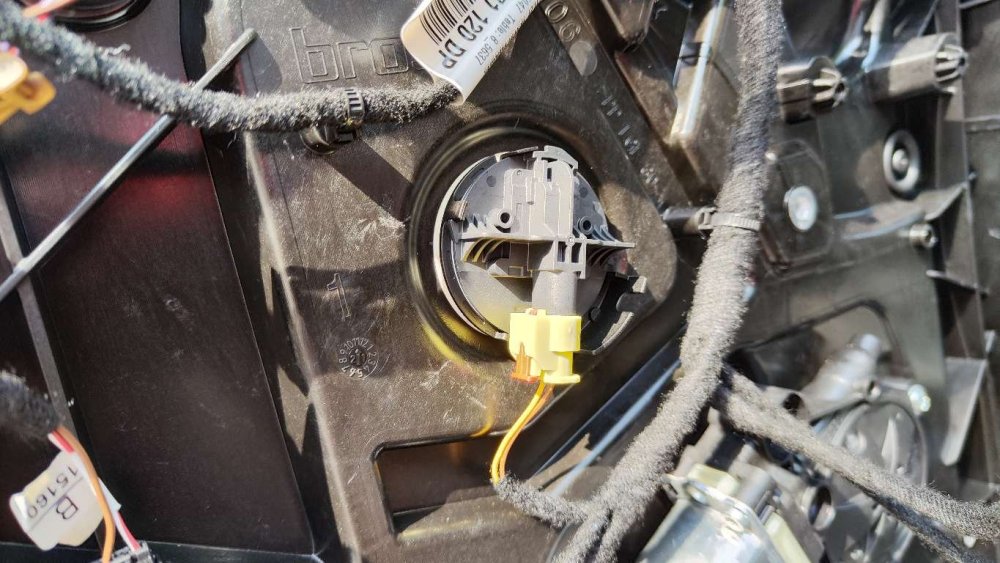
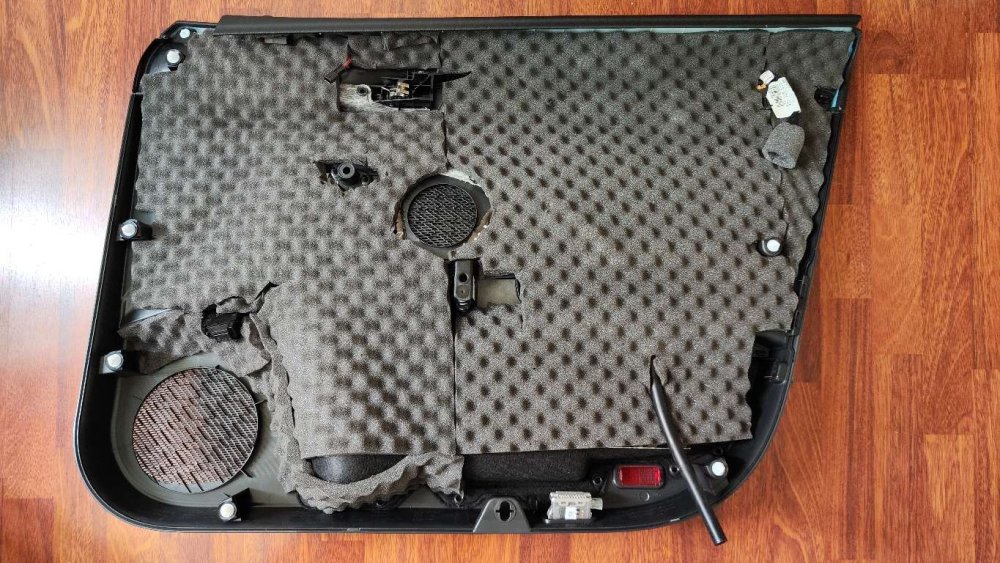
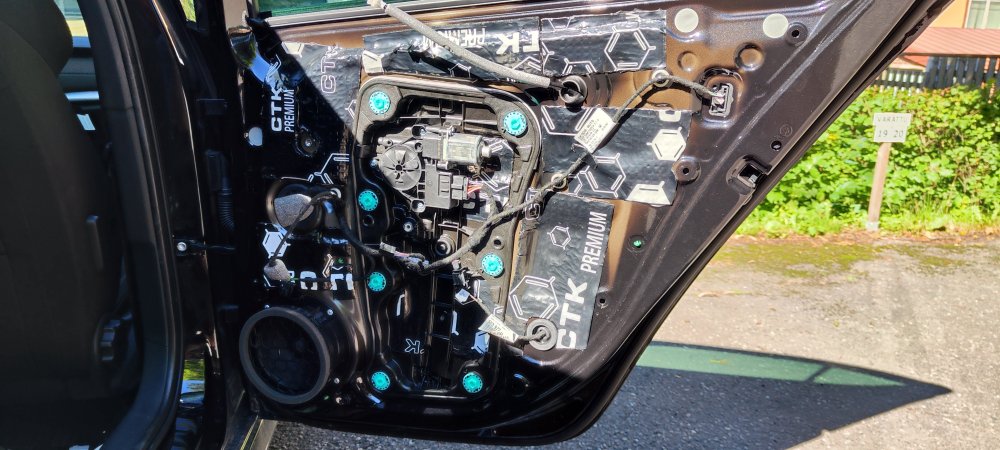
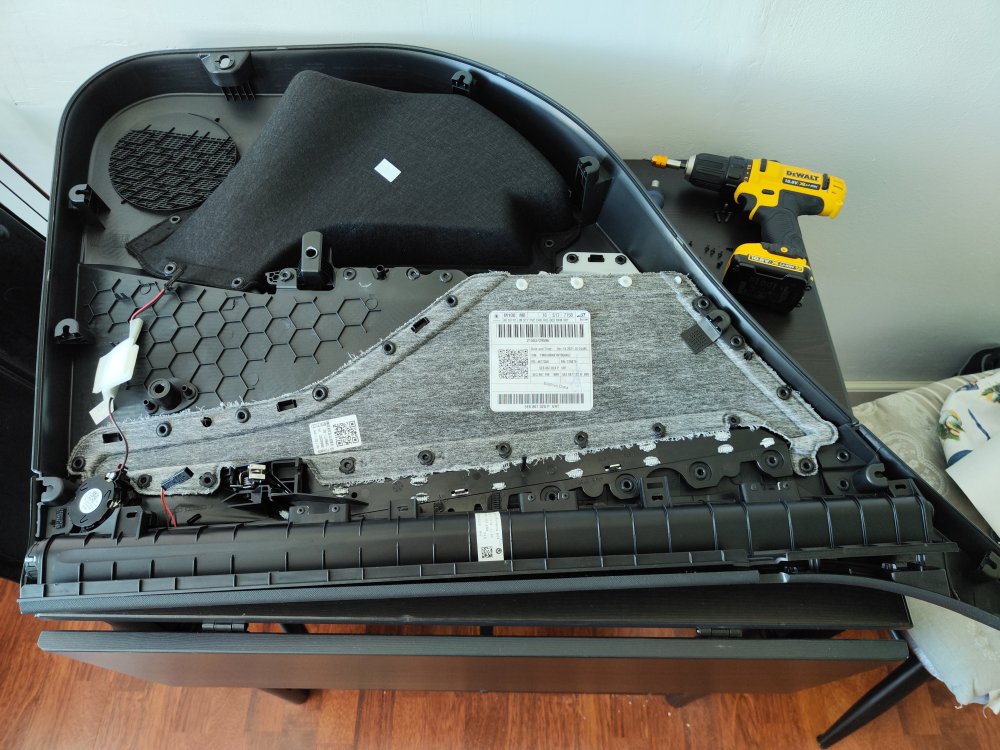
That's it. Doors, trunk and rear seat done. As promised, here are some pictures of the front door. Overview Crash clip 1, screw type. Crash clip 2, releases by lifting the door card. Anchor on door card for crash clip 2. Door control module. The connector on the right side (brown/green) was sliding back and forth and rattling. Another potential source of rattle. Pressure sensor for the airbag system. This should be left connected and untouched. Door card finished. Didn't put any material close to the LED projector as it has a heatsink that needs some air around it.


-
Worth adding: The front passenger door also had an additional control module (made by Continental). One of the connectors was so loose in its socket it would rattle just by giving it a little nudge. All doors have had plastic holders that rattle when the wiring looms move. All rattles disappear when these are tightened up with either foam or a piece of butyl in the right place 🙂 If I remember, I will take pictures of these areas when doing the driver's door.
-
Did the passenger front door today. Mostly the same procedure as the rear doors, except the front doors have two "crash clips" as VW/Skoda calls them. They are both located on the rearward facing part of the door. The bottom one is released by taking out a screw behind a small lid that pops open easily using some thin enough item. The top one is a one way clip that can't be "pulled" out unlike the other rivets. Instead it slides open when you lift the door card out of the window channel, no idea trying to force it out by pulling, it will break for sure. My 10€ plastic trim removal set has proven itself invaluable as I've been taking apart the trim in different places. No broken clips yet. Only thing broken are the small "hooks" on the inside of the door handle cover, but they don't really contribute to anything, the cover stays tightly in place only with the push-in clips.
-
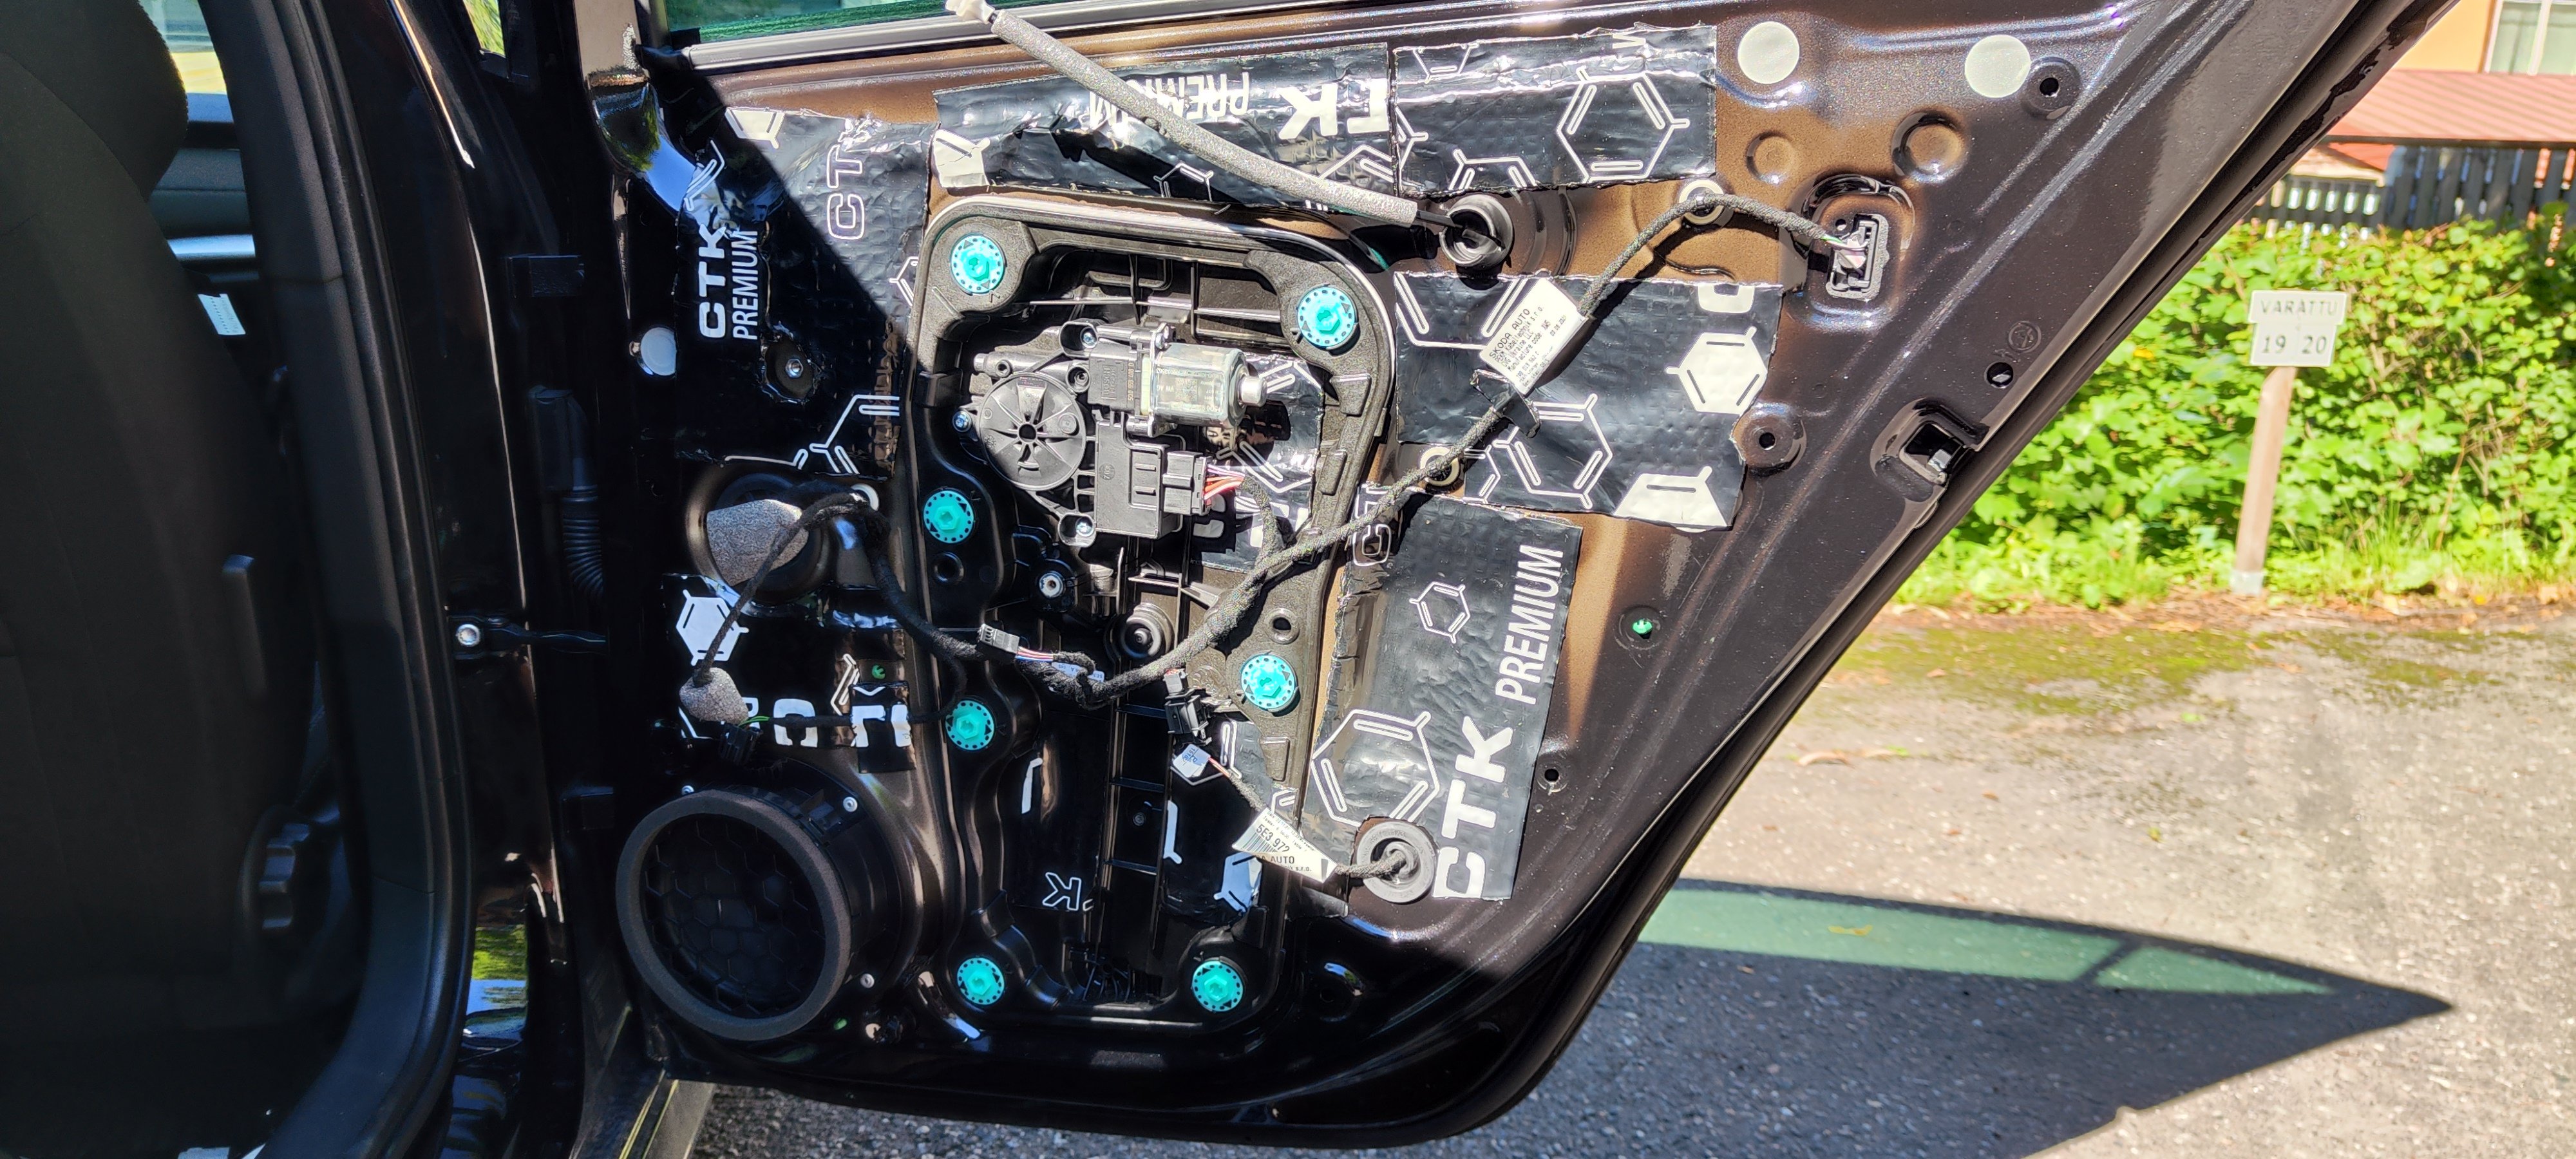
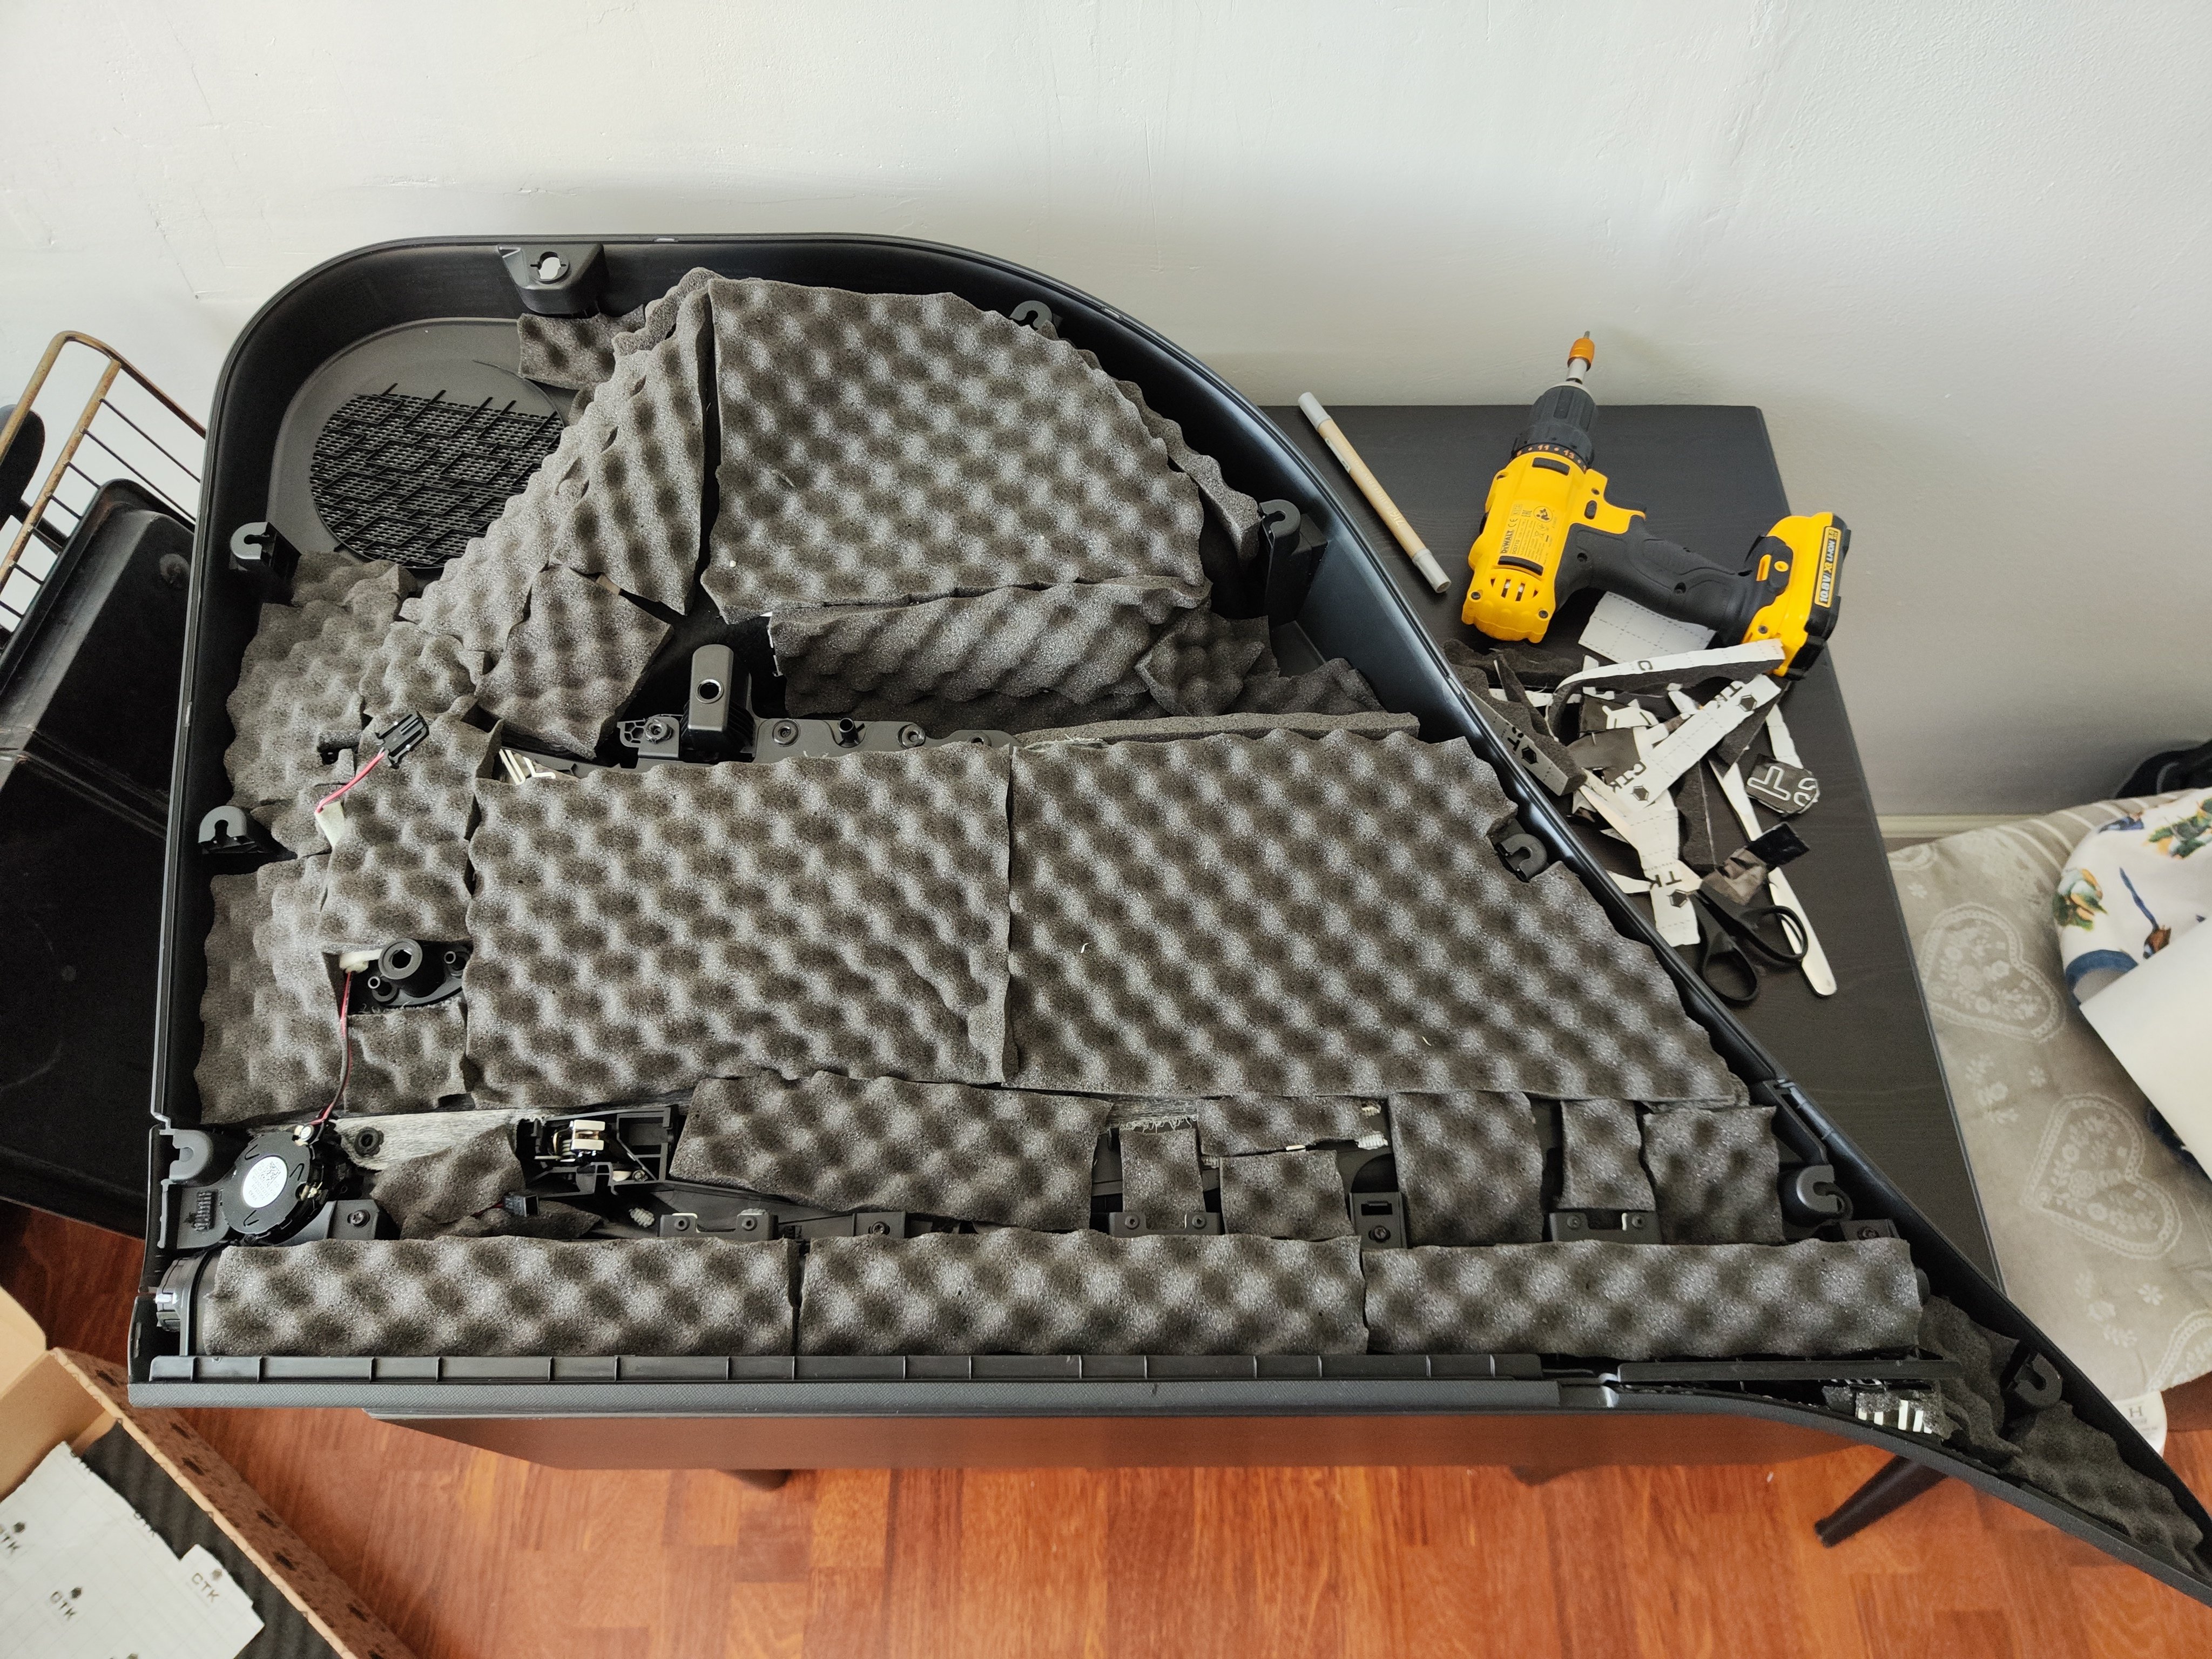
Proceeded to the doors today. Started out with the rear right since I've had an annoying rattle coming from that one. Upon removing the door card I discovered there's no way of getting to the outside panel anymore, without removing the window and the whole lift assembly. I applied 2.2mm butyl mats to the most resonant parts of the inner frame. The door card didn't have any sort of deadening material on it, so I applied butyl on the worst sounding surfaces and topped everything off with 15mm CTK WaveFix acoustic foam.

-
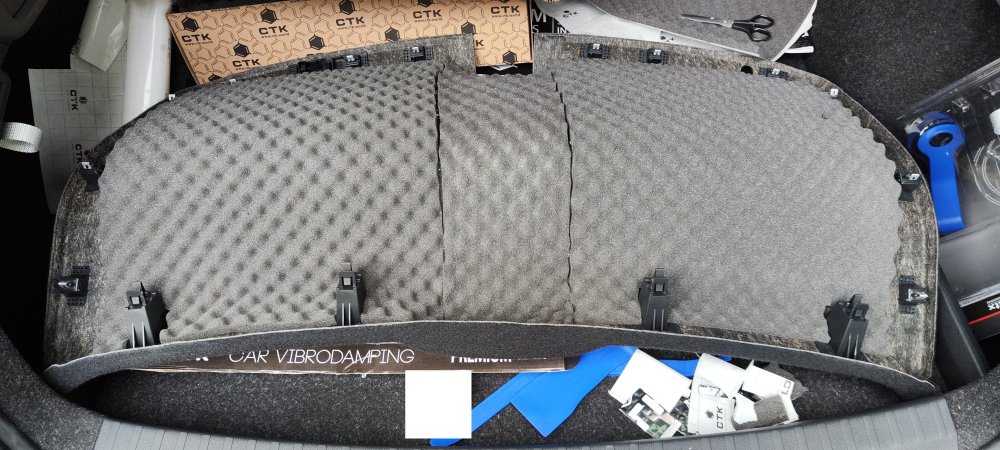
Will start doing the doors soon. Today I did the boot lid. Added butyl mats in the cavities with a lot of flat surfaces. The trim got some butyl mats and acoustic foam on top.

-
It's recommended to clean the surface with some isopropyl alcohol for example, but for surfaces like this where the mat is pulled down by gravity I don't consider it mandatory. I just went over the area with a dry rag and the mats stuck really well.