
lewiswal47
Members
-
Joined
-
Last visited
Everything posted by lewiswal47
-
I once had a start/stop error happen because of a dodgy LED brake light I had fitted. Anything can cause the BCM to have a meltdown. If you had the EPC light on, you MUST have had a fault code stored. You say your friend "cleared it", well, they cleared the stored code which causes the EPC light to turn on.. You are best monitoring it, if the light comes back then scan every module in the vehicle and pop back with all the codes, regardless of how small they may be. If not, consider it a momentary blip..
-
For my Fabia I just used a multimeter to test which fuse had permanent 12V for the perm (red usually) line, and ACC/Switched 12V for the ACC (yellow usually) line.
-
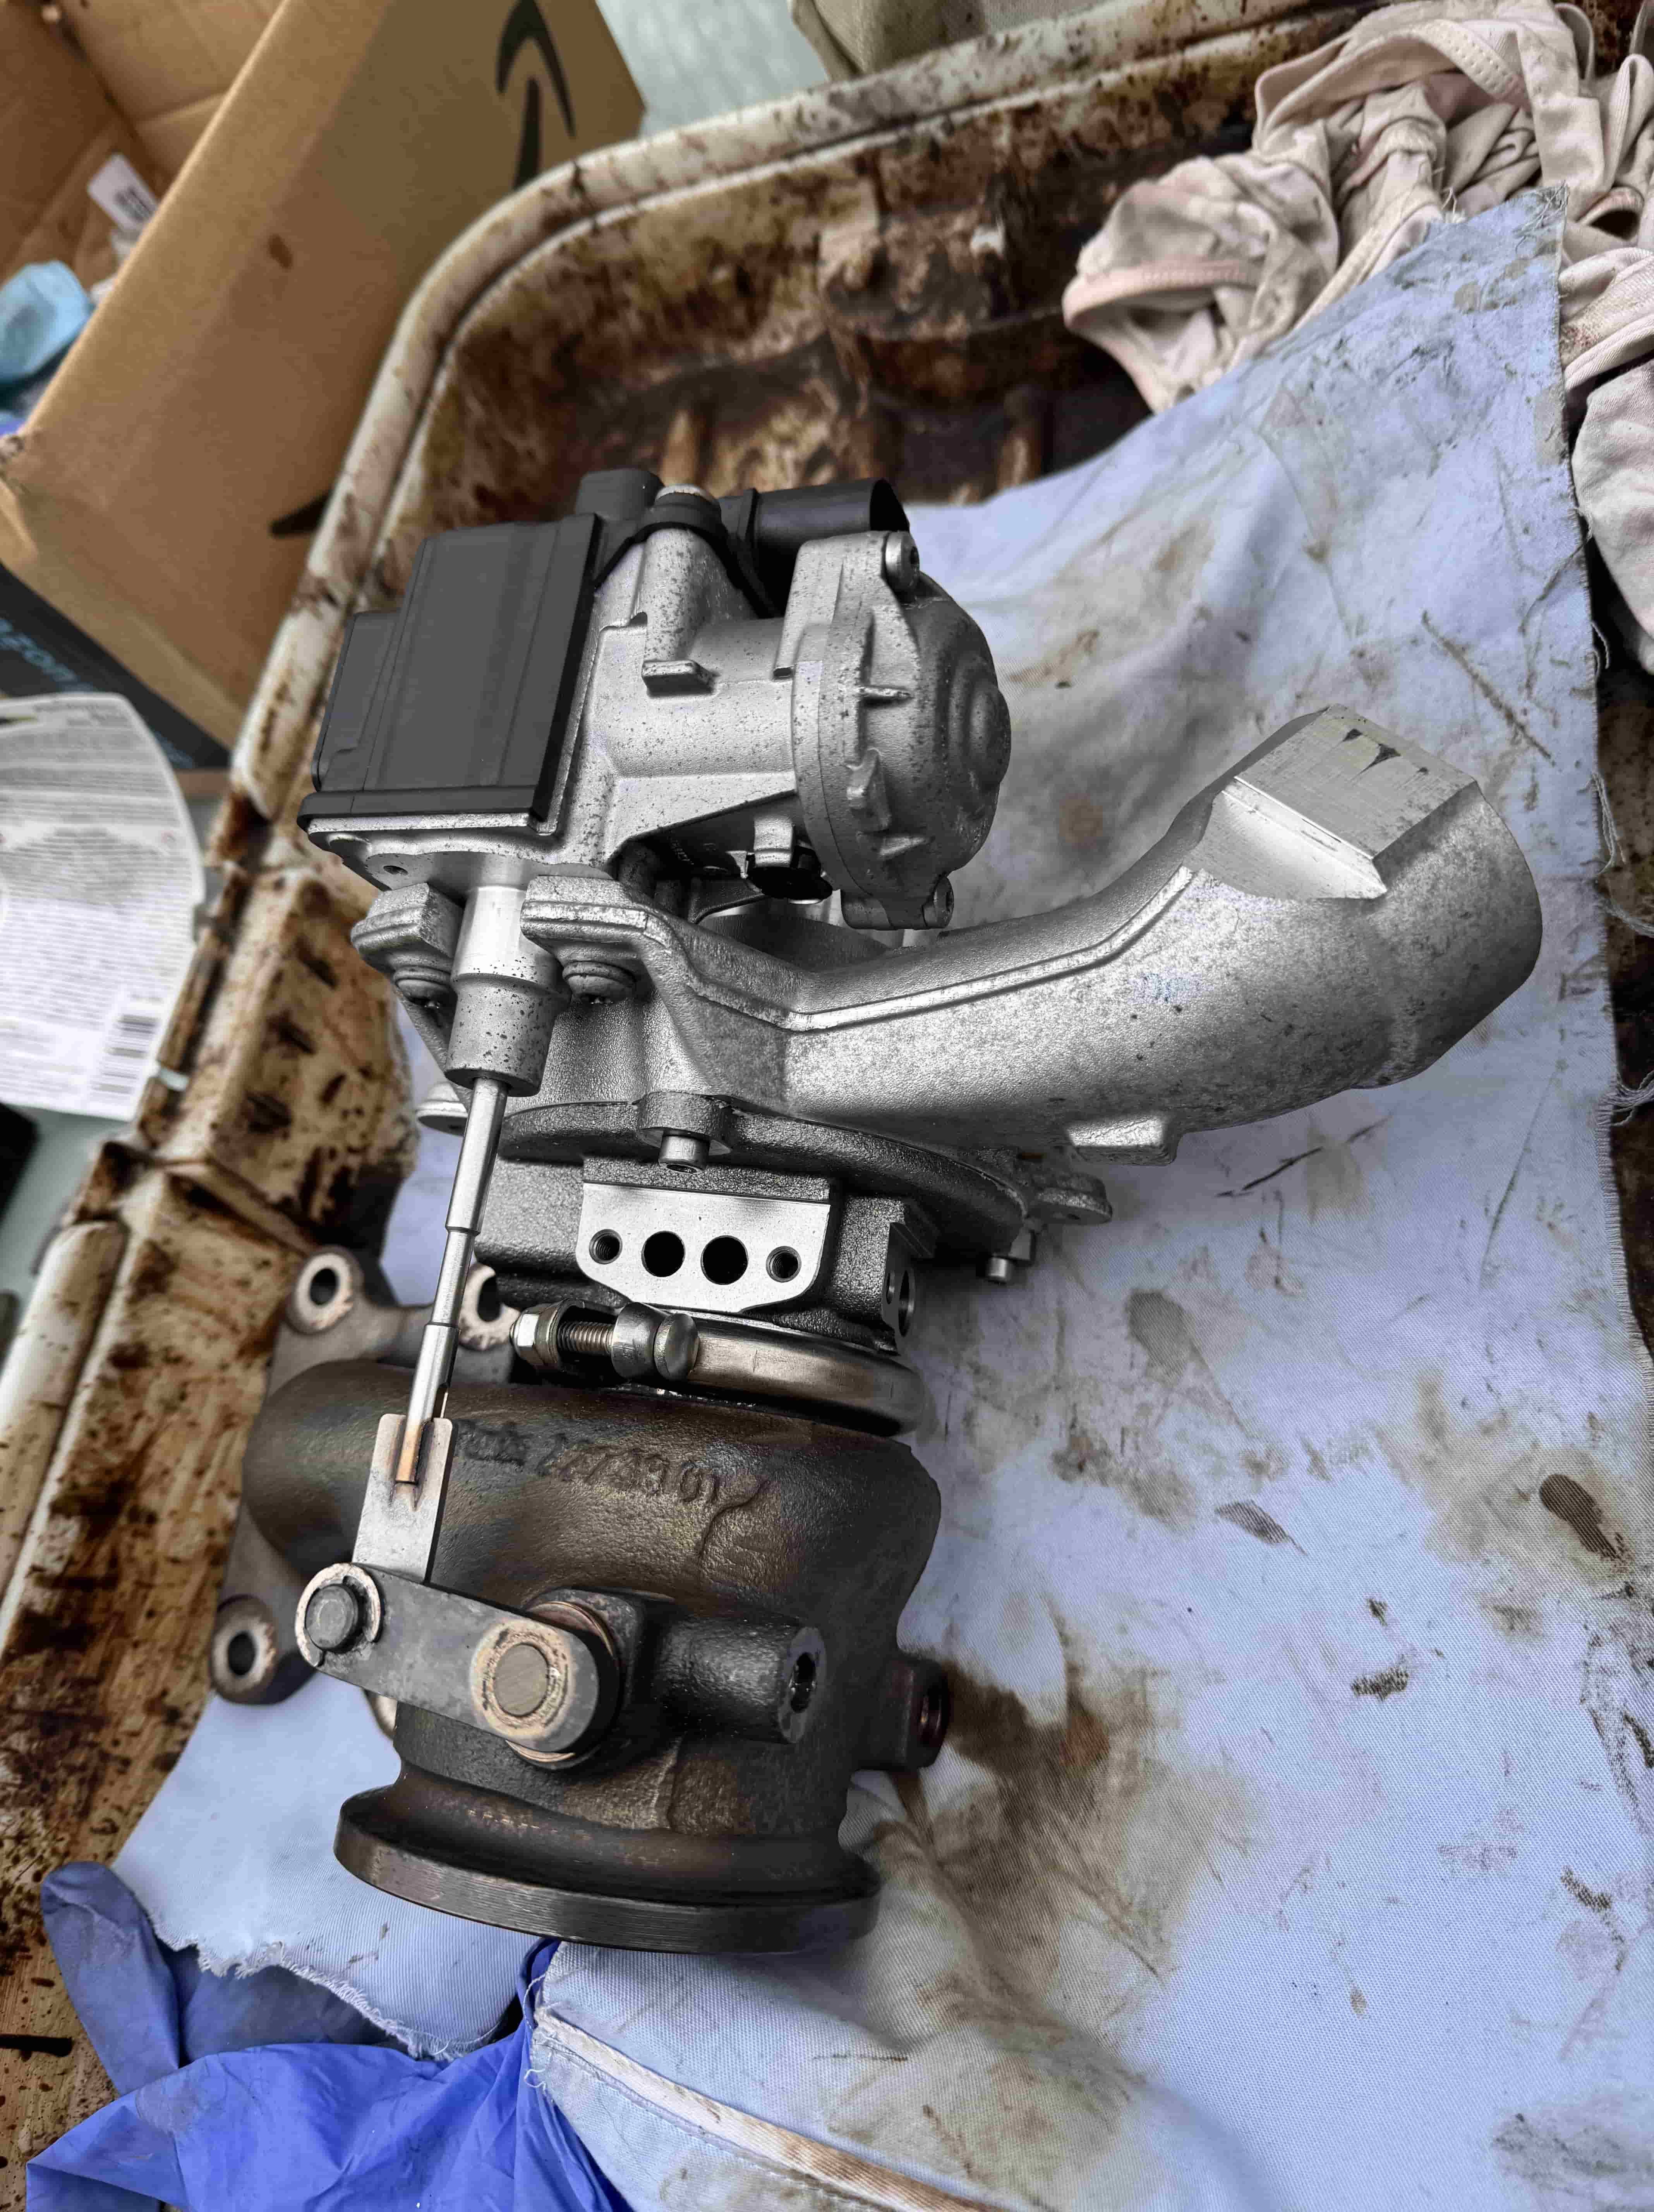
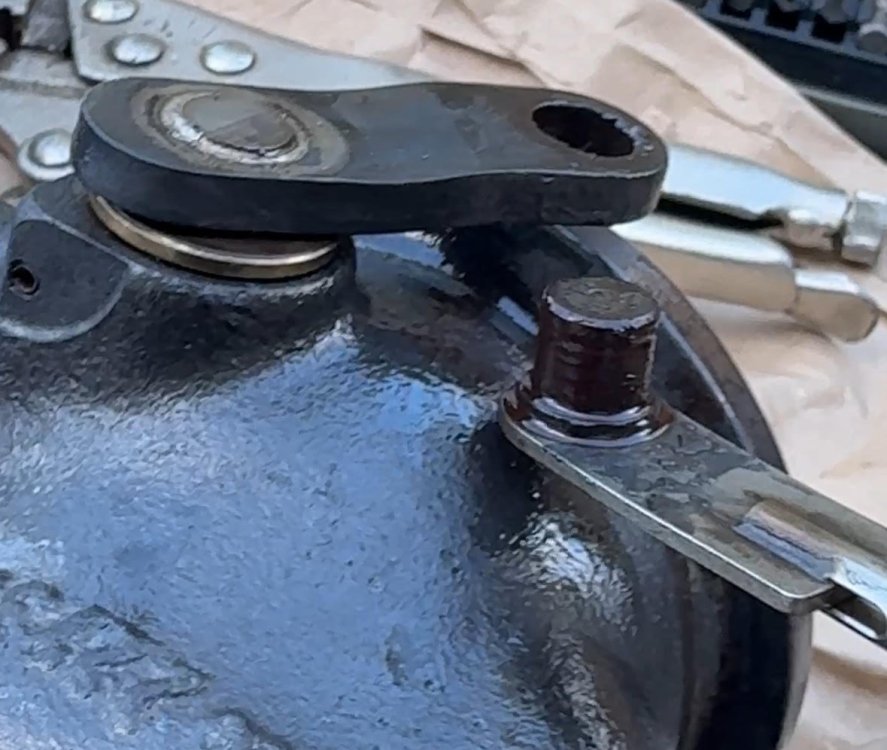
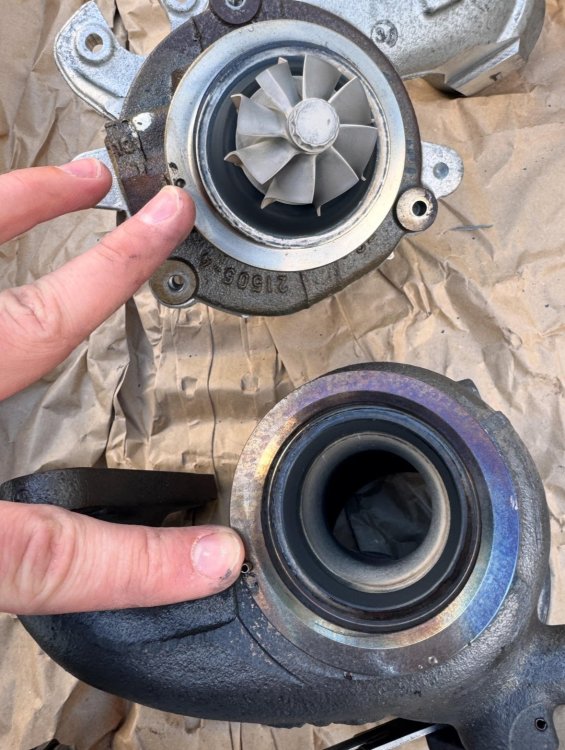
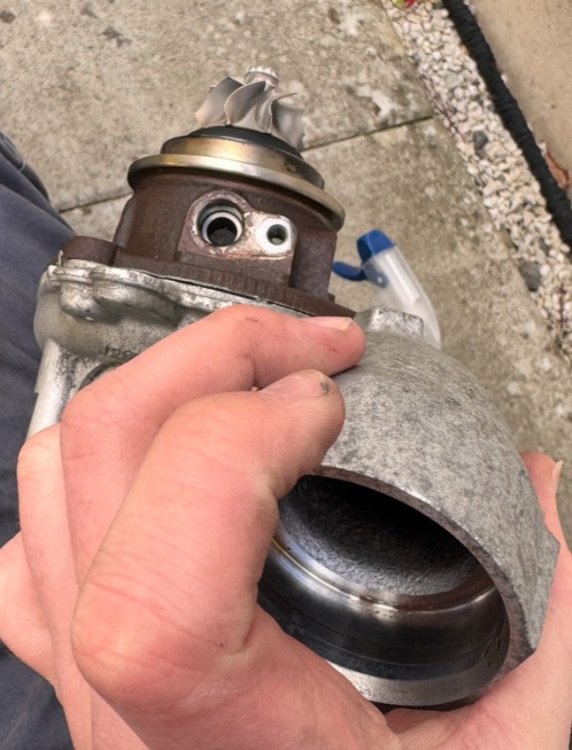
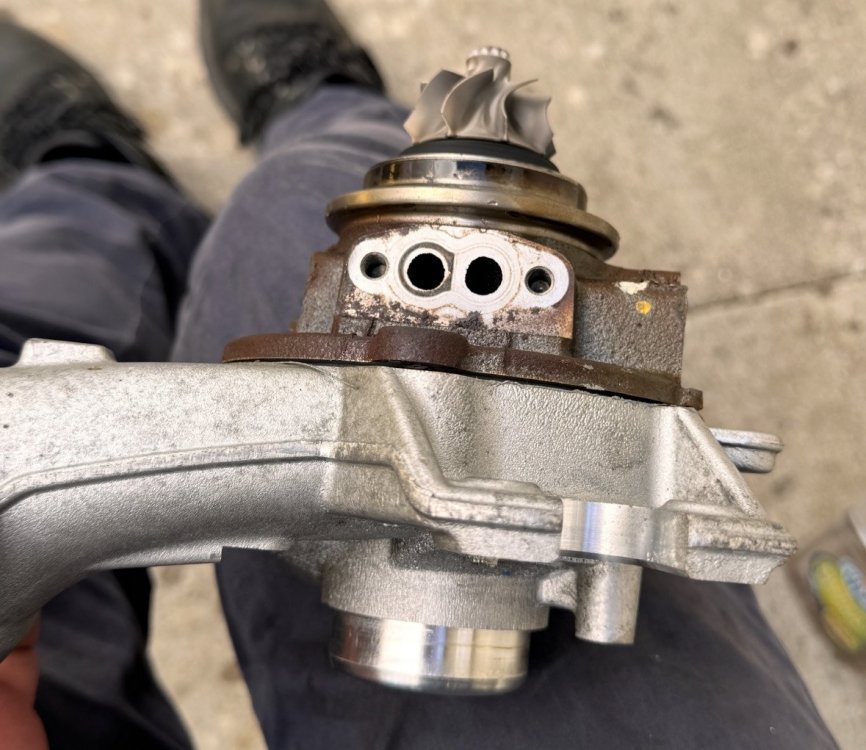
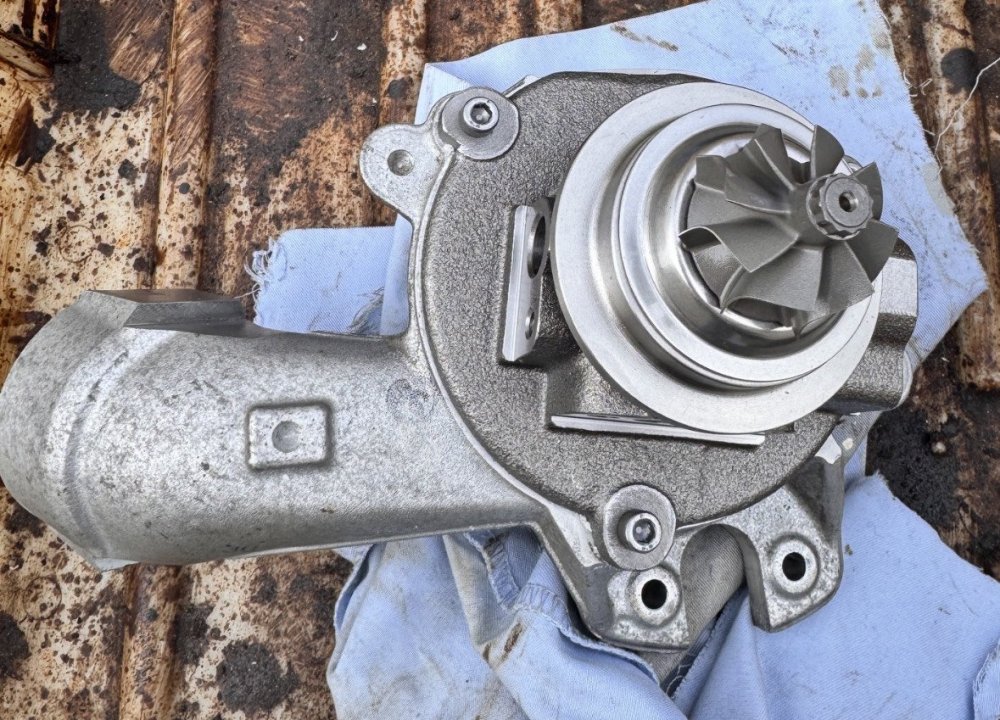
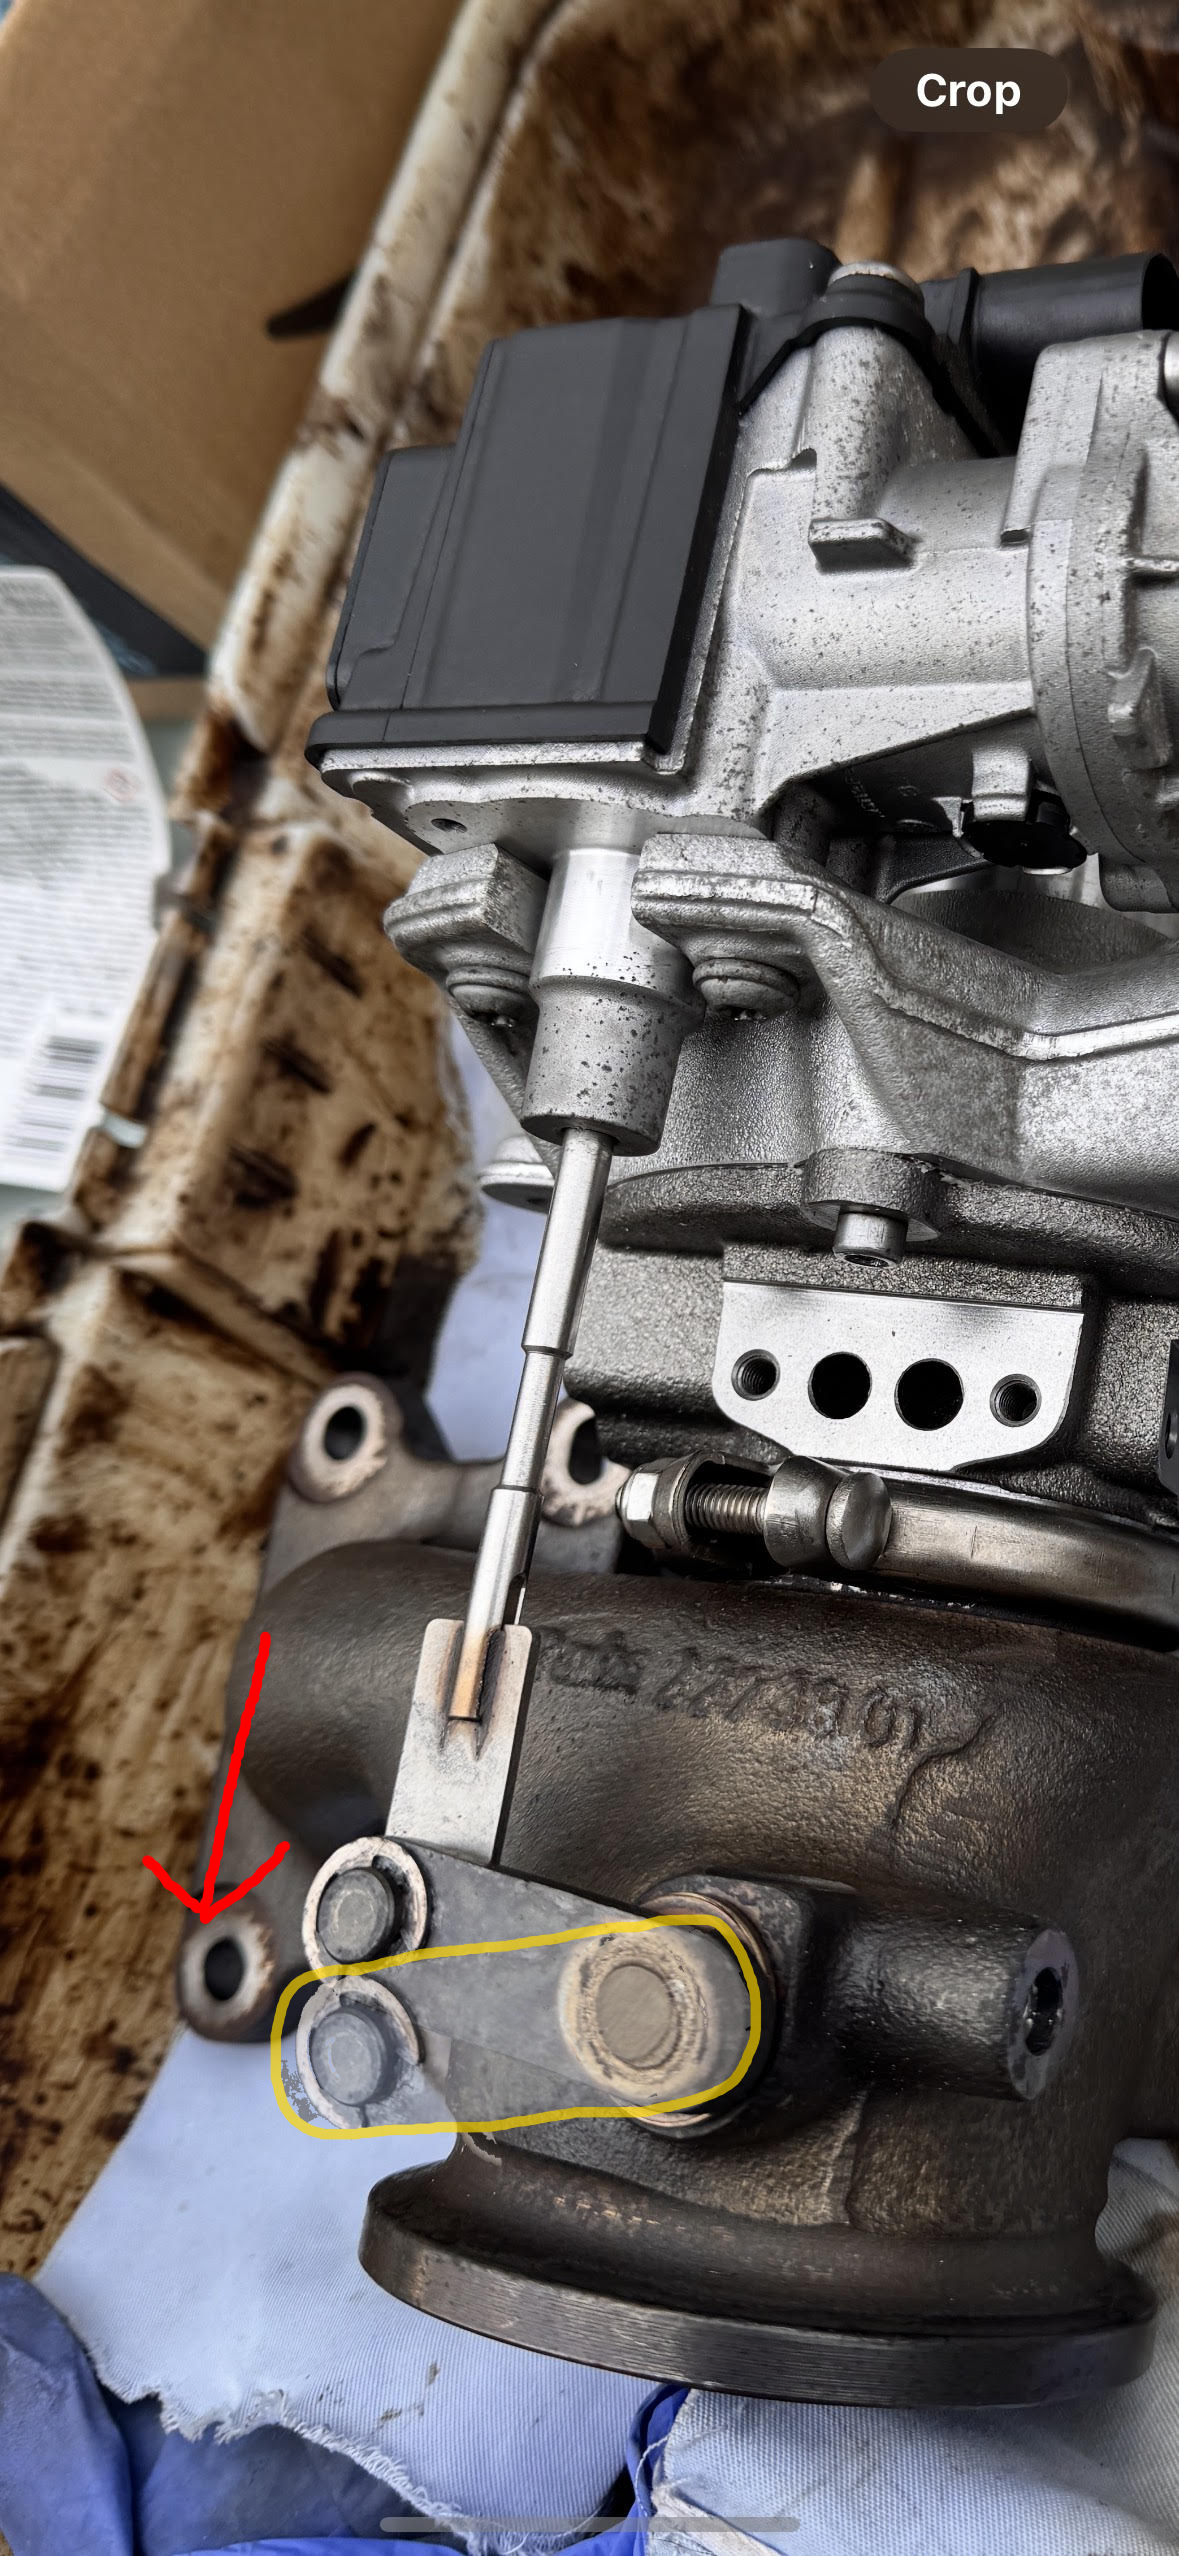
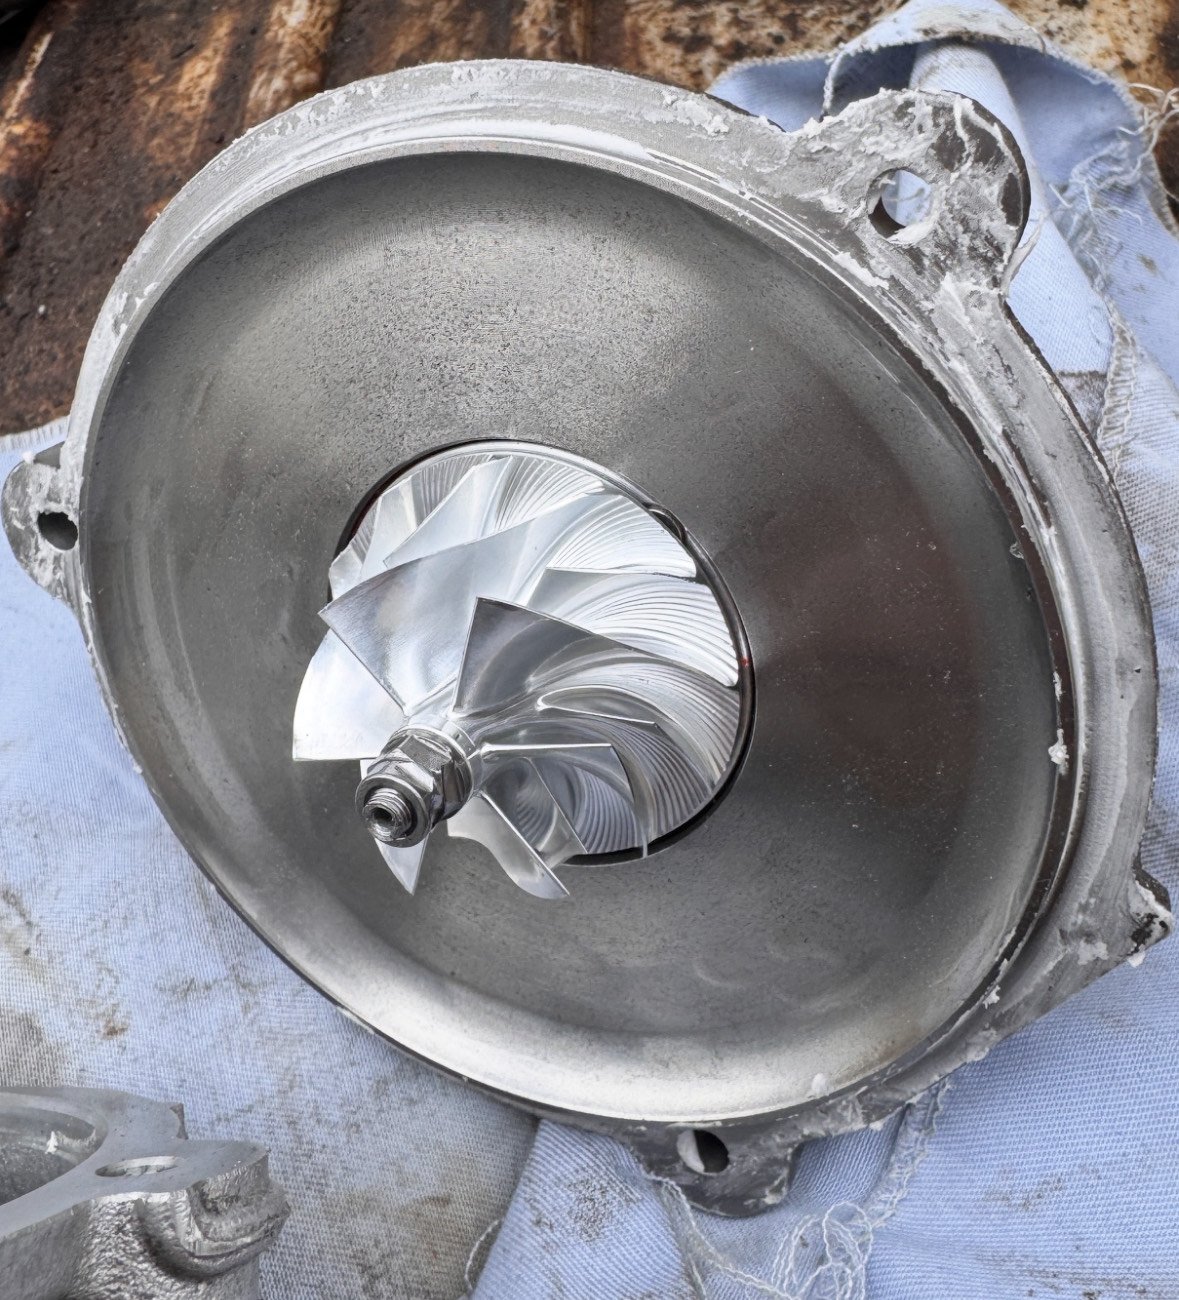
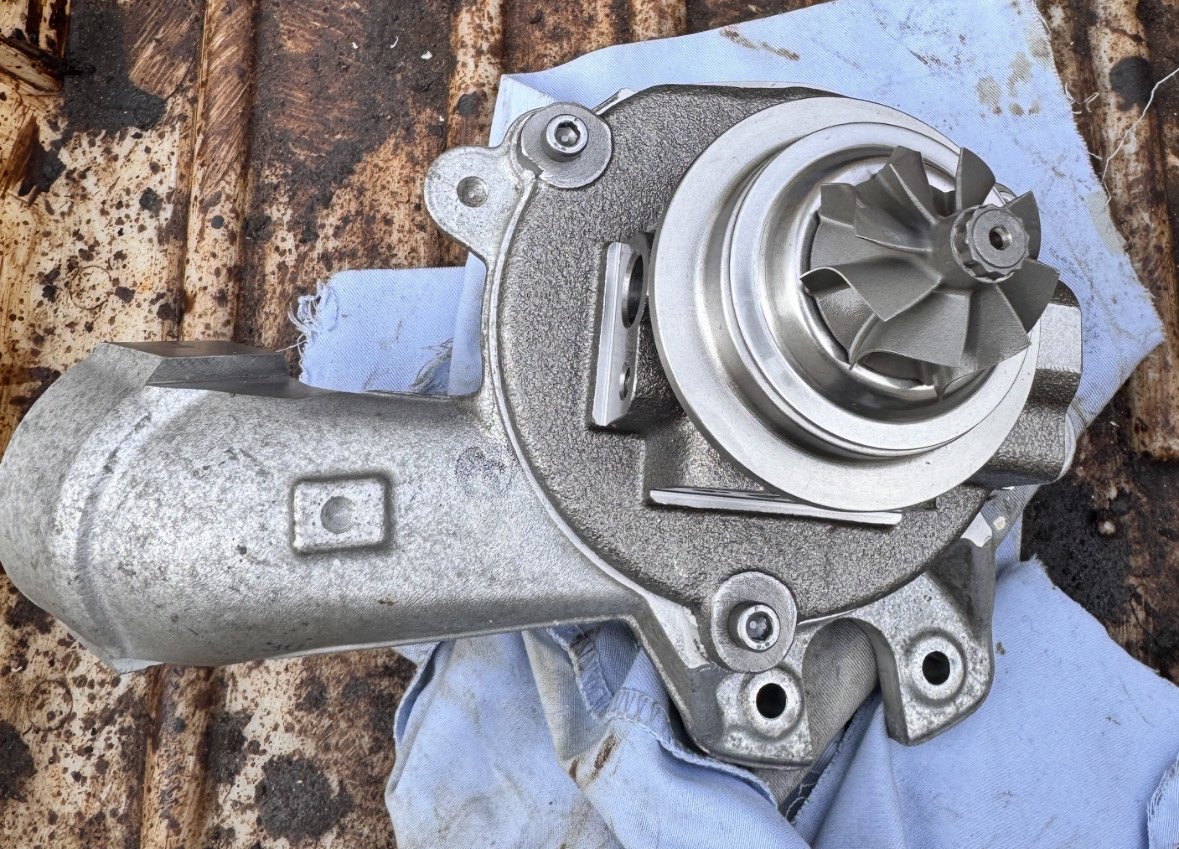
Upon deciding to keep my Mk3 Fabia until its death, I've decided I want some more power from my EA211 1.2TSI 110 and as such needed a larger turbo. This very handy guide linked below by @FabiaGonzales will tell you everything, except self refurbishment, that you need to know about fitting a larger turbocharger from the bigger sister engine 1.4tsi; https://www.briskoda.net/forums/topic/481489-turbo-swap-choices-for-ea211-12-tsi/ Now, I decided that I didn't want to fork out for a brand new turbocharger, and I didn't want to ship a turbo off to Europe for refurbishment, so I decided I'd do it myself. With limited resources online about how to do this, it was a slow job whilst I made sure I did it correctly. However, Hopefully this guide will be of use to anybody looking to replace the turbocharger core on their EA211 1.2 or 1.4TSI. I picked up a used turbo (04E 145 721B) from ebay for £87. Quite a steal if you ask me. Now, The turbo itself seemed fine, but i was not about to risk it exploding in my engine, so I picked up a new turbocharger core (the most important part) from London-2020-TurboShop for £100. This will come with a balancing sheet to put your mind at ease, and is also supposedly an upgrade from OEM as its wheel is lighter - whether or not actually proves real performance differences im not sure. You dont need many tools for this job, namely; T30 Torx bit 4mm Hex bit 10mm socket WD40 / GT85 Carb Cleaner a few rags Nickel Grease Exhaust Assembly Paste PLEASE NOTE: I am in no way a trained super mechanic or turbocharger extraordinaire, this guide is simply how I completed the job, and is in no way the definite, correct method. If you undertake this job, you do so at your own risk (Like I did), and I am not responsible for any damage caused to anything. If you are not mechanically sound, I would suggest letting professionals deal with the job. Turbochargers can spin up to speeds in the hundreds of thousands of RPM range, and an imbalance can destroy both the turbocharger, and your engine. Part one First step is to free off the actuator pivot. This may not apply to everybody. I found the turbo I bought had seized on the pivot, a common issue. If you can extend the actuator and thus open the wastegate, you're fine. If, however, you can't, with your hands, extend the actuator then its seized. You'll need to just go to town with some WD40 or GT85 and a wire brush to try and wiggle it free. Images - demonstrates normal movement of the actuator (yellow outline is wastegates open position) Firstly, Remove the circlip from the pin. Then, remove the two T30 screws holding the actuator to the turbocharger. You should then be able to push the pin DOWN and out of the arm. You can see this in the image above, on the right. Like a see-saw, this will raise the actuator away from the turbo inlet side. Now that that's done I gave the actuator pin and wastegate arm a good clean, ready to be reinstalled with some nickel grease later. Part two After removing the actuator from the turbo, I then proceeded to remove the exhaust side from the core. First job is to remove the clamp that holds the core to the exhaust side. Just use your 10mm socket to loosen off the bolt, then remove the clamp. You should then just be able to pull away the exhaust side with ease. Notice in the photo what i am pointing to. There is a little notch on the exhaust side that fits in to a groove on the turbo core. This is to ensure correct orientation when fitting. Images - Exhaust & Core Notch Excellent, Now we're ready to remove the core from the inlet side. Before doing so, please take images of the correct orientation of your core, as there is no groove to align it properly on this side. Images - Core Orientation Remove the 3x 4mm hex bolts from the face of the core. Once removed, you should just be able to pull the core off. It seems there was a paste used to seal this side, so I had to slightly twist and wiggle the core to break this, then pull it off. Now, your turbo should be fully disassembled into the 3 parts. I now cleaned up the cast parts. I used carb cleaner for the exhaust side and it did look slightly less black afterwards. I avoided using a wire brush on any internal, smooth parts, as I didnt want to introduce imperfections to the surface. Now, reassembly is mostly the same but in reverse order. Be VERY CAREFUL with your new core as it is very delicate. I applied some Exhaust Assembly Paste around the outer lip of the core (The surface that sits against the inlet side) before fitting back and bolting down. Just ensure that if any exhaust assembly paste sits ON or inside the lip you wipe this off. We only want it sitting outside, and not smushing inside when you bolt the core down. Images - Exhaust Assembly Paste & New Core Fitment Once completed, pop the exhaust side back on, minding the core & remembering to align the notch. Then, Tighten the clamp back down to hold it in place. Lastly we have to fit the actuator again. I applied Nickel grease to the pin and arm hole to ensure effective movement and to prevent it from seizing in the future. Then just bolt it back in. Hooray! Now you've completed the refurb, and your turbo should look beautiful, like the below. I hope this guide has helped, if anybody has any better tips/guidance feel free to leave them in the comments. This is by no means the "correct" way to do this job, just how I did it! Lew


.thumb.jpeg.c6a5781c36a4232ac5751e07c65cc4bf.jpeg)
.thumb.jpeg.abc1825d8963798323d5e84a4a481aab.jpeg)

-
https://www.undergroundparts.co.uk/products/gloss-black-front-bumper-grille-surround-for-skoda-fabia-mk3-2018-2021?variant=40829949575248&country=GB¤cy=GBP&utm_medium=product_sync&utm_source=google&utm_content=sag_organic&utm_campaign=sag_organic&gad_source=1&gclid=CjwKCAiAlPu9BhAjEiwA5NDSA5T47jY8aR3GQ0JyALwVOzLBK56YThmDCi7azBSzrpl_4Gnj7k7JyxoCmrsQAvD_BwE Grill surround can be found here Enjoy modding it!
-
Im currently at work which blocks my access to that so I cant find it right now, but it *should* be on there... Yes.
-
https://mibsolution.one/
-
I don’t know exactly but i’d imagine they’d charge anywhere from £50-100 for such a simple job that you could do yourself. As Long as you have access to an SD Card, and something to put the file onto said SD Card. Yes there is a software update available for that, which is MEN2_EU_SKGPX_P9160L (MU 8742) which if you have the SD you can download for free and upload.
-
May be a good idea to ask your local skoda dealership to lookup this bulletin if nobody on here can access it. From a quick look on the VCDS forums, it is said that after resetting the system you must drive the car for a bit to calibrate it, so if you've reset it and only driven say a mile to the shops, it may not have properly calibrated. Do you have access to coding such as OBDEleven? Looking on mine, I have the options to "Reset to factory setting of tire pressure monitoring display", "Reset tire pressure monitoring display warnings". These may just be what you can access through the screen, though.
-
think you've posted the wrong link. Anyways, the reverse camera input on the Mk3 Fabia is on the blue connector inside the quadlock to the unit. it should be 2 raw pins you fit in.
-
Glad the update fixed this, And sorry the link didn’t work. Not sure why, Worked for me when i sent it! Hope the dealer didn’t charge for the update 🫣
-
Hello there, Updated version MEN2_EU_SKGPX_P9160L (8742) is available for this device. Maybe this will fix the issues. Trying to find the file for you now and will DM you it.
-
Is your firmware up to date? Hold the SETUP button for ~5 seconds, go into software update/versions and let me know the installed software version, ill tell you if a update is available
-
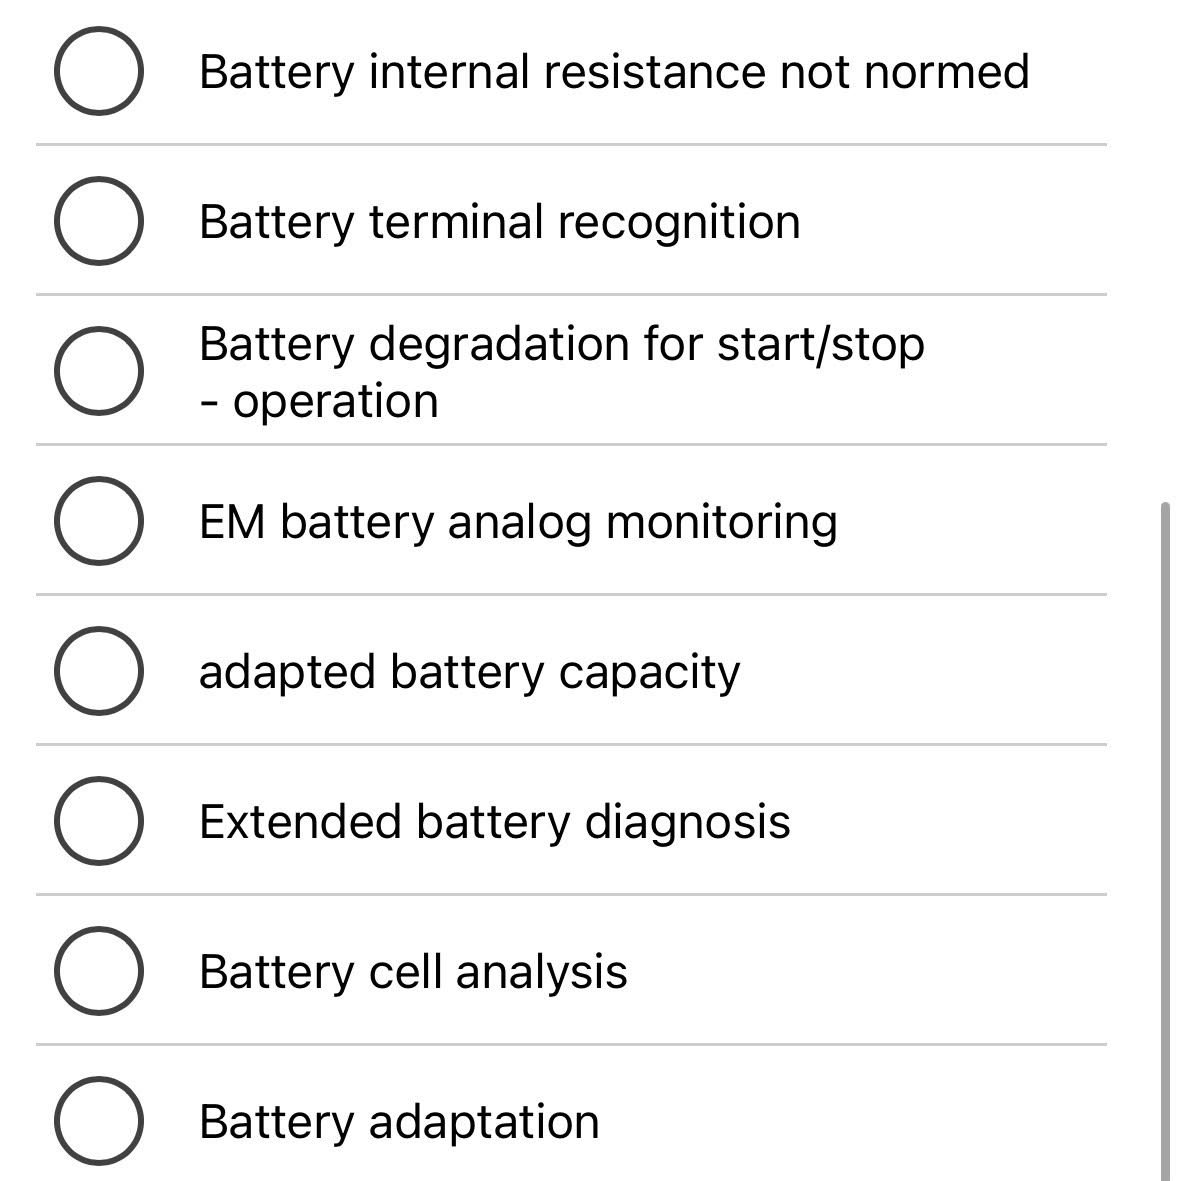
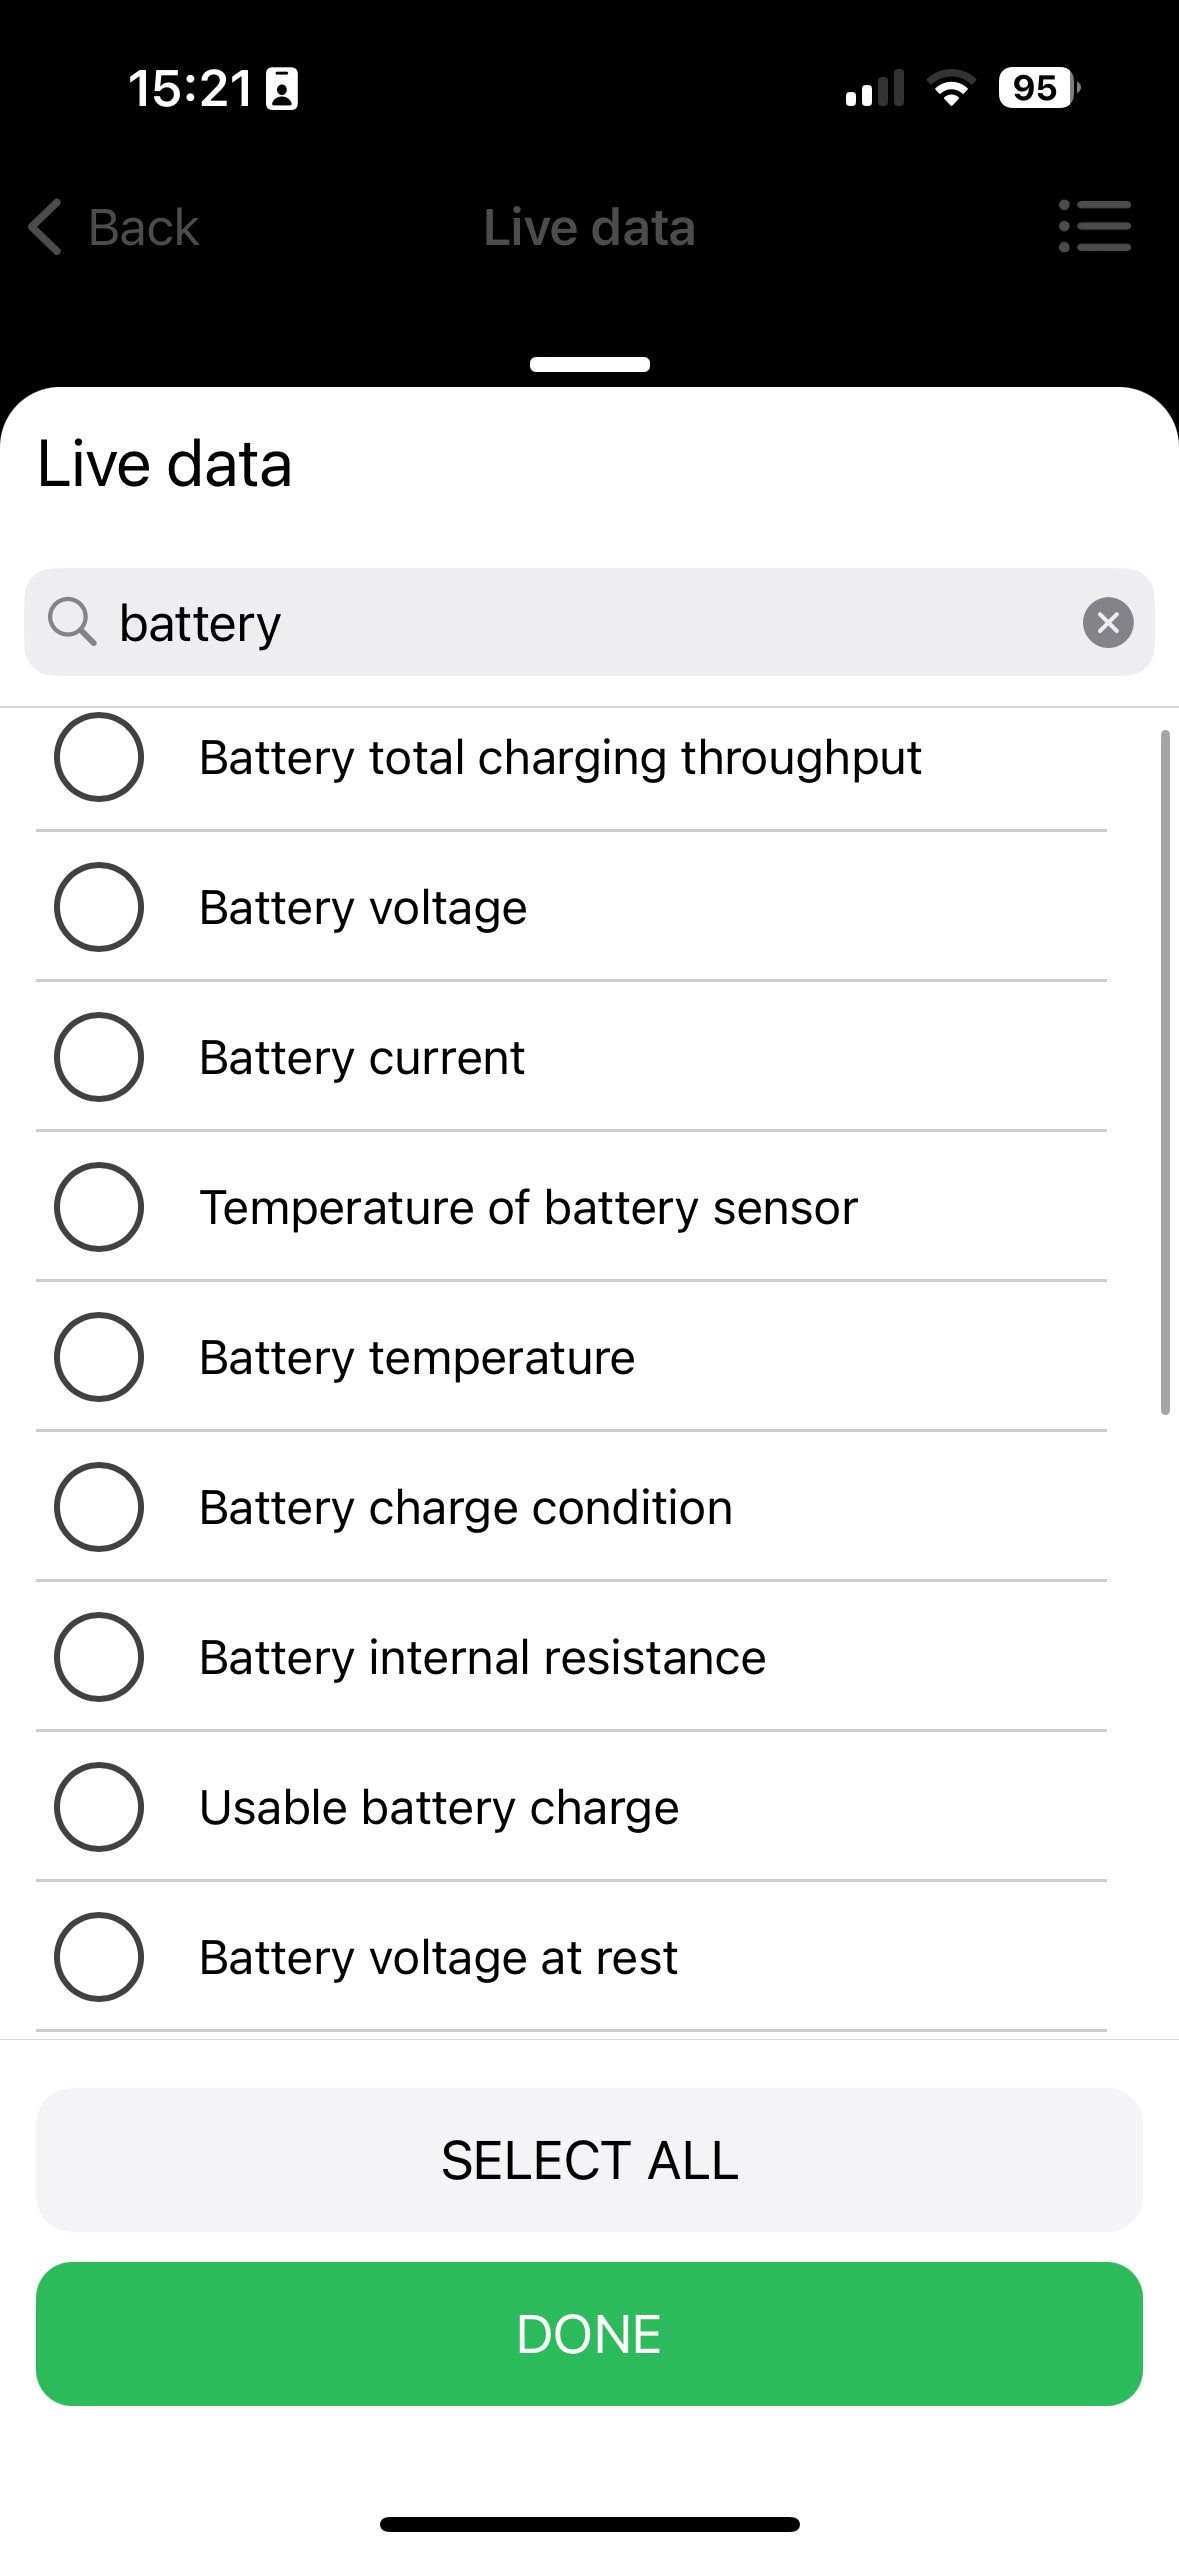
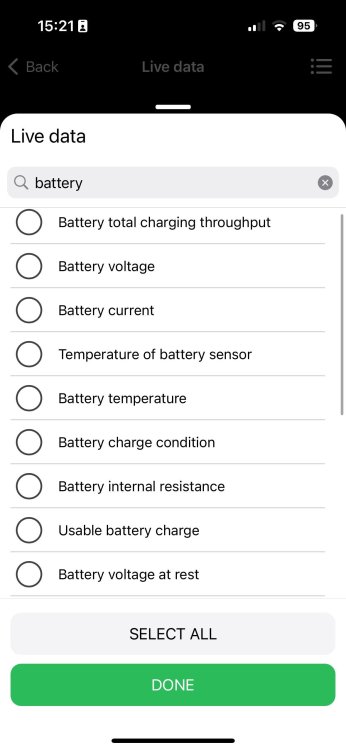
OBDEleven just reads the cars own sensors so its accurate to the start/stop systems information. I took note of my "Battery Charge Condition" rating before and after a 50 minute (mainly motorway) and it changed from 62% to 63%. Not a great improvement. No air con, window heaters, no high demand really. Also interesting that the alternator sits at a constant 14.6V whilst the battery only sits at 14.3. There are however plenty of options for live data which im going to trial in order to fully understand when and how the system charges the battery

-
Interesting, You learn something new every day. I questioned my skoda dealership on the system whilst I was there and I was told essentially the car only maintains the basic charge needed (around 60% they said) and it only gets a good charging on good runs with overrun. Looking on my OBDeleven also shows my battery to be at 62% capacity at present. Hence why I have always opted for the occasional run with the module disconnected for some charge
-
You’re correct yes, Negative indeed. Mixing up my lefts and rights 😂
-
Hi. I understand "Regenerative Braking" typically refers to switching the polarity on electric motors to recuperate energy. The fabia is a micro-hybrid vehicle with this technology. You can read more here; https://www.yuasa.co.uk/info/technical/micro-hybrid-hybrid-vehicles-explained/ The fabia falls under this category; Charge Management & Regenerative Braking (Micro hybrid 2)
-
Hello there, If you unplug the Battery Control Module from the POSITIVE terminal on the battery, This will disable the start-stop system and will allow the alternator to charge the battery to capacity. If you are not aware, and AFAIK, the alternator will ONLY charge the battery when braking on overrun (Car in gear, off the accelerator, braking). "Regenerative Braking". Cant find a photo for the fabia, but it looks very similar to this. Bare in mind it will throw up an error for the start/stop system. Hopefully doing this every so often will help charge your battery
-
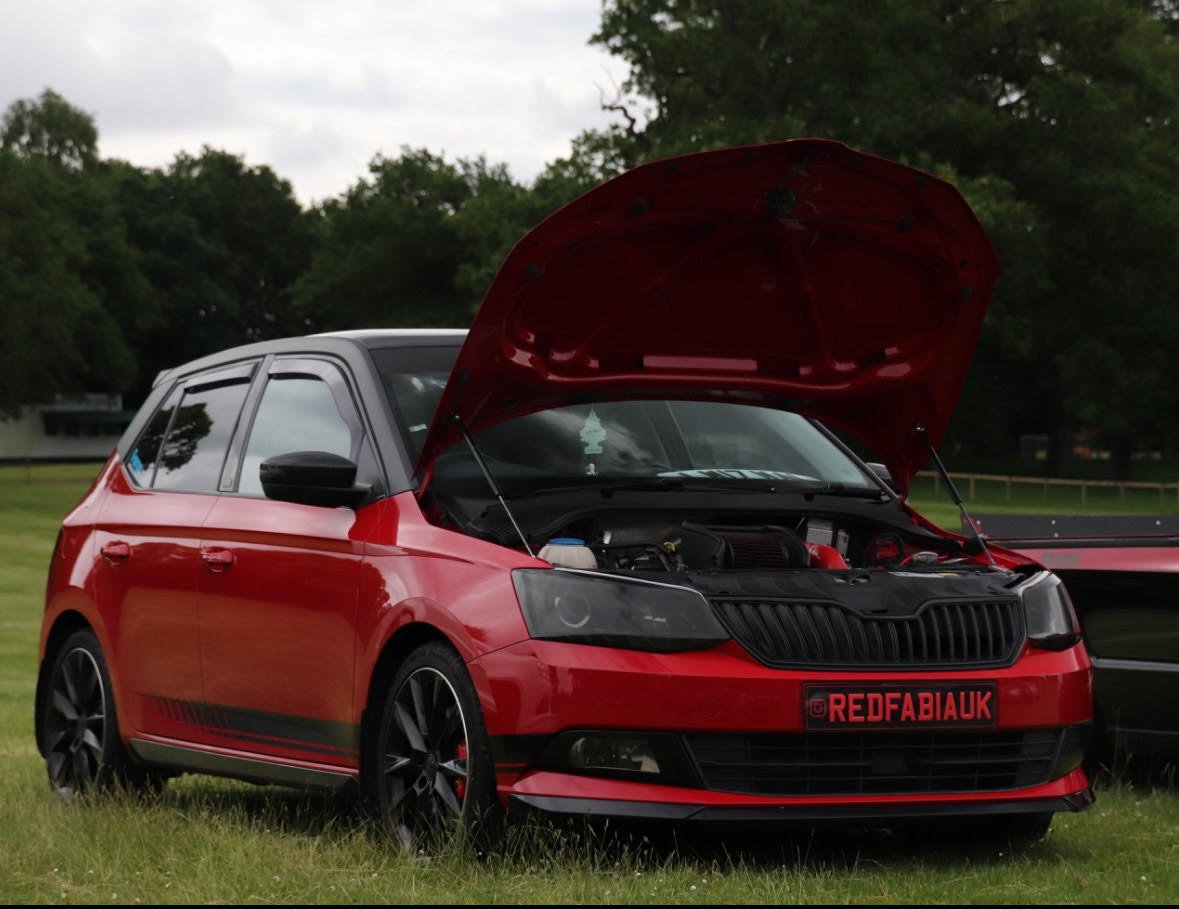
Aw, Looks like my cars younger sis! Looks so much better with the springs youve fitted, that arch gap is way better controlled like that! Fitting new springs to mine this weekend to do the same, drop that huge gap in the rear! 😛

-
Hey up, Im from the area! I do most of the work on my car myself, but I've heard very good things about Kendal VW Centre! Garages I have used include Westgate Tyres for any wheel/exhaust works, Been multiple times and theyre great chaps or York Bridge MOT Center for my MOTs - but I believe they also do preventative maintainence so could do the cam belt. Although I'd probably stick to Kendal VW Centre as theyll be well used to the EA211 engines in the fabia
-
-
Don't believe the engine is equipped with one as it has no BOV/Diverter from factory. think its something to do with the turbo and IIRC is an internal wastegate And yes, flutter/surge/stustustu is bad for your turbo!
-
Nm rapidly increase between 1500and 2400 rpm, peak at 2500 and then hold on until 3300, then it drops off. So if this is the kind of power youre experiencing its pretty normal, and then id suggest the above route of looking at the pedal. If this isnt what youre getting you need to look into why.
-
Before what kicks in, any power? If so, the question you need to be askingis why you have such little power there. These engines are typically way better at the low-mid nd than the mid-high, mine feels great around 2k revs but has dropped any power by 4k If so, throttle response will change nothing. I tried the XLR5 once and returned it after a week. Although it felt great whilst in gears, it was so impractical whilst setting off from stationary as one tiny touch of the pedal nearly sent it to redline, bye bye clutch. Suppose, if you get used to a setting it wont be so bad. Really though, if power is the issue you should be looking at a tuner chip from racechip and not an XLR5 pedal box. or both, theyd both work together. I use the RS Chip, which "gains" 16hp and 44Nm, but the difference can very much be felt between race mode and standard. If you have access to OBDeleven or VCDS there is a slight tweak you can make to your throttle pedal to so called increase the responsivity.
-
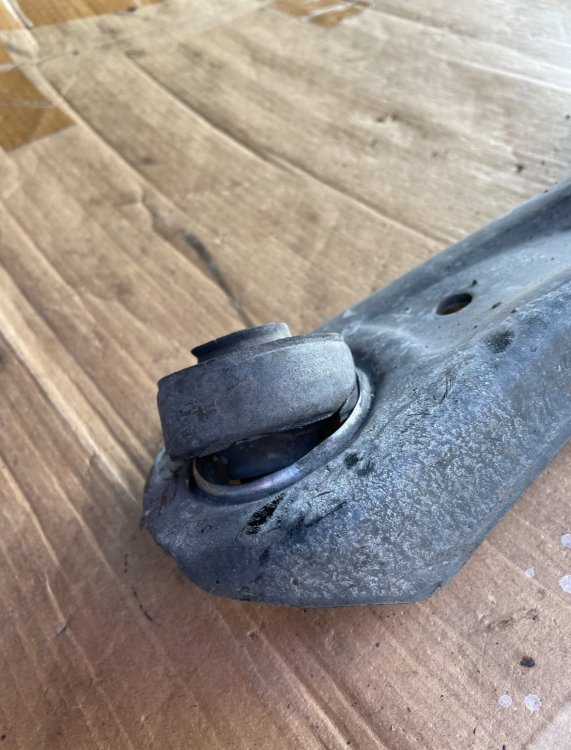
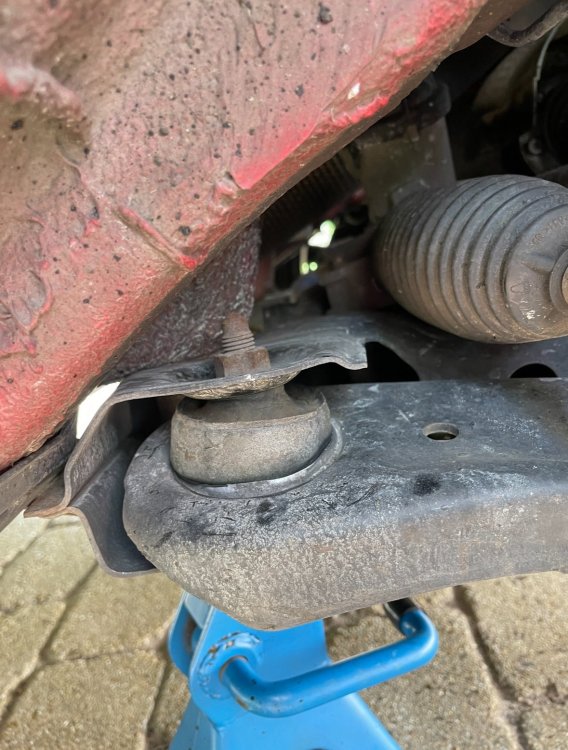
Have a listen to this video below, Do you think it sounds similar? This was caused by a control arm bush, which i’ve also posted a picture of for you as it’s relatively easy to spot if it is this! filtered-924A91DB-D691-416B-BD17-26BB7982A28E.mp4
-
Interesting, there is a stalk with the ACC and Mode button! I did try look but couldn’t find one for the Fabia. Perhaps it will work then providing this stalk is fit


.jpeg.f28a2e19103dc39fa31f676051b4c527.jpeg)
.jpeg.087aef71746b7681583d8d9d1b7df865.jpeg)