rbhelle
Members
-
Joined
-
Last visited
Everything posted by rbhelle
-
To set the level right since gearoil expands when hot. Should set level when oil temp is between 35-45 degrees celsius. When operating temp, 77-87 degrres celsius, the level will be just right then. Do not check and set level when gearoil is below 35 degrees.
-
GL5 75w90 works fine. Same as I use.
-
That is what I will call a job superbly done mate! It is a big difference doing this with only tools one have in car compared to a well specced workshop with lifter! Kudos to you! but, you are a mechanic by profession?
-
When doing manual clutch I do use this centralizing tool.

-
Oh, in dsg there is no clutch outside to replace, just the flywheel. The clutch is a wetclutch inside the gearbox housing. And you are right, no need to remove the right axle flange to do a flywheel change, but I will split the transfer box from the gearbox and according to elsawin I need to take out the right axle drive flange...But you have done it woithout, so that job could have spared me some time then...well will remember to next time :-) According to VW specs, the DQ250 6 spd dsg weighs 109kg dry + 15kg transfercase. 7ltr dsg oil and approx 1 ltr diffoil. Approx 133kg in total. My MC jack that I use as a gearbox jack has a max limit of 135kg capacity. So that is why i empty fluids and split the transfercase. Trying to avoid accidents :-)
-
Doing this repair I estimate to save 3500-3700 GBP everything included (NOK converted to GBP) yes, workshop jobs are expensive in Norway.... EGR cooler, dual mass flywheel, crank shaft seal, poly v-belt, dsg oil service, front diff oil service and a thorough inspection.
-
https://www.garageequipmentonline.com/products/scissor-lifts/geo-3-tonne-mid-rise-car-scissor-lift Mine is of this model type 3 tons capacity/3000kg
-
So yeah, sxissor lift not portable, but deployable to a garage and then it is stuck within that garage floor. Moveable from one place in garage to another, but that is about it. So, yeah....drawback 😆 I have 3 cars, and moved it from one part of the garage to another 2 years ago. If I relocate in the future, I feel sorry for the guys/girls with the task to help me 😆 But on the other hand, I park my car over it, no problem using the mounted/moveable driving ramps
-
Since mine is a 4x4, there is no other option than to take out the right drive axle flange. It is not possible to reach any of the bolts for the support bracket on the transfer box bolted to the engine. When the right side flange is out, it gives you more room to manouvre the gearbox out, especially if you dont take down the subframe (this is on typical 2wd with manual box). Actually I dont think it is physical possible to take down the dsg 4x4 gearbox without removing the subframe....but maybe someone has managed it with a lot of swearing and hassle...🙂 I have not yet taken down the gearbox, so I guess I have left maybe 1-1,5 hours of labour to get it out. Remaining job for me now is: * Take out starter * Unscrew gearbox cables and some connectors. * Take out the radiator fan assembly (give me more leverage when I disassemble the propshaft from the transmission box) * Support engine with engine beam * Take out engine supports and finally the bolts that connects the gearbox to the engine. I reckon to use at least 12hours all in all. But then also Egr cooler done and gearbox seal on crankshaft side done. The gearbox itself weighs 135kg, so thats why I have emptied all dsg oil and all transferbox oil (front diff oil) to save some weight. Maybe I will split the transfer box from the gearbix as well, just to make the dsg gearbox more suitable to handle. The dsg 6spd dq250 weighs 109kg empty. A manual 6spd gearbox weighs only 76kg. So that is a significant difference when it comes to handling. Sxissor lift weighs approx 650kg and since it has hydraulic unit with 15ltr of oil, I would that that it is moveable within a limited amount of space. But yeah, in my garage I can move it around from one place to another on flat level concrete. It is shipped with tools to move around.
-
The dsg oil will expand when up to working temp, so that is why you need to set the level when oil temp is at working temperature. And also it should be filled when engine is running after all gears have been run through, minimum 10 sec in each gear so the mechatronic has picked up fluid correctly. That is very important both running through all gears, engine running and correct oiltemp (dsg) when setting the oil level.
-
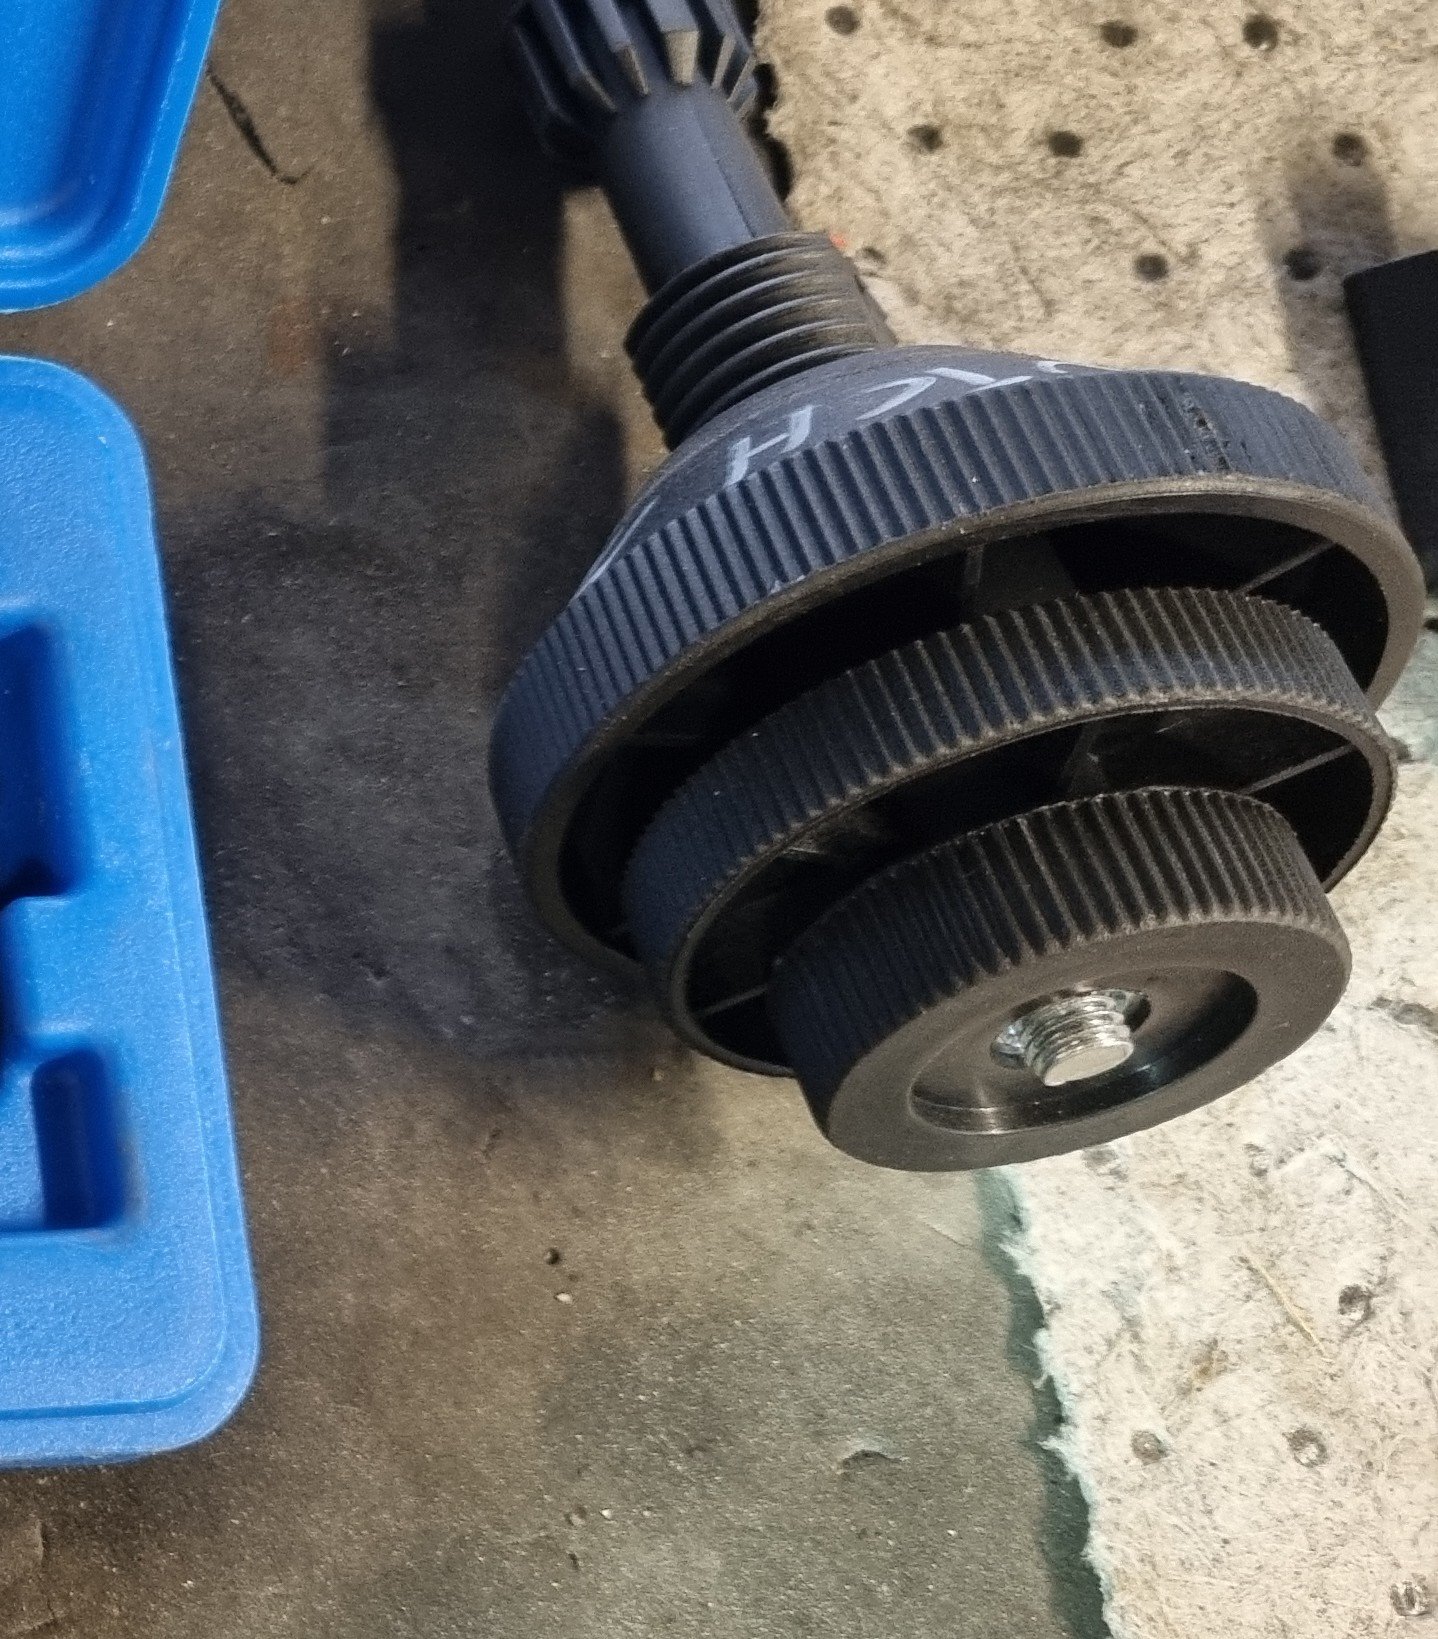
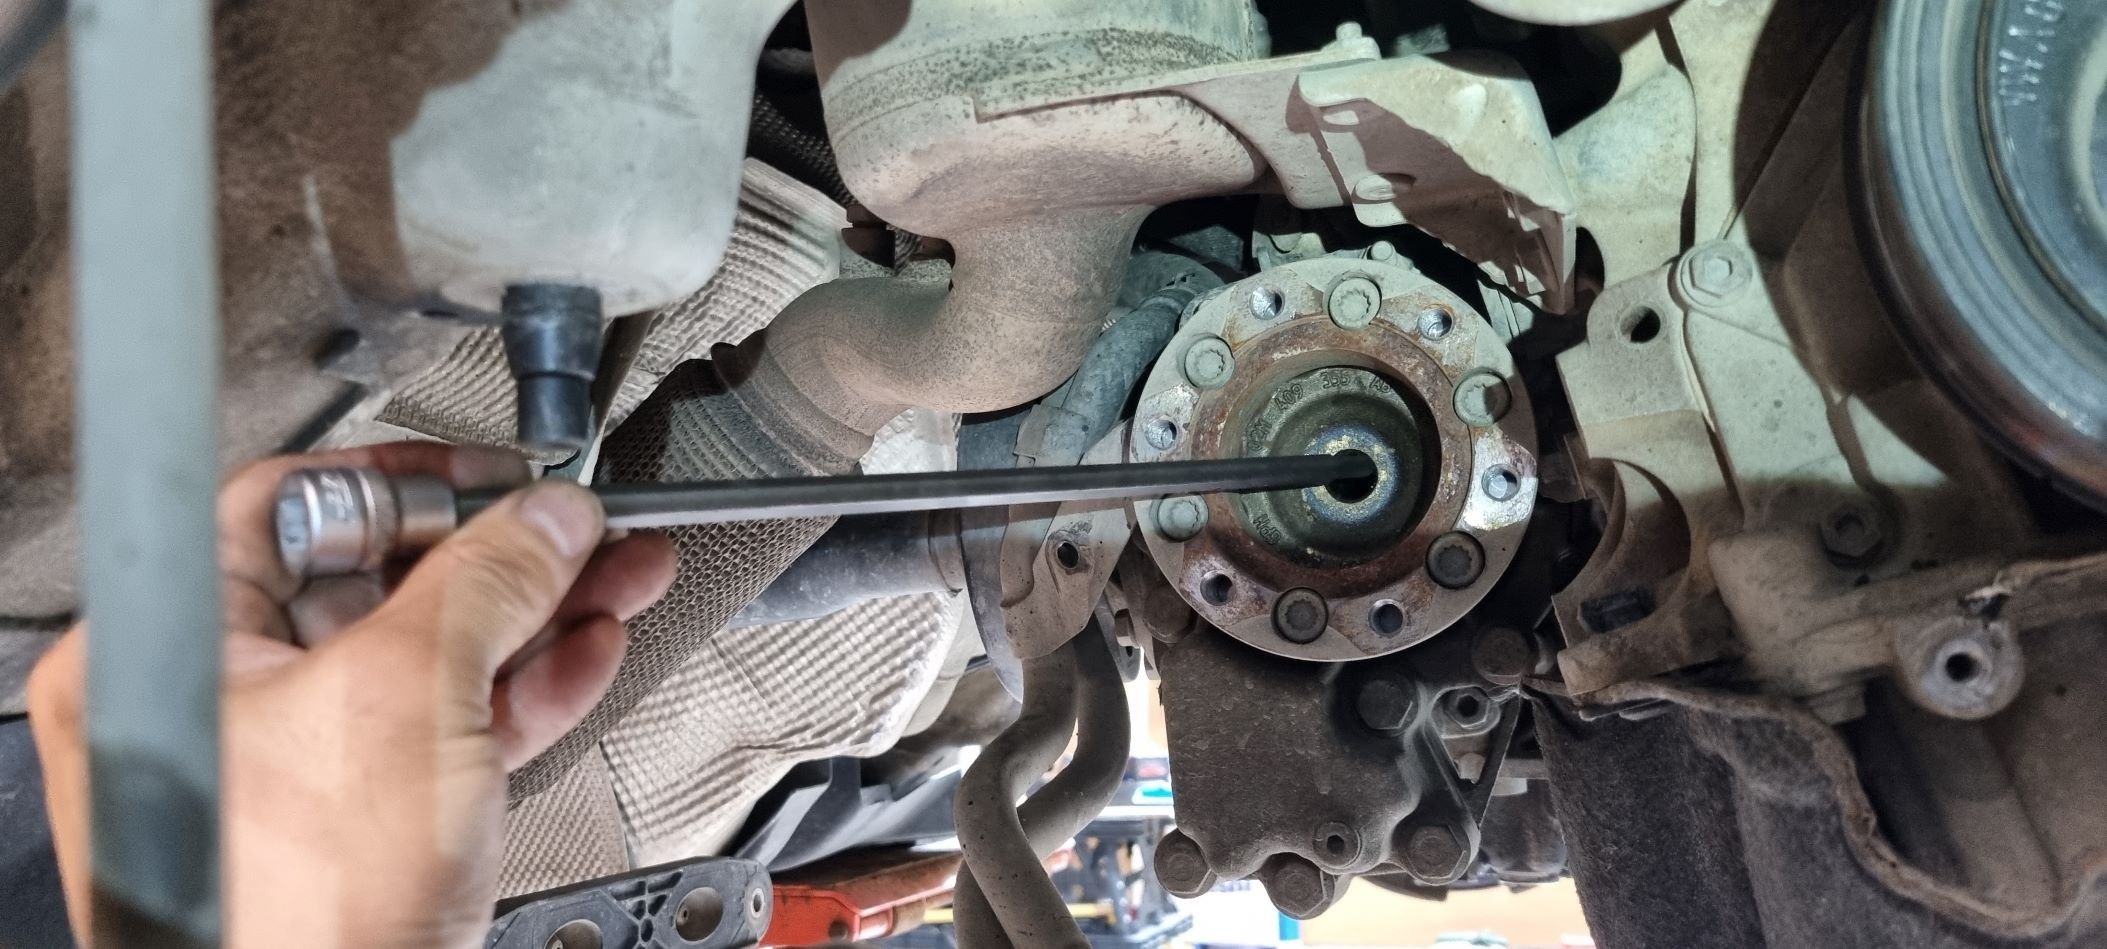
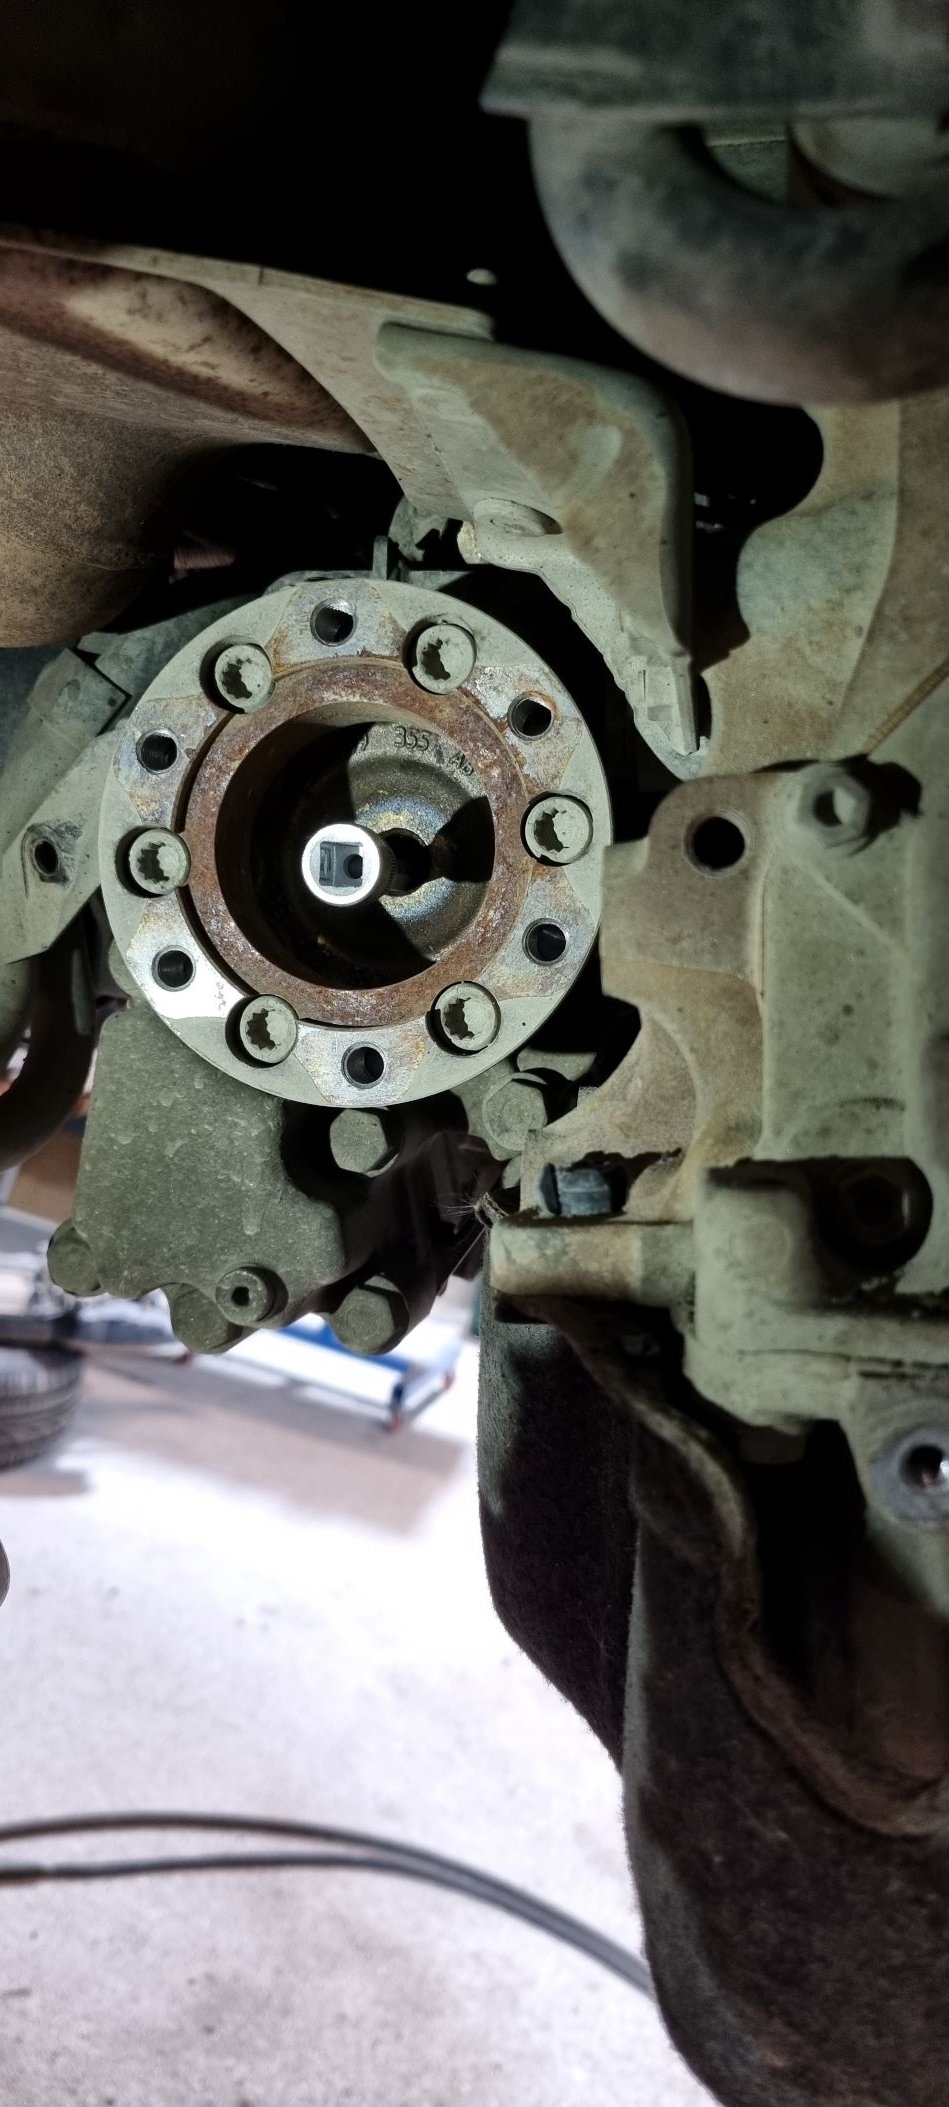
The drive axle flange..Do not try to remove gearbox on a 4x4 without removing the axle flange first. That is a nogo and save yourself of a ton of work, and just remove them during the subframe removal process. I use a special tool, it is just a very long hex 5. And to get the drive axle flange out you will need a press or use what I used, a slidehammer. You will figure out what is best, but VAG do have a special press tool for this, but a slide hammer is just as good.


-
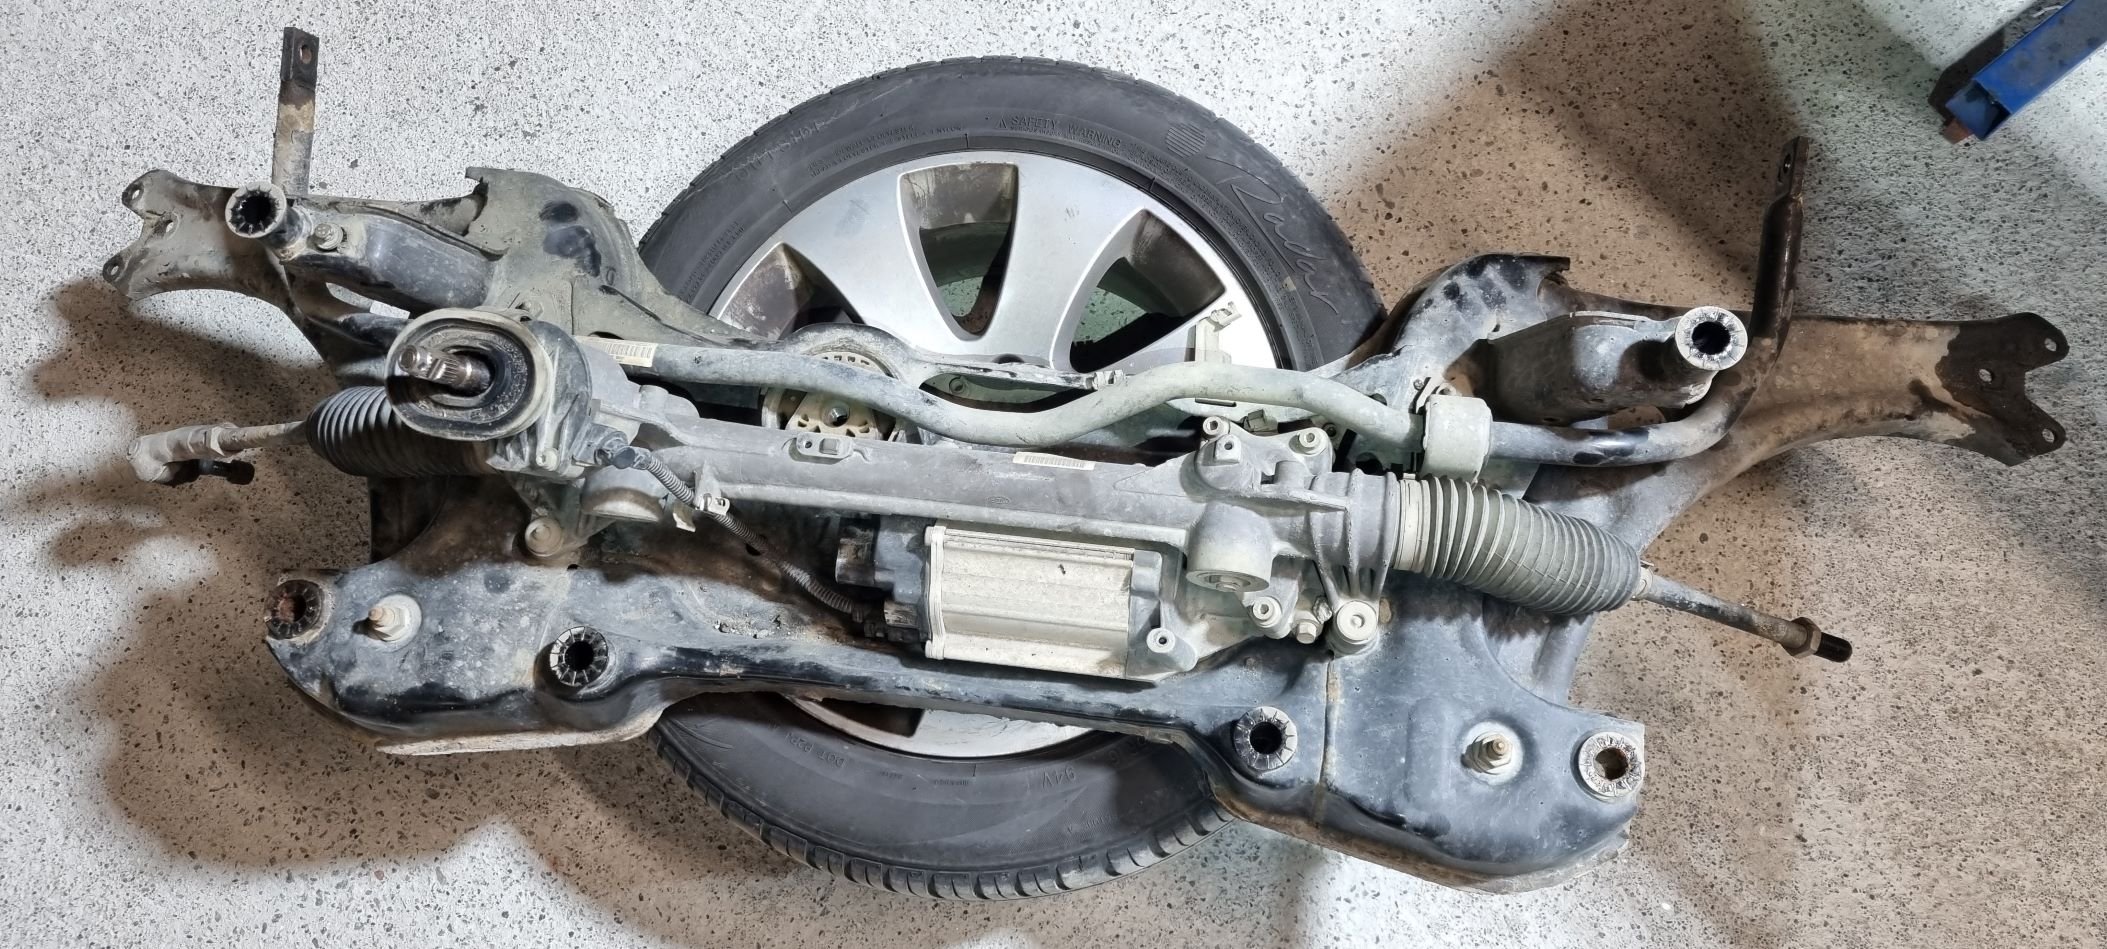
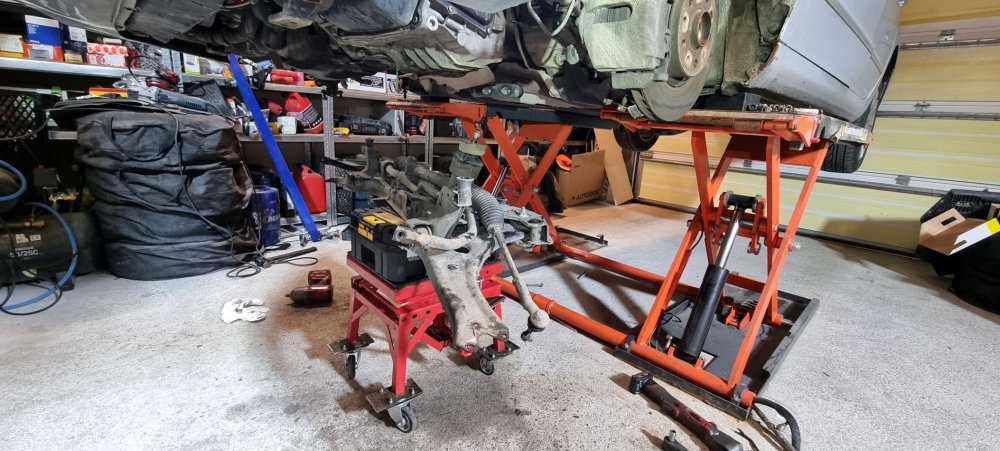
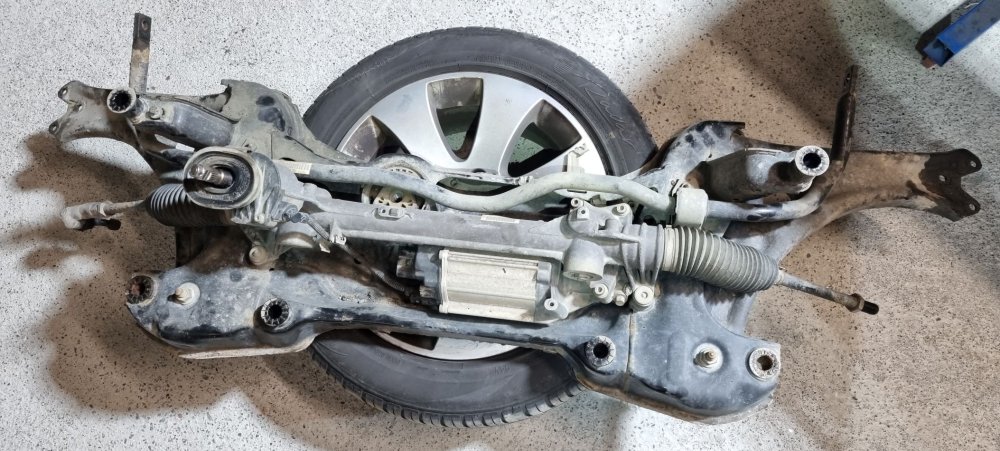
Her you see the bolts on the heat shield on the subframe assembly that needs to be removed in order to access the connectors. And finally the subframe down. Very easy access to replace bushings, stabilizer and steering rack when it is out. To replace bushings in-situ is doable, but i prefer to have working space and since noone is paying me for doing it, why not just remove the subframe and have space :-)
-
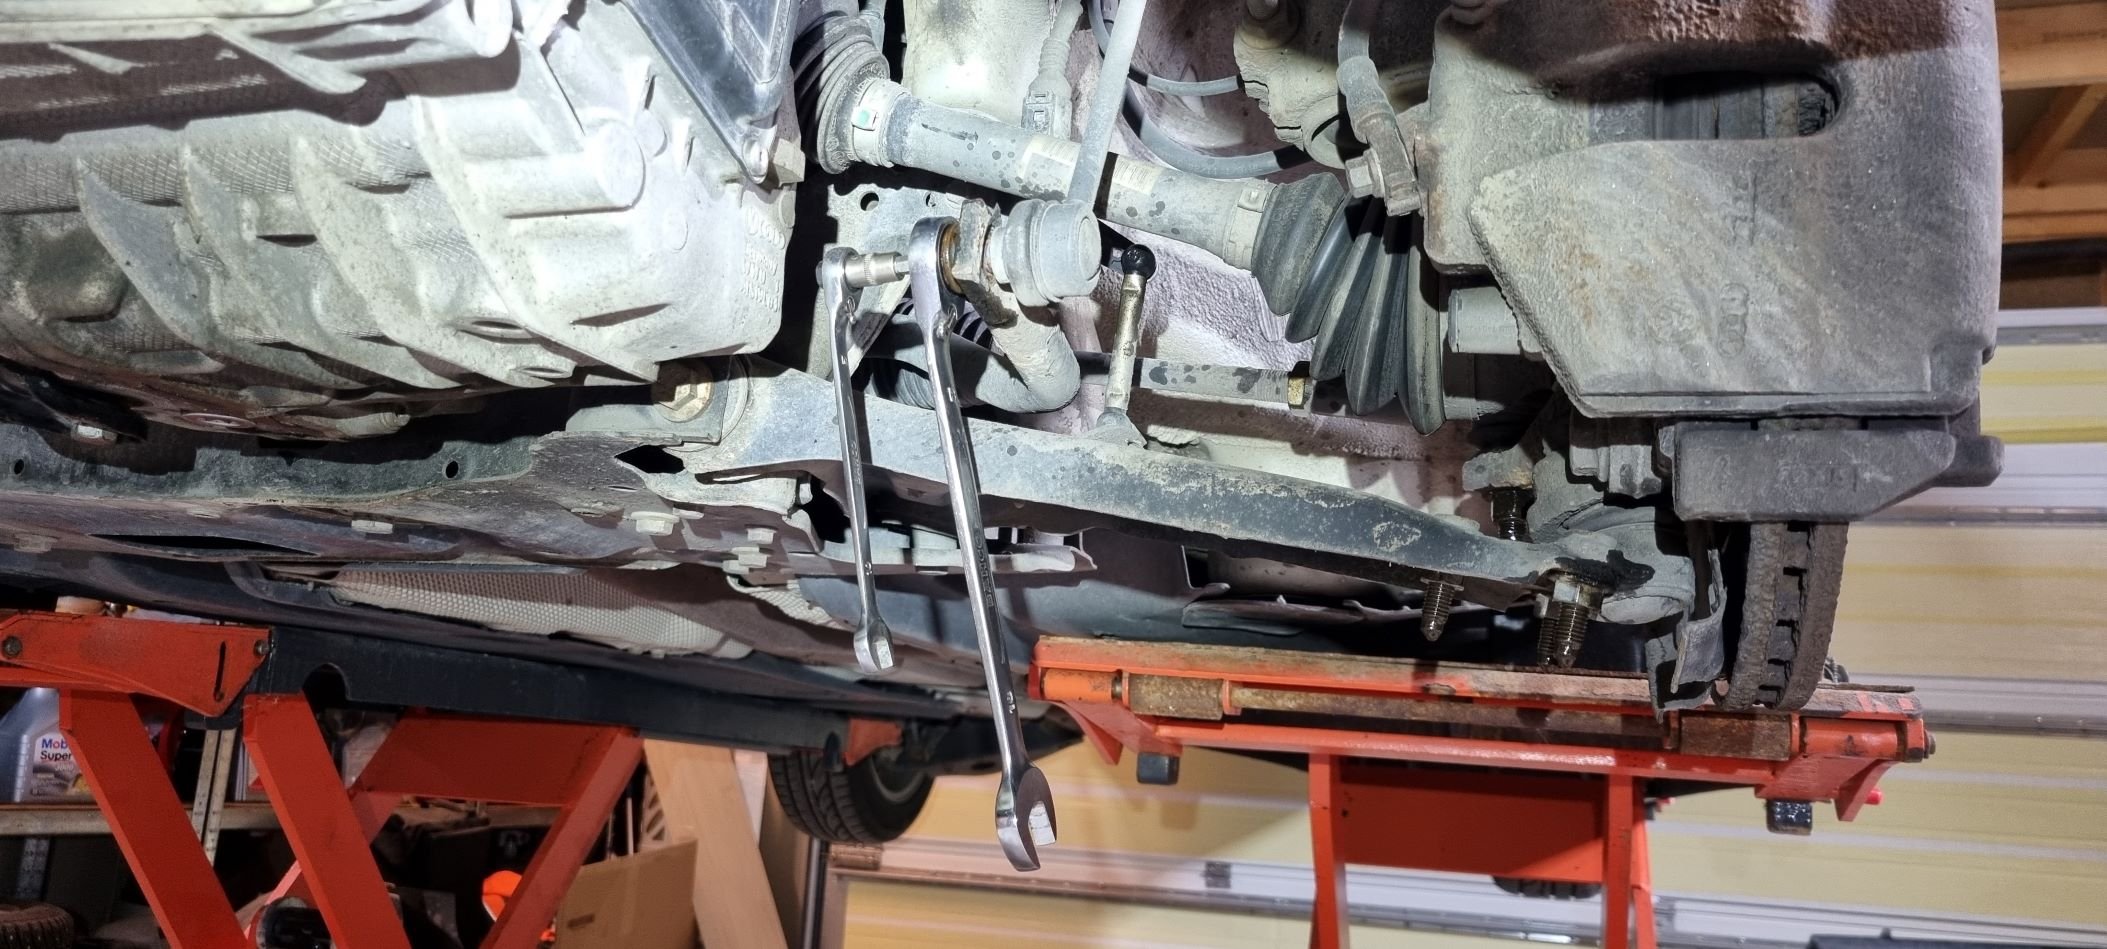
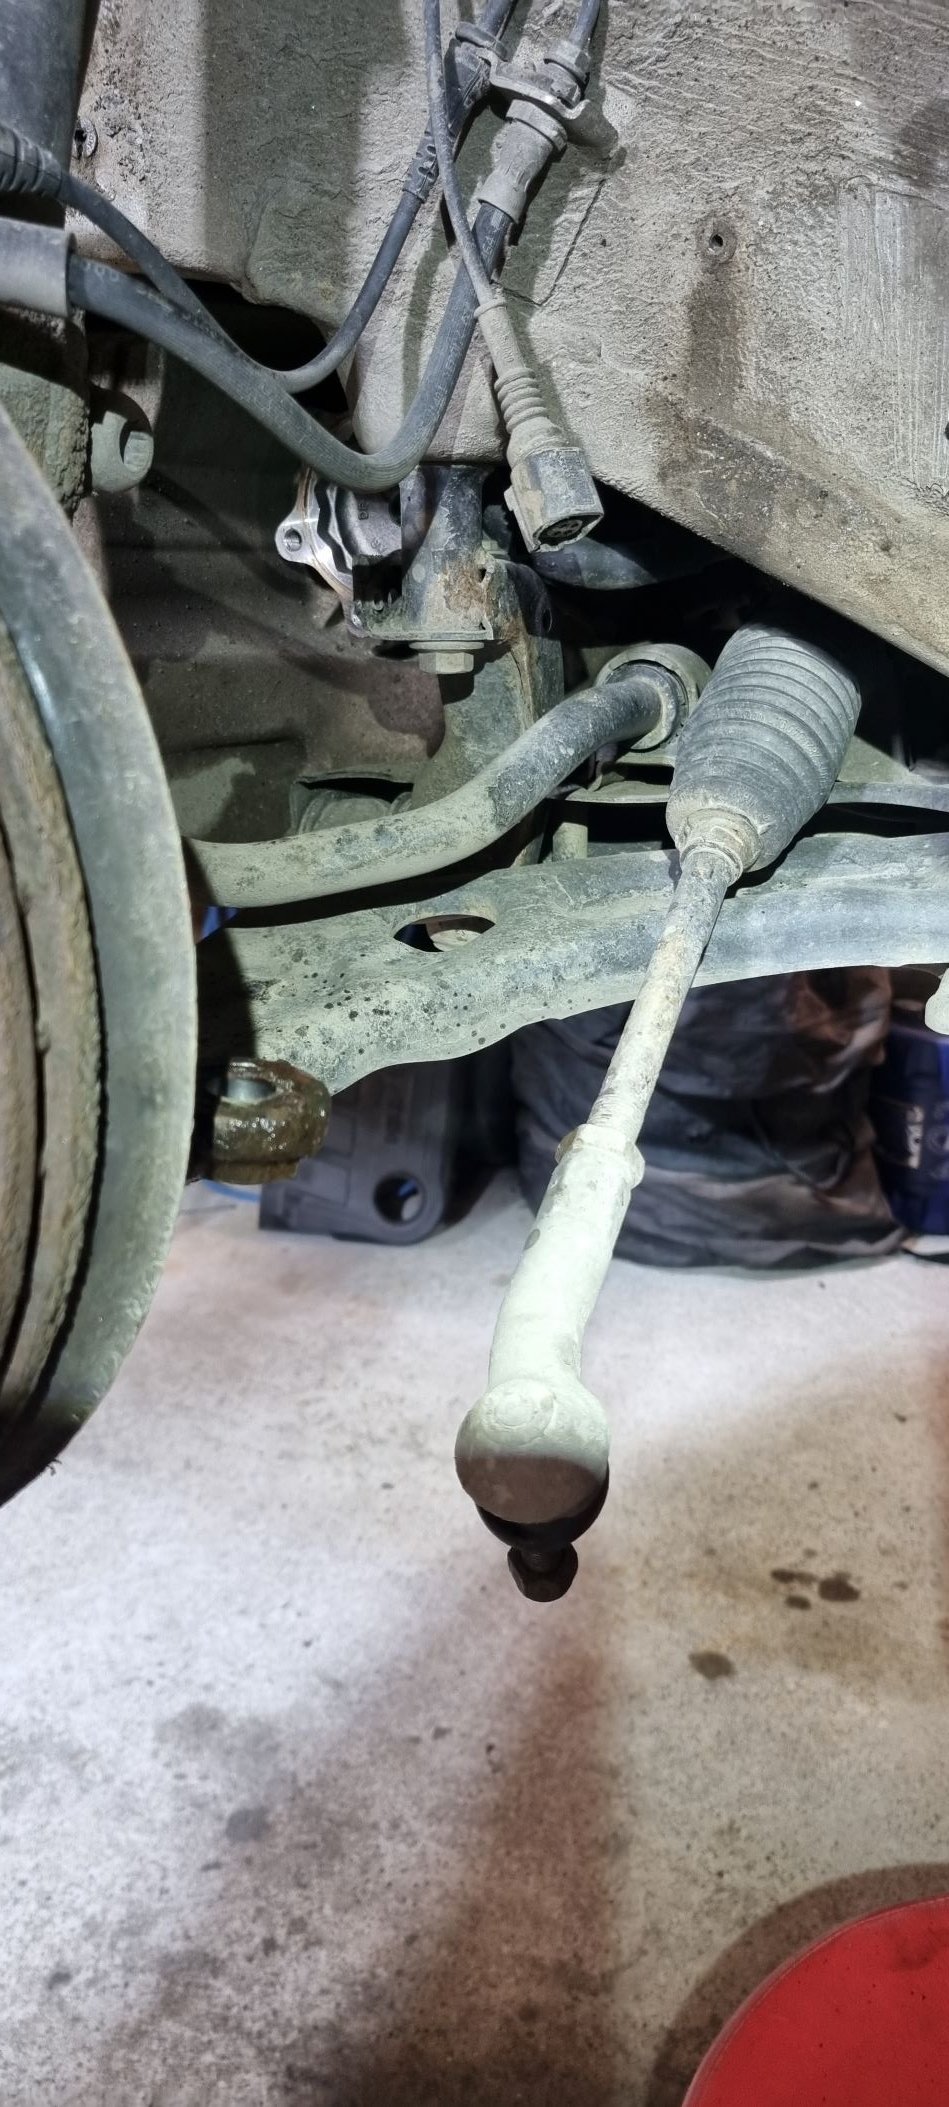
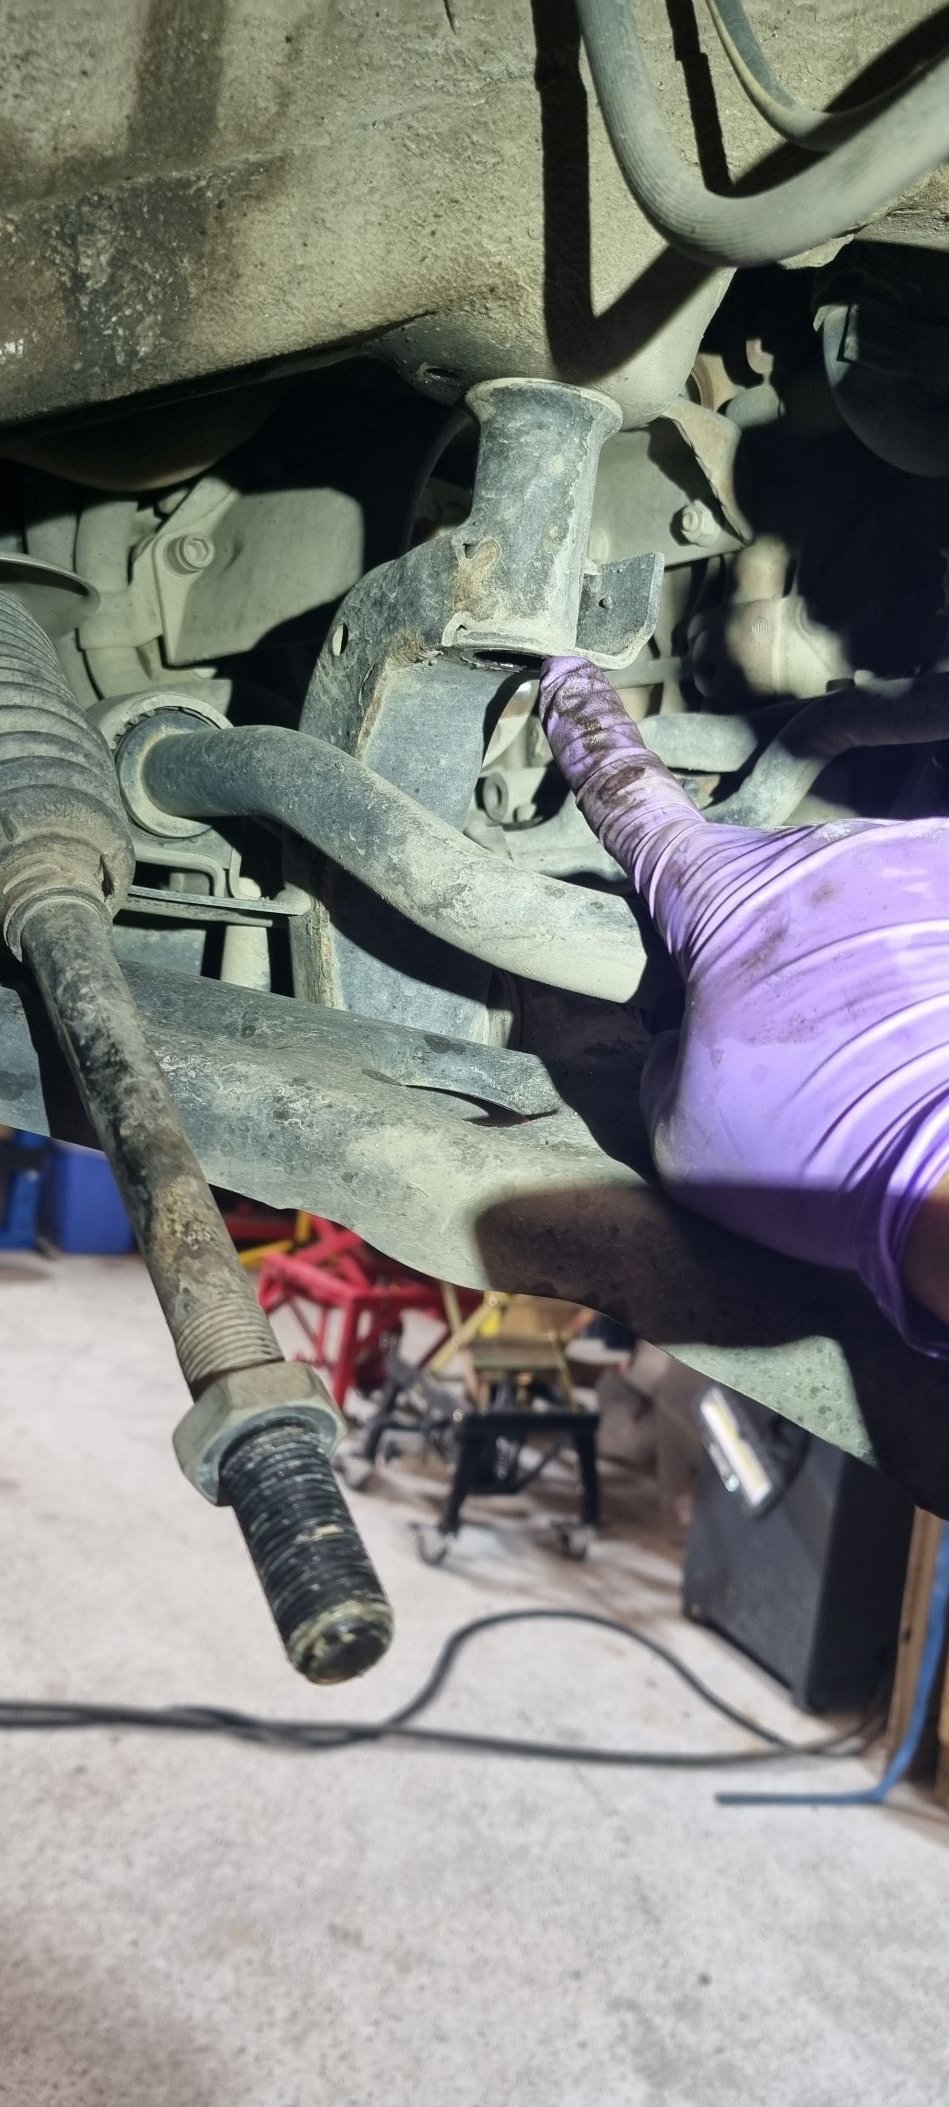
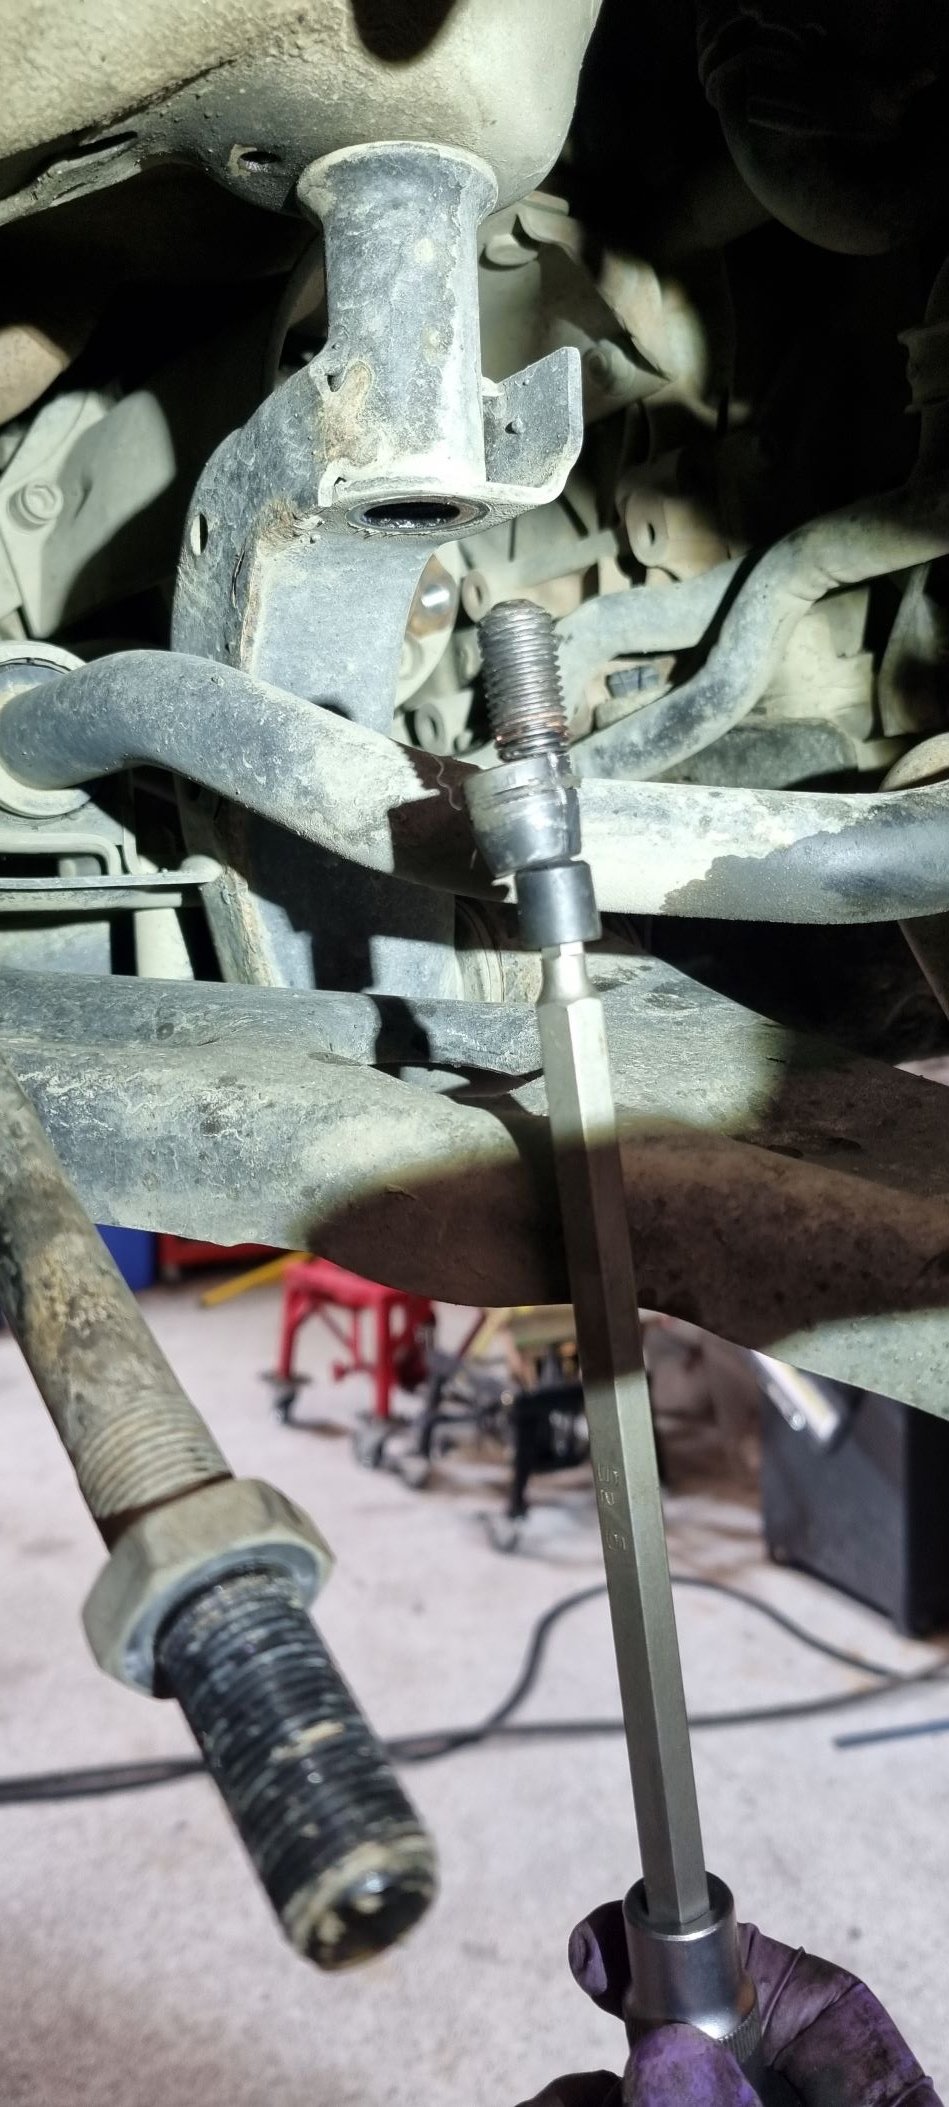
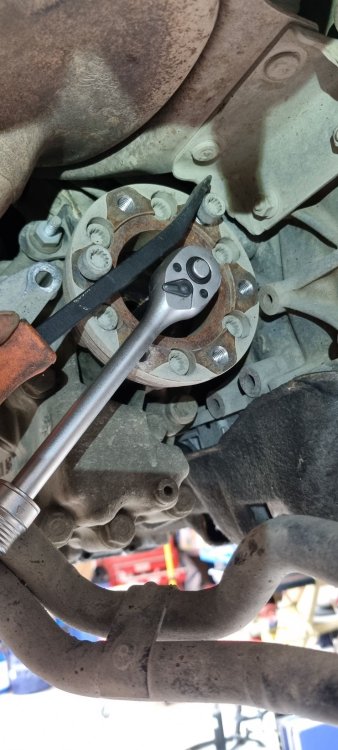
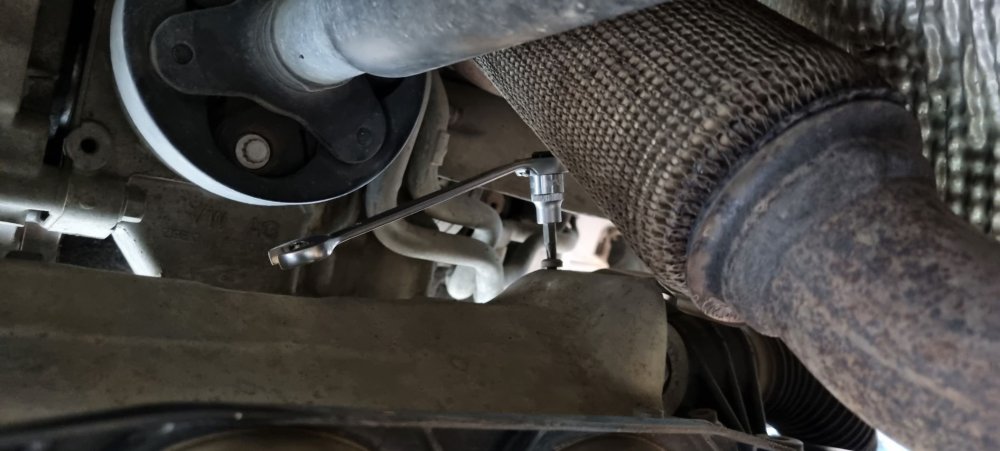
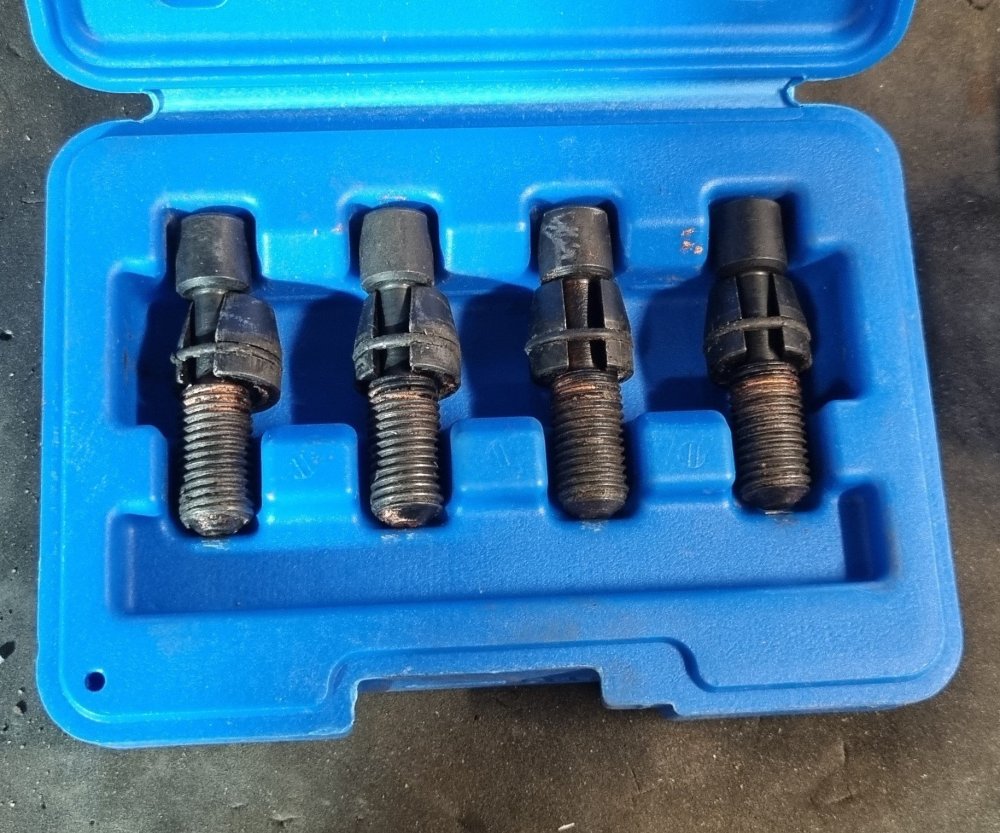
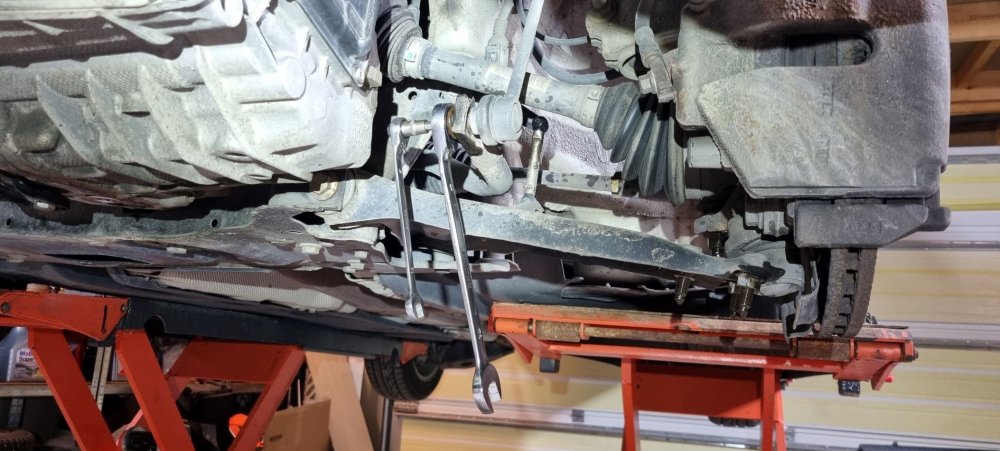
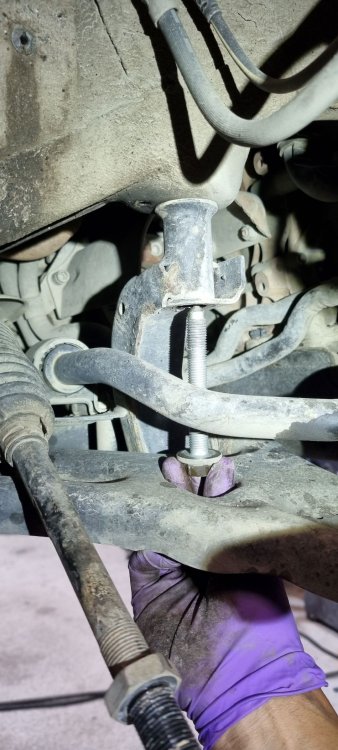
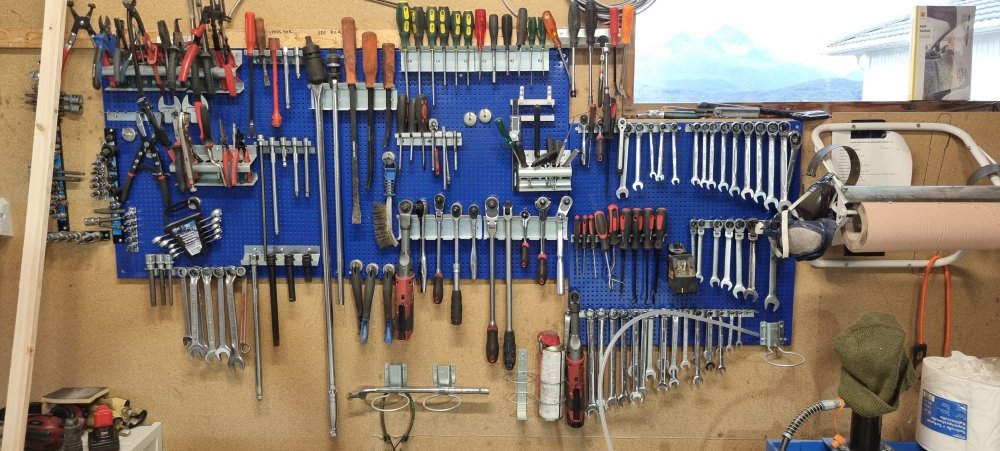
To replace the dual mass flywheel on superb 2.0tdi 4x4 engine code CFFB and 6spd DSG box (wetclutch), there are some precautions I need to consider. First, get the right tools for the job. You never know what you get in terms of availability to certain bolts and nuts. Next is to consider, are they easy to unscrew? So, to me I have different tools to these jobs. Mostly I use Milwaukee battery tools, but also a lot of hand tools, since it is easy to brake bolts and nuts with too much power. For rusted nuts I have a induction heater and that helps a lot. When everything else is a failure, a well loved grinder is the way to go. Both a big one or a small Dremel like one. I started with loosening the axle bolts on both sides before raising the vehicle. Used 24mm 12-point socket and biggest Milwaukee M18 Impact wrench (1898NM) to get them loose. Take off wheels using 17mm socket and undo all plastic under engine and wheel housing with Torx25 and torx 30 Take out both axles using a long XZN 10 (or no 8). I stick a screwdriver into the vented brake disc plate to stop rotating. This should be easy. I actuallu disassembled the right brake caliper, disc and disck protection back plate to get better access to the drive axle bolts. In GB that would be on the driver side, but in Norway thas is the passenger side. Next is to disassemble the lower vertical stabilizer nut to free the joint from the knuckle I think it was a 16mm pipe and also disassemble end link on steering rod from the knuckle (21 mm pipe I guess). Use a press, not a hammer imho. Last, unscrew 3 nuts, 16mm pipe, holding the lower control arm from the knuckle. Dont forget the height adjustment device (green one) on the left side of the vehicle bolted to the inner side of the lower control arm. Use 10mm socket. Now, disconnect the 10mm nut inside on the steering rack behind the gas pedal in you car. Lift up and disconnect. Do not touch the steering wheel after this! Remove the 3 dogbone bolts, one is 18mm, the 2 front are 16mm. Remove dogbone. Remove the 2 13mm bolts holding the exhaust to the subframe Now the subframe is held by total of 3 bolts to your car on each side. One is located thorugh a hole in your subframe and the other 2 in the back of your subframe. You will find them bolted directly to your car chassis. There are other bolts as well, but they are not connected to your car chassis, but to the steering rack etc. I use subframe guiding pins to avoid needing a 4-wheel adjustment after the subframe is taken down. See picture. Take out bolt by bolt replacing each one with a guiding pin. Also set a gearbox jack or MC jack under subframe to support it. Now when all 6 bolts are removed, the subframe will come down and out. Remember to disconnect cables to the subframe assembly, especially the oil level sensor will easily break if you forget to disconnect. Just lower the subframe enought in order to use your hands to unscrew the 3 torx 30 bolts on the heat shield over the subframe electronics. And use a small pick to disconnect the cables. When all are loosened, lower subframe. There, subframe down and ready to continue next step. Here is a picture of the guiding pins in use.


-
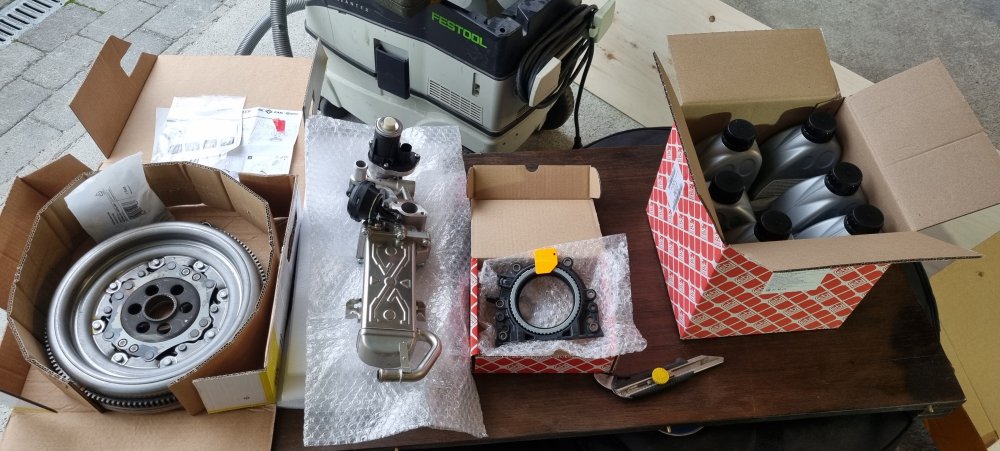
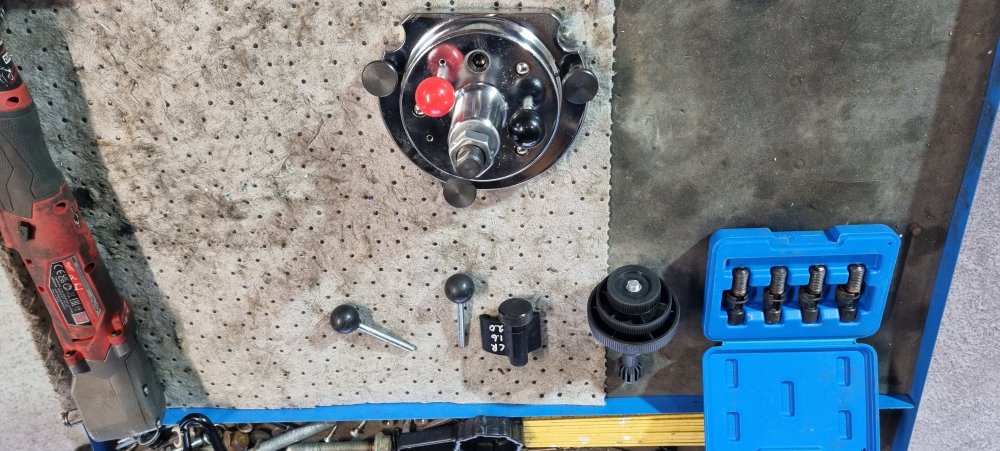
Parts to be replaced and some special tools required.
-
2011 superb 2.0tdi, 4x4 DSG. Well yes, tomorrow I'll start the process of changing these parts. Also dsg oil/filter service, front diff service and general inspection service when things are disassembled. I will try to document as best I can, but I know for a fact that when I am in the "zone" , pictures are not in the front of my head... My scheduled work order is: Empty dsg case and engine oil. FL+FR wheel off Front axles off Front subframe down Disconnect pipes to/from webasto heater DPF down Next start disassemble things in order to get the transmission case removed from the gearbox housing. Then removal of dsg gearbox. Behold, there I will have a clear and present view of the infamous EGR cooler 😆 Replace. Well, flywheel off and finally use tool T10134 to assemble new crank seal. But first, remember to set engine at TDC by use of tool T10050. Wish me luck. (Have done a couple of flywheels, timingbelts and other **** before) Will document in here with pics and what special tools or helpful gadgets I use. Worth to mention, I do this in my own garage (have own scissorlift).
-
If youre not equipped with tools to tighten bolts to specs, tighten in unladen position and able to take out the springs, I would actually consider to get it done at your local indy shop 🙂 On a 4x4 it is definately more work involved than on a std 2wd car.
-
I did mine a couple of months ago. Pretty straight forward job, but yes there are some things worth mentioning when doing this on 4x4. I have a pretty well equipped garage with a scissor lift, so pretty easy. If u have epb you will need vcds to retract the epb brakes. Some use 9v battery, but its really your choice. Also on 4x4 you will need to disassemble the rear wheel bearing housing and lower the bottom suspension braclet that holds the spring. Should use special mcpherson spring release tool, but clamps will work. Anyway, the spring has to come off to release the wheel bearing housing in order to push out the rear axle. You will not gain access to whell bearing bolts without this step. The lower bolt on the suspension must also come loose and that is only available once the spring is out... Anyway, when all this is done, removing the 3 or 4 wheel bearing bolts is easy. Sometimes the wheel bearing itself is pretty stuck caused by rust and corrosion. I used a slidehammer to shock retract the wheel bearing. A special tool yes. Once out, clean and lube before refitting new bearing. And now the fun part starts to assemble the lower suspension strut bolt and the spring. Without a mcpherson compression tool, you will have to use a hydraulic car jack or something similar to press the lower rear control arm back in place to fit the new stretch bolt onto control arm and wheel bearing housing. I used a gearbox jack, others use a normal hydraulic jack. Your choice. When all is done, do not tighten those bolts yet, since you have to tighten to specs when car is situated in proper ride height. Use a torque wrench and tighten to specs. Now, assemble brakes, caliper etc and youre done.
-
No need for engine to do a regen if soot values are within specs in the dpf filter.
-
It is sometimes caused by leaking seal between DPF and turbo. Check for black residue around that connection (since it is close to fresh air blower)
-
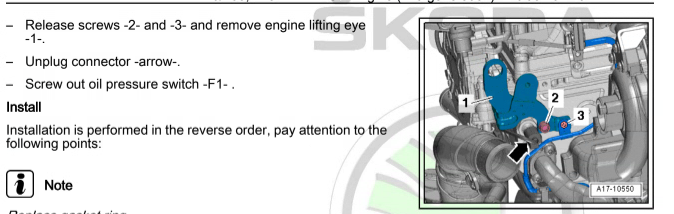
If engine code CFFB: see picture On other engines it should be located approx in same area....somewhere 🙂

-
Have not heard of that concerning regen actually. Glow plugs are primarily for pre heating diesel when it is cold and not for regen purposes. Have been driving around for years with a bad glow plug earlier, only 3/4 worked, and regen happened as usual since that demands a warm engine, cooling temp above 70 degrees and a soot level above specs for automatic regen. have also performed a "forced regen when driving" on this vehicle with bad glow plug. So guess not. It was actually a bit slow starter when outside temp reached below -20 degrees celsius, but after 2 glowing periods it started as normal. Partsnr should be: 059 963 319 AB for engine code CBBB CLJA,CFFB CFGB CAYC
-
I have just replaced mine (on a octavia, but same cylinder) and there is a metal locking pin on the connecting pipe to the concentric slave cylinder that should "click" in place. But if that is present and still "no lock in place when connecting" I would suggest that the receiving end of the concentric slave cylinder may have been damaged when removing. Those are made of plastic, and can be damaged. Locking pin should look like something in the pic.
-
Check sway bar bushings and lower control arm bushings as well. They will make sound as described in situations you have. Also as T0nt0b0b says, did they replace the top mount suspension assembly when doing your suspension?
-
Yes, it is. Try bleeding the slave cylinder first. Really do it properly. If still stalling, do a complete clutch replacement.
-
It depends on driving style and environment. If wet clutch DSG and often drive in city traffic with lots of stops and traffic halts. Well, they tend to have a short lifespan, from 60 000 miles to 100 000 miles. Combine that style of driving with trailer (heavy towing) it is a certain recipe for DMF failure. use manual gearing in those situations. If manual, they will last much longer. Never ever just replace clutchdisk and pressureplate without DMF. When all things are down, do the whole clutch assembly with DMF. I guess most reasonable car mechanics will agree with me on this one.