erindad
Members
-
Joined
-
Last visited
Everything posted by erindad
-
To be honest I didn't look at the revs when it happens but I'll take note of the revs. No i didn't take the FIX , Me being a miserable git would have to had a 100 mile round trip at my expense even thou the message about the FIX said at " No expense to you"🤥 and the stories circulating at the time.
-
Does anyone with a 1.6tdi get juddering at 45mph in 5th gear. Only done 80,000mls but 10 years old , new belts 30,000 mls ago. Cruising along gently in 5th gear about 45/50mph when I go to accelerate it hesitates and jumps gently then off we go. Am I in too high a gear ? , Noticed this problem in the last year or so and getting worse , it used to do it about 40mph, which I put down to too high a gear. I was wondering if a valve gasket or something is starting to develop holes. I was going to scan with VCDS but laptop just packed up. Any suggestions ?
-
You may see more with the engine cover lifted off. Looks like a oil/fluid spill onto hot engine/exhaust
-
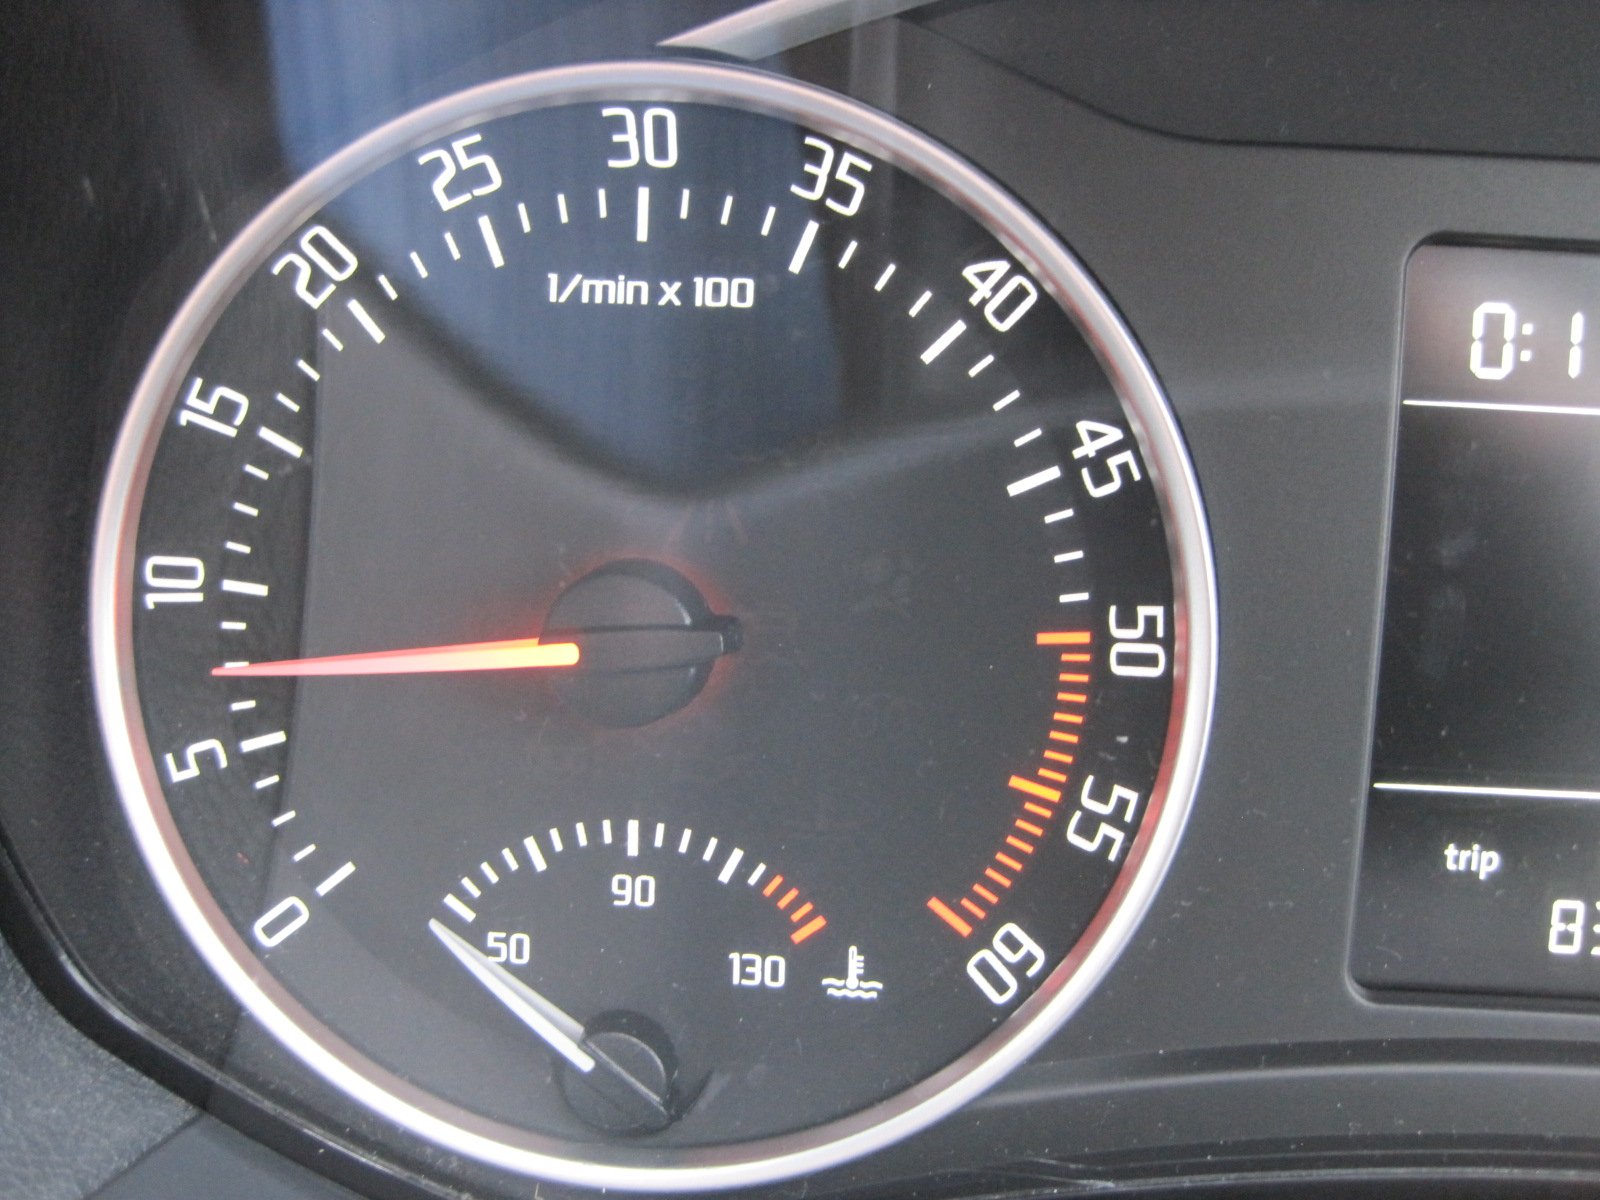
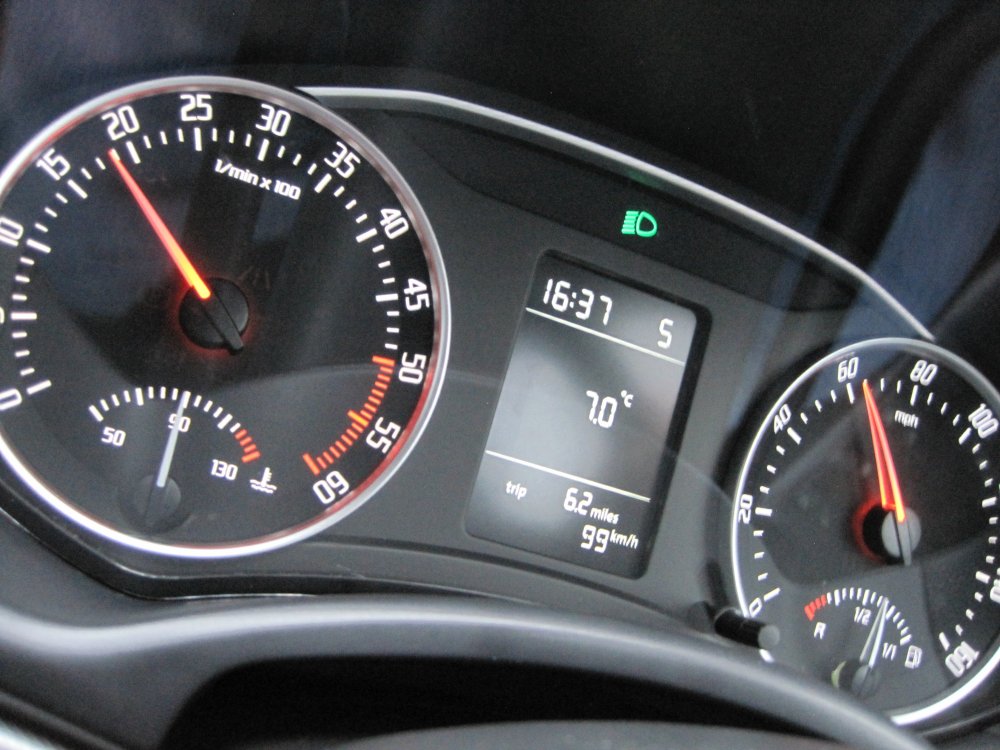
I tried the red needle idea as previous post . Used red insulating tape stuck to a piece of clear sticky tape and a hole punched in it . Attached it with a small dab of hot glue. Came out quite well but don't know yet if any heat from the LED will affect it . Not been tried in the dark yet. Instead of bright white smd leds for the gauges I used warm white but not impressed with them I will change them for bright white and make them red also.

-
Dimmer control doesn't make any difference to the needle brightness or make the temp and fuel needles light up.
-
Since getting used to the bright needles on my speed and rev dials I've just discovered the fuel and temp gauge needles LEDs are not working now. A repeat performance is now required . I found the brightness was irritating and wonder if a piece of a sweetie colour film put over the LEDS would change and dim the leds just that little bit. A blue or red needle with a white background ? Going to try it when I have the dash panel out again
-
I prised my one off. It was tight but cleaned the jets and put it back on . It fell off first time out but was'nt expensive to replace. £7.50 six years ago from Skoda. Cheaper than £60 a pop.
-
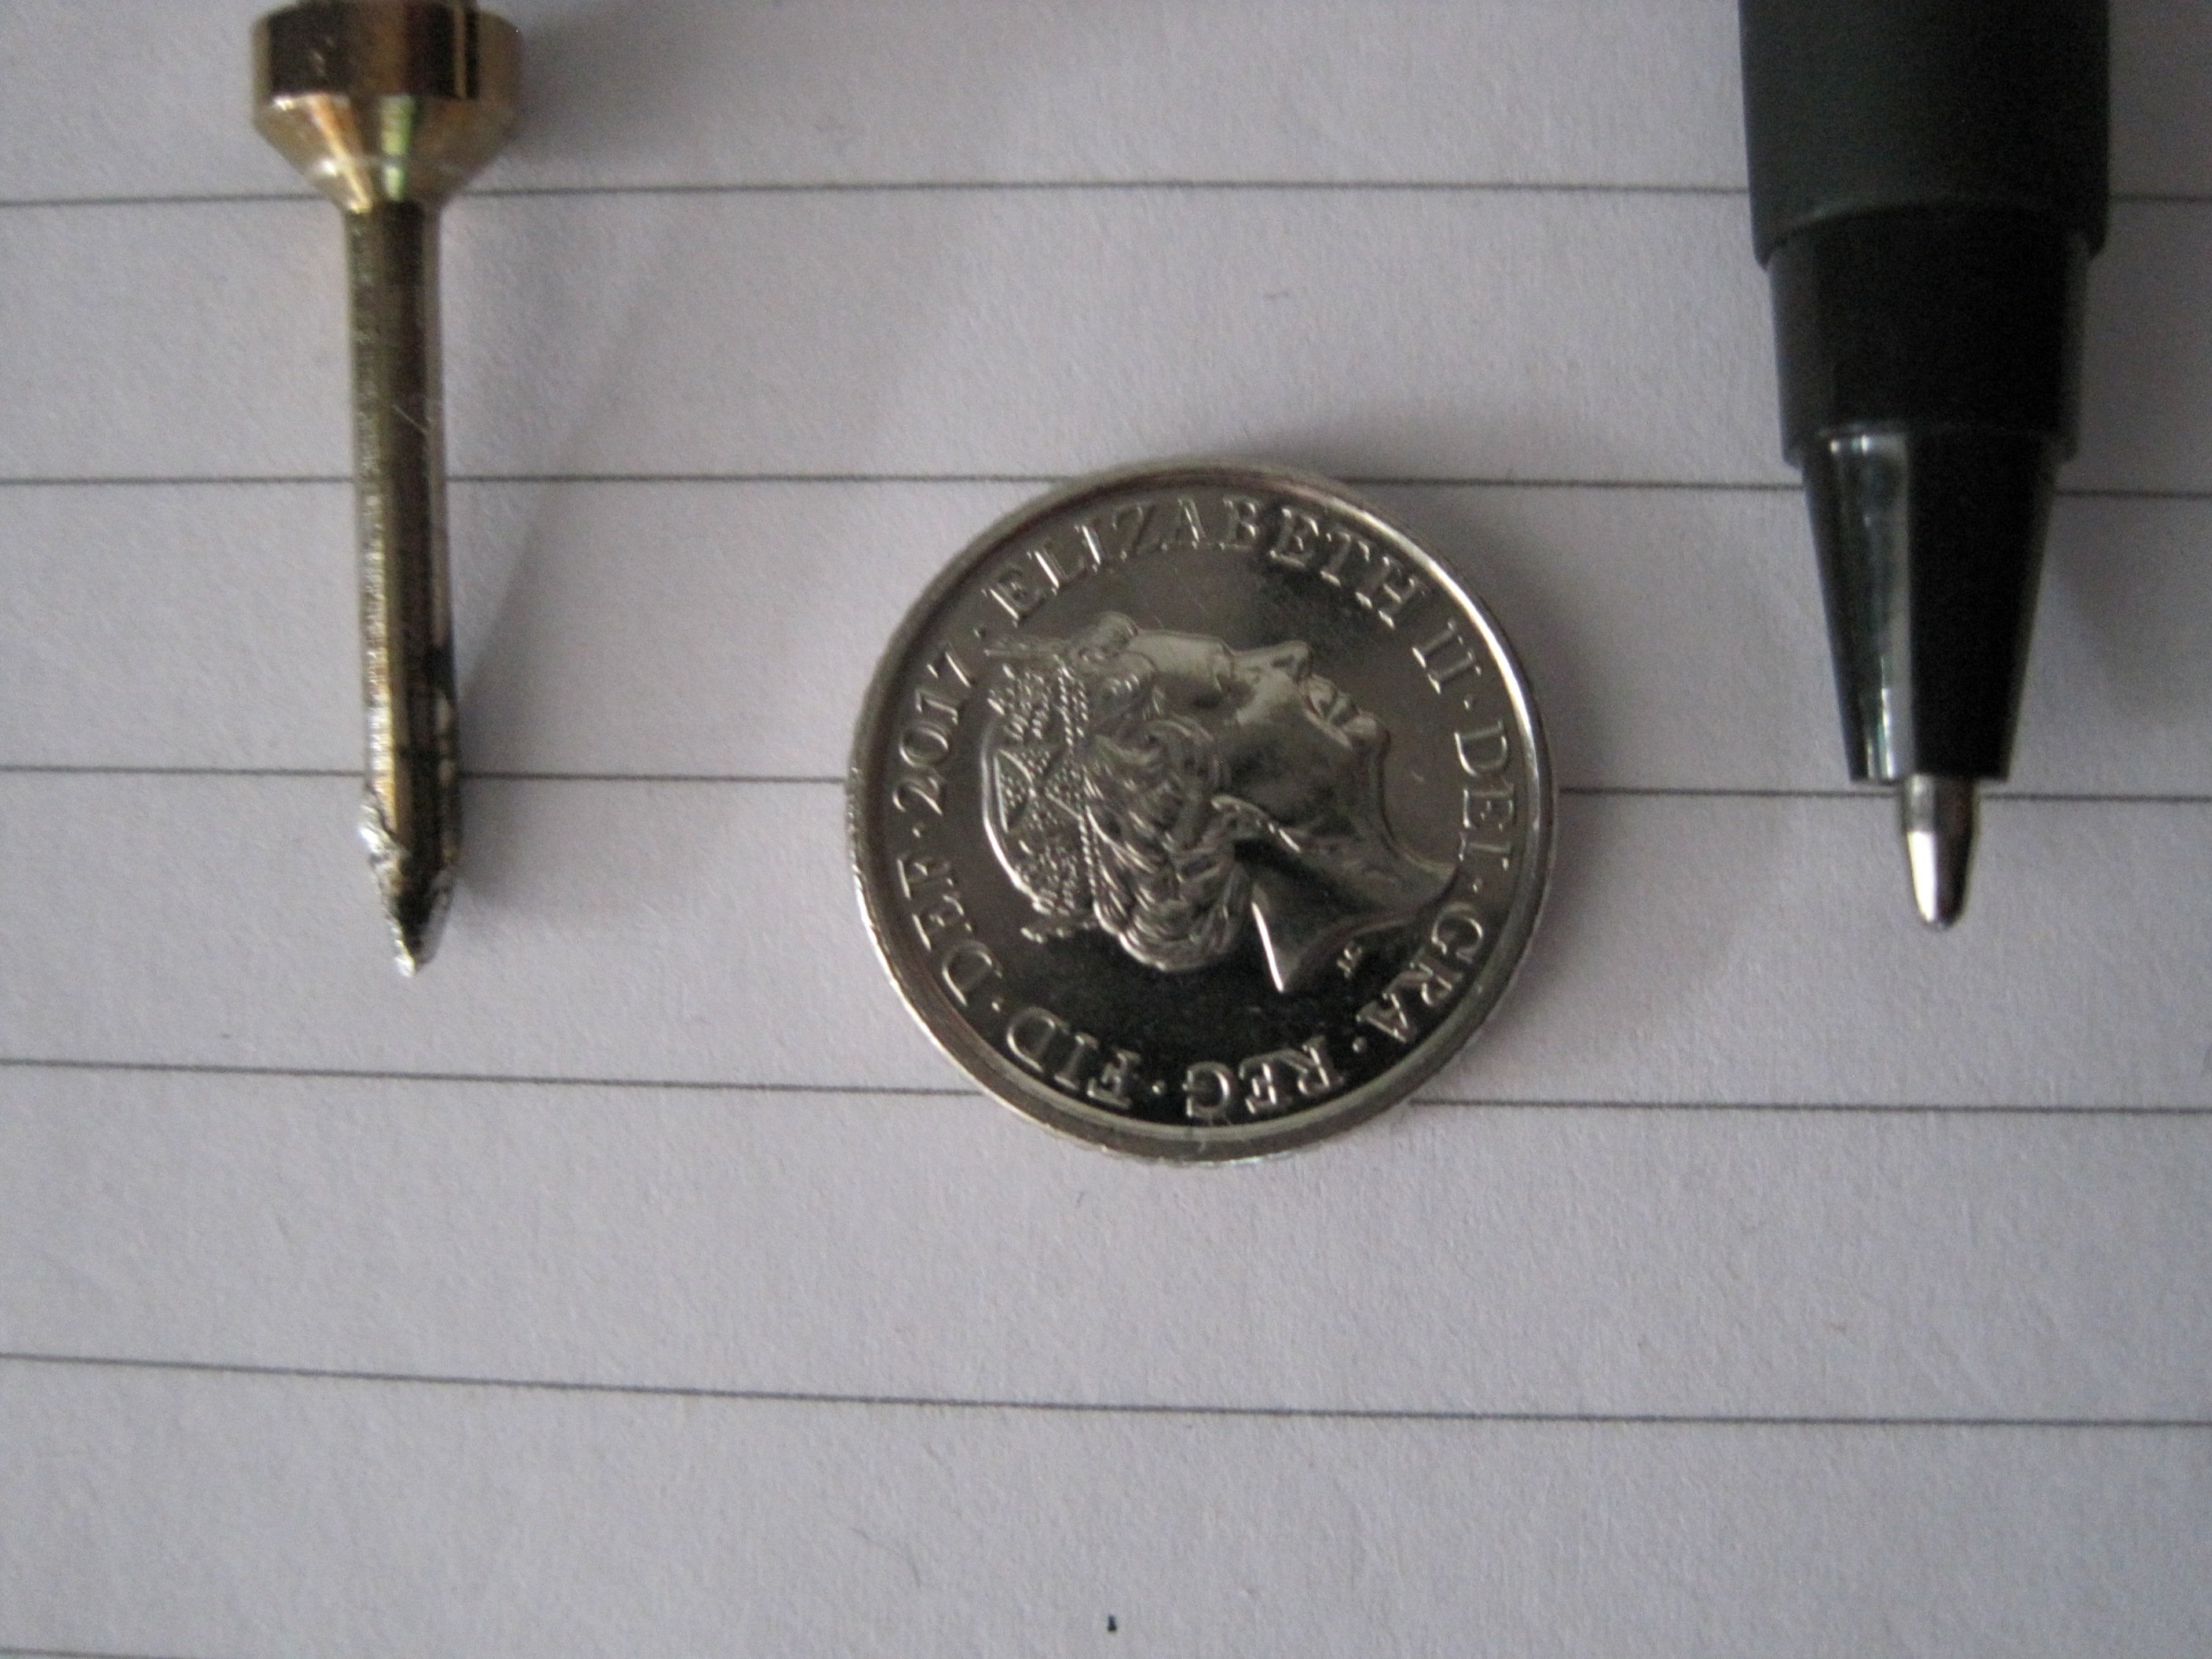
The original tip was rounded , I just ground it down to a point. There is photo of the size now about the size of a ball point pen tip

-
I've got fat stubby fingers but as long as you can hold a pair of tweezers in one hand and a soldering iron with a really small tip in the other and have a magnifying lamp on an adjustable stand you'll manage . Just follow the instructions above.
-
I though that maybe the motors had been damaged when taking off needles as it took a lot of leverage with the forks (good idea the forks ) Getting it down to a fine art now , takes about 5mins to remove instrument panel and 5 mins to strip. The needles centre were just too close to the white diffuser shield .Been pushed too far on. Raised them a fraction and alls well. The biggest problem I found was getting a soldering iron with a small enough point to melt the solder without melting the SMD led when fitting the new ones. Had to modify my smallest tip which did the job. 10 SMD off ebay @£1.70, cheap enough to melt them . Could not have done it without my magnifying lamp.
-
I followed the instructions above for replacing the SMD leds in my instrument panel. It worked but now the needles are jerky in operation . The speedo needle goes up smoothly but jerks /jumps on the slow down . The rev counter was OK until I realised the needle was in the wrong position, 6000 revs with engine off. After sorting that out the rev counter has now started to jerk like the speedo . At first I thought the face dial was incorrectly placed but no. Could I have damaged the motor which turns the needles. Could the needle be to far on and rubbing on the face. ? Any ideas anyone?
-
As Above a lot of BS What about taking it to a official VW/Skoda dealer ( or another one ) for their opinion and ask for an estimate to repair. (if slipping )? At least you will have something to show him he's wrong and what it may cost him to put right. The longer you leave it the harder it will get for you to get him to repair /replace it. I wonder about the seized calliper in the first place as it rolled OK on the flat.
-
Are the two "special bolts , nuts and washers " you replaced the adjustable ones. If so then thats your problem as KenONeill says.
-
You wont be able to do it without taking the whole headlight unit out, simple job (unless the xenon is a different h/light unit from the halogen) A plastic nut behind the h/light needs unscrewing , A hook thingy sits on the bottom side of the headlight, Pull the lever outwards and the whole unit comes away . Disconnect the multiplug and its out. then follow the above instructions. It will just push back in no bother. If your changing for LEDs then check that the bulbs and in the correct way . Just plug the multi plug back in and s/lights on to check, if they dont work remove the bulb and rotate it 180 degrees
-
Why dont you search on the net for anti-roll bar bushes for your octavia , that will give you a clue if its a whole bar or just bushes you need,?
-
There should be drain holes along the bottom of the bootlid that lets water out in case of a small leak round the window etc. Are they clear.
-
Could the clutch pedal sensor have anything to do with this fault?
-
aluminium and steel placed together do not mix , the steel will rot the aluminium (electrolysis ? ) so better with an aluminium washer
-
Clutch pedal switch ? You may not have one as i was going by the forum you posted in ,
-
I too had this water in boot problem , Didn't leak in with hose running on top of roof, no wet carpet etc , no sign at all of where it was coming in. Dried it all out and went for a run on a wet day and boot was filling up again . It only leaked when driving on a wet day . Painted lines around likely areas for leaking with kids water based paint , and found a water track. The cheap plastic bung on n/side/left rear was loose and any spray from underneath was being sucked in past the bung. Removed bung and sealed up hole. no more water in boot
-
I was taught that the (not quite square) square seals went in with the thickest face facing the inside of the cylinder so when the piston was pushed forward towards the pads the thick/lip bit acted as a kind of return spring that helped to push/pull the piston back into the cylinder when the brake pedal was released. It also ensured a better seal round the piston.
-
Anti roll bar links possibly ?
-
see second post , yellow is/was then switched live