Clarke2744
-
Posts
59 -
Joined
-
Last visited
Content Type
Profiles
Forums
Gallery
Shop
Events
Downloads
Everything posted by Clarke2744
-

1 and half months later, another turbo gone!!
Clarke2744 replied to JaamesVRS's topic in Skoda Fabia Mk I (1999-2007)
With greatest respect, I sill wouldn’t touch them with a barge pole. The shafts probably made of ‘chinesium’ , and the balancing, toloarancing and everything else will never be of the same standard as Garrett or any other reputable turbo company. And on top of that you’re combining something that’s already a reduced specification/standard with more stress from a remap. Beckons the saying buy cheap buy twice. :/ I would go for the Garrett PD150 as you mentioned. -
1 and half months later, another turbo gone!!
Clarke2744 replied to JaamesVRS's topic in Skoda Fabia Mk I (1999-2007)
Some sort of alignment issue, from fitting/manufacture?? Hence the siren noise you mentioned, which ultimately has caused the bearing to give up. “That Latvian company”, doesn’t immediately feel me with confidence :/ What bearings does/did it use?? Ball or journal?? Unlucky mate, certainly not ideal!! -
Ahh! Sorry I’ve just read your initial post!
-
Hmmm, mine starts identically to that first thing in the morning. Is it not just soot having settled in the exhaust, seems pretty typical of a diesel?
-
Guide: Fabia mk1 (VRS) braided brake hose install
Clarke2744 replied to Clarke2744's topic in Skoda Fabia Guides
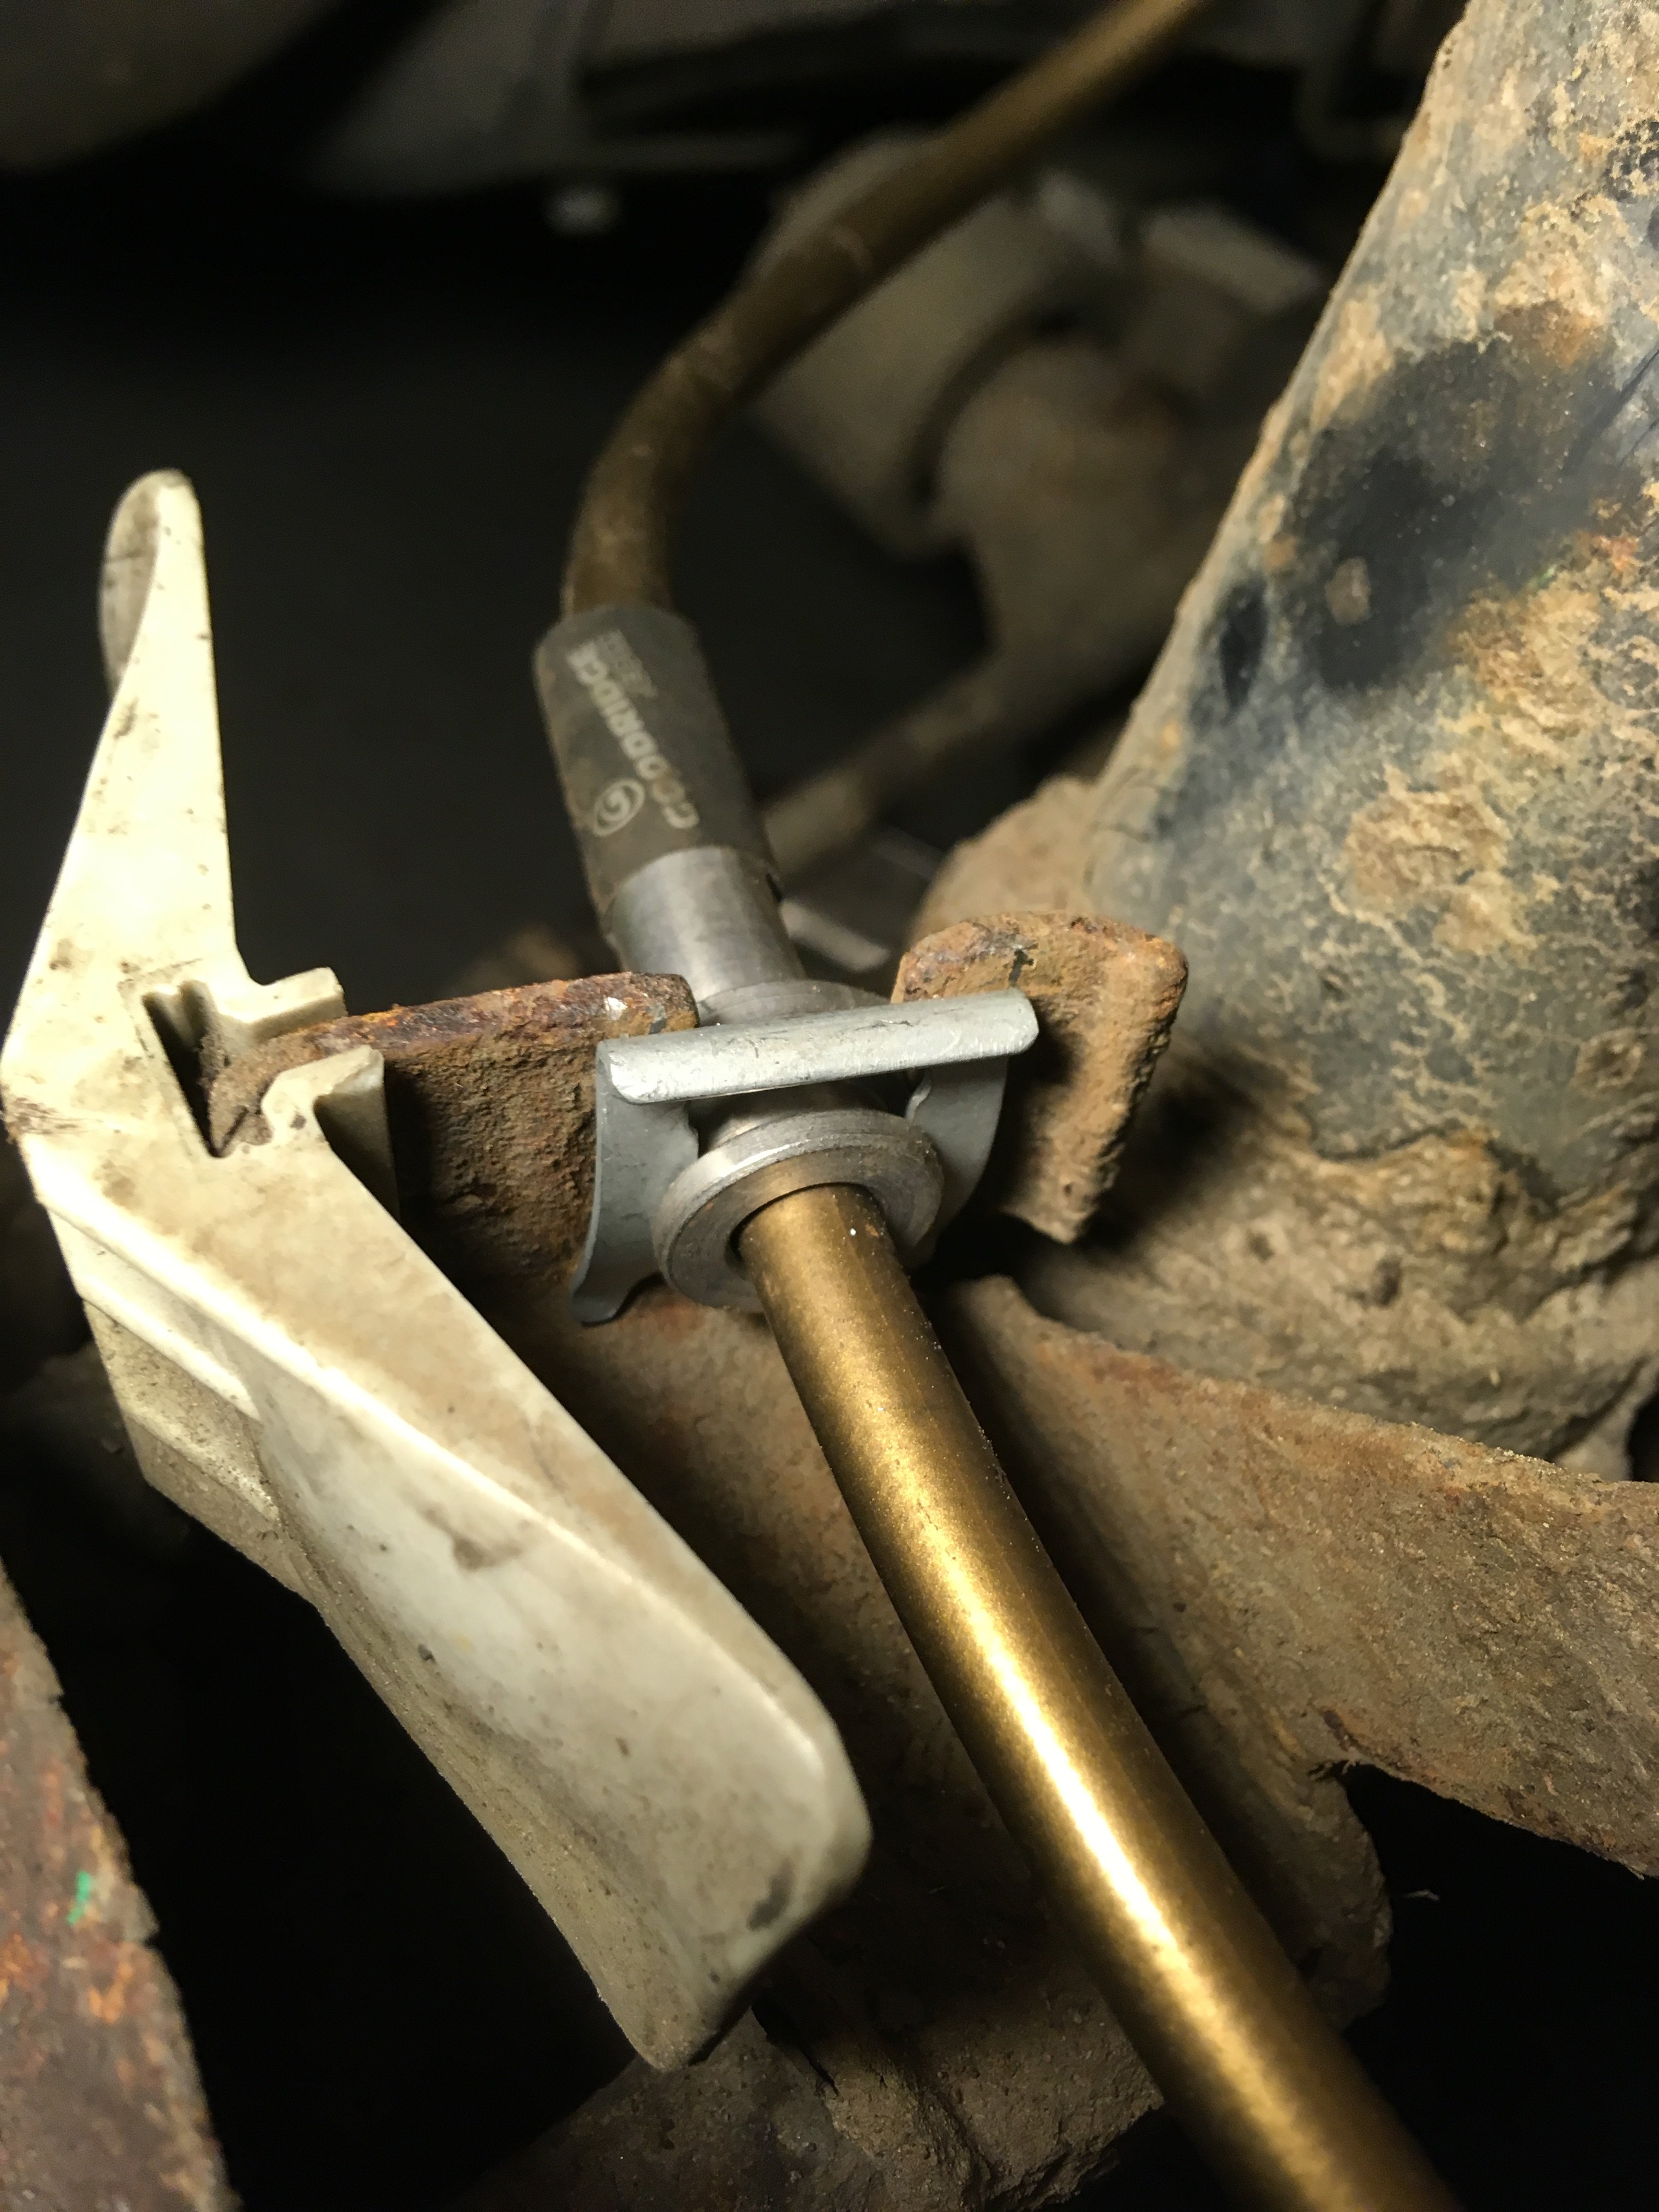
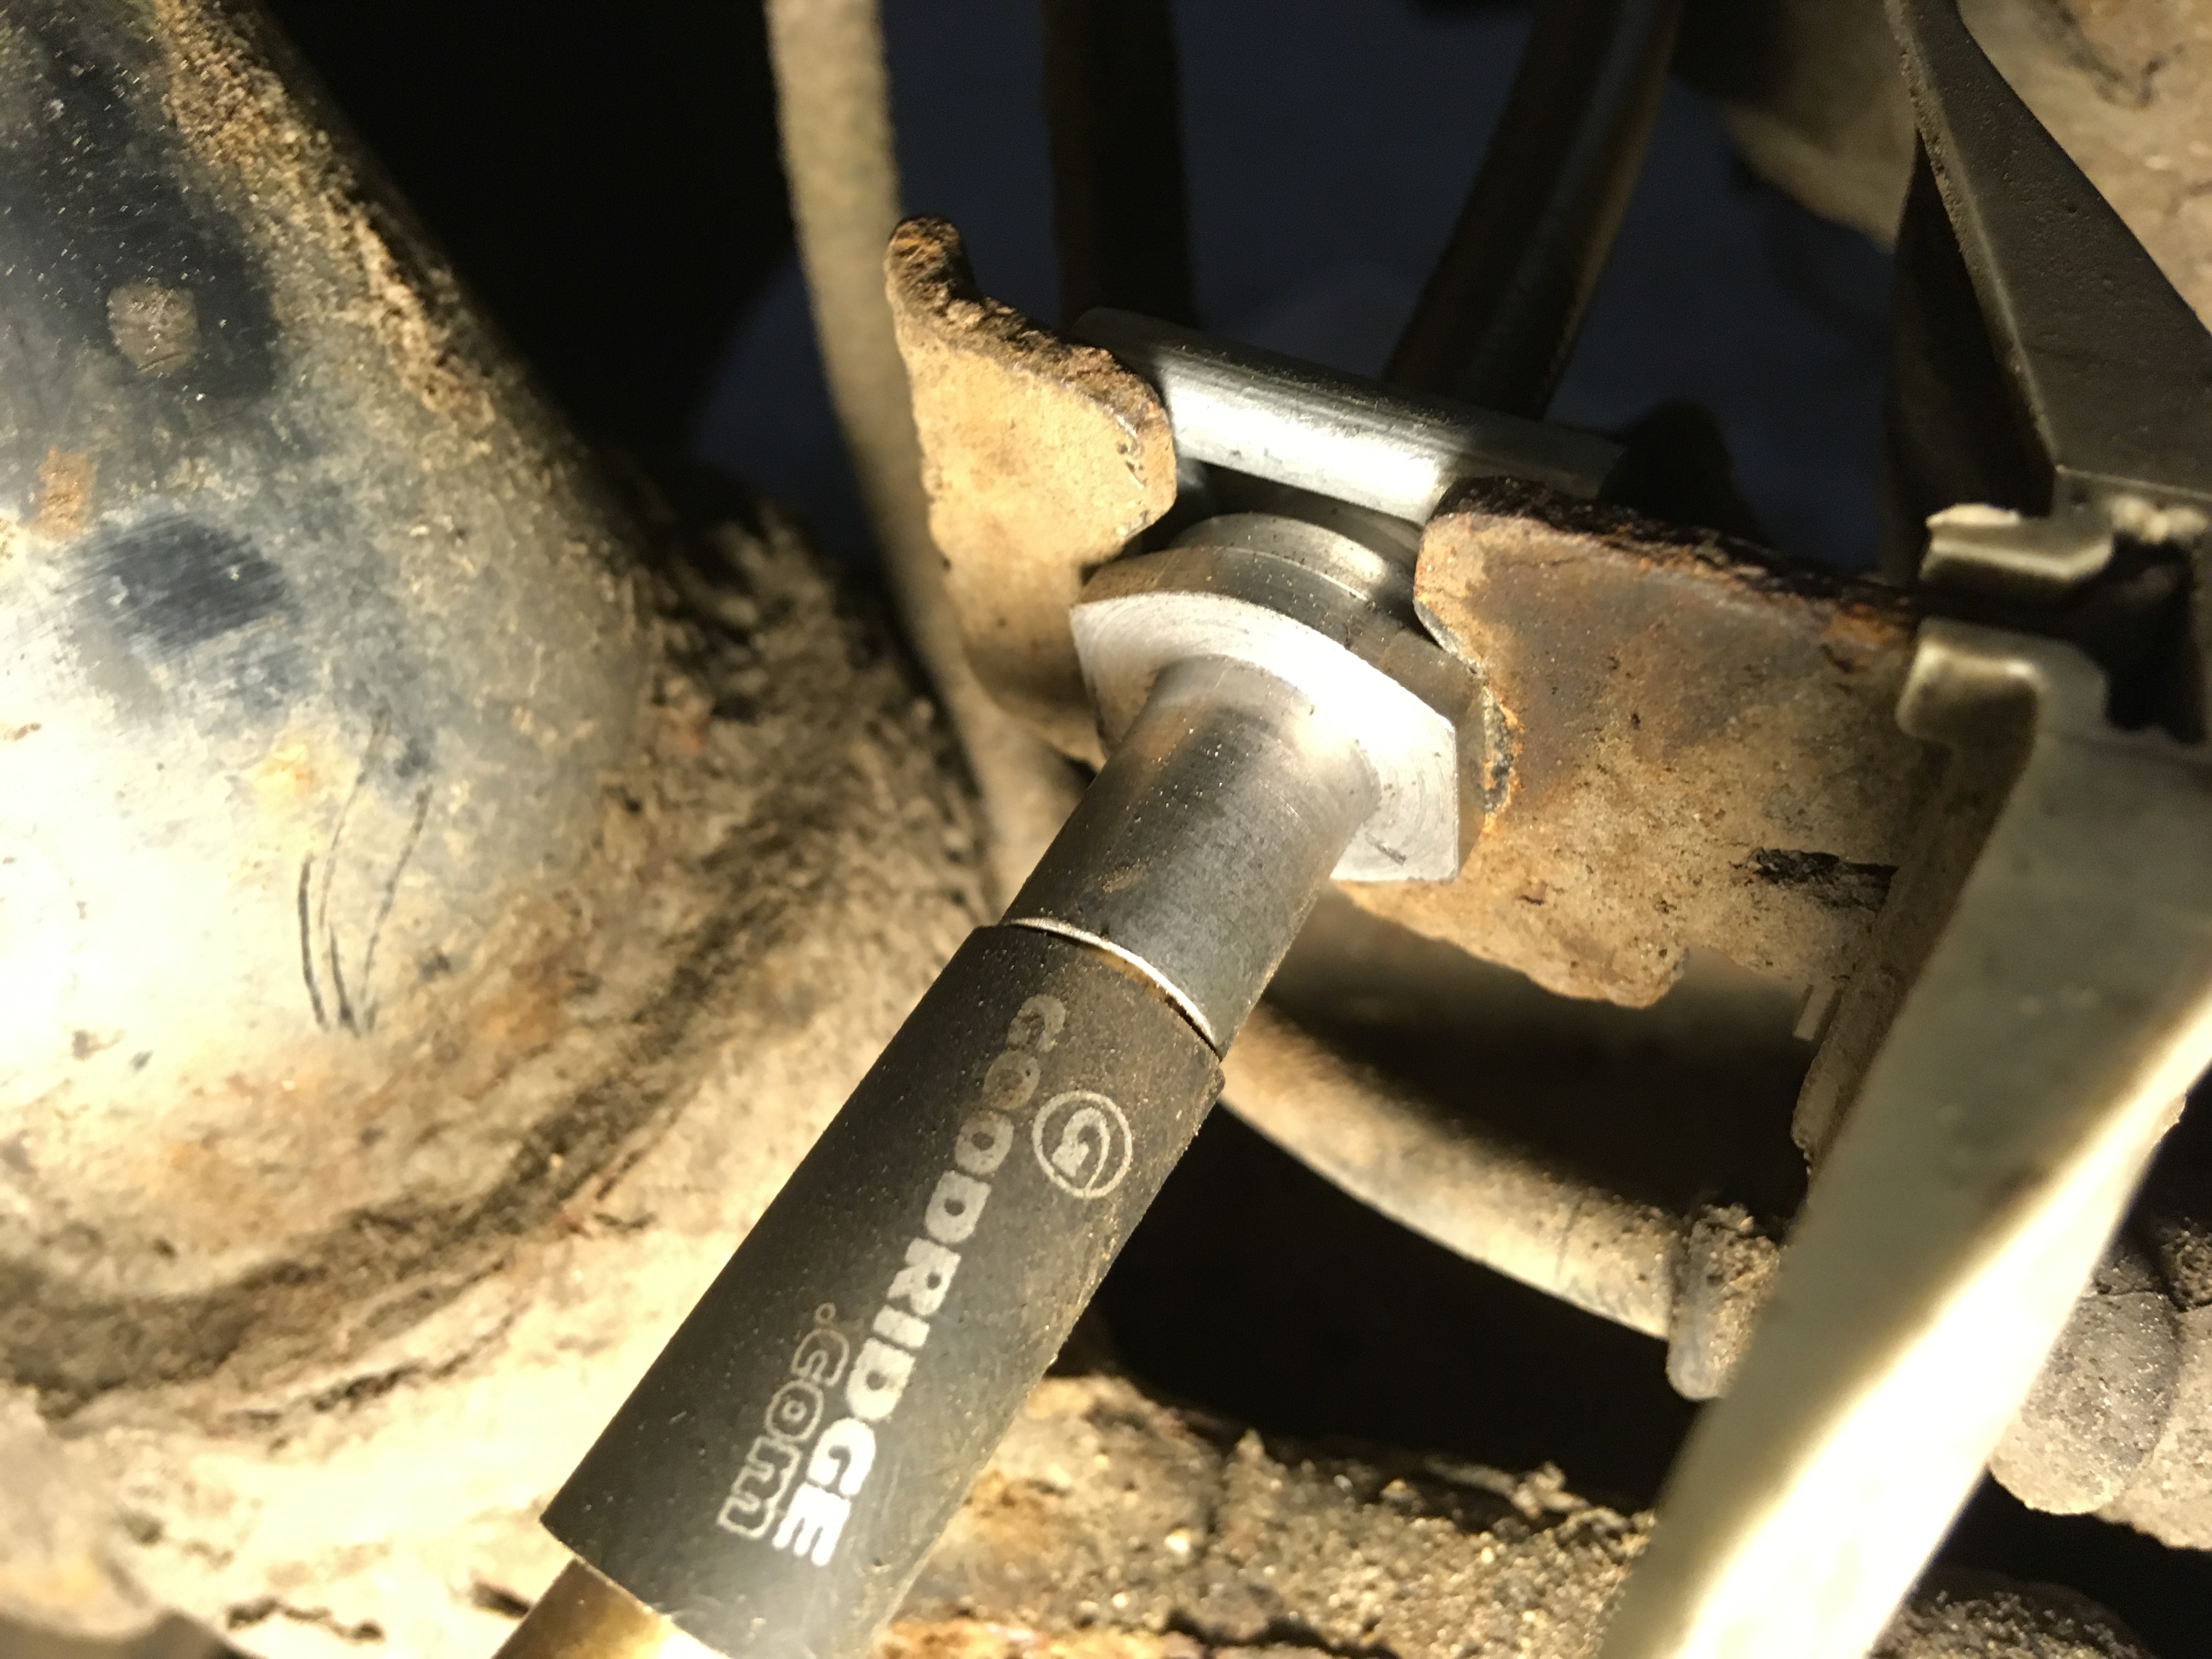
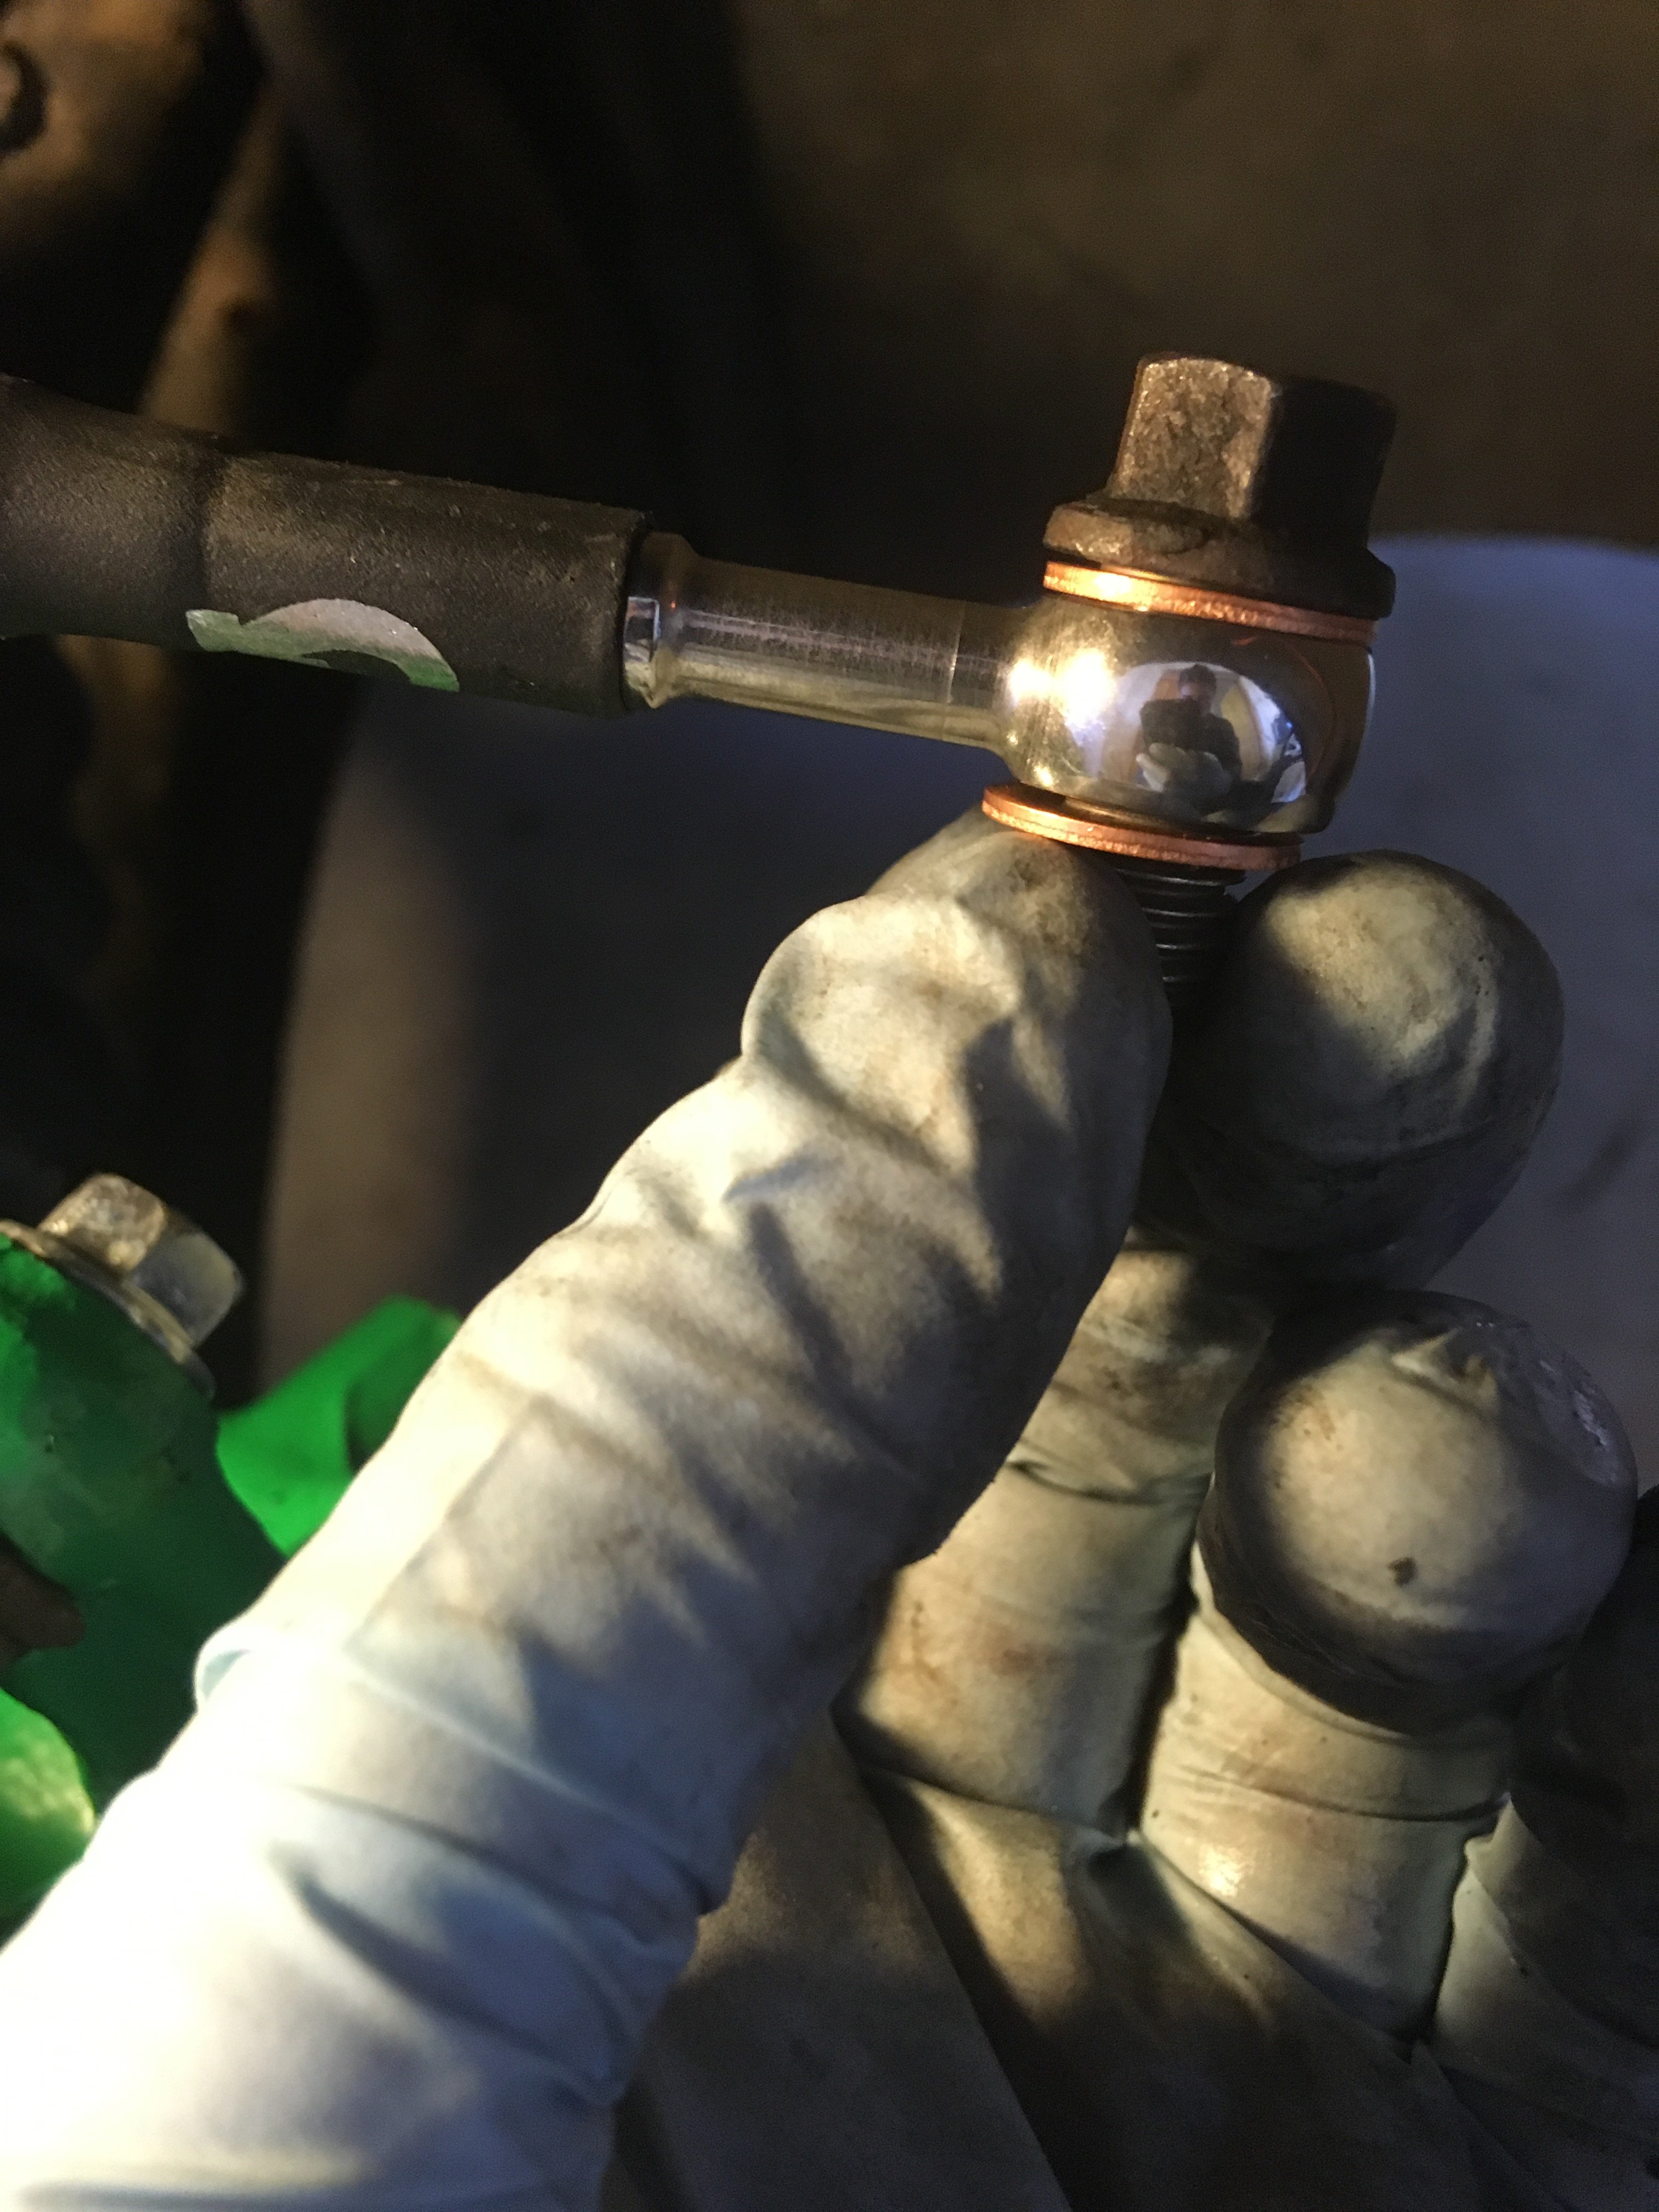
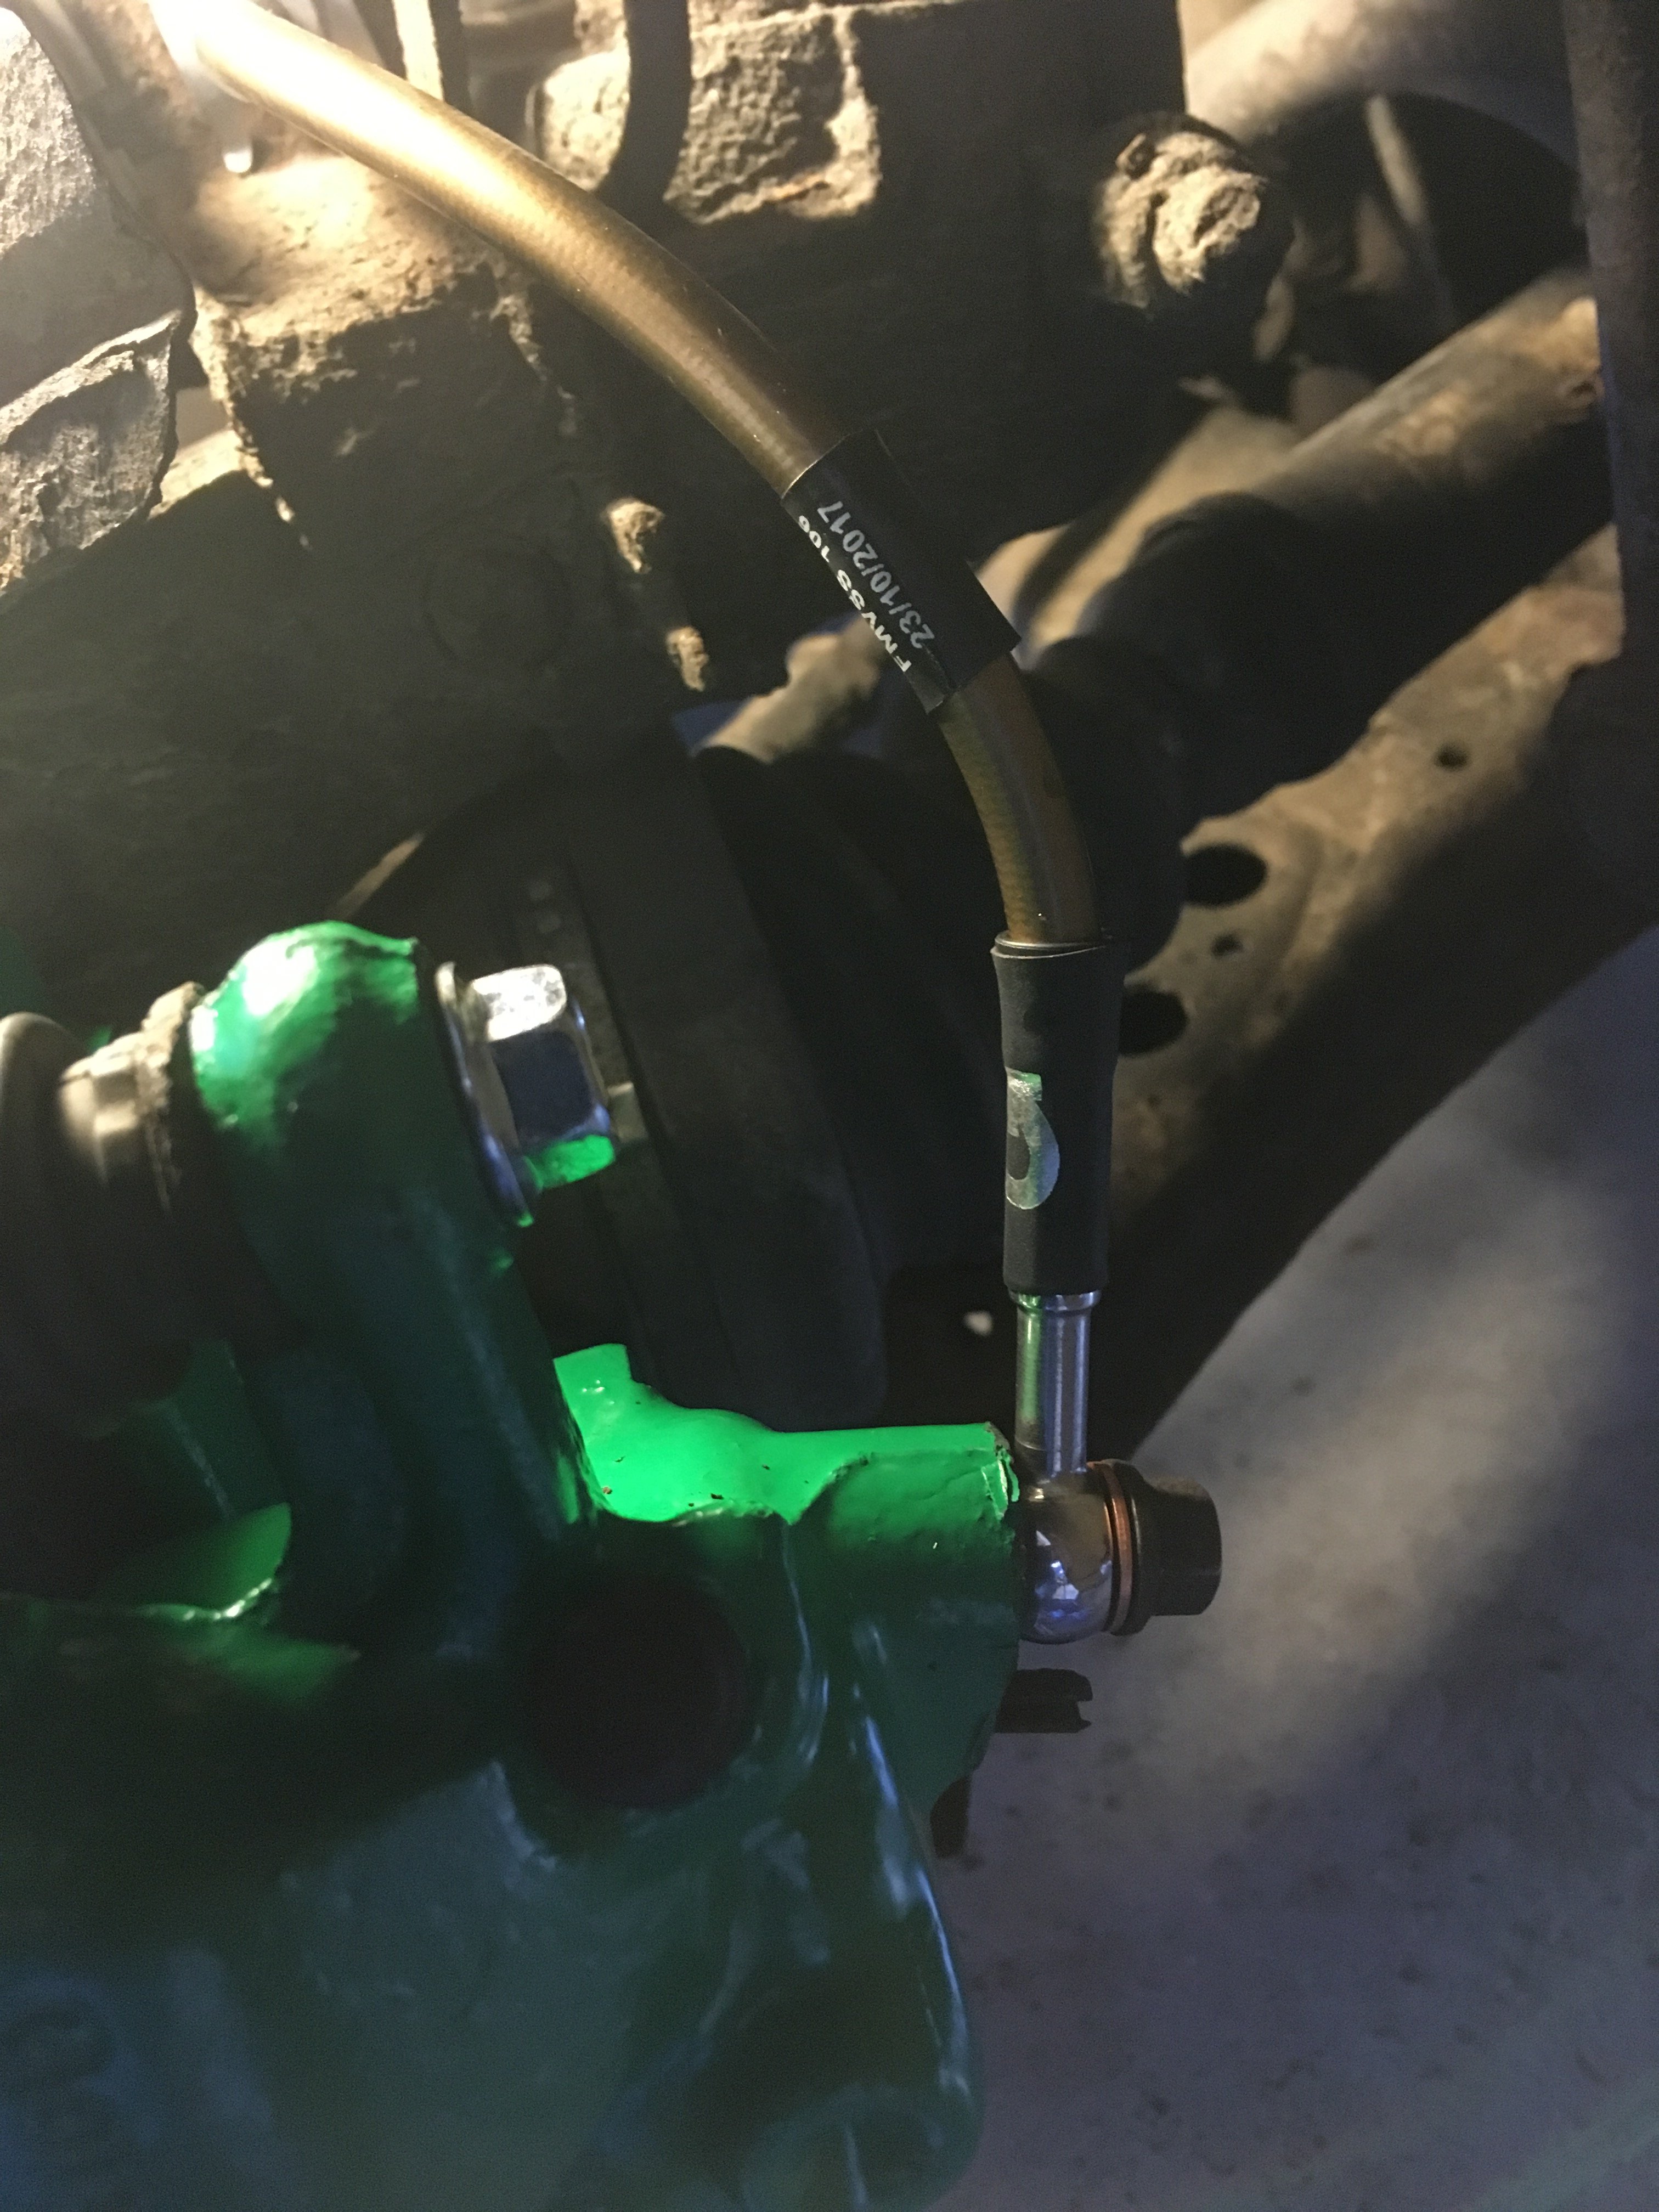
Once you’ve filed the braided hose to fit, push it through the bracket, you’ll have to hold it in place before screwing the union down onto the original spring clip. Be careful not to over tighten the union nut. I screwed it down so it was hand tight, the spring clip stops it coming loose so it’s not necessary to exert brute force to obtain a seal. Next route the braided line down towards the calliper. It’s supported in place by another bracket at the bottom of the strut, held in place by a type of spring clip. I renewed mine, as the old ones were rusted. I’ll try and edit this later with the part numbers, but they’re about 25p each from TPS. Pictures above show how the hose fits to the support bracket. The metal mounting ‘sleeve’ on the hose can be moved along the hose to adjust the length to suit. It then pushes down into the cutout in the support from above, before the spring clip secures it in place from the front. Final stage of installation is to refit the banjo bolt to the braided hose, sandwiching the hose with the two new copper washers provided in the kit. As shown above. Finally bolt the banjo back into place on the calliper. When tightening be sure to hold the braided hose very securely by hand, as it’ll try and twist as you tighten it up (you’ll see the original hose had two pronges on the end which fit either side of a split pin sticking out the calliper to prevent twisting the hose)... Sadly the braided hose doesn’t have this feature. Torque settings for the banjo bolt arent given in the workshop manual. I think I tightened mine down to about 20Nm. I think there was an advised torque setting on the box that the braided hoses come in. Be very careful not to strip or shear the thread or the banjo nut! Once you’ve checked the banjo bolts and unions are all tightened down sufficiently, you can remove the polythene from under the brake fluid reservoir cap. Remember you’ll then need to bleed the brakes again before you start pumping the pedal!! Having blended the brakes be sure to check for leaks before using the car.
- 1 reply
-
- 2
-

-

-
- fabia mk1
- braided brake
- (and 2 more)
-
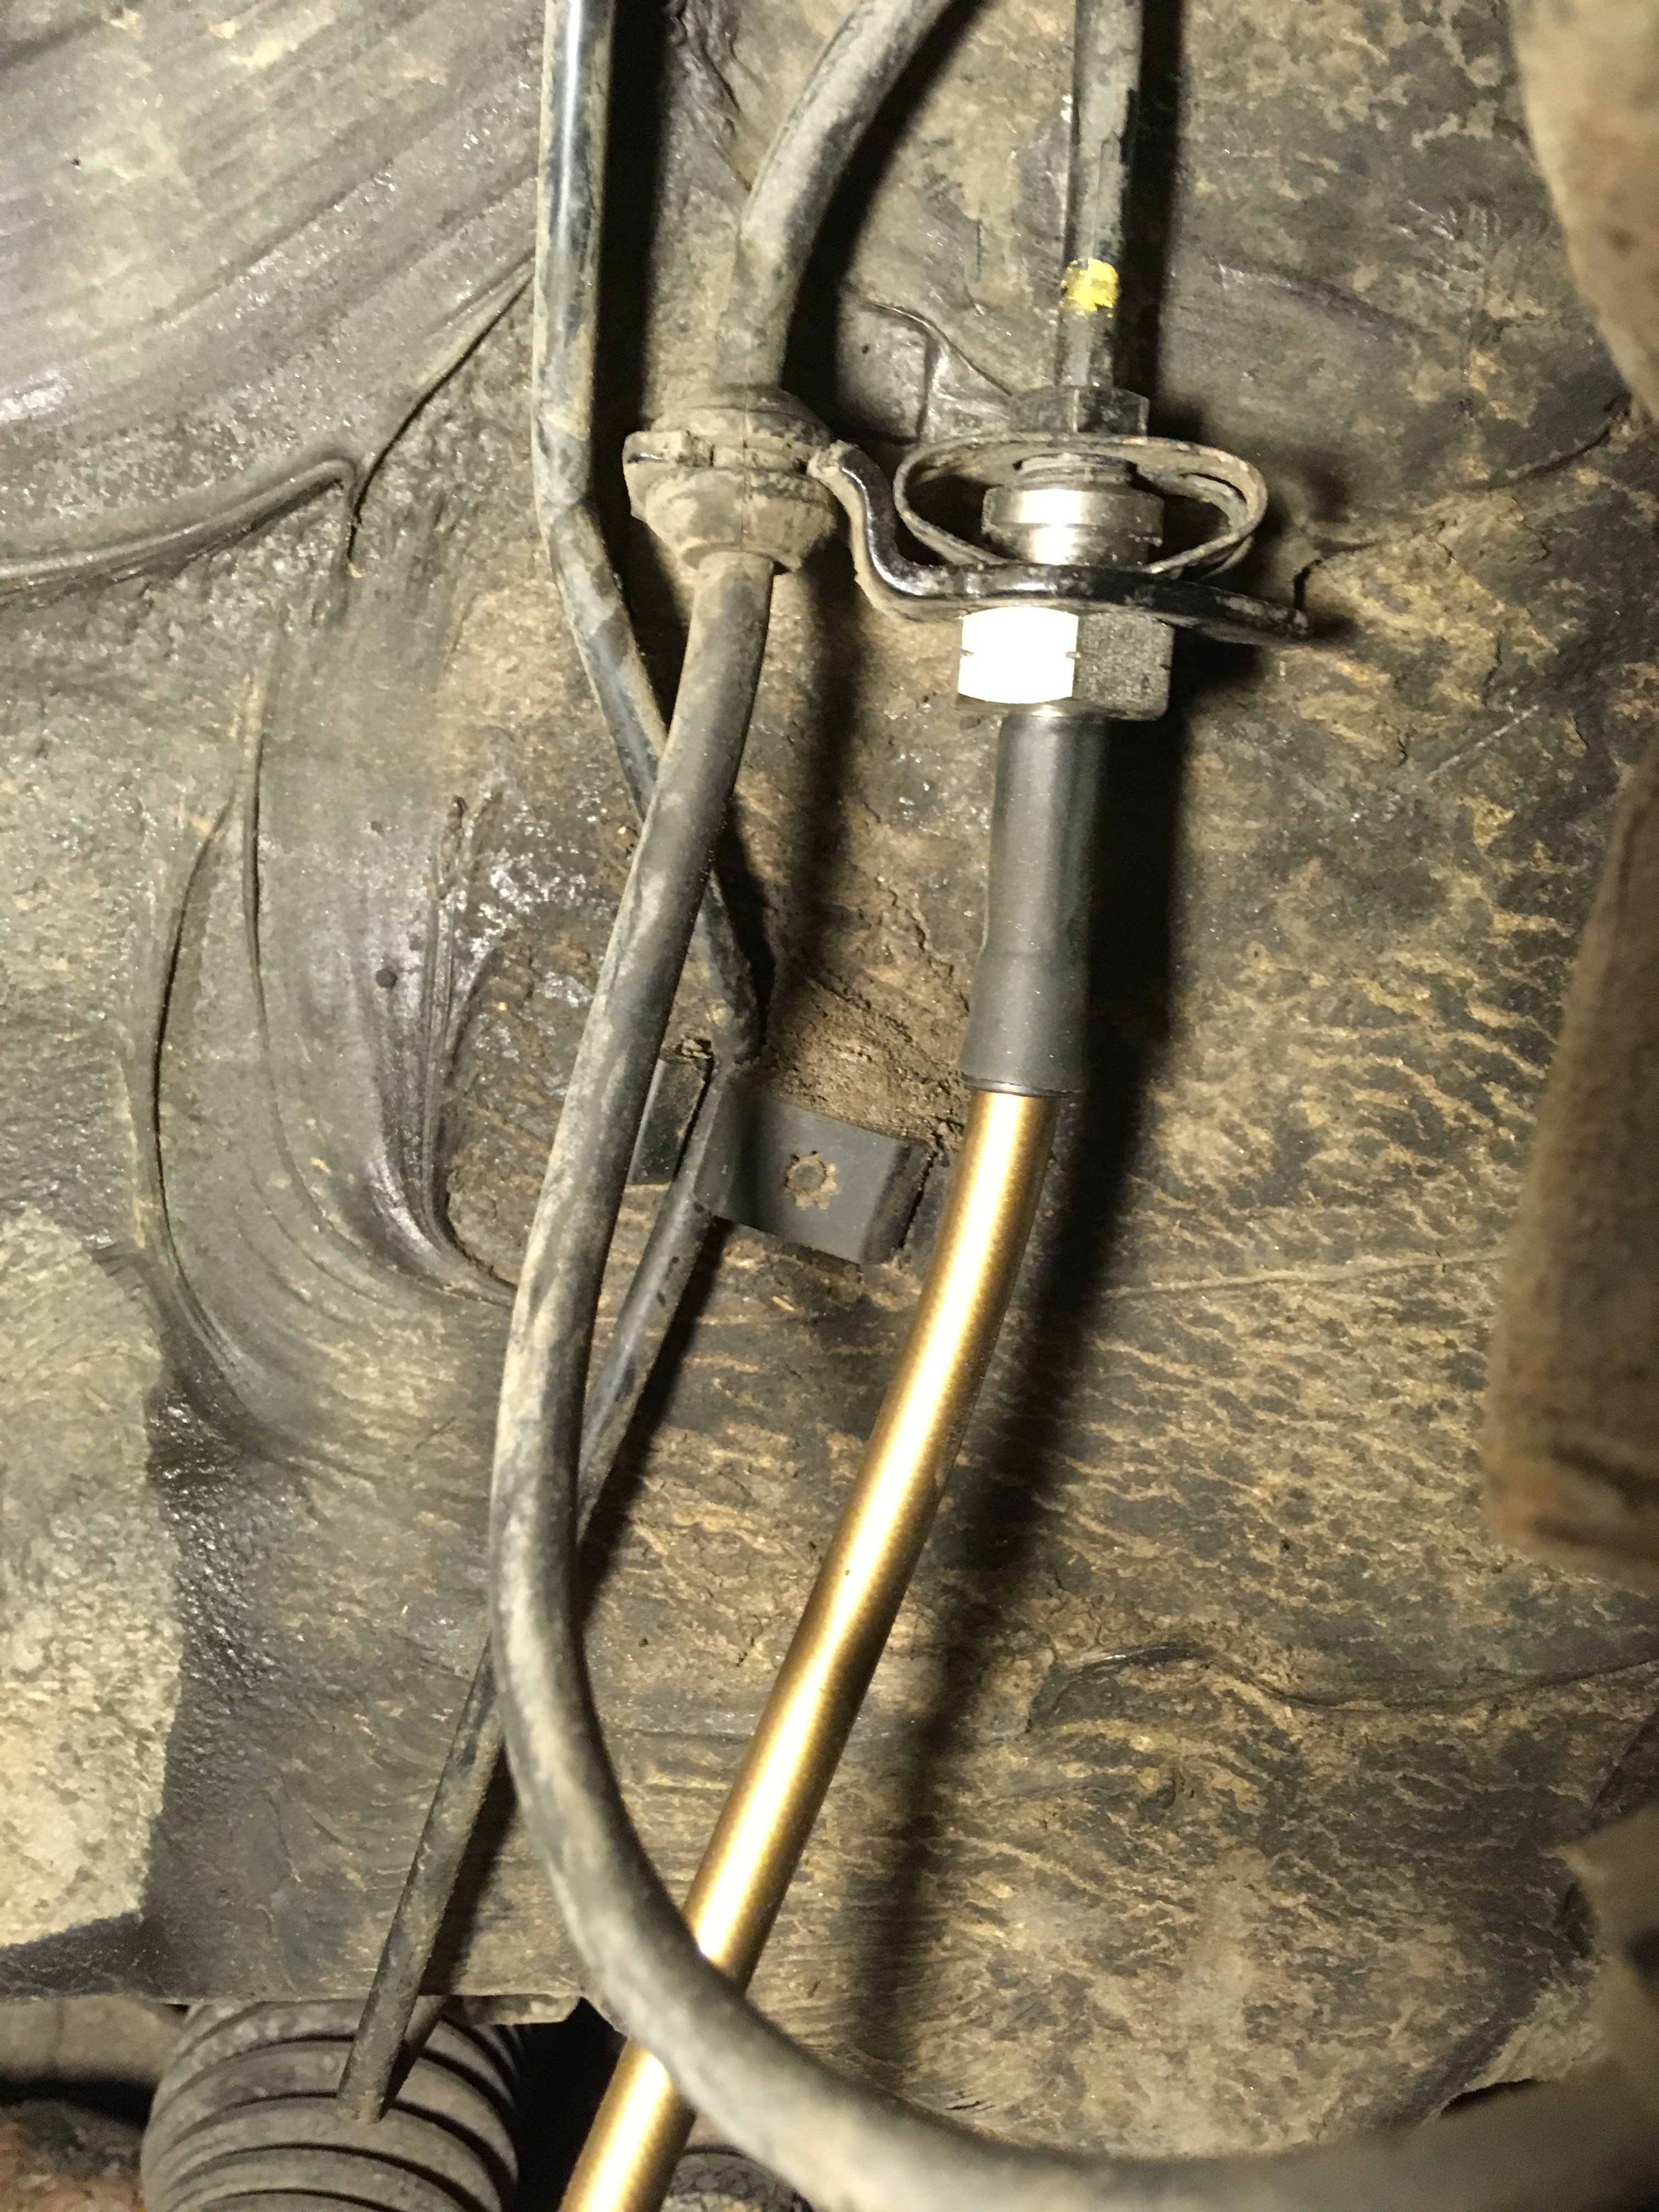
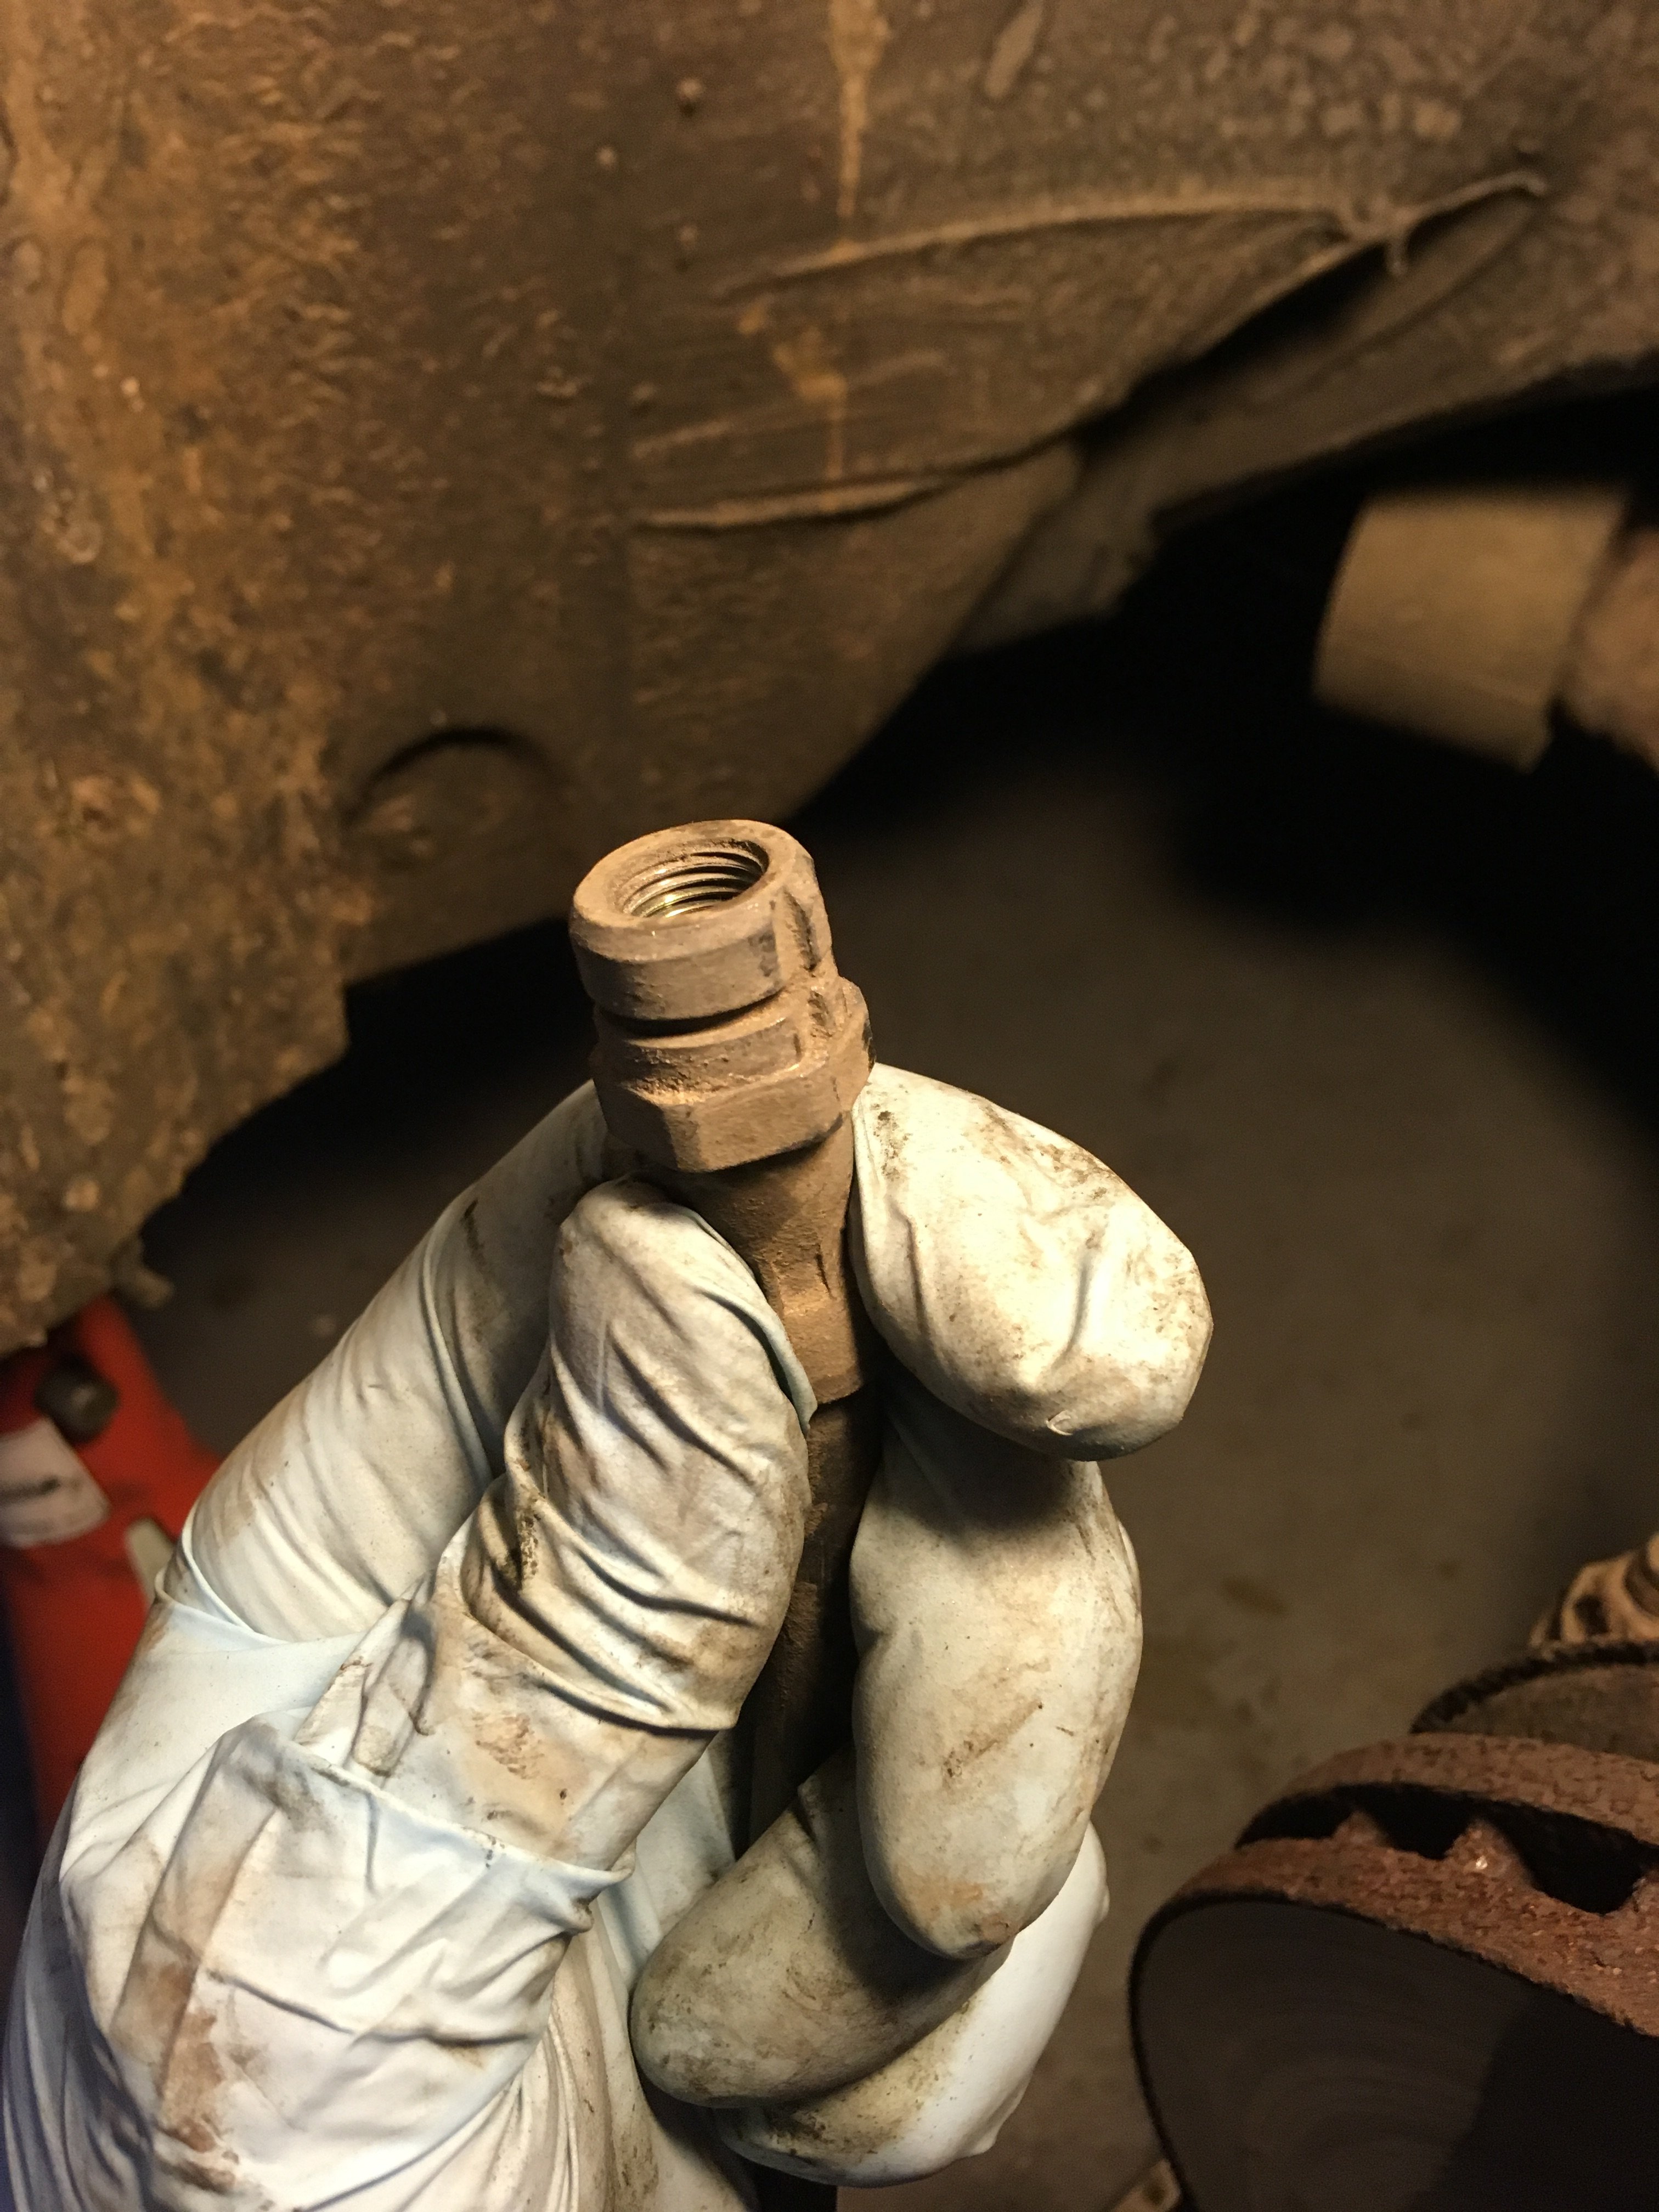
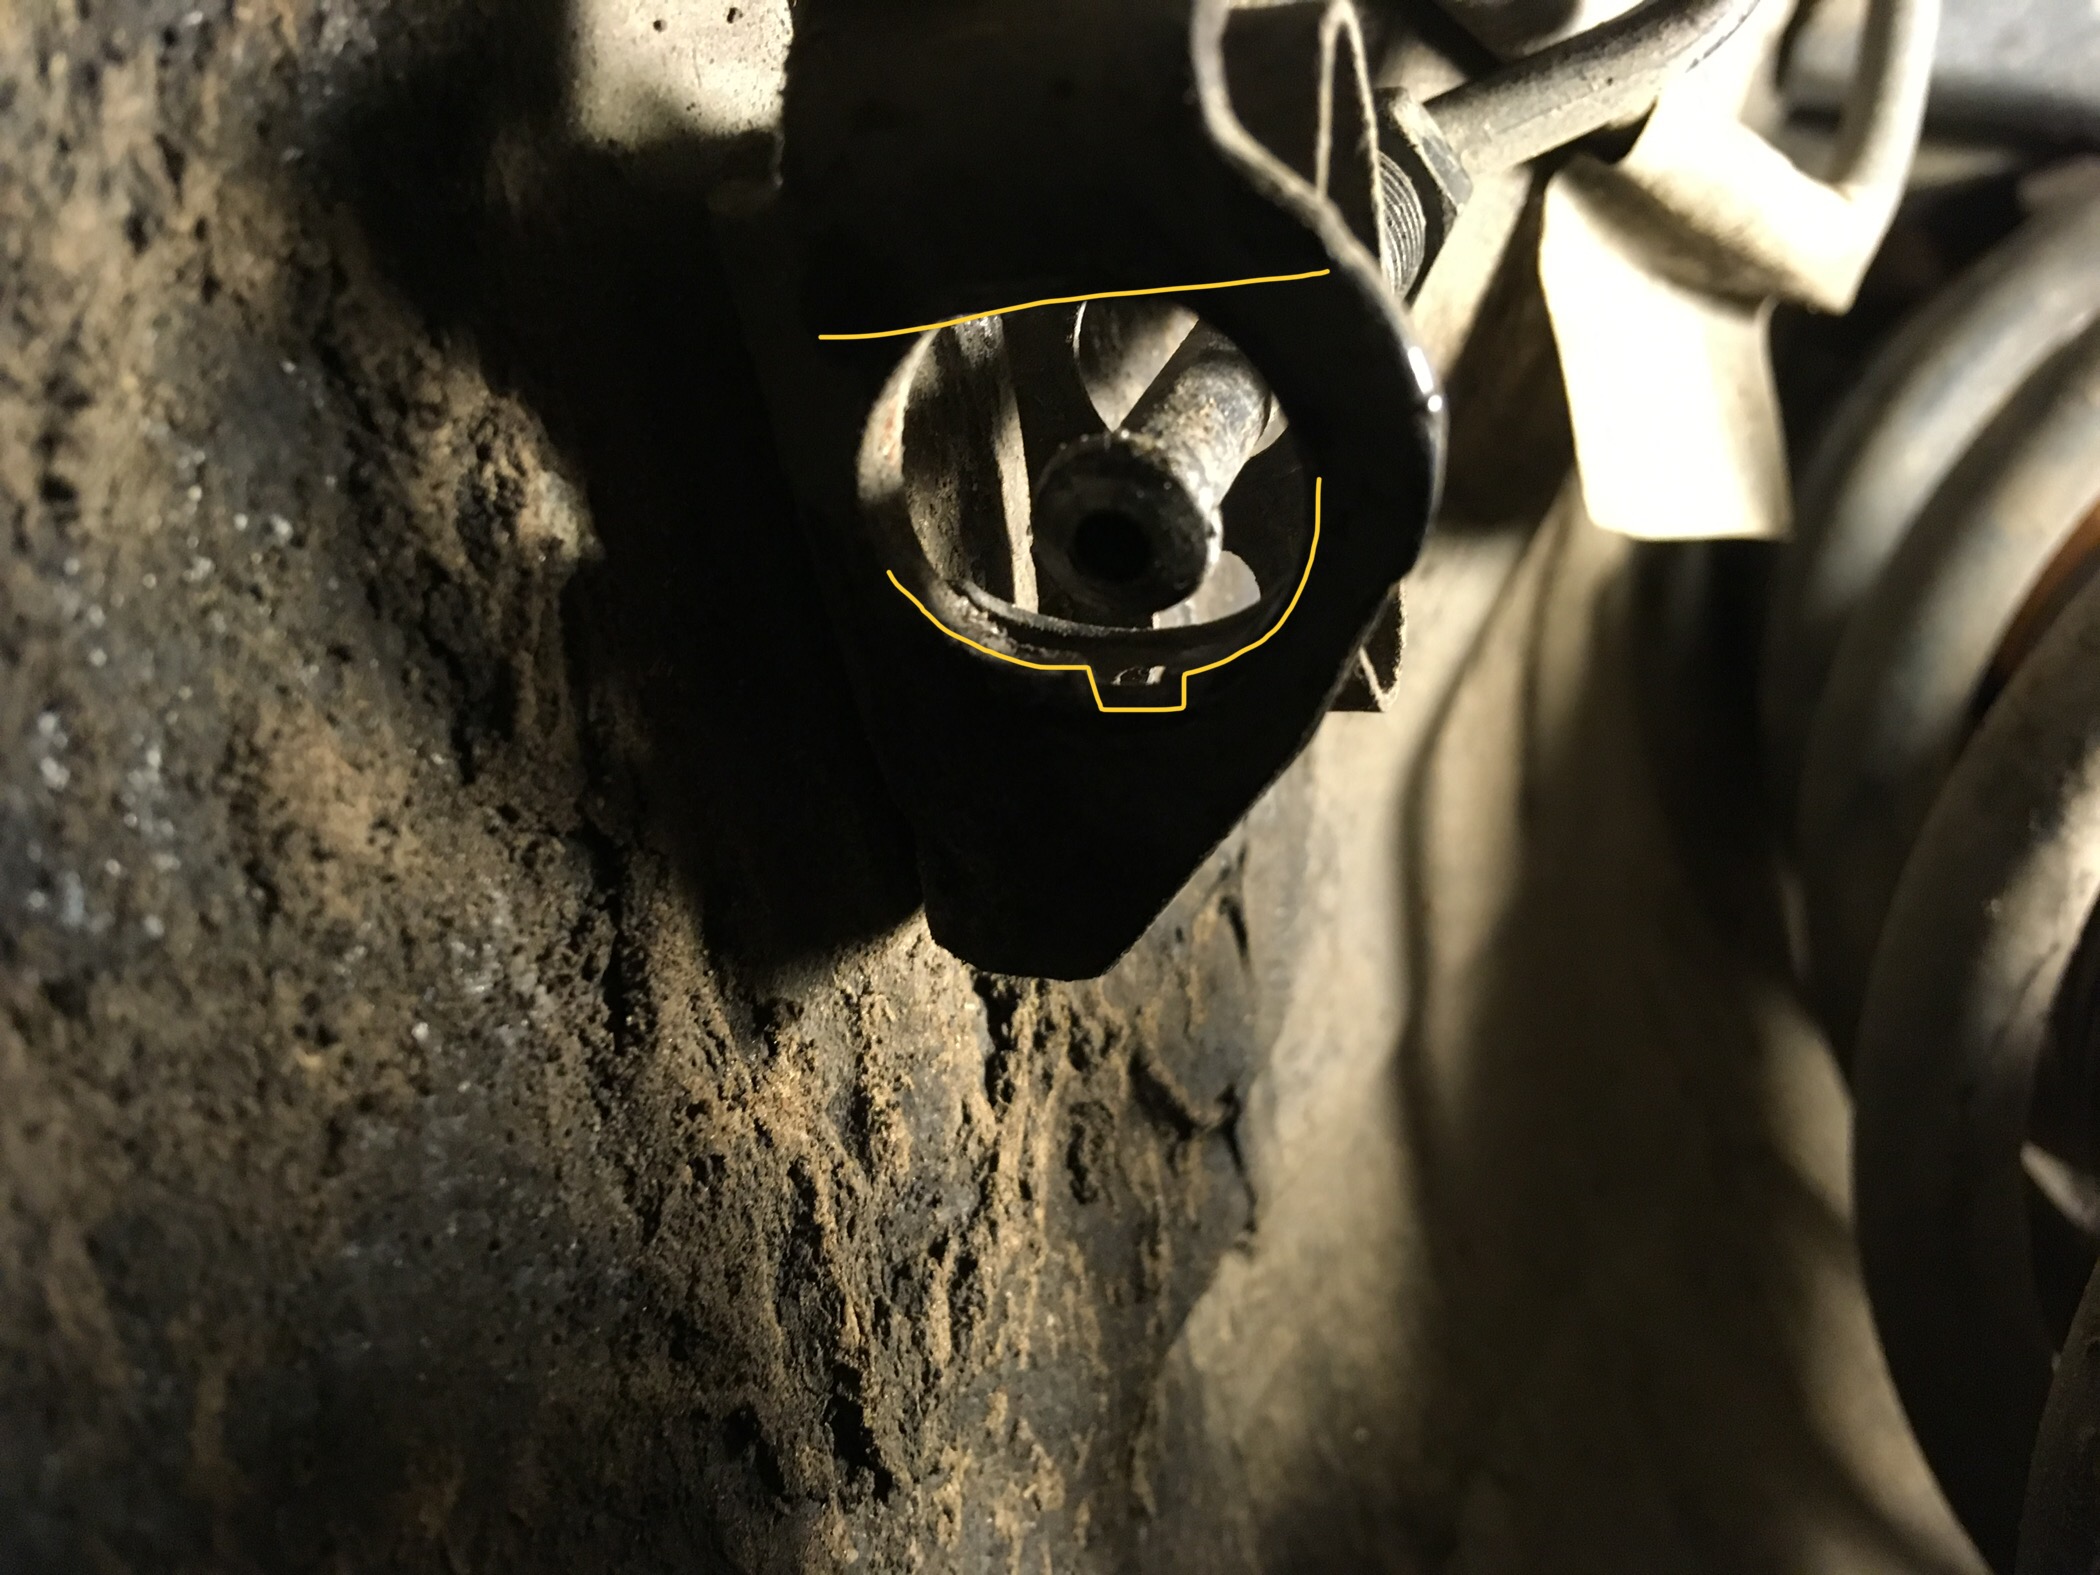
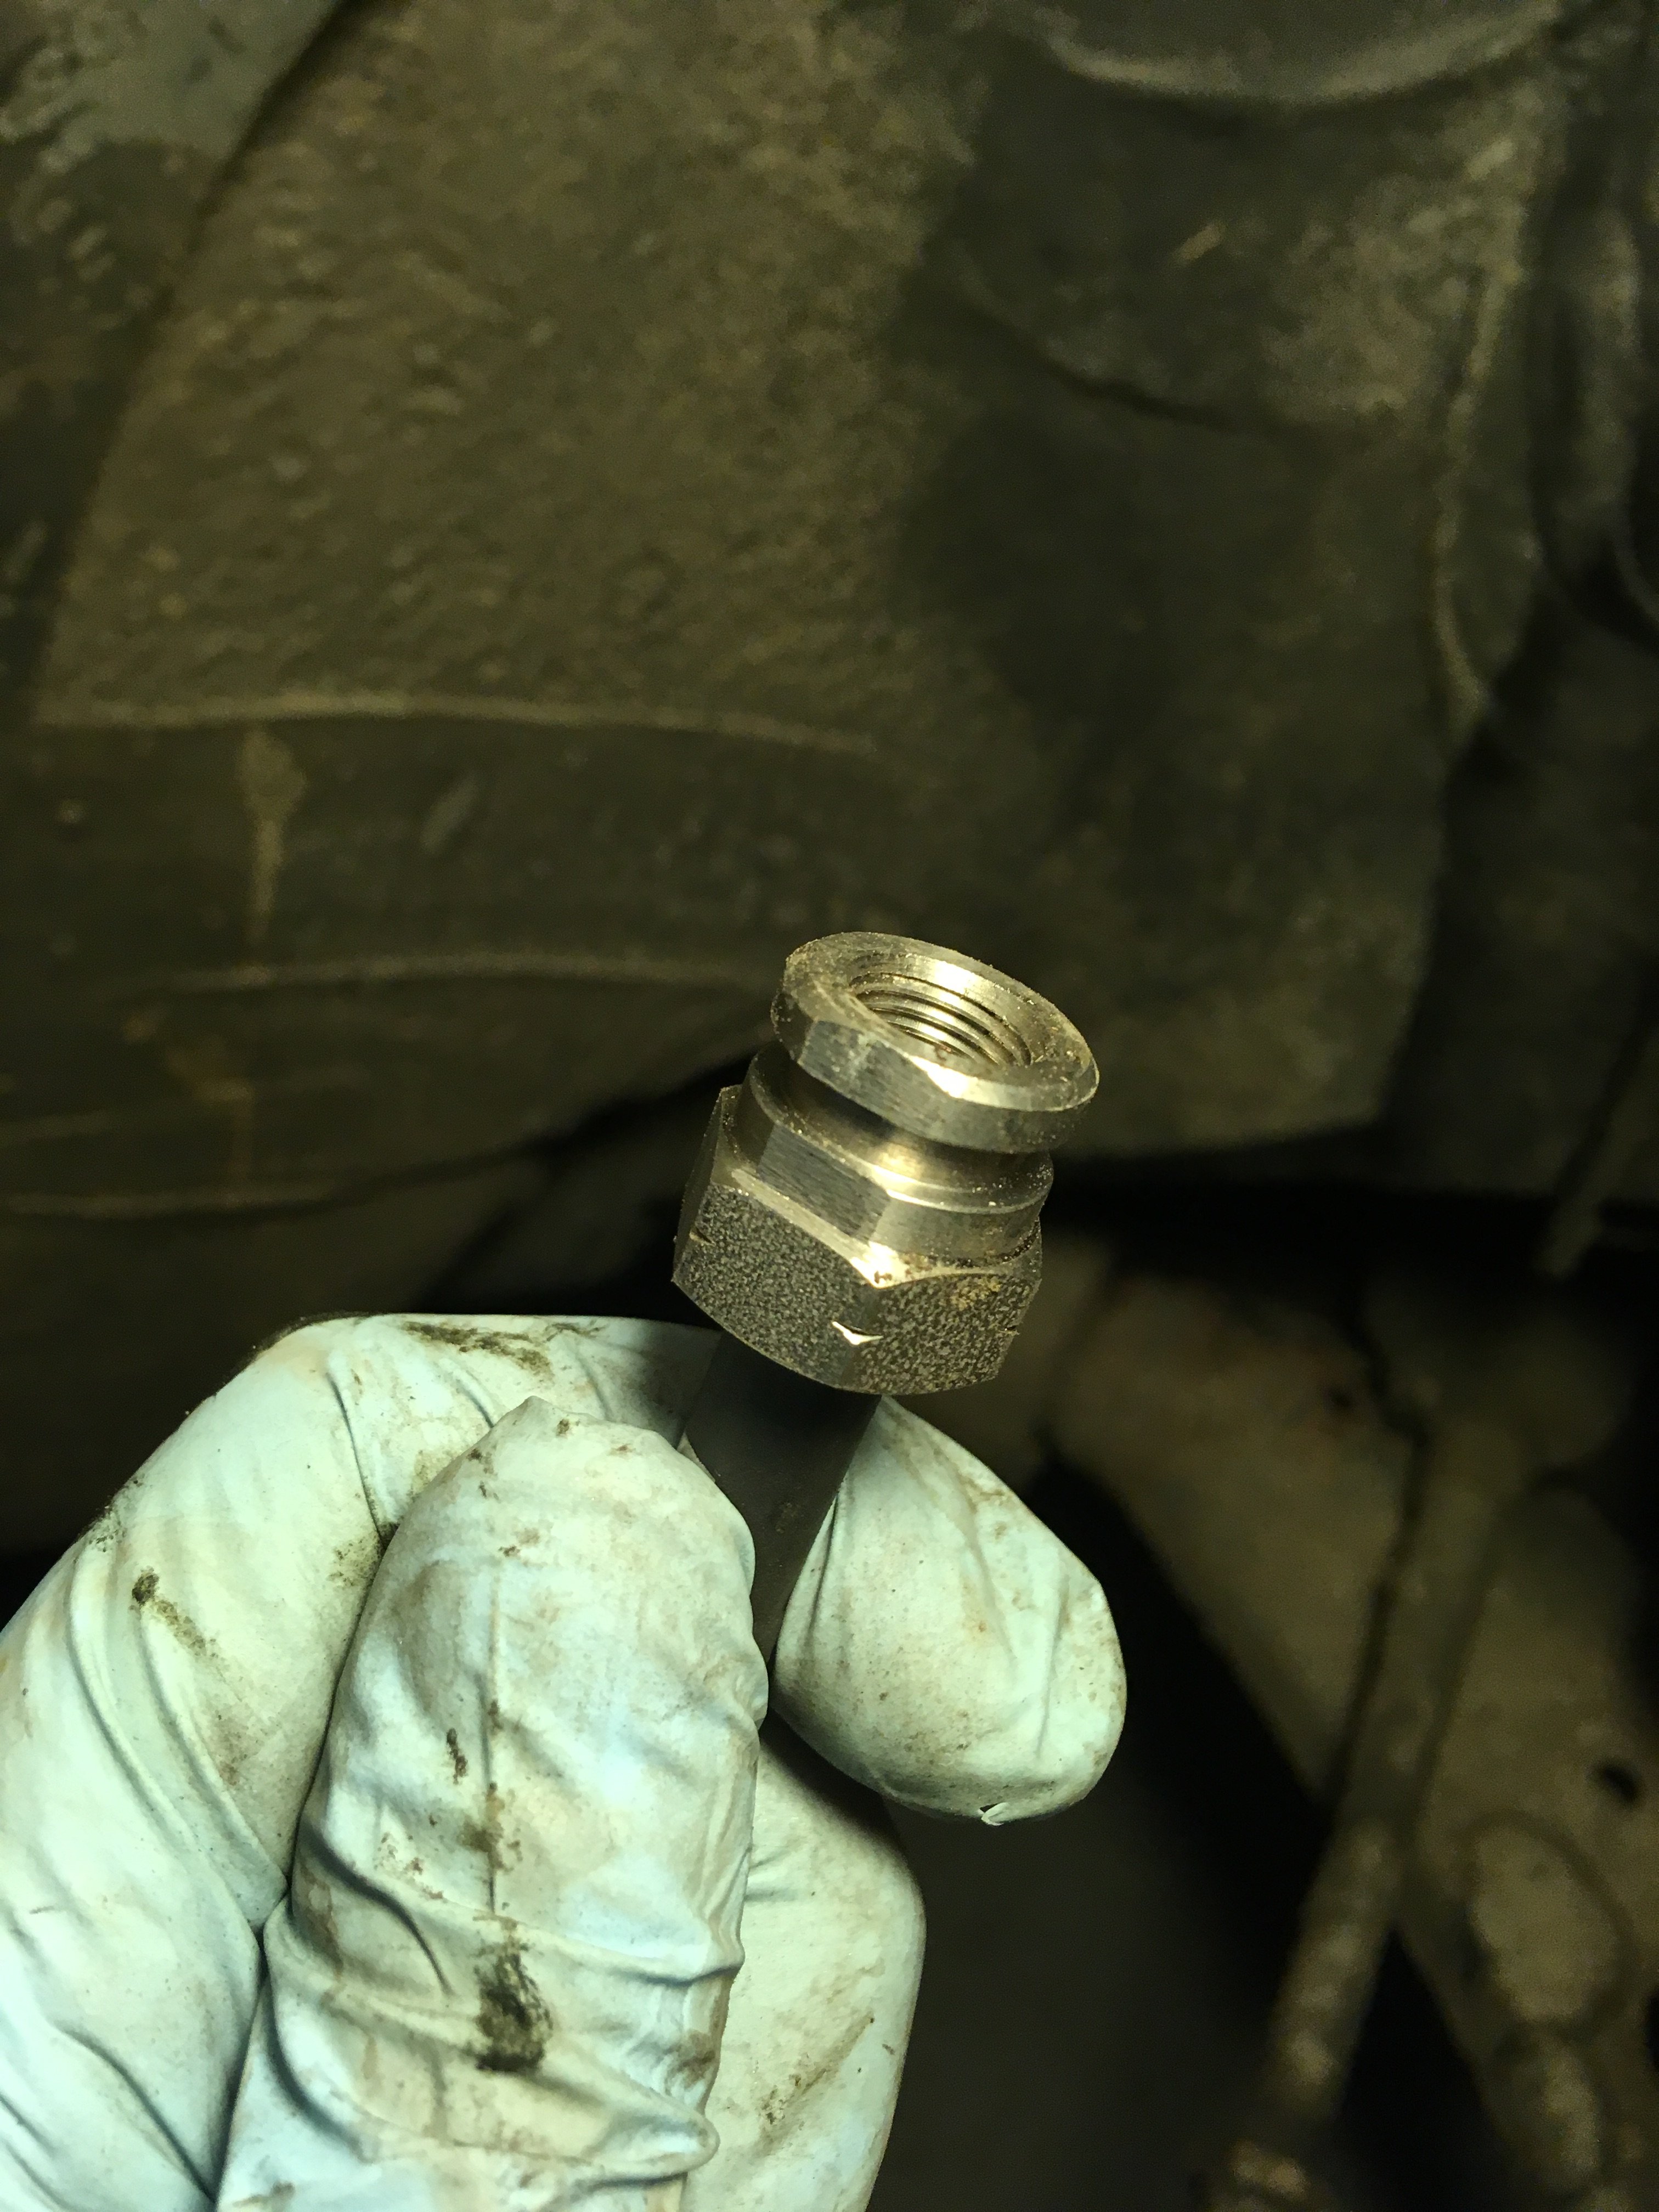
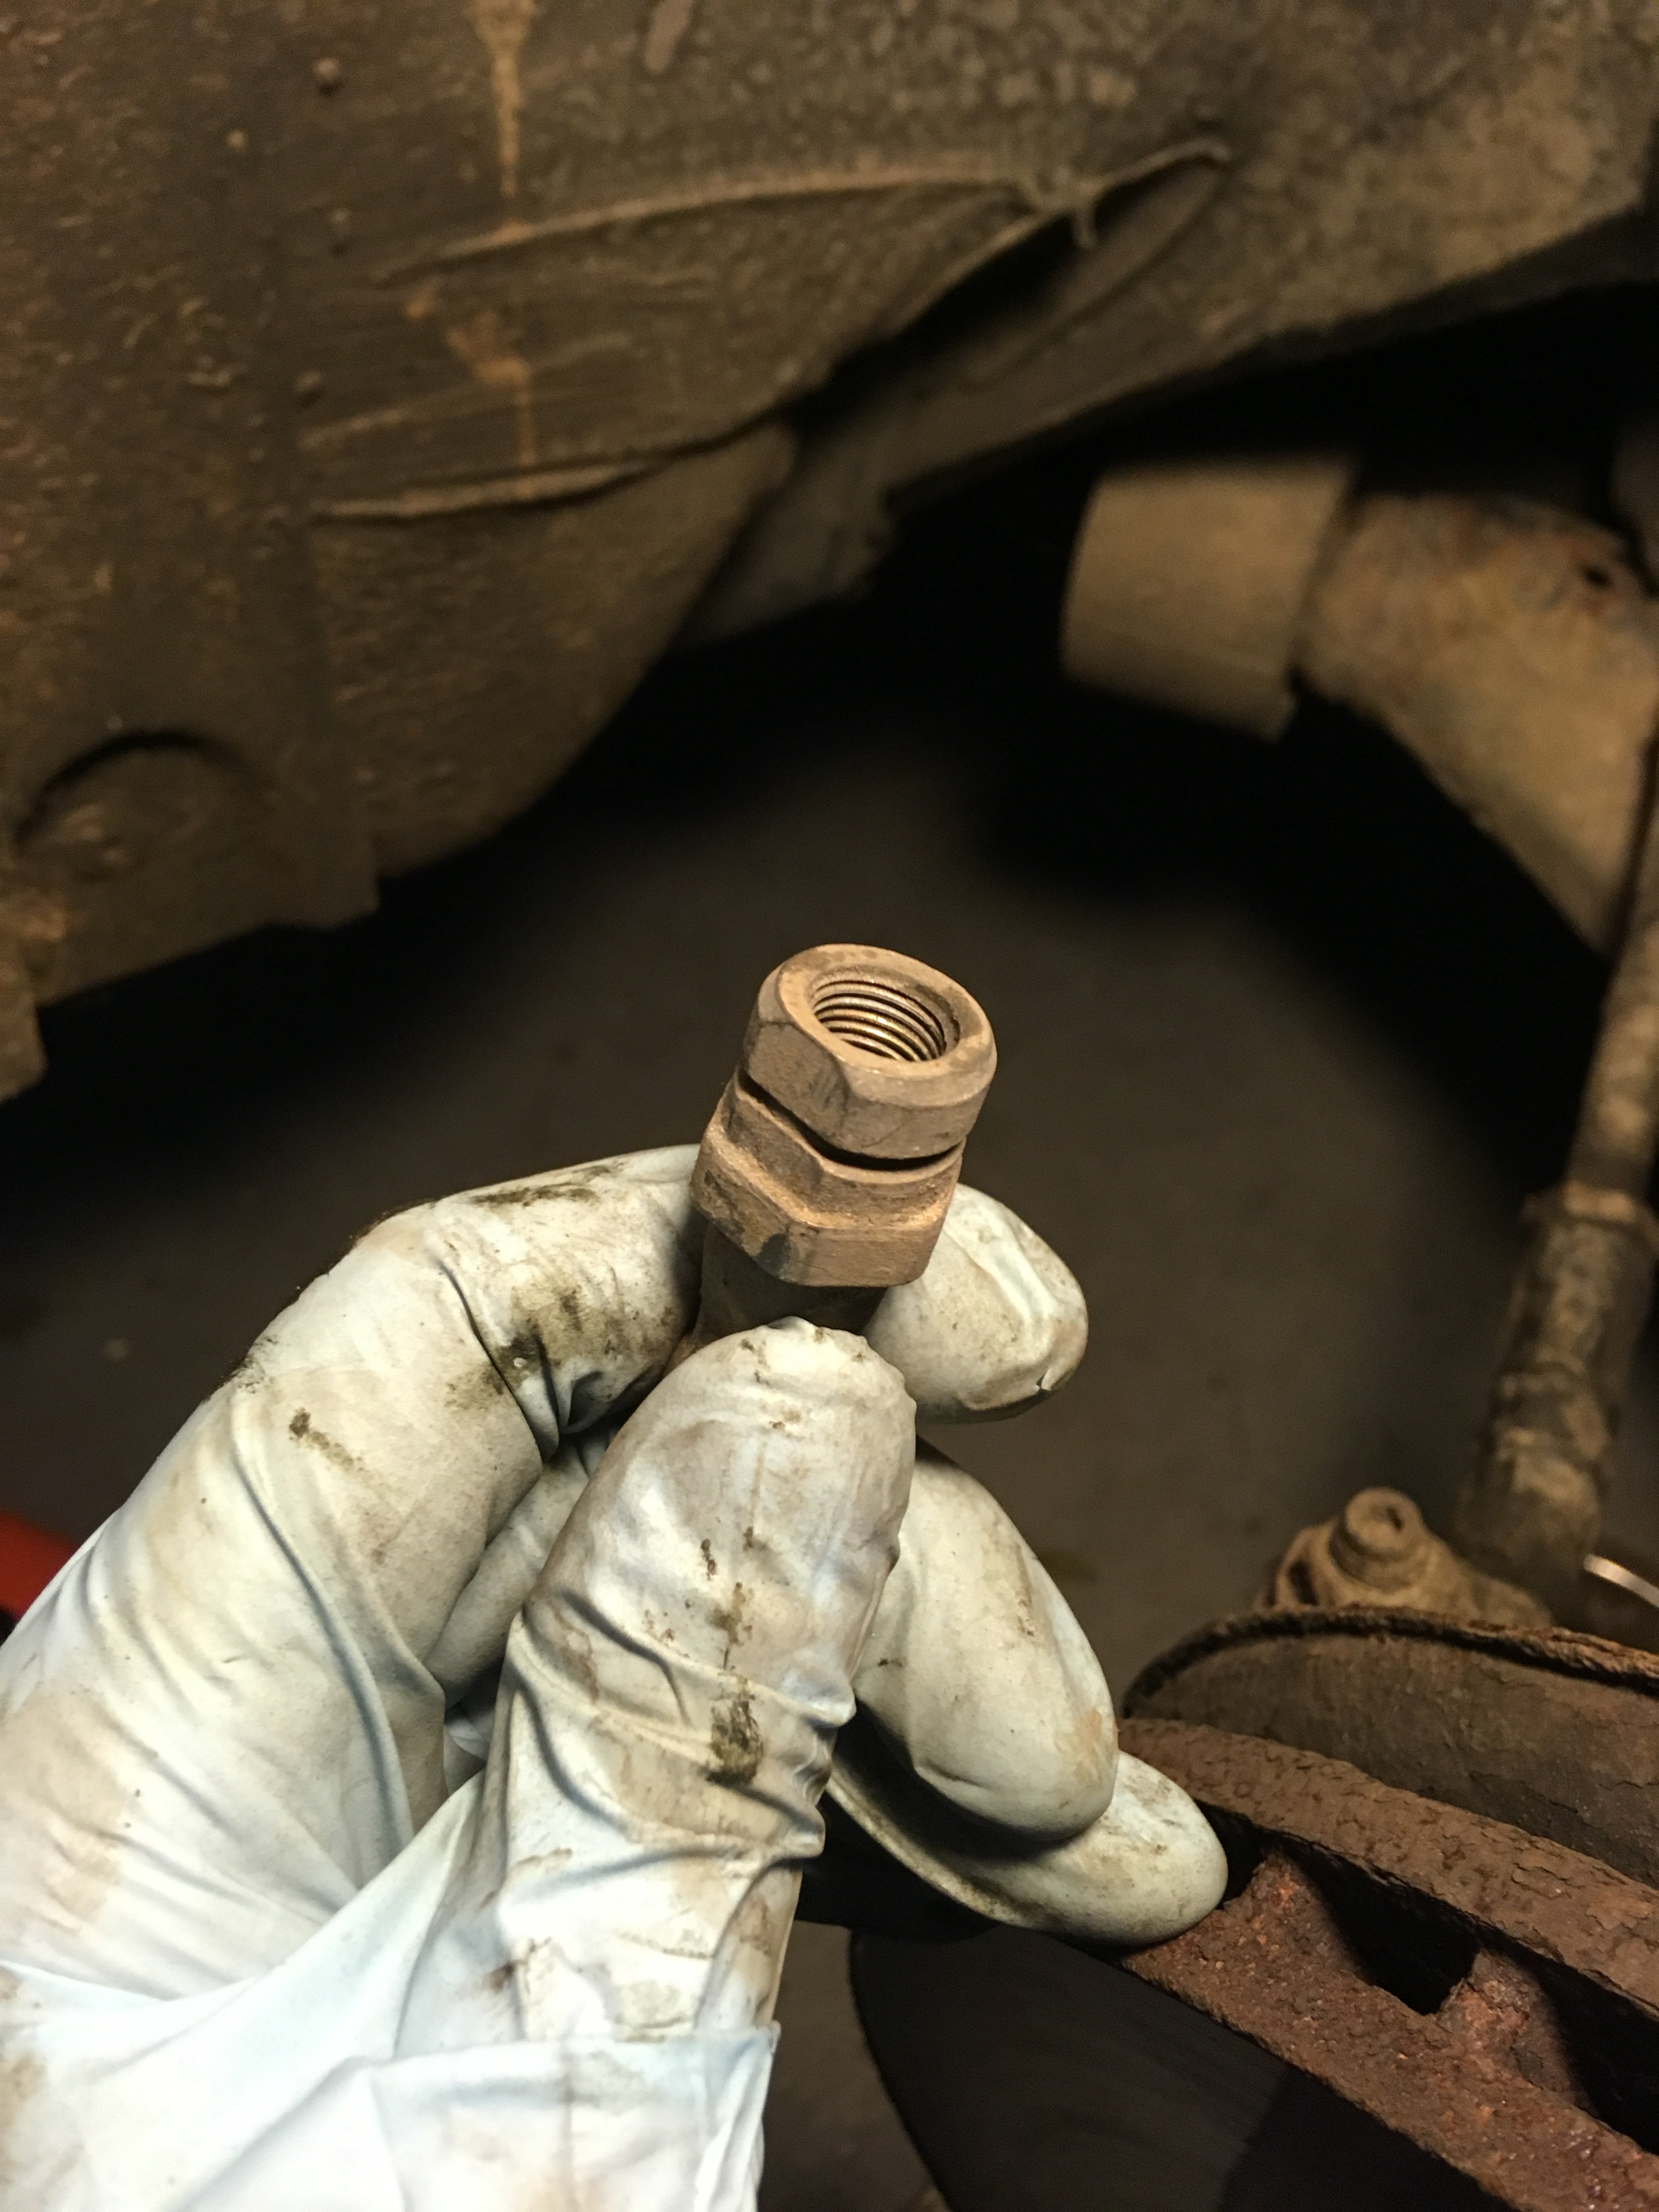
This post is to act as a guide for those fitting Stainless Steel braided brake hoses to the mk1 Fabia. This guide was written from my experience having fit Goodridge hoses to my 2004 Fabia VRS, and so may slightly differ for those installing on other models. Similarly those installing HEL braided lines may also encounter some differences, although I’m sure it’ll be a similar process. Below I have attached a link to the Goodridge Stainless Steel hoses that I bought; https://www.goodridge.co.uk/products/car-brake-kit-for-skoda-fabia-vrs-1999-2007?variant=31695476423 Usual guide disclaimer, proceed at your own risk. Remember you’re working on your brakes, so from a safety aspect be careful and don’t cut corners!! So far this guide only advises how to fit braided lines on the front of the car. I found that there was not enough access to fit the rear lines on axle stands, and shall wait to fit those when I have access to a lift. I will update this guide once I’ve fitted the rears. To begin with I suggest removing and then tightening the reservoir cap down on a piece of polythene bag or something similar to create a vacuum, to reduce fluid loss when you remove the old brake hoses. I also suggest giving the area you’re working in a good clean, as you don’t want any dirt etc getting into the brake hoses or calliper. I used methylated spirits for this, as there’s no danger of it damaging the rubber seals on the calliper. Next, having jacked the car up and removed the front wheels, unbolt the rubber brake hose banjo bolt at the calliper. From memory I think this is a 12mm bolt. Be ready with a tray of sorts and the usual blue roll, as you’ll spill some brake fluid regardless of having sealed the reservoir cap. Be sure to use plenty of lubricating oil, as you will need to re use your old banjo bolt as the braided kit doesn’t come with replacements. You’ll find the banjo bolts appear to be captive within the end of the stock rubber brake hose. On closer inspection you can remove them and re use them by ‘unscrewing’ the triangular washer that’s keeping them in place. Once removed give the banjo bolt a good clean in methylated spirits. In particular clean it’s thread. Unfortunately I don’t have a picture of this, but I hope it’s reasonably self explanatory. Once the calliper end is un done, unbolt the union nut, and pull the old rubber hose downwards away from the solid brake line through the chassis bracket. To unbolt the union nut I suggest using a brake pipe spanner, or at least a close fitting open ended spanner. Be careful not to round off the nuts, as they’re likely to be tight and or corroded. Of course if the nut is damaged you’ll need to renew it on assembly. Moving on to the actual installation. You’ll have to slightly adapt the new stainless steel hose in order to allow it to fit through the chassis bracket before it plugs into the union. Below is a picture of the shape of the chassis bracket, as well as the old rubber brake hose, that you’re going to replicate by filing away as your new stainless hose - rather daunting I know! This turned out to be a rubbish photo, so I’ve drawn in yellow the shape of the cutouts in the chassis bracket, which match up to the shape of the original rubber hose below; Dont worry about replicating it too accurately - I filed two flat faces which worked fine instead. Just as long as your braided hose can sit flat, flush with the underside of the chassis bracket, which will ensure the solid pipe and union will screw into your braided hose. An example of my braided hose having been filed flat is shown below;
-
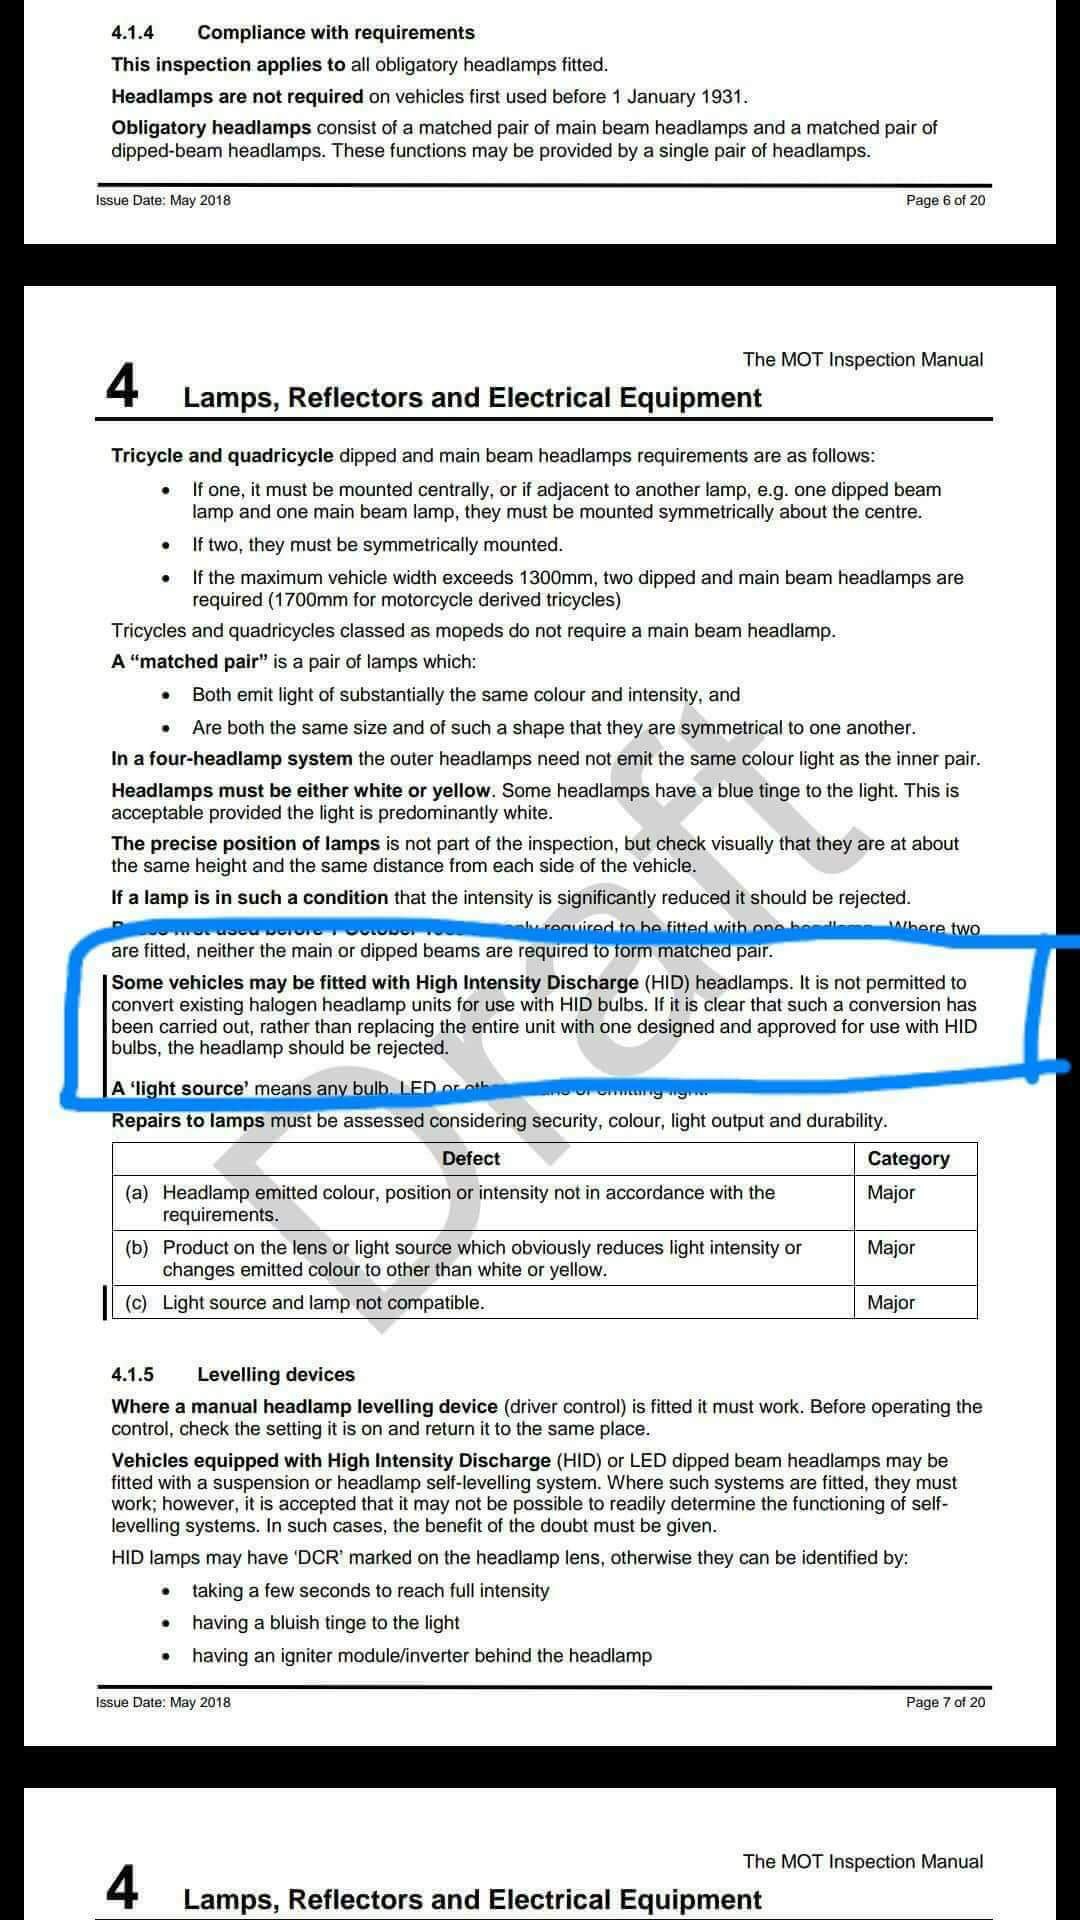
That’s certainly an option, regarding swapping lights/bulbs for MOT. I was just putting a word of caution out there having been sent that MOT reg update (dated May 18) by a friend just before I ordered parts to retrofit headlights on my car Relating to washers and self levelling, I asked my MOT man about that, he said along the lines of how they’re only necessary on cars that should be fitted with them as standard after something like 2010, unless you’re in Northern Ireland.
-
With greatest respect to @hutchysrs50, be aware of new MOT regs being introduced soon. Of course these regs would not apply to genuine xenons.
-
Fabia vrs mk1 hel braided hoses don't fit?
Clarke2744 replied to hugh130's topic in Skoda Fabia Mk I (1999-2007)
I fitted braided lines to my car a few months back and took quite a few pictures as I meant to write up a guide although never got round to it! Despite using Goodridge not Hel, I’m sure they’re similar and I’m sure I encountered the same issue as you did. ....If not then I’m sure it’ll help someone’s else out! I found that the non banjo end, the union end I think it’s called, fits through a bracket on the car before screwing into the solid pipe. The bracket being where the issue lies! As seen below: (although the picture show once I had fitted the braided hose) Looking at the original brake hose you’ll find a flat face on one side, and an almost castilated face on the other side, which allow it to fit through the bracket on the car. This I think stops the hose from twisting etc. The union end of my Goodridge hose, was round, hence didn’t fit through that bracket. Simple solution to this was to file a flat face on both sides to allow it through the bracket, mimicking the shape of the original brake hose. (See below for the cutouts on the original hose): And then one side my new braided one with the amended face (for example): That sorted the the issue for me! But as I say, you may have a completely different issue! Good luck!!
-
To change, or not to change?
Clarke2744 replied to GeneralDogsbody's topic in Skoda Fabia Mk I (1999-2007)
+1 more to keep it as it is. I think it looks very smart, and pretending it’s something it isn’t wouldn’t solve anything. -
Headlights still available?
-
Shark performance stage 1 remap using STS unit
Clarke2744 replied to Clarke2744's topic in Skoda Fabia Mk I (1999-2007)
I’m aware of that, but an insurer will want headline figures. -
Good evening all, has anyone had any experience stage1 remapping their mk1 VRS using the Shark STS unit? I’ve read up a lot about “stage 1” maps, most people saying that on the stock turbo you’re unlikely to produce any more than 160bhp. Shark advertise their stage 1 remap at 170bhp - has anyone got any rolling road figures of their car after a shark stage 1 map using the STS unit? Im specifically interested as the difference between 160 and 170bhp make a big difference in insuring the car Many thanks in advance!
-
^second phillips extreme vision
-
Have a read through this for all you need to know about poly bushes. Regarding the rest of the handling, mine is fitted with white line RARB, on hard setting (not much difference from the medium setting I had it on when I fitted it). The RARB made a huge difference to handling, pretty much eliminates understeer snd you can drive the car on its throttle through corners which you couldn’t as stock. I second what’s been said about tyres, I bought the car with ditch finders fitted... quickly fitted some Goodyear Eagle F1 Asy2 on the front axle which vastly improved things. Have recently renewed the rear set for the same, so Goodyear’s all round. The car feels really balanced with them all round! They’re about £84 each inc fitting from black circles online. Very nice car, looks really clean!!
-
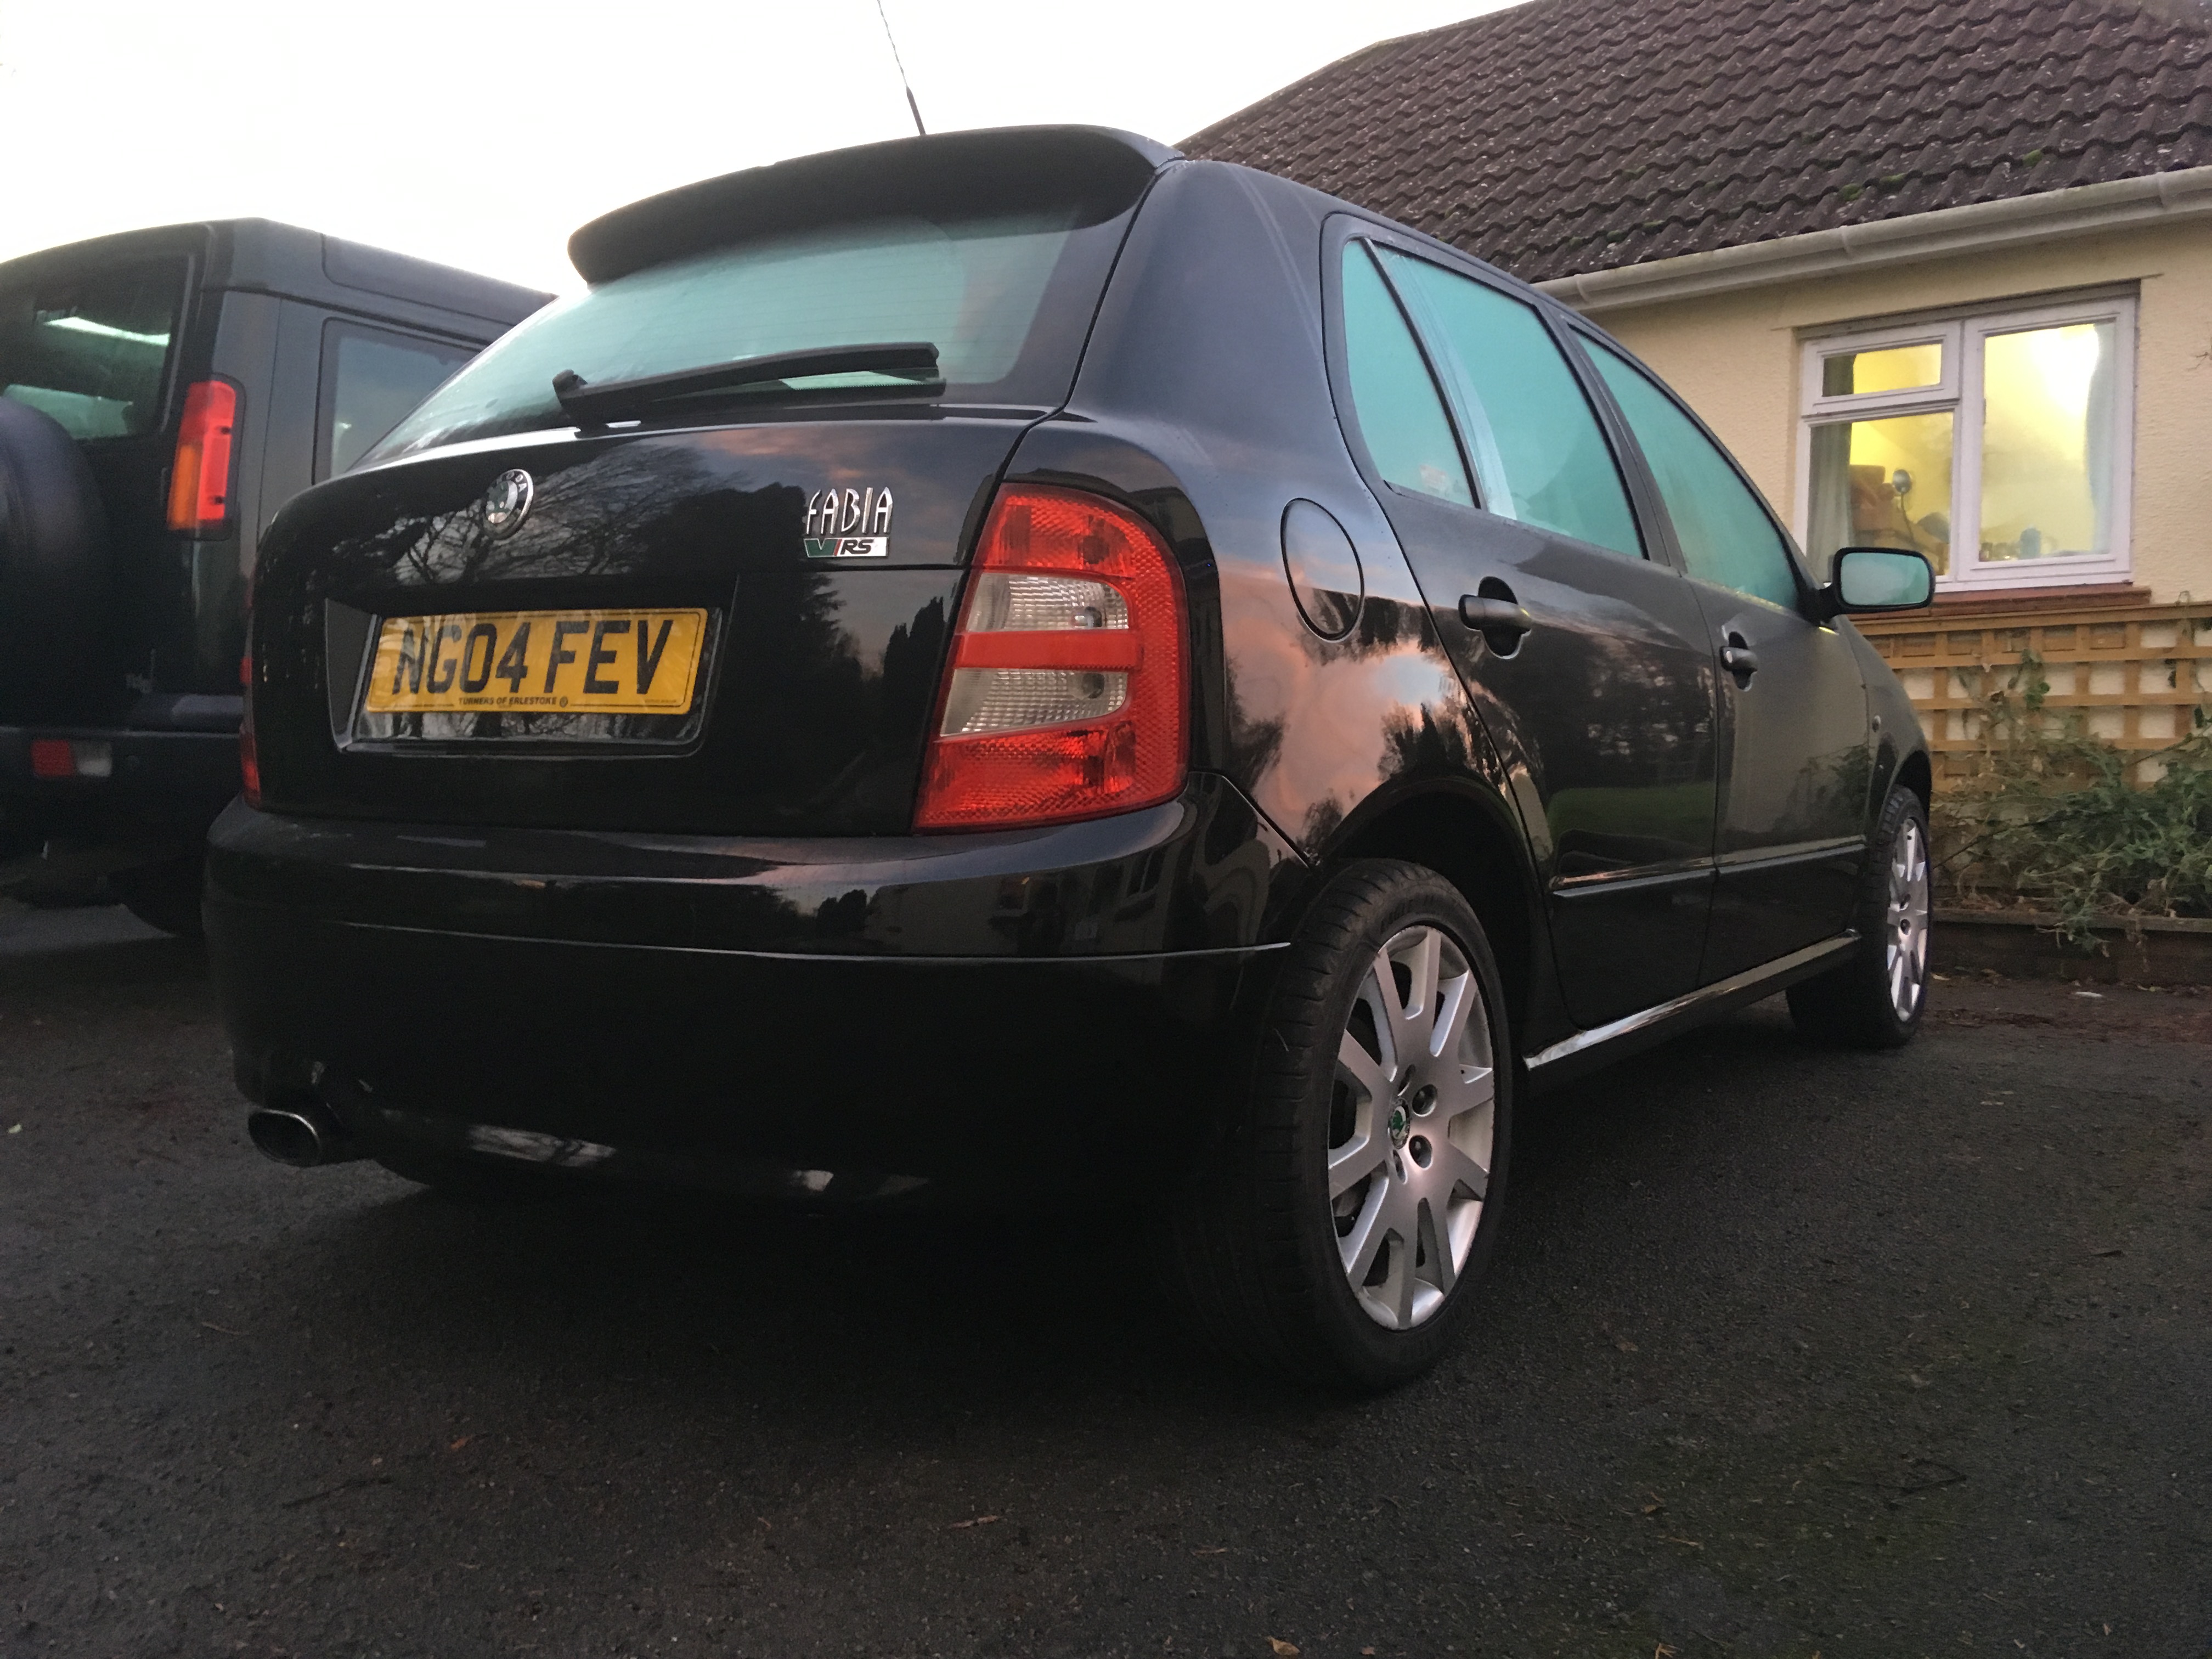
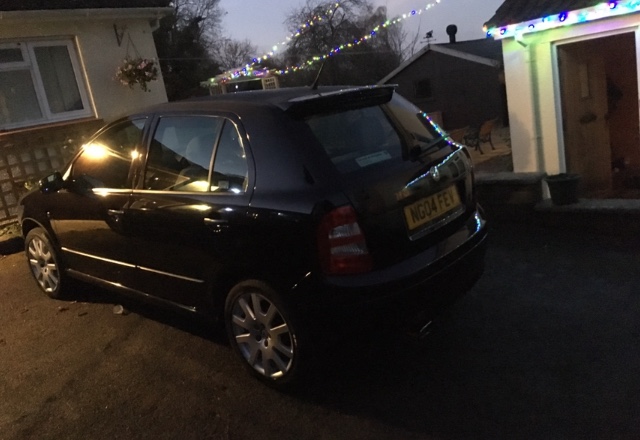
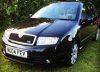
Looking rather chilly this morning after yesterday’s wash.
-
Having just checked it’s not got great MOT history over the last few years! May act as a word of caution suggesting it hasn’t been desperately looked after......... however, also means you know what to look for when you see it/have it MOT’d to ensure it’s been sorted out. I saw this listed week or so ago, it does look very tidy!! Plenty to haggle upon tho
-
I don’t think they fail at an MOT, but may be an advisory(?) not hard to replace but can end up difficult if you can’t get the nut off the top of the shock absorber which is easier said than done! They’re also not expensive (just under £20 a side I think) - the issue will be without the bump stops the plastic shock cover won’t sit in place, therefore exposing the seal between the two ends of the shock which after a while can deteriorate the shock.
-
Can see in that pic you posted that rear bump stops on the rear shock absorbers need replacing - not expensive, but more ammunition to haggle with good luck!!
-
That sounds a pretty reasonable price. Particularly baring in mind the spec of it. I bought my 2004 vrs last year, with 80k miles, reasonably immaculate condition but quite low spec (no xenon or cruise control) for £2.4k - that also needed cam belt doing, which I did myself, with genuine parts from skoda for around £100 off the top of my head. Have you had a look through past MOT history? If that all looked okay then I would say £2k mark would be a bargain!
-
Who fitted the projectors to Vrs lights
Clarke2744 replied to Haych123's topic in Skoda Fabia Mk I (1999-2007)
Please can you send me the link? -
Who fitted the projectors to Vrs lights
Clarke2744 replied to Haych123's topic in Skoda Fabia Mk I (1999-2007)
What ballasts do you use?? There seems to be thousands far and between on eBay, or do you buy them combined as a kit with the projectors? ....or is that a trade secret? -
Who fitted the projectors to Vrs lights
Clarke2744 replied to Haych123's topic in Skoda Fabia Mk I (1999-2007)
Thanks for the replies! That’s encouraging, I’m going to check with my MOT man just in case... then crack on -
Acts as a great excuse to uprate them
- 11 replies
-
- 1
-
-
- first car
- modification
- (and 1 more)
-
Get some decent tyres is number one priority. After than probably sort the suspension. My first car was a Felicia 1.3. One of the front McPherson struts rusted through, and so I “uprated” all 4 corners with Bilstein B4 shocks. They aren’t desperately expensive, improved the handling and most importantly from an insurance point of view, Admiral accepted them as just updated standard parts rather than performance upgrades and so didn’t increase my premium! https://www.demon-tweeks.co.uk/performance/shock-absorbers/car/skoda/fabia-00-07/2004/1-9d/bilstein-b4-gas-shock-absorber-front-2 https://www.demon-tweeks.co.uk/performance/shock-absorbers/car/skoda/fabia-00-07/2004/1-9d/bilstein-b4-gas-shock-absorber-rear If you can afford it maby a rear antiroll bar (assume this fits to the estate as it does the hatchback?) Good luck!