


logrover
Finding my way
-
Joined
-
Last visited
Everything posted by logrover
-
I expect your forum searching brought this up, but just in case it did not then here's is the link - may help with wiring and diagnosing if it really is the switch, etc...
-
we had similar with a 1.4tdi mk2 died whilst driving and then not restarting, although we also had all dash lights going out at same time. Trying to restart failed due to immobiliser, and i eventually solved by resoldering some connections inside dash - been fine since for last 18months. saga here:
-
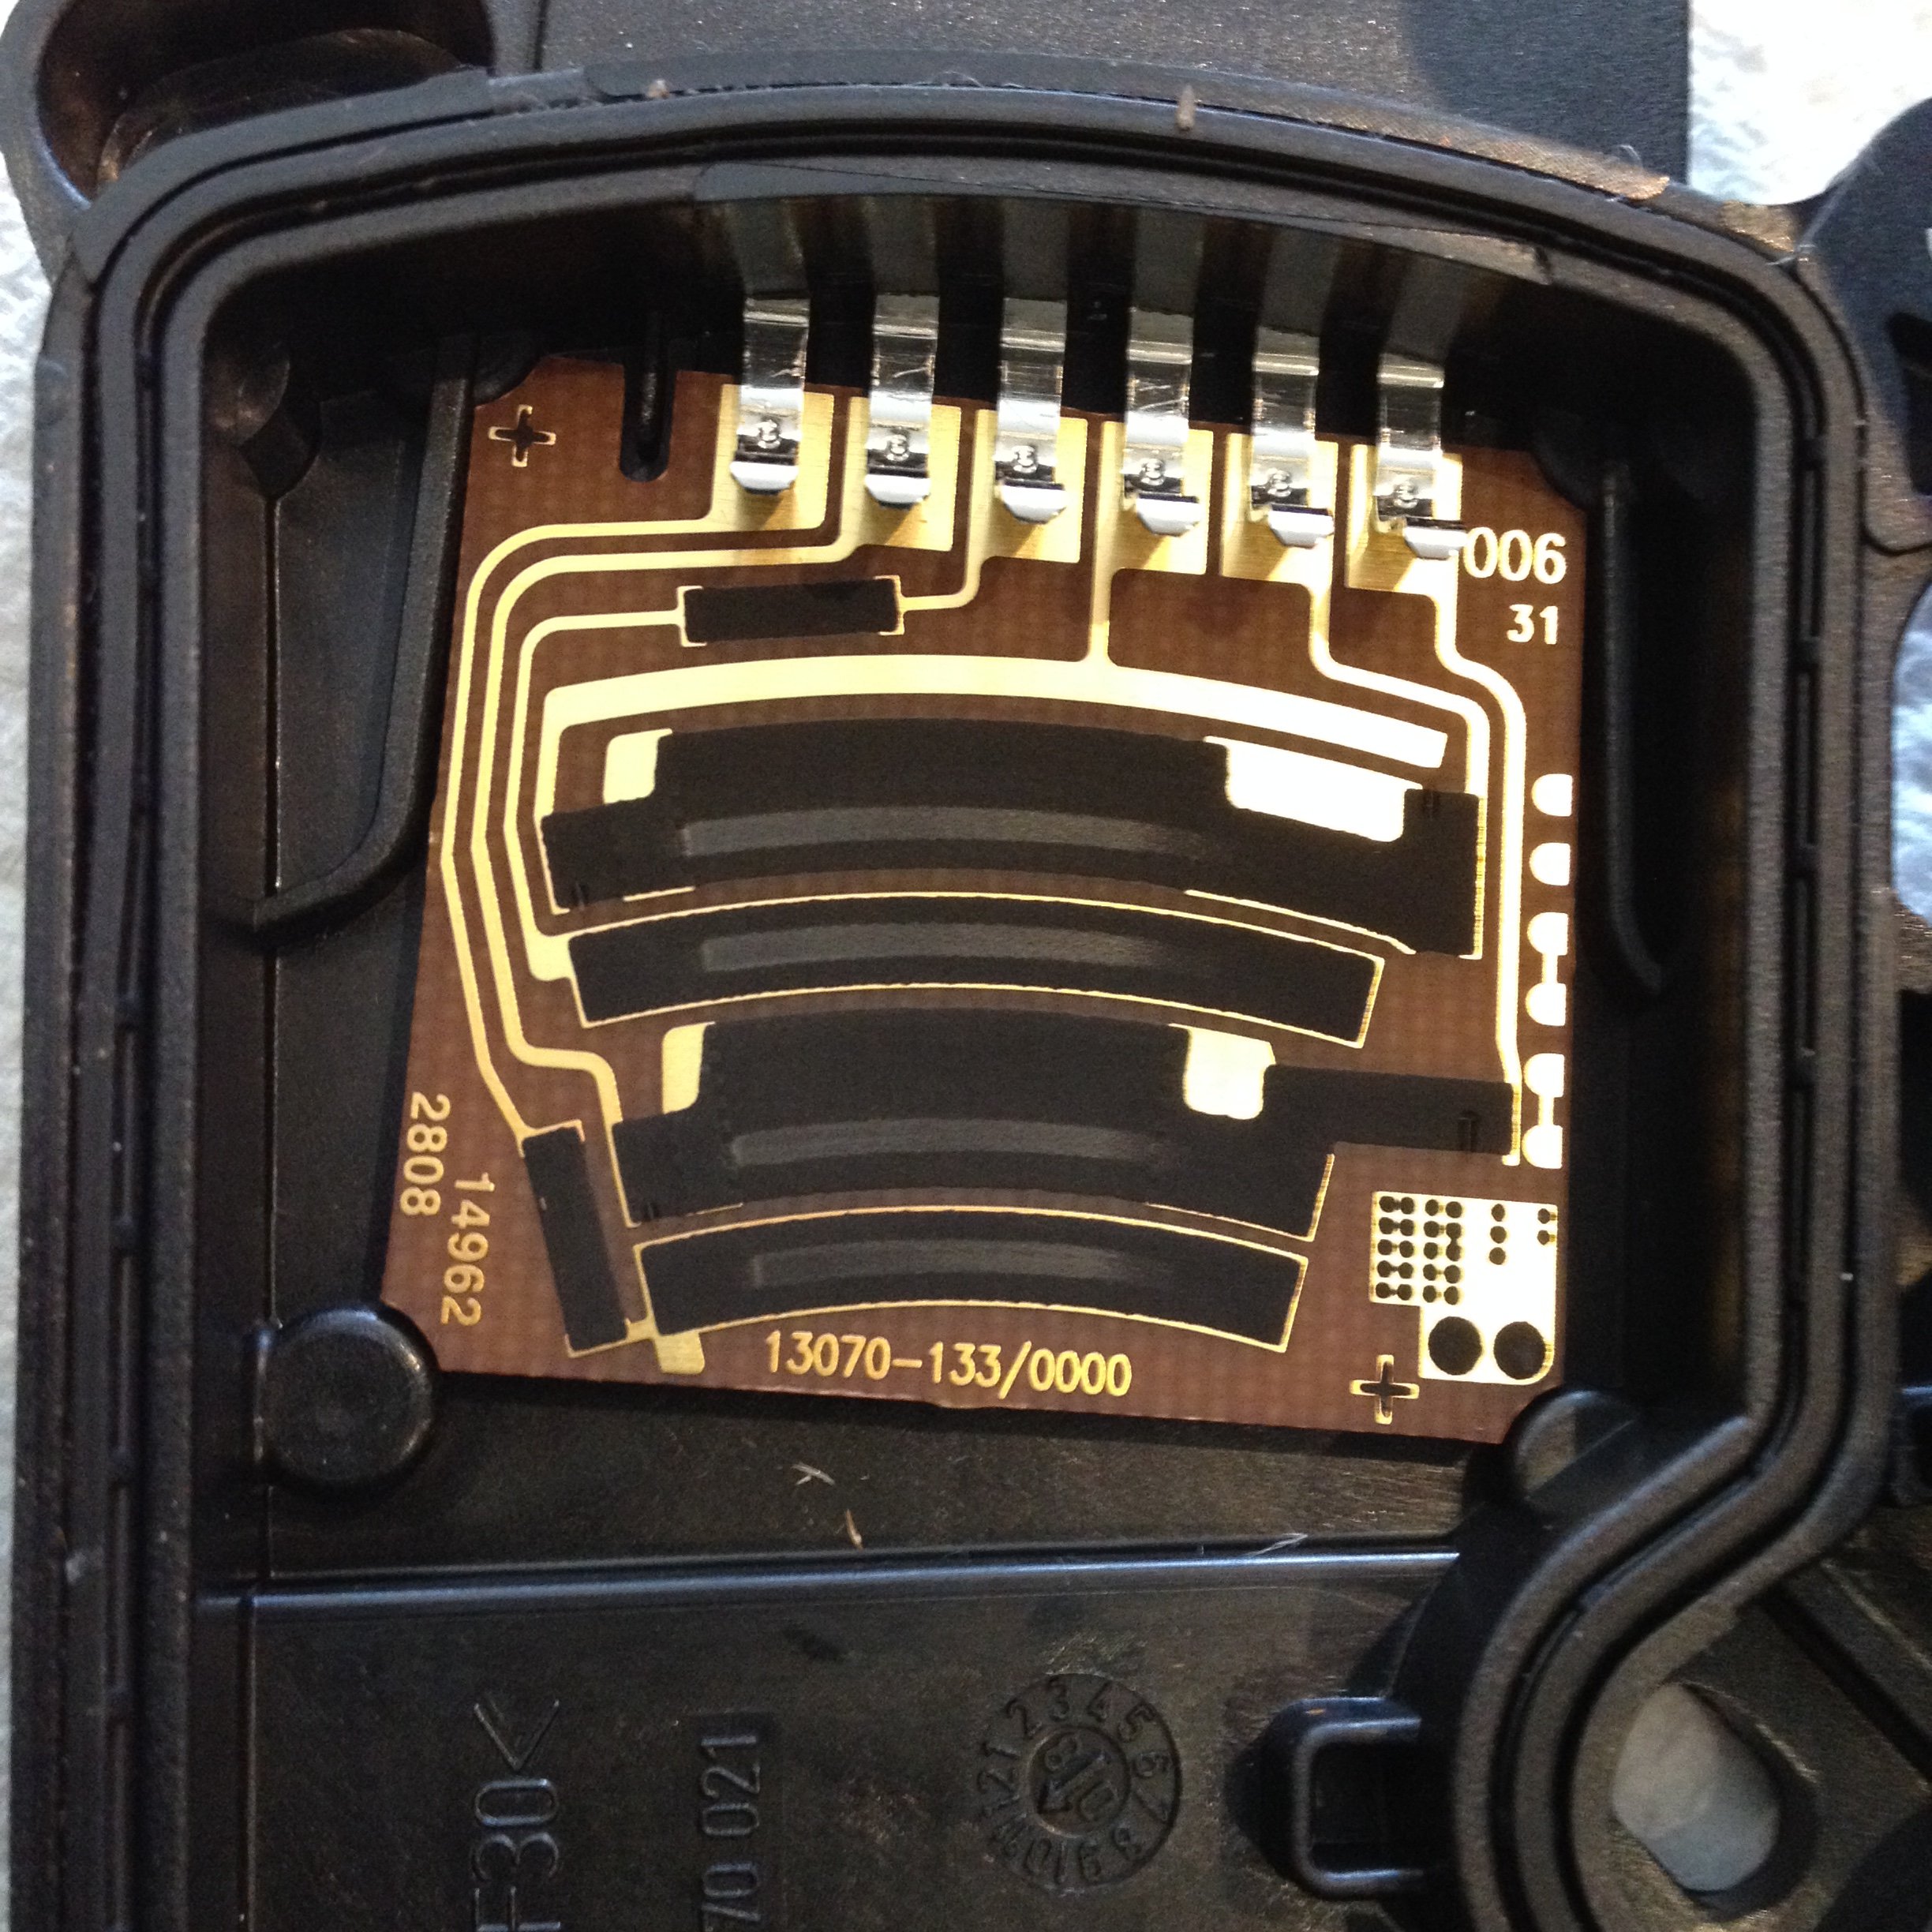
When i had throttle issues (signal dropping so fabia-2 1.2 went into limp home mode), i removed the electronic throttle pedal and opened it up. I seem to recall it was easy to remove and open, and i then cleaned the contact tracks and "fingers" and made sure they were making good contact, put it all back together and its been good for a couple of years so far. might be worth a go? pics on inside of pedal after cleaning:
-
Could also be dodgy connectors in the window motor surprisingly. Mine had the door open fault intermittently but it hasn't returned for a year now since i applied the fix below:
-
thanks for the info - i did a search on that kit number and the three parts you mention don't look the same as any of the parts i have (for a BBM fabia) - so i think they must have been different connectors. - but thanks anyway. I did however manage to refit my connector properly - although it felt it had been pushed fully home, i concluded it was not far enough on, so some thorough cleaning and then a smear of vaseline on the new filter stem, and it went fully home with a very satisfying loud click - so i'm sure its on properly now.
-
Had fuel leaking from the filter (not sure exactly where), so thought I'd just replace anyway as no record of being done. Replaced with Mann WK69/2 and all went well (apart from rusted out mounting bolt that I had to drill out and replace with a stainless one). However, a few weeks and few hundred miles later and the return line popped off the filter and killed the engine. Looks like the clip in the connector is not locking onto the ridge in the filter pipe (blue bit in picture). Having spent the evening searching the web I discover that these clips are a common problem, and the usual advice is to replace the whole pipe assembly, often involving dropping the tank! However I do see some clips are advertised (often for Octavia or Golf, but not Fabia or Polo). Has anyone replaced just the clip in the filter connectors on a 2009 Fabia 1.2 ? Any advice or part number for the clips? I will take a better look at the connector tomorrow and clean it again in the hope some dirt is preventing latching.
.thumb.JPG.2dc2458da67a15f7cccaf71824de168d.JPG)
-
I had the dash apart recently (fabia 2) and got an airbag light on, and I was able to reset it using an older and cheapo (£25'ish) code reader i had lying around - a U281 which was for VW family vehicles. Worked first time, no problem.
.thumb.JPG.61c52073010331f383f014486a850e43.JPG)
-
perhaps set your phone up to video the cylinder /shoe and then run round and press the pedal - just a passing thought....
-
-
On the plus side, looking at the last few pics I would say you have definitely found out why the new exhaust is loud If you are doing it yourself and have the right diameter tube clamp, assemble both pipes into the tube and make sure they are both sitting in the right place without hangers straining and without touching any bodywork/engine etc,, then tighten the two bolts evenly and check again the exhaust is all sitting where it should. If you don't do this then its possible to tighten things up when they are in the wrong place and then you get rattles if the exhaust touches something or failures if the exhaust routing is wrong or mounts distorted/strained.
-
well that is three days of cold starts and daily running, and no warning light at all - so looks like the bridge wire solved it. Must have been a break in the loom between dash and wheelarch, and the bridge has bypassed it. I did notice that one of the brake light bulbs was blown, so I replaced that yesterday. Cant be sure how long it was blown for, but think that must be coincidence as I believe the brake pad wear circuit just monitors that and not other brake items? Could remove the bridge to double check now that the bulb is working, but will leave well alone until after tomorrows MOT....
-
was cold this morning (frost) and the brake pad warning light stayed illuminated on starting (even though both wires soldered together at wheel end). Usually subsequent trips throughout the day do not have the light illuminated. so I went ahead with the earth bridge discussed above (joining pins 1 and 8) on the 8 pin connector behind cluster, took about 5 mins. Used some heavy duty solid copper house wire as it fitted firmly alongside the pin bodies in the back of the connector. Light now stays off, but it always did after first start, so real test will be tomorrow morning. if it works, we'll see how long it takes me to remove this temporary fix and do properly , and if it doesn't work then I'll have to look at the PCB connections again...
.thumb.JPG.82dfc2a8b7acb38244bf63a6650f0563.JPG)
-
Yes, the total dash loss followed by immobiliser cutting in immediately after starting has not reoccurred after I reflowed all pins of both connectors on the cluster. However I didn't identify any actual fault at the time though (assumed a hidden dry solder connection of one of the power feeds) so always feel a bit unsure that it was something I've done has fixed it or that it was a very random fault. This occasional pad warn light was going for a few weeks before the main cluster fault, and has continued afterwards, but it is always intermittent. My thinking now is if I jump the wires at the connector block and fault goes it will suggest loom to sensor fault, but if it remains it will suggest cluster PCB.
-
thanks for quick reply - i'll investigate that tomorrow. for some reason i can find more motivation to work from the drivers seat into the dash cluster than with my head in the wheel arch dealing with dirty and rusted fasteners everywhere
-
Wino, another quick question if i may: Does that red wire to pin 1 in the cluster return an earth from the pad sensor from the yellow wire? ie. when the pad sensor is closed (or the two wires shorted together) it provides an earth to pin 1, and when sensor open no earth provided and dash symbol illuminates? If so, I could maybe provide an earth to red wire at the dash 8 pin connector (from pin 8 wire) to bypass any damaged sender cable - first to help diagnosis and maybe as a permanent fix/bodge. cheers.
-
Thanks Wino, I should have remembered that as we discussed it recently when i had a fault with that instrument cluster and I initially thought pin 1 could be the culprit : https://www.briskoda.net/forums/topic/490180-blank-cluster-dash-display-and-immobiliser-killing-engine-wiring-help-needed/ So I have already reflowed all 8 pins there. I don't fancy trying to trace the wiring behind dash, so that just leaves trying to check it further up from the joined sensor wires in the wheel arch, or trying to get it disabled by someone. thanks for your help again, saved me heading off towards the ABS unit...
-
Problem with the 2009 1.4tdi BNV this time: Brake pad wear indicator coming on intermittently. Checked wheel end and no sensor fitted and cable has been cut and joined previously. I opened these up and cleaned them, and soldered together and heat shrinked. Whilst doing this, separating the wires caused light to come on, and soldering together cancelled it, so I thought I'd solved it. However, on some journeys (first journey, coldish), the light is still coming on, so i suspect a wiring fault further up the circuit. Does anyone know where the wire routes? I see it going behind wheelarch liner and can hear it behind dash it sounds when rattled. Does it end up in the ABS plug with the adjacent ABS wiring, or does it go elsewhere?
-
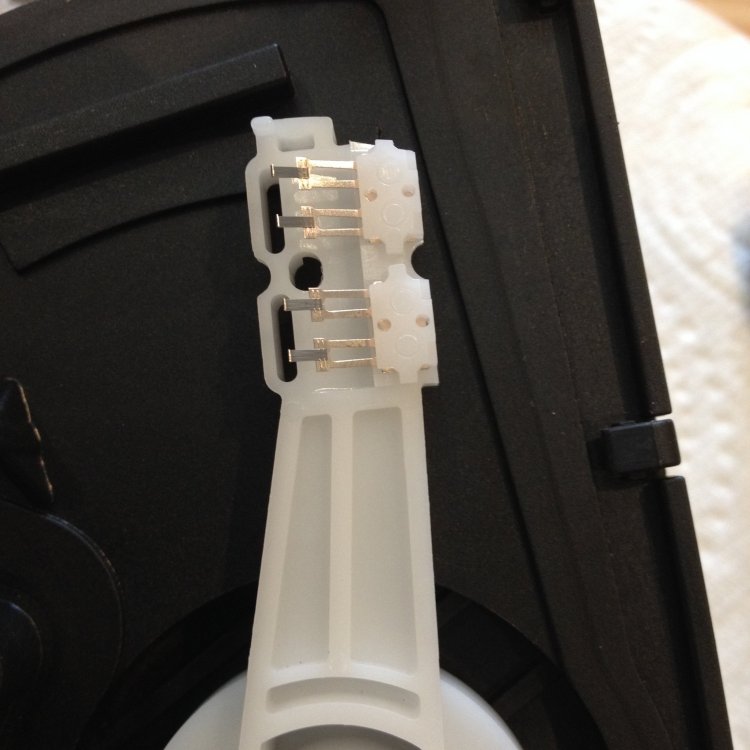
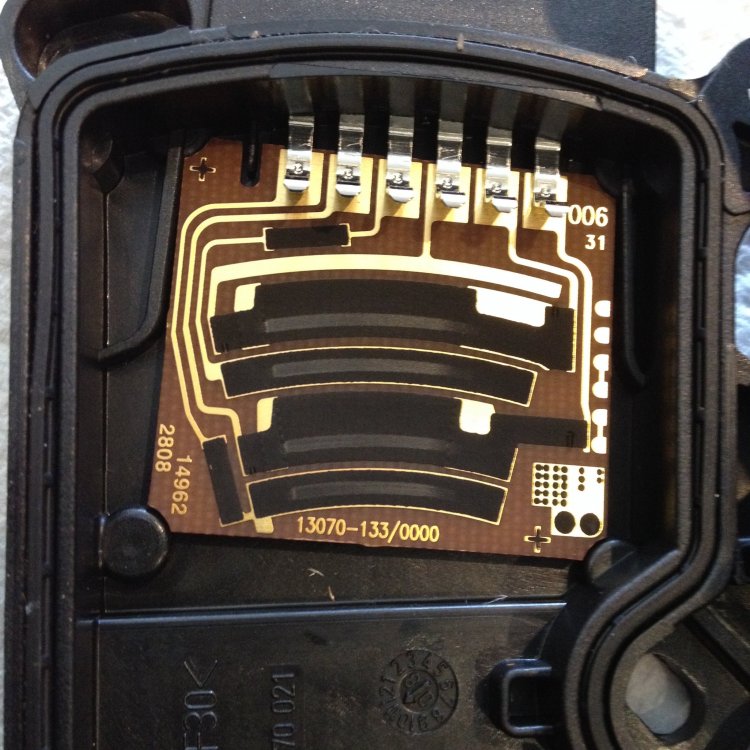
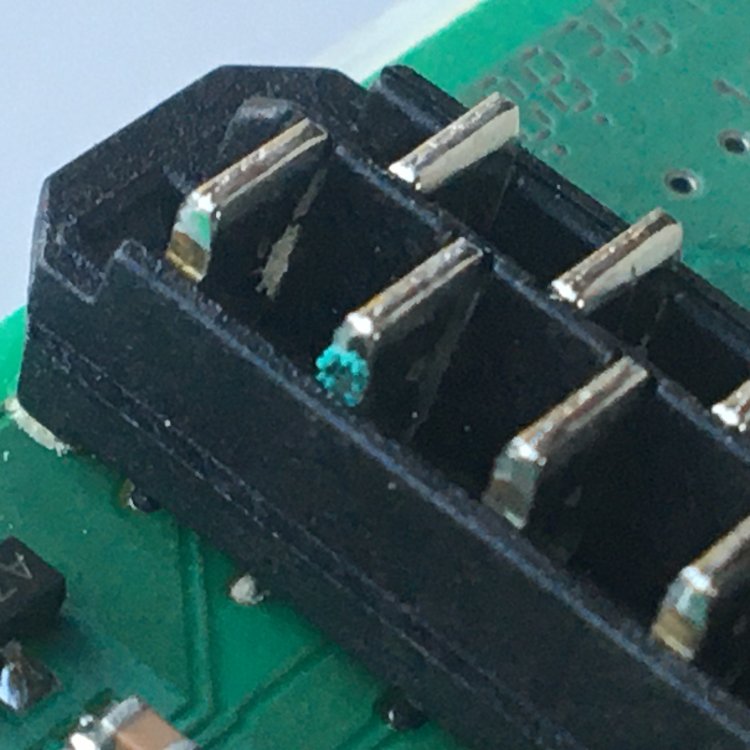
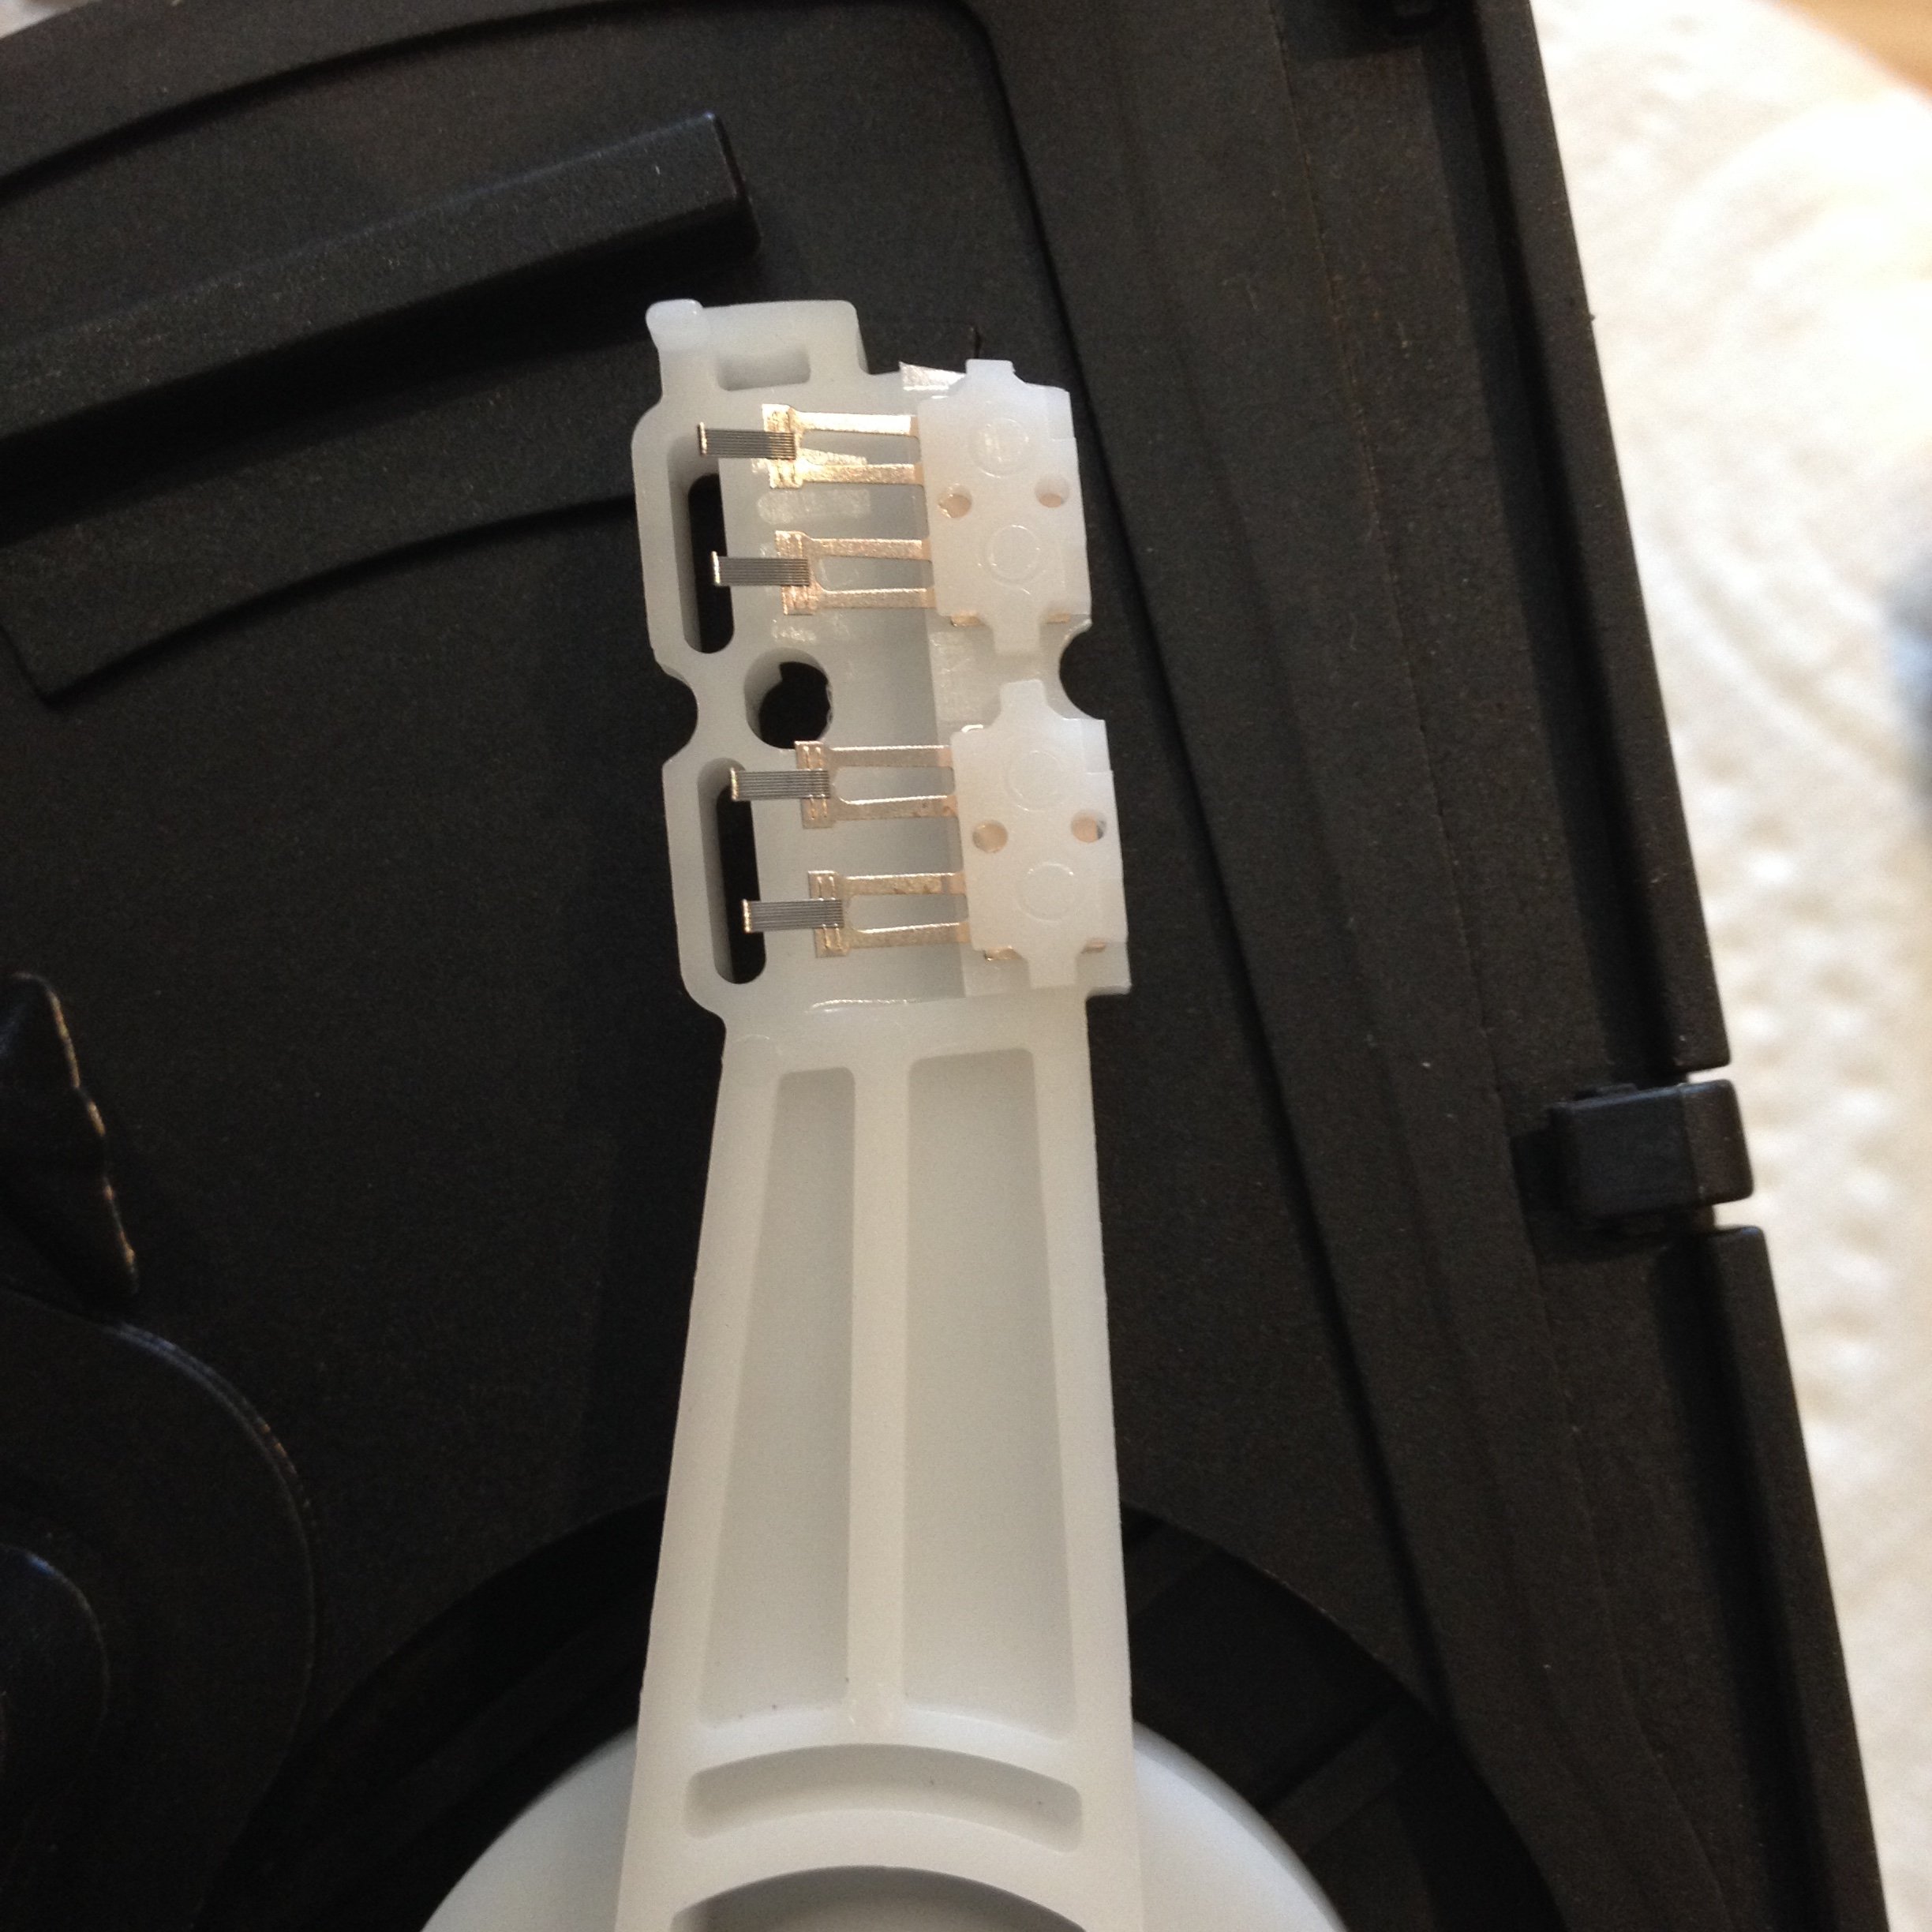
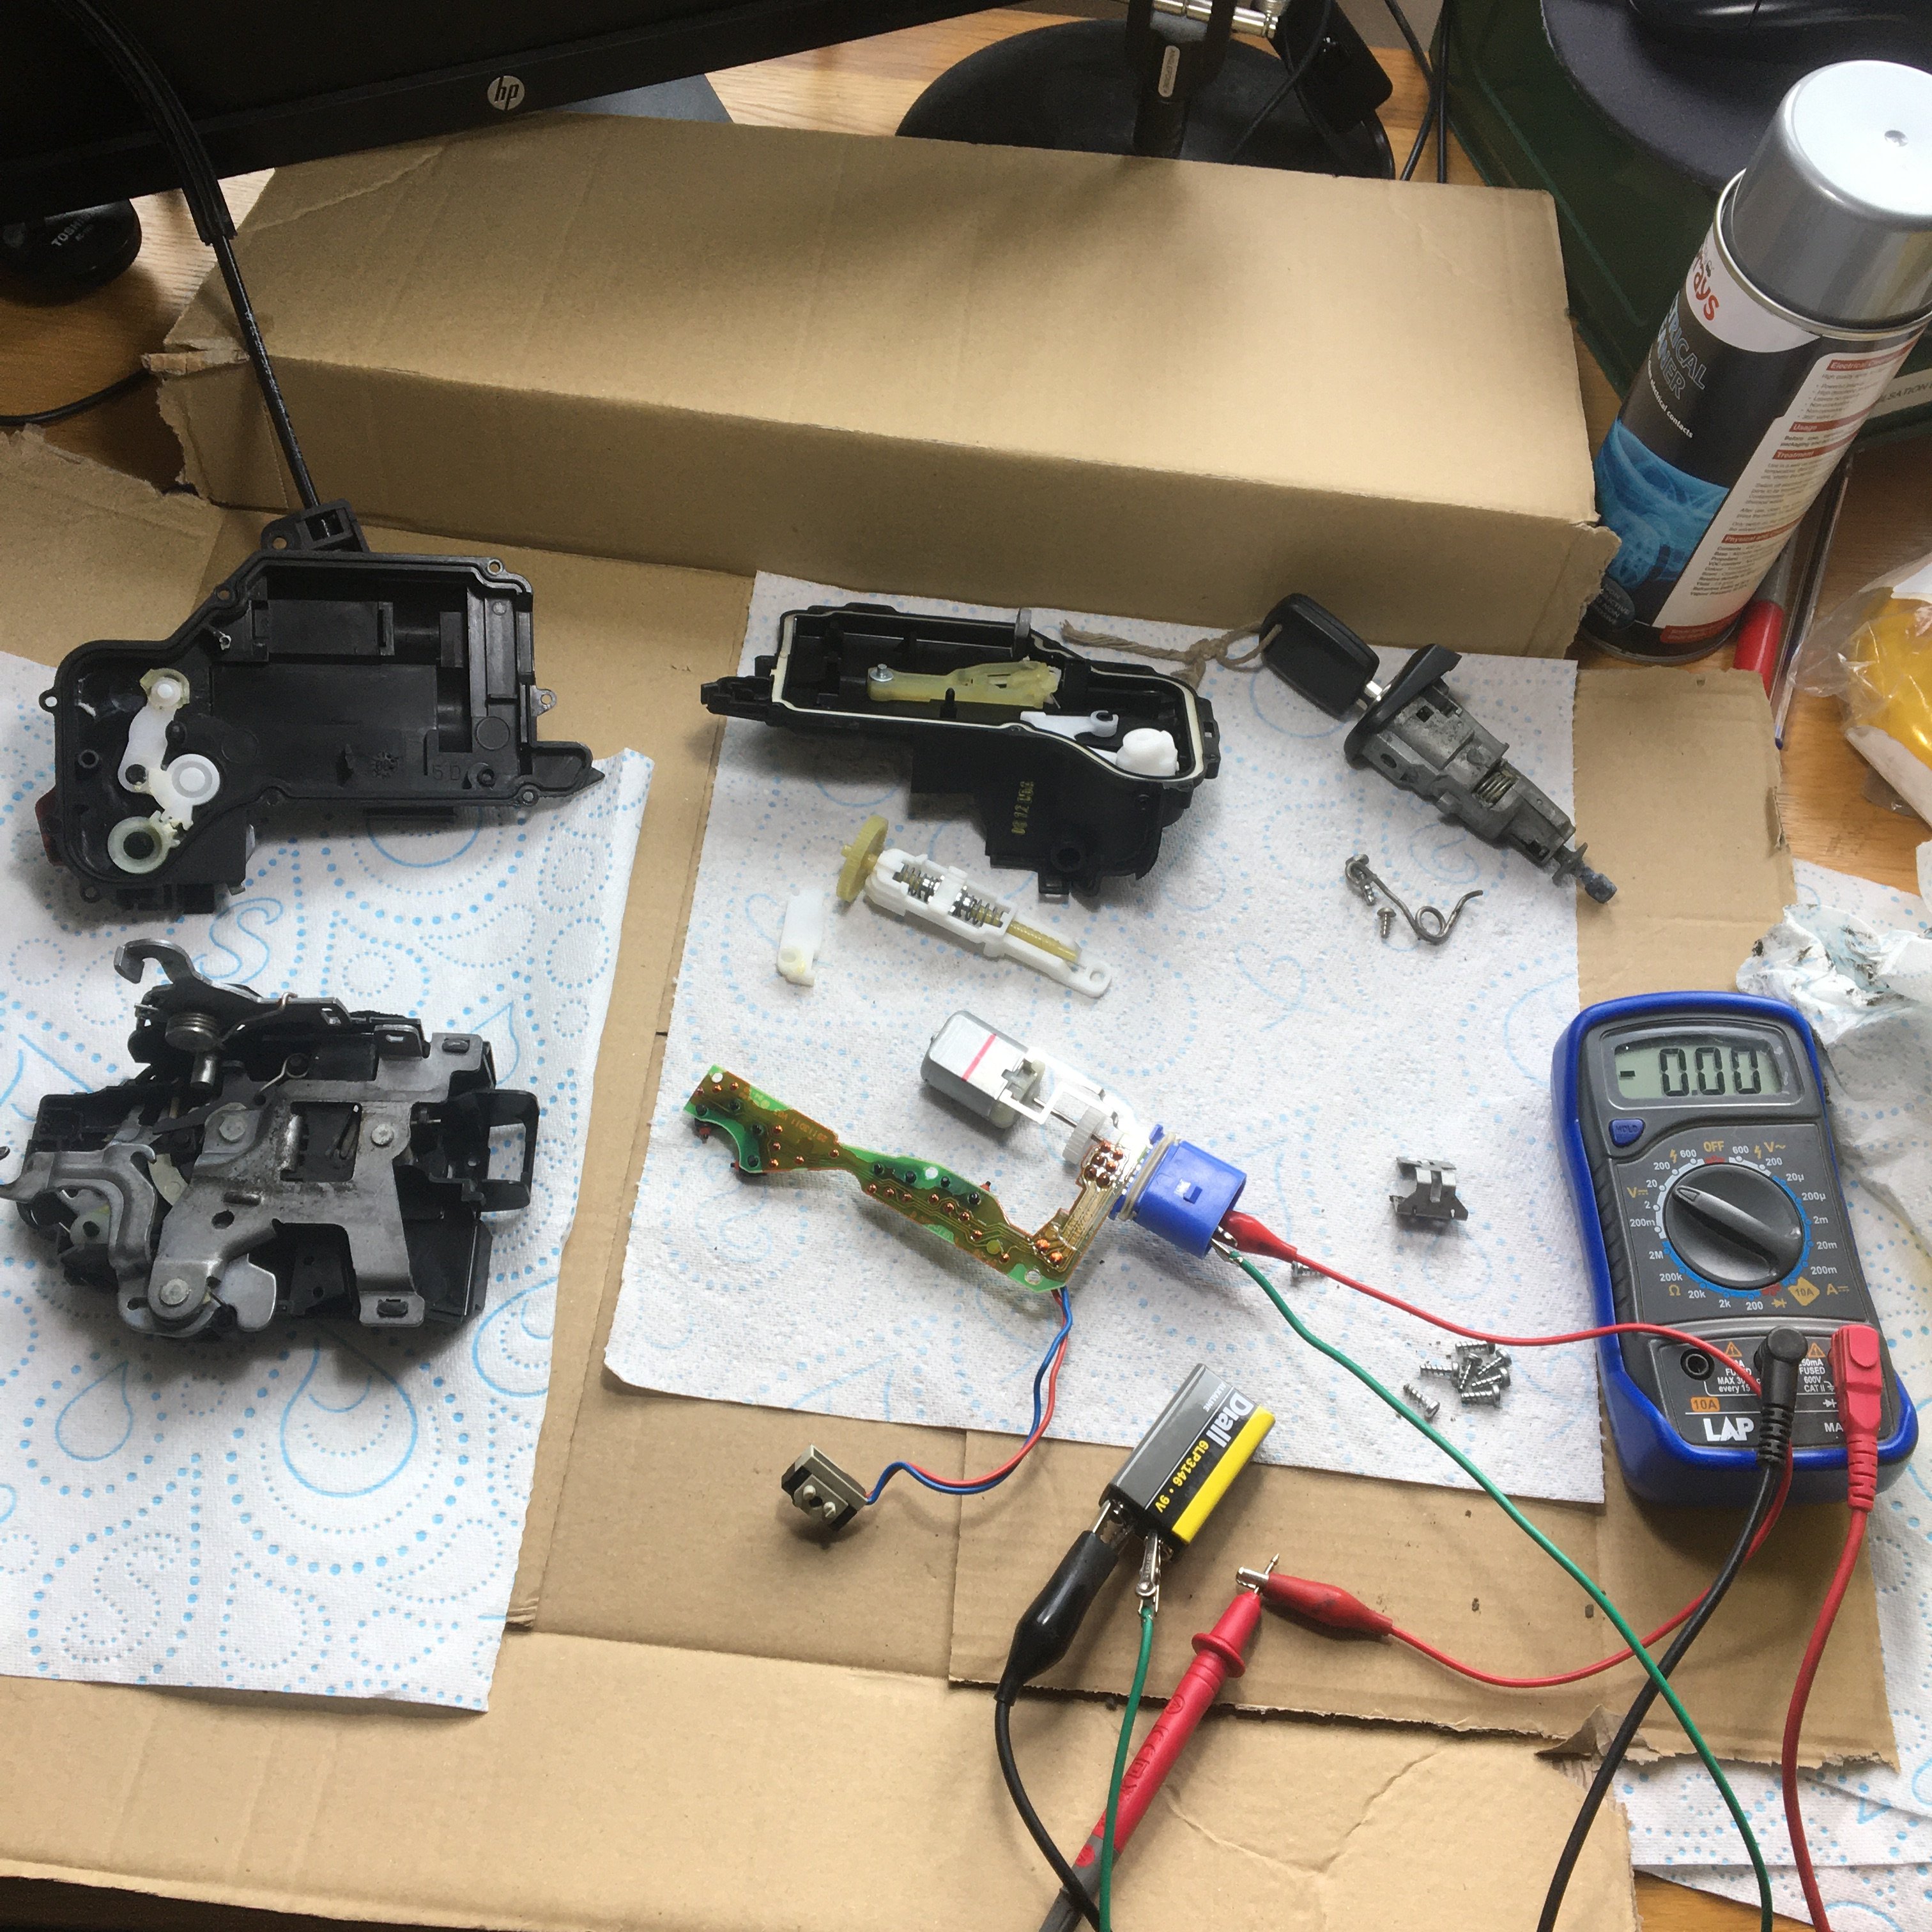
This one took me a while to trace, so I thought I'd document it to maybe help others. Fault - (2009 Fabia 1.2 Hatchback, BBM) Door open light and chime and interior lights coming on at random whilst driving and stationary. Fault was intermittent so made it harder to test. Summary - Opening and closing each of the doors wasn't conclusive but I thought it was drivers door when I could get the fault to occur. I read up on here and then checked the wiring in A pillar bellows (all looked good unusually), so I then removed the door latch mechanism as described in posts on here. I tested the latch micro switch on the bench and all seemed good. I checked the PCB contacts for the connector and switches both visually and with meter for continuity and all seemed good. I ran 9v from a battery through switch and all good. I then removed the complete door loom (a little fiddly but it can be done without removing the speaker) and double checked all wires - all good. Having not found any problem with door lock mechanism or door loom I decided to put it back together and reinstall without changing micro switches or re-soldering so as not to disturb anything. I then looked at wiring diagrams in posts on here to see if something else could be happening. It showed that the door latch circuit has two wires (brown, brown/yellow) and when the door is open then these connect in the latch micro switch and earth is supplied to the brown/yellow cable and that feeds back through the bellows to the Convenience unit under the dash. However, there is another brown/yellow cable that goes from the same pin in the bellows connector to the Window Motor/Door Control (not sure why). This meant I could easily test the state of both brown/yellow wires at the window motor connector with the door in operation (have door open all the time and just use a screwdriver to push the door catch cam all the way in to simulate it being closed). Doing this when the connector was off the window motor I was able to see the door catch micro switch always operated perfectly and only completed the earth circuit when the door was open (and the dash light operated correctly). However, when I reconnected the connector to the window motor, that wire was earthed intermittently and caused the dash door open warn light to come on even when door was closed. So I concluded the window motor was incorrectly earthing out the circuit and causing the fault. As an aside, using this window motor connector (status of brown/yellow wire when unplugged) would be a good way to test the door micro-switch operation without needing to dismantle door catch as easier to get to than the bellows connector and allows window motor to be excluded from the test (as its unplugged). So I then decided to strip the window motor as couldn't find much info on here. First time stripping it came apart completely and I found a very tiny spot of green corrosion, some metal filings, but not much else so I cleaned and sealed up the pins on the board with PCB varnish thinking it was maybe just moisture or filings causing a short. Reassembled, tested, just the same fault.... So took it off again (three screws, easy), and second stripping it came apart in better way and PCB easier to access. I tested what i could with a meter for continuity of soldered joints behind main connector, but everything else was tiny SMD stuff so beyond me. I didn't find a fault but decided to reflow the solder on the connector joints as they cause issues elsewhere (dash, lock pcb etc). They are small and fiddly, but I got it done and then added PCB varnish on top. Reassembled everything, and everything now works as it should - the original fault of door open light coming on has not happened since. I did look at replacement window motors before i stripped it and there are many versions, and some are costly, so this might be an option to try before going that route. The circuit board is small and I couldn't see detail that well (corrosion, joints, filings, etc) so I zoomed in on camera and took lots of photos, then zoomed in again whilst viewing and surprising what can be seen then! Some pics below, but they are just a fraction of the couple of hundred I must have taken.... Testing the door latch on bench (now know this could have been avoided by testing in situ through the window motor connector) Model of window motor on this 2009 1.2 hatchback Window motor connector (brown/yellow at bottom right here is the wire that should be earthed when latch closed (test with connector unplugged from window motor to test latch micro switch first, then plugged in to see if Window motor is providing a false earth). Connector block on Window Motor PCB, - small amounts of corrosion, but perhaps more under the block itself, but didn't fancy trying to remove. PCB from Window Motor with my thumb for scale (board is small....) - I reflowed solder on back of connector block (the 14 blobs in the middle - they look a bit domed but connectivity was good and I was concerned at leaving too much heat on the pads with all those SMD's around...) PCB Varnish added on top to seal out any moisture. Hope that helps someone. I have more pics of dismantling things is required (but there was a 10mb limit on this post).

.thumb.JPG.41e1cb2e0cef87e0fb8af1aae3246094.JPG)
.thumb.JPG.f205c502233bf84faae0955b6ea50eaa.JPG)

.thumb.JPG.347b6f516747a18fefb4218ba8acf96b.JPG)
-
-
not sure if it will help, but when i had throttle issues (signal dropping so fabia-2 1.2 went into limp home mode), i removed the electronic throttle pedal and opened it up. I seem to recall it was easy to remove and open, and i then cleaned the contact tracks and "fingers" and made sure they were making good contact, put it all back together and its been good for a couple of years so far. not sure if dirty contacts could give a throttle signal staying on, but might be worth a look? pics on inside of pedal attached:
-
Whipped cluster out and reflowed all pins on both connectors - didn't take that long and just managed to get to all pins without removing needles/faceplate/LCD. All back together again now and lights up and starts fine, and will test drive tomorrow and see if the mystery fault returns (could still be a fault with power getting to the cluster rather than cluster itself). Thanks for the help Wino and Mrgf.

-
yes, i'd found ig feed on 5 too (but mistyped as 7 above !) - anyway, we both got to 5 in the end We did have the brake pad warn light on last week a few times, then disappeared, so probably related to the pin 1 - will keep an eye on it. Cluster is back in, but it only takes 2 mins to take out so I'll follow your good advice and reflow all pins tomorrow as could well be 5,7 or 8 if not 1. Thanks for pointer to Erwin, will check that out. cheers, neil
-
Oh yes Wino, I did get that delayed buzzer going off once I supplied a two power feeds and earth - so thanks for that warning
.thumb.JPG.f7797a04a38992cac1a23a305cddee01.JPG)
-
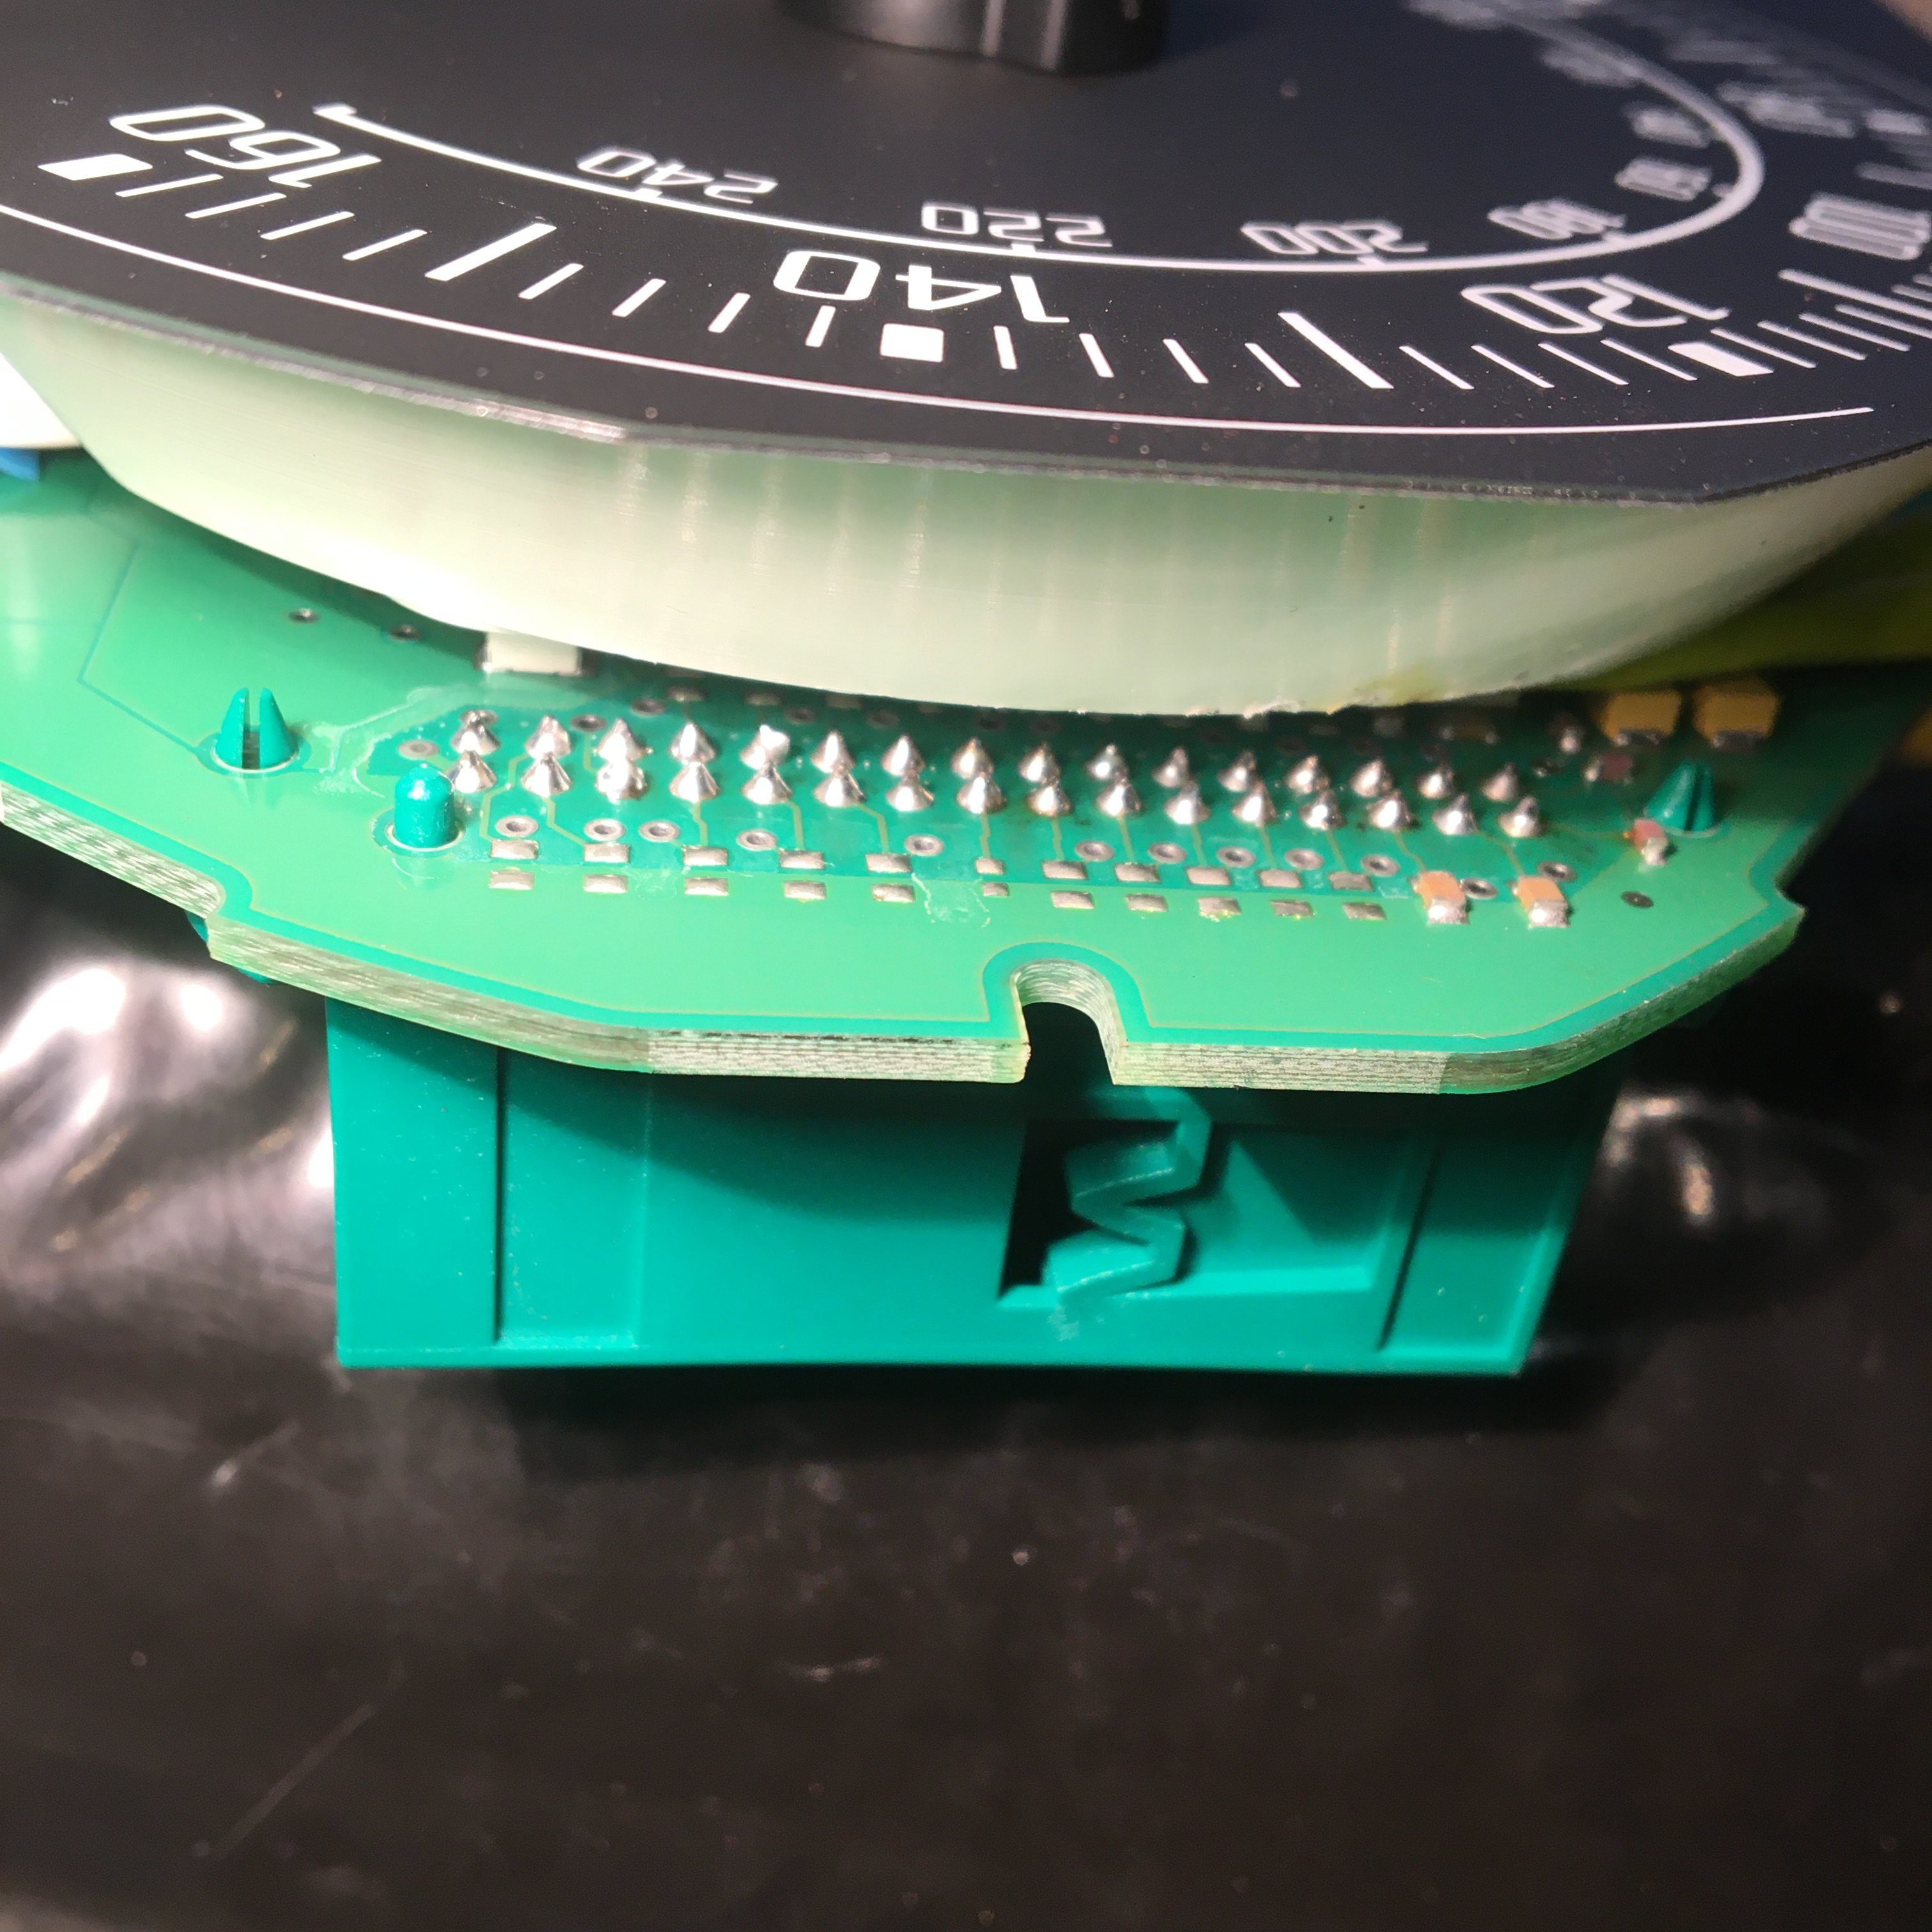
Todays update - removed cluster and had a better look indoors as too cold outside today (although dash was lit up ok and started fine so problem not evident again). Once on kitchen table with good light and glasses i could see what looks like a possible dry solder connection on pin 1 (front right of the 8 soldered pins on my photos). One pic shows before and one shows after i reflowed the solder. Took about 20 photos just to get these two.... These pins are small and hard to see whats going on, but zooming in on the pics on phone/pc afterwards helps. Wino - On the wiring i tested the plug in the dash for earth, Bat feed, Ig feed, before I went inside and found one pin different to what you suggested. I found 8 was earth, 7 was a bat live, but the ig feed was on pin 7 (not 6). Everything powered up ok on the kitchen table, but despite some good warming with a hairdryer i couldn't recreate the fault before the soldering was done. I'm now curious what the problem pin is used for. It is pin 1 with the pinkish cable to it - do you have a wiring diagram that shows what this is used for? So I'm hoping it was a dry solder joint on pin 1, and that pin 1 is something that could disable the whole display, and that I've now addressed that - but I could be wrong on any of those.....
.thumb.JPG.a91c94a06f851da7d70190ce8db138cd.JPG)
.thumb.JPG.a808b2be2b7bffd2480dc73569136a0b.JPG)
.thumb.JPG.09cb59d966b74ce09ccdc28a335cd3d9.JPG)
.thumb.JPG.ea596afb1fa62a52e622e5f001d87b43.JPG)
.thumb.JPG.317aca481e03bd28627383590dd0cb92.JPG)
-
thanks wino, i'll give that a go tomorrow, and thanks for the noise warning

.JPG.2ba07a095c5bd634ab94ca2027b3c4e5.JPG)
.JPG.38f91b4aa730a2b5e1f3c88186d5db15.JPG)
.JPG.78da2a6e1b37eed4f8e780ab7f11ec53.JPG)


.JPG.6715b145ef0a14f3d8f661d7fc8b0060.JPG)
.JPG.14bfcbadf74e2074f933f30ccbb8aec2.JPG)

.JPG.451a9802570d5ead3912cff19fd255fc.JPG)

.JPG.afd1850ec3bc13cff0a14c439a442399.JPG)
.JPG.b7f183240704d96cf179bdae93743289.JPG)
.JPG.31037b9c721d837f546b9c66a430b7e5.JPG)
.JPG.4e4775dbeda730af7ff97efdefc7901e.JPG)
.JPG.a4f1b5ef476fea582ef549ec2b116399.JPG)
.JPG.6e5ddcb9ac3e4b298a9b3a75e34553fc.JPG)