.jpeg.2be1ff23db65b1928106364ab86f4b3c.jpeg)

Binx1310
FREEDOMLite
-
Joined
-
Last visited
-
When I changed a glow plug, I sprayed it when hot and cold with WD40 specialist penetrant for about 3 weeks leading up to being brave enough to try taking it out. https://www.eurocarparts.com/p/wd-40-specialist-penetrant-400ml-542771790?utm_source=google&utm_medium=cpc&utm_campaign=610675635&utm_content=70461851759&utm_term=&type=shopping&gad_source=1&gad_campaignid=610675635&gbraid=0AAAAAD1aCJiCH00Nb1y-9oNagakWazLWg&gclid=CjwKCAjwifjVBhBKEiwAYx4K9Gr4esDsqkYF07vtj-SUlNoa99sUK64kWpMgQefPCrCN5MJdWU_ttRoCb-IQAvD_BwE It came out ok but took quite a bit of force (And bravery) to crack it initially. But they can be very hit and miss!
-
I bought them from Eurocarparts (UK) but you can search the Brembo website based on your exact car - mine is 190 TDI FWD Estate. I got the Prime model. https://www.bremboparts.com/europe/en/catalogue/skoda-superb-iii-estate-3v5-2-0-tdi/000115168-1
-
I was the same. Changing back discs and pads didn’t cure it but fronts did. All brembo parts used. Remember to clean and lubricant the slider pins. This should be the proper ate grease for the fronts. Not copper slip.
-
Ah yes. Good spot. I think the process is the same but need to make sure you get the right update package. If you put your existing software train into MiB helper it will tell you the latest version. If there is more than one version between your existing and current one you may have to upgrade in stages https://mib-helper.com
-
Is it just moral? Potential new regulations on mot in 2027. Unless that’s just diesels. Recently discovered mine hasn’t done a regen in 50,000 miles or so. That might get interesting.
-
@JR RS has done a brilliant guide. Make sure you have a good battery charger connected as a failed battery during this process can be catastrophic.
-
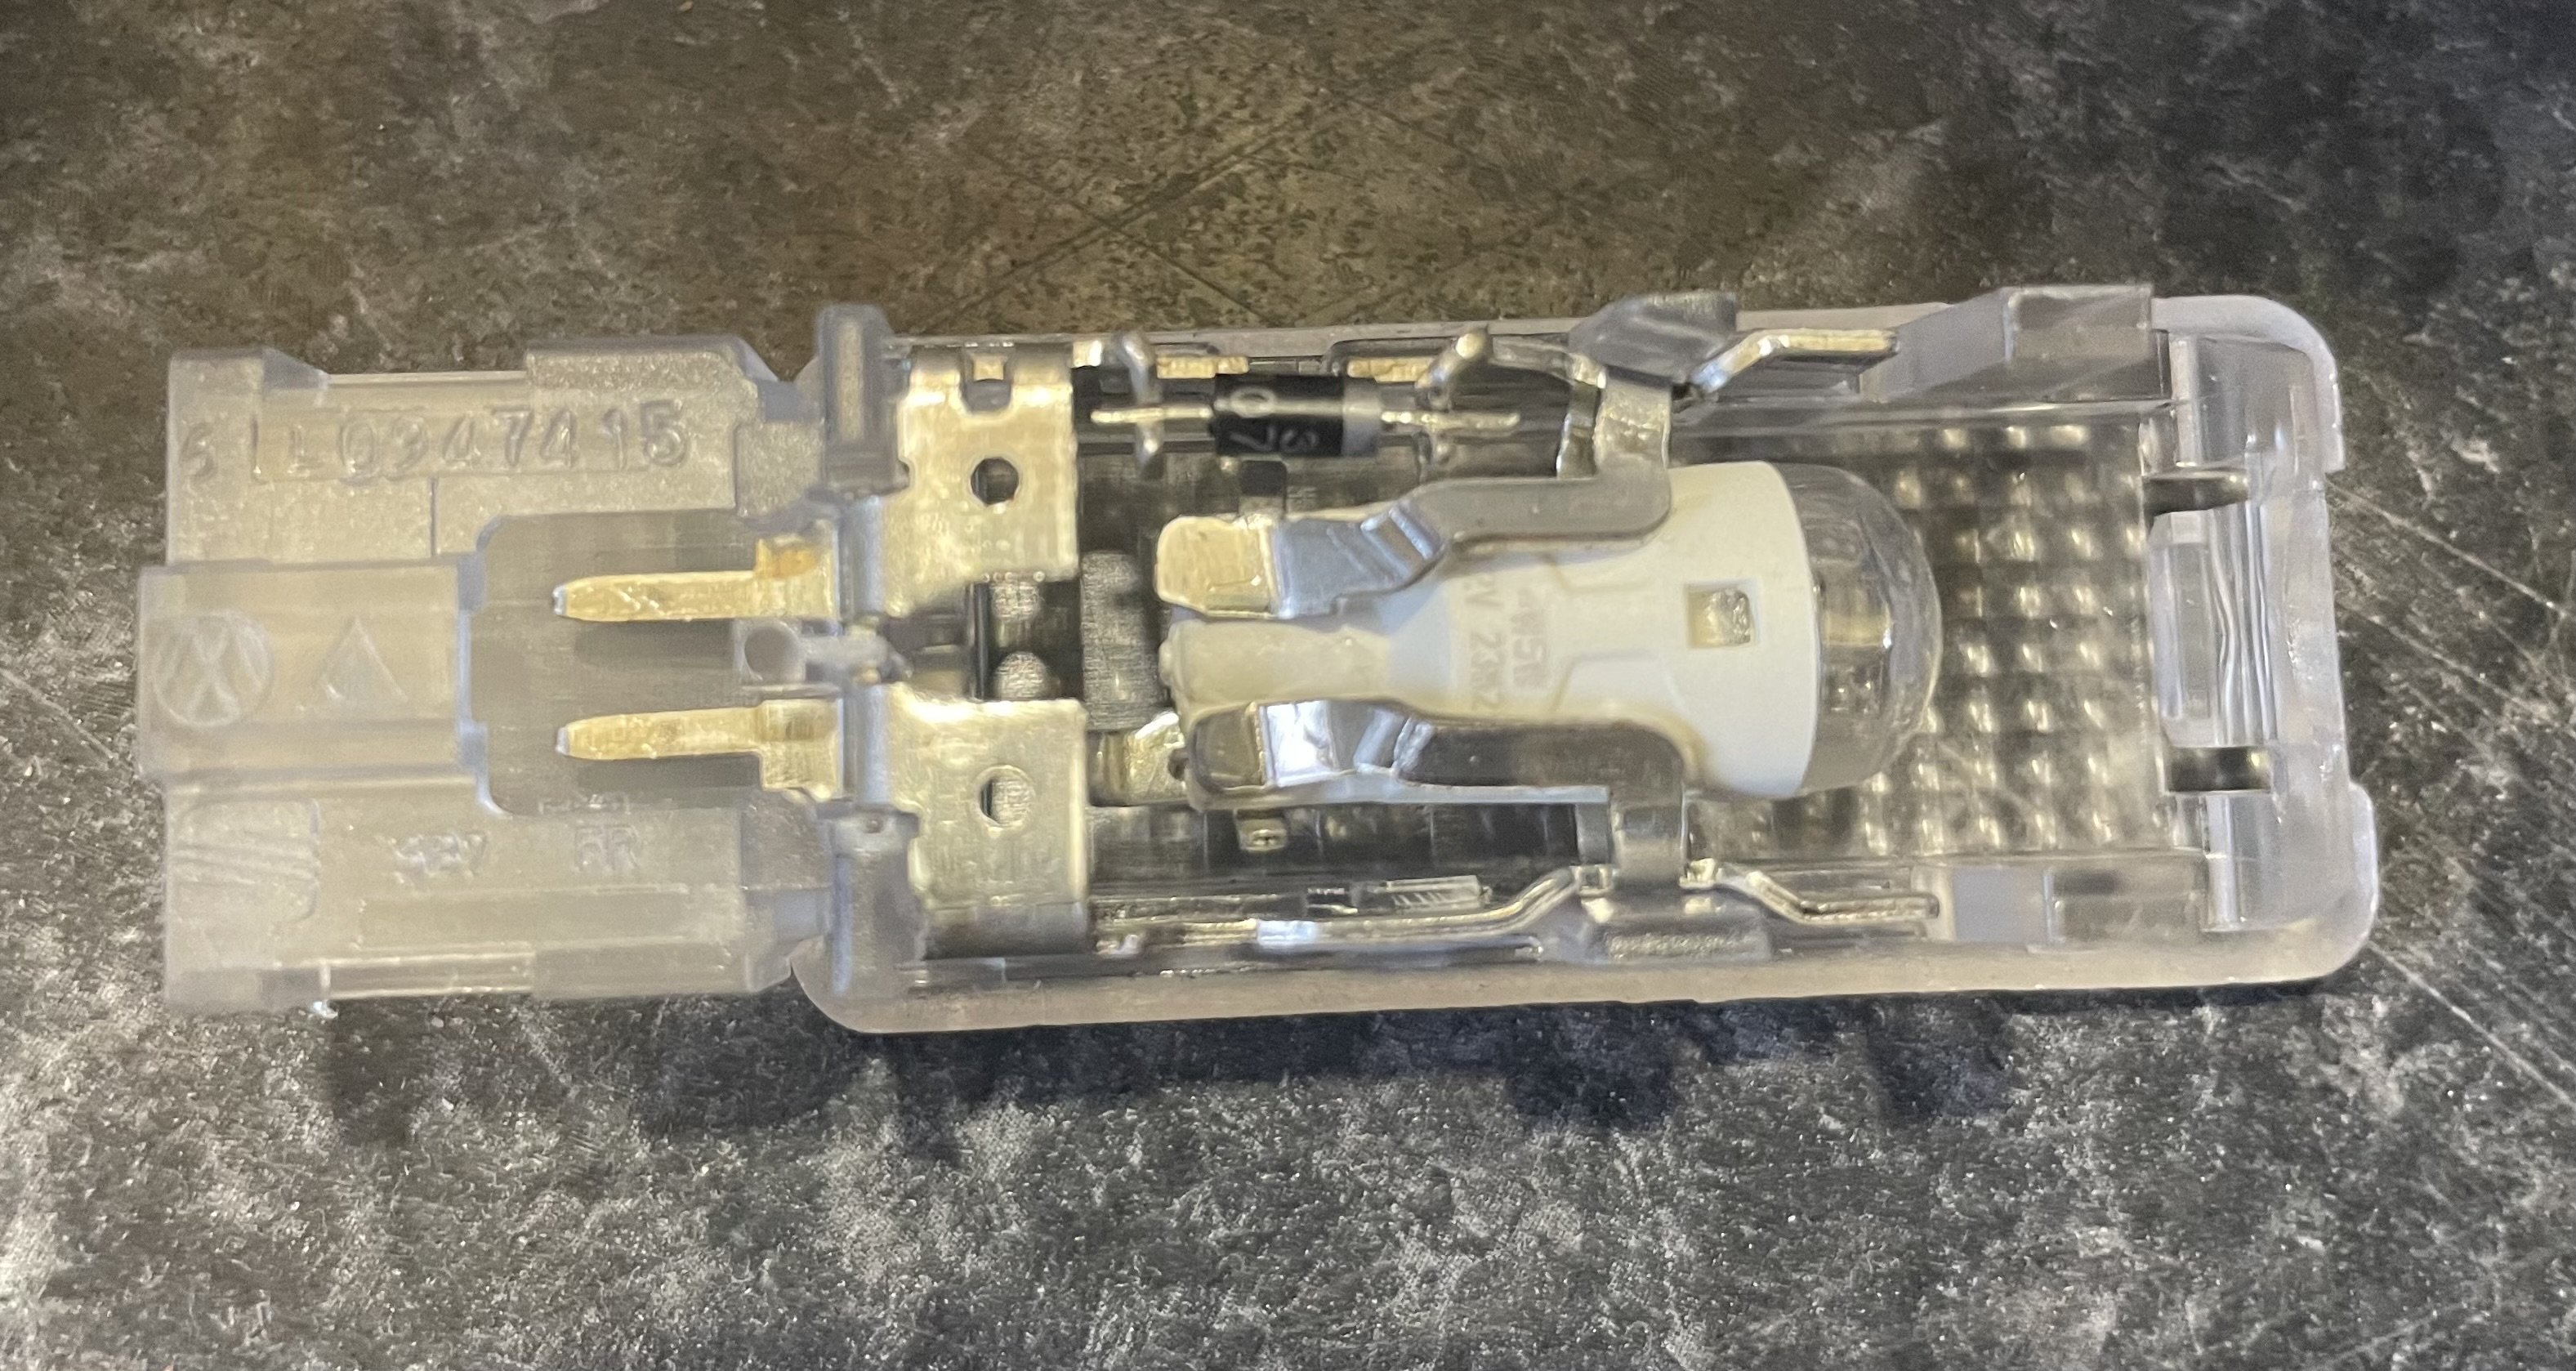
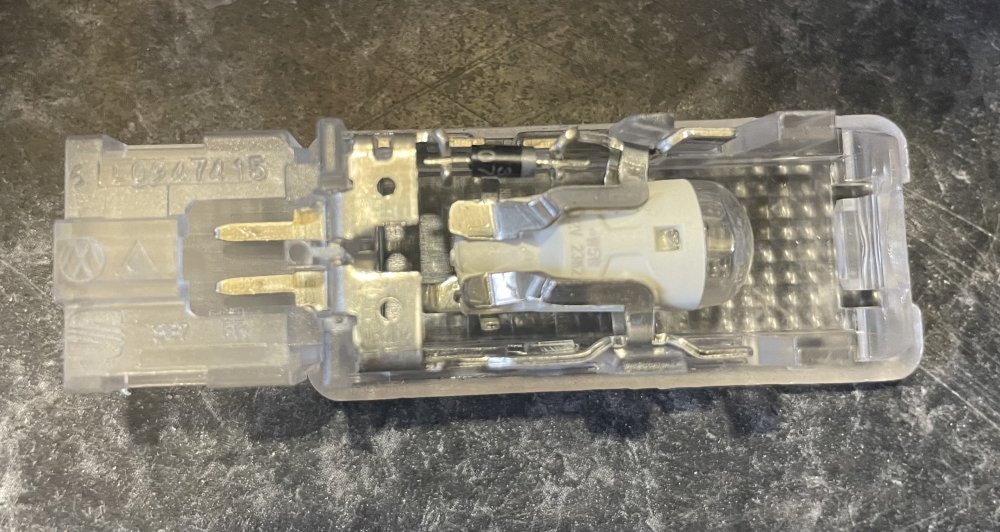
Mine are Phillips cool white w5w led bulbs. Were fitted by previous owner and appear to have a resistor in the light fitting too.
-
Not sure I can answer your questions specifically. But I love the solution on this one to keep OEM look with super sprint back boxes
-
Well I said on the wish list. Doesn’t mean I’ll actually do it…
-
Will be good to see some before and after pics. It’s something that might find its way onto my wish list.
-
Got mine given a quick once over yesterday too. Makes it look so much better. Won’t last long I think!
-
I wrote a guide for connecting by UART should anyone need it in future.
-
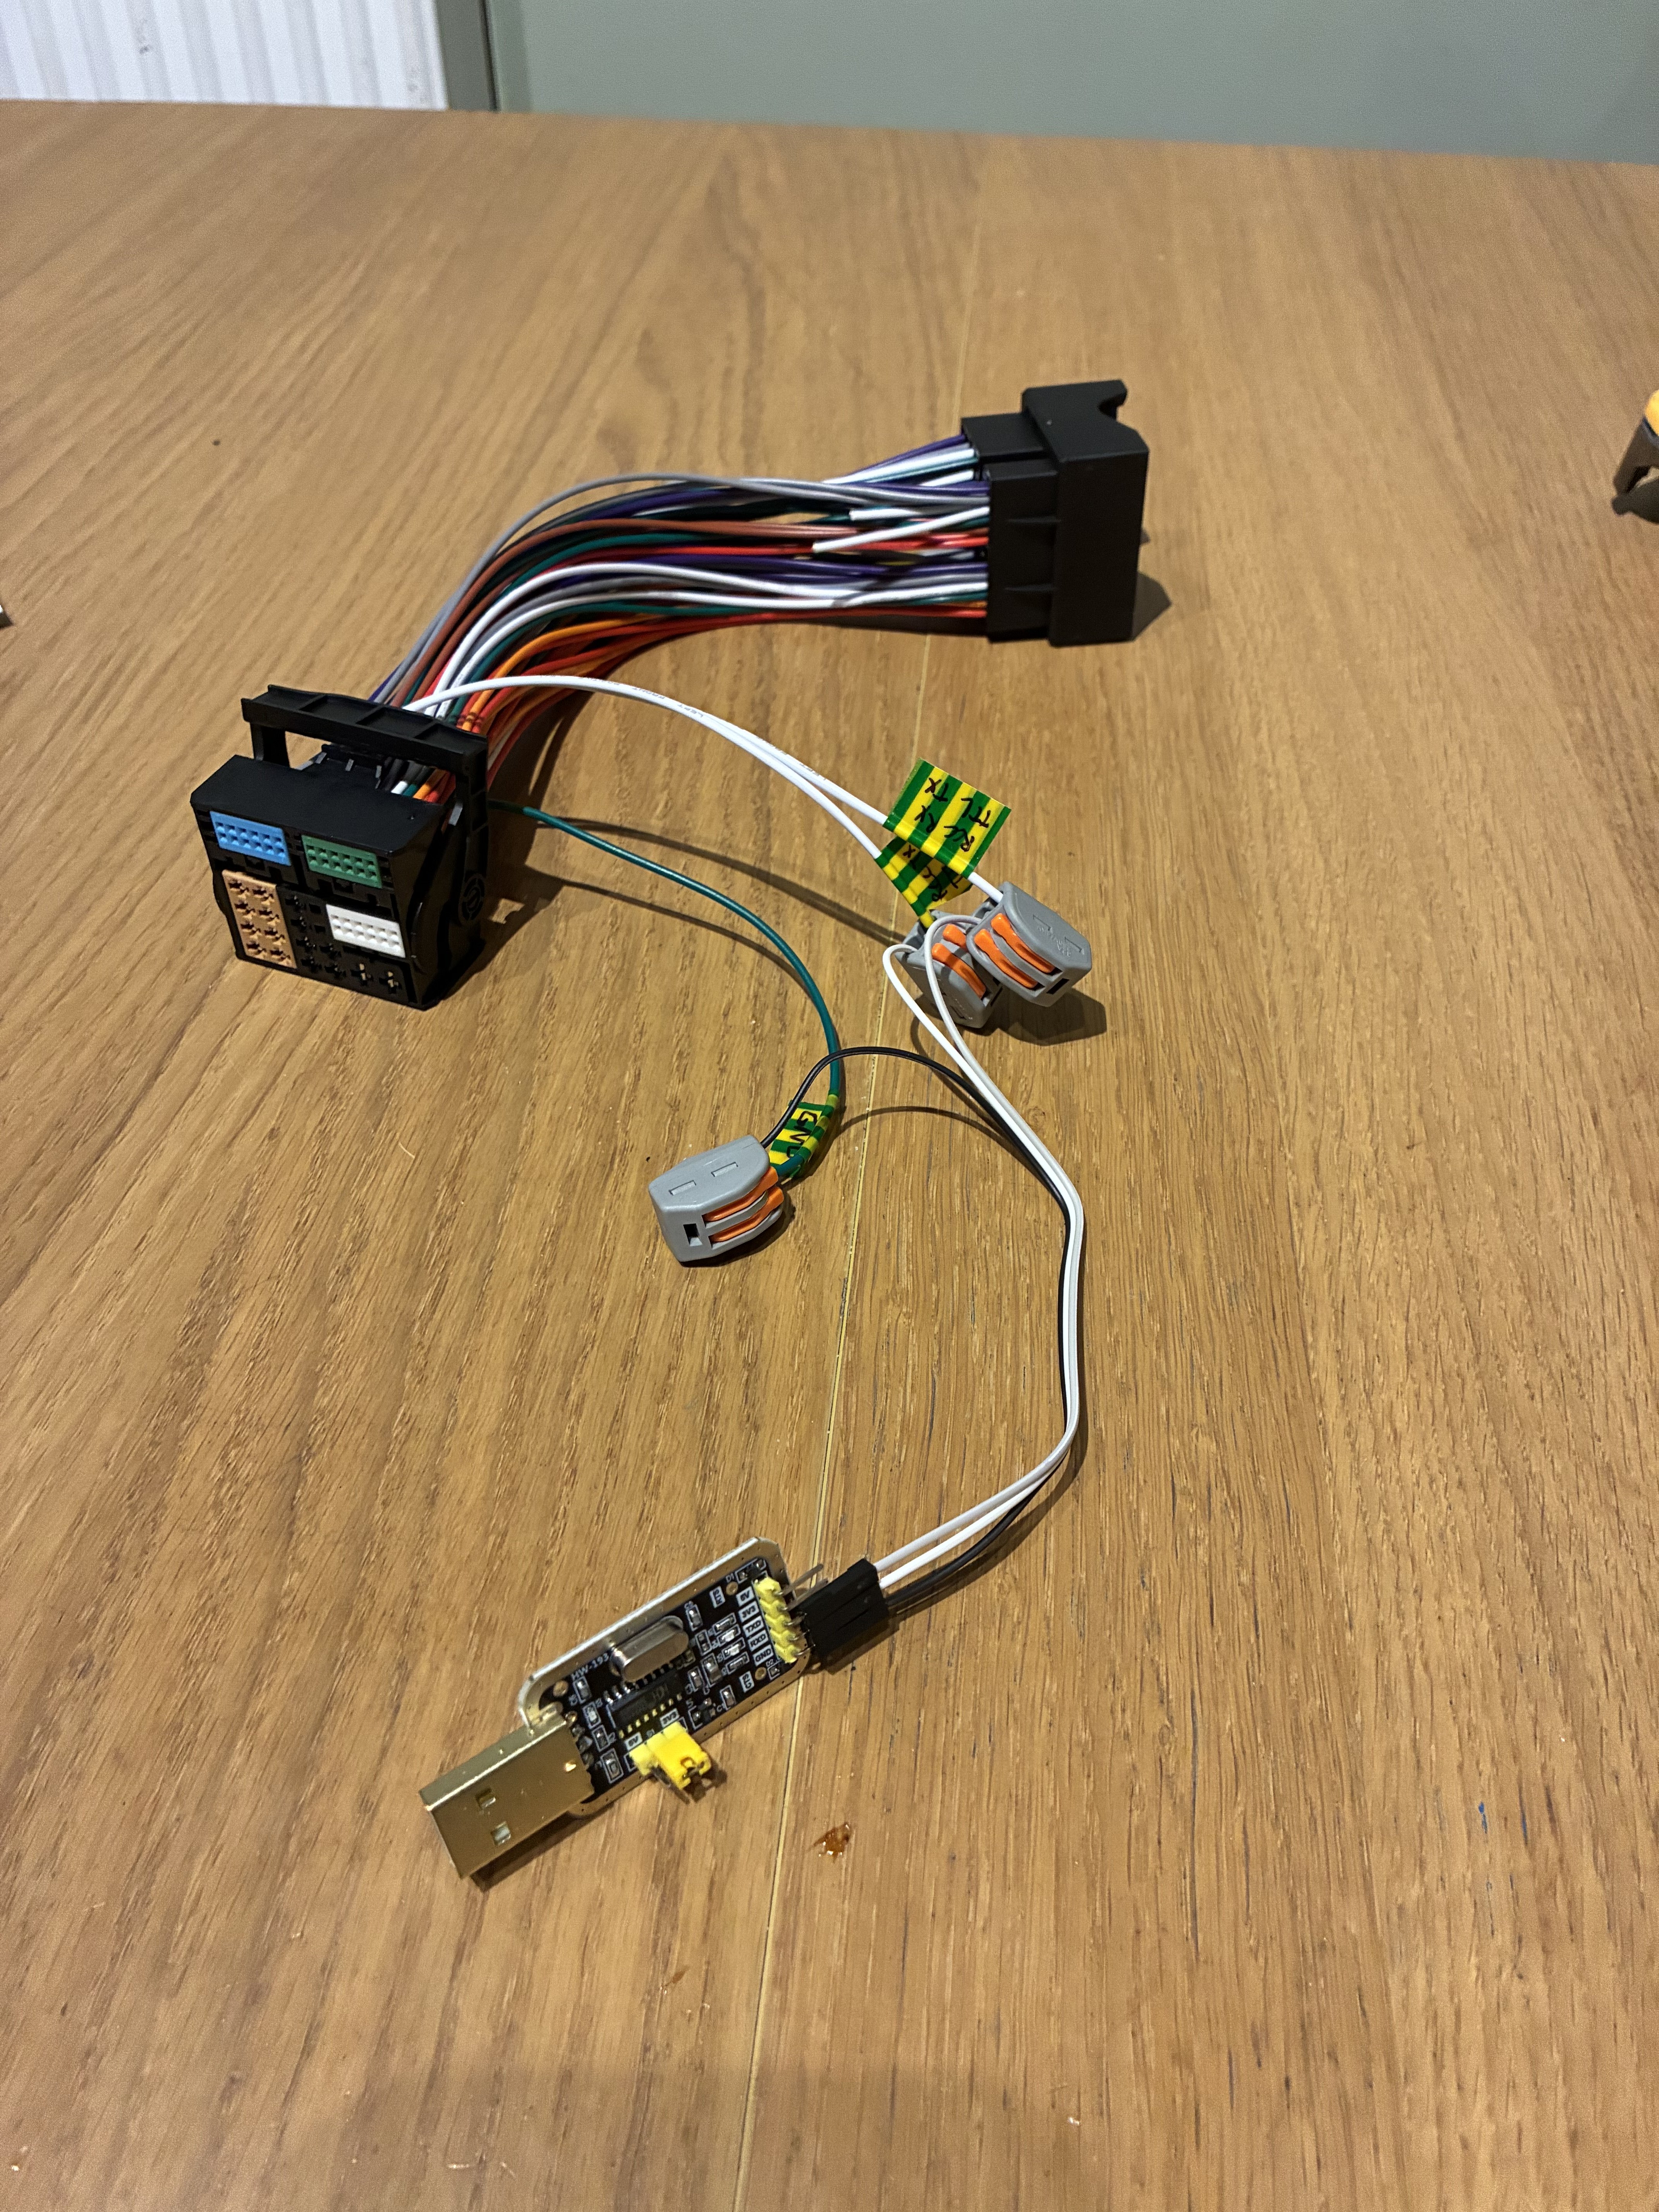
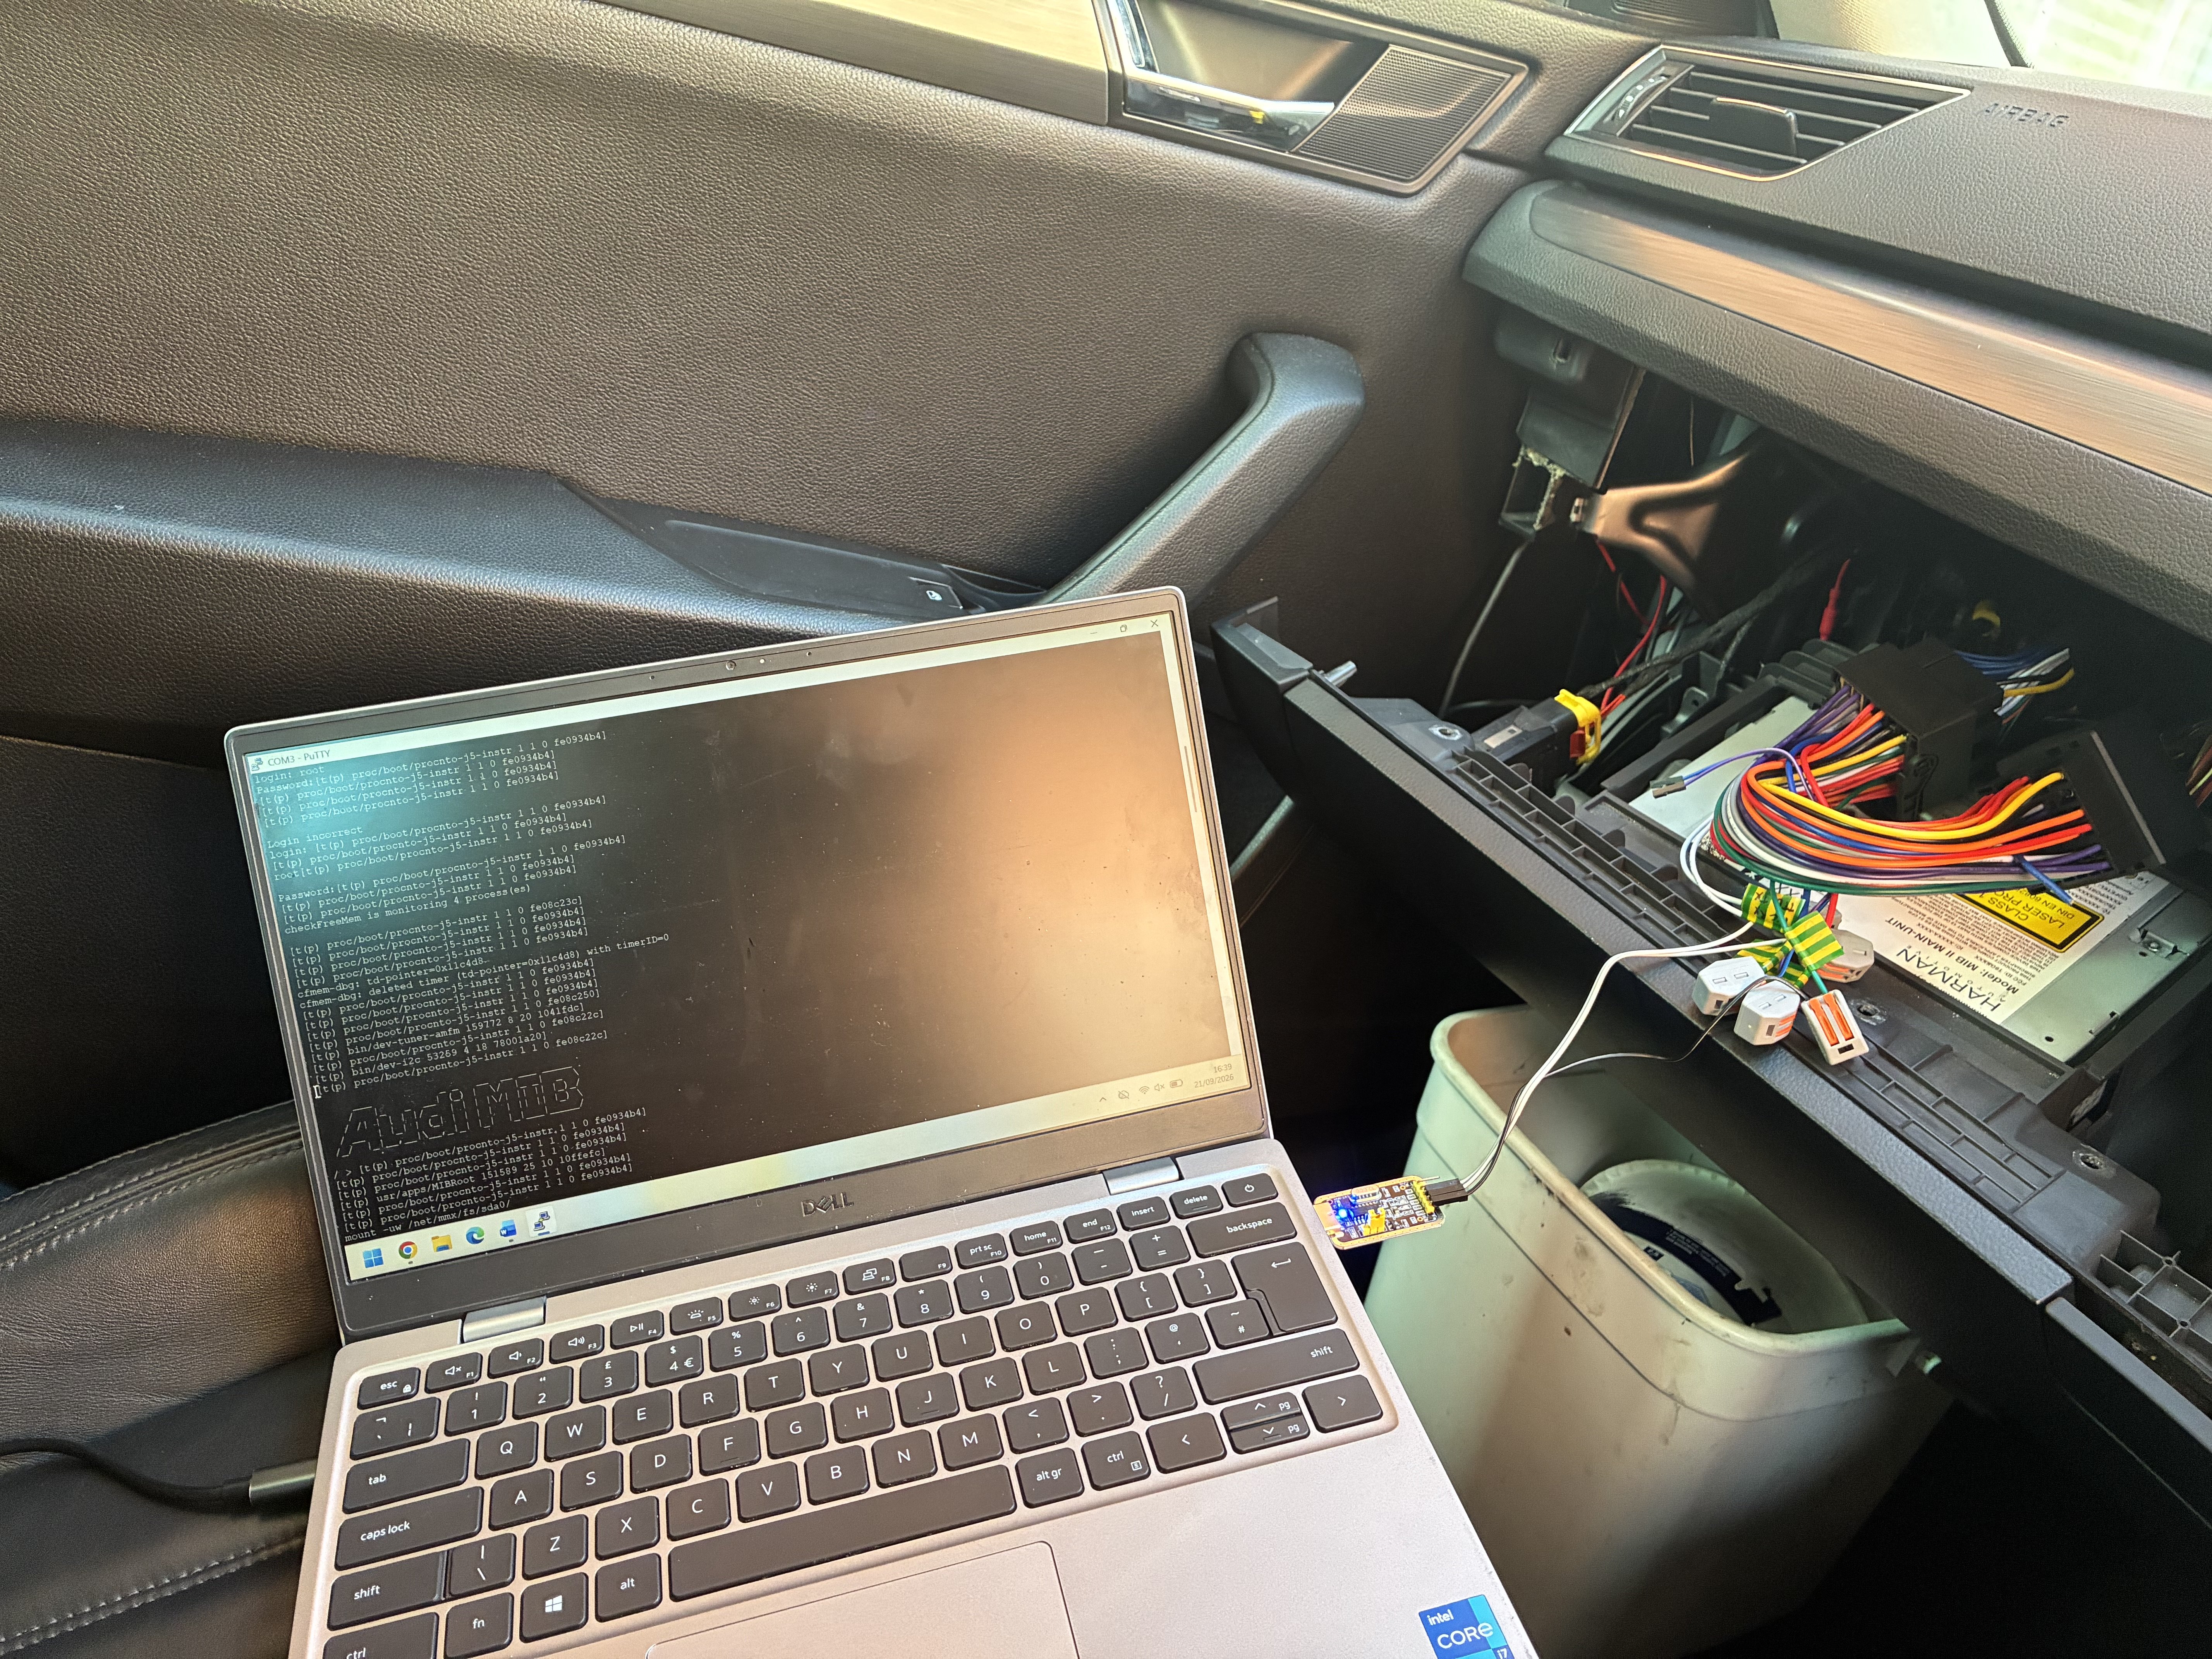
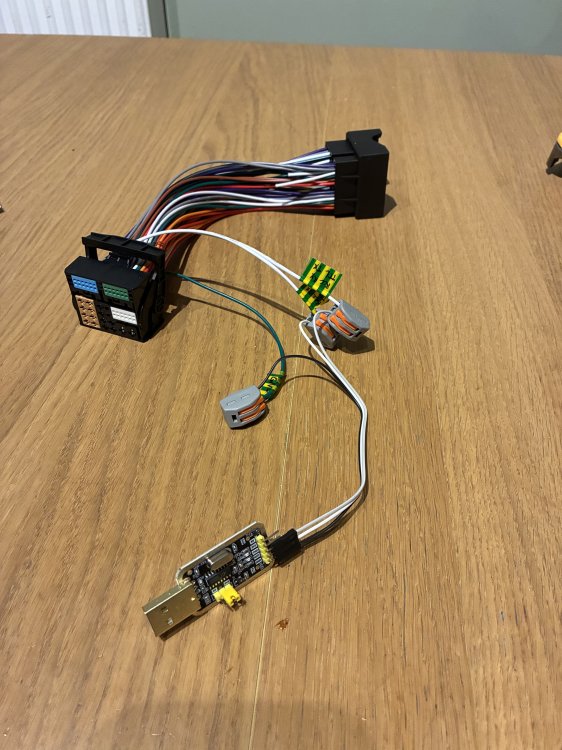
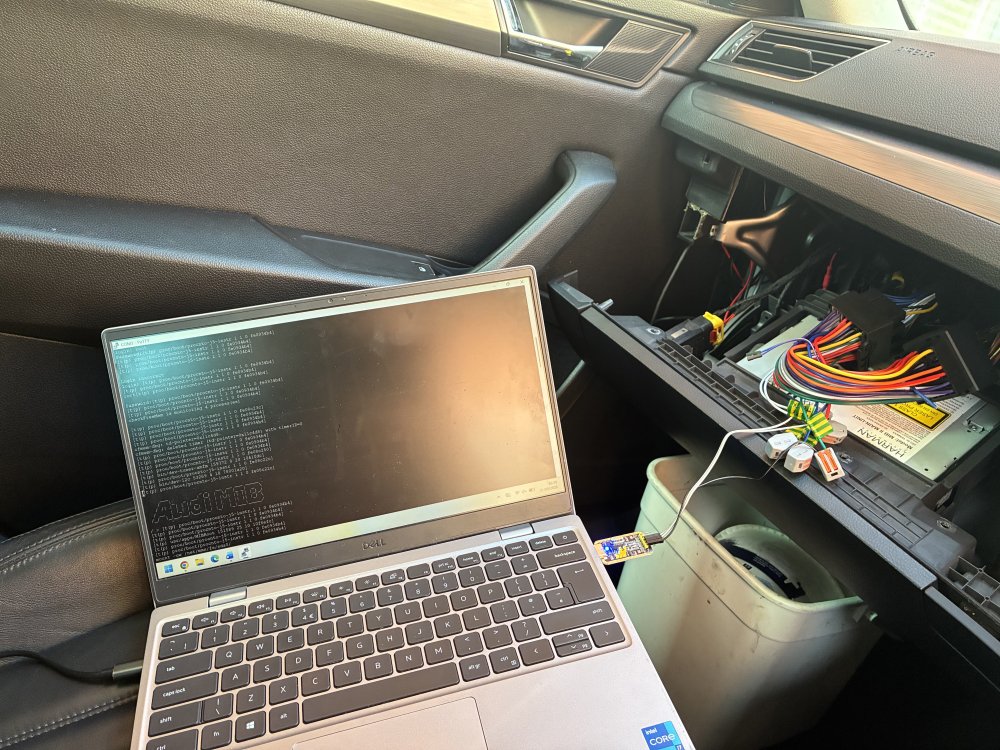
Having had to do this recently to try to recover a bricked MHI2, I found the info to be a bit all over the place so thought I would gather it into one guide. You may well need the guidance of an expert such as @pab567 once connected to the MIB for the next steps in recovery/programming, but this set up will allow them to remote access to you to do so. I take no responsibility for any effect connecting in this way has and am in no way an expert on this process! Useful Video of the general process: Parts required: TTL to USB adaptor. There’s lots about on Ali or Amazon. Look for CH340 chip and you need to make sure it supports 3.3v. This is the one I used https://amzn.eu/d/03Rt3b1k Quad lock extension cable. Not completely essential but this is an easy way of connecting to the right pins and also allows you to connect cleanly and reversibly to the existing wiring whilst maintaining all the other connections to the car for testing purposes. https://amzn.eu/d/086O3DlR Connectors, such as crimp terminals or WAGO connectors. Laptop First step is to make up the cables following this guide https://www.scribd.com/document/849387823/Connecting-TTL-adapter-to-UART-on-quadlock-VAG-MIB2 find the correct wires in the quad lock extension cable and then cut them and crimp/connect on the UART connection wires so they connect to the lever plug end of the extension. I added some labels so I could ensure I connected them to the USB adaptor correctly. You may need RCC or MMX connection so I added in the wires for both and then just connected the right ones to the USB adaptor as needed. Next, prepare the laptop. Download and install PuTTY https://www.chiark.greenend.org.uk/~sgtatham/putty/latest.html Plug in the USB and find the correct com port associated with it in device manager. Then set up the connection as per the scribd article linked above. Save this as a profile for easy connection next time. Find the correct password required to login to the MIB based on brand and software version as per this article https://www.scribd.com/document/464567838/Audi-Mib2-solution And put it into a txt file so it’s ready to copy and paste. Now connect to the car. It is essential that the car battery is in a good state of charge. Connect a good quality battery charger during this process. I would highly recommend charging the battery for a few hours prior to starting this process to ensure it’s in a good state. You can take the MiB unit out of the glove box but I chose to drop down the whole glove box and rest it on a bucket as it allowed access to the fuses and keeps all other wires connected to the MiB. Remove the 20a fuse (position 12) from the fuse box to power down the MIB unit. Remove the quad lock from the back of the MIB unit and add in the modified extension you have just made by connecting it to the back of the MiB. And the other end to the quad lock of the car that you’ve just removed from the MiB. Ensure the correct wires are connected to the usb adaptor in the right way and that it is set to 3.3v. Plug usb in to laptop. My wires were quite short so I had to balance the laptop on the passenger seat. You can extend the wires when making the adaptor but they should not be extended more than a metre. Open putty and load the profile you set up. You should see a blank black screen. Now copy the password from the txt file. Insert the fuse for the MiB unit. You should see the screen now being populated with text and code as the client logs the activity of the MiB. Press enter and type root, then enter then right click on the black background. (This will paste the password you copied) and press enter. If the login is successful you should see “Audi MIB” in ascii characters as per the picture above. You are now logged in to the MiB. If you are being supported remotely ensure you have an appropriate remote access tool installed to allow your support to control your laptop to enter commands. Using certain command codes it’s possible to backup to an SD card as well as various things such as remove component protection or update fec codes/ program the eeprom etc. I have no information on how to do this! There is a high chance of bricking your unit so do not proceed unless guided by an expert or you are confident in what you are doing!
-
I tried silicone and it didn’t last. Some have said tiger seal. I cleaned up the groove and made sure the trim was shaped well and not out of line and it seems to have stayed on its own. Time will tell.
-
I found one in the notifications list. If you pull down from the top of the screen.