GregorSamsa
Members
-
Joined
-
Last visited
Everything posted by GregorSamsa
-
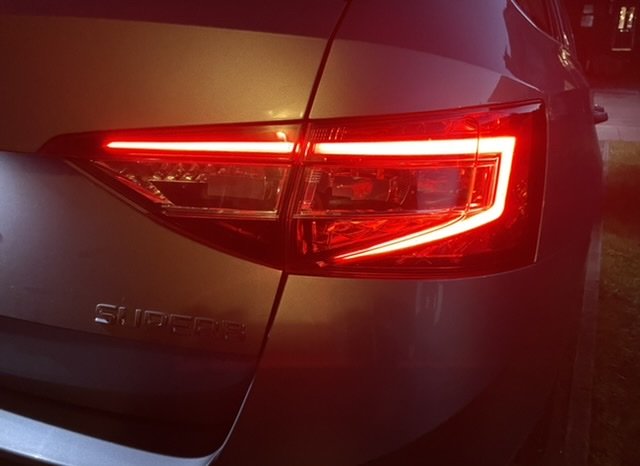
Maybe it depends in trim or even markets, but here in Ireland, 2021 Style level Combis don't have those newer style lights. I assume the OP's picture is of his own (2021) car, and here's another example: (link to car in question: https://www.carzone.ie/used-cars/skoda/superb/fpa/202109207579671?journey=Search) @Legacy, I'd go as far as to assume that the body section of the lights should be lighting up. Since the car is new and obviously in warranty, maybe give your dealer a call and ask about it.

-
Unlike you're going to get a reply on a thread from 2 years ago from a poster who only has 3 posts. Maybe he meant to type 206, maybe he meant to type 280. Maybe it's a mystery that we were just never meant to solve. 🤷♂️ But then, his profile does say he was last online 17 hours ago, so maybe he's was just waiting for the question to be asked...
-
Sorry, I can’t help with your question, but I have an Irish 2017 2.0 D Combi Style, and the light area on the tailgate does illuminate. Not sure why the 2021 model doesn’t.
-
I would guess that it's a custom abbreviation of the original badges: Škoda Superb 4x4
-
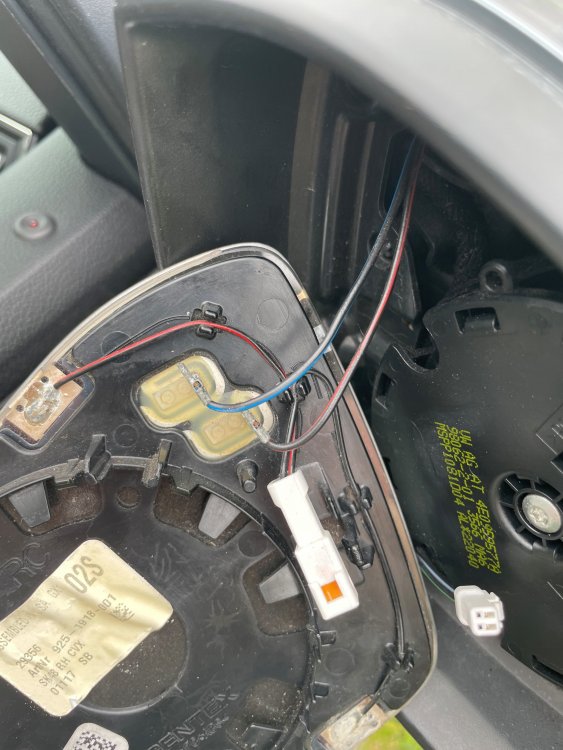
Is yours an L&K with a rear door module? Your connector below the window motor looks the same as in the previously posted photo that shows the L&K as an example. It was suggested in that post that there’s a way to connect the light directly to the module and code it. This business of connecting it to other wires is for folk that don’t have that module.
-
Fitted a pair of these Auxito LEDs as reverse lights this evening. Seem to be a big improvement. €14.95 on eBay for a pair shipped (from an Irish seller, ordered them yesterday, arrived today). As well as better illumination at the back, they throw much more light out to the side, so you can see what’s going on in your side mirrors much better. I’ve a very dark driveway, and reversing into it, it can be hard to orient yourself in relation to the lawn at night time. And last week I was reversing into a parking space one night that was marked out with brick work in the paving, and I couldn’t see the delineation of the space at all in my mirrors. These bulbs seem to fix that. My old Volvo V50 had amazing reversing lights - they shone like headlights (ironically the actual headlights were really crap - they would make you want to reverse everywhere). My other car is a Ford S Max with very dark factory tinted windows and birthday candles for reverse lights. Sometimes you look back, can’t see anything, and then have to double check the gearstick to make sure you’re actually in reverse. I’m going to try a set of these LEDs in it and see how I go.
-
Probably easier to just line the dog

-
€29.99 for the RHD one on Kopacek. http://www.kopacek.com/Skoda/SUPERB-III/Superb-III-RHD-OEM-footrest-deadpedal-SPORTLINE-version-RHD
-
Corrected, thanks to @MartiniB’s eagle eye.
-
Is it upside down? There were no instructions, and it went on easy this way.
-
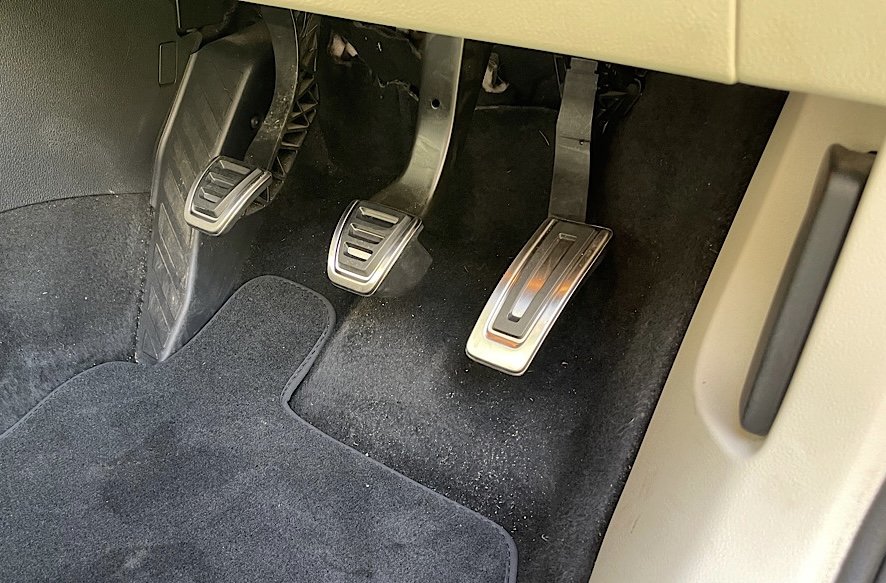
Upgraded the pedals, and fitted some nice OEM Prestige mats. I know you only see the pedals for a second or so as you get into the car, but for that second the view is now much improved. The mats are way nicer than the 3rd party crap that came with the car. Luxurious! The delivery arrived from Kopacek in a TV box. The kids were very disappointed when I opened it up, but I was delighted!

-
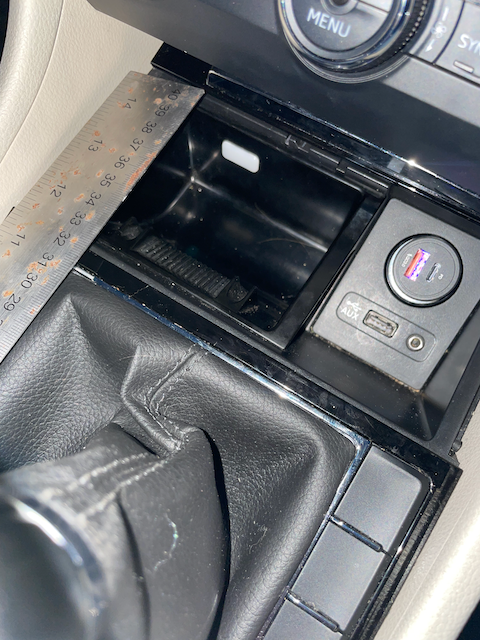
Two more slots at the bottom, so 4 keys (or slivers of bank card!) needed to remove it. Note that if you're using standard radio keys, you need to remove them from the screen (by popping the clip behind where they slot in) before you put screen back. That stumps some people (including me) the first time.
-
OP already confirmed they have Front Assist (collision avoidance), and therefore the radar that ACC uses. Regular CC doesn’t use that radar at all, as it just involves setting a speed and driving at that.
-
Lads, it’s a doable job. The stalk is just over £100. https://www.ebay.ie/itm/SKODA-SUPERB-3V-MK3-2015-2019-INDICATOR-WIPER-CRUISE-CONTROL-STALKS-SQUIB-RING-/224575632156?mkcid=16&mkevt=1&_trksid=p2349624.m46890.l6249&mkrid=710-127635-2958-0 He likely has the radar already. Get the plastic trim for the steering column and the rest is coding. it’s worth a phone call or a FB message to confirm the feasibility.
-
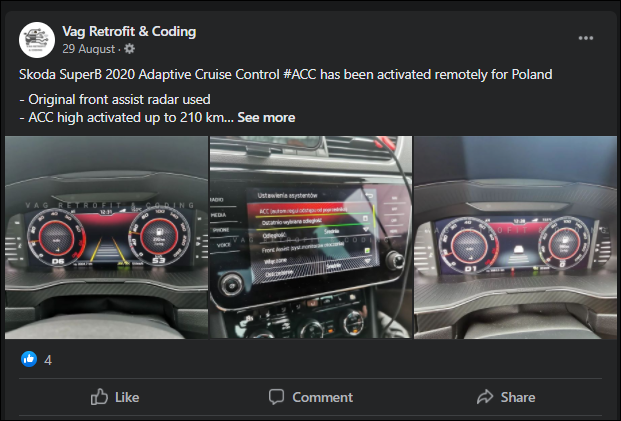
Might be worth giving these guys a shout. They should be able to tell you if you have the correct radar unit already (assuming you have the means to identify the unit you have now). You'll need to get and fit the stalk set. As mentioned above, ACC itself doesn't use the A5 camera. However as you have it already (Lane Assist requires it), you could possibly get Predictive ACC. I've never used these guys, just came across them mentioned in a few retrofit threads. https://www.facebook.com/vagretrofitcoding/
-
The metal clips will just slide off. You can't miss the AQS sensor once you take the grille off. It's mounted just using a clip. Actually, see those two round tabs underneath the windscreen? You might have to pop them off and undo a screw under each of them too - I can't quite remember now. So maybe there's one tool involved. Even so, it's really easy. I got my Superb in August and the AQS was throwing an error, so it was the first thing I did on the car. I got my part from skoda-parts.com. I paid €52.81 for the Chinese version. Skoda OEM part is €93.90 there, and there's a German 3rd party part for €69.02 - just to give you an indication of the prices. https://www.skoda-parts.com/spare-part/5q0907643c-air-quality-sensor-de-40156.html
-
-
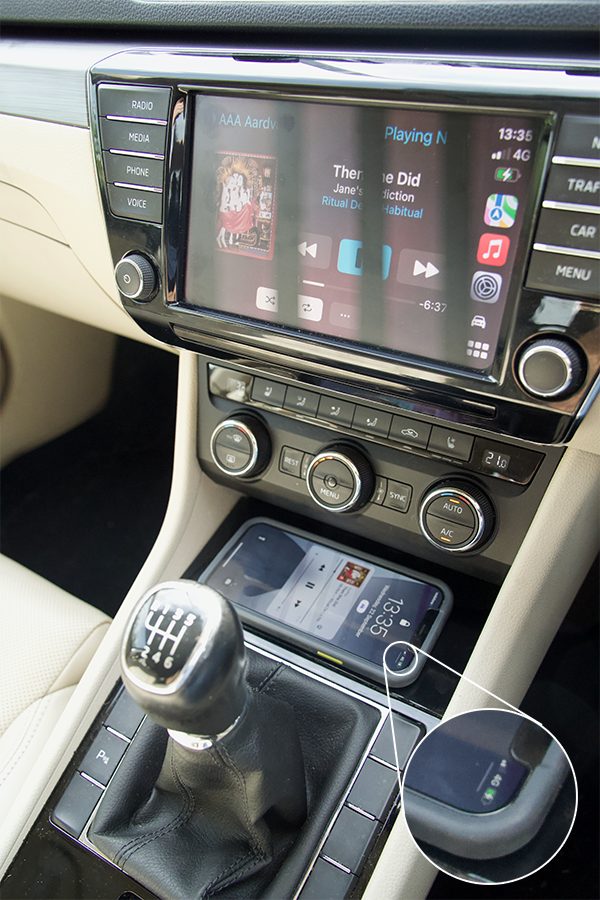
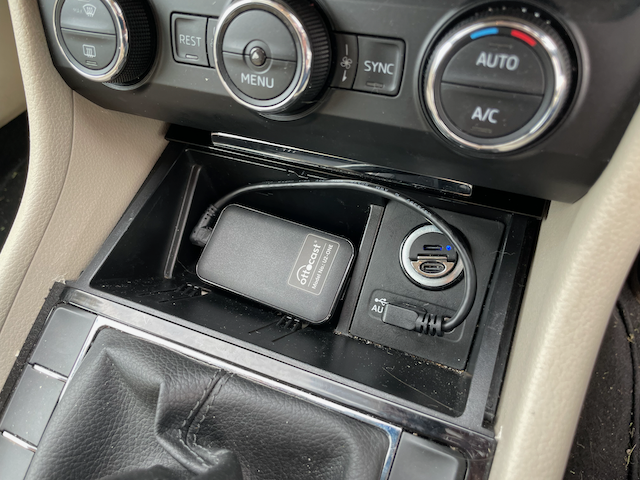
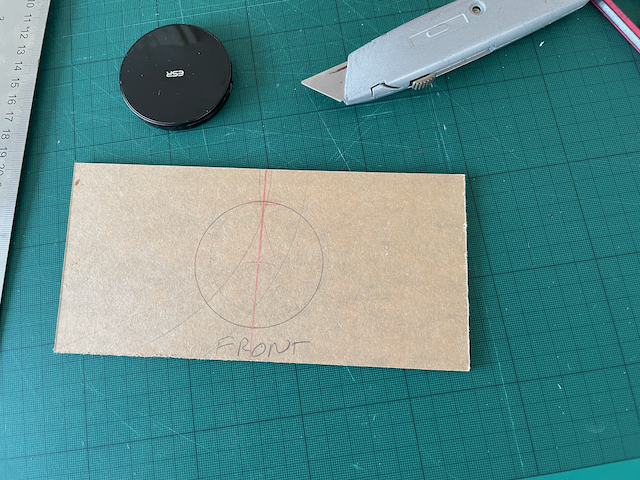
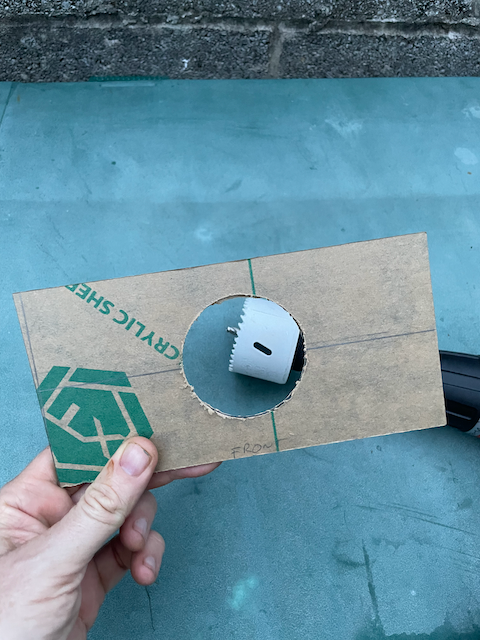
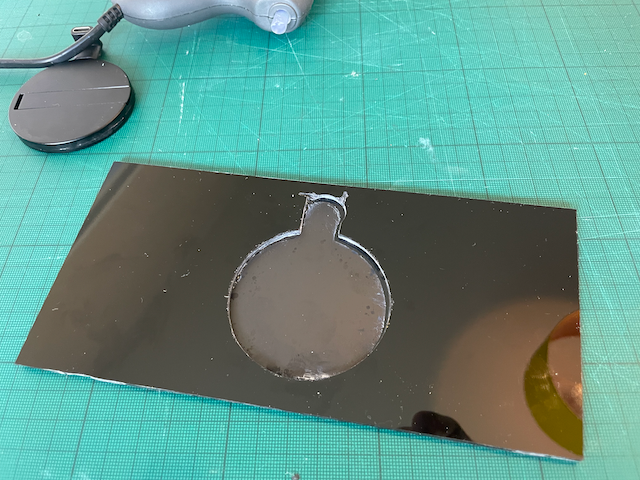
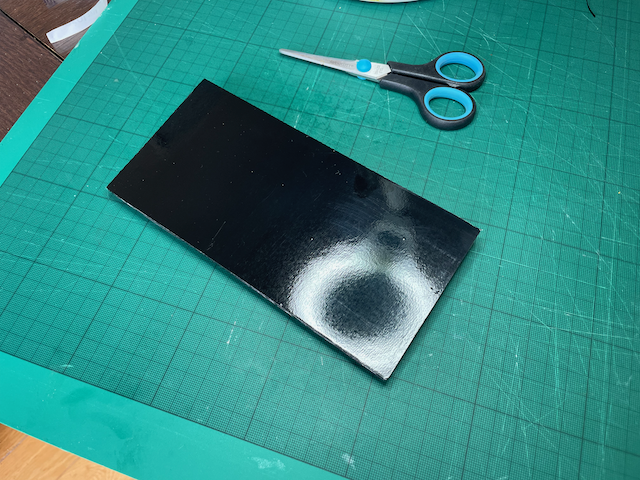
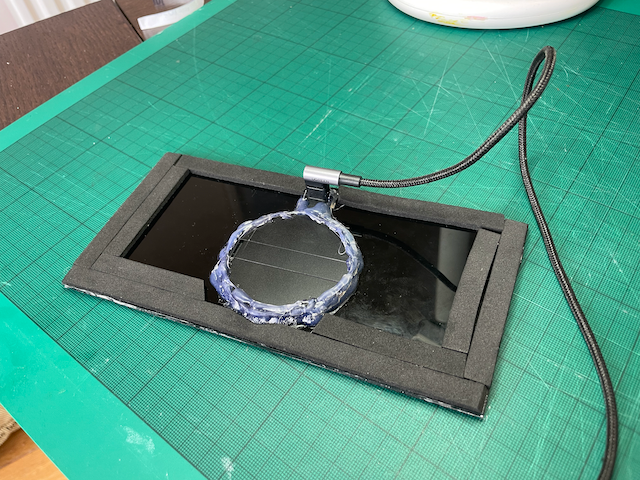
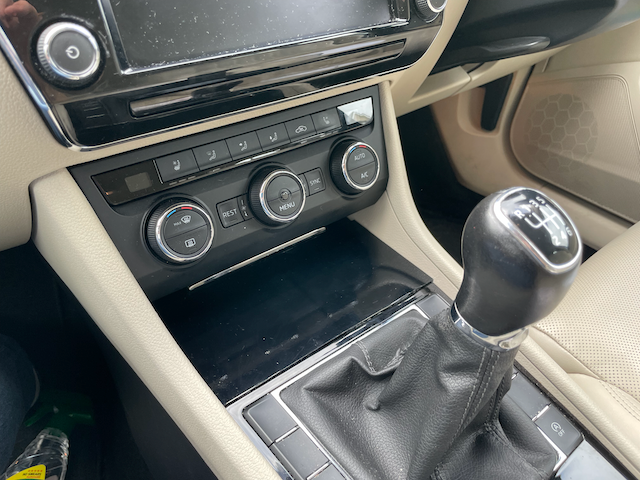
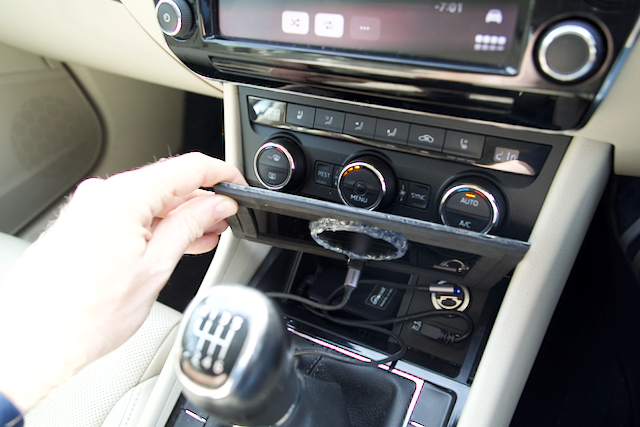
The wireless CarPlay bit is easy. An Ottocast U2-ONE wireless CarPlay adapter. Chosen above rival devices as reviews claim it's the fastest to connect, and most importantly, the USB cable is detachable. So I was able to use my own 90 degree angled USB cable to hide it out of the way in the ashtray. I did have a Cplay2Air one, but it was slower and has a fixed USB cable, which made tucking it into the ashtray more difficult. But the main reason I had to stop using it was that it had a very dodgy cable/USB plug that would disconnect at the slightest bump or touch. The Ottocast connection is rock solid. Then, there's the wireless charging plate itself, that goes over the entire area. This is where the DIY comes into play. I put a lot of effort into making it look as as inconspicuous as possible. So it doesn't look like much in the pictures, and when you look at it, it's just a glossy black sheet, but there was a fair bit of thought and multiple iterations in getting it to look so underwhelming. The core is the wireless charging. I use an iPhone, and I wanted to use MagSafe, as it attaches to the phone via a magnet, and will prevent the phone from sliding about when driving. Also, you have a physical indication that you've pit the phone in the exact right spot and that it's successfully charging - you fell the magnetic attraction. You don't get that with Qi chargers. Both myself and my wife (the only two drivers of the car) use iPhones with Otterbox MagSafe cases. I first thought about using an Apple MagSafe charger, because I had a couple in the house anyway, but quickly rejected them for this project. I went with an ESR HaloLock Kickstand Wireless Charger for a few reasons. It's MagSafe compatible, so it has the magnetic attraction I want. It's exactly 6cm in diameter, and I have a 6cm hole saw, so drilling a hole to mount it in the plate would be easy. It also has a replaceable USB cable, which means that I could replace it with one with 90 degree angles, so that the plate could sit flat over the ashtray frame. It charges the phones at 7.5w, which is plenty for my use. Then I had to think about how to mount the charger and creating a plate. I use a 3mm sheet of black plexiglass. Plexiglass is very easy to cut (score and snap, like a tile or glass, and it can be drilled too). I measured the shape of the ash tray cubby - it's asymmetrical - the corners on the left side are 90 degrees, but on the right, it's an obtuse angle. I made a few prototypes with cardboard to make sure I had the shape exactly right for a perfect fit before I cut the plexiglass. I basically opened the sliding lid, and have the plexiglass plate sitting on the frame of the ashtray. Nothing is fixed down and nothing was removed or modified. Here's the plexiglass and the charger during cutting (these pics are from various versions, the final one has the hole positioned about 8mm more towards the front off the plate): Once the plexiglass was cut (and a notch to accommodate a USB-C elbow adapter), I covered the top in a sheet of 0.5mm plexiglass. This is to give the plate a smooth top, and makes the charger invisible. Charging is no problem though the 0.5mm of perspex. This is the view of the bottom of the plate during construction, with the thin plexiglass surface sheet on the cutting mat side: I was hoping that I'd just be able to use the think plexiglass sheet as the surface of the plate, but it turned out to not be as glossy as I wanted (to fit in with the trim around the gearstick). I tried polishing it, but I couldn't get it glossy enough. So I covered it in a sheet of self-adhesive black glossy vinyl for a perfect finish. But what's going on underneath. Well, I mounted the charger disk in the hole I cut. It was nice and snug, but it needed fixing. I had used some Sugru mouldable glue in an early prototype. It looked good, but it's expensive and unnecessary as this part isn't visible. So I just used liberal amounts of hot glue. I put strips of self adhesive foam all around the edge so that the plate can sit firmly on the structure of the ashtray, and to bring the thickness of the plate up to the level of the gearstick trim. hooked up a USB-C cable with a 90 degree plug, and everything fits neatly under the plate when it's installed. I had assumed that I'd need to fix it down with maybe double-sided tape or glue dots, but actually it fits snug enough that it doesn't shift at all when you remove the phone, despite the magnets. It was a fun project, and it works flawlessly. Parts, including the wireless CarPlay dongle probably cost me about €220. Is that too much to pay for wireless CarPlay and wireless charging? Maybe. But sometimes you get an idea in your head that you just have to pursue. And there's value beyond the surface economics in conceiving, designing, building and using something like this. I wonder what's next?
-
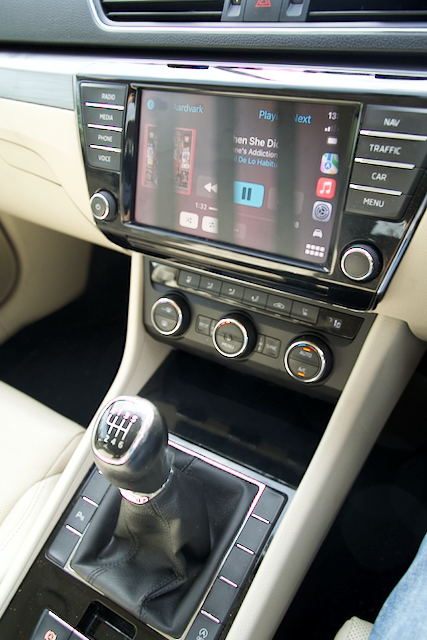
Got a 2017 Superb Combi/Estate last month, and of course one of the first things I needed to do was plug my iPhone into it for music, calls, maps, etc. It has a Columbus head unit, so wired CarPlay is there, but there's nowhere proper to put the phone, and the cable is a bit of a mess. The car came with an ashtray (which fortunately was never used for its intended purpose). So I wanted a place to put the phone, and the ability to wirelessly charge. I didn't want a phone holder up on the dash (makes no sense when the car's screen will be displaying CarPlay), and I didn't want to put it into the arm rest storage, because I'd forget it when I got out of the car. I didn't want cables trailing about the place at all. So I wanted it visible and accessible, but discreet. I also wanted whatever I built to be fully reversible. I looked into retrofitting the proper Phone Box, but I've an iPhone 13 pro in an Otterbox case, and my wife has a 12 Pro Max, and I don't think the Phone Box will fit the larger phone. I also liked the idea of wireless CarPlay. For short journeys, I'd just hop into the car with the phone in my pocket, and it would connect up automatically for calls and music. For longer journeys, I could set the phone down to charge. Never being one to put common or economic sense before a DIY project, I decided to build my own solution. And here's what I ended up with (excuse the banding on the screen, my camera was in silent shutter mode, and the sensor's refresh rate conflicts with the screen's): You get in the car, set the phone down on a glossy black surface below the aircon controls, the phone magnetically sticks to a MagSafe charger underneath, starts charging, Then when you turn on the ignition, the phone connects to a wireless CarPlay dongle, and within 20 seconds, you're wirelessly connected. So what exactly did I build? I'll explain in the next post.

-
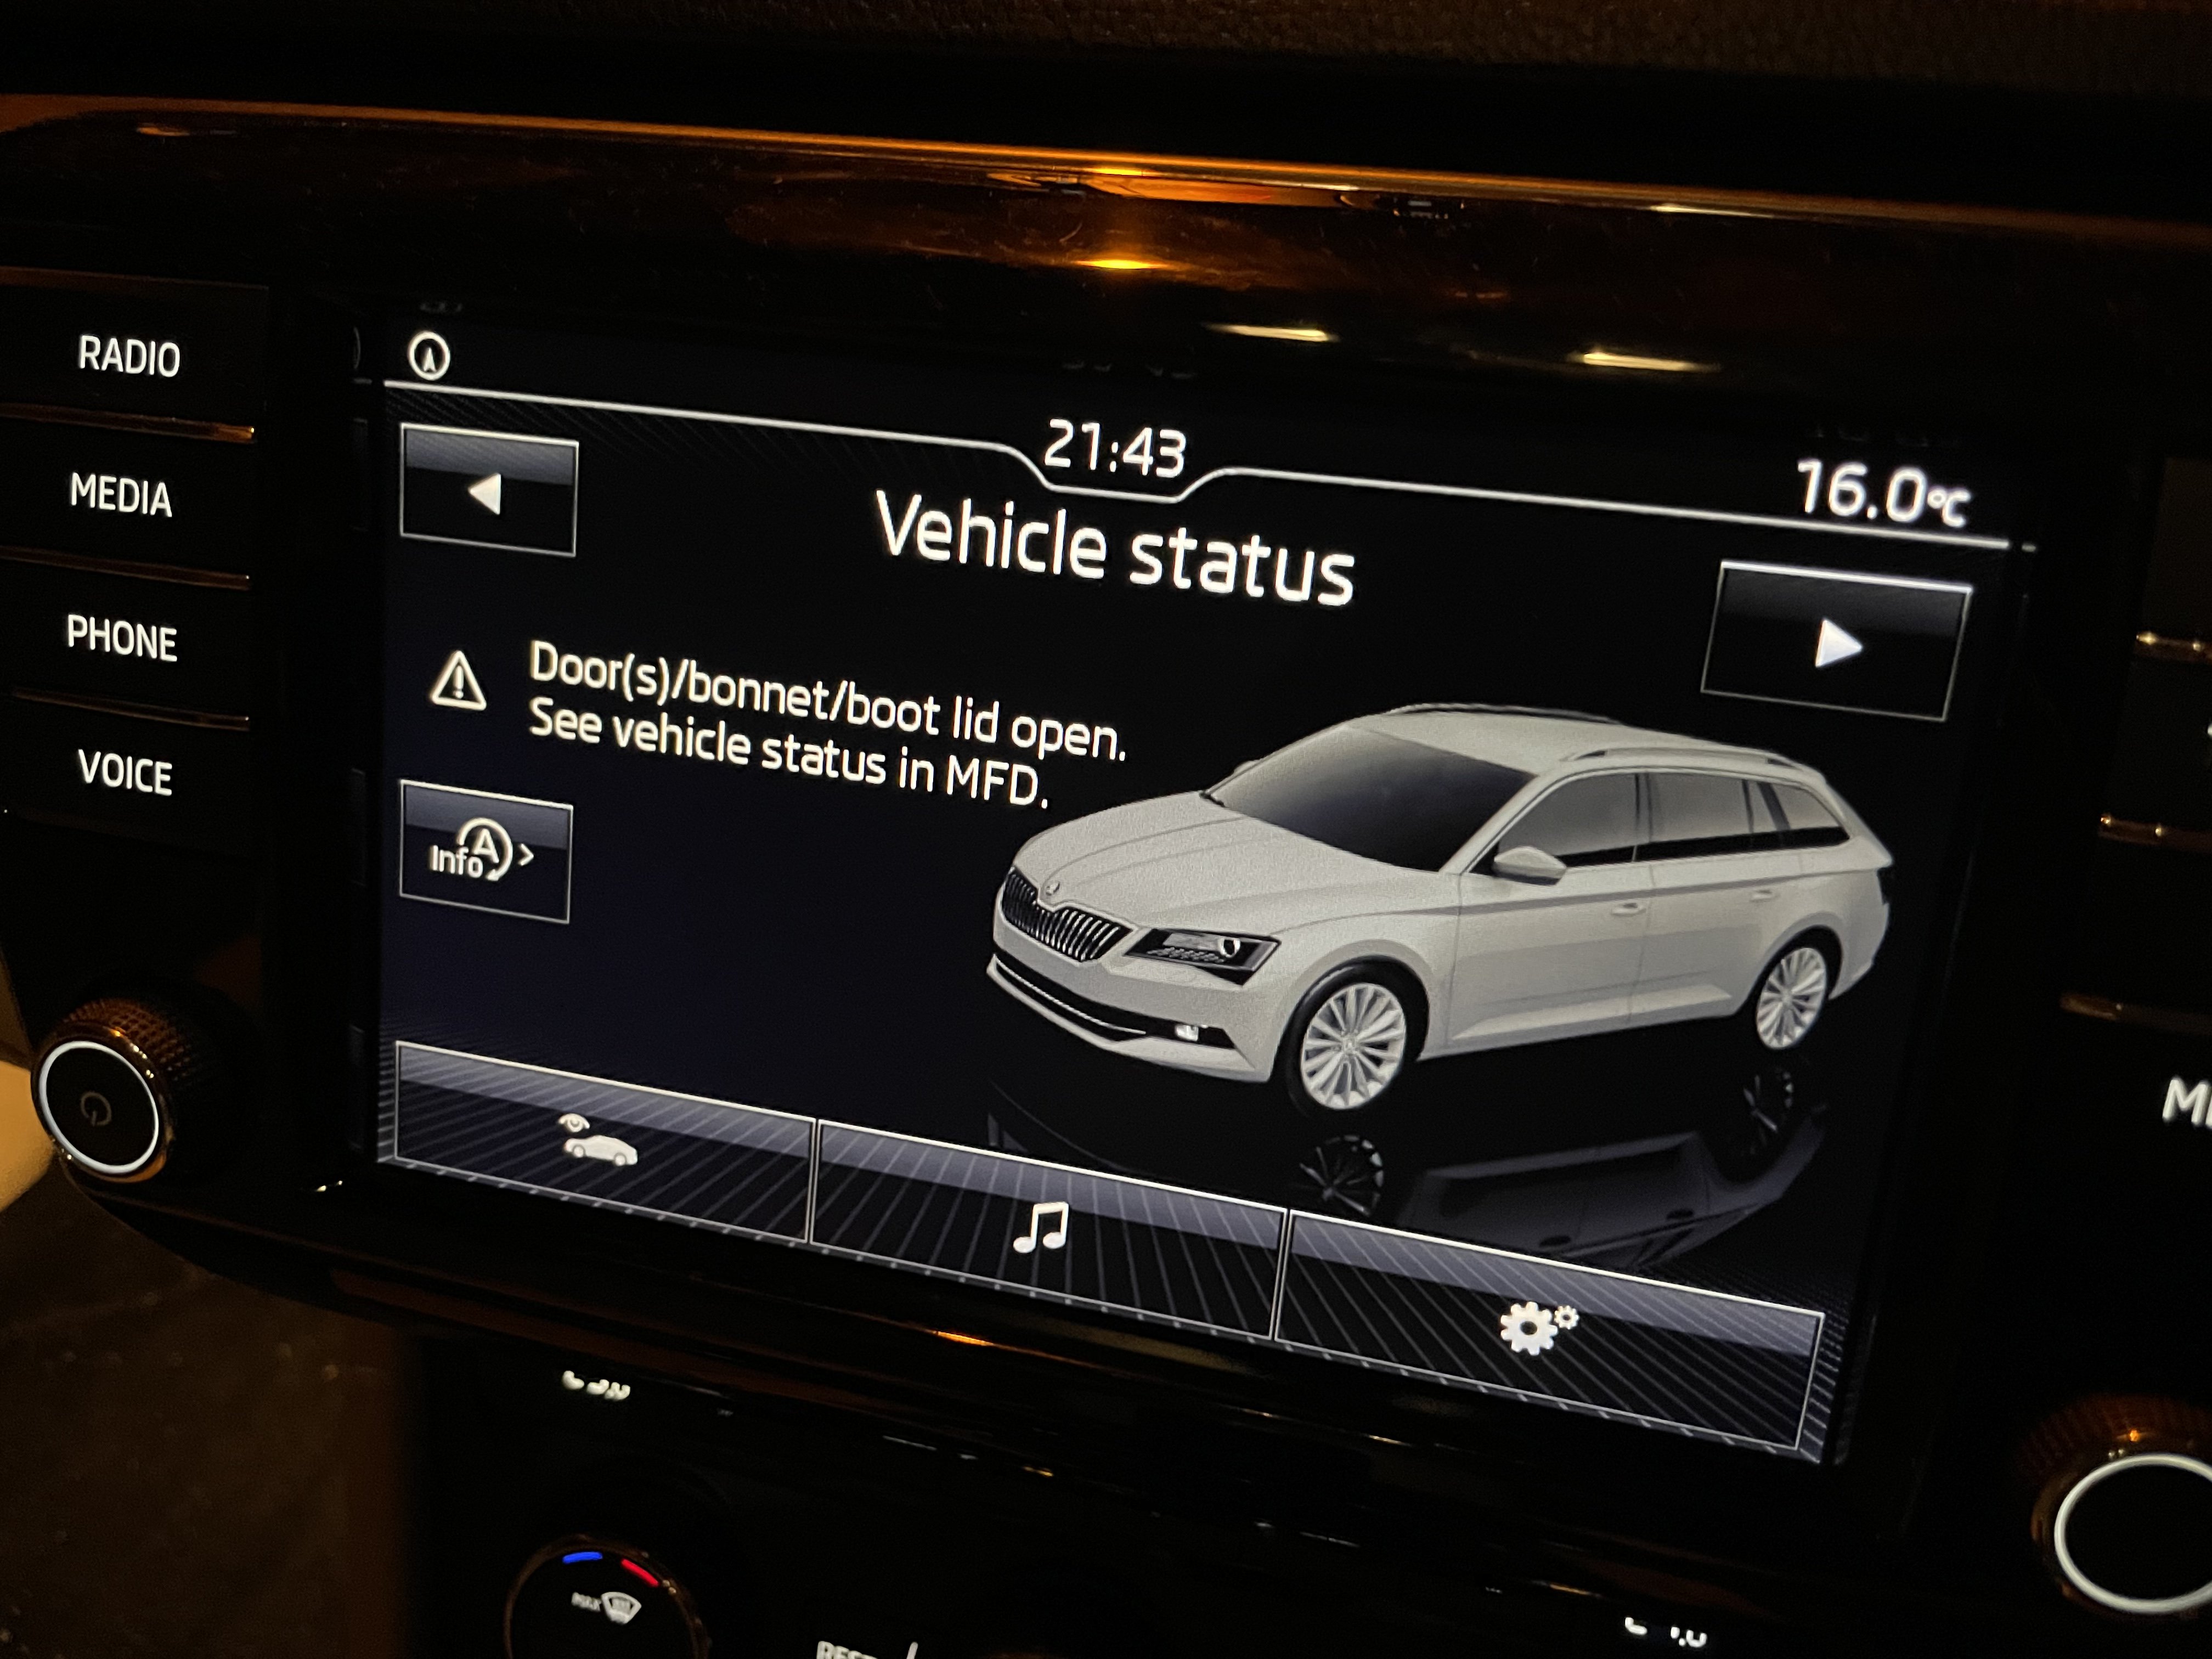
While the Vehicle Status screen does display a door/bonnet open warning, it doesn’t highlight the engine and steering when it does so. I think the OP is right to query the warnings, as they could be more serious. If they turn out to be innocuous, then great. But any dealer worth their salt should be able to say exactly what they are one way or the other.

-
The car doesn't tell you when the timing belt and water pump need replacing, so those errors are separate to that. If the garage can't tell you exactly what the error codes are, I wouldn't trust them in the first instance. With known, but indeterminate, issues on the car, I wouldn't be relying on any return option to deal with the situation. Buying sight unseen is always a risk, but buying sight unseen when you know there's issues, but don't know what the issues are, is just asking for trouble.
-
Not all diesels have AdBlue. My 2017 2.0 TDi (150bhp) doesn’t.
-
For Skodas (and VAG in general) OBDeleven is probably the best, as it does coding and adaptations and more detailed VAG specific fault codes. It has a dedicated hardware device. It's pricy, though. Carista is pretty good too, and also has a dedicated hardware device, and does a lot of the above VAG specific stuff (and specific stuff for other marques too). "Car Scanner" is an iPhone app that I used before I got OBDeleven, and it has similar functionality in that it can do coding. But it's not as widely used OBDeleven, so there's less support for it on the internet. I used it with the Carista dongle, but it should work with any good OBD ii device. Advantage is that unlike Carista and OBDeleven, it's a one time purchase rather than a subscription for the app. OBDeleven, Carista and Car Scanner will let you configure things on your car like having the rear lights on with your DRLs and loads of other stuff. If you just want basic OBD fault code reading and clearing, then an app like DashCommand and a bluetooth scanner like this would do. Don't get a WiFi one. Bluetooth is better because you'll still have you phone's internet connection if you connect via Bluetooth, where as if you connect via WiFi, you won't. And if you're diagnosing a fault, you'll want your internet connection. But I'd personally say that OBDeleven is worth the investment because it's as thorough as you can get on VAG cars without going all out and running VCDS on a laptop..
-
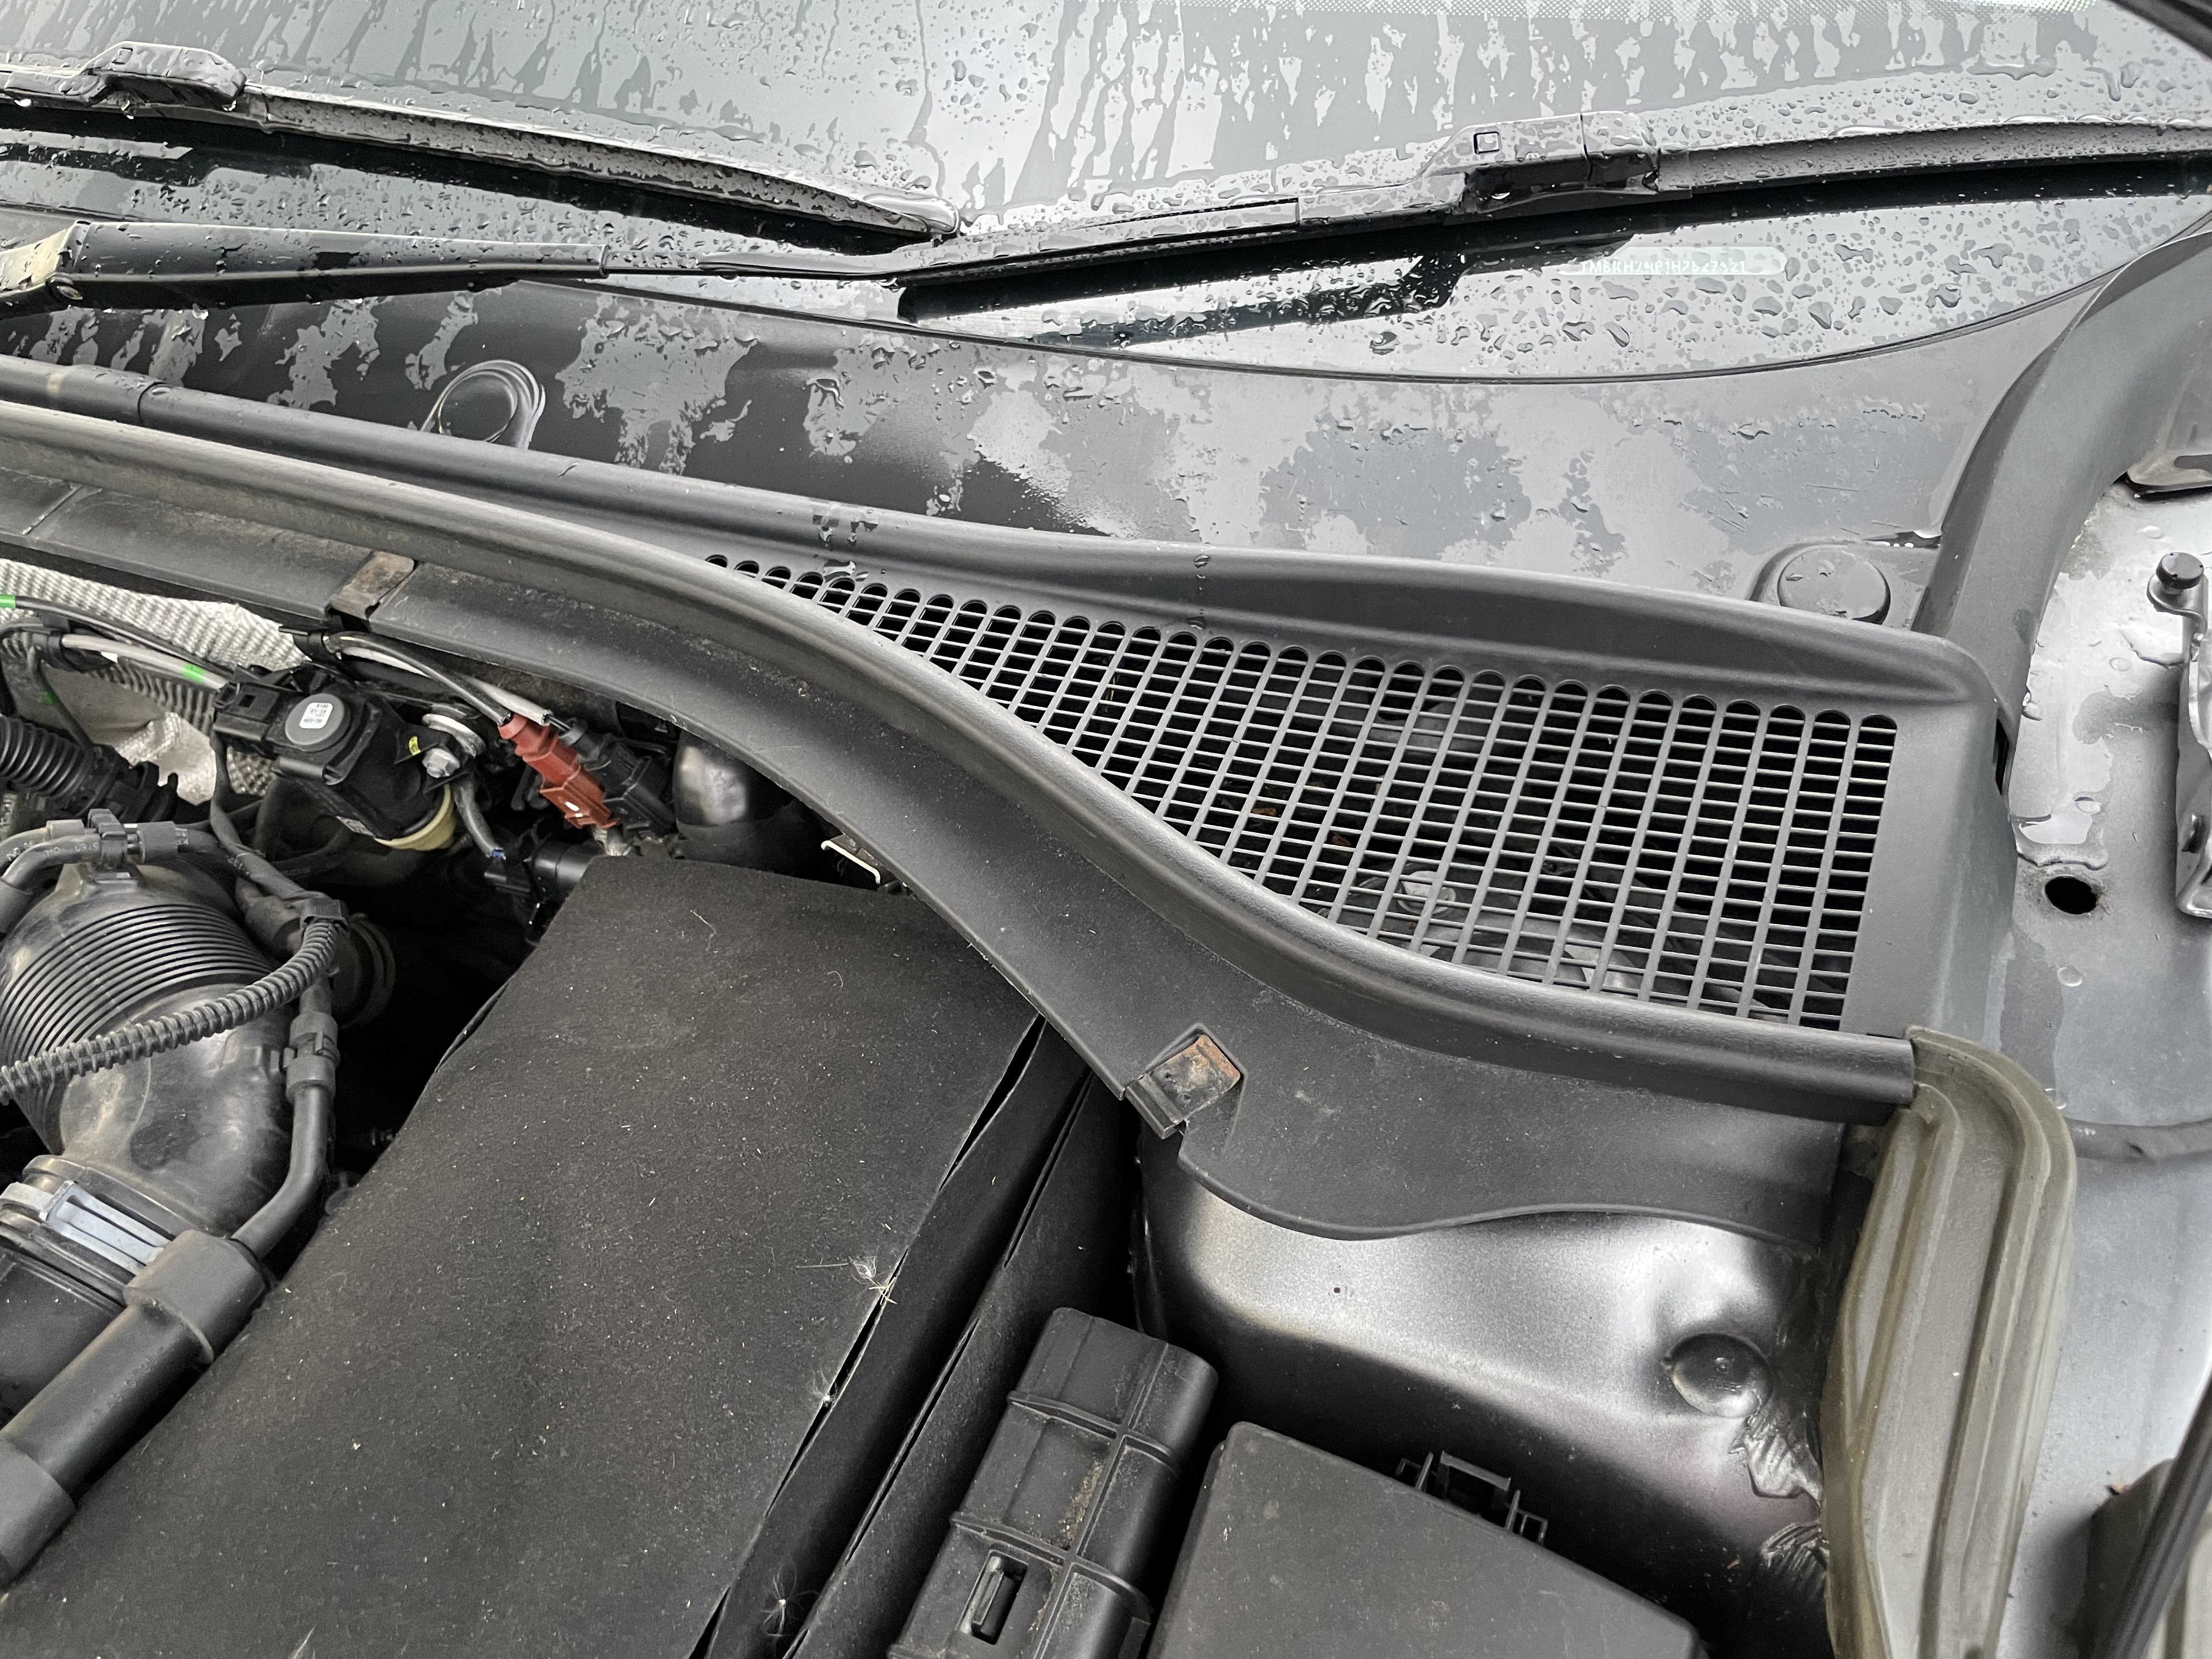
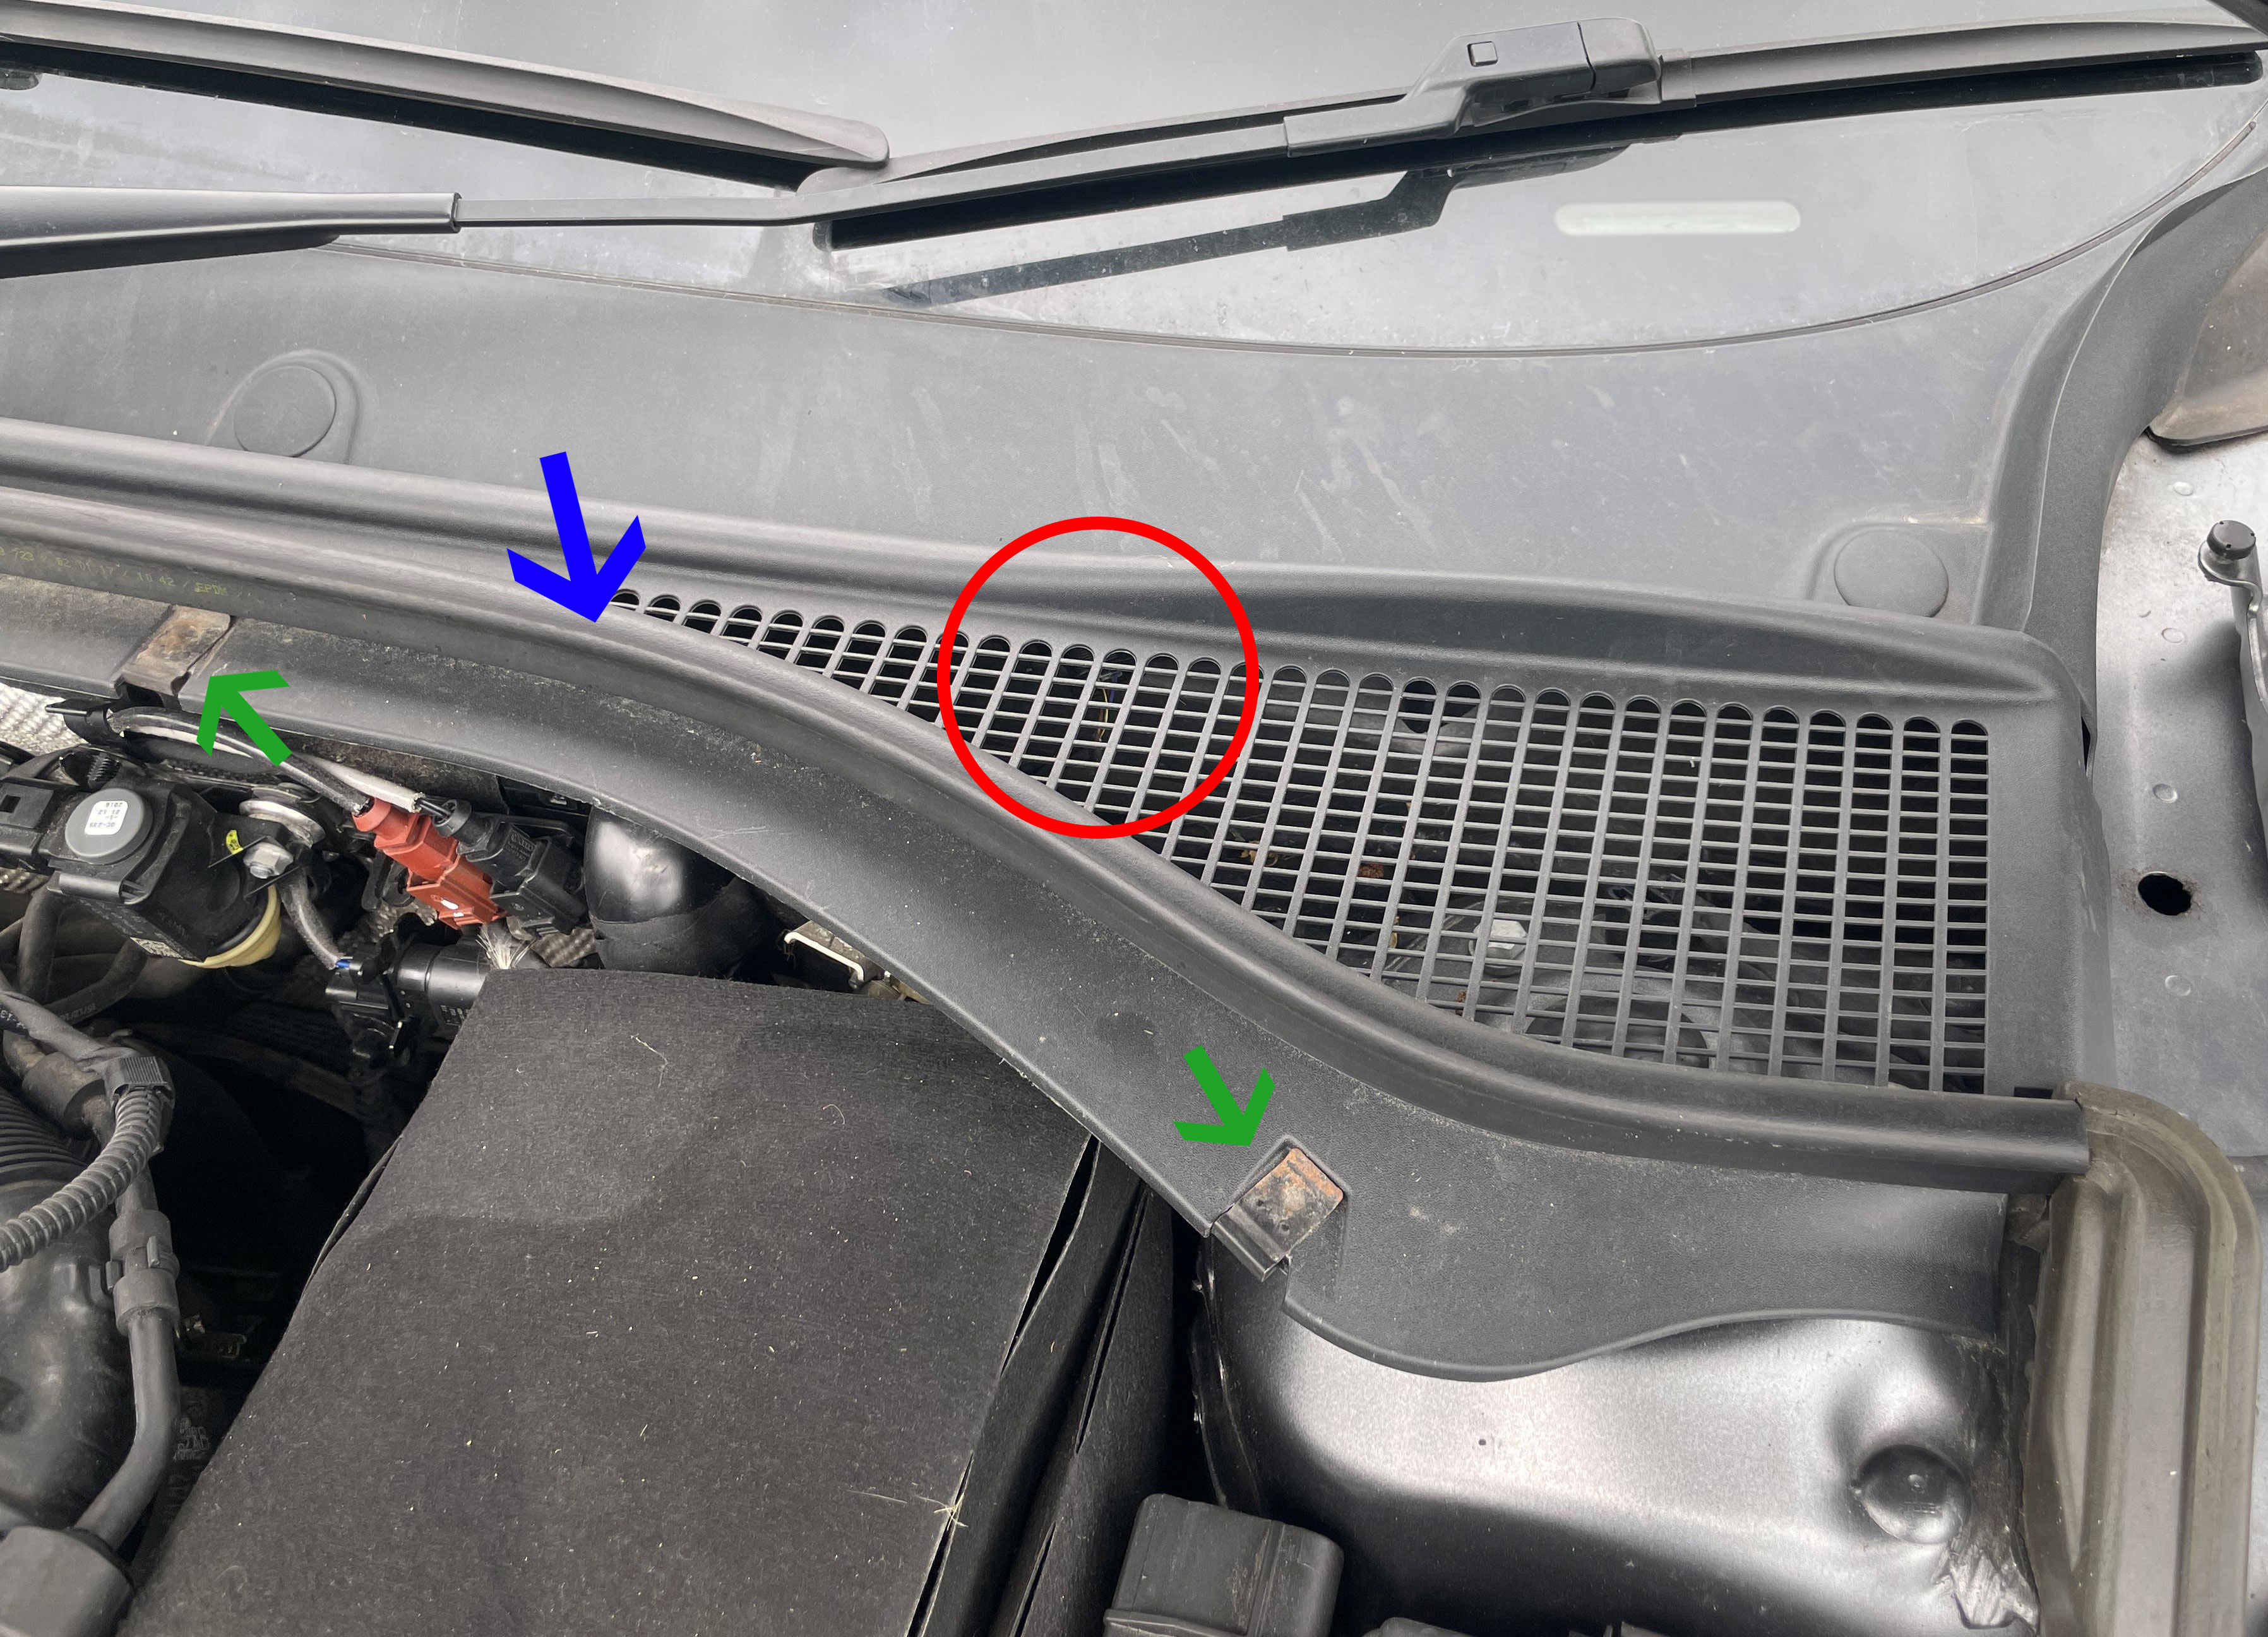
@Steviedakota No coding, easy swap. It's located just behind the plastic grille under the passenger side (RHD) wiper. If you look closely in the area of the red circle below, you'll see the wiring. Pull the rubber trim back (blue arrow), undo the clips (green arrows), remove the plastic cover, undo the wiring from the sensor, pop the sensor off it's bracket, pop the new sensor in, connect the wiring, put the cover back on, clear the faults and you're done.

-
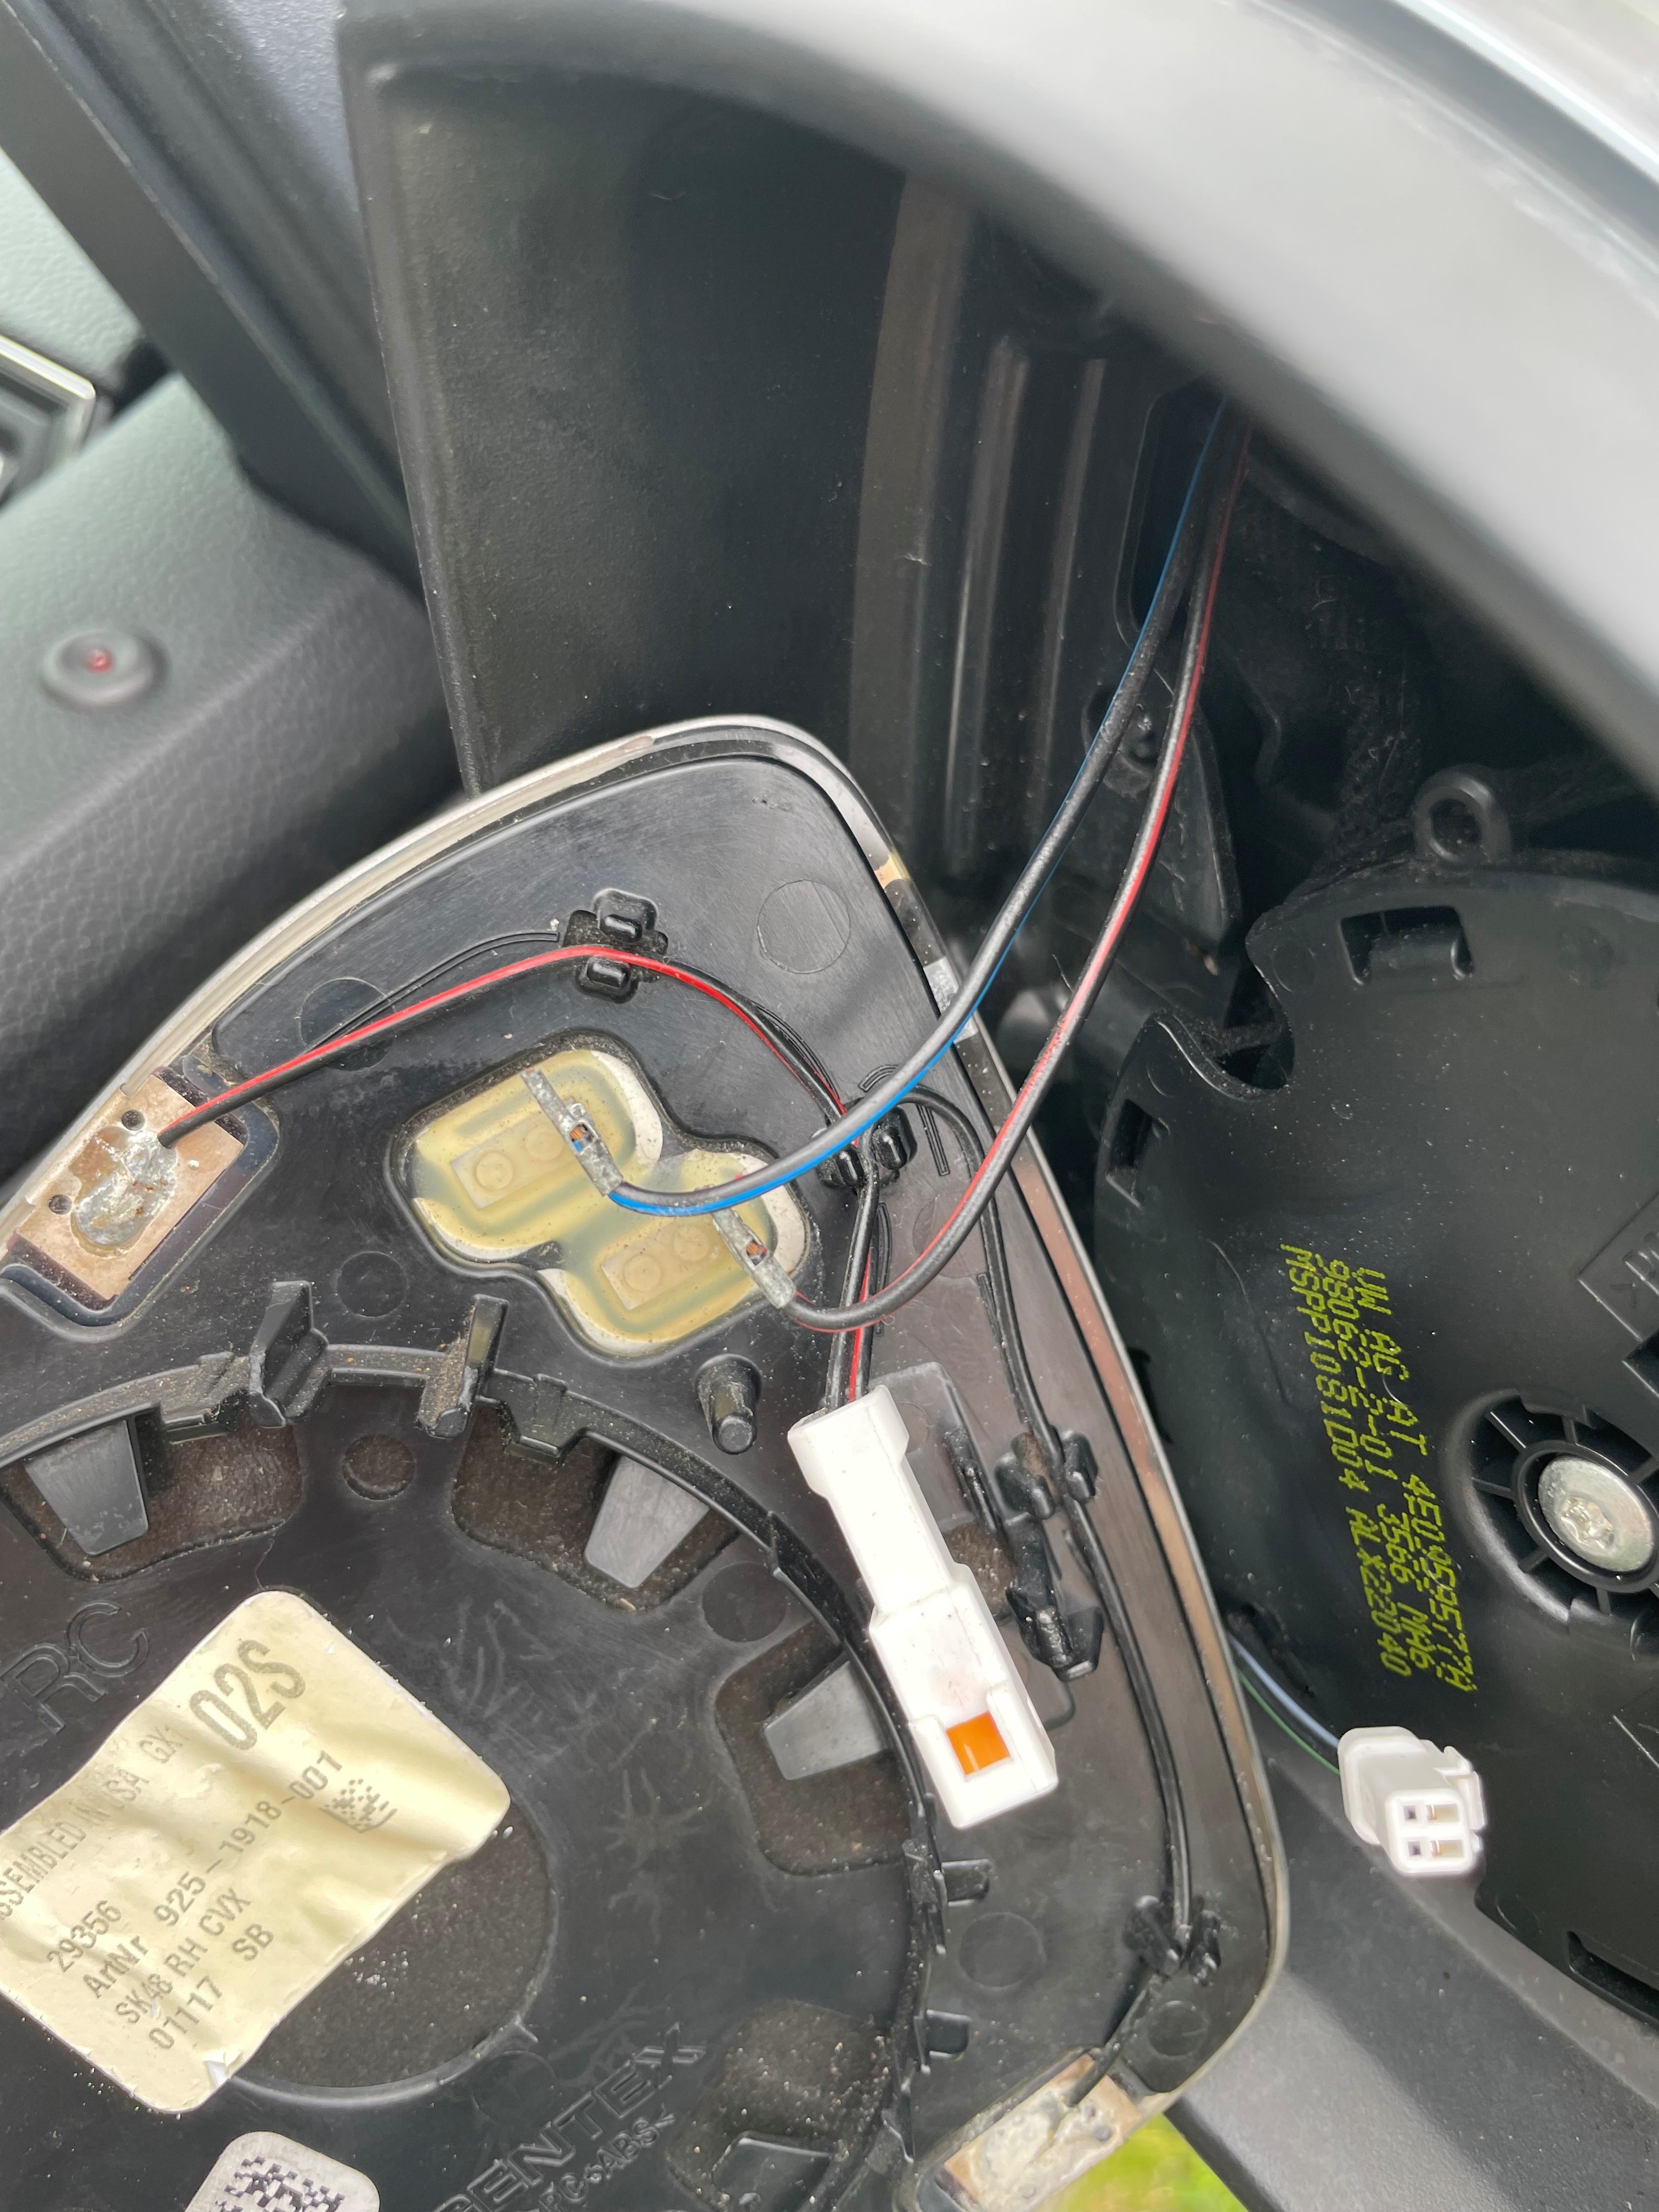
I took a bit of a closer look at lunch, and the mirrors definitely aren't heating. They stay cool to the touch regardless of switch position. My wife took the car then before I could do any more investigation, but I did manage to get a look in behind the glass. I need to get the multimeter out to see what's happening. There's two sets of wires: one set going to the spade connectors in the middle, and one set going to the white connector block. Does anyone know which ones are for the heating element? I assume the others are for the auto dimming.