Bete Noir
FREEDOM
-
Joined
-
Last visited
Everything posted by Bete Noir
-
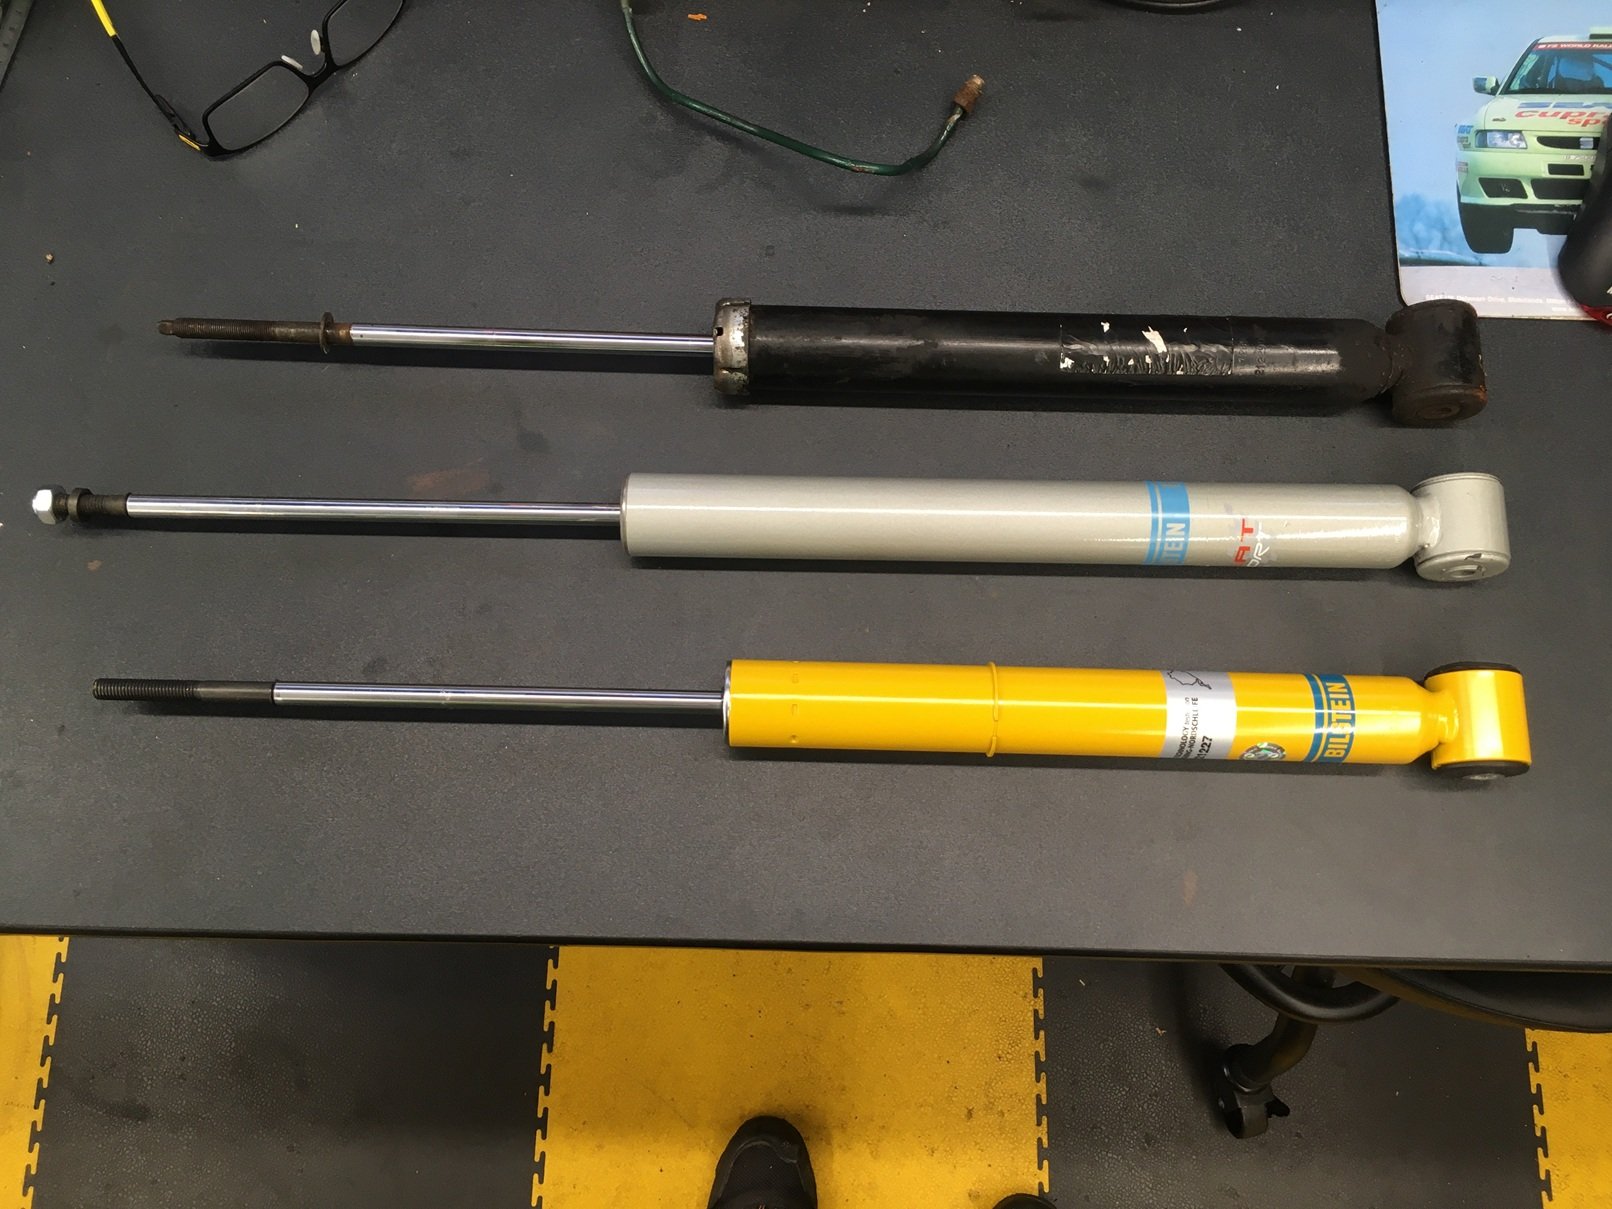
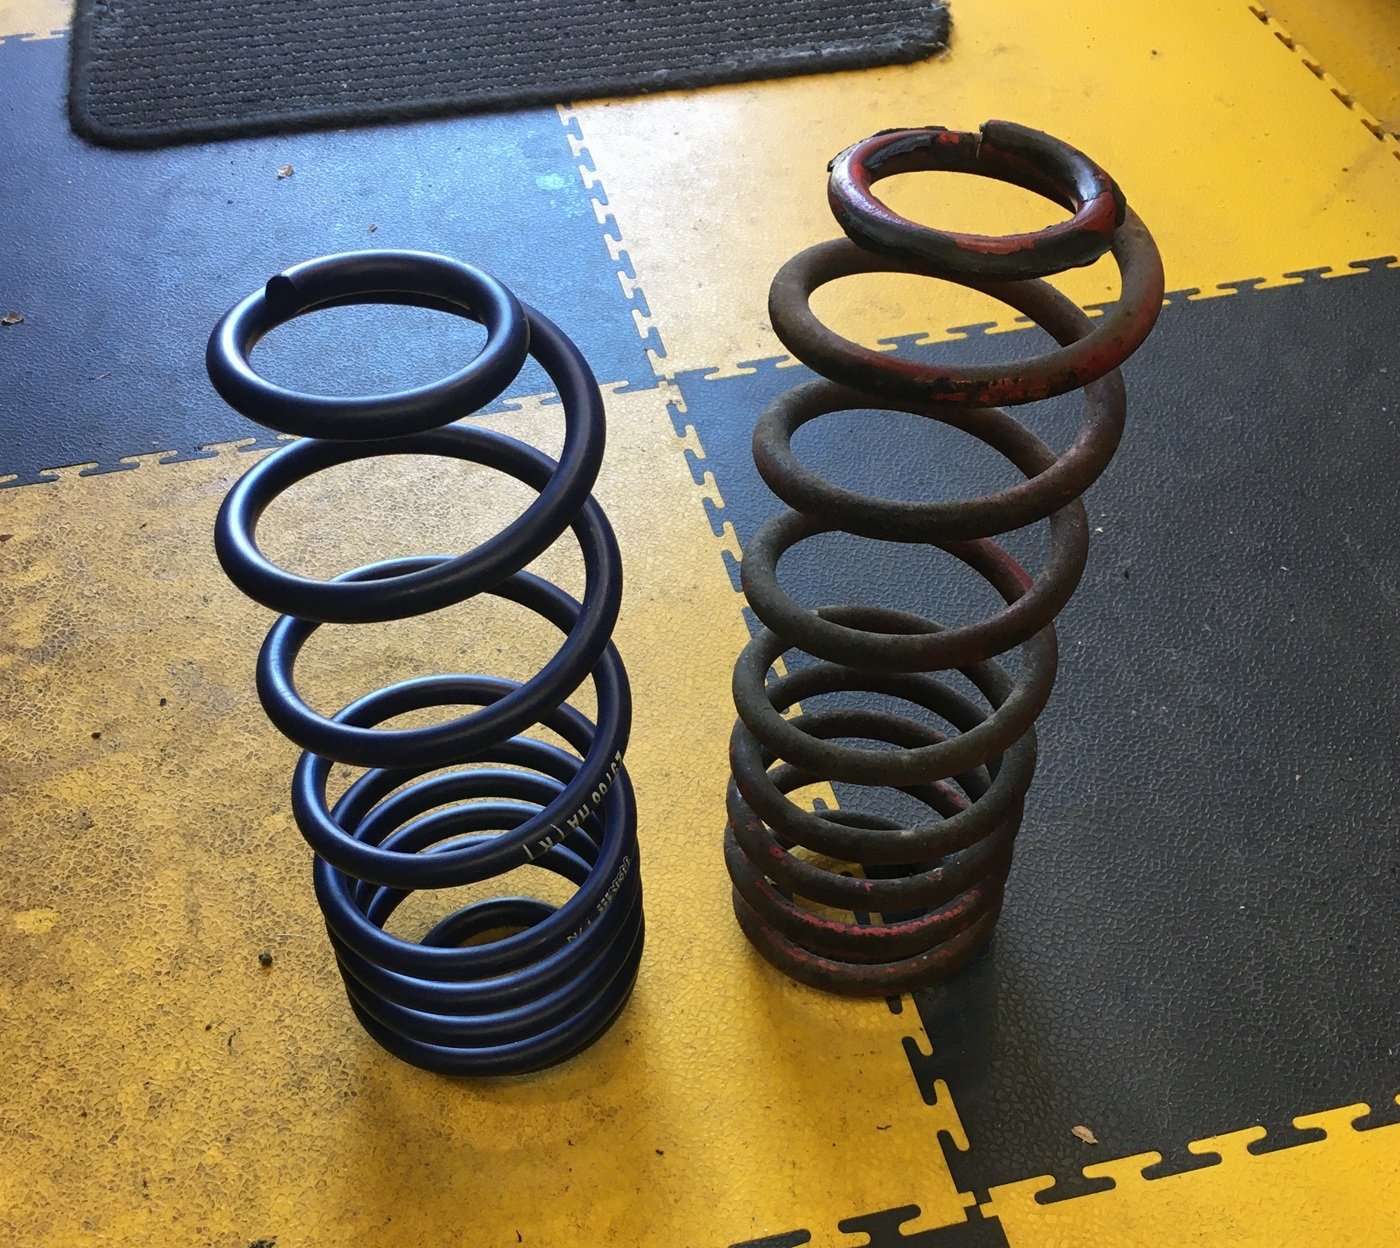
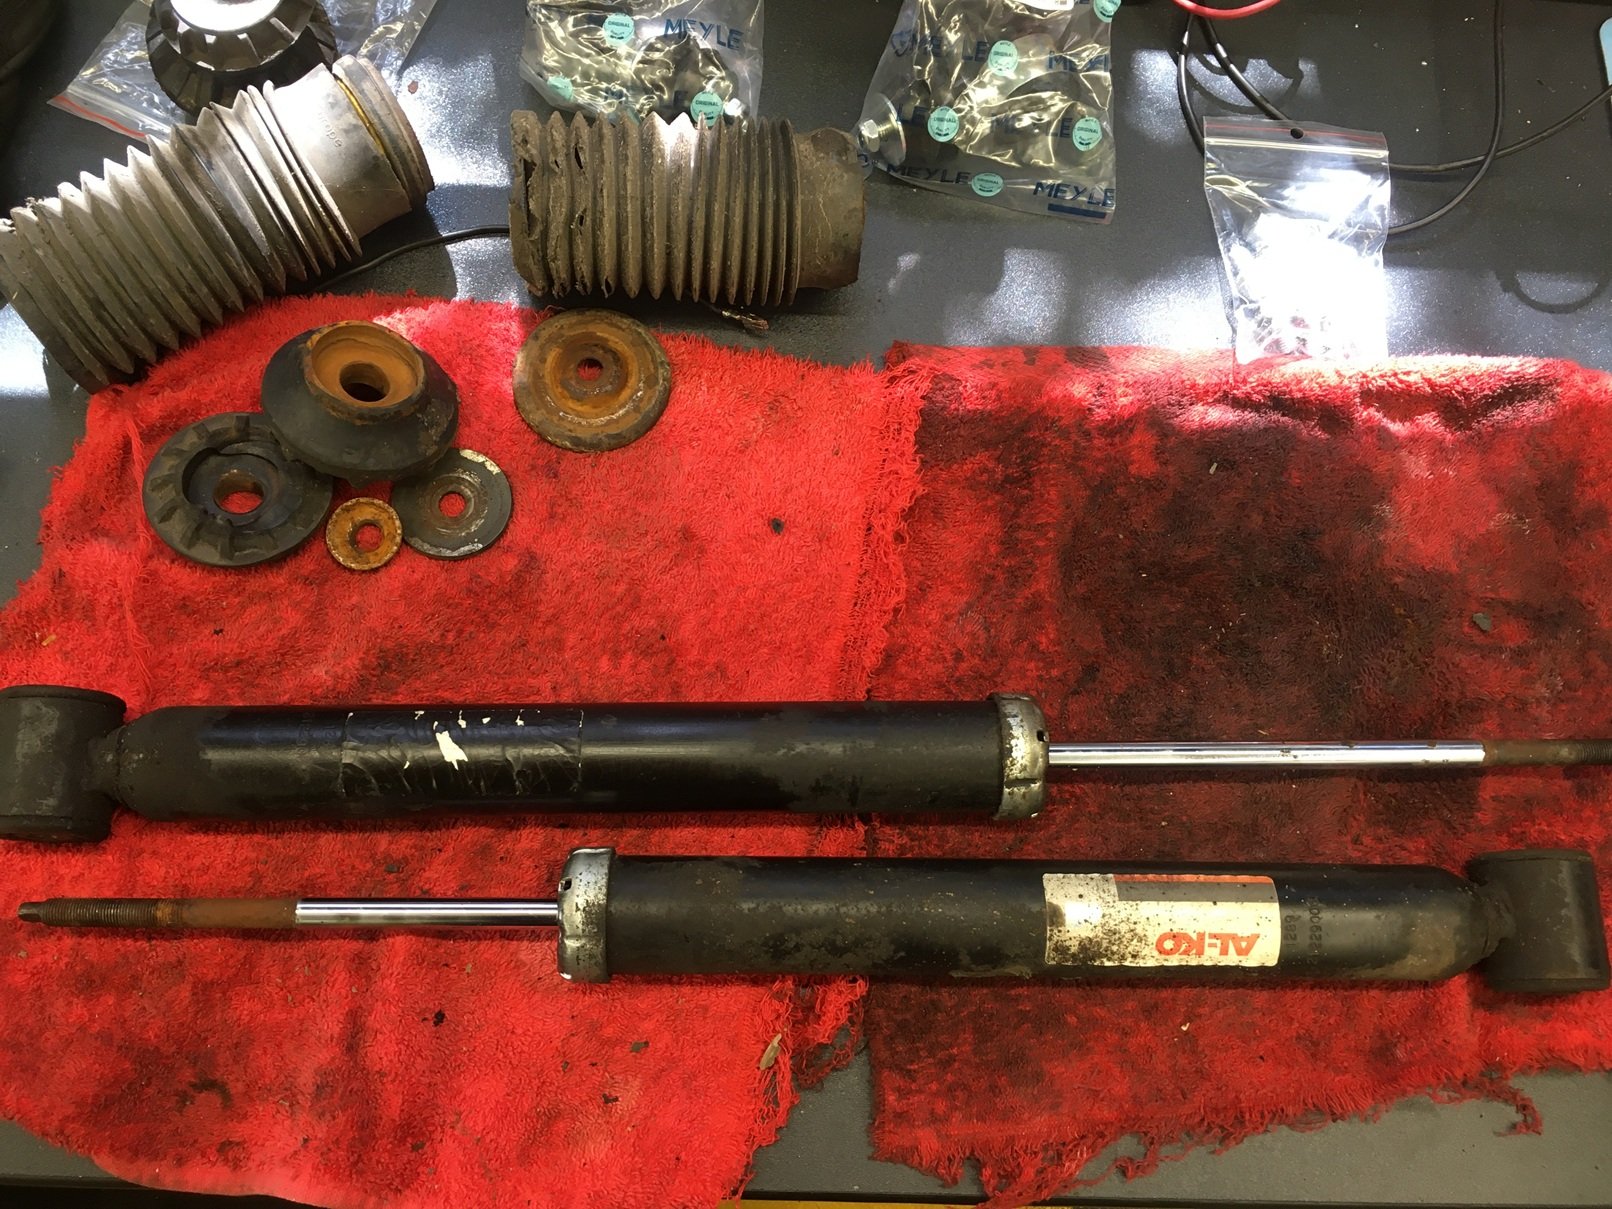
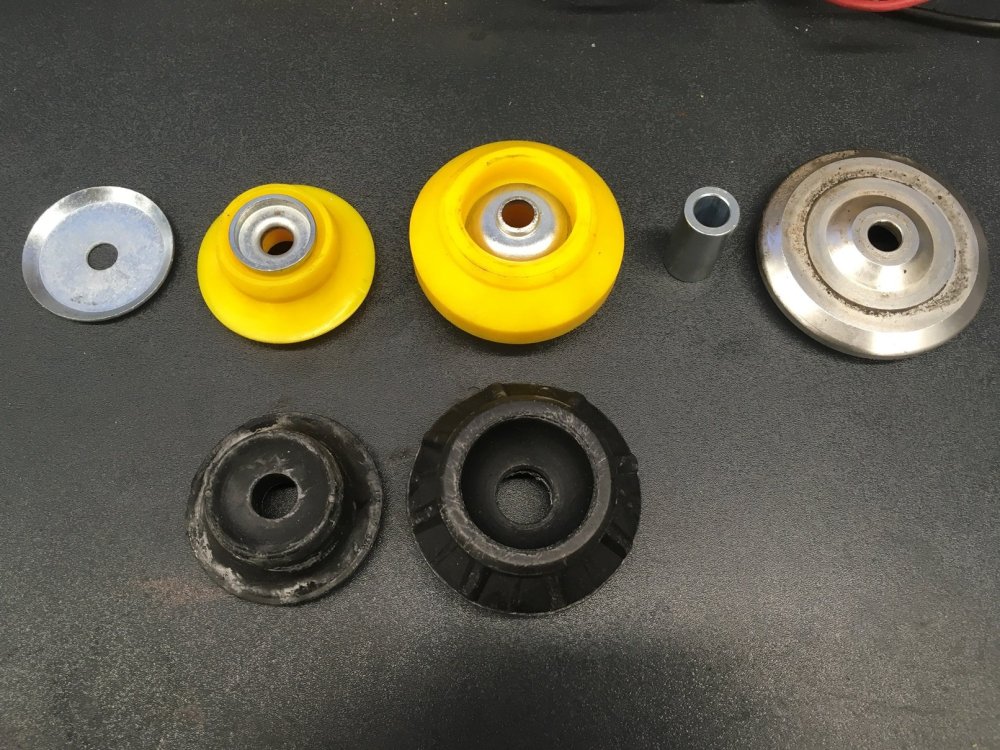
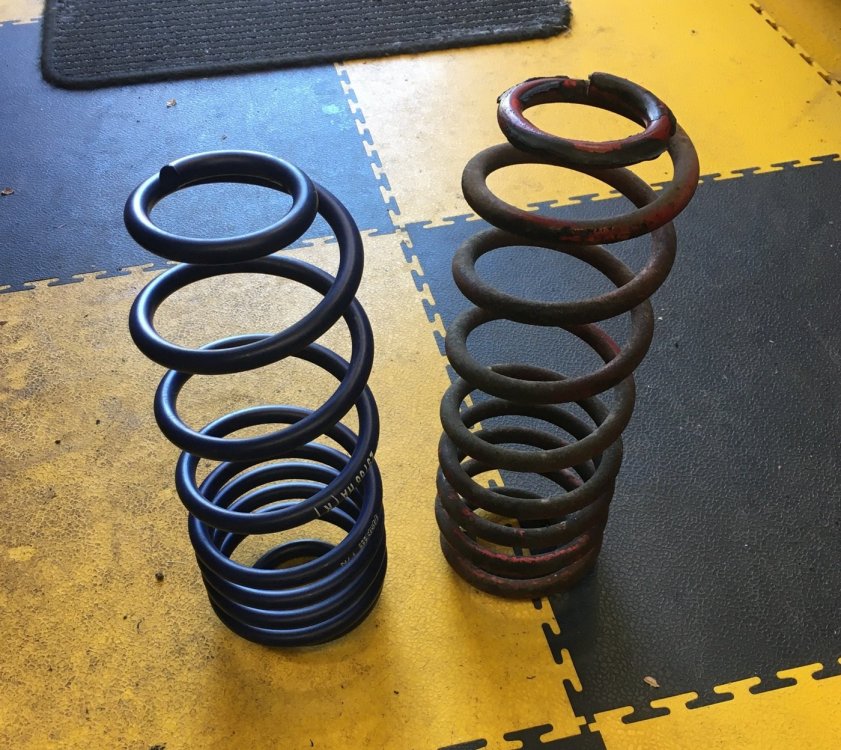
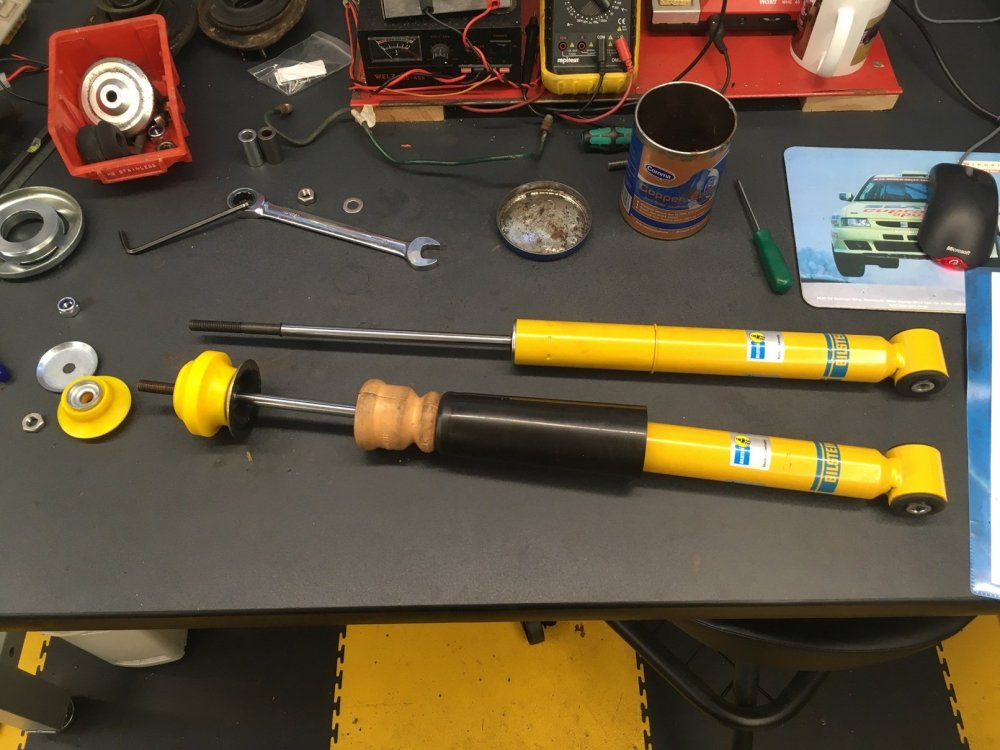
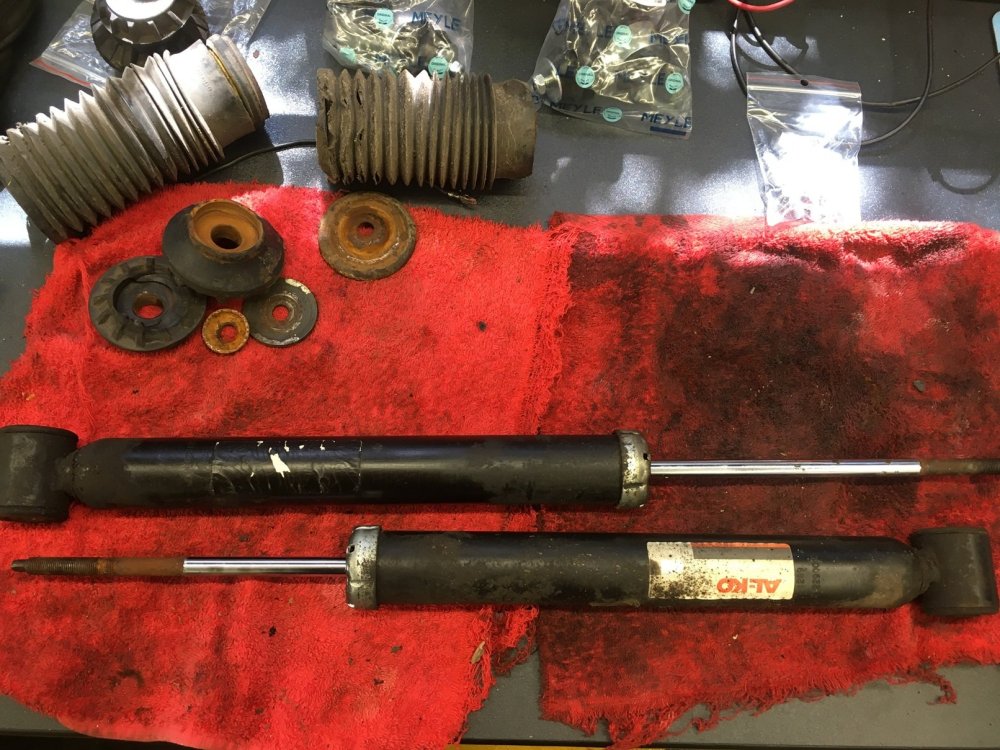
When I dismantled the rear suspension, I thought the top mount bushes looked familiar, but they had seen better days and it was impossible to compare definitively with new parts. I soon found out why they looked familiar once I started searching for replacements, and discovered they were the same part number as mk2 (and mk3) Ibiza parts. I had some Powerflex Ibiza bushes on the shelf, so I decided to fit those. Unfortunately, they did not include the various spacers and shaped washers required, so I had to order a cheap rubber top mount kit to get those. When I took this picture I had yet to realise that the two shaped washers are different sizes, and it is the slightly larger one which goes on top of the top bush. I had toyed with the idea of fitting coilovers to the rear too, before deciding to go with lowering springs and uprated dampers. This did not make things significantly easier as good quality uprated dampers for the rear of the mk2 Caddy pick-up are no easier to find than coilovers. I found some mk1 Leon SEAT Sport Bilstein dampers for a bargain price, and bought them thinking they might fit, but when they arrived it was clear that the damper body was longer than on the parts I removed, and the threaded section at the top of the damper rod was significantly shorter. These were not going to work. I then reasoned that as the top mounts are the same as the mk2 Ibiza, that meant that the threaded section on mk2 Ibiza dampers must be the right length. As my mk2 Ibiza track project was in the workshop alongside the Caddy it was easy enough to measure the Ibiza rear dampers and confirm that they appeared to be the same size as the Caddy parts. Satisfied that these were likely to fit, I negotiated a discount on some mk2 Ibiza Bilstein B6 dampers, which arrived a couple of days later. In the picture below, the damper I removed is at the top, the mk1 Leon part is in the middle, and the mk2 Ibiza part at the bottom. The rear springs I decided to try are H&R springs intended to provide a 25mm drop on a mk1 Octavia. I stood them alongside the unknown springs I took off the Caddy and it is clear that the H&R springs (on the left) are both shorter and less substantial (so probably softer) than the parts I removed (on the right). Although I was not particularly aiming for a further drop in rear ride height, I thought I would have a look to see how it looked with the H&R springs fitted. I think the rear bump stop kit I used was intended for a mk4 Golf. Initially I wanted to use a Powerflex kit, intended for lowered cars, but I could not identify one which was suitable, so I resorted to cutting-down the full length parts. The struts looked OK assembled on the bench, and went onto the Caddy without difficulty. Once I lowered the Caddy off the lift it was clearly sitting lower at the rear than what I wanted. I left it sitting in the workshop for a couple of days to make my mind up whether I could live with it that low, before deciding that it needed to be higher. Swapping back to the springs I had just taken off was achieved pretty quickly, but even once I had done that it was not far off from sitting on the bump stops, so the struts came off again, I cut a bit more off the bump stops, then it went back together again. I would have included a photo here of how the Caddy looks sitting on its new suspension, but as the ride height is unchanged, it would be pointless.

-
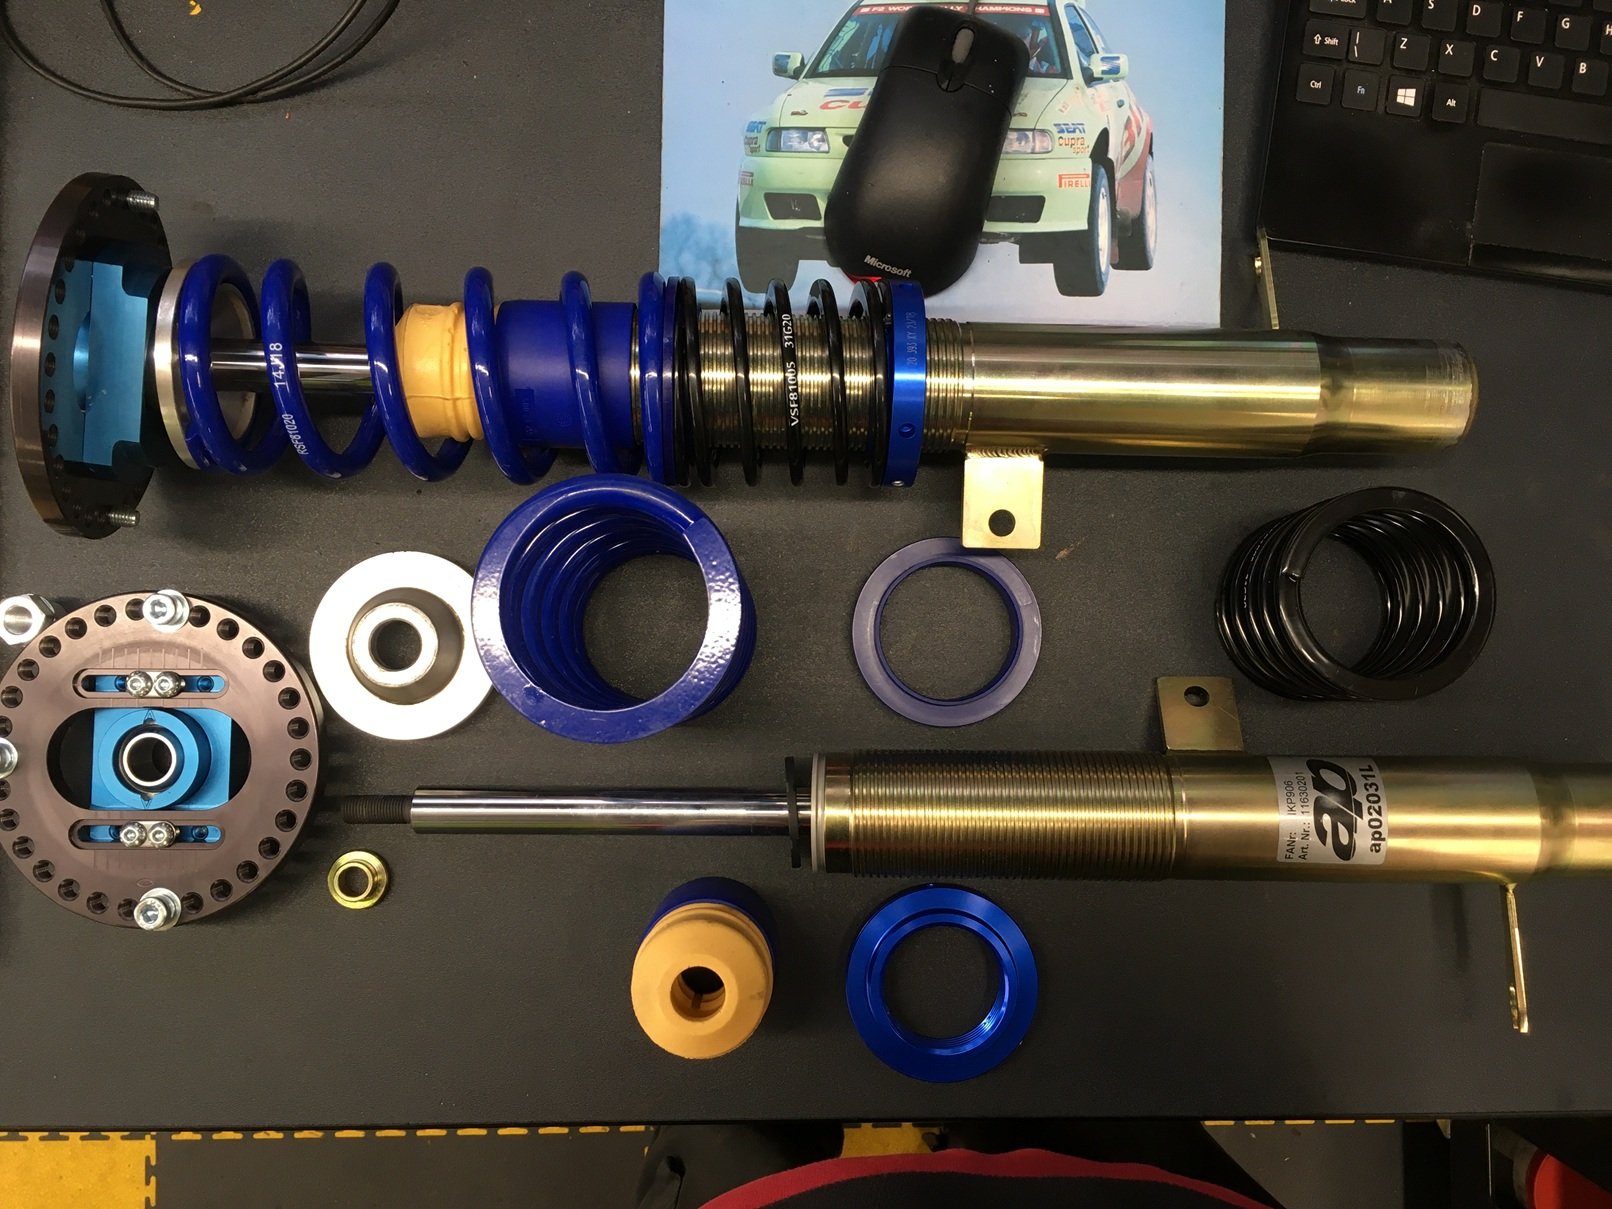
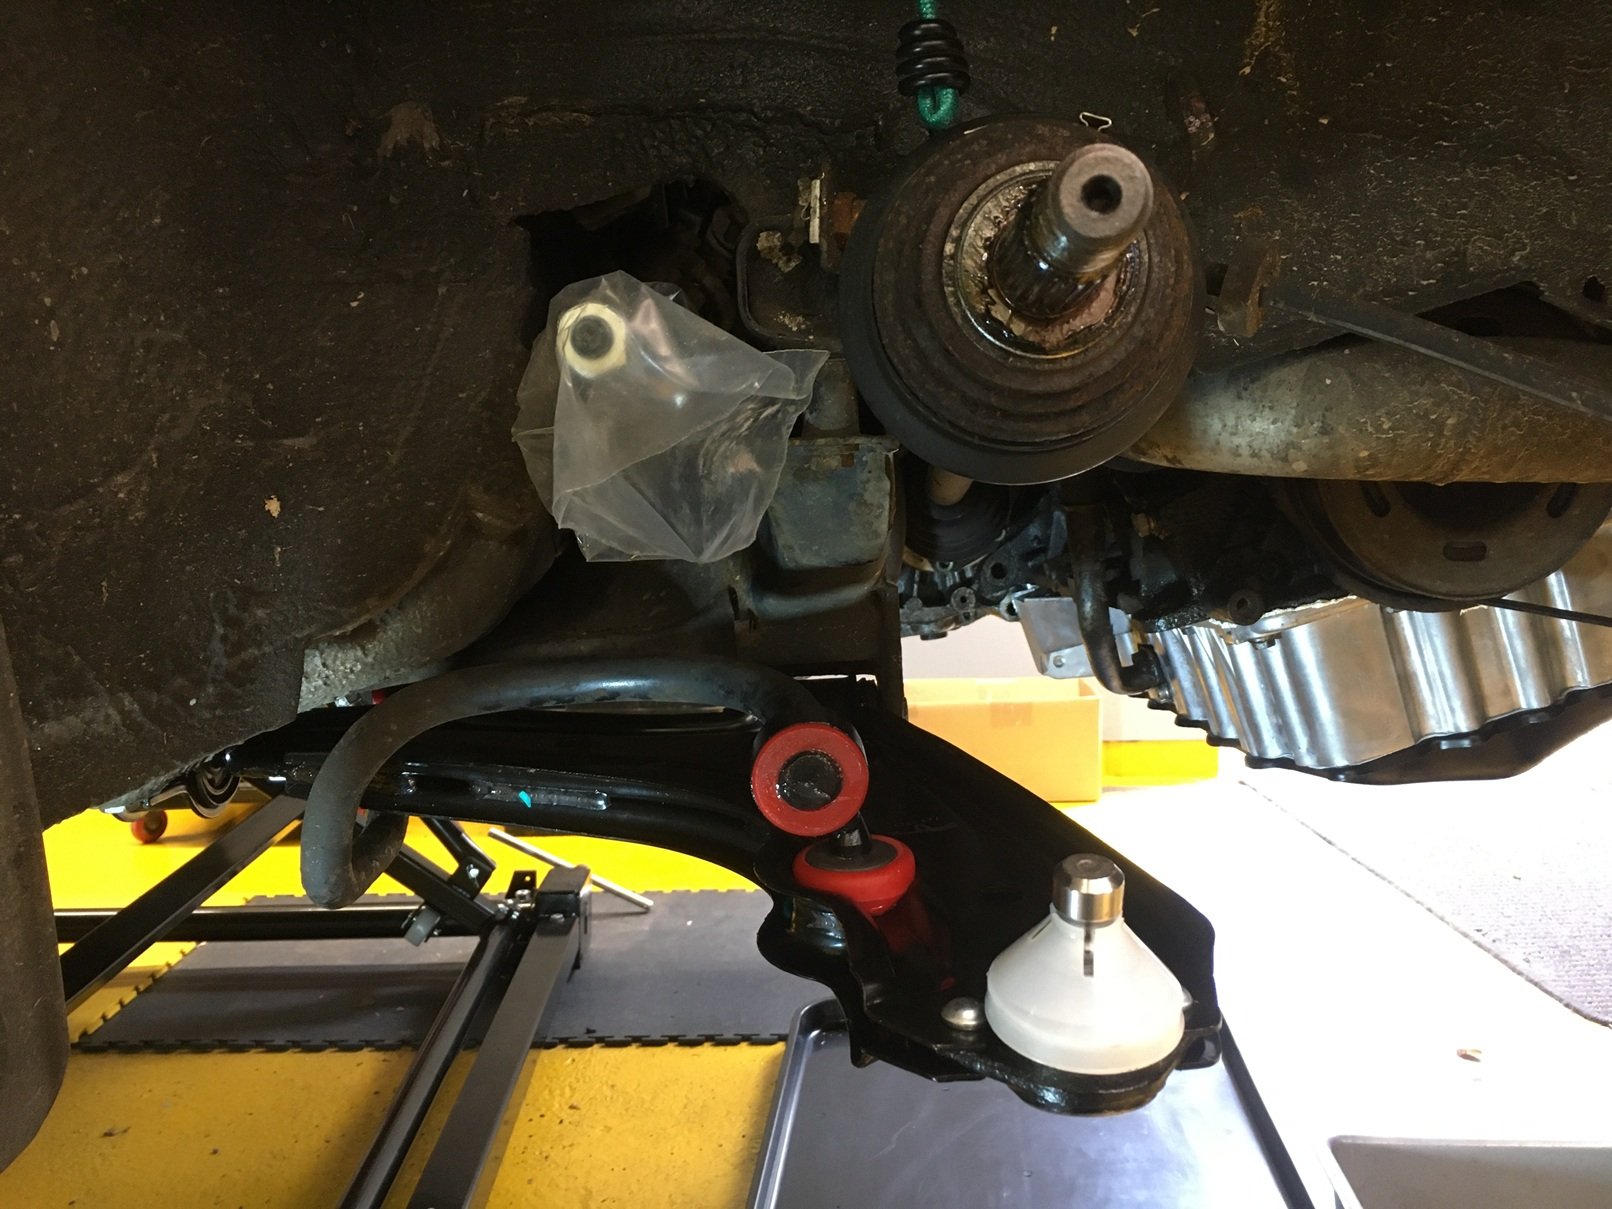
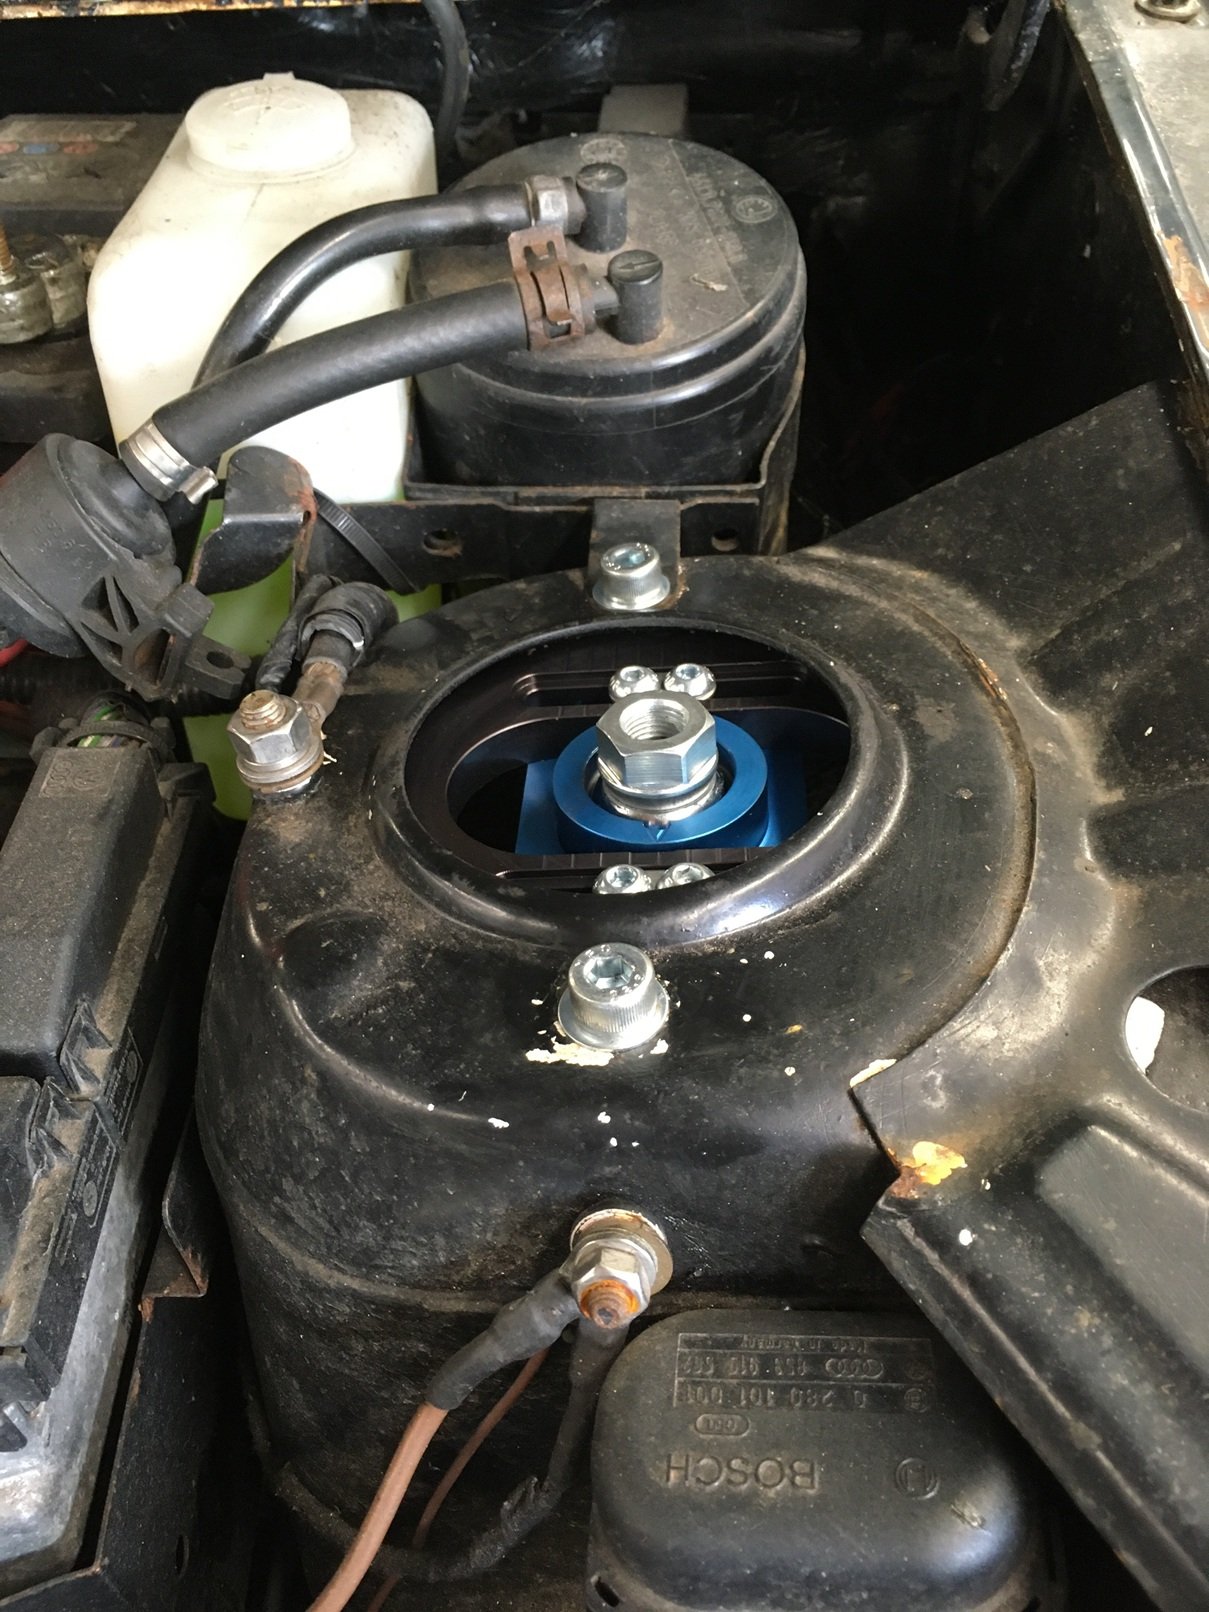
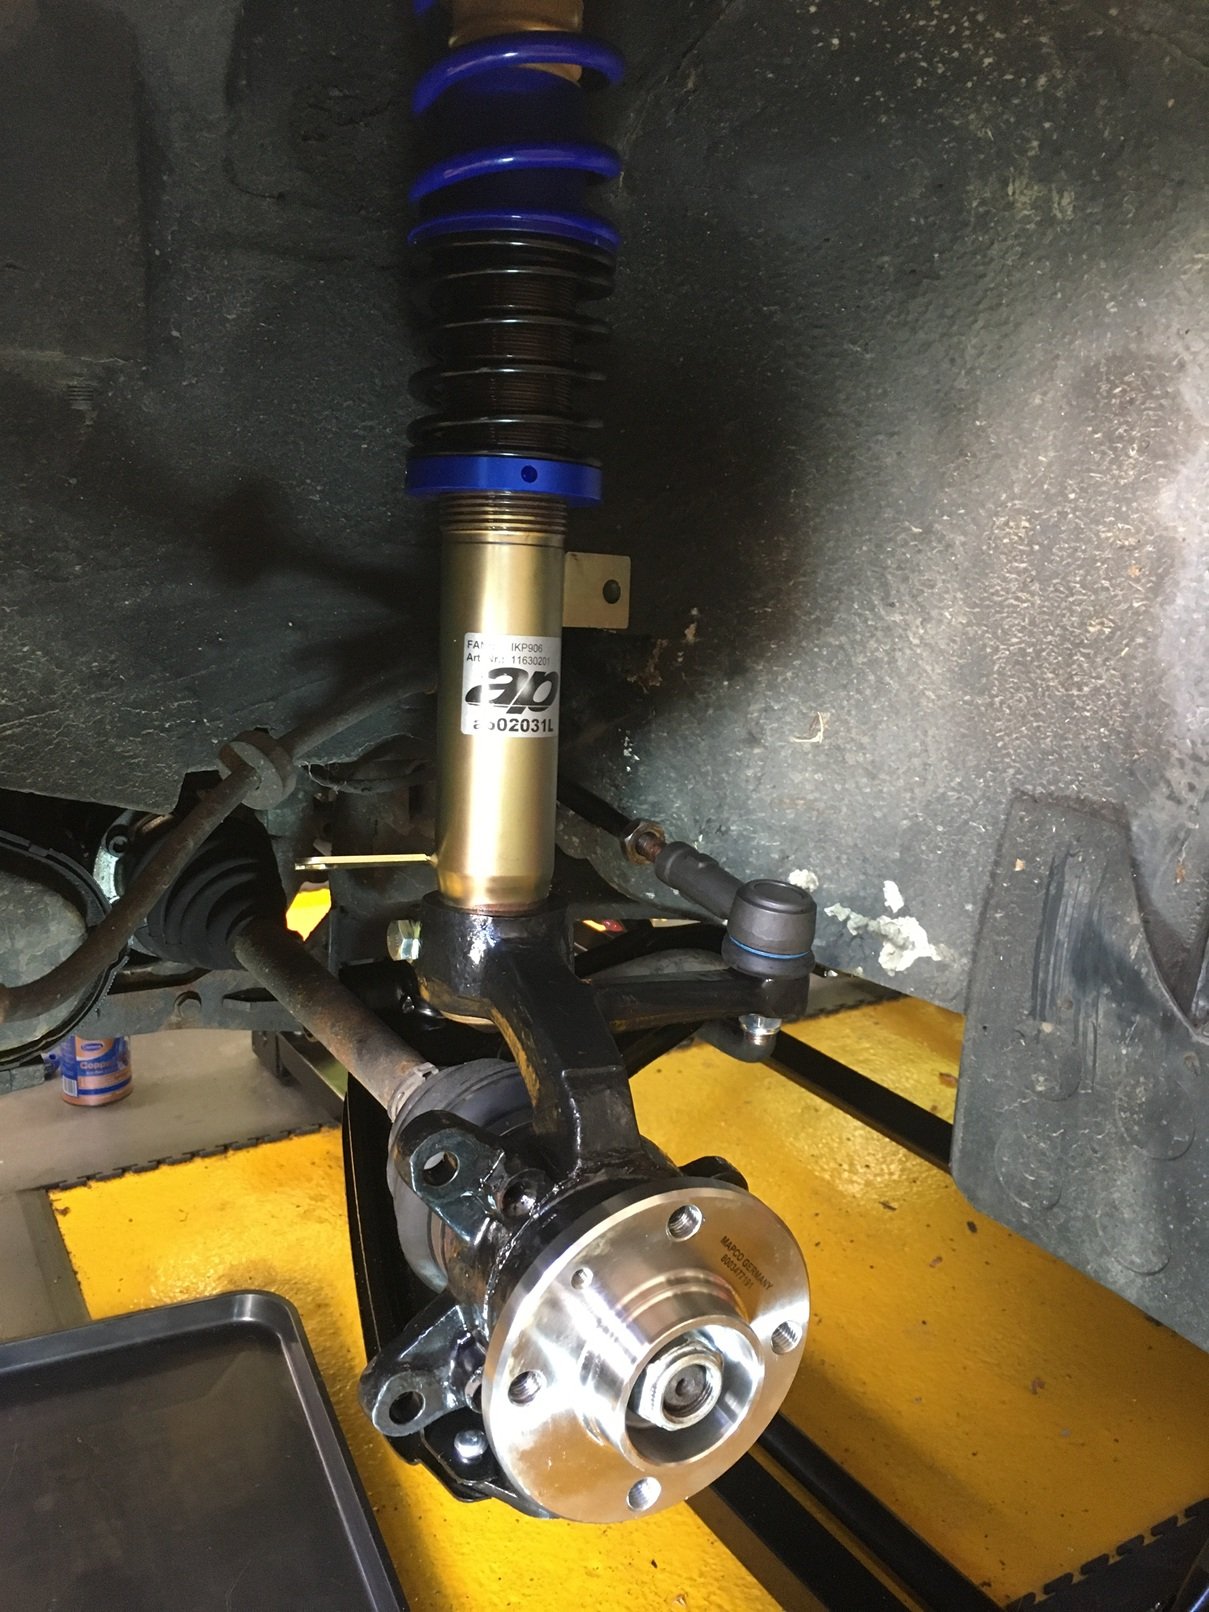
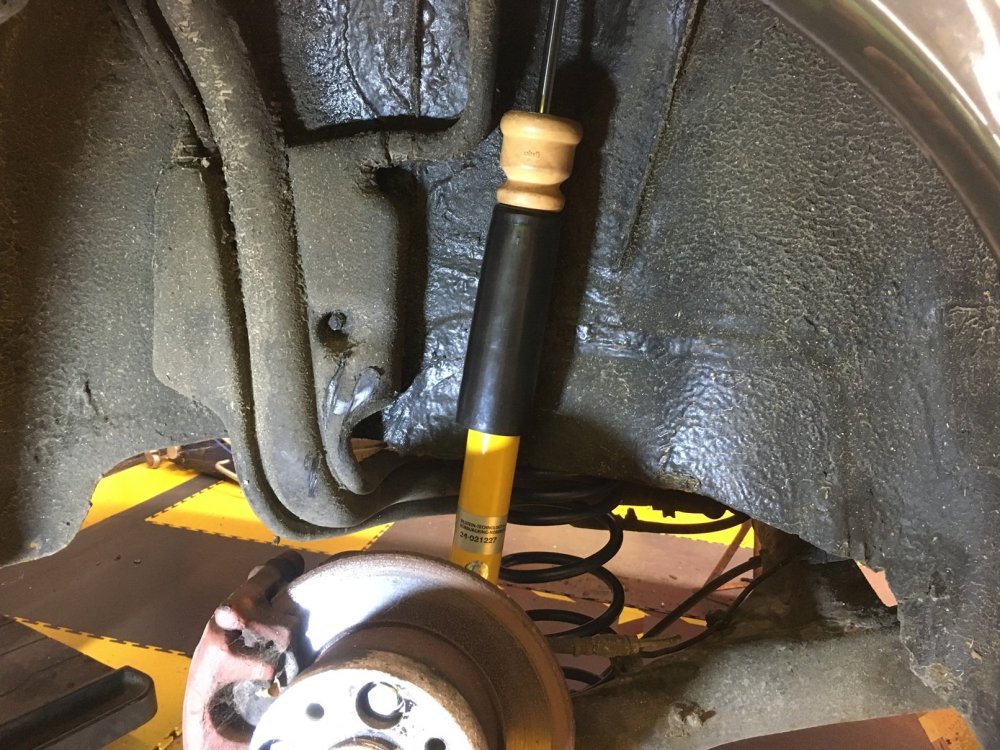
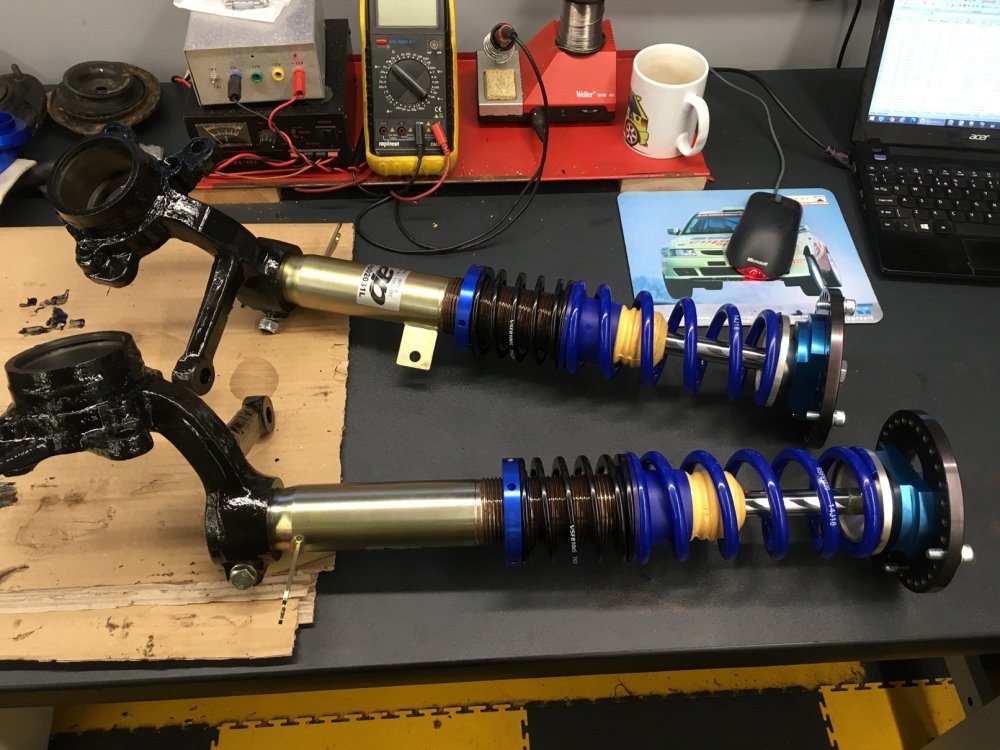
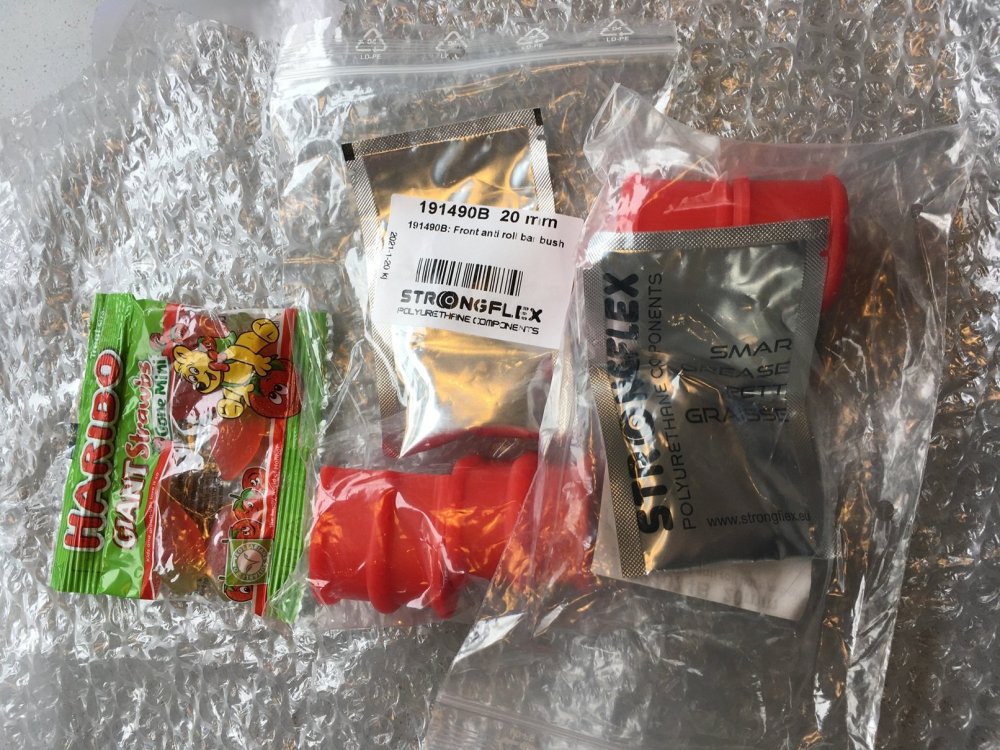
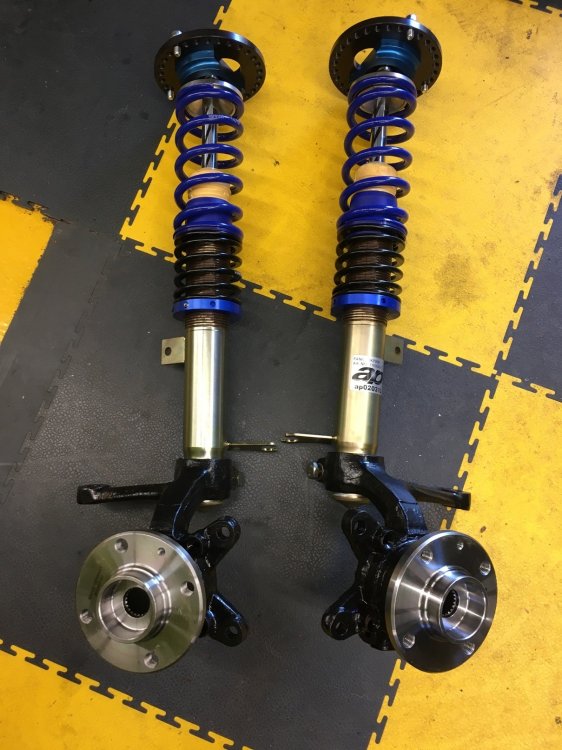
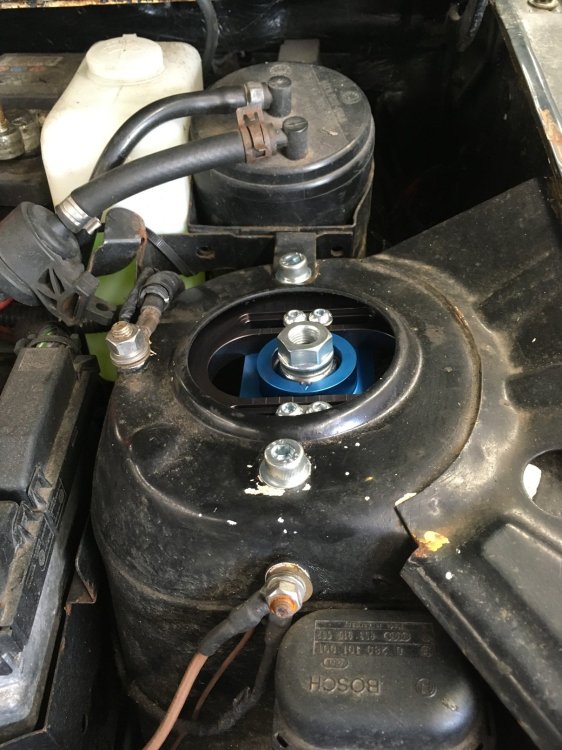
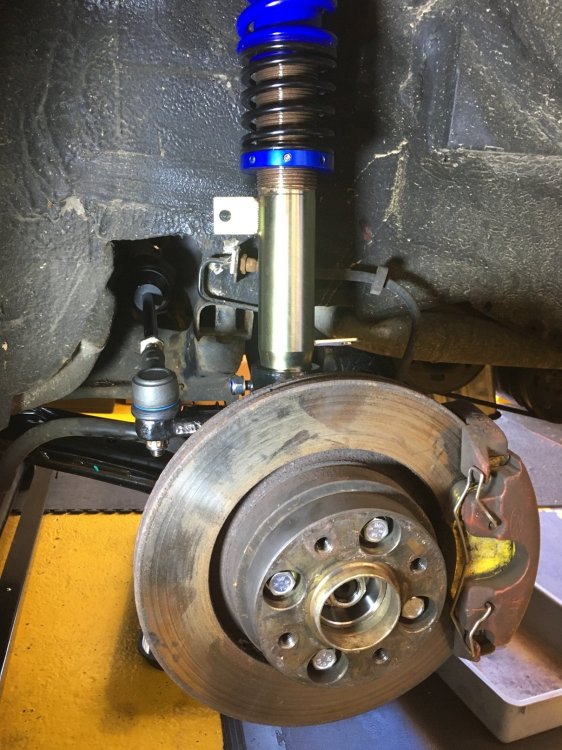
The new front coilovers are AP mk1 Focus units, as I mentioned previously. For top mounts I bought some CompBrake adjustable solid parts. The only part of the front struts which was reused was the top spring cap. These do not look like standard Caddy (Felicia) parts, and nor do they resemble the parts that came with the coilovers, so I have no idea what they were originally designed for, but they are perfect for what I need. The FK front coilovers had been pressed into the hub carriers with considerable force, and there was no way they could be removed. Because of this I had to source some replacement hub carriers, which I had machined to accommodate the new coilovers and the larger mounting bolts for my Ford (ATE) callipers. When they came back from the machine shop I gave them a lick of paint before trial fitting the assembled front struts. Anti-roll bar and drop-link bushes had been sourced from Superflex months back, but when I tried them against the ARB I realised it is 20mm diameter, not 22mm as I had thought. The 20mm bushes took a couple of weeks to arrive from Poland, but when they did the package contained a note apologising for the delay, and a small pack of Haribo. I will be happy to order from them again. New wishbones were fitted, and went on a treat with new bolts after the damaged captive thread had been re-tapped. The ARB drop-link bushes and drop-link mounting bushes are actually the same as mk2 Ibiza parts, although the Ibiza drop-link is straight whereas the Caddy part is inclined. In this photo the plastic bag is protecting the new track rod ball joint while waiting for rack gaiters to arrive. I had always planned to replace the track rod ends, but they were seized solid so I had to buy new track rods too. I do not know why, but Felicia / Caddy front wheel bearings seem to be my kryptonite. Whenever I try to replace them, however careful I am to follow the correct methodology, I always end-up with the bearing inner race stuck resolutely to the hub, and the outer race similarly in the hub carrier. There were some fraught moments, including a big circlip that should have been secure deciding it was no such thing, but eventually I had new bearings and hubs fitted to freshly machined hub carriers. Before assembling these onto the Caddy I removed the top mounts, which I bolted loosely into place first. I then offered the uprights into position so I could feed the driveshafts through the hubs, and put the top nuts on, at which point the weight of the uprights was supported and I could pop them onto the bottom ball-joints. I will probably replace the top mount bolts with longer bolts fed through from under the top mount plate, so that it is easier to remove the strut brace without having to worry about the top mount being detached at the same time. New track rod ends were fitted, and everything was torqued-up, with a jack under the ball-joint to make sure the damper was properly located in the hub carrier. Both the strut and ball-joint pinch bolts were replaced with new. The brake callipers are now looking a bit shabby in comparison to the shiny new suspension parts. A brakes refurb may be on the agenda shortly. The strut pinch bolt had not been tightened when this photo was taken.


-
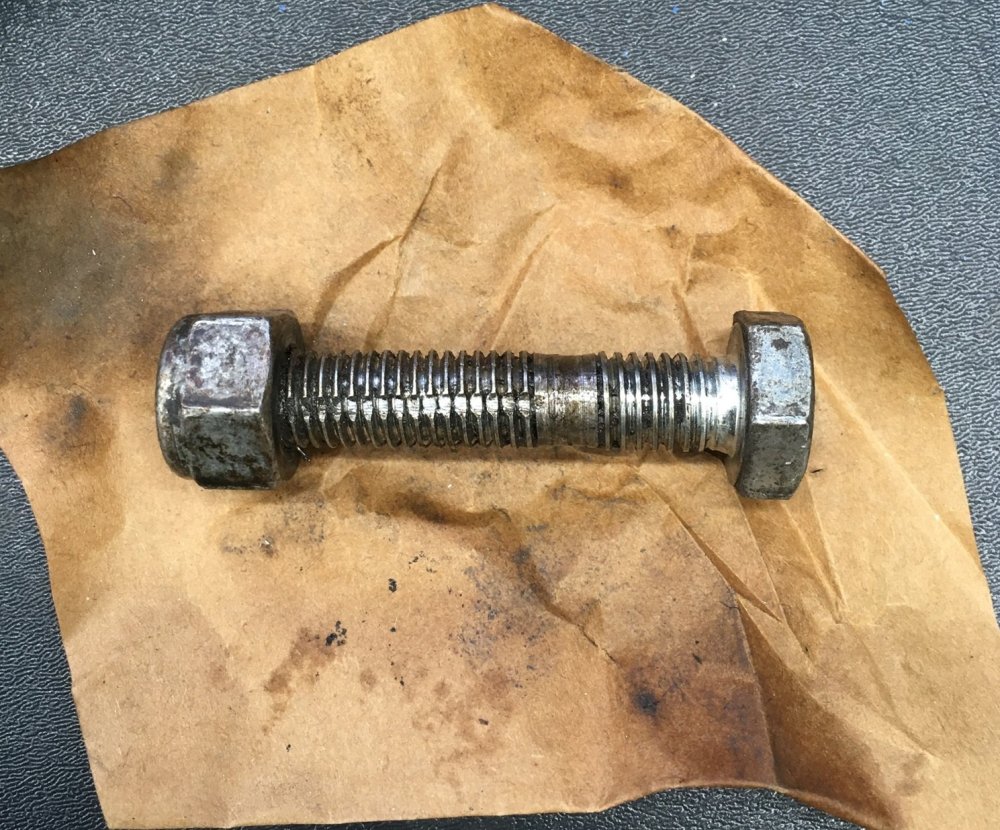
Stripping-down the suspension was almost entirely trouble-free. One of the front wishbone rear mounting bolts caused some concern as it was very tight to undo virtually for the whole of its thread. It was a big relief when it came out in one piece, but the terrible state of its thread dictated it went in the scrap bin. New bolts were added to the shopping list, as was a tap for the captive thread. Both front and rear suspension had previously been reassembled without much attention being paid to the quality of the fasteners used. They will all be going in the bin. At the rear end, none of the suspension components looked as if they had been selected for their quality. The arrangement of spacers, shaped washers etc. in the top mounts both sides did not match. Pretty much everything will have to be replaced.
-
Thanks, and thanks also for the nudge which made me realise I have not updated this with the latest progress.
-
Fortunately for me, when the 1.8T engine was fitted to the Felicia, the previous owner had realised that a tall engine squeezed beneath a low bonnet leaves the sump vulnerable, especially if the ride height is less than generous. To mitigate against catastrophic damage he had fitted an African spec shallow sump with a steel pan. This had taken a couple of fairly substantial clouts in the Caddy, and was looking very much worse for wear. I could not find a genuine replacement, but the pattern part I found looks like a decent copy. The tapped holes for the bolts that attach the steel pan to the alloy upper part are shallower on the pattern part, but apart from that it even looks like it could be made using the same tooling as the genuine part. The sump plug supplied did not look great, but I had an ECS magnetic sump plug which I fitted instead. With the Caddy up on the scissor lift, swapping the sump was easier than I expected. Hopefully I can keep this one away from the tarmac. Despite the old sump looking to be in a sorry state, when I tested it after I took it off it still appeared to be oil tight. A standard all-alloy sump would certainly not have survived to that extent.


-
After the minimal front suspension rebuild when the coilovers were fitted, it was only a matter of time before I needed to do a proper job. The FK coilovers which had been on my Felicia 1.8T donor were always terrible, and they had deteriorated noticeably from that. They were mk1 Ford Focus parts, but I was led to believe that mk4 Golf (mk1 Leon, mk1 Octavia) front coilovers might also do the job. I bought an incomplete used set of AP mk4 Golf coilovers, but it was clear that the front damper diameter was too large for these to fit into the Caddy hub carriers without significant metal having to be removed, to the extent that the hub carrier may be substantially weakened. The mk1 Focus coilovers are smaller in diameter towards the bottom, so less metal needs to be removed. I was not keen to pay for a set of four coilovers and only be able to use the front pair, and eventually I found someone who was prepared to order just two rather than four coilovers from KW, although it was their cheaper brand AP which I went for. They arrived more quickly than expected from Germany, but when I opened the boxes they were obviously not a matching pair. KW were very apologetic, and dispatched the correct replacement straight away. The coilovers and a pair of hub carriers went off to my friendly local machine shop so the hub carriers could be machined to accommodate the coilovers and the larger mounting bolts for the ATE (Ford) callipers. My plan was to strip and rebuild both front and rear suspension at the same time, and to make this easier (and safer) I bought a scissor lift for the workshop. To get it under the Caddy I had to use four low-rise ramps, and then I had to put some ballast in the back of the pick-up because even with the scissor lift positioned so it was touching the front wheels, it was still the back that lifted when I wound the lift up. Initially I put the extra weight as far back as possible, then once I had the front of the Caddy at the desired height I shifted the weight forward so it was balanced and I could tilt it with one hand to get it level. Axle stands then went under the rear of the Caddy, the scissor lift tilt mechanism was locked, and I shifted the ballast again so there was some weight on the axle stands. Already I am convinced this scissor lift is a properly cool piece of kit.


-
I cannot believe two years have passed since I last posted an update on here. There is a bit of catching-up for me to do. Some jobs you do on a car bring a level of satisfaction massively disproportionate to the expense and effort that goes into them. If you need a 'quick win' to maintain enthusiasm these jobs are good candidates, but sometimes these things just have to be left to be symbolic of a job done. With the engine swap from 1.9SDI to 1.8T completed, I had one of these symbolic tasks to complete. Before: After:


-
After over 18 years of ownership since we bought it new, and 112,000 almost completely trouble-free miles, the time came to move the Octavia on. It was still doing a fantastic job, but it had come to the point that if anything serious (i.e. expensive) went wrong with it I might have had to scrap it, and that would have been heartbreaking. I had not got as far as advertising it when my daughter and her partner mentioned they were considering looking at Octavias. When they found out ours was available we struck a deal very quickly. Before it went I replaced things like engine covers which had been sitting in the garage for a while, and gave it a clean under the bonnet. The deal we had agreed included me keeping the Oz F-1 wheels, and replacing them with something of the same size. A set of VW Santa Monica alloys came up on eBay locally, and after I had given them a good clean and fitted Skoda centre caps I put them on the Octavia. The wheels are not to my taste, but that is kind of the point. Before it went off to its new owner the personal plate was replaced with a 'standard' registration. I never loved the Octavia. It was my partner's car and I always had my own car which I liked better. Having said that, every time I drove it I enjoyed it, even when I had something much faster (Evo VIII) or more flash (RS4). It was a bloody good car, which I never regretted buying, and which I was sad to see go.
-
PM sent
-
You do not have to change the bumper cover or bumper reinforcement bar for the facelift front end. I did it on my old Felicia pick-up a few years ago. I took the facelift parts off it when it went, so if you decide to go this route and you need the bits give me a shout.
-
I have a couple of Felicia fuse and relay boards. I assume they are the same part whatever the engine, but do you know the part number you are after?
-
I do not claim to be an expert, and it has been a while since I did this on my previous pick-up, but I hope the following makes sense and is helpful. The dealer is correct that the ball end of the cable attaches to the pull handle inside the car. In order to remove the old cable and attached the new one to this handle, I found I had to remove the pull handle from its mounting bracket, and I did this by removing (cutting) the pin on which the handle pivots. I suspect that this is the pin that you have identified as being required to attach the cable to the pull handle. I replaced mine with a small bolt fitted with washers and a nyloc nut to make the job easier if I have to do it again. At the bonnet end, I have seen the cable clip replaced with a cable barrel clamp, similar to those used on bicycle brake cables etc.
-
Welcome. I am in Bognor so if you want to have a look at my Caddy 1.8T before you embark on yours, just let me know.
-
I used standard Felicia / Caddy top mounts with the Focus coilovers on my Caddy https://www.briskoda.net/forums/topic/440903-vw-caddy-mk2-felicia-pick-up/?do=findComment&comment=5221446
-
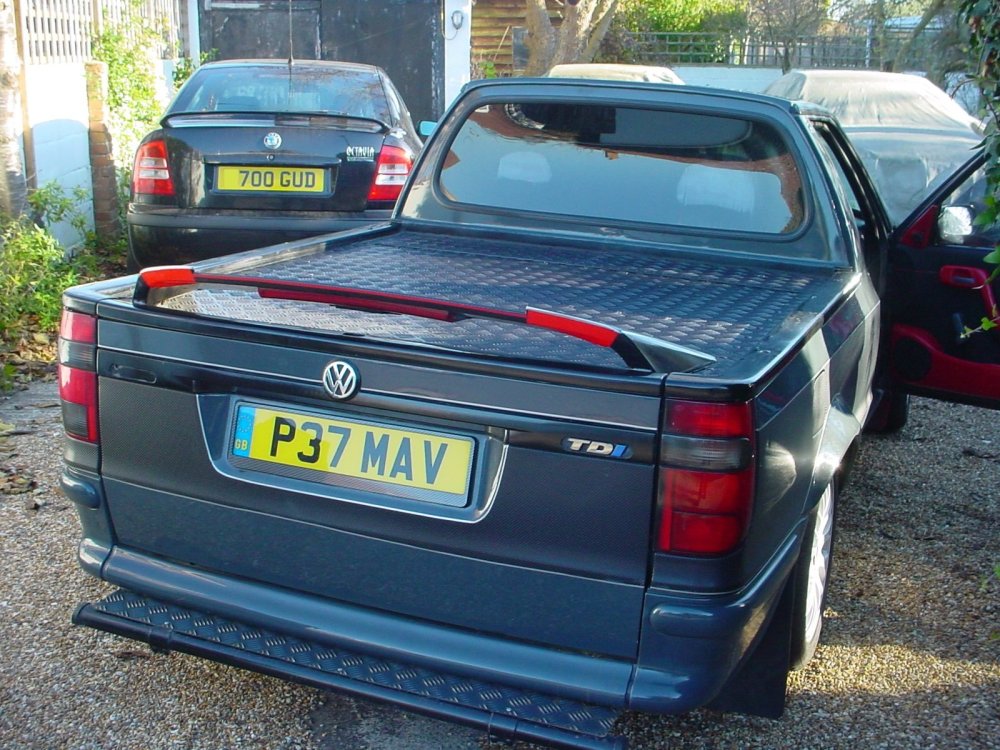
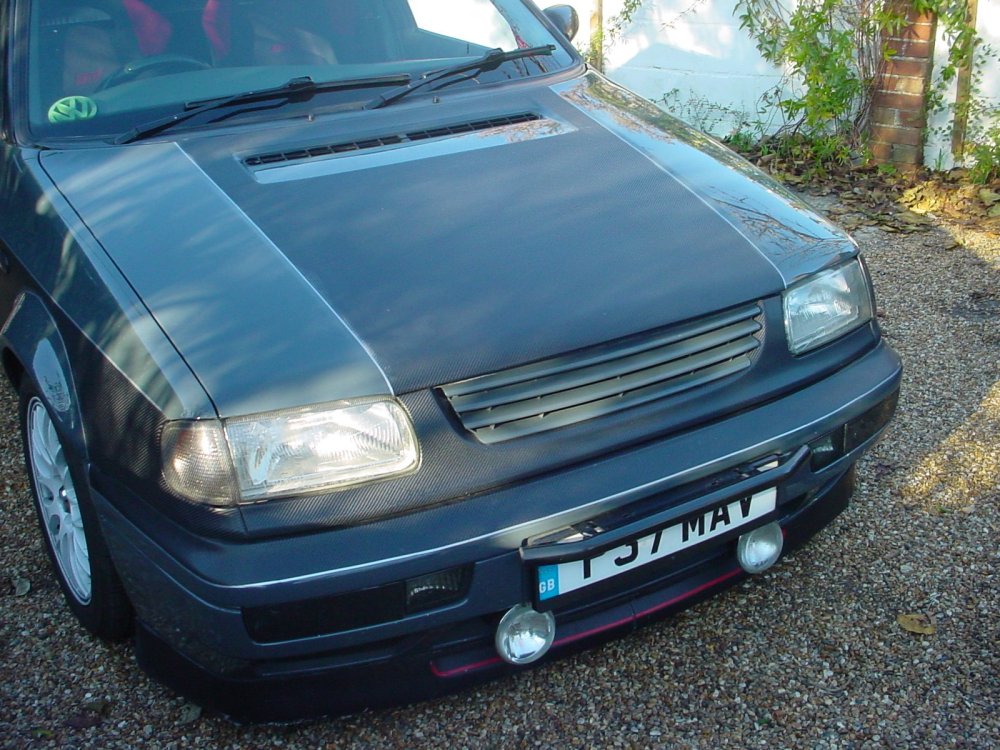
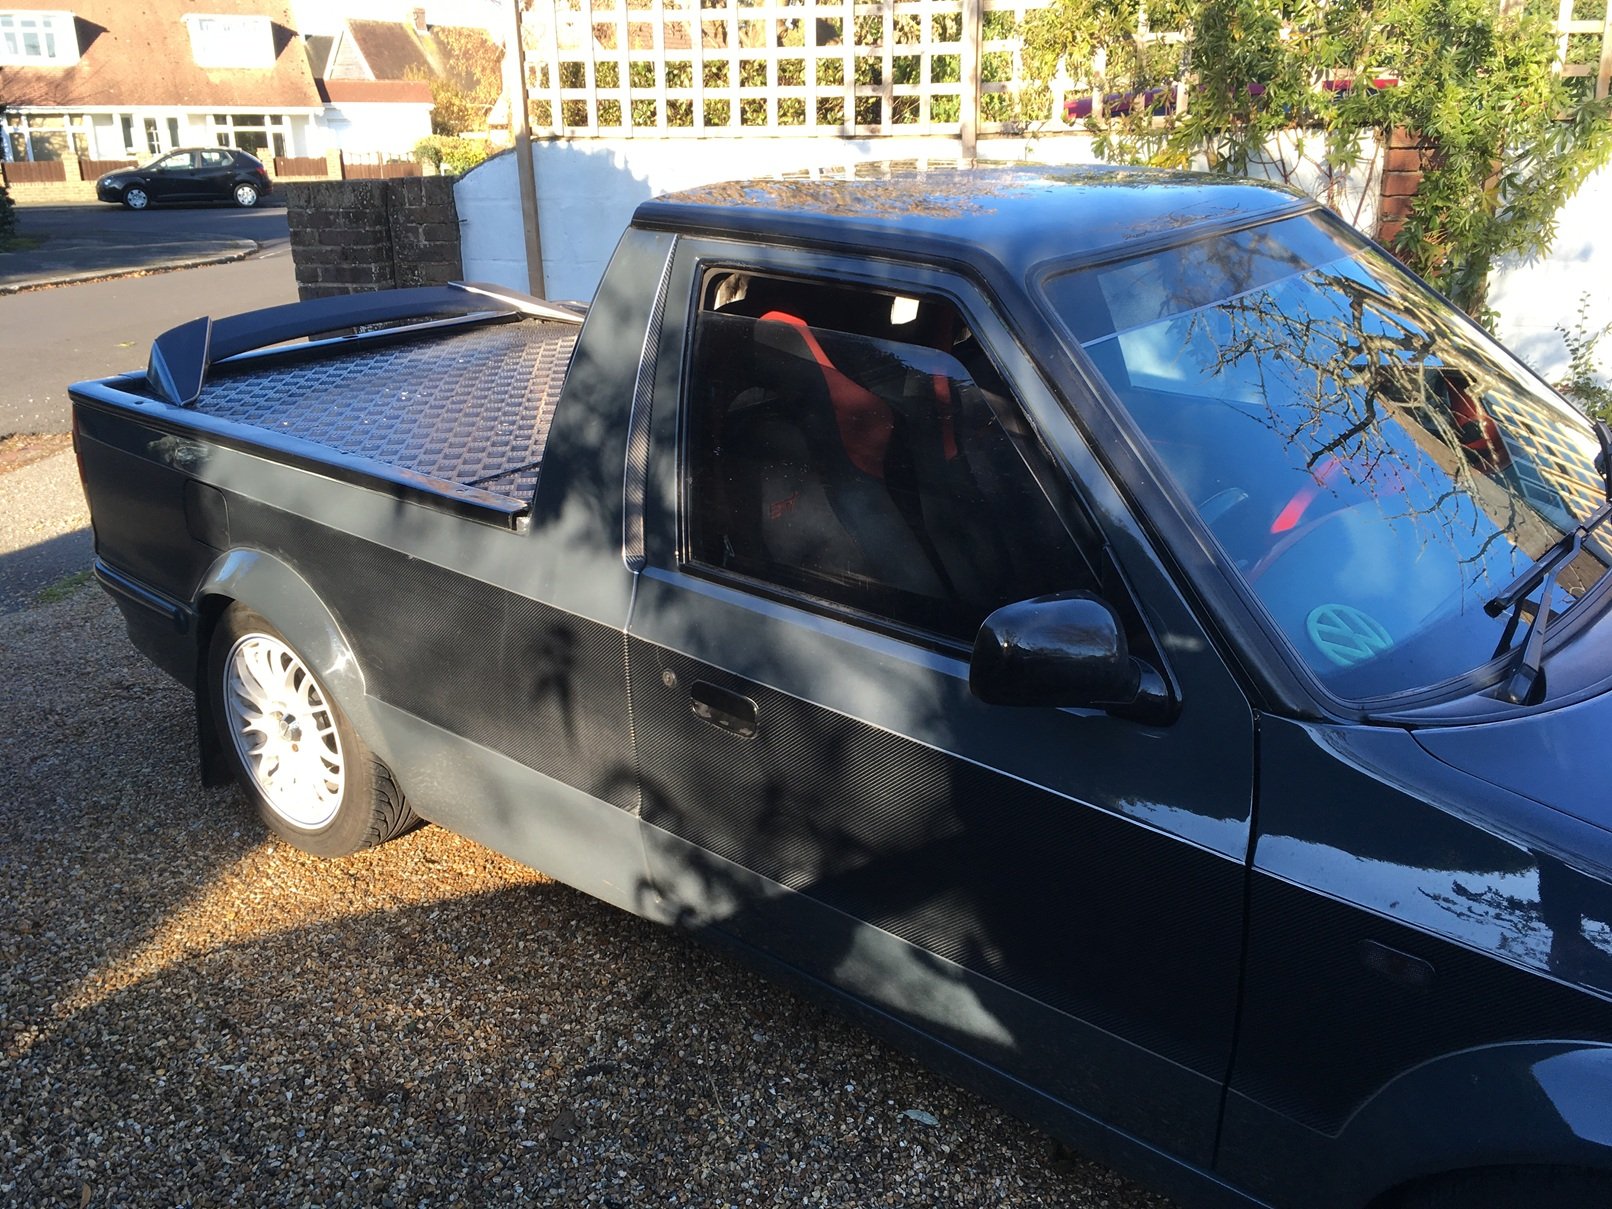
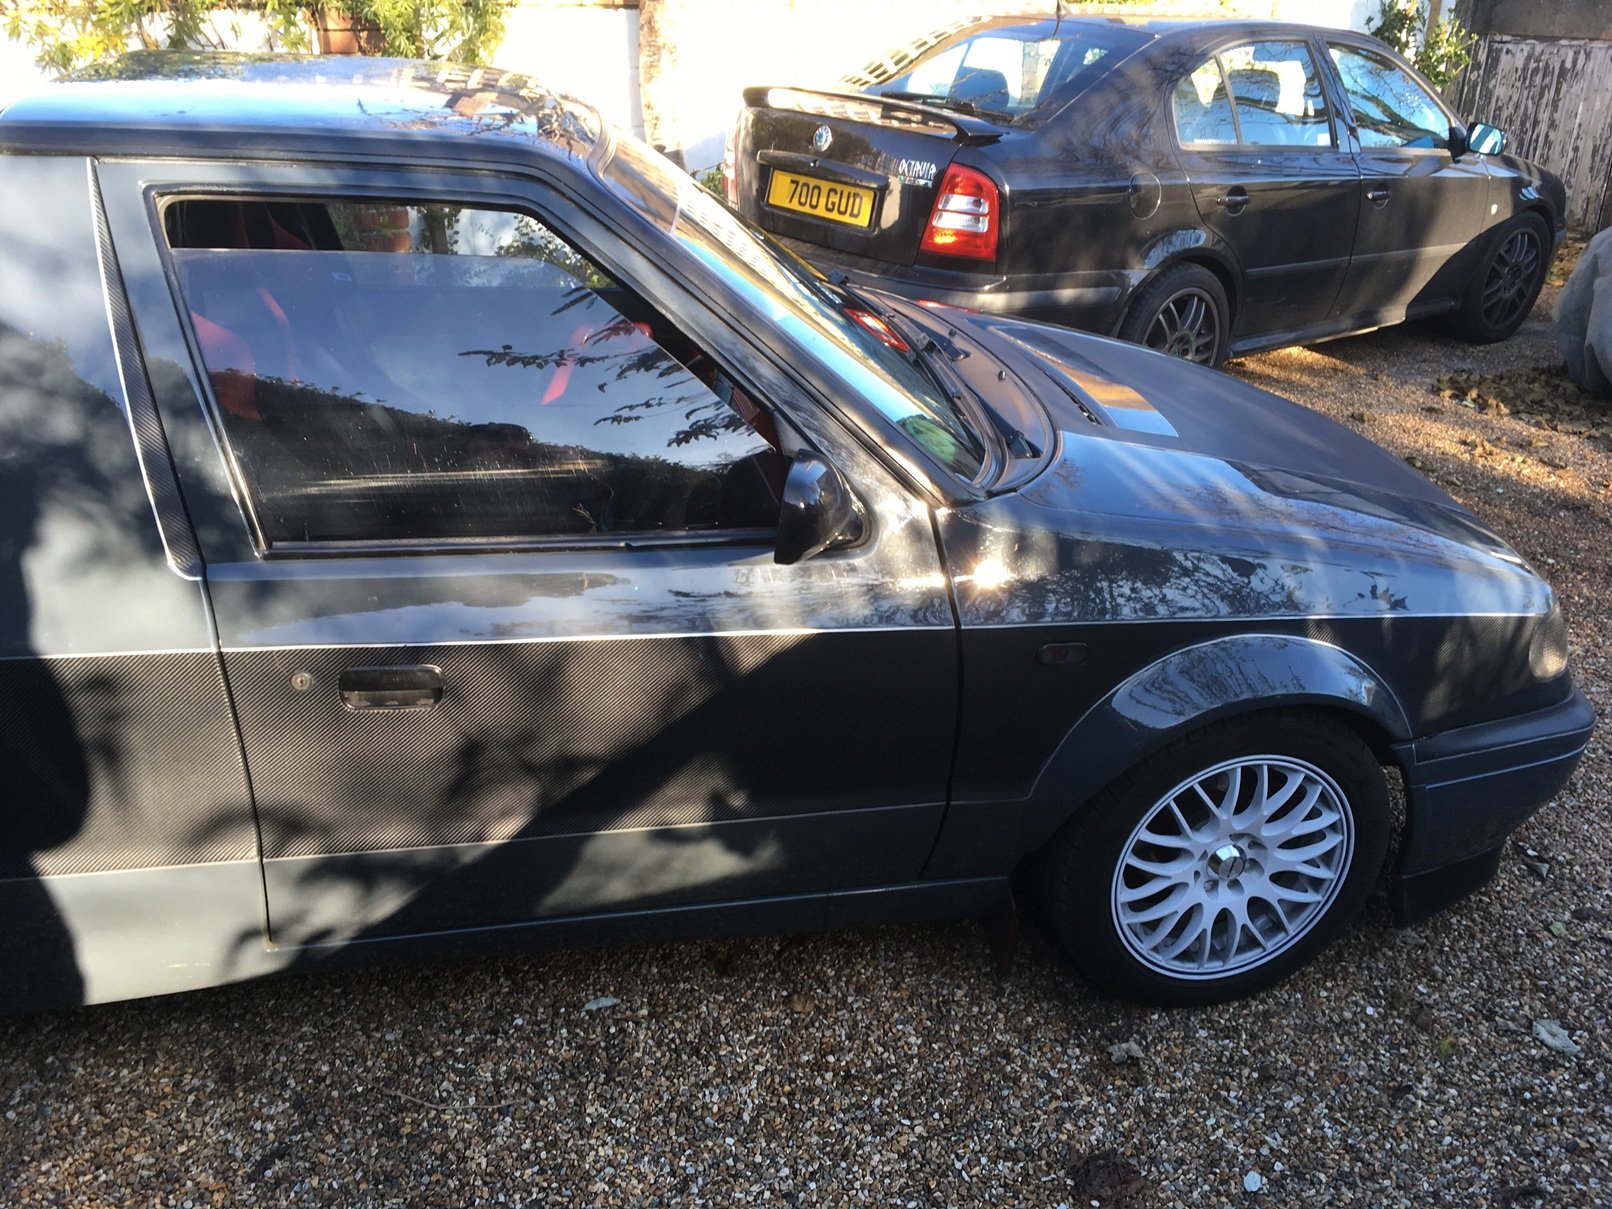
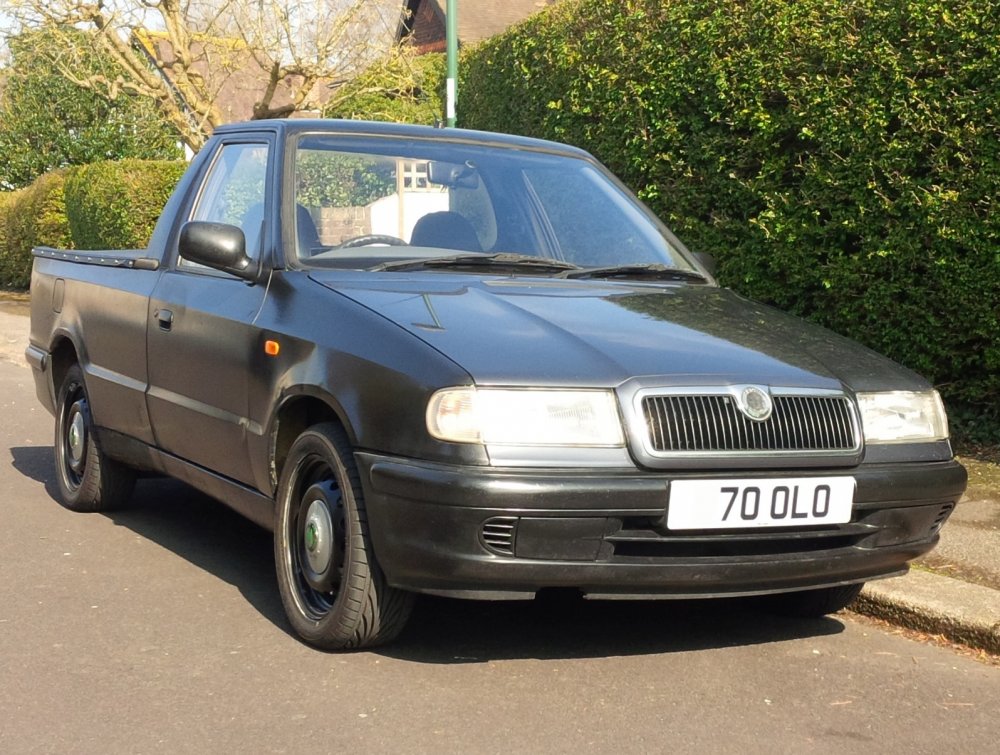
Having reluctantly decided that my Felicia pick-up was too tired to be a good base for my plans, I spent months looking for another. Although I have owned VAG cars for many years, I had not previously owned a VW, but the pick-up that I found was a Caddy, so I hope you will tolerate a thread about a VW on a Skoda site. When I bought it, it looked like this (bear with me, it gets better!). It is a 1.9D, which has previously had a substantial amount of effort put into sorting the bodywork, which is what was most important. Coincidentally, I bought it from the same place (Peterborough) as I bought my Felicia pick-up.