abaday789
Members
-
Joined
-
Last visited
Everything posted by abaday789
-
I got mine secondhand from a breakers on eBay as like you said brand new they wanted silly money for it. May just have to wait until one comes up to get it cheaper secondhand.
-
I doesn't make it fully level with the lip of the boot but brings it in a lot closer. I'll try to remember to get picture of it tomorrow evening. This is the one I got. Arrived a few days after ordering it.
-
Agree with getting the spare wheel kit. Fitted on recently in mine and was a doddle to install.
-
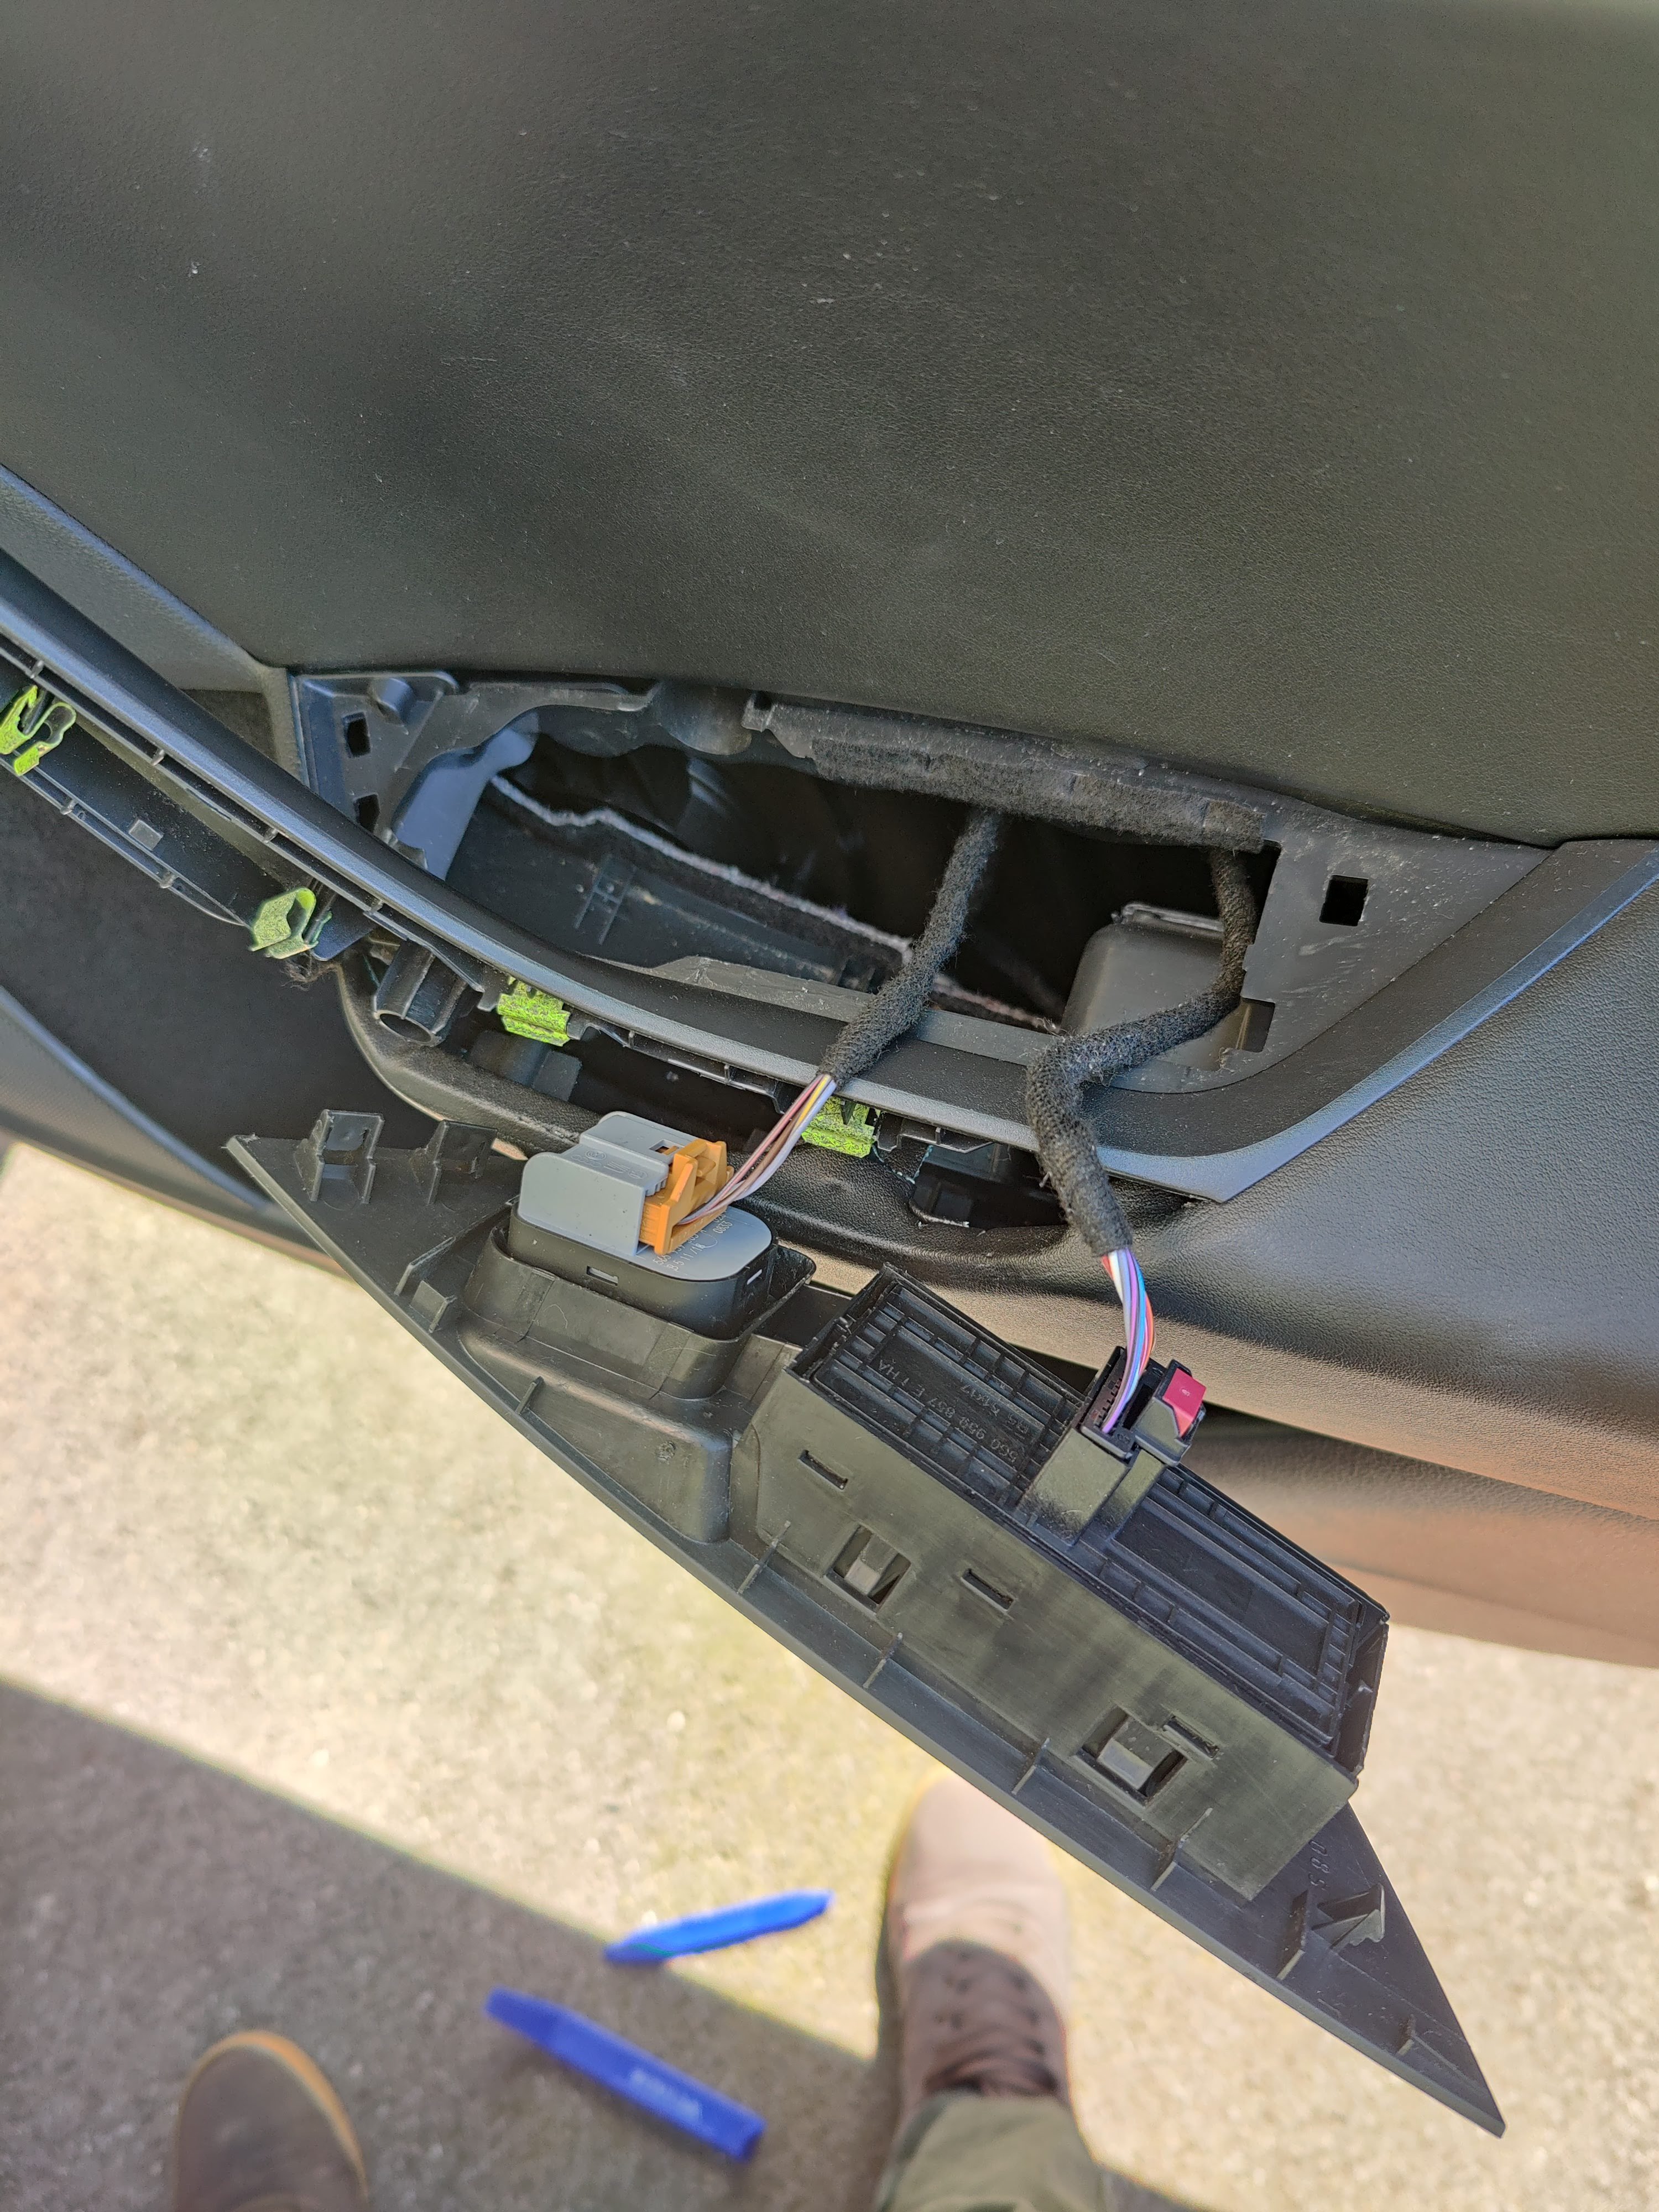
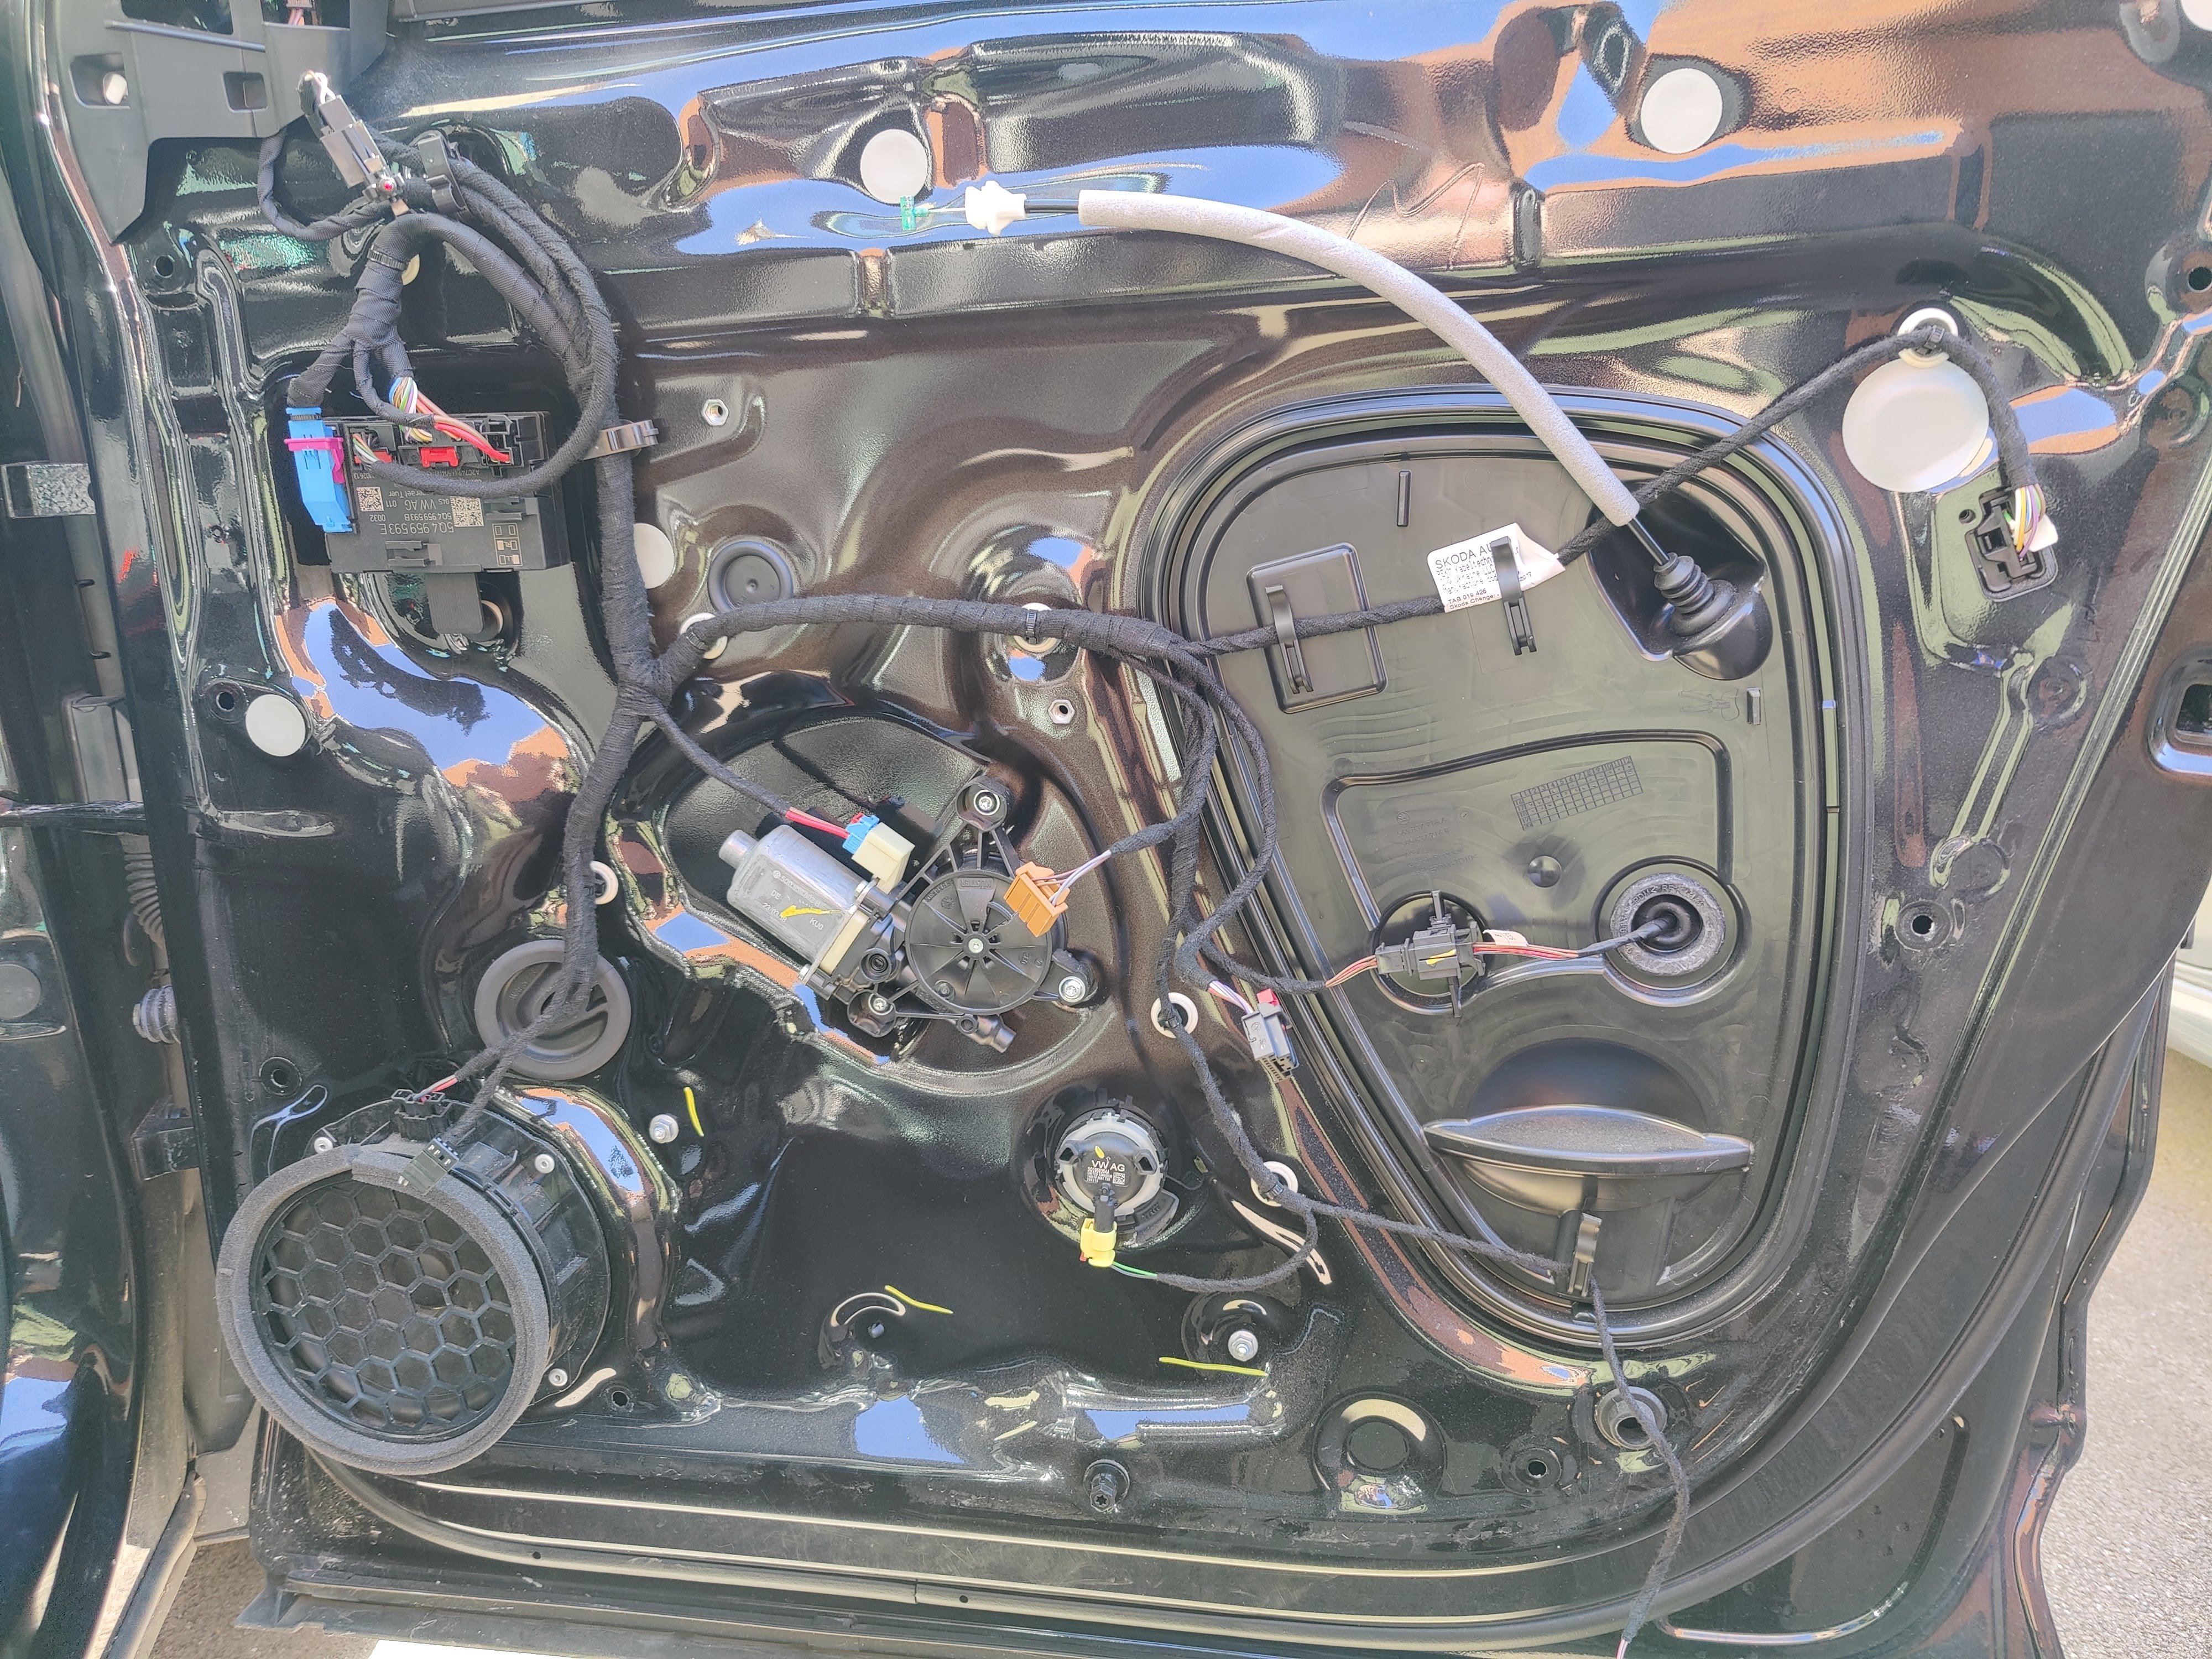
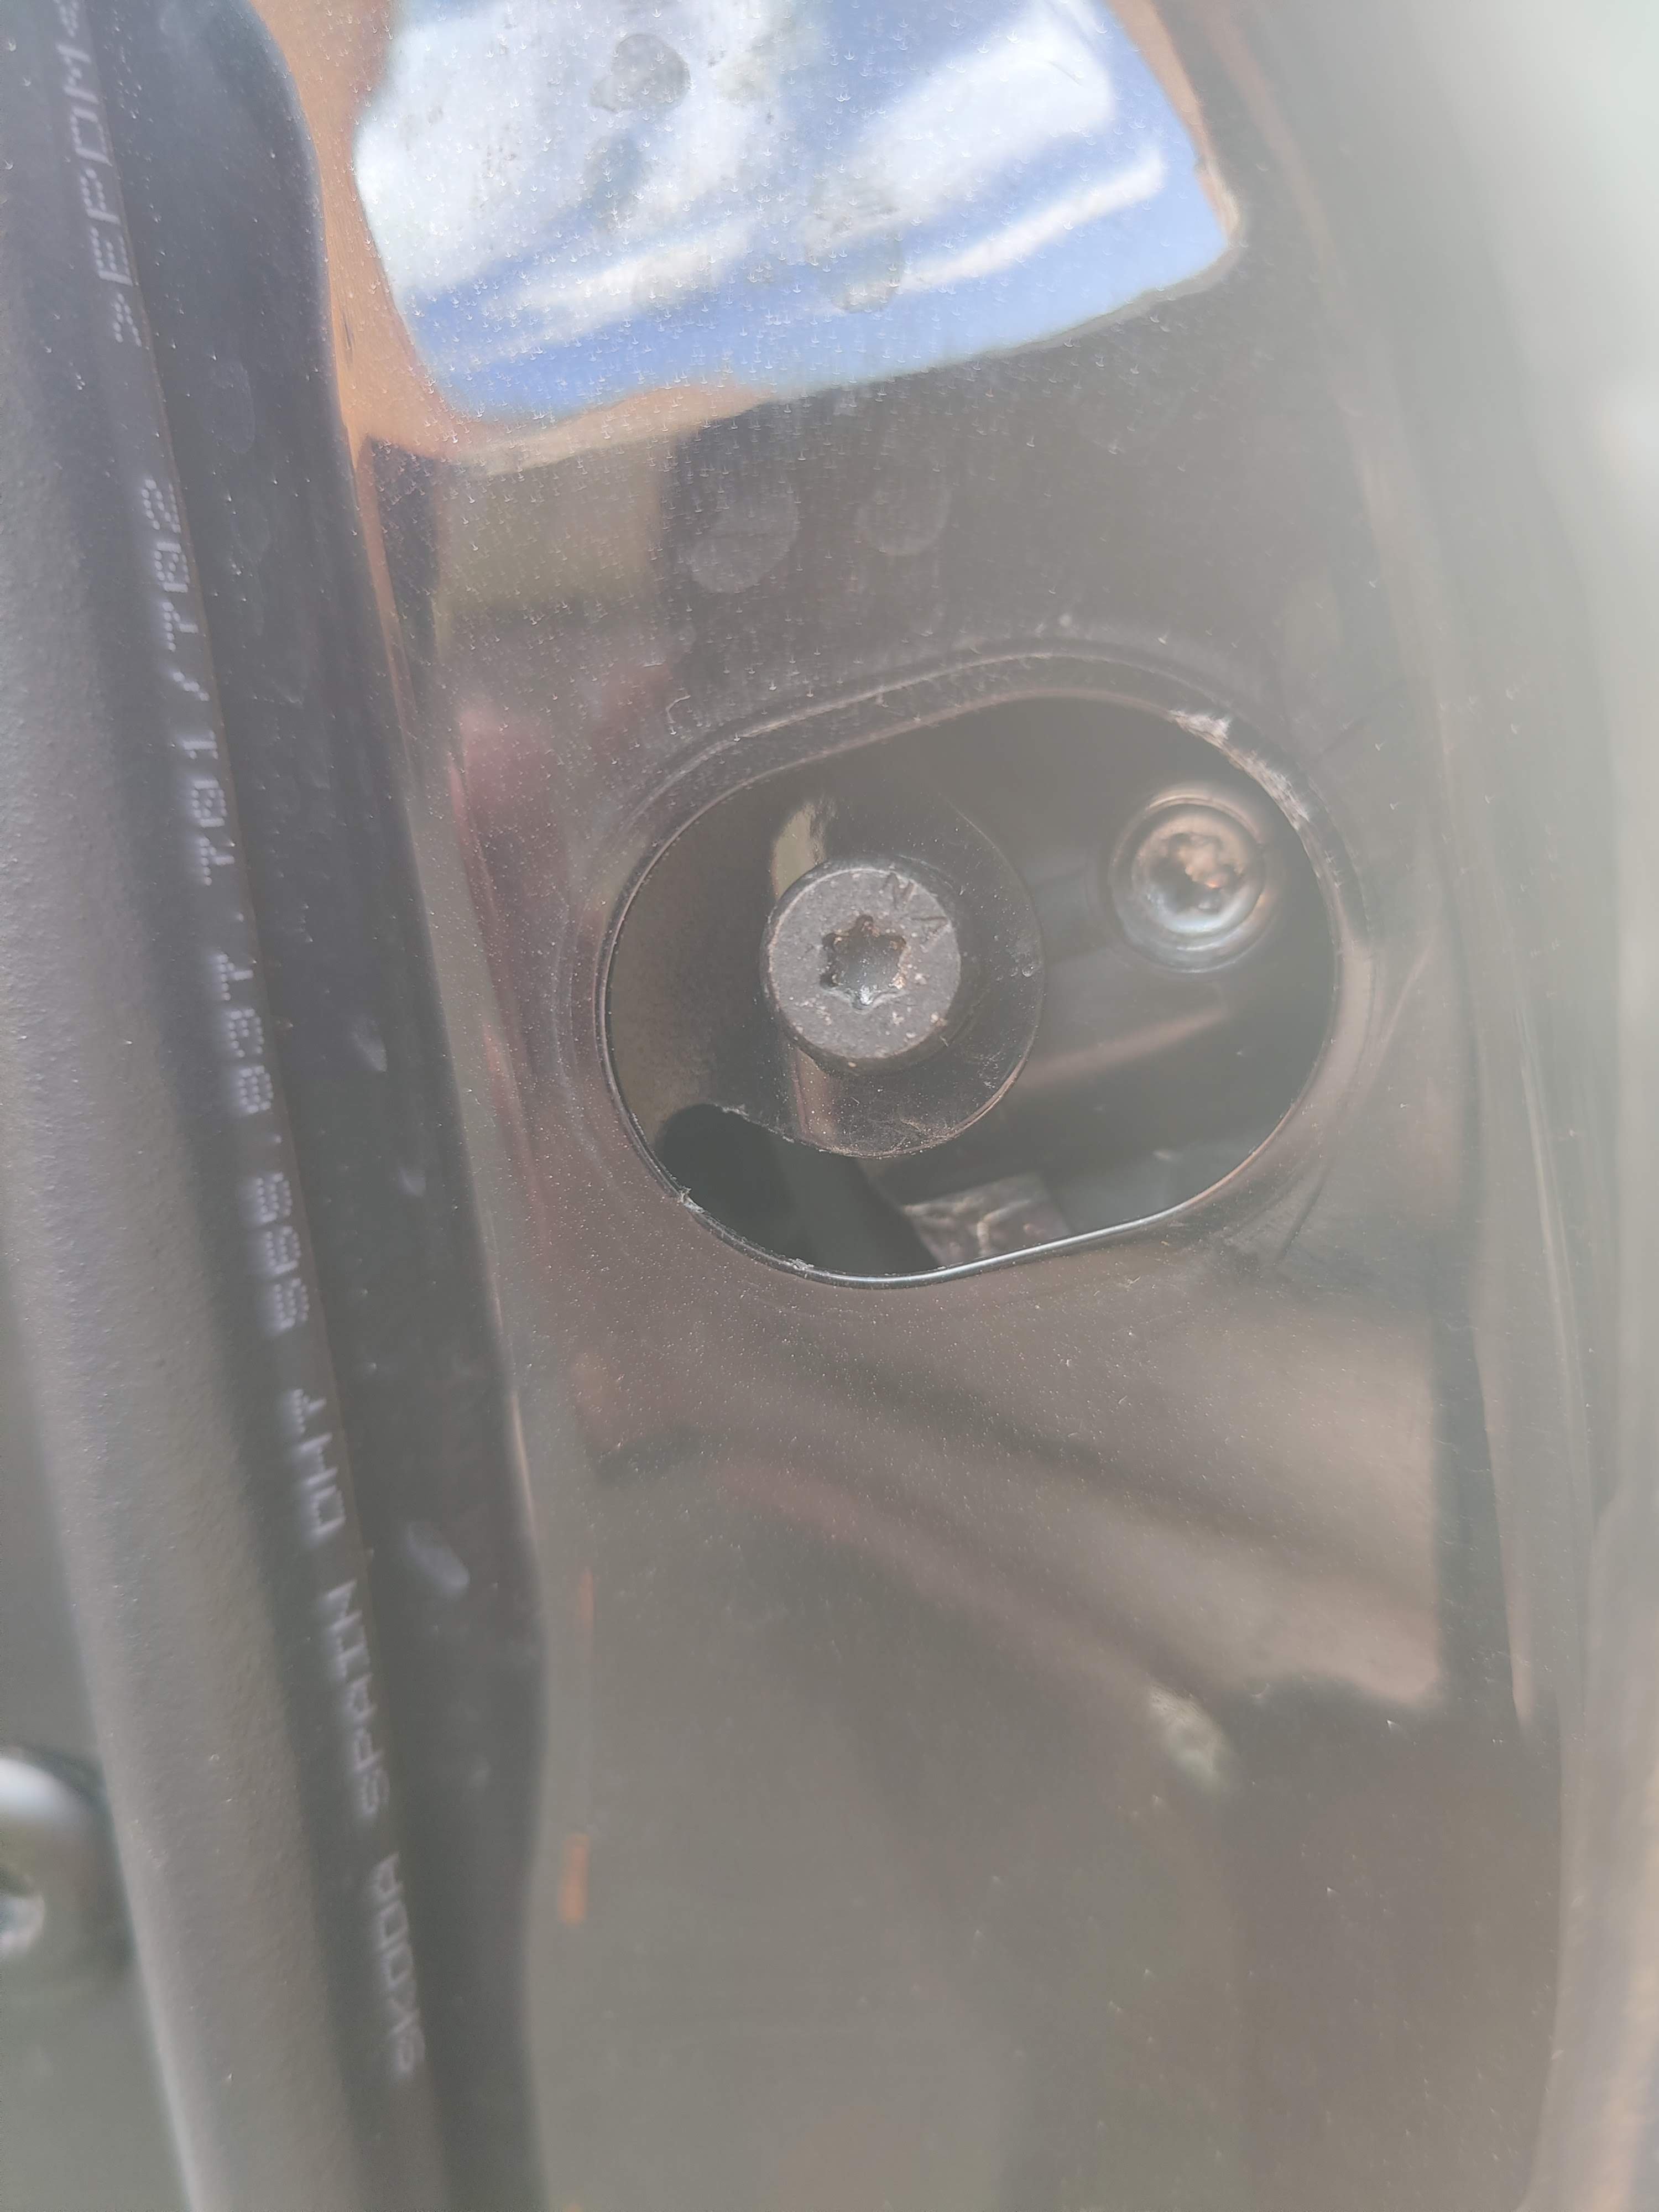
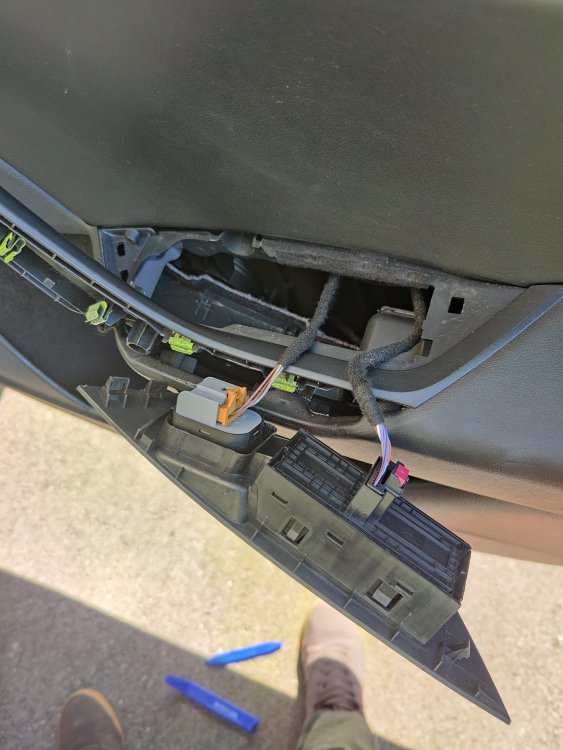
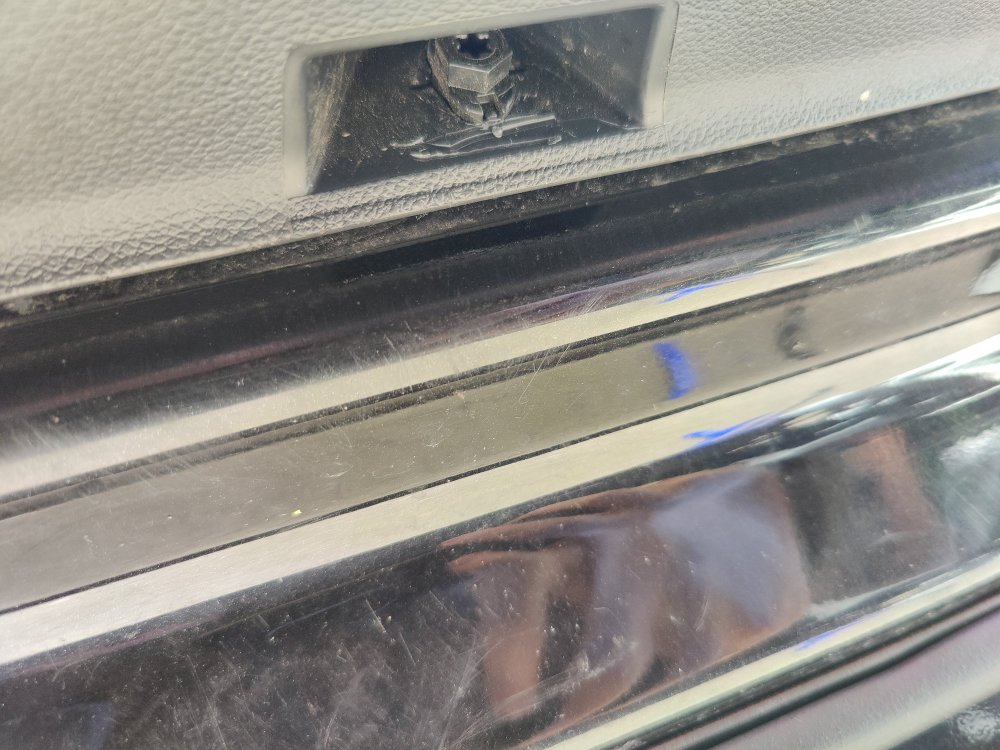
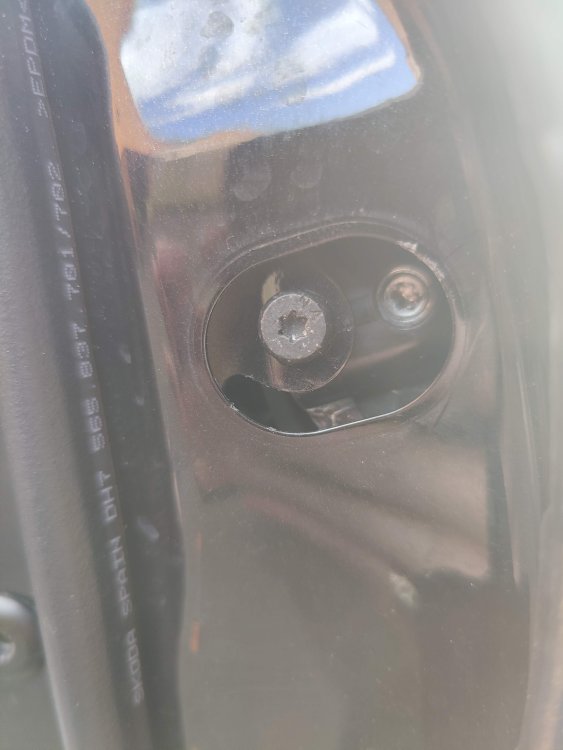
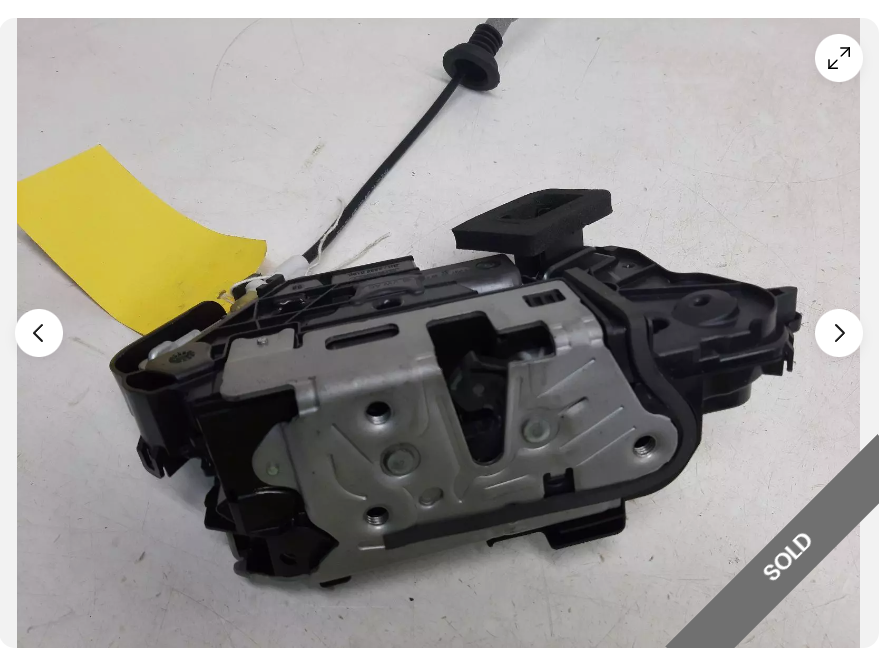
Found my 2018 (160k mile) Kodiaq was starting to suffer from an intermittent fault where the drivers door wouldn't always lock and the occasional spray of lube wasn't going to keep the mechanism working any more. I was worried this may have been a "dealer" only job due to having KESSY and it may need some specialist coding done. Also didn't want it to get to the stage where it got stuck in the locked position resulting in having to take a more drastic approach to accessing the lock. Thankfully after doing a bit of a research and seeing a similar done on some other Skoda models it seemed it was fairly plug and play and got a spare ordered up for ~£50 off ebay. All in this probably took me a couple of hours to do though your mileage may vary. Things you will need: Replacement door locking mechanism (mine came with the cable that links it to the internal handle but you could getway without it) Trim removal tools 11mm spanner (I think) Torx bits (can't quite remember sizes as a couple different ones are needed) XZN Multipoint bit (size 6 I think) Torch (optional) Spare VAG trim clips (optional but good to have to hand) I started off by removing the trim around the internal hold handle. This should come off fairly easily by starting off using your trim removal tools on the underside and steadily working your way around. There will be some metal clips that may come off with it, put these back onto where the trim came off from being careful to make sure you have them the correct way round. You then need to lever up the window control switch module as there is a Torx head bolt you will need to get to behind it. It may bet a bit finnkey to get off but will pop out if you go about it in the right manner. Unplug any cables from it and pop to one side. (FYI I did all this work with the car unlocked but didn't bother disconnecting the battery or anything) Next you need to look at the underside of your door and will find a plastic locking wing nut type thing. Use a spanner to turn this 90° so that it is no longer holding the bottom of the door card in place. Then undo the two torx bolts in the door. You will find one behind where the window switch was and another towards the top of the handle. You should then be able to start prying off the door card steadily working your way round it. (this is where the spare clips come in, in case you snap any) I found starting from the bottom worked best for me. Once loose from the door you will then need to work you way round unplugging the numerous accessories from the back of the door card. I would advise propping it up on something to take the strain off the cables giving you more freedom to use both hands. Each cable had a slighly different way to disconnect it but were all fairly simple. The most difficult I found being the red door opening light on the bottom corner and I never knew that the cubby hole for the umbrella has a little drain on it, this is just a pipe pushed through a hole in the door (, rubber grommet you can see at the bottom righ of the pic below), so no need to uncrimp it or anything. I used this video here for reference You should then be left with a naked door. You then want to unhook/clip any cables from the large kidney/triangle shaped cover and unplug the door locking mechanism from the cable you can see in the top right of the image (car will probably ding at your to say it has a fault with the KESSY system if you have it but no need to worry). Again all these cables have slighly difference connectors but are fairly easy to figure out. I then loosend up the two rubber grommets by easing them into the door before using the trim removal tools to get the cover off. It does have a image on it saying to use some stong pliers to pull on the plastic tab just below the top grommet to remove it but I found this a bit futile so went back to prying it off instead. Once off you should then have access to the door locking mechanism. However before you can remove it, you will need to remove the key barrel from the door, for me this was probably the most troublesome part to get done. It's not difficult I think I was just being a little too hasty. This can be done by flicking off the small oval shaped cover on the end of the door not far above the latch to reveal a torx bolt and a grub screw. The bolt I removed while the grub screw I wound all the way back without removing. You then can then remove it by feeding it out from inside the door or carfully using a plastic prying tool on the outside to get it out. I found it took a few attempts adjusting the grub screw in and out to get it to finally submit and then easily glide out it's hole to be kept for later. (I forgot to take any more pictures from here so will have to take my word for it but I did use this video here as a guide for the lock replacement which helped a lot) Key barrel out you can now use the multipoint bit to remove the two bolts holding the locking mechansim in place. I needed a fair bit of force to get them going but they will go. This will allow you to now remove the locking mechanism from inside the door (there may be a loom cable that will need unlcipping from it first). Finally you will need to unclip and unhook the cable that links the locking mechanism to the external door handle This is behind the little flappy panel it feeds into and may take a little effort to get off but again will come off. You can then switch it out with the replacement mechanism do everything you have just done in revese and hey-presto! (Just make sure to check that everything is plugged back in and tied back where it should be again to avoid any knocks and rattles & or head scratching as to why the windows won't go up and down 🤪)

-
So in conclusion in the end I went for this one from DriveDen. I did pop them a message to ask prior to ordering if it would fit, to which they said it would and also have that to fall back on if I found it wouldn't. Anyway arrived quickly rolled up in it's box. Took a couple of days for it to return fully back to shape but fits the boot well and for half the price of the caffyns one.
-
The age old question of rubber boot liner. I'm trying to find a boot mat / liner for my 5 seater kodiaq with spare wheel kit. The only one I have been able to find so far is the reversible one from caffyns which seems a bit pricey and the pictures for it don't really show what the rubber side is like. Has anyone been able to find any 3rd party alternatives that will fit with the wheel kit?
-
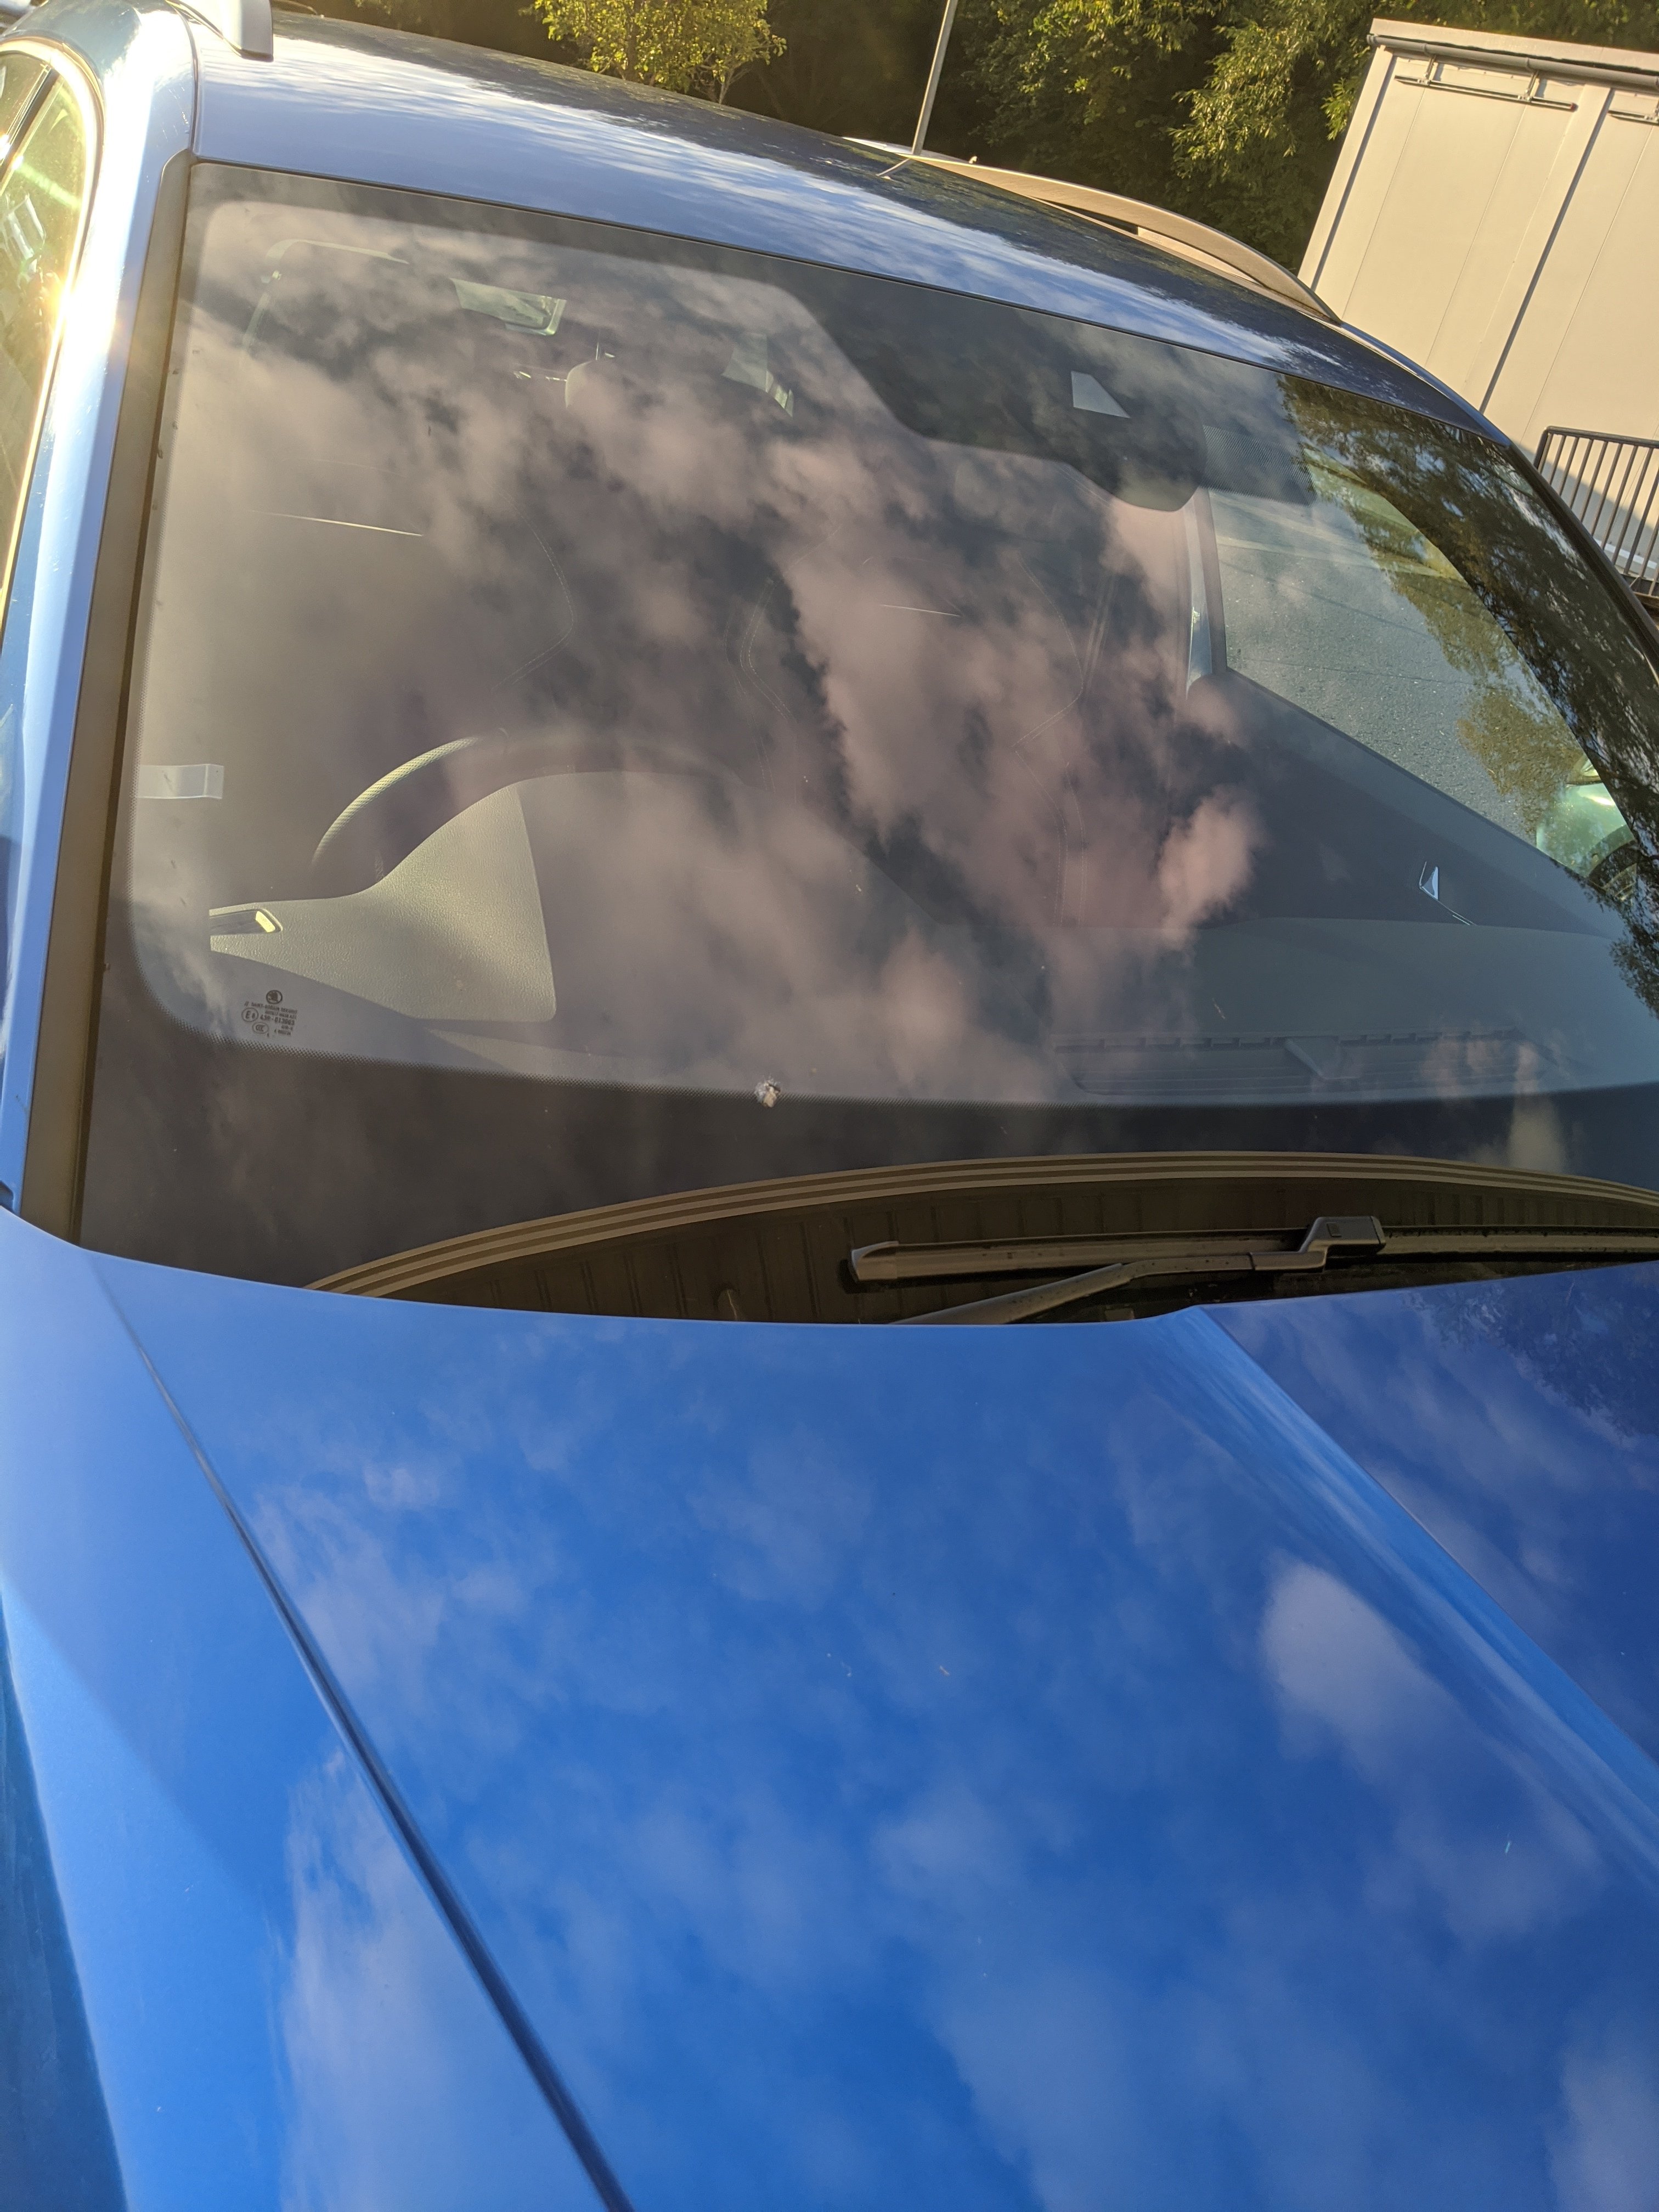
Got a stone chip in the windscreen yesterday when going along the A34 between winchester and Newbury. (Which is where I have got all my windscreen stone chips before from, for some unknown reason) The chip is right in the transition area on the drivers side of the windscreen of the lower opaque strip. So couldn't be considered right on the edge of the screen nor really in the driver's line of sight as it's hidden behind the raised dashboard. Autoglass in their wisdom over the phone believe it should be a full replacement but if i'm honest I don't believe it so due to its size and location on the screen. Plus I'm a bit dubious of what glass I'm going to get as a replacement from them especially as they need to remember it's heated screen plus there is all the driver assistance kit they will need to recalibrate as well. Autoglass haven't even asked for any photos from me in regards to the stone chip either so am tempted to visit their local branch to see what one of their techs has to say about it.